
Assignments
"design and 3D print an object (small, few cm) that could not be made subtractively, and 3D scan an object (and optionally print it)".
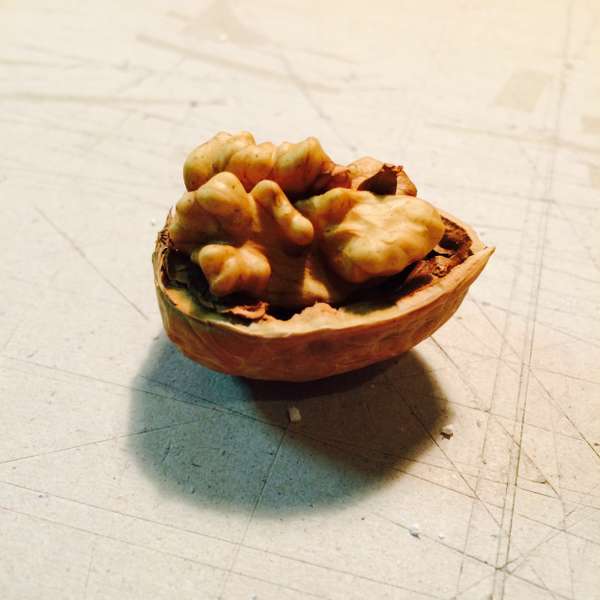
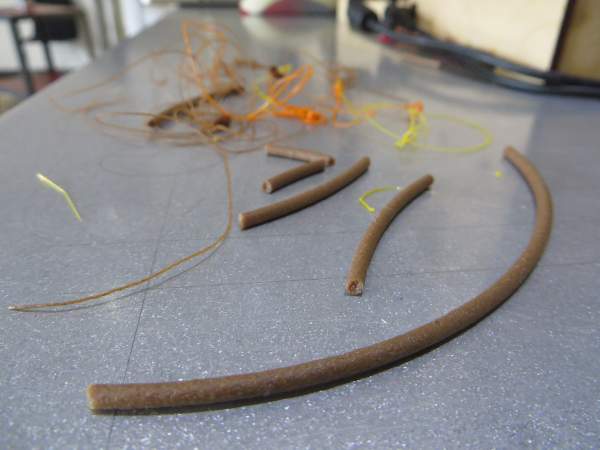
Feb 26 / As part of the assignment (bring an object to scan) I brought a bag of walnuts to the lab today. During Alex's lecture on how to use the Roland Modela for scanning objects (which, surprisingly, is the same machine we used to mill and cut our circuit boards last week), we decided to scan one of my walnuts as an example. Because I wanted the nut to be open to also scan the 'brainy' insides, it took our crew all of 10 minutes, 8 walnuts, a wrench, pliers and a workbench to open one while leaving the insides intact. Very amusing!
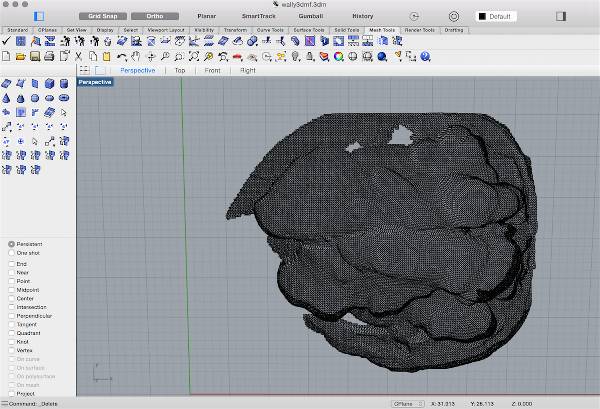
Scanning a walnut
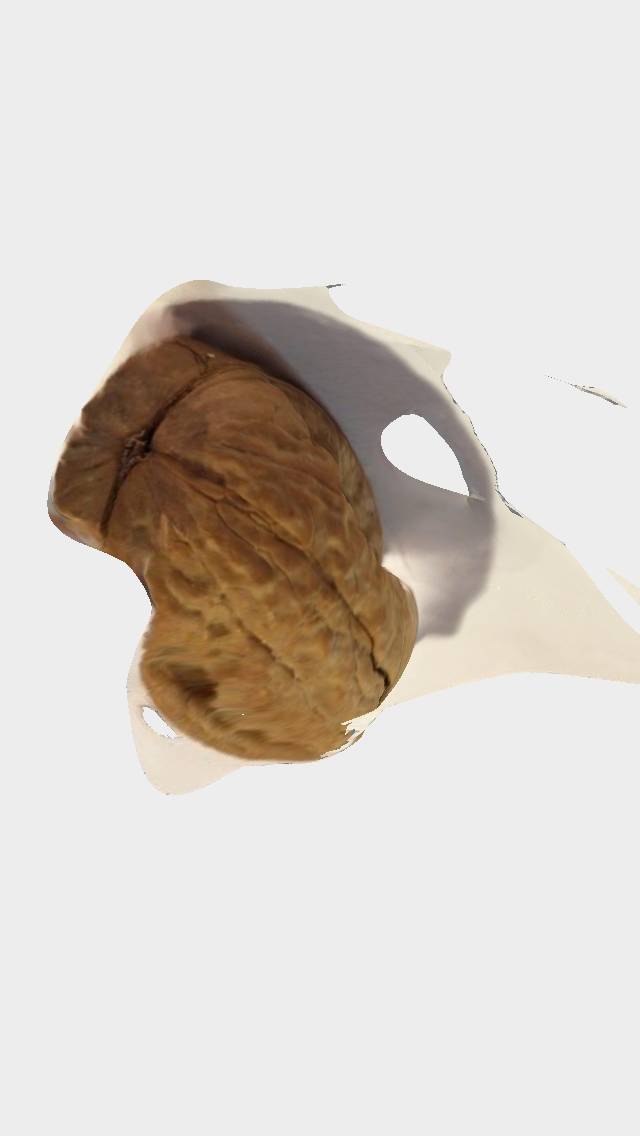
Since part of the markings on the Modela base have worn off, Alex enhanced it with two pieces of tape to indicate the 20 mm line. I hot-glued the walnut to the base. Since the Roland Modela scanning function works with a vertical touch probe (see the picture above) it can only scan the top half of the walnut. In order to get a 3D model f the whole nut, I will have to scan the other side later and connect the two models in a 3D program such as Rhino afterwards. To operate the milling machine as a scanner we're using a program called Dr. Picza (by Roland). I used the following settings;
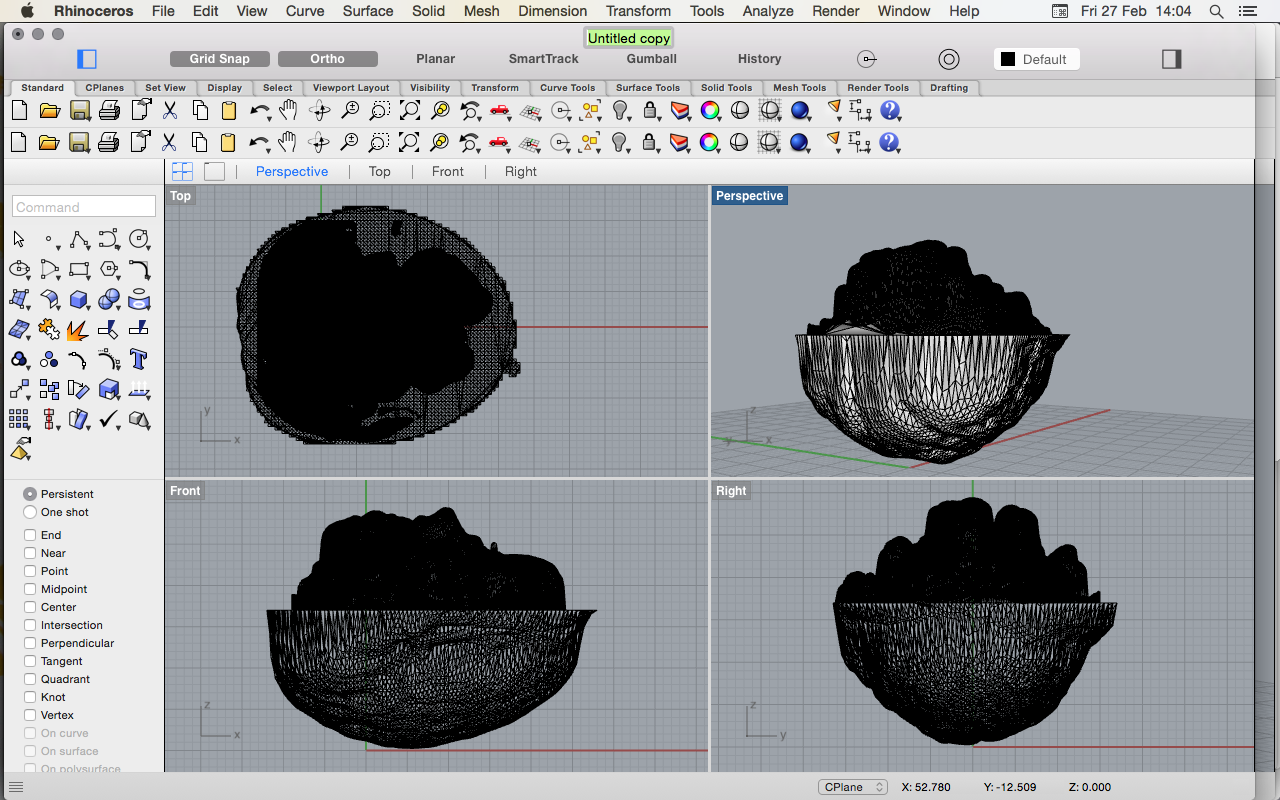
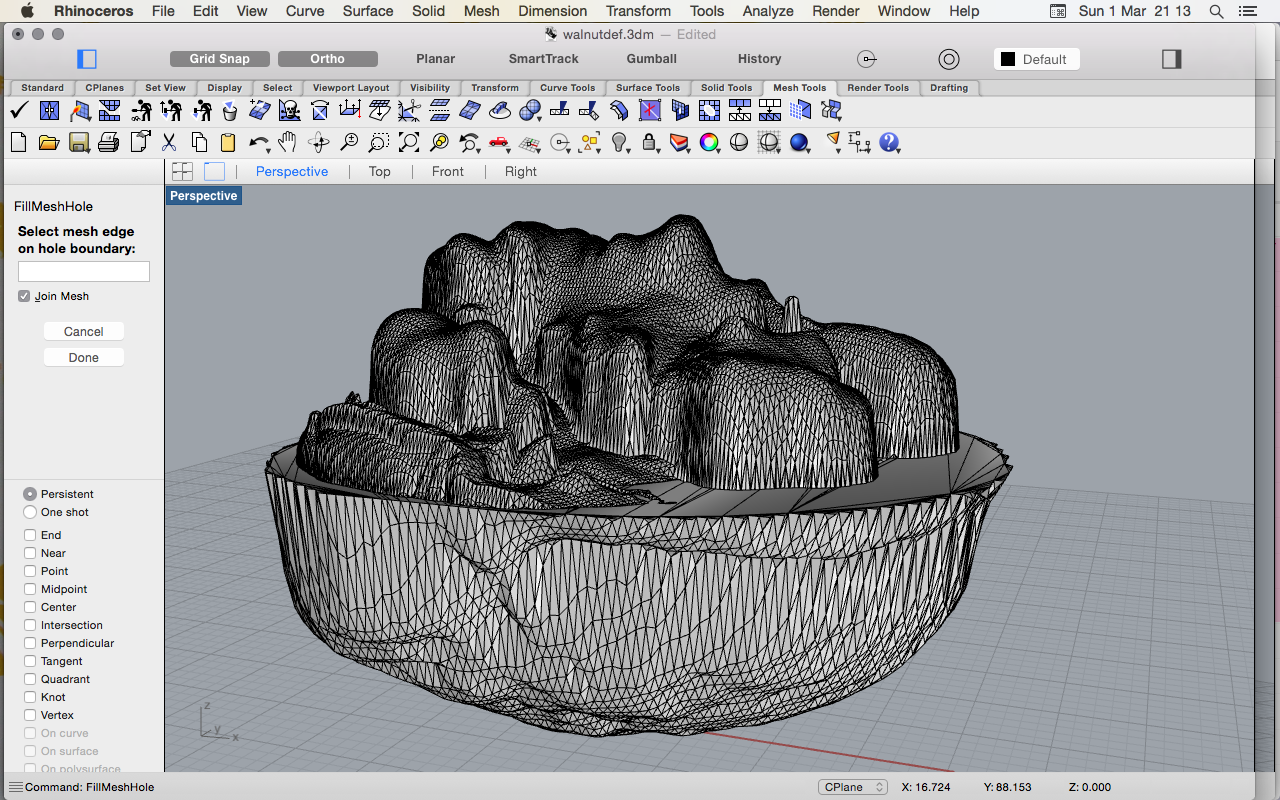
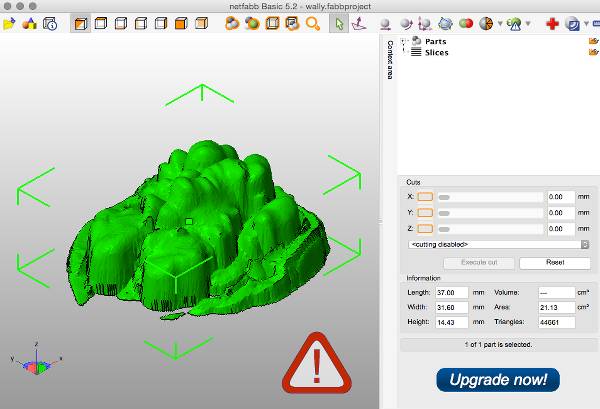
The scan resolution of 0.20 mm is quite high and the shape of the walnut quite complex, which results in a scanning time of about 4 hours. The result is stunning I must admit, but when I scan the other half of the walnut I will try going down on the scan pitch to save time. I exported the scan a an .stl file from Dr. Picza and imported it into Rhino. There, the top view reveiled three large holes in the mesh. I tried out both Meshlab and Netfabb and found that the latter is most straightforward in checking and fixing meshes, at least for me. The basic version lets you clean up your meshes and save the 'cured' file as an .stl again.
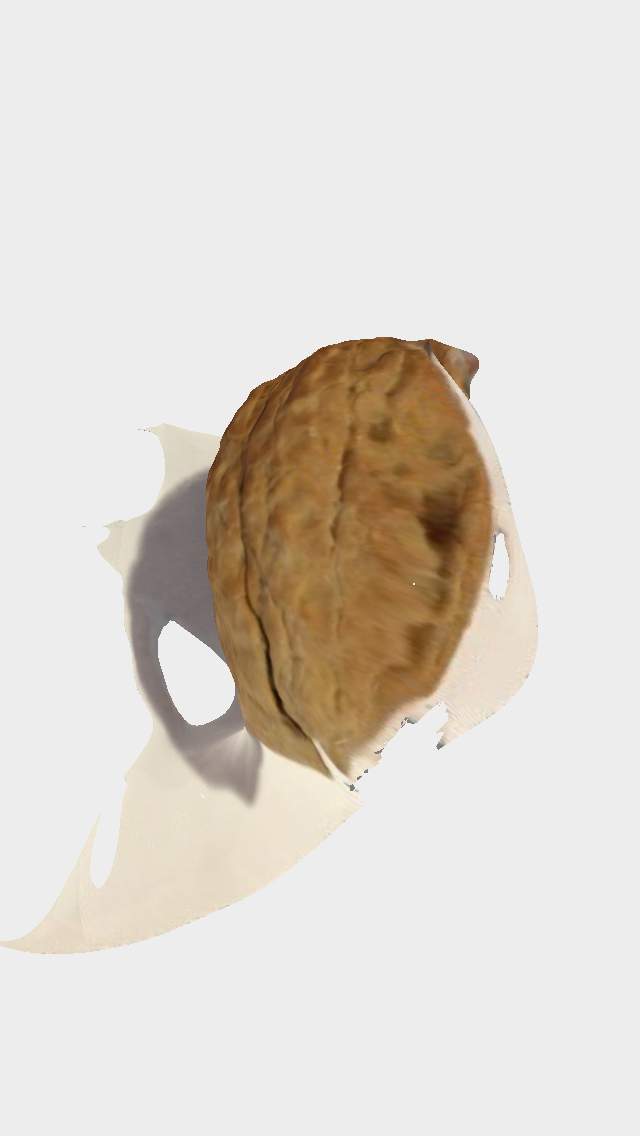
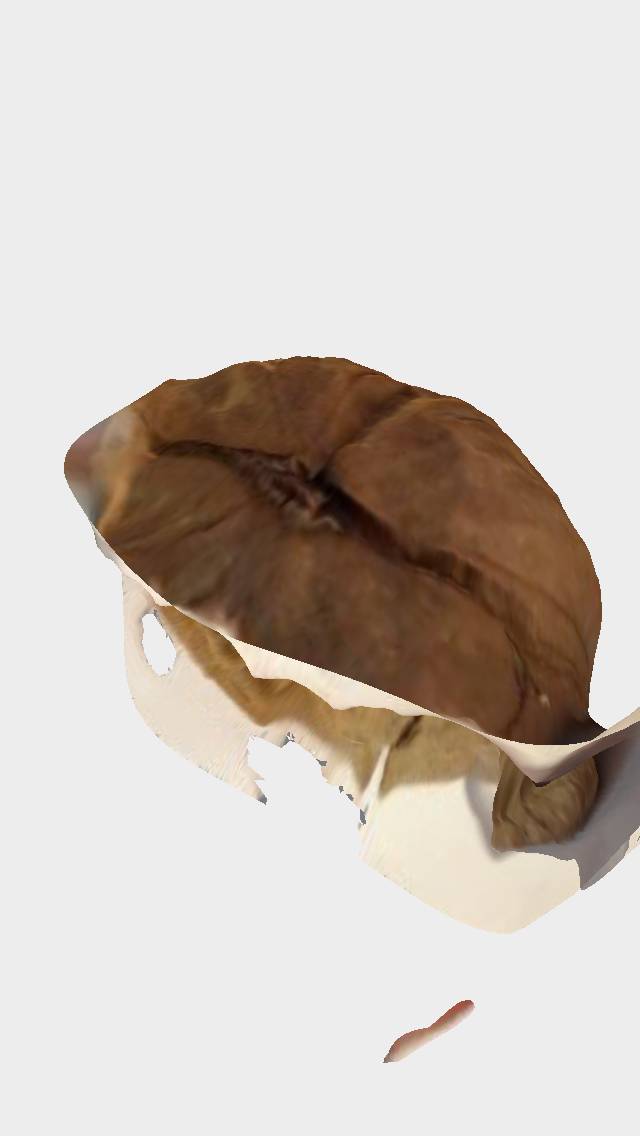
While scanning was in progress, I tried out 123DCatch, an iPhone app by Autodesk that lets you "create 3D scans of virtually any object". By taking about 20 photos in a loop around your subject, the program generates a 3D model of your object. I turned out taking about 57 photos of a walnut in the lab's photobooth, and I noticed how important it is to be able to reach all ends of the object easily, by being able to walk around it, for instance. Also - as I saw my collegue Frank Vloet do (and it's not mentioned as a tip in the software) to put your object on a small pedestal of sorts so that it is easier to clean up the background of your model afterwards. In the photobooth, my walnut wasn't lit evenly and I couldn't easily reach the back of the nut to secure an even loop of photos. The model that was generated didn't represent the whole object, as you can see in the pictures below, but I can imagine if the conditions are right, 123DCatch could render a full, representative model of an object. Through another free app; 123DMake, you can export your (cleaned up) model as an .stl file into, i.e., Rhino. If I have time later on in the program I would like to try that.
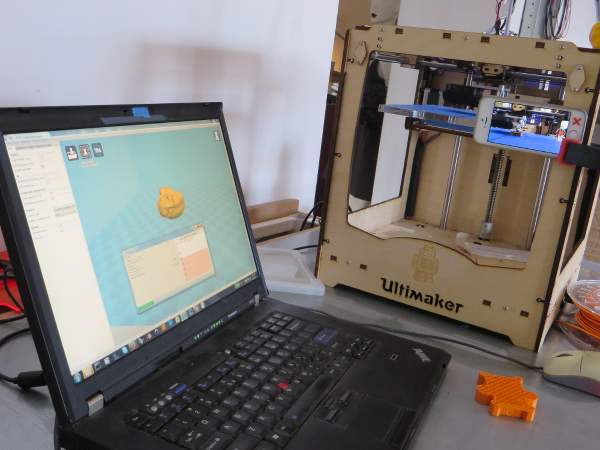
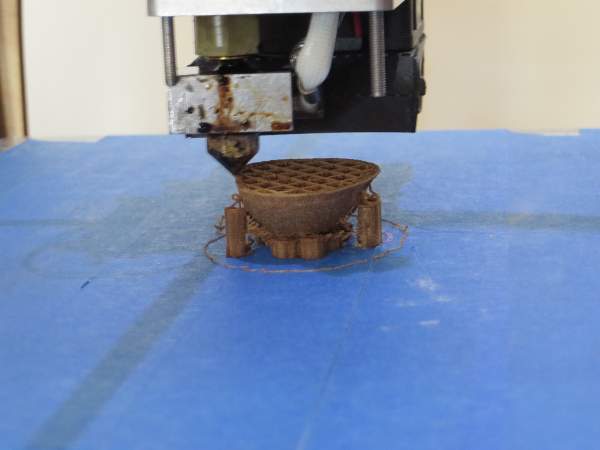
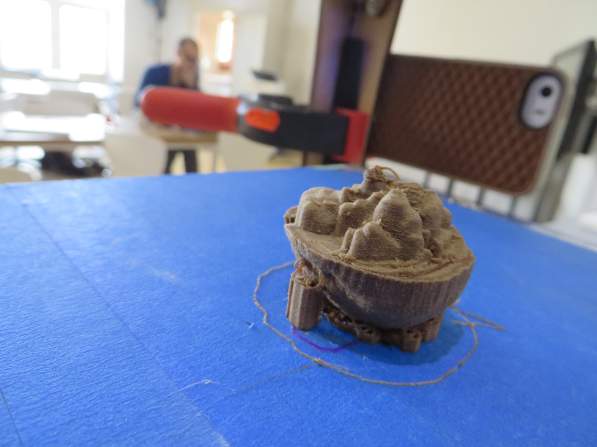
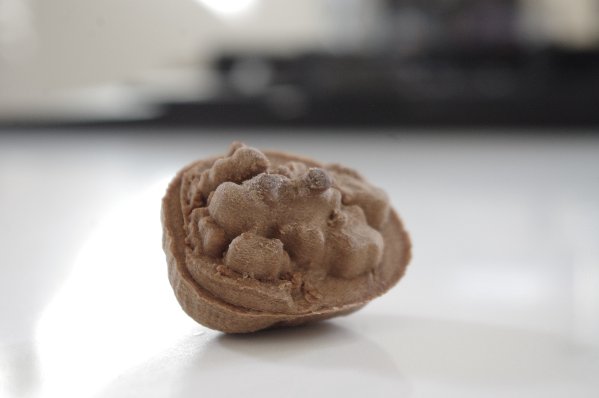
Feb 27 / Today started at 9:30 with an introduction to 3D printing on the Ultimaker, by Fablab Amsterdam's Cecilia. During the instruction we printed a lovely little sphere with holes in it, designed by our collegue Loes, in a semi transparent, shiny, violet plastic. Cecilia showed us various kinds of filament, among which a woodfill filament made of 70% PLA and 30% wood, which I immediately planned on using to print my walnut later today. Although it would be interesting to use a contrasting material such as a transparent, shiny or even flexible filament, I was very curious as to what the woodfill wood look like.
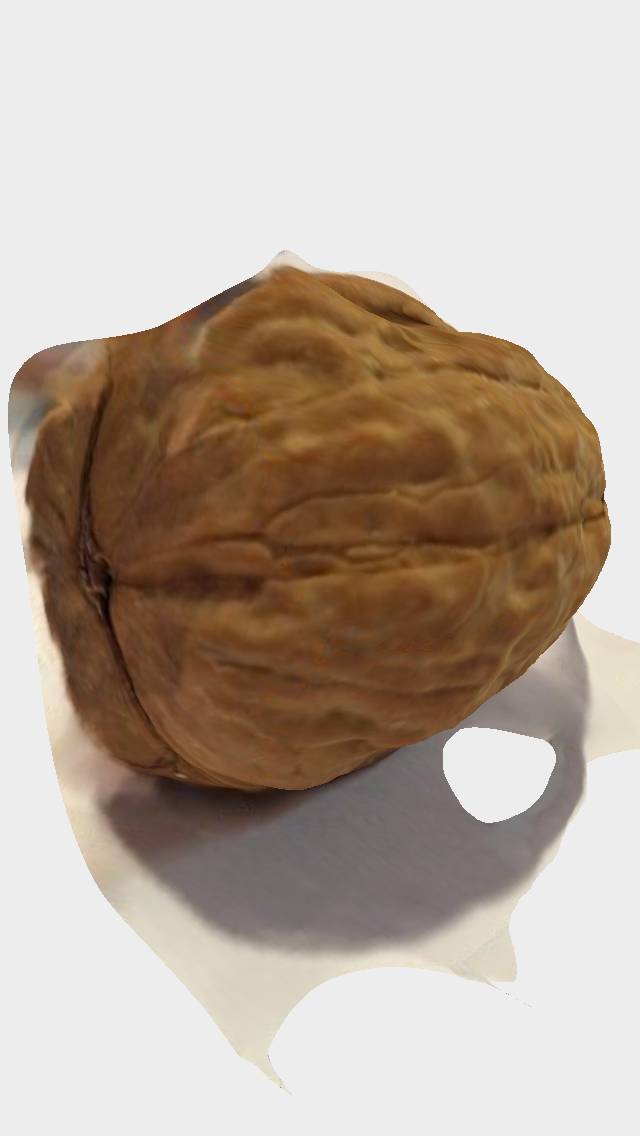
First, however, I needed to scan the other half of the walnut and put the parts together in Rhino. Another little challenge presented itself this morning as I found out that I ate - yes I did: I ate and threw away - the walnut that I scanned the top of. So today I'm scanning the bottom of another walnut and will have more work in Rhino to make a match. With some effort, I could even call that a good thing. This time, as mentioned, I used a lower scanning resolution of 0.50 mm, the other settings I left intact. This - in combination with the less complex shape - decreased the scanning time considerably, to 1 hour and 15 minutes.
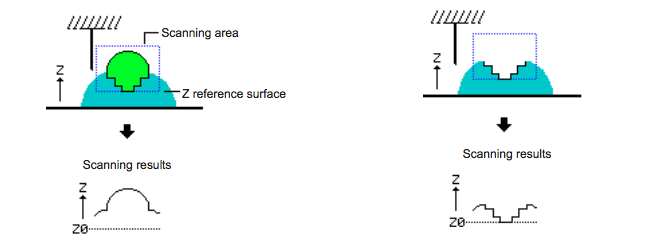
After scanning both sides of the walnut, I found an excellent PDF on Dr. Picza, that focuses on reducing scan time. It had a great tip - instead of turning an object around to scan the other side, just push the bottom part of the object in clay - that way it will be secured when scanning the top part, and then take the object out and scan the 'hollow' negative of the bottom part:
 ..................................................................................................................................................................................
Printing a walnut on the Ultimaker
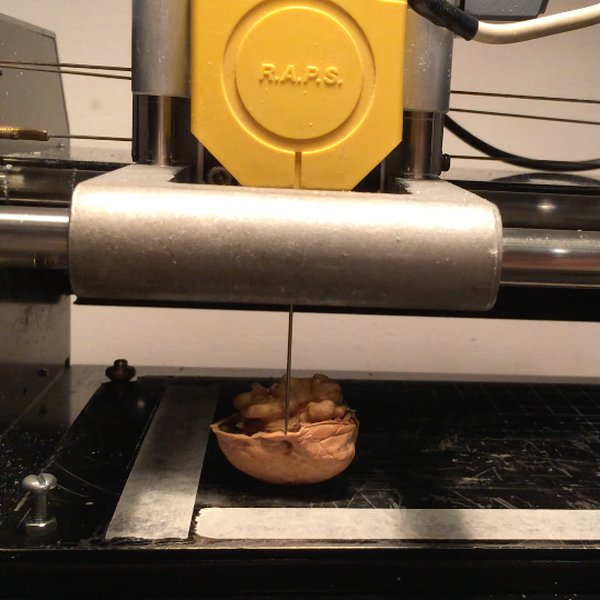
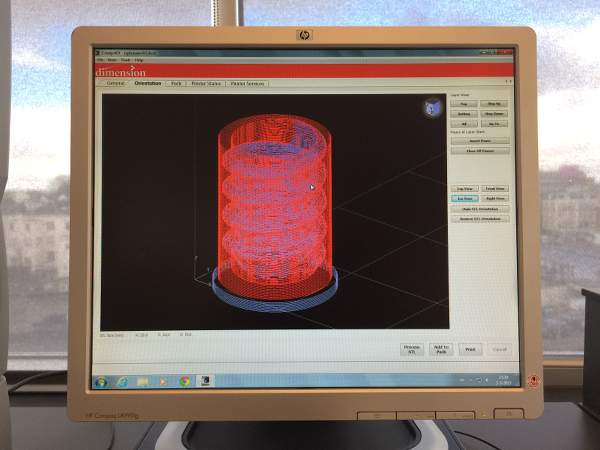
I imported the .stl file of the bottom half of the walnut in Rhino, and (since the halves weren't scanned from the same nut) I fiddled and scaled until they fitted together and joined them into one mesh. Luckily, in a rough and organic shape like this, the junction hardly showed aside from the difference in mesh detail between the top and bottom halves. I checked and repaired the mesh with NetFabb again and sent the .stl file to Cura, the software that the Ultimaker uses. I chose the woodfill filament, but its less flexible and also quite brittle texture made it difficult to feed into the machine and the material brok off several times. I was determined to use this material however, and finally - with two hours left in the day - I was ready to print. Where Cura initially estimated the running time on 39 minutes, it quickly changed to 1.45 hours after pressing 'print'. It was definitely worth the wait though, because after removing the support and a bit of sanding on the burnt top, the texture looks beautifully organic, matte and woody.
 ..................................................................................................................................................................................
Designing and printing a new shape
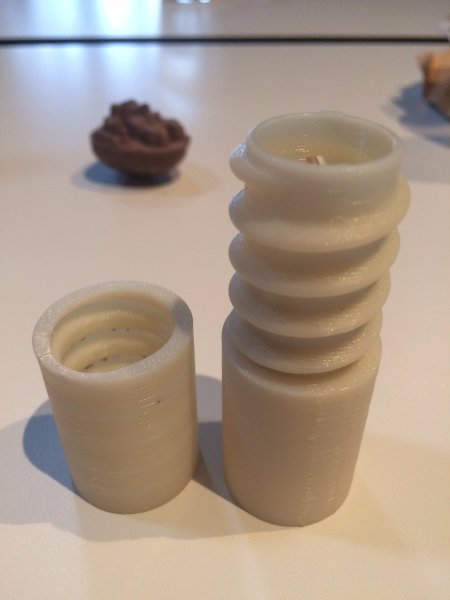
March 2 / I'm taking this opportunity to dive deeper into Rhino in order to design a shape that can not (or at least not easily) be made substractively. I recently found a tutorial on making screw threads in Rhino, which is something I think would be super handy to learn. So - for my ISP I'll try to make a box that screws together and that will keep it safe. Making screw threads in Rhino involves all of 15 steps. A list;

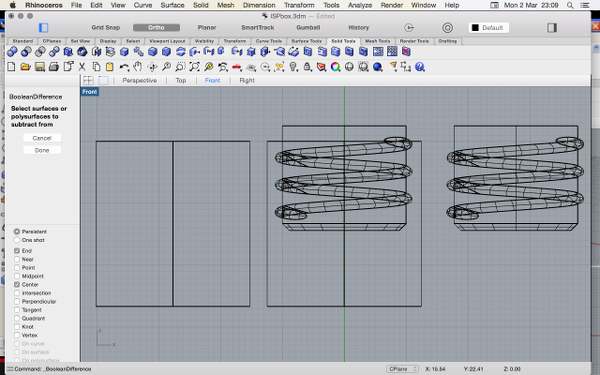
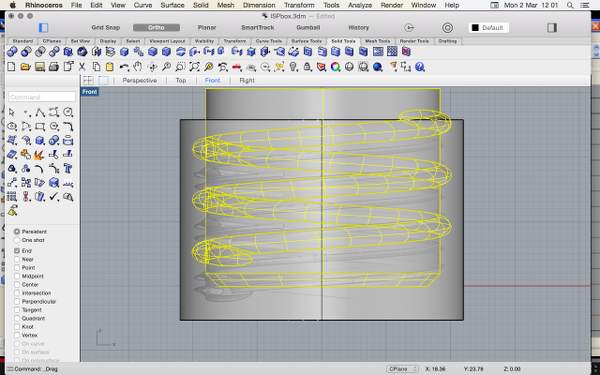
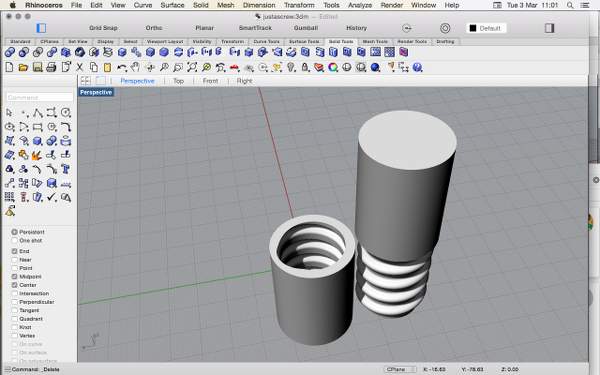
I used all of these steps (several times over) to make the box, made a cap which I hollowed out so that the ISP will fit inside. I exported as two separate .stl's (thinking I would use two colors) and put them on a stick to take to the Creatielab of Amsterdam University of Applied Science. After using the Ultimaker at Fablab Amsterdam, I was very curious about using the big, industrial-looking Dimension printer there. It prints support material that is water soluble, very handy for printing hollow objects, or objects with moving parts in one go.
 ..................................................................................................................................................................................
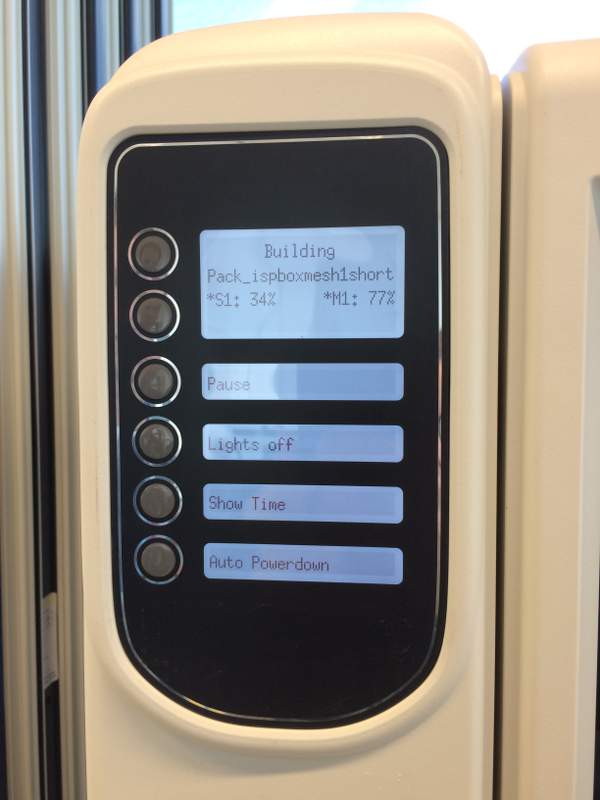
Printing the box
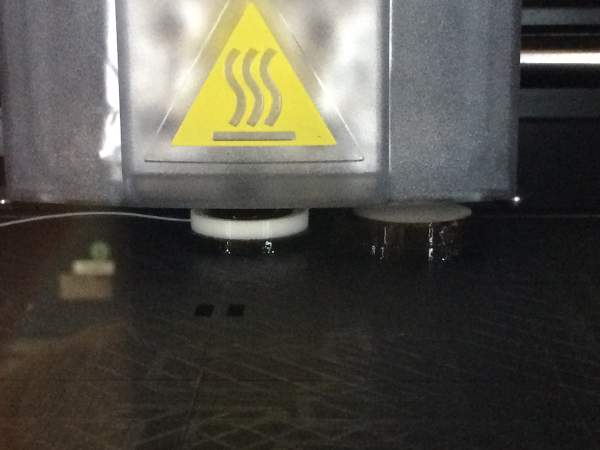
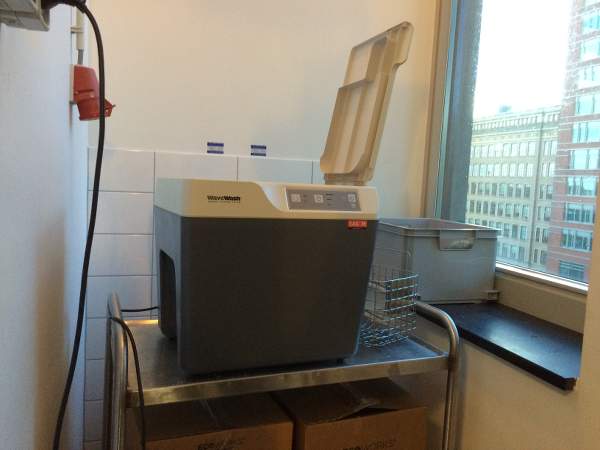
Cees Boschman gave me instructions on how to use the Dimension printer together with the CatalystEx software. He explained that the Dimension also heats up the environment in which is prints (which is why it takes 20 minutes for the machine to prepare itself before printing). This makes for a smoother finish, because the layers don't dry as fast after printing. A nice feature within the software is that it visualizes the path of the head 'layer by layer'. If you push the button quickly enough, you can see your object grow on the screen. With the command "process stl", the software decides where it will print support material for the model. In the model for the ISP box, support will be printed within the whole screw thread, as well as a mount around the long part of the box to stabilize it. The machine then estimated a printing time of 4 hours. After printing though, the support material will have to be cleaned off in the WaveWash - a dishwasher-like machine which will (shortest cycle) also run for 3.5 hours. Unfortunately, this means that I won't get to see whether the screw threads work today. The printing will take all afternoon and we'll do the washing in the morning.
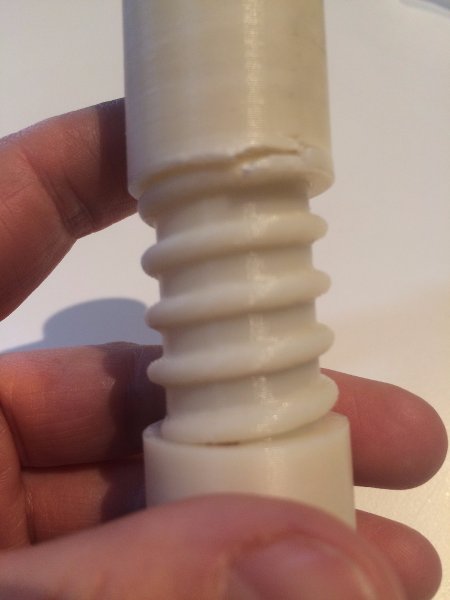
March 4 / This morning I washed the model and tried to screw it together but since I now realize that I used no offset, there wasn't enough space between the female and the male threads. A little force caused the 'female' end to tear a little;
 ..................................................................................................................................................................................
Some conclusions
Some notes on workflow
Resources