Théo Lepage-Richer

Fab Academy / Digital Fabrication 2015

Molding a Mold of a Mold to Make Other Molds: Making a Rotational Casting Machine

While looking online for molding and casting inspirations, I quickly stumbled upon various projects involving rotational casting machines. While Neil’s eloquently highlighted the various advantages and opportunities offered and afforded by molding and casting, I kept the prejudice that, at a DIY level, this practice was only useful for making full, bulky pieces – in that sense, I was especially interested to see how such an easily buildable device allowed to expand even more the possibilities embodied by these two technics.

While discussing ideas that could be accomplished with such a device, Ferdi quickly recommended me to make one of them as my final project and I have to say that I am finding this idea quite attractive at the moment. I still need to reflect upon the question, but I nonetheless decided to take a first step in that direction and use the molding and casting assignment to make a bevel pinion that could allow to transmit a given rotational force to a second, perpendicular axis.

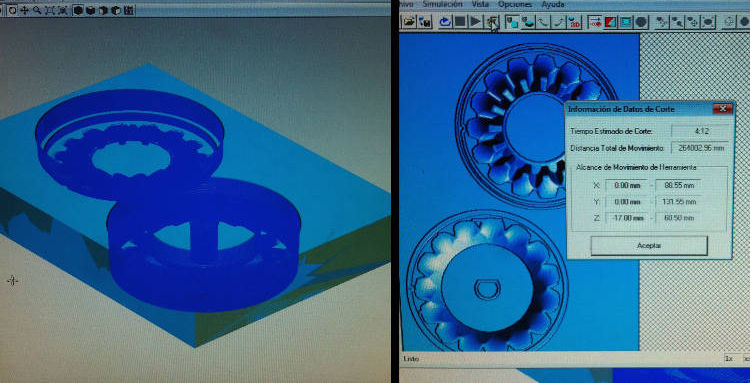
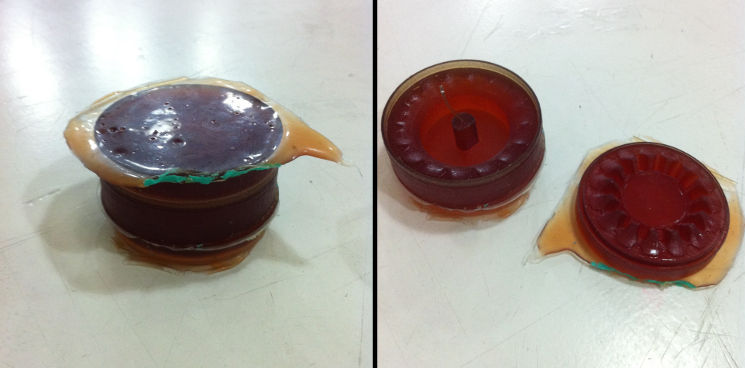
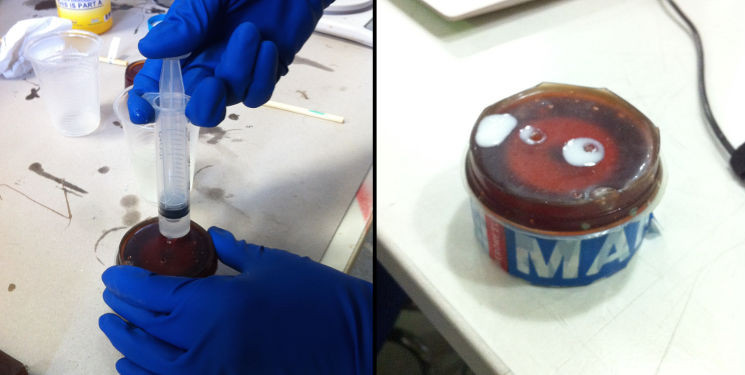
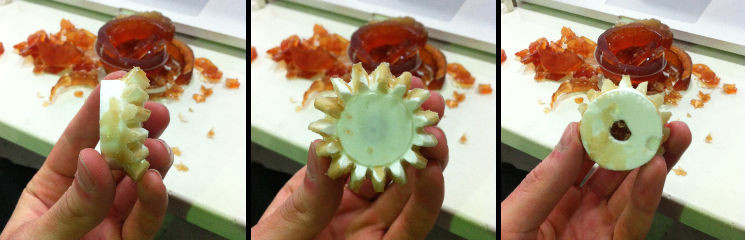
The design part went quite well. SolidWorks offers a series of default pieces that can be easily generated, including bevel pinions, and I could quickly easily select the settings for the needed piece and export it to Rhino as a .step file. Making the mold went fairly smoothly after having been able to find the right spot where to divide the piece (thanks to the help of Ferdi), and I could start the milling quite promptly with the Modela. The first draft with a 3mm mill took two hours to complete, while the final refining with a 1mm mill took a full four hours. I made few (stupid) mistakes with my design, but could easily fix them on the spot with a drill a third mold improvised out of a plastic cup and some plasticine (whatever works, right?).

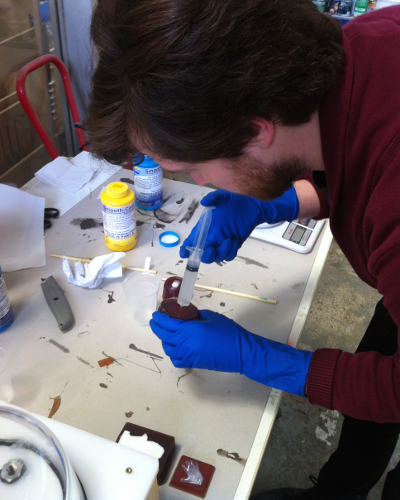
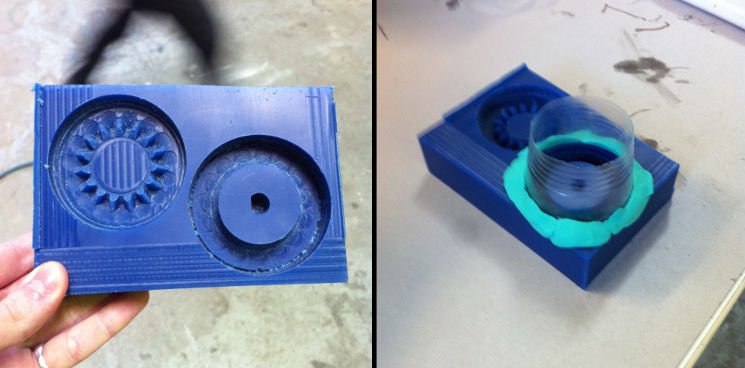
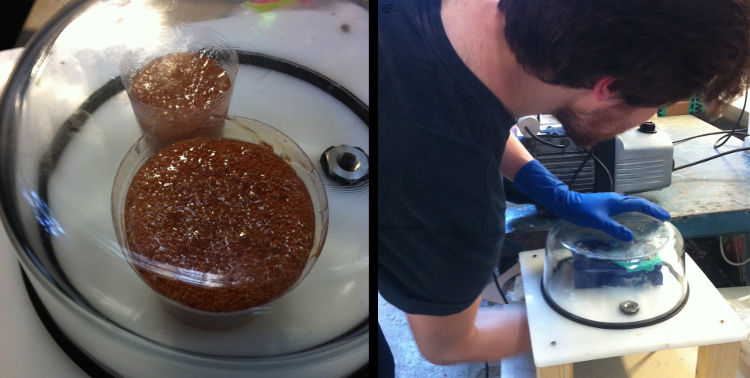
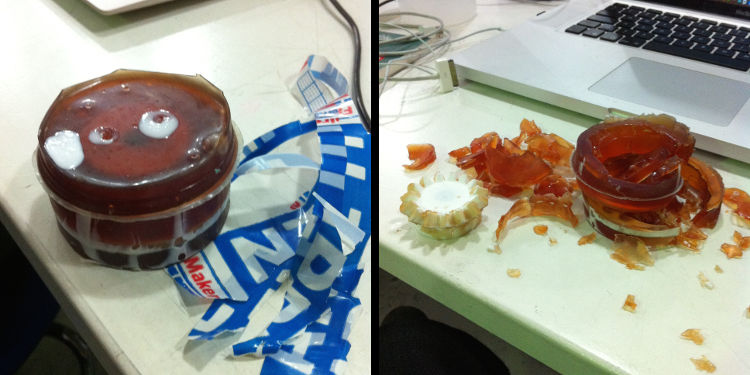
To make the mold, Ferdi’s DIY pressure chamber revealed to be essential to take out the bubbles out of the silicone mix and therefore assure the right finishing, but I ended up having to literally destroy it to take my plastic piece out of it (now, I know that, even if the package says that the mix contains some oil that makes it easy to take a casted piece out, one still needs to read the data sheet to realize that this oil’s efficacy is only assured if it is mixed with another detaching spray – always read the data sheet, kids). The piece itself came out really neatly, but required a long period of cleaning and scrapping to take out all the resin residues. I doubt that I will be able to use it for my actual project – for there is still some bits of resin that I couldn’t bother scrapping since I need to make another mold for the second piece anyway – but now I know that, next time, the detaching spray is far from being a simple recommendation and I should then be able to make two identical pieces out of the same mold.

See below for all the details/for each step.

Your Name

  • Week: 09
  • Subject: Molding and Casting
  • Tools: SolidWorks, Rhino, Modela, Wax, Resin, Silicone
  • Objective: Design a Mold and Cast a Piece out of It
  • Files: Click here

Project 01a
Like I said, I took the pinion itself from the SolidWorks library. I had never used this software before and I have to say that I found the whole logics behind it quite… confusing. It clearly allows the user to put way more intelligence into his/her design compared to an environment like Rhino (which, without Grasshopper, doesn’t really have any), but the learning curve behind it was simply way to steep for my short-term needs, and I therefore ask some help from Ferdi to already make a division between what ended up constituting the two parts of my mold.
Project 01a
From there, I could divide the piece in two and made a polysurface representing the negative of my mold. I added a contour around the two parts to later easily imbricate them, as well as a small cylinder to make their alignment easier.
Project 01a
I then exported my piece as an .stl and tired to open it with the Fab Module, but its latest version didn’t seem to work properly – it couldn’t compute curves and non-linear forms, and therefore only approximated them at a really low resolution. I switched to the Modela software and could easily draw the adequate path for my piece. In a bric of was, I first milled a draft with a 3 mm mill in two hours, and then refined the whole thing with the 1 mm mill in a bit more than four hours.
Project 01a
My counter-mold came out really neatly, but I realized that I had made a (major) mistake – the mold for the top part of the piece was to high in relation to the border, in a way that there would be no way for the exterior and the interior sections to be connected together. Using a plastic cup and some plasticine, I could improvise an extension, which quickly and cheaply settled the issue.
Project 01a
After having made the resin mix, I used Ferdi’s DIY pressure chamber to take all the bubbles out, which revealed to be essential for a smooth finishing. The whole thing is a big tricky as the mix solidifies quite quickly and extracting the bubbles from the mix, the first layer applied and the final filling alike take a fair amount of time (and of shaking around), but it already went way better the second time I did it after I had to destroy my first mold (see below).
Project 01a
I left the mixture overnight and came back to find it perfectly solidified. I could easily take out the bottom part by hands, but had to use some pressurized air to pop the other part out (never forget to leave a small passage for the air to come out).
Project 01a
At this point, I quickly drilled two holes in my mold – one to fill it, the other one to let the air come out – and filled it with the silicone mixture using a syringe. This part is actually quite easy, as long as one makes sure to not let any bubble in (just look closely and move the mold around until the last one comes out of the second hole).
Project 01a
There, I realized that I had made my biggest mistake of this assignment – to only skim the data sheet. The package might say that the silicone mix contains some oil allowing for the easy detachment of the casted piece from the mold, but the data sheet indeed specifies that some additional detaching agent was essential. When I tried to open the mold, there was no way to detach it from the piece, and I had to cut it off with a knife. It is a bit of a shame, as I actually need two casted pinions for my project, but I least now I know how to make a more… lasting mold.
Files: Click here alt="Project 01a" />
After a solid hour of cutting resin around, I could finally extract my pinion. Even though it is probably unusable – I can’t seem to find the energy of cutting the remaining bits and parts of resin away – I was really reassure to see how the two parts came together perfectly, and how clean the finishing of the piece was. I am currently making a second mold and intend to keep the exact same workflow, with the addition of the detaching spray when it will be the time to cast it again. Otherwise, I am extremely impressed by the quality of work that molding and casting affords!