Théo Lepage-Richer

Fab Academy / Digital Fabrication 2015

Embedded Programming: From 0s and 1s to Dots and Dashes

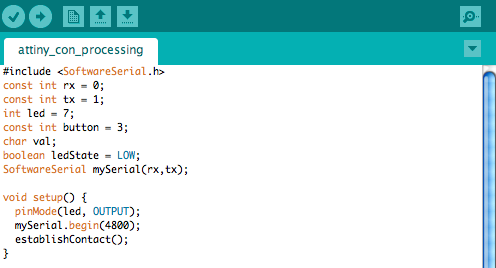
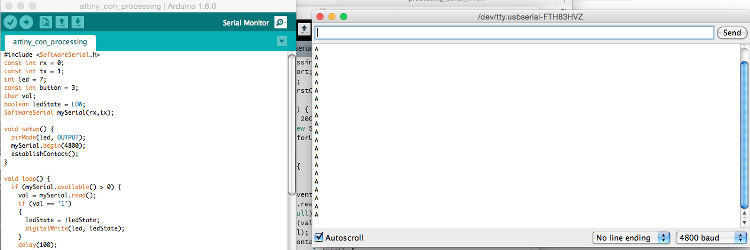
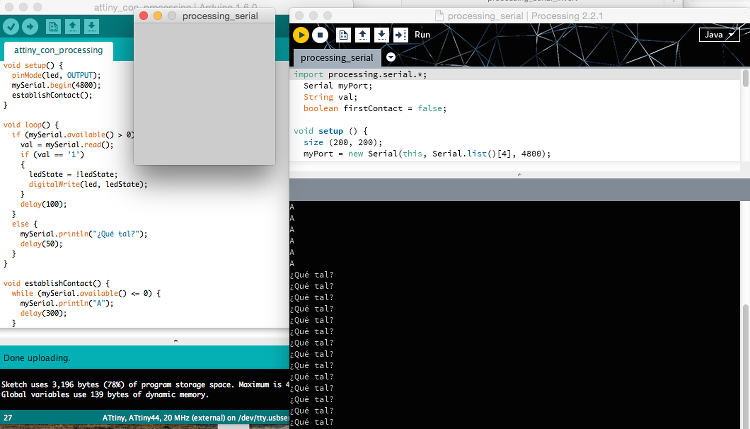
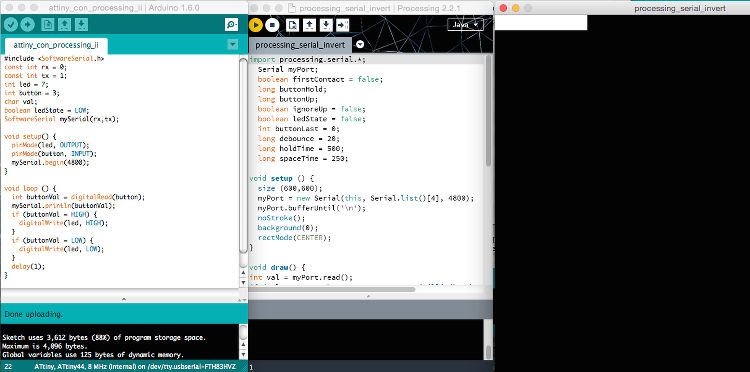
After having designed our own board, this week’s assignment consisted in programming it in as many languages as possible. As I am now working on a new idea for my final project – two terminals communicating in Morse code/through flashes, establishing an ambiguous dynamics for the user as it witnesses two ‘black boxes’ that use a language that it can actually understand – I decided to use this week as an opportunity to elaborate some of its most basic properties. In the first case, I used Arduino to write a script allowing the system to make the difference between different states (dots, dashes & spaces) and, in the second, I attempted at establishing an exchange between Arduino and Processing in a way that they could both share these states and interpret them.

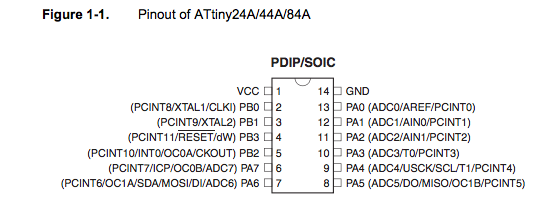
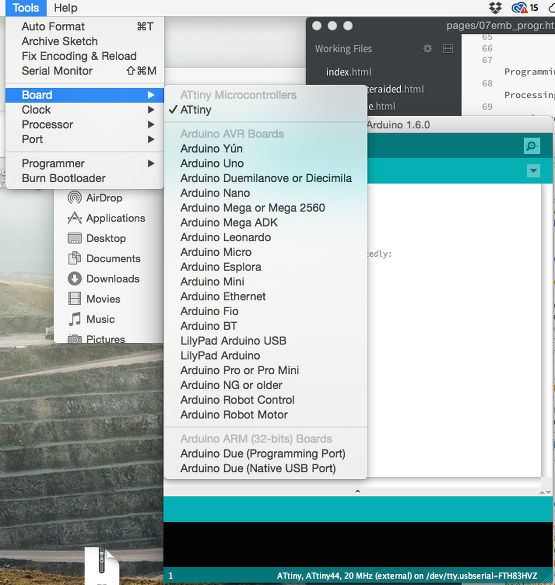
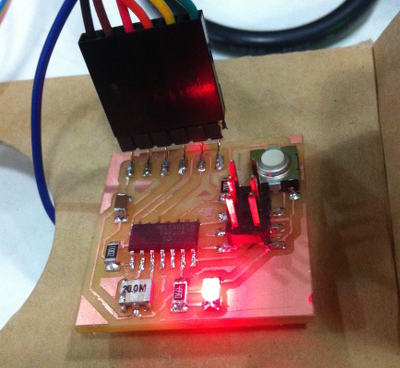
The whole process went quite well. Last week, I had already made my board blink using a very basic Arduino, example script as well as familiarized myself with the ATtiny 44 data sheet. In that sense, I had already used this document to see how a C programming language like Arduino maps the microcontroller’s pins under different numbers than the ATtiny itself while, this week, it was to see if the ATtiny has a seriel port (which it doesn’t) as well as few other hardware capacities. The biggest challenge was therefore not really to adapt the Arduino programming software to the ATtiny – it was only a matter of changing some numbers – but rather to work around the hardware strictures of the ATtiny and find a way to simulate these properties at a software level.

In short, I worked on three scripts this week, at different levels of success: one aiming at making the distinction between three different states/events, i.e. making the system aware of the difference between a dot, a dash and a pause (successful), another one bringing Arduino and Processing to communicate together (successful), and, finally, a last one pushing the aforementioned states/events to Processing so it could visualize them (halfway successful, if someone has a very broard definition of “halfway” and "successful" alike).

See below for all the details/for each step.

Your Name

  • Week: 07
  • Subject: Embedded Programming
  • Tools: Arduino, Processing
  • Objective: Program your board in as many programming languages as possible
  • Files: Click here

Project 01a Project 01a
Before talking about the scripts, I first want to refer to the diagram from the data sheet that I used throughout the programming of my board – the one about pin numbers. As ATtiny and Arduino map pins differently, it is essential to refer to this diagram to use the right number while programing one’s board with the Arduino programming software. As I mentioned last week, it is also essential to downloard the ATtiny library and import it to one’s Arduino library. From there, the user can simply select in the Tools menu the properties of its board - ATtiny44, 20MHz Clock (external) in my case - before uploading one's script.

Morse Code Script - Arduino from Theo L. Richer on Vimeo.

My first script – which can be downloaded here – is a remake of the Press+Hold test sketch by Jeff Saltzman that I found online. In its original version, the script only recognizes two states – a click followed by an almost immediate release, and a click maintained for a few seconds – while my needs required that the script could also acknowledge pauses between them. Adapting the whole thing was fairly simple, as I only had adapt the script to my needs, make it aware of the value of the last time the button was pushed and create a third possible ‘event’, or state, but it was nonetheless quite satisfying to do, as I learned from it how to establish such differentiated states. To emphasize these differences in state, I programed the board so it would flash at 100% strength for a dot, and light up for a longer period at 50% only for a dash.
Project 01a
For the second script, I built upon a Handshake sketch that I found online – its sole aim is to establish some exchange between Arduino and Processing through serial communication. I decided to give a try to this sketch because, as mentioned above, ATtiny doesn’t have a serial port and I really wanted to figure out how to make such an exchange work at a software level before going further. After some research, I stumbled upon Arduino’s SoftwareSerial function/library and, with Taichi’s help, realized that one can simulate a serial port with the ATtiny’s rx and tx pins. This function can thereby be simulated with the coding above.
Project 01a Project 01a
In the end, the program ended up looking like this when it was up and running. The Arduino as well as the Processing sketches can be downloaded respectively here and there.
Project 01a
For my last script, I finally attempted at bringing these two sketches together and making Processing visualize the dots and the dashes produced by the board's button as one clicks on it. To do so, I kept the Arduino script fairly similar to the second one, and translated into Processing the coding of the first script. In the end, I got a little short on time and couldn’t refine the whole thing as I wanted, but the resulting script worked… a bit. The circles and rectangles didn’t exactly followed the logics that I had tried to ascribe them – in fact, it looked like they weren’t following any logics at all – but this was nonetheless an interesting first attempt at translating a ‘material’ input into a readable, visual output. I will give it a rest for now and certainly go back to it during the Input and/or Output Devices weeks! I will attach to my website the resulting script as soon as it will be at a more decent stage.