Théo Lepage-Richer

Fab Academy / Digital Fabrication 2015

Embodied Data, Datafied Bodies: 3D Printing and Scanning

Part I: 3D printing

I anticipated this week’s topic – 3D printing– with a mix of curiosity and skepticism. This technics, without denying its actual potential, has evolved into a quite annoying buzzword standing for pretty much everything and its opposite, and I ended up growing tired of all these messianic speeches à la Ted Talk forecasting a world where we will print at home our own consumer goods, machines, houses, organs, food as well as other 3D printers printing each other ad nauseam. This is why – in a weird way – I was agreeably surprised to discover behind these promises a capricious machine full of limits and constrains.

Far from being the magical black box translating pure data in pure matter as it is often caricatured into, 3D printing – from its material constraints to its materials’ – is not simply a finality but a process that must be considered from the very beginning of the design of what will be printed. Wall thickness, filling, hangouts, angles… 3D printing obeys to the most basic physical laws of its material and one must necessarily consider its method of layering in all its subtlety to really tackle the specificities of this medium. 3D printing might indeed convey most of the possibilities that its advocates highlight, but only if it is engaged in its own terms rather than some new all encompassing technology encompassing and displacing all its predecessors and contemporaries.

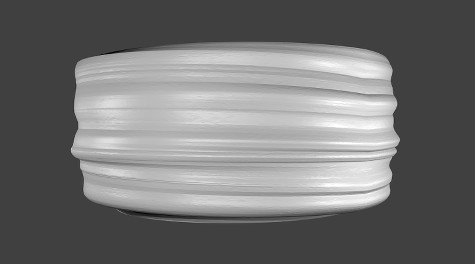
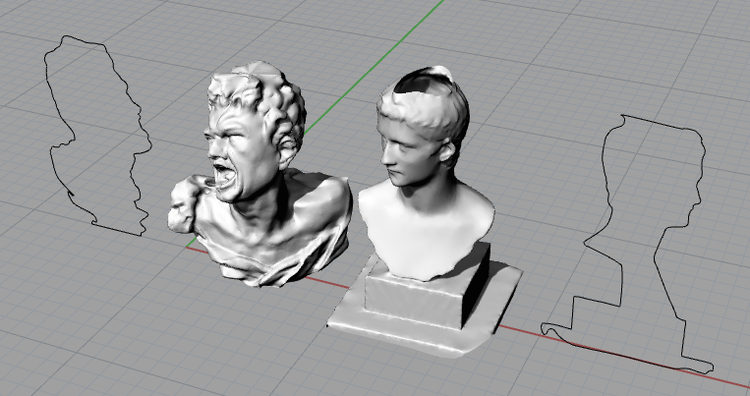
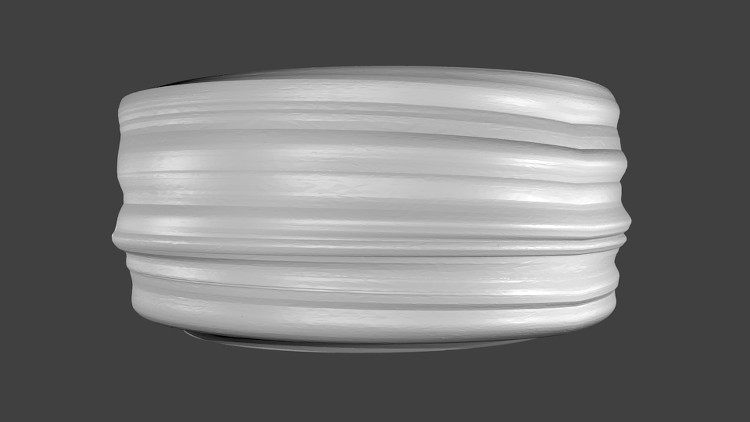
Bref – enough Ted Talk bashing. To explore this means, we were invited to design and print an object that couldn’t be made substractively i.e. in parts to be assembled. To do so, I wanted to stay away from static designs and gave myself as a restriction that my project would have to use the possibilities afforded by 3D printing to emphasize some idea of motion, transformation or expressivity. After a while, I stumbled upon 3D scans from sculptures exposed at the MET museum and extracted the profile of two busts – one with the stoic figure of emperor Gaius and another immortalizing the tormented figure of a screaming martyr – to build a simple, circular object materializing the transition between the two.

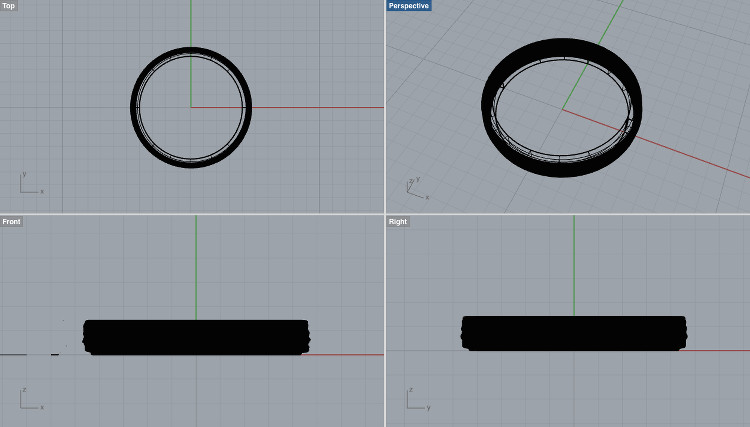
Before printing the object (i.e. monopolizing the MakerBot for hours and wasting a few decades of euros worth of material), I made a quick visualization on Maya to see how the transition between the two faces would look like:

Spinning Janus from Theo L. Richer on Vimeo.

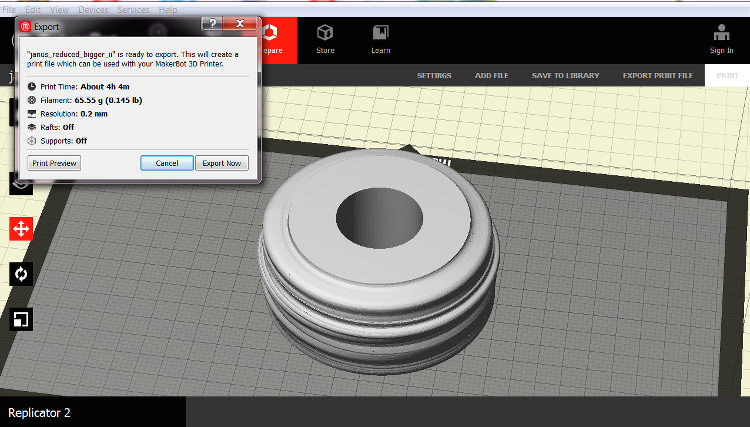
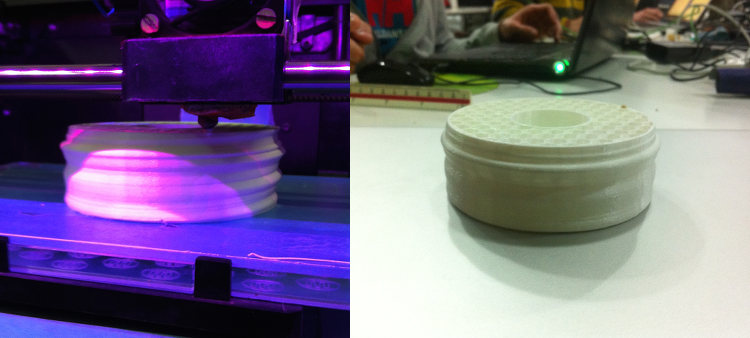
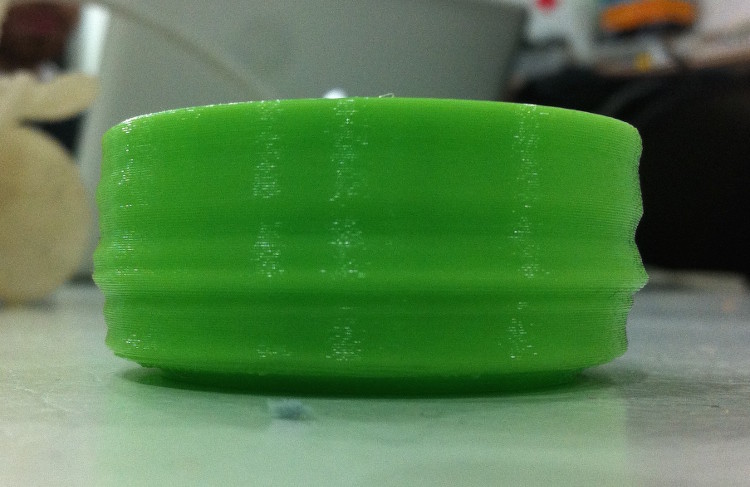
The resulting object was quite simple to print, as printing the profiles on their head easily compensated the overhangs of the noses and other facial features. I decided to use the MakerBot to print my piece, but, on the first try for which I had set my project’s diameter at 10cm, it simply (and painfully) crashed after four hours into the process. I couldn’t really pin down the source of the problem, but something as stupid as a momentaneous misconnection between the machine and the computer might very well explain the whole thing. As I couldn’t afford to monopolize the machine for another five hours, I opted for a smaller version of my project by reducing its diameter at 5cm, which divided the printing time by five. While the piece doesn’t look like much at a first glimpse, the machine’s layers of plastic quite smoothly embody the transformation from one profile to the other and stands for a promising first prototype for a potential, larger version later on.

See below for all the details/for each step.

Part II: 3D scanning

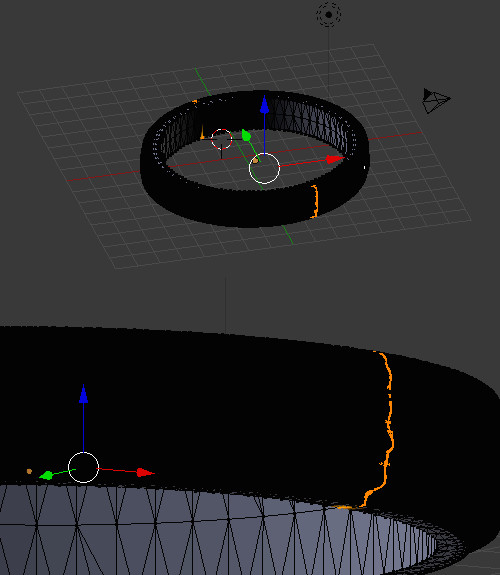
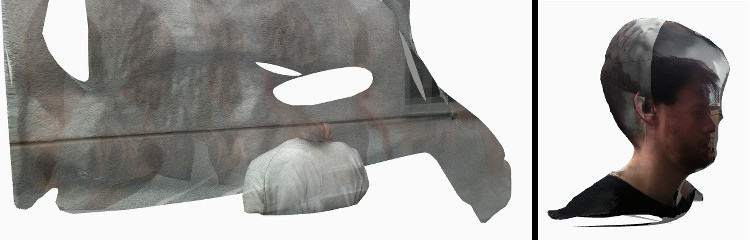
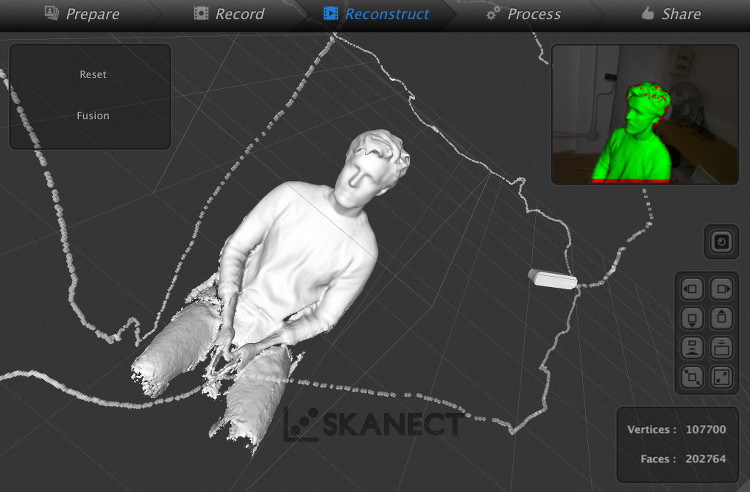
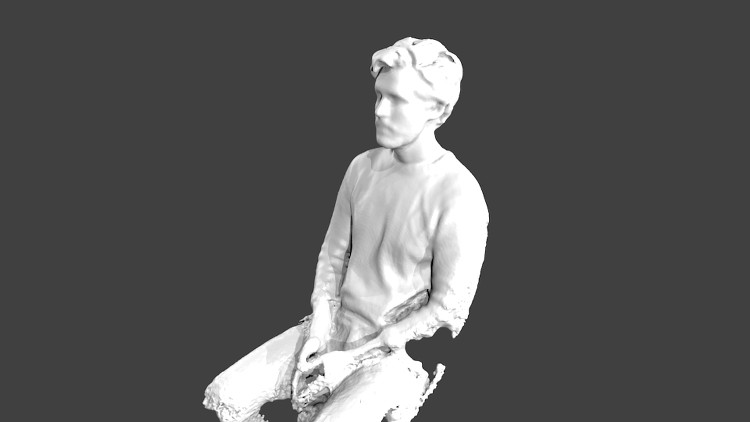
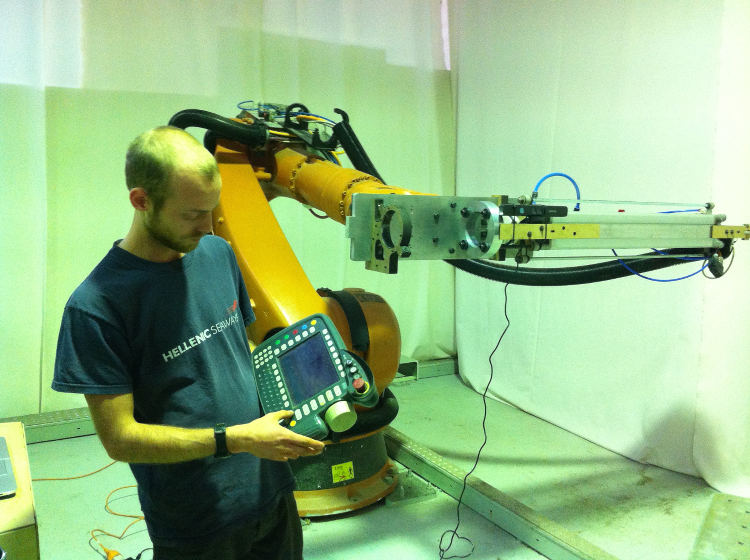
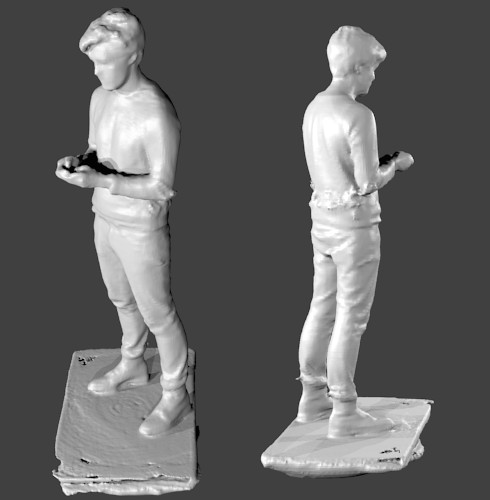
The second assignment for this week was to make a 3D scan of a person, an object or a space. Quite unoriginally, I attempted at making a 3D scan of myself, yet did so as a way to test various different technics. In the first case, I gave a try to Autodesk’s online app 123D Catch – a photogrammetric software building a model out of its subject’s photos – and, in the others, used Skanect and a Kinect to make a scan both by hand and with the end of IAAC’s 6-axis robotic arm. The result of the first try was quite catastrophic – while the software seems quite powerful, taking the right photos is extremely tricky and I couldn’t achieve the right composition to make a convincing model – but the two models I got out of Skanect were really well done and I then could try my hand at some 3D retouching using Blender.

See below for all the details/for each step.

Your Name

  • Week: 05
  • Subject: 3D Printing & Scanning
  • Tools: Rhino, Skanect, MeshLab, Blender, Maya & MakerBot
  • Objective: Design and print an object that couldn't be made substractively, as well as make a 3D scan of an object.
  • Files: Click here

Project 01aProject 01a
While the idea itself is quite simple, the trickiest part was to find the right workflow to bring the object into being. I opted for Rhino as its command line-based logics seemed to me as serving my purpose better, and I could satisfactorily make my object by using a simple combination of the these commands: MeshOutline to outline the sculptures’ profiles, Loft to build a polysurface passing through the two profiles and finally Flow to give a round shape to it. At my first try, I simply made a half-circle made out of one profile merging into another, and cloned the piece and used the Mirror command to make a full circle out of it.
Project 01a
I then exported my model in .stl and opened it in Blender to make sure that it ‘mathematically made sense’. Unfortunately, it didn’t – the mesh was full of manifold faces (highlighted here in orange – the mirroring and merging of the two parts apparently created a bunch of overlapping surfaces), in addition to being simply way too big to be printed (it was around 150MG while one should limit its model to 10 MG for a clean print).
Project 01a
I therefore went back to Rhino and redesigned my morphing polysurface to make a full circle rather than a half one. I could do it without any problem, but lost a bit of the design’s richness in the process – rather than embodying two transformations from one profile to the other and back again, I could only make a single one with the second profile being formed at a single point rather than two. I then exported the model to Blender again and used its Decimate function to divide the number of triangles of my mesh by five – lowering my file's size to a more reasonable and workable 12MG.
Project 01a
The next step then consisted in setting up the file for the MakerBot machine. The printer comes with a quite straightforward software that allows for last-minute adjustments and checkups – size, position, orientation, amount of material needed… I first set my object’s diameter at 10cm with a filling of 10%, which engaged a printing time of around four hours and 62 grams of PLA filaments.
Project 01a
Everything went well for three hours until… Nothing. The machine stopped moving and the interface simply stated that the print failed. I still can’t explain what happened with certitude, but the most probable explanation is that a momentaneous misconnection took place – in a room full of machines and people walking in and out, moving stuff, plugging things in and out, &c., the contrary would actually be more surprising. I considered cleaning the blob of PLA and try to find the right layer from which resuming the operation, but I couldn’t find any such a command in MakerBot and simply gave up resuming the process.
Project 01a
Despite all this, it was really reassuring to see how neat and clean the piece’s outline was – there is no way I could have achieved such a smoothness for the transition between the two profiles with another means of fabrication. I was also surprised to see how strong the melted PLA was and realized how a filling of 10% was actually more than enough for the needs of this project.
Project 01a
At this point, I couldn’t really afford to monopolize the machine for another 4-5 hours, so I decided to make a smaller version of my project – one with a diameter of 5cm, which necessitated only 48 minutes of printing and 12 grams of filaments. The result is indeed less interesting than what a bigger counterpart could have been, but I was still satisfied with the precision of the machine at such a small scale. For this week, I will stop this project there, but I do intend to bring it to another level in the short run. Next step: printing a bigger version of it that could be mounted on a small motor rotating it horizontally. From there, I would install a projector at a 90-degree angle to project on a wall the transformation between the two profiles. Maybe a good idea for the output devices week? Let’s see!
Project 01a
Among all these moments of waiting, printing, rendering, &c., I had plenty of time to try my hand at 3D scanning. Francesca and me were both curious to give a try to 123D Catch, as its photogrammetric logics seemed to be the easiest, most accessible one to grasp. We indeed expected it to be a bit capricious with the quality of the uploaded pictures and I do reckon that I was especially rigorous in taking the cleanest pictures, but we didn’t expect the result to be so… disastrous. We both took around 50 pictures of each other (click here for hers, here for mine) in a shaded, regularly lighted spot – circling around each other – but these superficial efforts were far from being enough. The resulting models as seen above hardly pinned down the subjects to model – merging my bust with the environment while dramatically beheading Francesca – and we quickly gave up using this means. I don’t doubt that 123D Catch might come extremely handy in some low-tech situations, but the high homogeneity it requires for the uploaded photos makes the whole process… chancy.
Project 01aProject 01a
For my second attempt, I used Skanect, which proved to be a very user-friendly and efficacious piece of software. Daniel had a Kinect with him so we plugged it in and attempted at scanning each other. The preferences were really easy to set up and we simply had to aim the Kinect at the other while maintaining a distance of a meter and walking around it, making sure to cover each angle. The software evaluates the position of the scanner in relation to the subject and makes it easier for the user to evaluate missing spots. When it is done, the software quickly computes the model and affords various settings to make the model watertight, erase manifold vertexes, smoothen faces, &c. There was hardly anything to do afterward, except sculpting lost angles on Blender using its Sculpt Mode.
Project 01aProject 01a
For my last attempt, Adolfo, Kalil and me were introduced by Sophocles to IAAC’s 6-axis robotic arm on which a Kinect had been installed. We were exhaustively warmed about the dangers that such a machine can represent, so we limited our use to a single axis of movement – the vertical one – in addition to the rotation of a metal board installed in front of the arm. We spent a fair amount of time debating on the optimal synchronization between the two to have a full body scan as quickly as possible – the arm completing a full ascension while the platform would make x rotation(s), &c. – to finally succumb to the easy way out: successively fixing the Kinect at the three different heights with the board making a full rotation at each of them. It is of course not the most efficient way, but it gave satisfying results, with the only major flaw behind the top of the model’s head being lost. If I had to do it again, I would probably add another of movement so the robot could lower the Kinect’s angle when it reaches its highest point as well as increase it when it reaches its lowest one – that way, the top of the model’s head as well as manifold features such a the chin and the nose would be more accurately scanned.