9week//
This week I've design on 2D, passing onto 3D to create the mold of my cat bracelet and ring design.
This week I've design on 2D, passing onto 3D to create the mold of my cat bracelet and ring design.
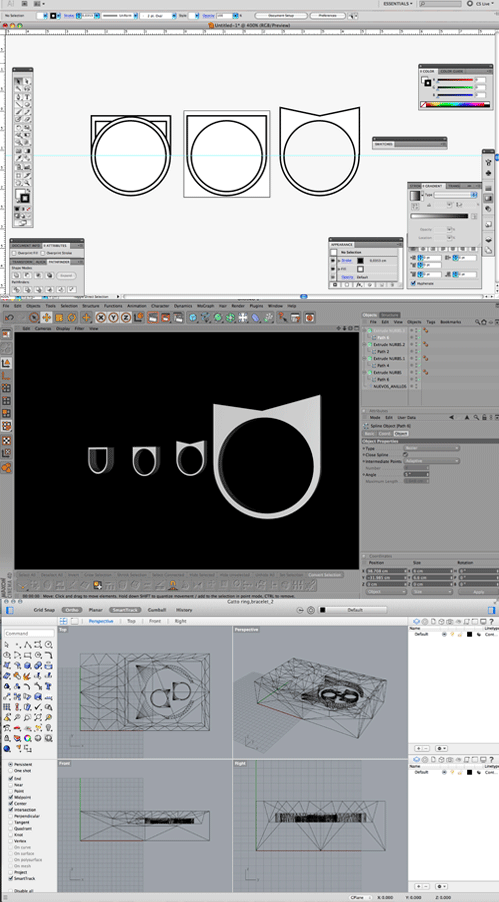
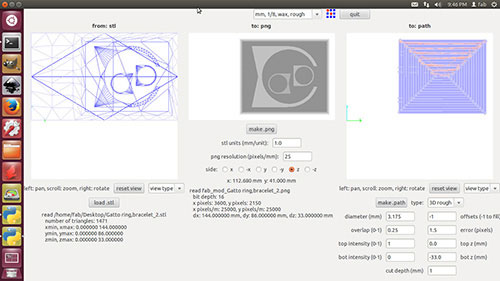
• I've designed my bracelet and ring on 2D with Illustrator and I've made into 3D with Cinema 4D. I exported it on .stl format.
• I've made in Rhino a box with the dimesions of the WAX piece 145x125mm and 250mm of thickness. You need to left at least 3,175 mm from the sides and 15º degrees of inclination to let the tool removing the wax. I placed at 0,0 point in negative position my bracelet and inside two rings and export this piece to mill the mold on .stl
• I've create a .rml on Fab Modules to send to mill with the Modela machine the wax. Same process to make the electronics boards but this time we are using wasted milling tools to remove the wax.
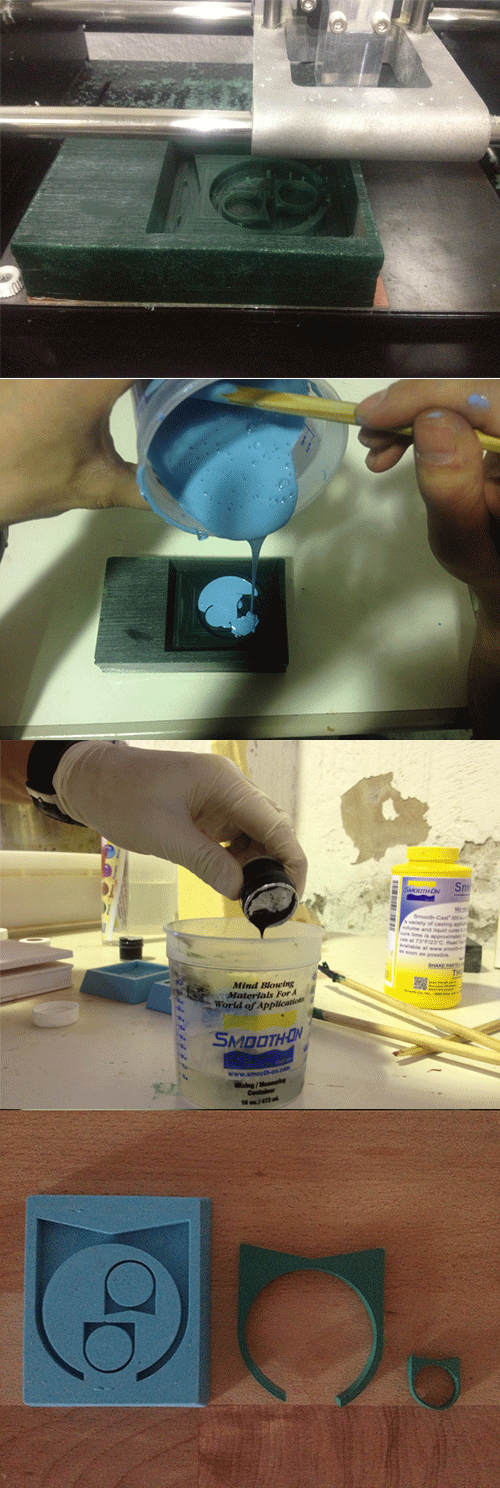
• When the milling is ready we have the mold for our design, so now it's time to cast.
For this process use gloves. Put some spray Smooth-on Universal Mold on the mold to take out later easier. Applied twice to 30cm of distance and wait 3 minutes in between.
I've used Silicone Rubber to create my soft mold.
I've mixed the Wet and Dry 1:1 relations. I measured it on a balance. Mix it carefully both components without leaving waste on the borders and bottom of the glass.
I put the mixed rubber carefully and slowly on the hard mold until the material reaches the top of the mold.
I hit the hard mold to the table to allow the air bublues goes out from the rubber. I left the mold one day on the Lab.
When my soft mold was ready I've used the Liquid Plastic to make my bracelet and ring.
I added green color pigmented to changes the color of the plastic!
• Now my bracelet and ring are ready: RING!