File Preparation with Inkscape
The PCB drawing that is provide are eagle files and png files, but for my work flow with both Easel and CAM software (which is CAMBAM in my case), I will need SVG files. Inkscape are more than capable of doing the file transform, and svg is a piece of cake since it's Inksacpe's default saving format.
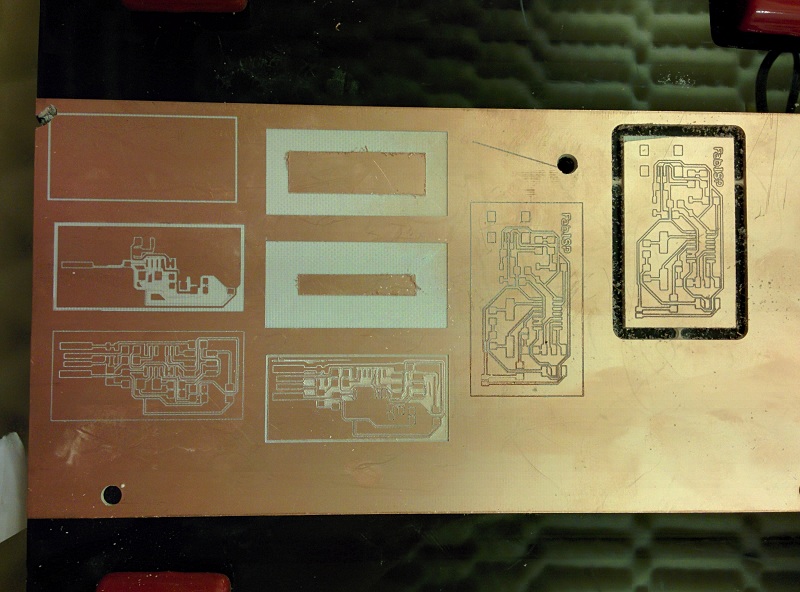
 For testing purpose, I also make one SVG files with only "stroke" of the pcb, and without "fill". I'm curious how fast can I save on milling time, and how much harder will it make soldering become. (Normally, all the black area on the picture above will have to be milled out. With only stroke, the CNC only need to mill out the deperation line, whcih should cut down the milling time significantly. )

For testing purpose, I also make one SVG files with only "stroke" of the pcb, and without "fill". I'm curious how fast can I save on milling time, and how much harder will it make soldering become. (Normally, all the black area on the picture above will have to be milled out. With only stroke, the CNC only need to mill out the deperation line, whcih should cut down the milling time significantly. )
To convert png to SVG in Inkscape, simply use "Trace Bitmap" under "Path" tab. Something to pay attention to for doing the conversion: lower the "Scans:" number to 2, otherwise there will be a lot of the same image being output,
 and also make sure "Remove background" is selected, or the entire face of the pcb will get milled out! (See the two big squares in the middle? yeah, don't do that...)
and also make sure "Remove background" is selected, or the entire face of the pcb will get milled out! (See the two big squares in the middle? yeah, don't do that...)

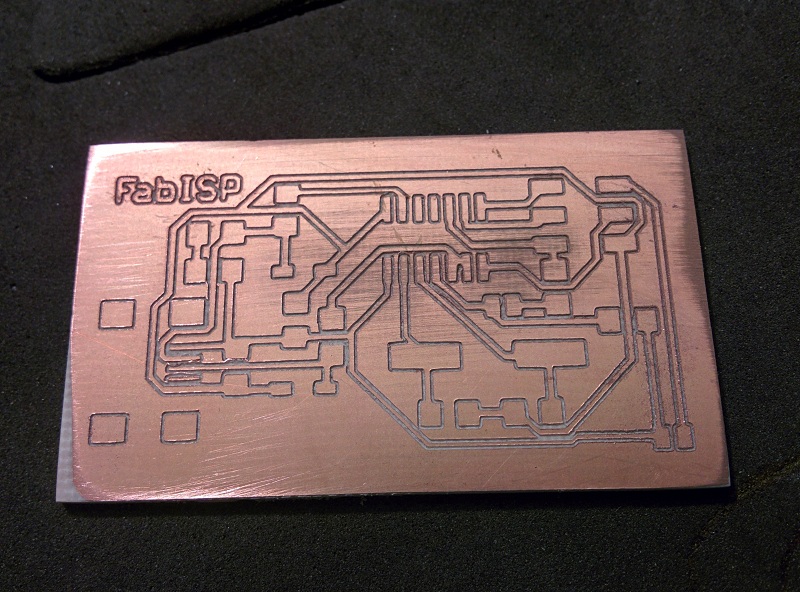
 400 grid Sand paper can easily remove all the burr from the edge of the traces.
 For sending the g-code files CAMBAM generated to CNC, I use Universal G-code Sender, which is really simple compaers to 3D printer's host program like Repetier-Host.


 Start putting on solder and solder the component by hand,


 It's so much easier to solder without unused copper everywhere.


 Instead shows up as FabISP, mine shows up as USBtiny in the control pannel.
However, since it works flowlessly when programing my hello world board, it's probably just Windows trying to get attention :p
Instead shows up as FabISP, mine shows up as USBtiny in the control pannel.
However, since it works flowlessly when programing my hello world board, it's probably just Windows trying to get attention :p
