{ Fab Academy 2015 : Koichi Shiraishi }
{ Home } { Final project } { Class } { Fab Academy }
- Week 06: Electronics Design -
Weekly Assignment
- redraw the echo hello-world board,
- add (at least) a button and LED (with current-limiting resistor)
- check the design rules, and make it
- extra credit: simulate its operation
1: Install EAGLE and lib data
I already installed “EAGLE.”(ver. 7.2)
I installed the library data and sample schematic/board according to the instruction on “Introduction to EAGLE.”
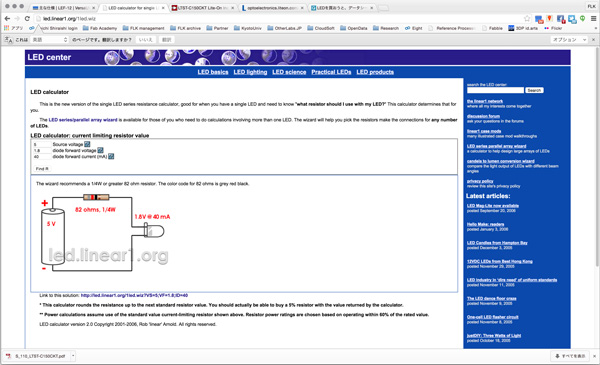
I checked a data sheet of LED I choose. The LED need 1.8V,40mA. I used “LED calculator.” It is a convenience.
I decide to use a 100 ohm resister.
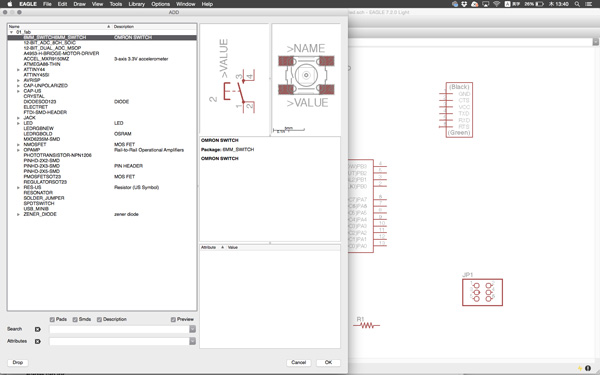
2: Schematic(EAGLE)
I opened the sample schematic, added the parts.
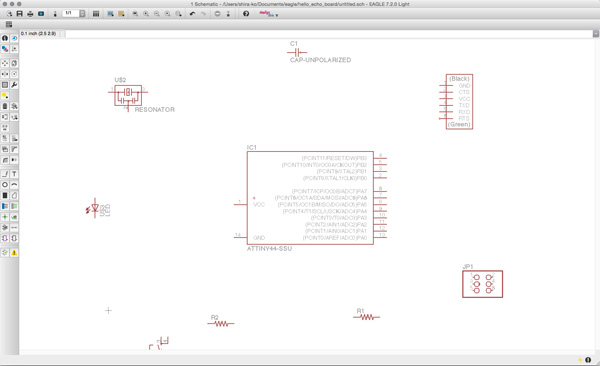
It is very easy and simply. I put the parts, as I recalled the schematic symbols.
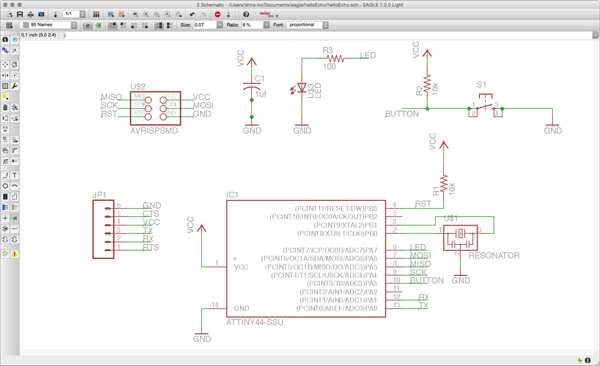
The connecting function is control intuitive handling. It is easy to use.
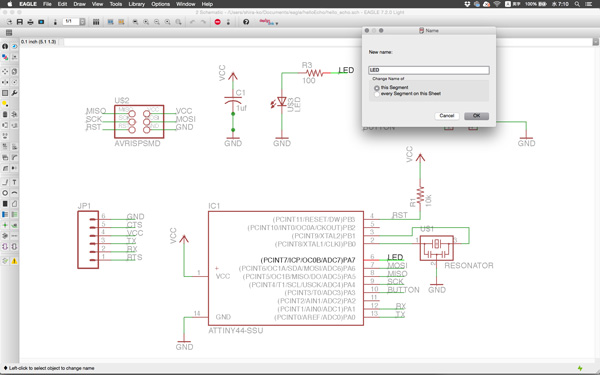
It can connect the wire for invisibility by setting a same name.
3: Board(EAGLE)
I arrange the parts in the board window. It also control intuitive handling.
I could not image the real-size. I think checking a scale by paper print is important.
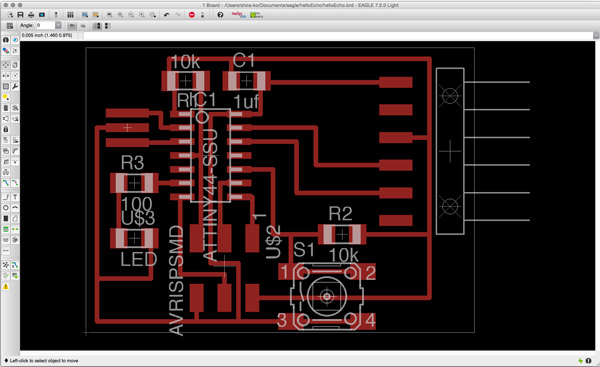
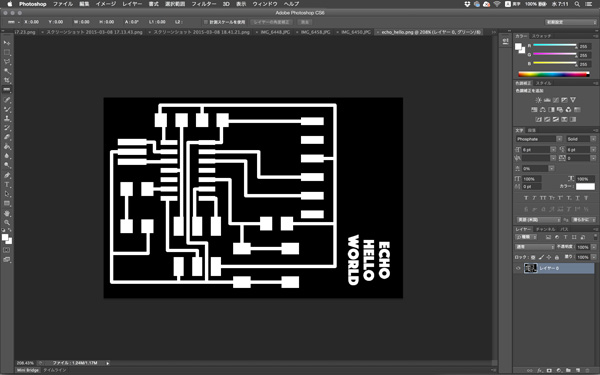
Thanks to “Introduction to EAGLE”, my circuit was completed.
Designed files
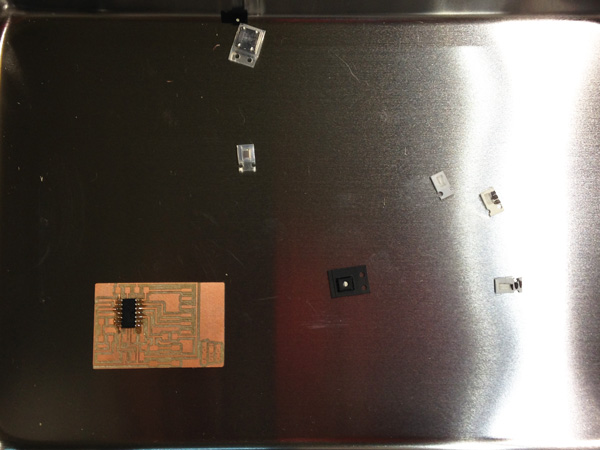
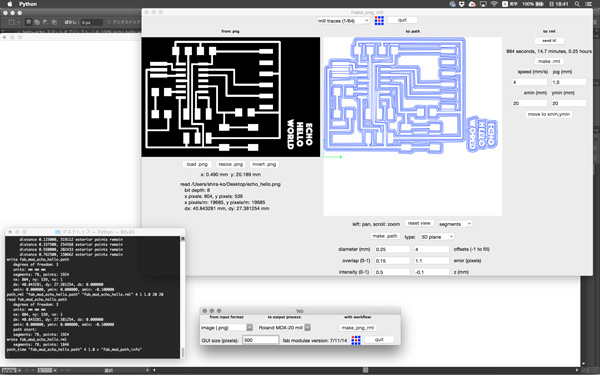
4: Milling a board
I engraved the circuit pattern by this way(Week04).
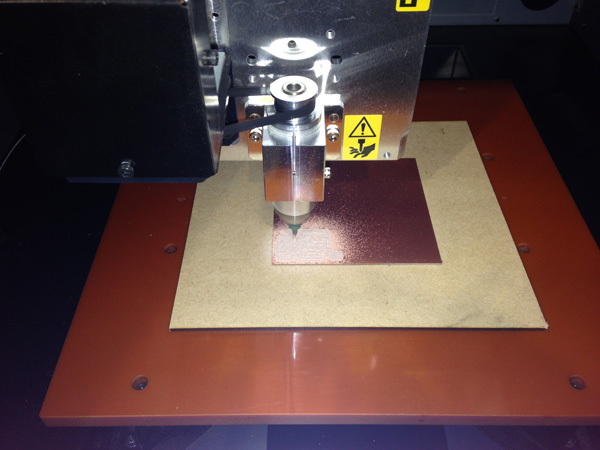
Setting Z origin is very difficult, because the mill I used has a very sharp tip.
The first cut was not enough engraving. I redid after setting Z origin.
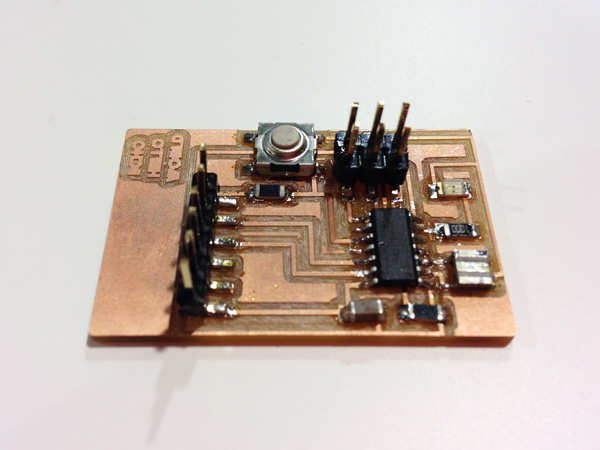
5: Soldering
bought a sharp iron tip, because I had a hard time to use a thick tip when I made the Fab ISP.
I could set the tip on the aimed point. Therefore, I soldered pretty well.