
HOW NOT TO DO AN ASSIGNMENT
I planned this week as well as I could but unfortunately things did not go well. This is partly due to neglecting to watch the video tutorial, but also because the way things ended up, my goals were too ambitious. My plan at the beginning was to use press fit construction tools to create an instrument that creates sound in the same way a guitar does, something I am calling a music box for now.
The first thing I did was look at past students for tips and tricks in laser cutting, write up what I already know about the mechanics of guitars (which you can find here) before starting to conceptualise and getting to know grasshopper better.
I started by going through the past students I check regularly. Fiore Basile, didnt have anything particularily useful in the lesson.Gerard Patawaran (the only other fab academy who has done anything concerning guitars that I can find) created a press fit torsion bow guitar model. So close to being helpful! Dana Schwimmer used grasshopper to create parametrically designed puzzle game, but didnt really expand on how she did it other than provide a link to her code. If nothing else this post proves that grasshopper can achieve what I need.
Next I looked through the resources we came up with as a group in the class. Articles on nodes (Adjusting the cut to create specific points of friction in timber products and in acrylic and adjusting the tolerances so the laser cutter cuts to precise dimension (which is here). Theese skills seem essential for laser cutter mastery as do the Fab Academy tutorials on press fit construction which mention using a chamfer to put the pieces together easily.
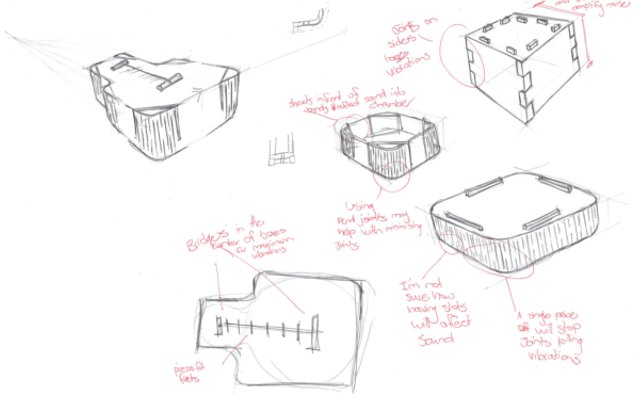
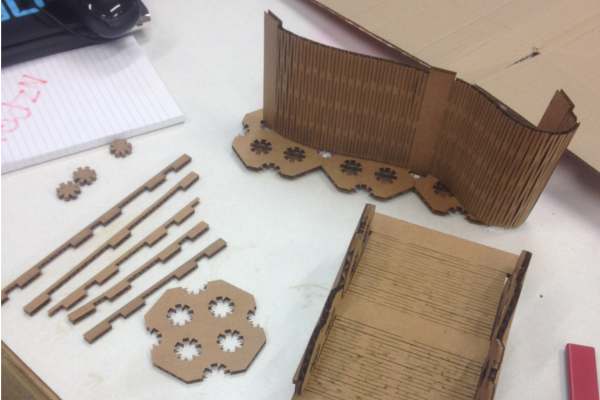
I started to draw. I looked at how the box could fit together and resonate nicely, as well as provide enough support to hold the tension of the string. I came up with a concept that used two resonating plates (front and back) with a single divider piece (which split into two due to material size limitations). To make a single piece I was to use laser cut flexible bends, the joints were to have a locking mechanism using the nodes tutorial which I found before, and the string and bridge was to be supported with a mechanism I found in a laser cut ukulele. Finally I planned to parametrically make the joints to allow for easy customisation in future designs.
I then moved on to testing the joint. I started with cardboard, but I quickly realised I would need more sturdy material to support the string.
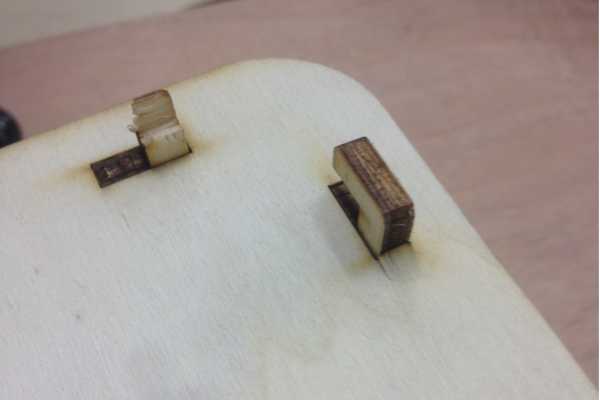
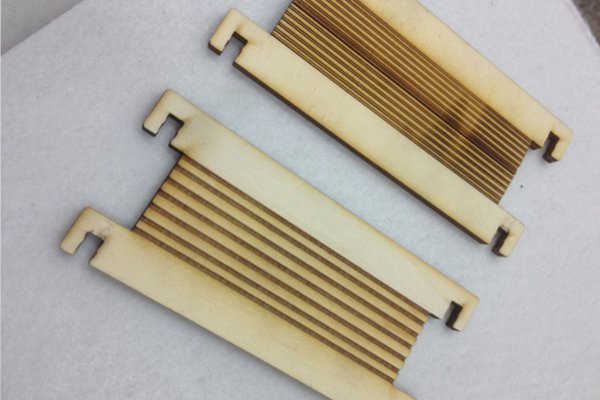
I moved on to (supposedly) 4 mm poplar plywood (which turned out to be between 4.5mm and 4.8mm). After 3 of 4 tests to figure out the tolerances of our laser cutter (which was about 0.1 per line cut for poplar ply) I had a test joint that fit nicely.
I had a bit of trouble with exporting out of rhino as a .dwg and into illustrator. What I would find was that my file had shrunk or grown larger by what seemed a random amount. I resorted to finding the dimensions of the file in Rhino, by what scale the file had changed by, then scaling it back to its origonal size in illustrator. This was pretty time consuming but I couldnt find a fix in the settings.
Then monday arrived and I was alerted that what I was doing did not fit the assignment. It was then I promptly decided I should watch all of the video lecture. I learnt that I had to use cardboard to create a construction kit - laser cut pieces that could create more than one thing through assembly and that I had to use parametric tools for the joints.
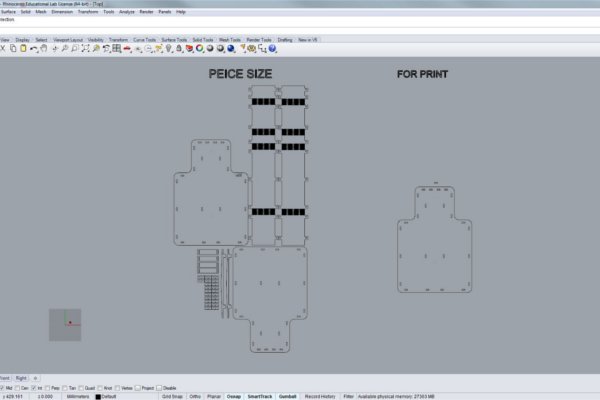
I went back to drawing and quickly came up with a concept for modular furniture using a laser cut flexible sheet and some attachment panels. I moved onto Rhino and grasshopper to create the joints parametrically. I made some decent progress but in the end did most of the work in Rhino. My grasshopper skills are improving very slowly but I did make a little bit of progress.
I managed to make a working parametric design through copying different points with adjustable vectors. I would then set it up so that the laser cutter offset would subtract or add automatically, and transform the geometry to make my desired shapes.


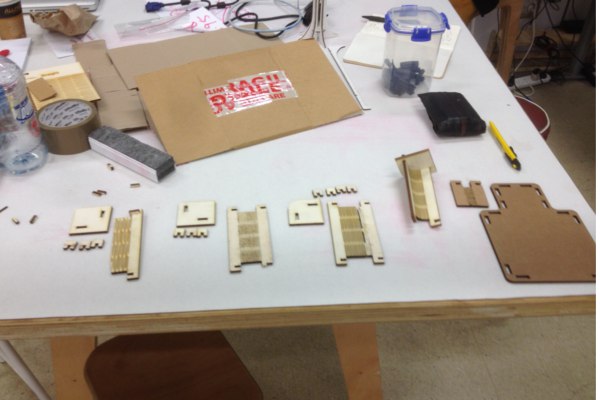
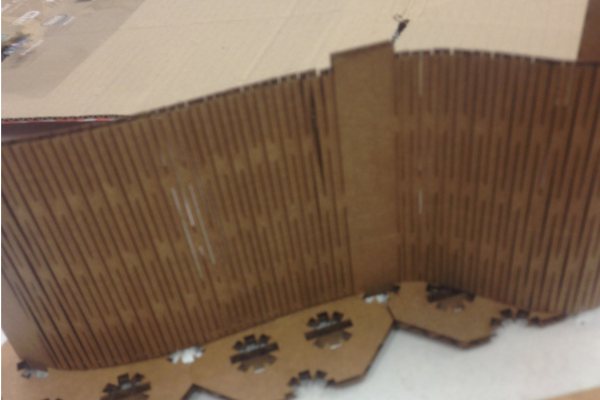
Finally it was time to laser cut, both the music box and the construction kit. The cardboard construction kit used 4mm corrogated card- and used a single pass of the laser cutter with the power settings of 65%, speed at 12% and a PPI of 315.
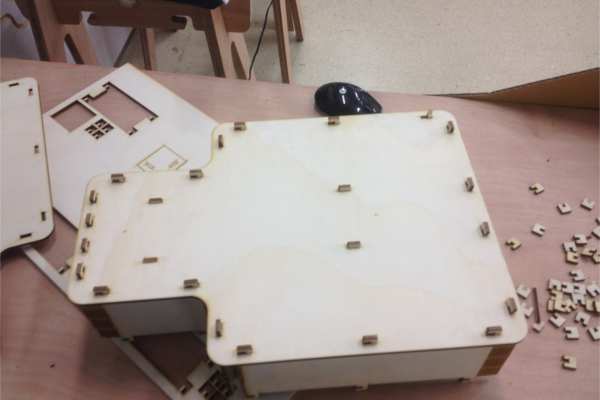
The Poplar ply required two runs to fully seperate the peices, the first run was at a power of 70%, speed of 9.4% and a PPI of 300 with the second run decreasing the power to 50%, increasing the speed to 12% and keeping the PPI the same. The cardcoard cut time took around 5 minutes in total. The Poplar ply cut took much longer, totalling at around 30 minutes.
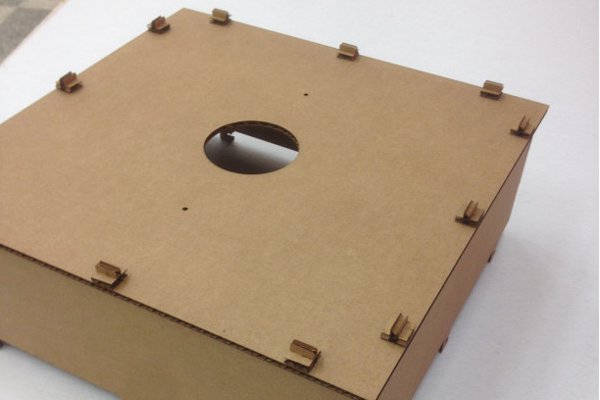
The construction kit was the only one that worked. Cardboard is a very forgiving material because it bends under pressure and does not snap easily, unlike poplar plywood.
My design uses an octagonal panels with long frames that attach the panes side by side. The flexisheet is then bend in any number of organic curves to create funtion in the furniture.

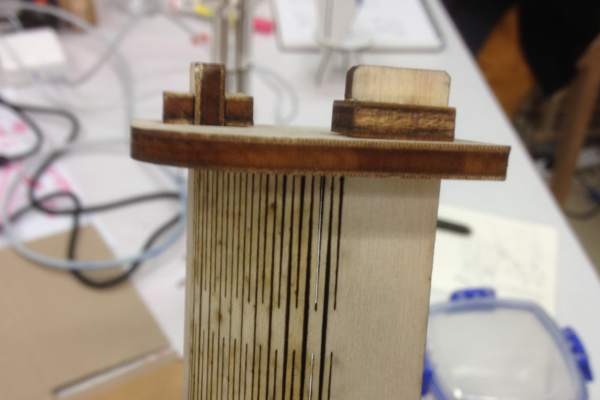
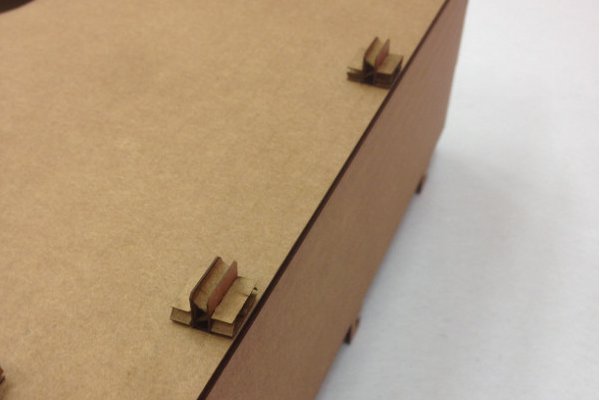
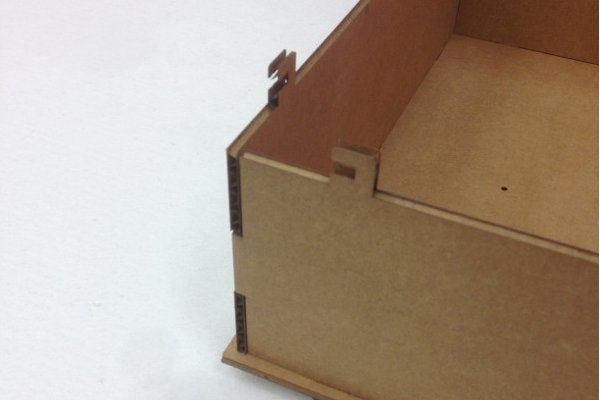
The poplar ply music box did not work at all. First of all the joint tolerances were off by about 0.1 mm, which made the joints very difficult to put together. The number of joints and because they had to be inserted at the same time meant that inserting the side panels into the top was very difficult. Furthermore, the flexible joints were far too fragile and would snap in half with the slightest flex in the wrong direction. Overall I figured out a really good way to not make a press fit instrument, but come next week I shall develop the next iteration and construct that.
MARK TWO
Having finished this weeks assignment (making and programming the fabISP) in the first two days I started working on the second prototype of my music box.
I started by looking at the work of the other fab academy students for their laser cutting assignment. Sungeun Lee is fab academy student from Seoul. He looked at organic shapes and connections, particularly of the zipchaise and methods of bending MDF. I also was inspired by a project sitting in the Wellington fablab done by a group of university students last year.
I started with experimenting with using laser engraving and rastering to create a living flex joint with 4mm poplar ply. Long story short, it did not work at all and it would be better to try again with a small cnc mill

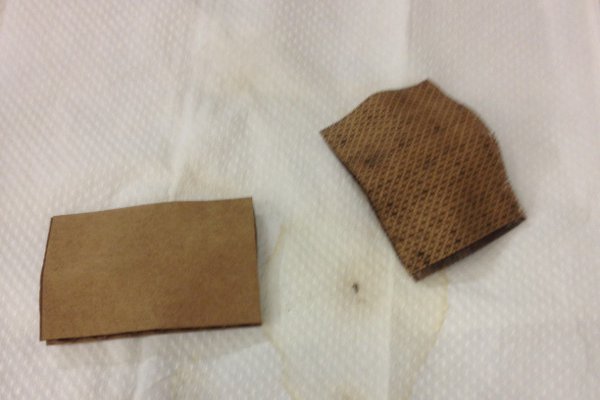
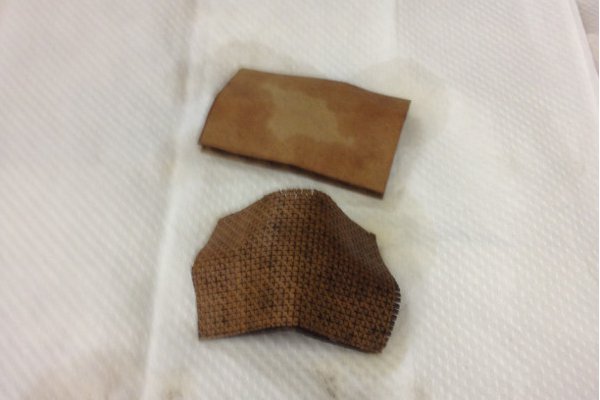
The next thing I tried was to bend laser cut crosshatched living hinge corrugated cardboard. By soaking it in water, then letting it dry in the bent pattern the cardboard was supposed to hold the organic shape. What was interesting was that as soon as the cardboard piece was laser cut it lost any acoustic qualities it had (which I figured out by holding it loosely in one hand and flicking it with the other) I soaked both the crosshatched and normal cardboard piece.
The normal piece was much harder to bend, but dried quicker and retained it rigidity after drying fully. The crosshatched pattern did bend much easier, but never fully dried to the same level of structural composition as when it was dry. Overall, using cardboard (with the corrugations going in a straight line) with water just weakens the structural integrity of the corrugations, making it less suitable as an acoustic material. I will need to do further experimentation with this process.
Finally I decided I just wanted a working prototype this week and changed the design of the music box to have 4 piece side rather than one long piece. This design means that the sides lose some of the acoustic vibrations of the strings which will result in the acoustic sound being duller.
In conclusion I have made a prototype that works badly, hopefully from here I can iterate this design into something that sounds good.