 |
 |
 |
 |
 |
 |
Using the milling machine (MODELA) and electronics workbench
This is a video of the whole process:
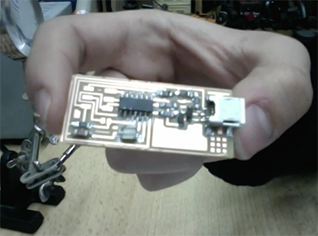
It is my first time to use the milling machine. I have long wanted to make circuit boards using the modela and finaly i did.
It did not take time, but when it comes to accuracy and clear traces, you need to take steps neatly just to limit the number of failure trails. It took me three trials to come up with a working programmer.
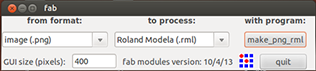
1- Open the software (Fab Modules), set it on the output format Modela RML and the input format png
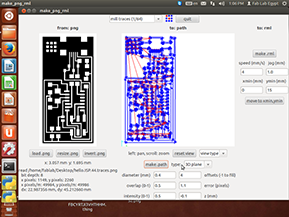
2- Insert the interior trace, using the 1/64 inch diameter end mill to mill the electrical traces
3- Fix the board using super glue, or bouble sided tape
4- Prepare the machine, zero the X, Y, and Z axis, and start milling
5- When you are done with the trace, insert the outer trace to cut the traced circuit from the excess material, using the 1/32 inch diameter end mill
6- Finally, prepare workbench and components
NOTES:
Make sure that the end mill, the bed and the material are fixed otherwise they will vibrate during milling, causing inaccurate tracing and in some cases damaged material.
Double check the end mill type before you start tracing otherwise, if not the proper one for the function, the end mill might break.
After trail and error, I was able to adjust the sufficient depth of milling in the tracing phase in order to come up with clear traces for easier soldering.
Choose a suitable origin for the starting point in order not to wast material.
|
|
|
|
|
|
Using an AVR
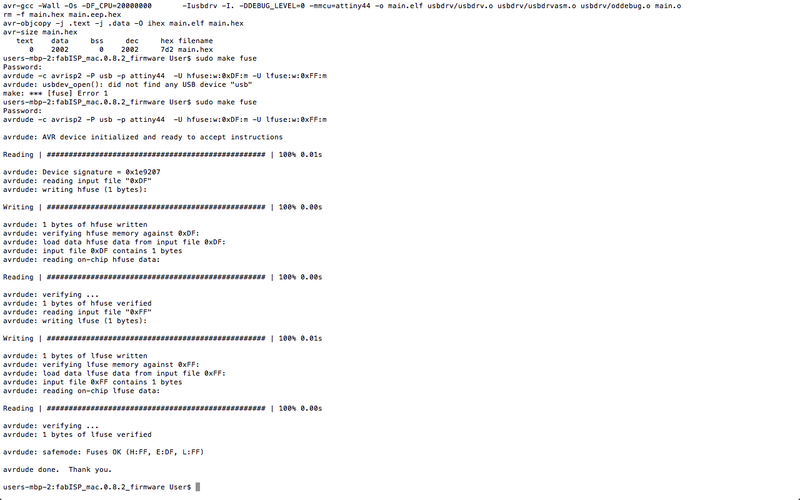
For me, this is the hardest part since I am not familiar with programming languages. Going through different tutorials, i was able to upload the code using python. After programming the IC, the board can be used as a programmer itself.
NOTES:
Before programing, make sure that the board is connected properly to your lap top and that the AVR gives you the green light to upload your code.
Some of the common errors that you might find while programming are, unmatching file names, or misloacated files.
 |
 |
 mariamwaelgado@gmail.com mariamwaelgado@gmail.com |
 http://mariamwaelgado.wix.com/ http://mariamwaelgado.wix.com/mariam-wael |