Scott Zitek - Fab Academy 2014
Composites
Week 11 Assignment
The assignment for this week is design and make a 3D mold (~ft2), and produce a fiber composite part in it. It can be an open mold that would need to be vacuum bagged or it can be a closed mold that could be clamped.
Designing the mold form
It was recommended that we don't go overboard with the mold design and instead focus on workflow for creating composites.
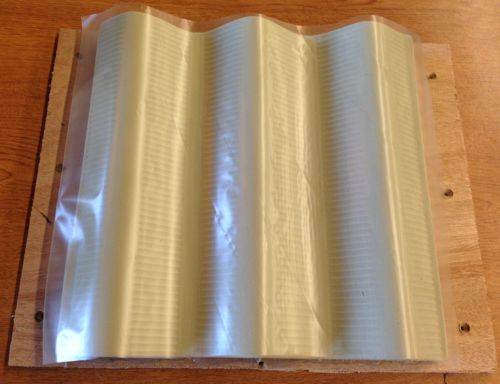
- I experimented with several different designs like decorative bowls, wall sconces, and a trailer hitch cover. I eventually decided to make a simple one-sided wave form.
- I used Vectric Aspire to 3D model the wave shape by sweeping a vector of the wave along a straight rail down the center of the part.
- Since I was making the part out of machinable foam and the deepest feature was only about one inch deep, I used a 1/4 inch plunge cut flat endmill with no roughing passes. I generated a tool path that rastered back and forth at full-depth. I rotated the raster cutting direction to cut the wave using the y-axis and z-axis since I had problems with "sloppiness" in the x-axis when using high feed rates to cut the wax mold for the week 9 assignment.
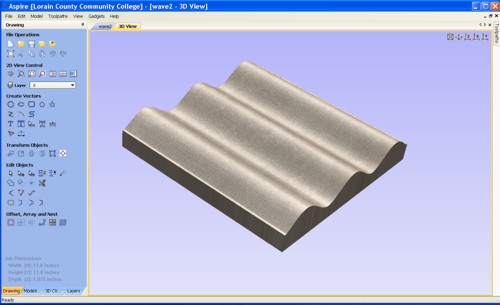
Result of simulation using Vectric Aspire.
Cutting the mold form
- I found an old odd shaped piece of machinable foam. It was easy to cut down to size using a scroll saw. I needed a way to hold it in place while the Shopbot cut it, so I attached it to a board using double sided tape which did not stick well to the "sandy" surface of the machinable foam. I also attached it to the board using hot glue since I didn't have much faith the double-side tape by itself would be enough.
- The Shopbot took longer to cut than I expected to cut the surface. I think I could have used a faster feed rate since the machinable foam does not seem to melt like the machinable wax does.
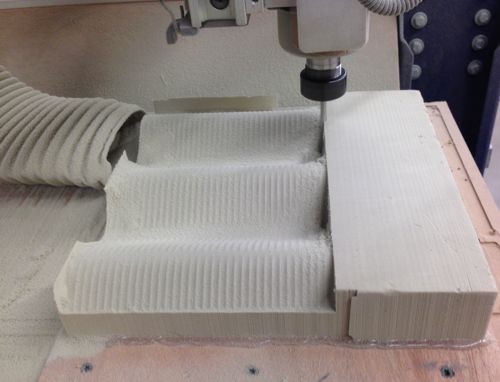
Shopbot cutting wave surface.
- I was surprised how rough the surface finish was. Even though I used I step-over of about 50%, there were grooves the width of the tool. The machinable foam was very easy to sand by hand. I cleaned up the form a little with a flexible sandpaper block but I decided to leave most of the groove marks to see how well they reproduced by the composite part.
The surface finish was pretty rough.
Creating the composite part
We use the large room attached to our Fab Lab for many things. It is where we keep our messy and loud Fab Lab equipment like the Shopbot. It is also where we teach hands-on things like wind turbine blade repair since it has good ventilation. So we are lucky to have access to vacuum bagging equipment and more. I was even more fortunate that the instructor for our Wind Turbine program was able to take me through the composite layup and vacuum bagging procedure. With his help the procedure went smoothly. The hardest aspect is finishing before the resin hardens.
- I had a choice of three different types of fiberglass.
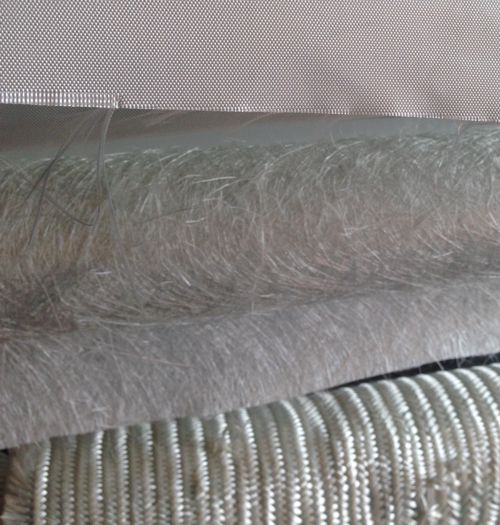
Three different types of fiberglass: smooth high thread count fabric, random orientation strand, and thick rope like fibers.
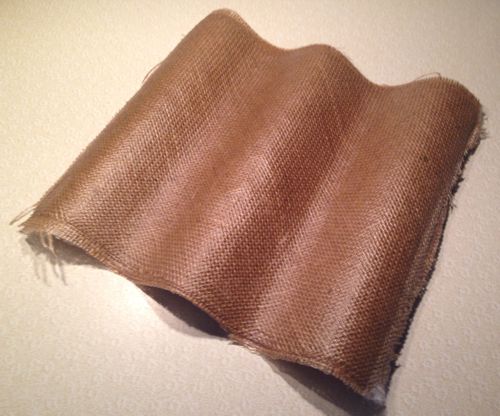
- I decided to use burlap instead since it is so much safer to work with. I wanted to try to cut the burlap into nice perfectly shaped pieces. Unfortunately, the laser wasn't available at the time. So I used a metal plate as a template and cut around it with an Exacto knife. It was also easy to cut with sharp scissors. However, cutting perfect rectangle shapes of exact dimensions was difficult since the fabric easily stretched and the cut ends kept fraying. It wasted material but I cut the rectangle shapes so that the fibers would run in different directions for each layer. I was hoping this would make the composite part stronger.
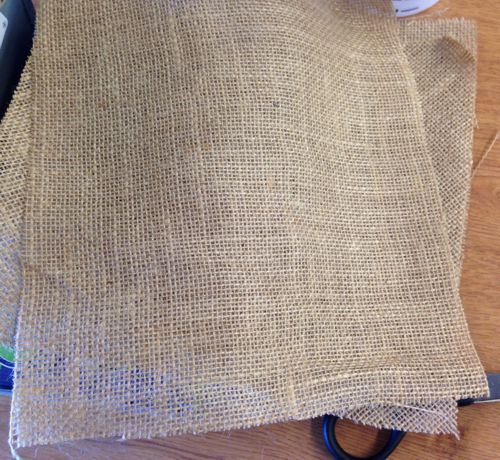
Burlap cut to the shape of my part. Note each layer has fiber strand orientation in a different direction.
- The vacuum bagging films come on big rolls that are stored together in a large rack with the various rolls of fiberglass. We roughly measured and then cut lengths of each type of film we will need from the big rolls.
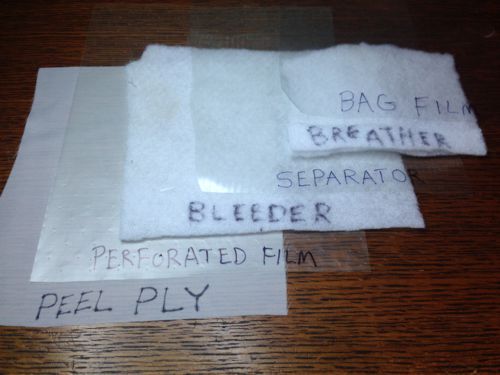
There are several different types of films used in layers.
-
We precut the various films to more precise sizes as we layered them as a "dry run" without any resin. Since the resin would otherwise stick permanently to the machinable foam mold form, the first layer was separator film to protect the mold.
Wave mold with layer of separator film.
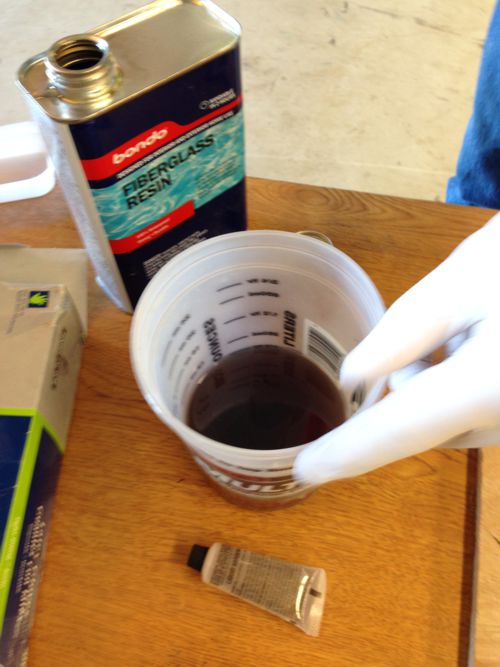
- The recommended ratio is 10 drops of harder per ounce of resin.
I mixed 8 oz. of fiberglass resin with 80 drops of hardener and mixed thoroughly trying not to create air bubbles.
- The recommended ratio is 10 drops of harder per ounce of resin. This should provide a working time of 10-12 minutes.
- When mixing larger quantities of resin you use less hardener.
- Using less hardener should allow a longer working time.
- Once the hardener is added to the resin, you only have about ten minutes to finish. I was really glad to have someone to help me. I brushed a thin layer of resin onto the separator film that was sitting on the mold. The resin is pretty thick and sticky so the film was moving all over the place on the mold form. We ended up moving the film and instead work on a flat part of the table. I put a layer of burlap on the resin and then coated the burlap layer with resin. I repeated this until I had four layers of burlap and ran out of resin.
Fiberglass Resin 20122 and hardener.
- We moved the layers of resin and saturated burlap back onto the mold form.
- We then quickly layered all the films and breathers in the right order. The final layer of film is the vacuum bag which is held to the table using sealant tape which is like sticky putty which comes on a roll. A vacuum port is poked through the vacuum bag and then attached to a vacuum pump.
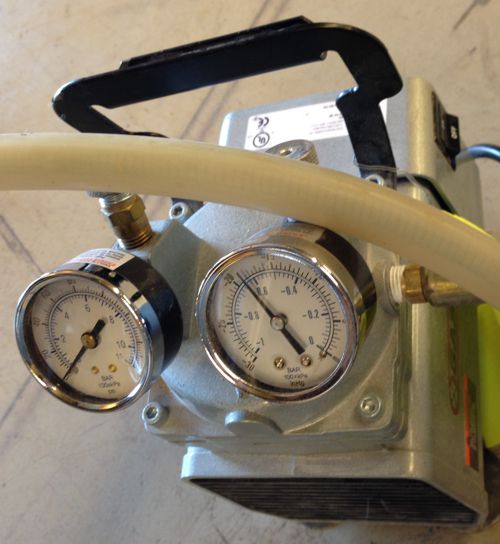
Vacuum pump - gauge reads approximately -19 inHg (inches of mercury)
- Since we did it so quickly, there were a few wrinkles in the vacuum bag where it attached to the sealant tape onto the table. This caused the bag to leak and not pull tight until we sealed the leaks with more sealant tape.
Completed vacuum layout
- Heat lamps were moved into position to help with the curing. I was surprised how much heat the resin produced as it cured.

Heat lamps
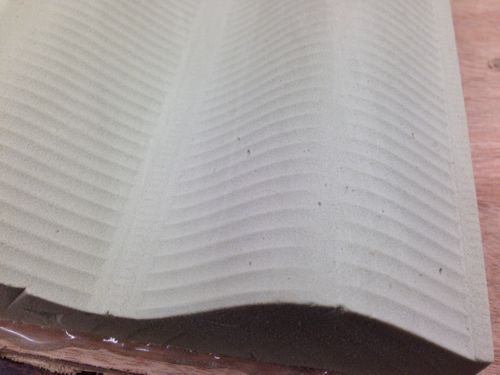
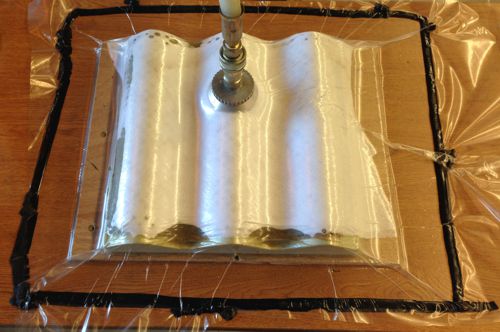
- After about an hour the part was solid. I simply peeled all the layers of film away to reveal the composite part.
This is what the composite part looked like when it came out of the vacuum bag layers. The edges are not perfect but they could be cut and sanded. The top surface conforms to the burlap fibers.
The bottom of the part where is was against the mold form and release film was very smooth and glossy. If you look closely at the right hand side of the photo, you can make out some of the grooves reproduced from the Shopbot tool marks on the mold form.
Conclusions
Although the process was a little messy and very smelly, it was a fairly quick and easy way to produce a light-weight durable part. I could see using the same process to make much larger parts if the resin had a longer working time.
Files
Back to index