wk5 | 3D scanning
Assignments :
- 3D scanning: Scan some object (test out as many as possible techniques)
- 3D printing: Print a design that can't be made by milling (like with some overhangs, or a nested shape)
Download : 123 catched clay skull - stl ready for 3D printing
My notes :
28 feb 2014 | installing 123Dcatch
For this weeks assignment I would like to see if I could make a object that will be useful for
my final project.
My tutor advised me it's better to first try and make something like a skull in stead of
focusing on a working printed joint (basics first, make it complex later).
Since the Lab's 3D printer (Makerbot) is still in back order, I start with 3D scanning.
I downloaded the program 123Dcatch. I tried to install it but got the massage that I needed framework 3.5
(for extra support in windows).
So I downloaded that as well, installed it, and then finished the installing of the 123Dcatch.
But when I started up the program I got a 'you're offline' message.

123Dcatch is capable of editing already rendered files, but the actual rendering itself is done by the
online cloud of 123Dcatch.
The advantage is that while rendering, you can do other things with you computer instead of waiting.
The drawback is that you need to be connected to internet for rendering your editing.
Now to get the program online, you need to have a account.
Step 1: Click on the 'create a empty project' button.
Step 2: On the right side of the screen there is a tiny 'sign in' button, click it.
Step 3: Click the 'create an account' or sign in of course if you already have a existing account.
Step 4: Now the regular top menu bar isn't grey anymore, and you can excess the 'create a new capture option'.
Step 5: Select the photo set you have made of the object you which to render, click ok.
- The option 'wait' will let you see a progress bar of the uploading and rendering process.
- The option 'email' will close the program and email you the rendered file when it is done.
Step 6: Have fun with editing the mesh.
3 march 2014 | using 123Dcatch
What interested me in this program is that you can capture any type of object by simply making photo's.
You do need to edit the mesh afterward to get it ready for printing (making the mesh watertight).
But 123Dcatch is easy to understand, and the tutorial video's on their website are very helpful and informative.
Good tutorials 123Dcatch : http://www.123dapp.com/howto/catch
Which is fine if you're doing something artistic of fun, but not a solution if you goal is to get a 3D duplicate or very
fine and evenly placed details.
Personally, my goal was to test and experience this process, to see if it's a useful technique for me.
In our Lab I started with a piece of modelling clay and having some fun sculpting (in stead of being frustrated
about blender).
The tutorials of 123D catch did warn about too blend objects, being hard to transfer to a mesh.
But since one of there example video's did show a evenly grey colored Buddha, I hoped working with clay will
turn out fine as well.
Several render tests later I did manage to get a nice model, without to much of a hassle.
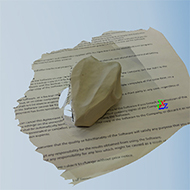 |
Test 1 : a smooth clay shape with a text sheet beneath it as reference point. Result : nice, I just didn't take enough photo's from one side, so about 3/4 of the shape looks good. |
|
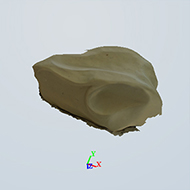 |
Test 2 : took more photo's this time for a better result. Result : good. I used this mesh to see how much editing is still needed in Blender. (it still is possible to get the mirror modifier to work, yet the XYZ axes need to be redefined). |
|
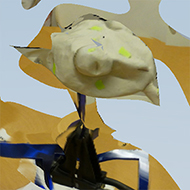 |
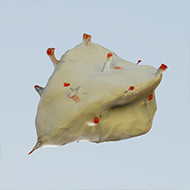
Test 3 : mounted clay upon a pin to try and get photo' from beneath as well. Result : Messy. the green-ish pieces of post-it aren't good enough to be used as reference points. |
|
 |
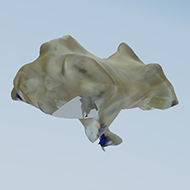
Test 4 : Tried using red pins for reference. Result : Better, but still messy. I was able to get photo's from beneath. |
|
 |
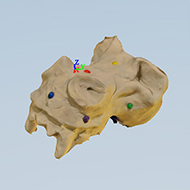
Test 5 : No pins, a rough clay shape (with some fingerprints etc. still on it) and spread out pieces of newspaper beneath it for reference. (this was the big set of a 130 photo test, later tried 80 photo's). Result : Good from the top, still the problem that taking photo's beneath like this is impossible. |
|
 |
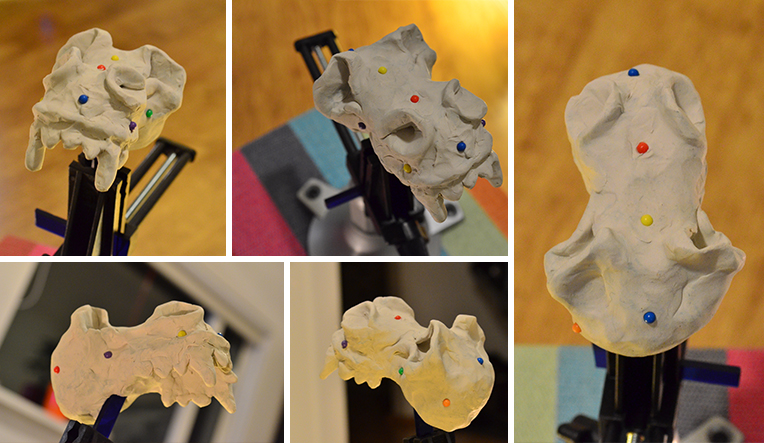
Test 6 : Photo's taken in the evening by lamplight. And different colored pins for reference. Pins are pressed deep into the clay. Only a small set of photo's, yet carefully preselected them. Result : Very good. A nice result with a good view from all sides. Some 3 or so extra pins would have even been better for around it's teeth. Almost no editing needed. |
Experience trough testing :
- Less is more! (The tutorial vid said said that about 70 photo's is the max you can upload.)
I tried 130 photo and yes, I got a mesh back, but it's a impossible slow file to edit. Also 80 photo's are not
that good to work with.
My test with only 28 carefully shot photo's with proper reference points, worked out
perfectly. It was quick, and I barley had to edit stuff out.
30 good photo's are definitely better than 70 slightly bad ones.
- Be critical about the quality of the photo's.
Like the tutorial vids suggest, have natural lighting in all the photo's. No overexposure of underexposure,
no hard shadows (like the ones caused by bright sunlight).
Though taking photo's by yellow lamplight can work out, if the light spots are evenly placed around the room.
Preselect the photo's, take the slightly blurry ones out (or retake them if possible).
- Have (at least) 4 good reference point's in every photo (recognizable /overlapping in several photo's).
The tutorial vid suggested using a newspaper below your object, but unfortunately that didn't really work out for
my clay tests.
You get back a model with semi good newspaper, but a vague messed up sculpture.
Some of the reference point's really need to be in your object, not used under it.
Also photographing the bottom of the model becomes impossible, since you reference points will be out of view.
My solution for the reference points was to stick colored pins into the clay.
And I mounted the clay upon a plastic stick so I would have enough space to also take some photo's
of the bottom of the sculpture as well.
- It's possible to add to many new reference points.
It was my attempt to manually stitch in 20 photo's that failed to upload. (you can do about 16 different points max,
and I also added one reference point in about 60 different pics, which the program didn't really like).
If you need to edit so many photo's to get the model right, it's simply quicker to start again and make a
new photo set.
- Make sure you save important editing.
I had used added some new reference points in with manual stitching, and tried up upload then straight away
to get the render process going again.
But my computer had problems with connecting to the 123Dcatch cloud, and the program simply shut itself down
without giving me a chance to save my work.
4 march 2014 | 123Dcatch endresult
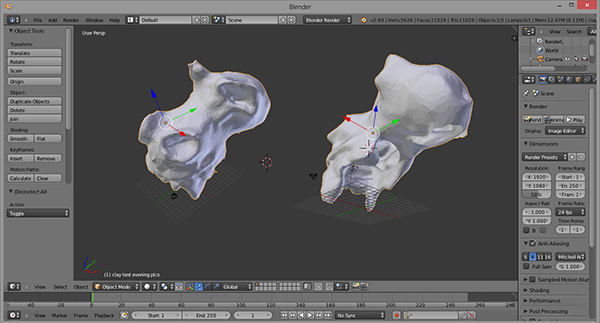
123D catch exports obj and I imported it in Blender.
Some few gaps were at the bottom of the model, but those were to be expected.
And fixing it, by editing in some extra faces is no problem.
And the nice thing about Blender, is that it has a sculpt mode,
witch makes it easy to edit flaws like the bumps of the pins.
Model is now ready for printing.
