Molding and Casting
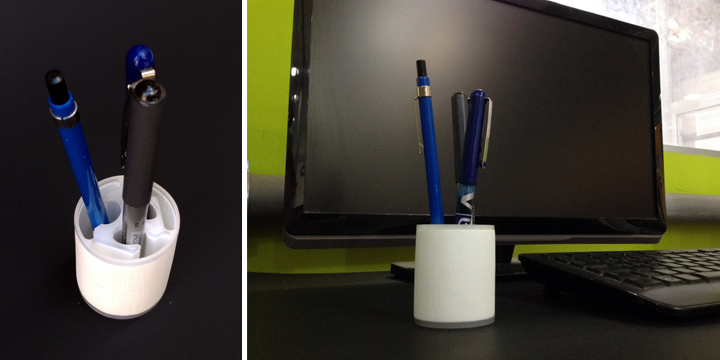
My idea for this week is to run a pen holder using the technique of molding and casting, this will allow me to get a nice object that can be played in series and be a gift.
Manufacturing process by which a liquid material is usually poured into a mold, which contains a hollow cavity of the desired shape, and then allowed to solidify. The solidified part is also known as a casting, which is ejected or broken out of the mold to complete the process. Casting materials are usually metals or various cold setting materials that cure after mixing two or more components together; examples are epoxy, concrete, plaster and clay. Casting is most often used for making complex shapes that would be otherwise difficult or uneconomical to make by other methods.
Fab Academy Barcelona Class No.17
Assignament: Molding and Casting
By Robert Garita
Machine:
-Roland Modela MDX-20 milling machine
Software:
-Rhino 5
-Modela
-Eagle
Materials:
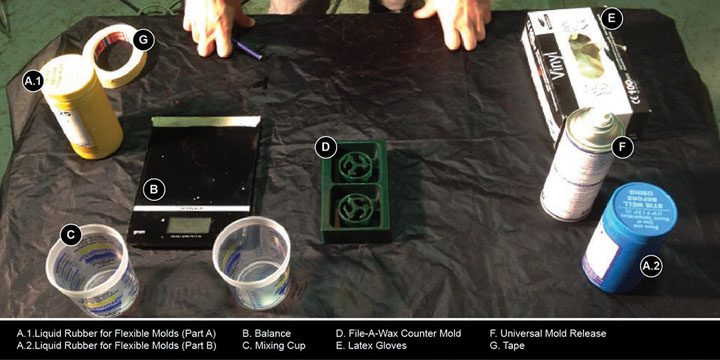
-Liquid Rubber for Flexible Molds (Parts A + B).
-Balance.
-Mixing Cup.
-Fite-A-Wax.
-Latez Gloves.
-Universañ Mols Release.
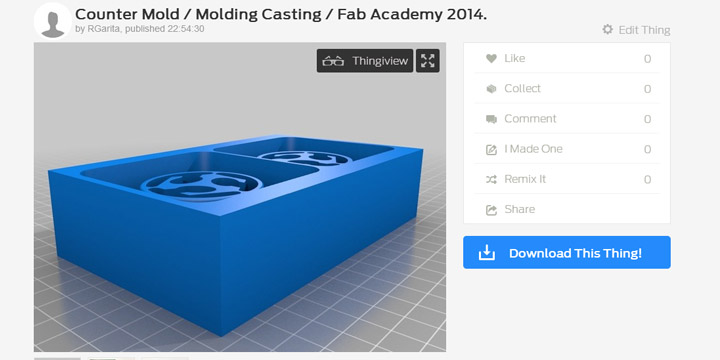
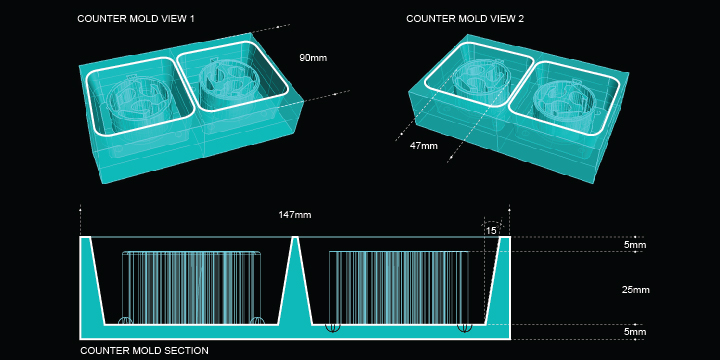
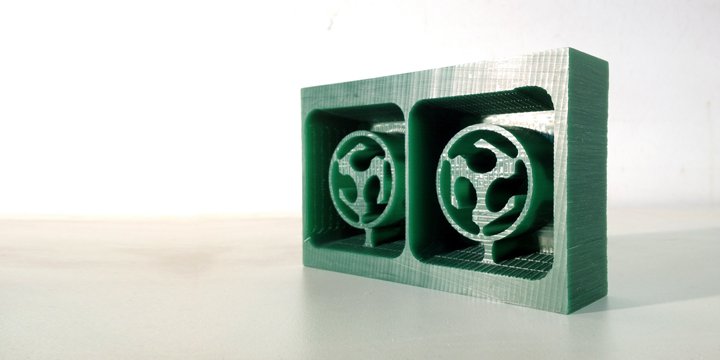
The assigment of this week is to make a mold from a wax counter mold , this allows us to deposit different materials for its high temperature resistance, long lasting resin from drying for metal figures until fast-drying resins for plastics.
First thing to do: the “Hard Mold”
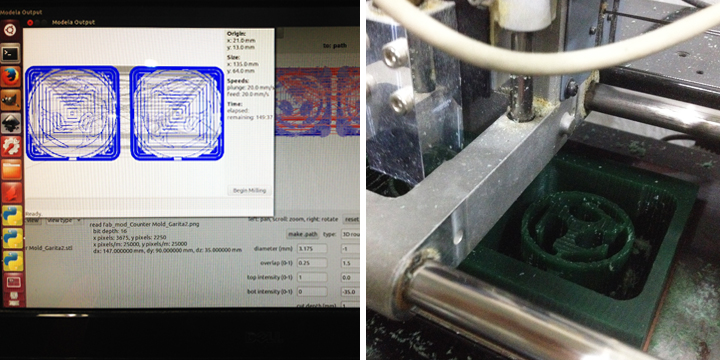
For this process we need to use the roland modela machine and for that is import to consideres the types (dimensions) of mill we are going to use:
1. 1/8 end mill = 3.175 mm.
2. 1/16 end mill = 1.5875 mm.
3. 1/32 end mill = 0.79375 mm.
4. 1/64 end mill = 0.396875 mm.
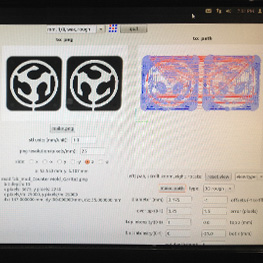
Folowwing those guides is time to make the 3D model for the Counter Mold, in my case im want to use Rhino. When the 3d model is done is time to export it as a STL (mesh) and after that is time to open the file into Fab Modules.
Fab Modules:
-Open Fab Modules on terminal: sudo fab.
-Choose Modela .stl.
-Select your 3D STL file.
-Select your molding step: Roughing (1/8).
-Click Make Path.
-Set your 0,0 point at the top-bottom-left corner.
-Click on make rml.
-Send the job to Modela Machine.
We need to repeat the process twice, for the roughing part we will use the 1/32 mill and for the finishing the 1/64 end mill tool. Something important; for the "Finishing" process is necessary to to change the value of the tool diameter manually, after that you can send your file to mill.
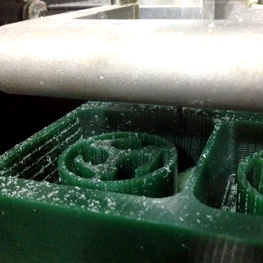
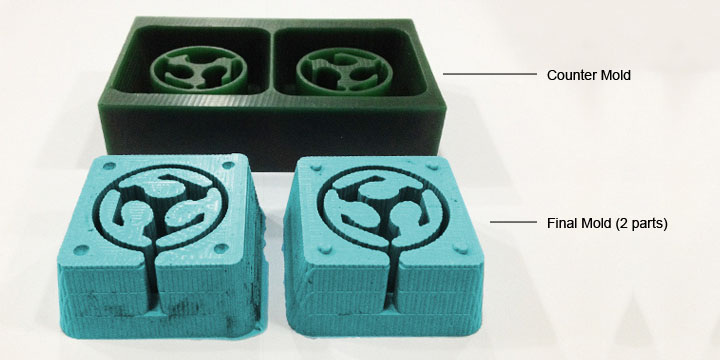
Soft Mold:
For my project I will use a soft mold so we need to follow the next steps:
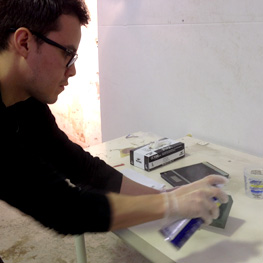
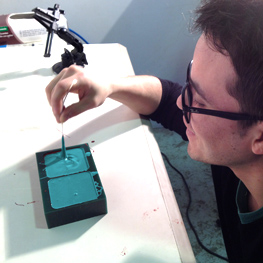
- Prepare all the material that will need for the process (mix material and safety equipment).
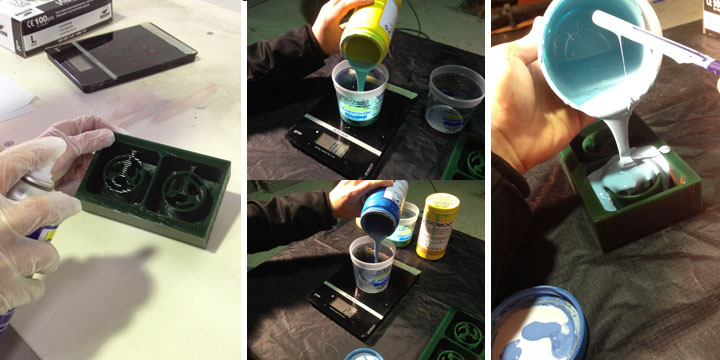
- Now is time to use the spray Smooth-on Universal Mold release. You need to apply it keeping some distance from the counter mold, arounf 30cm long distance, repeat the process two times and wait for 3 minutes after each application.
- I use for the soft Mold process PMC®-121 - Easy To Use Urethane Rubber .
- For the mix, the proportion it has to be equal on each part 1:1 (volume).
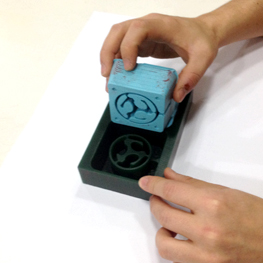
- Once the rubber is mixed (Dry and Wet), is time to put it carfully into hard mold until the material reaches the top of the mold.
- Try to take it out all the air inside the mold, for this you can hit “slow and very carefully” the molod against the table.
- Now we are ready to take out the final piece but not before to wait for 1 hour.
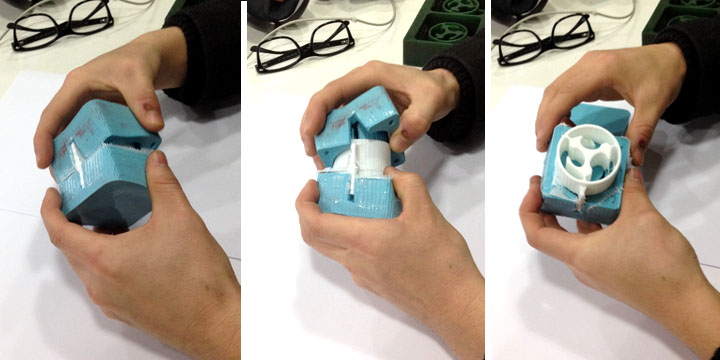
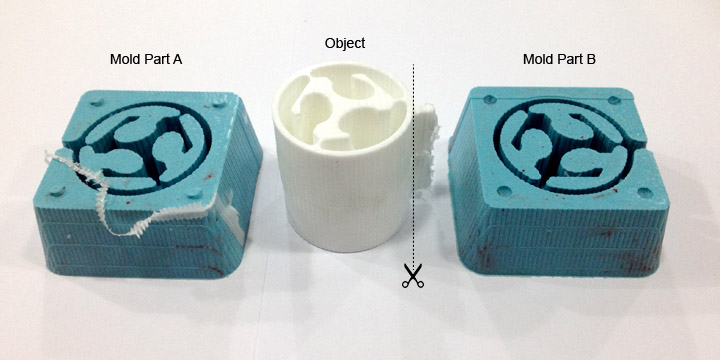
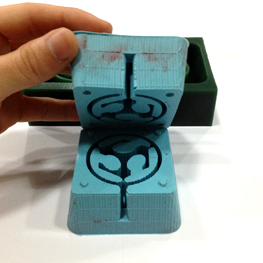
Now is time to use my mold for the final proposal, looks very nice!!! In you want click here to download the Counter Mold through my Thingiverse account