Electronics Production
Lesson 4
This week's assignment is to make the FabISP in-circuit programmer.
This week's assignment is to make the FabISP in-circuit programmer.
I have never a printed circuit board before, so I was a little worried if I would be able to make it. This is my PCB milling adventure:
Steps to take for milling the board: Go to folder you work in ( fabmod) and save as to projects ( add your name). This will be directory where you will save you data. Then copy the hello.ISP.44.cad file into this directory and start the fabmodules. Get the hello.ISP.44.cad file and set in the top bar from .cad to .rml, as we start out with a .cad file and what it to be readable for a the miller. Next step is to make a png file, but the resolution should not be too low (50 or higher).
Set the settings file to output traces and exteriors and press the make png button.
 |
Set mill traces to 1/64 as we want to take material away and not cut the board. This will load the settings for this 1/64 drill into the software.
diameter: is the tip of the head of the drill
offsets: is the amount of layers its going to remove around the parts
overlap: is how far each offset part is overlapping
2dz: is the deepness of the cut
error : is the straigthness of the lines
speed : is the forward cutting speed
jog : is how high it should lift the drill to move from one part to another part
ymin and xmin: is how much you should change the origin to start drilling.
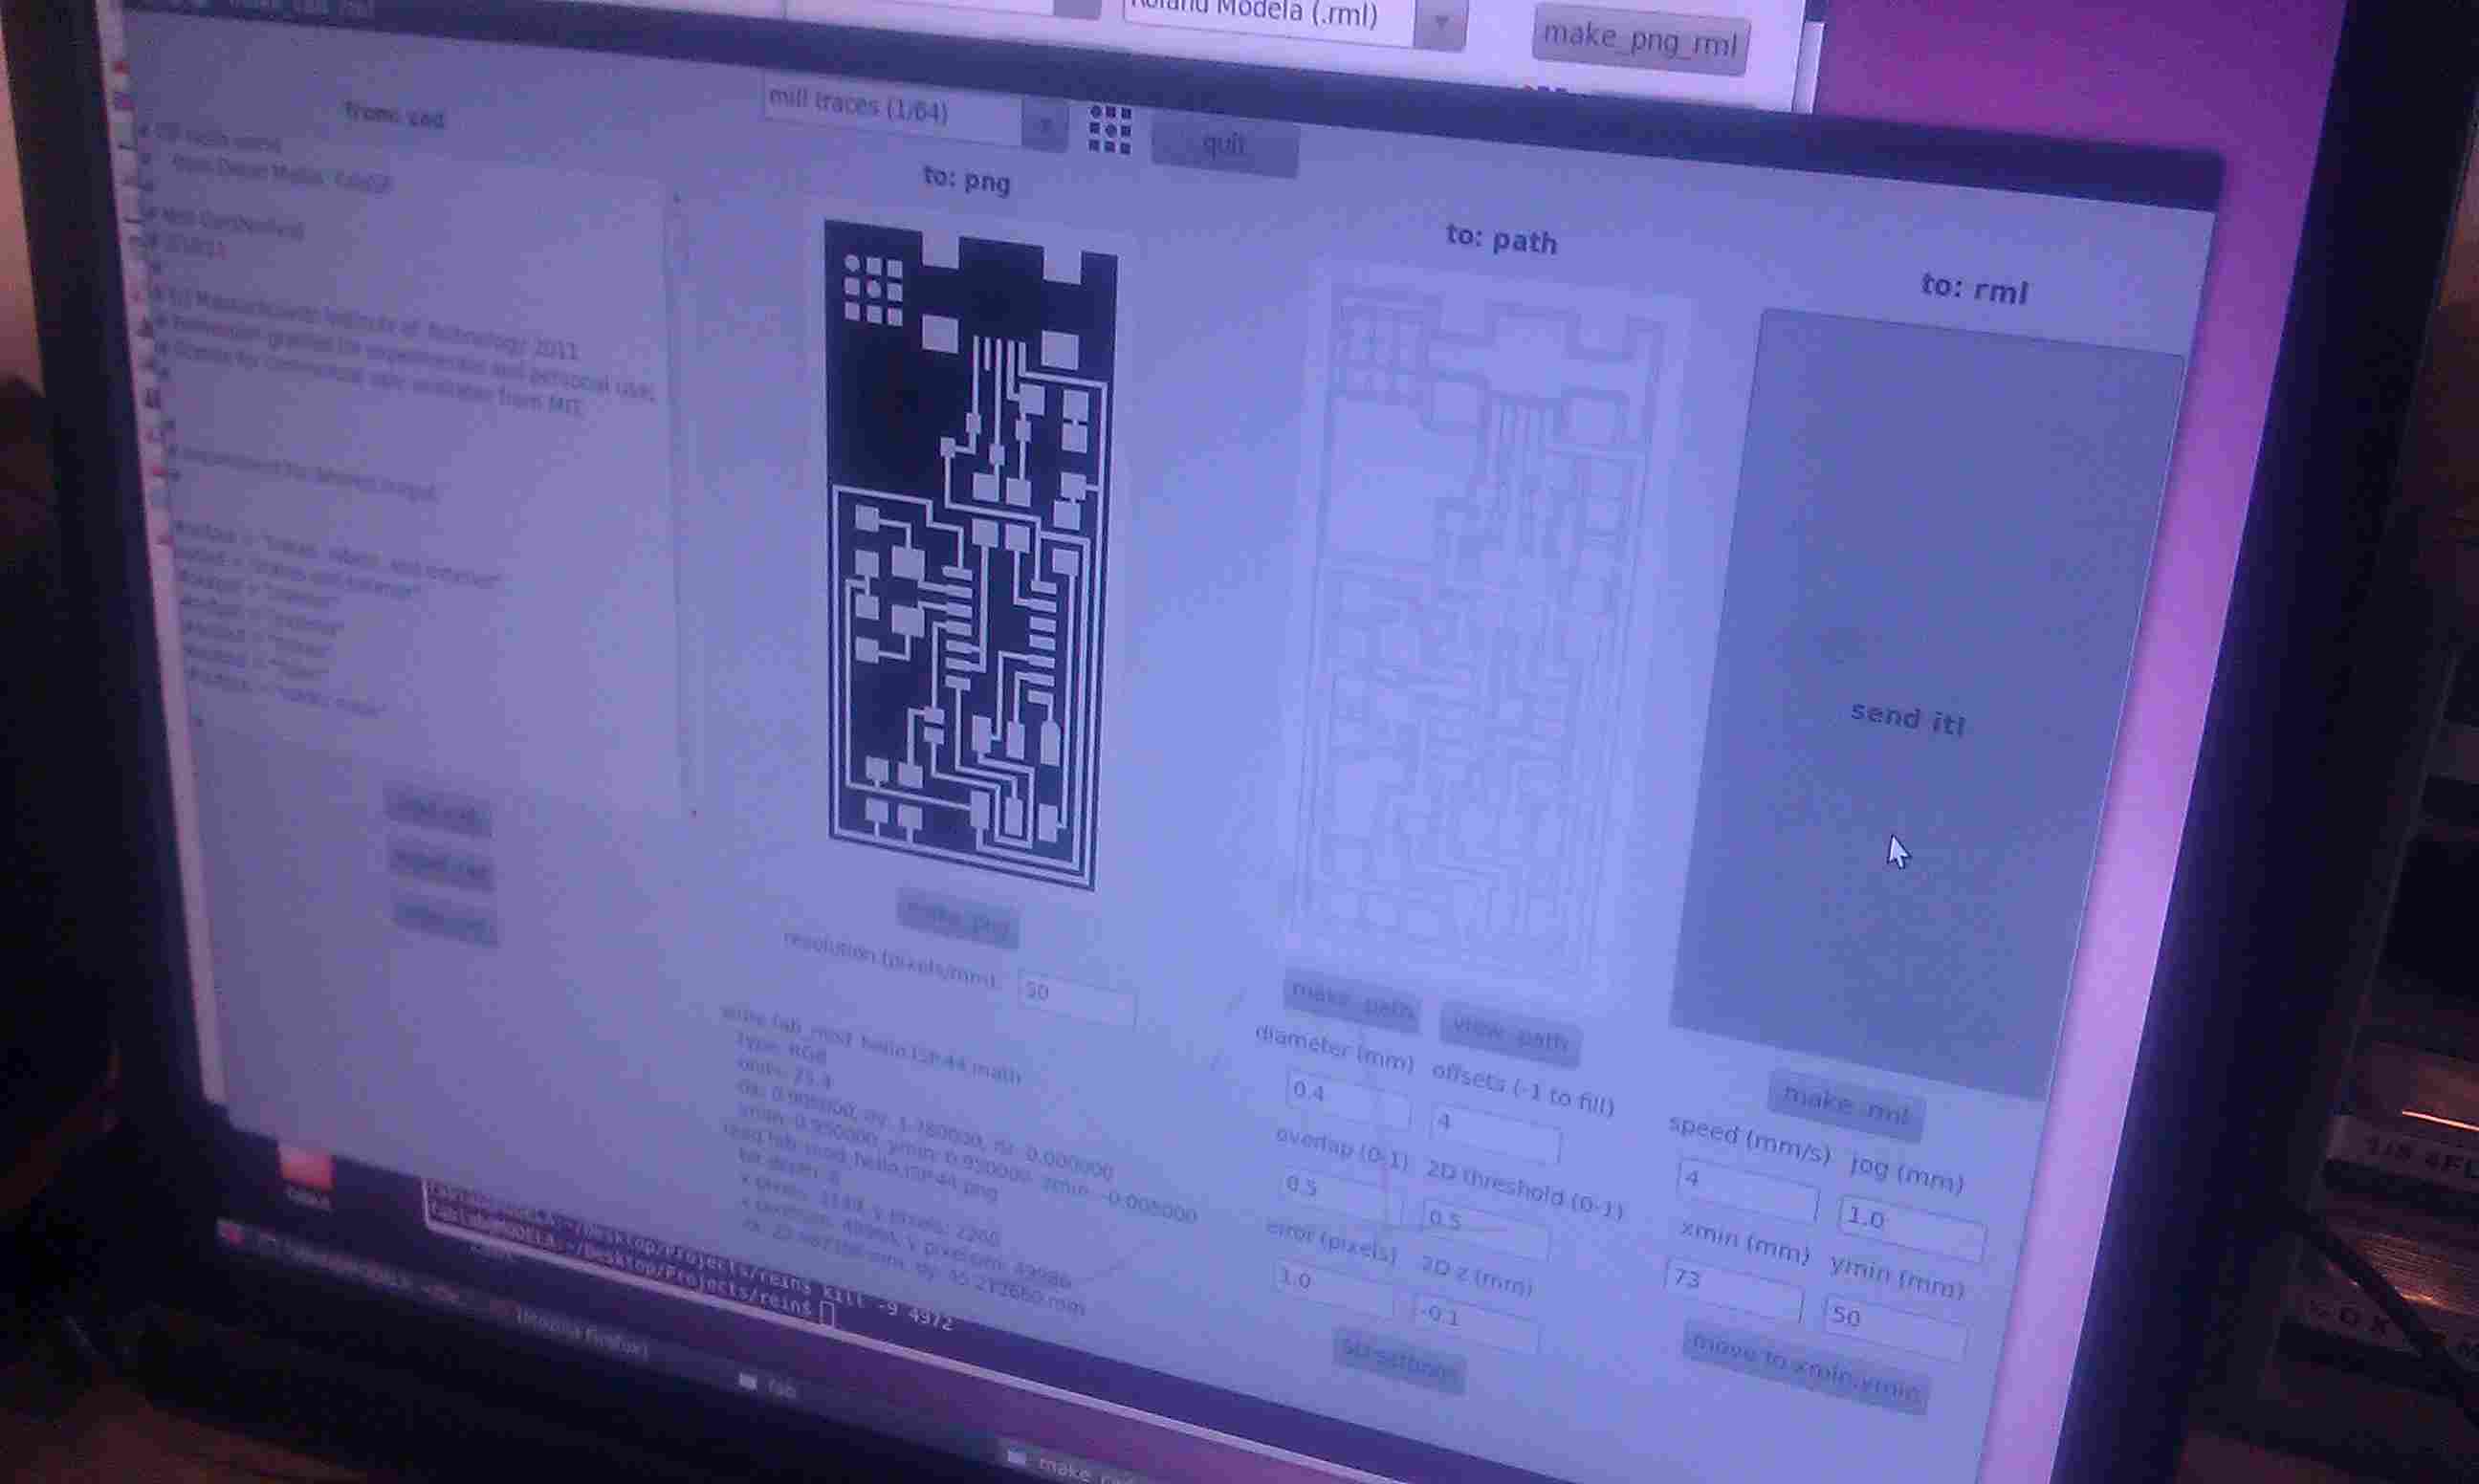 |
Then we make click on the make path and view path button to see how the machine will over the board. If this looks good we continue to the next step. Then we press "move to xmin,ymin", lift up the drill and change the drill to right size if needed. Pay attention to imperial or metric. First, you set the drill lightly in the machine and then move the drill lower, but leave some space between the drill and board. Release the drill gently until it touches the board and tighten the drill to the machine. Now press make .rml and sent it to the miller. The miller start cutting away the excess material.
 |
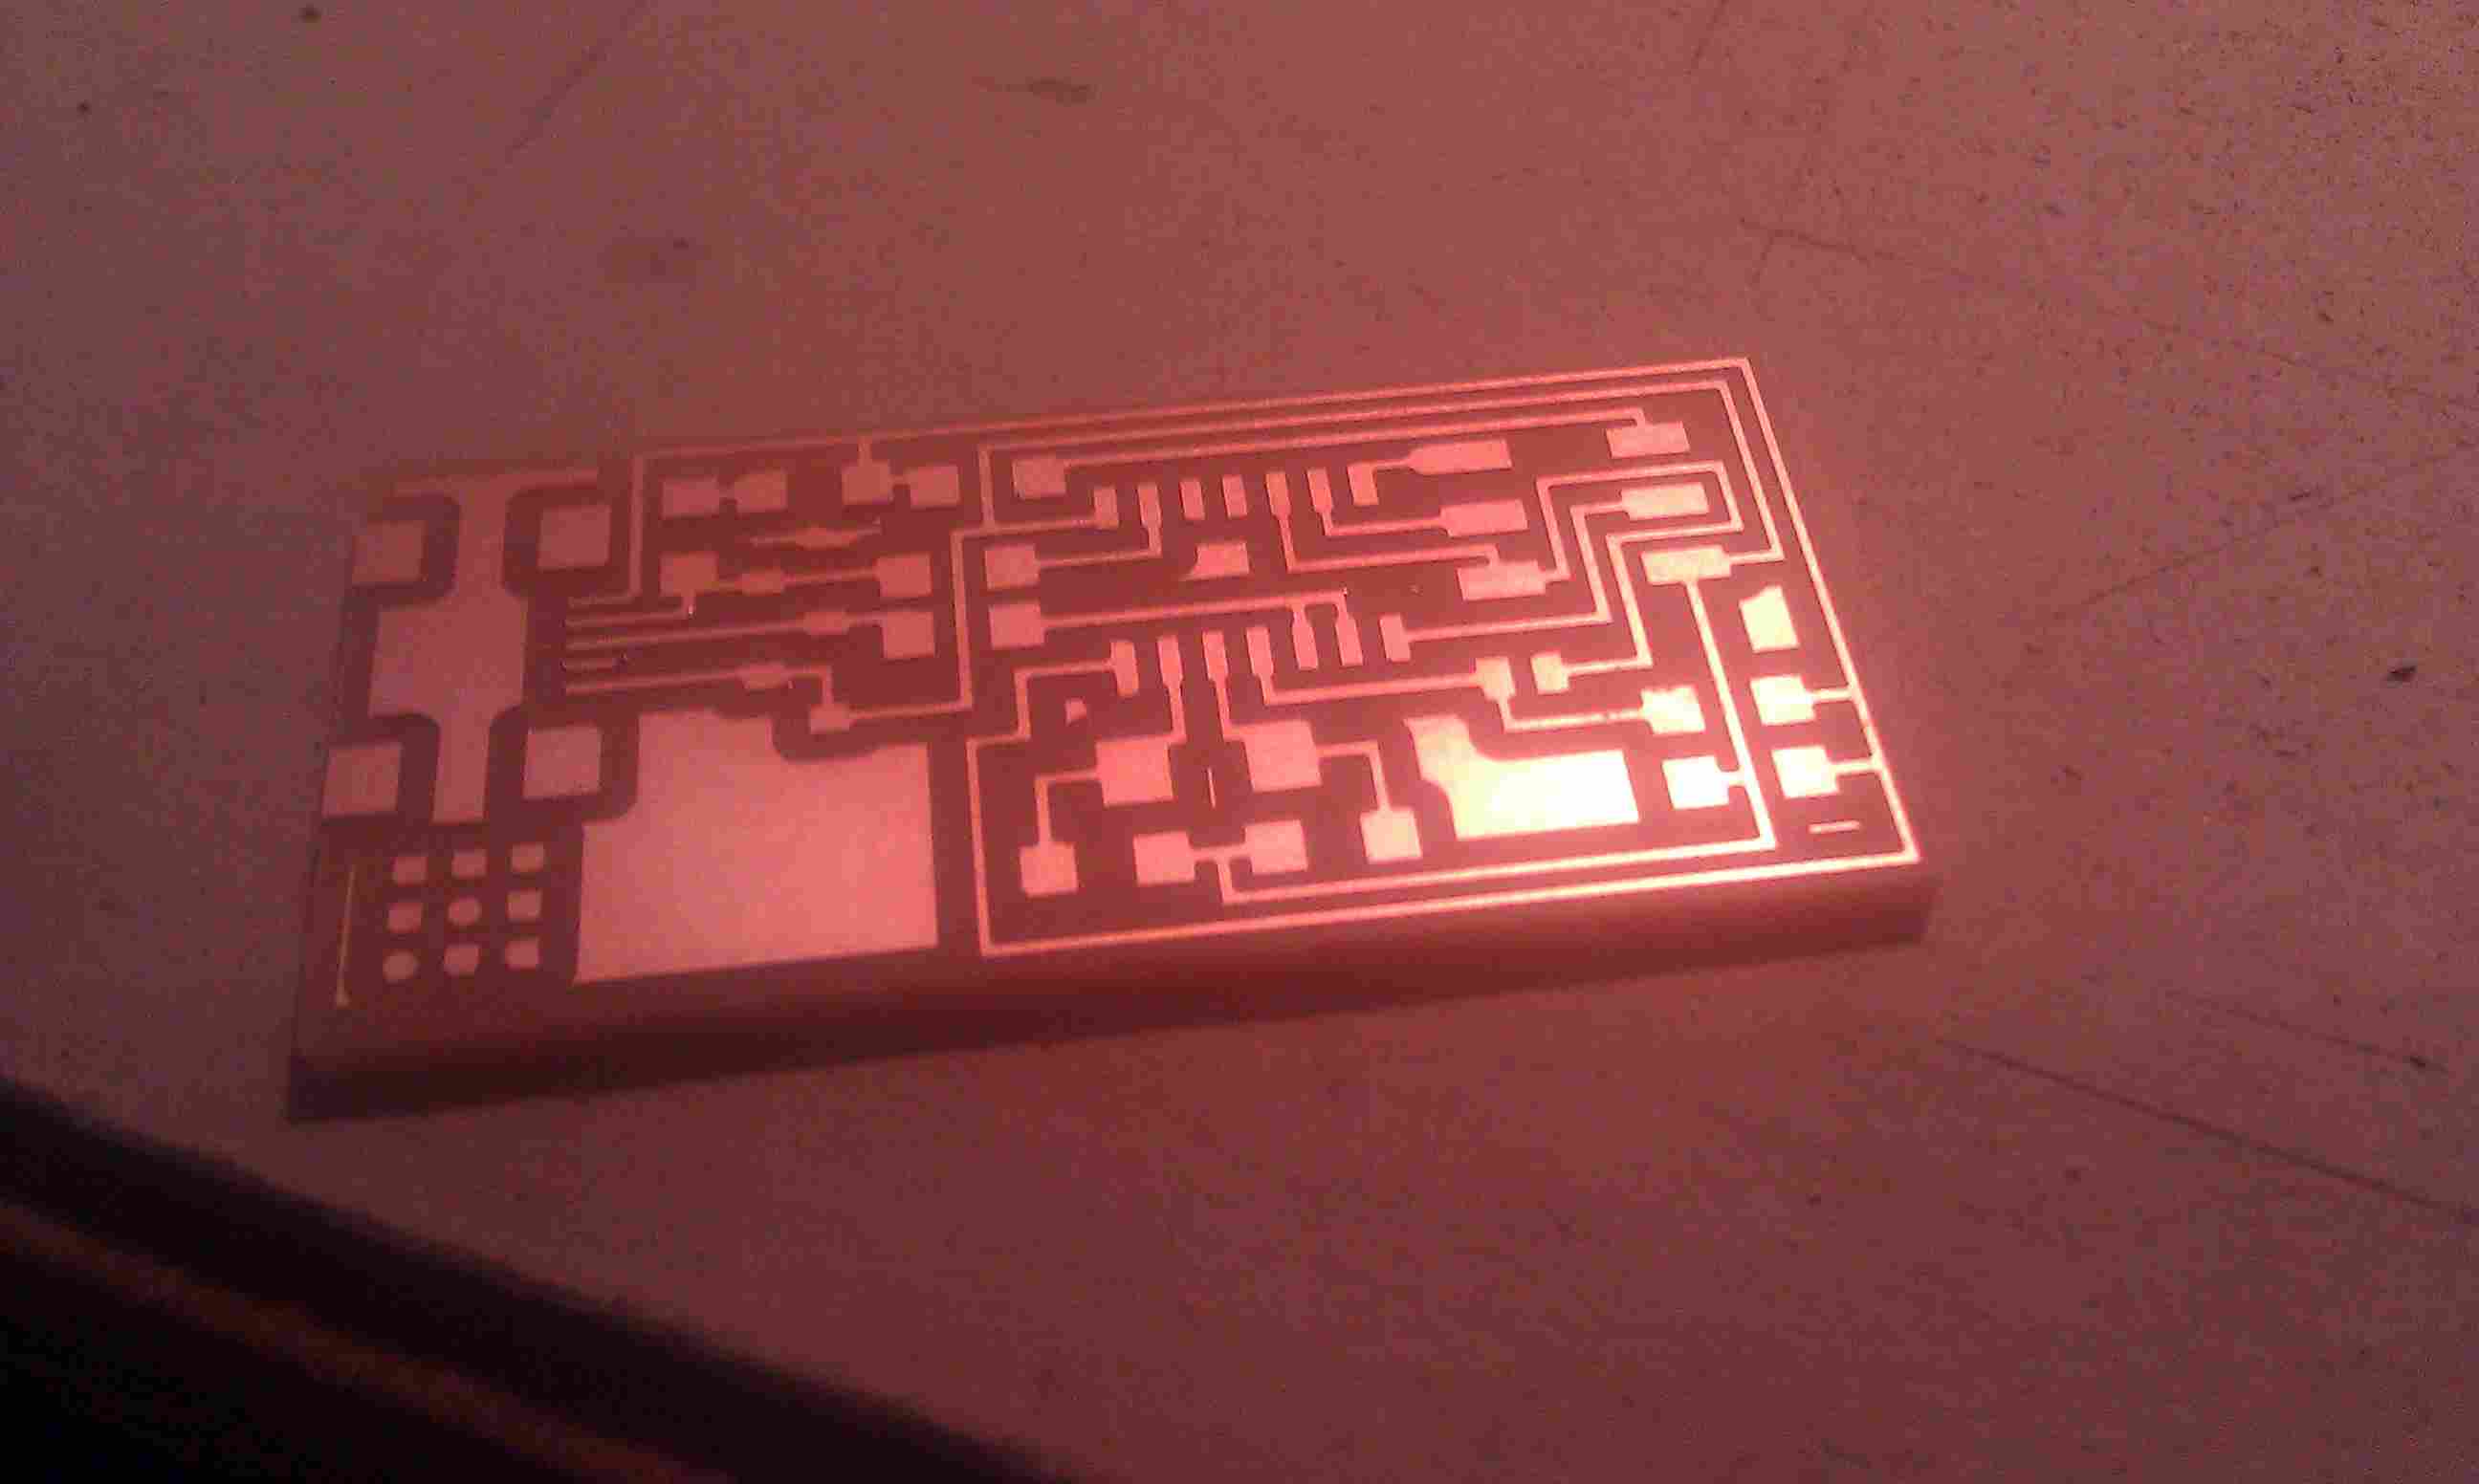
Then when the miller is finished, we change the drill head to a 1/32 drill in a similar fashion as we did before. We need to cut through the board and we also change the software settings from 1/64 to 1/32. We change 2Dz to 0 and mill traces to exterior and then press make png, make path, view path and make rml and then send it when everything look ok.
 |
When the machine is finished the end product will look something like this.
 |
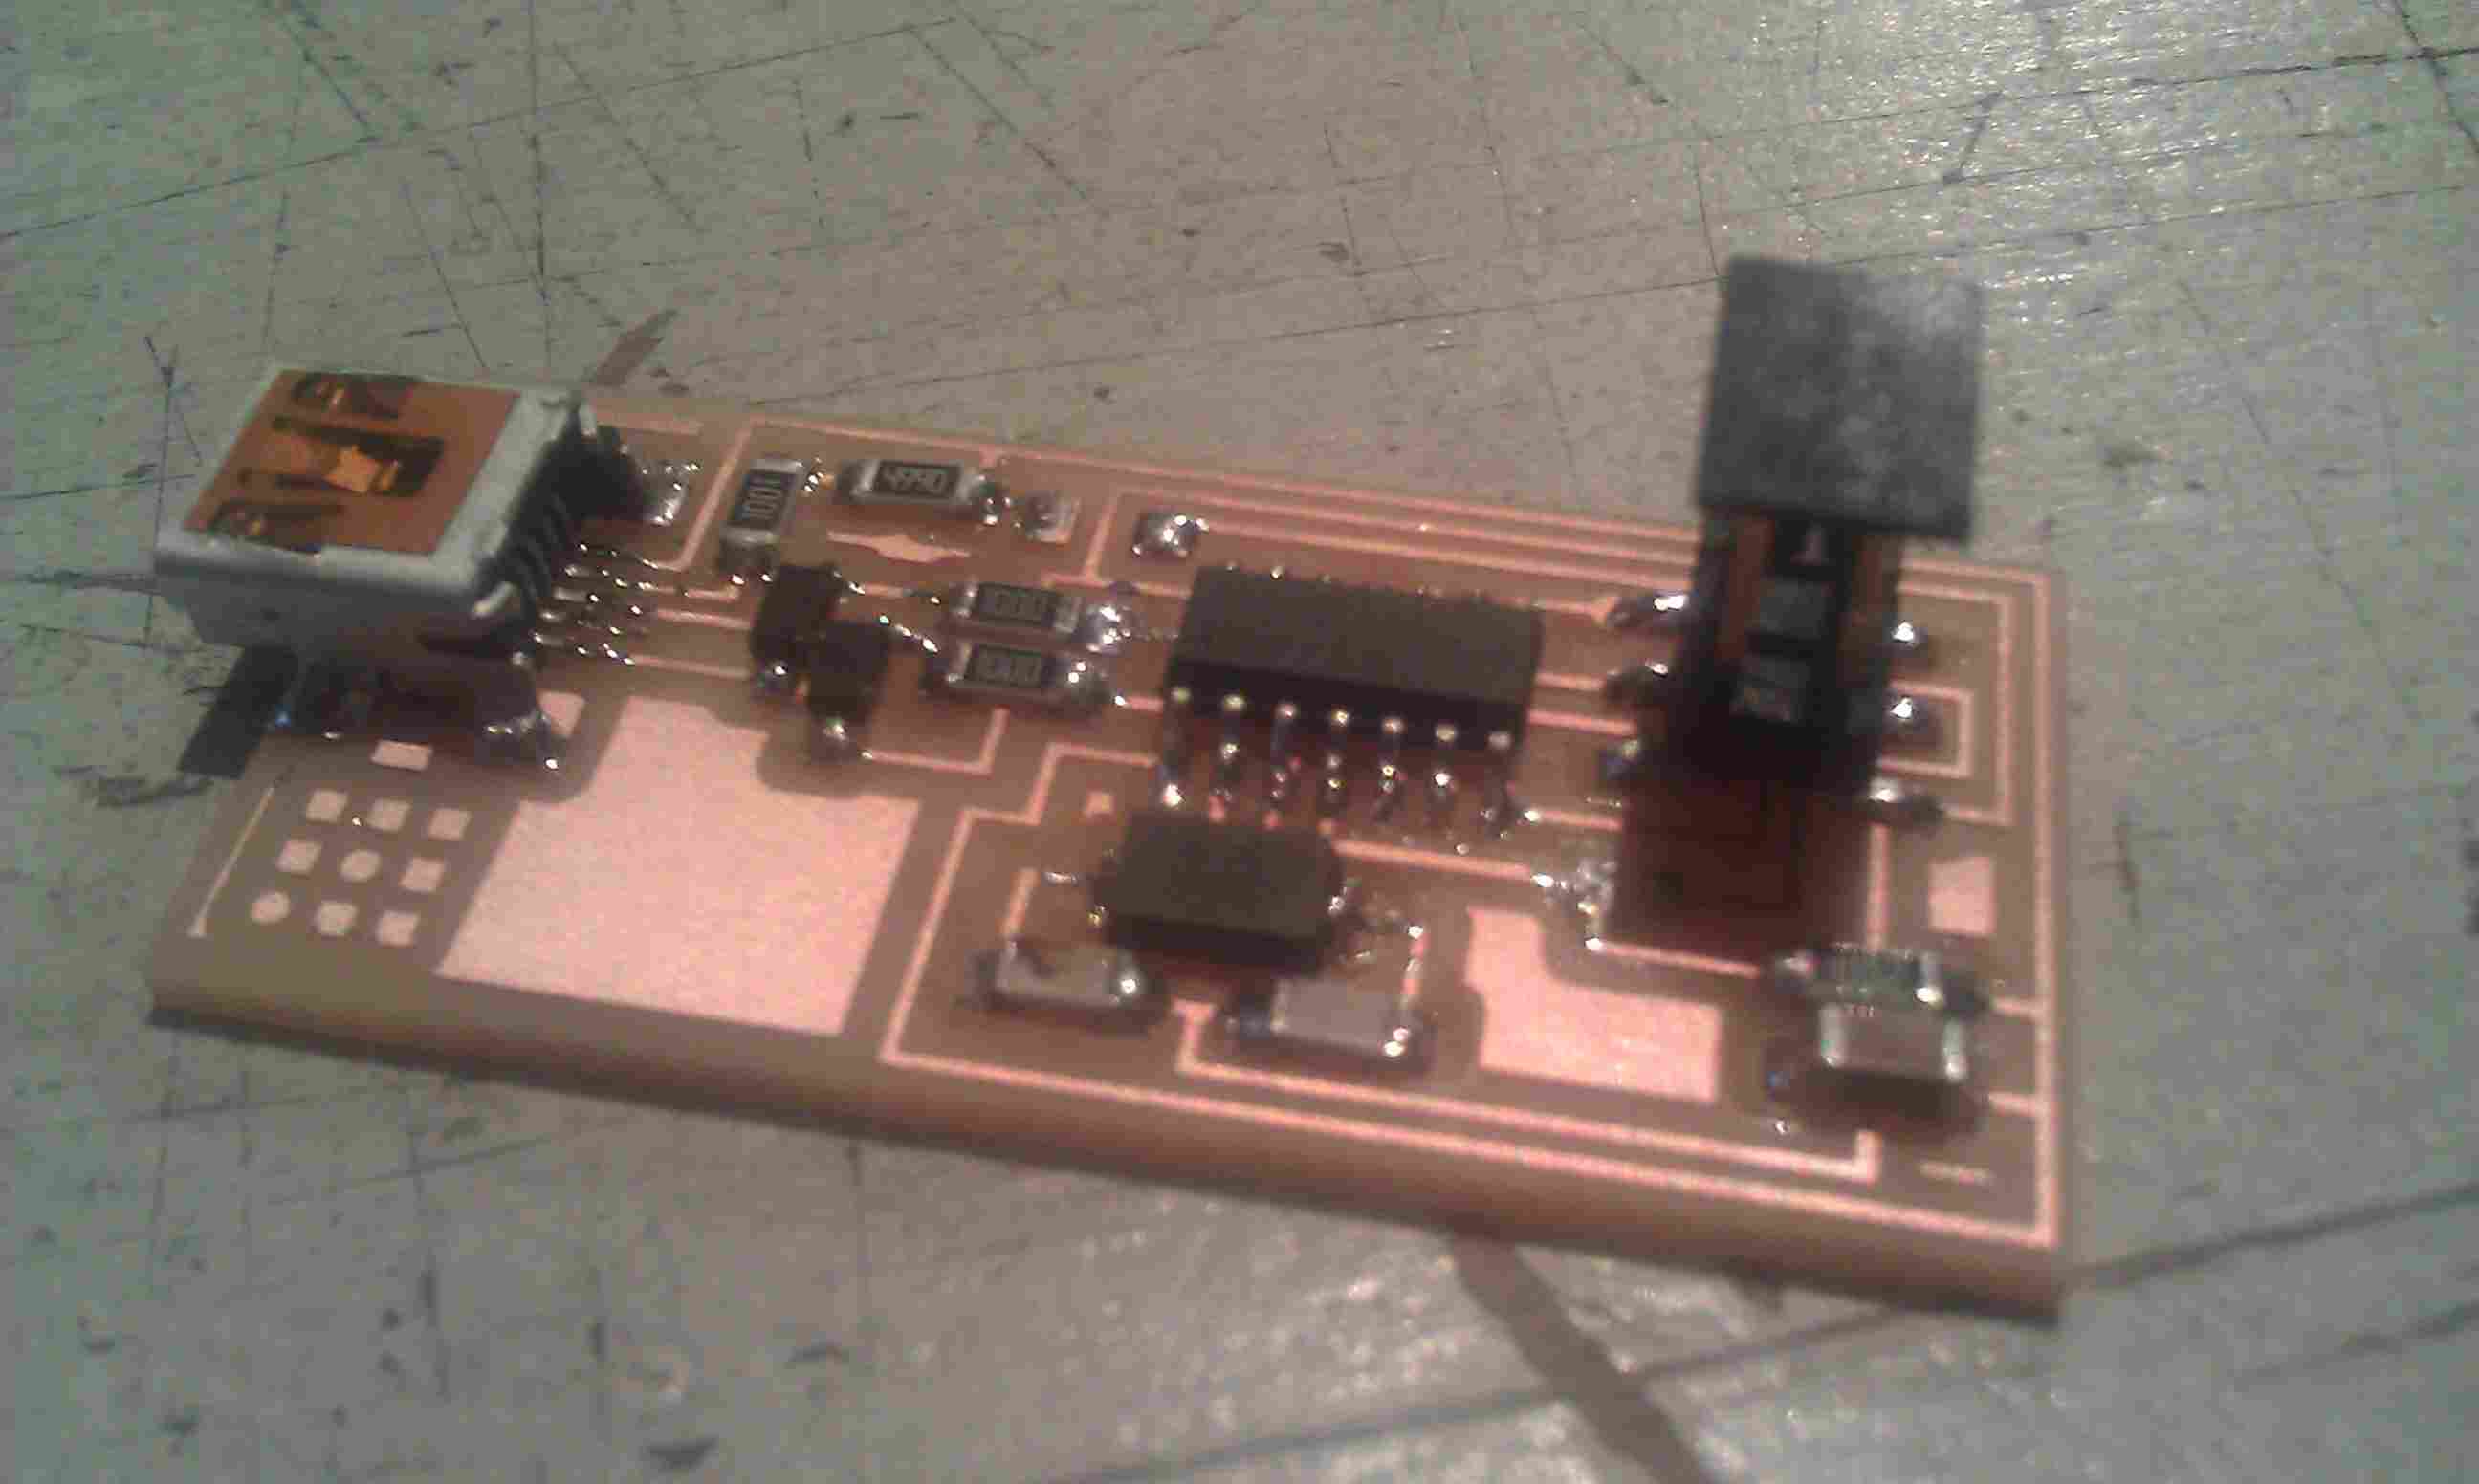
Soldering was more difficult then I expected. I had trouble getting the solder smooth and shiny and I had problems when I removed the soldering iron, the solder would have a tendency to pull along with the iron, so there would be a tip in the solder. I tried to reheat the solder to get it shiny again, but it got worse. I removed the solder with the copper wire and in the end I found a way to do it correctly. Hold the tip against the copper of the PCB and the component, heat it and then hold the solder against and then remove the soldering iron. Do not hold it too long. When I got all the components in place, this was the end result.
 |
To be honest, i did not really understand what i was doing in this part, but Bas reassured me that this will come back in the next lessons. I follow the instructions and below you see the steps I took to get the PCB programmed.
download firmware.zip  from fablab site and unpack

C:\Documents and Settings\Maurice\Desktop>cd firmware

C:\Documents and Settings\Maurice\Desktop\firmware>make clean
rm -f main.hex main.lst main.obj main.cof main.list main.map main.eep.hex main.e
lf *.o usbdrv/*.o main.s usbdrv/oddebug.s usbdrv/usbdrv.s

C:\Documents and Settings\Maurice\Desktop\firmware>make hex
avr-gcc -Wall -Os -DF_CPU=20000000       -Iusbdrv -I. -DDEBUG_LEVEL=0 -mmcu=atti
ny44 -c usbdrv/usbdrv.c -o usbdrv/usbdrv.o
avr-gcc -Wall -Os -DF_CPU=20000000       -Iusbdrv -I. -DDEBUG_LEVEL=0 -mmcu=atti
ny44 -x assembler-with-cpp -c usbdrv/usbdrvasm.s -o usbdrv/usbdrvasm.o
avr-gcc -Wall -Os -DF_CPU=20000000       -Iusbdrv -I. -DDEBUG_LEVEL=0 -mmcu=atti
ny44 -c usbdrv/oddebug.c -o usbdrv/oddebug.o
avr-gcc -Wall -Os -DF_CPU=20000000       -Iusbdrv -I. -DDEBUG_LEVEL=0 -mmcu=atti
ny44 -c main.c -o main.o
avr-gcc -Wall -Os -DF_CPU=20000000       -Iusbdrv -I. -DDEBUG_LEVEL=0 -mmcu=atti
ny44 -o main.elf usbdrv/usbdrv.o usbdrv/usbdrvasm.o usbdrv/oddebug.o main.o
rm -f main.hex main.eep.hex
avr-objcopy -j .text -j .data -O ihex main.elf main.hex
avr-size main.hex
   text    data     bss     dec     hex filename
      0    2050       0    2050     802 main.hex

look at makefile and cange avrdude to usbtiny

C:\Documents and Settings\Maurice\Desktop\firmware>make fuse
avrdude -c usbtiny -p attiny44  -U hfuse:w:0xDF:m -U lfuse:w:0xFF:m

avrdude: AVR device initialized and ready to accept instructions

Reading | ################################################## | 100% 0.02s

avrdude: Device signature = 0x1e9207
avrdude: reading input file "0xDF"
avrdude: writing hfuse (1 bytes):

Writing | ################################################## | 100% 0.02s

avrdude: 1 bytes of hfuse written
avrdude: verifying hfuse memory against 0xDF:
avrdude: load data hfuse data from input file 0xDF:
avrdude: input file 0xDF contains 1 bytes
avrdude: reading on-chip hfuse data:

Reading | ################################################## | 100% 0.02s

avrdude: verifying ...
avrdude: 1 bytes of hfuse verified
avrdude: reading input file "0xFF"
avrdude: writing lfuse (1 bytes):

Writing | ################################################## | 100% 0.02s

avrdude: 1 bytes of lfuse written
avrdude: verifying lfuse memory against 0xFF:
avrdude: load data lfuse data from input file 0xFF:
avrdude: input file 0xFF contains 1 bytes
avrdude: reading on-chip lfuse data:

Reading | ################################################## | 100% 0.00s

avrdude: verifying ...
avrdude: 1 bytes of lfuse verified

avrdude: safemode: Fuses OK

avrdude done.  Thank you.


C:\Documents and Settings\Maurice\Desktop\firmware>make program
avrdude -c usbtiny -p attiny44  -U flash:w:main.hex:i

avrdude: AVR device initialized and ready to accept instructions

Reading | ################################################## | 100% 0.02s

avrdude: Device signature = 0x1e9207
avrdude: NOTE: FLASH memory has been specified, an erase cycle will be performed

         To disable this feature, specify the -D option.
avrdude: erasing chip
avrdude: reading input file "main.hex"
avrdude: writing flash (2050 bytes):

Writing | ################################################## | 100% 1.23s


avrdude: 2050 bytes of flash written
avrdude: verifying flash memory against main.hex:
avrdude: load data flash data from input file main.hex:
avrdude: input file main.hex contains 2050 bytes
avrdude: reading on-chip flash data:

Reading | ################################################## | 100% 0.88s


avrdude: verifying ...
avrdude: 2050 bytes of flash verified

avrdude: safemode: Fuses OK

avrdude done.  Thank you.

avrdude -c usbtiny -p attiny44  -U hfuse:w:0xDF:m -U lfuse:w:0xFF:m

avrdude: AVR device initialized and ready to accept instructions

Reading | ################################################## | 100% 0.02s

avrdude: Device signature = 0x1e9207
avrdude: reading input file "0xDF"
avrdude: writing hfuse (1 bytes):

Writing | ################################################## | 100% 0.02s

avrdude: 1 bytes of hfuse written
avrdude: verifying hfuse memory against 0xDF:
avrdude: load data hfuse data from input file 0xDF:
avrdude: input file 0xDF contains 1 bytes
avrdude: reading on-chip hfuse data:

Reading | ################################################## | 100% 0.00s

avrdude: verifying ...
avrdude: 1 bytes of hfuse verified
avrdude: reading input file "0xFF"
avrdude: writing lfuse (1 bytes):

Writing | ################################################## | 100% 0.00s

avrdude: 1 bytes of lfuse written
avrdude: verifying lfuse memory against 0xFF:
avrdude: load data lfuse data from input file 0xFF:
avrdude: input file 0xFF contains 1 bytes
avrdude: reading on-chip lfuse data:

Reading | ################################################## | 100% 0.02s

avrdude: verifying ...
avrdude: 1 bytes of lfuse verified

avrdude: safemode: Fuses OK

avrdude done.  Thank you.


C:\Documents and Settings\Maurice\Desktop\firmware>