WEEK 08 — Electronics Production
XIAO ESP32C3 + Fiber Laser PCB Manufacturing
Personal Contributions
| Name | University | Activities carried out |
|---|---|---|
| Rodrigo Guamán | Universidad de Cuenca |
|
| Jenny Rojas | Universidad de Cuenca |
|
| Diego Zhindón | Universidad Politécnica Salesiana |
|
Week Objective
This week focused on understanding the complete workflow of PCB fabrication, from the conceptual electronic design to the validation of a fully functional embedded system.
The main goal was not only to fabricate a PCB but to understand how fabrication parameters directly affect electrical performance. A 50W fiber laser machine was used as an alternative manufacturing method, replacing traditional CNC milling or chemical etching processes.
This required developing an understanding of digital manufacturing processes, thermal material behavior, and iterative experimentation.
GROUP ASSIGNMENT — Fiber Laser PCB Characterization
The group assignment consisted of analyzing and characterizing the fabrication capabilities of a 50W fiber laser machine when applied to PCB production.
PCB Manufacturing: Dual Technology Approach
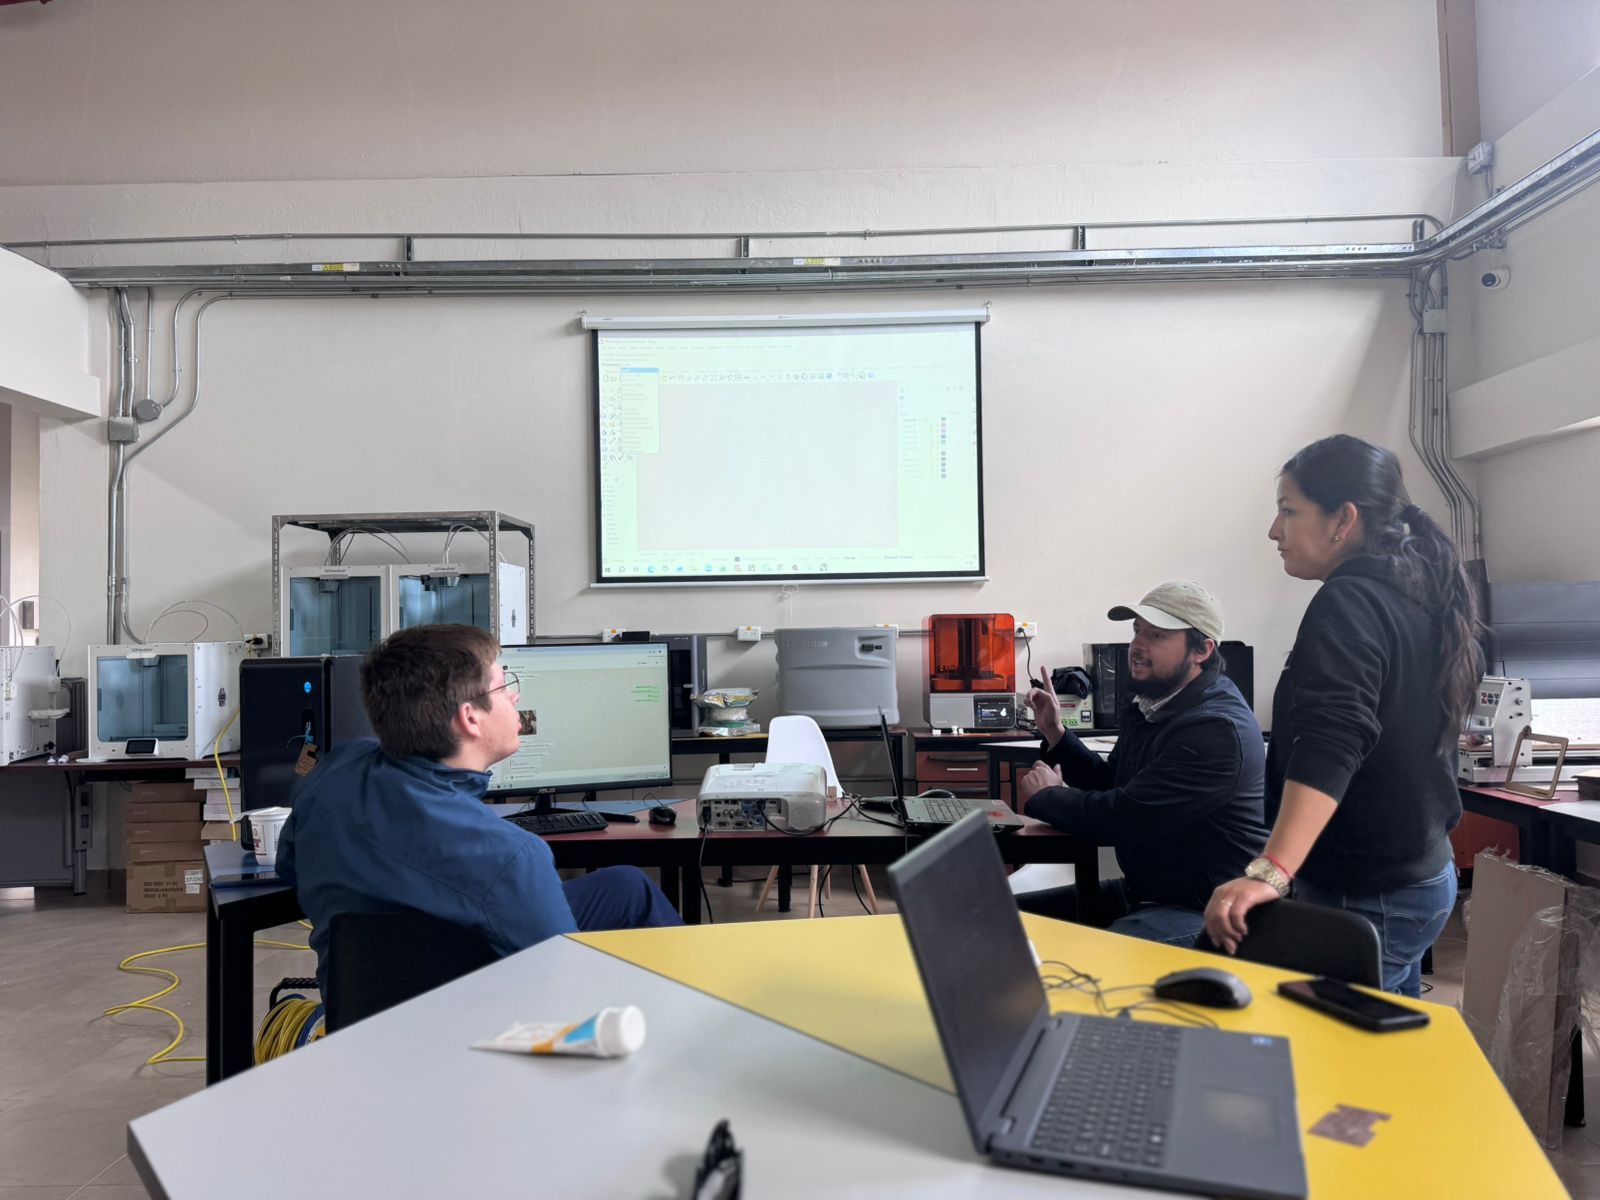
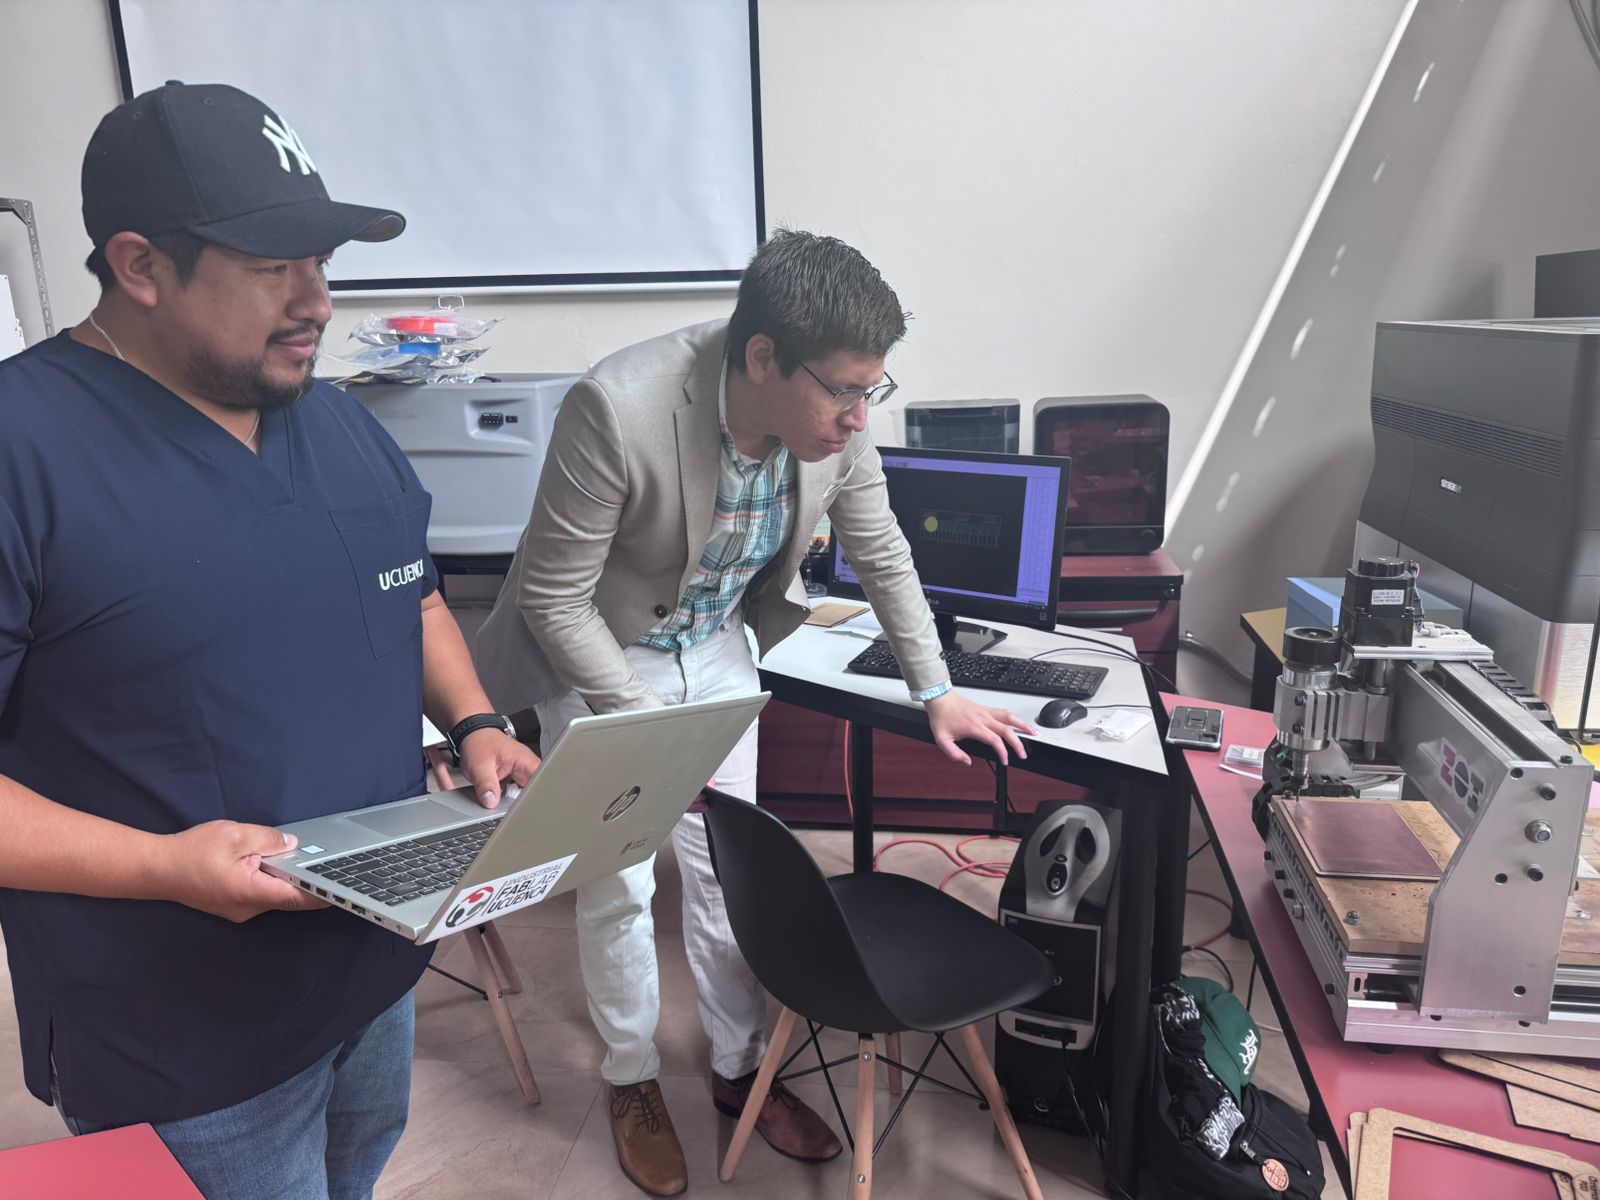
In this assignment, PCB fabrication will be explored using two complementary manufacturing technologies: CNC milling with a high-speed spindle and fiber laser machining. The goal is to compare precision, speed, and manufacturing constraints of each method.
.
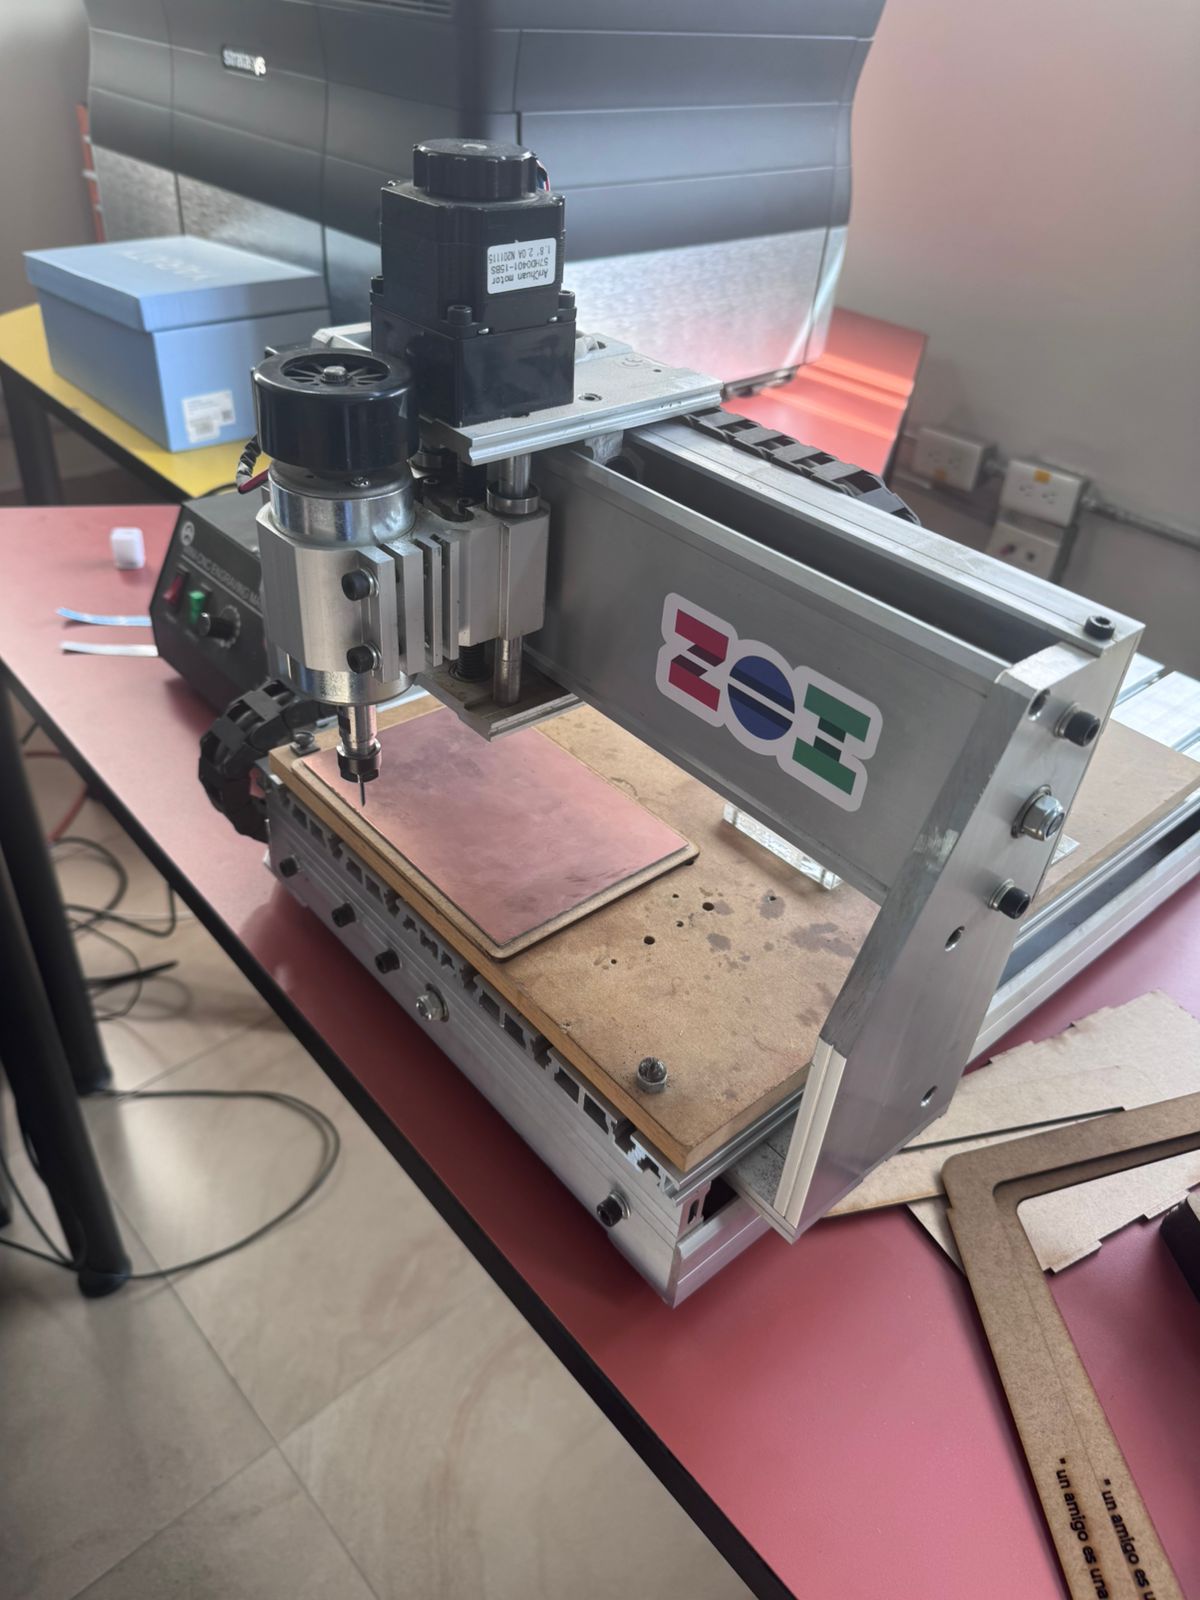
1. CNC Milling Machine
- Process: Subtractive manufacturing using rotating cutting tools
- Tooling: V-bits and micro end mills (0.2–0.8 mm typical)
- Precision: Medium to high (depends on calibration and tool wear)
- Strengths: Good for rapid prototyping and multilayer isolation routing
- Limitations: Tool wear, mechanical vibration, and minimum trace width constraints
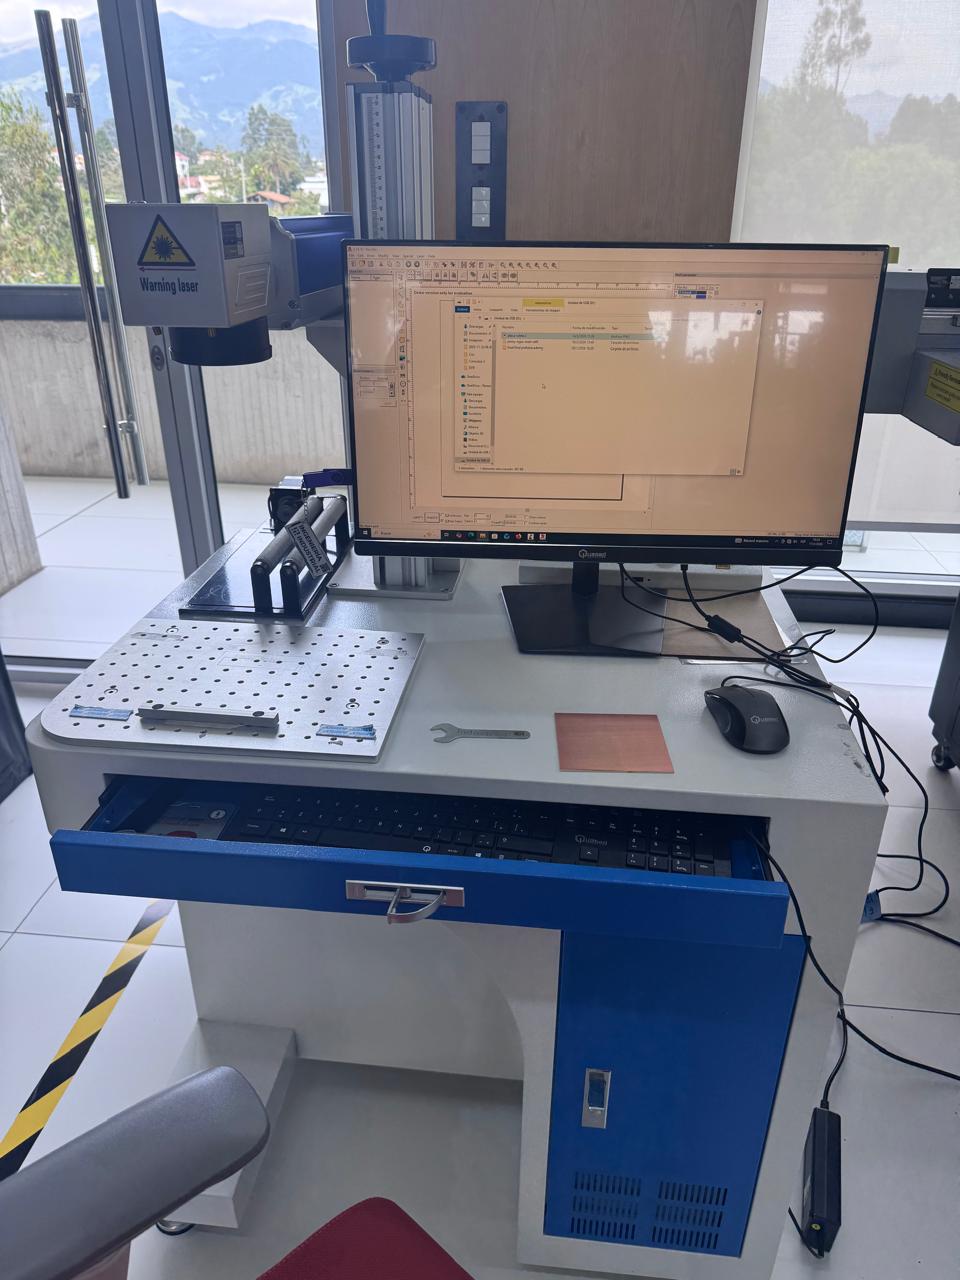
2. Fiber Laser Machine (JPT 90W)
- Technology: Fiber laser marking and ablation system
- Power: JPT laser source, 90W
- Process: Non-contact material removal using high-energy laser beam
- Precision: Very high (excellent for fine traces and micro-patterns)
- Strengths: No tool wear, high repeatability, clean edges
- Limitations: Material sensitivity, heat effects, and higher setup cost
Objective
Both technologies will be evaluated to determine their effectiveness in PCB fabrication, focusing on resolution, reliability, and workflow efficiency.
PCB Design Rules: CNC & Fiber Laser Manufacturing
This section defines the minimum design constraints and fabrication rules for producing PCBs using two in-house technologies: CNC milling and JPT 90W fiber laser. These rules ensure manufacturability, reduce errors, and improve repeatability in the production process.
CNC Milling Design Rules
- Minimum trace width: ≥ 0.4 mm (recommended 0.5 mm for reliability)
- Minimum isolation gap: ≥ 0.4 – 0.6 mm depending on tool diameter
- Tool diameter: 0.2 mm – 0.8 mm V-bit or micro end mill
- Cut depth per pass: 0.05 – 0.2 mm (avoid tool breakage)
- Material flatness: Must be perfectly leveled (critical for isolation routing)
- Speed & feed: Low feed rates required to avoid copper tearing
- Limitations: Mechanical wear, vibration, and tool deflection affect precision
Fiber Laser (JPT 90W) Design Rules
- Minimum trace width: ≥ 0.1 – 0.2 mm (high precision capability)
- Minimum spacing: ≥ 0.15 – 0.25 mm depending on energy settings
- Power range: Adjustable (JPT 90W, optimized per material)
- Process type: Non-contact ablation (no mechanical stress)
- Heat affected zone: Must be controlled to avoid substrate damage
- Surface requirement: Clean, flat copper surface for consistent engraving
- Limitations: Sensitive to material reflectivity and thermal distortion
These rules define the baseline for PCB layout design before fabrication. Proper adherence ensures higher yield, reduced iteration cycles, and compatibility with both CNC and laser manufacturing workflows.
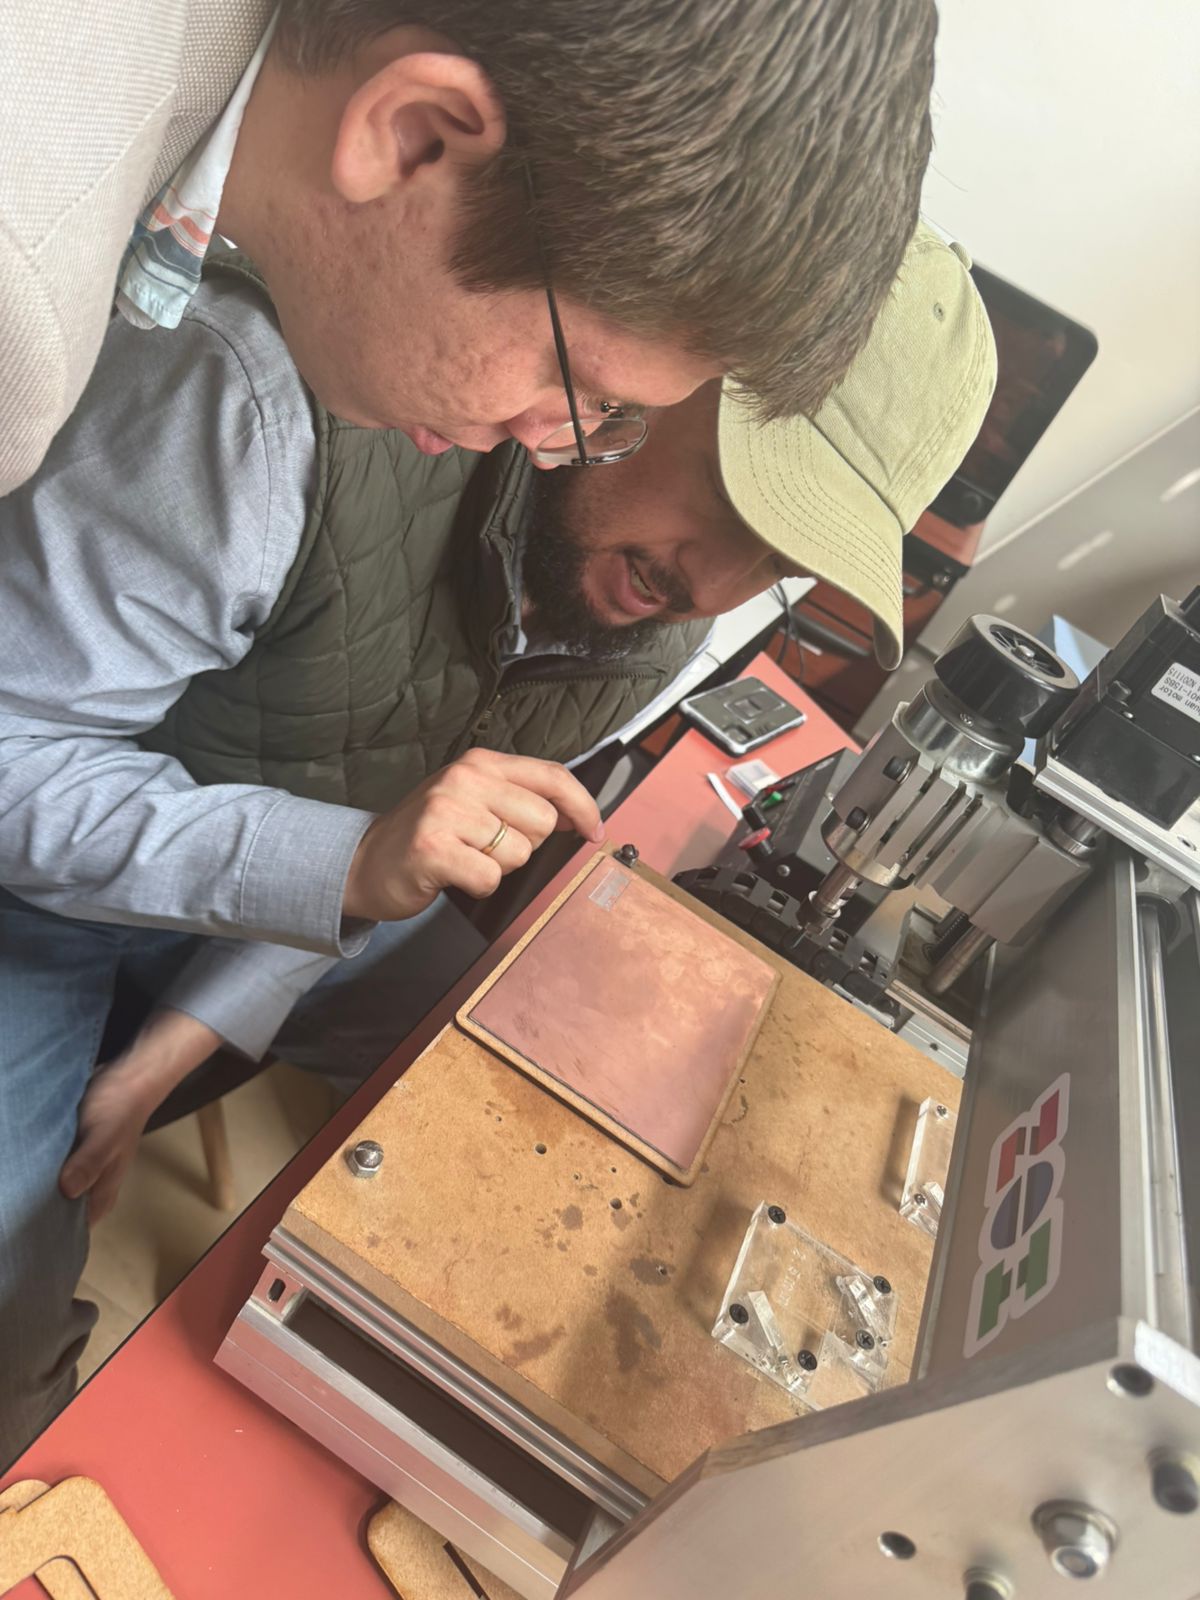
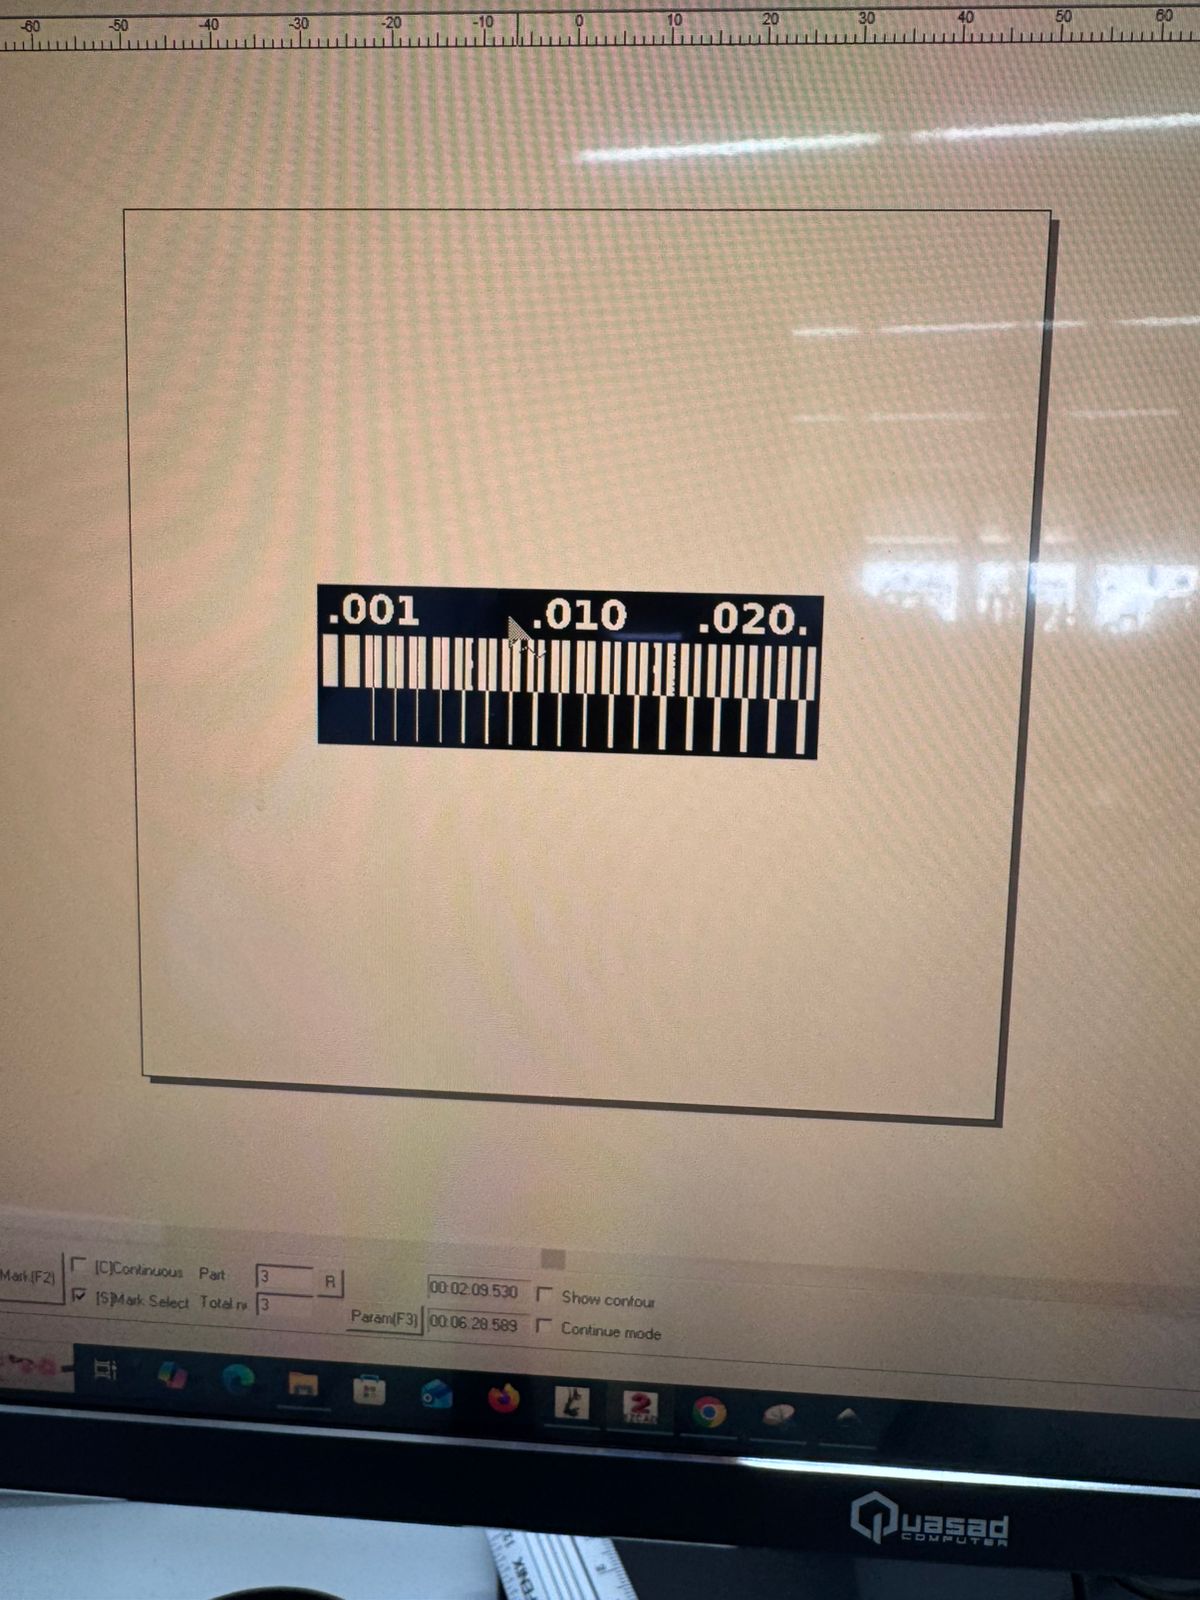
Machine and Process Description
PCB Test Production: Trace Fabrication Trial
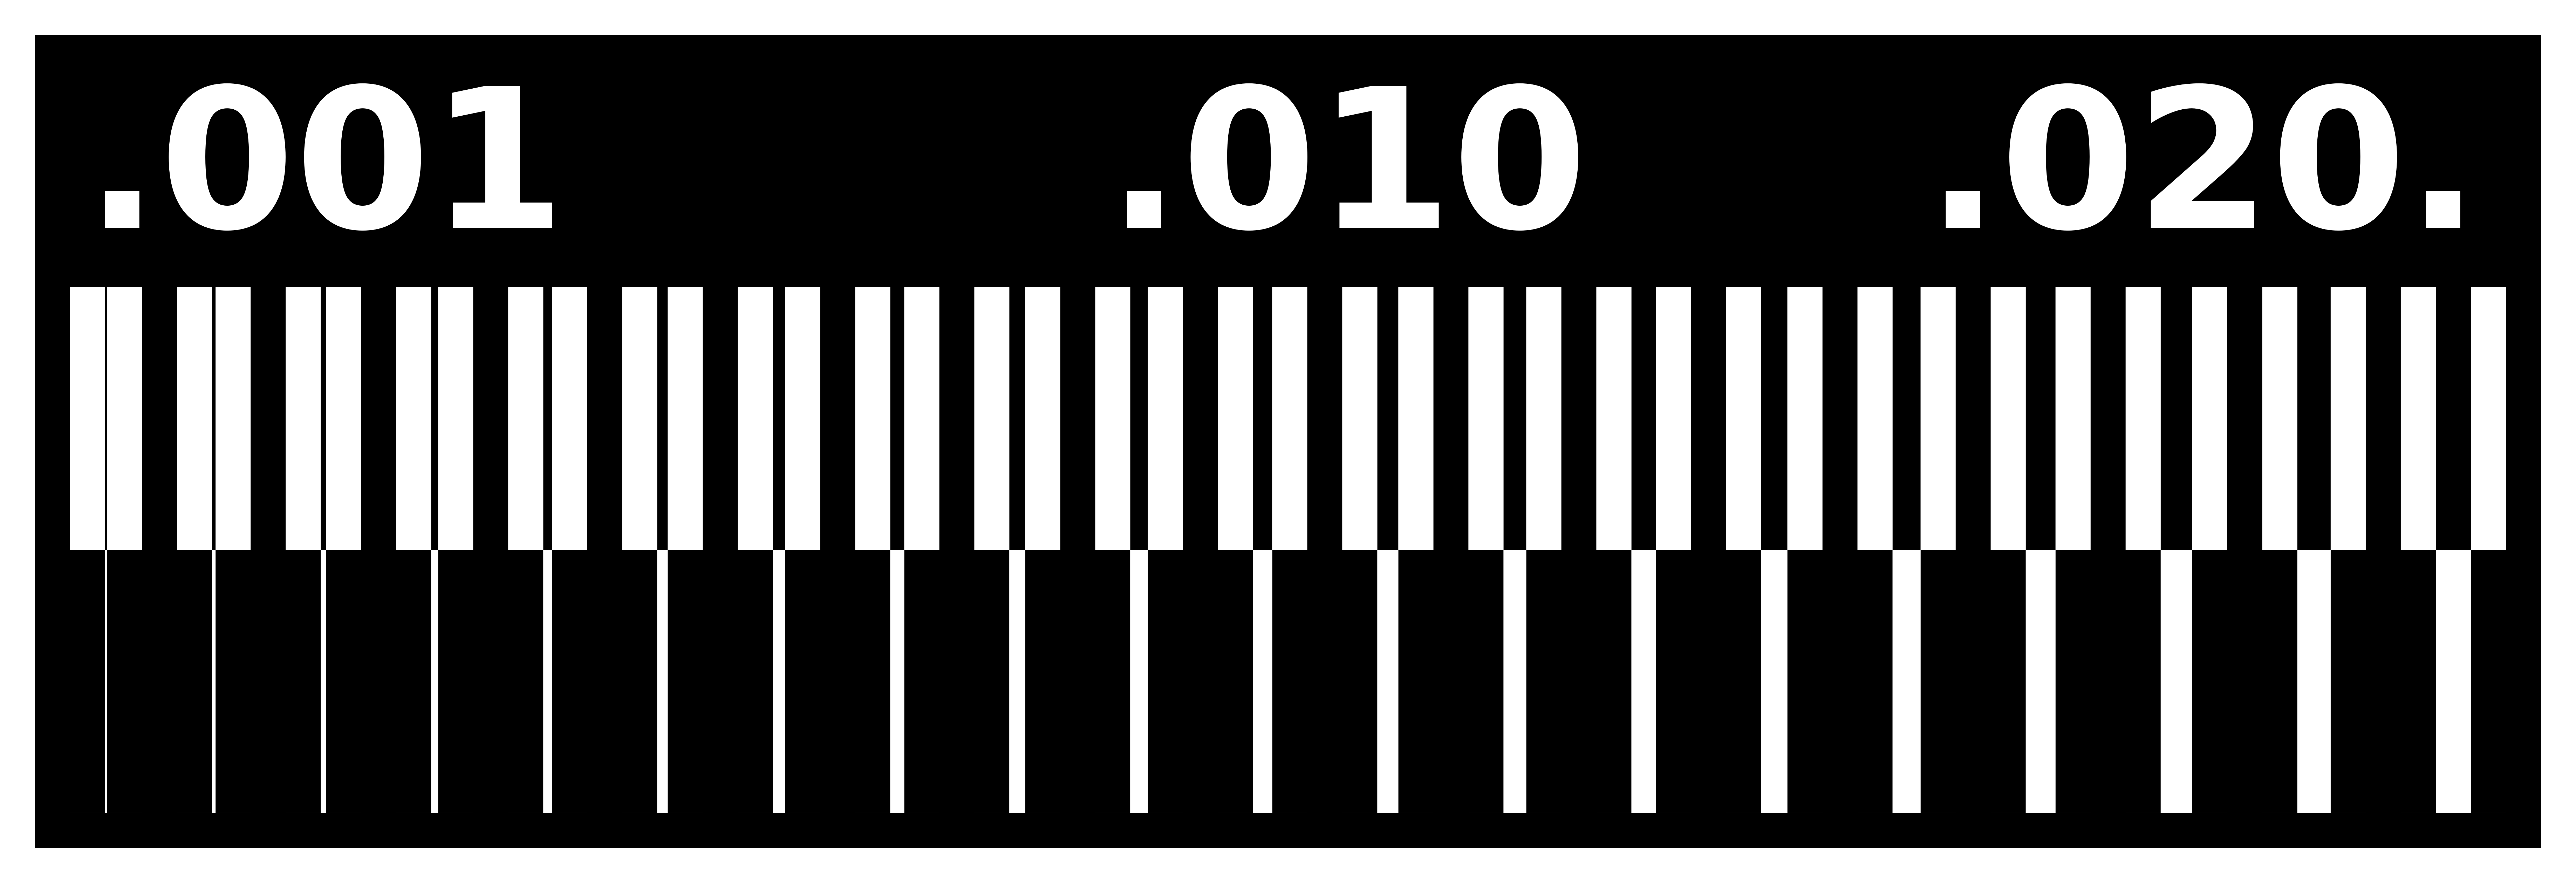
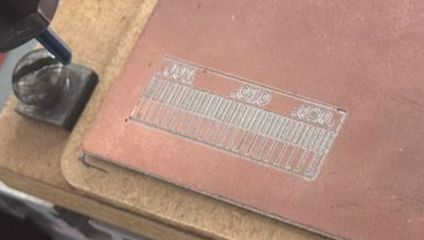
We used the provided drawings for the traces to generate a controlled fabrication test. The objective was to evaluate resolution, precision, and repeatability in both CNC milling and fiber laser processes under real manufacturing conditions.
CNC Milling Process
- Import of trace drawings into CAM software
- Toolpath generation for isolation routing
- Selection of V-bit tool (0.2–0.4 mm tip)
- Material leveling and fixturing of copper board
- Execution of milling with controlled feed and depth
- Cleaning and inspection of trace quality
Fiber Laser (JPT 90W) Process
- Import of vector trace design into laser software
- Parameter setup (power, speed, frequency)
- Focus calibration of JPT 90W fiber laser
- Non-contact ablation of copper layer
- High-resolution engraving of fine traces
- Final cleaning and inspection under magnification
This comparative test highlights the differences between subtractive CNC milling and non-contact fiber laser machining, focusing on precision, repeatability, and fabrication efficiency.
The fiber laser machine operates by emitting high-frequency pulses of energy that remove copper from the PCB surface through thermal ablation. This process is entirely contactless and controlled digitally.
Unlike milling, there is no mechanical force applied to the board. However, the process introduces thermal energy that can affect both the copper layer and the substrate.
Critical parameters:
- Laser Power: Controls energy intensity
- Speed: Determines exposure time
- Frequency: Defines pulse density
- Number of passes: Controls depth and precision
Understanding the interaction between these variables is essential for achieving reliable PCB results.
Test Board and Experimental Strategy
A test PCB was designed to explore the limits of the fabrication process. This board included a range of geometries to evaluate resolution, spacing, and engraving quality.
The experimentation followed a structured iterative process:
- Prepare the copper board by cleaning oxidation and residues
- Generate monochrome design files for laser input
- Select initial parameter combinations
- Execute engraving process
- Inspect traces visually using magnification
- Test electrical continuity and isolation
- Adjust parameters and repeat
This process was repeated multiple times to ensure consistent results and identify optimal fabrication conditions.
Results
PCB Test Results: CNC vs Fiber Laser
This section summarizes the results obtained from the PCB trace fabrication tests using two different manufacturing technologies: CNC milling and JPT 90W fiber laser. The comparison highlights performance differences, advantages, and limitations observed during the process.
CNC Milling Results
Pros
- Accessible and widely available fabrication method
- Good for rapid prototyping and iterative testing
- Works with standard PCB copper boards without special coating
- Easy integration with CAM workflows (e.g., FlatCAM, Fusion 360)
Cons
- Tool wear affects precision over time
- Limited resolution due to mechanical constraints
- Requires careful leveling of the material
- Risk of trace breakage or inconsistent isolation paths
Fiber Laser (JPT 90W) Results
Pros
- High precision and excellent trace definition
- No physical contact → no tool wear
- Fast processing for detailed micro-patterns
- High repeatability and consistency
Cons
- Higher setup complexity and parameter tuning required
- Sensitive to material reflectivity and surface condition
- Thermal effects may damage fine features if not controlled
- Equipment cost is significantly higher than CNC milling
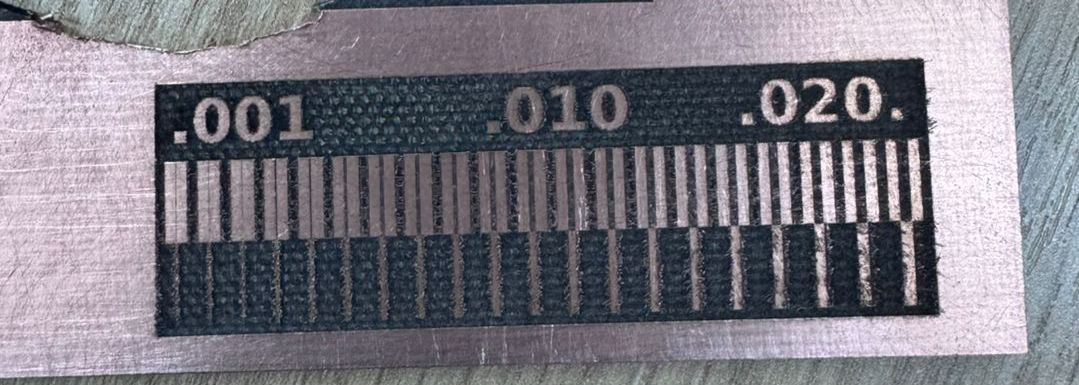
Overall, CNC milling is more practical for fast prototyping and educational environments, while fiber laser machining provides superior precision and repeatability for advanced PCB fabrication.
External PCB Manufacturing Workflow
In addition to in-house PCB fabrication using CNC milling and fiber laser machining, it is important to understand the professional workflow used to send a PCB design to an external manufacturing company. This process is useful when the board requires higher quality, solder mask, silkscreen, plated holes, several units, or professional assembly.
A common workflow starts in a PCB design platform such as EasyEDA, where the schematic and PCB layout can be created in the same environment. EasyEDA allows the user to design the electronic circuit, convert it into a PCB, check the routing, and visualize the final board in both 2D and 3D. This visualization is useful because it helps verify the position of components, board dimensions, connectors, orientation, and possible mechanical conflicts before sending the design to production.
The main objective of this workflow is to move from a digital PCB design to a manufacturable board by generating the correct production files and uploading them to a PCB fabrication service.
1. PCB Design in EasyEDA
The process begins with the schematic design. In this stage, all electronic components are connected logically using symbols. After the schematic is completed, the circuit is transferred to the PCB editor, where components are placed physically on the board and connected using copper traces.
Before exporting the production files, it is necessary to verify important design rules such as trace width, spacing, hole diameter, board outline, component orientation, and the number of copper layers. A design rule check helps reduce fabrication errors and ensures that the board can be manufactured by the selected company.
2. Production Files Required for Manufacturing
Once the PCB is finished, three important groups of files can be exported: Gerber files, BOM file, and Pick and Place file. Each one has a specific function in the fabrication and assembly process.
Gerber Files
Gerber files are the standard manufacturing files used to describe the physical layers of a PCB. They contain the information needed by the manufacturer to fabricate the bare board. These files do not describe the electronic function of the circuit; instead, they describe the geometry of the board.
A Gerber package is usually exported as a compressed ZIP file and can include several individual files, such as:
- Top copper layer: contains the copper traces and pads on the top side of the PCB.
- Bottom copper layer: contains the copper traces and pads on the bottom side of the PCB.
- Solder mask layers: define the areas covered or exposed by the solder mask.
- Silkscreen layers: include text, logos, component names, and orientation marks printed on the board.
- Board outline: defines the final shape and dimensions of the PCB.
- Drill files: define the position and size of holes, vias, and through-hole component pads.
These files are used to manufacture the PCB substrate, copper layers, holes, solder mask, and silkscreen. For this reason, the Gerber package is the first file requested by companies such as JLCPCB, PCBWay, PCBCart, and other PCB fabrication services.
BOM File
The BOM, or Bill of Materials, is a list of all components required to assemble the PCB. This file is especially important when the manufacturer will not only fabricate the board but also assemble the electronic components.
A BOM file usually includes:
- Designator: the reference name of each component on the PCB, such as R1, C1, U1, or LED1.
- Quantity: the number of units required for each component.
- Component value: for example 10kΩ, 100nF, or 3.3V regulator.
- Footprint/package: the physical package used by the component, such as 0603, SOT-23, SOIC, or QFN.
- Manufacturer part number: the exact component identification used for sourcing.
- Supplier part number: the part number used by the PCB assembly provider or component distributor.
The BOM must be carefully reviewed because the selected parts need to be available in stock. If a component is not available, it may be necessary to replace it with an equivalent part while checking electrical characteristics, package compatibility, voltage rating, current rating, tolerance, and orientation.
Pick and Place File
The Pick and Place file, also known as the centroid file or CPL file, contains the position and orientation of each component on the PCB. This file is used by automatic assembly machines to pick components from reels or trays and place them accurately on the board.
A Pick and Place file usually includes:
- Designator: the component reference, such as R1, C1, U1, or D1.
- X and Y coordinates: the exact location of the component on the PCB.
- Rotation: the angle used to orient the component correctly.
- Layer: indicates if the component is placed on the top or bottom side of the board.
- Footprint: the package associated with each component.
This file is critical for assembly because even a small error in rotation or position can cause incorrect soldering, reversed polarity, or a non-functional PCB. Components such as LEDs, diodes, integrated circuits, connectors, and microcontrollers must be checked carefully before confirming the order.
3. Uploading the Files to a PCB Manufacturer
After exporting the Gerber, BOM, and Pick and Place files, the next step is to upload them to a PCB manufacturing platform. Examples of companies that provide these services include JLCPCB, PCBWay, PCBCart, and other professional PCB manufacturers.
In this example, JLCPCB is used as a reference workflow. The platform first requests the Gerber file. Once the Gerber ZIP file is uploaded, the system automatically reads the PCB information and displays a preview of the board with its detected characteristics.
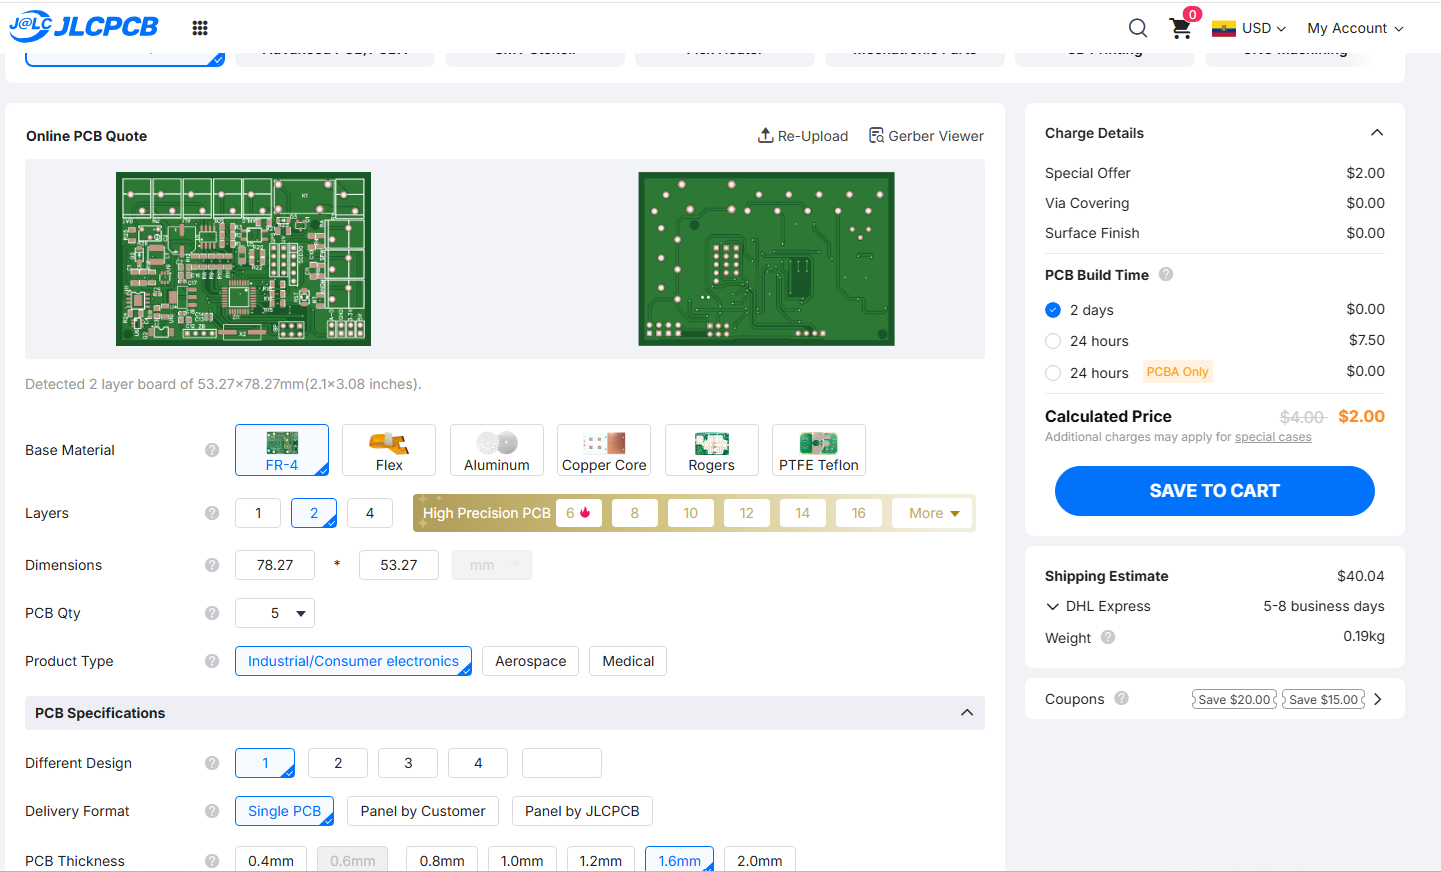
After uploading the Gerber file, the user can configure several fabrication options depending on the requirements of the project. These options may include:
- PCB quantity: number of boards to manufacture.
- Number of layers: single-sided, double-sided, or multilayer PCB.
- Material: commonly FR-4, but other materials may be available for specific applications.
- PCB thickness: mechanical thickness of the board.
- Copper weight: thickness of the copper layer, important for current capacity.
- Solder mask color: green, black, blue, red, white, or other available colors.
- Surface finish: finish applied to exposed copper pads, such as HASL or ENIG.
- Electrical test: verification process to detect shorts or open circuits.
- Panelization: option used when several boards are manufactured in a single panel.
- Additional advanced options: impedance control, via covering, castellated holes, or other features depending on the project.
These manufacturing options directly affect cost, quality, delivery time, and the final performance of the PCB. For simple prototypes, standard settings are usually enough. For more advanced designs, it is important to verify the manufacturer capabilities before confirming the order.
4. PCB Assembly: BOM and Pick and Place
After defining the bare PCB fabrication options, the platform asks whether only the PCB will be manufactured or whether component assembly is also required. If assembly is selected, the BOM and Pick and Place files must be uploaded.
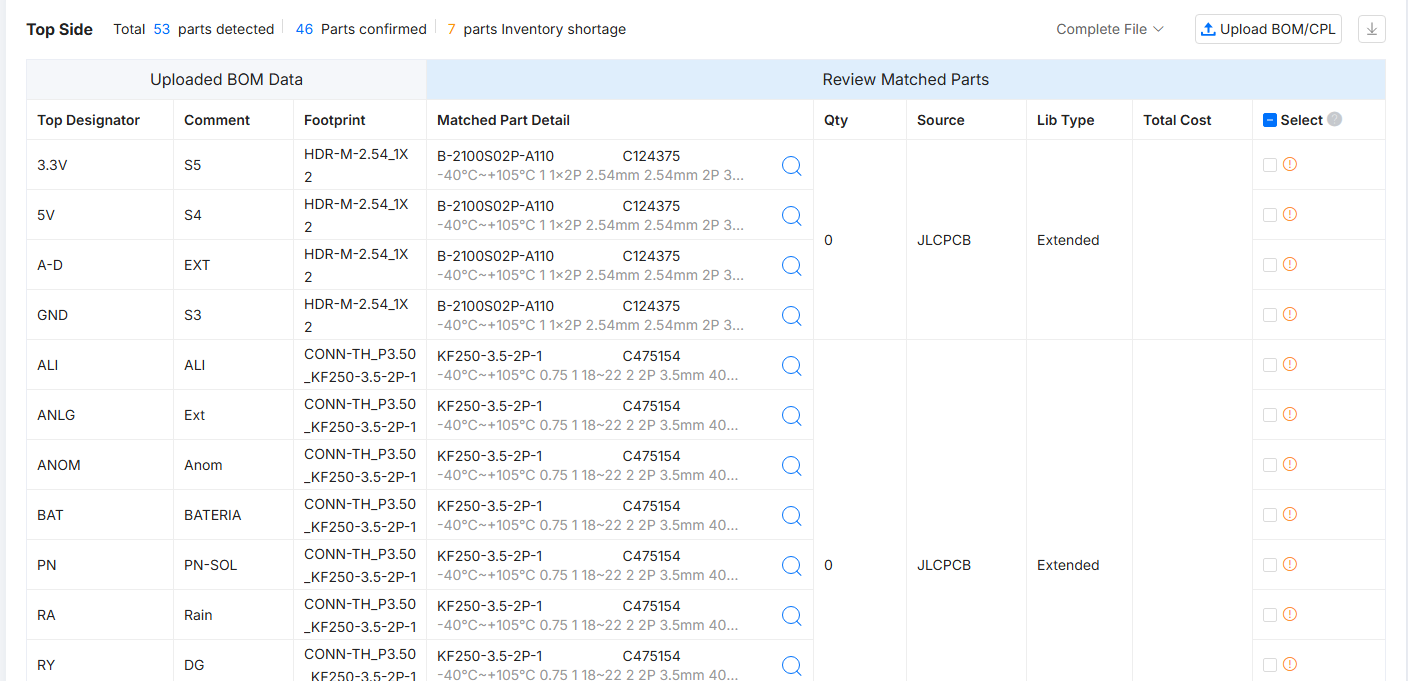
The BOM allows the manufacturer to identify each component, check stock availability, compare part numbers, and calculate the assembly cost. During this stage, it is important to review whether the parts are available in the provider inventory. If a part is unavailable, the platform may suggest alternatives, but these alternatives must be checked to avoid electrical or mechanical incompatibility.
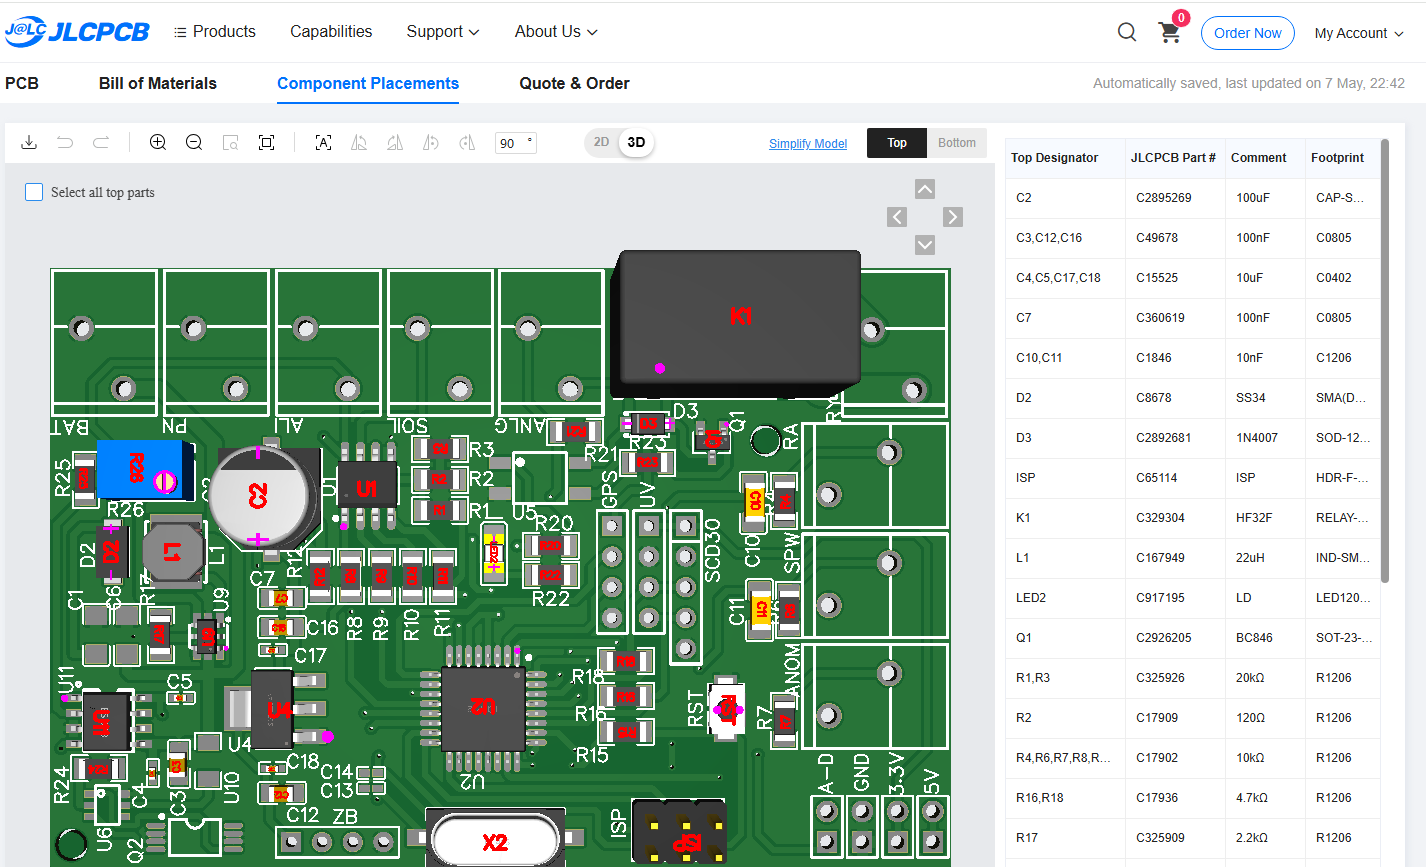
The Pick and Place file is used by the automatic assembly machine to position the components on the PCB. The machine uses the coordinate data, rotation angle, and component side to pick each part and place it in the correct location. After placement, the PCB normally goes through a solder paste and reflow soldering process for SMD components.
5. Final Review, Cost, and Delivery
Before ordering the PCB, a final review is necessary. The Gerber preview must match the original design, the board outline must be correct, and all holes, pads, and layers must appear as expected. For assembled boards, the BOM and Pick and Place previews must also be reviewed carefully to confirm component orientation, polarity, stock availability, and placement.
After the files and configuration are confirmed, the platform calculates the final cost. This cost depends on board quantity, size, number of layers, material, copper thickness, surface finish, assembly service, component cost, shipping method, destination country, and estimated delivery date.
This external fabrication workflow is very useful because it connects the digital design process with real industrial PCB production. It also shows that PCB design is not only about routing traces, but also about preparing clear manufacturing data, selecting components correctly, and understanding the limitations of the fabrication and assembly process.
Reflections
- PCB fabrication requires both design knowledge and manufacturing awareness. A design that looks correct on the screen may fail if fabrication limits are not considered.
- CNC milling is useful for rapid prototyping because it allows the board to be produced locally, but it depends strongly on tool condition, leveling, and mechanical precision.
- Fiber laser fabrication provides very high precision and repeatability, but the process requires careful parameter tuning to avoid burning the substrate or damaging fine traces.
- Comparing CNC milling and fiber laser machining helped us understand that each technology has different advantages depending on the goal of the project.
- Design rules are essential. Minimum trace width, spacing, hole size, and board outline must be defined before fabrication to reduce errors and improve reliability.
- External PCB manufacturing companies are very useful when a project requires professional finishing, solder mask, silkscreen, plated through holes, several copies, or component assembly.
- Gerber files are the core manufacturing files for the bare PCB. If the Gerber export is incorrect, the manufactured board will also be incorrect.
- The BOM is critical for assembly because it defines the exact components required. Component availability, package, value, and part number must be checked carefully.
- The Pick and Place file connects the digital PCB layout with automatic assembly machines. Correct coordinates and rotation are necessary to avoid misplaced or reversed components.
- This assignment showed that electronics production is an iterative process. Testing, inspecting, correcting, and documenting each step are necessary to achieve reliable PCB results.