Week 05 — Group Assignment
3D Printing Design Rules
This group assignment focused on testing the design rules of the 3D printers available in our lab environment. The goal was to evaluate how different machines behave under the same test conditions, identify practical limits for common design features, and document the parameters that affect print quality, dimensional accuracy, and reliability.
Personal Contributions
| Name | University | Activities carried out |
|---|---|---|
| Rodrigo Guamán | Universidad de Cuenca |
|
| Jenny Rojas | Universidad de Cuenca |
|
| Diego Zhindón | Universidad Politécnica Salesiana |
|
1. Checklist
- ✅ Identified the 3D printers available in the lab and their main characteristics
- ✅ Tested design rules using calibration, tolerance, and dimensional verification models
- ✅ Compared FDM workflows using Bambu Lab X1E and Ultimaker S5 printers
- ✅ Recorded common printing settings such as layer height, temperature, speed, and infill
- ✅ Evaluated tolerances, bridge distance, overhang angle, and dimensional accuracy
- ✅ Documented observed failures such as vibration-related adhesion problems and stringing
- ✅ Included practical SLA considerations for Form 4 such as support strategy, inclination, hollowing, and drain holes
- ✅ Added screenshots, printed results, downloadable files, and process video
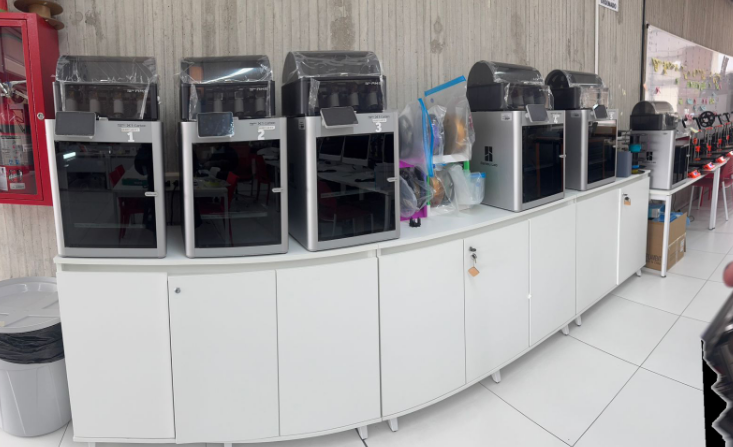
2. Lab Spaces
The tests and observations were developed considering the 3D printing resources available in two workspaces: StartLABS in Quito and the fabrication space used by our teammates at the University of Cuenca.
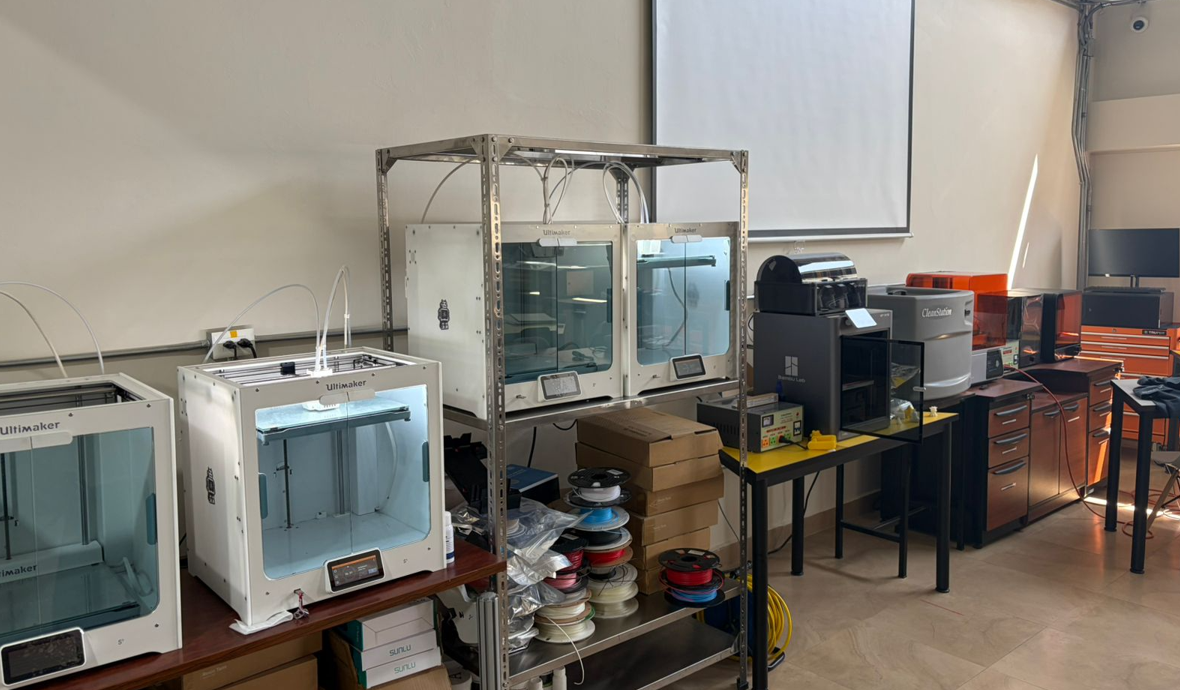
3. Machines Used
Our lab setup includes FDM and SLA technologies. For the measured tests in this assignment, we used the Bambu Lab X1E and Ultimaker S5 printers under equivalent FDM conditions. We also documented key design considerations for the Form 4 resin workflow.
| Machine | Technology | Main characteristics | Typical use |
|---|---|---|---|
| Bambu Lab X1E + AMS | FDM | High-speed printing, strong dimensional consistency, automated features, AMS multi-material support | Rapid prototyping, functional parts, dimensional tests, fast iteration |
| Ultimaker S5 | FDM | Reliable industrial workflow, dual extrusion capability, stable large-format printing | Technical prototyping, robust parts, educational and professional production |
| Form 4 + Wash + Cure | SLA | Very high detail, smooth finish, requires wash and cure post-processing | High-detail parts, complex small geometries, aesthetic or precision-focused prints |
4. Machine Comparison
| Feature | Bambu Lab X1E | Ultimaker S5 | Form 4 |
|---|---|---|---|
| Technology | FDM | FDM | SLA |
| Nozzle / optical system | 0.4 mm nozzle | 0.4 mm nozzle | Resin light-based curing system |
| Resolution | Good | Good | Very high |
| Speed | Very high | Moderate | Moderate |
| Tolerance behavior | Excellent | Good | High accuracy, but strongly dependent on orientation and supports |
| Bridge test | Up to 36 mm | Up to 36 mm | Not evaluated in the same way |
| Overhang test | Up to 70° with visible filament at the limit | Up to 60° cleanly, filament visible at 70° | Requires support planning rather than unsupported overhang evaluation |
| Post-processing | Low | Low | High: wash and cure required |
5. Common Materials
| Material | Main advantage | Main limitation | Typical use |
|---|---|---|---|
| PLA | Easy to print, stable, low warping | Lower heat resistance | General prototyping and dimensional tests |
| PETG | Better toughness and chemical resistance | May produce more stringing | Functional parts and medium-duty prototypes |
| ABS | Stronger and more temperature resistant | Warping and enclosure sensitivity | Technical functional parts |
| TPU | Flexible | More difficult to control dimensionally | Soft or elastic components |
| Standard Resin | Excellent detail and smooth surface | Requires careful handling and post-processing | Detailed small models and visual prototypes |
| Tough / Engineering Resin | Better performance for functional resin parts | Still requires supports, wash, and cure | Engineering validation and precision applications |
6. Printing Parameters Used for FDM Tests
- Material: PLA
- Nozzle diameter: 0.4 mm
- Layer height: 0.2 mm
- Printing temperature: 210 °C
- Infill: 15%
- Infill pattern: Triangular
- Printing speed: 70
The same general parameters were used to maintain a fair comparison between Bambu Lab X1E and Ultimaker S5. This allowed us to focus the analysis on machine behavior, dimensional response, and print quality under similar operating conditions.
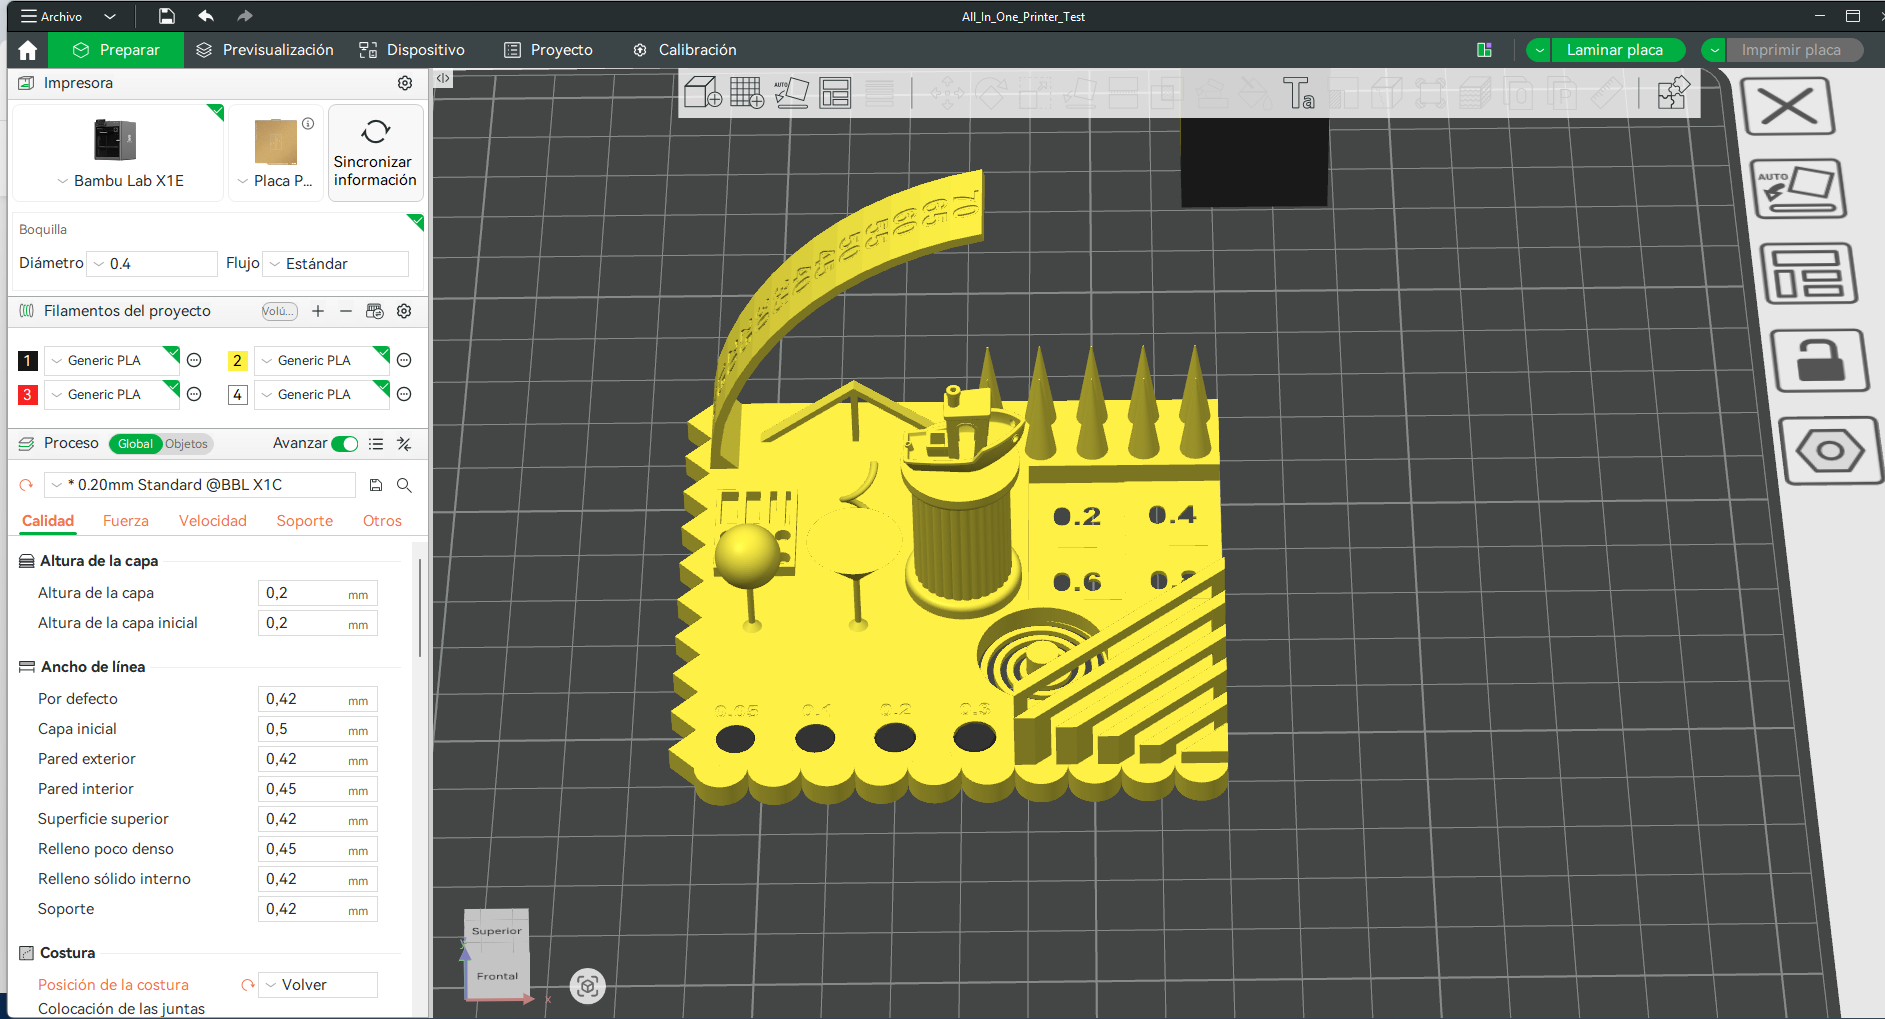
7. Test Files
Three reference files were used during the evaluation process: a complete calibration test, a tolerance test, and an XYZ calibration cube. The first setup was prepared in Bambu Studio and later the STL files were reused in Cura for the Ultimaker tests.
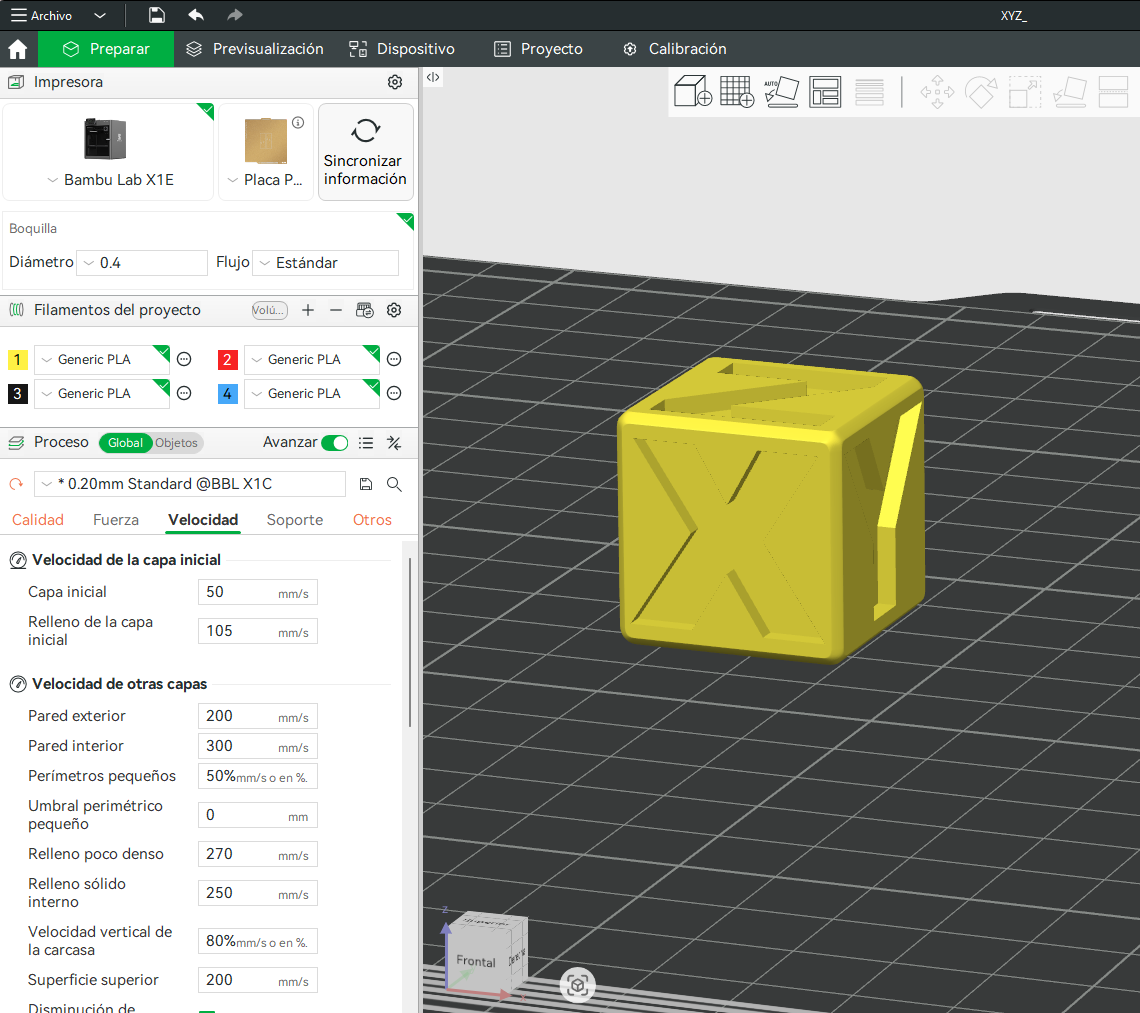
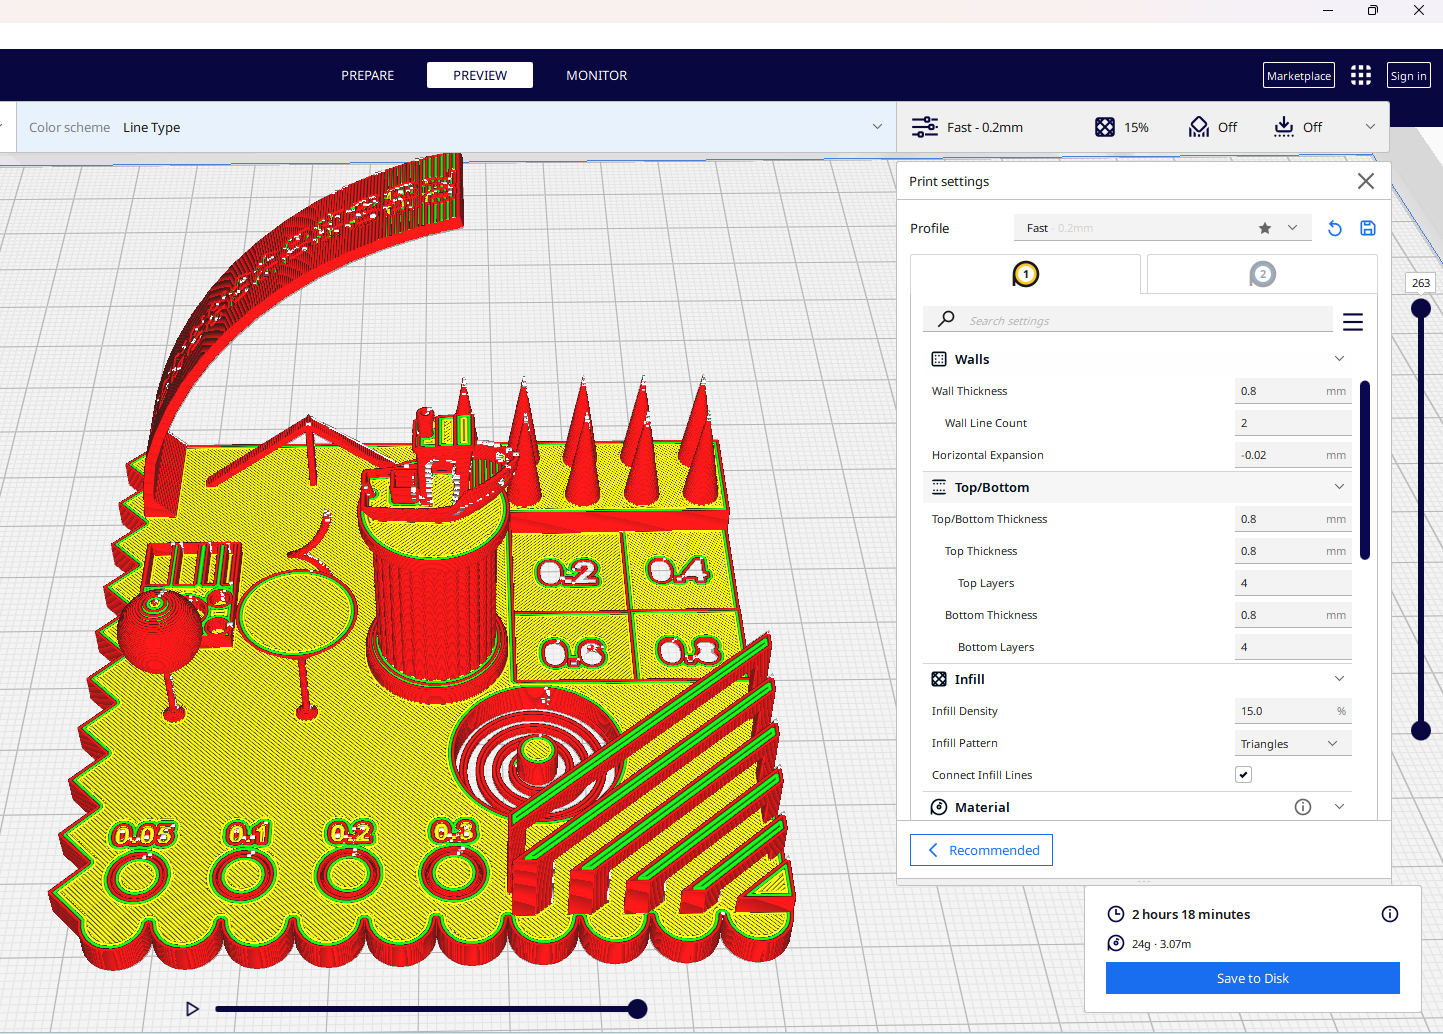
8. Bambu Lab X1E — Digital Preparation
The first set of tests was prepared in Bambu Studio. These screenshots correspond to the calibration test, tolerance test, and XYZ calibration cube before printing.

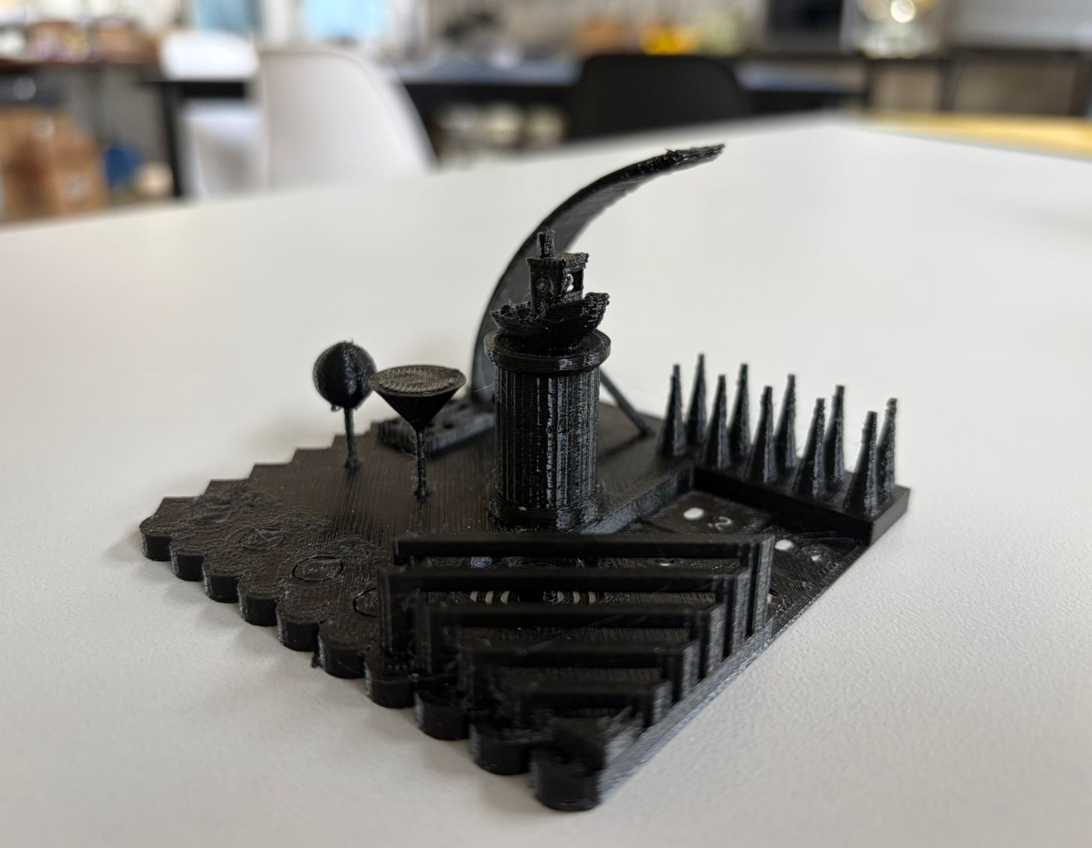
9. Bambu Lab X1E — Printed Results
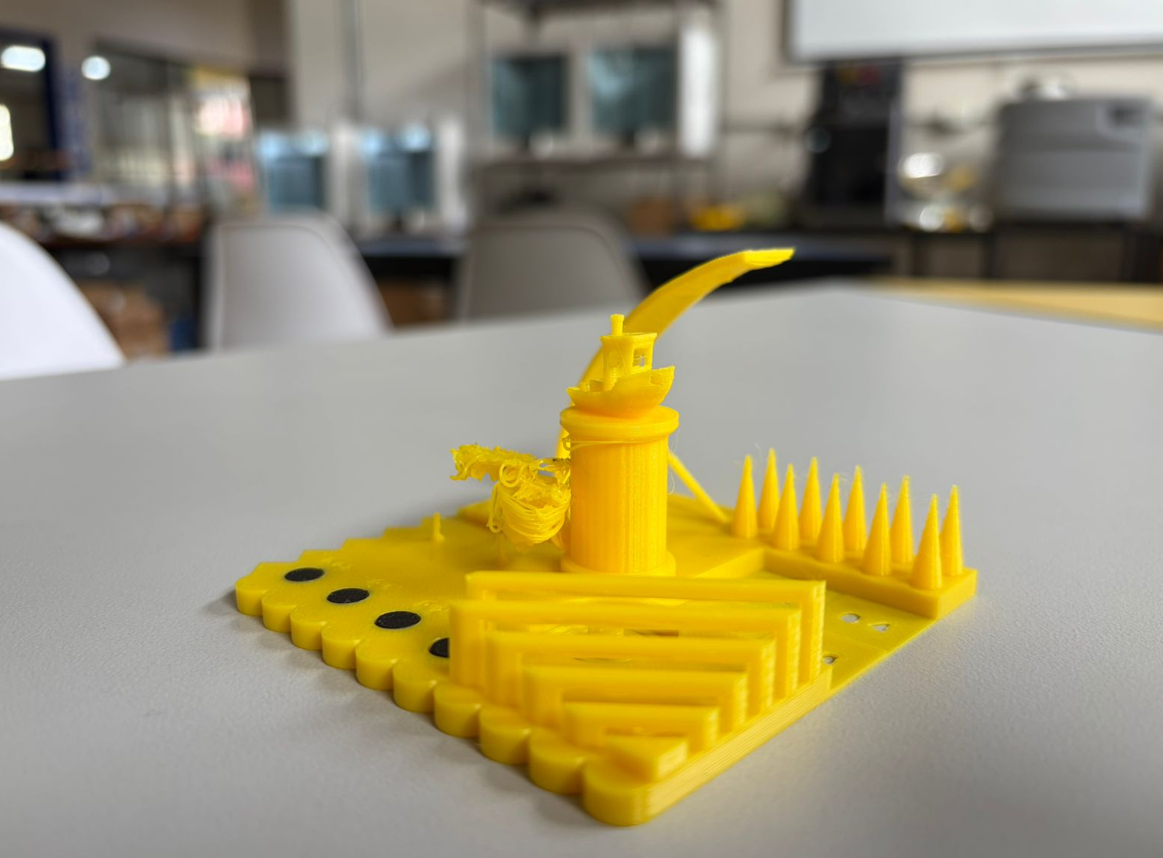
A failure was observed in one of the unsupported features of the calibration test. Due to movement and vibration, that area did not adhere correctly during the print, which caused the feature to fail while the rest of the part printed successfully.
10. Printing Process Video
The following timelapse video shows the Bambu Lab X1E printing the complete calibration model.
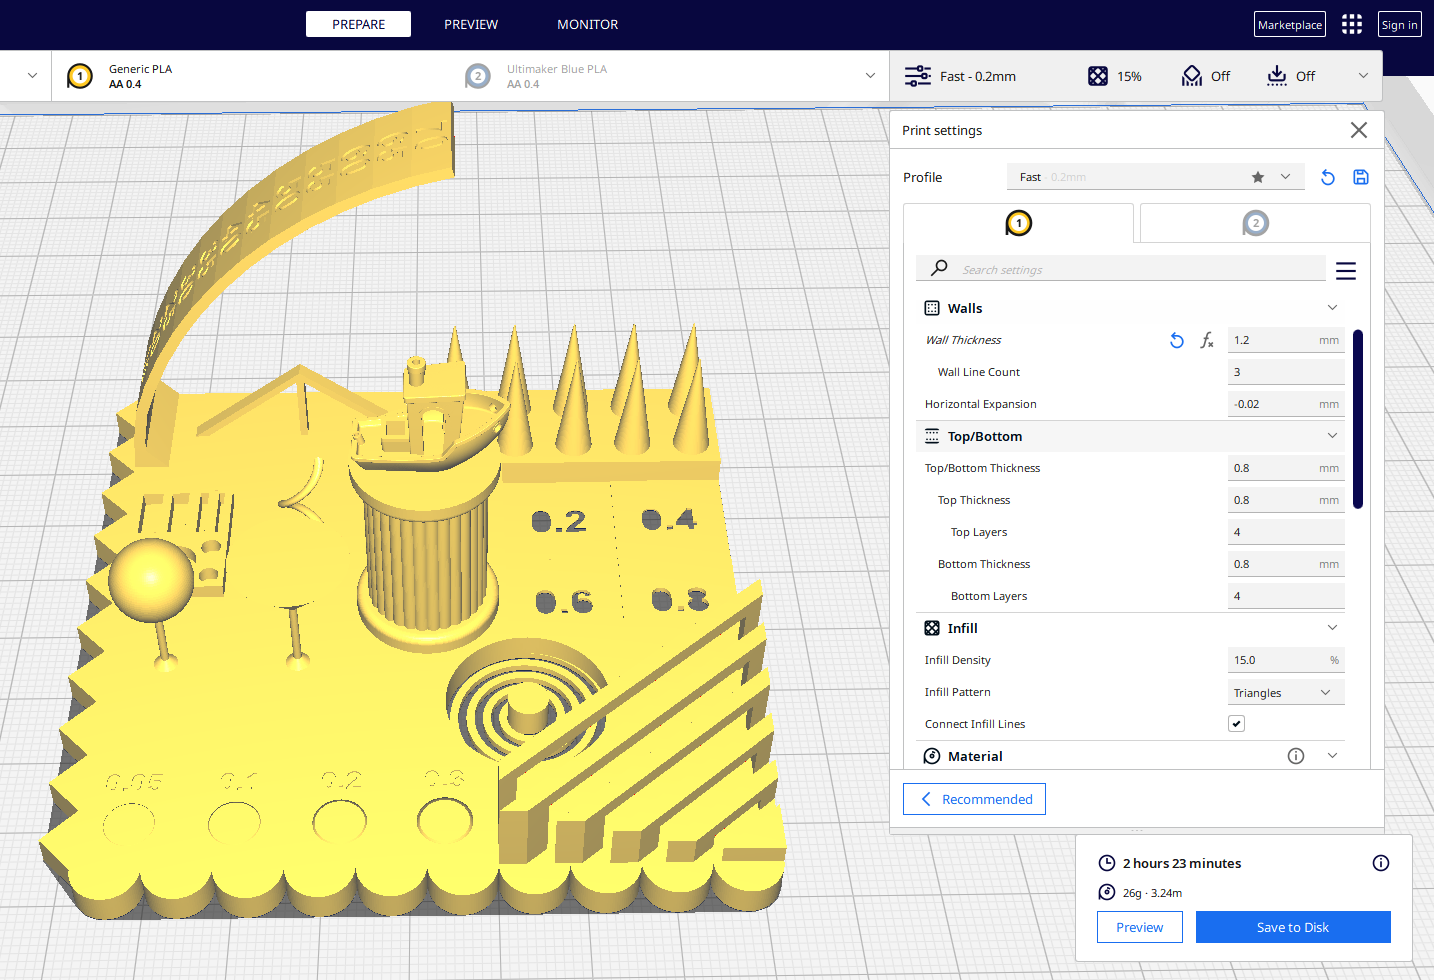
11. Ultimaker S5 — Digital Preparation in Cura
The same calibration model was later imported into Cura to compare the print behavior in the Ultimaker S5 using two wall thickness configurations: 0.8 mm and 1.2 mm.
12. Ultimaker S5 — Printed Results
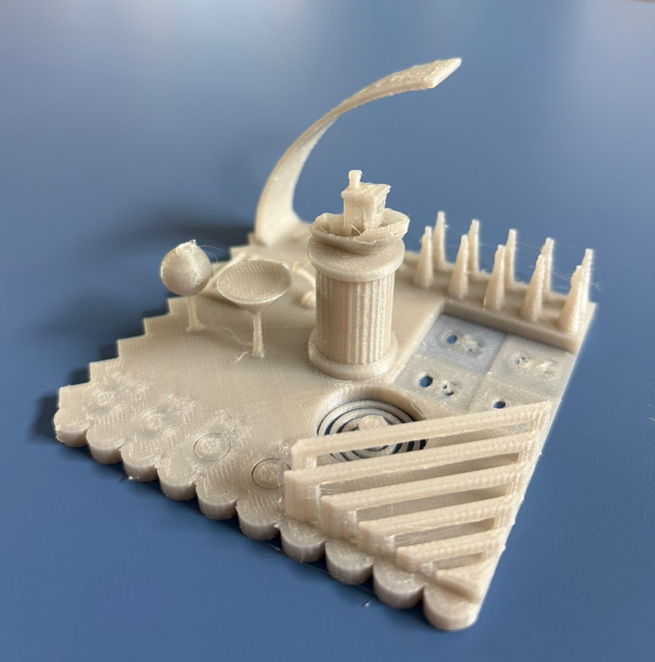
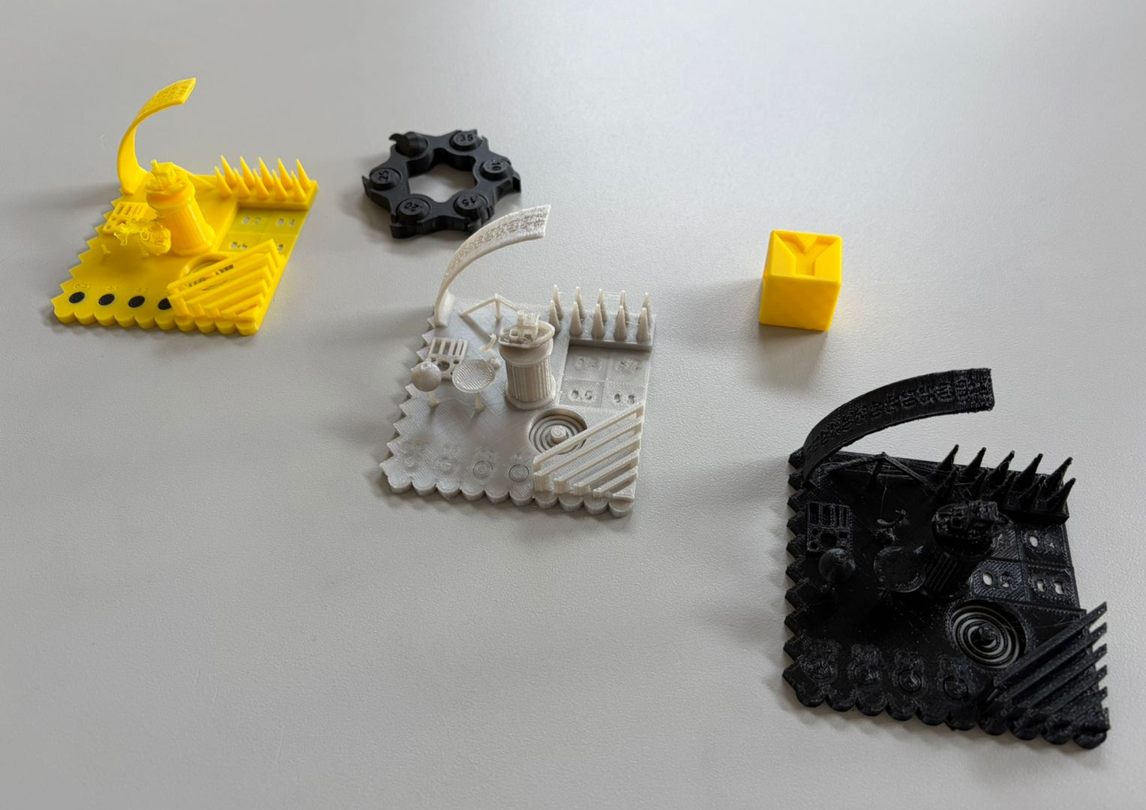
In the Ultimaker prints, fine hair-like strings were visible between some features. This was related to retraction settings not being activated between separate printed sections, which led to stringing artifacts.
13. Measured Design Rules
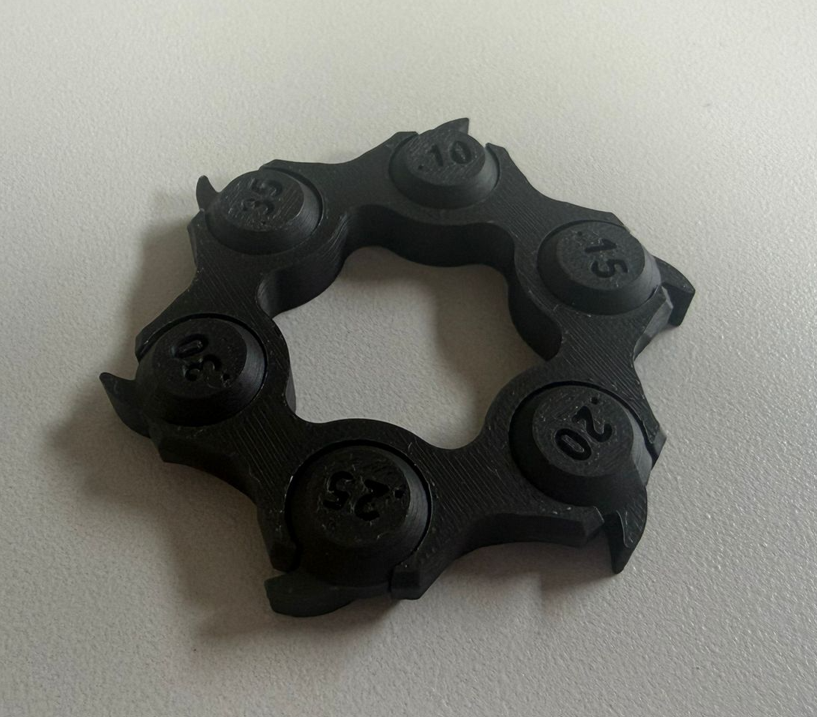
13.1 Tolerance Test
- 0.1 mm clearance: too tight
- 0.2 mm clearance: optimal fit
- 0.3 mm clearance: looser fit
13.2 Bridge Test
- Bambu Lab X1E: printed successfully up to 36 mm without support
- Bambu Lab X1E: at 40 mm the lower filaments began to sag slightly
- Ultimaker S5: printed successfully up to 36 mm without support
- Ultimaker S5: at 40 mm the lower filaments also began to sag
13.3 Overhang Test
- Bambu Lab X1E: good performance up to 70°, although at the limit the filament became visible and less clean
- Ultimaker S5: reliable performance up to 60°
- Ultimaker S5: at 70° the filament became visibly exposed and quality decreased
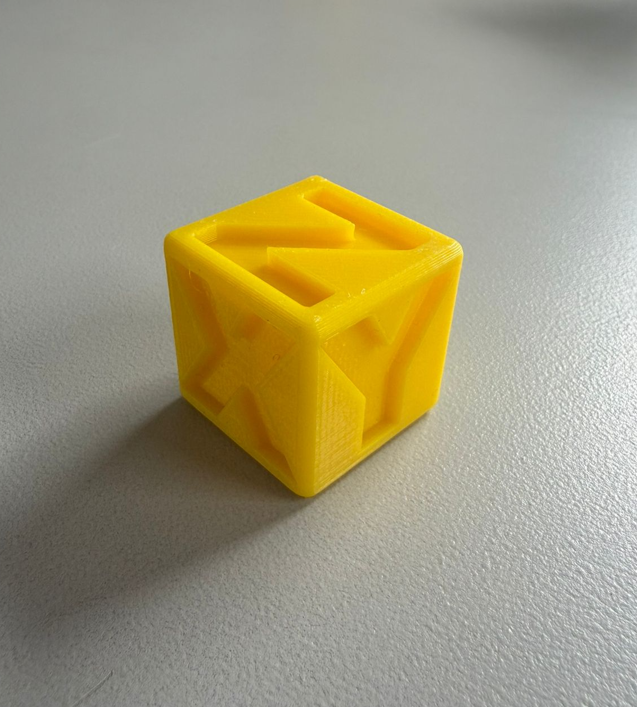
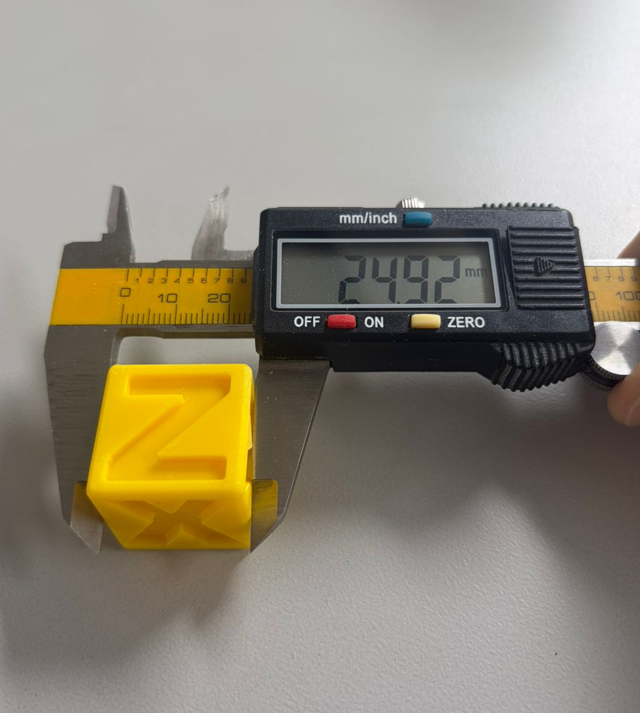
13.4 Dimensional Accuracy
- Designed cube: 25 mm × 25 mm × 25 mm
- Measured cube on Bambu Lab X1E: 24.92 mm
- Deviation: -0.08 mm
14. Important 3D Printing Rules
The following table summarizes the most important design and process rules considered during the group analysis. These same criteria are useful when preparing both FDM and SLA prints.
| Rule / Parameter | Why it matters | Typical consideration |
|---|---|---|
| Supports | Prevent collapse in overhangs and unsupported regions | Use only when necessary and optimize for easy removal |
| Model orientation | Affects surface finish, strength, support amount, and print time | Rotate the model to reduce unsupported geometry |
| Layer height | Defines detail level and print time | 0.2 mm is balanced for FDM; lower values improve detail |
| Infill percentage | Defines rigidity, weight, and material use | 15% is efficient for general test models |
| Printing temperature | Controls flow and adhesion | Must match the selected material profile |
| Print speed | Higher speed reduces time but can affect quality | Use moderate speed when evaluating accuracy |
| Tolerances | Important for assemblies and moving parts | Leave enough clearance; in our test 0.2 mm worked best |
| Warping | Can lift or deform the part from the base | Use good bed adhesion and stable environmental conditions |
| Bed adhesion | Critical for print stability | Incorrect adhesion can cause early print failure |
| Retraction | Reduces stringing between separate printed regions | Important when the part contains multiple separated features |
| Wall thickness | Affects structural rigidity and consistency | Tested here with 0.8 mm and 1.2 mm walls in Ultimaker |
15. SLA Design Considerations — Form 4
Although we did not run the same measured comparison tests on the Form 4 during this group assignment, we documented several important design rules that are specific to resin printing and are essential for reliable results.
- Inclined orientation: resin parts are commonly printed at an angle to improve surface quality, reduce suction effects, and improve resin flow.
- Supports and bases: supports must be placed strategically, and the base structure must stabilize the part during the print.
- Hollow models: large resin parts are often hollowed to reduce material use and print time.
- Drain holes: hollow parts require small holes so trapped resin and internal pressure do not remain inside the model.
- Internal vacuum effect: without proper venting, enclosed volumes can create suction or pressure issues that affect print reliability.
- Post-processing: resin parts must be washed and cured after printing to reach their final state.
16. Analysis
Under the same general PLA settings, the Bambu Lab X1E and Ultimaker S5 both produced very good results in bridge performance, reaching 36 mm before visible sagging appeared at 40 mm. The tolerance test clearly showed that 0.2 mm is the most reliable clearance value for fit-based assemblies in our conditions.
The Bambu Lab X1E achieved a good dimensional response in the XYZ calibration cube, measuring 24.92 mm for a nominal 25 mm cube. This small deviation indicates good dimensional consistency for practical prototyping. The Bambu calibration model also showed that isolated unsupported details can fail if local adhesion is lost due to movement or vibration during the process.
In the Ultimaker prints, the main visible defect was stringing. This did not come from a major geometry failure, but rather from retraction not being enabled correctly between separated features. This is a good reminder that machine capability and slicer settings must be evaluated together.
17. Conclusions
- The tolerance test showed that 0.2 mm is the most reliable clearance for fit-based FDM printed parts under our selected conditions.
- Both the Bambu Lab X1E and the Ultimaker S5 were able to bridge up to 36 mm without support, while 40 mm began to show filament sagging.
- The Bambu Lab X1E achieved a good overhang result up to 70°, although the filament became visible at the limit of the test.
- The Ultimaker S5 produced stable results up to 60°, with visible quality reduction when reaching 70°.
- The measured XYZ cube printed on the Bambu Lab X1E showed a small dimensional deviation of -0.08 mm, which is acceptable for prototyping applications.
- One of the main observed print failures was caused by insufficient adhesion in a moving unsupported region, demonstrating how vibration and local instability affect the result.
- Stringing in the Ultimaker tests showed that slicer settings such as retraction are as important as the mechanical quality of the printer.
- For SLA workflows such as the Form 4, orientation, support placement, hollowing, and drain holes are essential design decisions and must be considered from the start of the modeling process.