Assignment 3:- Computer-Controlled Cutting
learing outcome
In this assignment, I worked on computer controlled cutting. I learned how to use a laser cutting machine and a vinyl cutting machine. First, I understood how these machines work, how to prepare design files, and how to set the correct machine settings. During the learning process, I completed my group assignment, where we explored the machine together and understood safety rules and working principles. After that, I completed my individual assignment, where I independently used the machines and documented each step. This assignment helped me gain hands-on experience and confidence in using computer controlled cutting machines.
During this week, I designed a parametric construction kit and also created a logo for my laptop.
Group Assignment
Objectives of the Group Assignment
To learn how the laser cutting machine works.
To understand how to use the machine step by step.
To learn the safety rules while using the laser cutting machine.
To test speed and power settings and find the kerf value for different materials.
In this group assignment,
I worked on cardboard cutting and engraving tasks. I performed these tasks using different speed and power settings on 4 mm thick material and 3 mm thick material.
Mechine, tools and software
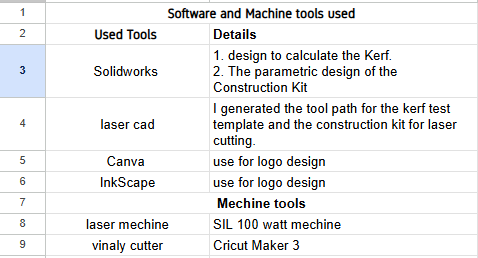
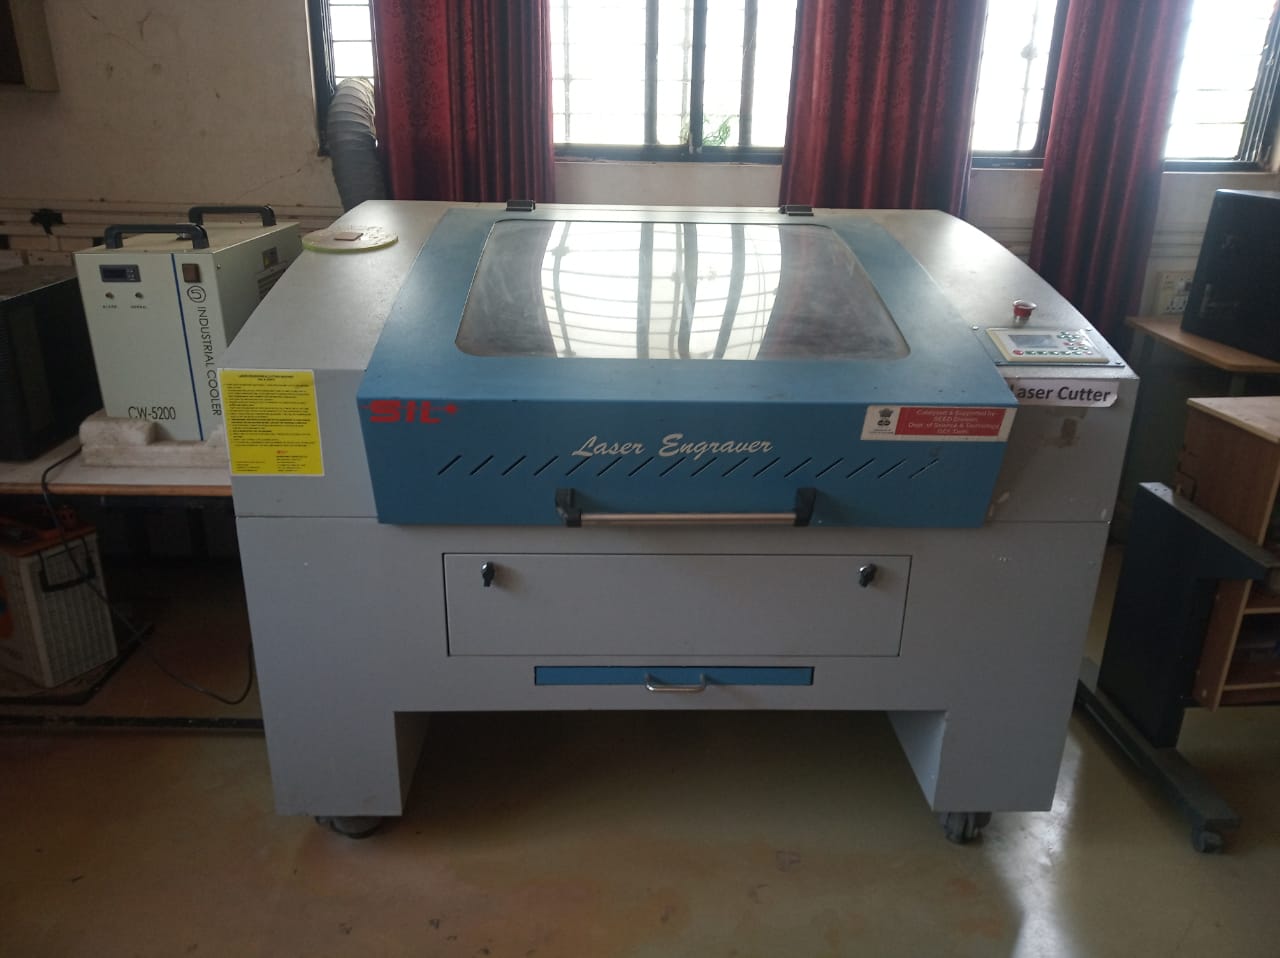
laser Mechine
A laser cutting machine works by using a high-power laser beam to cut or engrave material. First, a design file is created on a computer and sent to the machine. The laser beam is then focused on the surface of the material. When the laser moves along the tool path, it burns or melts the material, creating clean cuts or engravings. The speed and power settings control how deep and clean the cut will be. This process allows accurate and precise cutting without direct contact with the material.
Laser cutting machine in FABLAB at Vigyan Ashram
Name :SIL Laser Engraving - Cutting Machine
• Model No:1325 – 1318
• Laser Type:Co2 DC Glass laser Tube
• Laser Power:100 watt
• Processing Area(Bed size):900 x600 mm
• Working Speed :Adjustable
• Software: laser cad
• File Format Supported: .dxf .obj .svg
Step 1: First, turn on the servo voltage stabilizer.
This device helps maintain a stable voltage and protects the laser machine from voltage fluctuations
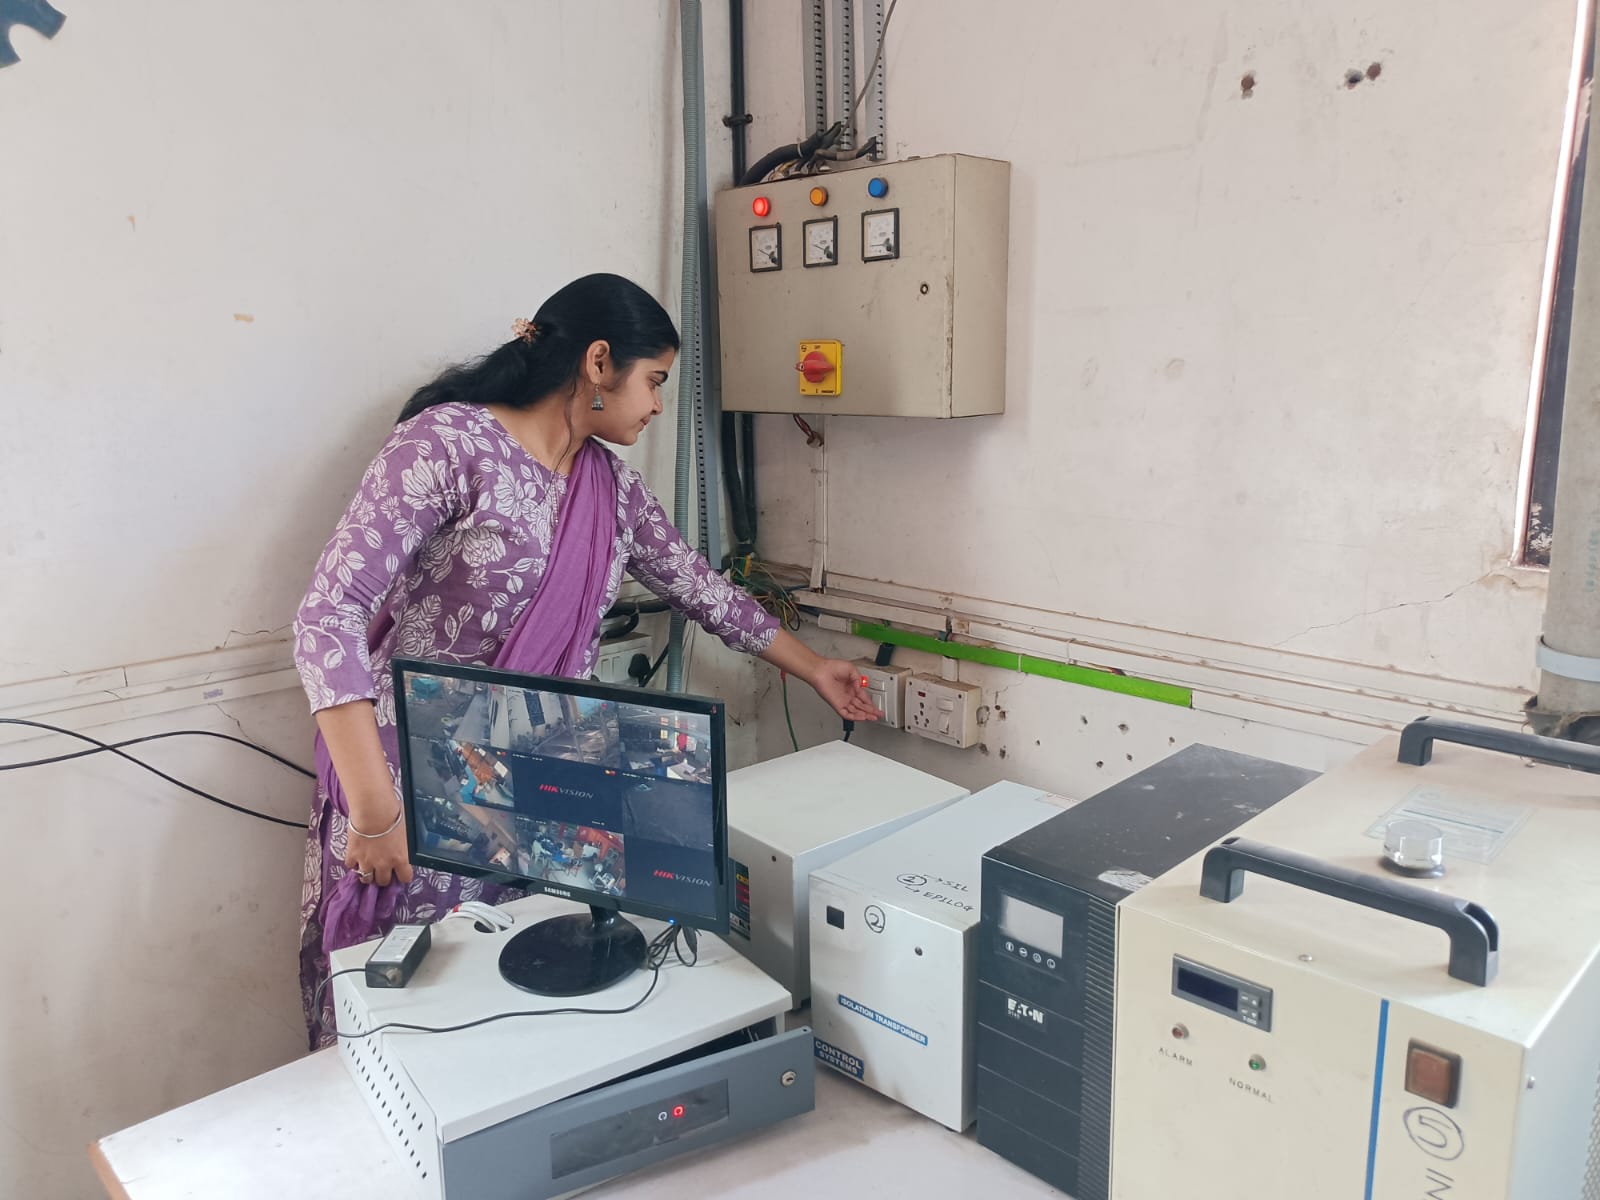
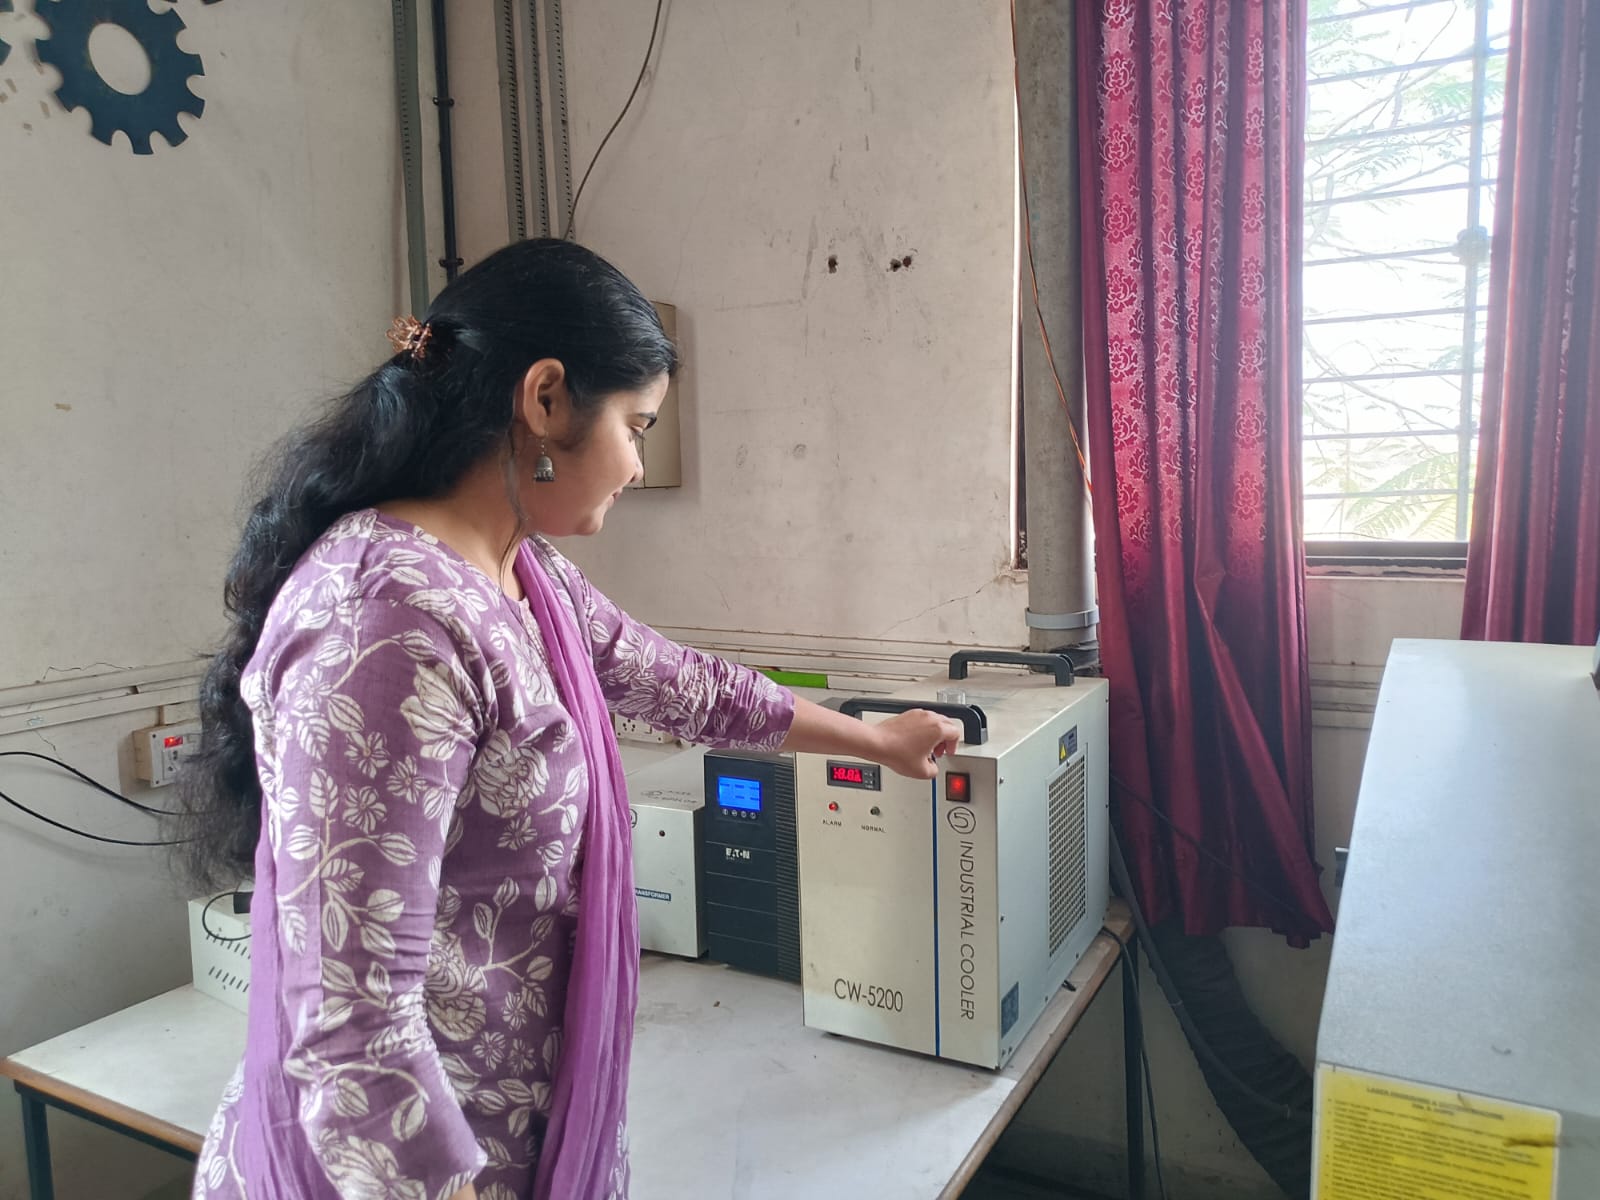
Step 2: Turn on the inverter. It provides backup power and helps in safely shutting down the machine during a power cut.
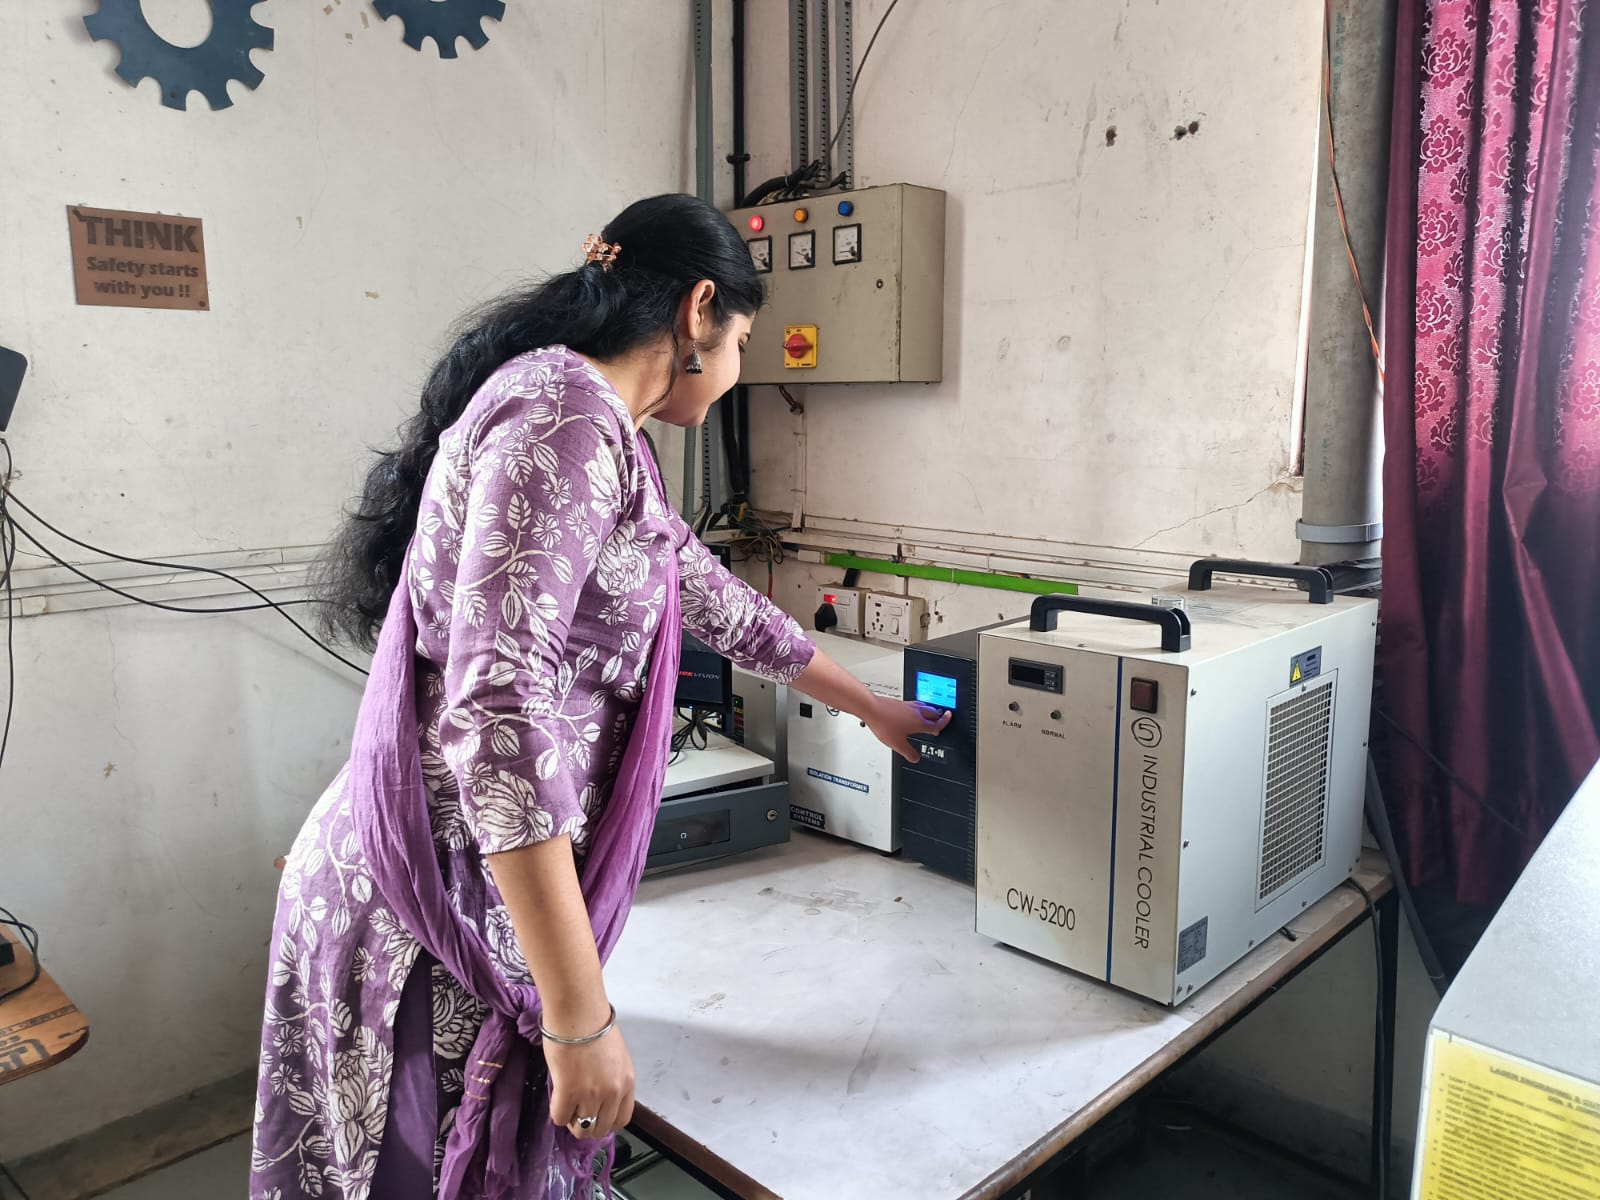
Step 3: Turn on the chiller/cooler. It is used to cool the CO₂ laser tube and should be filled with RO or de-ionized water.
If the chiller gives a high-temperature alarm, stop the machine immediately.
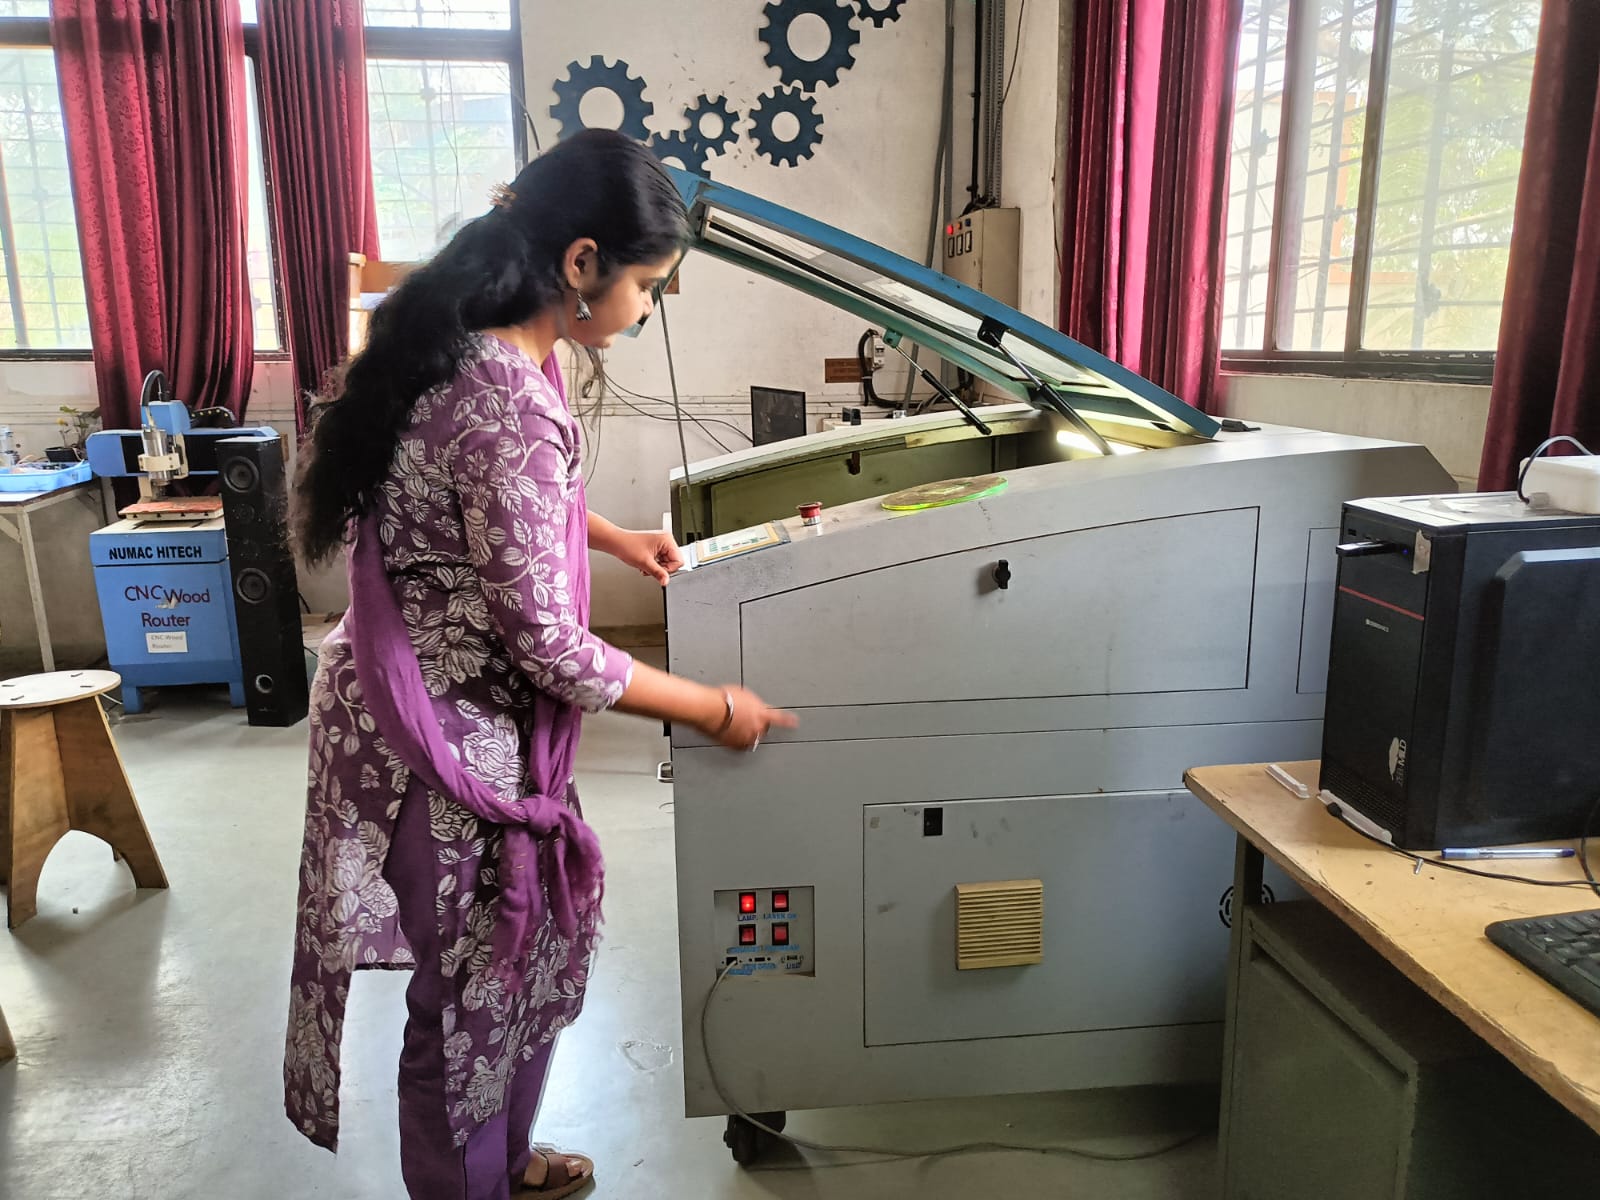
Next: Turn on the laser machine, nozzle air compressor, emergency switch, and control panel. The air compressor helps focus the laser beam and keeps the cutting area clean.
Some factor realated to Laser Cutter
Kerf:
Kerf is the thickness of the laser cut. The laser beam removes some material, so the final size becomes slightly smaller than the design.
Speed:
Speed is how fast the laser moves while cutting. Thicker materials need slower speed.
Power:
Power is how strong the laser beam is. It changes based on the material and whether we are cutting or engraving.
Safety Precautions for Laser Cutting Machine
Always turn on the exhaust system before cutting any material.
Do not leave the machine unattended while it is running.
Avoid looking directly at the laser beam, as it can harm the eyes.
After finishing the work, turn off the laser cutting machine properly.
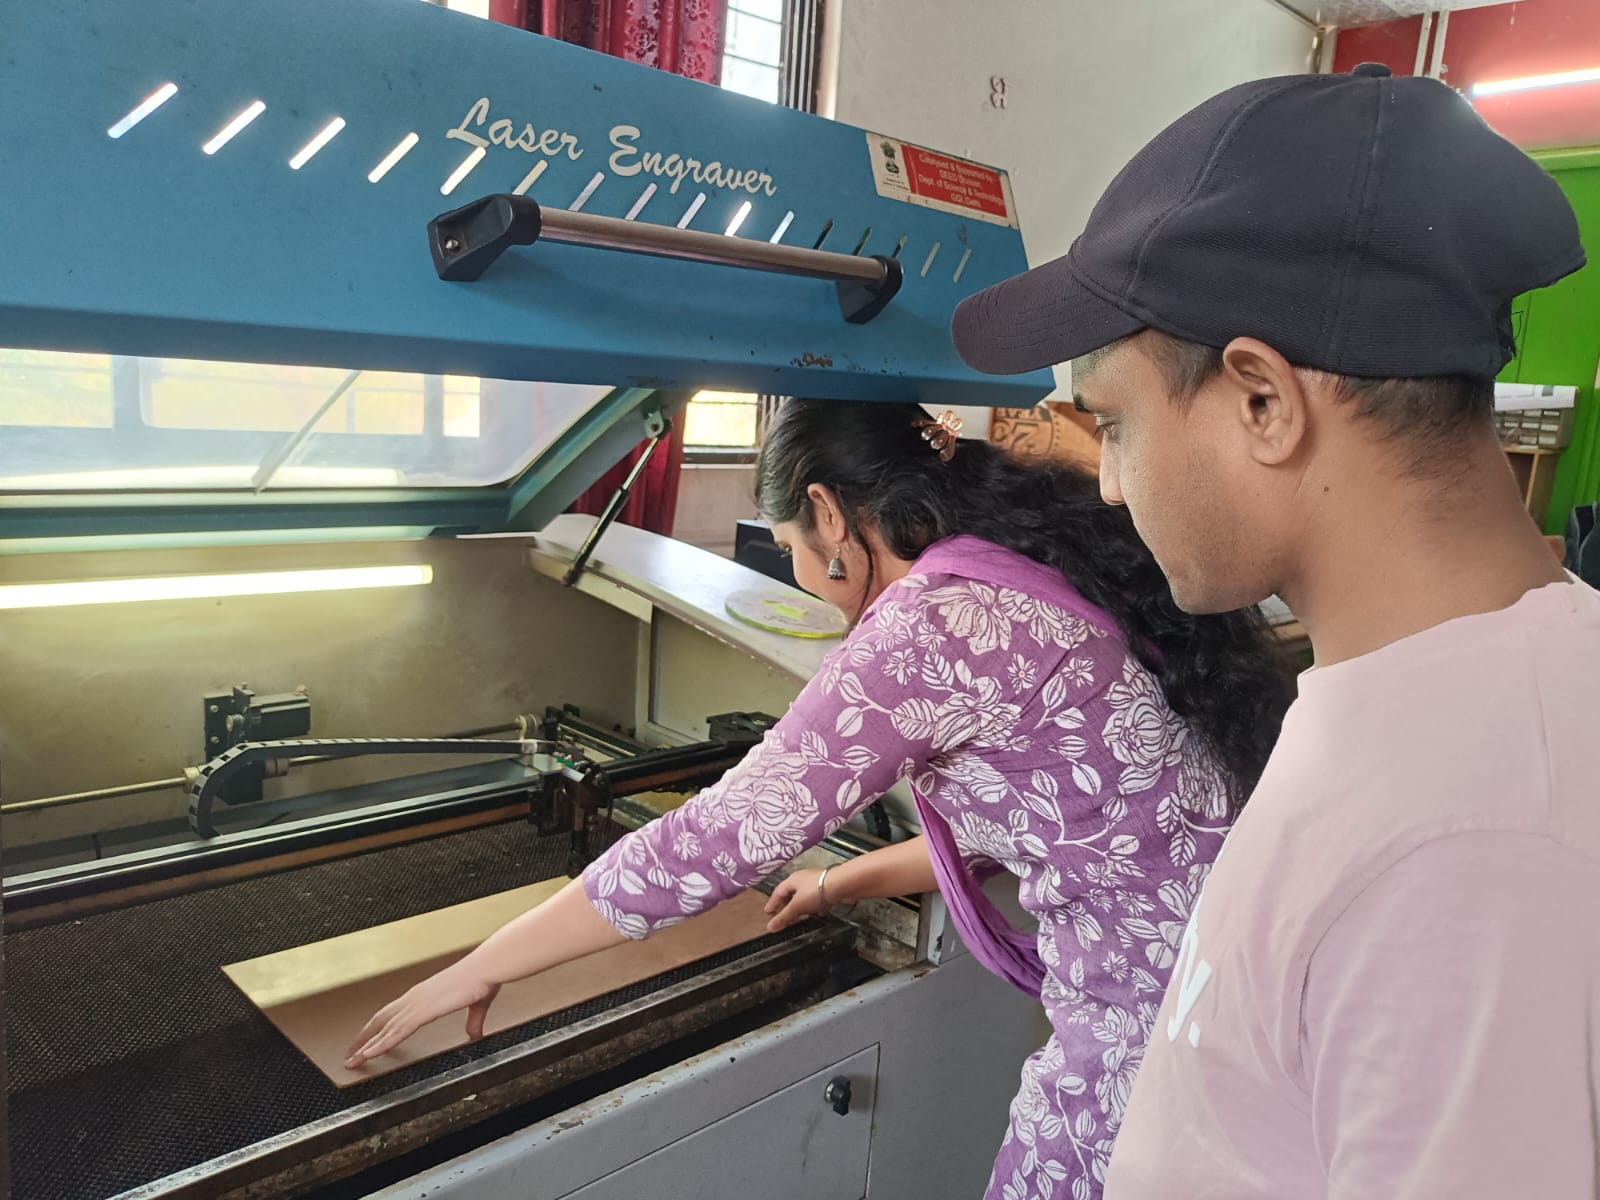
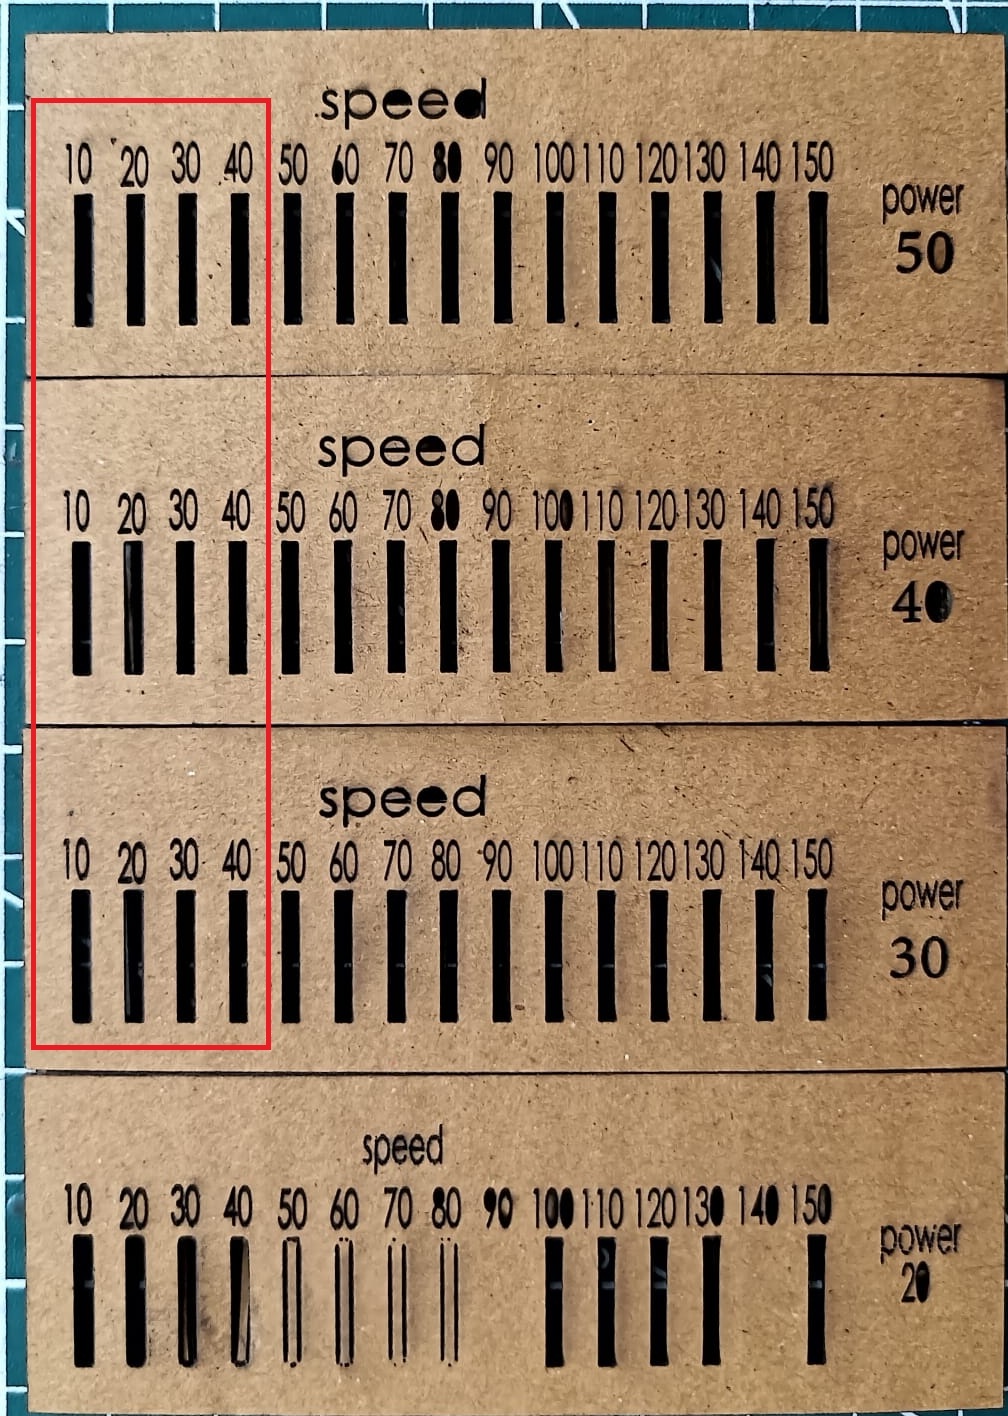
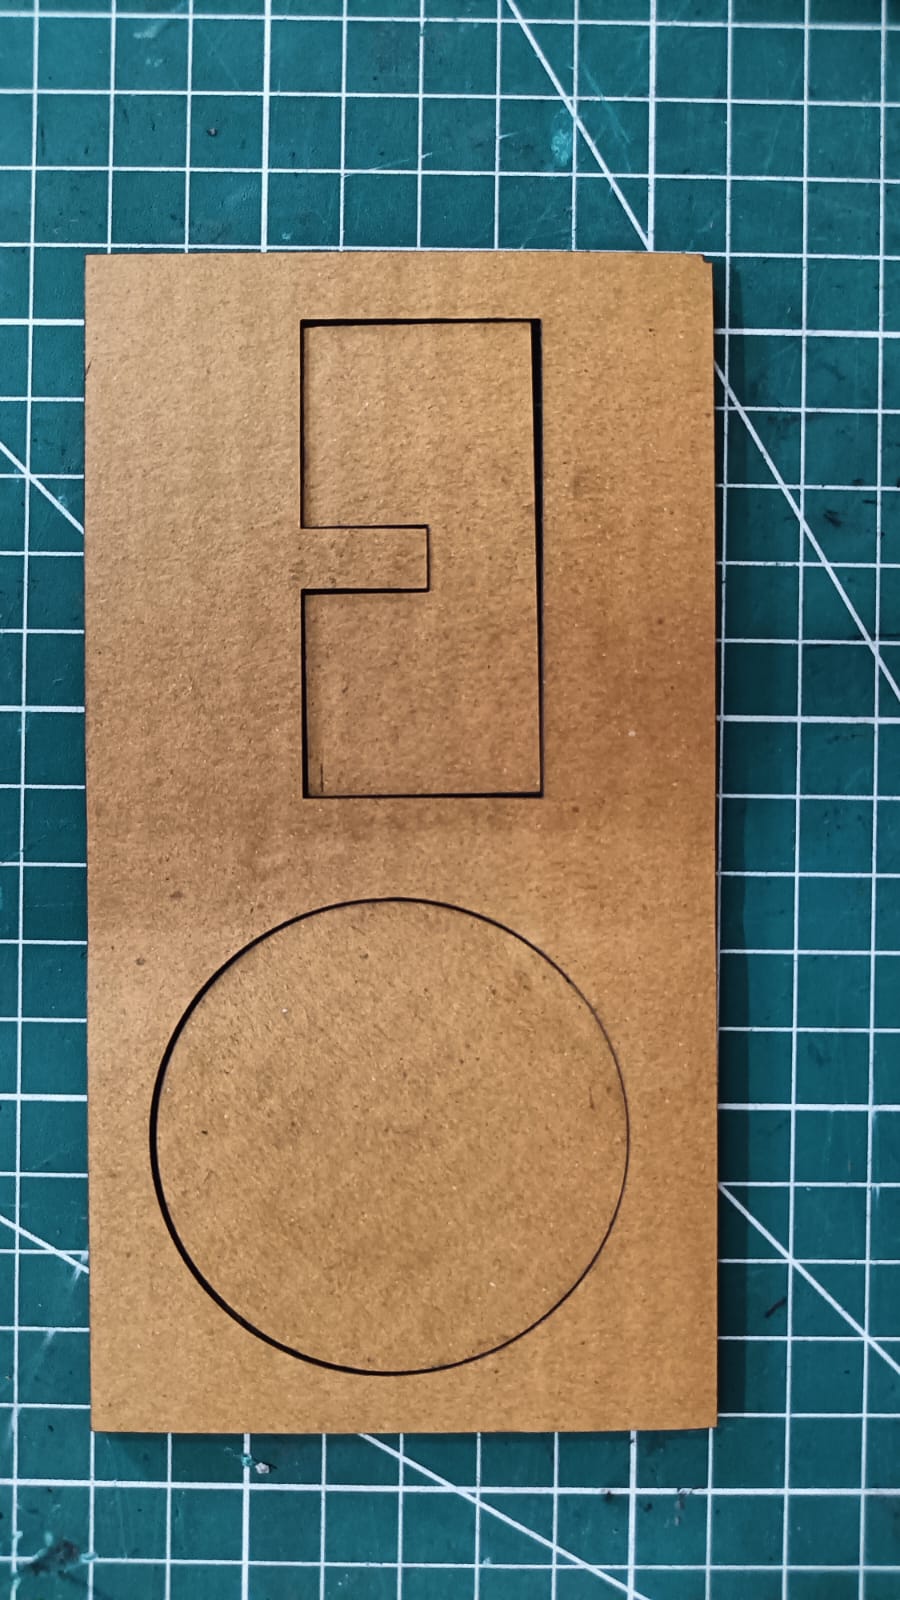
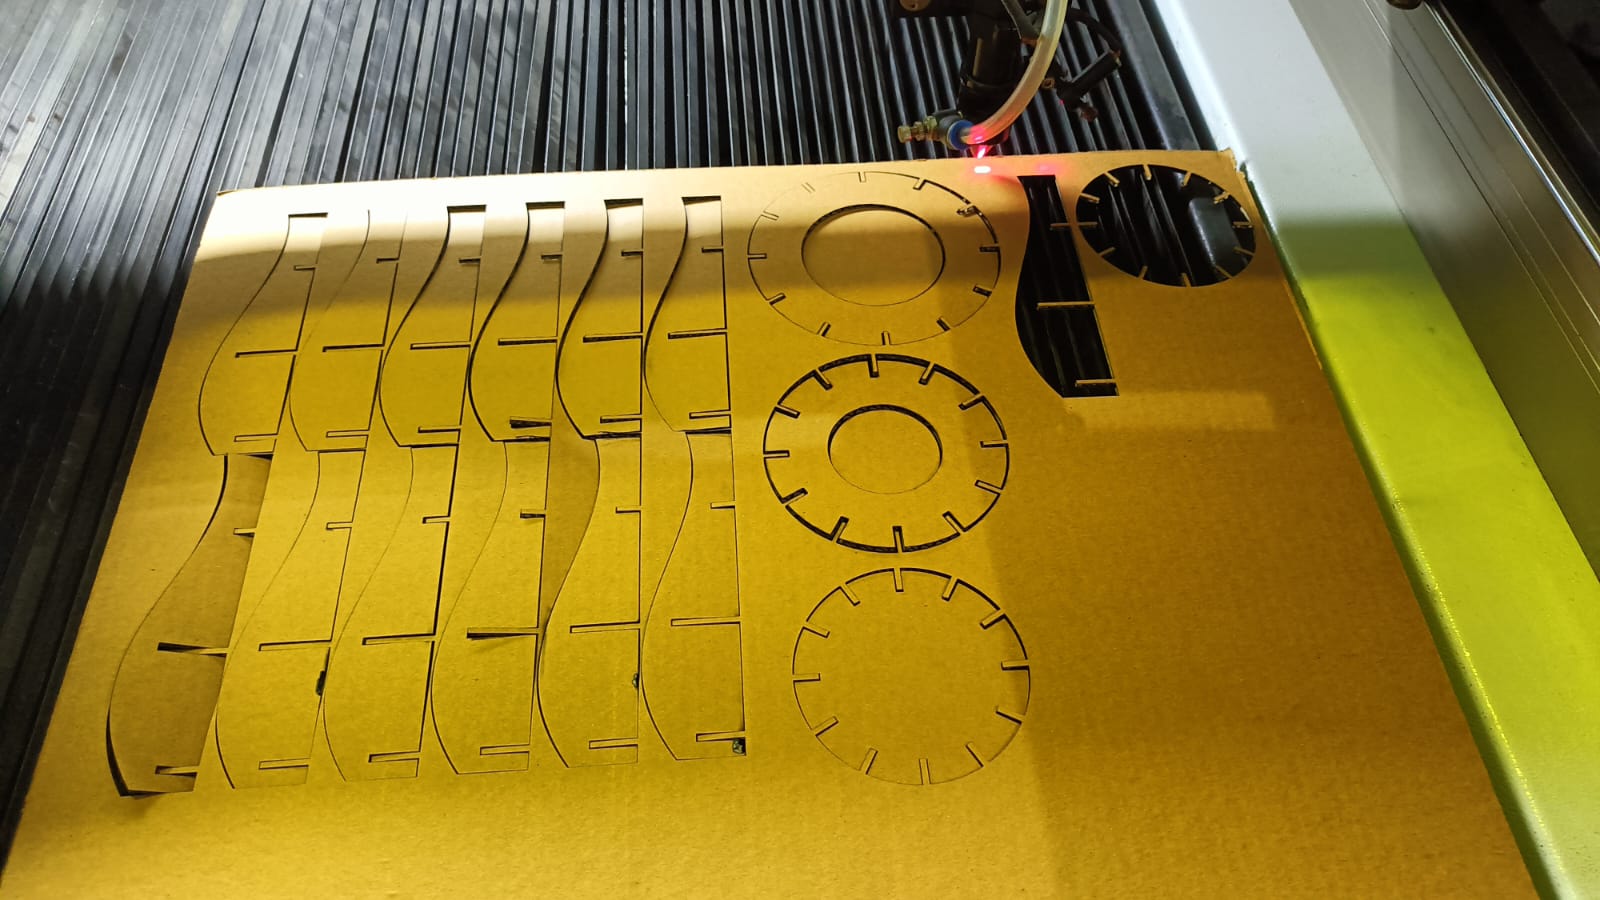
In this group assignment, we cut 3 mm and 4 mm cardboard sheets to test cutting, engraving, and slot fitting.
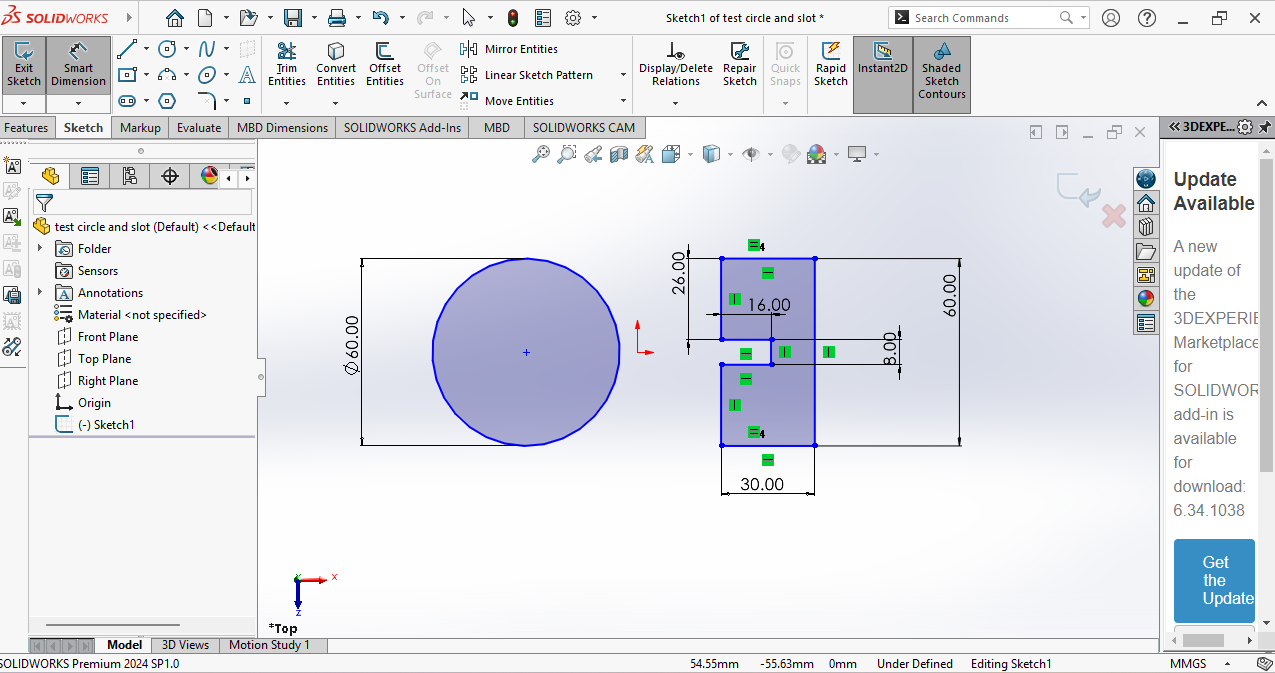
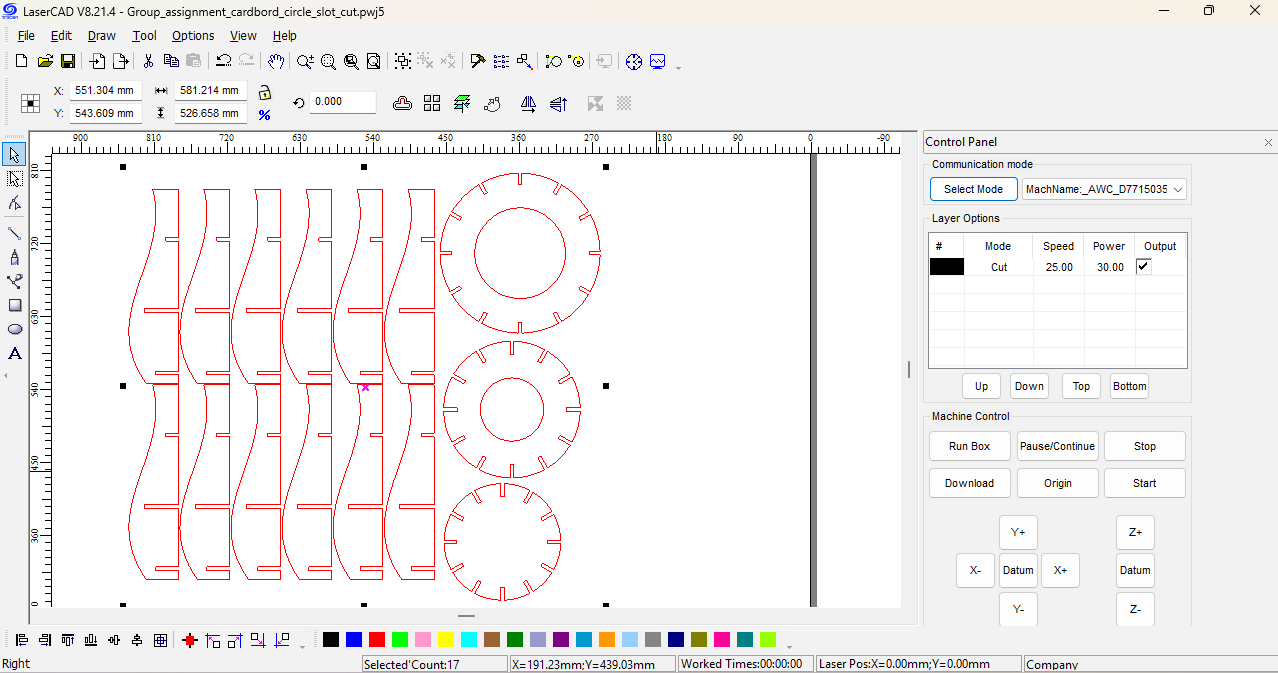
For cutting I first created the design in SolidWorks. After completing the design, I exported the file in a suitable format for laser cutting.
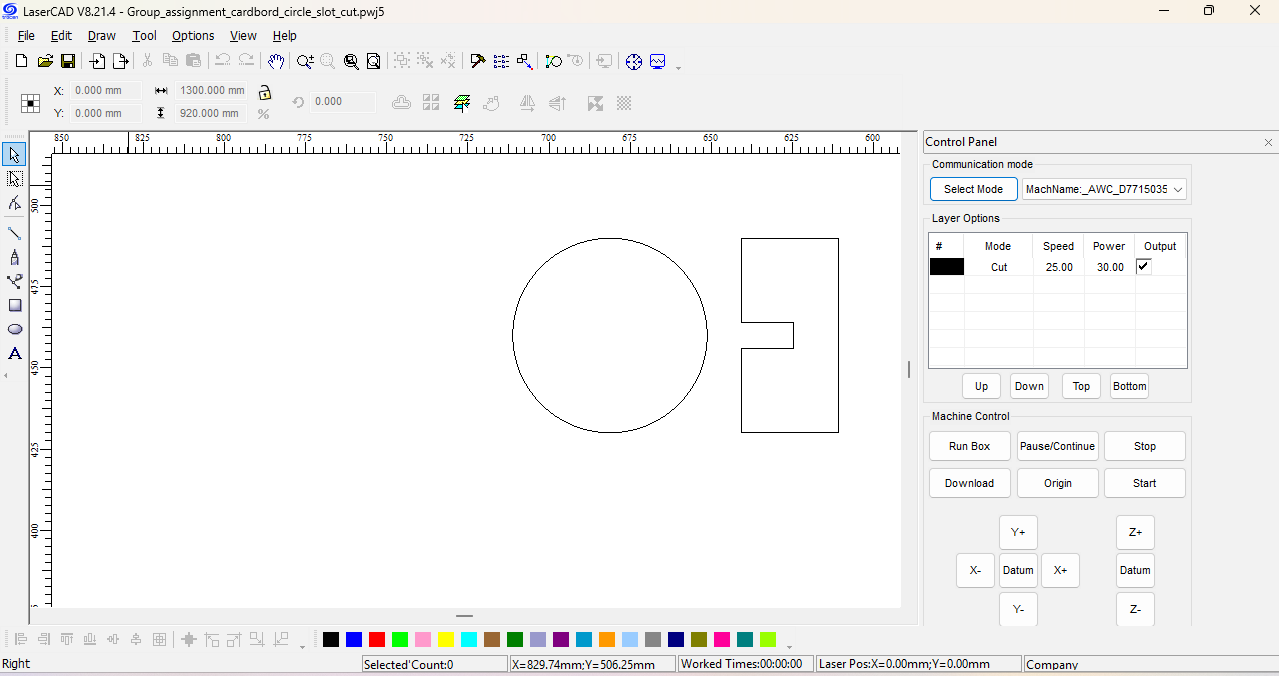
Then, I opened the design in LaserCAD software, which is used to control the laser cutting machine. In LaserCAD, I set different layers for cutting and engraving and adjusted the speed and power settings according to the material thickness.
After checking all settings, the file was sent to the laser machine for cutting and engraving.
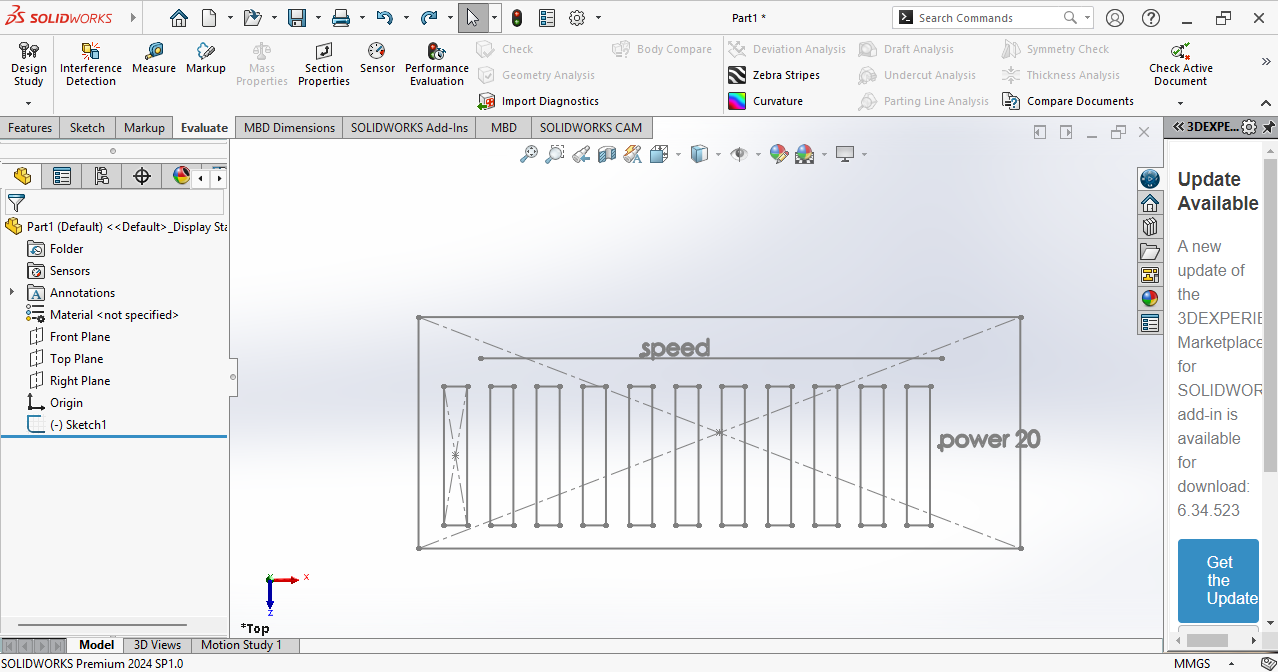
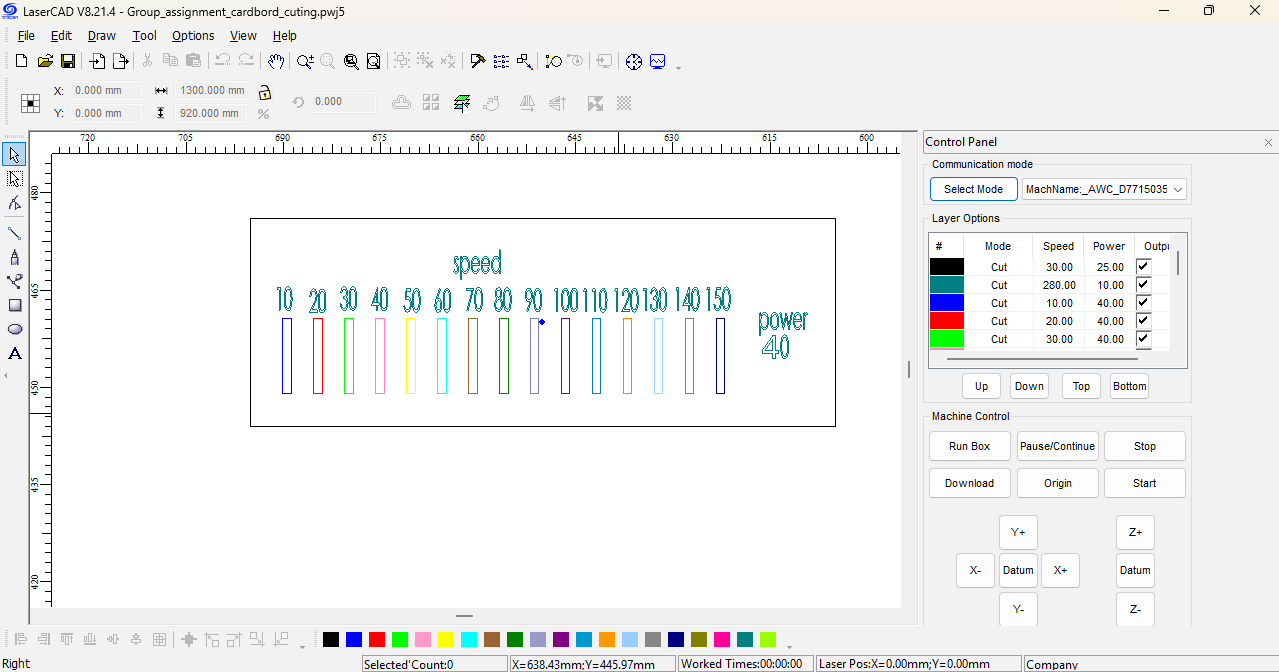
This file was used to cut 4 mm thick cardboard using different power and speed settings. Multiple test cuts were performed to observe how changes in laser power and cutting speed affect the cutting quality, depth, and edge finish.
From the results, it was possible to identify the optimal power and speed combination required for clean cutting on 4 mm material.
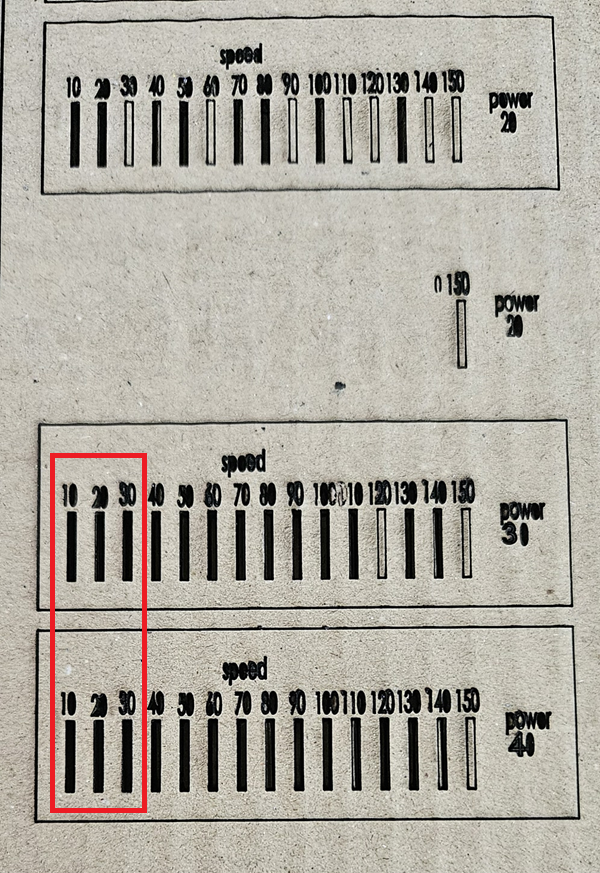
Conclusion: For 4 mm cardboard, the best cutting results were achieved when the machine was operated at a speed between 10–30 and power between 30–40.
These settings provided clean cuts and proper material separation on our laser cutting machine.
The same design file was also used to cut 3 mm cardboard.
Different power and speed settings were tested on the 3 mm material.
The cutting quality results were observed and compared.
This helped us understand the correct settings for thinner material.
Conclusion: For 3 mm cardboard, the best cutting results were obtained at a speed range of 10–50 and power range of 20–50.
These settings gave clean and accurate cuts on the material.
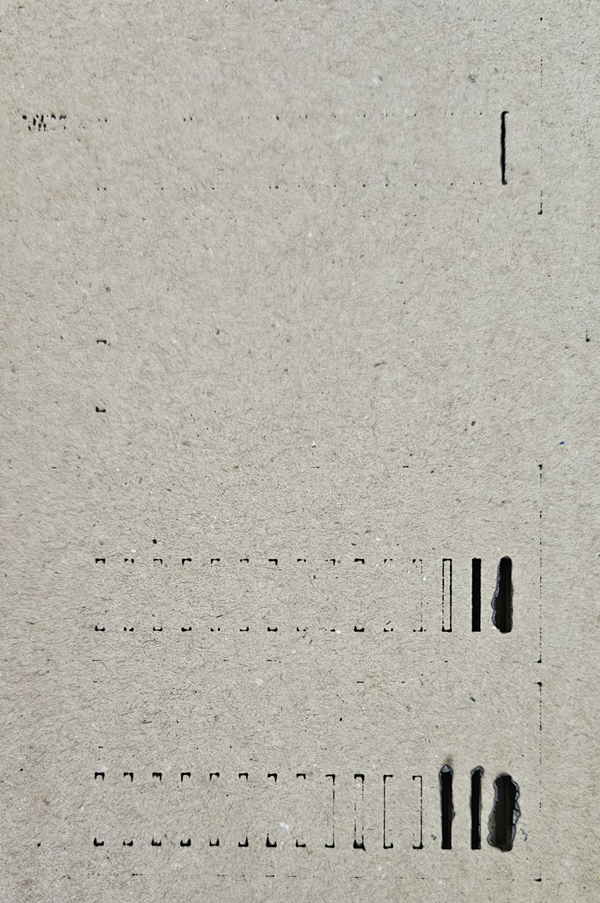
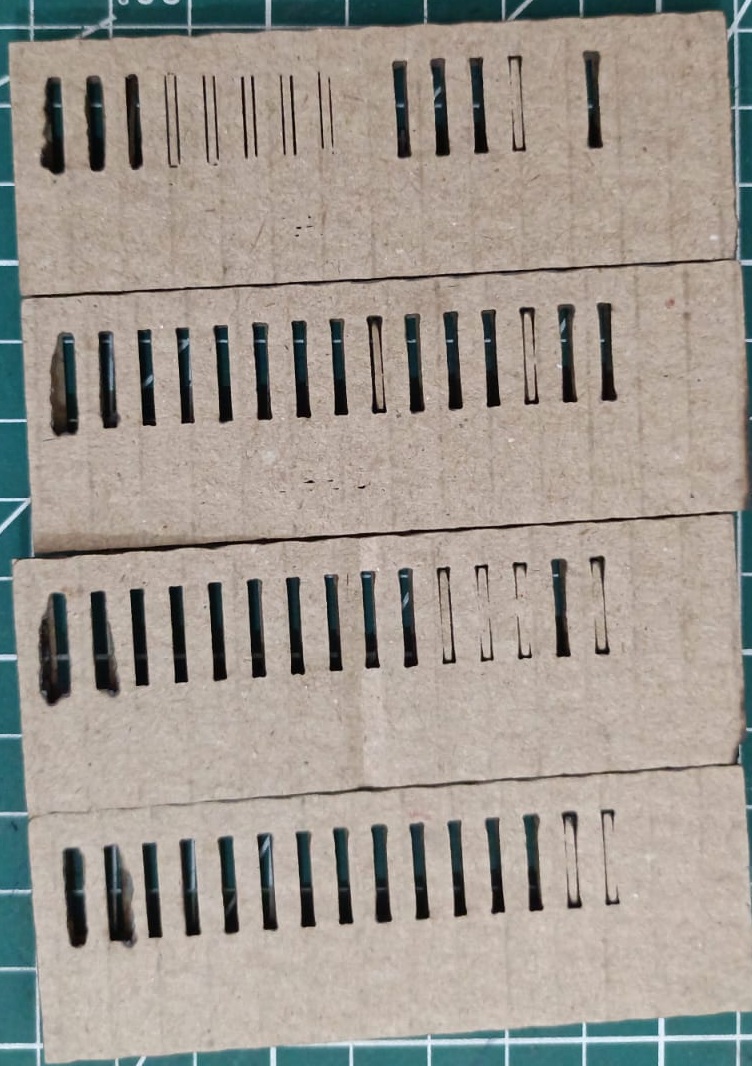
After that, we performed engraving on 4 mm and 3 mm cardboard using suitable laser settings.
The engraving quality was observed by changing the power and speed values.
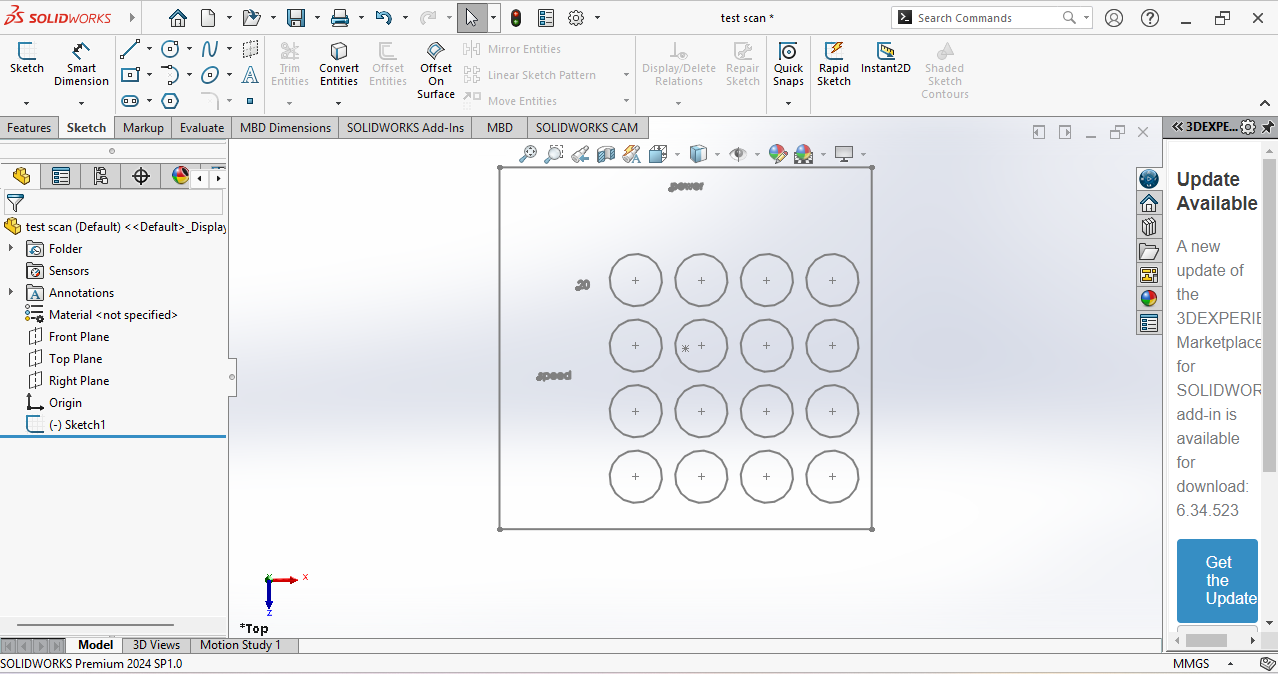
The design file was imported into LaserCAD, and different speed and power settings were set for each circle.
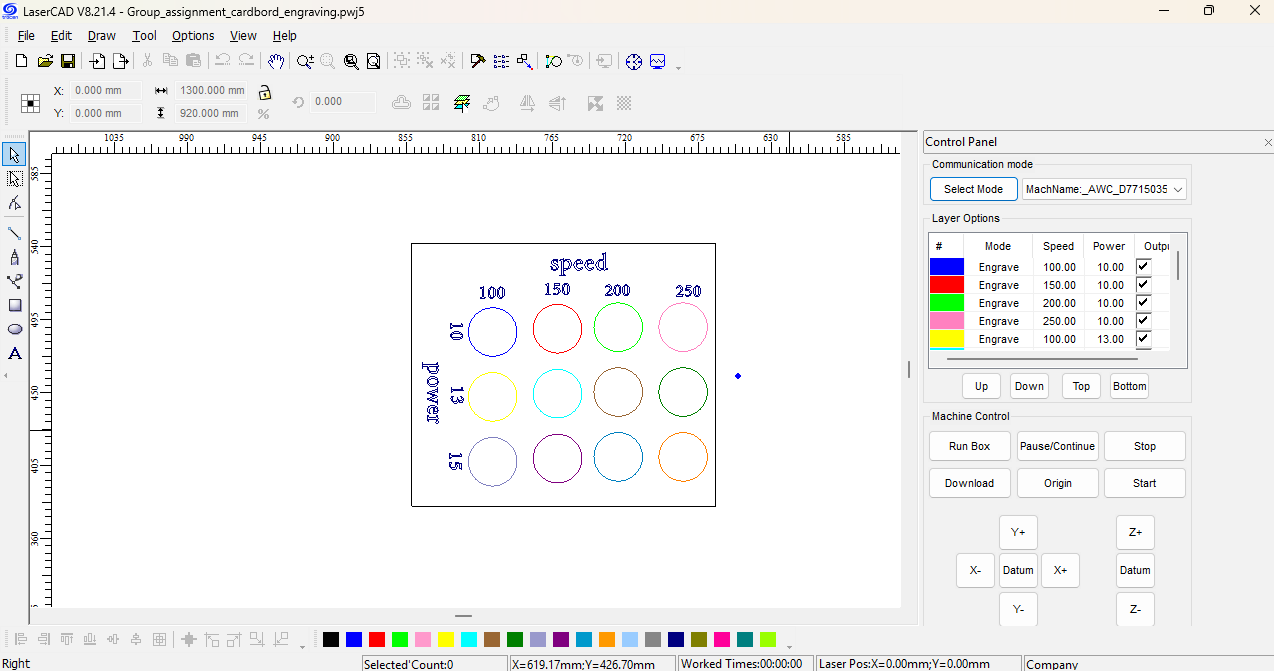
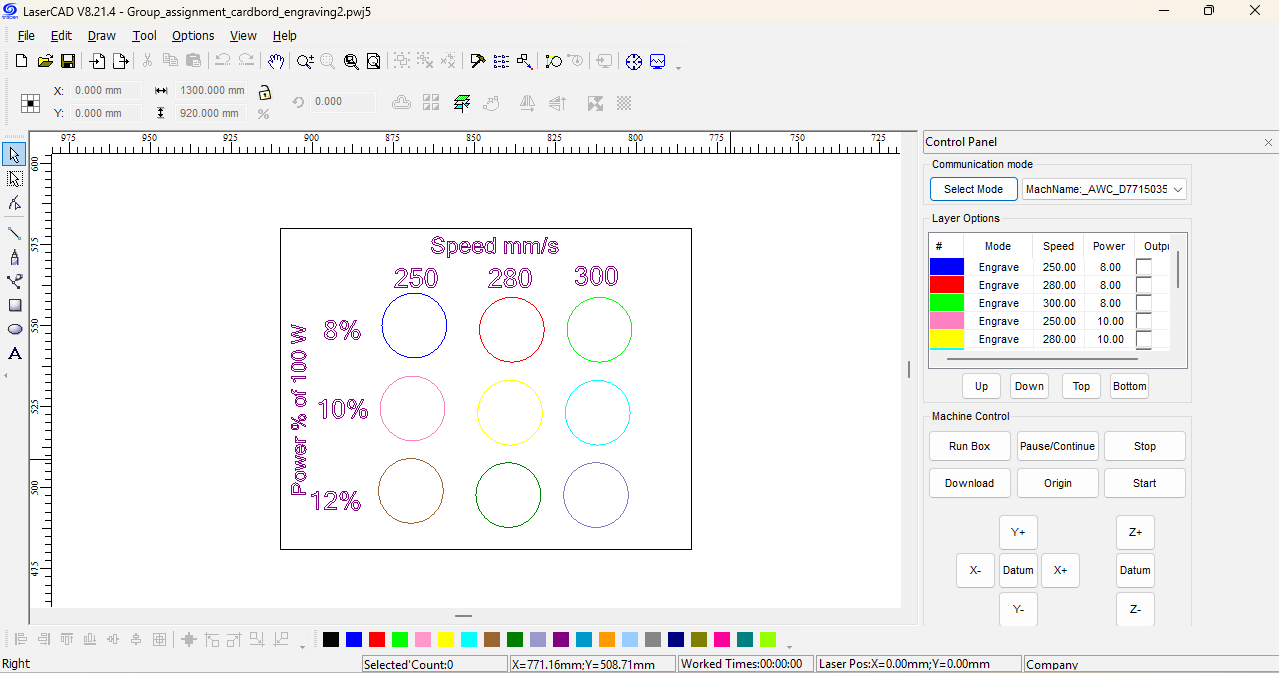
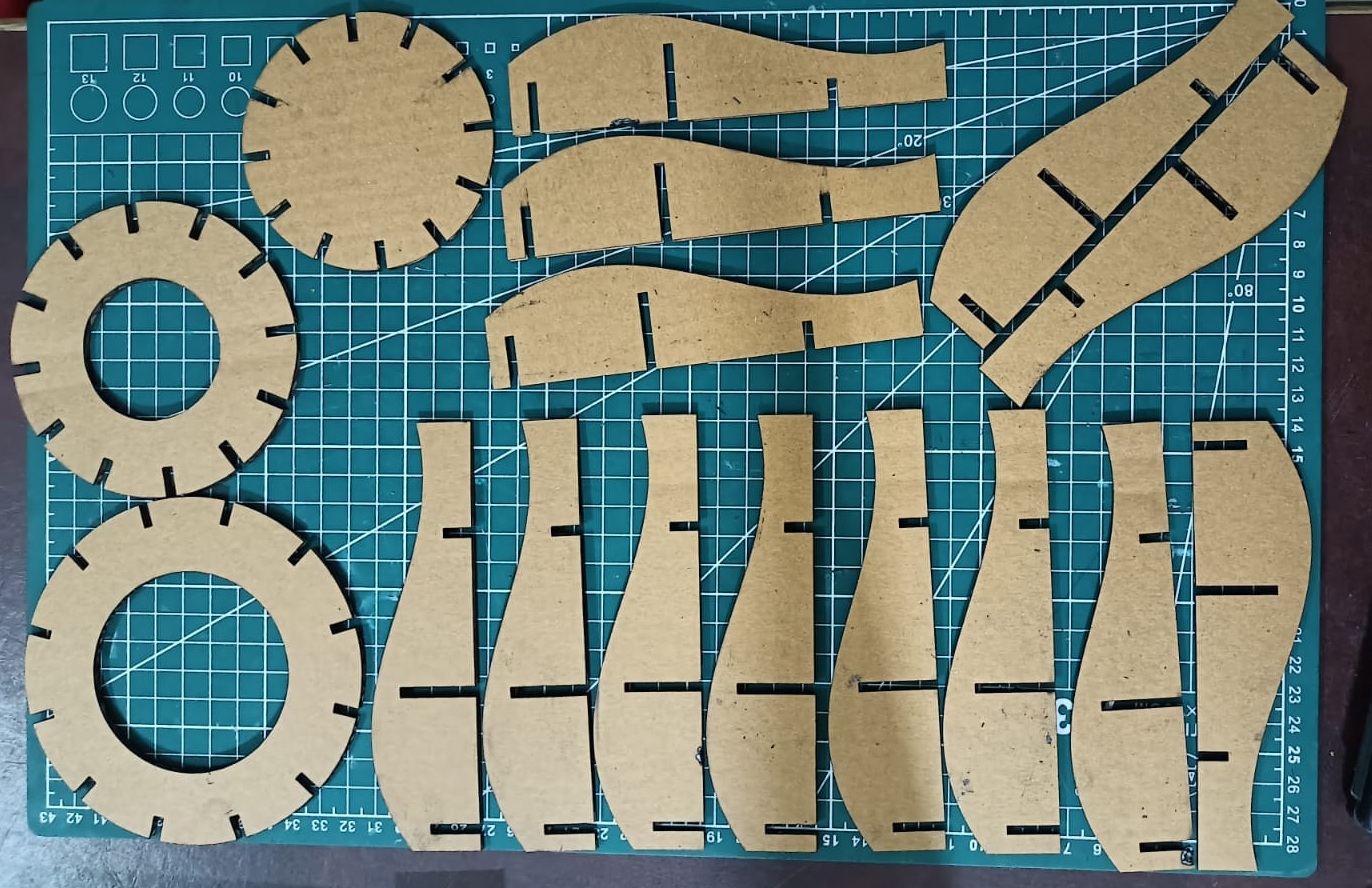
After that, the results are shown in the images.
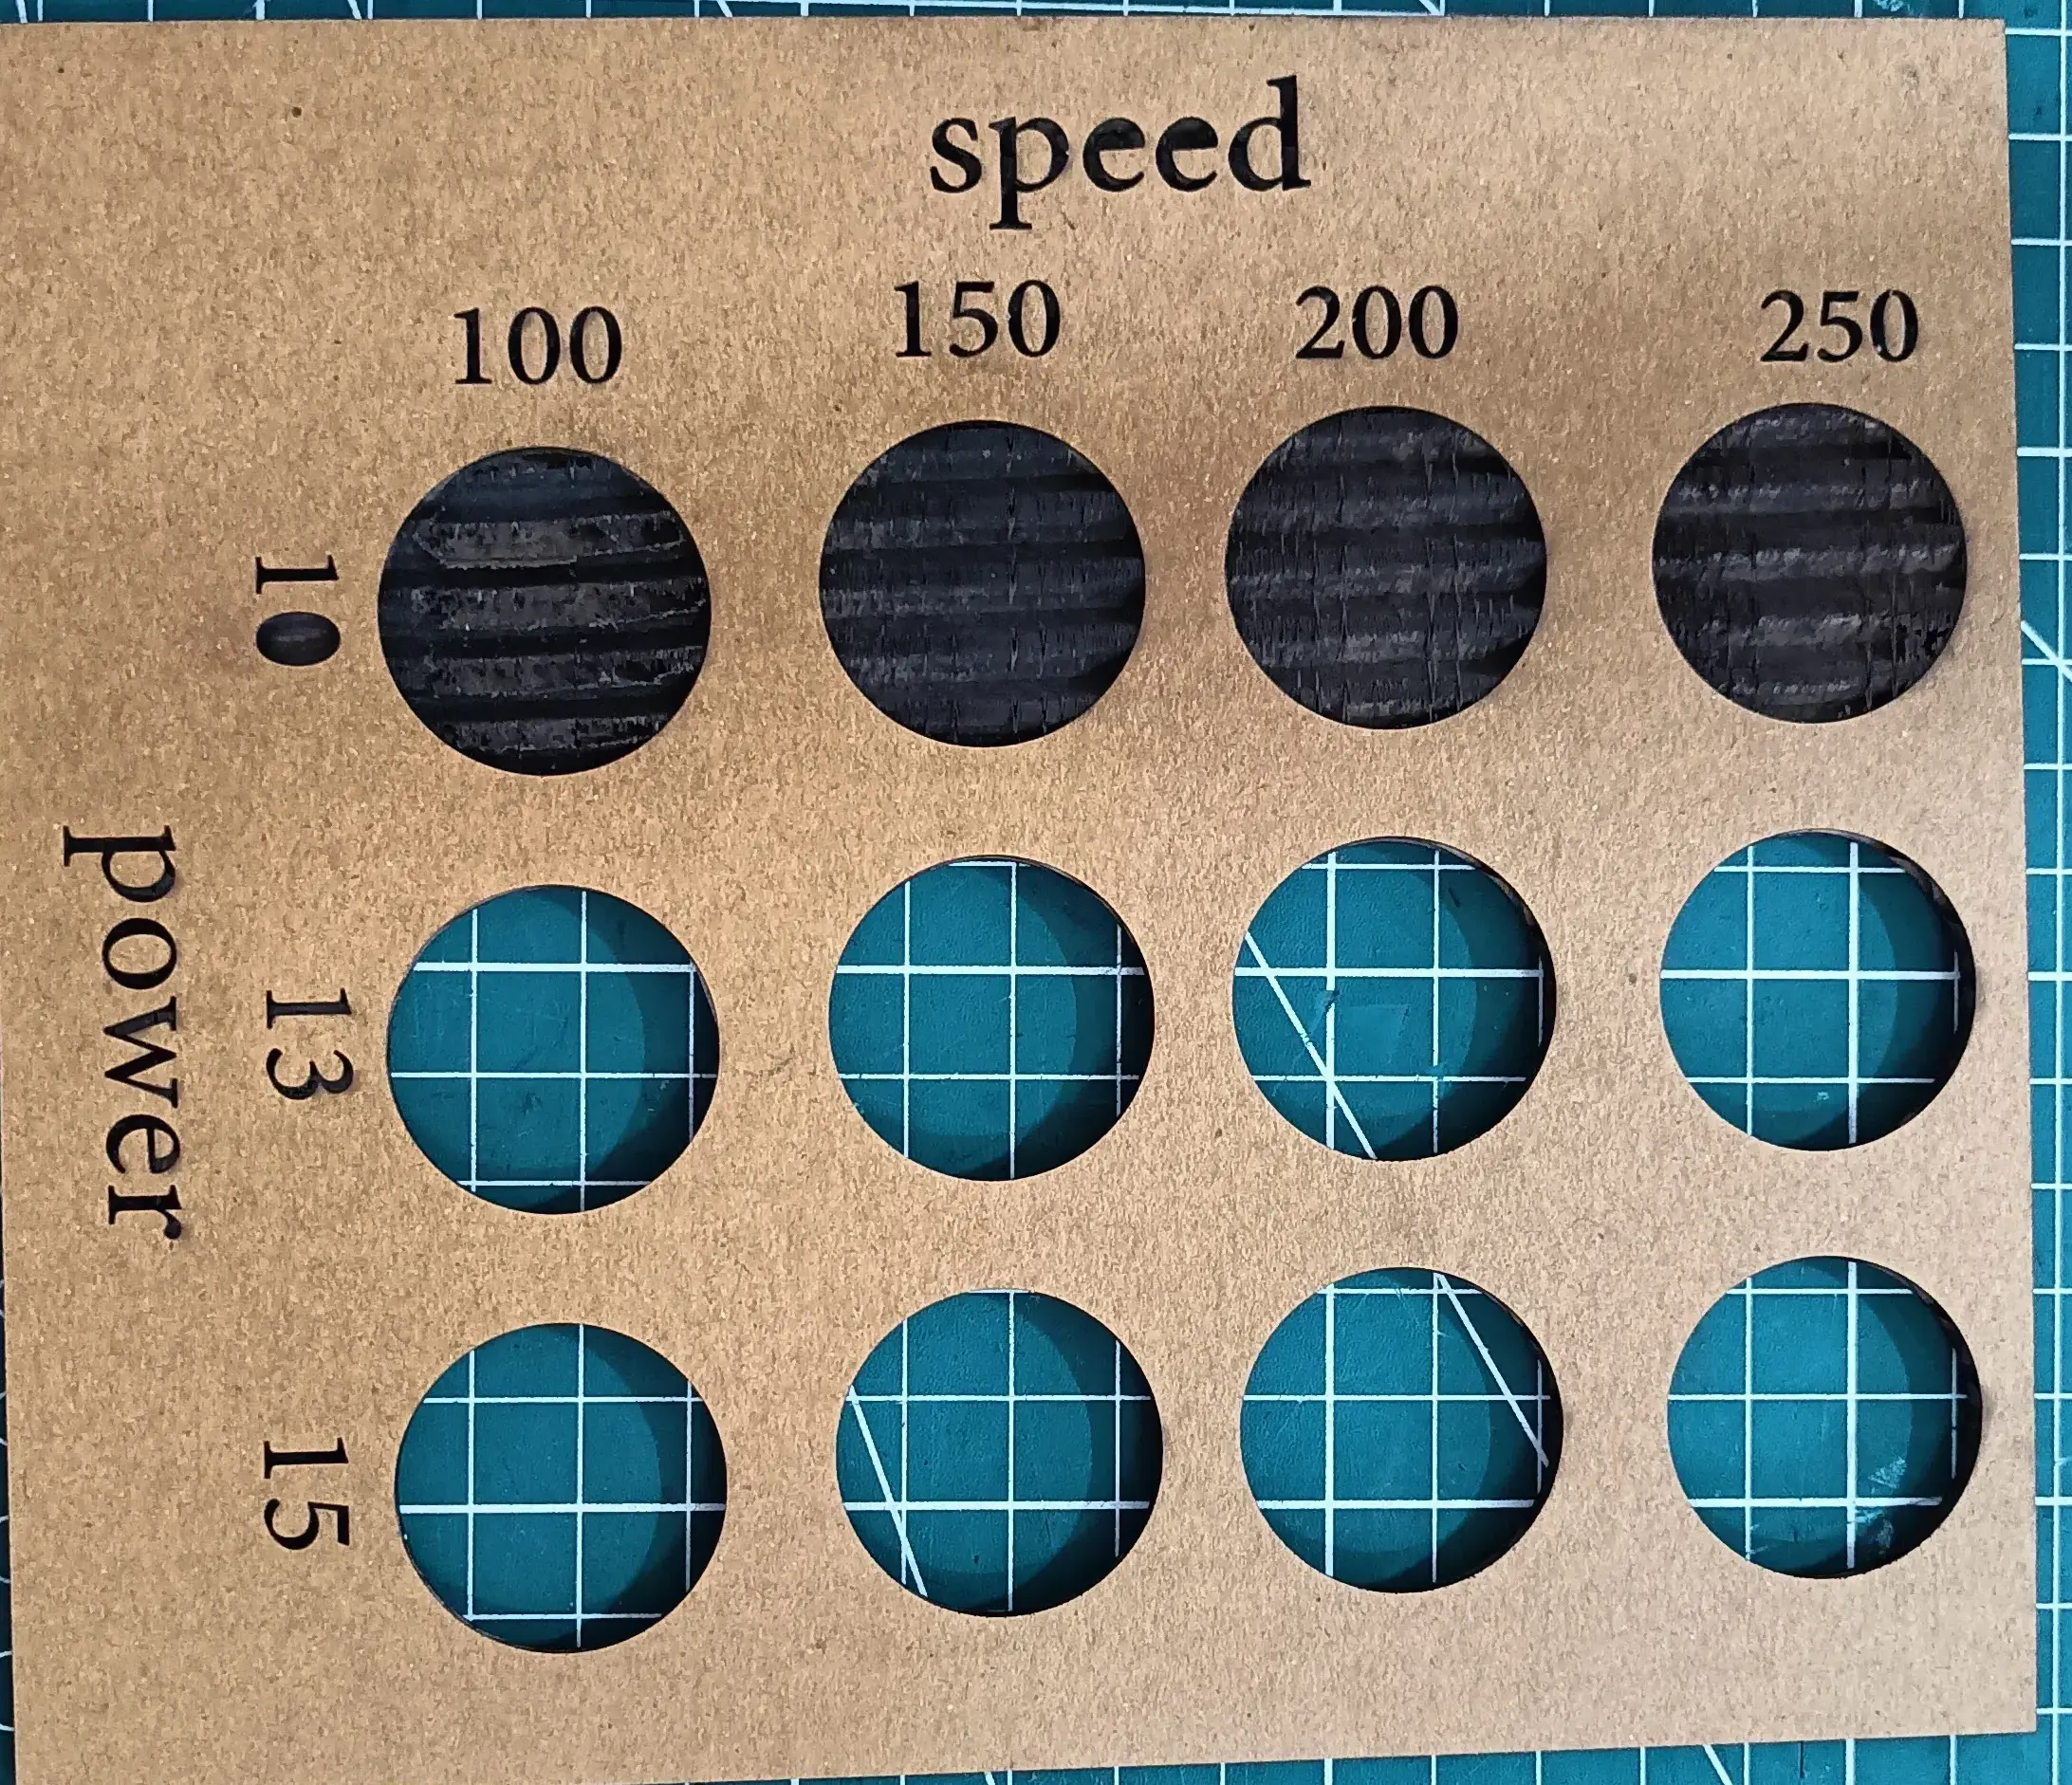
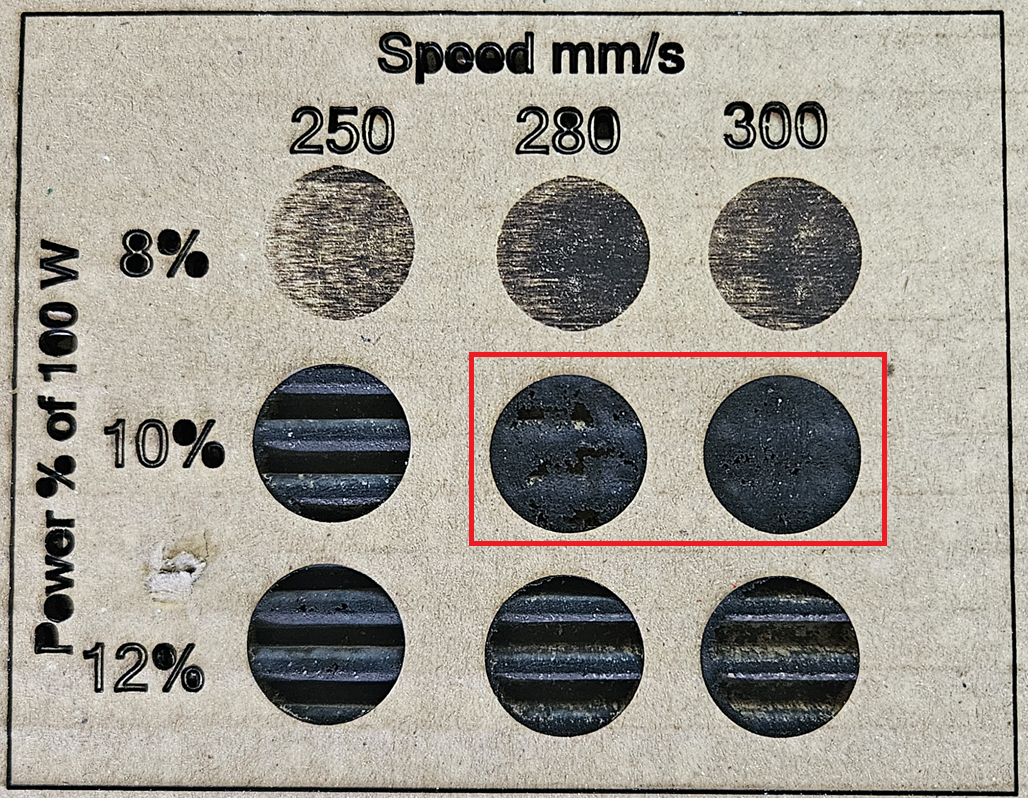
Conclusion: Good quality engraving on 4 mm cardboard was achieved at a speed of 280–300 and power of 10%.
These settings produced clear and clean engraving results.
We used the same design for hole cutting to keep the size and alignment accurate.

We calculated the kerf value for the 3 mm sheet because we are using 3 mm material for our construction kit.
Knowing the kerf value helps us adjust the slot size so that the parts fit properly after laser cutting.
After cutting,
we checked and measured the actual dimensions of the cut piece.
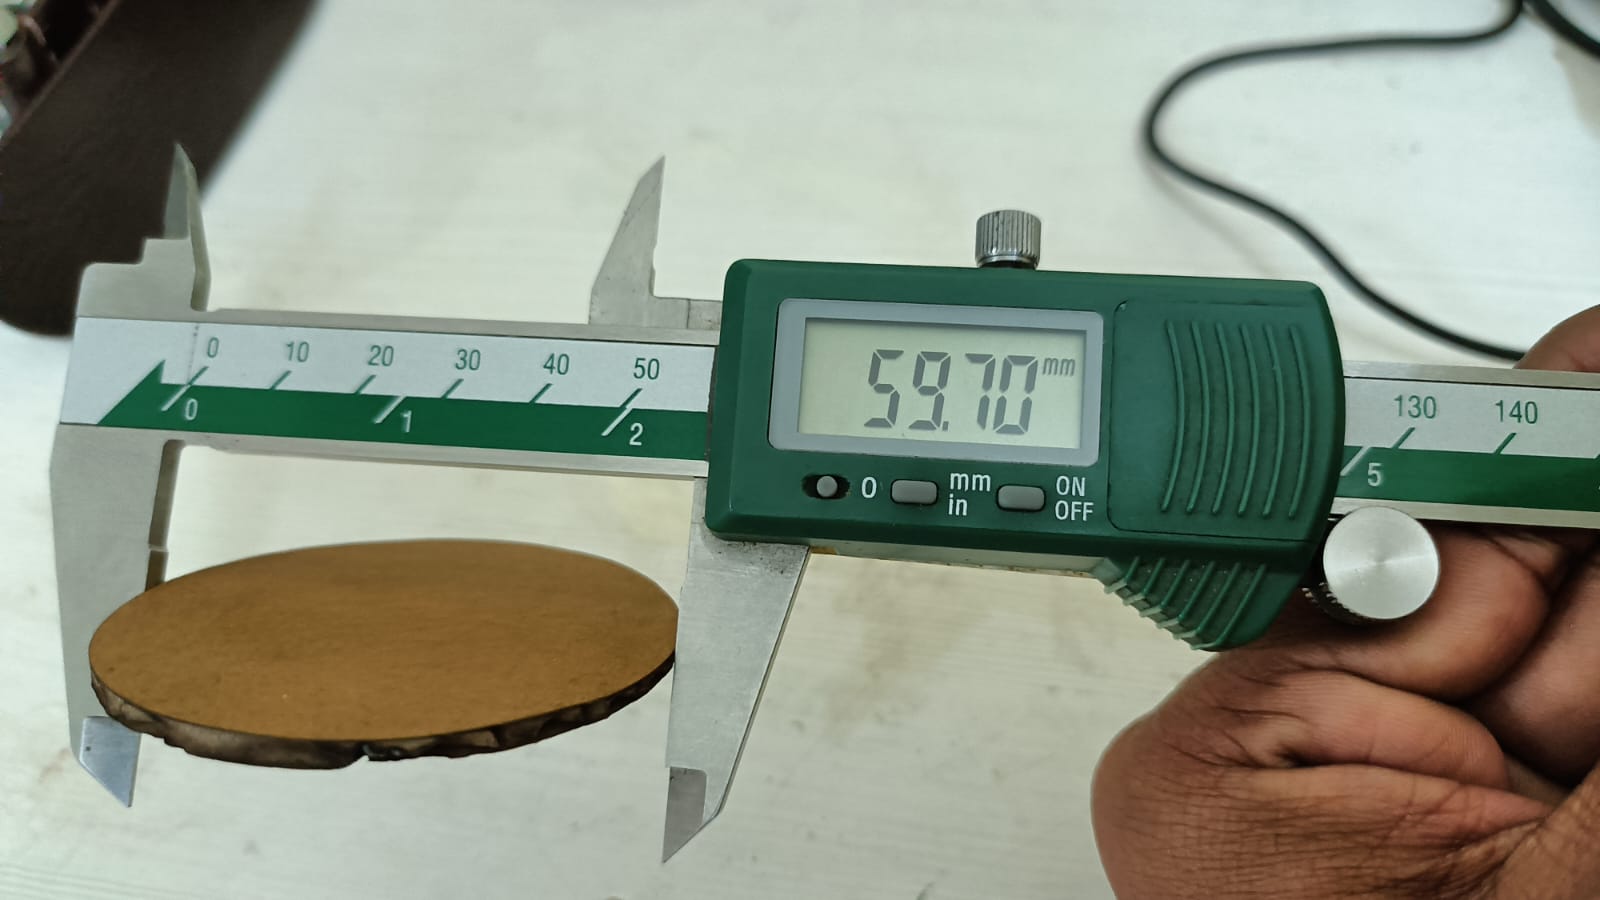
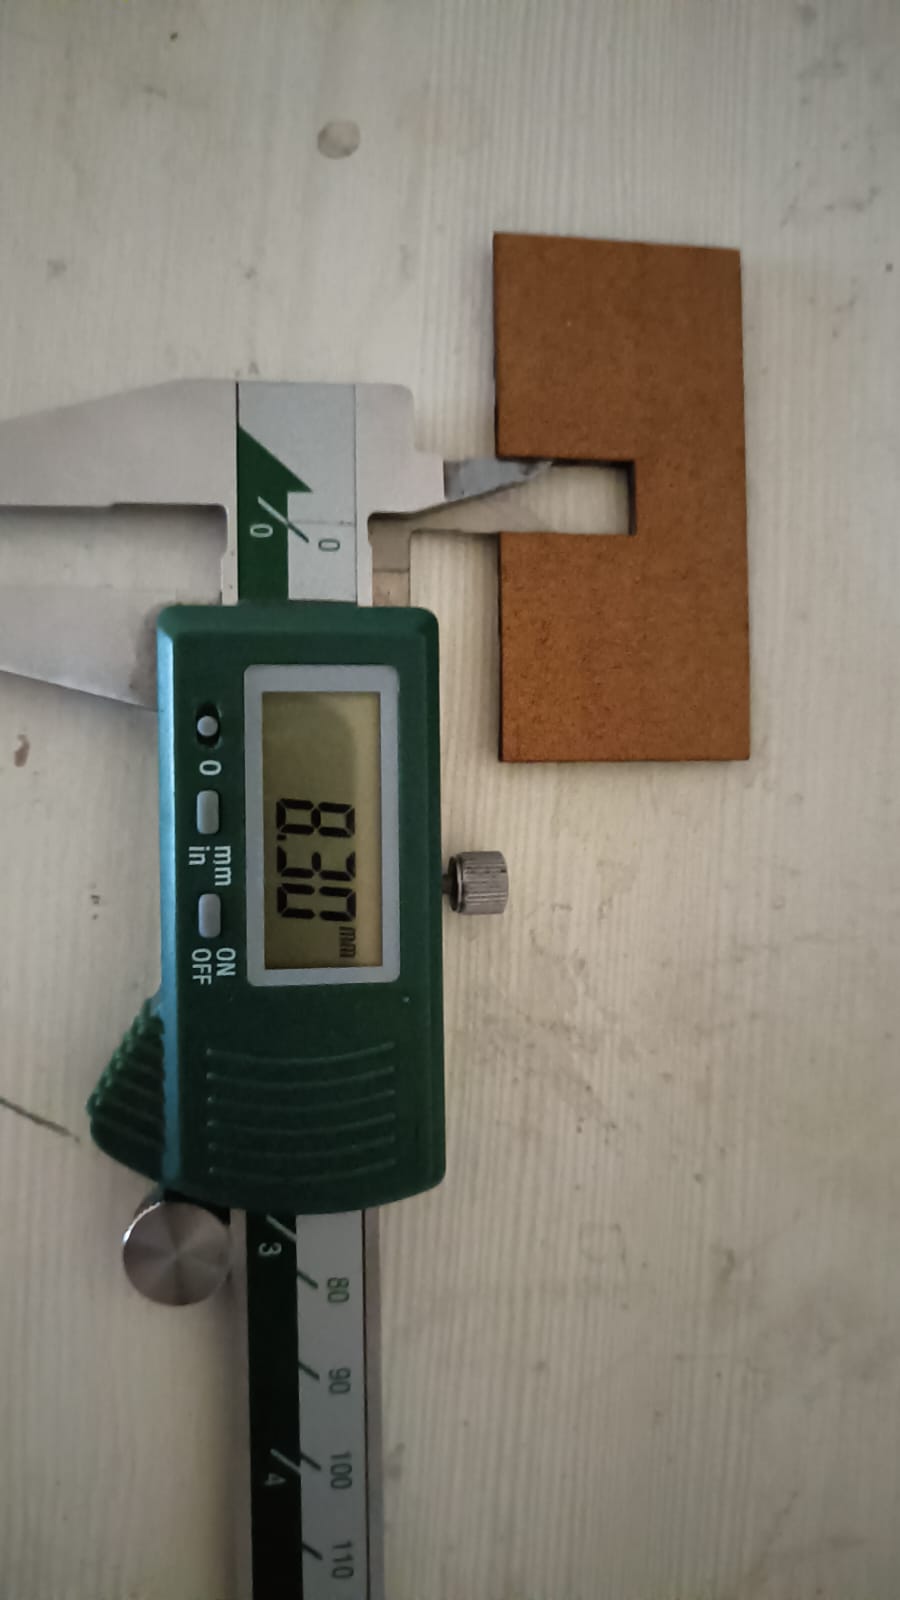
The designed circle diameter was 60 mm, but after laser cutting, the measured diameter was 59.70 mm.
Similarly, the designed slot width was 8 mm, and the measured dimension after cutting was 8.32 mm.
This dimensional variation is due to the laser kerf effect.
Kerf formula= design dimension—after cut dimension /2
kerf= 8mm - 8.30mm/2
kerf=0.15mm
The kerf value for 3 mm cardboard is 0.15 mm.
Click here more about Group Assignment
Individual Assignment
In the group assignment, we calculated the kerf value of 3 mm cardboard. After that, I used the same 3 mm cardboard to make my construction kit.
I designed the whole model in SolidWorks and documented the complete process step by step.
Step 1: I used SolidWorks and created a new design by selecting Part.
Then I chose the Front Plane to start my work. After that, I drew a sketch according to the required dimensions.
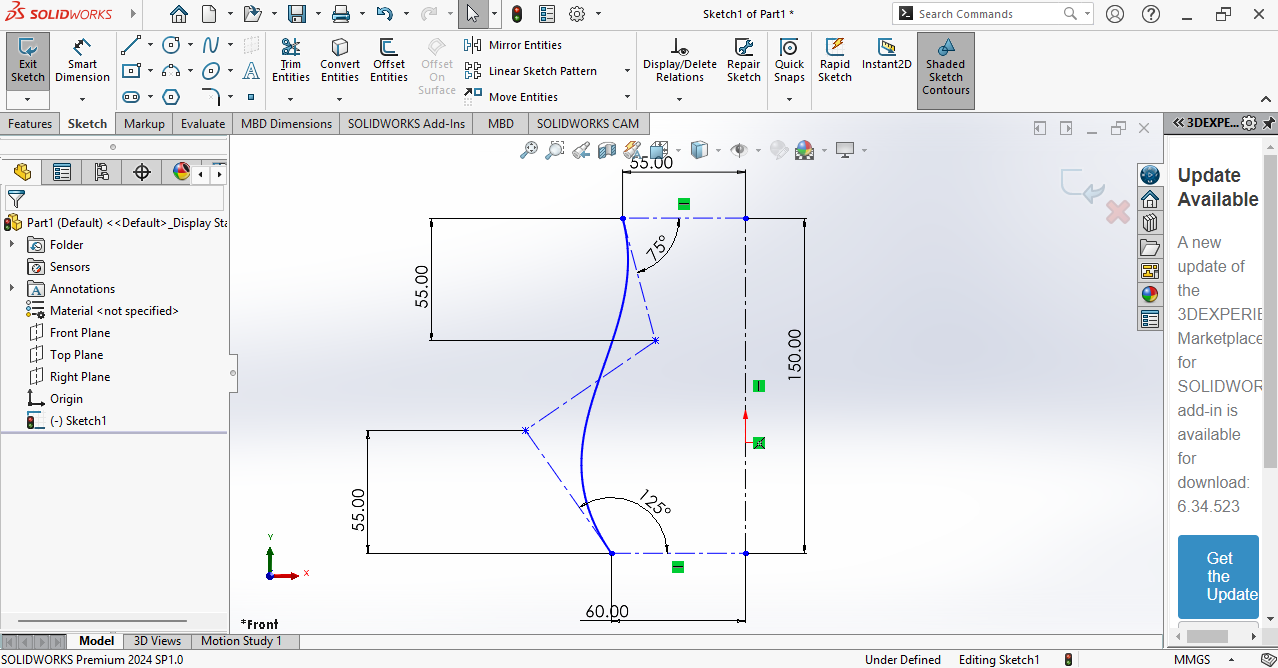
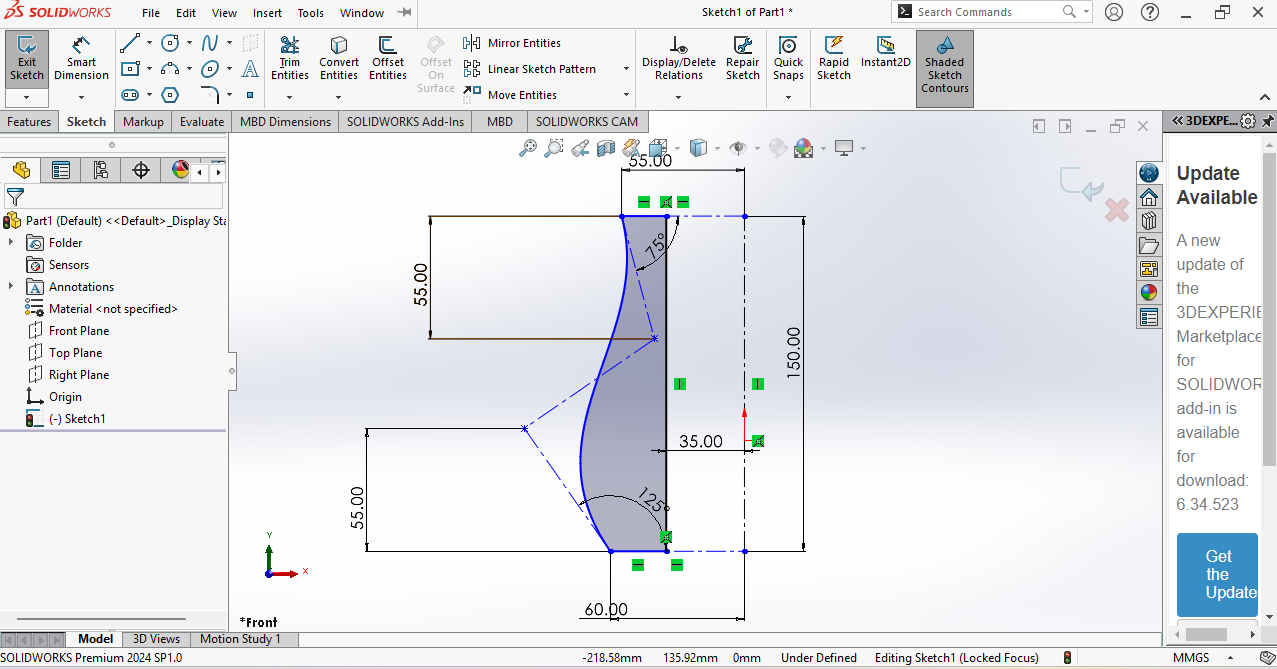
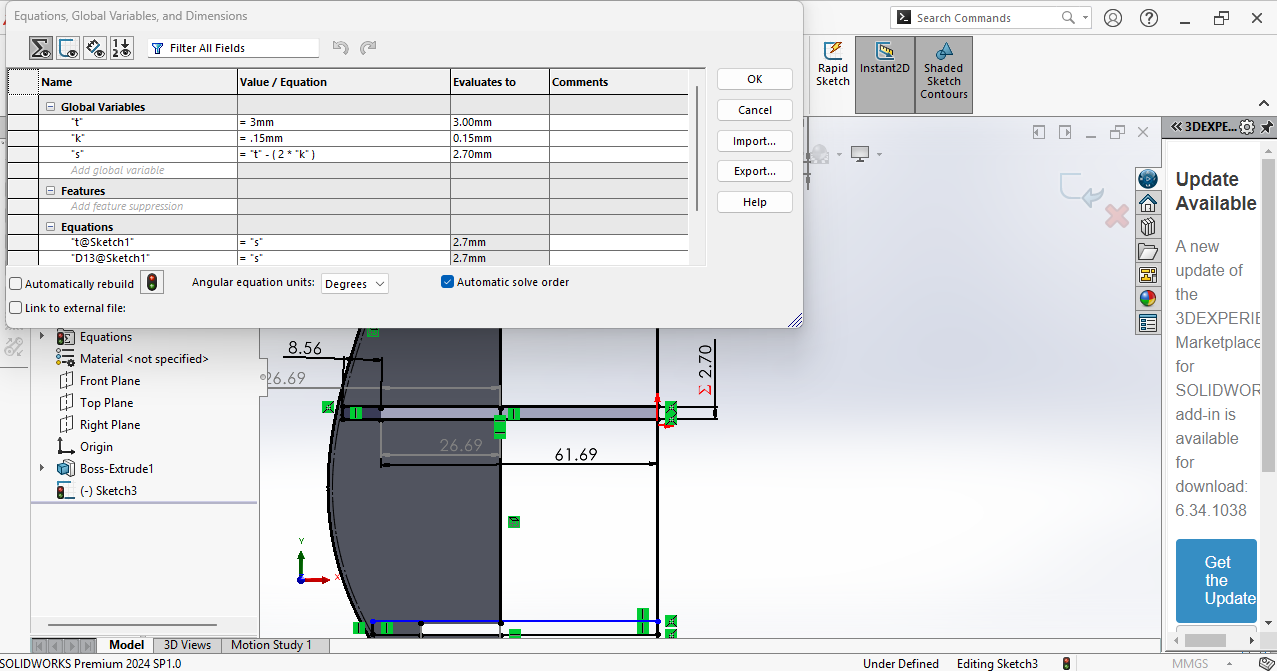
Step 2: After completing the sketch, I used the Extrude feature and set the thickness to 3 mm, according to the material size. Then,
I opened the Equation Manager and added parameters such as material thickness, slot width, and kerf value. By linking these dimensions to equations, I made the design parametric, so if
I change the thickness or kerf value, the whole design updates automatically.
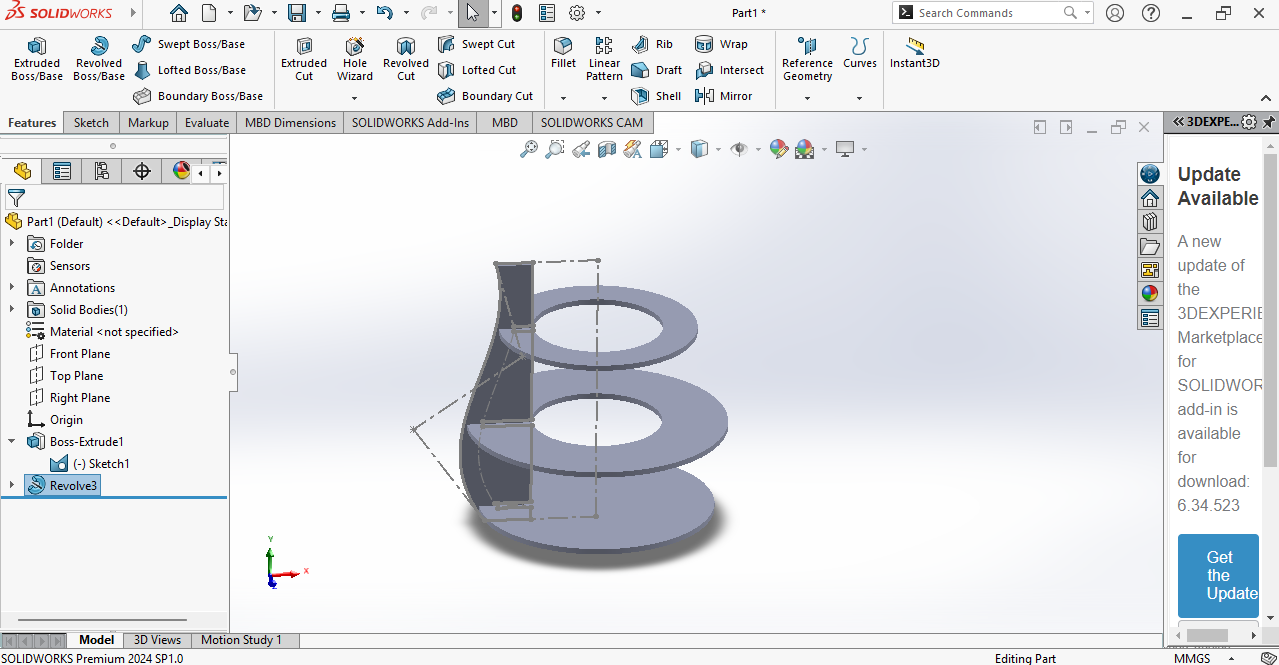
After my part was completed, I checked the final design.

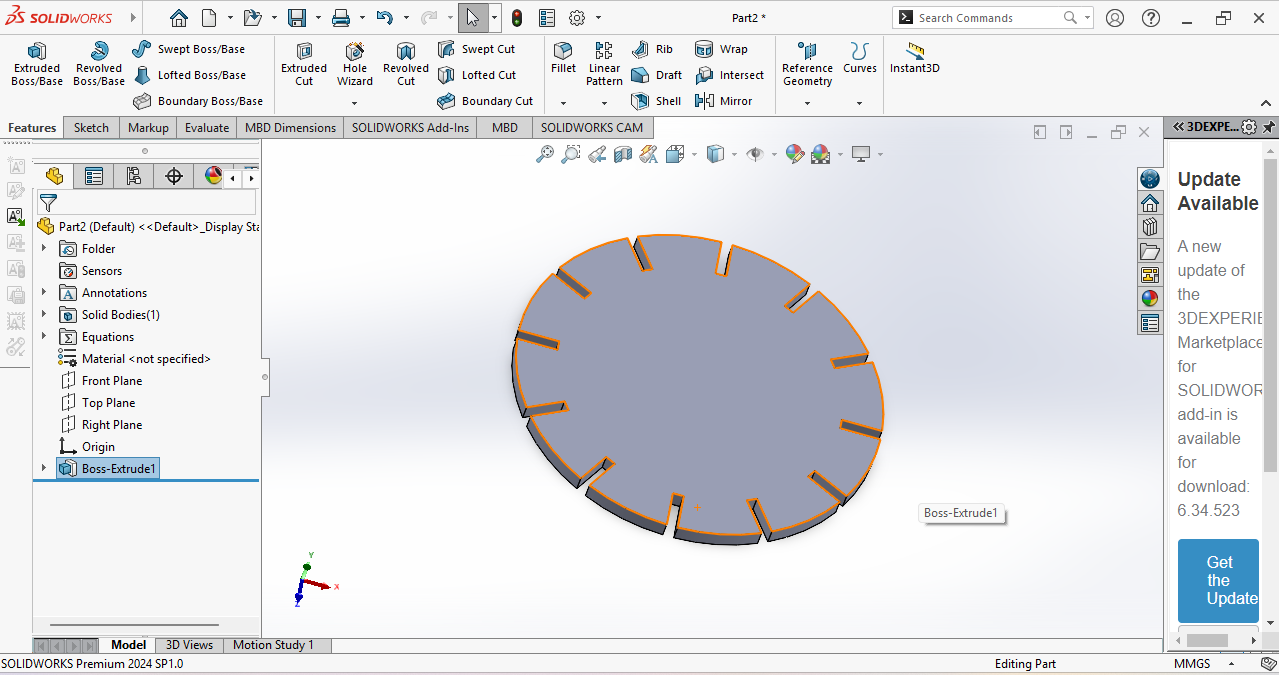
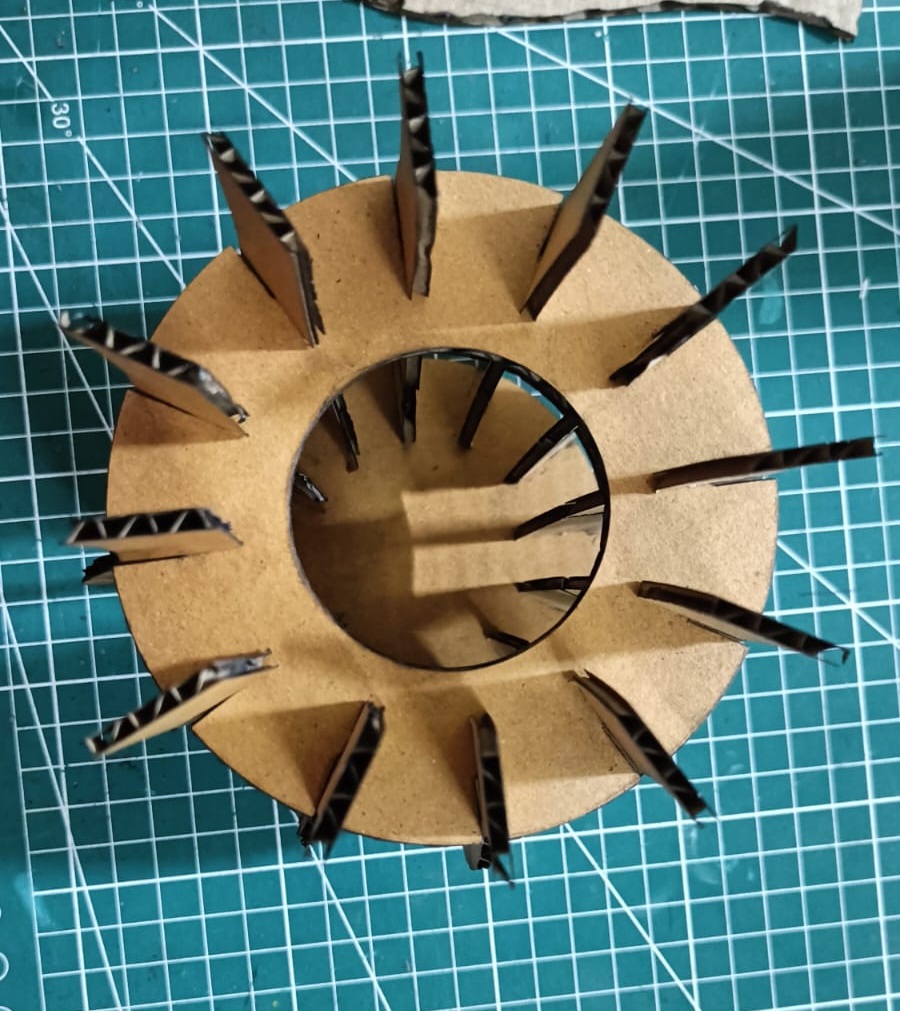
In my design, there are a total of four parts: side part, bottom part, middle part, and top part. After completing the first part, I started designing the second part.
I followed the same process by creating a new sketch and selecting the Top Plane. Then, I created a circular shape and made a slot using the Circular Slot option. After that,
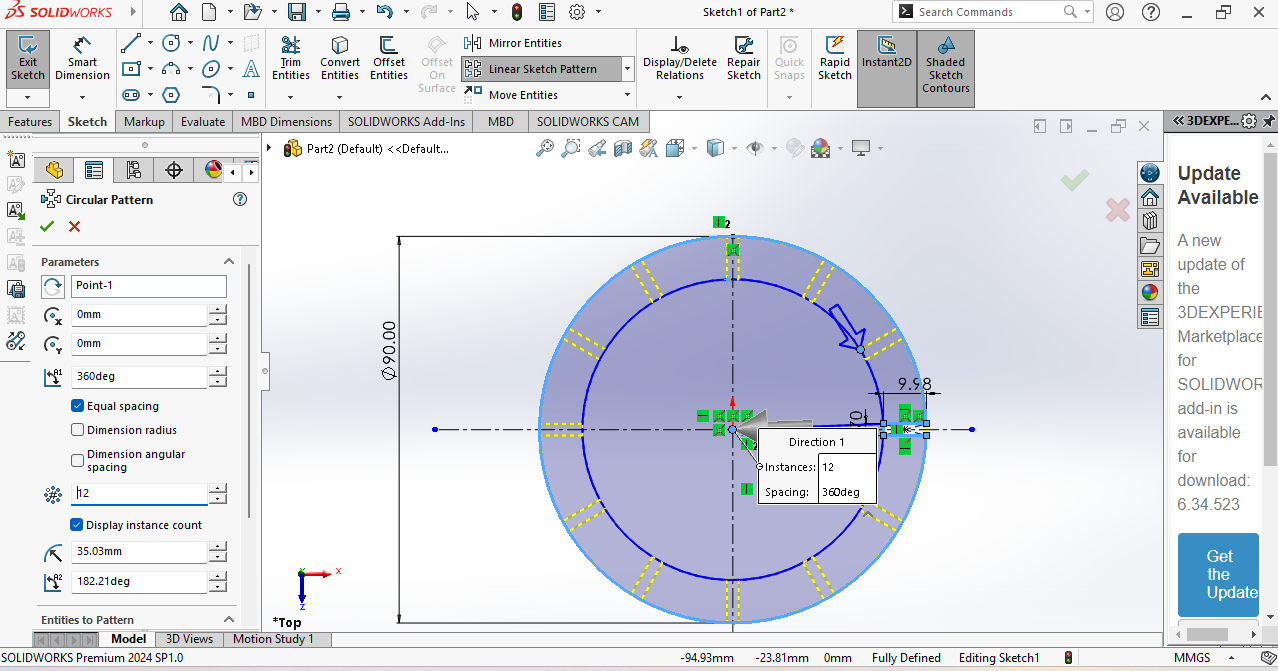
I used the Circular Pattern tool to repeat the slot around
Similarly, I designed my next part using the same process.
I followed the same steps to complete the remaining part design.
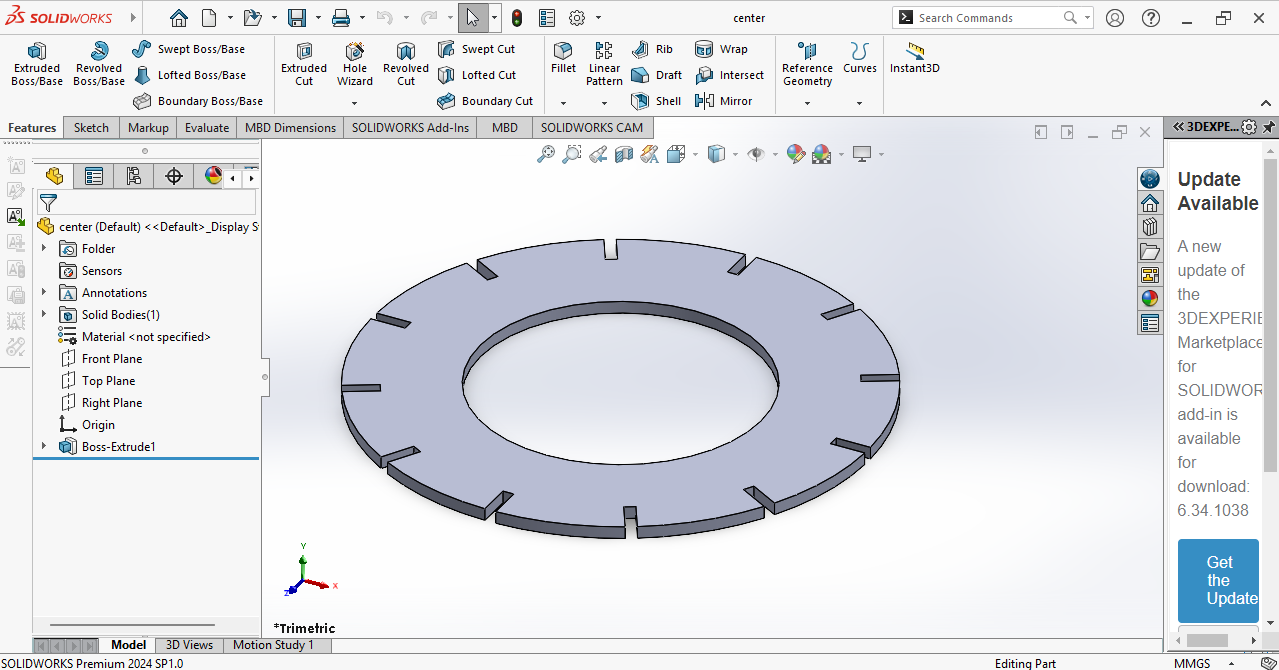
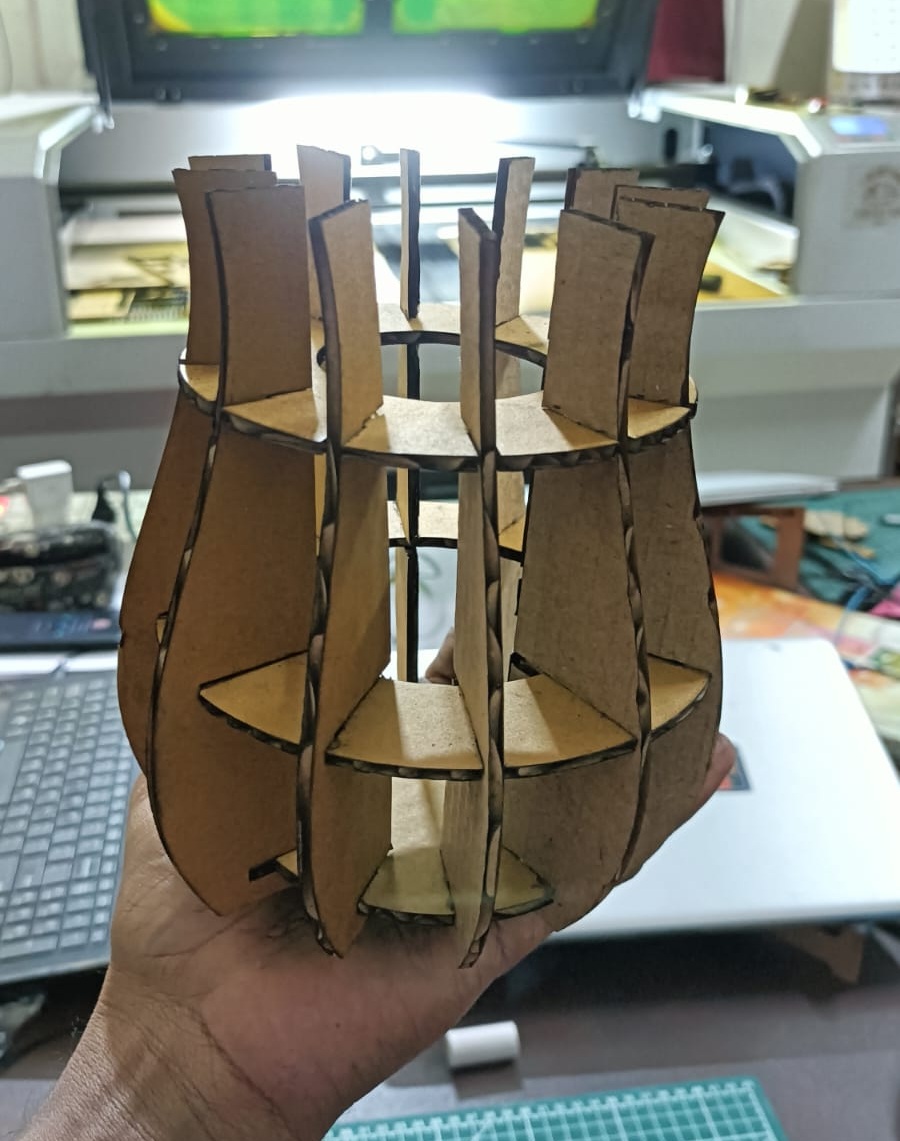
After completing all the parts, my final design looked like this. Once the design was finalized,
I converted the file into DXF format, which is compatible with the laser cutting software.In the next step, I imported the DXF file into LaserCAD to prepare it for cutting. Inside LaserCAD,
I arranged all the parts properly and created the cutting path by setting the required speed and power values. After checking all the settings, the file was ready for laser cutting.
Next, I cut the design on the laser machine using the prepared file.
The complete cutting process is shown in the video below.
This video demonstrates how the parts were cut from the material.
After cutting all the parts, I assembled them according to the design.
After cutting all the parts, I assembled them according to the design.

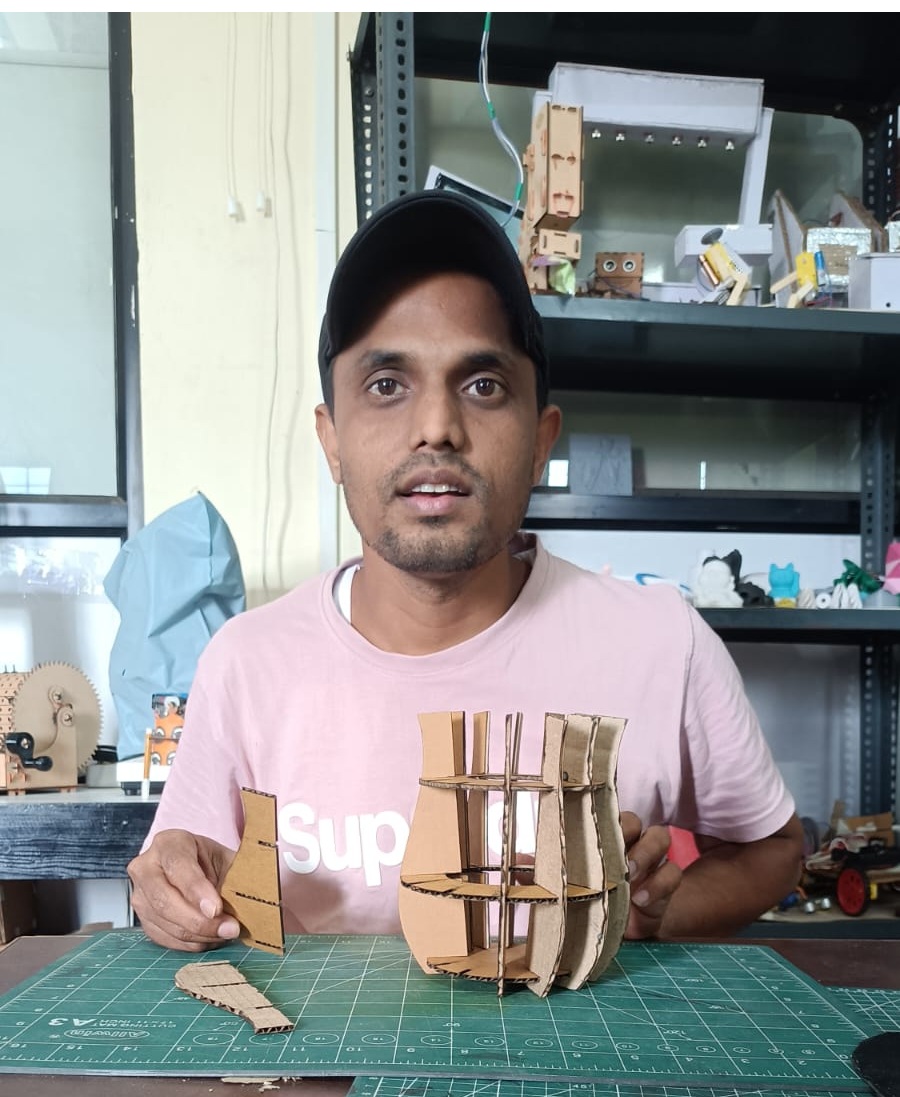
Finally, I successfully completed my design and assembled all the parts properly.
The construction kit fit together as planned because I considered the correct kerf value and dimensions.
This project helped me understand parametric design and laser cutting practically.
Vinyl cutting machine
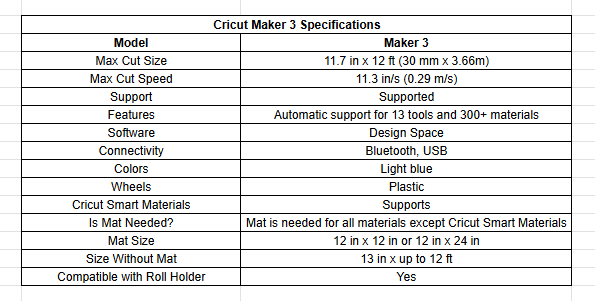
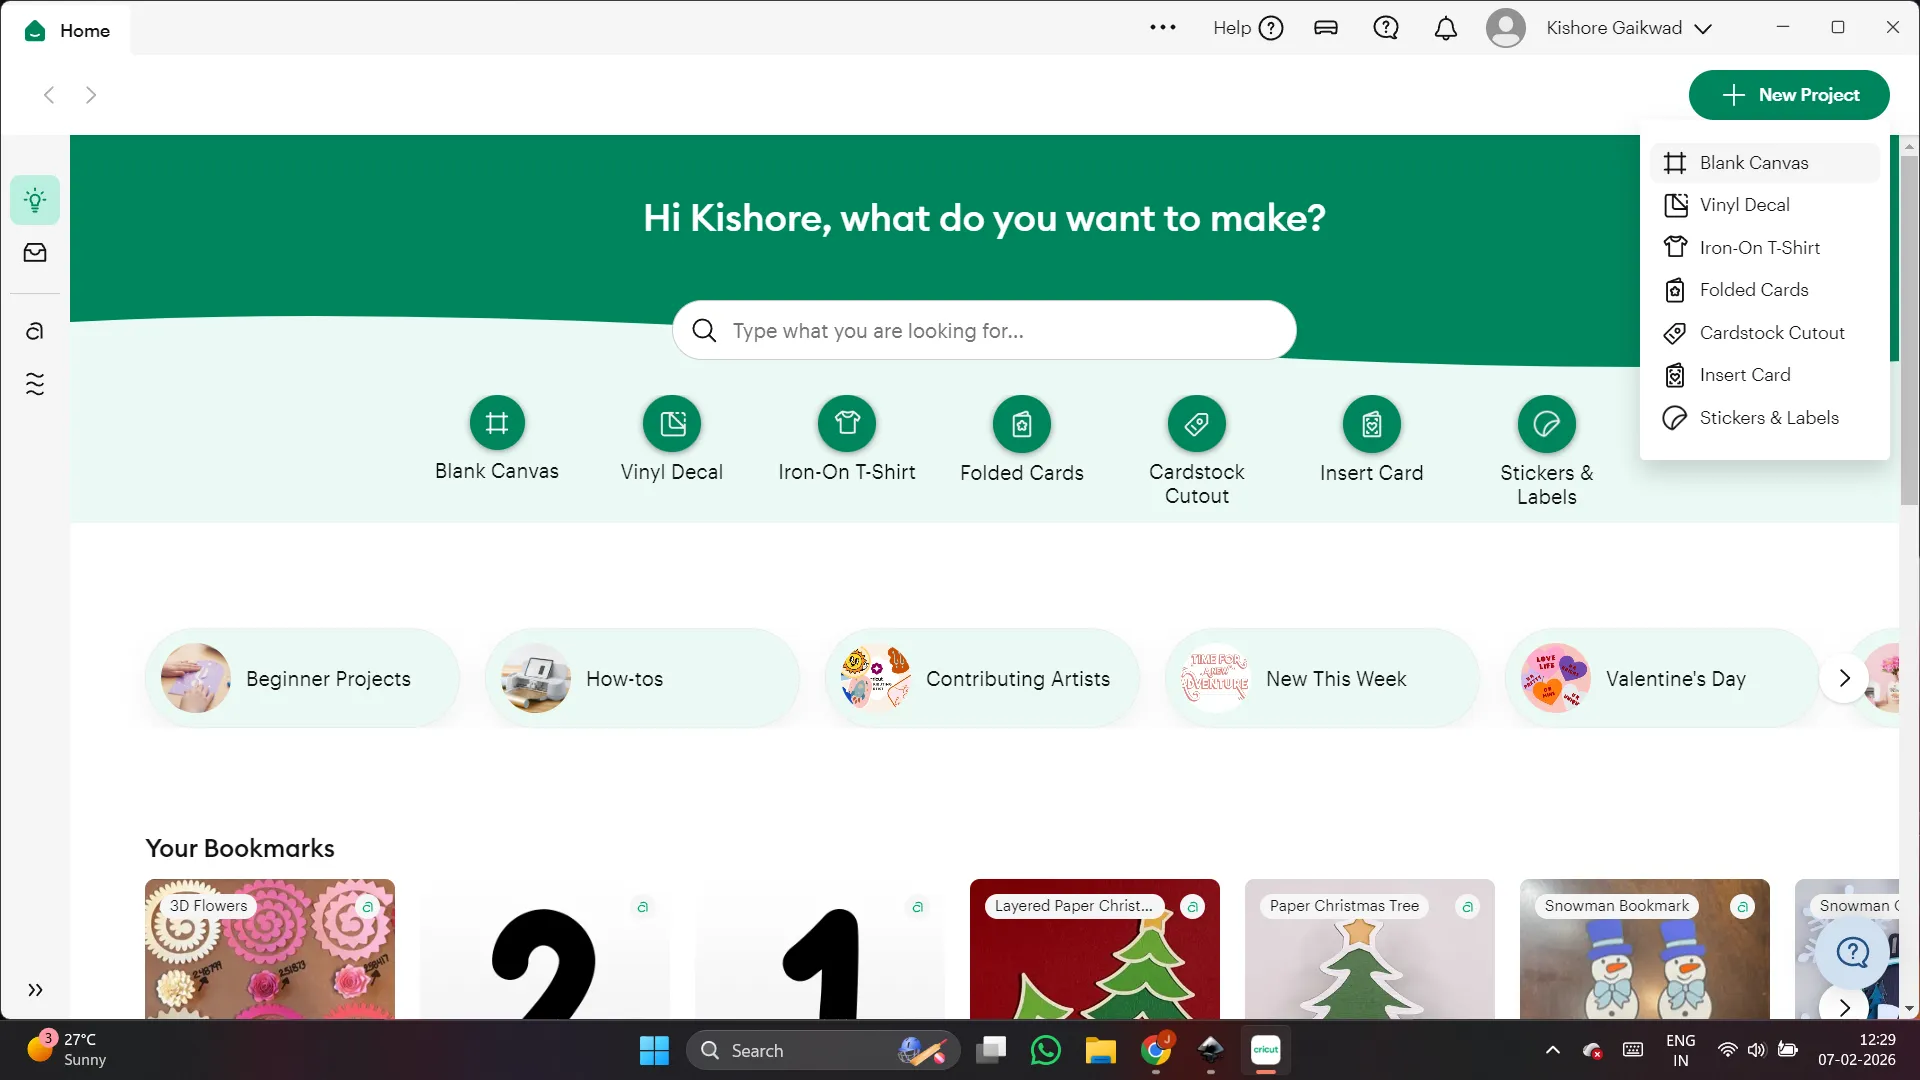
In this week, I learned about the vinyl cutting machine and used the Cricut Maker 3 available in our Fab Lab.
This machine is mainly used for cutting thin materials like vinyl sheets, paper, and stickers.
It works by moving a small sharp blade over the material according to the design file sent from the computer.
The blade cuts only the top layer of the material without cutting the backing sheet. The machine follows the exact path of the digital design,
which allows accurate and clean cutting. Through this process, I understood how vinyl cutting is useful for making labels, logos, and decorative designs.
clicking here more detailed:
https://digiartdreams.com/blogs/news/cricut-maker-3
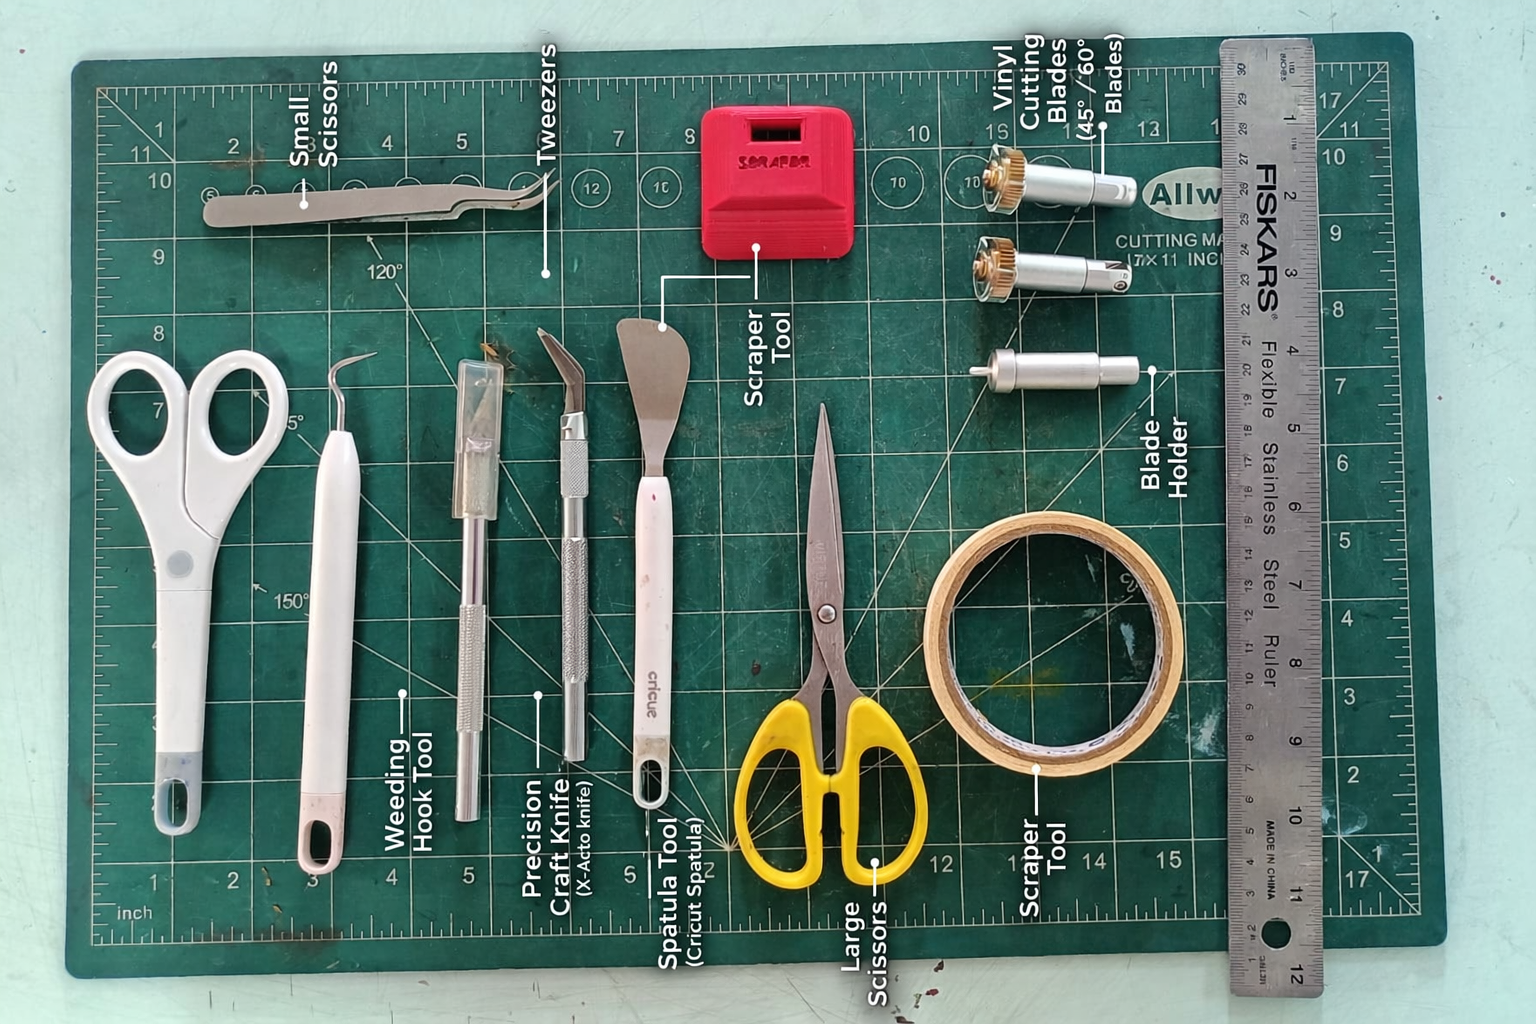
Before starting the vinyl cutting machine, I first checked all the buttons and controls to understand their function properly.
Then I learned how to correctly insert and fix the cutting blade tool into the machine.
I use all this tools in assignment.
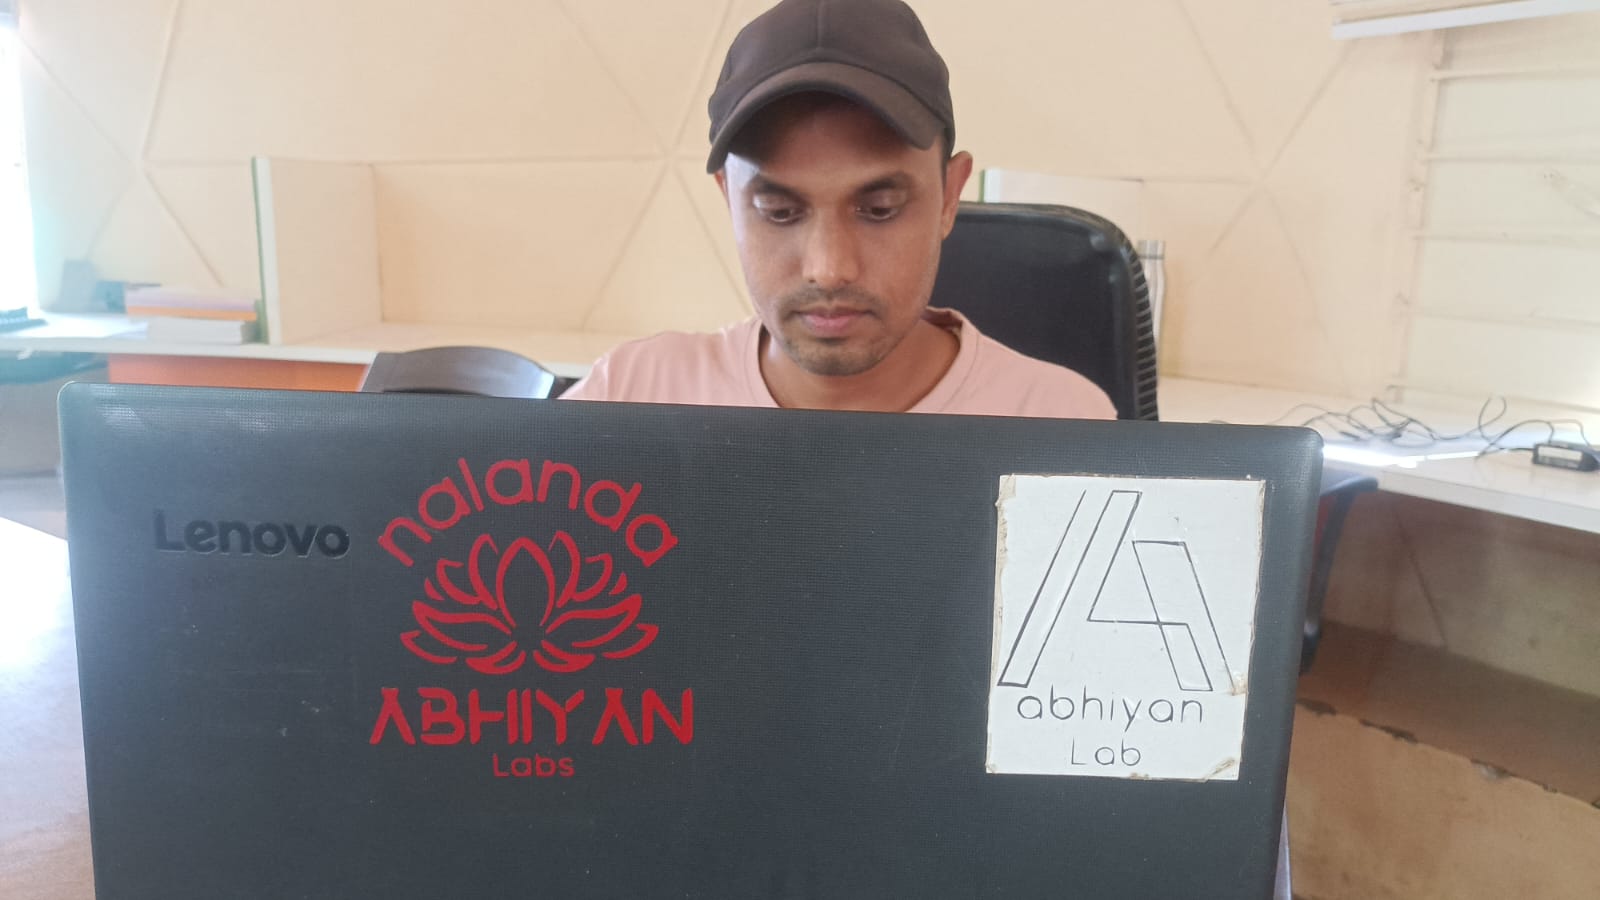
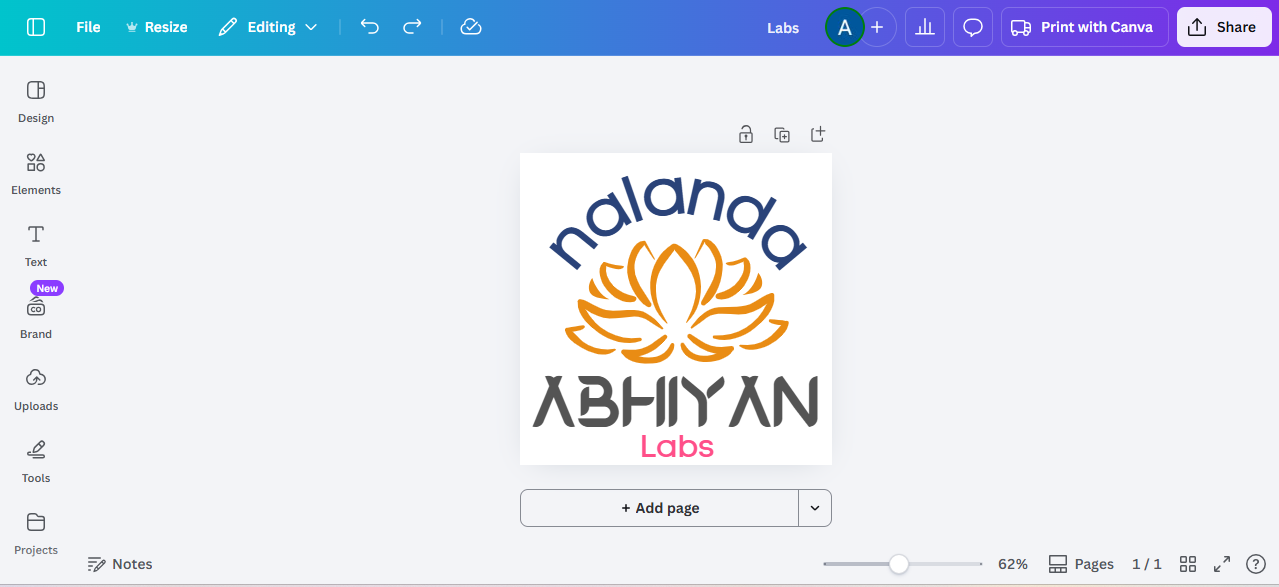
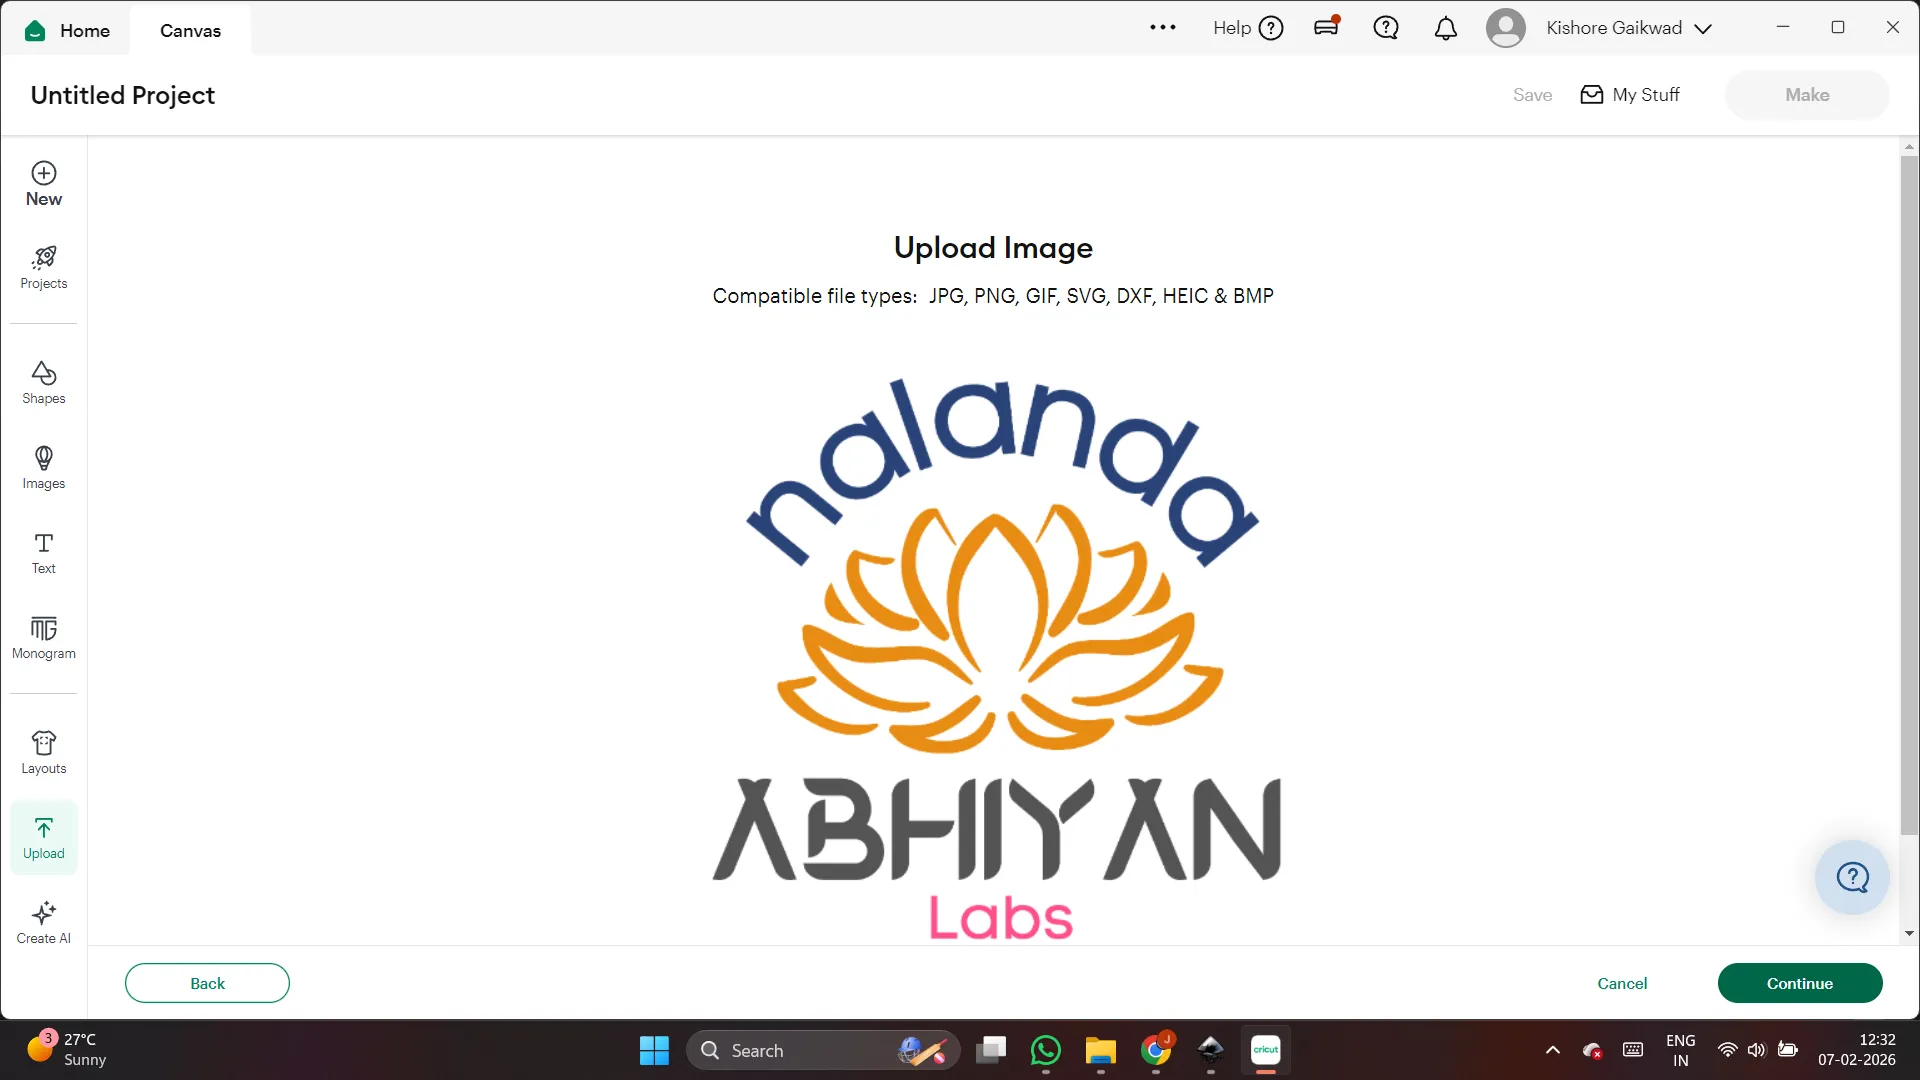
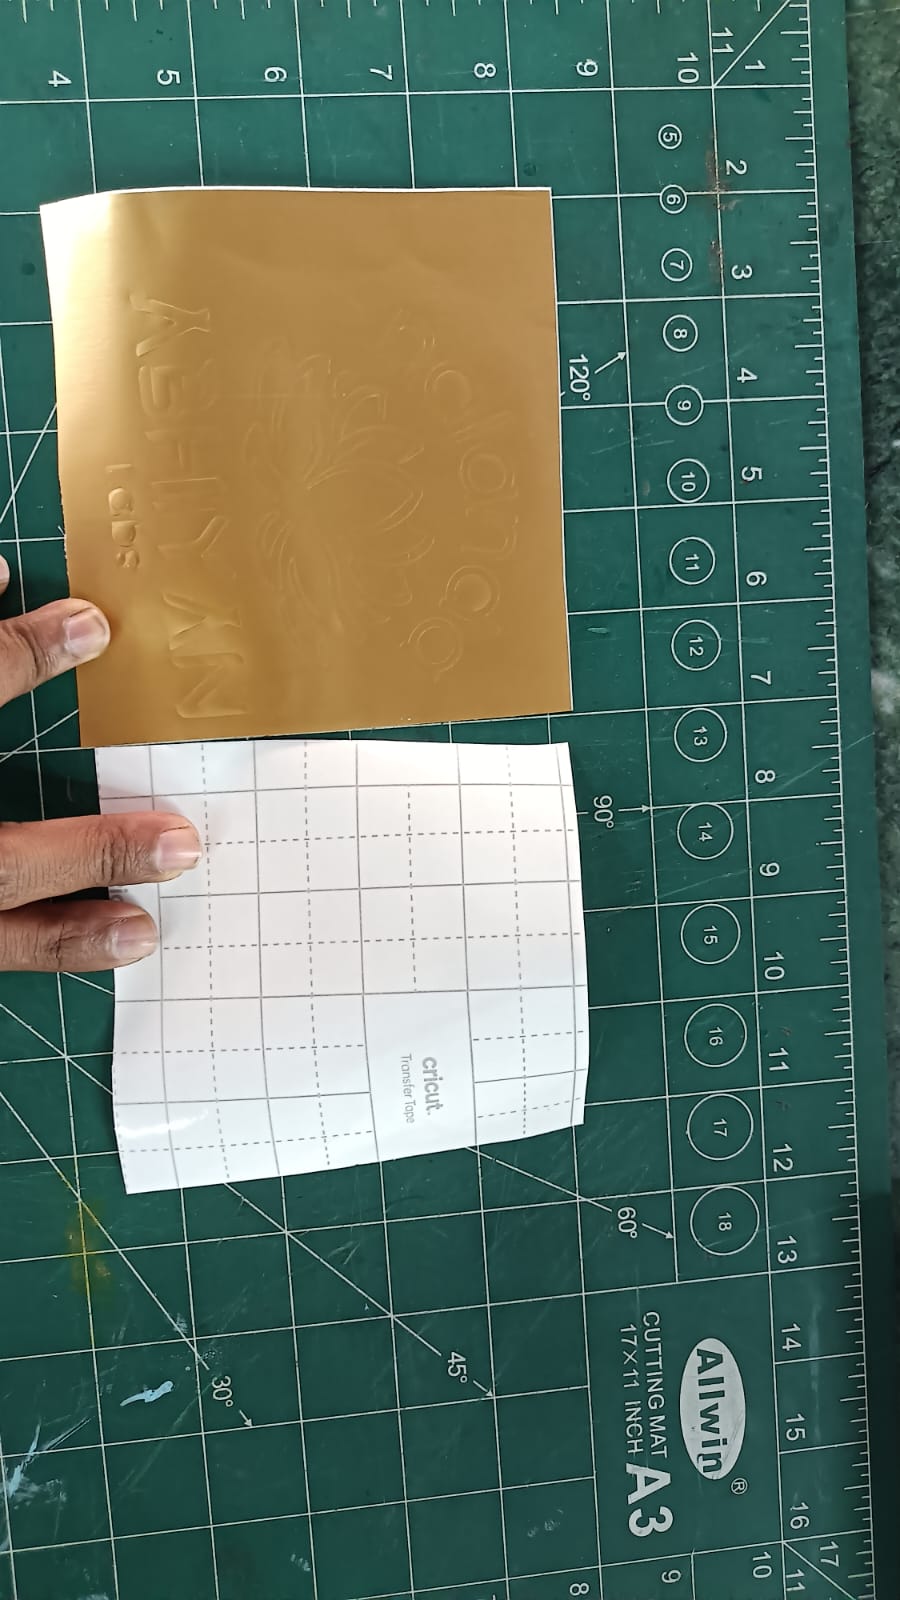
Before starting the vinyl cutting process, I first prepared my logo design. I created my logo using Canva.
After opening Canva, I went to the Elements section and searched for a lotus flower. I selected a simple and clean lotus flower design that matched my idea.
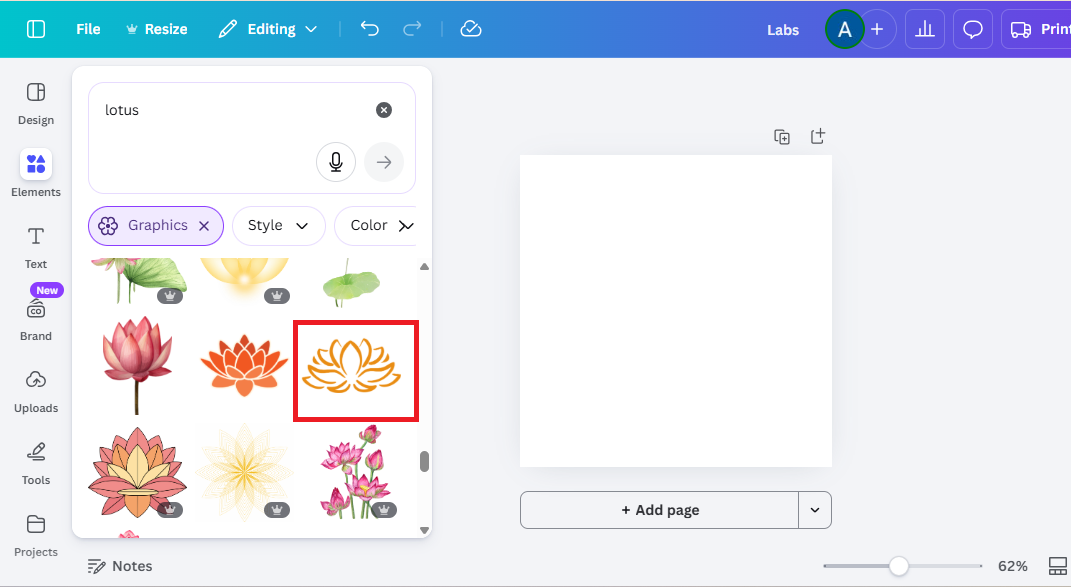
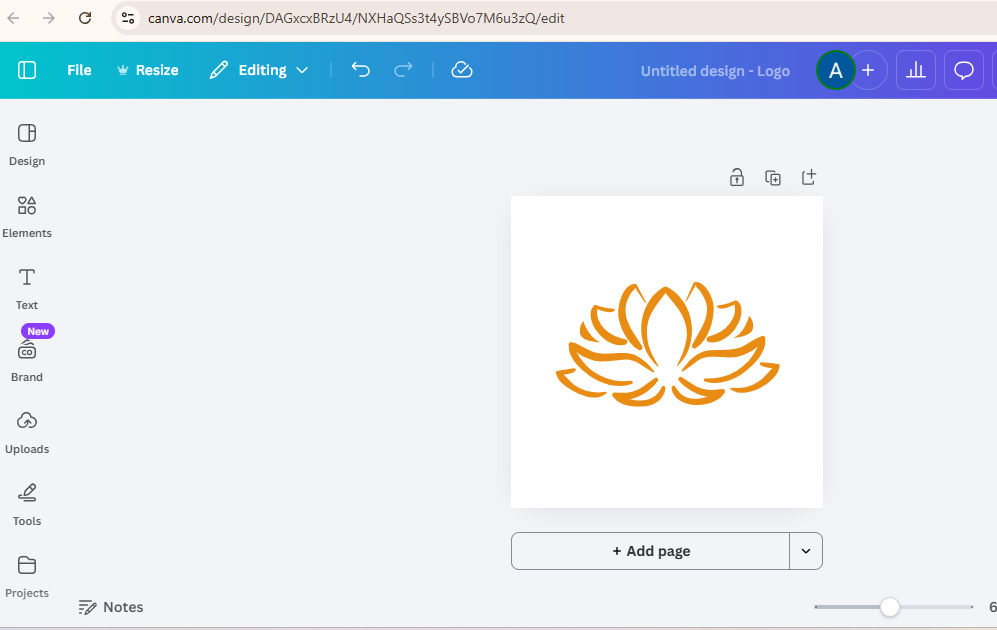
Then I added the lotus flower to my canvas and adjusted its size. I placed it in the center of the page and aligned it properly add a text on top and bottom.
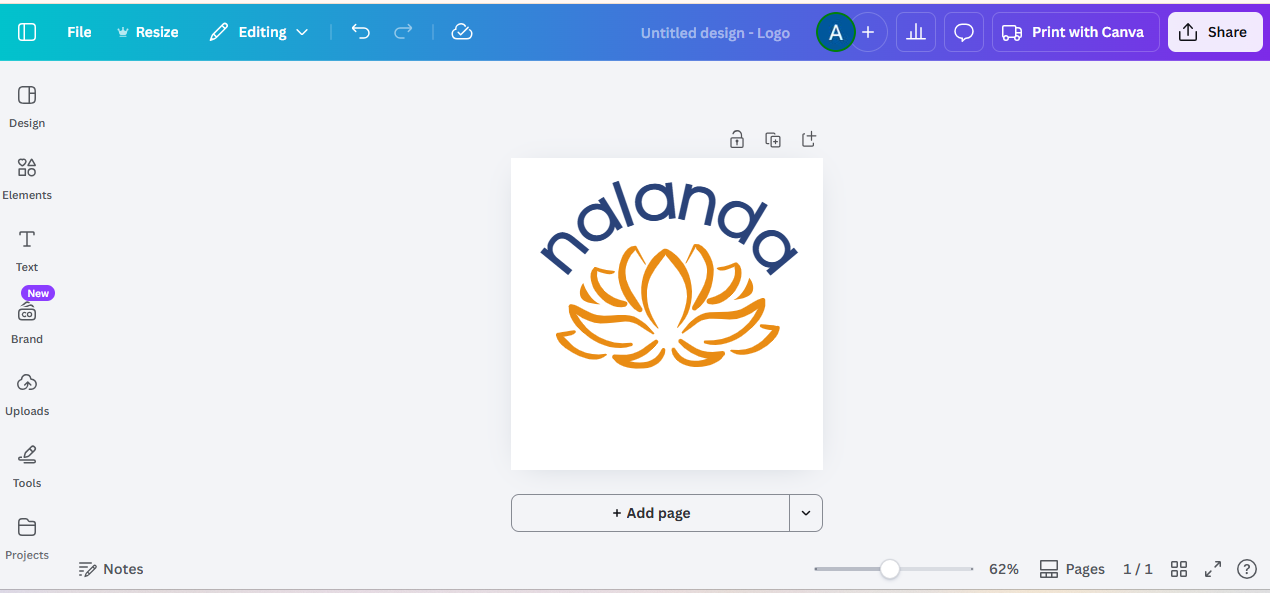
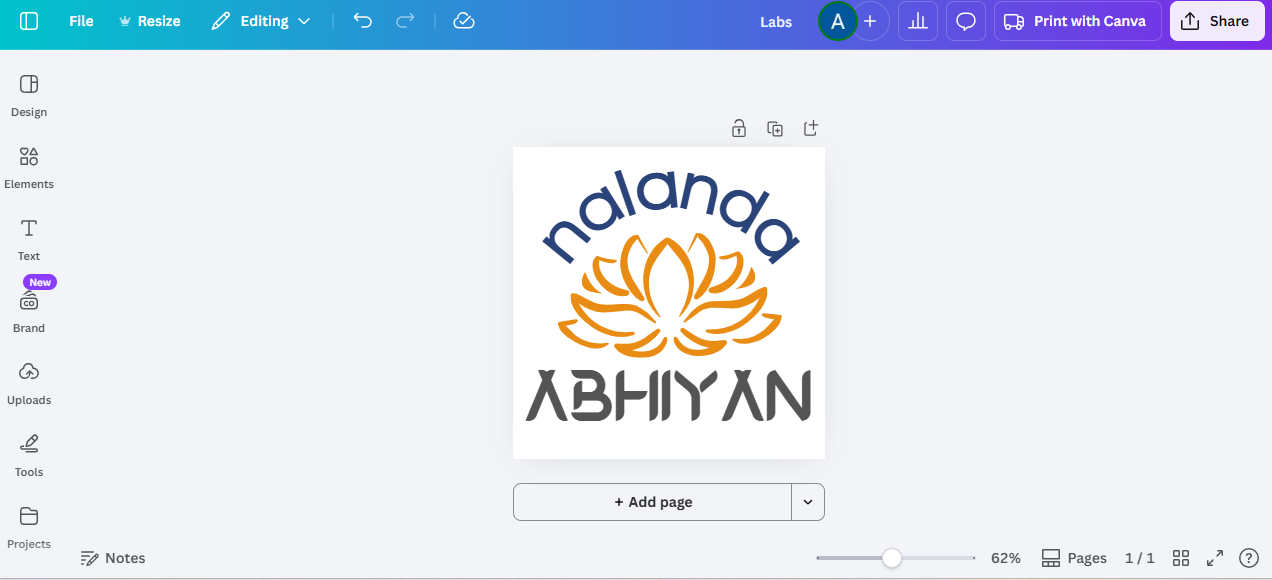
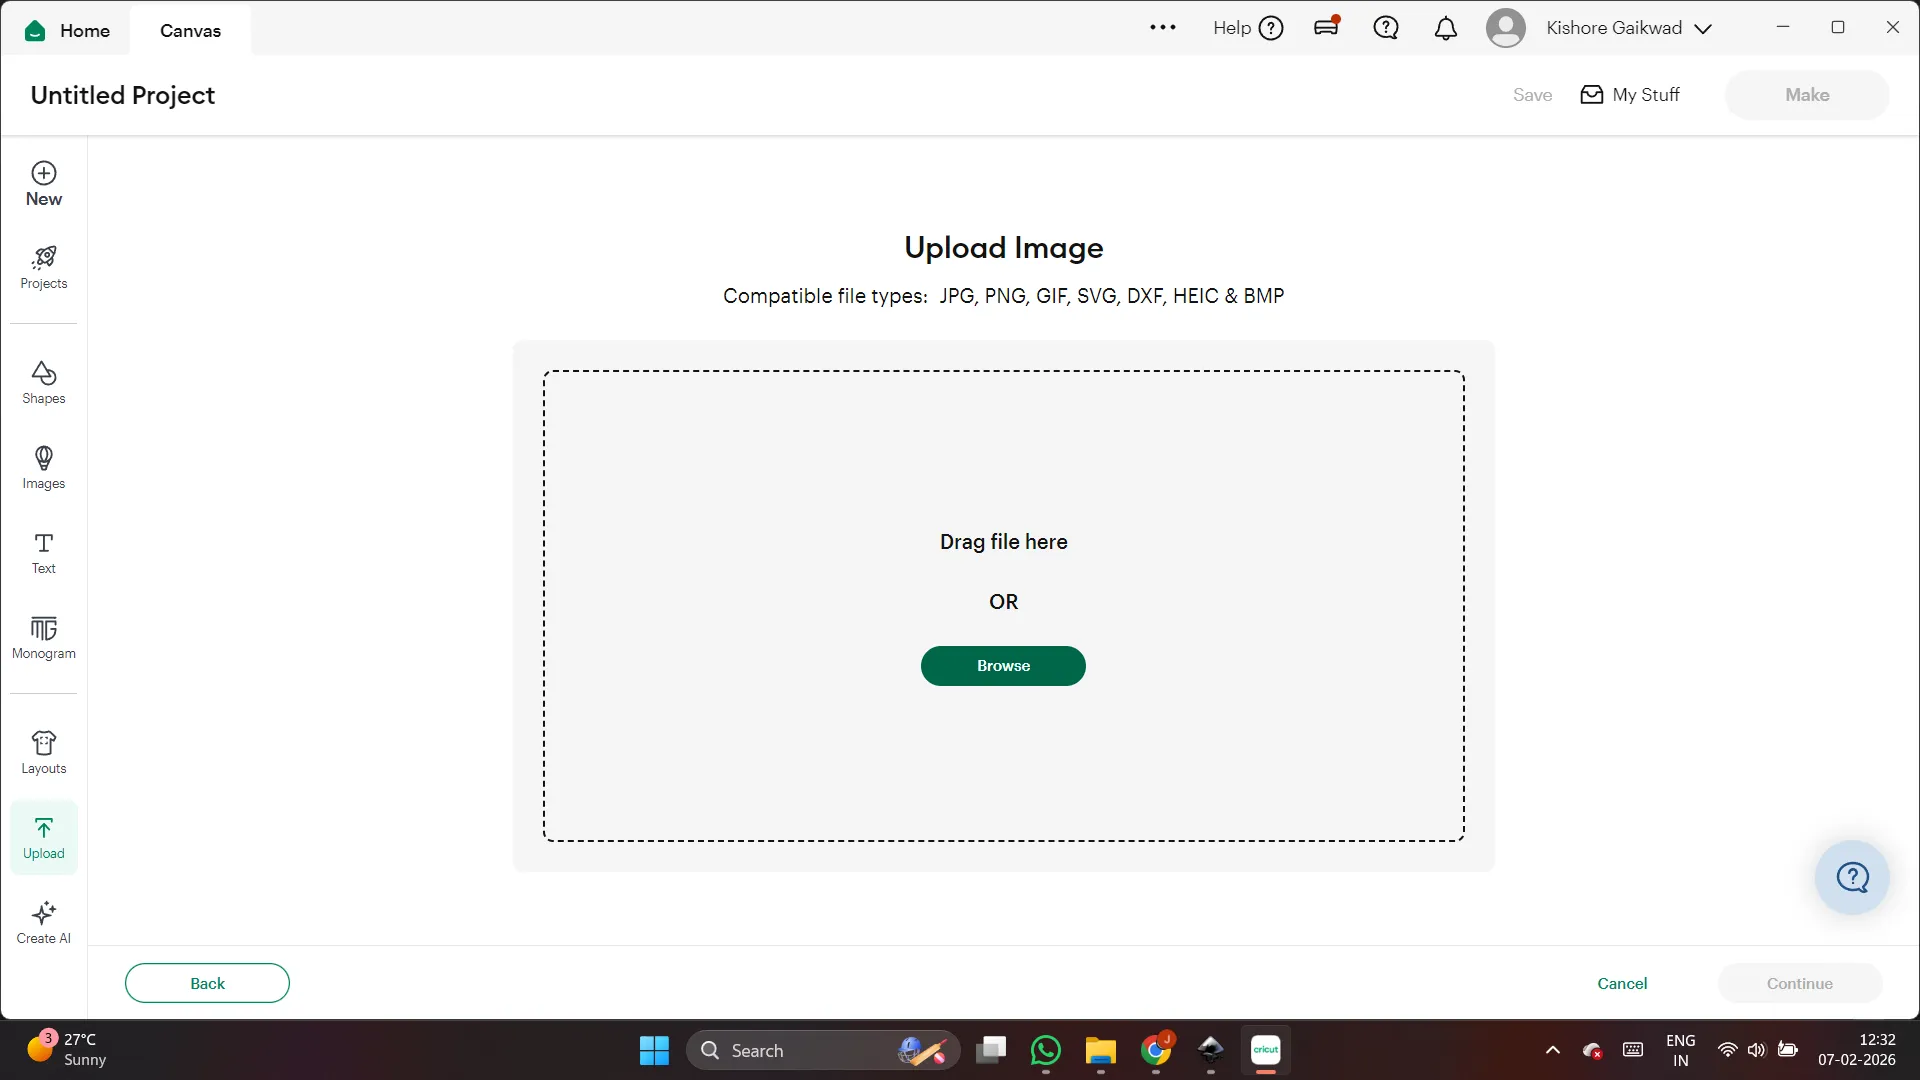
After finishing my logo design, I downloaded it in PNG format to my computer.
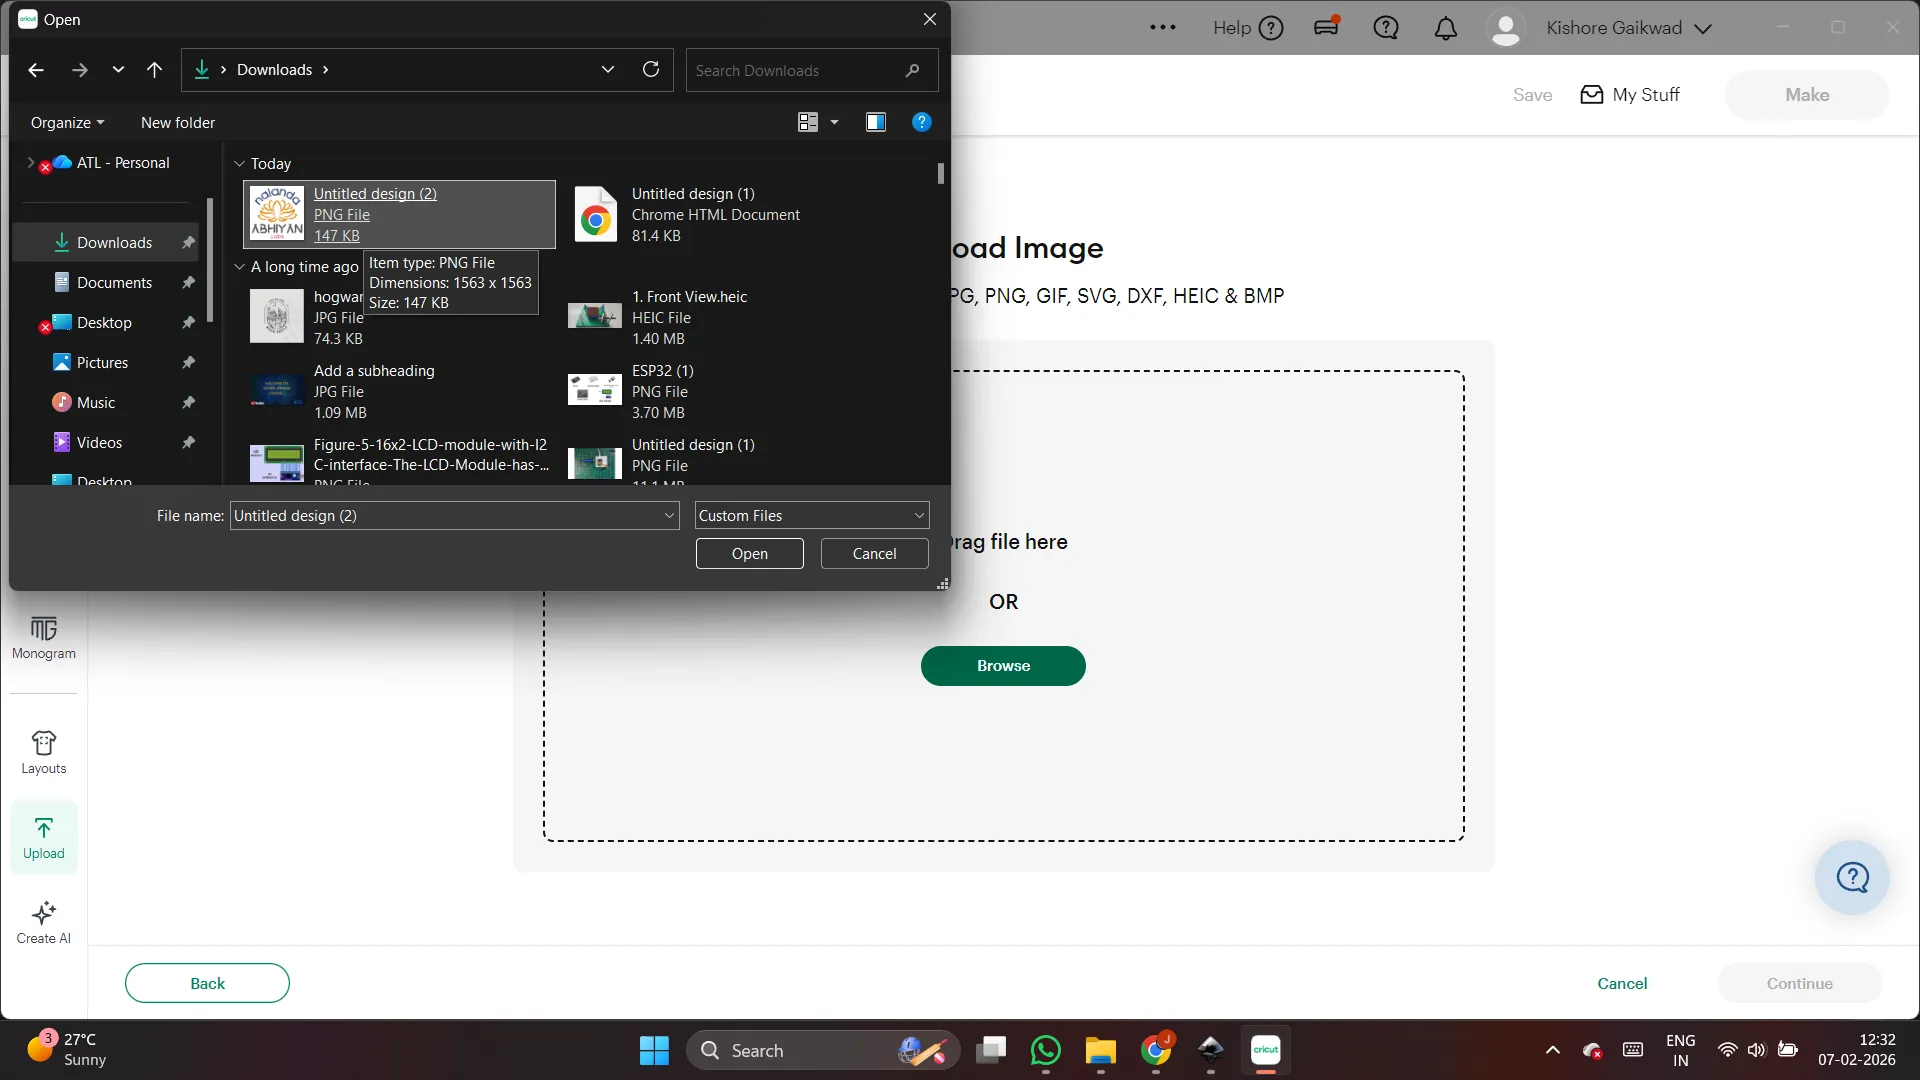
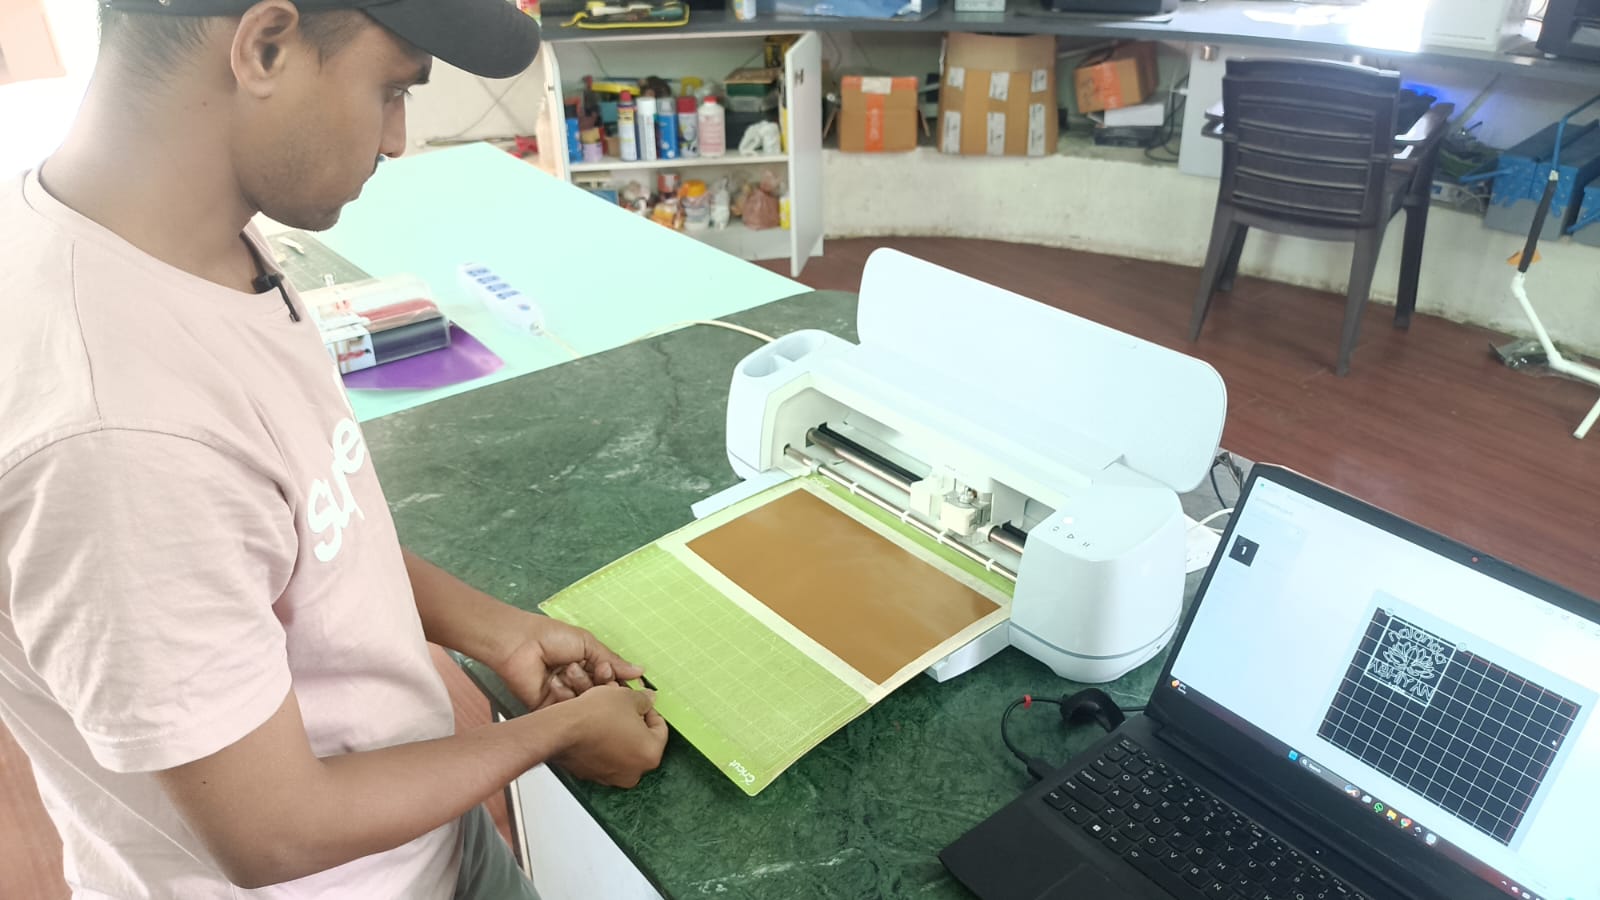
Then I opened the cutting software and selected the correct file from my system.
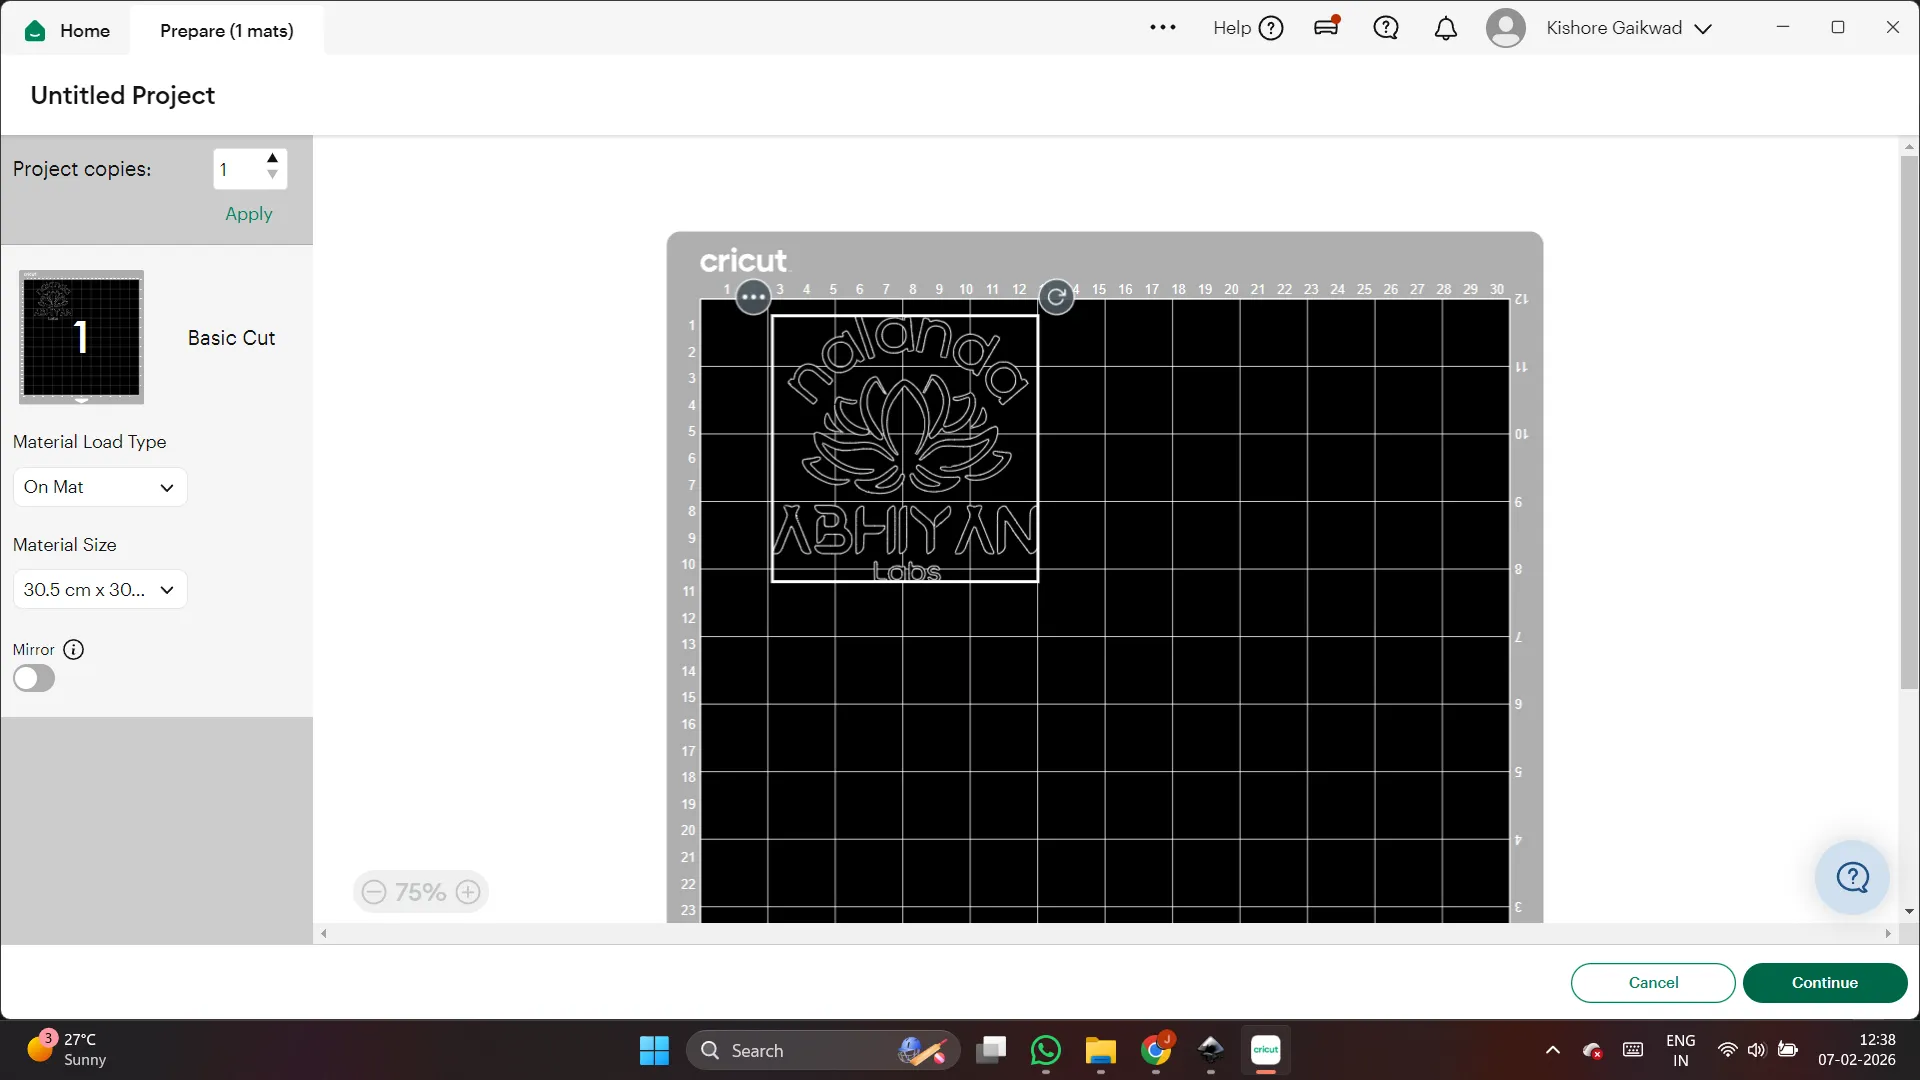
After importing the design, I checked the size and adjusted it if needed. Finally, I placed the design properly in the workspace and prepared it for cutting.
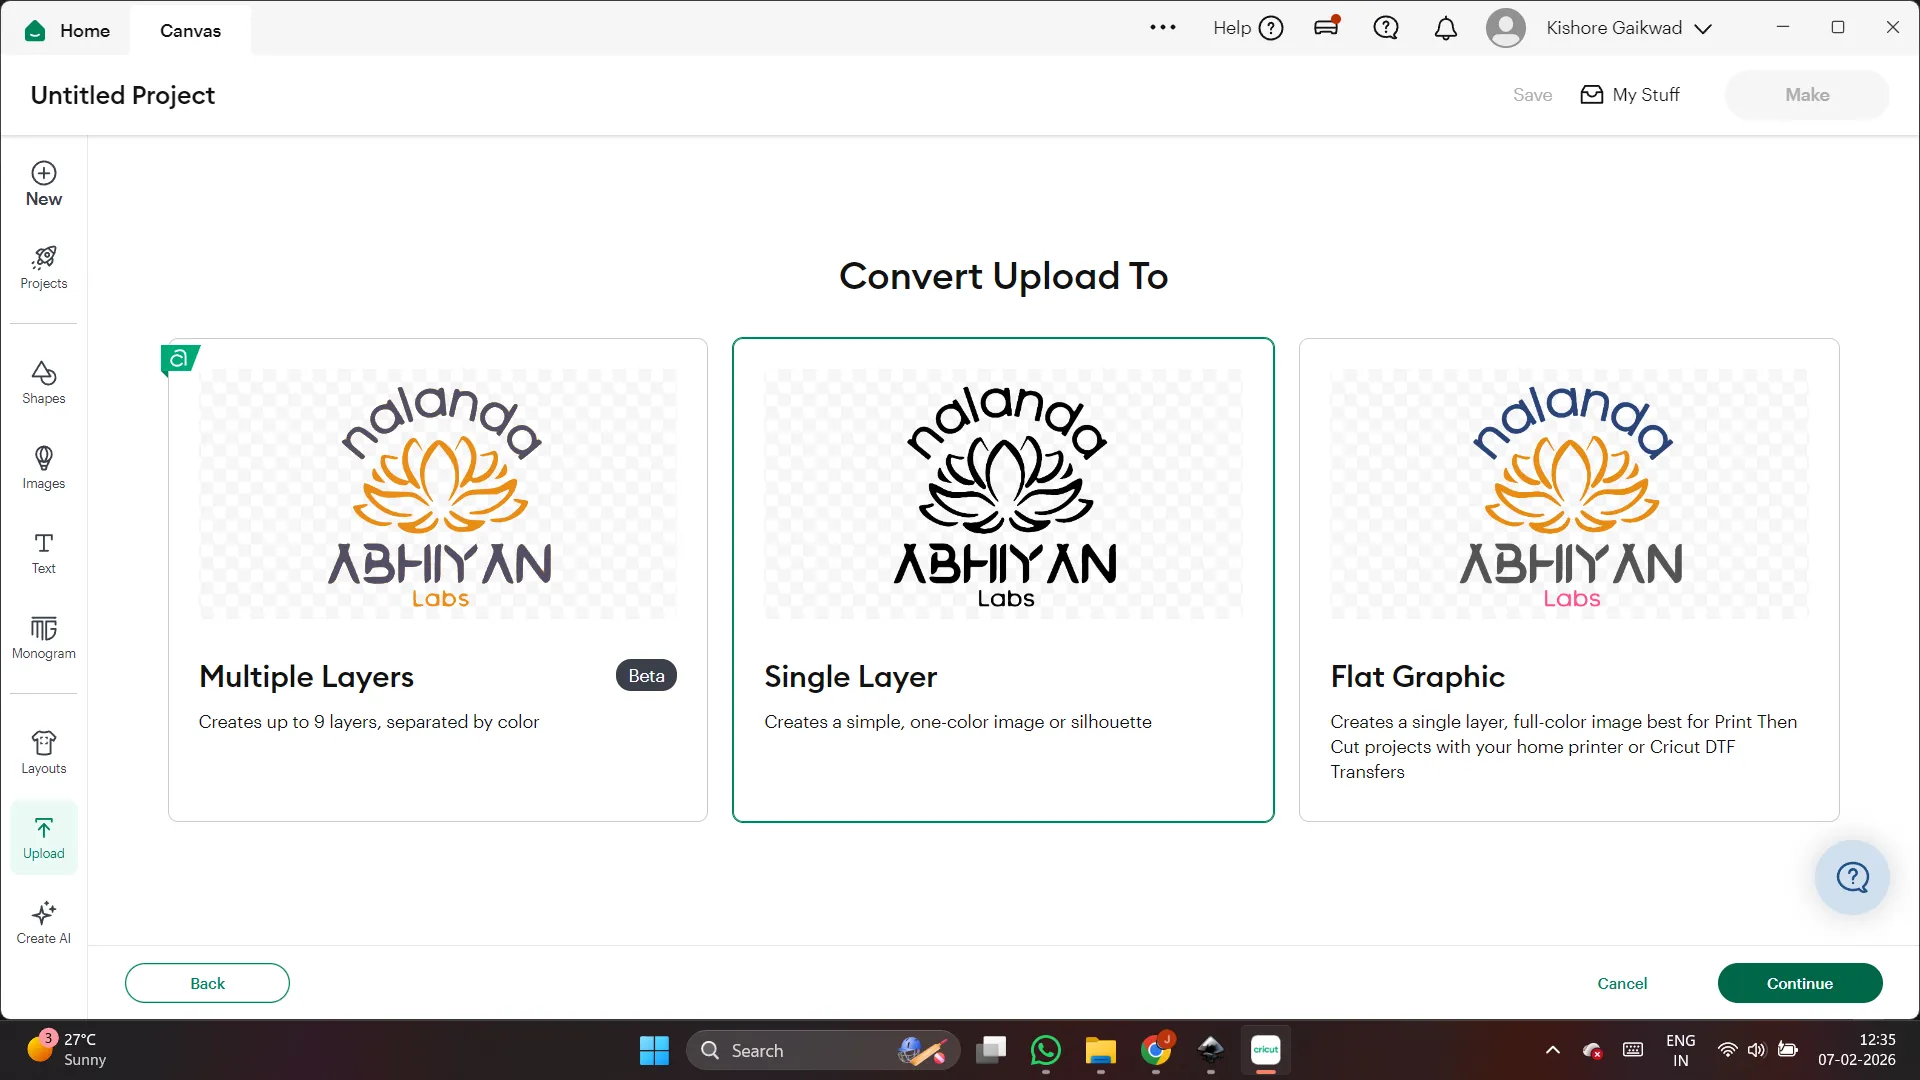
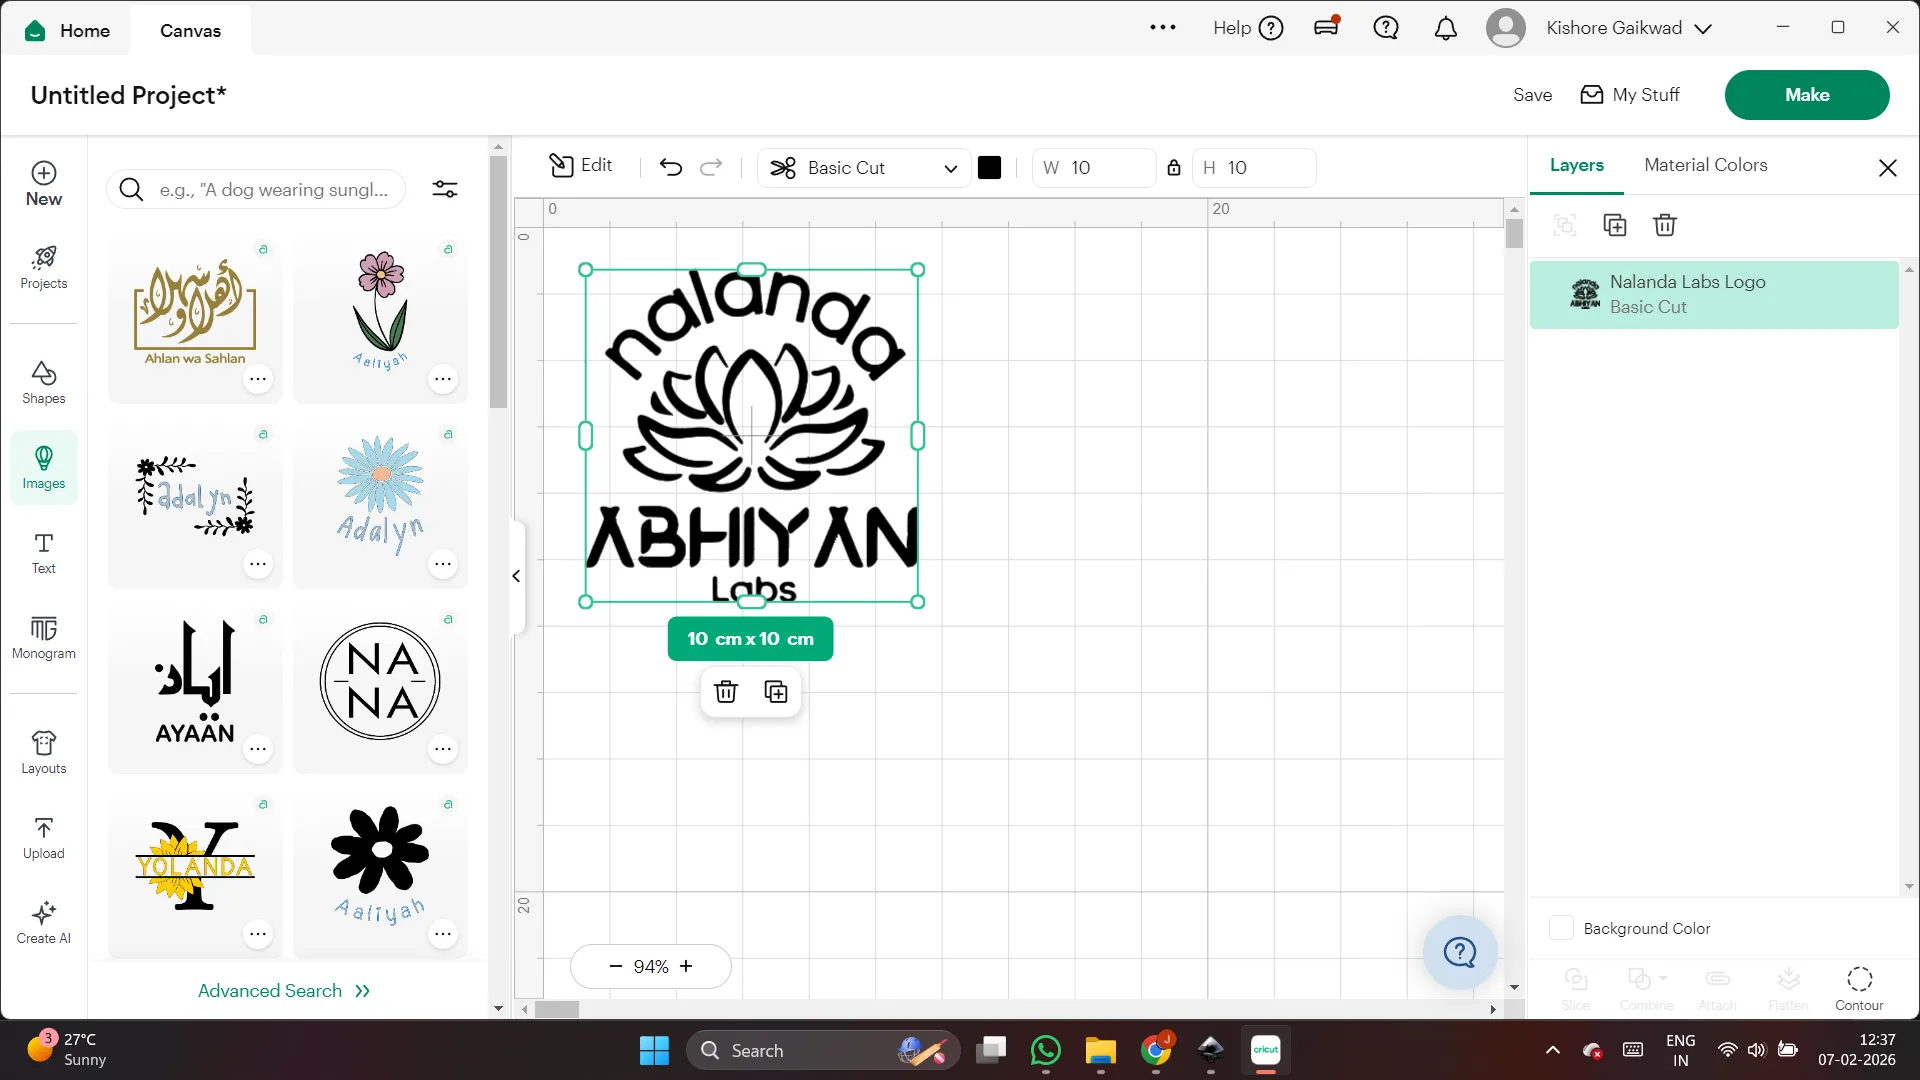
After that, I selected a single layer for the logo cutting and set the required dimensions.
Next, I selected the “On Mat” option in the software.
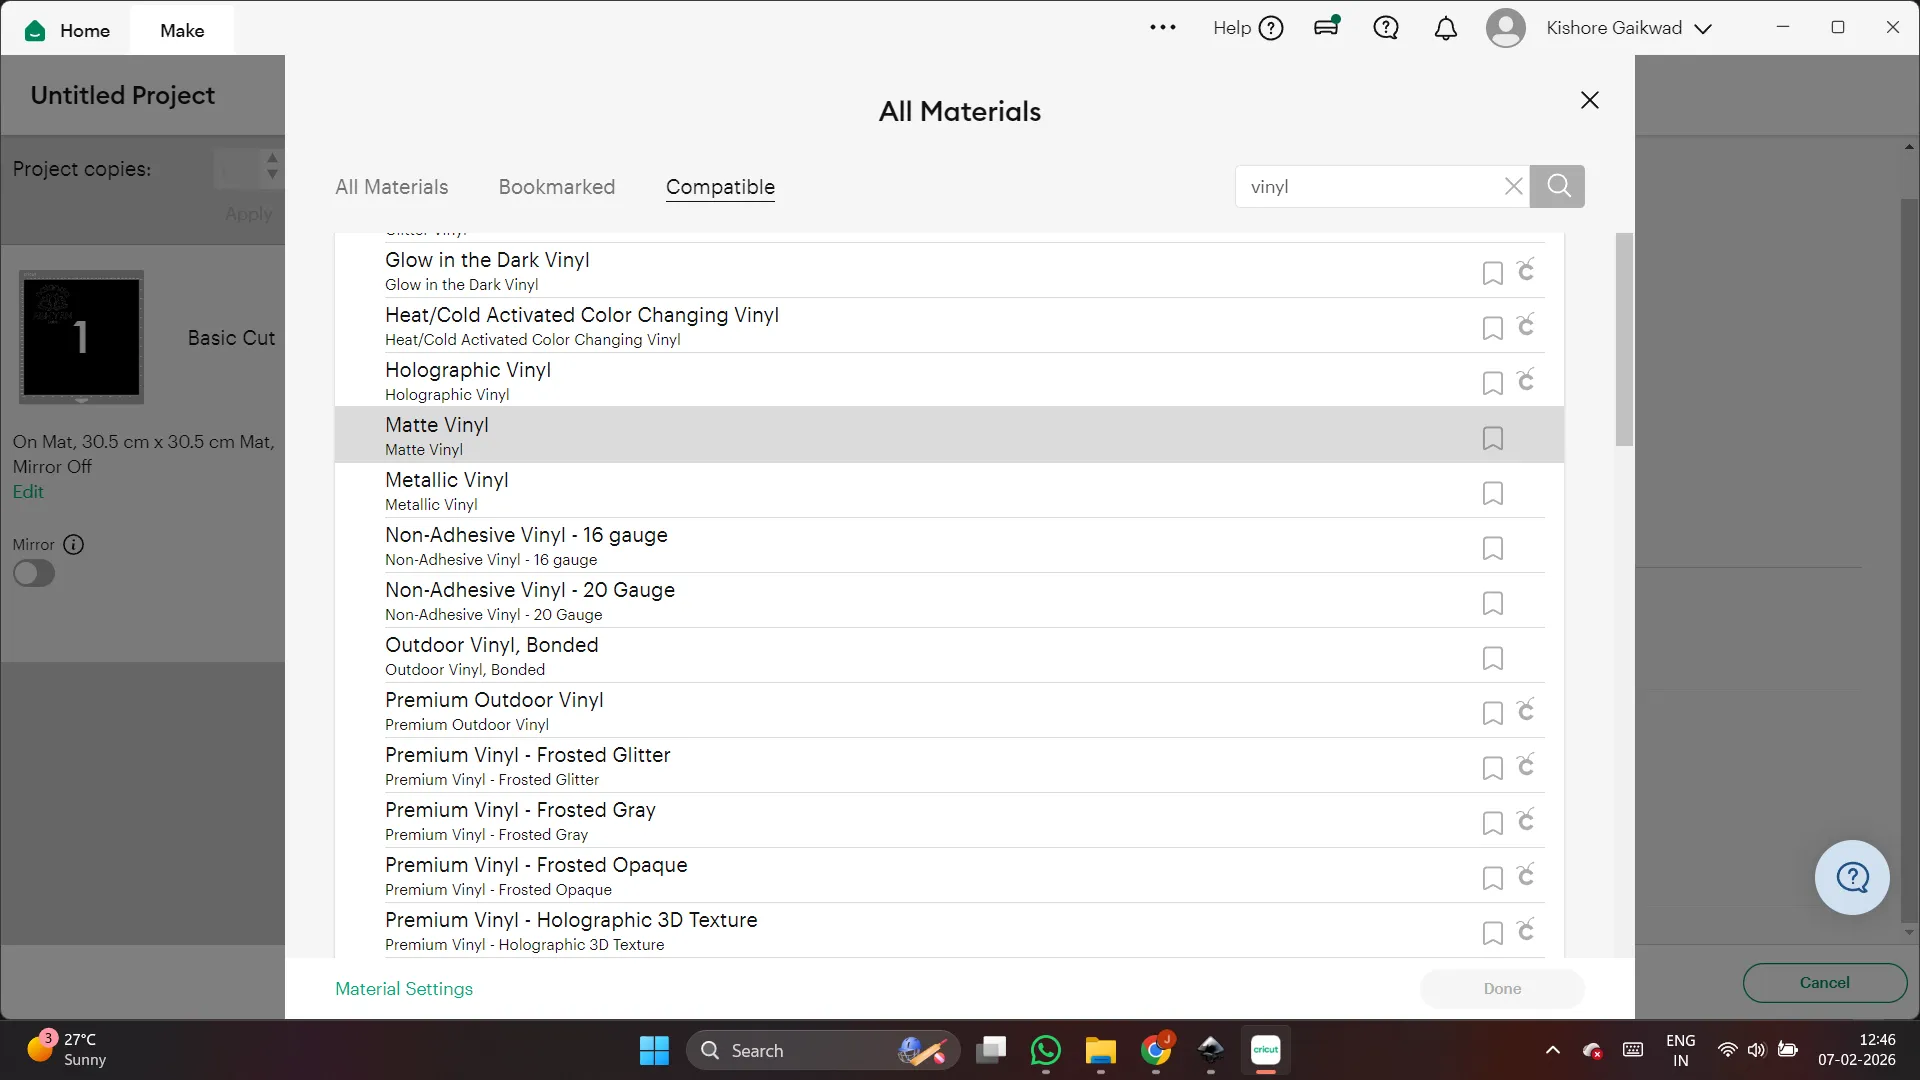
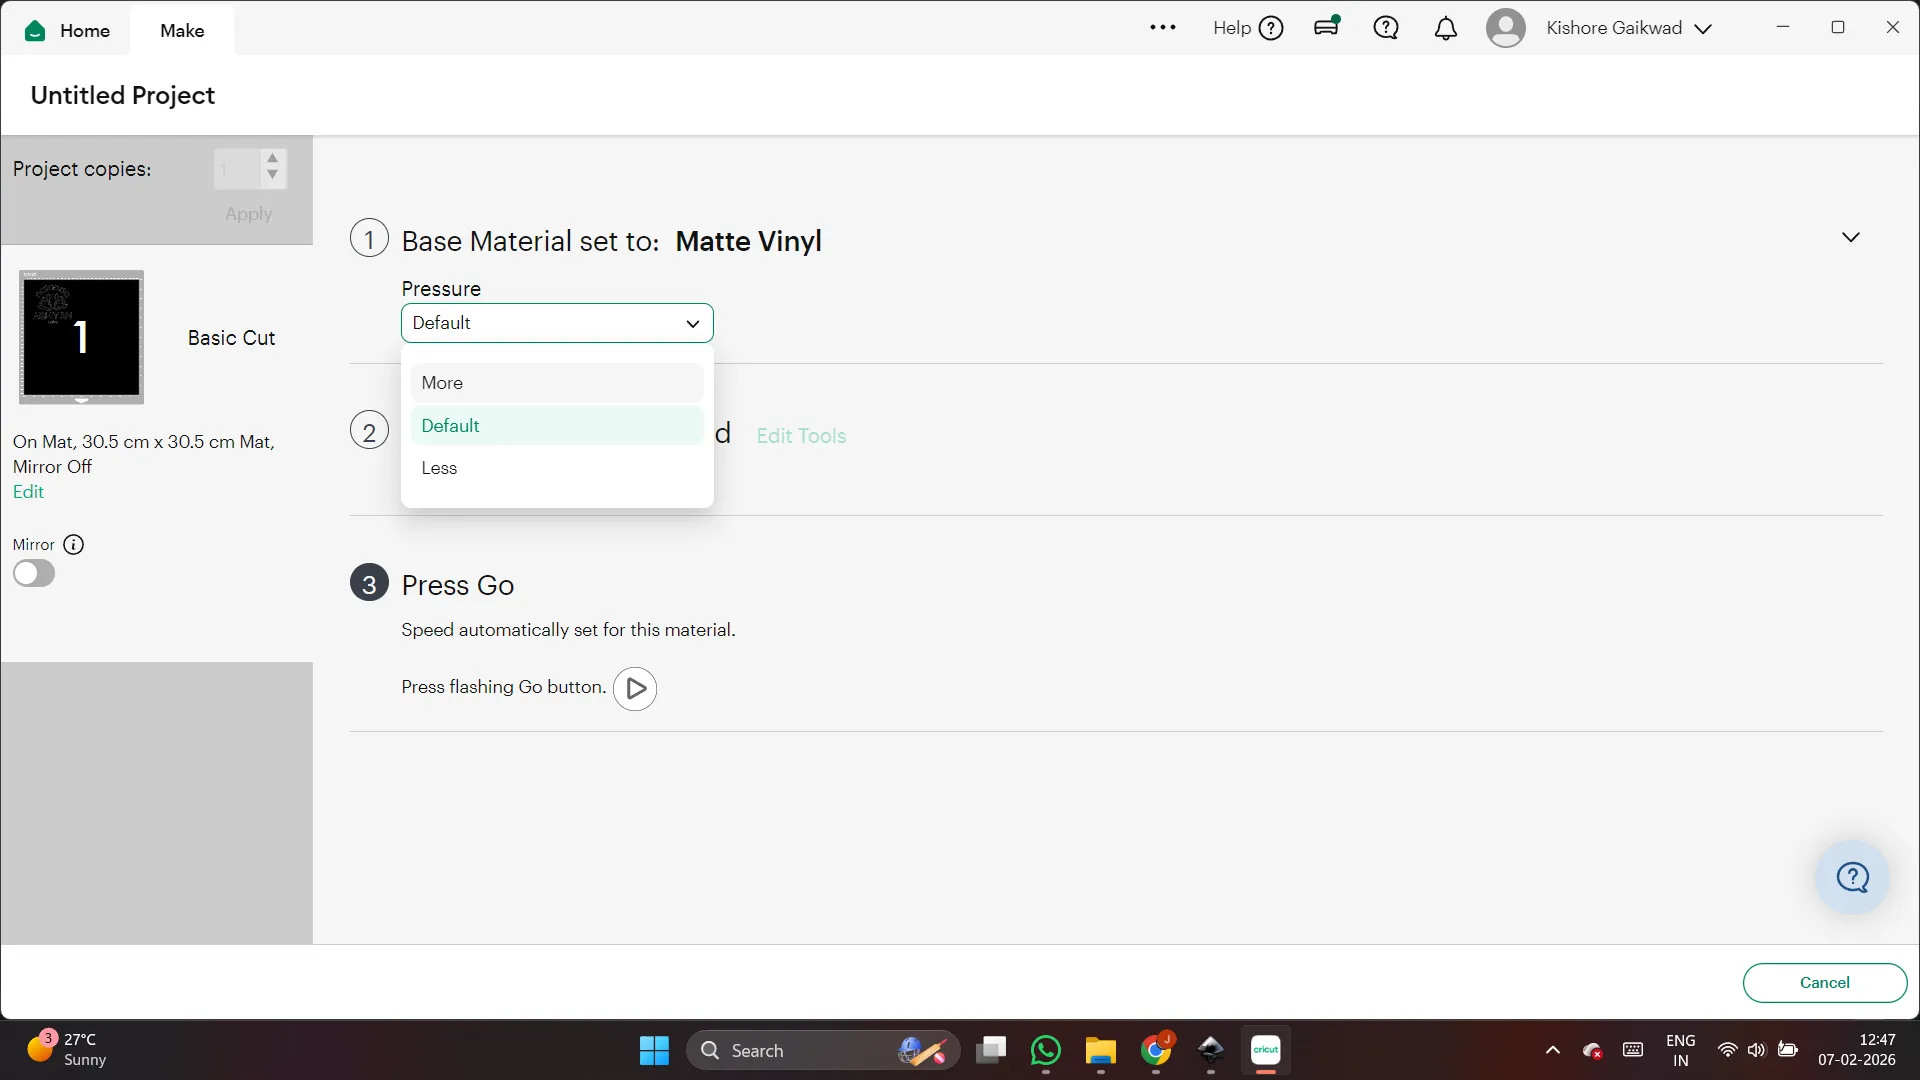
Then I chose the material type as Matte Vinyl, because I used matte vinyl paper for cutting.
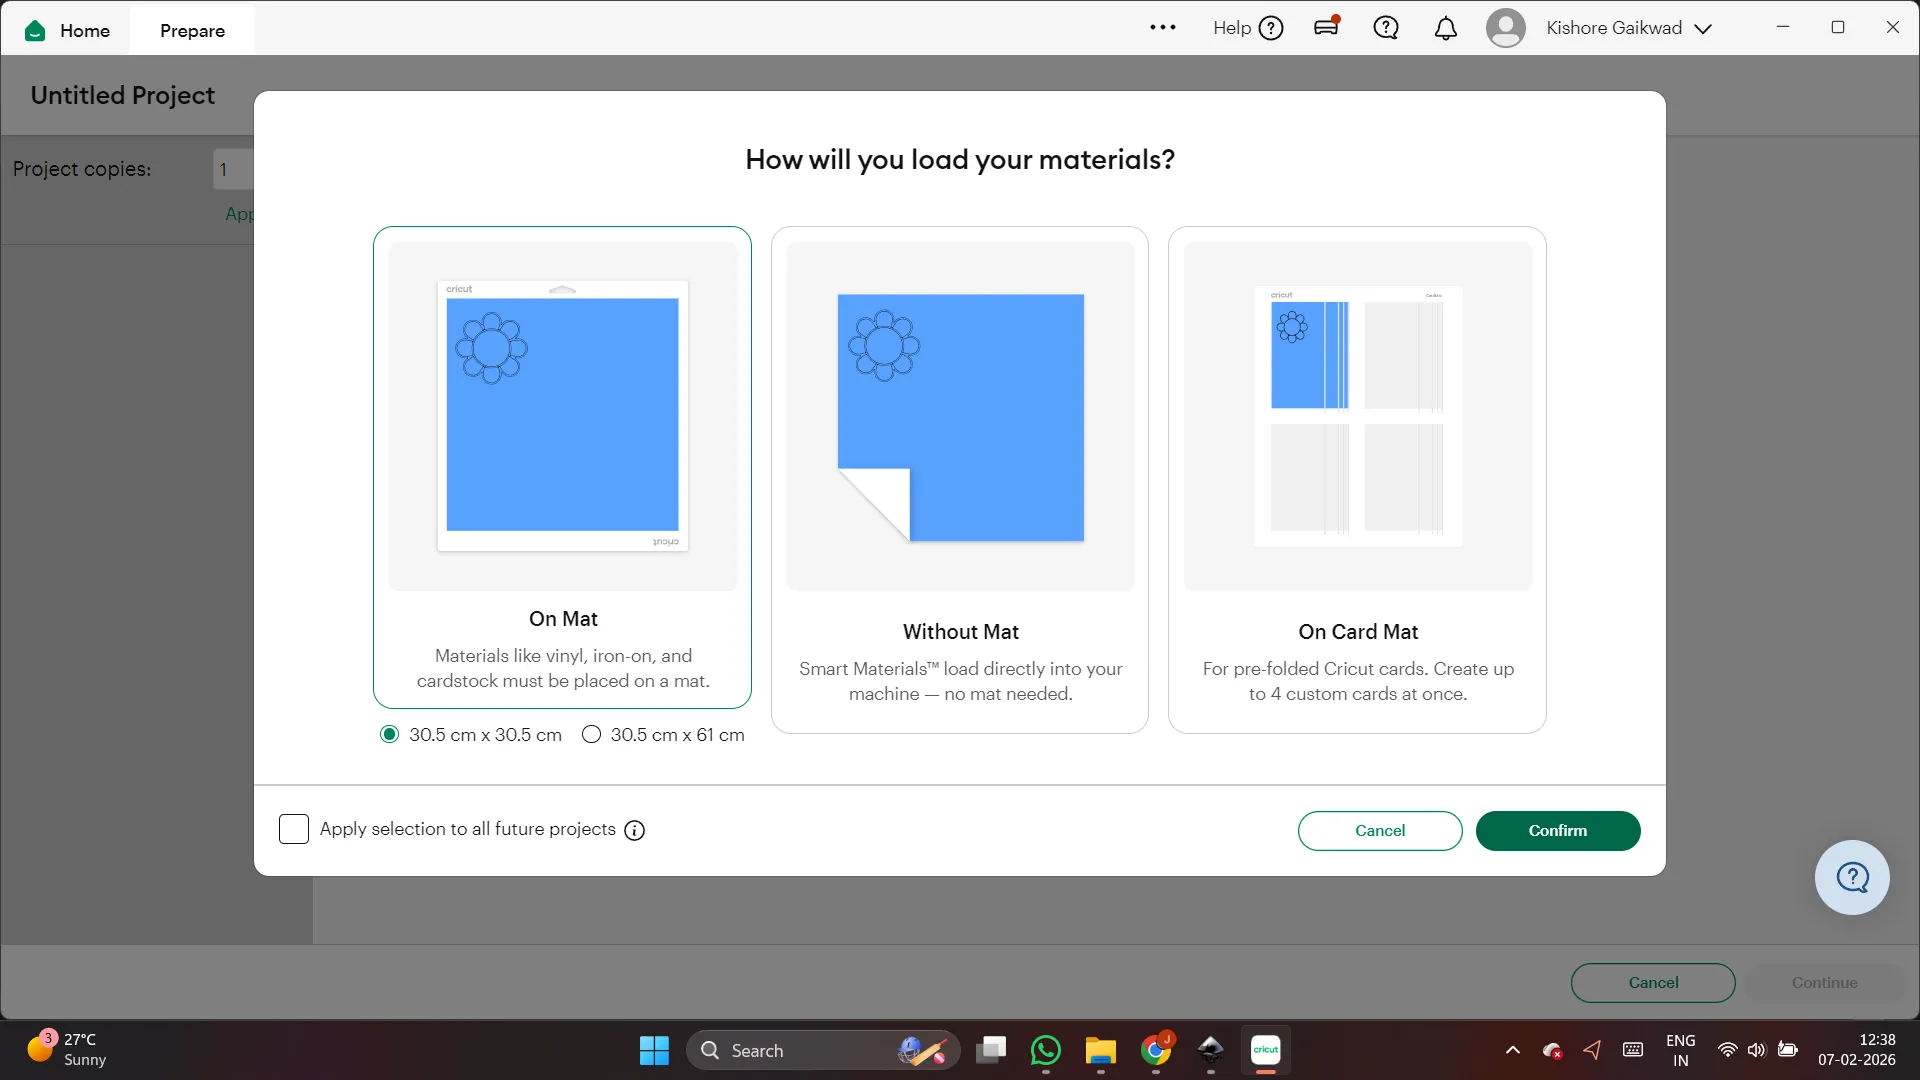
Then I selected the default settings in the software.
I positioned the logo properly and clicked continue to start the process.
After that,
I carefully placed the vinyl sheet on the cutting mat and made sure it was aligned properly so it would not move during cutting.
I also checked which cutting tool and settings are required for this material.
All these settings were done to prepare the logo for cutting.
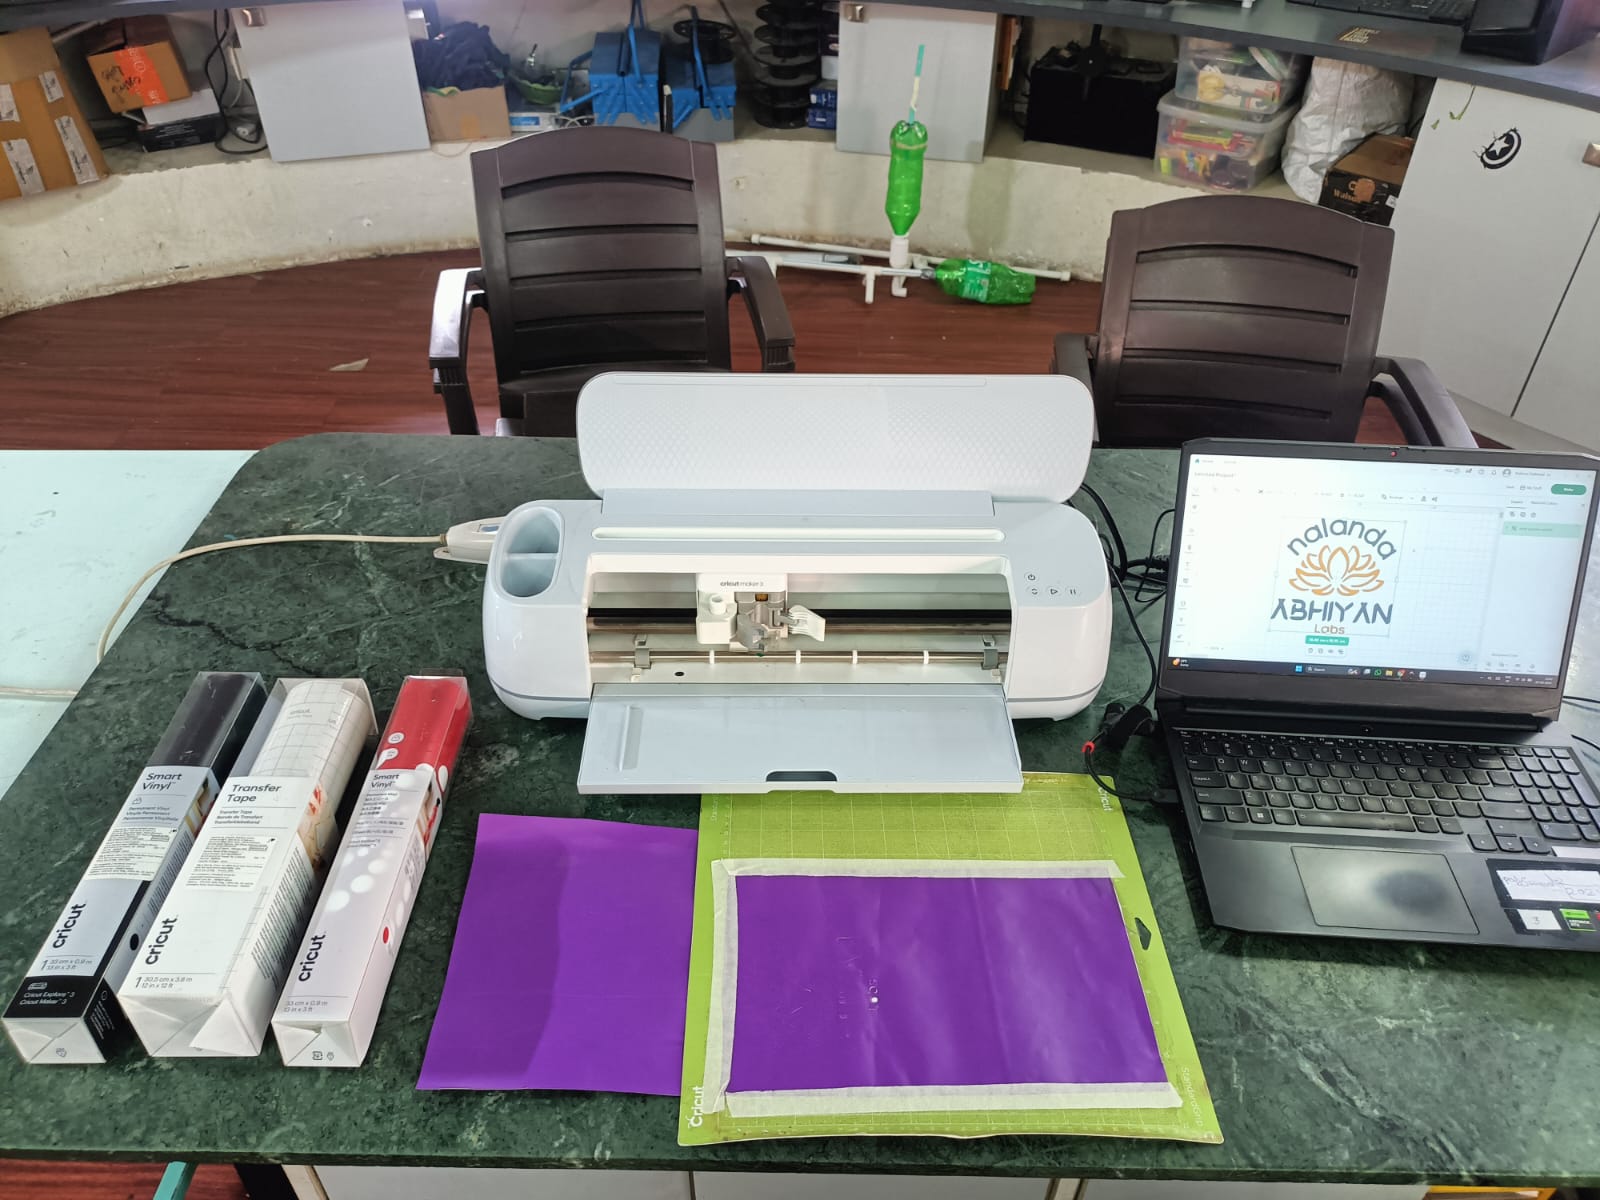
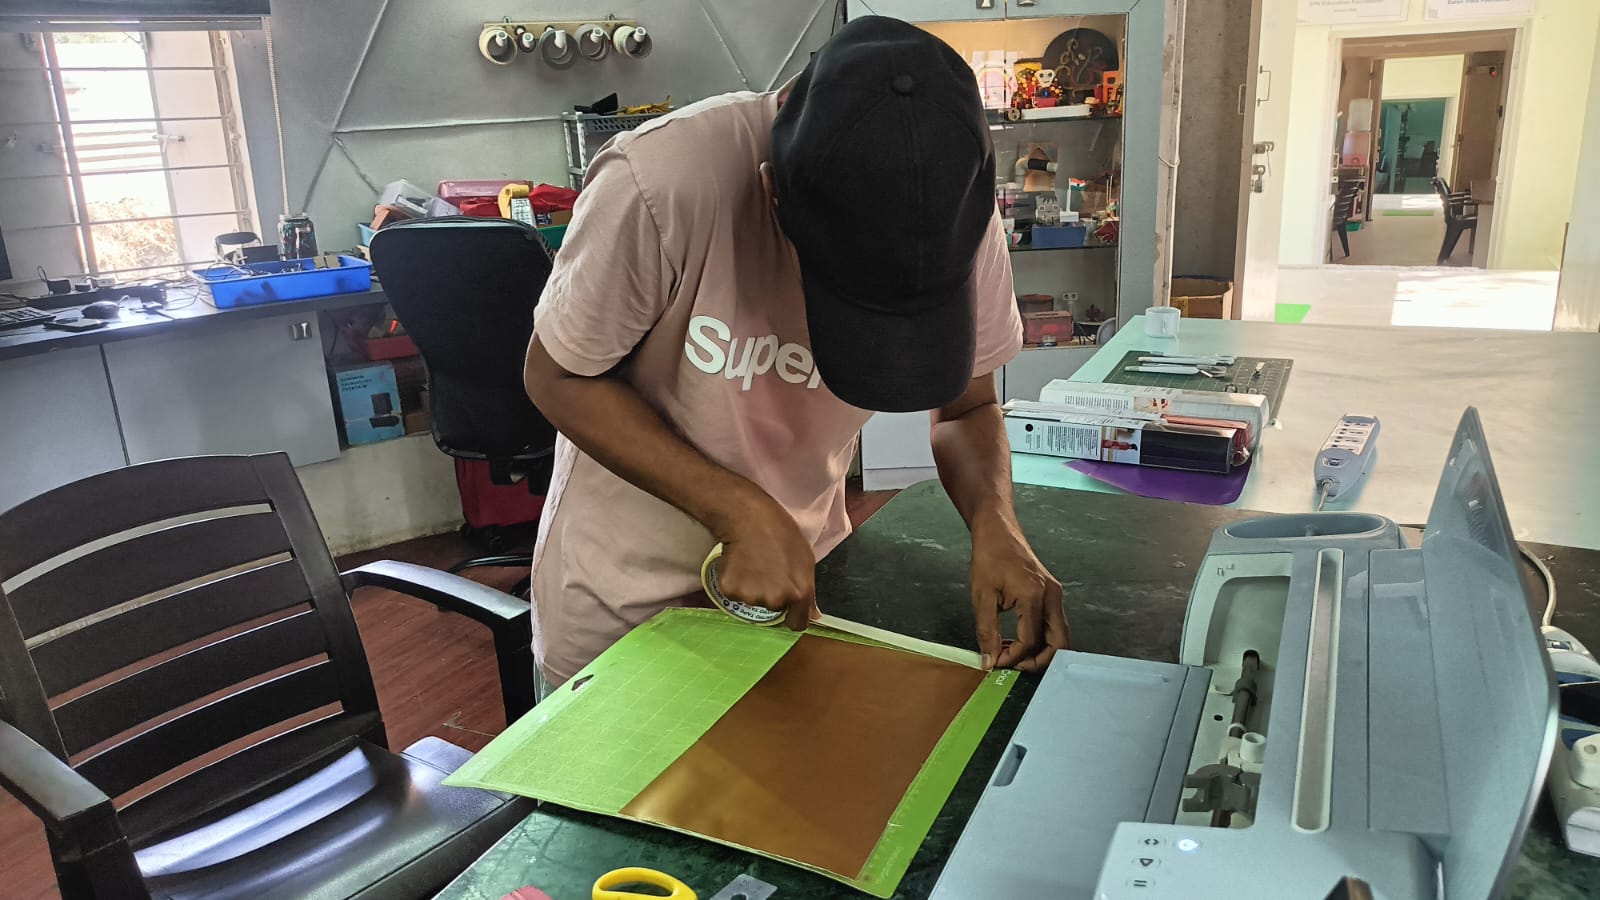
Next, I fixed the cutting tool into the tool holder properly.
Then I checked that the mat was correctly aligned with the machine base before starting the cut.
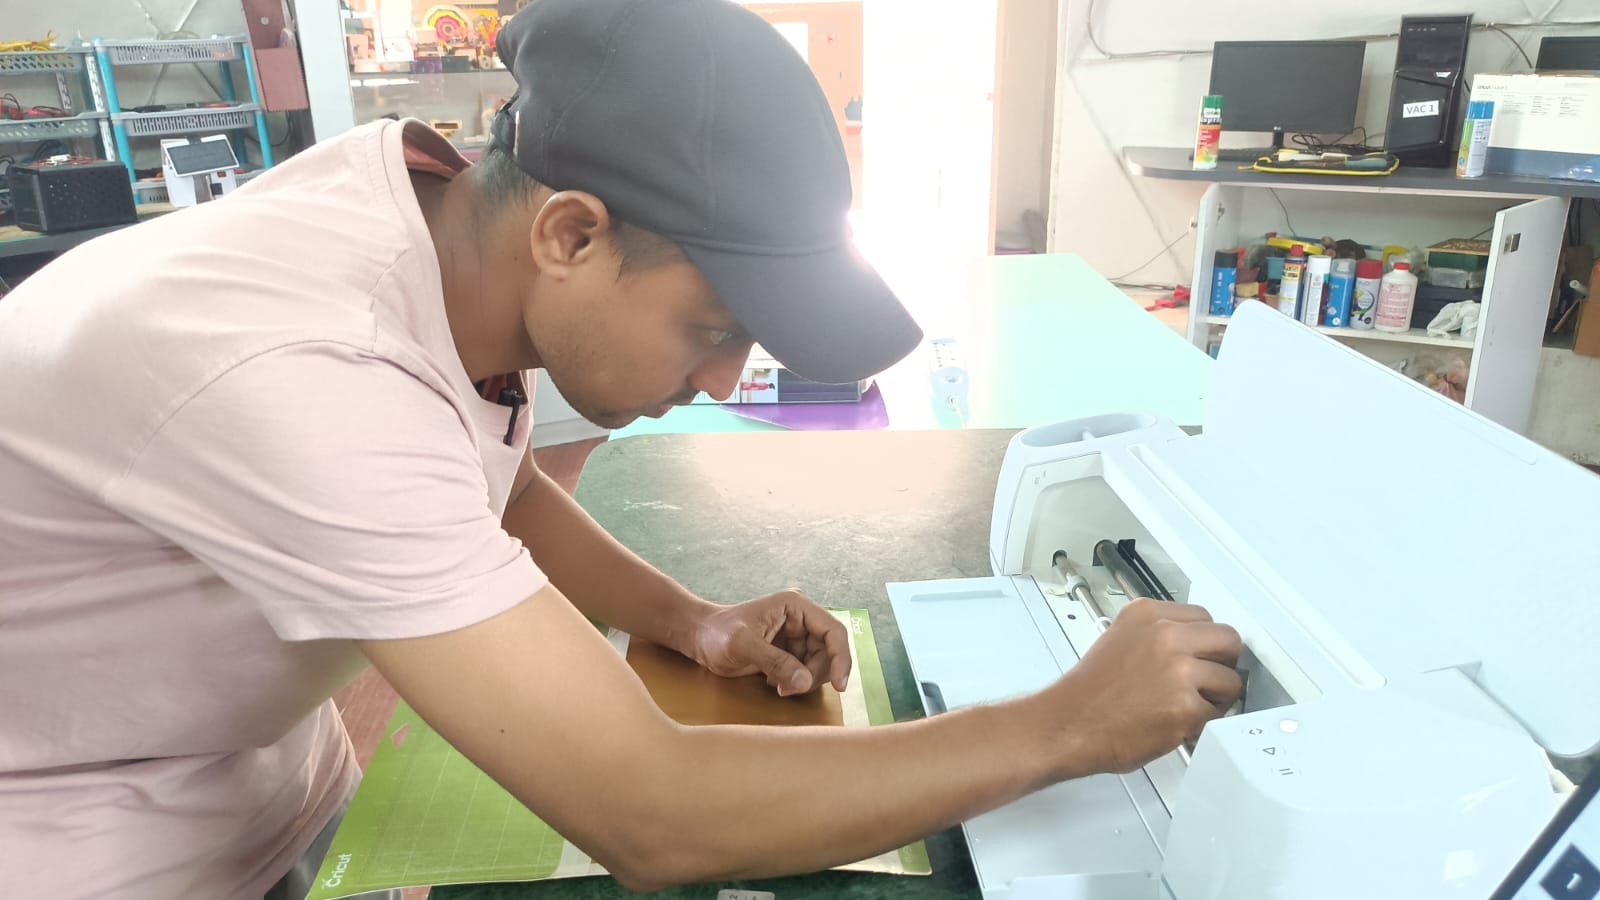
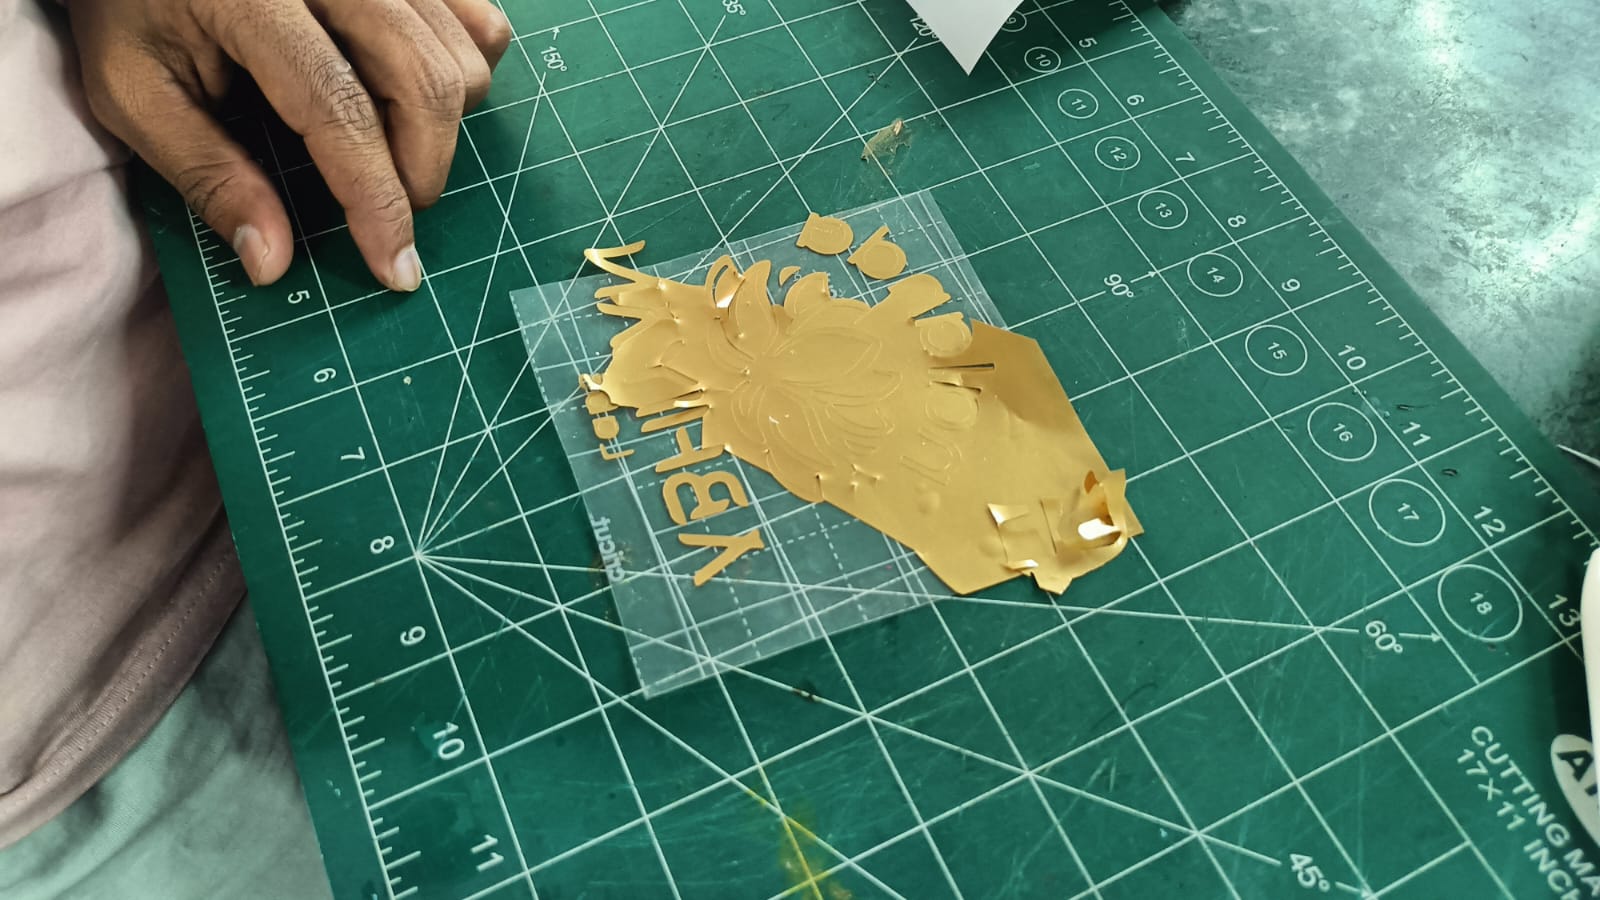
Next, I clicked the start button, and the machine began cutting the logo.
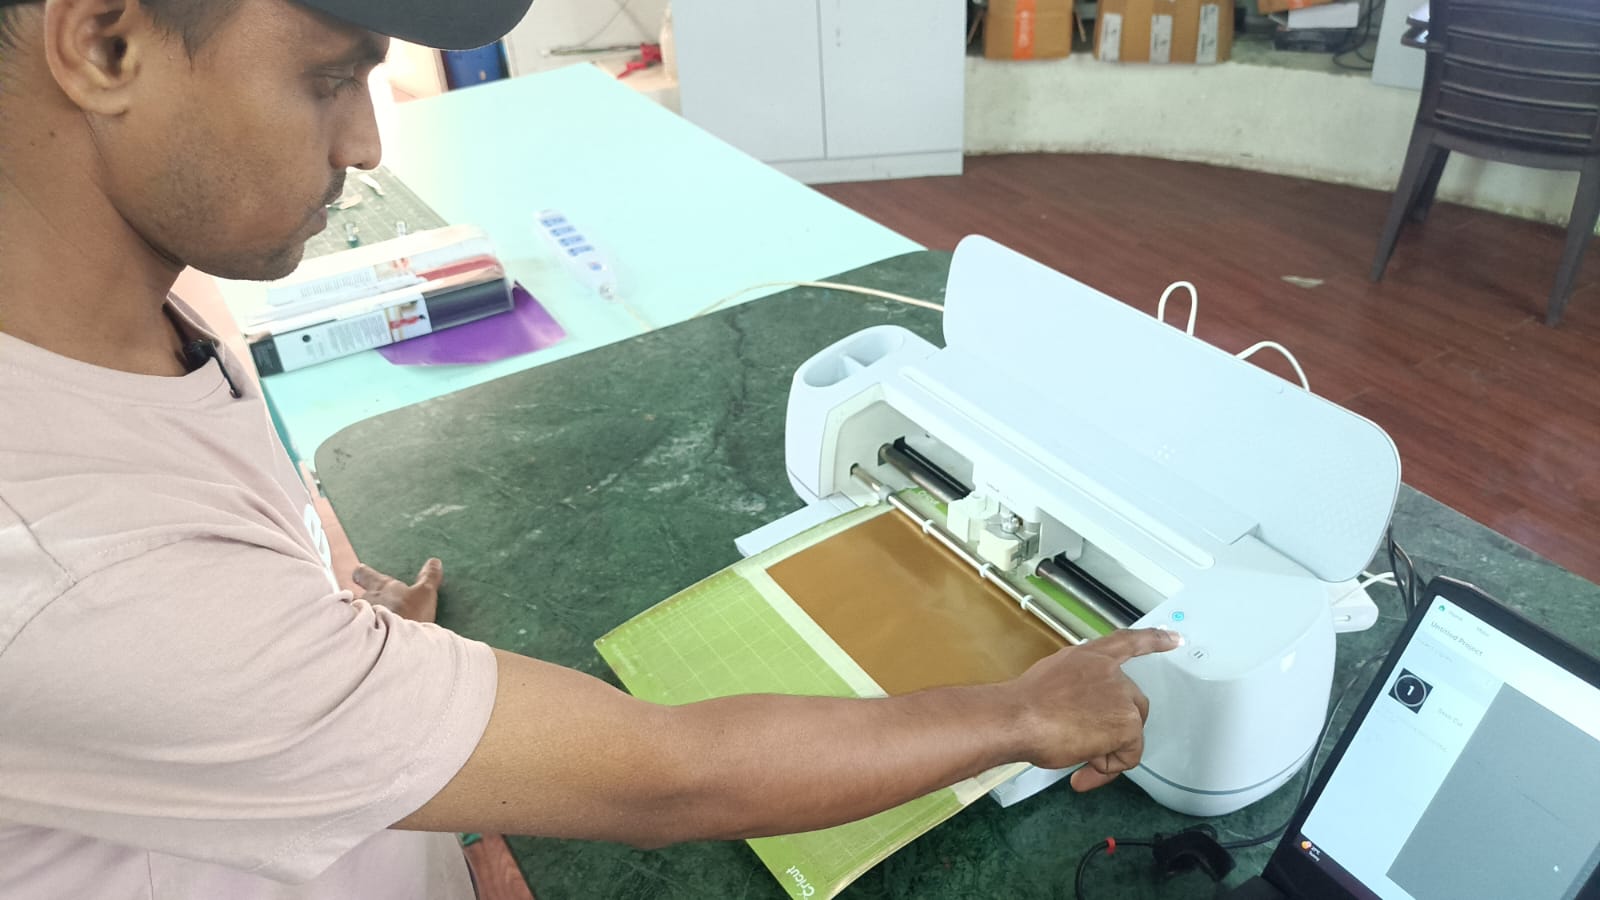
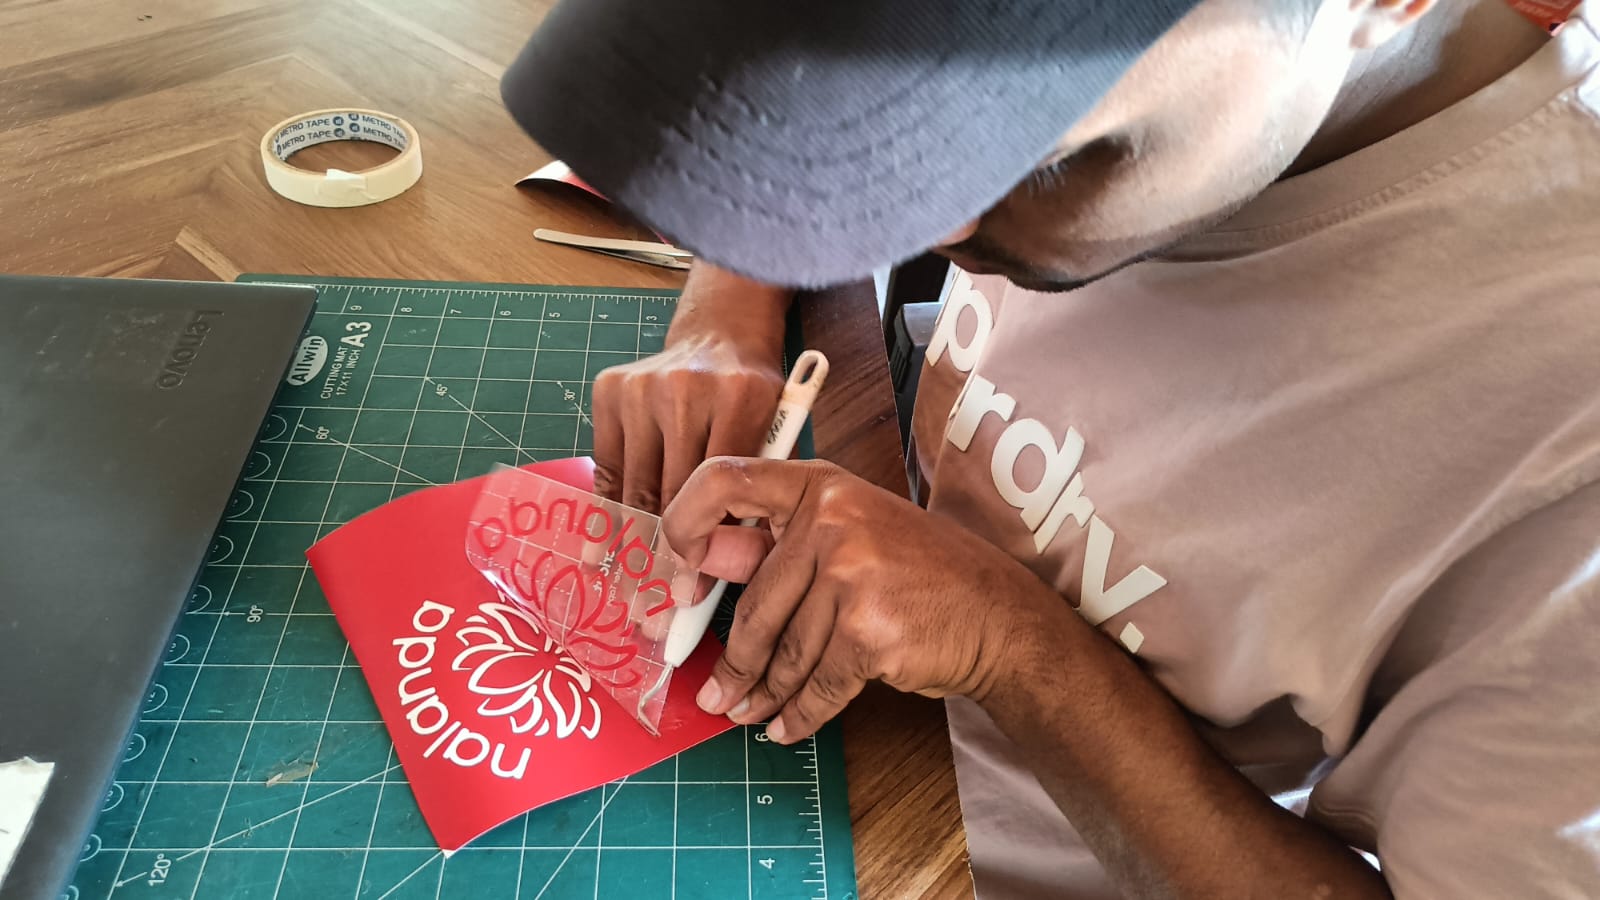
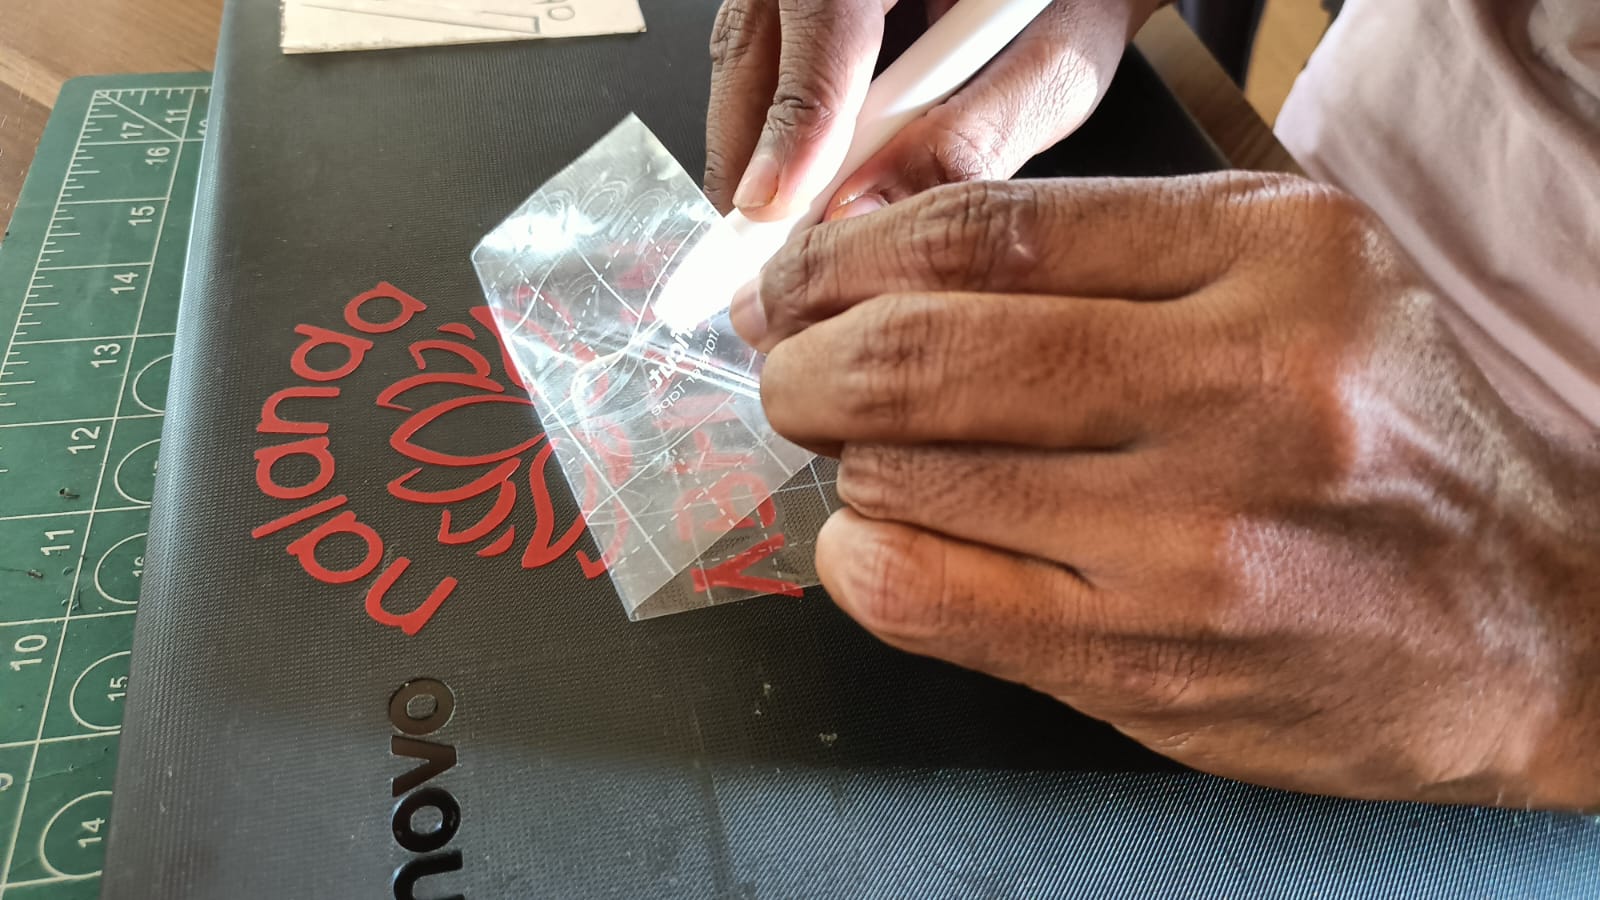
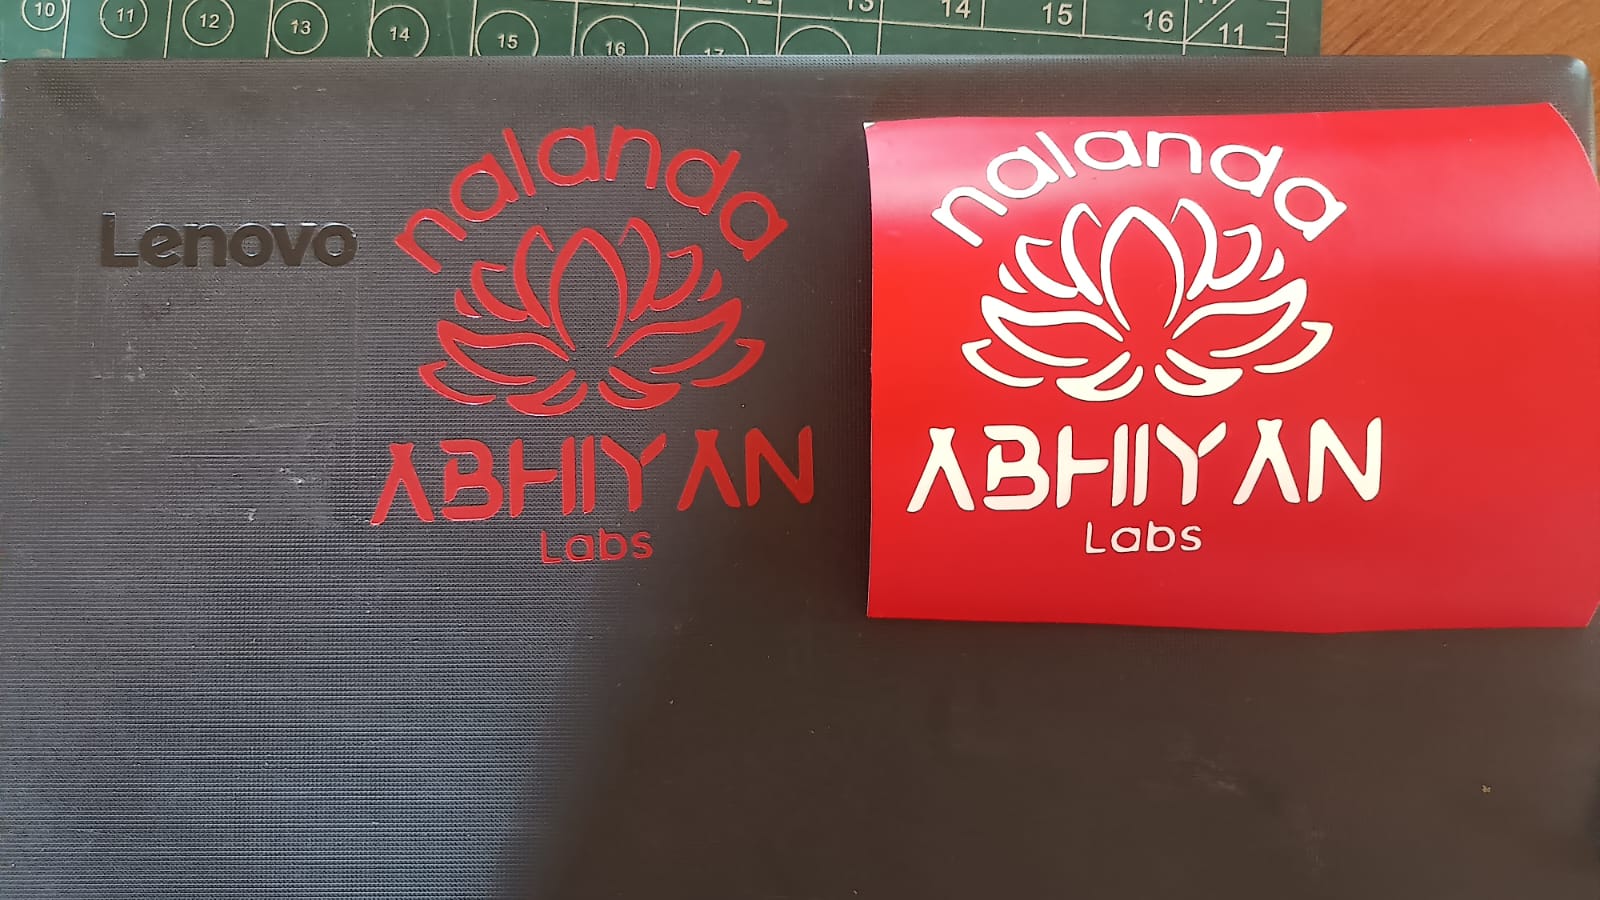
My first logo was cut nicely. Then I applied transfer tape to remove the negative portion. During this process, my logo got damaged while peeling out the negative vinyl.
After that, I repeated the whole process on red color vinyl paper.
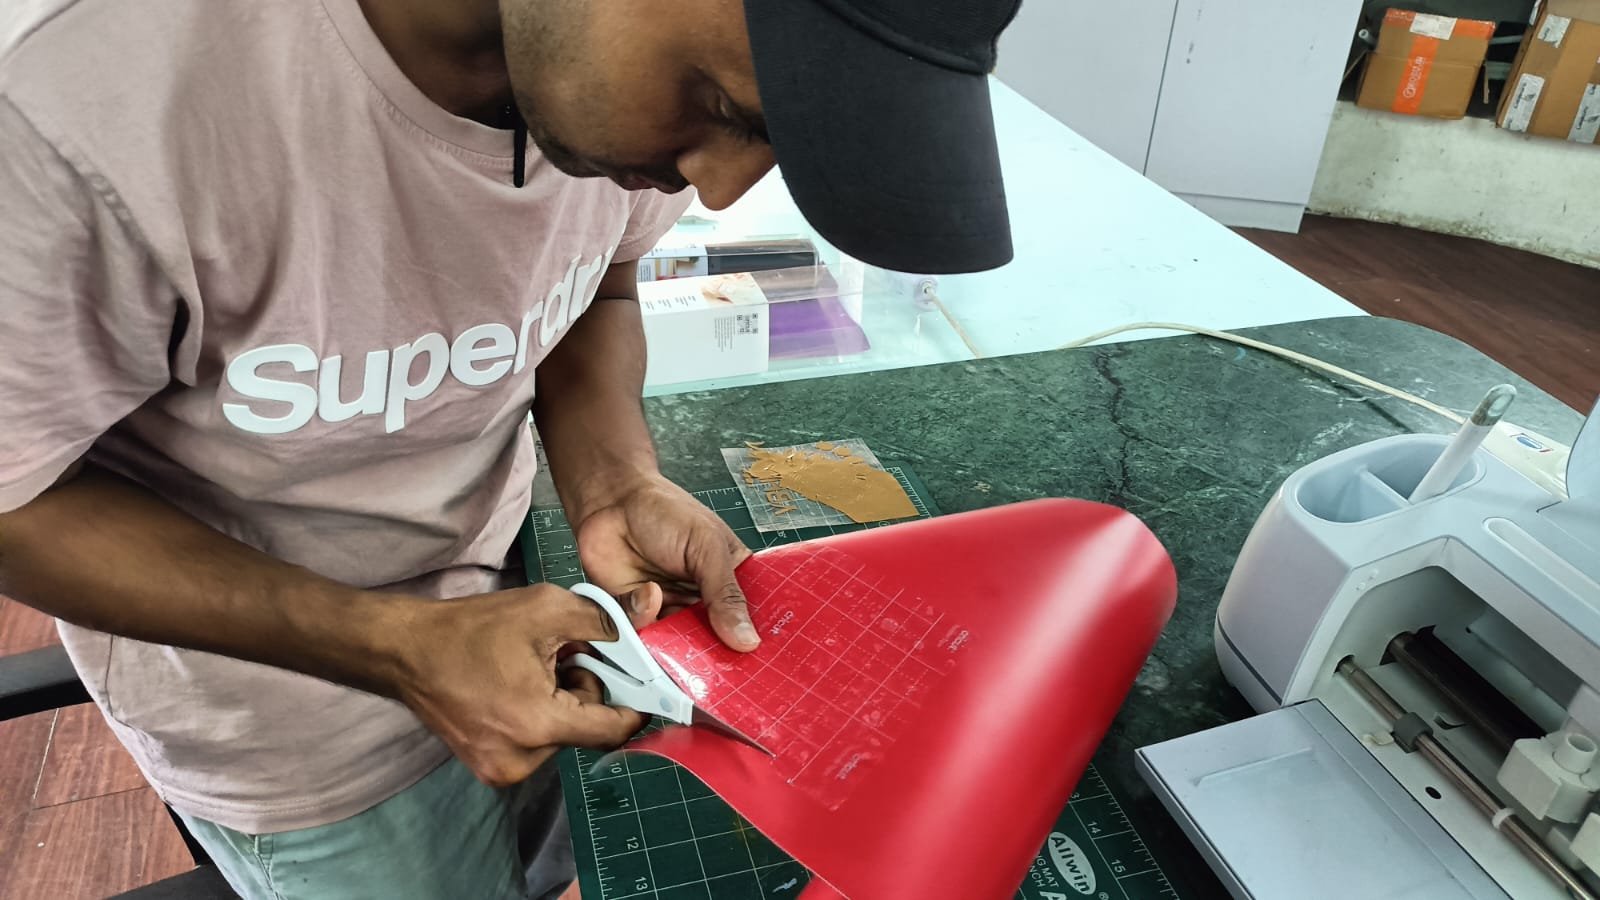
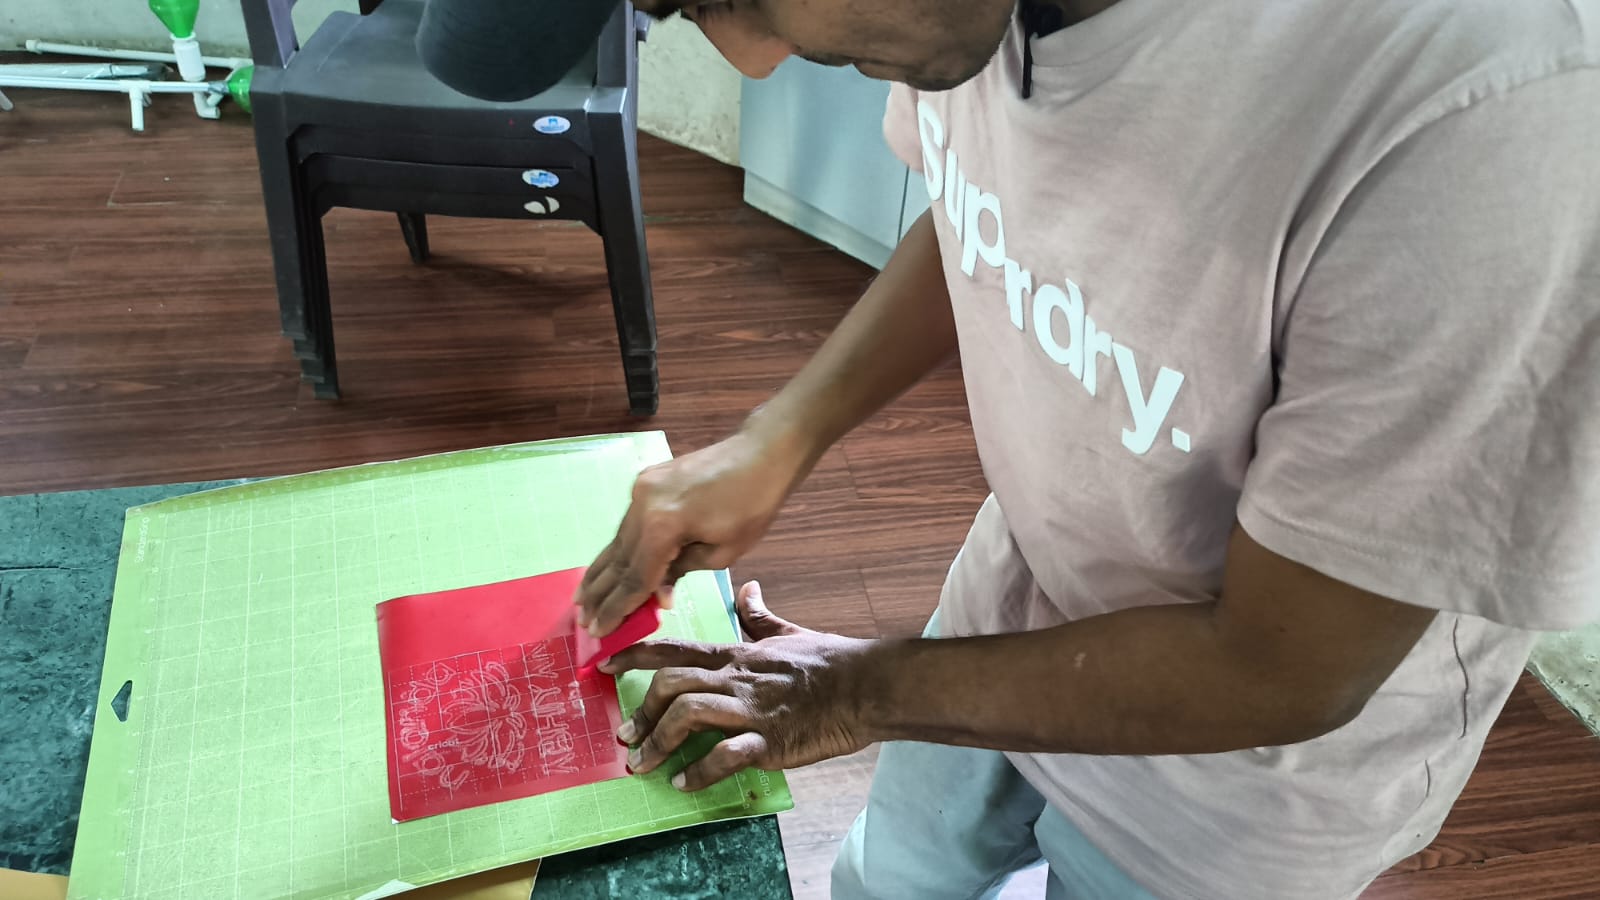
This time, my logo came out nicely without any damage.
I carefully removed the negative part and the design was clean and clear.
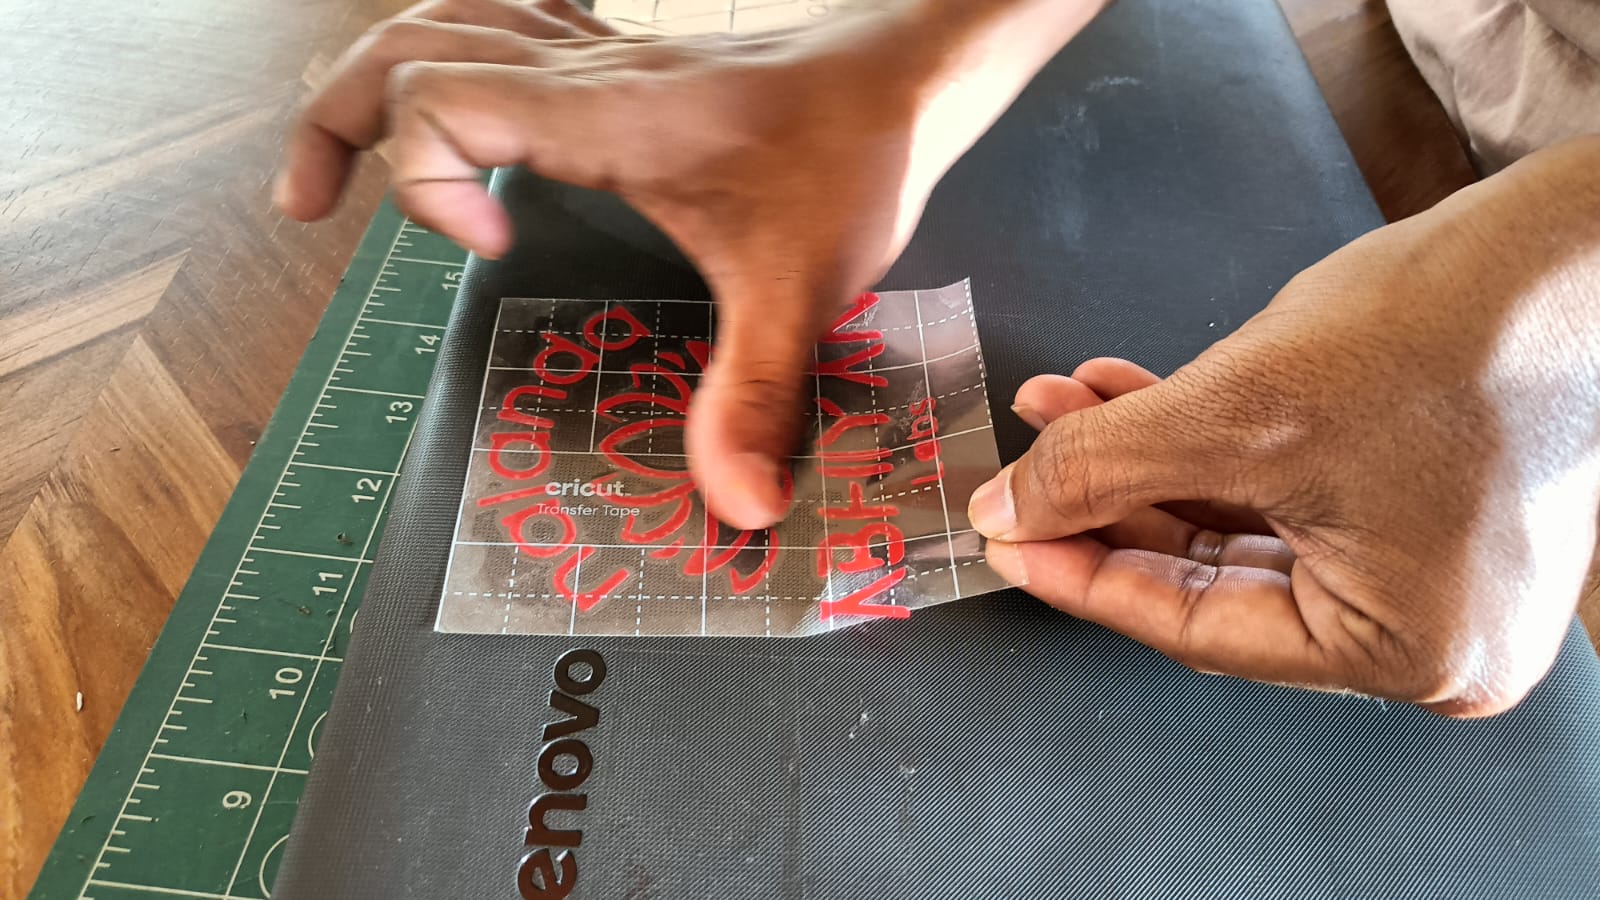
Finally, I stuck the logo on my computer carefully and pressed it properly so it fixed well.
Conclusion
In this Computer-Controlled Cutting week, I really enjoyed the process 😊. I learned many new things about vinyl cutting and how to use the machine properly. It was exciting to see my design turn into a real sticker. I also made some mistakes while using the laser machine, but those mistakes helped me understand the settings better. Overall, it was a great learning experience for me.
References
1. paramatric desgin
2. CNC machine
3. vinyl cutting machine
4. Canva
5.https://www.goodwin.edu/enews/what-is-cnc/
6. https://www.youtube.com/watch?v=0JIR2Zmc3u8