Group Assignment
3D Scanning and Printing
Group assignment
Test the design rules for your 3d printer
 |
 |
3D Printing
3D printing is a special way to make real objects from a computer design. It is called “3D” because the objects have three sides: length, width, and height. This means the object is not flat like a drawing on paper. It is real and you can touch and hold it. A 3D printer is a machine that makes these objects.
3D printing is used to make many things. It can make toys, tools, models, machine parts, and even school projects. Doctors use 3D printing to make models of body parts. Engineers use it to make machine designs. Students use it to make learning models. It helps people create new things easily.
3D printing is important because it saves time and helps people create new ideas. It is used in schools, industries, hospitals, and many other places. It makes learning fun and helps us understand how objects are made.
3D printing is a machine that makes real objects from commputer designs by adding material layer by layer,
Material used for 3D printing
- PLA(Polylactic acid)
- ABS(Acrylonitrile Butadiene Styrene)
- PETG(Polyethylene Terephthalate Glycol)
- TPU(Thermoplastic Polyurethane)
- Resin
- Nylon
1.PLA is the most common 3D printing material. It is easy to use and safe. It is made from natural things like corn and sugarcane. PLA is used to make toys, models, and school projects. It does not smell much and prints easily.
2.ABS is a strong plastic material. It is used to make strong objects like machine parts and tools. It is harder than PLA but needs more heat to print.
3.PETG is strong and flexible. It is used to make bottles, containers, and mechanical parts. It is stronger than PLA and easier to print than ABS.
4.TPU is a flexible material. It is used to make soft objects like phone covers, rubber parts, and wearable items. It can bend easily without breaking.
5.Resin is a liquid material used in special 3D printers. It makes very smooth and detailed objects. It is used to make small models, jewelry, and dental parts.
6.Nylon is very strong and durable. It is used to make gears, machine parts, and industrial objects. It is flexible and does not break easily.
Comparison between additive manufacturing and subtractive manufacturing

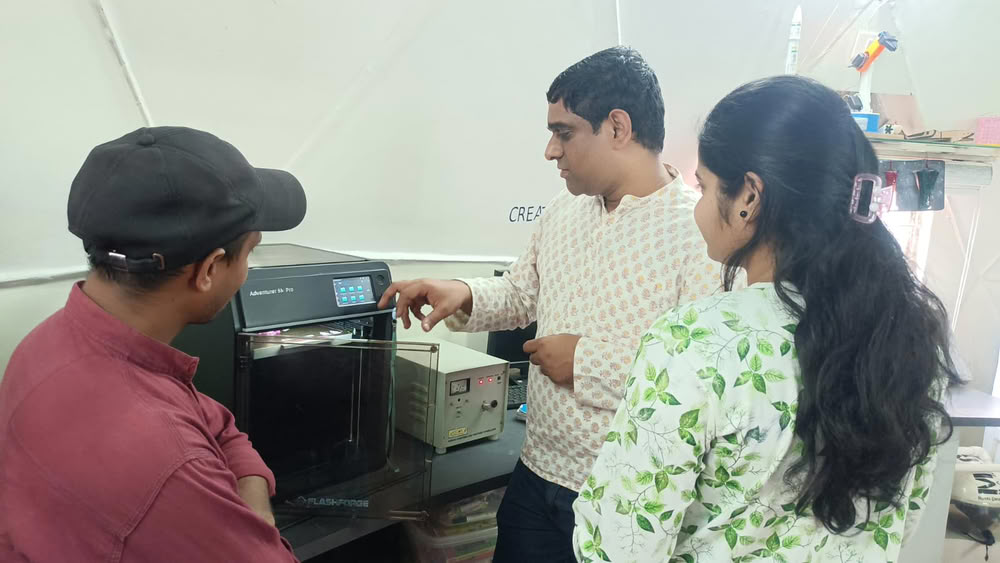
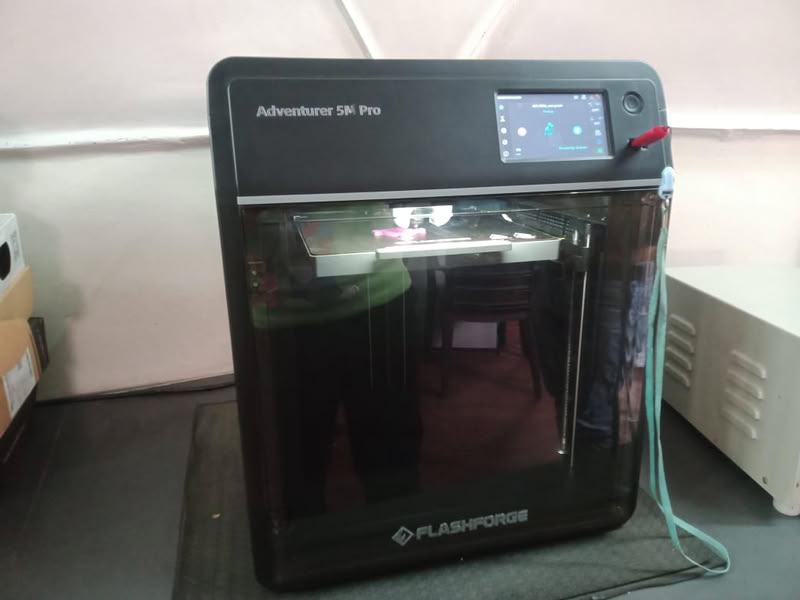
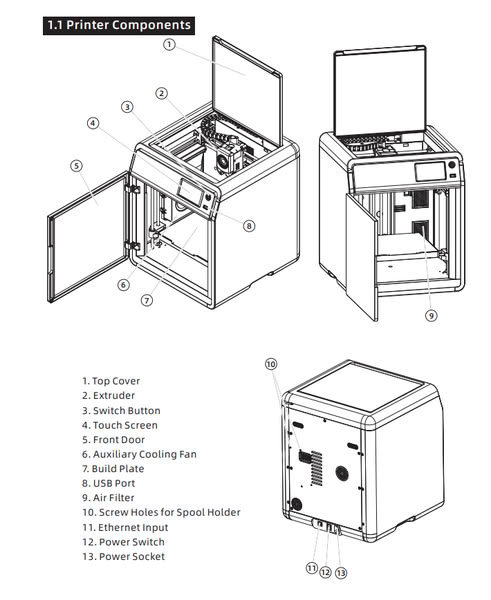
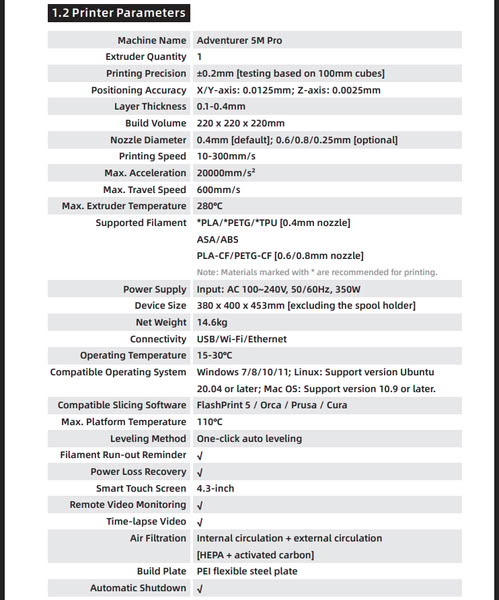
Flashforge Adventure 5M PRO
 |
 |
 |
Reference-Manuallib.com
Vibration Test:
But Why?
Vibration test is important because it makes sure the 3D printer is not shaking while printing. If the printer shakes, the layers will not be placed properly, and the object can become uneven or wavy. Too much vibration can also cause parts to move from their correct position, which makes the print look bad. By checking vibration before printing, we make sure the machine is stable and the final object comes out neat, smooth, and accurate.
Bed Leveling
But why?
Bed leveling is important because it makes sure the printer bed is flat and at the correct distance from the nozzle. This helps the first layer of the print stick properly to the bed. The first layer is like the foundation of a building. If the bed is not level, the filament may not stick, and the print can move, become uneven, or fail. Proper bed leveling helps the printer make smooth, accurate, and strong objects.
filament Loading
No filament = No Print!!!
Filament loading is important because filament is the material that the 3D printer uses to make objects. If the filament is not loaded properly, the melted plastic will not come out smoothly from the nozzle. This can stop the printing or make the object weak and uneven. When we load the filament correctly and heat it to the right temperature, the plastic melts properly and flows smoothly. This helps the printer build the object layer by layer without any problem.
Filament Unloading
Filament unloading is important because it helps us safely remove the material from the 3D printer when we want to change it or stop using it. We must heat the nozzle before removing the filament so the filament becomes soft and comes out easily. If we pull it out without heating, it can break inside and block the nozzle. Proper filament unloading keeps the printer clean, prevents clogging, and helps the printer work smoothly for the next print.
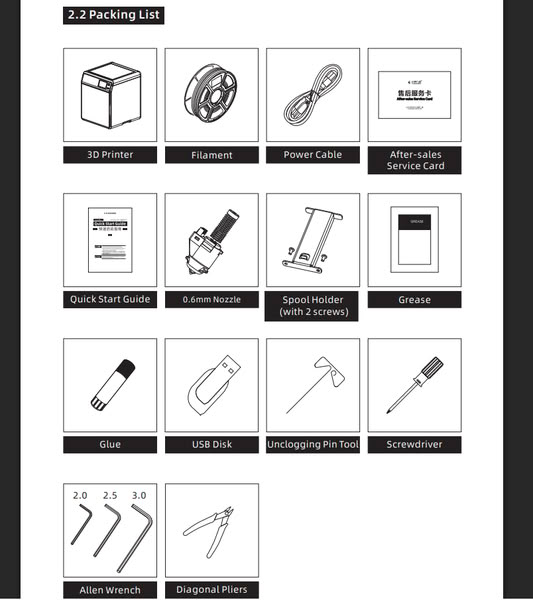
Hardware tools used
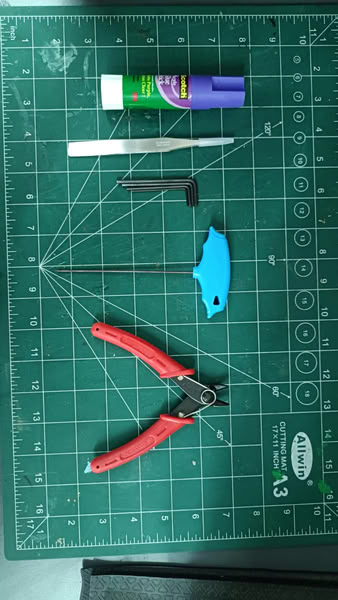
- Twiser:-Used to remove small supports and clean tiny parts of the 3D printed object carefully.
- Cutter:-Used to cut extra filament and remove support material from the printed model.
- Glue stick:-Used to apply glue on the printer bed so the print sticks properly and does not move during printing.
- Alen keys:-Used to tighten or loosen screws of the 3D printer during setup and maintenance.
- Screwdriver:-Used to adjust and fix printer parts securely
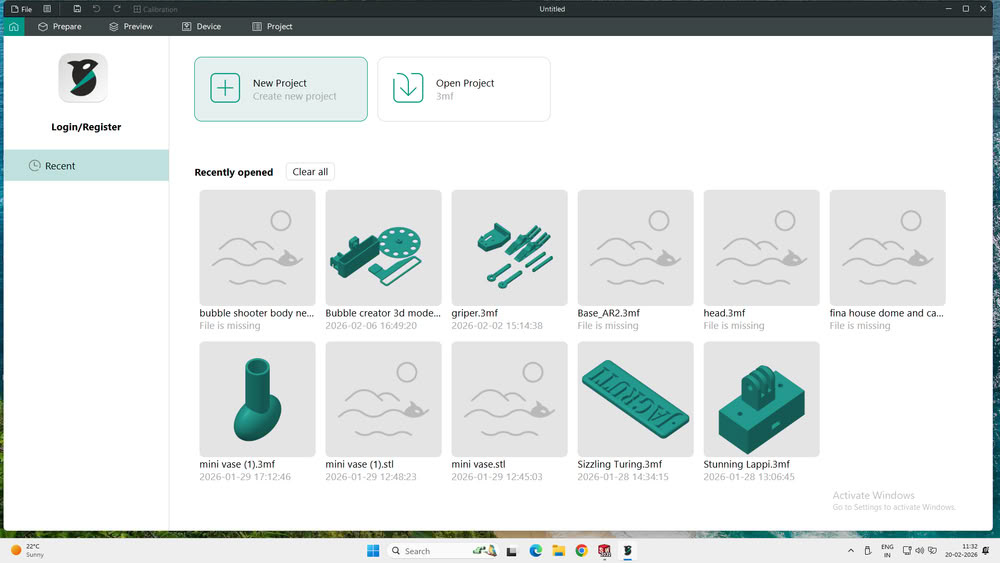
Slicing:
We used orca slicer for slicing objects
 |
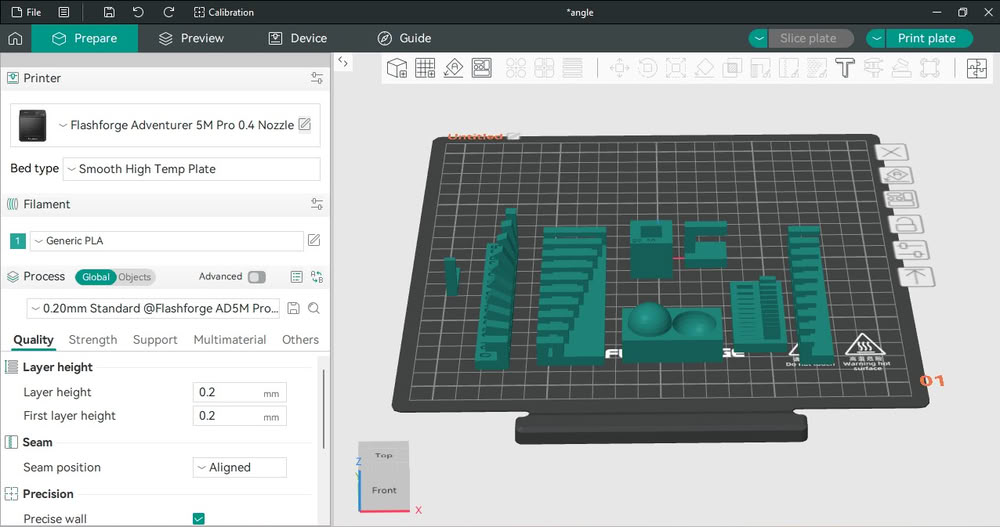 |
| First we opened the slicing software | we selected the FlashForge Adventurer 5M Pro printer with a 0.4 mm nozzle. we imported the STL files and arranged them properly on the build plate. I selected Generic PLA as the filament and set the layer height to 0.20 mm to achieve a good balance between quality and speed. This step allowed me to prepare the models and apply the correct printing settings before slicing. |
 |
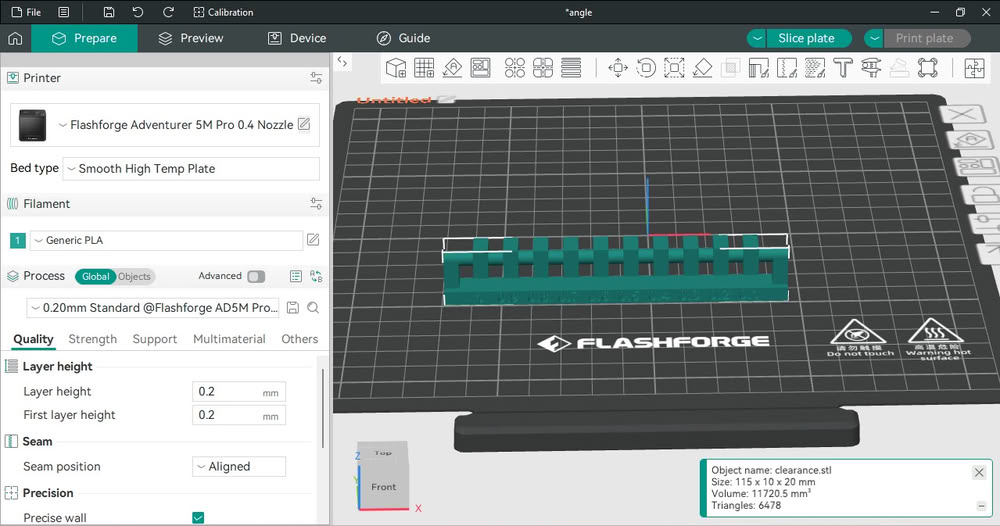 |
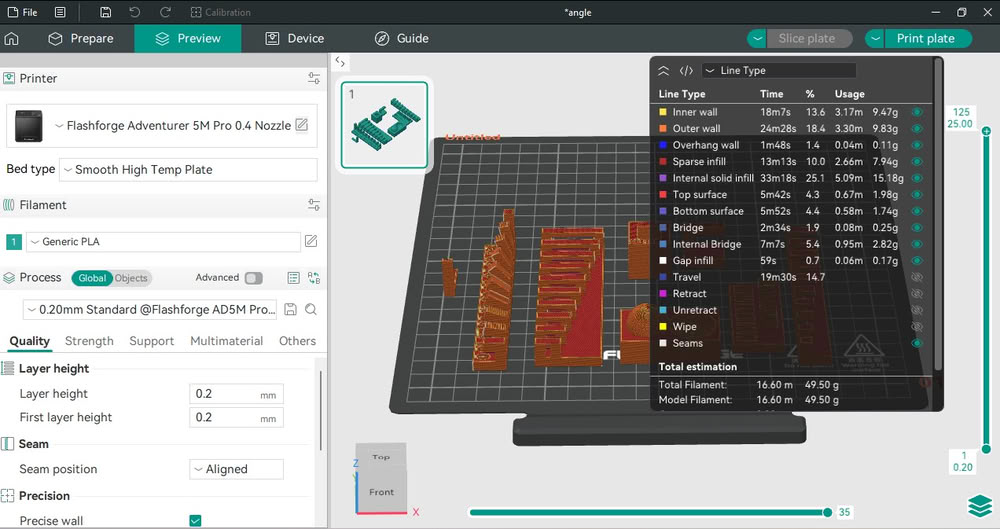
| After preparing the models, we clicked on the slice option and switched to preview mode. we observed the toolpath generated by the slicer, which showed inner walls, outer walls, infill, top layers, bottom layers, bridges, and travel paths in different colors. we checked the layer-by-layer structure and verified that the models would print correctly. I also reviewed the estimated print time and filament usage. | we selected the clearance test model and placed it on the build plate. This model was used to test the minimum gap required between parts for proper movement after printing. I ensured the model was properly positioned and checked its dimensions. This step helped us to verify the printers tolerance and accuracy for designing functional and movable parts. |
 |
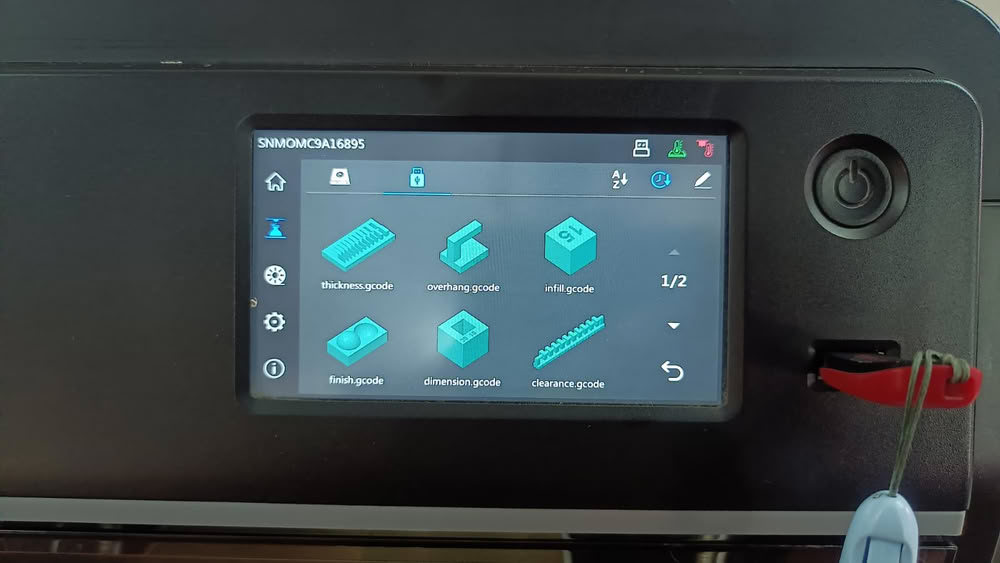 |
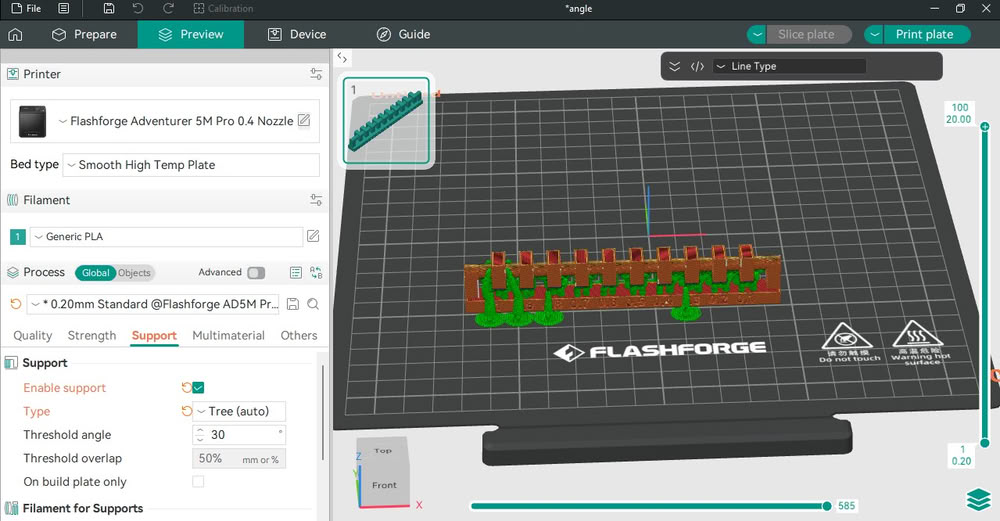
| we enabled the support option and selected tree supports with a threshold angle of 30°. The slicer generated support structures under the overhanging areas of the model. we switched to preview mode and checked the support placement to ensure the model would print successfully without collapsing. This step ensured proper printing of overhangs and improved the overall print quality. | we inserted the USB drive into the FlashForge Adventurer 5M Pro and opened the touchscreen interface. we viewed the available G-code files such as thickness.gcode, overhang.gcode, infill.gcode, finish.gcode, dimension.gcode, and clearance.gcode. These files were created to test different design rules like wall thickness, overhang capability, infill structure, surface finish, dimensional accuracy, and clearance. I selected the required file from the screen to prepare it for printing. |
3D printing rules:
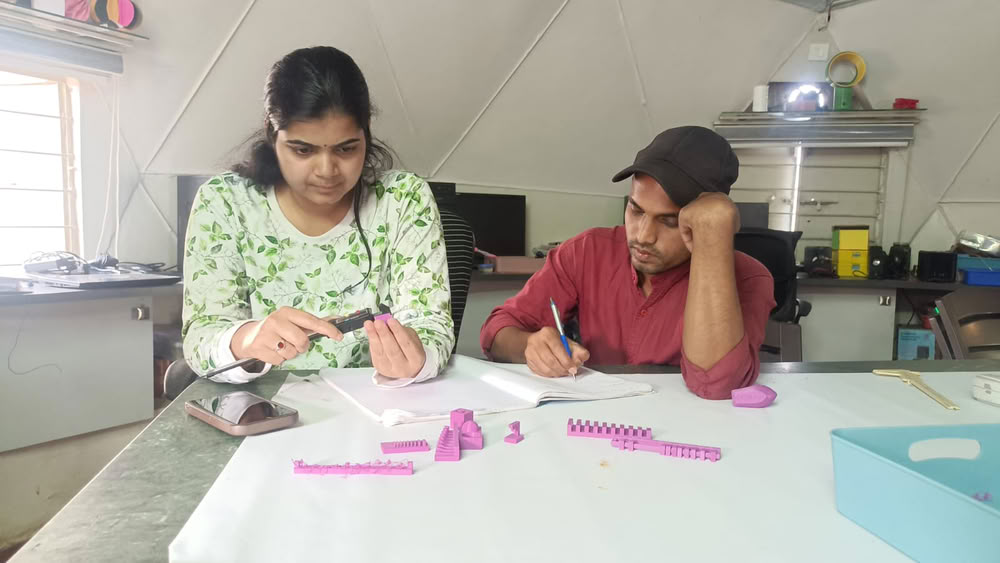
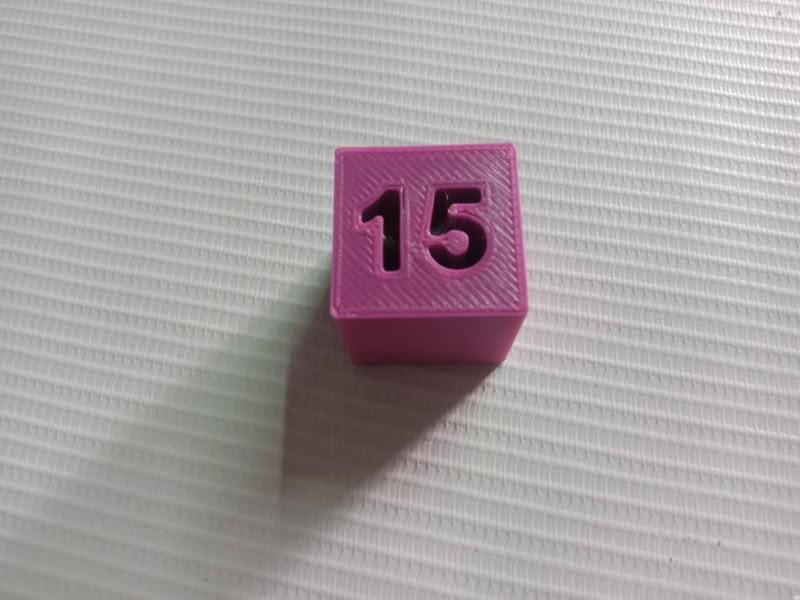
Components printed to test design rules for 3D printer
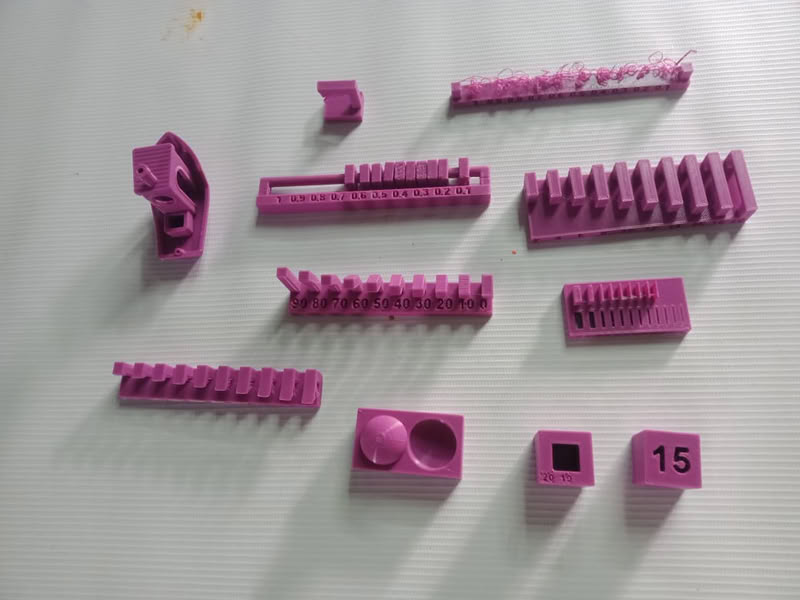
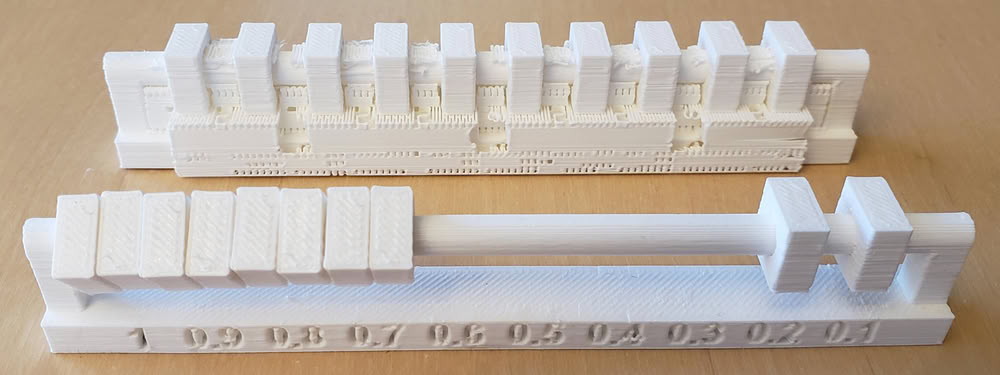
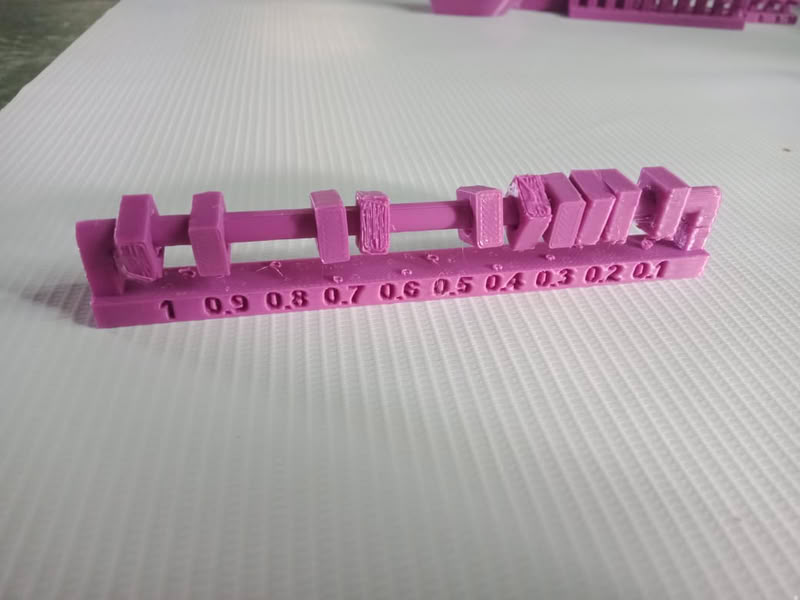
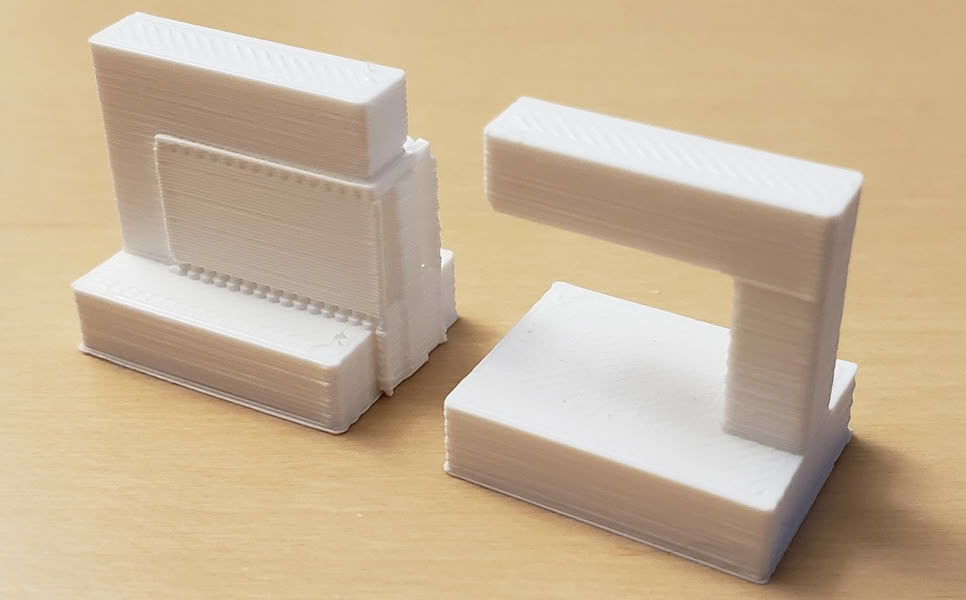
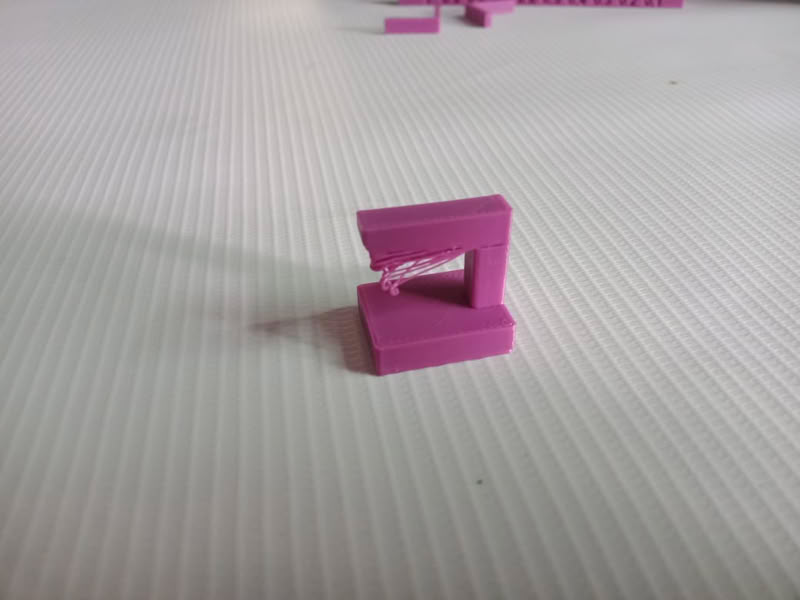
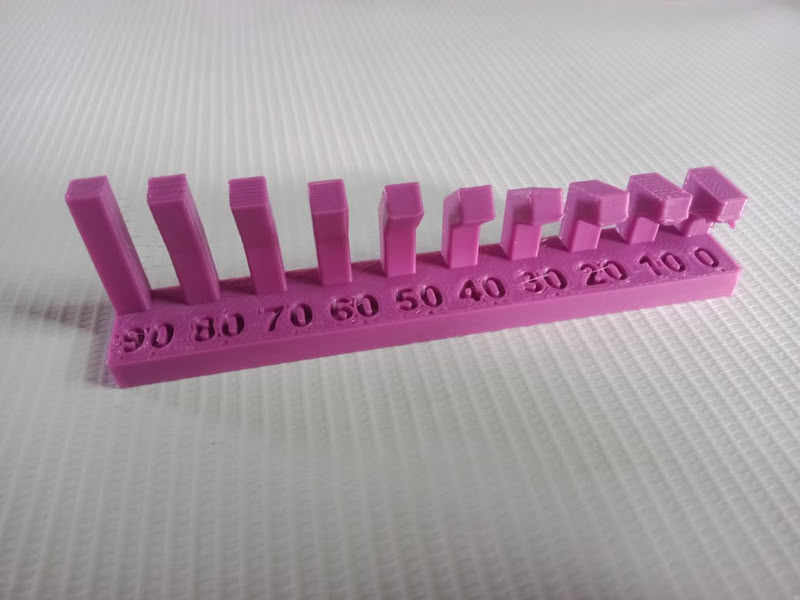
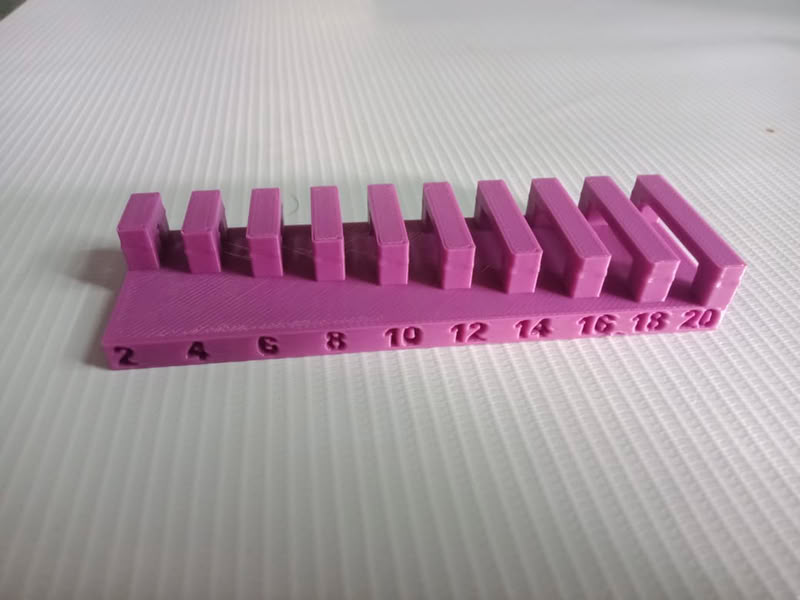
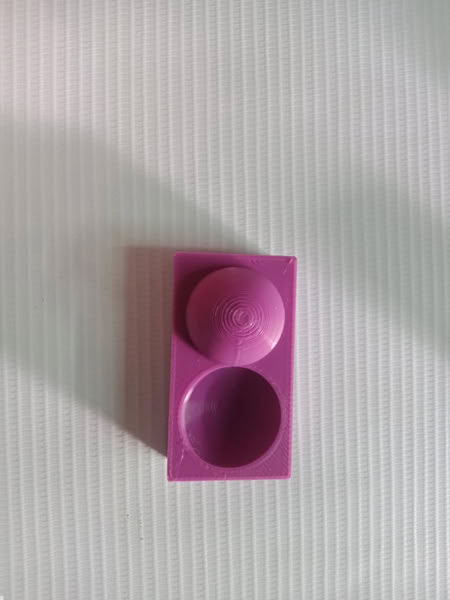
1.Clearance
 |
 |
Conclusion
Objects with a gap of 0.1-0.2 mm stay fixed and stable, and they do not move.Objects with a gap of 0.3-0.4-0.5-0.6 mm show small movement and can move slightly separate from each other.Objects with a gap of 0.7 - 0.8 - 0.9 - 1.0 mm show more movement, and they become more flexible and move freely.
2.Overhang
 |
 |
Conclusion
In 3D printing, sometimes parts stick out in the air. These parts are called overhangs. If they stick out too much, they can fall down or become bent.Support helps the shape stay correct. Without support, the print can become loose, bent, or broken.
3.Thickness
 |
 |
Conclusion
The wall should be thick so it is strong. A wall thickness of 2 to 3 mm is good and safe. If the wall is very thin, it can break or not print properly. We should choose the correct thickness so the object is strong and we do not waste material or time.
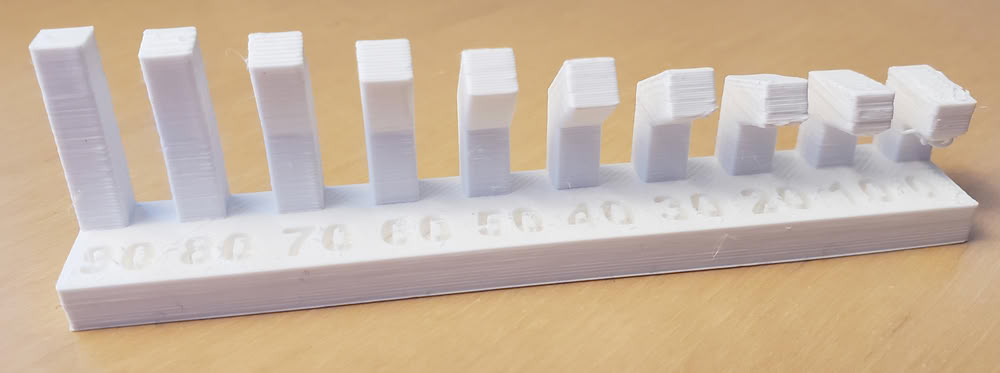
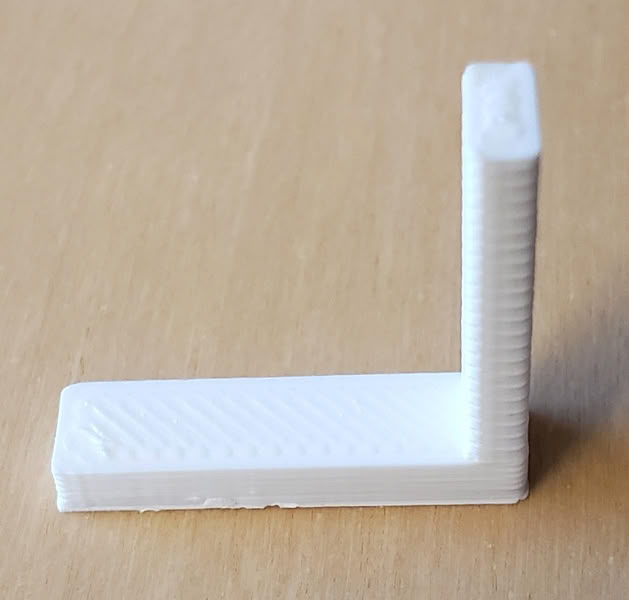
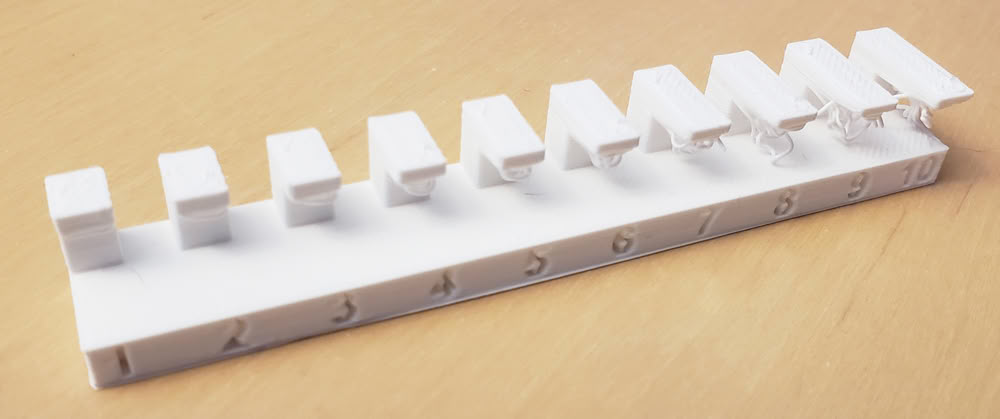
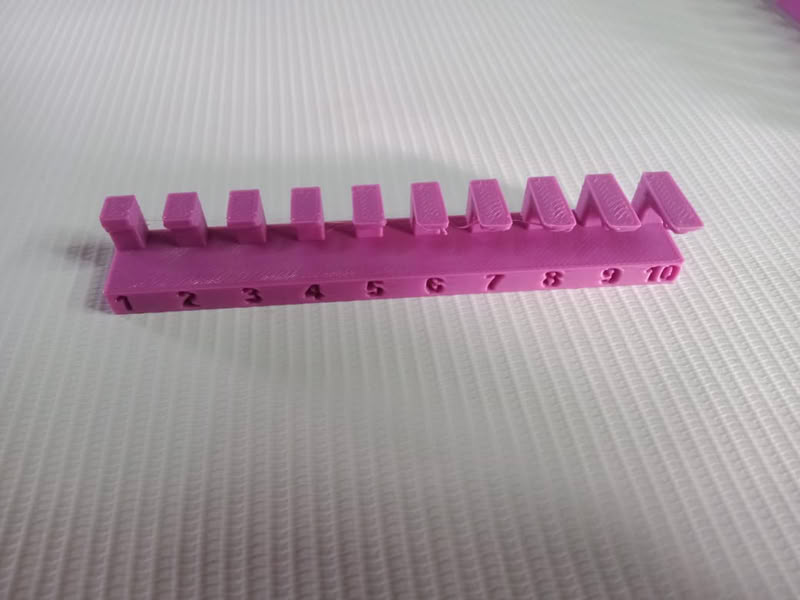
4.Angle
 |
 |
Conclusion
A 3D printer works best when the angle is between 30° and 90°. At small angles like 10° and 20°, the printer cannot make the shape properly. The material can fall down or make a bad shape. So, it is better to use angles between 30° and 90° for good and clean printing.
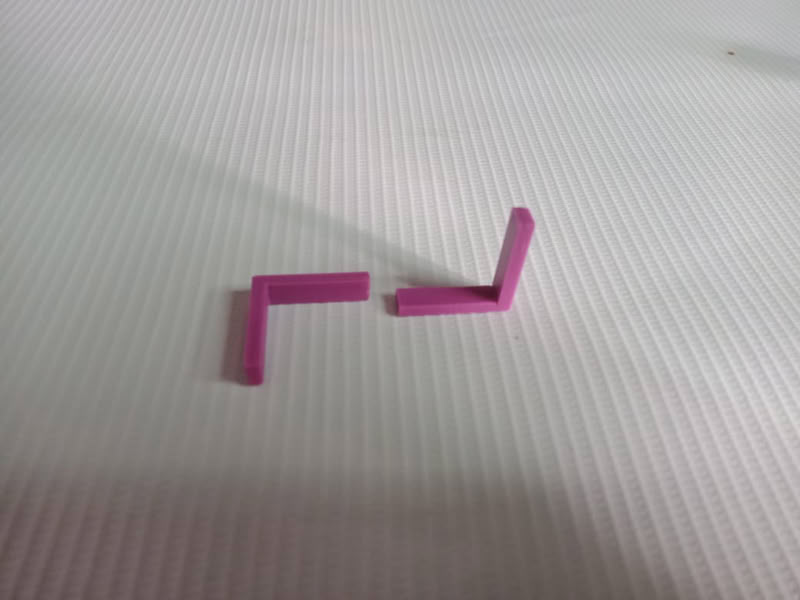
5.Anisotropy
 |
 |
Conclusion
The 3D printer works very well at a 90-degree angle, so the shape prints nicely and correctly.
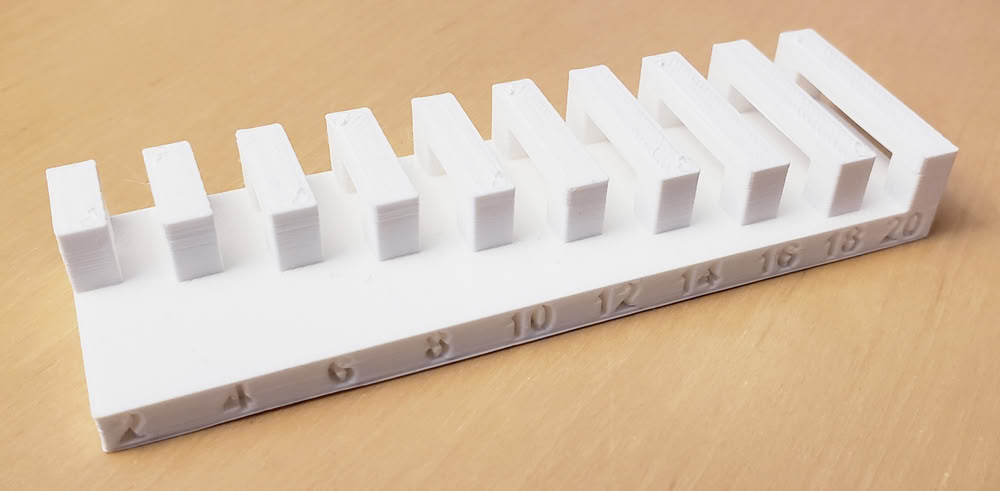
6.Bridging
 |
 |
Conclusion
The parts are nicely printed with a bridging distance of 20mm without support.Long bridges can bend.Using shorter bridges and thicker walls makes the object strong and helps it print properly.
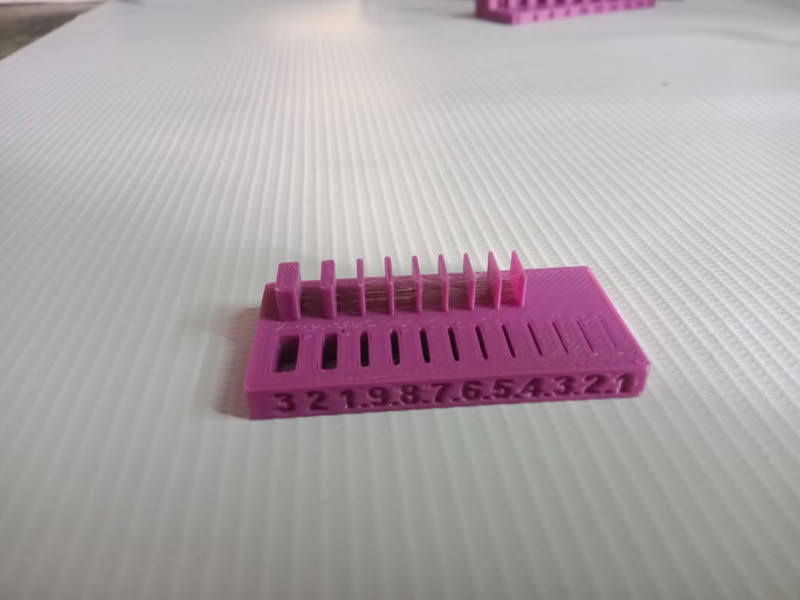
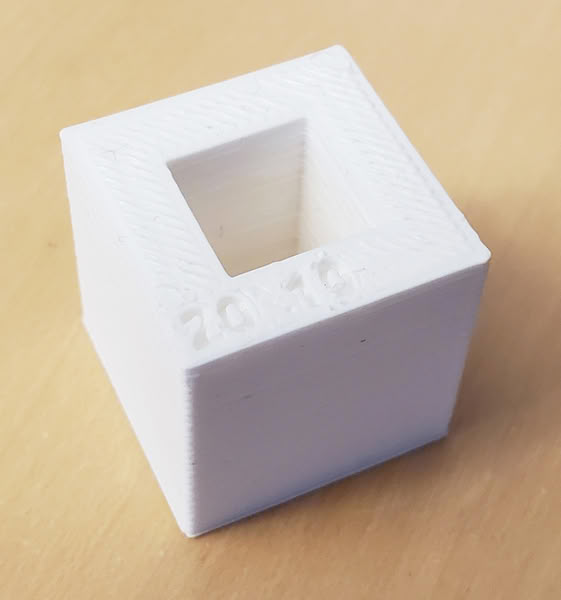
7.Dimension
 |
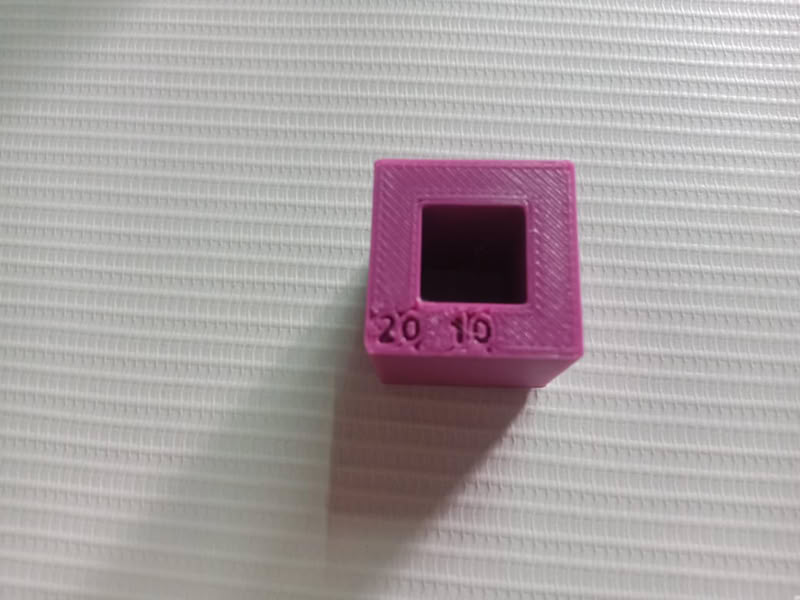 |
Conclusion
The outer dimension of the cube came out to be 19.8 × 19.8 and inner dimensions are 10.2 × 10.2.
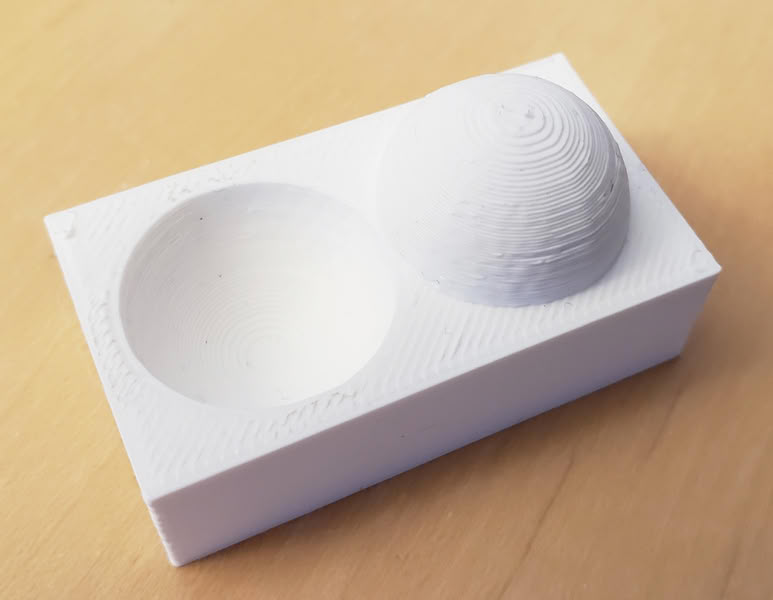
8.Surface Finishing
 |
 |
Conclusion
Surface finishing of the printed parts is good.
9.Overhang without support
 |
 |
Conclusion
If the thickness is too much, it can waste material and take more time to print. So, we should use the correct thickness and add support only when needed to save material and time.In conclusion, a thickness of 1 to 3 mm is good for use.
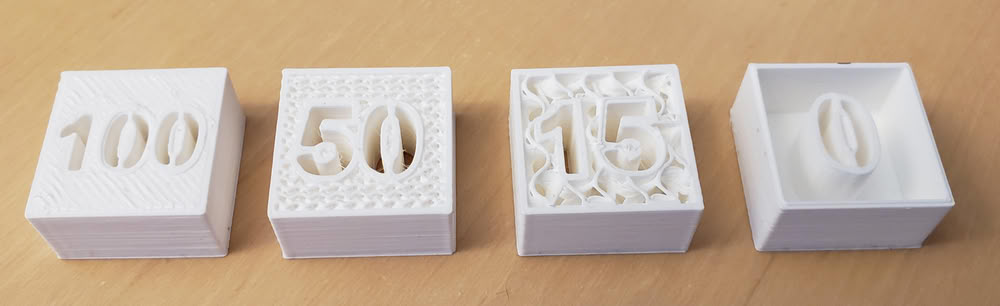
10.Infill
 |
 |
Conclusion
In conclusion, higher infill makes the object strong, but it uses more material and takes more time to complete.
3D printed Benchy conclusions
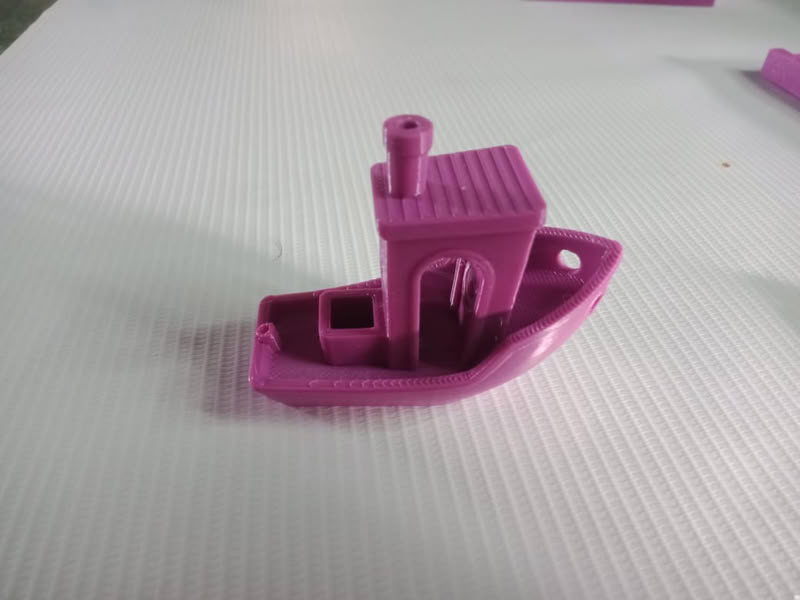
Conclusion
Length(x-axis)
The printed length is 60.3 mm instead of 60 mm. This shows a small increase. The printer has good accuracy, but there is a little expansion.
Walls and Edges
The walls are strong and well-formed. Edges are clear and smooth, which shows good print quality.
small parts
Small parts are printed properly. This shows the printer can handle detailed designs.
Overall accuracy
The difference of 0.3 mm is very small and acceptable. This shows the printer has good dimensional accuracy.
Final conclusion
The Benchy printed successfully with very good quality.