Introduction
From this assignment, I learned how to establish communication between two embedded systems using Wi-Fi. I understood how one board can act as a server and another as a client to exchange data.I also learned how data transmission happens between devices without physical connections, which is an important concept in IoT applications.
Task:-
Send a message between two projects
Communication protocol
Communication protocols are like rules that help devices communicate with each other. Just like traffic rules control vehicles on roads, protocols control how data is sent and received in a network. These rules make sure that devices from different companies can understand the data correctly.
TCP/IP Protocol
One of the most common communication protocols is TCP/IP. It is used in the internet. This protocol breaks data into small parts called packets, sends them through the network, and then joins them back together at the destination. This ensures safe and correct data transfer.
Other Communication Protocols
HTTP is used for opening websites,FTP is used for transferring files, SMTP is used for sending emails.
Serial vs Parallel Communication
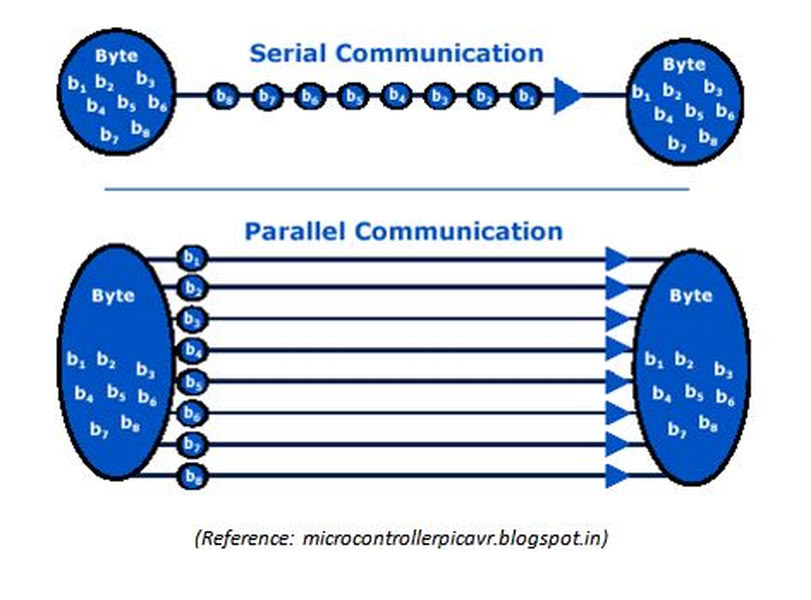
Serial communication:
In serial communication, data is sent one bit at a time. It is simple and suitable for long distances. It is widely used in systems like internet communication and microcontrollers.
Parallel communication:
In parallel communication, multiple bits are sent at the same time. It is faster but works only for short distances and requires more wires.
Transmission modes:
Image taken from CS Taleem
1.Simple mode
Data flows in only one direction. Example: TV broadcasting.
2.Half-duplex mode
Data flows in both directions but not at the same time. Devices take turns. Example: walkie-talkie.
3.Full-duplex mode
Data flows in both directions at the same time. Example: mobile phone communication.
Synchronous vs Asynchronous Communication
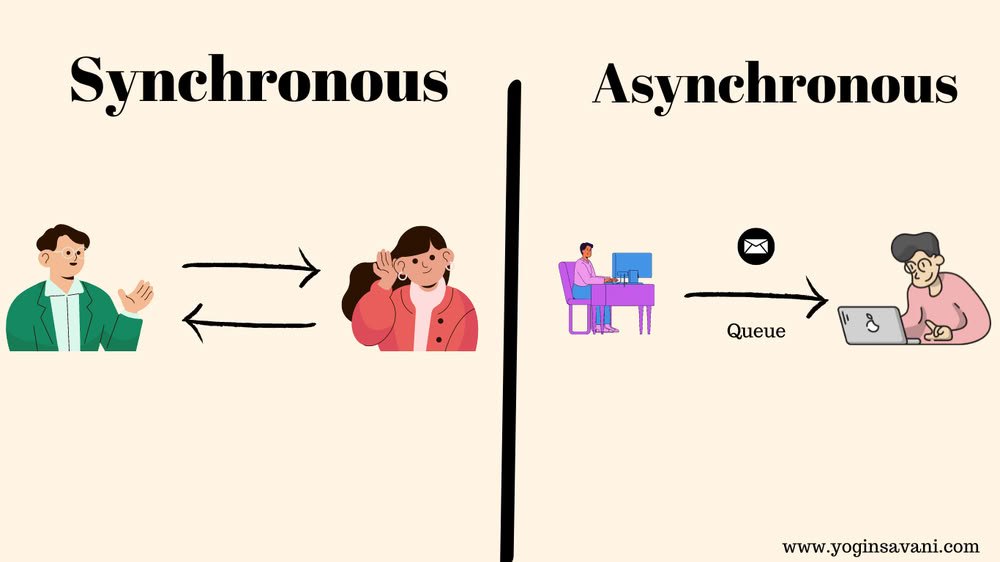
Synchronous Communication
In this method, devices use a common clock signal to send and receive data. It is fast and efficient for large data transfer.
Asynchronous Communication
In this method, there is no common clock. Data is sent with start and stop bits. It is simpler and commonly used in UART communication.
Common Communication Protocols for short distance
I2C Protocol
I2C is used for communication between devices on the same circuit board. It uses only two wires (data and clock). It is simple and commonly used for sensors and displays.
SPI Protocol
SPI is also used for short-distance communication but is faster than I2C. It uses multiple wires for data, clock, and device selection. It is used for devices like SD cards and displays.
I used below codes for showing communication between two boards
Client code
#include <WiFi.h>
//Includes Wi-Fi library so ESP32 can connect to internet/network.
const char* ssid = "OPPOA5s";
const char* password = "megzzzzz";
//Stores your Wi-Fi name (SSID) and password.
WiFiServer server(80);
//Creates a web server on port 80 (default HTTP port).
WiFiClient client;
//Creates a client object to handle incoming connections.
void setup() {
Serial.begin(115200);
//Starts serial communication
WiFi.begin(ssid, password);
//Starts connecting ESP32 to Wi-Fi.
while (WiFi.status() != WL_CONNECTED) {
delay(500);
Serial.println("Connecting to WiFi...");
}
//Keeps checking until Wi-Fi is connected, prints status every 0.5 sec.
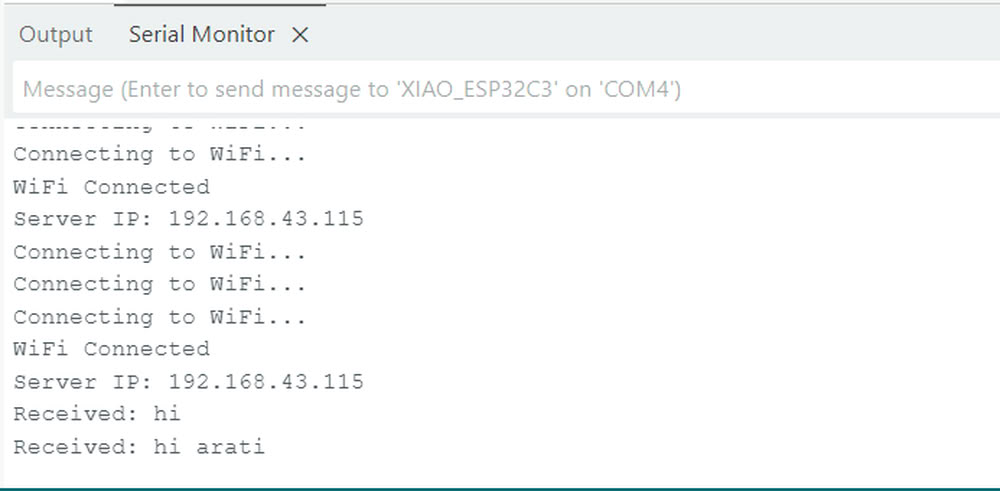
Serial.println("WiFi Connected");
//Prints confirmation after connection.
Serial.print("Server IP: ");
Serial.println(WiFi.localIP());
//Shows ESP32's IP address
server.begin();
//Starts the web server.
}
void loop() {
if (!client || !client.connected()) {
client = server.available();
//Checks if a client is connected; if not, waits for a new client.
}
if (client && client.connected()) {
//Runs code only when a client is connected.
if (client.available()) {
String msg = client.readStringUntil('\n'); //Reads message sent by client until newline.
Serial.print("Received: ");
Serial.println(msg);
//Prints received message on Serial Monitor.
}
if (Serial.available()) {
String reply = Serial.readStringUntil('\n');
//Checks if you typed something in Serial Monitor.
client.println(reply);
//Sends your typed message back to the client.
}
}
}
Server code
#include <WiFi.h>
//Includes Wi-Fi library.

const char* ssid = "OPPOA5s";
const char* password = "megzzzzz";
//Wi-Fi name and password to connect ESP32.

const char* serverIP = "192.168.43.115";
const int serverPort = 80;
//IP address and port of the server ESP32 you want to connect to.

WiFiClient client;
//Creates a client object

void setup() {

  Serial.begin(115200);
  //Starts Serial Monitor.

  WiFi.begin(ssid, password);
  //Starts connecting to Wi-Fi

  while (WiFi.status() != WL_CONNECTED) {
    delay(500);
    Serial.println("Connecting to WiFi...");
    //Waits until Wi-Fi is connected
  }

  Serial.println("Connected to WiFi");
  //Confirms connection.

  if (client.connect(serverIP, serverPort)) {
    Serial.println("Connected to Server");
  } else {
    Serial.println("Connection Failed");
  }
} //Tries to connect to the server ESP32 using IP and port.Prints success or failure.

void loop() {

  if (Serial.available()) {
    String msg = Serial.readStringUntil('\n');
    client.println(msg);
  }
 // If you type something in Serial Monitor, it sends that message to the server.

  if (client.available()) {
    String reply = client.readStringUntil('\n');
    //Checks if server sent any message.
    Serial.print("Received: ");
    Serial.println(reply);
  } //Prints received message from server.

}
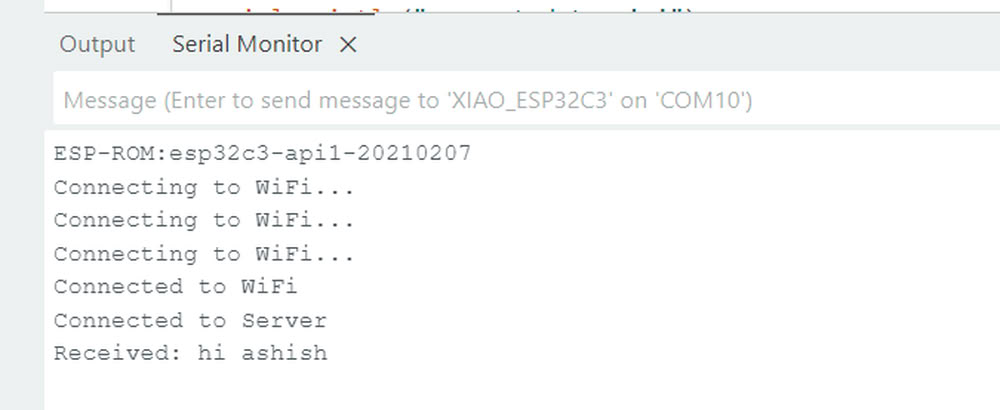
After adding wifi ssid and password in both codes We can easily established communication between two boards.
 |
 |
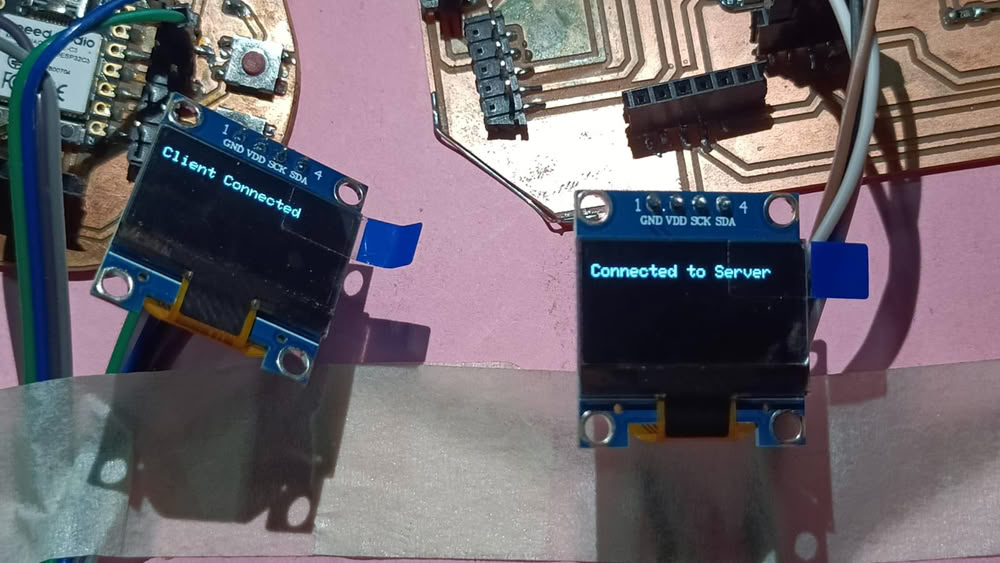
We also tried to communicate two boards using OLED Display
We used below codes for showing communication between two boards using OLED Display
Client code
      #include
#include
#include
#include

#define SCREEN_WIDTH 128
#define SCREEN_HEIGHT 64

Adafruit_SSD1306 display(SCREEN_WIDTH, SCREEN_HEIGHT, &Wire, -1);

const char* ssid = "OPPO";
const char* password = "123456789";

WiFiServer server(80);

void setup() {
  Serial.begin(115200);

  // ✅ ADD THIS LINE (CUSTOM I2C PINS)
  Wire.begin(6, 7);   // SDA = GPIO6, SCL = GPIO7

  // OLED init
  if(!display.begin(SSD1306_SWITCHCAPVCC, 0x3C)) {
    Serial.println("OLED failed");
    while(1);
  }

  display.clearDisplay();
  display.setTextSize(1);
  display.setTextColor(WHITE);

  // WiFi connect
  WiFi.begin(ssid, password);
  displayMessage("Connecting WiFi...");

  while (WiFi.status() != WL_CONNECTED) {
    delay(500);
  }

  displayMessage("WiFi Connected");

  Serial.println("Connected!");
  Serial.print("Server IP: ");
  Serial.println(WiFi.localIP());

  displayMessage("IP:\n" + WiFi.localIP().toString());

  server.begin();
}

void loop() {
  WiFiClient client = server.available();

  if (client) {
    displayMessage("Client Connected");

    while (client.connected()) {

      // Receive message
      if (client.available()) {
        String msg = client.readStringUntil('\n');
        Serial.println("Recv: " + msg);
        displayMessage("Recv:\n" + msg);
      }

      // Send message
      if (Serial.available()) {
        String input = Serial.readStringUntil('\n');
        client.println(input);
        displayMessage("Me:\n" + input);
      }
    }

    client.stop();
    displayMessage("Client Disconnected");
  }
}

// OLED display function
void displayMessage(String msg) {
  display.clearDisplay();
  display.setCursor(0, 10);
  display.println(msg);
  display.display();
}
Server Code
                    #include
#include
#include
#include

#define SCREEN_WIDTH 128
#define SCREEN_HEIGHT 64

Adafruit_SSD1306 display(SCREEN_WIDTH, SCREEN_HEIGHT, &Wire, -1);

const char* ssid = "OPPO";
const char* password = "123456789";

const char* serverIP = "10.148.189.202"; // CHANGE THIS
const uint16_t port = 80;

WiFiClient client;

void setup() {
  Serial.begin(115200);

  // OLED init
  if(!display.begin(SSD1306_SWITCHCAPVCC, 0x3C)) {
    Serial.println("OLED failed");
    while(1);
  }

  display.clearDisplay();
  display.setTextSize(1);
  display.setTextColor(WHITE);

  // WiFi connect
  WiFi.begin(ssid, password);
  displayMessage("Connecting WiFi...");

  while (WiFi.status() != WL_CONNECTED) {
    delay(500);
  }

  displayMessage("WiFi Connected");

  // Connect to server
  if (client.connect(serverIP, port)) {
    displayMessage("Connected to Server");
  } else {
    displayMessage("Connection Failed");
  }
}

void loop() {

  // Send message
  if (Serial.available()) {
    String msg = Serial.readStringUntil('\n');
    client.println(msg);
    displayMessage("Me:\n" + msg);
  }

  // Receive message
  if (client.available()) {
    String response = client.readStringUntil('\n');
    Serial.println("Recv: " + response);
    displayMessage("Recv:\n" + response);
  }
}

// OLED display function
void displayMessage(String msg) {
  display.clearDisplay();
  display.setCursor(0, 10);
  display.println(msg);
  display.display();
}
All code files
Click here to download code files