What is Molding & Casting?
Molding and Casting is a two-step technique used to create exact replicas of an object. Think of it as creating a "stamp" and then using it to make multiple copies — a process refined by civilizations for thousands of years and now accessible in any Fab Lab.
You take your original design (the "Master") and cover it with a flexible material like silicone. Once it hardens and you remove the original, you are left with a hollow cavity that perfectly mirrors every detail of the original piece.
You pour a liquid material — resin, plaster, wax, or even soap — into that hollow mold. Once it hardens and you "pop" it out, you have a perfect replica of the original, which you can repeat as many times as you like.
Testing Materials & The Chavín Mold
For the group assignment, I worked alongside Andres Mamani at the Fab Lab Universidad de Lima.
1. Chavín de Huántar Silicone Mold & Resin Casting: Creation and documentation of the workflow of a silicone mold using a master model found in our laboratory: a Chavín de Huántar "Cabeza Clava" — an iconic piece of ancient Peruvian art. We then performed casting tests with two different resin materials: SILIKAST EPOXY CRAFT A + B (crystal-clear epoxy for jewelry-grade finish) and Resina Silikast 70D (honey-amber polyurethane for structural strength). We compared the material properties, curing times, and final aesthetic qualities of both resins cast from the same silicone mold.
2. 3D-Printed Molds Experience: Documented the complete 3D-printed mold workflow using SLA resin printing to contribute to the comprehensive comparison of 3D-printed molds versus milled molds.
3. Technical Documentation — Resins & Silicones: Contributed to the laboratory documentation of all silicone and resin products used during the week.
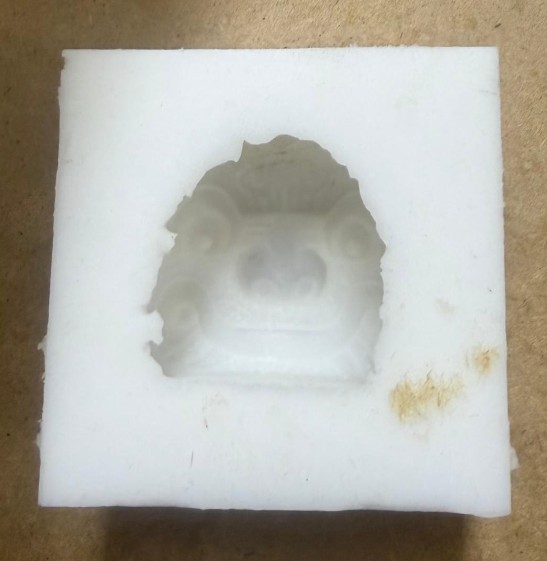
The Cabezas Clavas are stone sculptures belonging to the Chavín culture of Pre-Inca Peru. Originally embedded in the walls of the Chavín de Huántar temple, they represent human-feline transformations and are iconic symbols of ancient Peruvian lithic art. Having one as our master model was a meaningful cultural connection.
The piece was used as-is from the lab's collection, making this a pure mold-making exercise without a prior design or print stage.
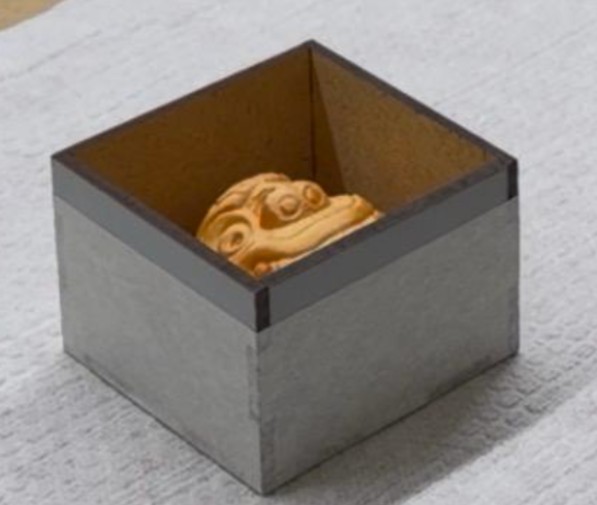

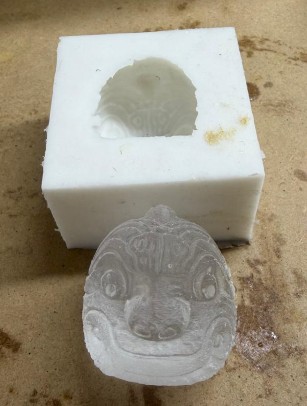
To replicate the Cabeza Clava, we used SILIKA CAUCHO SILICONA RTV TIPO 6 combined with its specific Catalyst. This material is preferred for its high fidelity in capturing textures and its ease of use for manual casting.
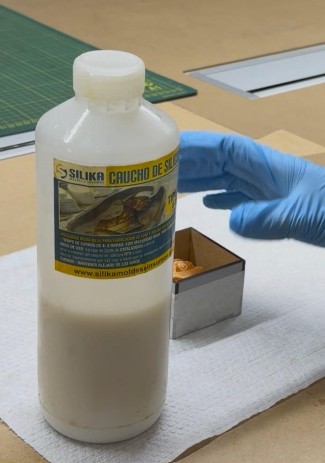
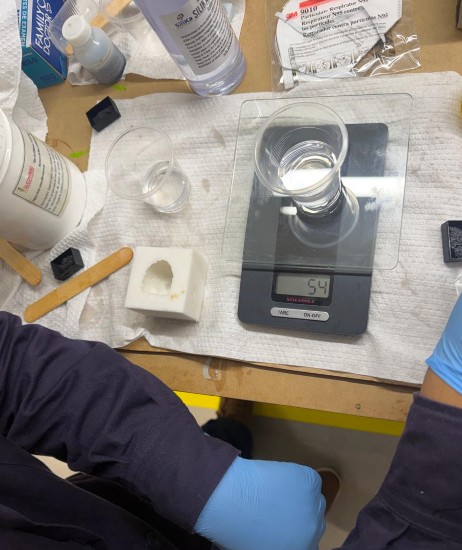
We measured the mold's capacity by filling it with water to estimate the required volume. Based on this, we calculated the amount of silicone needed, intentionally adding a small surplus to ensure the master model was completely covered.
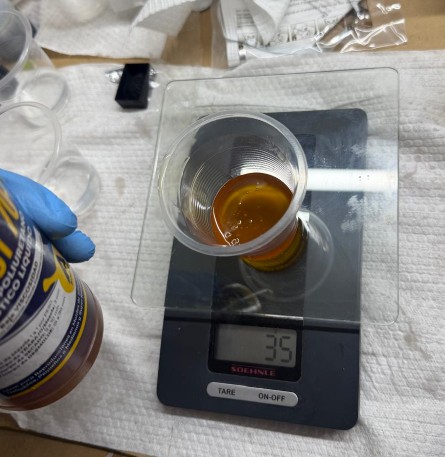
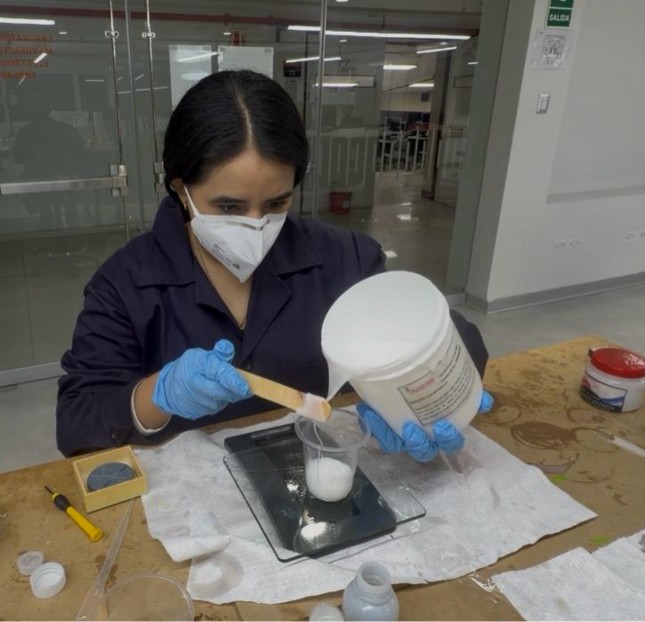
The RTV Type 6 silicone requires a precise mixing ratio of 2% to 3% catalyst by weight. For every 100g of silicone base, we used a precision scale to add exactly 2g to 3g of catalyst. This precision is essential to ensure the material cures correctly and achieves its full mechanical resistance.
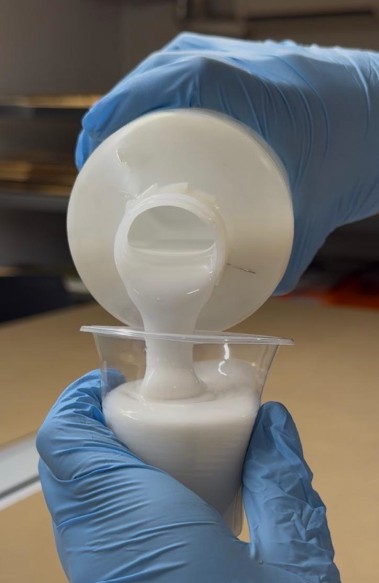
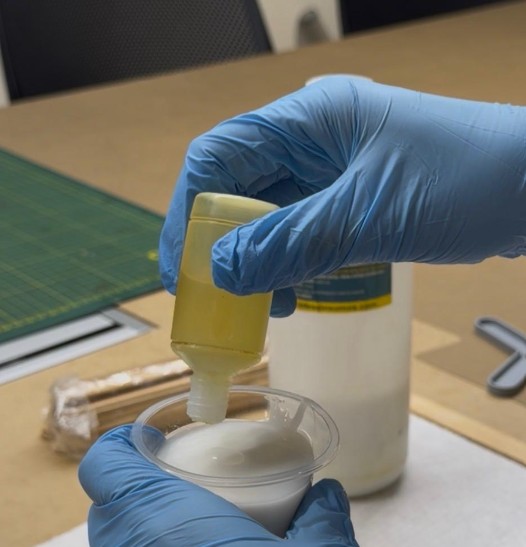
We mixed both components slowly and thoroughly for about 3 to 5 minutes, scraping the sides and bottom of the container to ensure no unmixed base remained. Unmixed material would prevent the mold from curing properly.
Once mixed, we had approximately 15 to 20 minutes to pour the silicone over the master model before it began to thicken. We poured from the lowest point of the mold box, allowing the material to rise naturally around the piece to minimize air bubbles.
We tapped the mold against the table so that any trapped bubbles would rise to the surface. The mold was then left to cure at room temperature for 4 to 8 hours depending on ambient temperature.

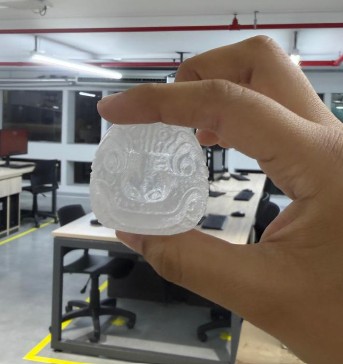
For the first casting process, I was in charge of using resin. We utilized SILIKAST EPOXY CRAFT A + B. The process consisted of pouring Part A and Part B into a cup at a 1:1 ratio (half and half), mixing them thoroughly, and pouring the mixture into the mold.

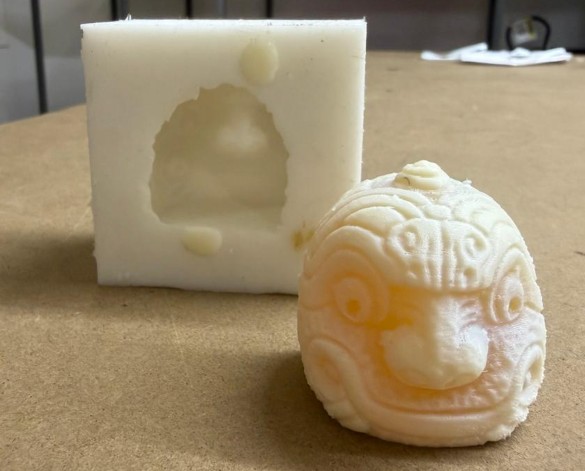
After letting it rest for 10 hours, the result was a beautiful, crystal-clear piece that captured every detail of the original Cabeza Clava.
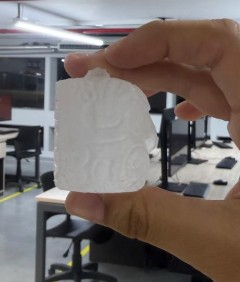
For the second test, we used Resina Silikast 70D, which has a distinctive honey-like amber color. We followed the same process since it also consists of a Part A and Part B.
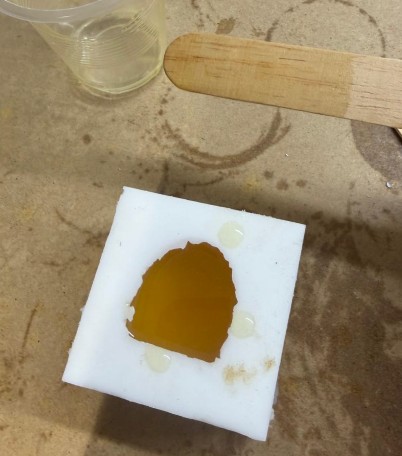
We let it cure for 5 hours — notably faster than the epoxy — and it yielded a very successful, solid amber-toned replica.
Both materials produced faithful replicas of the Cabeza Clava. The key difference is aesthetic and functional:
- Crystal clear, glass-like finish
- 10-hour cure time
- Best for decorative / transparent pieces
- Captures the finest surface details
- Honey amber color, opaque
- 5-hour cure time (faster)
- High impact resistance (70 Shore D)
- Better for functional structural parts
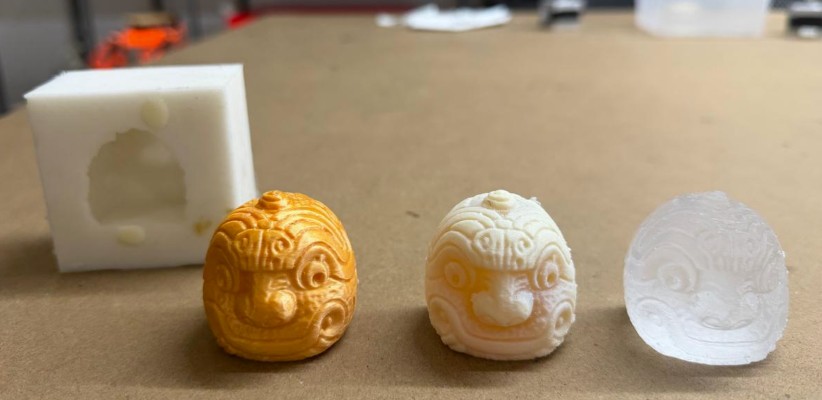
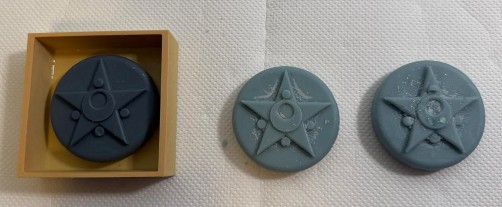
From left to right: 3D print original, Silikast 70D cast, and SILIKAST EPOXY CRAFT A+B cast
Technical Documentation — Resins & Silicones
As part of my group contribution, I documented the properties of all silicones and resins used. Since these are Peruvian-origin products, formal international data sheets are not widely available — the information below is based on regional product specifications and manufacturer guidelines.
Resins
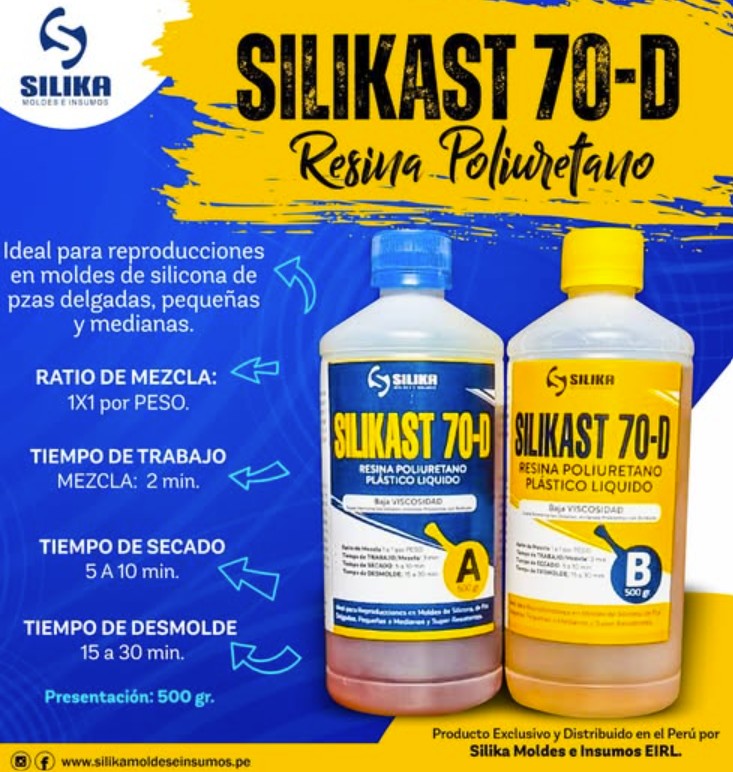
A high-performance rigid polyurethane resin designed for parts requiring high impact resistance and structural strength. Its honey-like amber color and extremely low viscosity make it ideal for capturing fine details without air entrapment.
It is also highly valued for its exceptional impact resistance and structural strength, making it the perfect choice for functional parts that require long-term durability.
↗ Product Page
| Technical Parameter | Detail |
|---|---|
| Mixing Ratio | 1:1 by weight (use a precision scale) |
| Pot Life | 2 minutes (at 23°C) |
| Hardening Time | 5 to 10 minutes |
| Demolding Time | 15 to 30 minutes (thicker pieces demold faster) |
| Final Hardness | 70 Shore D |
| Viscosity | Very low (similar to water) — excellent for fine details |
| Linear Shrinkage | < 0.1% (very low) |
A high-performance Epoxy Resin with low viscosity and high transparency, specifically designed for artistic casting and jewelry. Formulated to provide a crystal-clear, bubble-free, glass-like finish.
↗ Product Page
| Technical Parameter | Detail |
|---|---|
| Mixing Ratio | 1:1 by volume |
| Pot Life | 10 to 15 minutes |
| Viscosity | Low / Medium (self-leveling) |
| Touch Dry | 12 to 16 hours |
| Total Cure (>0.5 cm) | Up to 24 hours |
| Total Cure (<0.5 cm) | Up to 48 hours |
Silicones
A food-grade, platinum-cured RTV silicone rubber ideal for high-precision molds and special effects. Its semi-translucent appearance and soft 10 Shore A hardness make it extremely versatile for detailed reproductions.
| Technical Parameter | Detail |
|---|---|
| Type | Platinum-Cured RTV Silicone |
| Hardness | 10 Shore A (highly flexible) |
| Mixing Ratio | 1:1 by weight or volume |
| Working Time | 15 to 20 minutes |
| Curing Time | 4 to 6 hours (heat acceleratable) |
| Heat Resistance | Up to 250°C |
A condensation-cured (tin-based) silicone with medium-low hardness, specifically designed for high-fidelity molds with excellent tear resistance.
↗ Product Page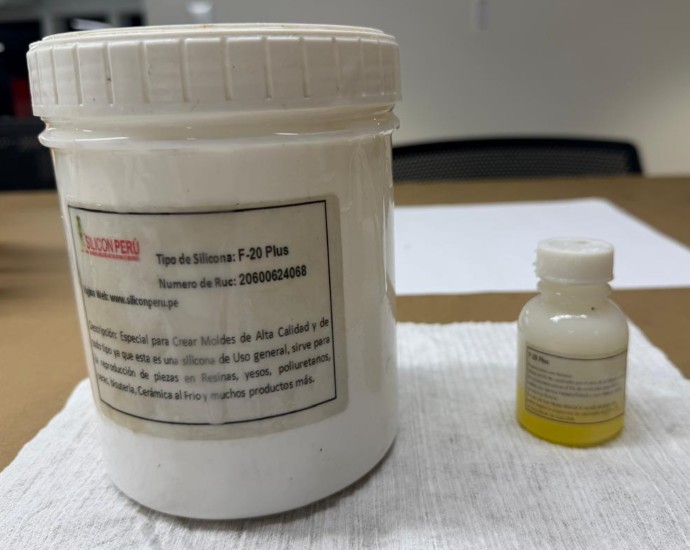
| Technical Parameter | Detail |
|---|---|
| Type | RTV-2 (Room temperature vulcanization) |
| Hardness | 20 Shore A (ideal for undercuts) |
| Mixing Ratio | 2% to 3% catalyst by weight |
| Color | White base / colored catalyst |
| Working Time | 15 to 20 minutes (at 23°C) |
| Curing Time | 4 to 12 hours (weather dependent) |
| Viscosity | Medium (excellent detail registration) |
This condensation-cured RTV Type 6 silicone was used for the Cabeza Clava mold. It offers an excellent balance between cost and mechanical resistance, specifically formulated to replicate fine textures.
↗ Product Reference
| Technical Parameter | Detail |
|---|---|
| Type | RTV-2 Condensation-cured (tin-based) |
| Mixing Ratio | 2% to 2.5% catalyst by weight or volume |
| Working Time | 15 to 25 minutes |
| Curing Time | 2 to 6 hours |
| Flexibility | High elasticity for easy release |
| Compatibility | Polyester, Polyurethane, Epoxy, Plaster, and Wax |
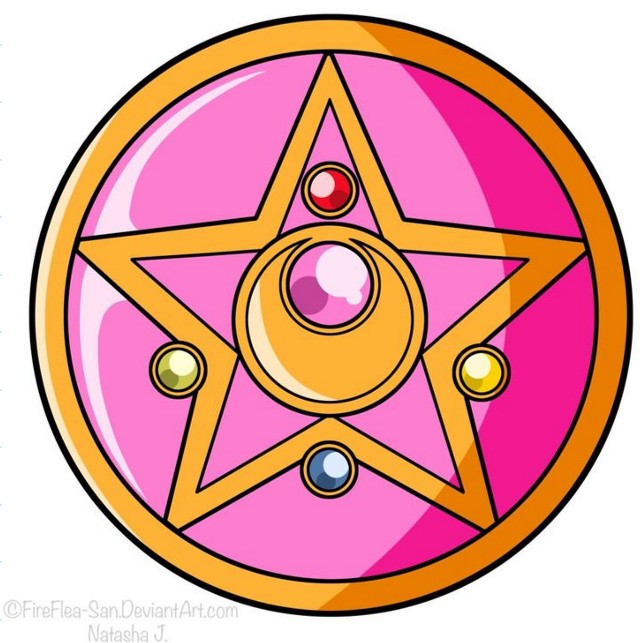
The Sailor Moon Brooch — Master Model Design
Moon Cosmic Power, Make Up! 🌟 This week, I decided to completely transform my workflow. I stepped away from Fusion 360 to immerse myself in Autodesk Inventor Professional with a legendary goal: recreating the magical transformation brooch from Sailor Moon.
After missing the chance to experiment with the SLA printer during Week 5 (3D Scanning and Printing), I used this Molding and Casting assignment to master SLA printing and achieve a flawless "jewelry-grade" finish that FDM could never produce.
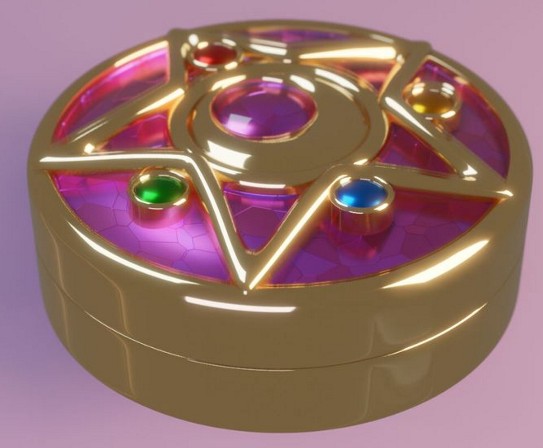
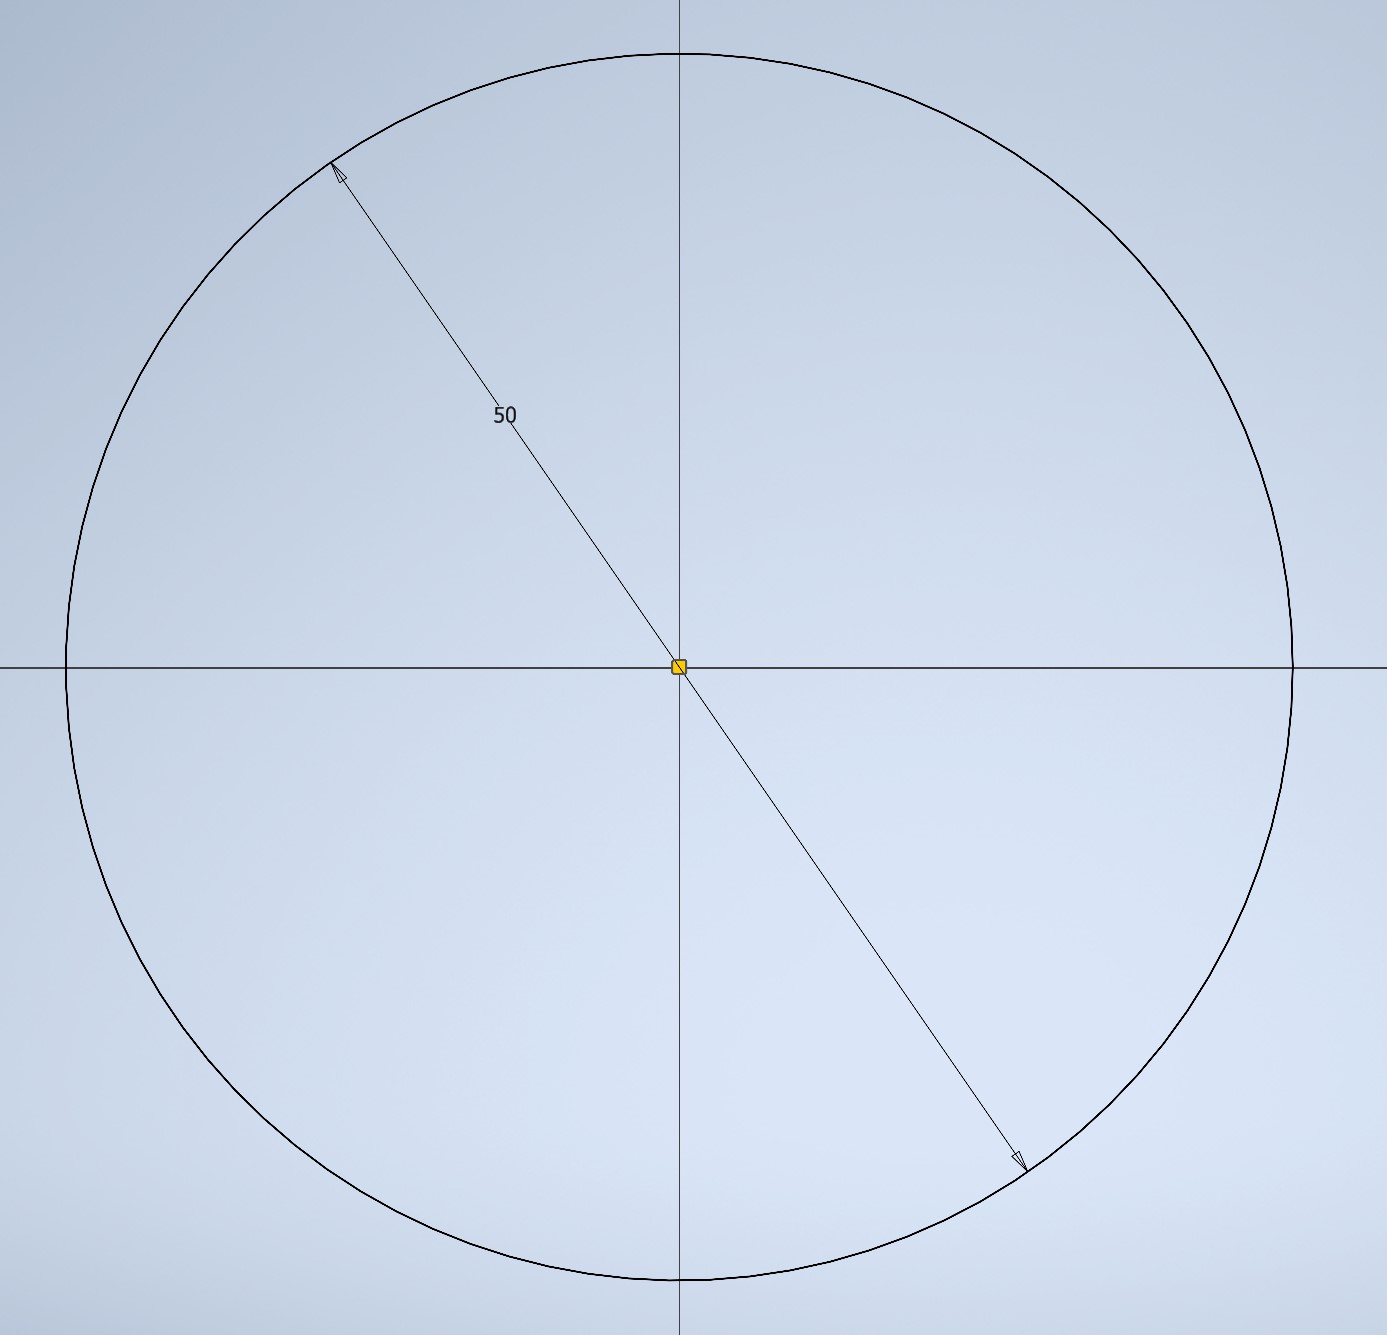
Modeling in Autodesk Inventor Professional
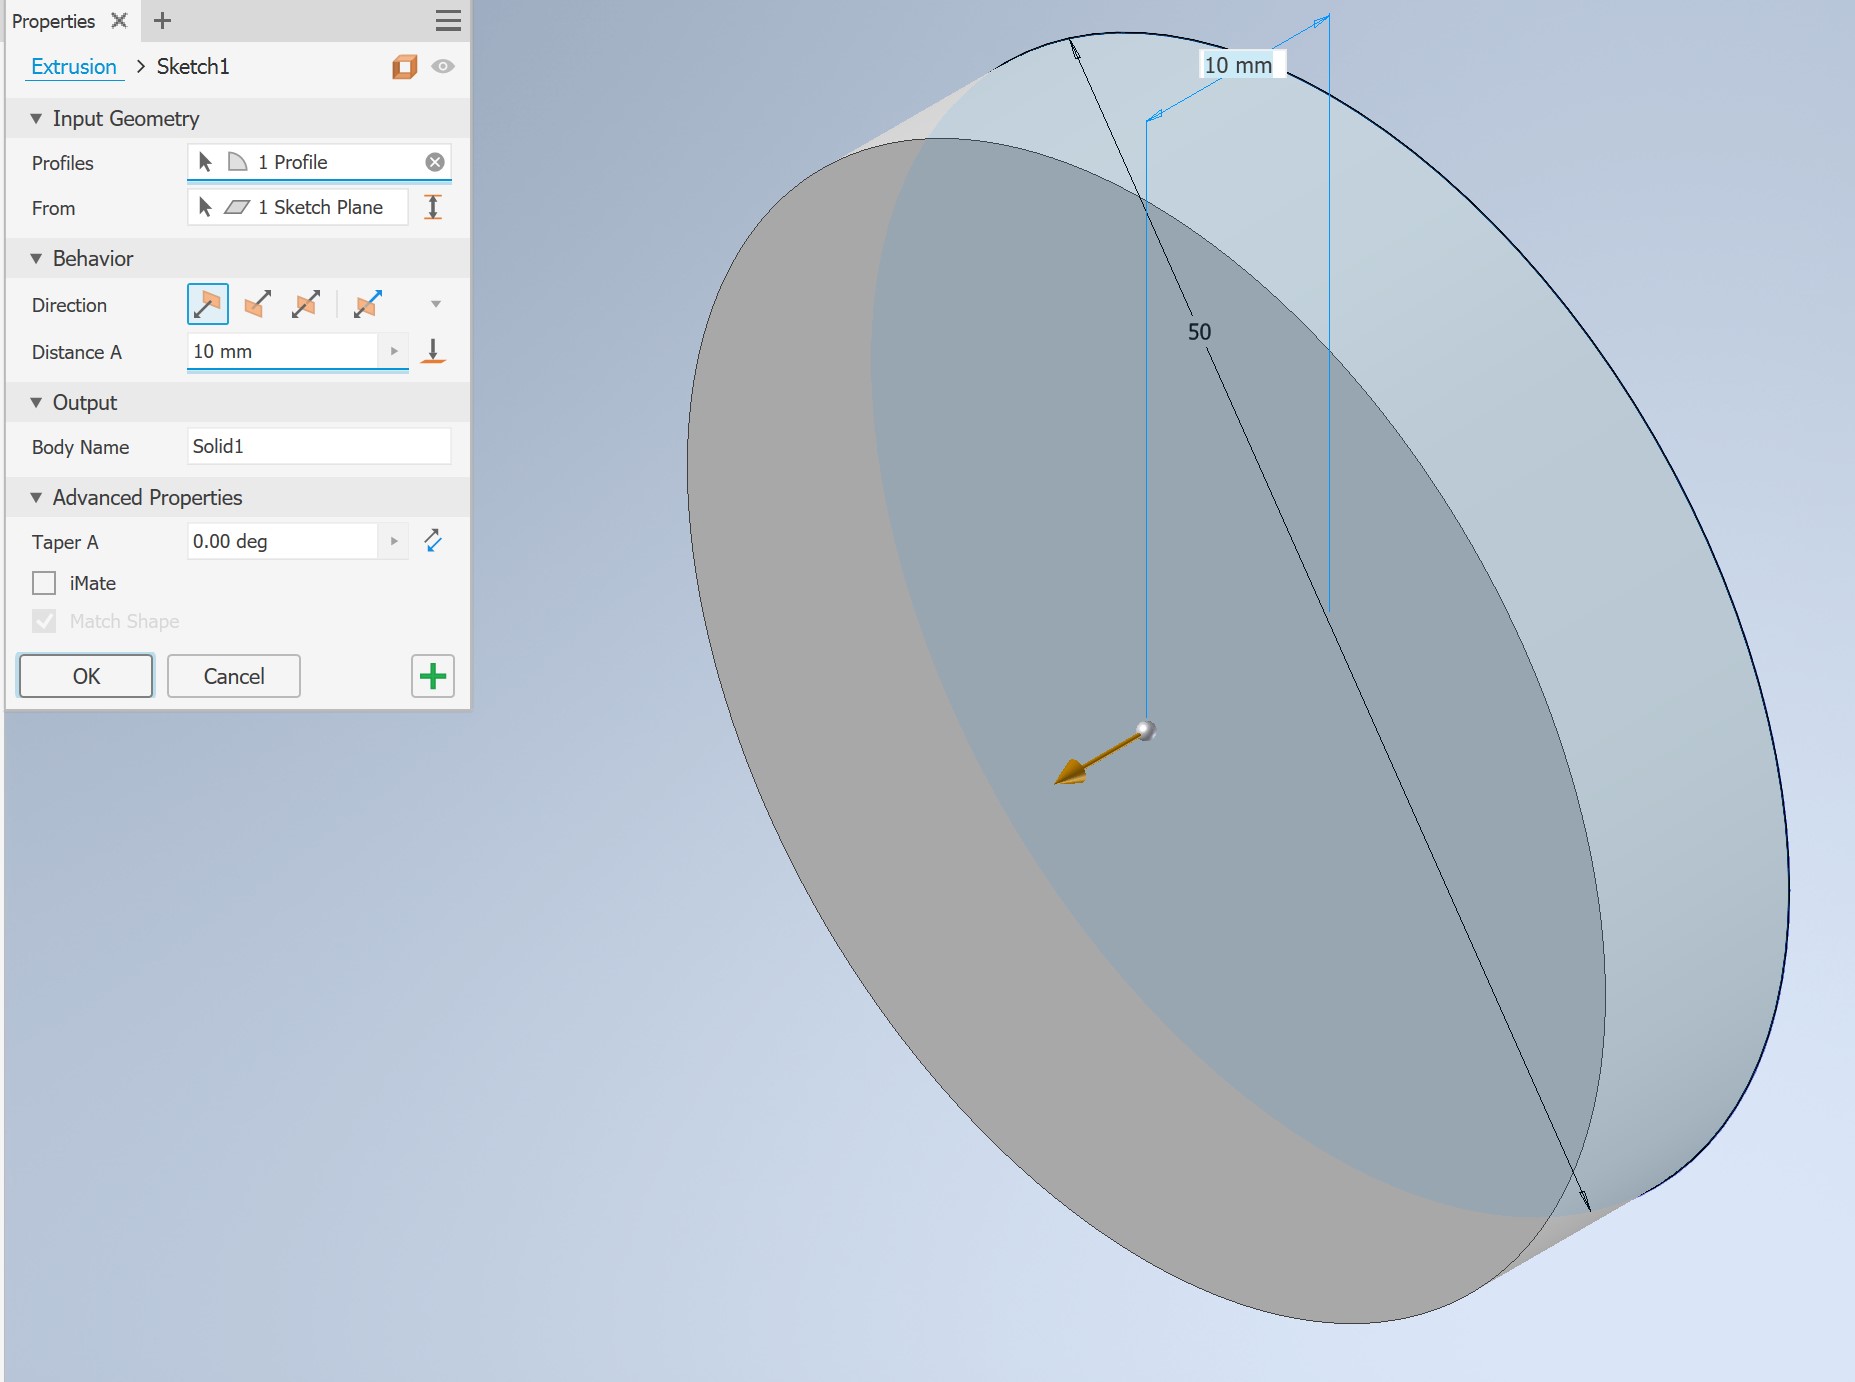
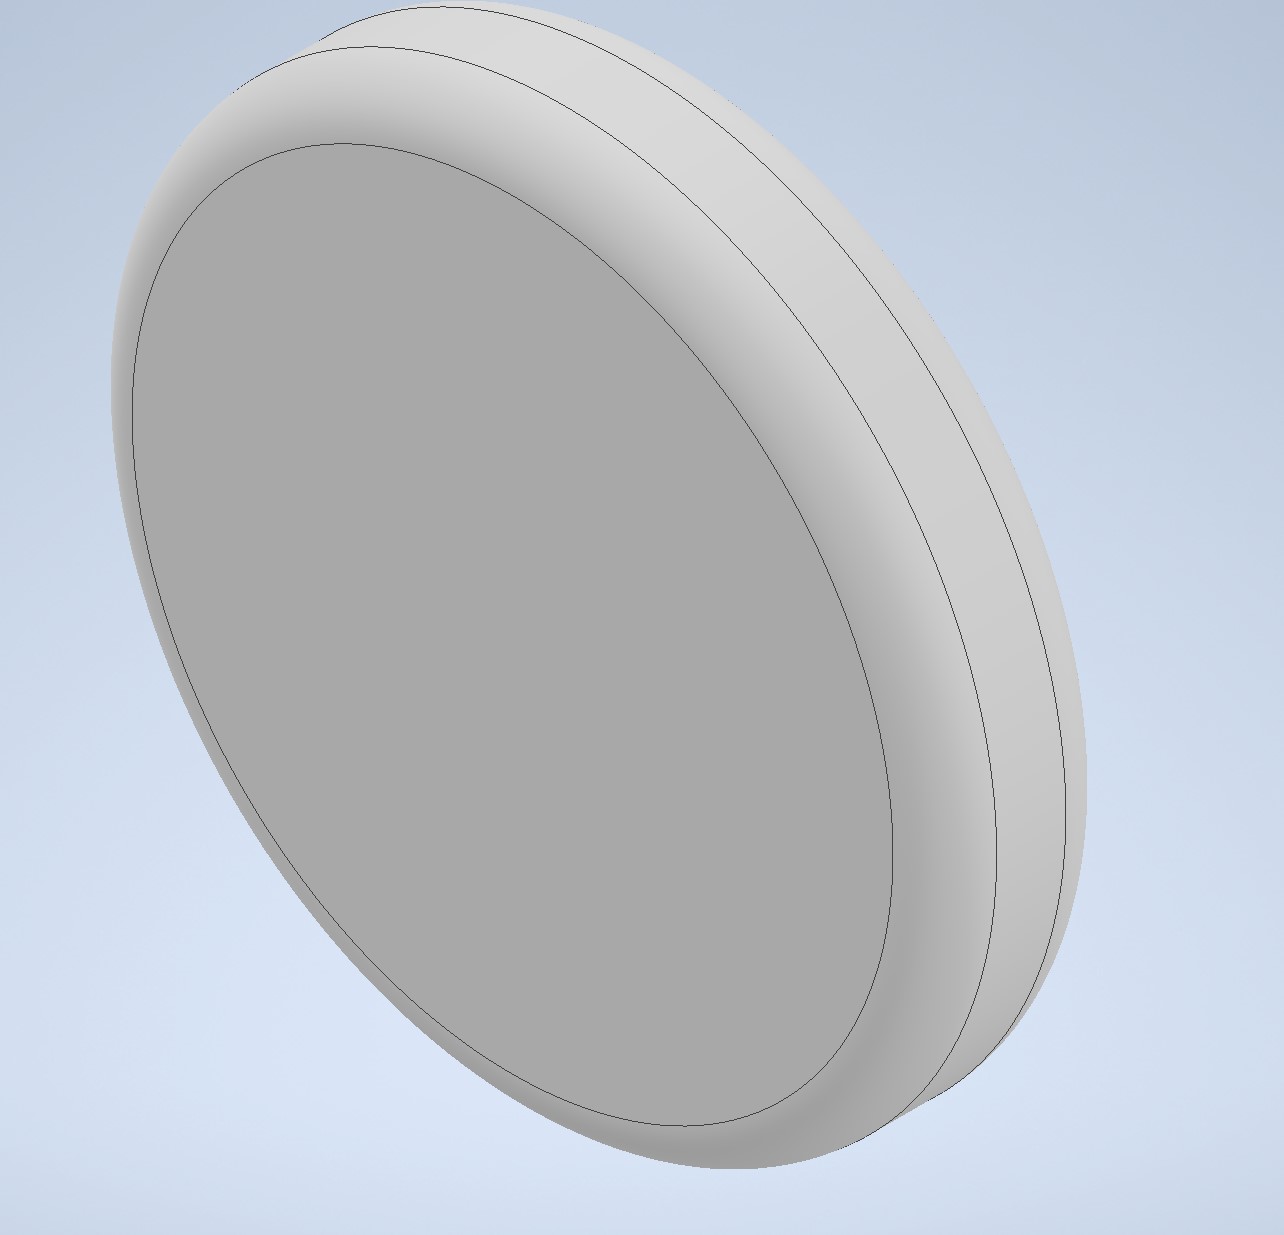
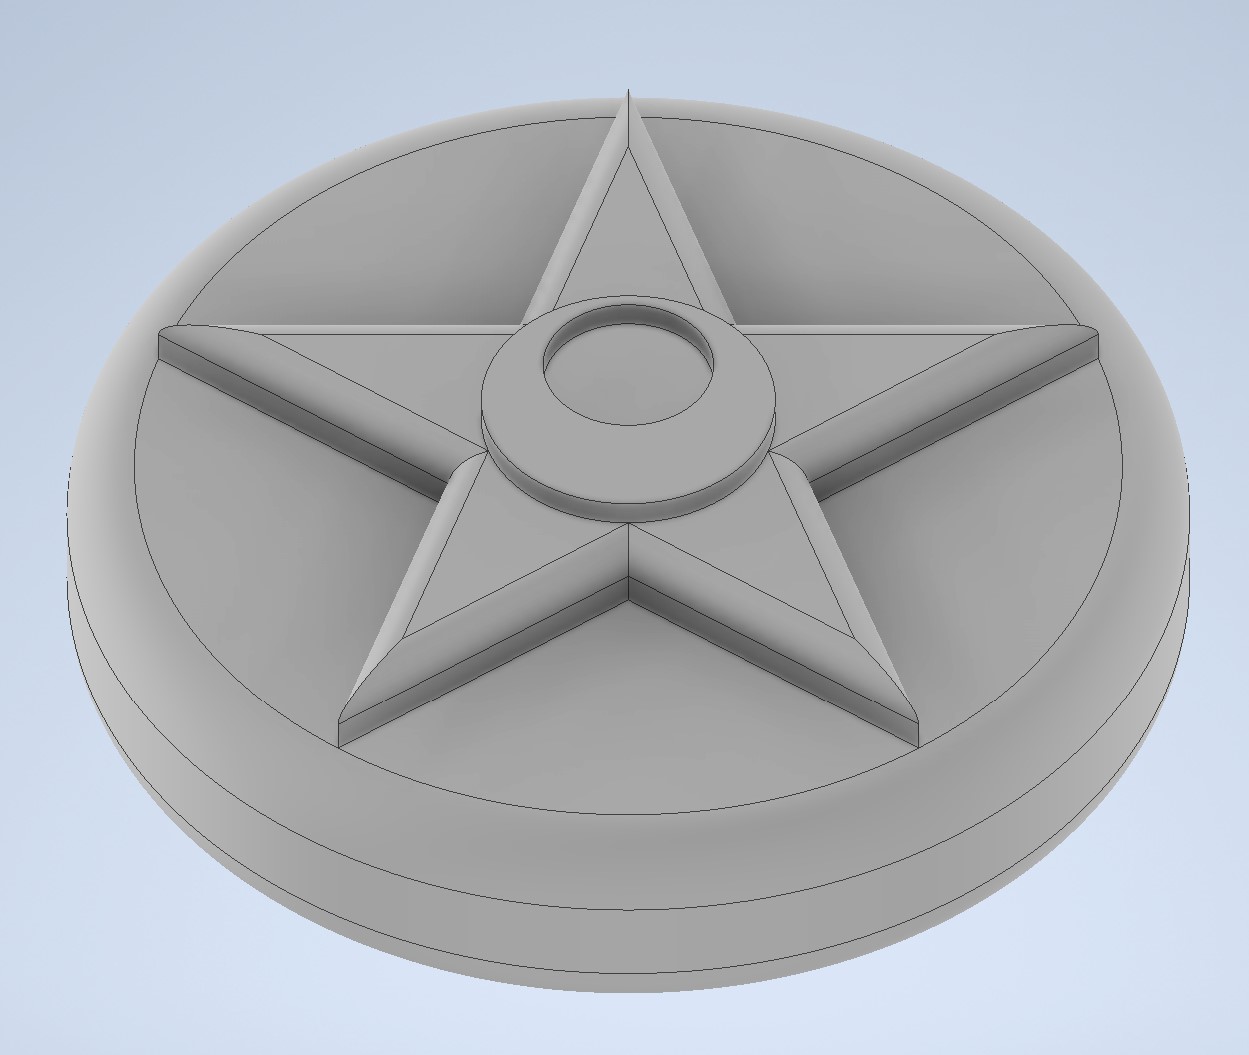
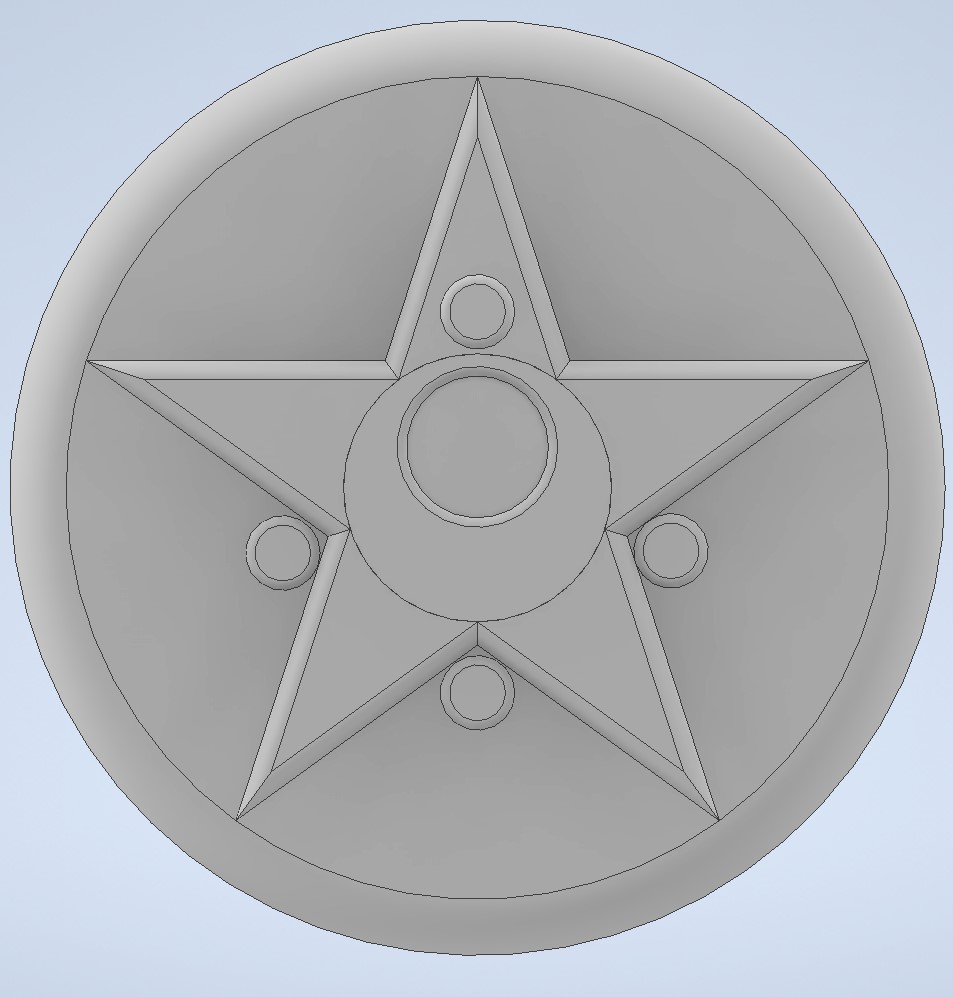
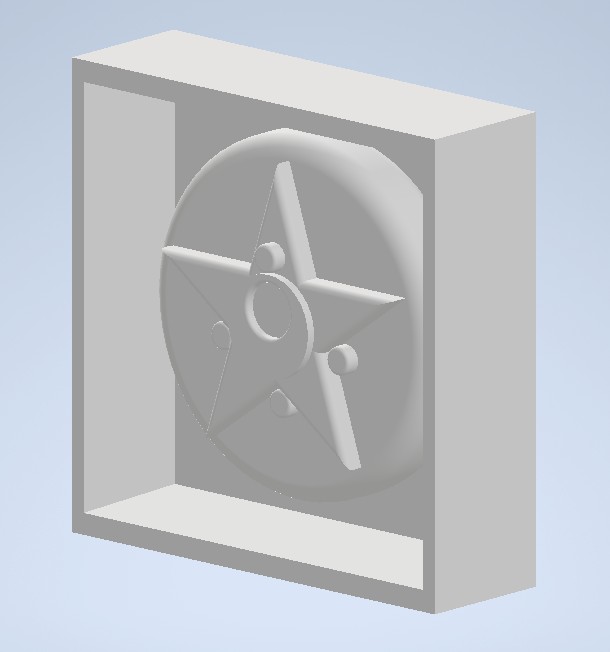
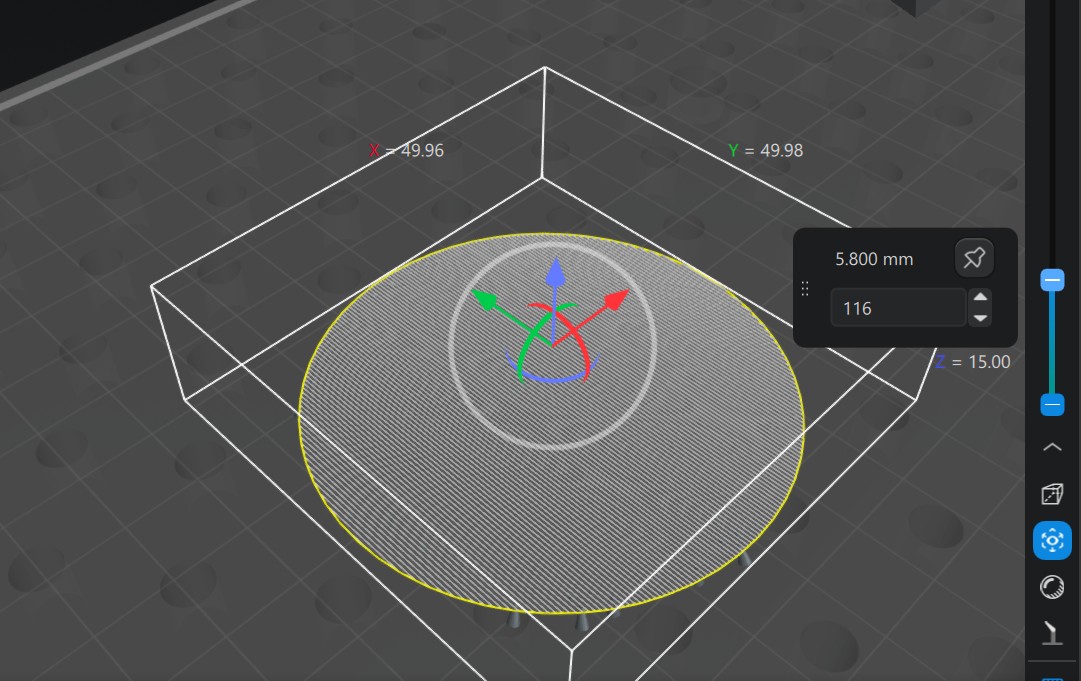
I started by creating a 50mm base circle on the XY plane, then applied a 10mm extrusion with the Taper set to 0. The key "magic" step was applying a large 4mm fillet radius to the top edge, creating a smooth dome that looks organic and provides a perfect draft angle for demolding.
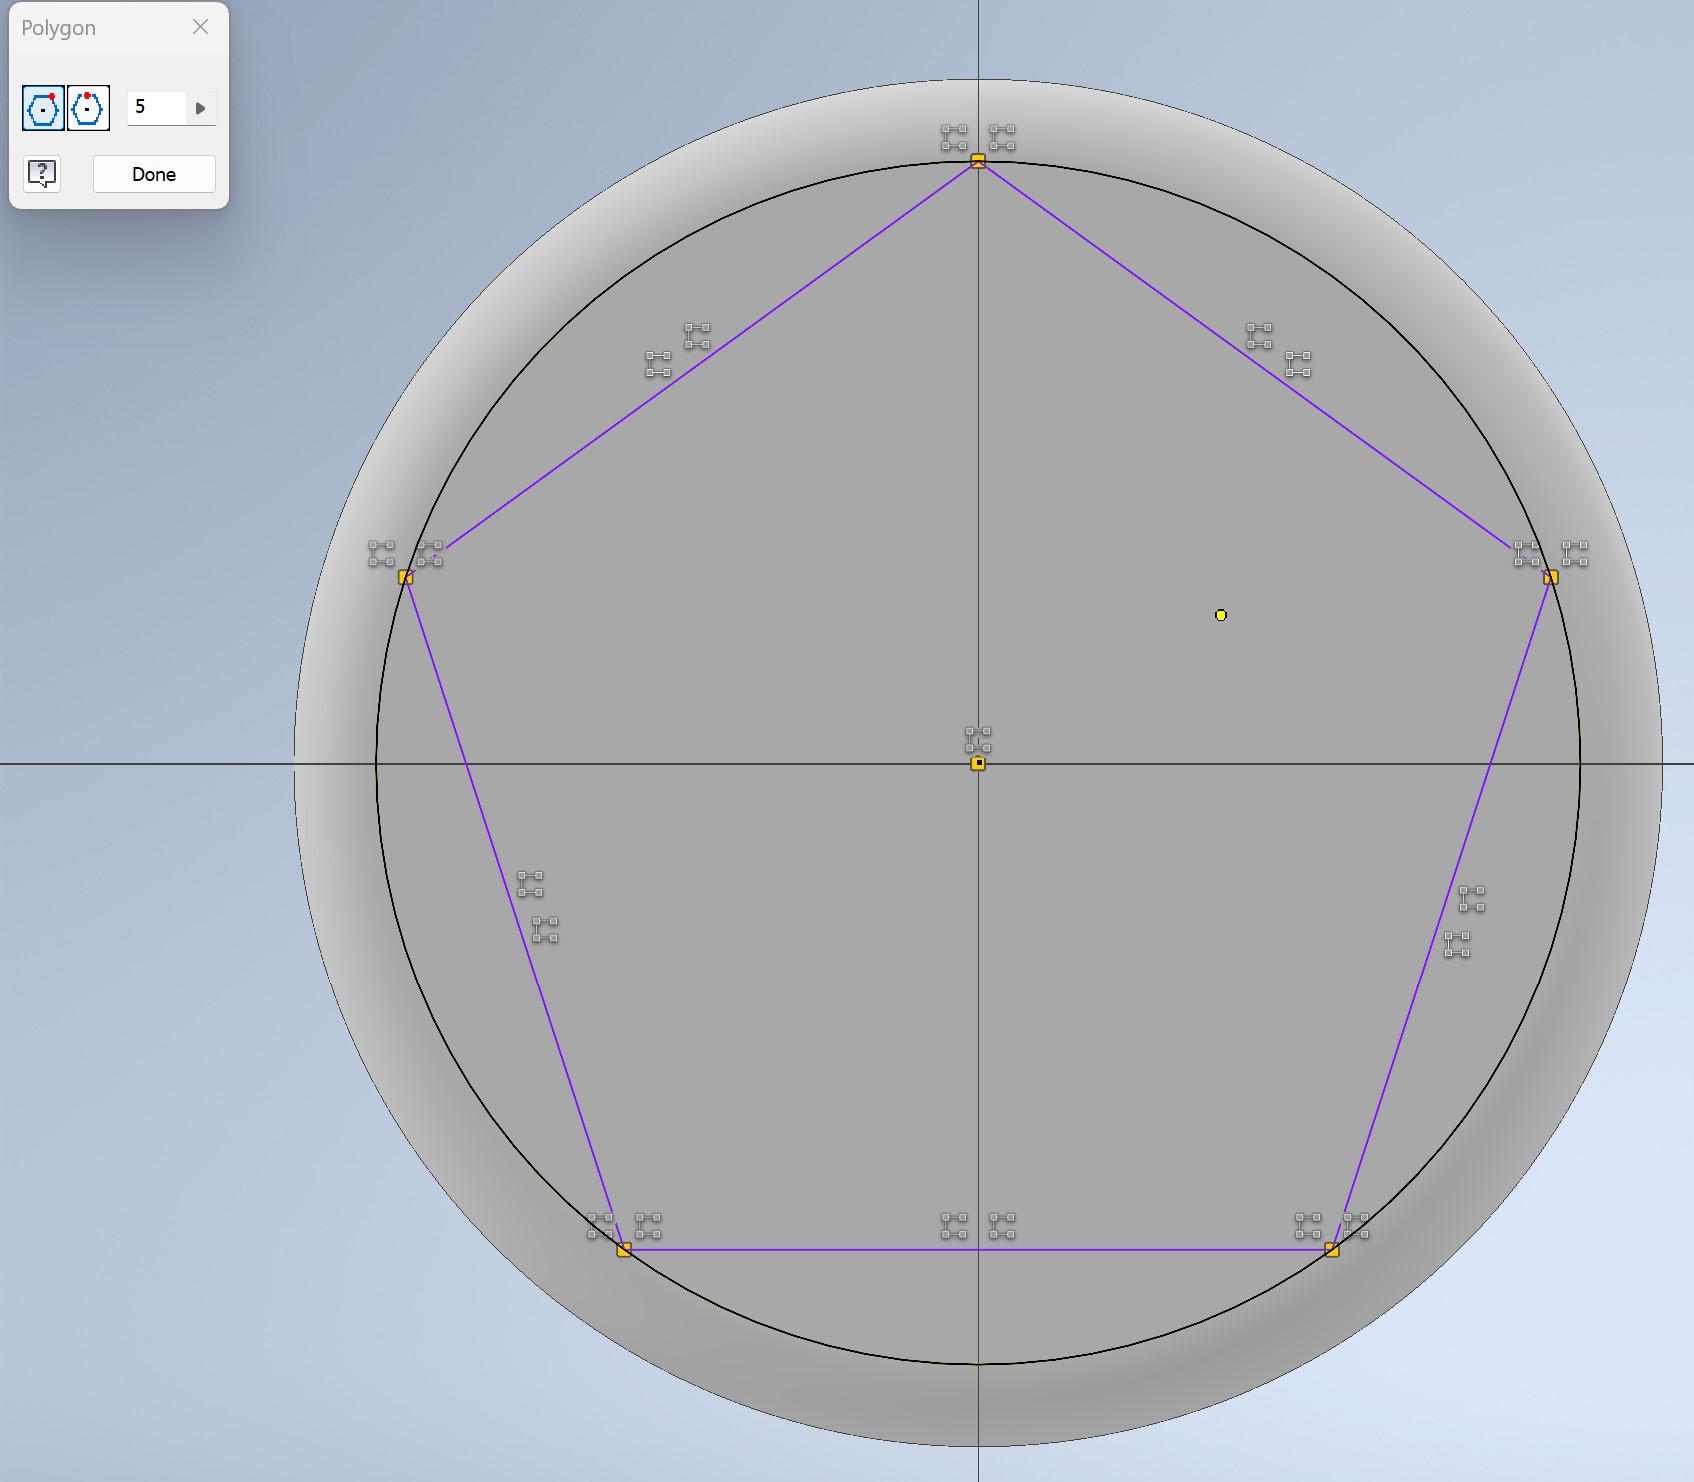
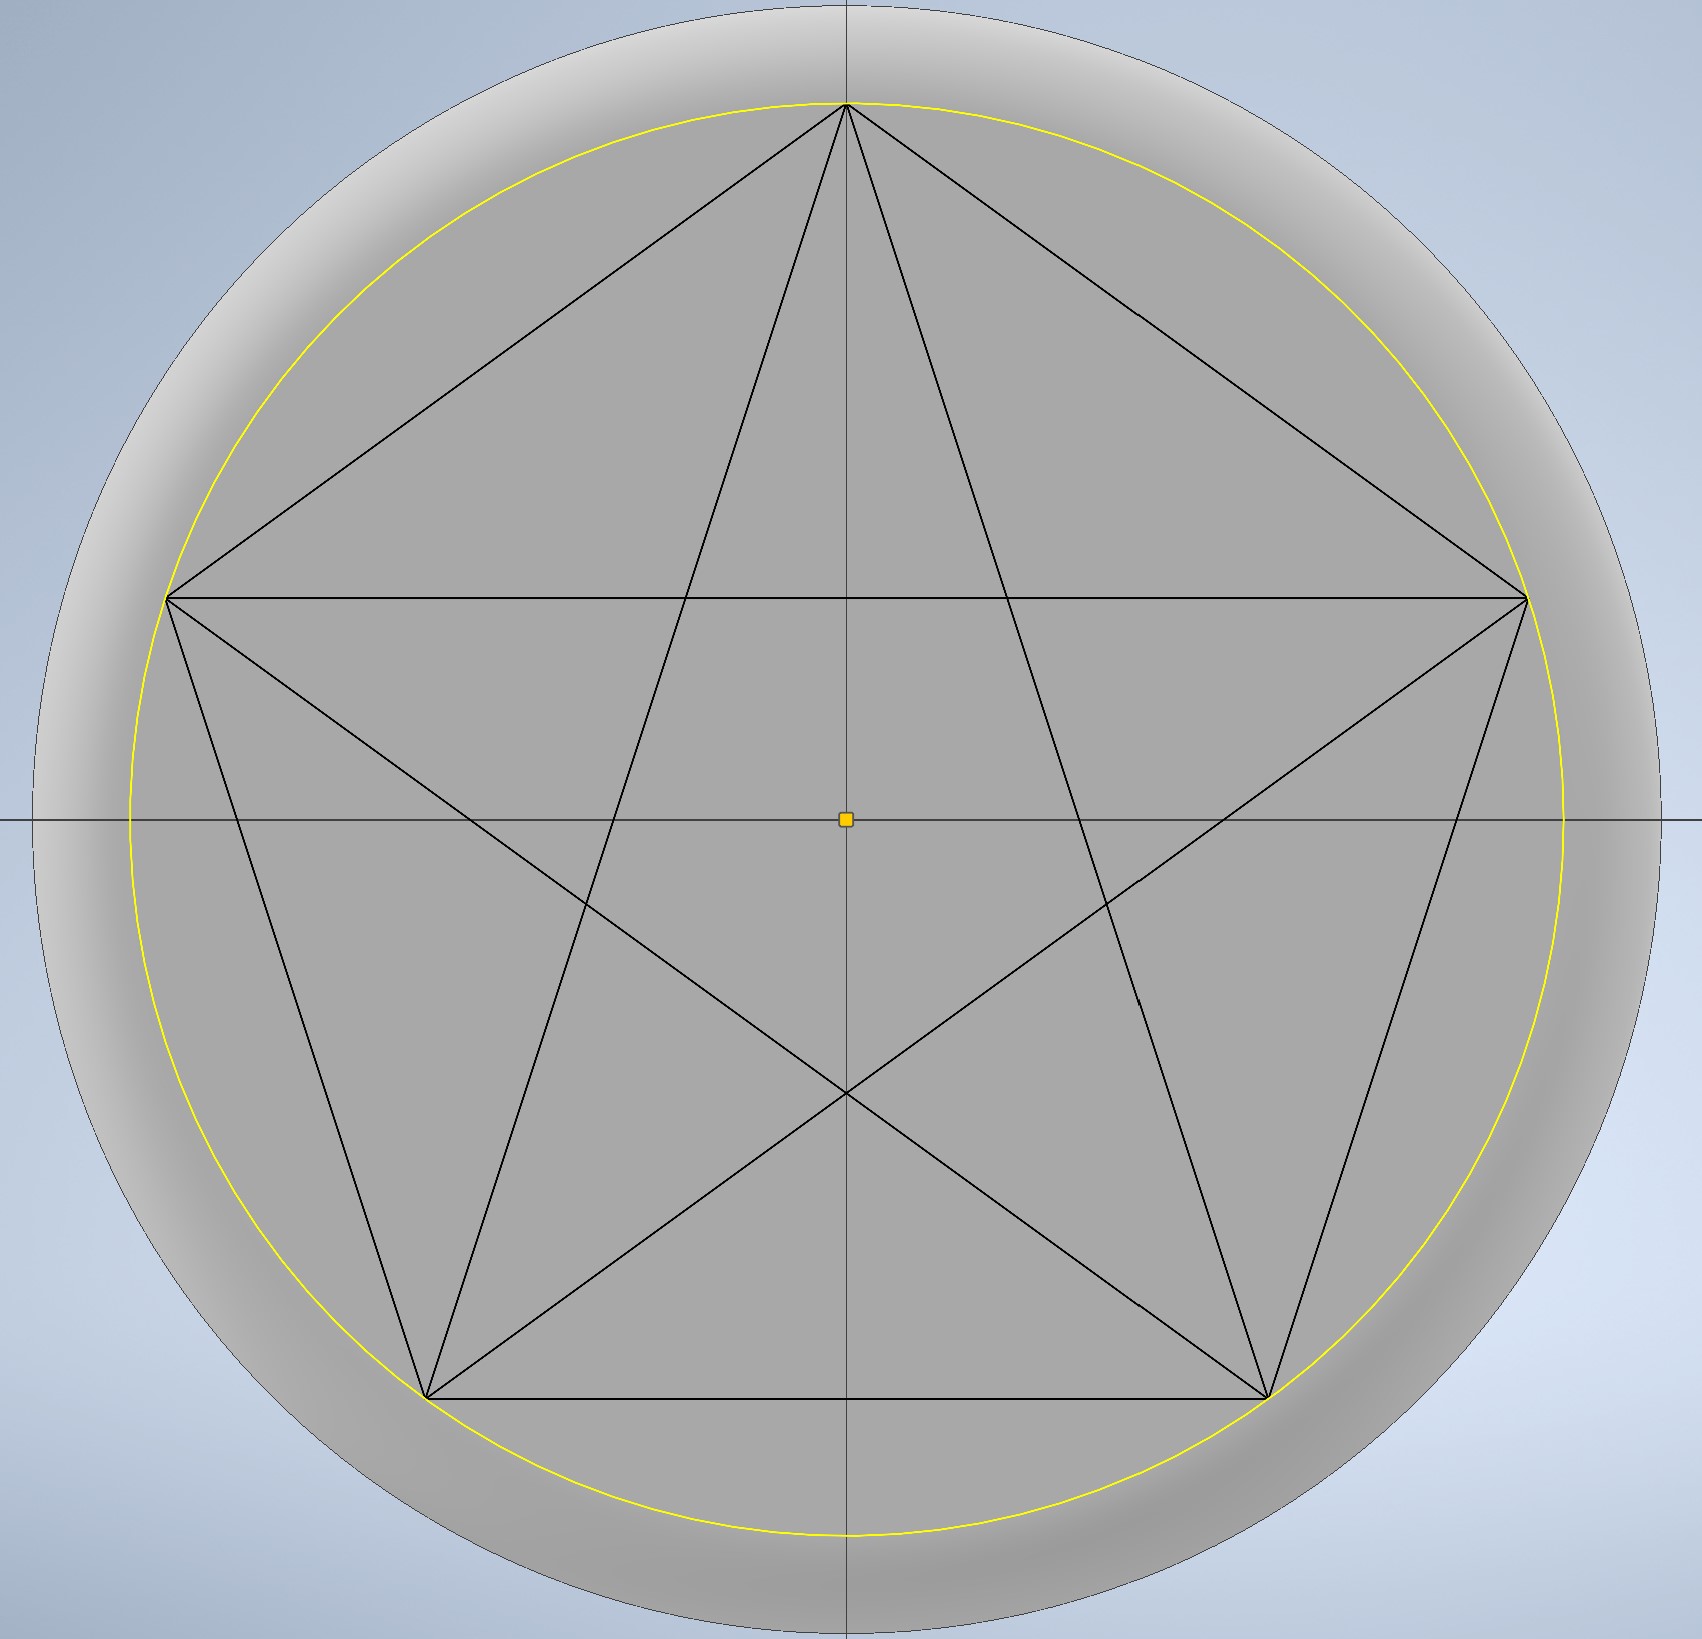
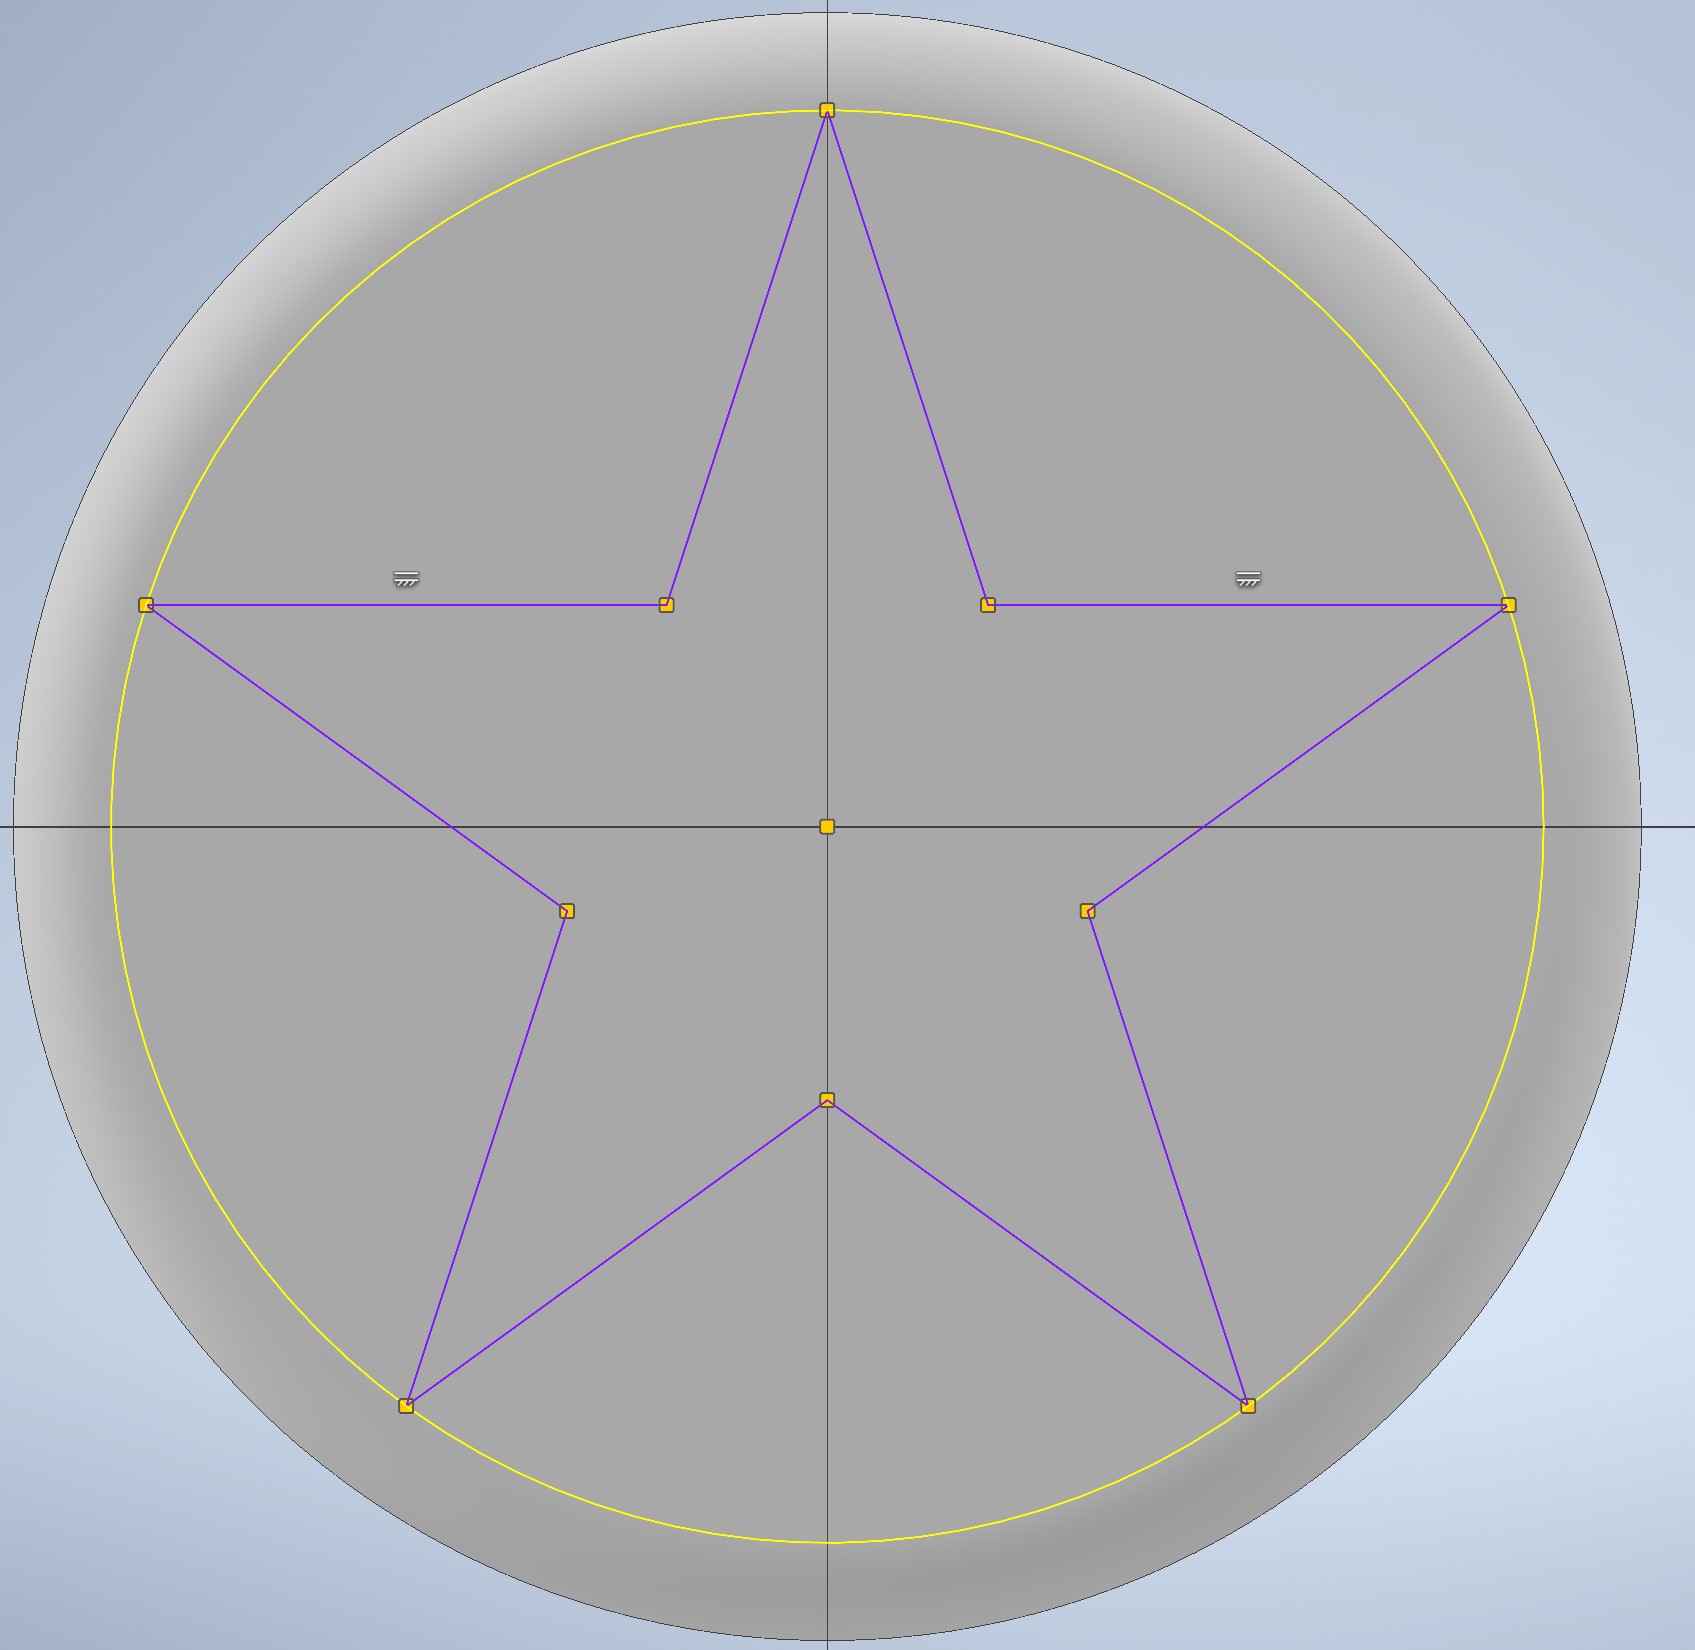
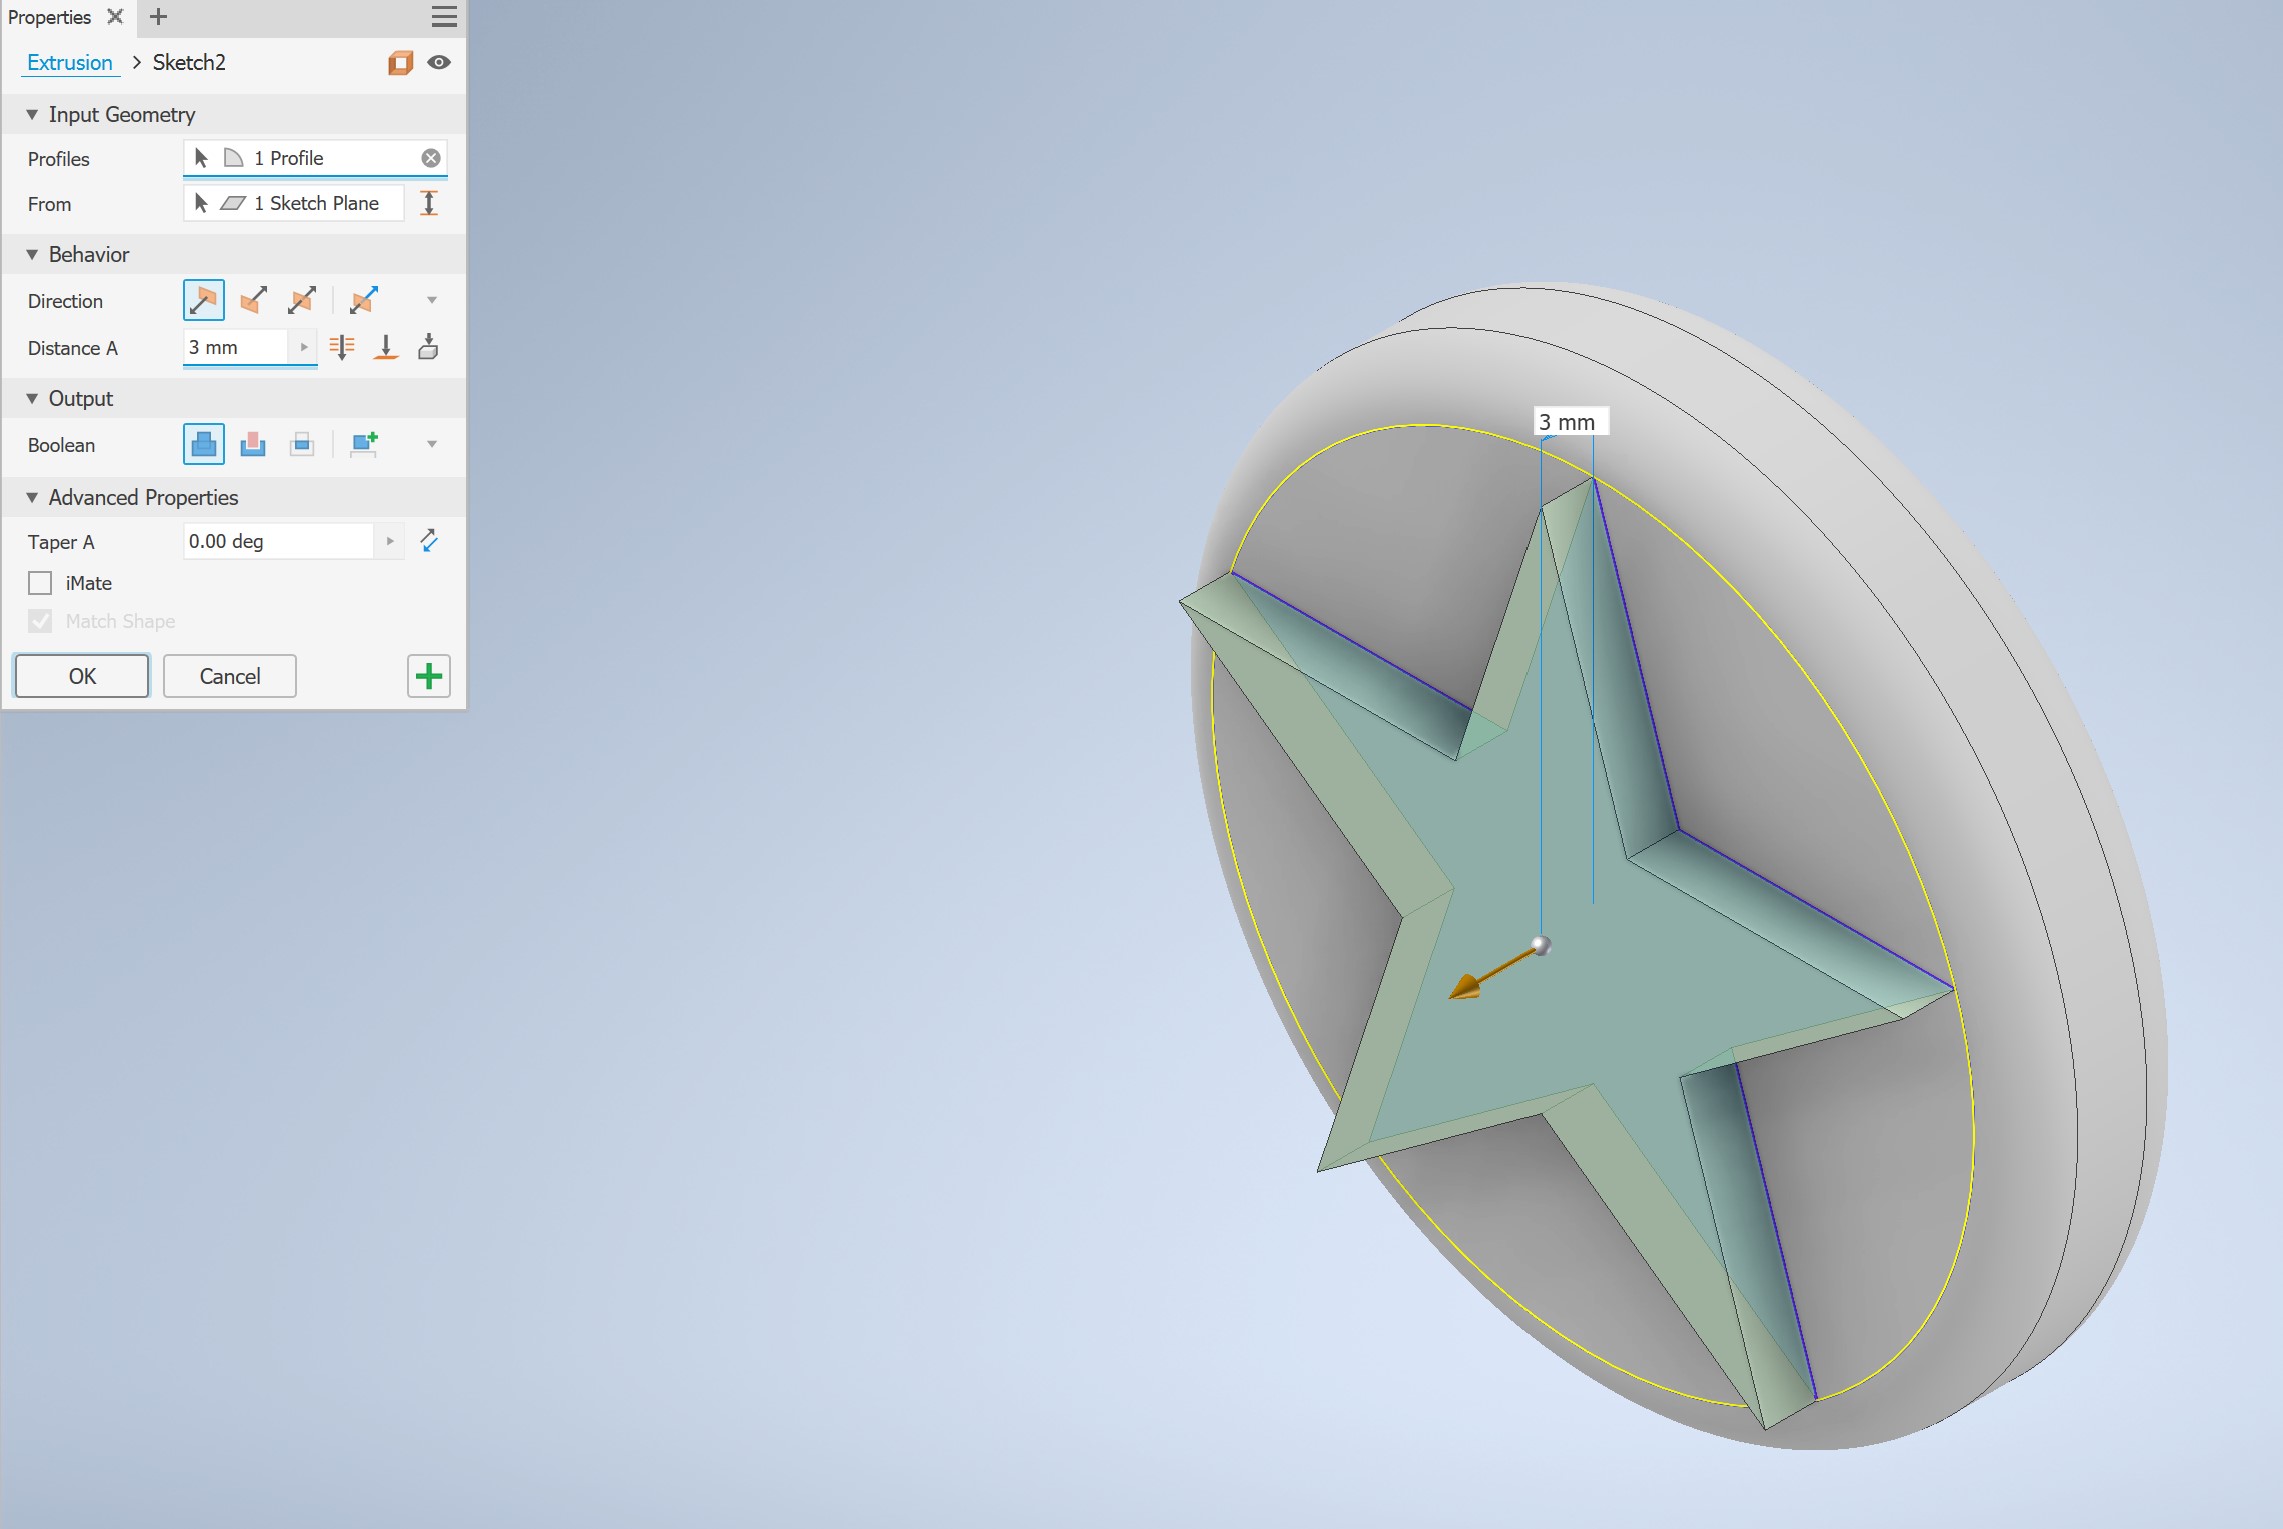
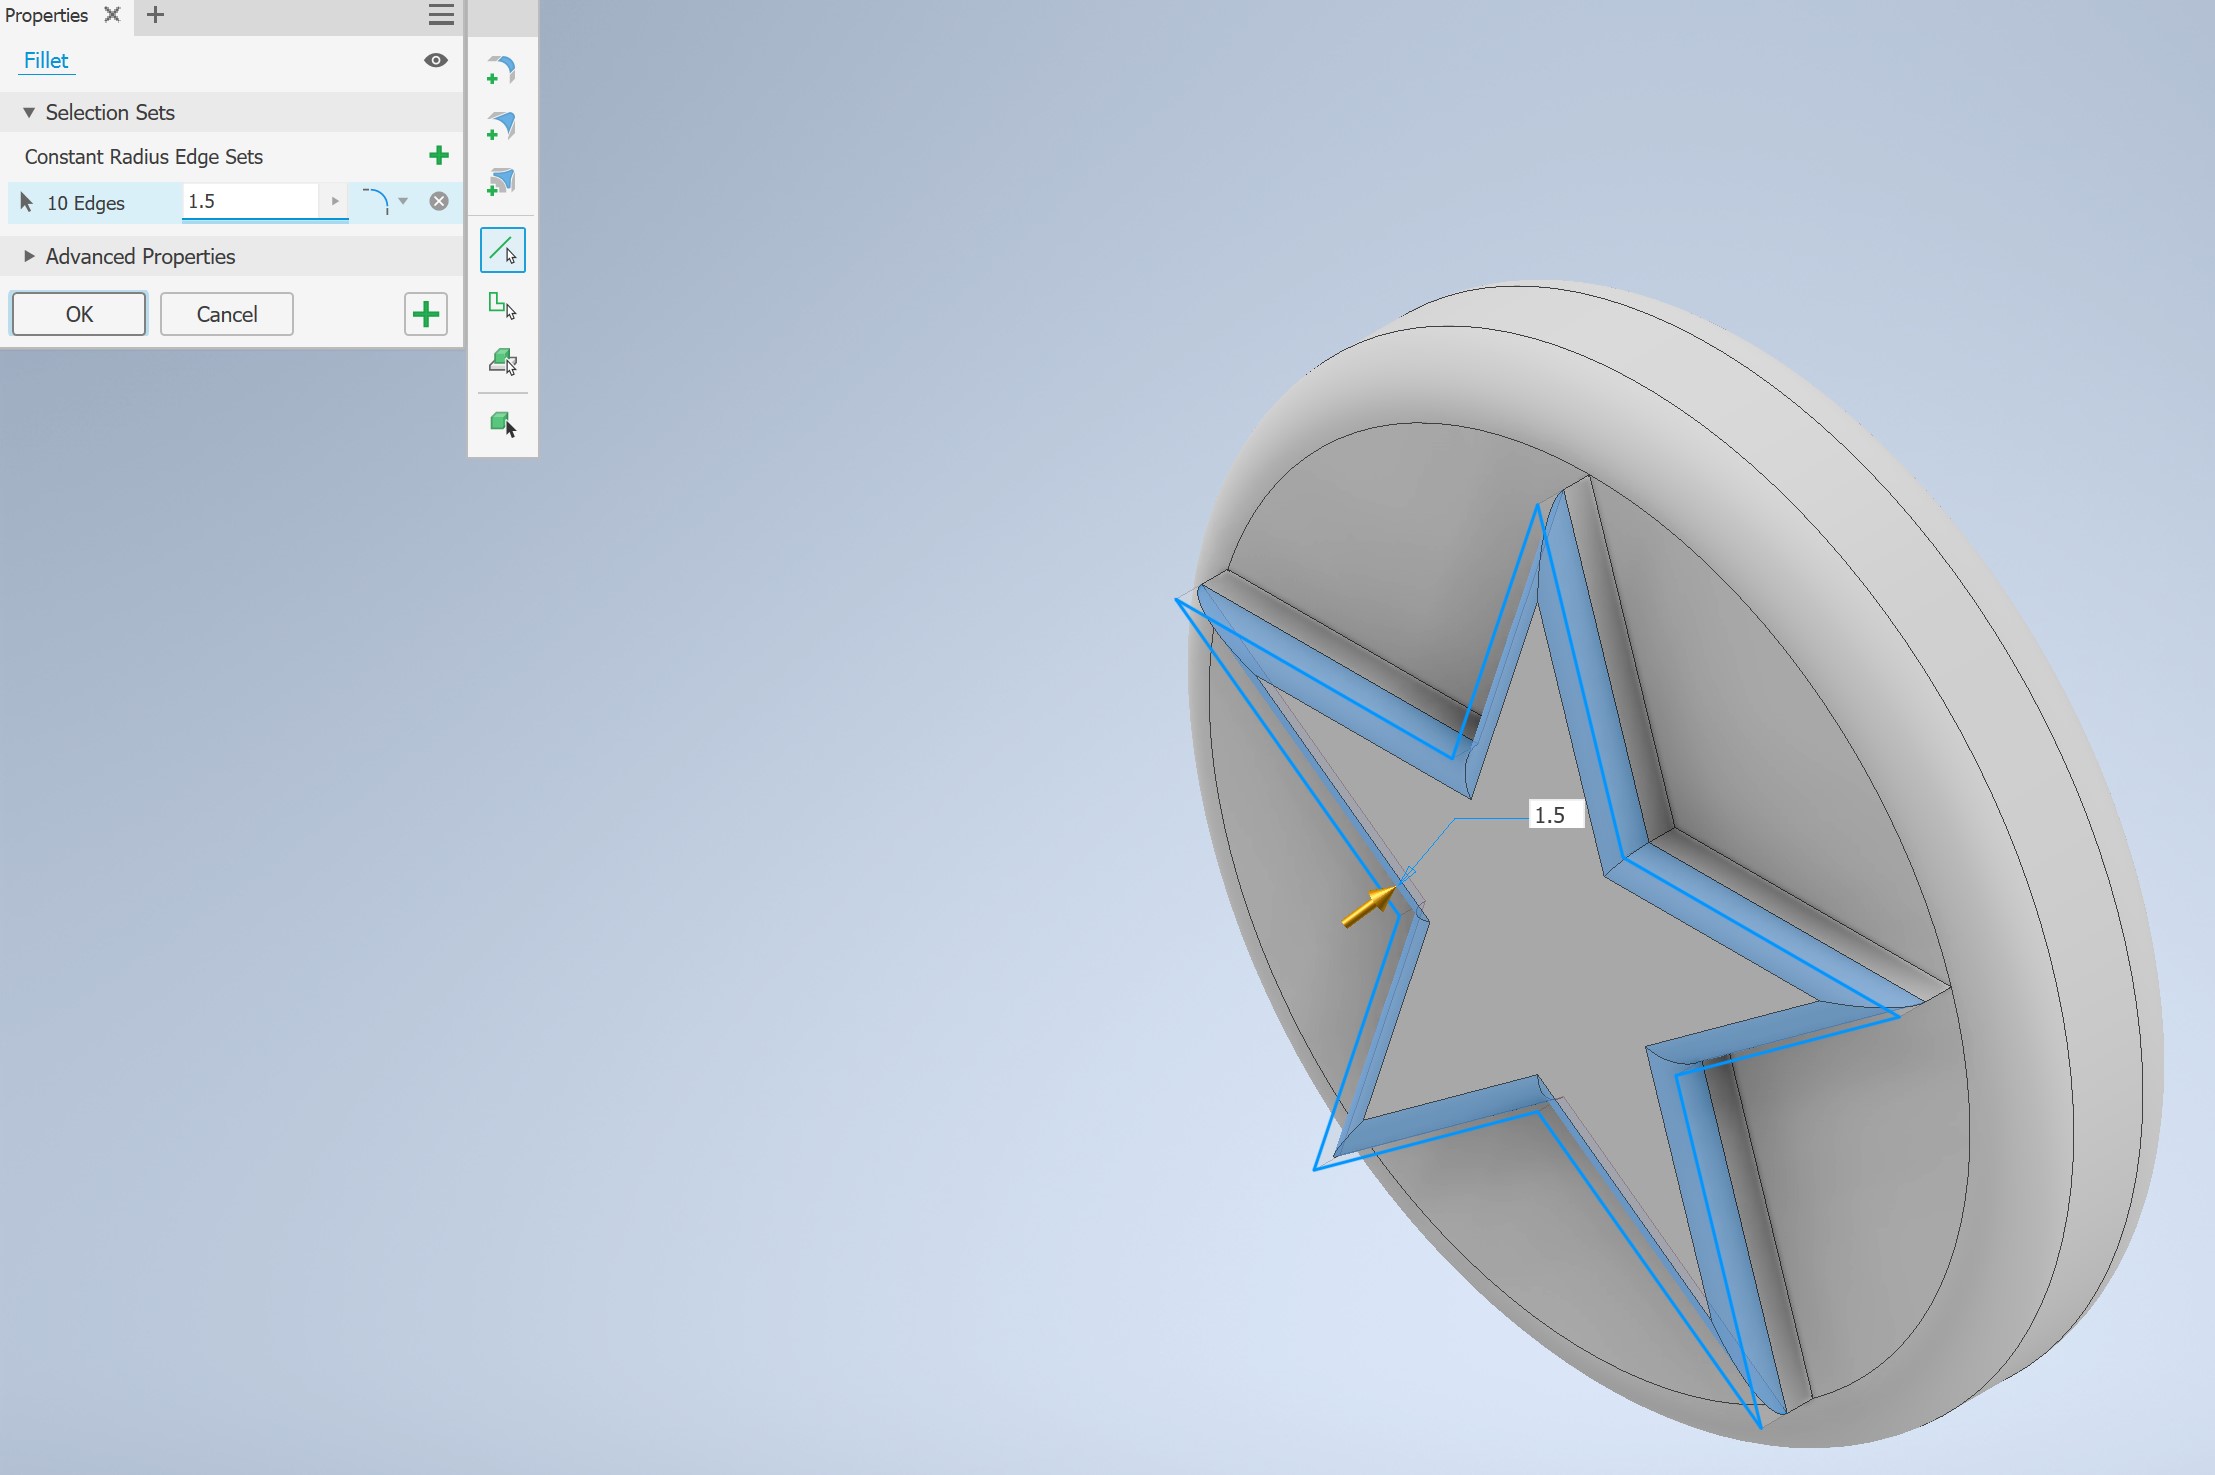
On the top face, I sketched a pentagon, connected all corners with lines to form the star shape, then used the Trim tool to cut the internal overlapping lines — leaving a clean 5-pointed star. It was extruded 3mm upward (Taper at 0), then finished with a 1.5mm fillet on all top edges to achieve the "puffy" jewelry aesthetic.
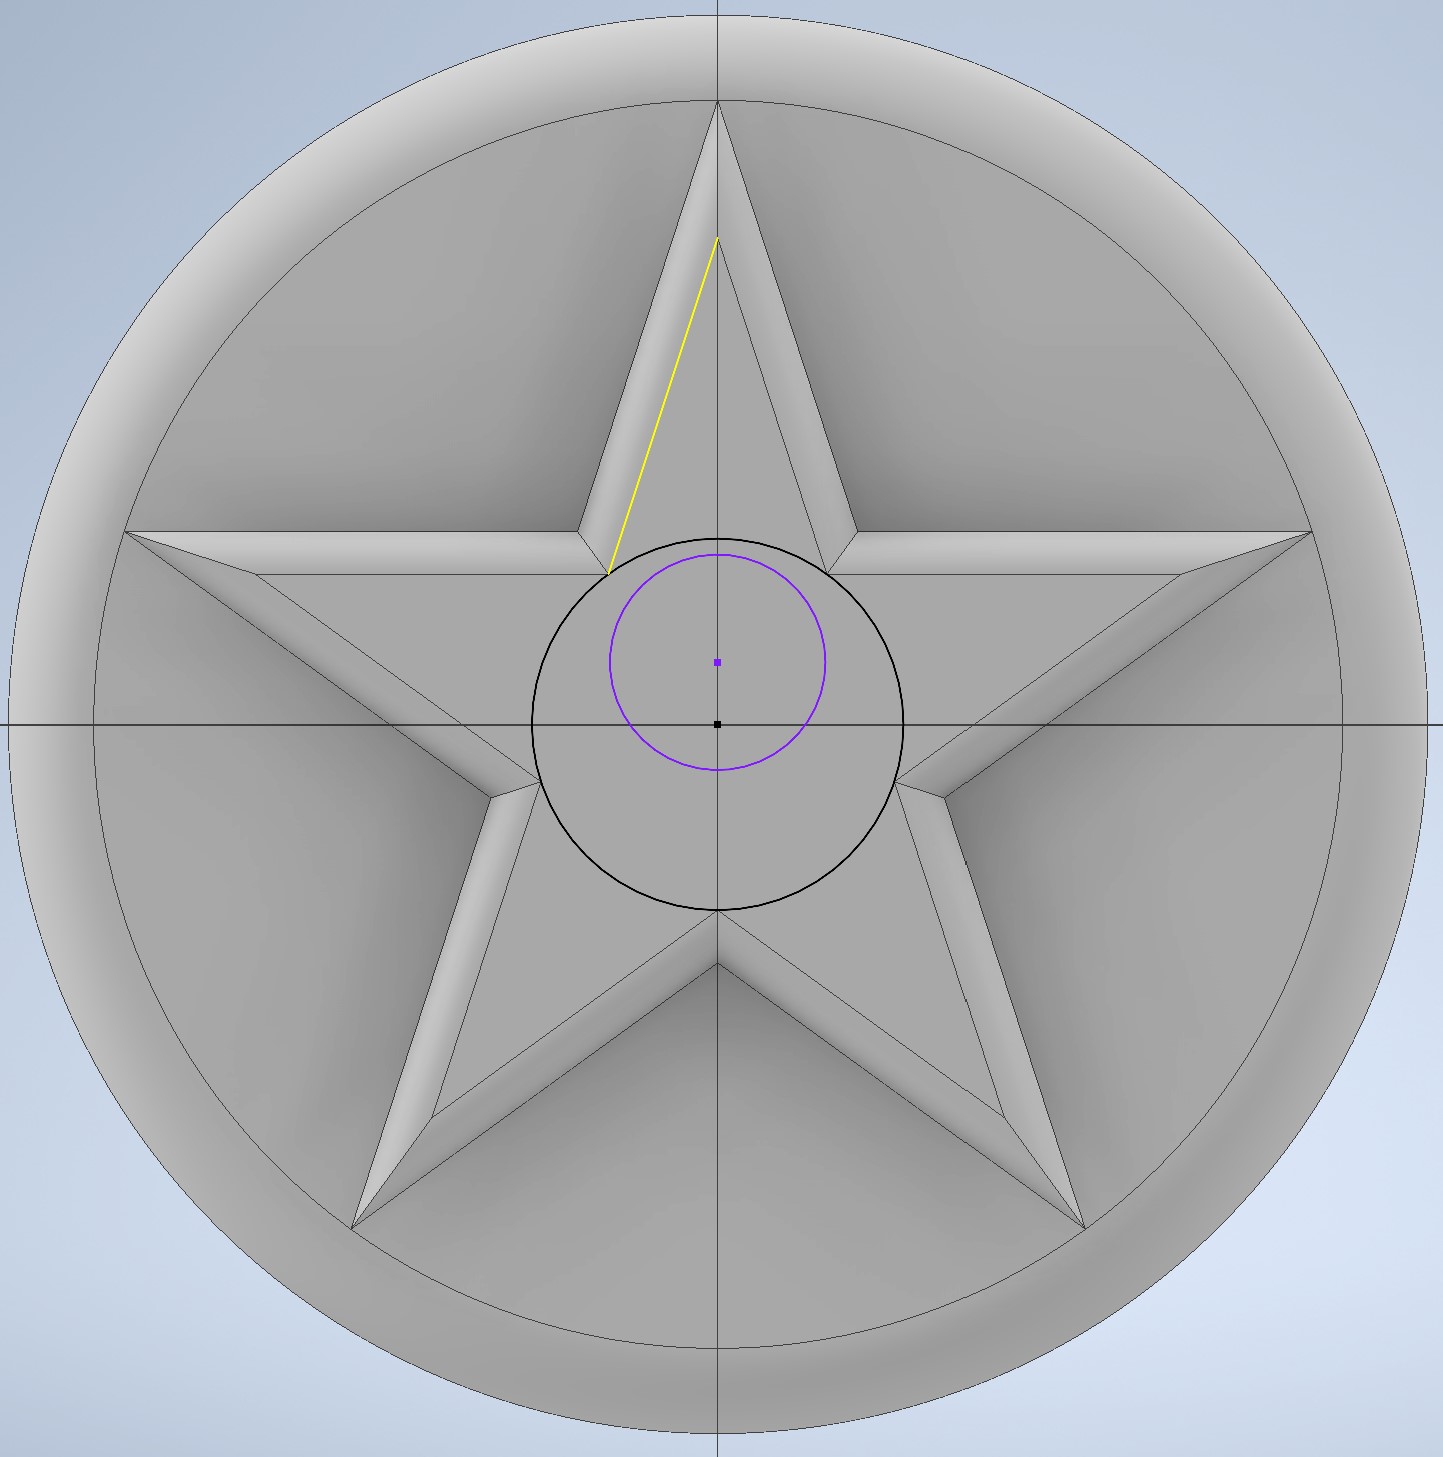
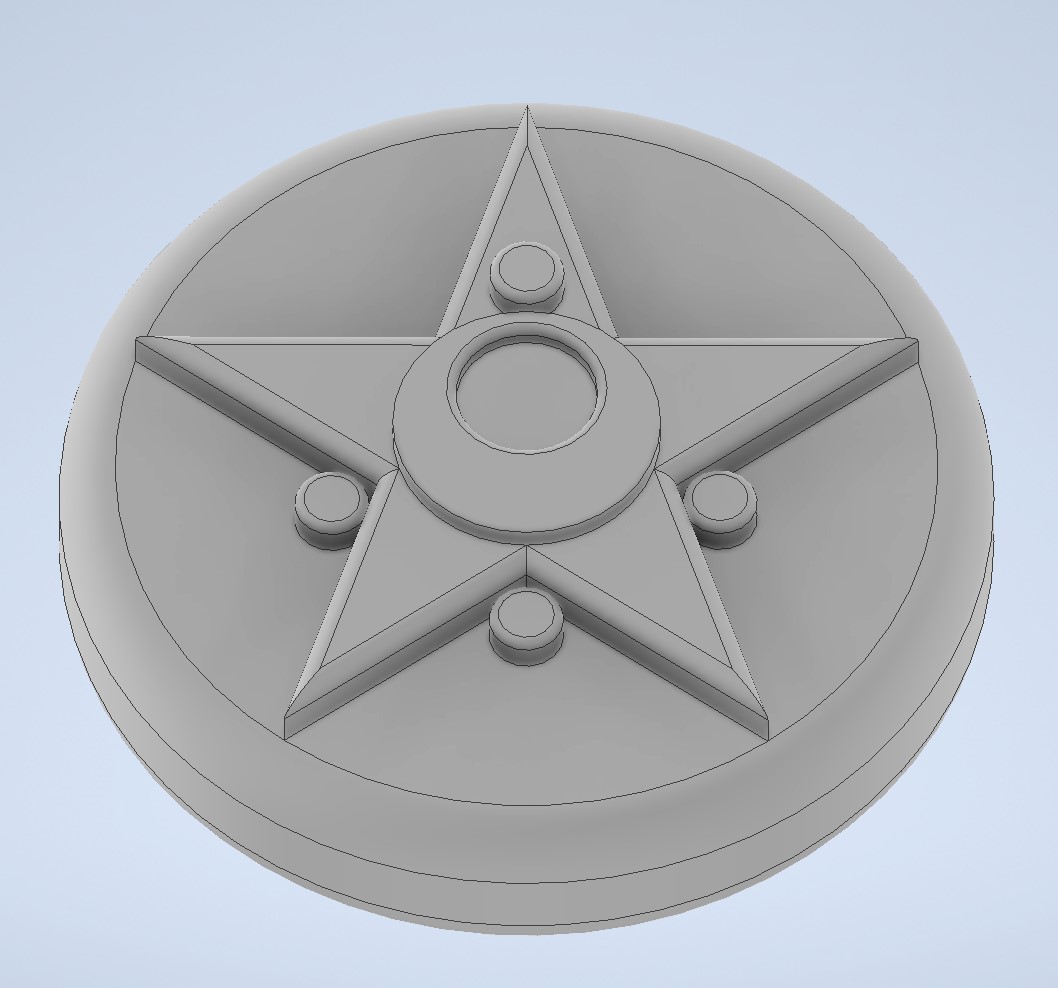
In the center of the star surface, I drew a large circle and a slightly offset smaller circle overlapping its top edge — this classic two-circle technique creates a crescent moon silhouette. The main circle was extruded 1.5mm, then filleted to maintain organic consistency. The same process was repeated for the 4 decorative gems.
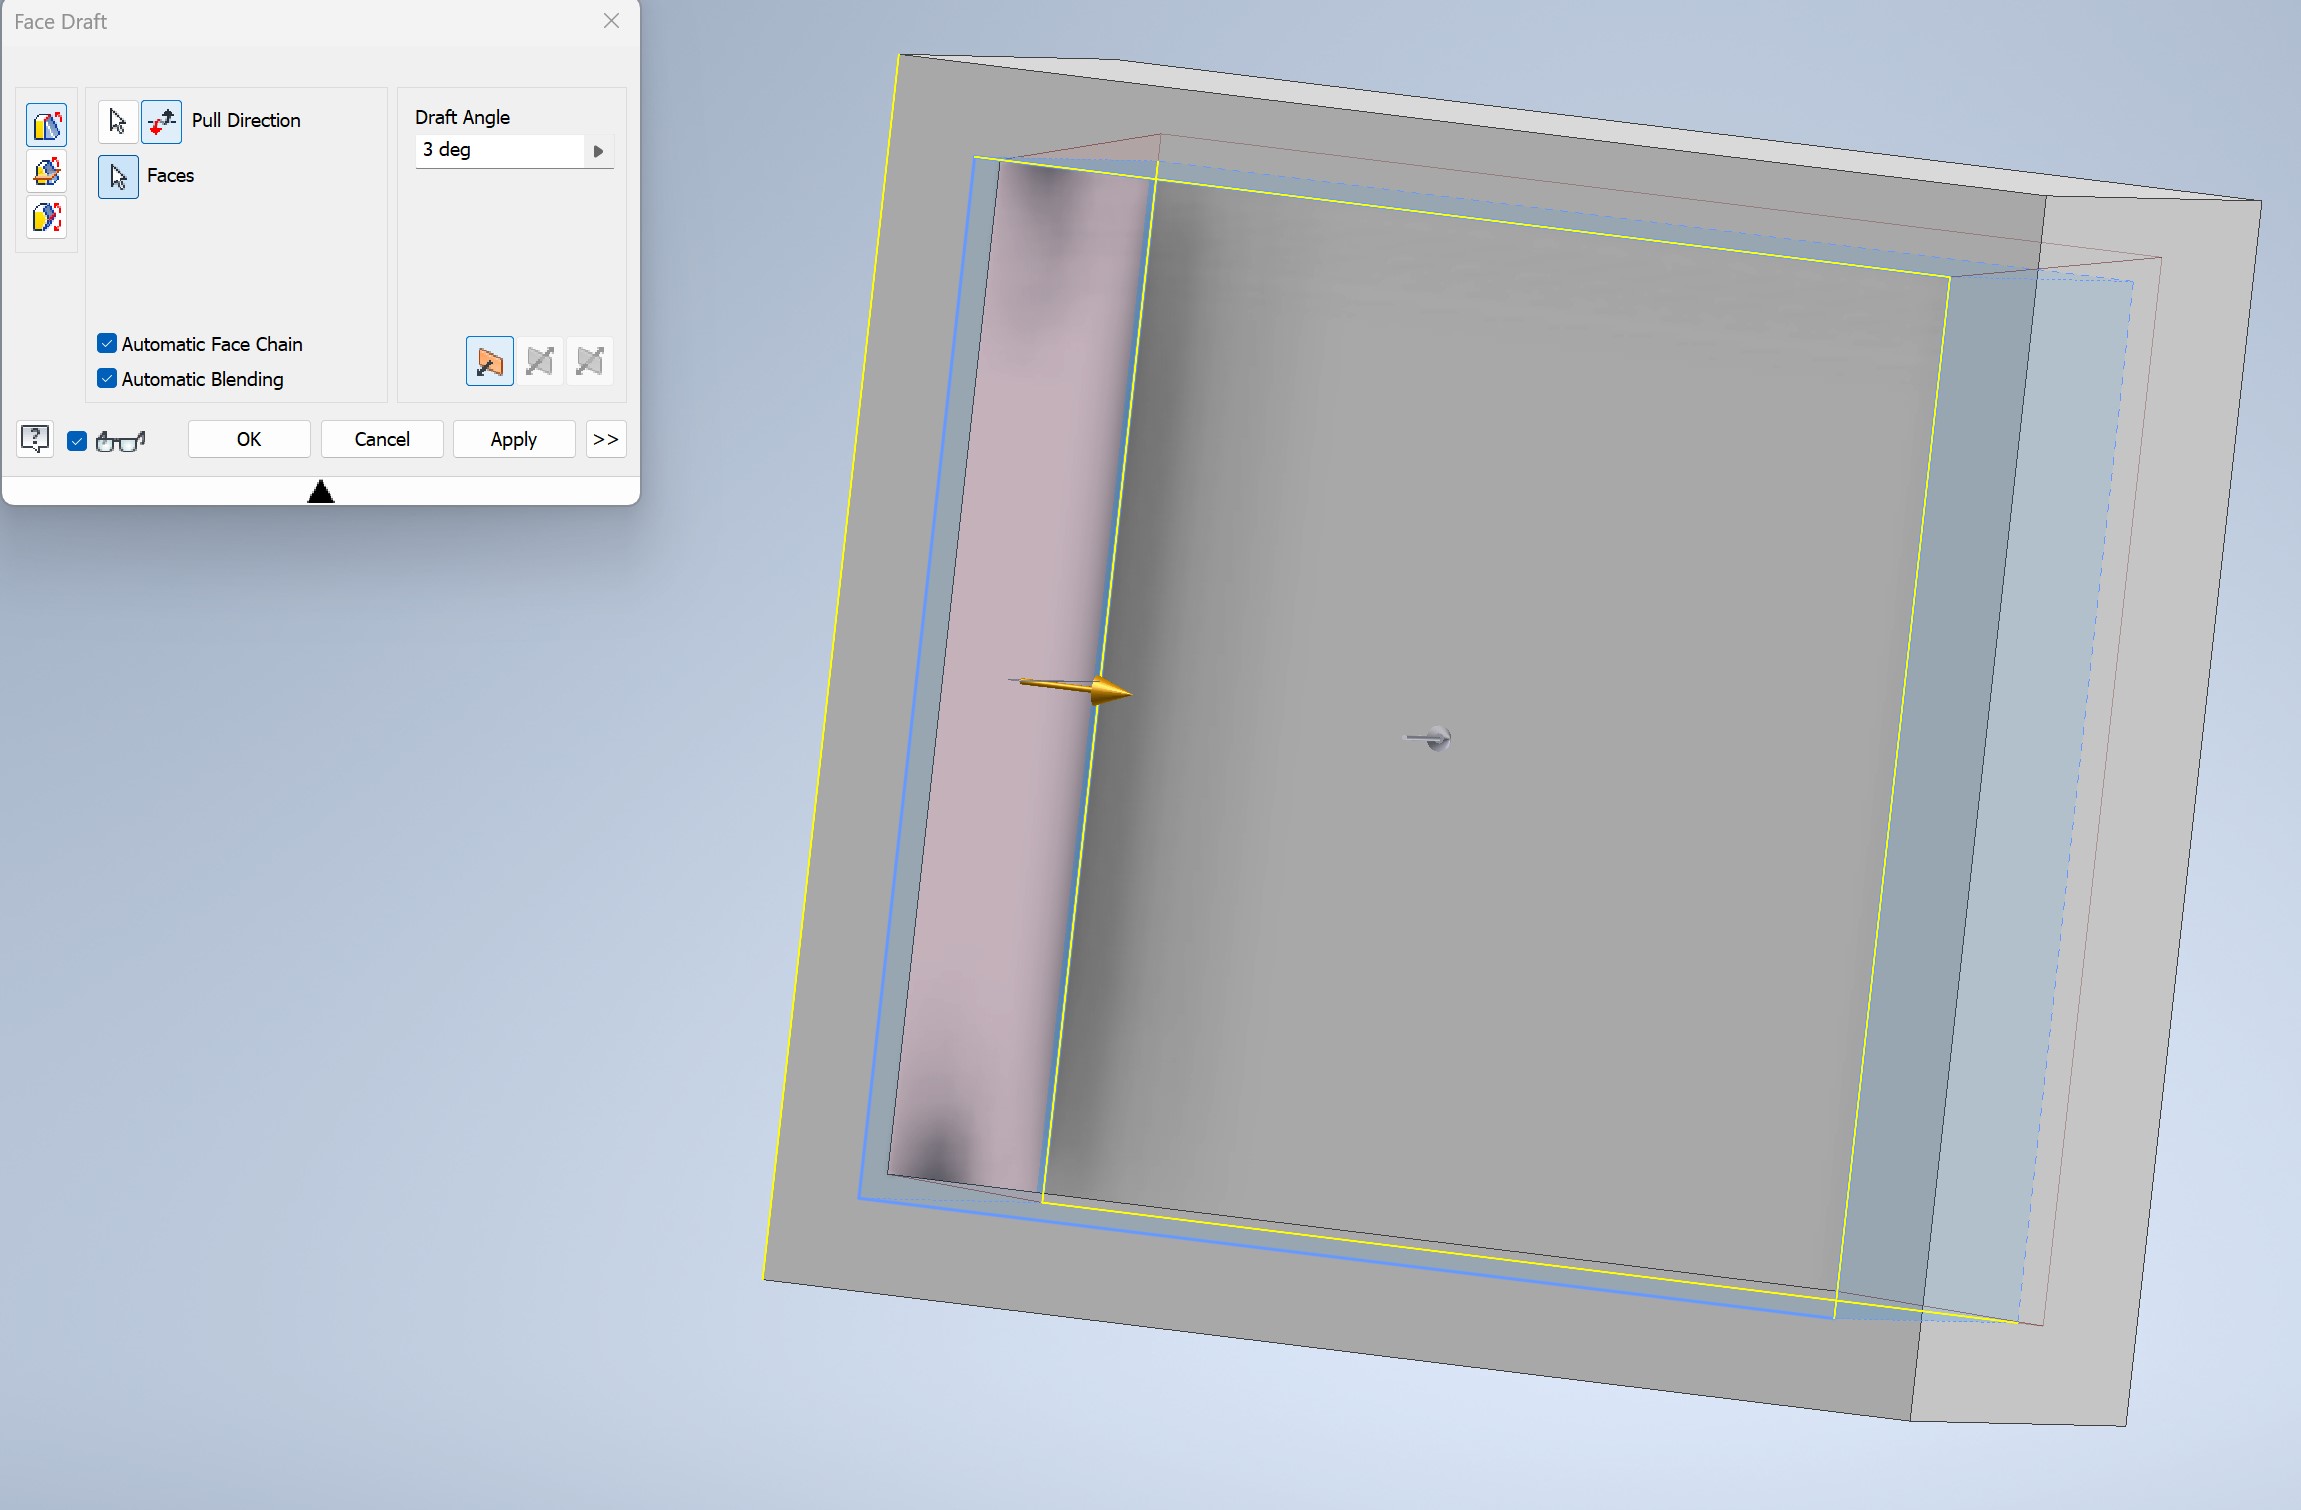
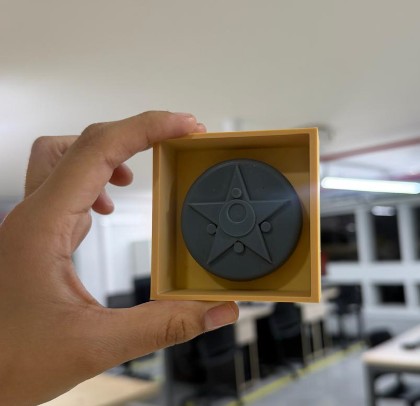
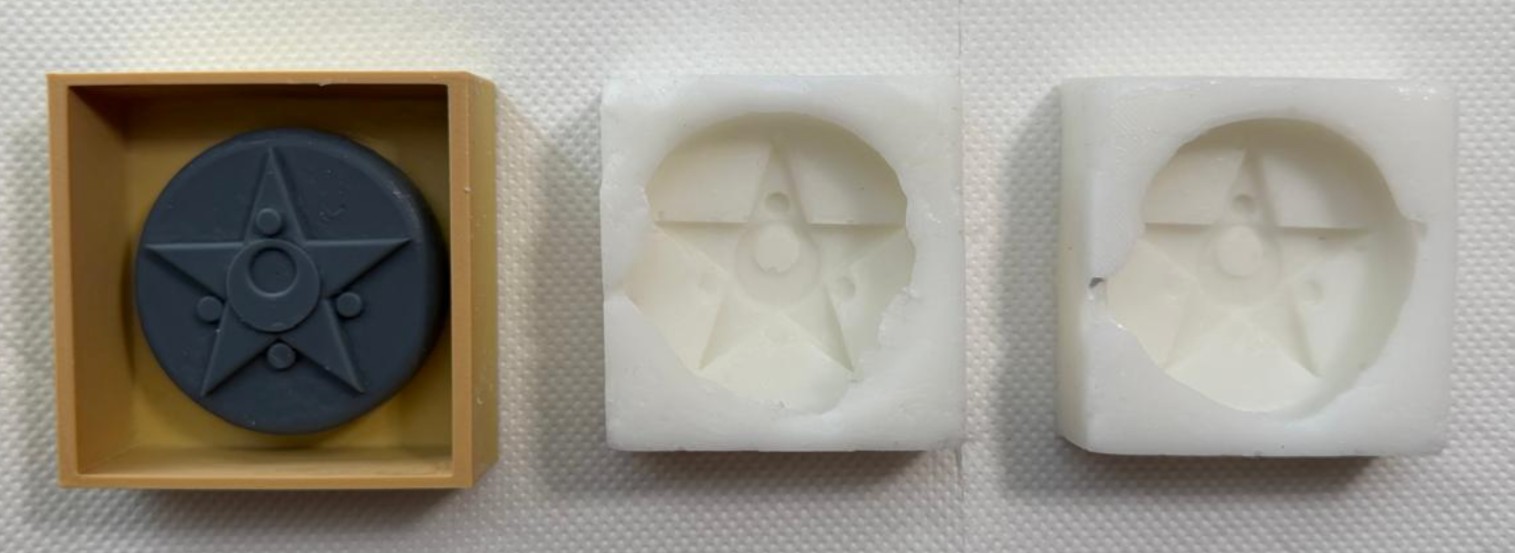
To prepare for silicone casting, I designed a surrounding box frame to contain the liquid silicone during pouring.
A 65mm square base extruded 26.5mm upward — 8.6mm taller than the tallest gem to ensure full coverage with silicone.
Applied the Face Draft tool on the internal walls so the silicone block slides out effortlessly once cured — no forced demolding.
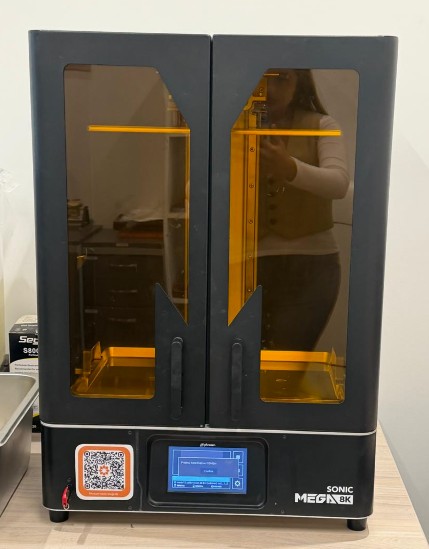
SLA Printing — Phrozen Sonic Mega 8K V2
At the ULima lab, we have access to the Phrozen Sonic Mega 8K V2 — a powerful resin printer with a large 330 × 185 × 400mm build volume and 8K resolution that captures even the finest surface details. This was my first time operating both this printer and Chitubox slicer software.
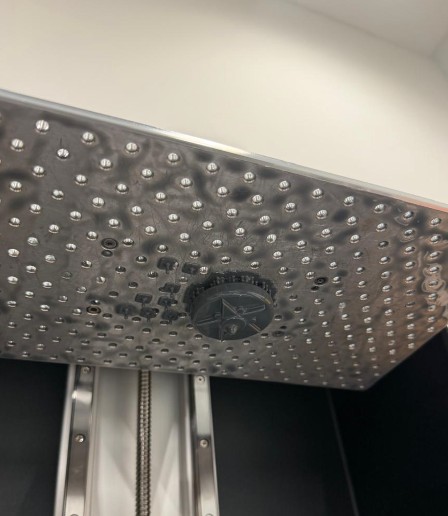
An interesting feature of this machine is its pre-calibrated building plate; unlike most resin printers that require manual leveling, this one comes ready to print straight out of the box, which really helped since it was my first time using it.
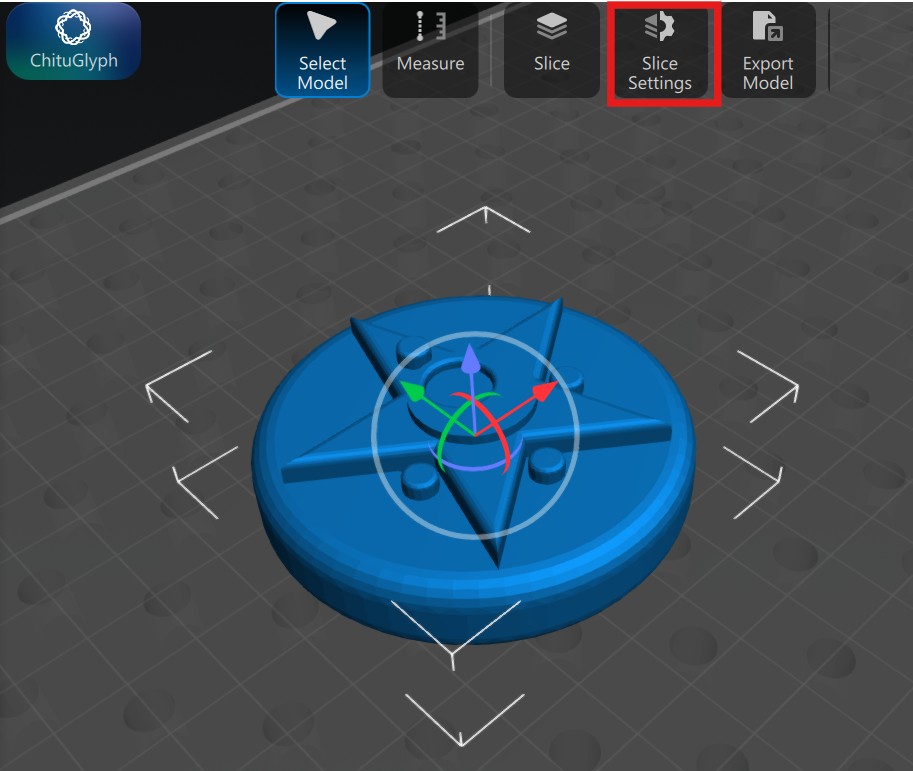
Slicing in Chitubox
I used Chitubox to bridge the gap between my design and the printer. It helped me set up the supports and check every layer to ensure the master model was perfect for molding and casting.

Slicing Step-by-Step
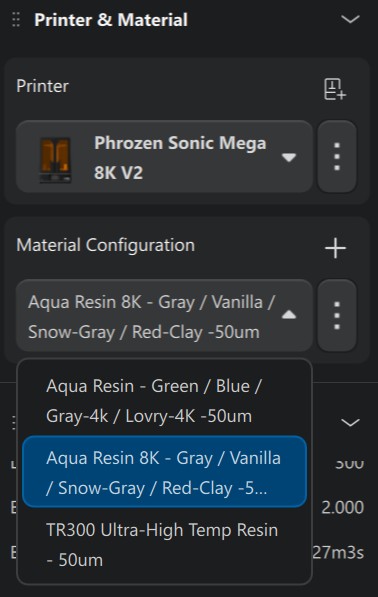
First, I picked the printer profile and used the basic resin profile.
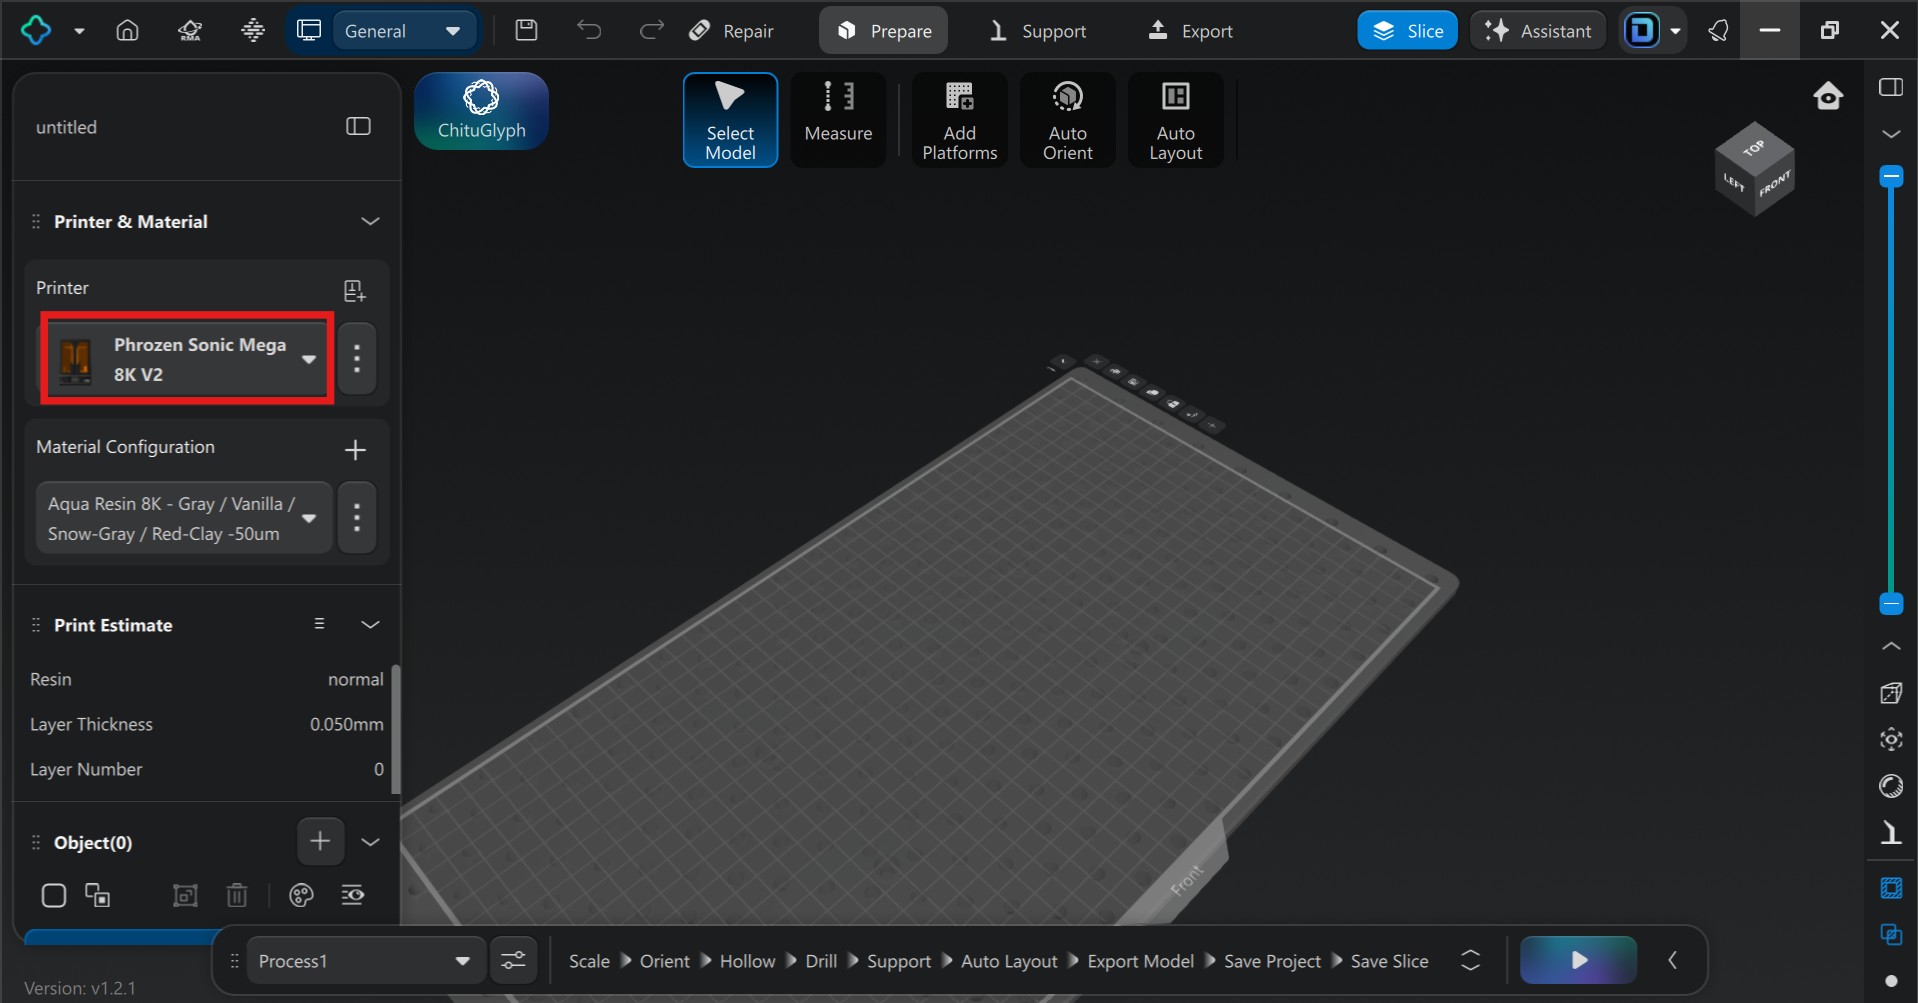
I clicked the plus (+) symbol to load my STL file directly into Chitubox.
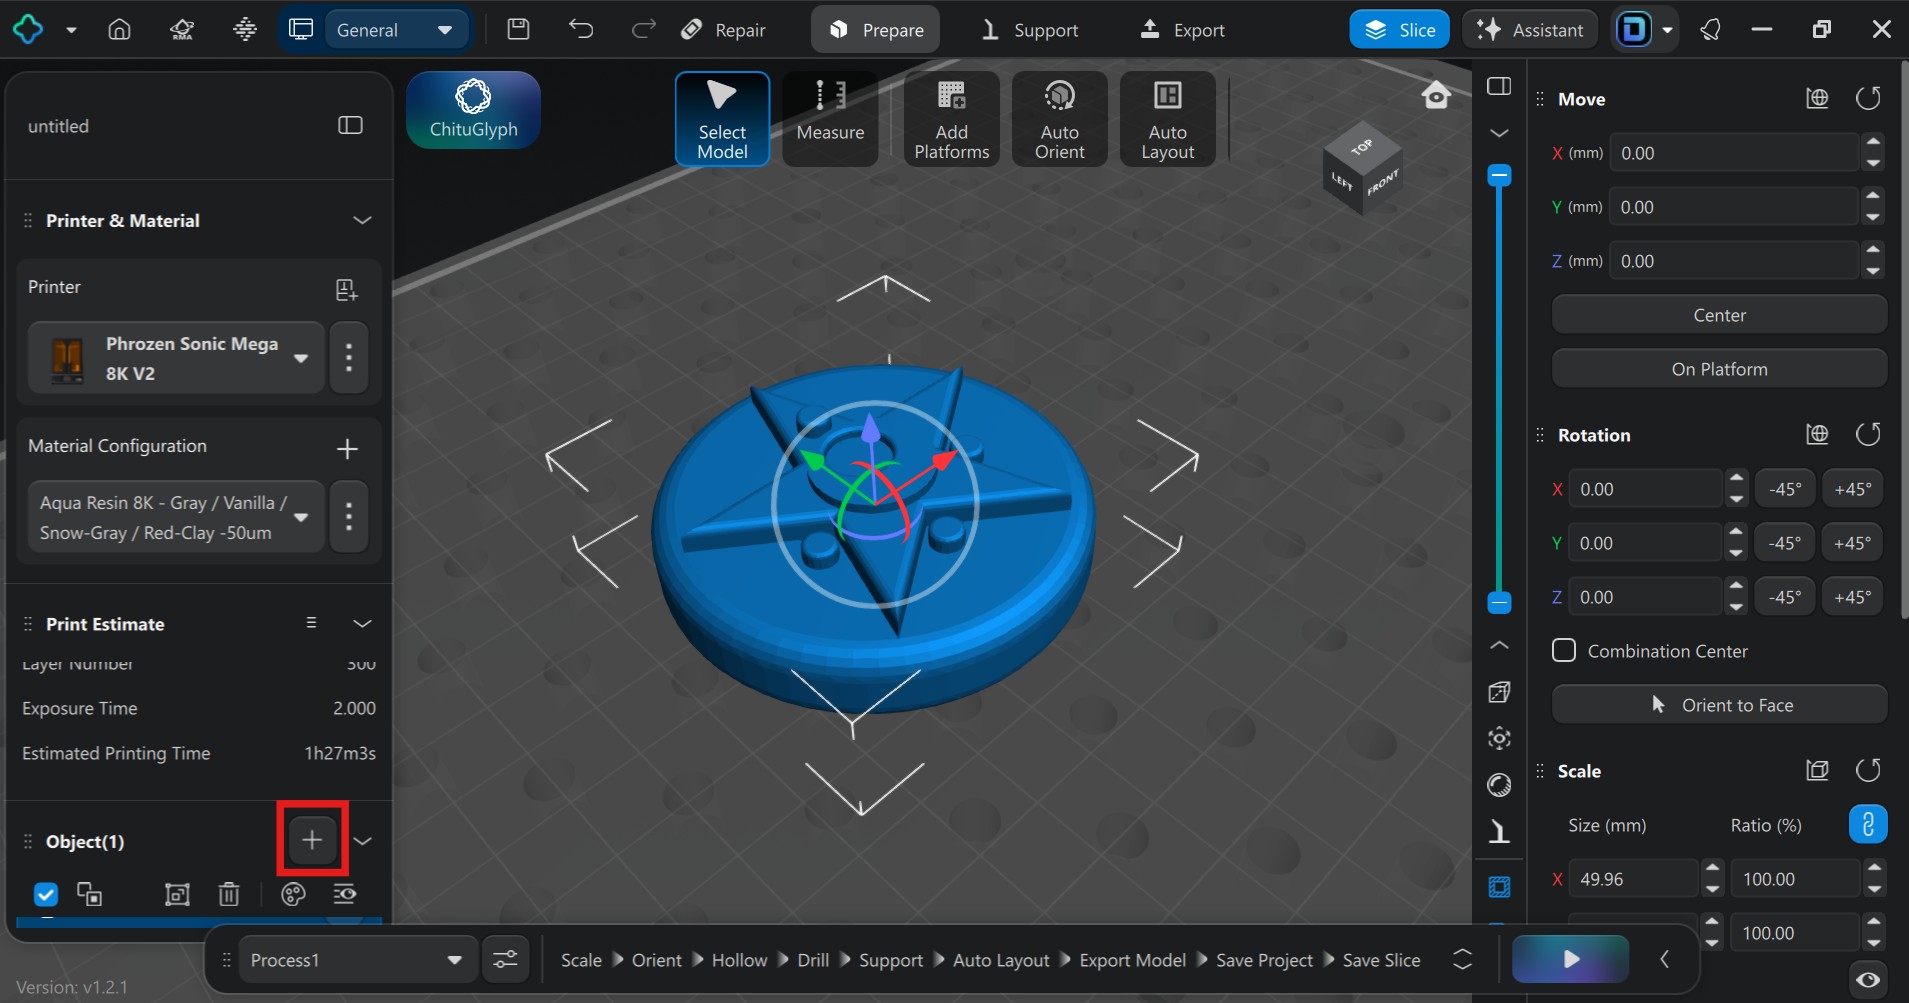
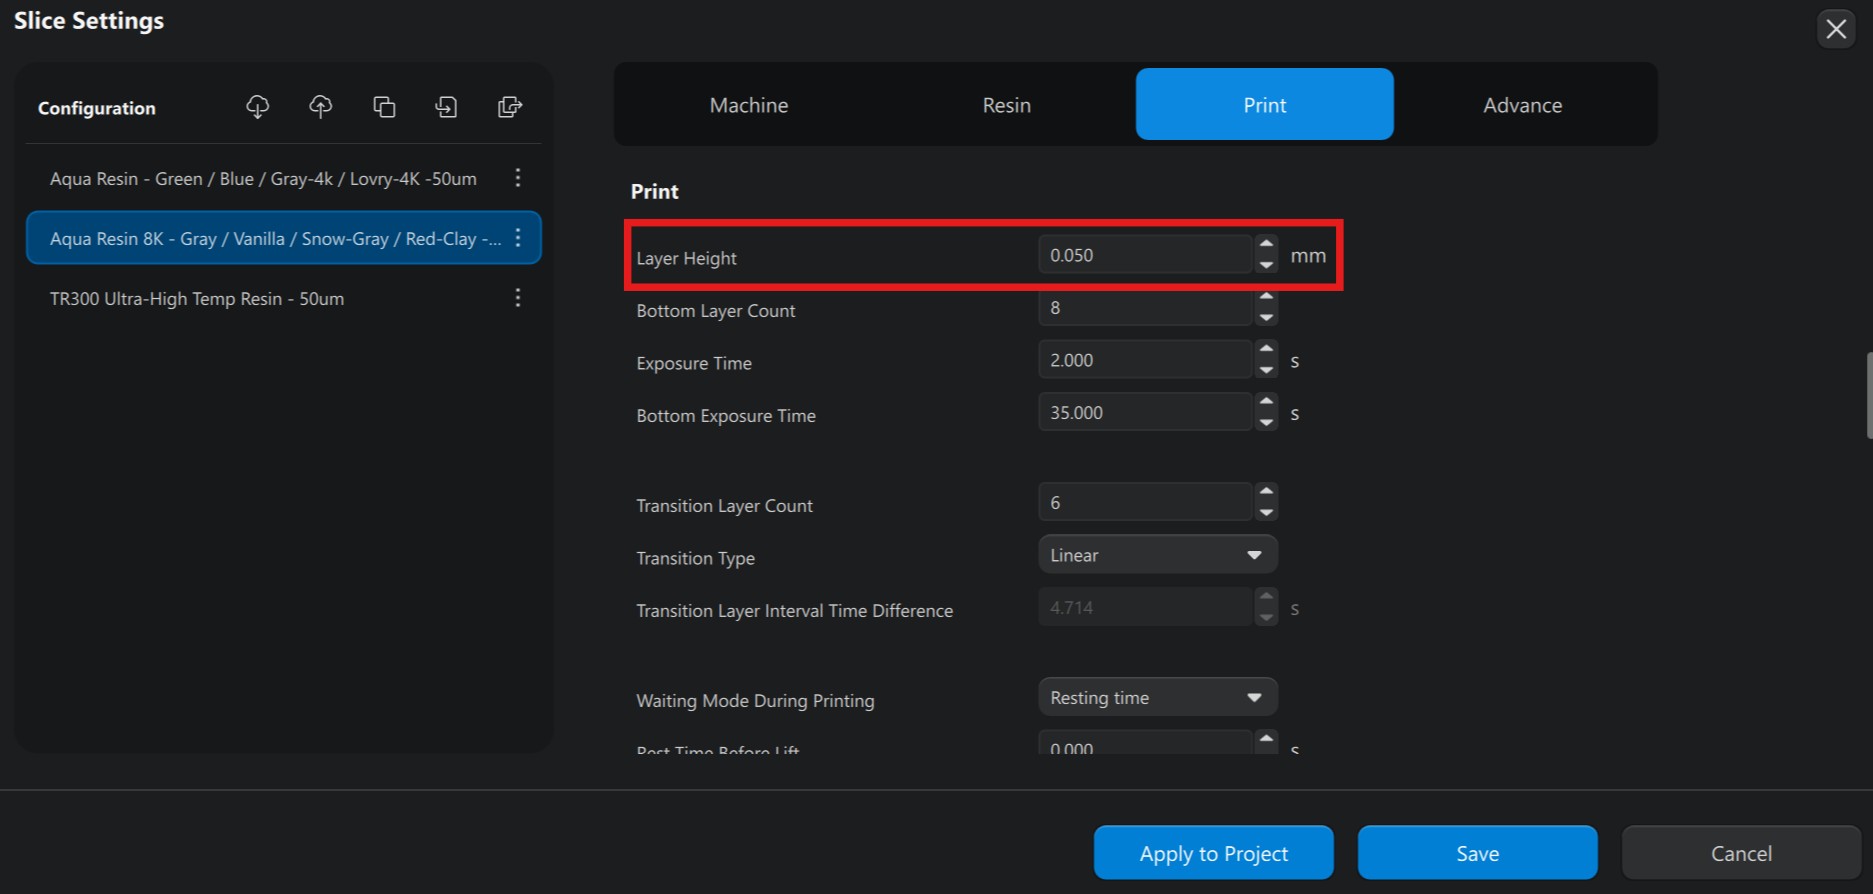
In the Print tab, I set the Layer Height to 0.05mm (50μm) — ideal for capturing high-resolution detail with an almost invisible layer line.
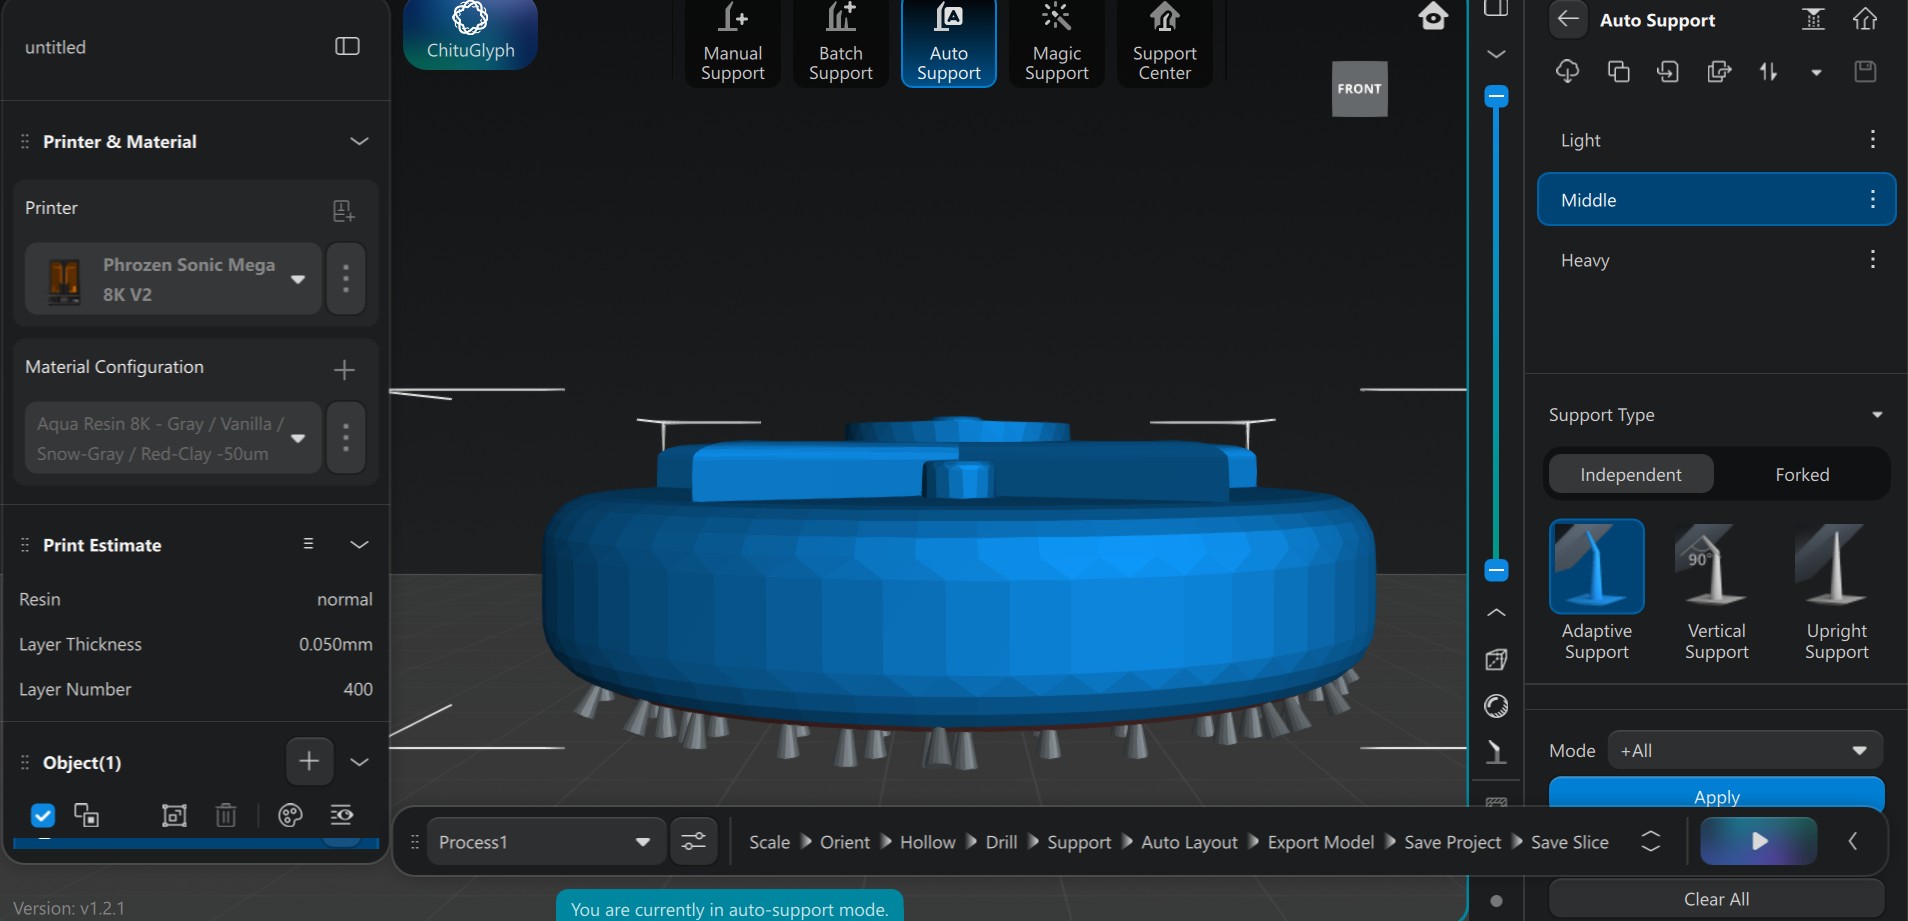
I switched to the Support tab and used Autosupport with Medium strength for stability. I intentionally oriented the print so all support marks would land on the back face, keeping the decorative front completely pristine.
I hit the Slice button and Chitubox processed 300 layers. Just like in Bambu Lab, I could check the layers one by one before saving to USB.
The model was exported as a .ctb file to a USB drive and transferred to the SLA printer. After confirming the settings and initiating the print, twelve hours and fifteen minutes later, the high-quality master model was complete.
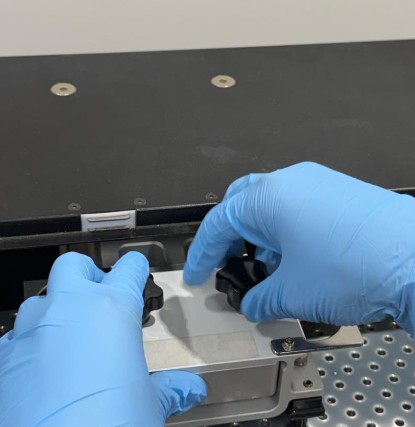
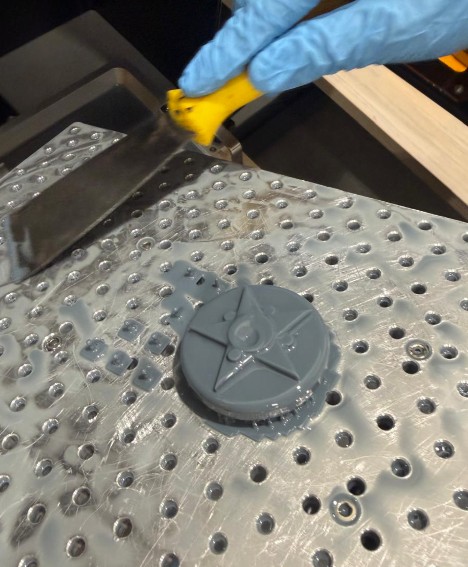
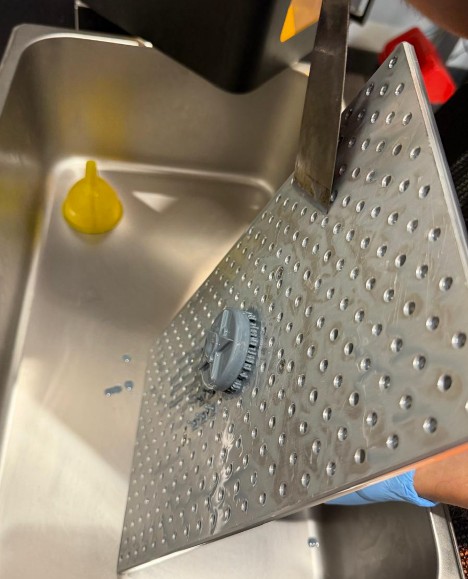
SLA resin is toxic — nitrile gloves are mandatory. I unscrewed the build platform from the machine to gain better leverage, then used a metal spatula to carefully detach the printed model from the perforated plate. I also cleaned any residue from the plate to avoid accidents and ensure future prints come out cleanly.
I decided to remove the supports before rinsing. Since the "green" uncured resin was still soft, supports could peel off more easily. In hindsight, rinsing first might have softened the attachments further — a useful lesson for next time. My earlier decision to place all supports on the back face successfully kept the front details completely pristine.
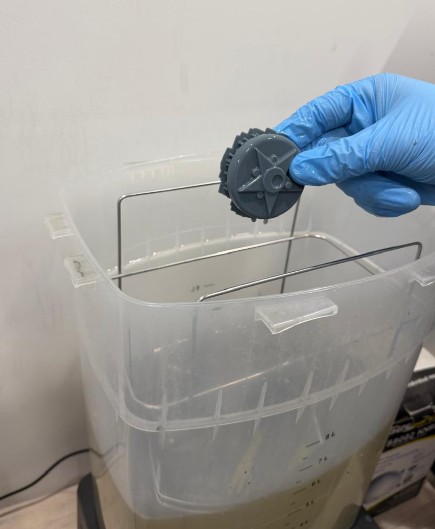
The model went into the washing station for 8 minutes. The machine agitates isopropyl alcohol around the part, cleaning all leftover liquid resin from intricate details.
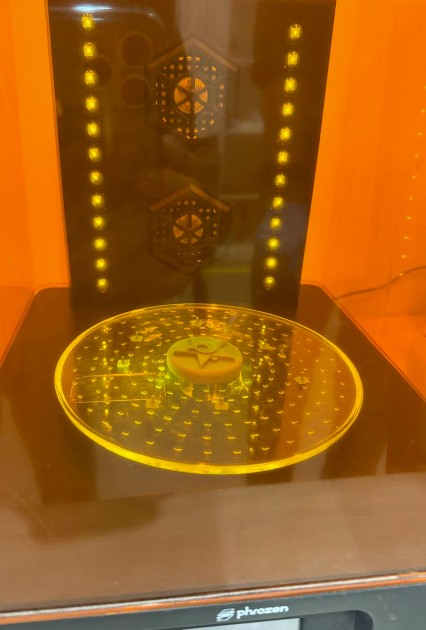
The part entered the curing station, which uses UV light, heat, and a rotating platform to bring the resin to its full mechanical strength. This step is critical before using the model as a master for silicone molds.
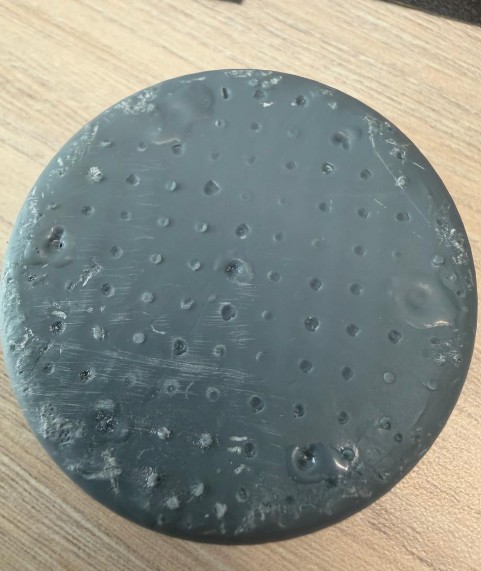
After curing, the back had visible support marks and small pits. I used a dual-refinement method to achieve a mold-ready surface:
Applied small drops of residual liquid resin to fill deeper pits, then spot-cured them in place with UV light.
Used pliers to remove support nubs and sandpaper to level and smooth the back surface to a flat, uniform finish.

From Mold to Magic — Soap, Wax & Resin
For the molding phase, I used RTV-F 20 Plus Silicone from Silicon Perú — a condensation-cured tin-based silicone ideal for high-fidelity molds. Its medium viscosity and 20 Shore A flexibility allow demolding of complex shapes without tearing. I chose this silicone because it is particularly effective for projects requiring durability and a faithful reproduction of original textures.
Product Specifications
- Silicone Type: RTV-2 Condensation-cured (tin-based)
- Shore Hardness: 20 A (Flexible and elastic, ideal for parts with undercuts)
- Mixing Ratio: 2% to 3% Catalyst (e.g., 100g of silicone + 2g or 3g of catalyst)
- Base Color: White; Catalyst Color: Transparent, Red, or Blue (depending on batch)
- Working Time: 15 to 20 minutes (at 23°C)
- Curing Time: 4 to 8 hours in warm weather / 8 to 12 hours in cold weather
- Heat Resistance: Up to 200°C — suitable for resins that generate heat during curing
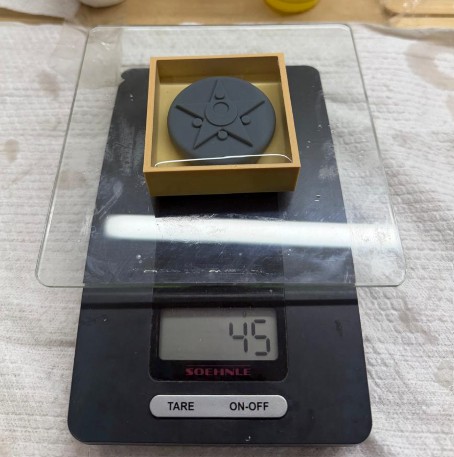
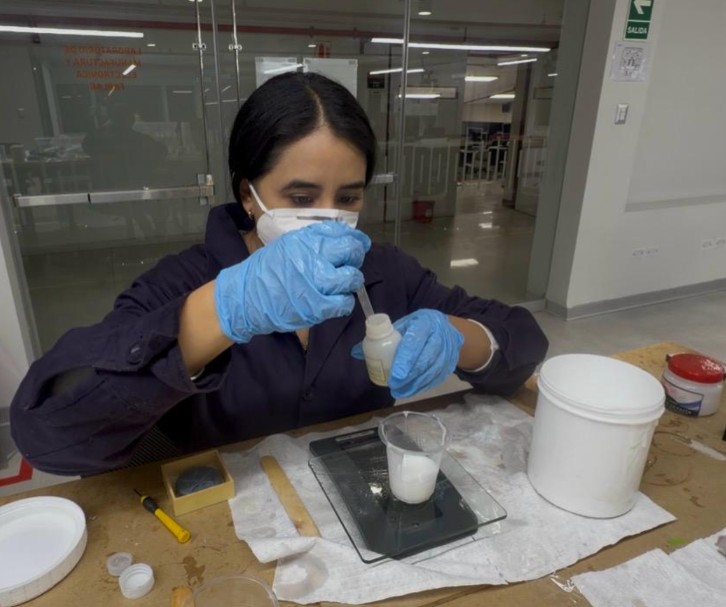
I measured the mold's capacity by filling it with water: 45g (45ml). Since silicone has a density of 1.2g/ml, this required 54g of base (45ml × 1.2g/ml). I prepared 60g of base as a safety margin to compensate for material lost on container walls. Based on 60g, I used a precision dropper to add between 1.2g (2%) and 1.8g (3%) of catalyst with high precision.
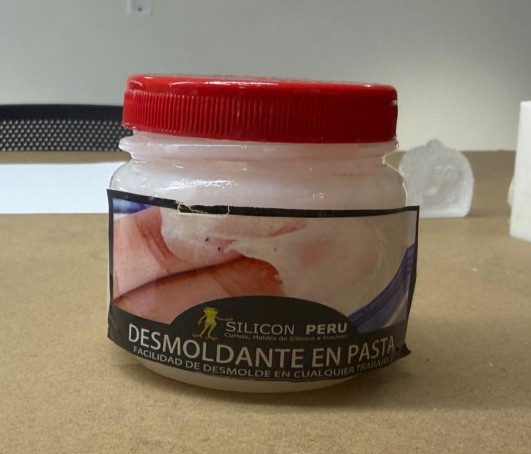
The I applied a release agent (desmoldante) into the mold, spreading it thinly and evenly to prevent the silicone from bonding to the piece or the box.
Thorough mixing for 3–5 minutes, scraping the sides to ensure a uniform blend. Once ready, I poured the silicone from the lowest point of the box to let it rise naturally, then tapped the mold against the table to force trapped air bubbles to the surface.
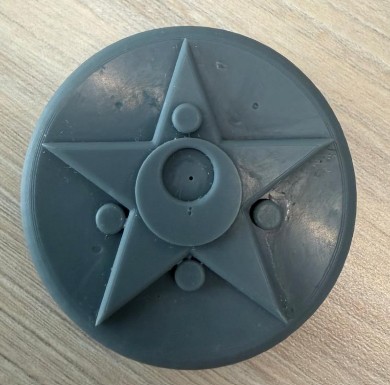
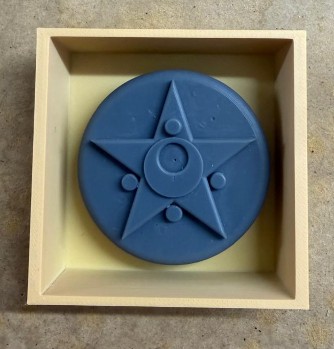
The mold cured at room temperature for about 2 hours. Since I had applied a proper layer of release agent beforehand, the extraction process was successful and the mold remained in excellent condition.
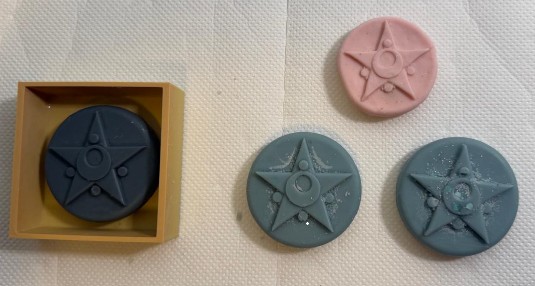
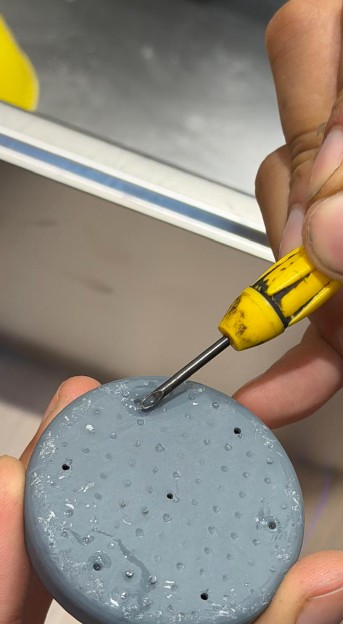
I also decided to create two molds as a precaution. This proved to be a smart move because the first one had a small hole on the left side—likely caused by a trapped air bubble during the pouring process—while the second one came out flawless.
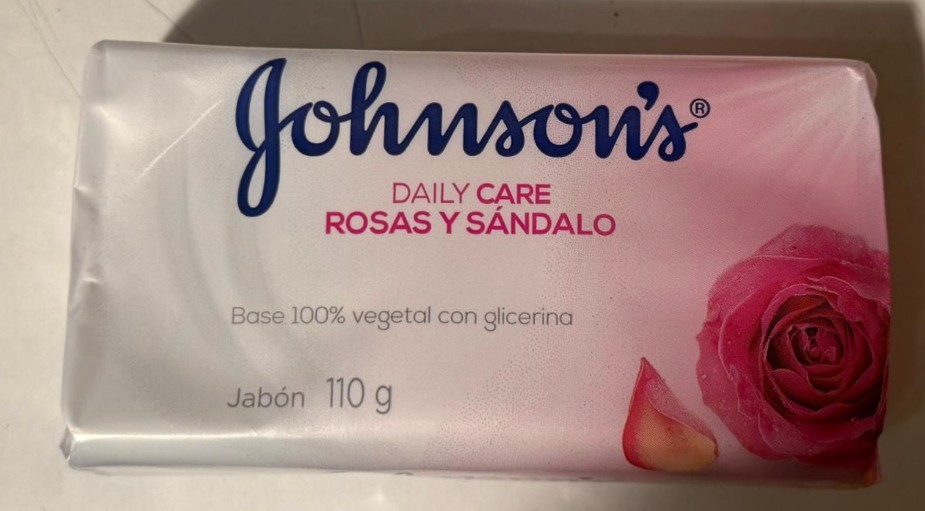
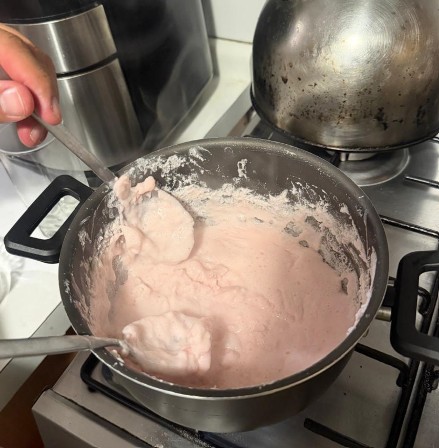
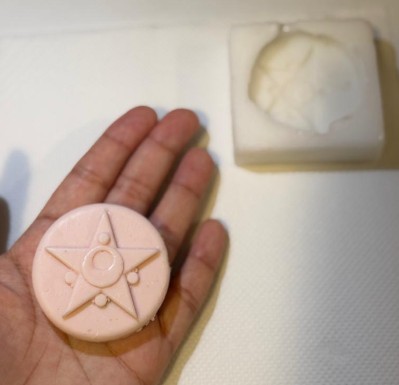
To bring the Sailor Moon transformation brooch to life, I used a vibrant pink soap base — perfect for capturing the magical aesthetic of the original designs.
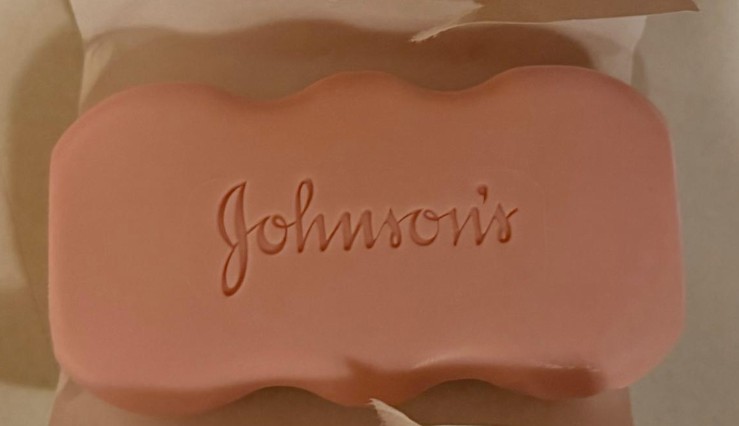
I used a cheese grater to shred the soap block into fine flakes. Grating is vital because it allows the material to melt much faster and more evenly, preventing hot edges and a solid center.
The flakes were heated to exactly 60°C — at this temperature the soap becomes fully liquid and pourable without losing its vibrant color or generating excessive bubbles.
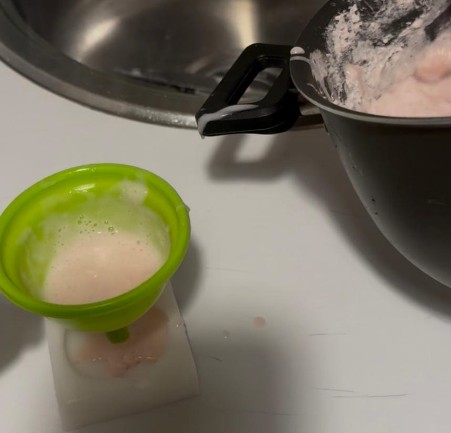
Because the brooch molds have very intricate details (stars, the crescent moon), I used a funnel for precision pouring — ensuring the liquid reached every corner of the silicone mold without spilling.
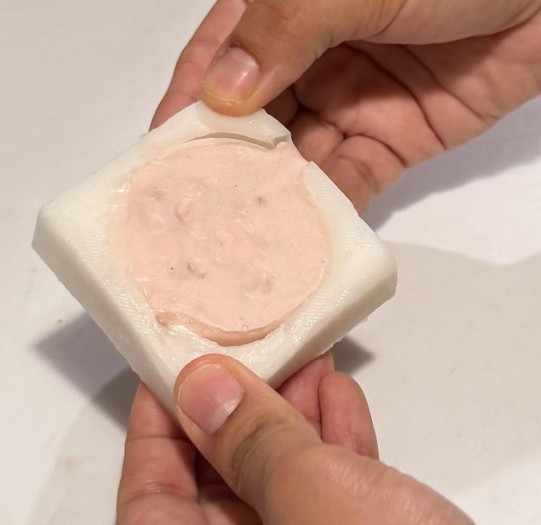
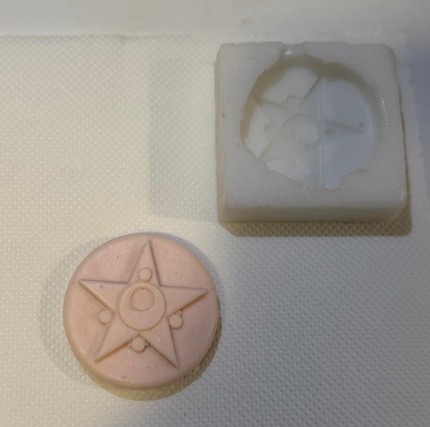
After approximately one hour of cooling, I carefully removed the pieces. The results are fantastic — high-detail pink soap that perfectly replicate the SLA-printed master models.
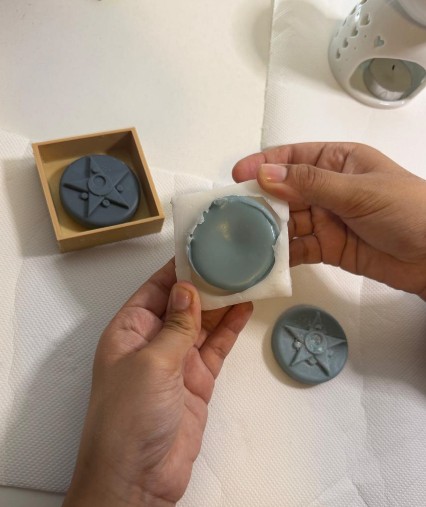
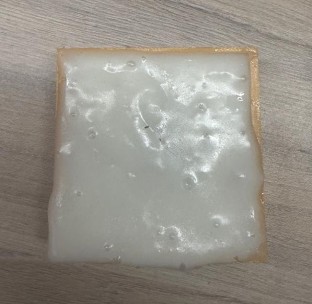
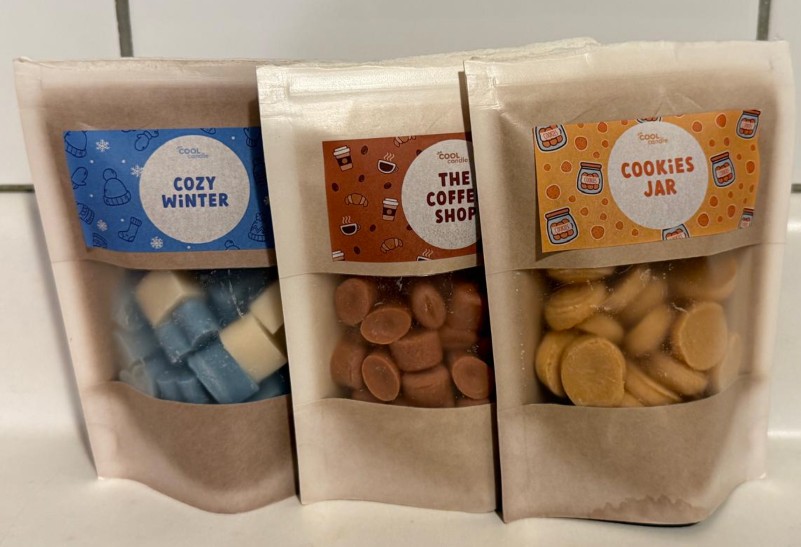
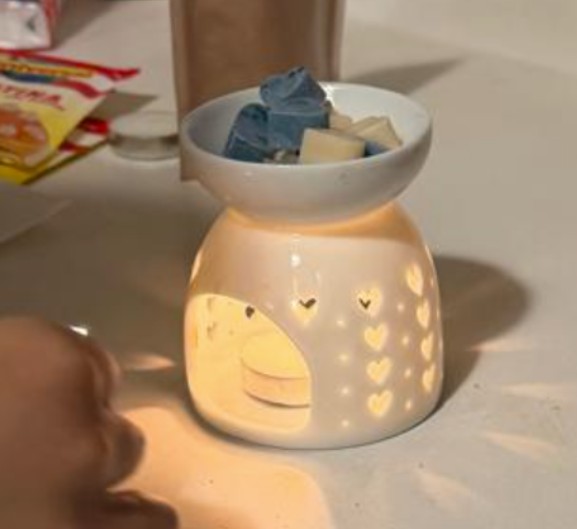
Since the F20-Plus silicone is heat-resistant up to 200°C, I decided to experiment with scented aromatic wax. I had several packs of aromatic wax available, and I chose the blue pack — not only for its wonderful scent but because blue is my favorite color.
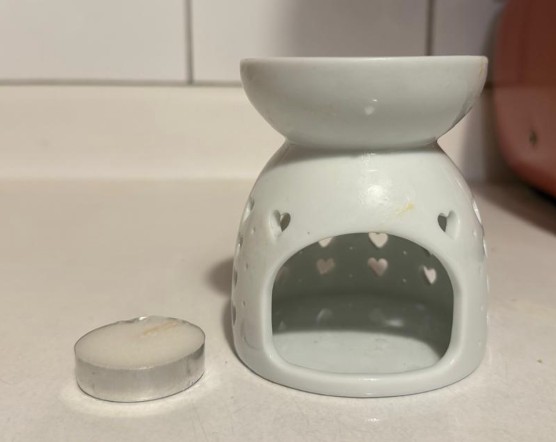
I used a small dedicated oven to melt the wax blocks, monitoring until they reached a fully liquid state. The aroma filled the entire room during the process.
To maintain control over the small mold details, I transferred the melted wax using spoons rather than a pour. This allowed me to fill each cavity carefully without overflow and with a clean finish for each piece.
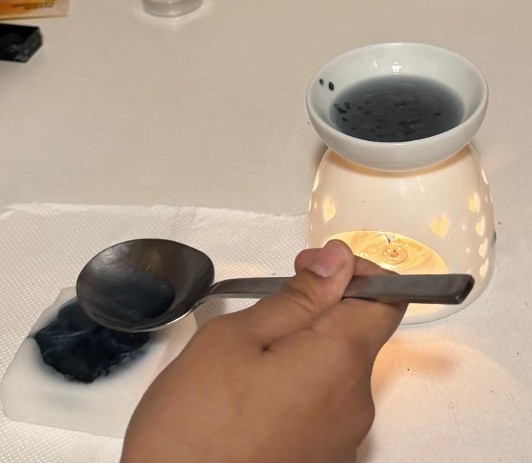
Wax cools much faster than soap. After only 30 minutes, the wax had fully solidified. The mold's flexibility meant the pieces popped out easily, leaving beautiful solid blue aromatic brooches.
After working with both casting materials, the differences became clear.
- Beautiful pink aesthetic
- Great detail capture at 60°C pour temperature
- Began to shrink after a few days — likely an unstable chemical recipe
- Difficult to recycle once degraded
- Significantly more durable over time
- Perfectly preserved original dimensions
- Finer, more defined detail reproduction
- Fully reusable — can be melted down and recast