Week 15 Progress Checklist
| Status | Task |
|---|---|
| ✓ | Linked to the group assignment page. |
| ✓ | Documented your process. |
| ✓ | Explained the UI that you made and how you did it. |
| ✓ | Explained how your application communicates with your embedded microcontroller board. |
| ✓ | Explained any problems you encountered and how you fixed them. |
| ✓ | Included original source code (or a screenshot of the app code if that's not possible). |
| ✓ | Included a ‘hero shot’ of your application running & communicating with your board. |
Interface and application programming
Group Assignment
Communication with Embedded Systems
One common way for a computer application to communicate with an embedded board is through serial communication. This method enables the computer to send and receive data from the embedded system in real time.
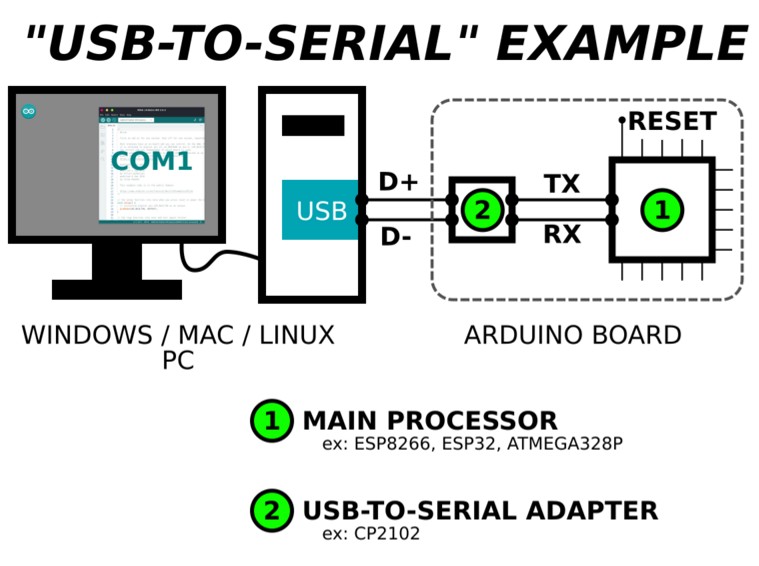
The software connects to the board through a serial interface, typically using a USB-to-serial connection. The embedded board sends and receives data through a serial port, while the computer application accesses this port using a serial communication library or driver. Once the connection is established, the software can exchange data with the board in real time by transmitting and receiving bytes according to a defined communication protocol.
1. FlowStone
FlowStone by DSP Robotics is a visual, drag-and-drop programming language used to create standalone applications, VST audio plugins, and robotic control software. It allows users to build complex programs without traditional coding by connecting functional modules, featuring real-time Digital Signal Processing (DSP) for audio and hardware interaction.
FlowStone Page: DSP FLowStone
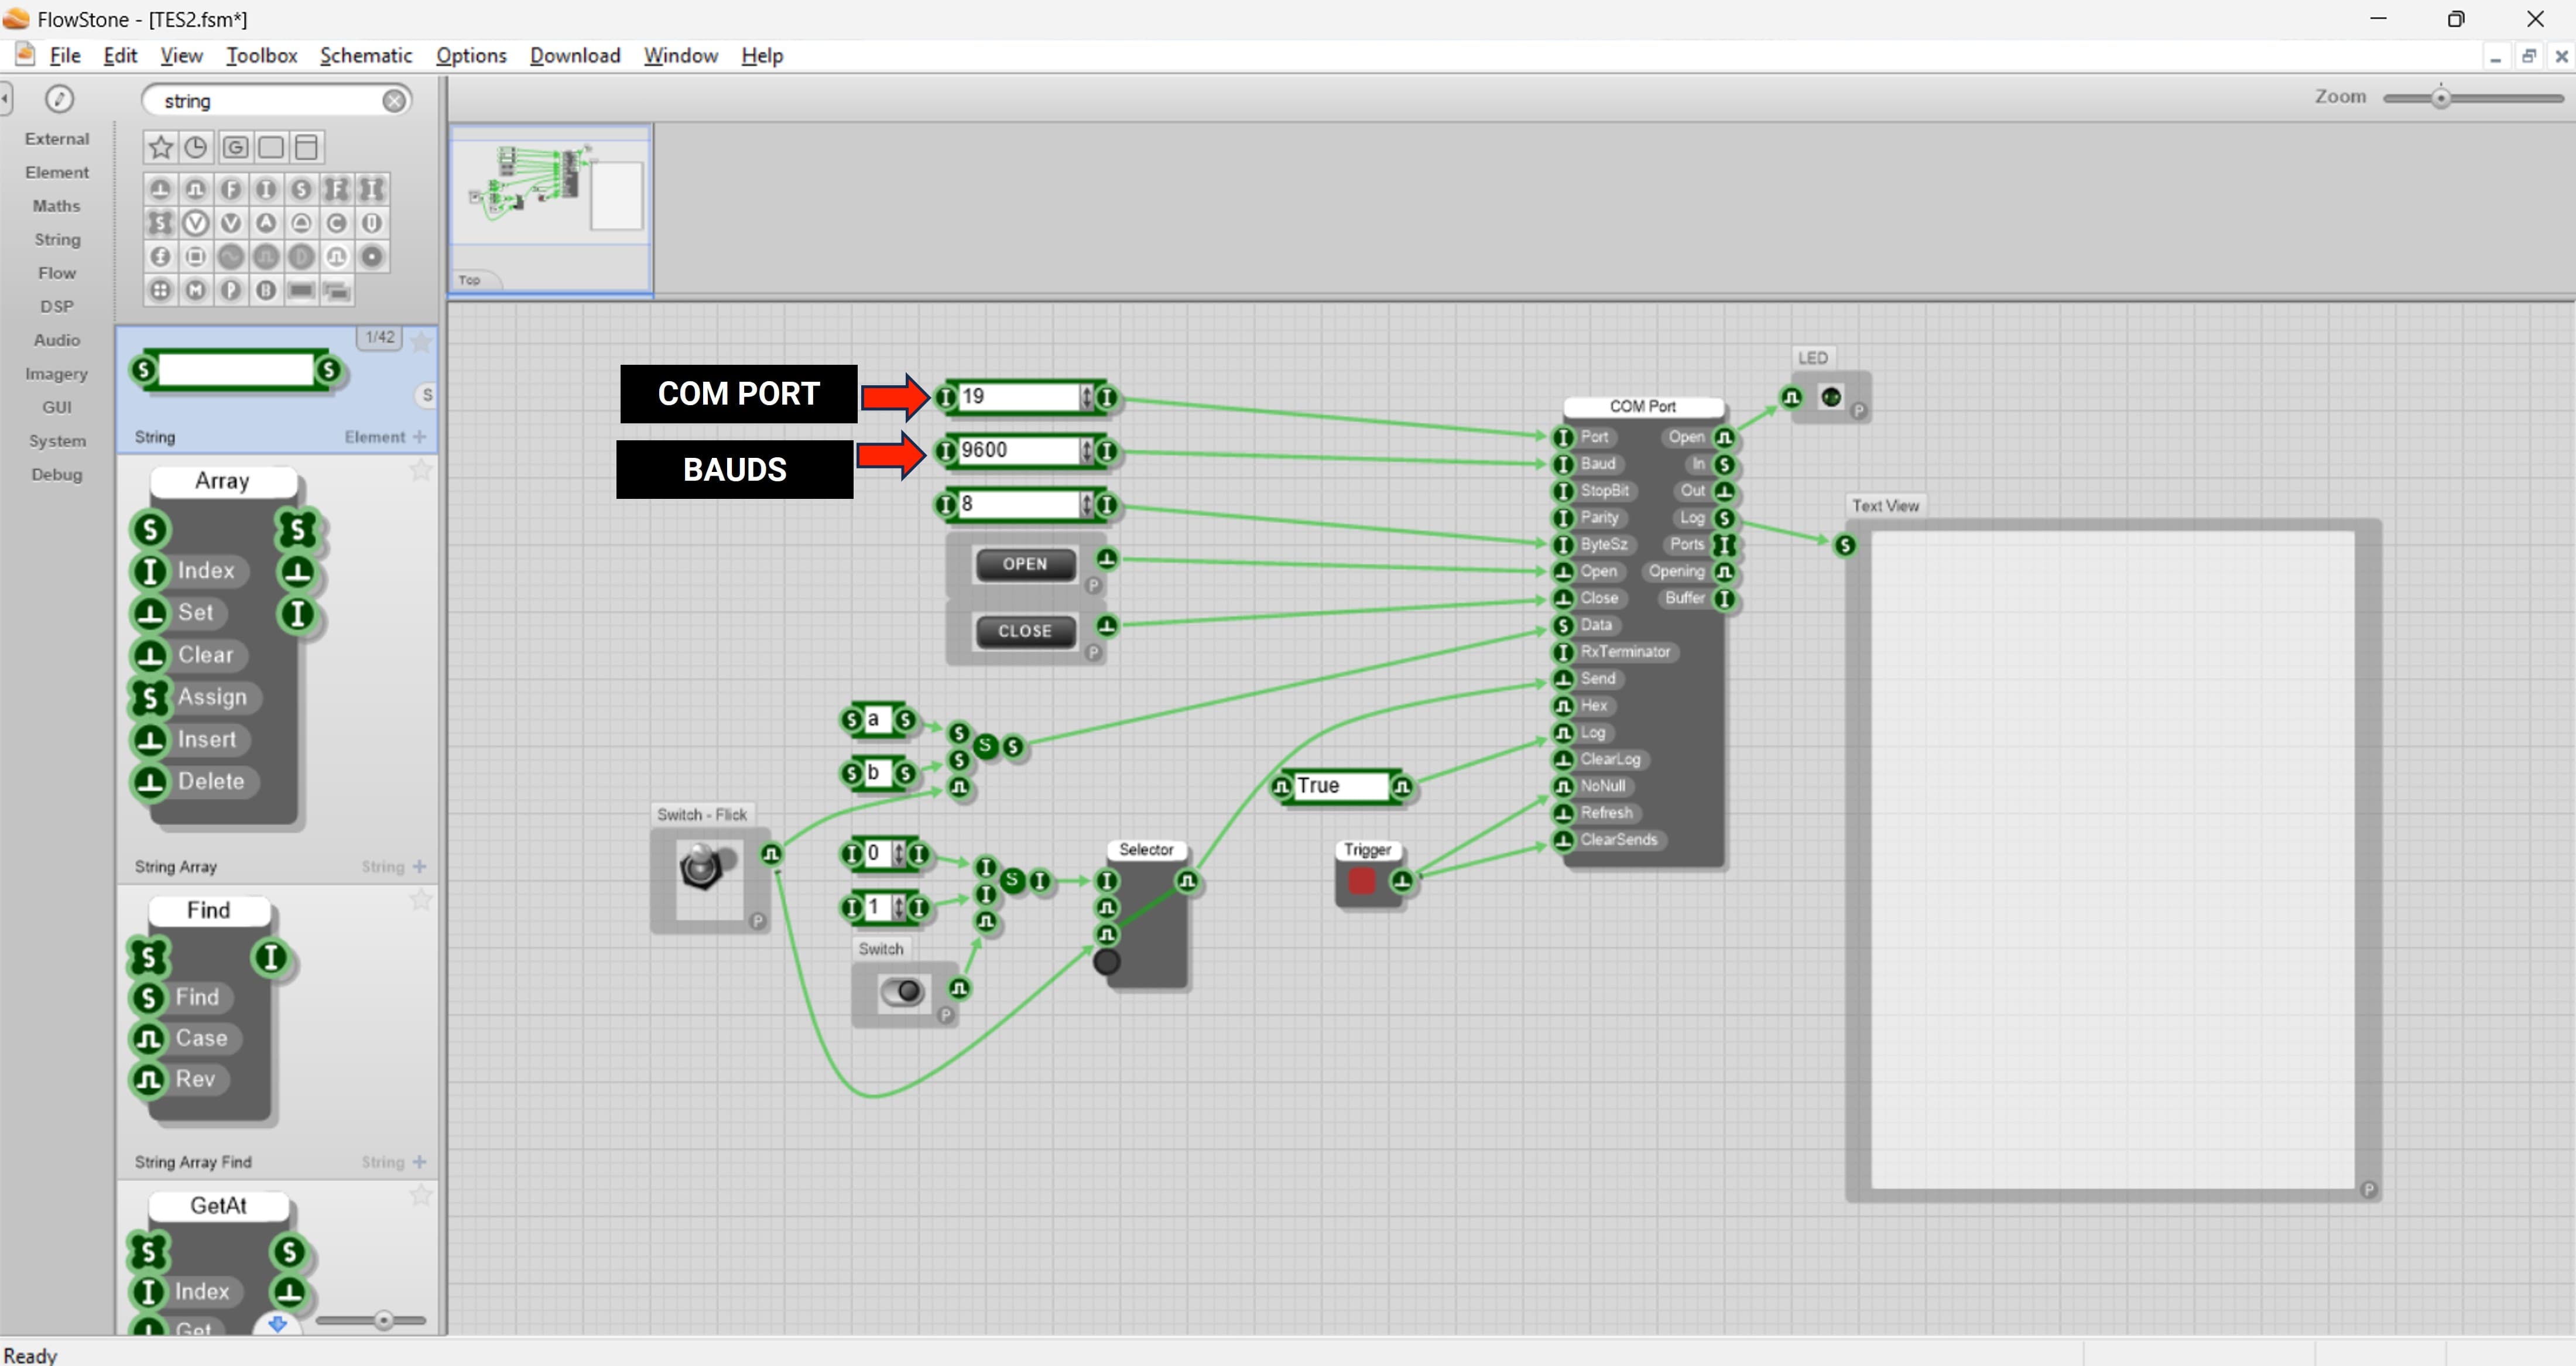
This program controls an LED through serial communication. It continuously checks if data is available from the Serial port. When a character is received, it reads it into 'var'. If the character is 'a', the LED turns ON. If the character is 'b', the LED turns OFF.
        int var;
        int pinled = 8;

        void setup() {
        Serial.begin(9600);
        pinMode(pinled, OUTPUT);
        }

        void loop() {
        if(Serial.available()) {
            var = Serial.read();

            if(var == 'a') {
            digitalWrite(pinled, HIGH);
            }
            else if(var == 'b') {
            digitalWrite(pinled, LOW);
            }
        }
        }
2. LabView
NI LabVIEW is a graphical programming platform used for data acquisition, instrument control, and industrial automation. It utilizes a visual "G" language to create "Virtual Instruments" (VIs) that act as code, allowing engineers to build complex systems using flowcharts, drag-and-drop interfaces, and integrated hardware drivers rather than traditional text code.
NI LabView: NI Labview 2026
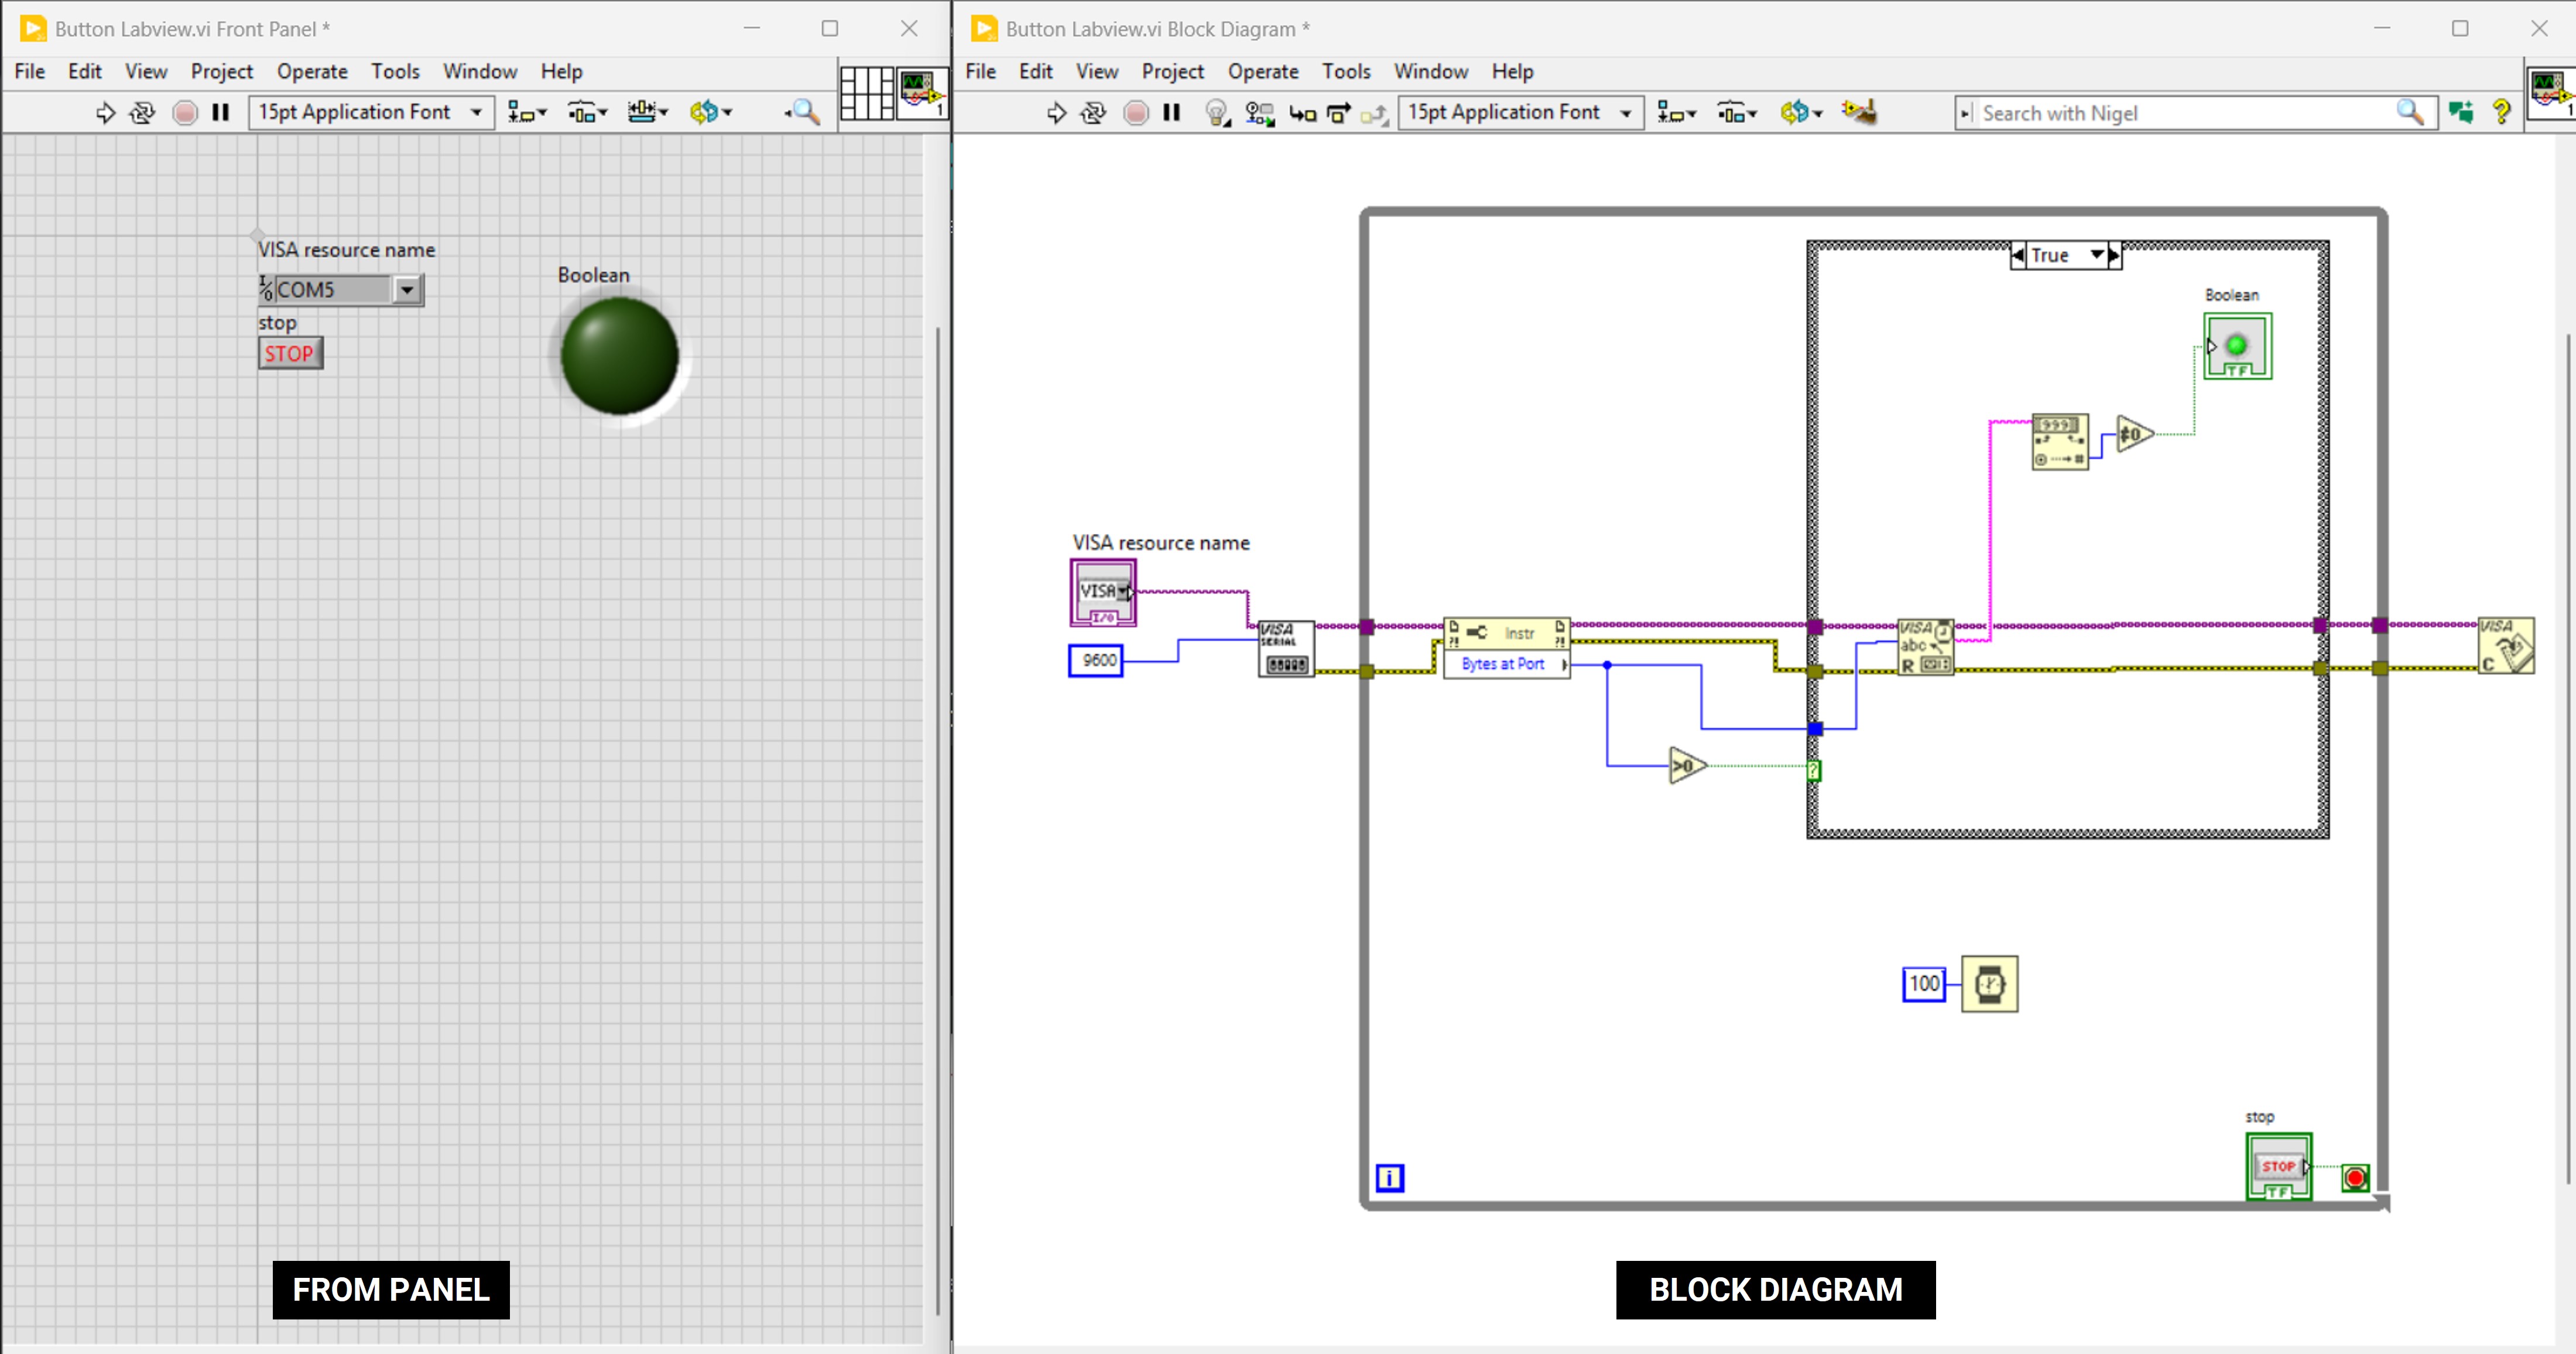
// This program reads the state of a push button connected to a digital pin. It uses millis() to create a non-blocking delay of 100 ms. Every 100 ms, it sends the button state (HIGH or LOW) through the Serial port. This allows monitoring the button without using delay().
        int pinbutton = 8;
        int var;
        unsigned long msegi = 0;

        void setup() {
        Serial.begin(9600);
        pinMode(pinbutton, INPUT);
        }

        void loop() {
        var = digitalRead(pinbutton);
        unsigned long msegf = millis();

        if(msegf - msegi >= 100) {
            msegi = msegf;
            Serial.println(var);
        }
        }
Individual Assignment
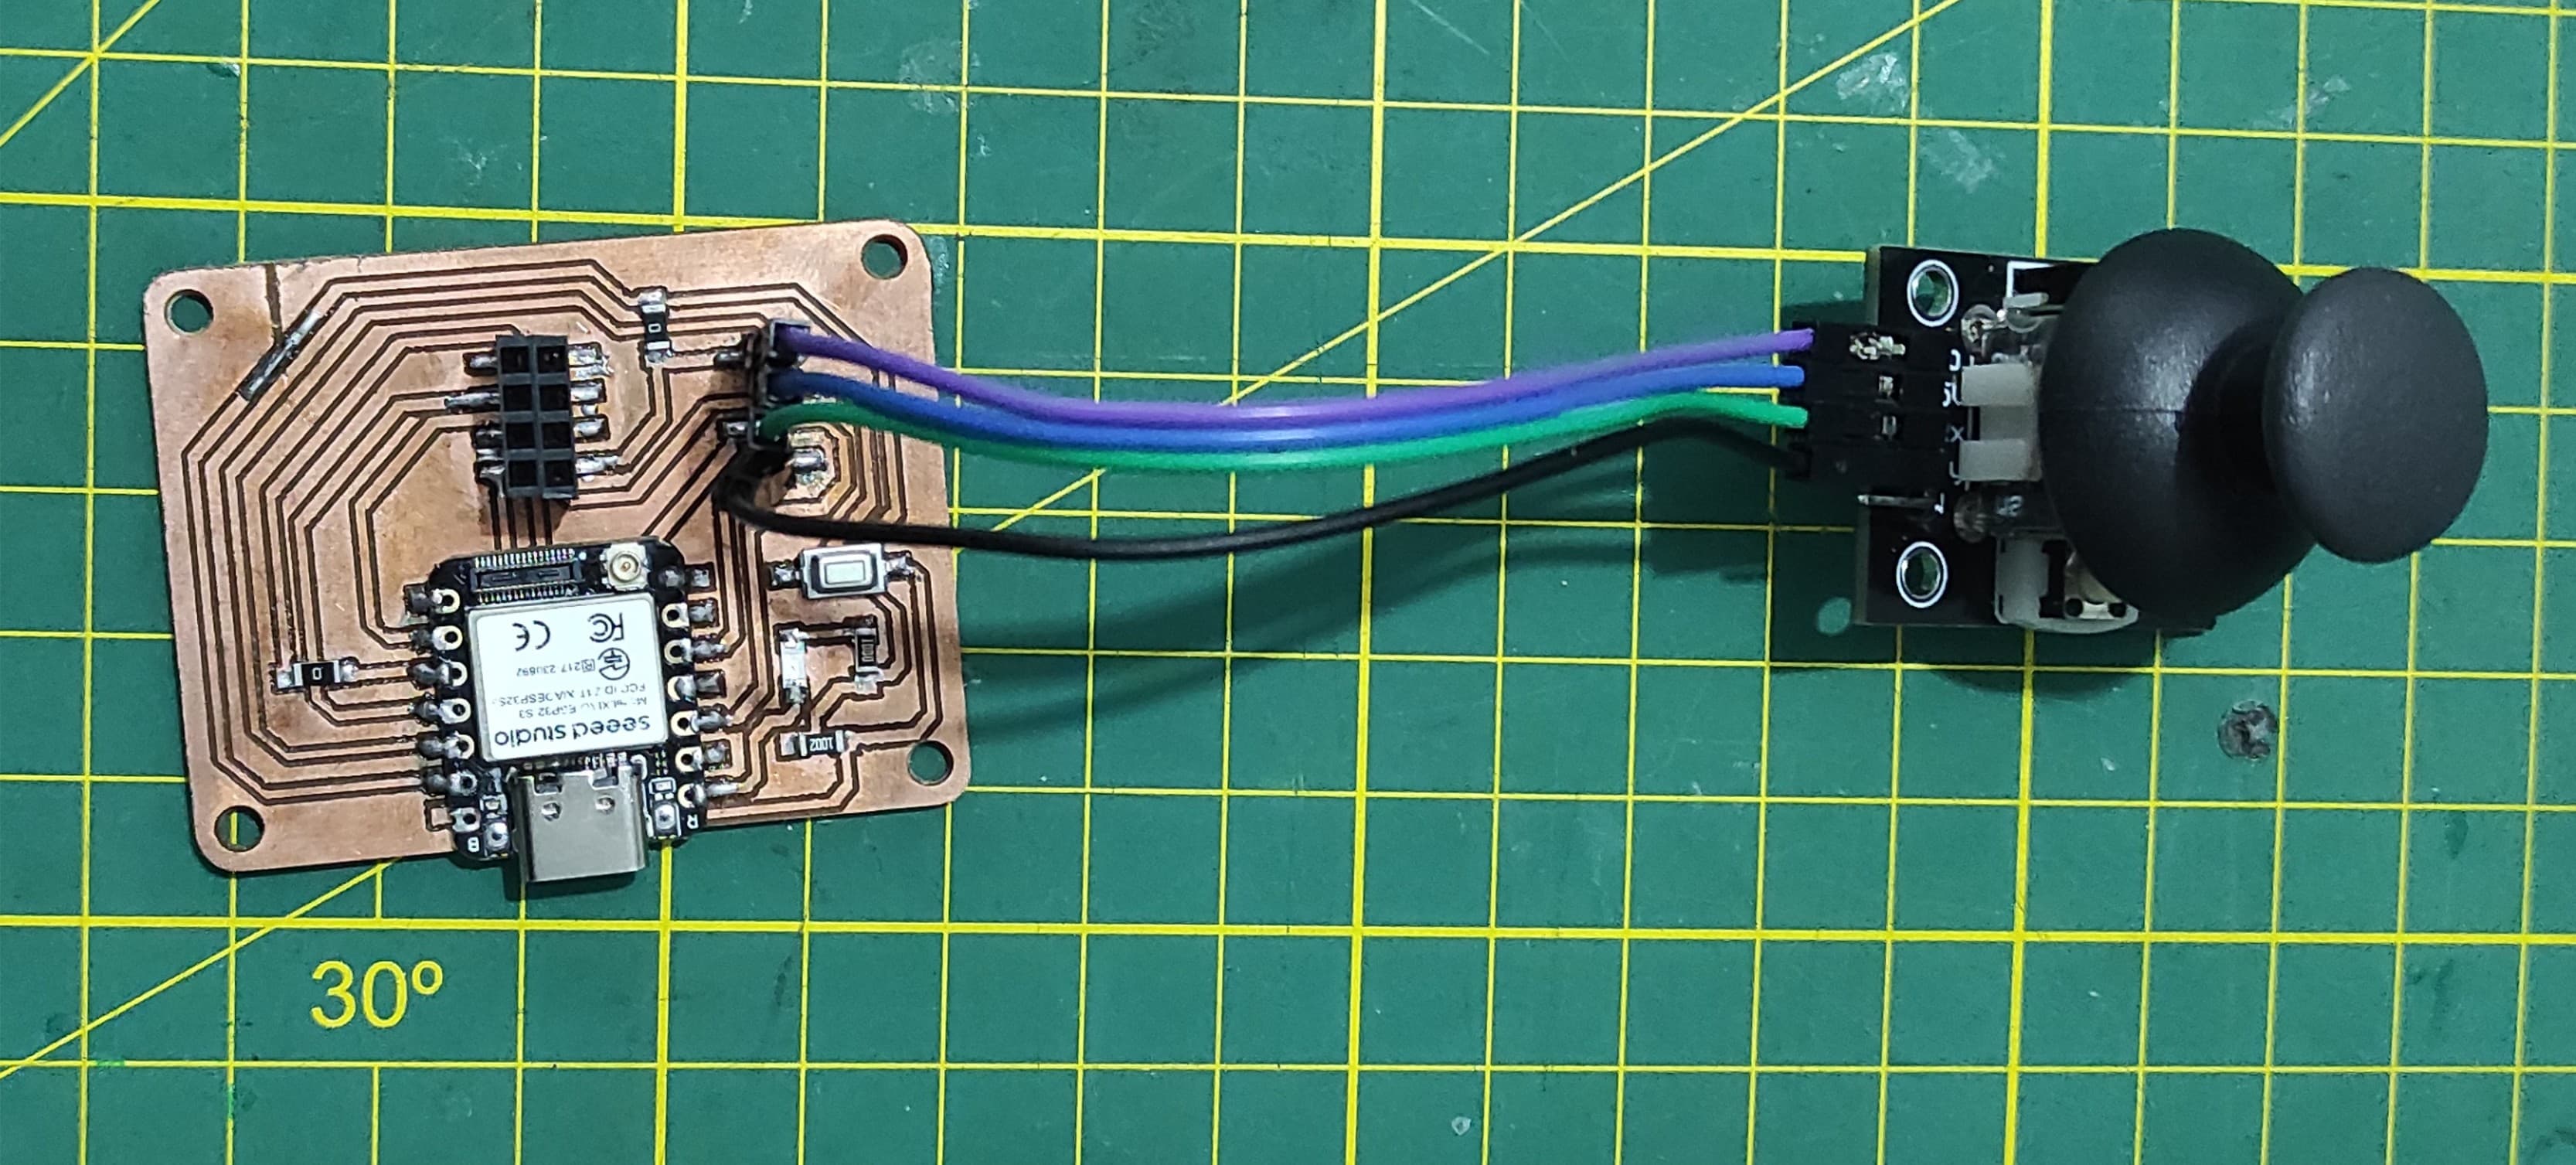
Interfacing the XIAO Esp32 S3 with Joystick
For this assignment, I will be using two boards that I previously designed. Their design and manufacturing processes can be found in Assignments 6 and 8.
For my individual assignment, I connected a joystick to the board I had previously designed. After completing the connection, I was able to visualize the joystick’s values on the LabVIEW front panel.
This code continuously reads analog values from two input pins (5 and 6) and sends the data to the serial monitor. It uses the millis() function to control timing, ensuring that the readings are printed every 100 milliseconds instead of on every loop iteration. Each output line contains both values separated by a comma, making it suitable for monitoring or plotting sensor data in real time.
        int varA4;
        int varA5;

        unsigned long msegi = 0;

        void setup()
        {
        Serial.begin(9600);
        pinMode(5, INPUT);
        pinMode(6, INPUT);
        }

        void loop()
        {
        varA4 = analogRead(5);
        varA5 = analogRead(6);

        unsigned long msegf = millis();
        if(msegf - msegi >= 100)
        {
            msegi = msegf;
            Serial.print(varA4);
            Serial.print(",");
            Serial.println(varA5);
        }
        }
3. Learnings
Interfacing a XIAO ESP32-S3 with LabVIEW is usually done through serial communication (UART over USB), and the most important thing to get right is the communication settings—especially the baud rate.
The ESP32 sends data using Serial.begin(baudrate) (for example, 9600 or 115200), and LabVIEW must be configured with the exact same baud rate; otherwise, you’ll see corrupted or unreadable data.
While 9600 is slower but very stable and easy for beginners, 115200 is commonly used for faster data transfer when sending frequent sensor readings. In LabVIEW, you typically use VISA Configure Serial Port, where you set parameters like baud rate, data bits (usually 8), parity (none), and stop bits (1).
It’s also important to format your data clearly on the ESP32 side (for example, comma-separated values with Serial.println()), so LabVIEW can parse it correctly.
Additionally, adding a small delay or timing control (like using millis() as in your code) helps prevent flooding the serial buffer and keeps communication smooth and reliable.
4. Files
Here are the files available for download.