Week 04: Embedded Programming
1. Introduction
This week’s assignment focused on understanding embedded systems toolchains, comparing different microcontroller architectures, and programming a microcontroller to interact with input/output devices.
2. Group Assignment: Toolchain Comparison
Arduino Uno (ATmega328P)
- Architecture: 8-bit AVR
- Clock Speed: 16 MHz
- Toolchain: Arduino IDE
ESP32 Dev Module
- Architecture: 32-bit Xtensa
- Clock Speed: 240 MHz
- Toolchain: Arduino IDE + ESP32 Package
3. Datasheet Study: ATmega328P
I studied the ATmega328P datasheet to identify safety limits and pin functions.
- Voltage: 1.8V – 5.5V
- Flash Memory: 32KB
- SRAM: 2KB
- Communication: UART, SPI, I2C
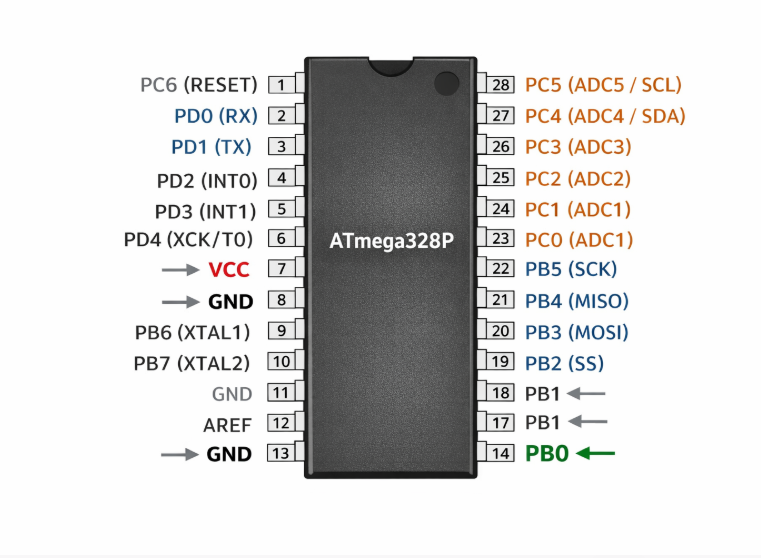
Fig 1: Pinout Diagram from Datasheet
4. Programming Project: LED + Button
I wrote a program where a button acts as an Input to control an LED Output, while sending status updates to the Serial Monitor.
Source Code:
const int ledPin = 13;
const int buttonPin = 7;
int buttonState = 0;

void setup() {
  pinMode(ledPin, OUTPUT);
  pinMode(buttonPin, INPUT);
  Serial.begin(9600); // UART at 9600 baud
}

void loop() {
  buttonState = digitalRead(buttonPin);
  if (buttonState == HIGH) {
    digitalWrite(ledPin, HIGH);
    Serial.println("Button Pressed - LED ON");
  } else {
    digitalWrite(ledPin, LOW);
    Serial.println("Button Released - LED OFF");
  }
  delay(200);
}
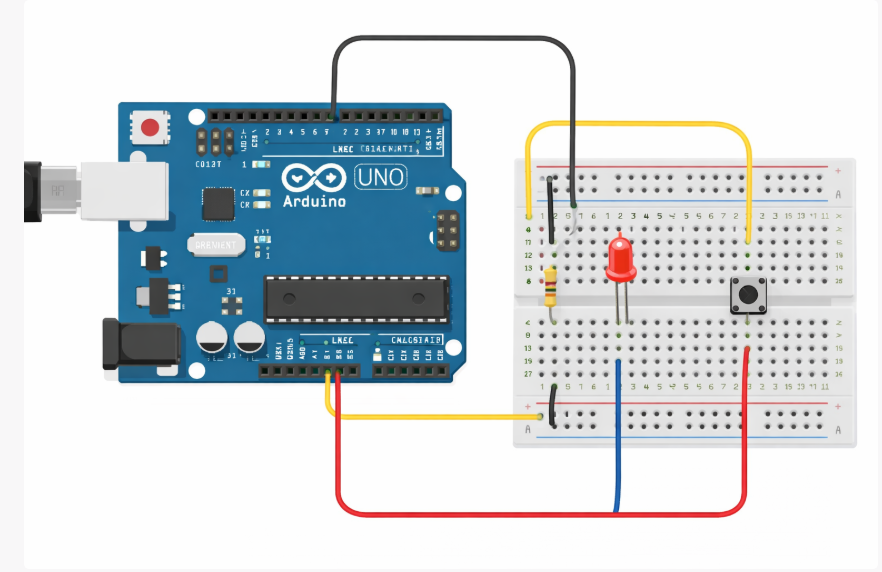
Breadboard Connection
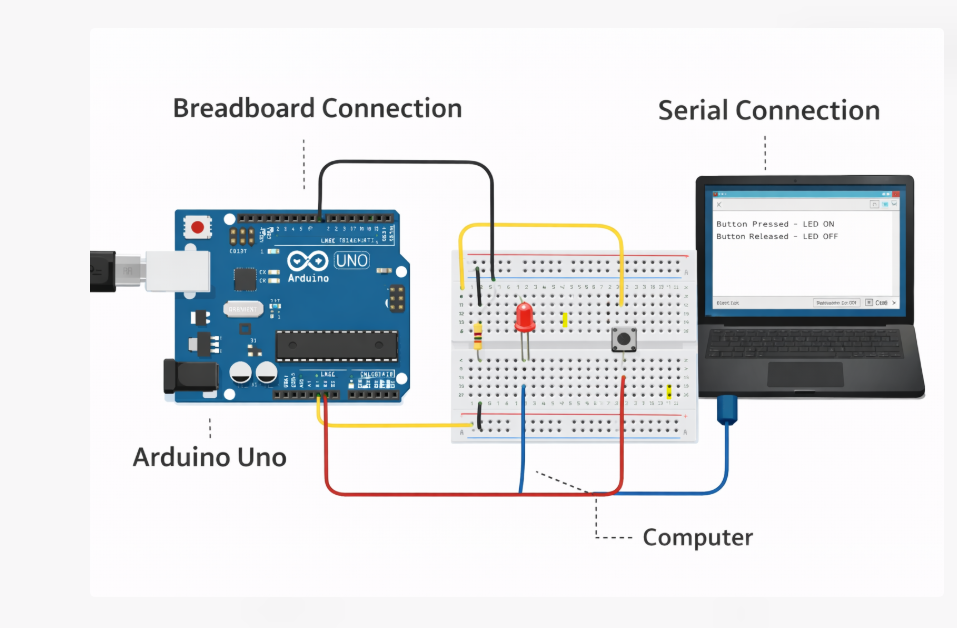
Serial Communication Proof
Final Hero Shot
