Week 16: Wildcard Week
In this week, the task was to design and produce something with a digital process, not covered in another assignment.
Before starting
On an industrial level, CNC embroidery is commonly used for the customization and manufacturing of textile products through the automated control of needles and threads based on digital designs. This technology is widely employed in the production of corporate uniforms, institutional clothing, sportswear, promotional merchandise, caps, backpacks, textile accessories, and decorative items.Due to its high precision and repeatability, it enables the accurate reproduction of logos, lettering, graphics, and complex patterns while maintaining consistent quality across large production runs. Its applications range from the creation of one off prototypes to full-scale industrial manufacturing, improving efficiency and minimizing human error.
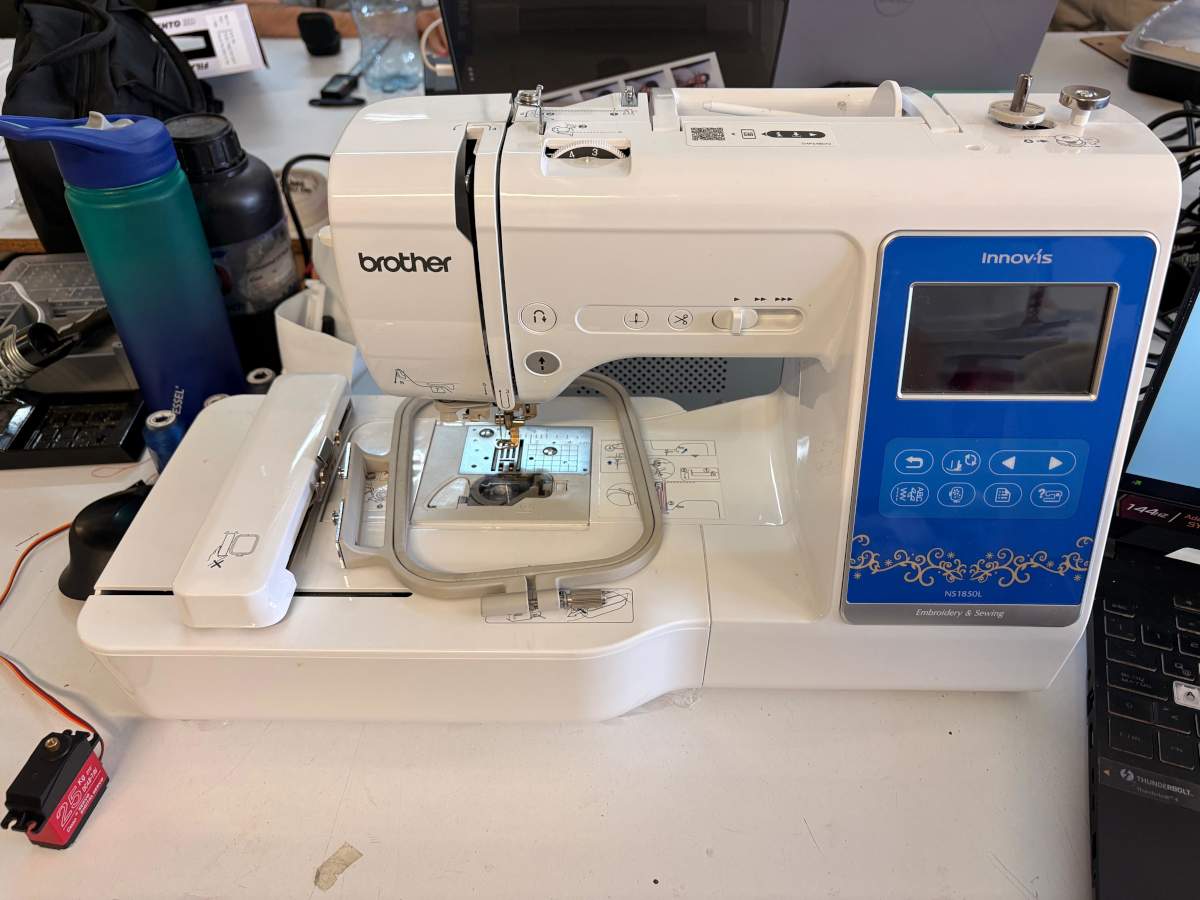
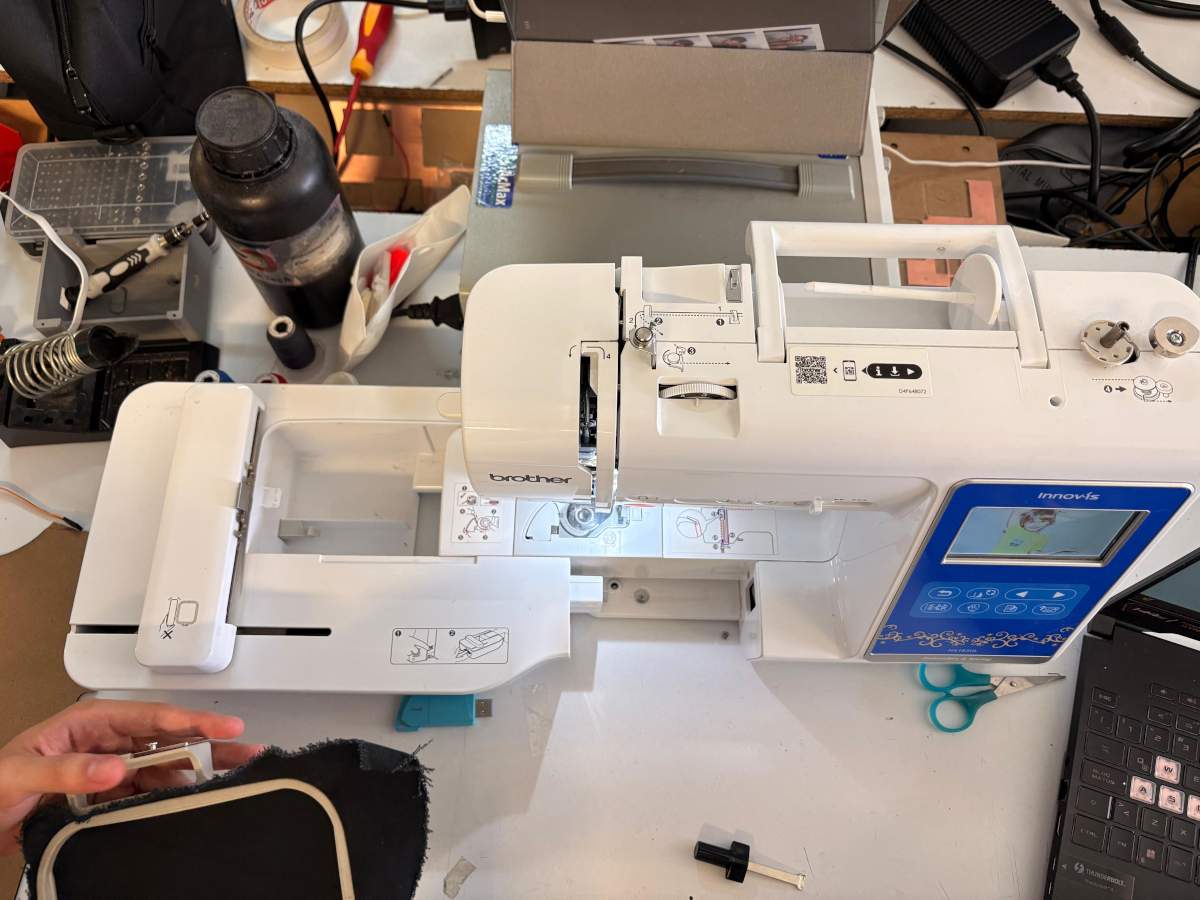
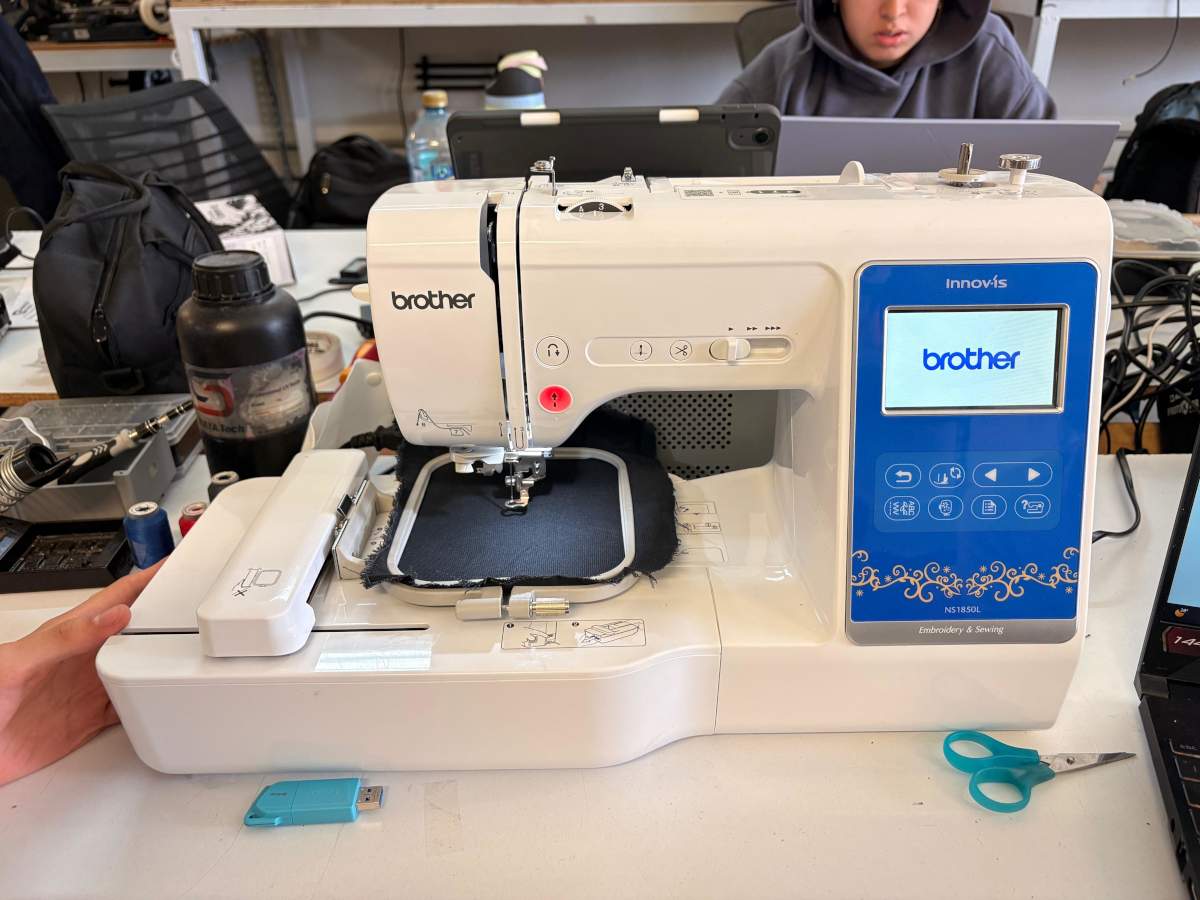
For this project, a Brother NS1850L machine was used, which is capable of performing both computerized sewing and embroidery through the loading of digital designs and the automatic execution of pre-programmed stitching patterns.
The machine features a wide variety of decorative stitches, on-screen design editing tools, adjustable operating speed, precise needle positioning control, and compatibility with embroidery hoops of different sizes. These capabilities allow the creation of highly detailed custom embroidery on a wide range of fabrics. In this particular application, the machine was used to produce embroidered designs intended for use as textile patches, which can later be sewn or attached to garments, backpacks, uniforms, and other products for decorative, identification, or promotional purposes.
Design
I used Inkscape. First we have to open it and donwload the Ink/Stitch extension.
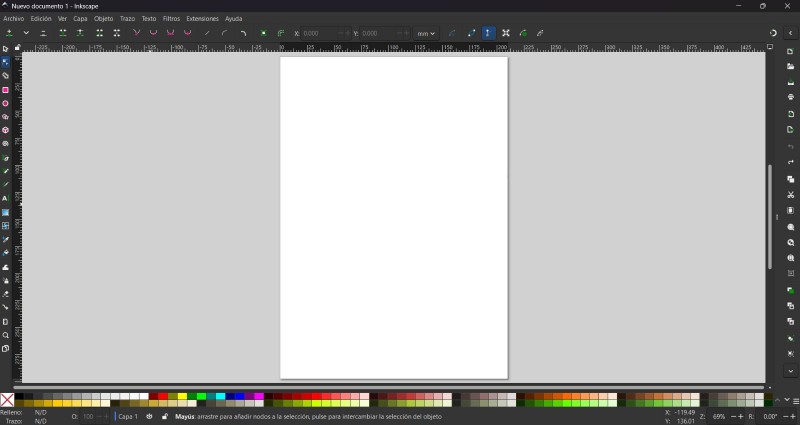
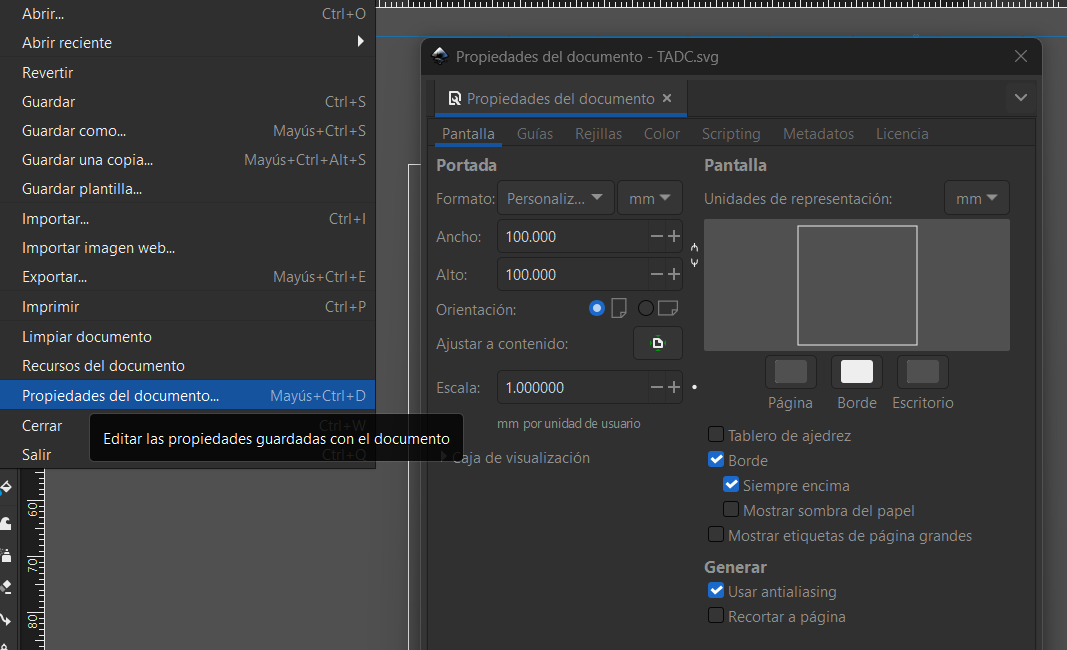
Then we have to change the size of the workspace, we can do it by pressing CTRL + SHIFT + D or looking at the top left corner, pressing File and selecting Document Properties. For my labs machine we have to set it in 100 X 100 mm.
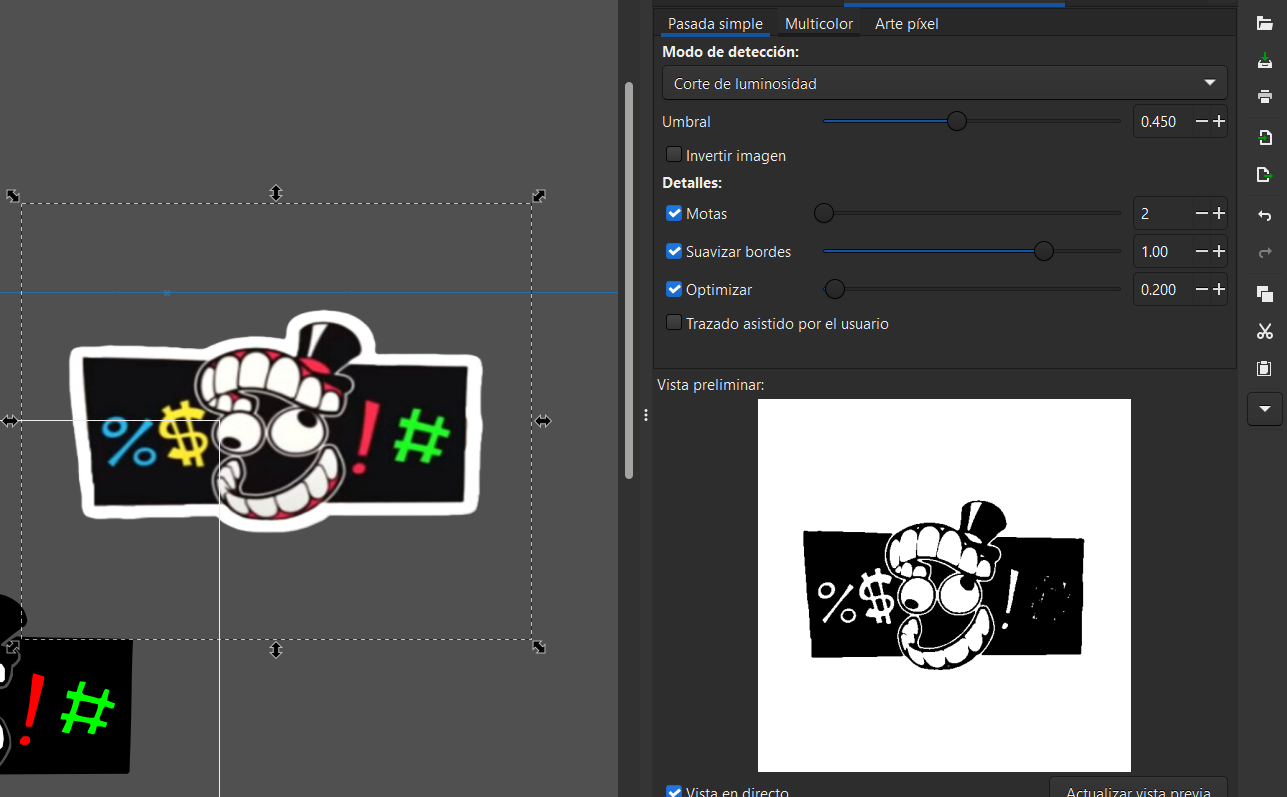
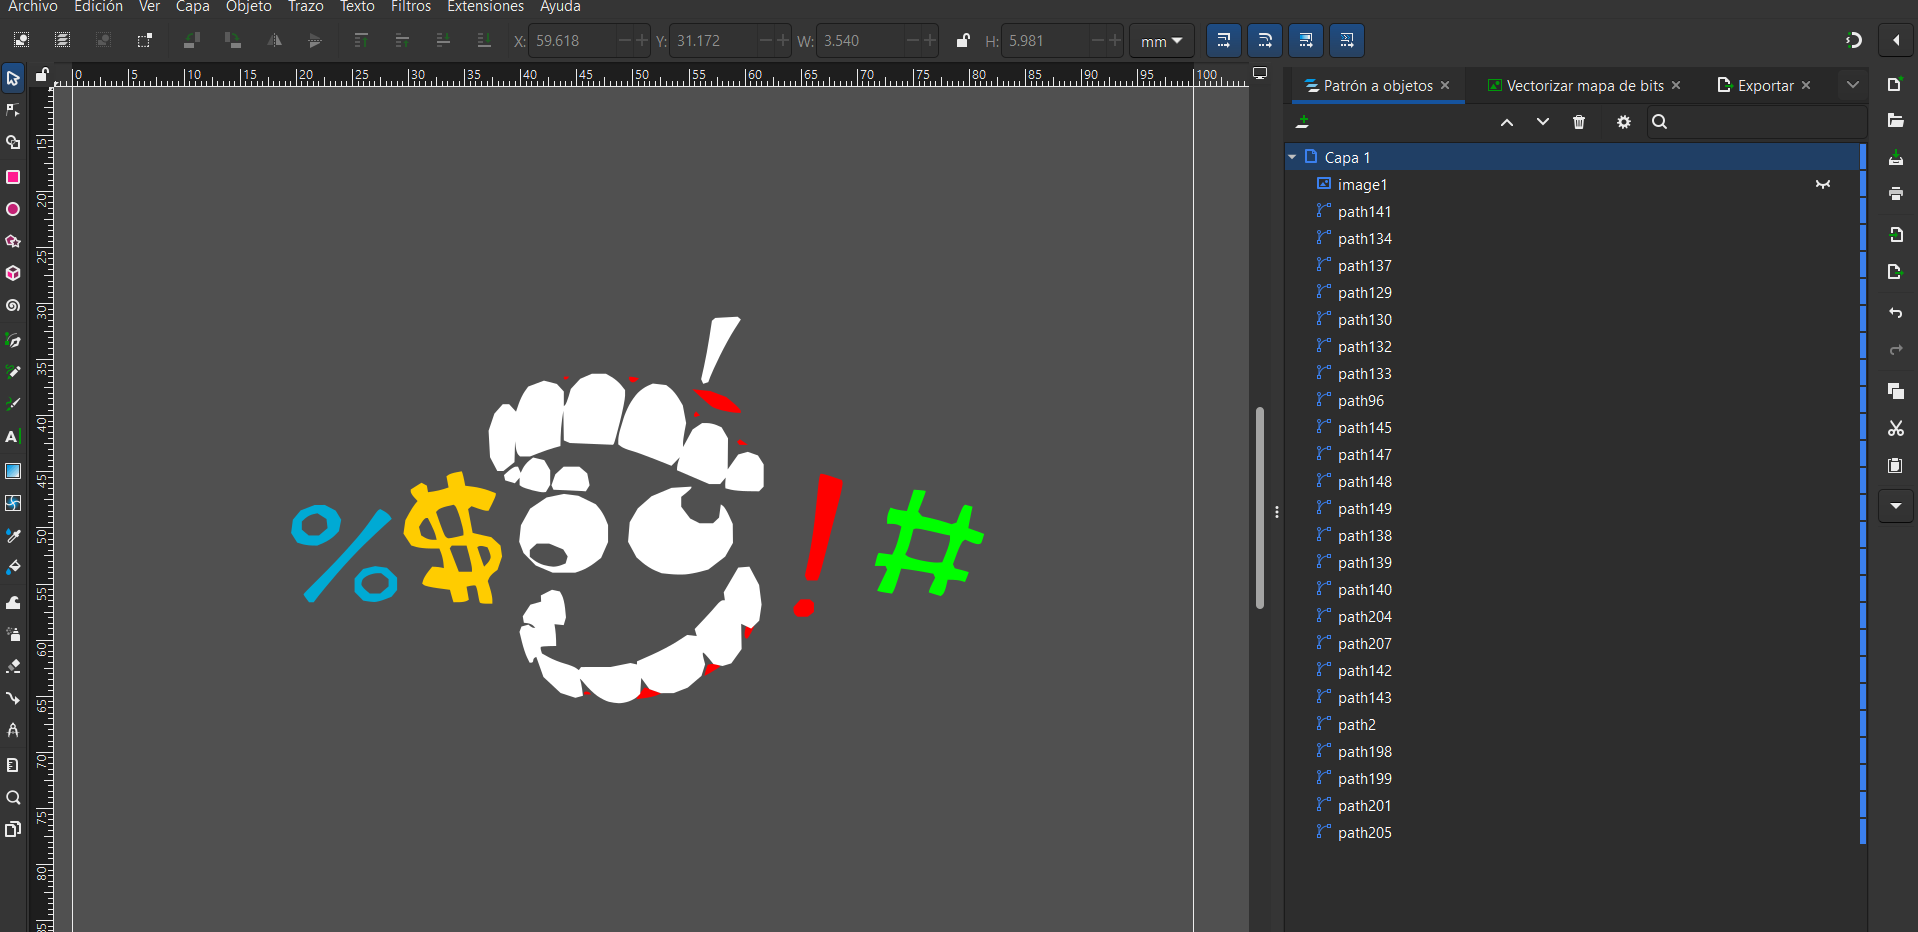
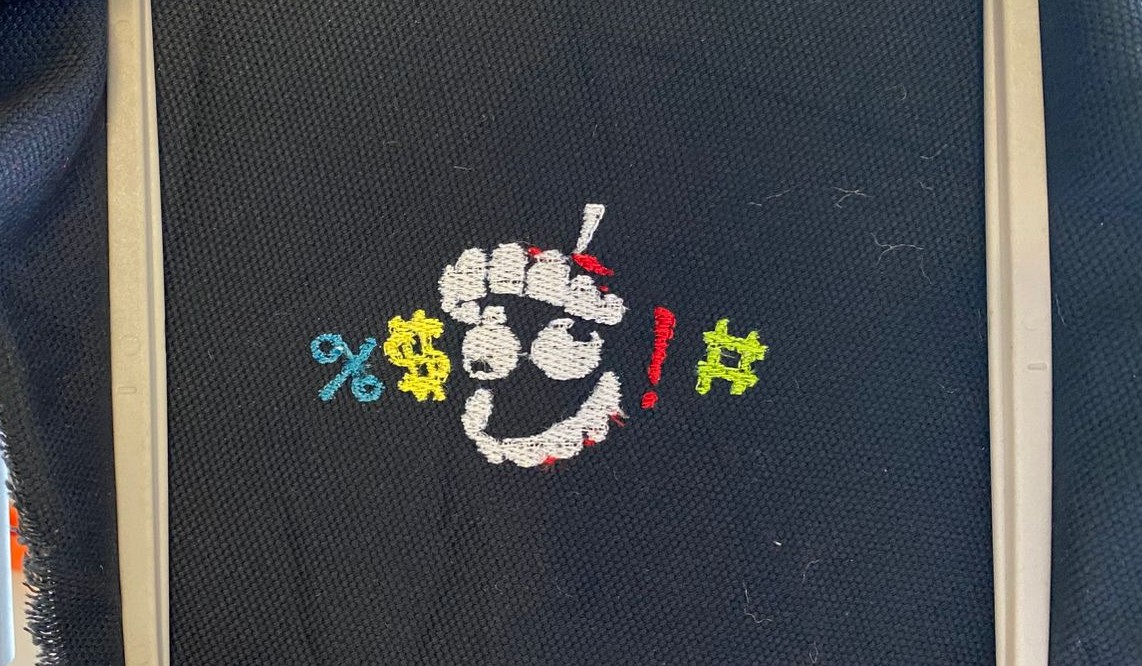
Then I used an image of The Amazing Digital Circus

Next, we need to vectorize the image using the Trace Bitmap tool, then select Brightness Cutoff and adjust the threshold and smooth corners.
 We also have to go to Path and select Break apart, this is to separate a vector into different parts. This will work for us to change the embroidery of each part and changing colors.
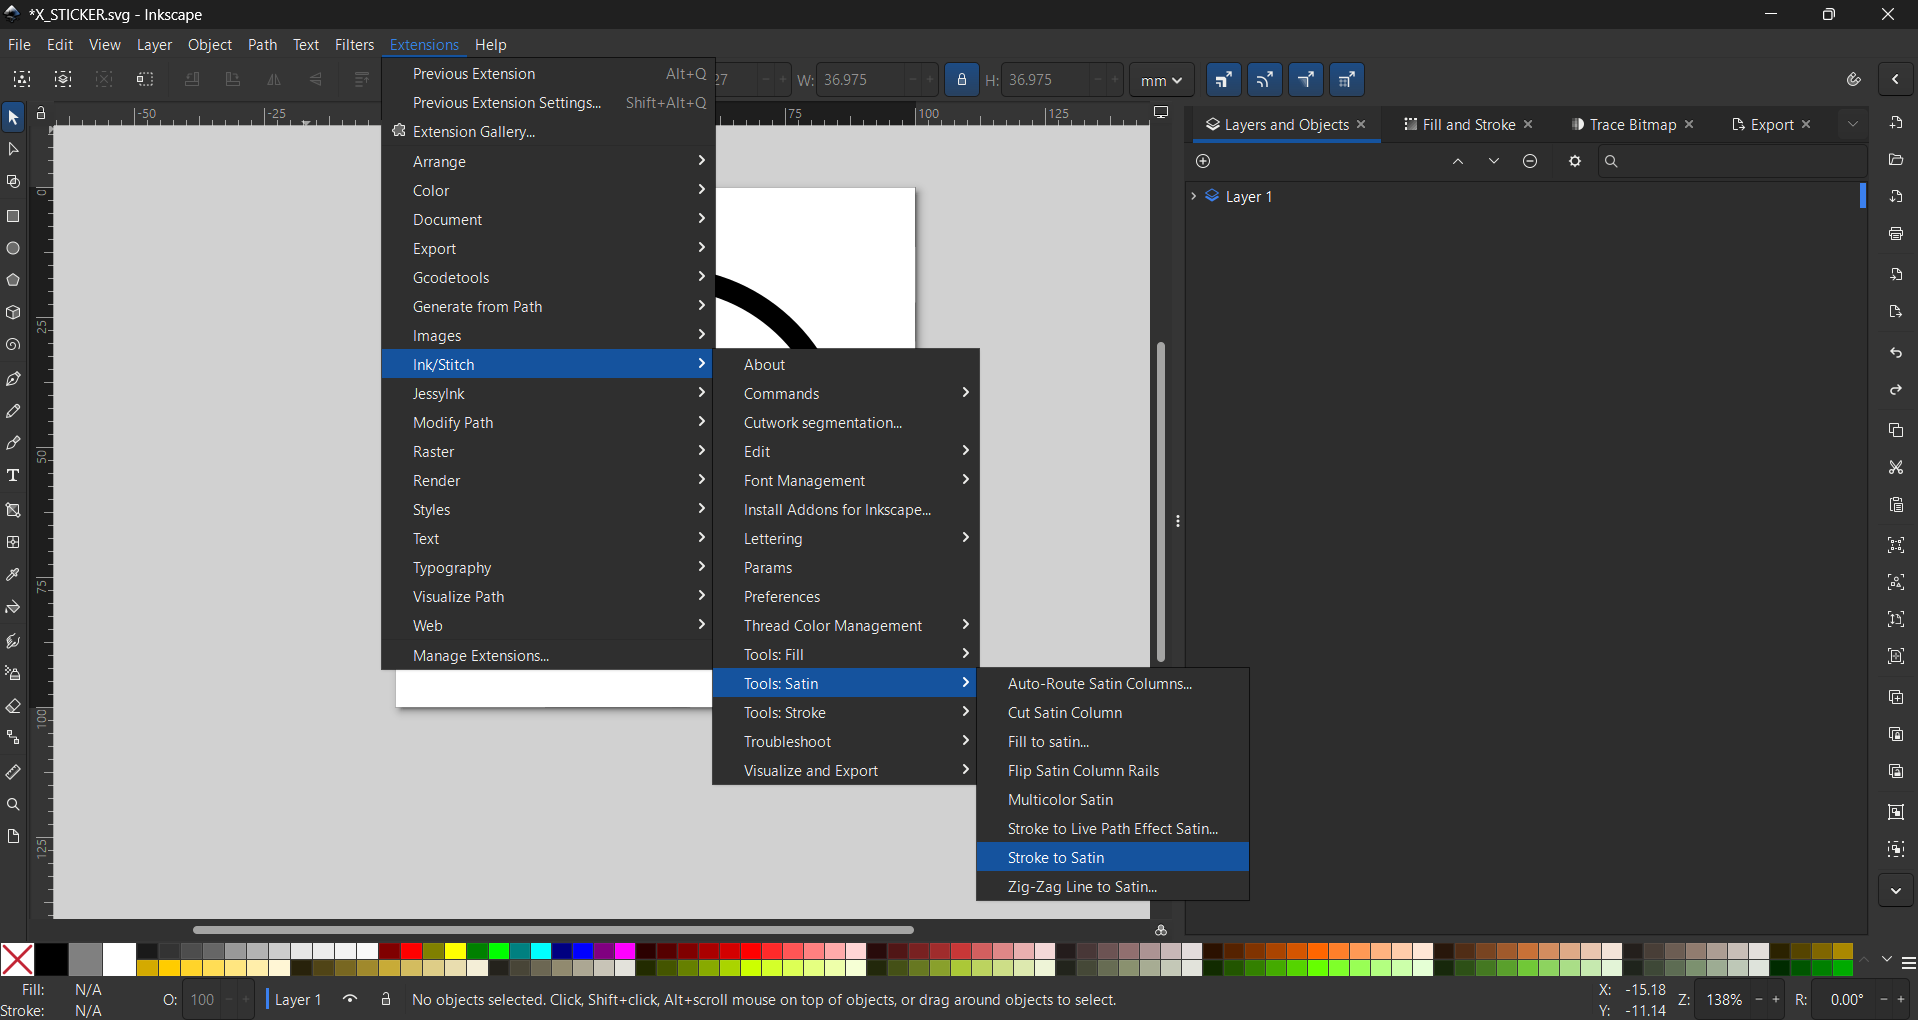
Then increase its thickness, go to Extensions, select Ink/Stitch, and finally choose Stroke to Satin.
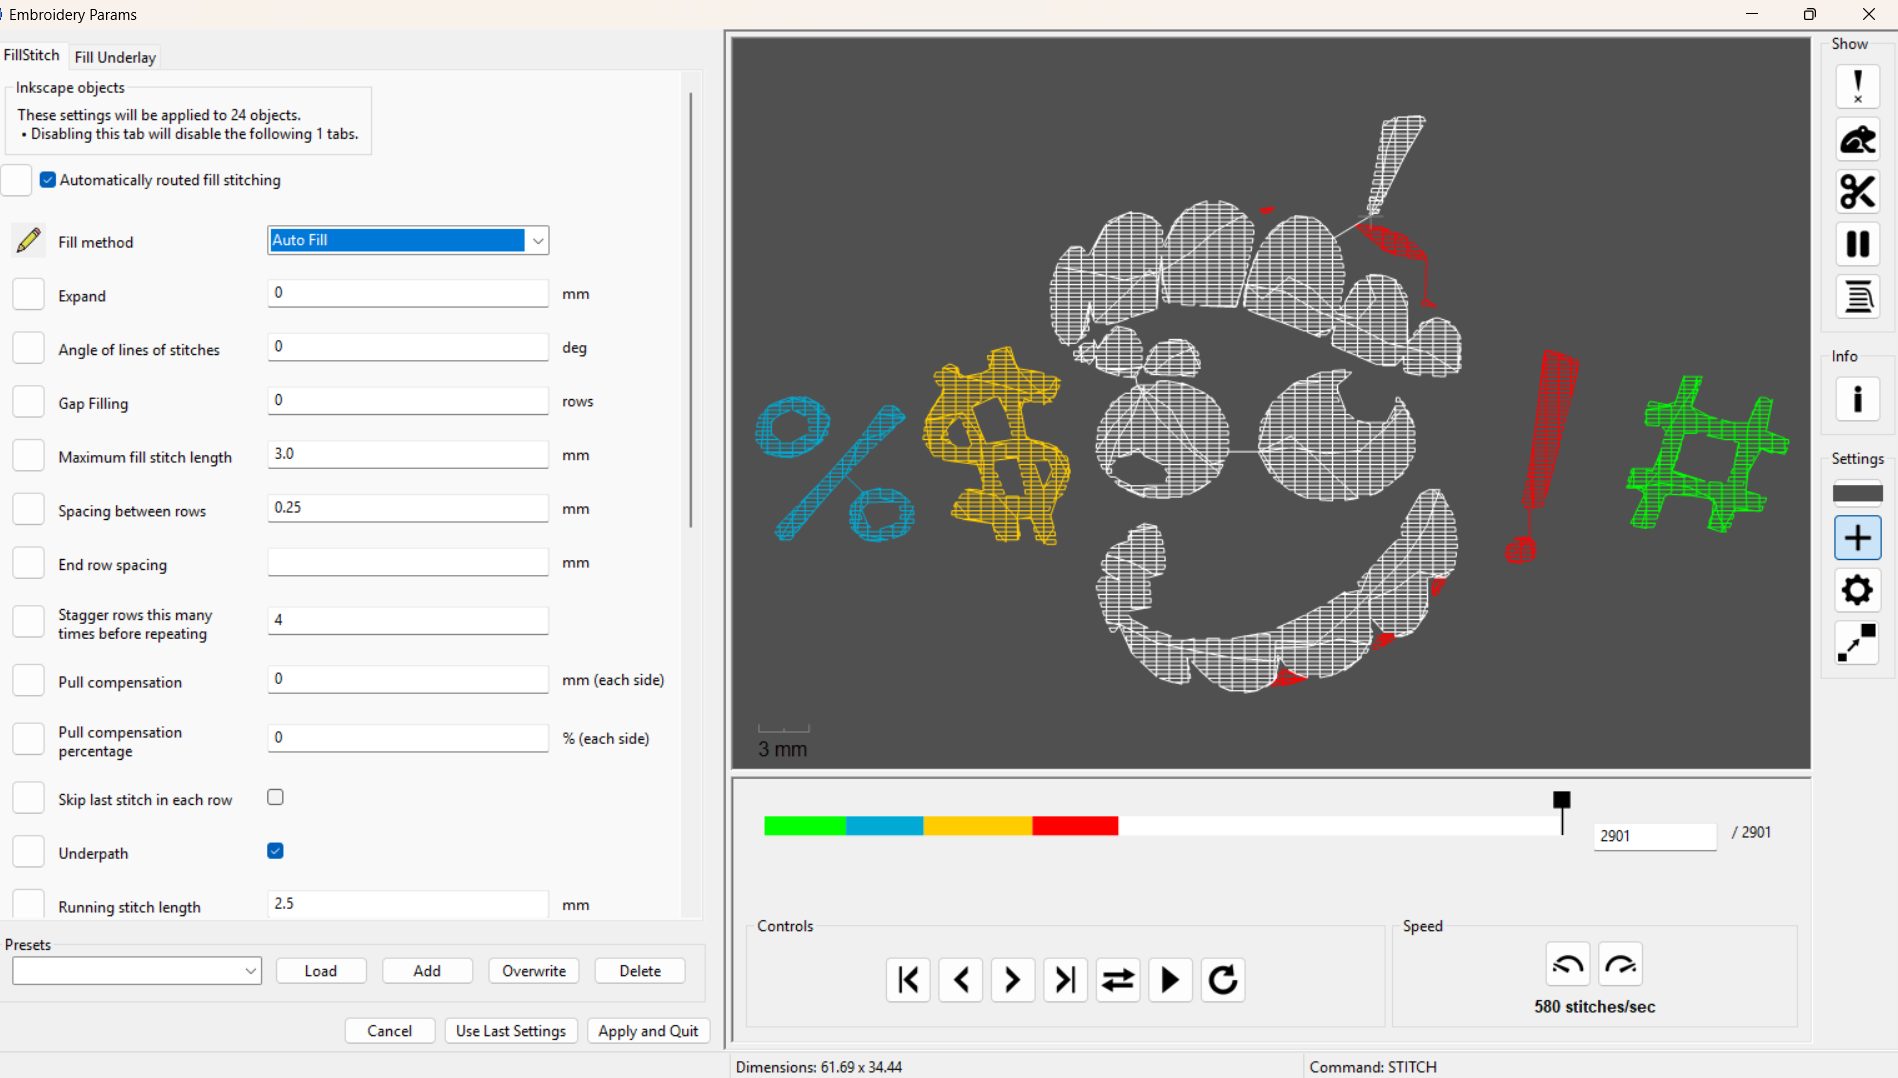 Now comes the interesting part. We need to go to Extensions, then Ink/Stitch, where we can do two things: change the parameters and view a simulation. To change the parameters, while in Ink/Stitch, select Params, and a pop-up window will appear where you can modify the embroidery process. To run a simulation, stay in Ink/Stitch, click Visualize and Export, and finally select Simulation.
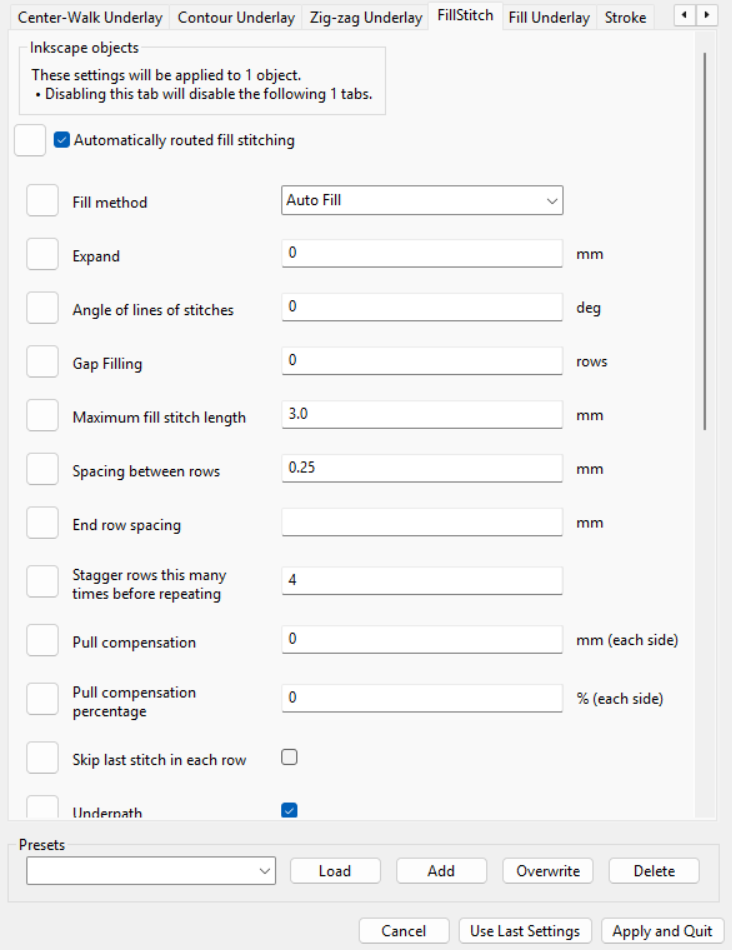
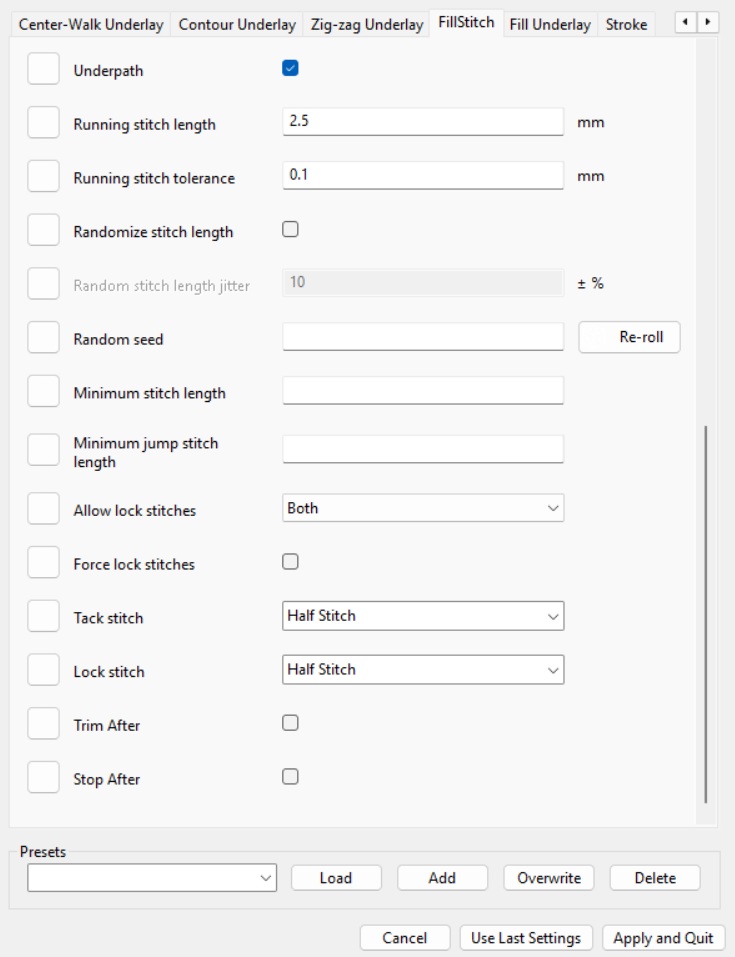
Parameters
In this section, you can modify the initial stitches, which start as three knots by default, as well as the spacing between stitches, the pattern to be used, and the number of rounds to be executed.
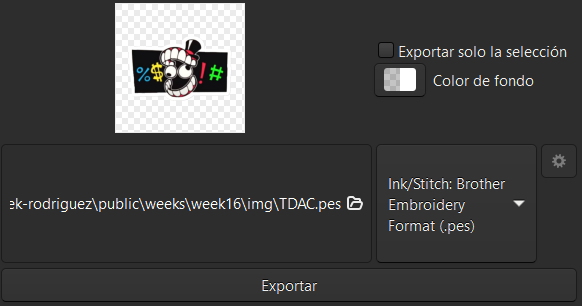
Finaly, to export we have to go to file and look for export, we can also press CTRL + SHIFT + E. Then change the format to .pes.
Embroidery
Embroidery
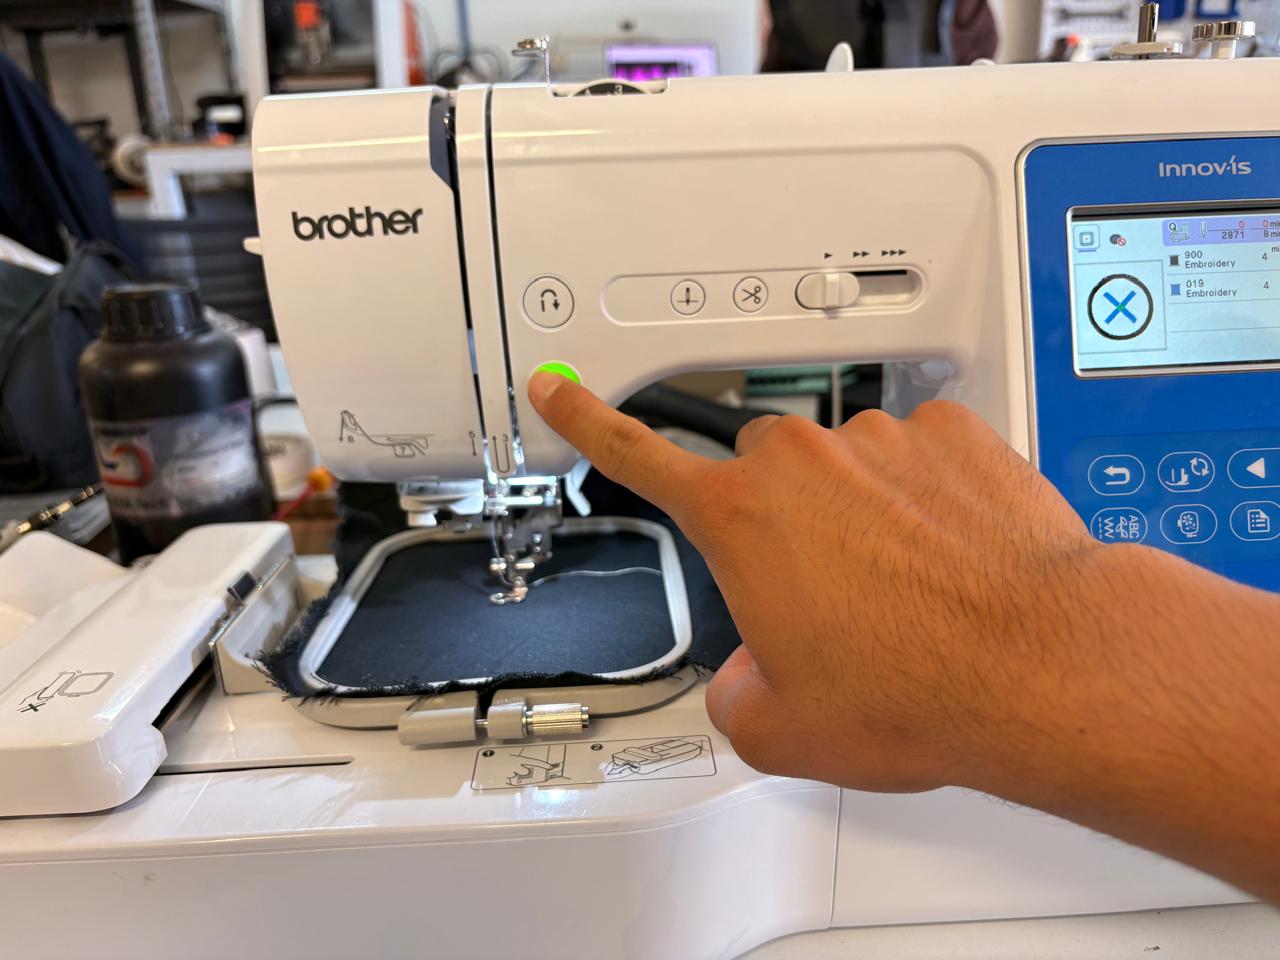
For embroidering in our lab we have the brother NS1850L.
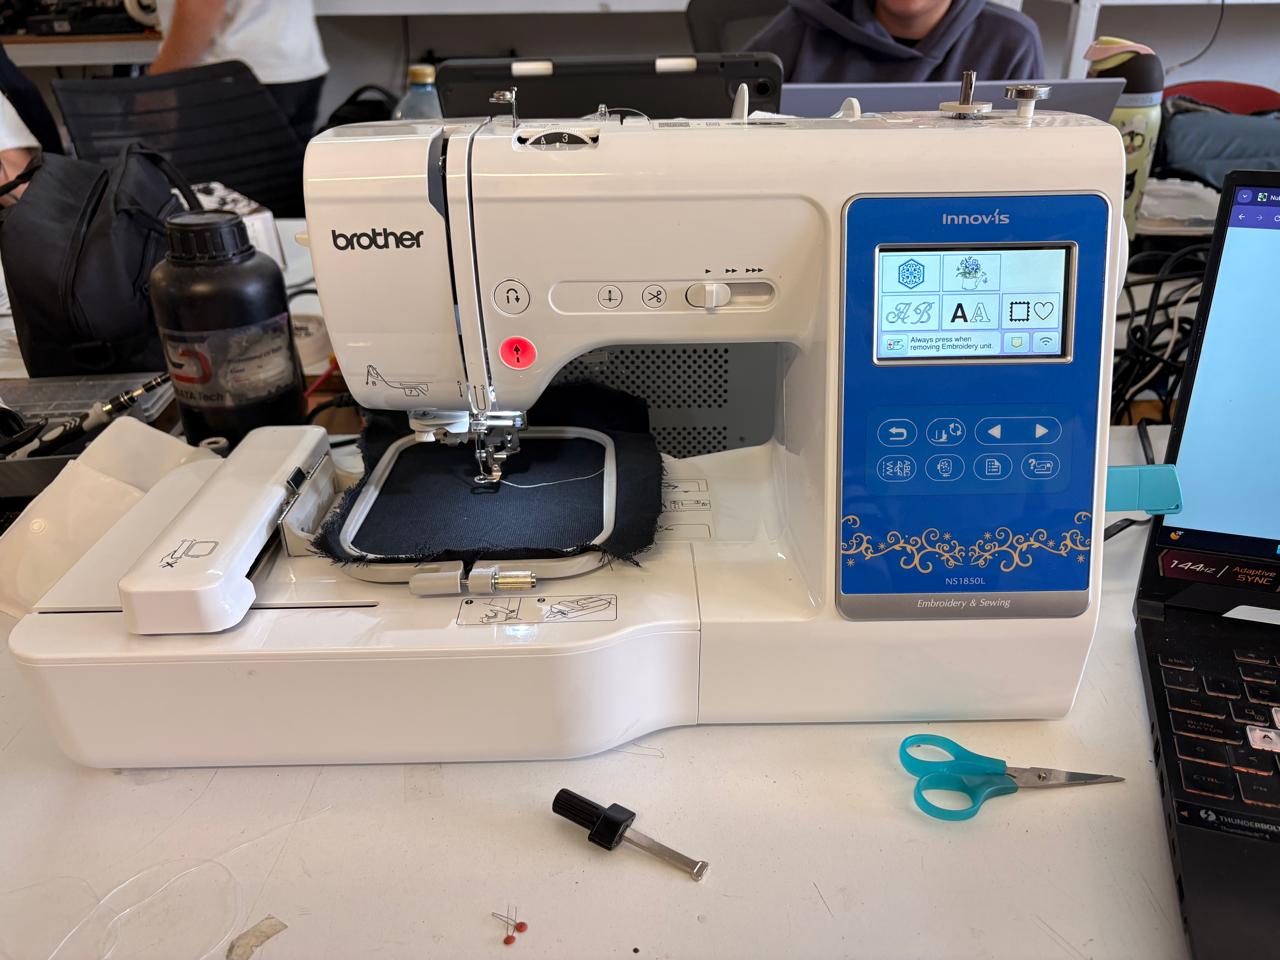
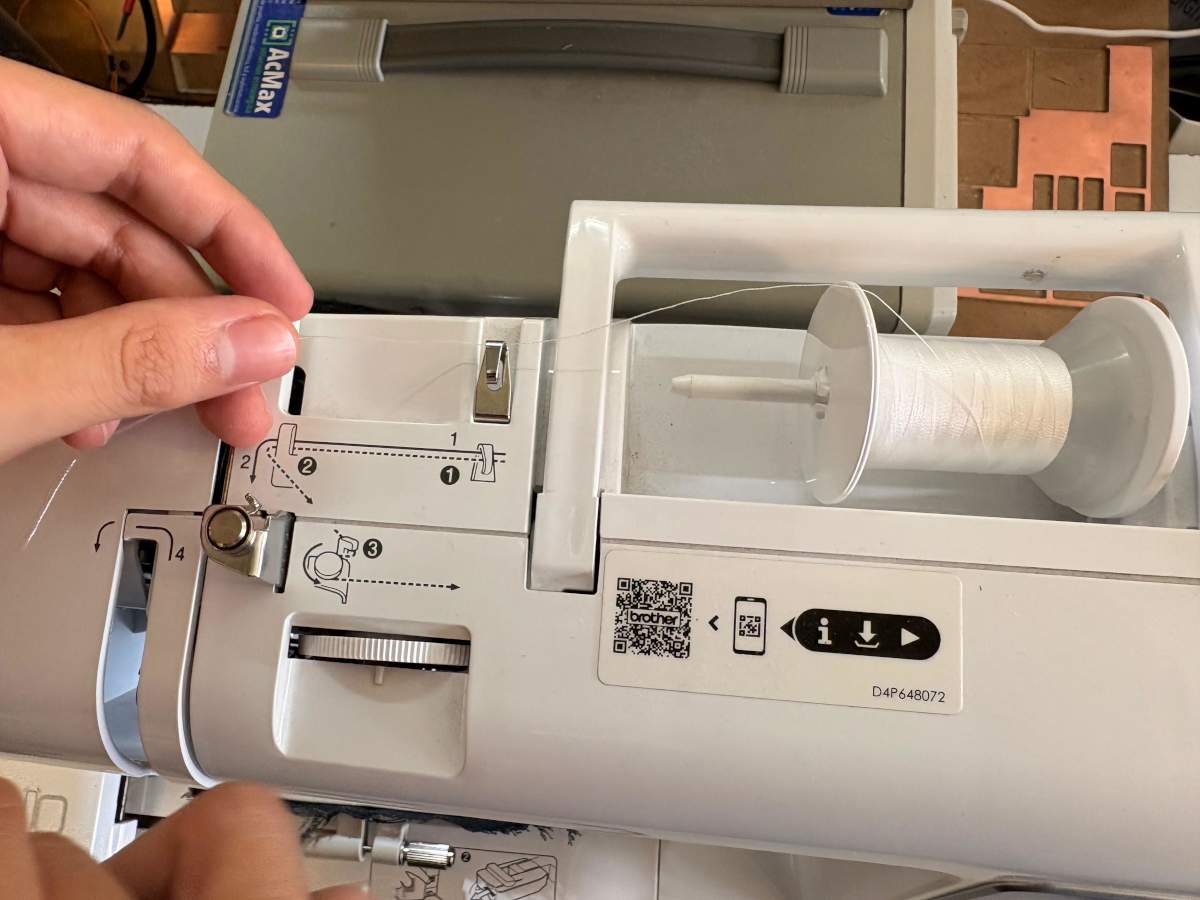
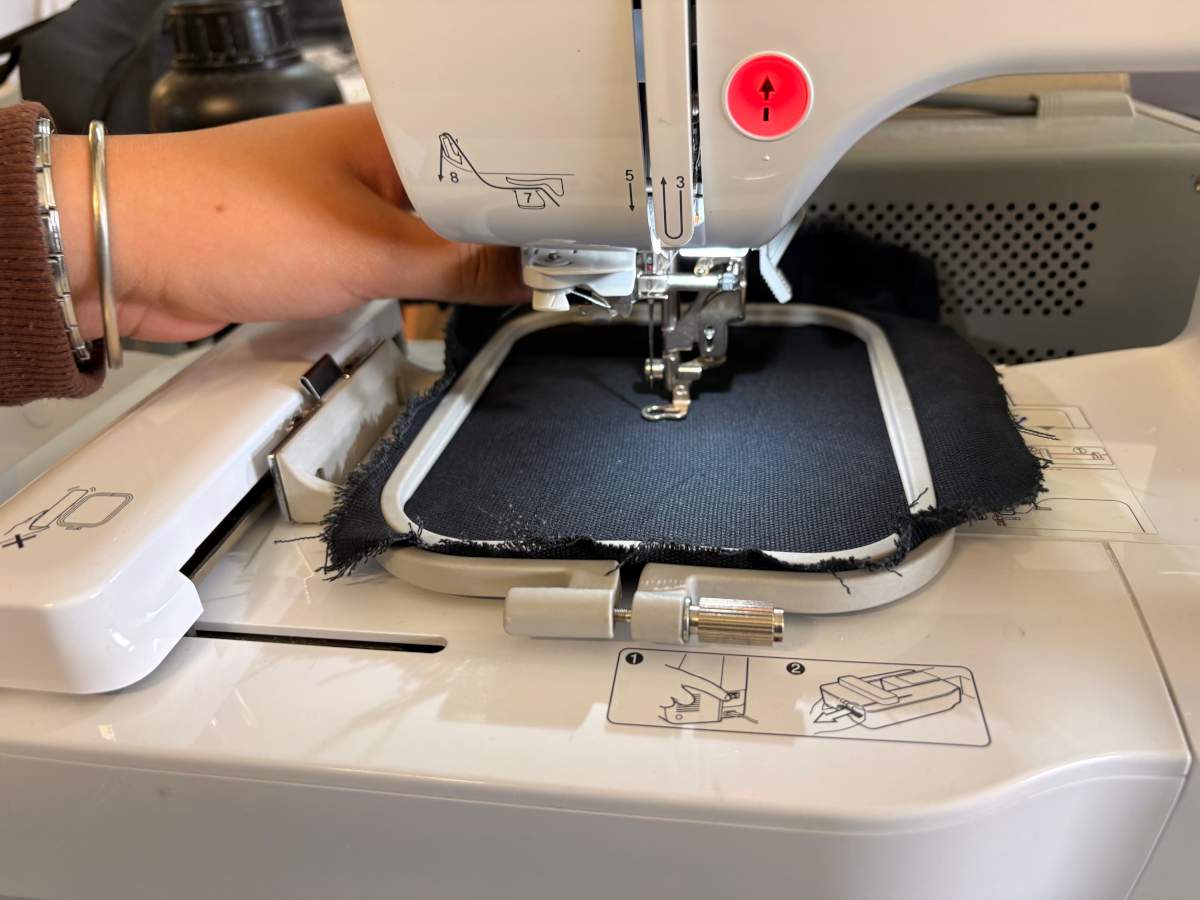
To start embroidering, we first need to know how to thread the machine. Fortunately, the machine has instructions printed on it showing how to thread each section. First we need to open the machine, for that we have to press the lateral button and pull it to the side, it must look like the second image.
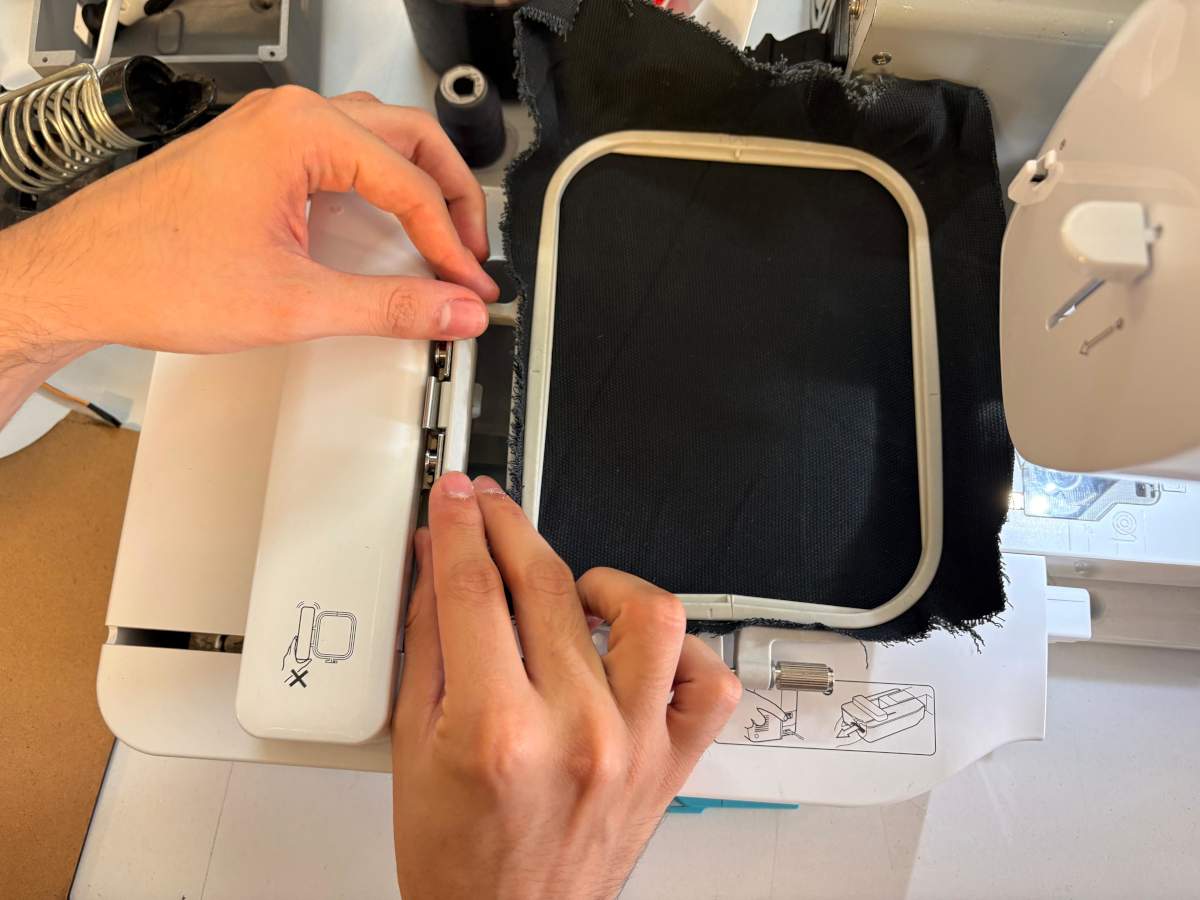
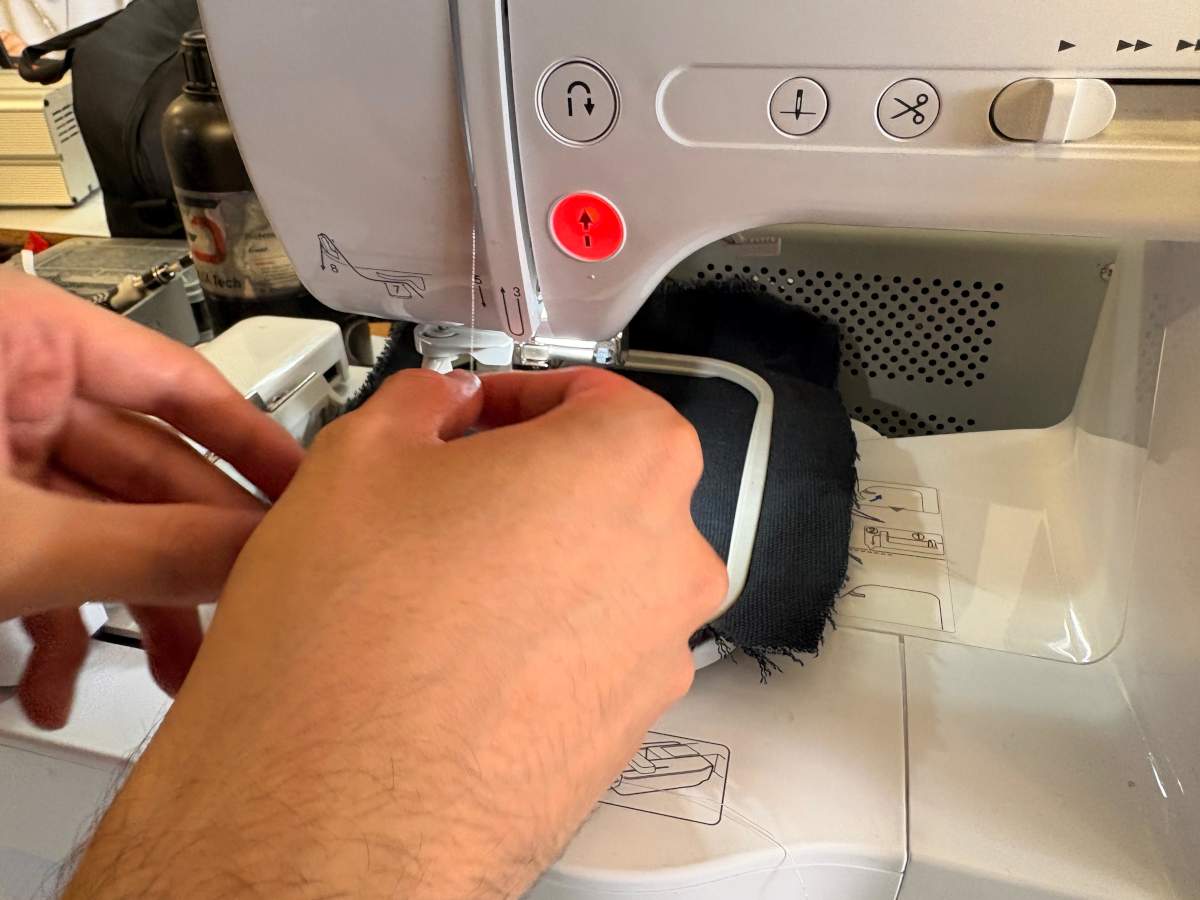
Next, we need to place the fabric in the machine’s small frame. When positioning the fabric, make sure the two small arrows on the frame are looking at each other, and then tension the fabric to prevent damage to the machine’s needle or poor results. Next we have to place it in the machine.
IMPORTANT
The video show a more difficut way to place the fabric.
Then, we must pull the lever up, this is because we don't want to harm the needle. We also need to make sure there is enough thread in the inside bobin; this thread is essential for attaching the upper thread.
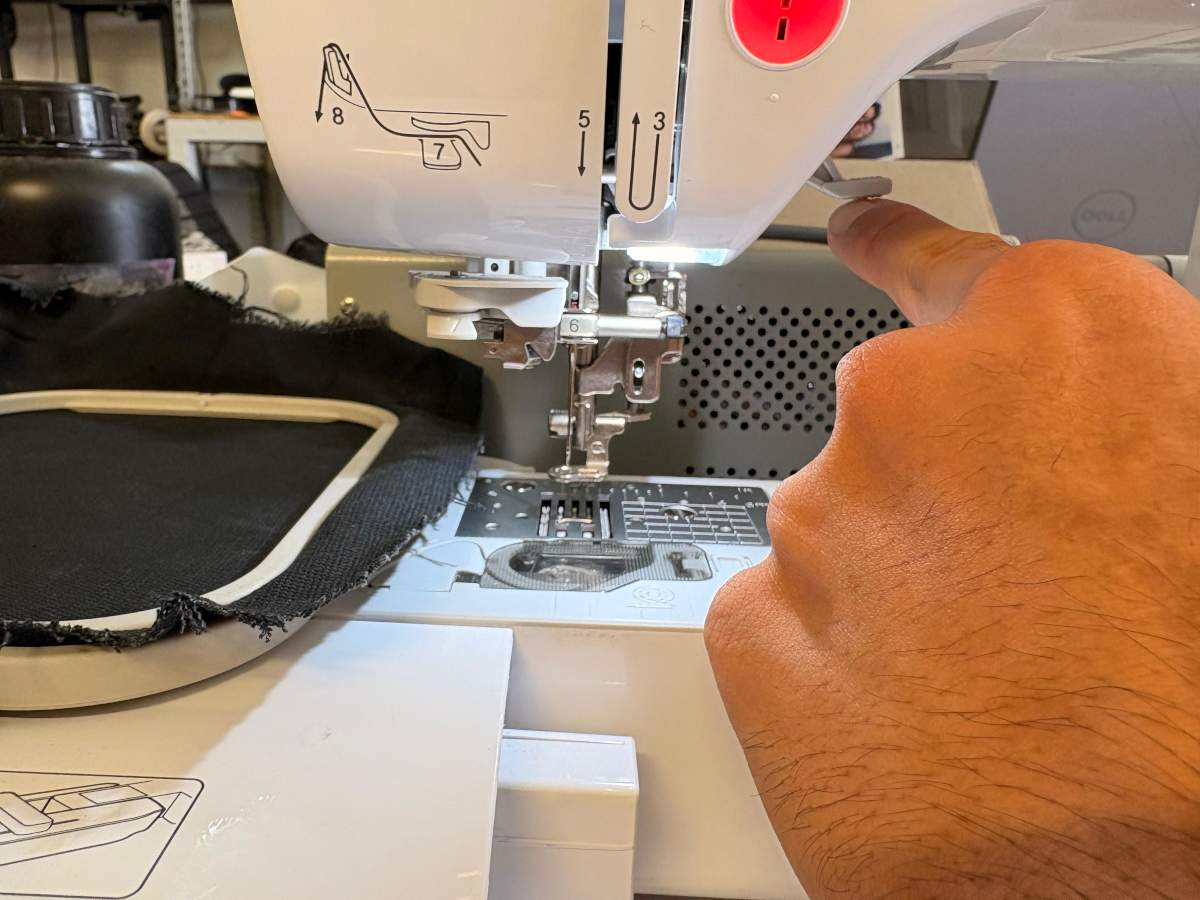
After making sure it is enough thread, we must place the fabric and then turn on the machine.

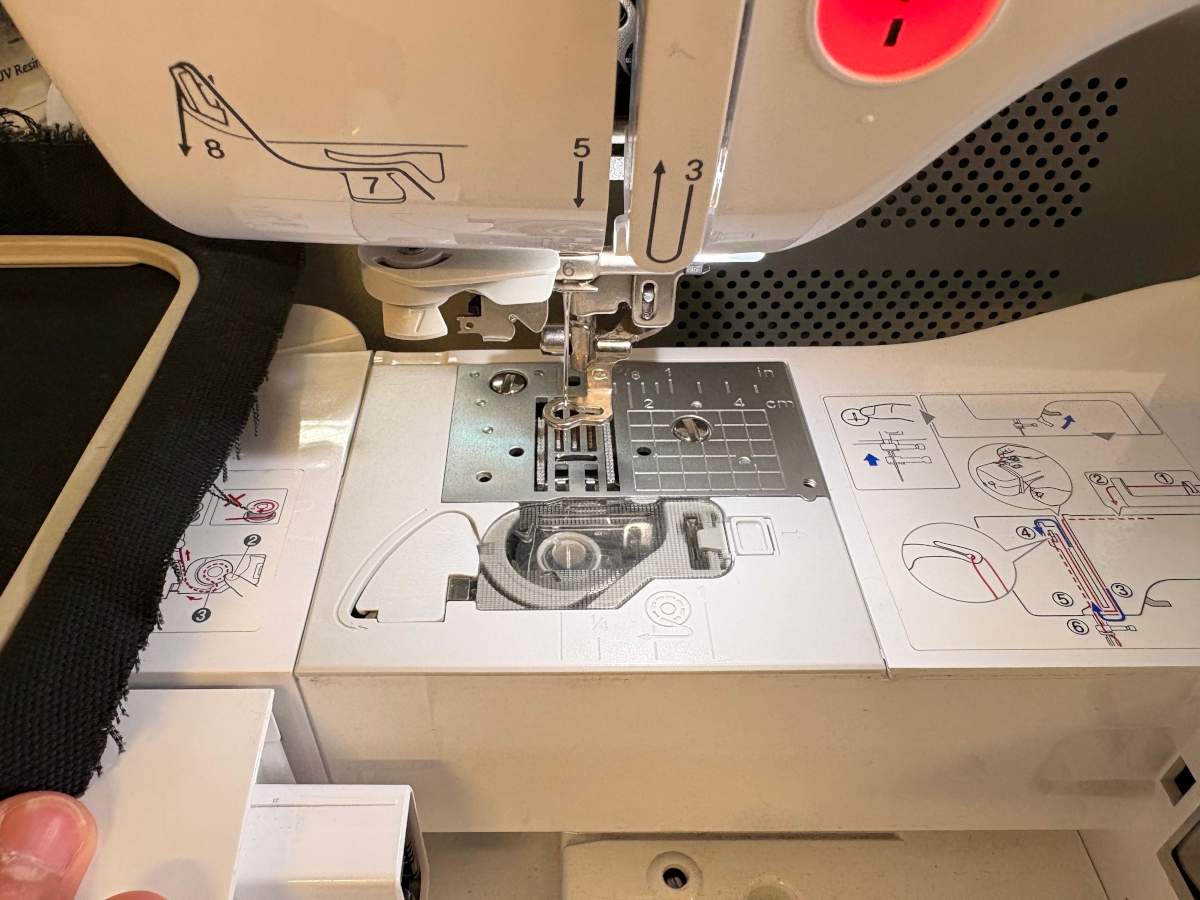
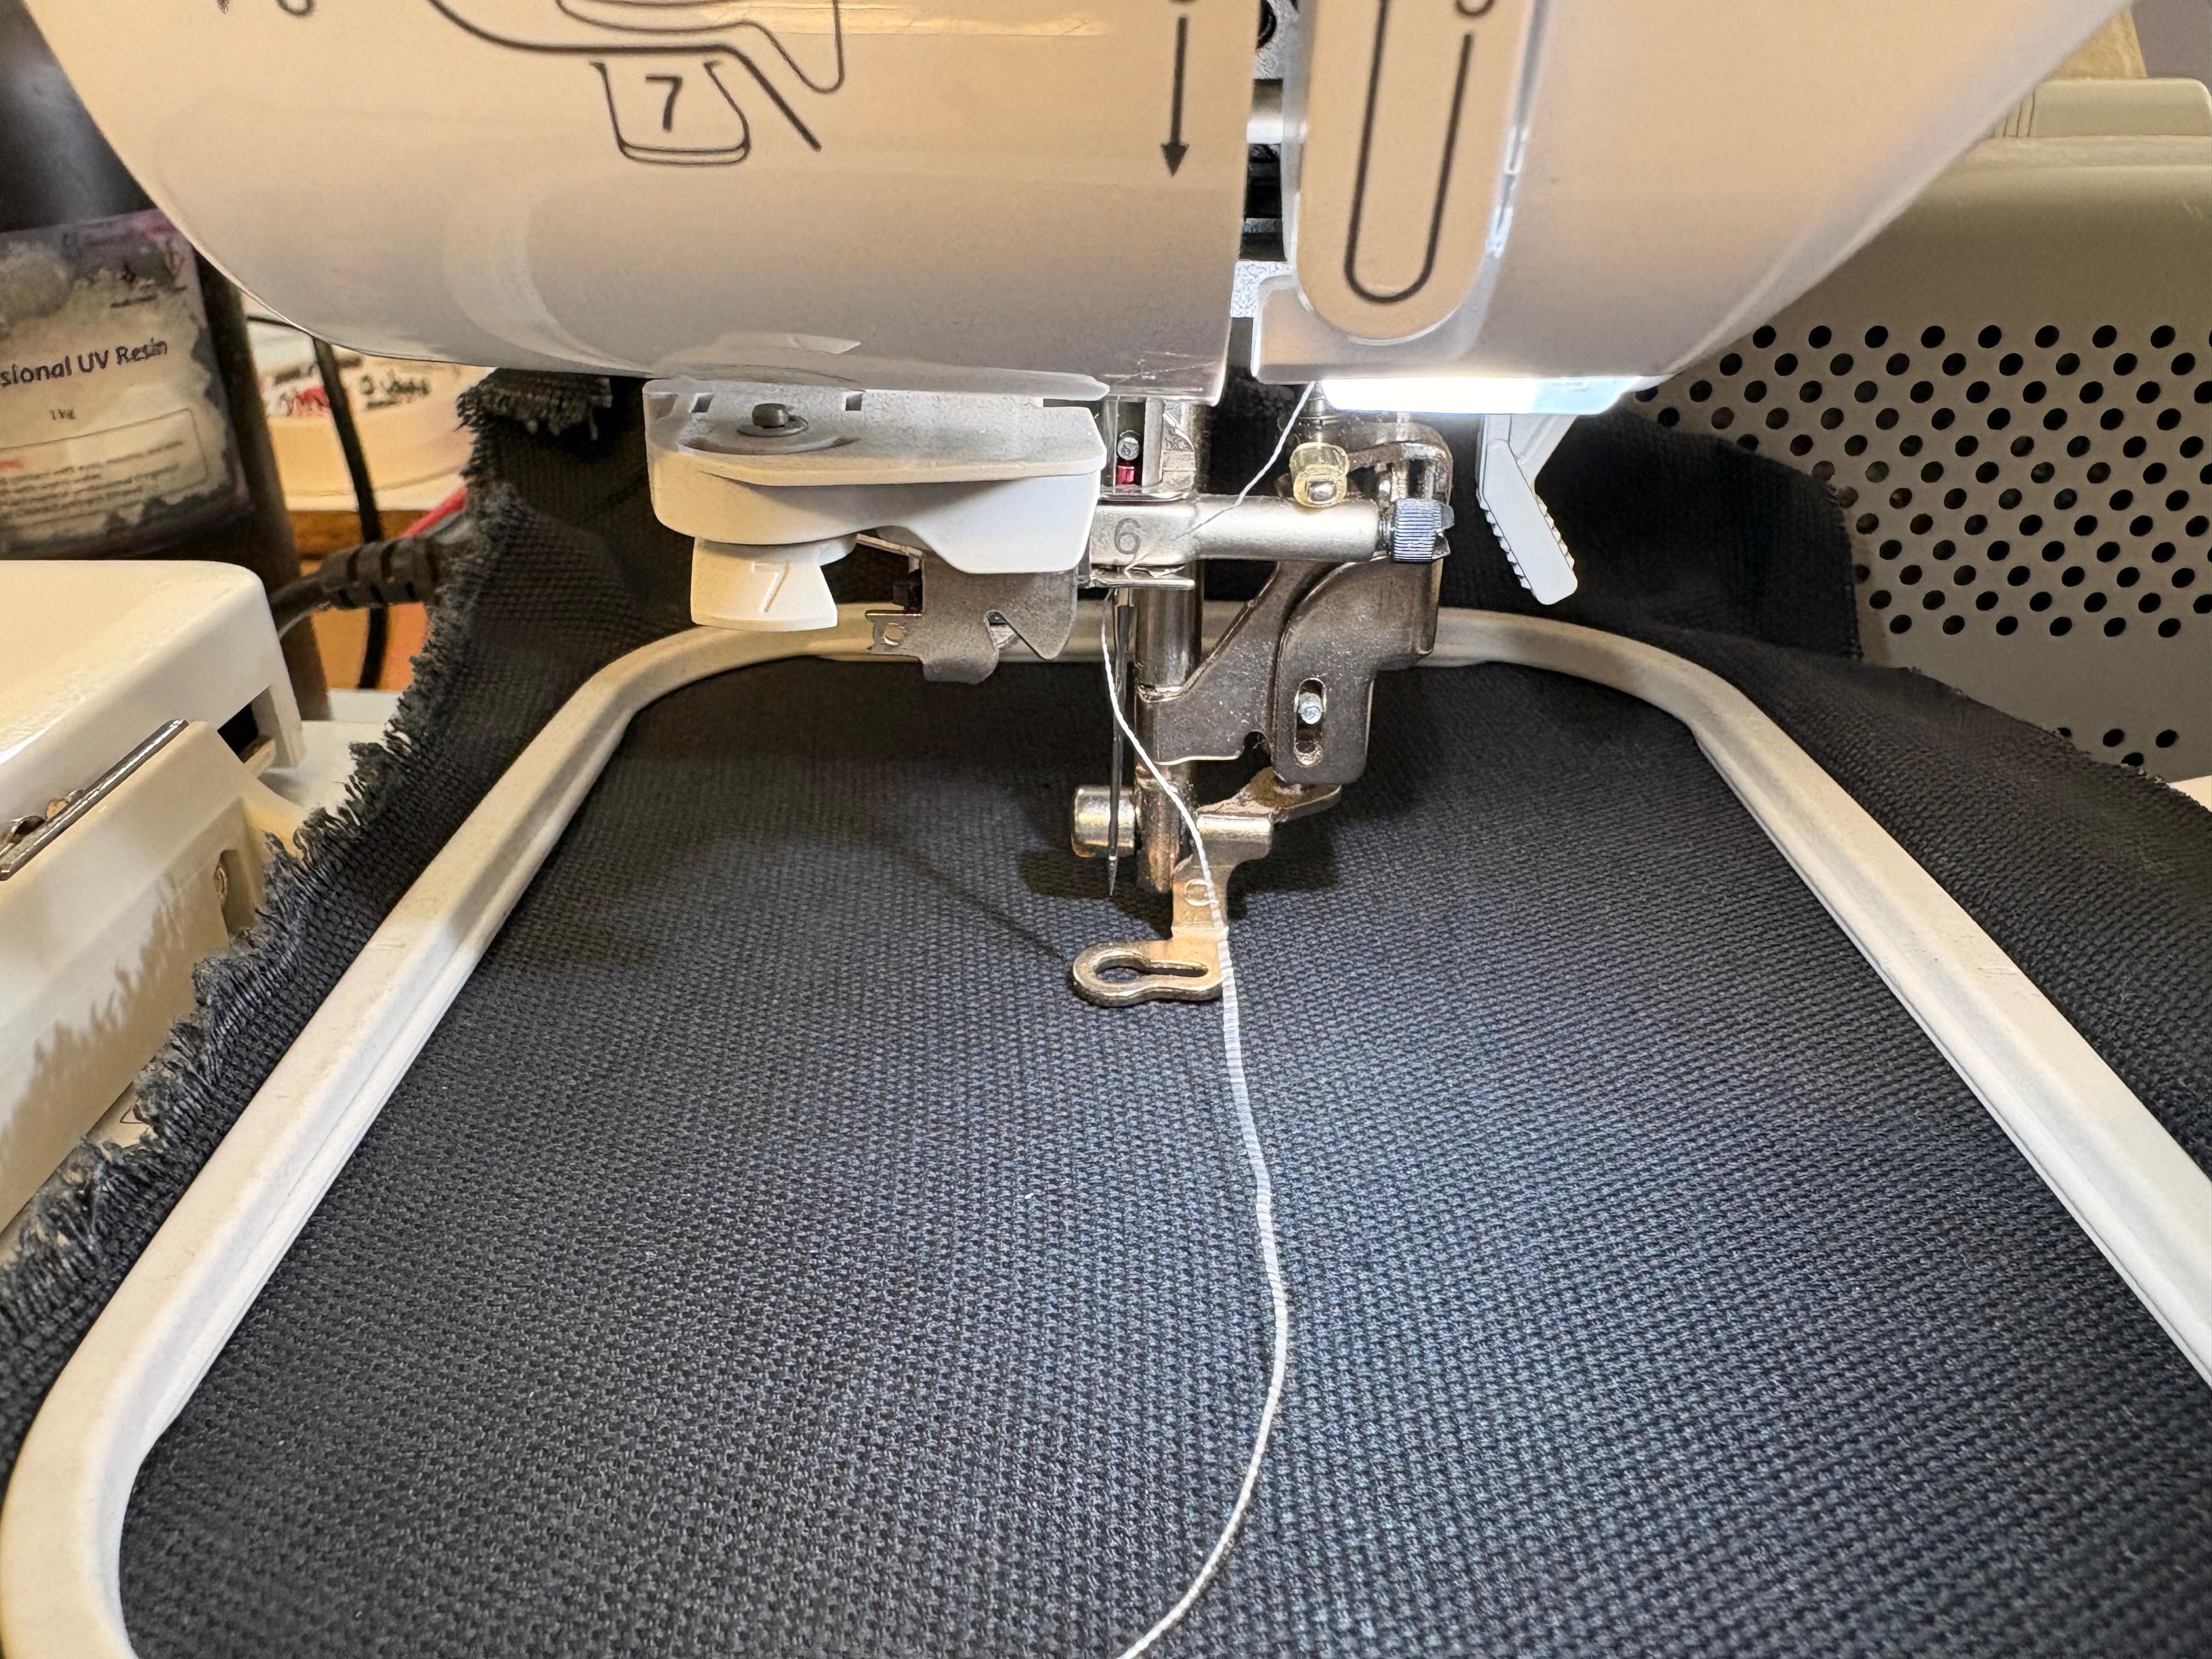
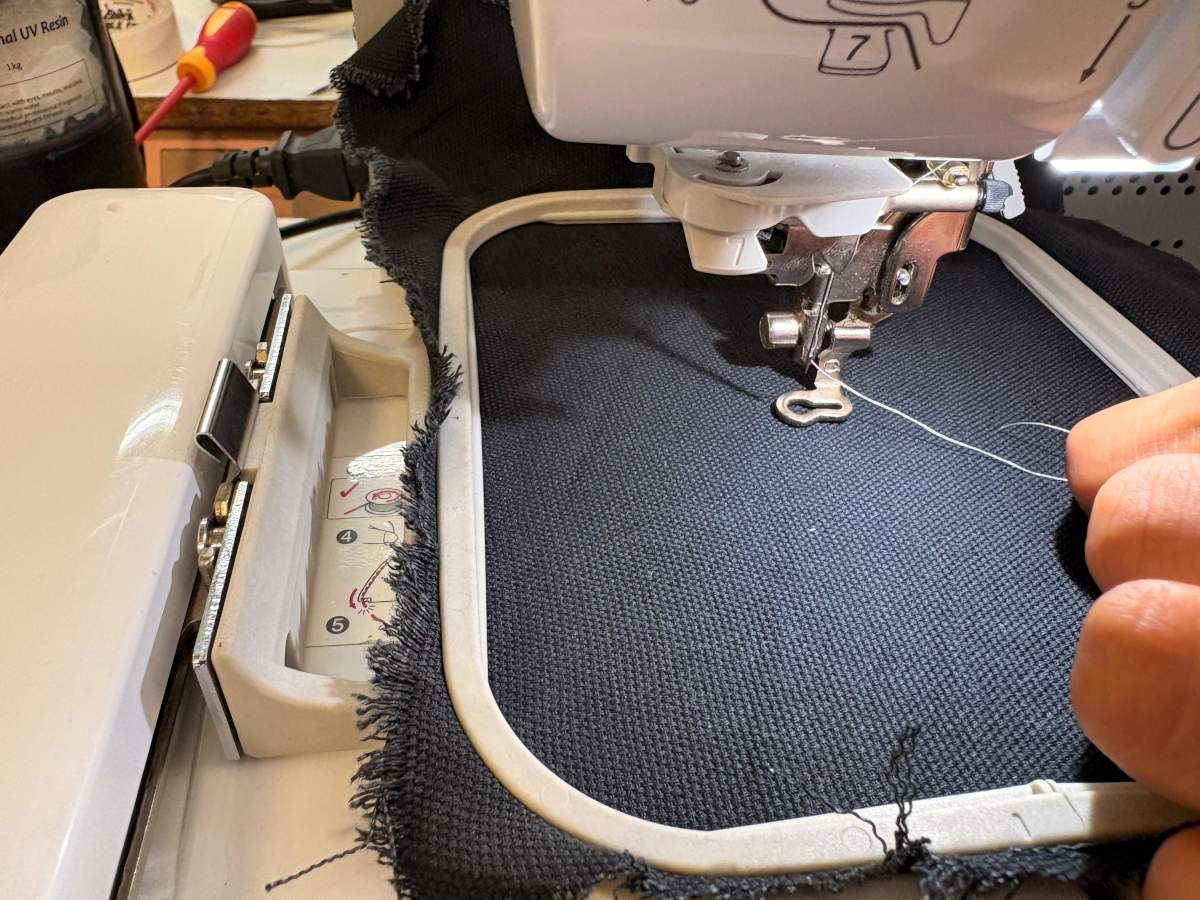
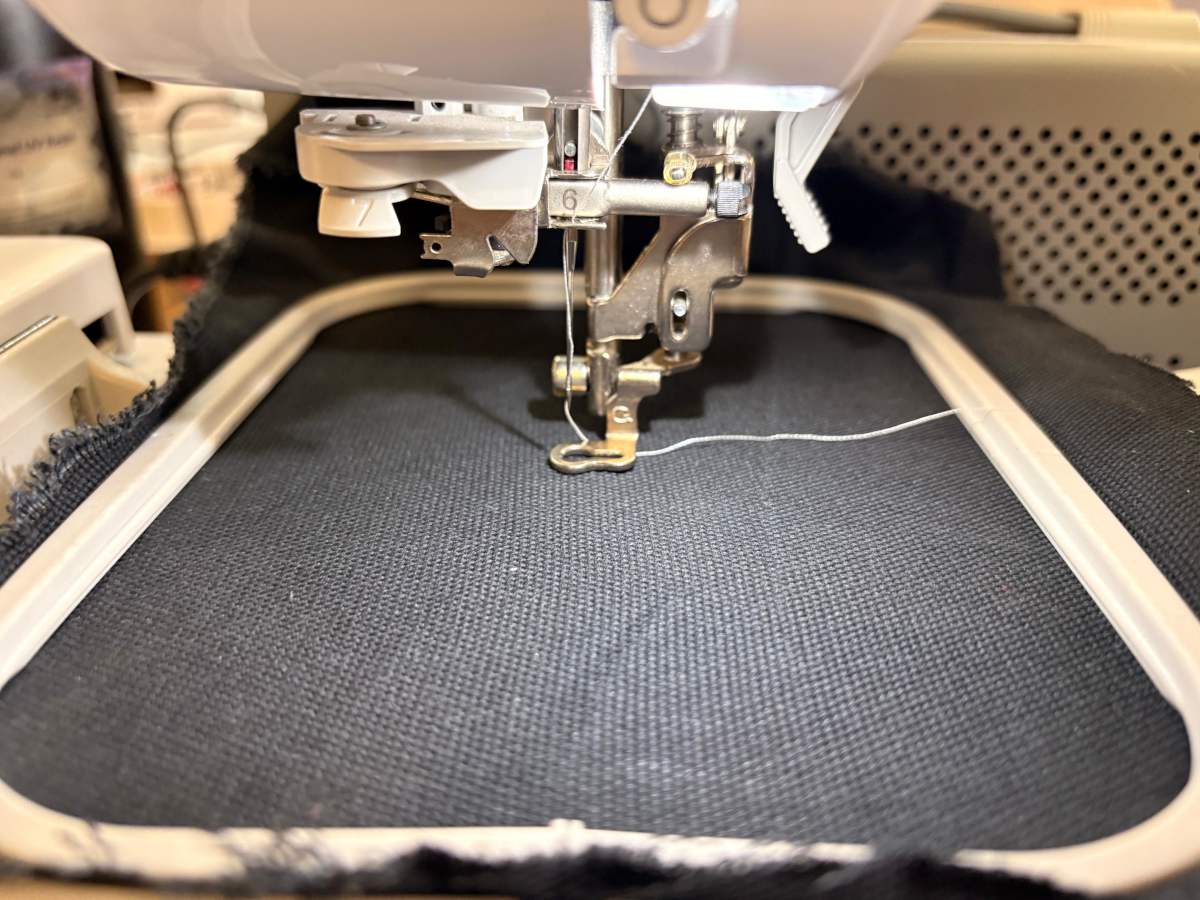
- Subsequently, we have to place the upperthread, the color we want and then follow the steps the machine shows to place it correctly. First, we have to hook it onto the little hook, and then insert it into the slot so we can lower it.
- Next, we need to pull it up along the curve, fit it into the groove on the inside, attach it to another hook, and lower it back down. Once it’s down, we need to thread it through the space marked with a six, immediately attach it to the front hook, and pass it through the space marked with a seven. Finally, we need to cut the thread and pull a small lever on the side, and the thread will automatically thread itself onto the needle.
- To finish threading the machine, place the thread under the presser foot and lower the lever to secure it against the fabric.
We have to place our USB to open our files.
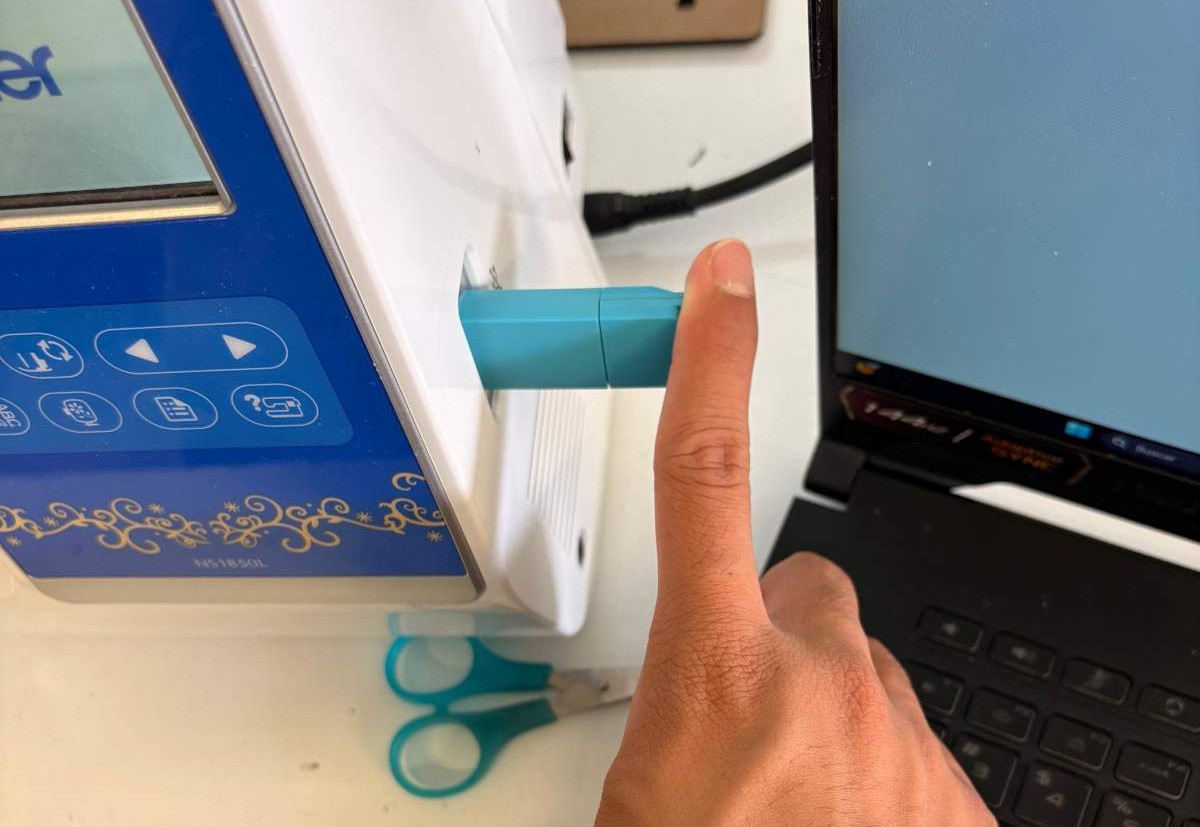
First, We have to press the USB Symbol.
Then, using the arrows in the control panel we can move through the files and look for our desired image. Next, we must use touch screen an select our image.
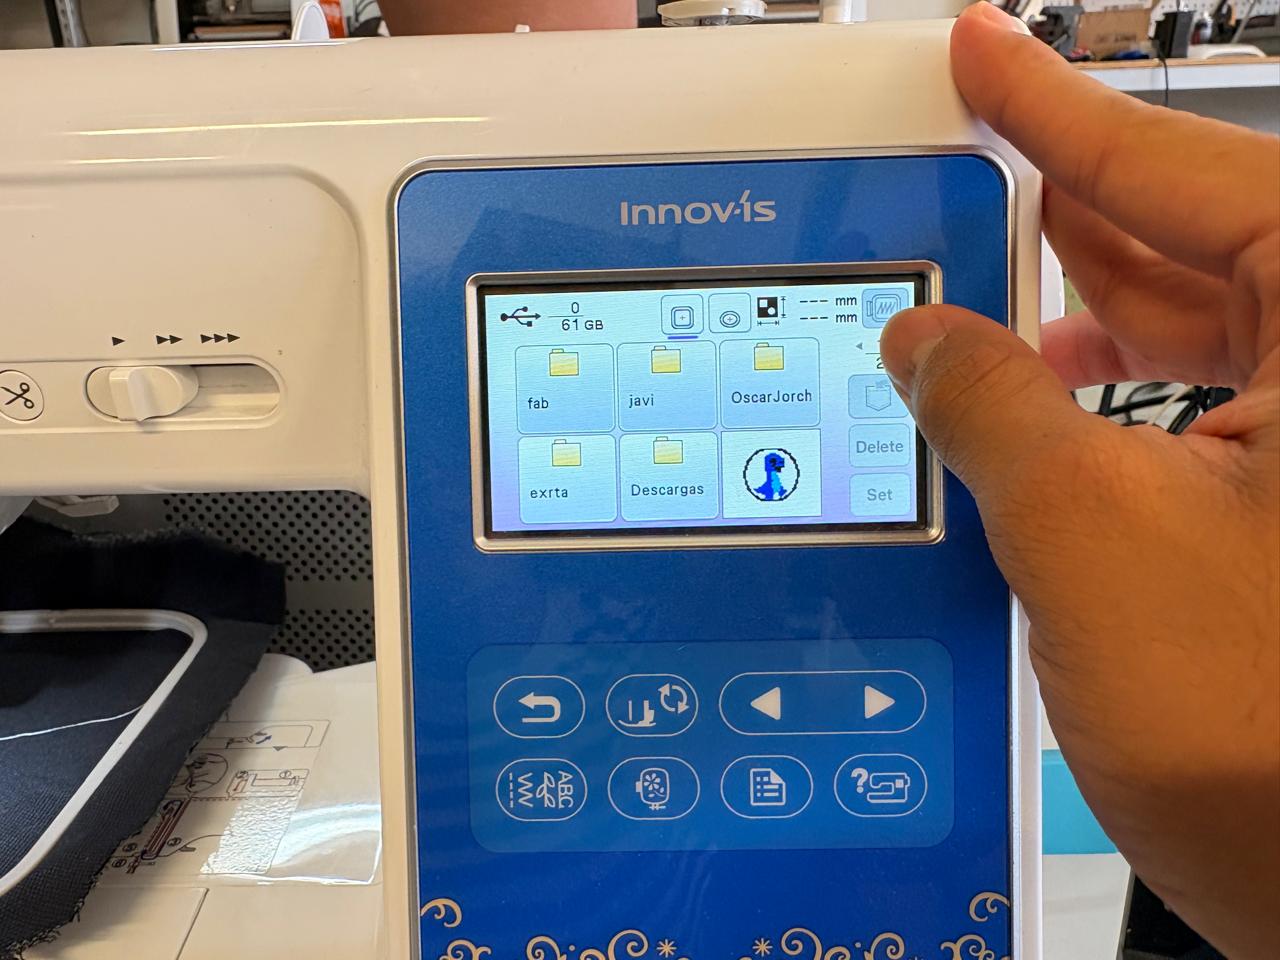
Control Panel.
Arrows: To go back and forth.
Return arrow: To return to the previous screen.
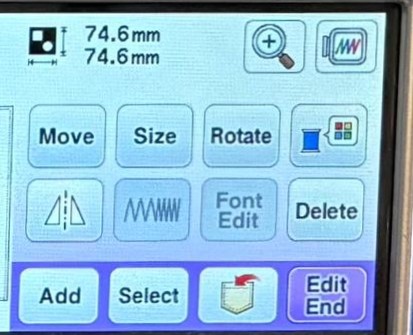
After selecting our shape, we can edit it. If we don't need to make any changes, we should click the purple button that says “Edit End.”
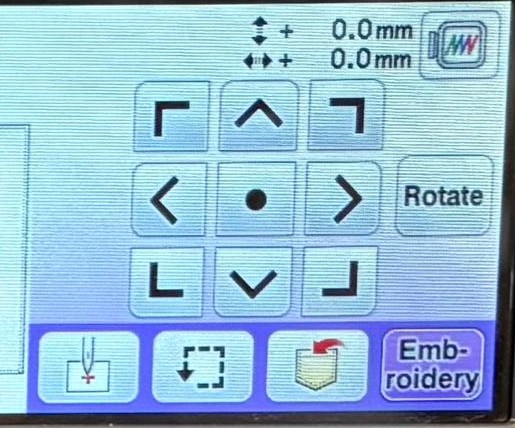
Later, we can change its position. If we don't need it, we should press the button labeled “embroidery.”
Results
Download files
For download 3D and others files, just click on the dancing shrimp.