This week we worked with embedded programming. The goal was to research different microcontrollers, review their data sheets, and program a simulation that included input, output, and communication. For my ball picking machine project, I needed to understand what options exist and how they are programmed.
Group Assignment
Embedded Systems Assessment: From Datasheet to Simulation
Microcontroller Research Datasheets
For the ball picking machine I need a microcontroller that can handle the traction motors, the collecting mechanism and the distance sensors. I reviewed the data sheets for two main options.
Microcontroller Comparison
| Feature | Raspberry Pi Pico 2040 | ESP32 |
|---|---|---|
| Voltage | 1.8V - 5.5V | 2.3V - 3.6V |
| Frequency | Up to 133 MHz | Up to 240 MHz |
| GPIO | 26 pins | 25+ pins |
| WiFi/Bluetooth | No | Yes |
| Main Language | MicroPython / C++ | C++ / Arduino |
| Price | ~$4 | ~$5-8 |
For my project I chose the Raspberry Pi Pico 2040. Programming in MicroPython is simpler. For the first version of the machine I don't need WiFi connectivity, and the flexible power supply voltage gives me more options.
Datasheets
I reviewed both data sheets to compare technical specifications. The RP2040 datasheet confirmed that all GPIO pins support PWM, ideal for controlling the servos of the ball picking machine. I considered the ESP32 in case I need WiFi connectivity in the future.
Wokwi Simulation Raspberry Pi Pico + MicroPython
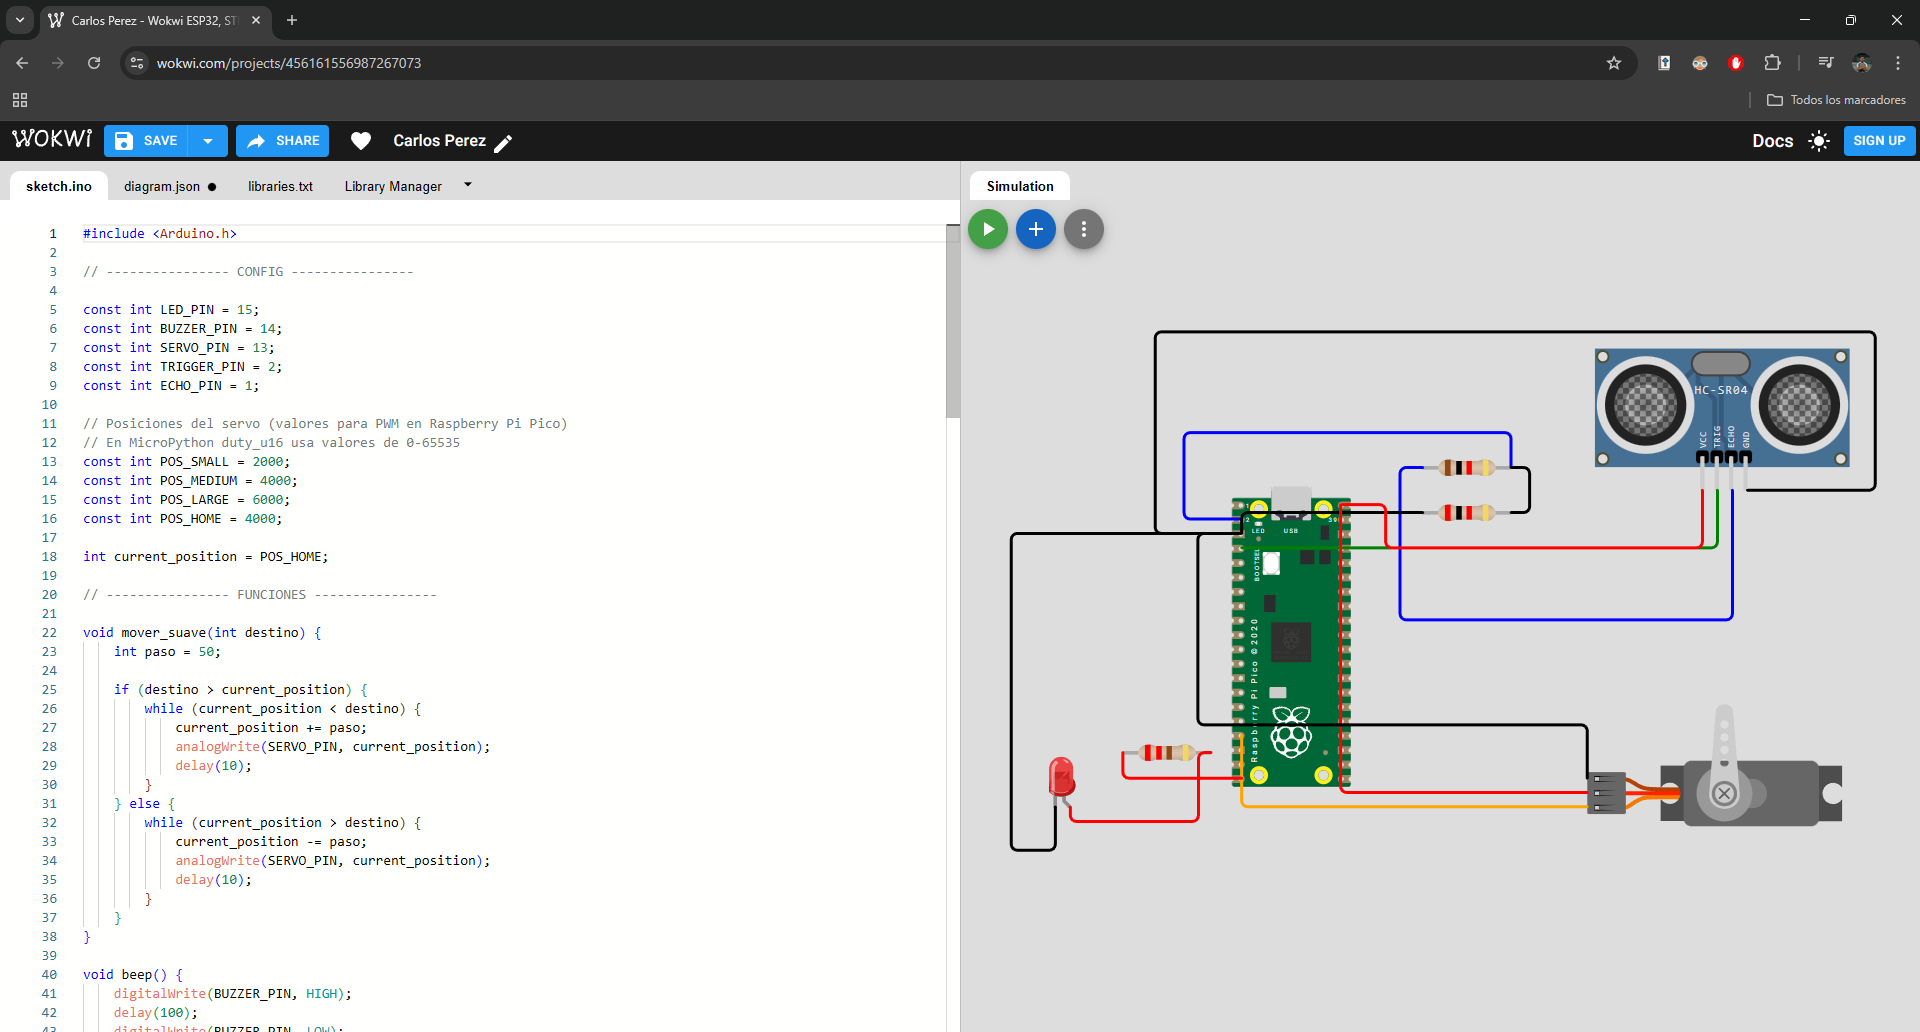
I used Wokwi to simulate the circuit before programming the physical microcontroller. This allows testing the code and connections without risk of damaging components. For this simulation, I created an automatic classification system that detects objects by distance and moves a servo to different positions.
Wokwi Setup
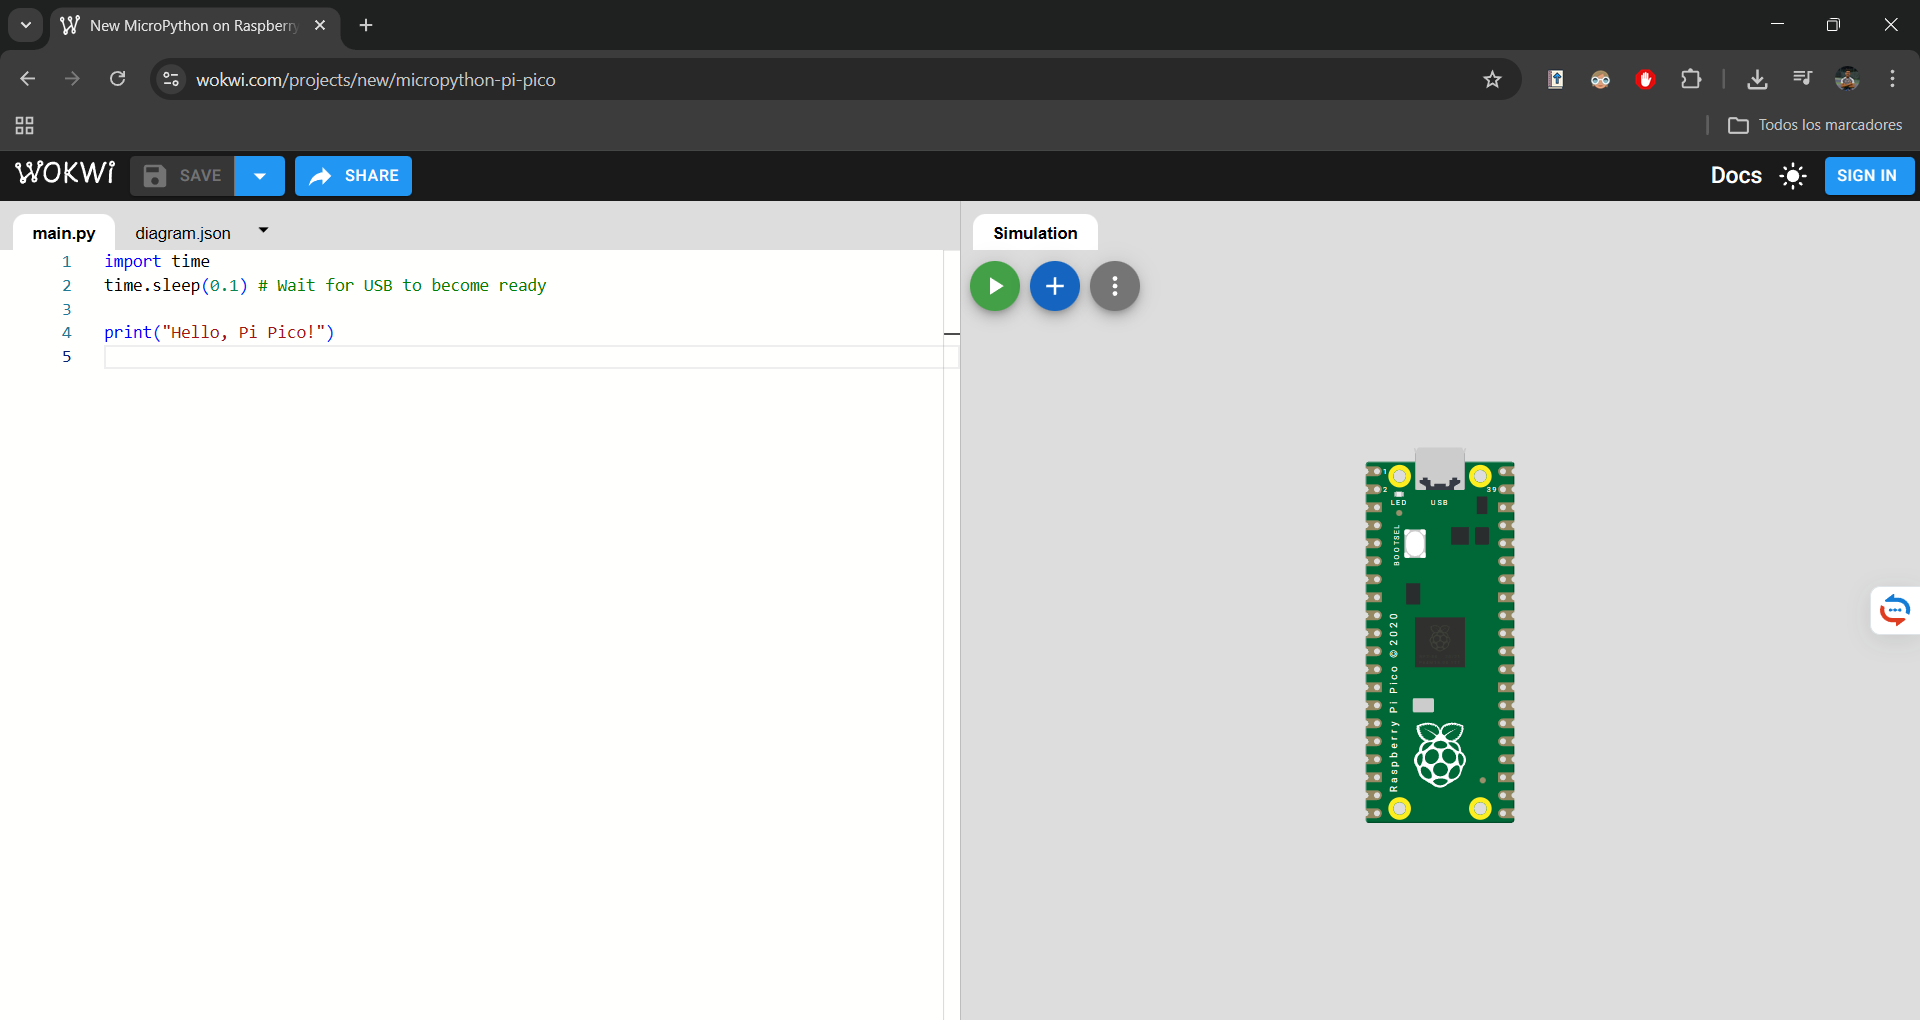
In Wokwi I selected the Raspberry Pi Pico as microcontroller and chose MicroPython as language. The environment allows dragging components and connecting them virtually. I added an ultrasonic sensor (HC-SR04), a servo motor, an LED, and a buzzer.
Connection Diagram
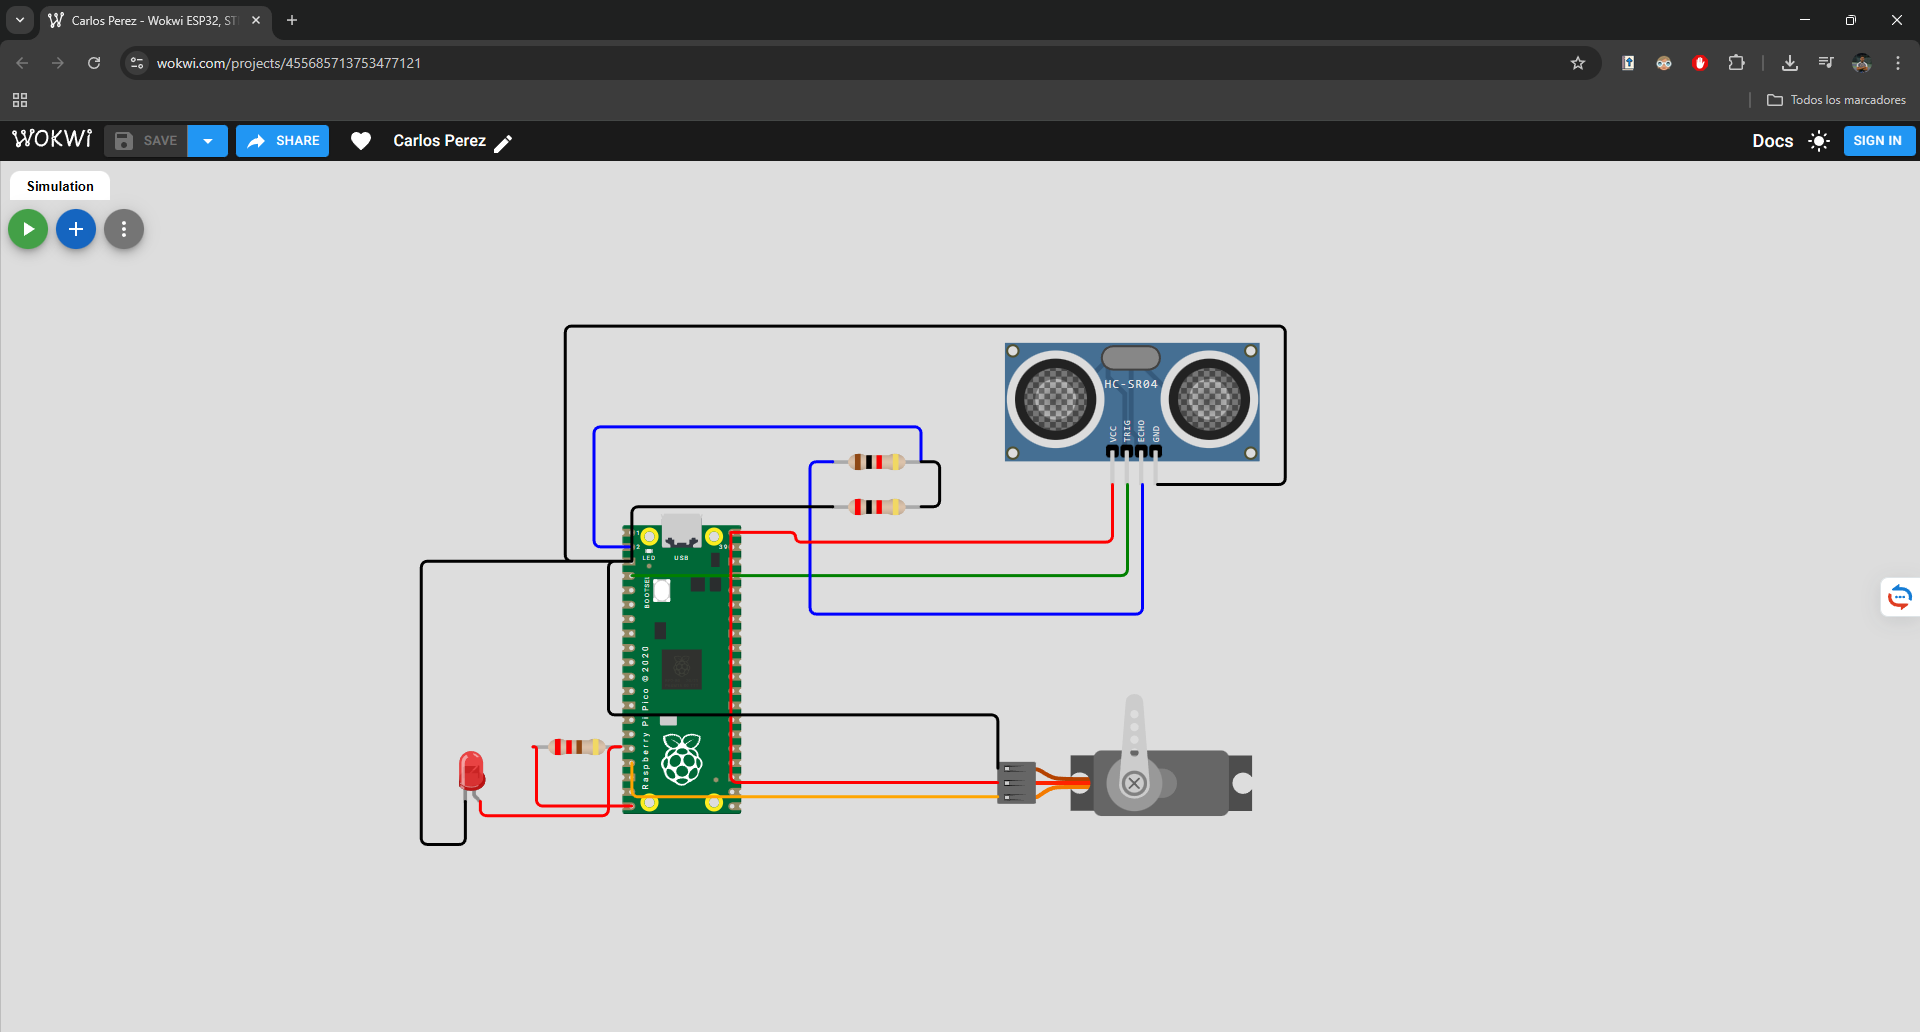
I connected an ultrasonic sensor (trigger on GP2, echo on GP1) to detect objects, a servo on GP13 to simulate the sorting mechanism, an LED on GP15 for visual feedback, and a buzzer on GP14 for audible feedback.
MicroPython Code - Automatic Classification System
from machine import Pin, PWM
import utime

# ---------------- CONFIG ----------------

led = Pin(15, Pin.OUT)
buzzer = Pin(14, Pin.OUT)

servo = PWM(Pin(13))
servo.freq(50)

trigger = Pin(2, Pin.OUT)
echo = Pin(1, Pin.IN)

# Servo positions
POS_SMALL = 2000
POS_MEDIUM = 4000
POS_LARGE = 6000
POS_HOME = 4000

current_position = POS_HOME
servo.duty_u16(current_position)

# ---------------- FUNCTIONS ----------------

def smooth_move(destination):
    global current_position

    step = 50

    if destination > current_position:
        while current_position < destination:
            current_position += step
            servo.duty_u16(current_position)
            utime.sleep_ms(10)
    else:
        while current_position > destination:
            current_position -= step
            servo.duty_u16(current_position)
            utime.sleep_ms(10)

def beep():
    buzzer.value(1)
    utime.sleep_ms(100)
    buzzer.value(0)

def get_distance():
    trigger.low()
    utime.sleep_us(2)
    trigger.high()
    utime.sleep_us(10)
    trigger.low()

    timeout = utime.ticks_us()
    while echo.value() == 0:
        if utime.ticks_diff(utime.ticks_us(), timeout) > 30000:
            return -1

    start = utime.ticks_us()
    timeout = utime.ticks_us()

    while echo.value() == 1:
        if utime.ticks_diff(utime.ticks_us(), timeout) > 30000:
            return -1

    end = utime.ticks_us()

    duration = utime.ticks_diff(end, start)
    distance = (duration * 0.0343) / 2
    return distance

# ---------------- MAIN SYSTEM ----------------

print("Automatic Classification System Started")

while True:
    d = get_distance()

    if d > 0 and d < 30:  # Only act if there's a nearby object
        print("Distance:", round(d,2), "cm")

        led.value(1)
        beep()

        if d < 10:
            print("SMALL object")
            smooth_move(POS_SMALL)

        elif d < 20:
            print("MEDIUM object")
            smooth_move(POS_MEDIUM)

        else:
            print("LARGE object")
            smooth_move(POS_LARGE)

        # Wait before returning
        utime.sleep(2)

        print("Returning to home position...")
        smooth_move(POS_HOME)

        led.value(0)

        utime.sleep(1)  # Short pause before next reading

    utime.sleep(0.2)
The code implements an automatic classification system. The ultrasonic sensor measures distance, and based on the value (<10cm, <20cm, or <30cm), the servo moves to different positions (small, medium, large). An LED and buzzer provide feedback, and the servo returns to home position after each detection. The `smooth_move()` function creates gradual movement instead of abrupt jumps.
Function Test
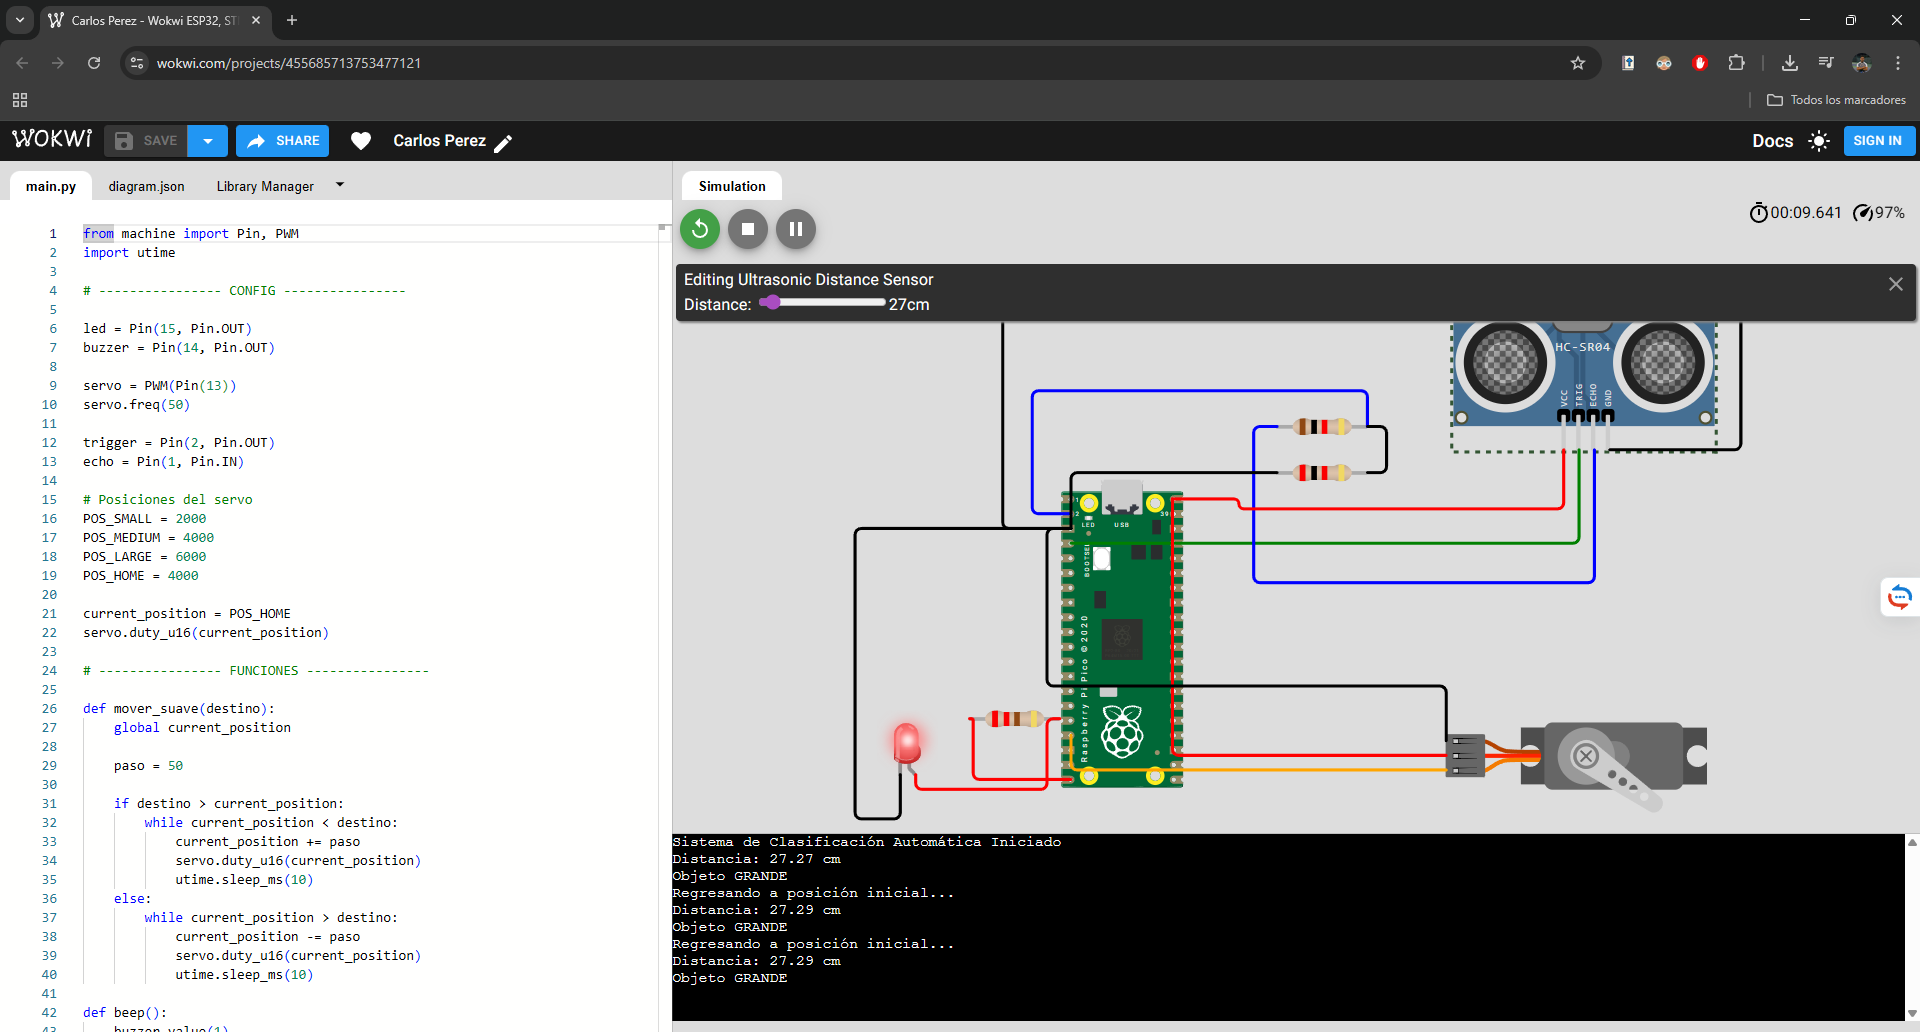
When an object is detected within range, the system identifies its size category, activates the LED and buzzer, moves the servo to the corresponding position, waits, and then returns home. The serial monitor shows real-time distance readings and actions.
Wokwi Project Simulation
The Wokwi project includes the complete MicroPython code and diagram. You can test and modify it directly in the browser. The system demonstrates a complete input-processing-output cycle with ultrasonic sensor (input), servo motor (output), LED/buzzer (feedback), and serial communication.
Code in C++ Raspberry Pi Pico
IA Support
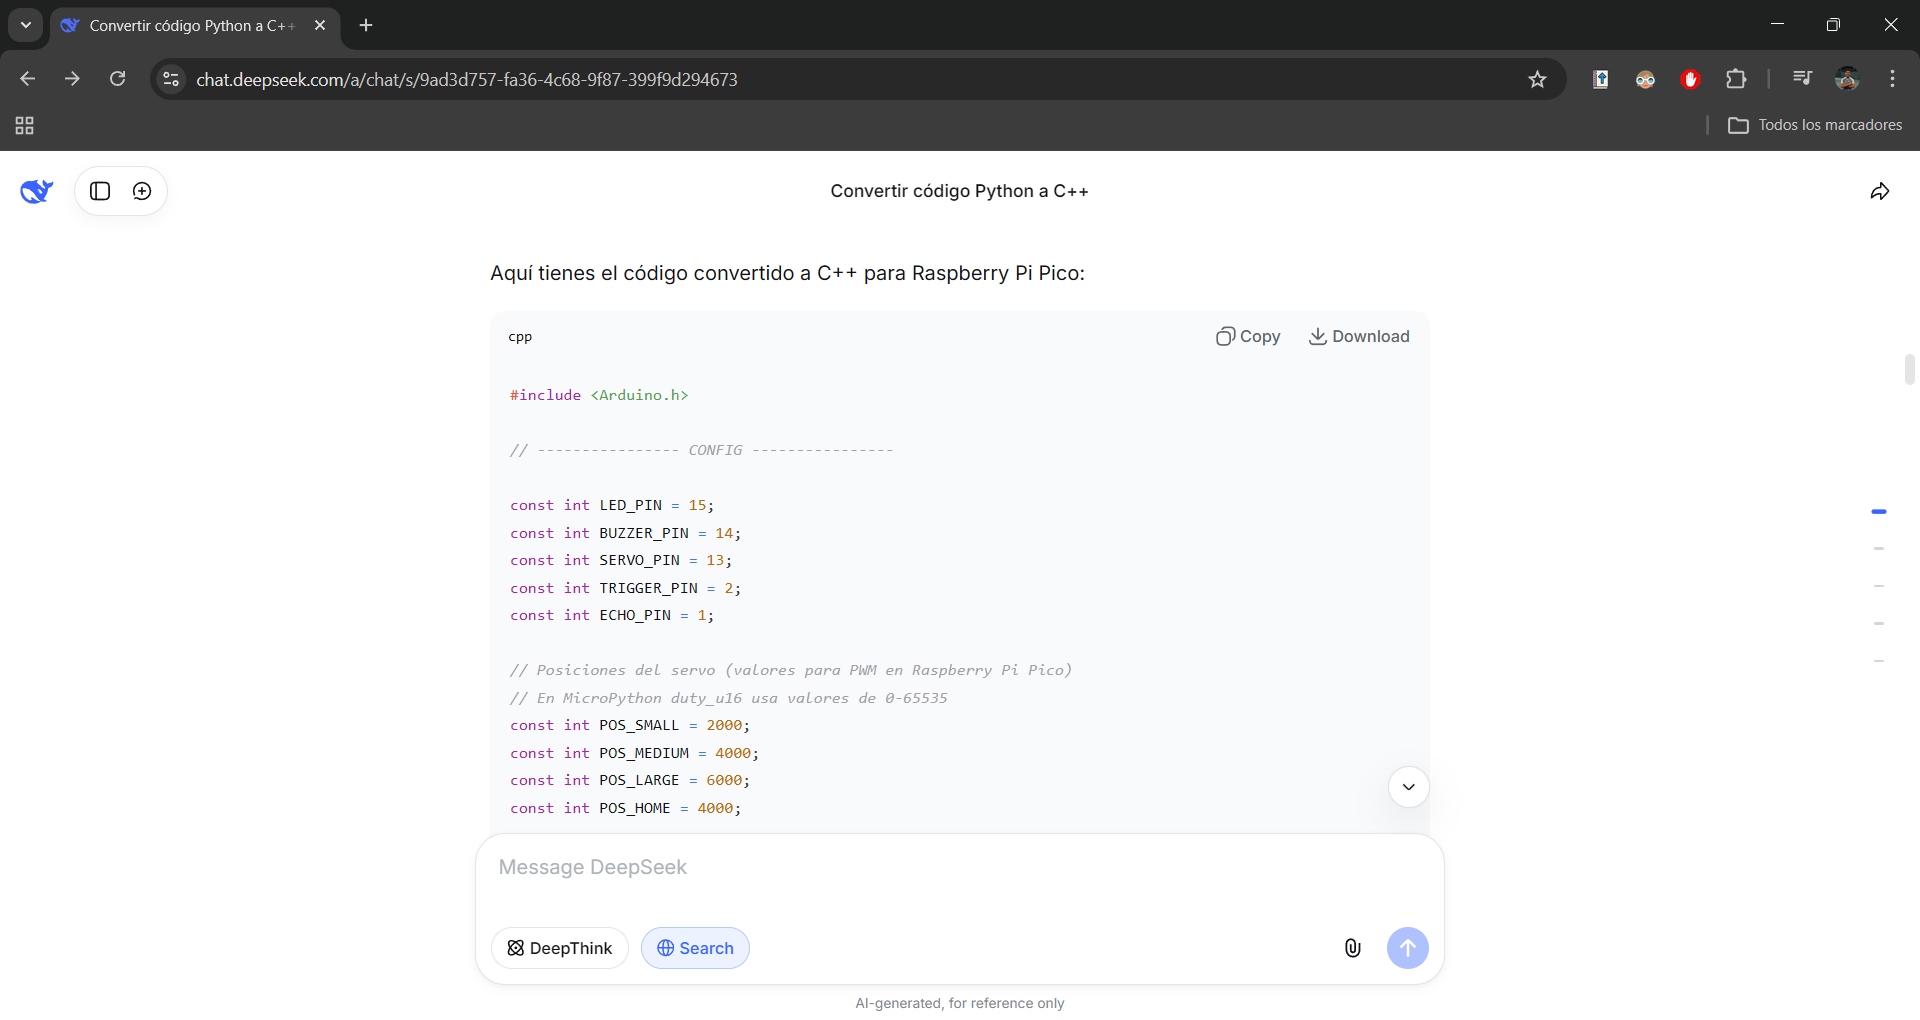
I requested assistance from AI to convert the MicroPython code to C++ because, although my experience focuses on physical design, 3D modeling and digital manufacturing, I needed to adapt the automatic classification system to a language more compatible with certain modules in the lab. AI acted as a technical support tool that allowed me to quickly overcome the programming language barrier, understanding every change made and generating functional and well-documented code, which allowed me to keep the focus on my strengths as a designer while learning key C++ concepts for future projects.
Code Upload
We opened a new simulation environment. While maintaining the original structure of the diagram and its components, we have optimized operation by integrating new C++ code developed with AI assistance, which improves model accuracy.
Physical Test
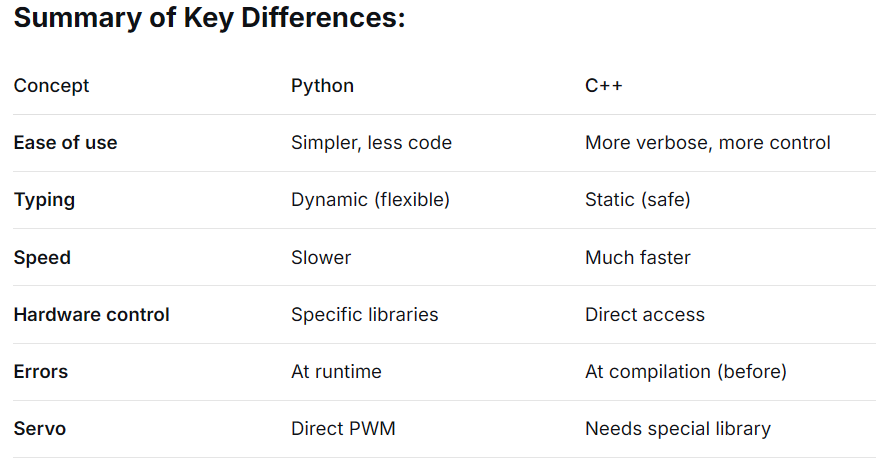
The following is a technical comparison between Python and C++. While C++ stands out for its robust structure and low-level control that optimizes performance, Python offers a more intuitive high-level syntax, making development time and learning curve significantly easier.
Wokwi Project Simulation
This project in Wokwi integrates the hardware scheme with a firmware developed entirely in C++. The system allows for real-time testing and modification from the browser, running a complete input-processing-output cycle: data capture by ultrasonic sensor, motion control with servo motor, and immediate feedback via LED, buzzer and serial communication.
Physical programming Arduino Nano
Arduino IDE

We copied the AI-generated code into C++ and pasted it directly into the Arduino IDE. The application automatically recognizes both the connection port and the microcontroller
Photo of the Ultrasonic Sensor
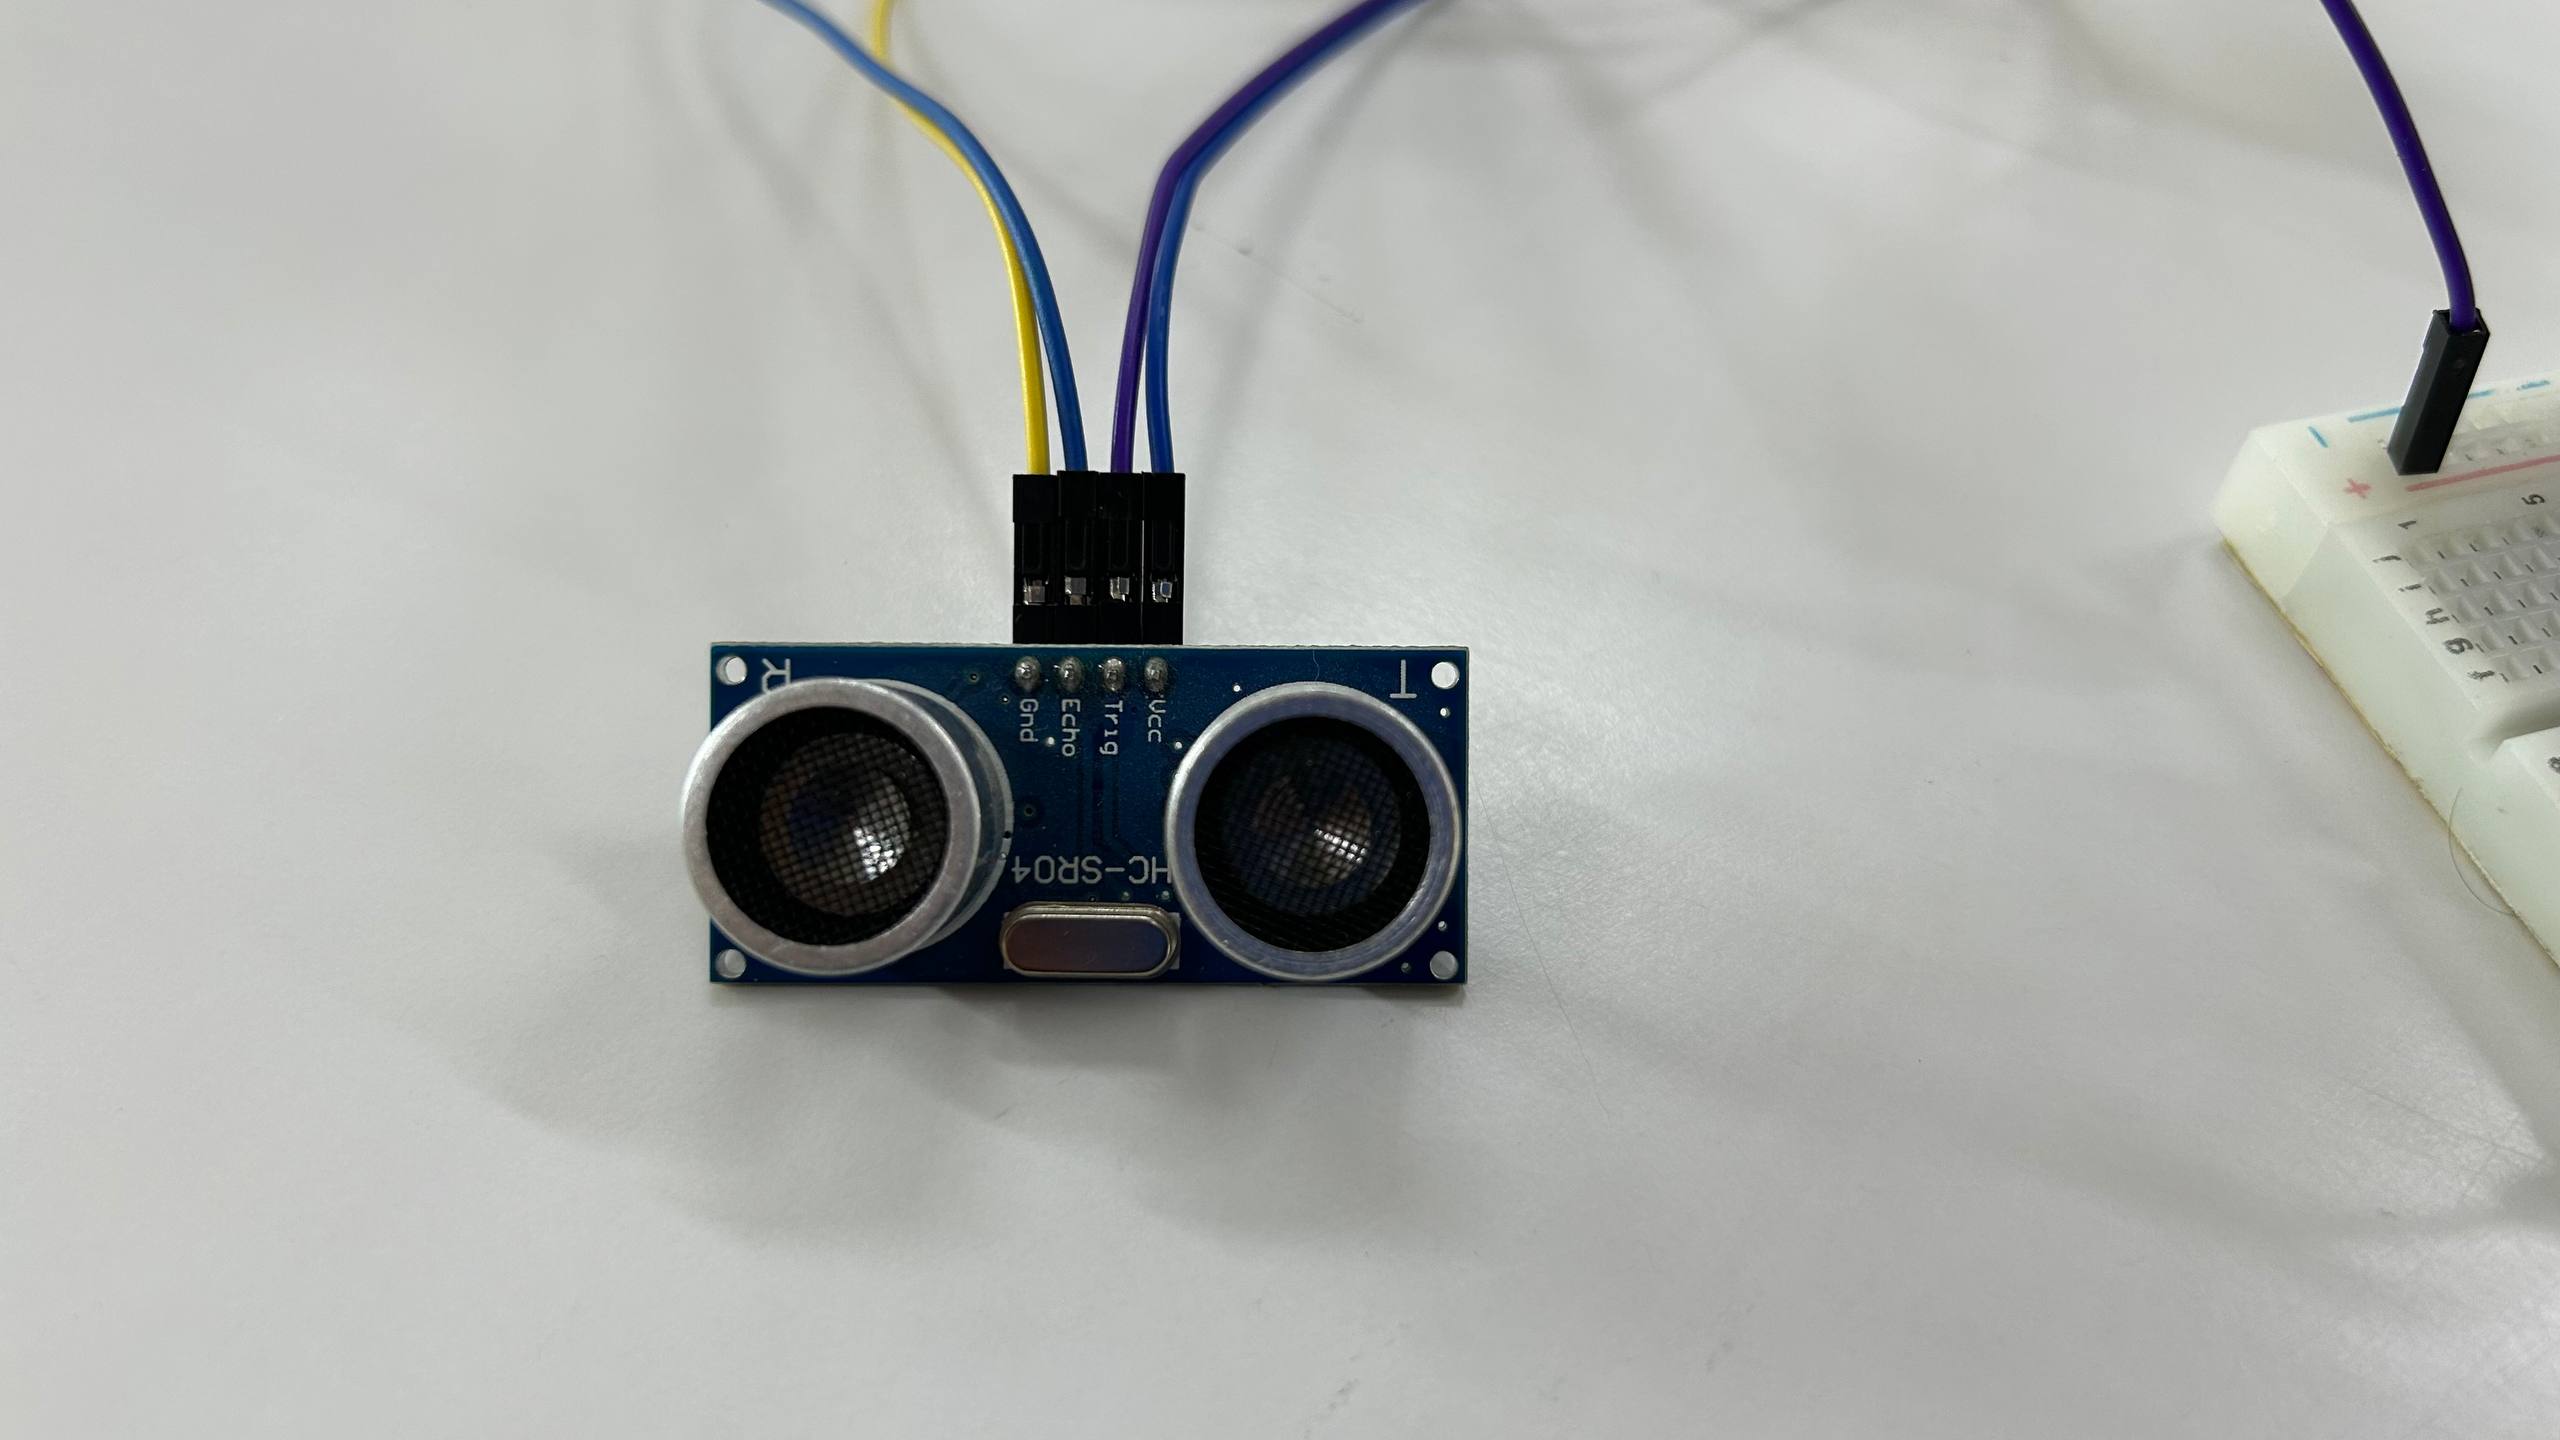
Photo of the Servo
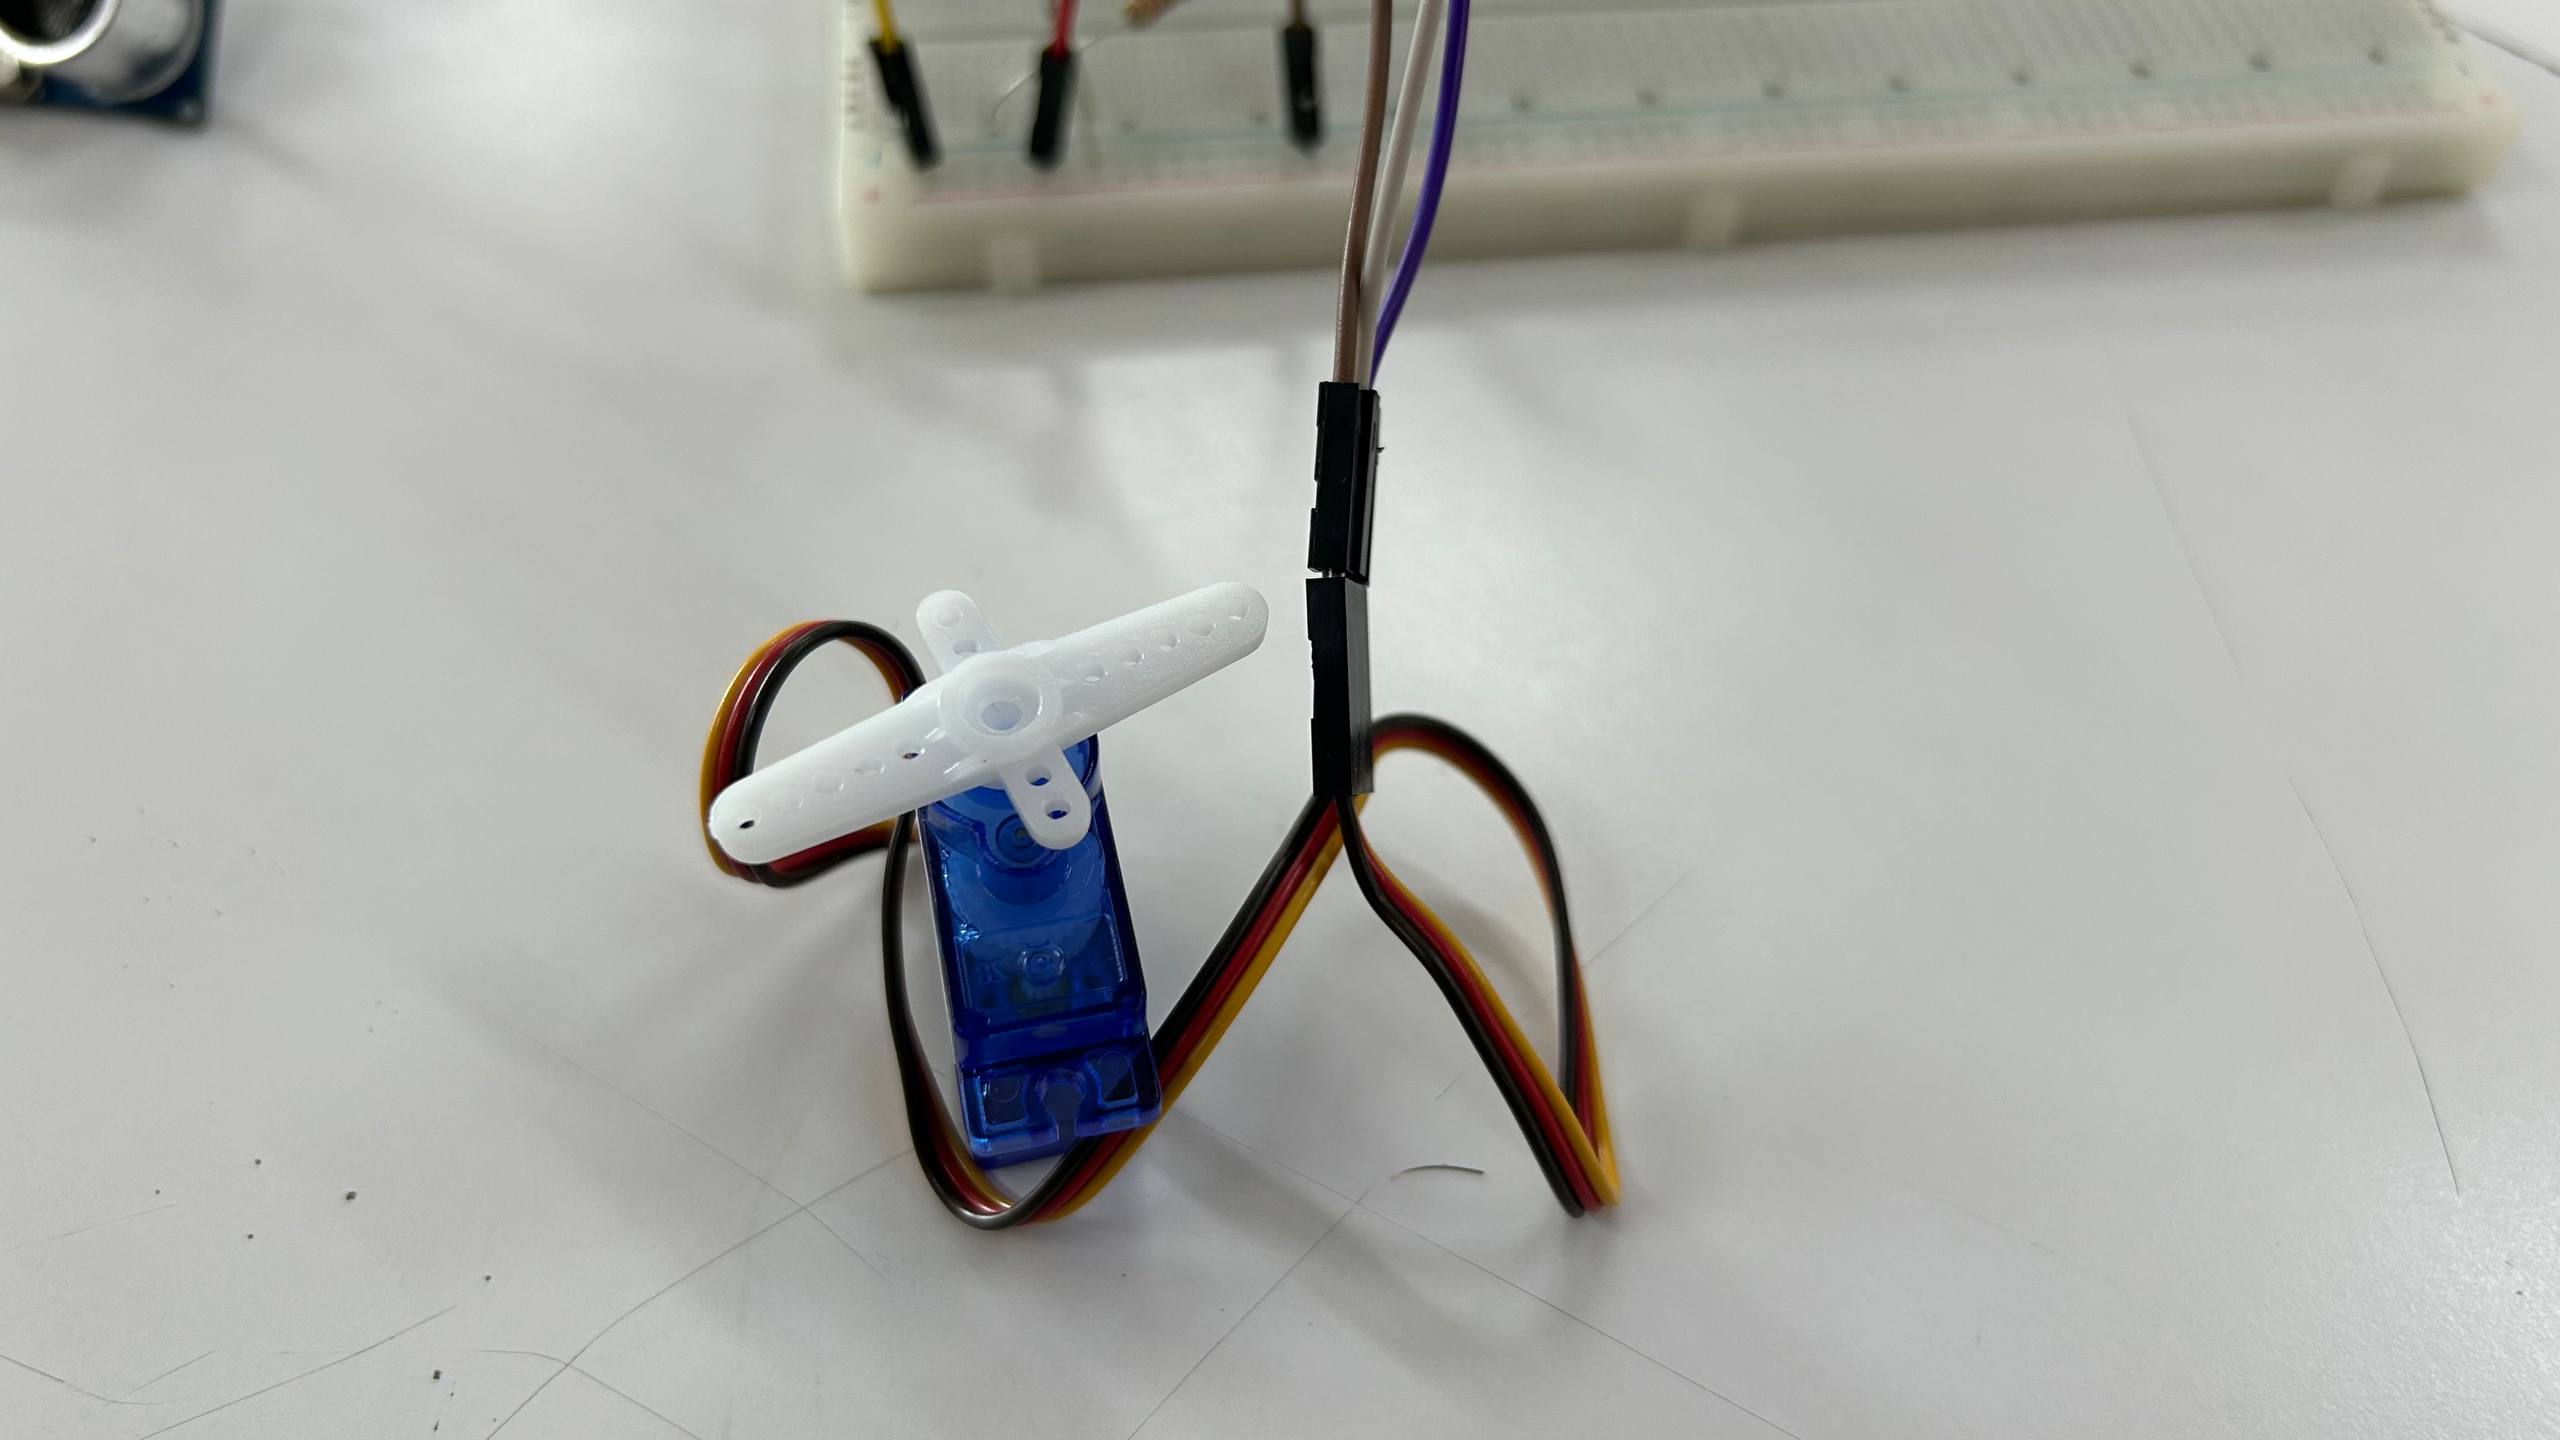
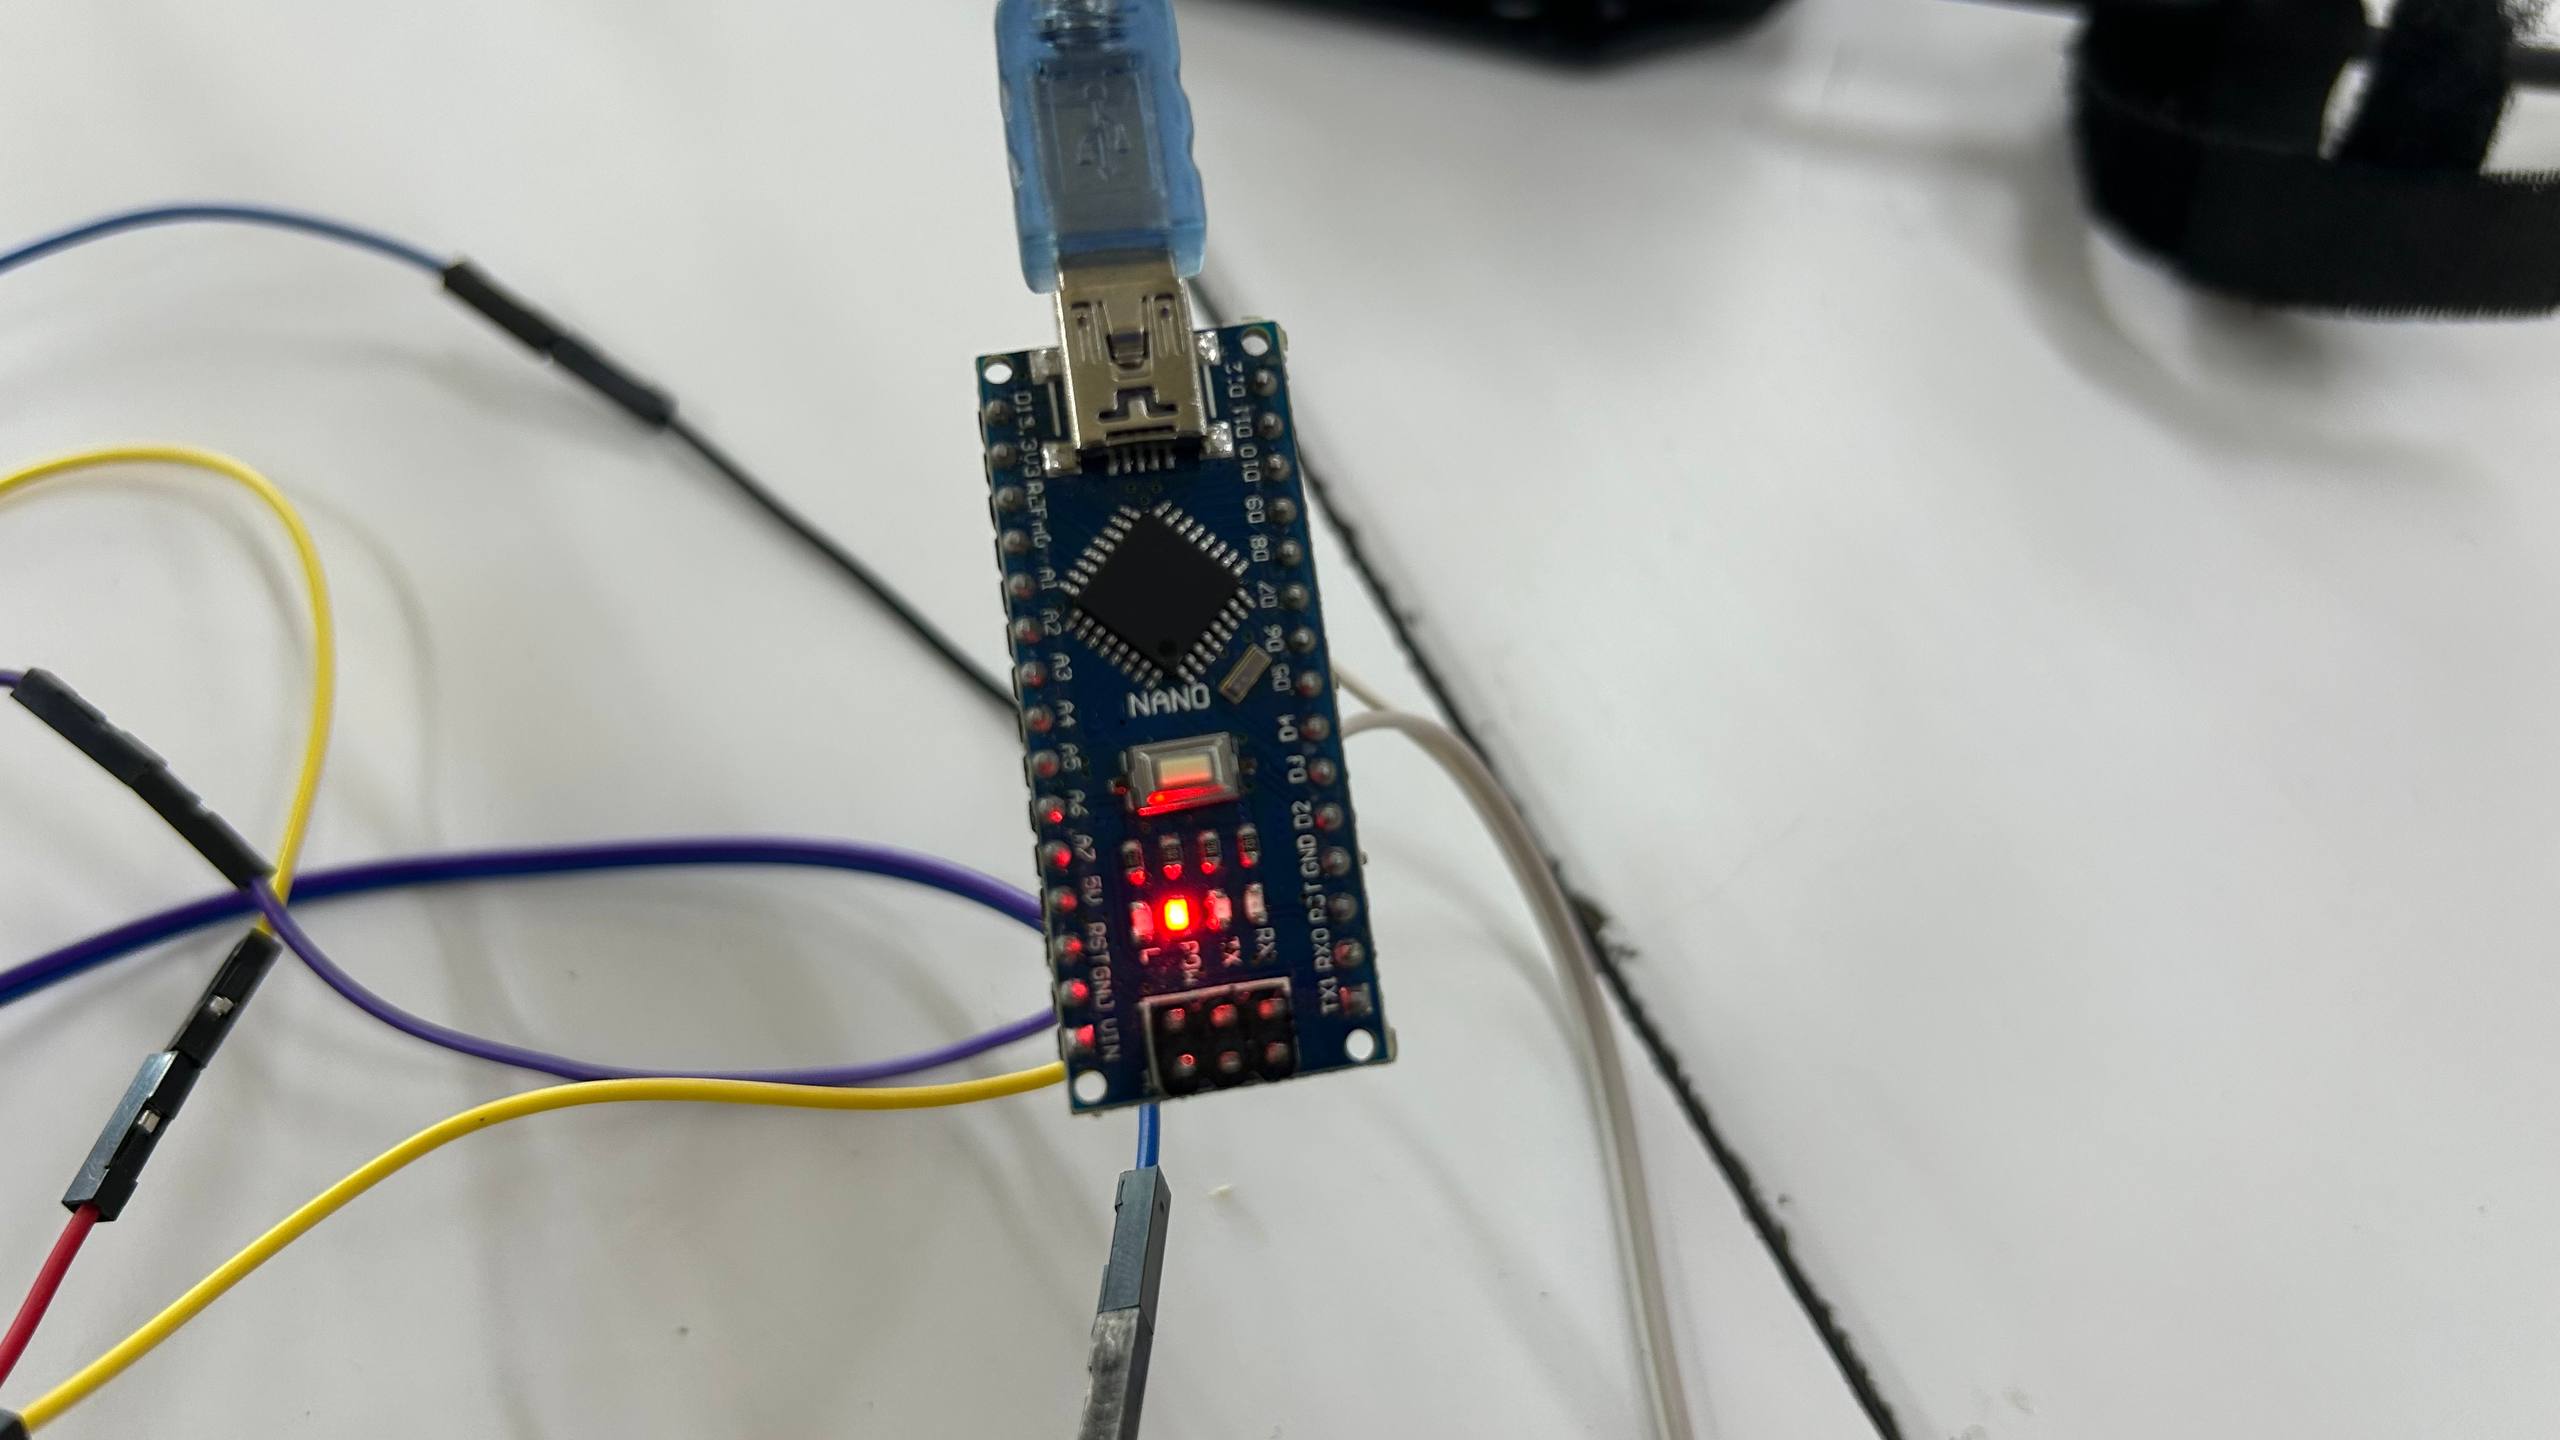
Photo of the Arduino Nano
Physical Test
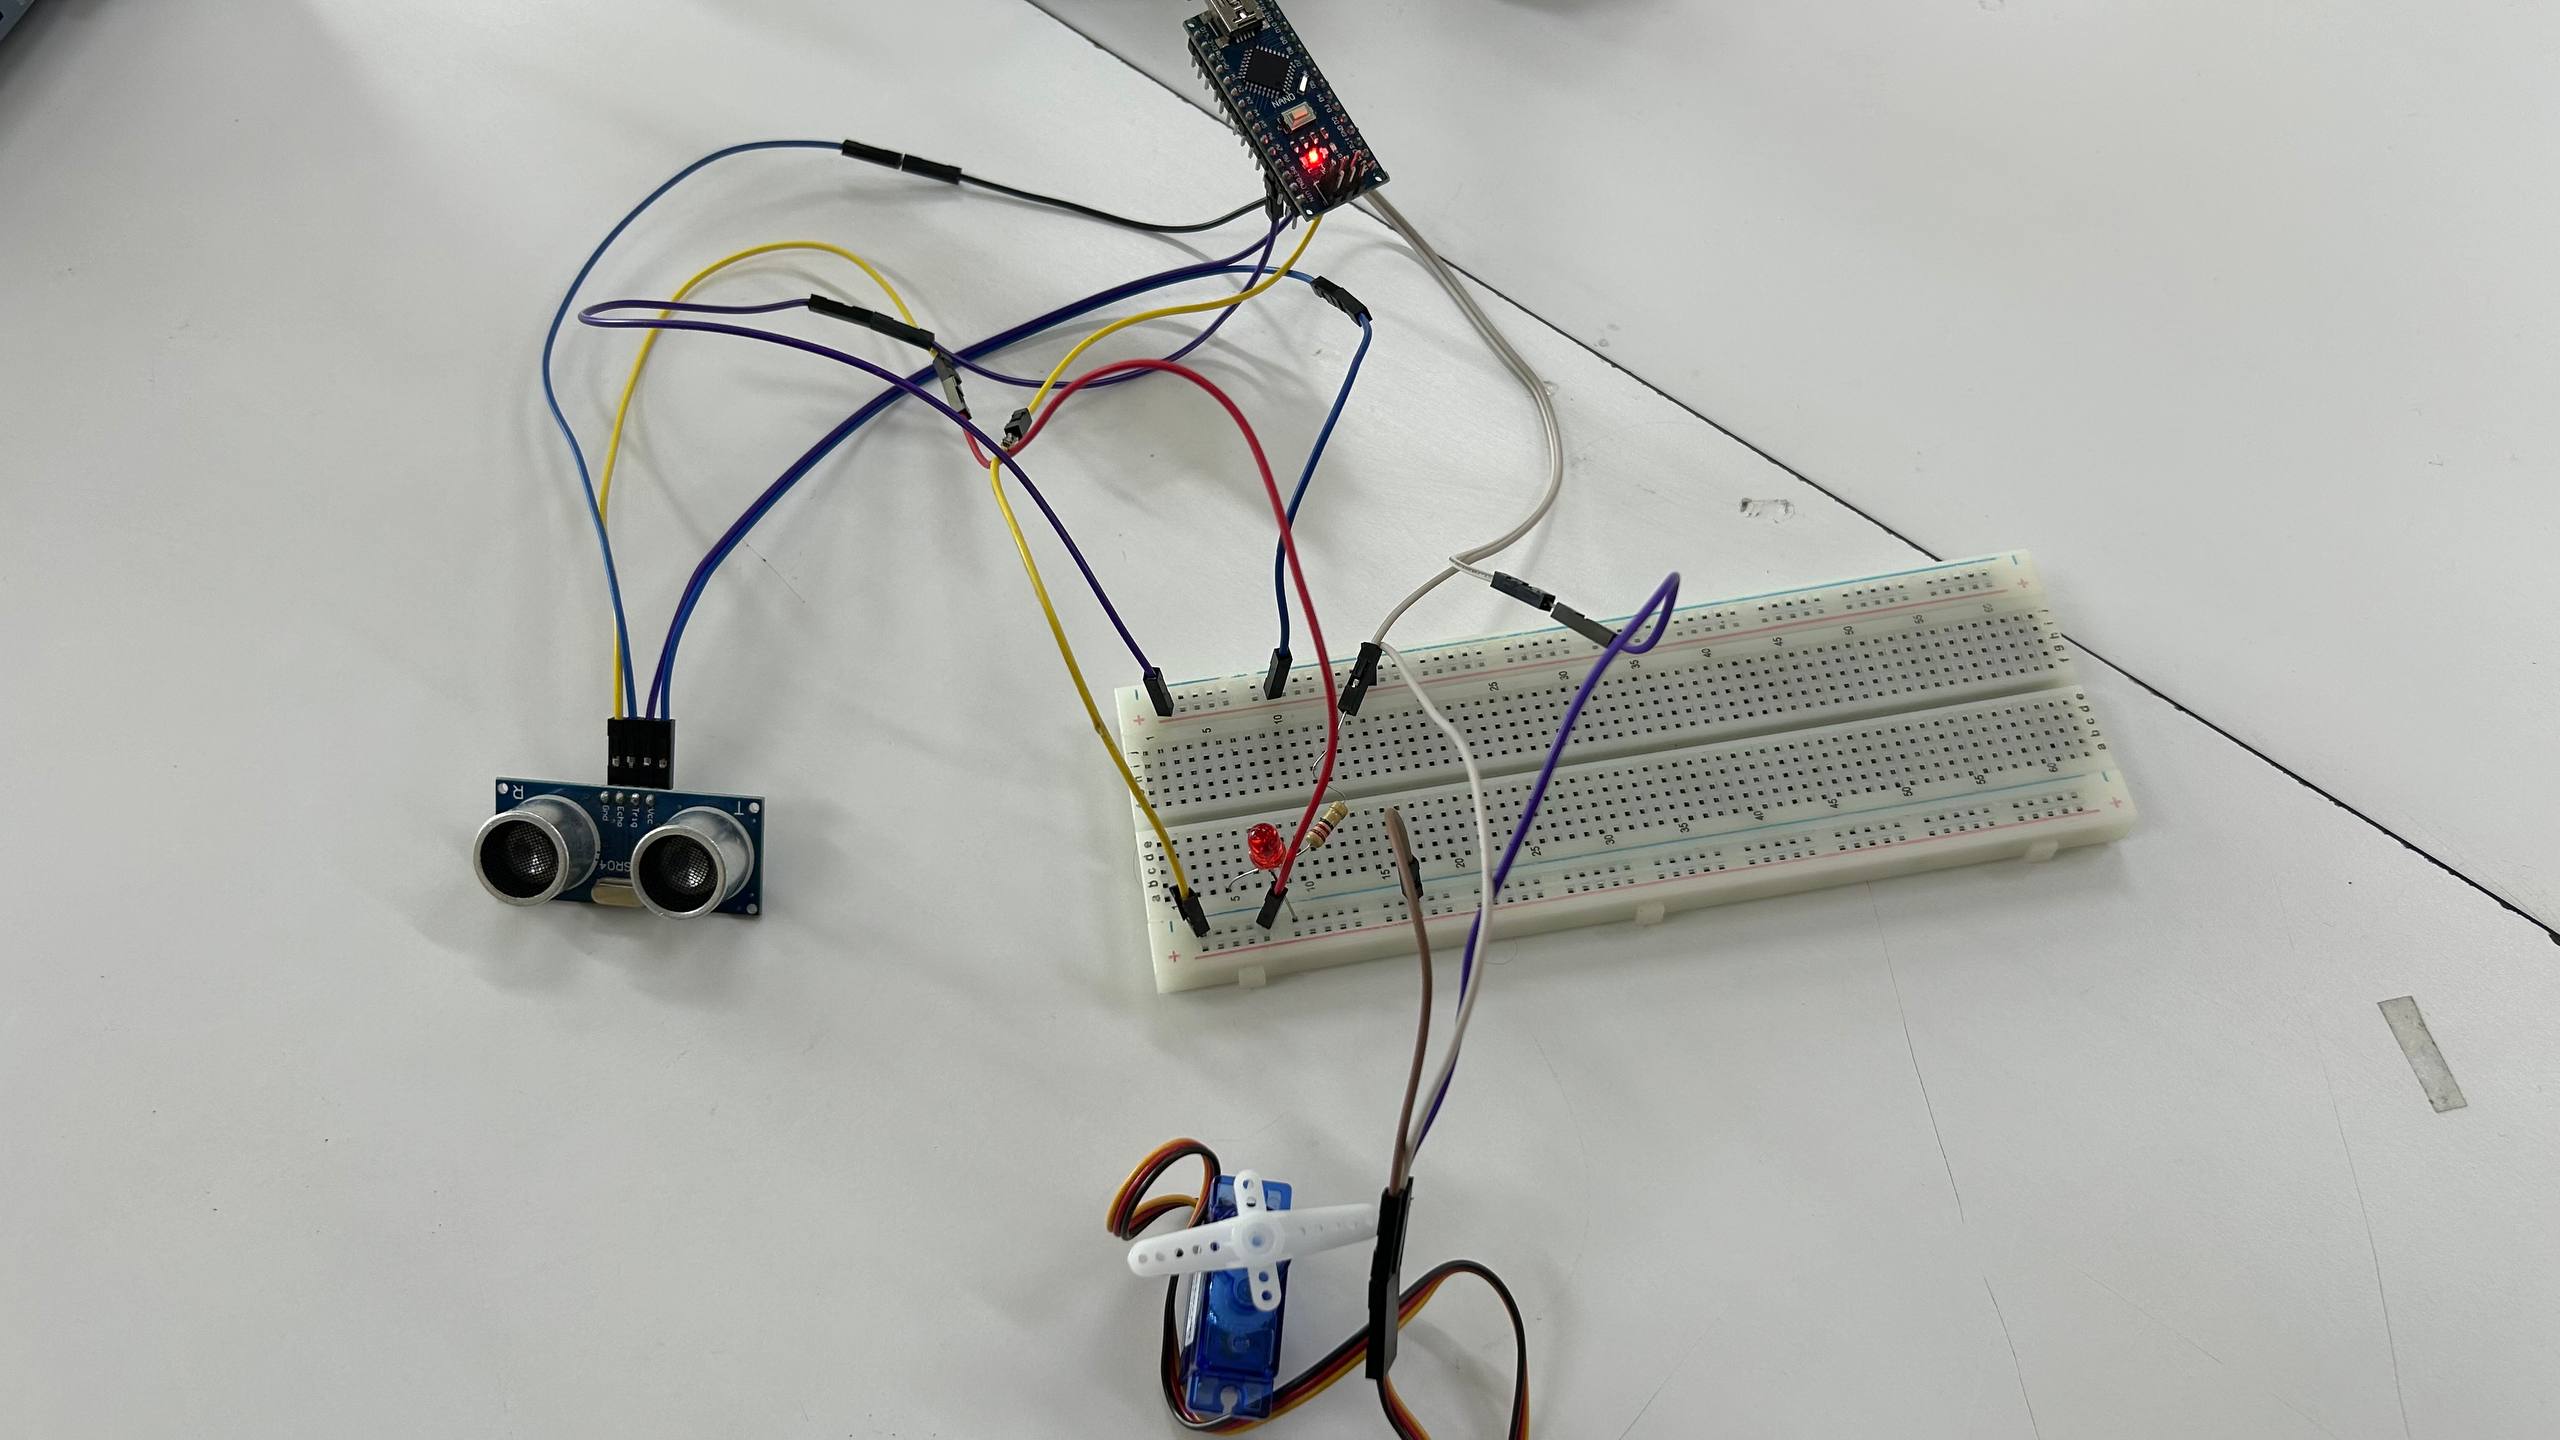
After wiring the components on the protoboard, we proceeded to load the code into the microcontroller. Once programmed, the system was ready to be energized.
Video
The video shows the implemented programming logic: the ultrasonic sensor detects objects at a certain distance, which activates an LED and positions the servo motor at 180 degrees. When the object is no longer detected, the system returns to its initial state. This mechanism represents the core of the ball collection system.
Conclusions Learnings
This week I learned to:
- Read datasheets: Identify key features of a microcontroller to choose the right one.
- Use Wokwi: Simulate circuits and code before moving to hardware.
- Program in MicroPython: Control inputs (button) and outputs (servo) and display information on serial monitor.
The next step is to integrate more sensors and motors for the ball picking machine, but this foundation with the Raspberry Pi Pico and MicroPython is a good starting point.