Documentation: Learnings & Methodology
This week we explored 2D vectorization, parametric 3D modeling, and efficient asset compression. Below we detail the unique approach, selected tools rationales, and comparative analysis against alternatives.
Key Learnings & Uniqueness
Manual vectorization vs automated tracing: We discovered that while Inkscape provides automatic bitmap tracing, Affinity Photo demands manual drawing, resulting in higher precision for complex edges. This hybrid approach taught us the value of intervention in critical projects.
Parametric patterns: Using rectangular/ circular patterns in Fusion 360 and Onshape reduces design time by 70% and ensures design consistency — a crucial industrial design principle.
Compression without quality loss: Our experiments with JPEGmini and FreeConvert showed a 35% size reduction with imperceptible visual difference, essential for web-based portfolios.
Methods Employed
- Raster-to-Vector workflow: Import → Layer separation → Manual tracing (Affinity) / Brightness threshold tuning (Inkscape).
- Constraint-based sketching: Fully defined sketches with dimensional constraints to enable parametric edits.
- Extrude & Pattern strategy: Extrude main body → Apply feature patterns to avoid redundant sketching.
- Fillet sequencing: Applying fillets at the end to avoid geometry corruption.
- Lossy vs Lossless compress: Tested both JPEG & MP4 compression to balance size and visual fidelity.
Why These Tools Over Others?
Affinity vs Adobe Illustrator: Affinity offers one-time payment (no subscription) and faster performance on complex rasters. Chosen for budget efficiency and non-destructive RAW editing.
Inkscape vs CorelDRAW: Inkscape is free, open-source, and its "Trace Bitmap" tool gives fine-grained control over brightness steps — ideal for educational environments.
Fusion 360 vs SolidWorks: Fusion provides integrated cloud collaboration and generative design at no cost for students, while Onshape offers full cloud-native workflow accessible from any browser.
FreeConvert vs HandBrake: FreeConvert requires no installation, works instantly online and preserves metadata — perfect for quick academic submissions.
Technical Comparison: CAD Approaches
| Feature | Fusion 360 | Onshape | Inkscape | Affinity Photo |
|---|---|---|---|---|
| Type | Parametric 3D | Cloud Parametric | Vector Graphics | Raster/Vector Hybrid |
| Learning Curve | Moderate | Moderate | Low | Moderate |
| Auto-tracing | No (sketch based) | No | Yes (Bitmap Trace) | No (manual) |
| Best for | Mechanical parts | Collaborative design | Logos, diagrams | Photo-based vectorization |
| Cost (edu) | Free 1-year | Free | Free | One-time $70 |
Affinity Photo Raster Editing
Affinity is a professional design suite, its three tools (Photo, Designer and Publisher) stand out for perfect integration and smooth performance in complex projects. Why Affinity vs Photoshop? One-time purchase, better performance with large files, and native support for vector layers inside a raster document.
Import and Setup
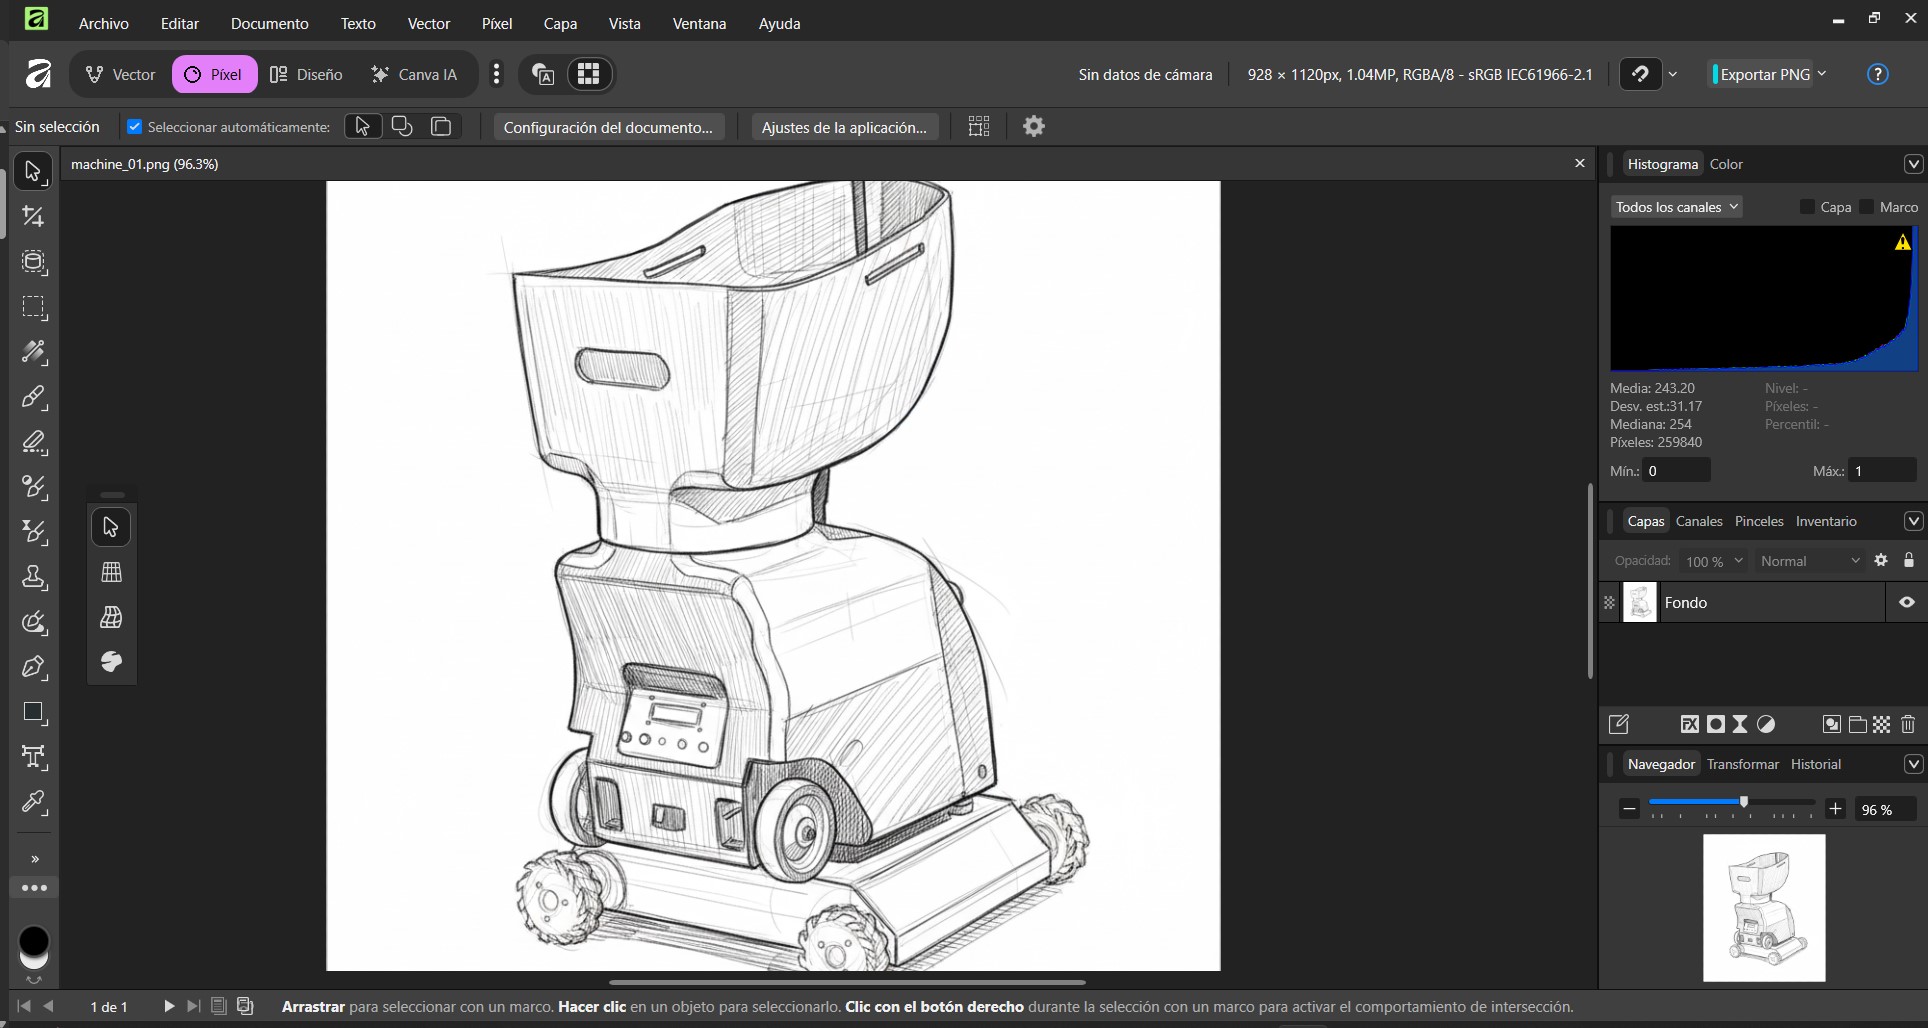
We import the image of our project, create a layer to be able to manually vectorize the drawing, since there is no option that automatically gives us the vector image.
Raster Editing
Once we have our vectorized image ready, we need to create a new layer to send it to the bottom of our layers, and in this one we can add color.
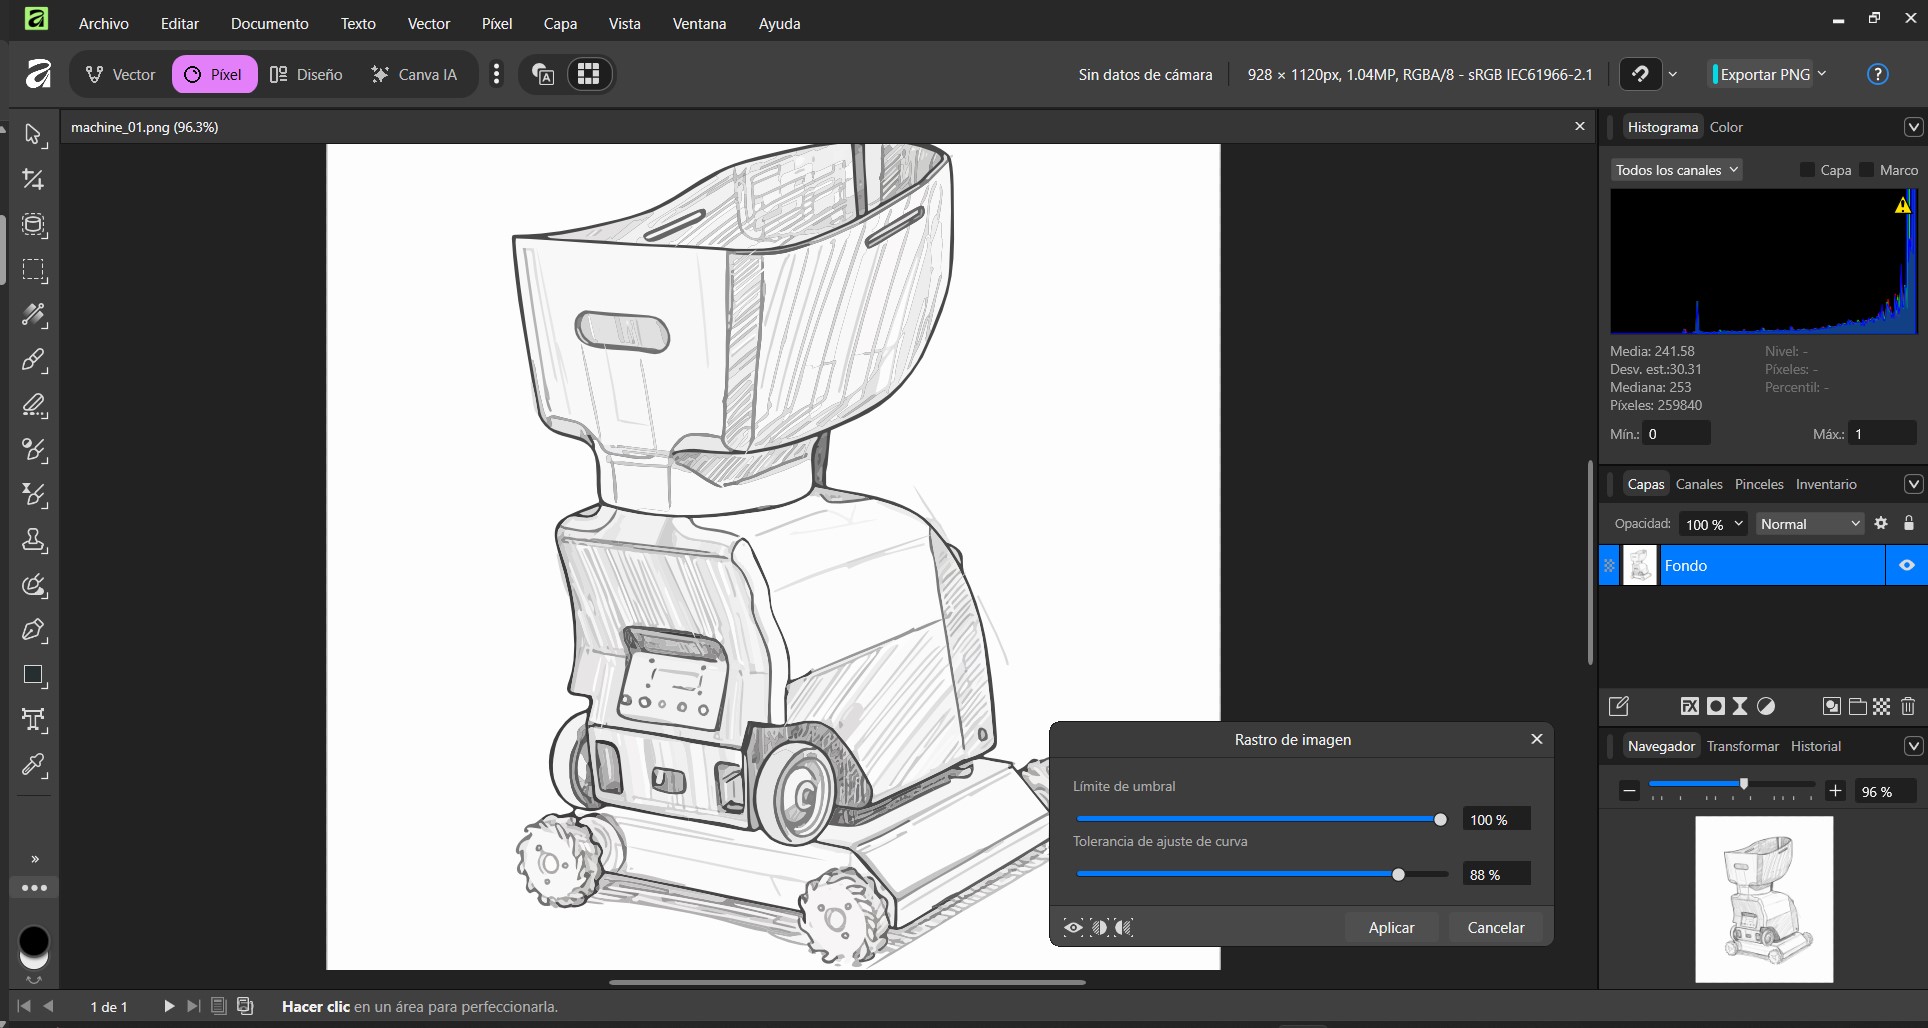
Check Quality
To export the image, the application gives us 3 options, JPEG, PNG or SVG, the latter is the vector format. For the file we have the format of AF File (.af)
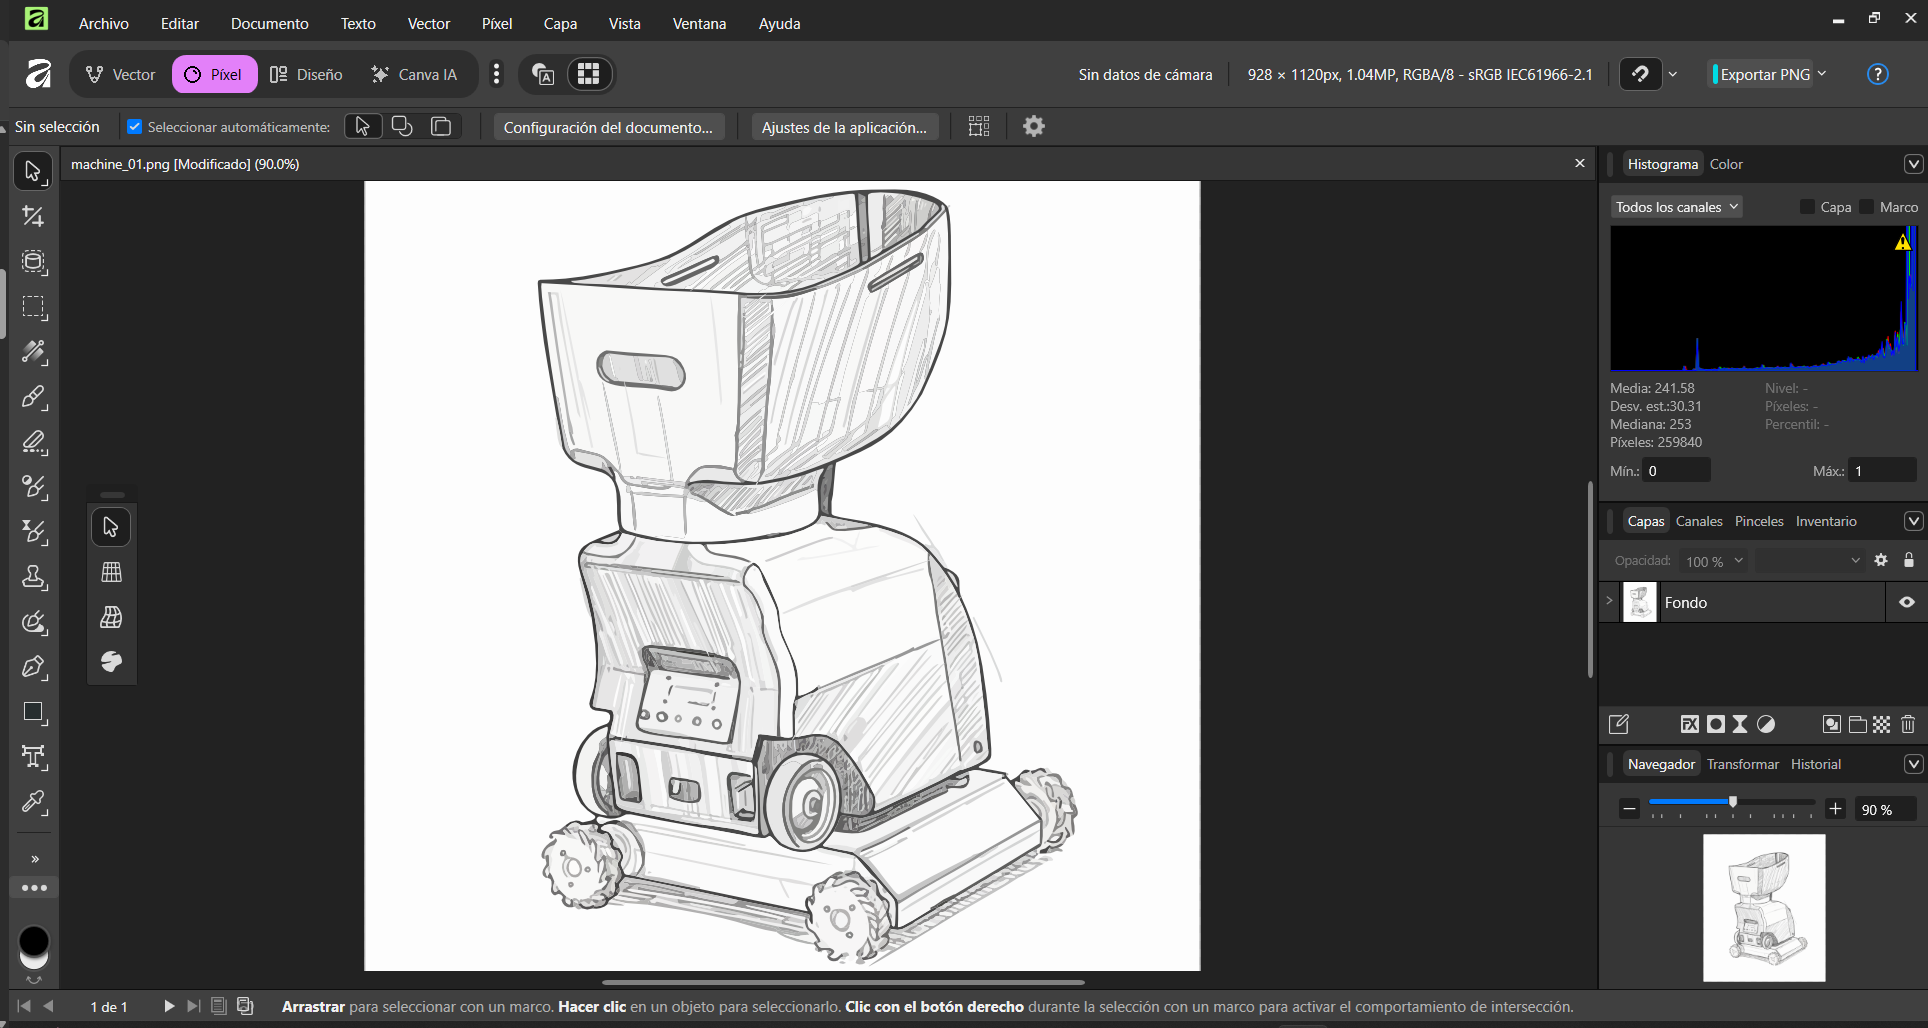
Export Optimization
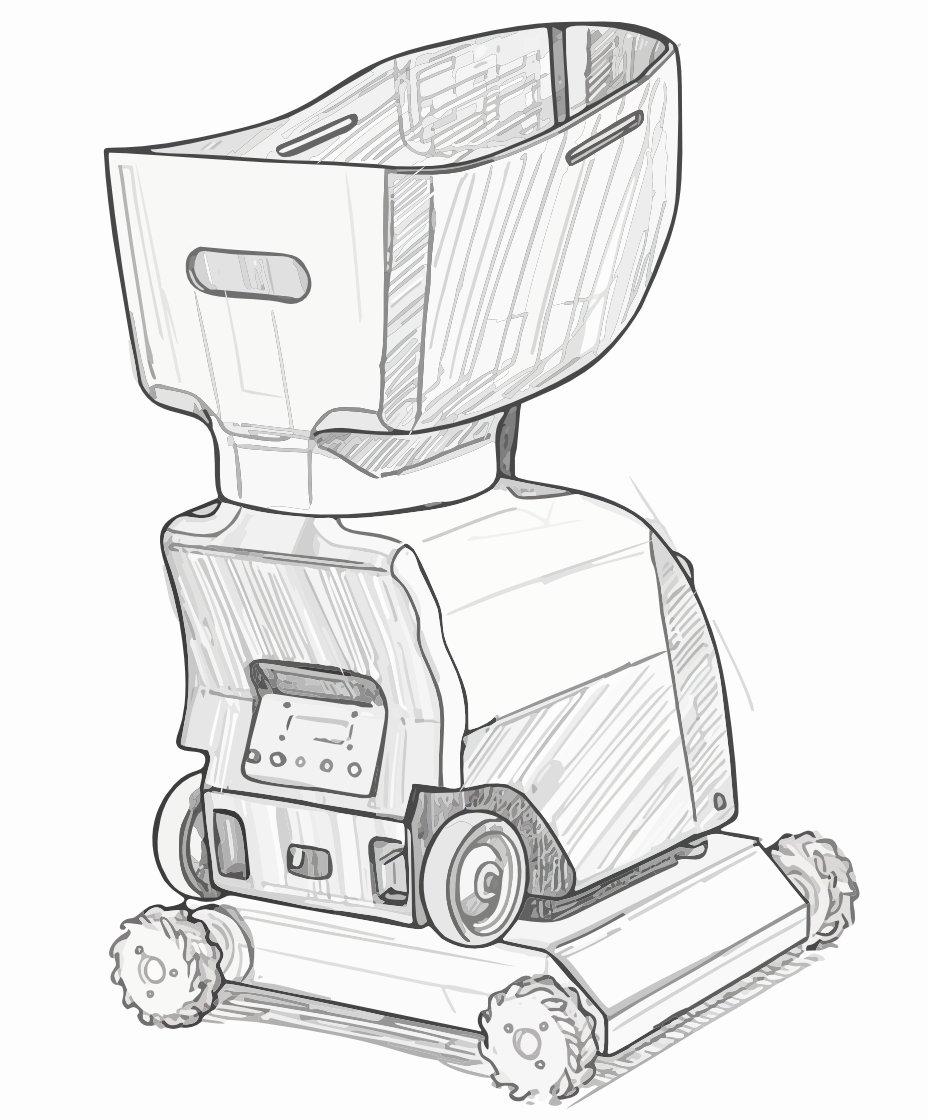
We export our file to a PNG format.
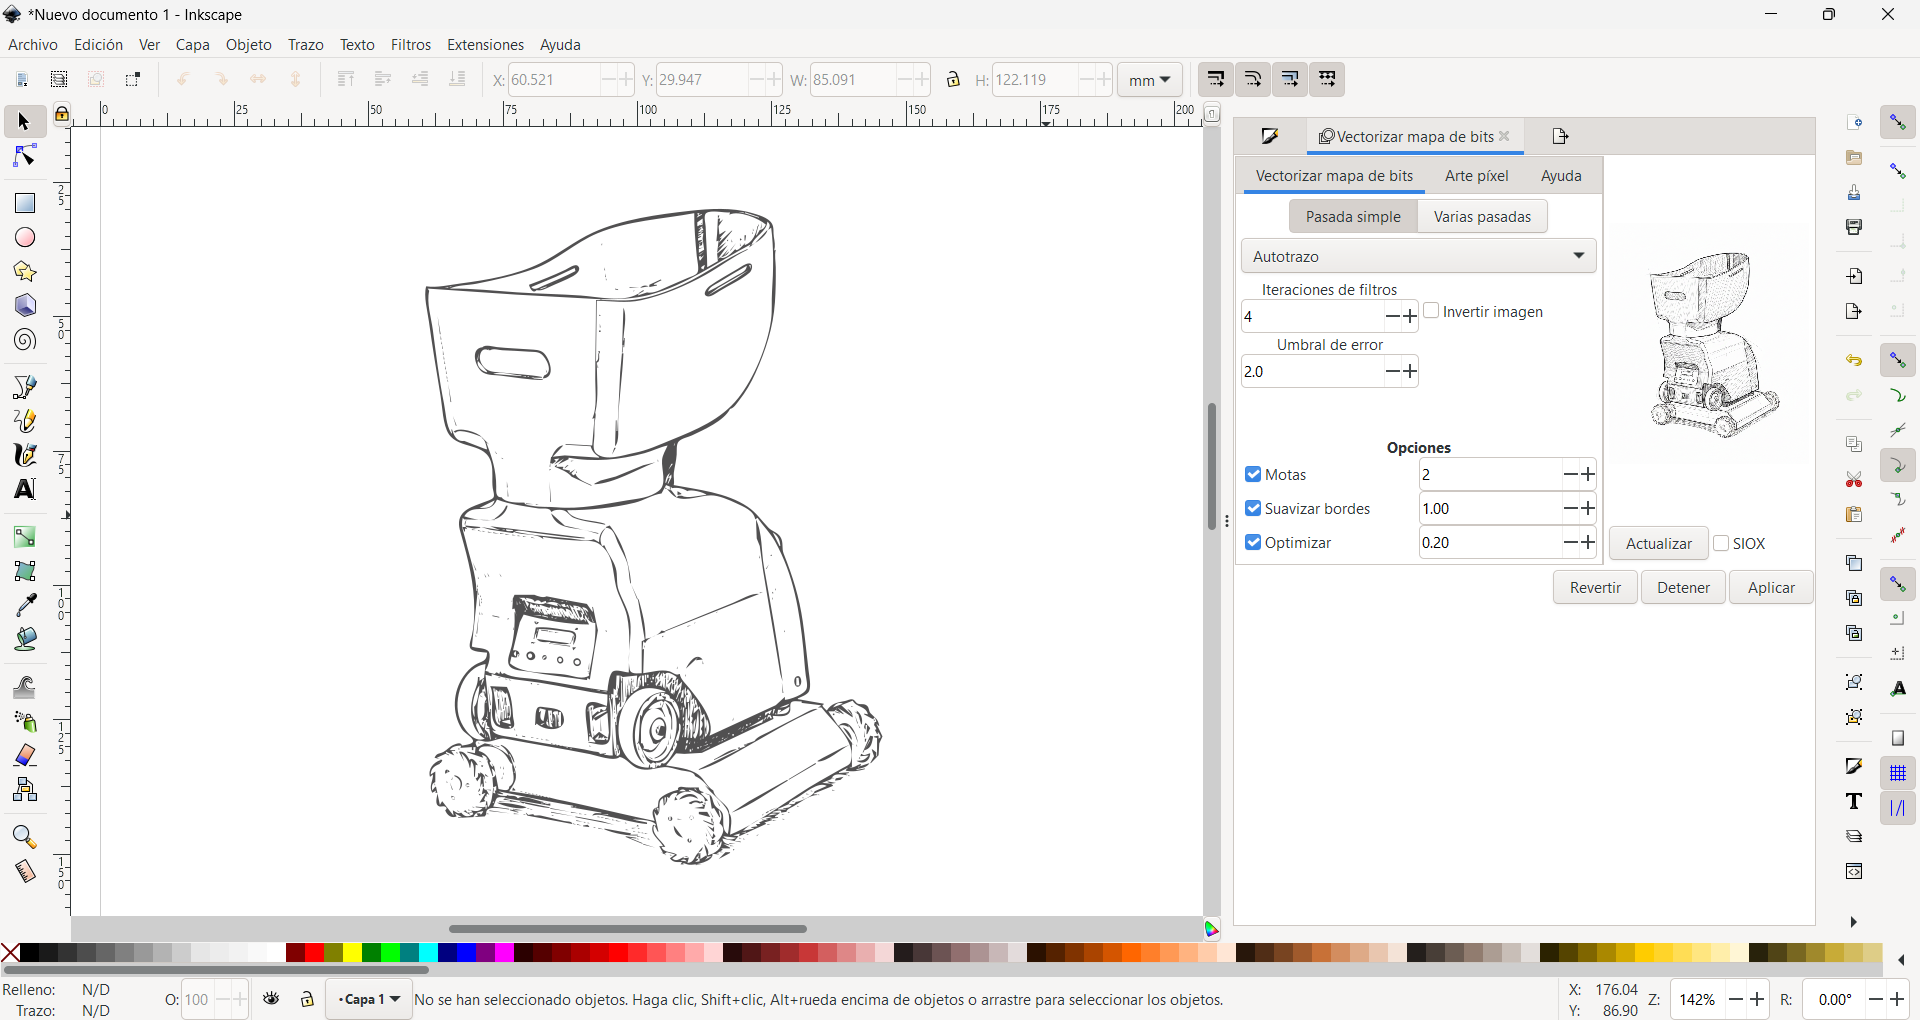
Inkscape Vector Graphics
Inkscape is free, open source vector editor. Unique advantage: The "Trace Bitmap" feature with multiple scanning options (brightness, edge detection) outperforms paid tools for certain illustrations.
Import and Setup
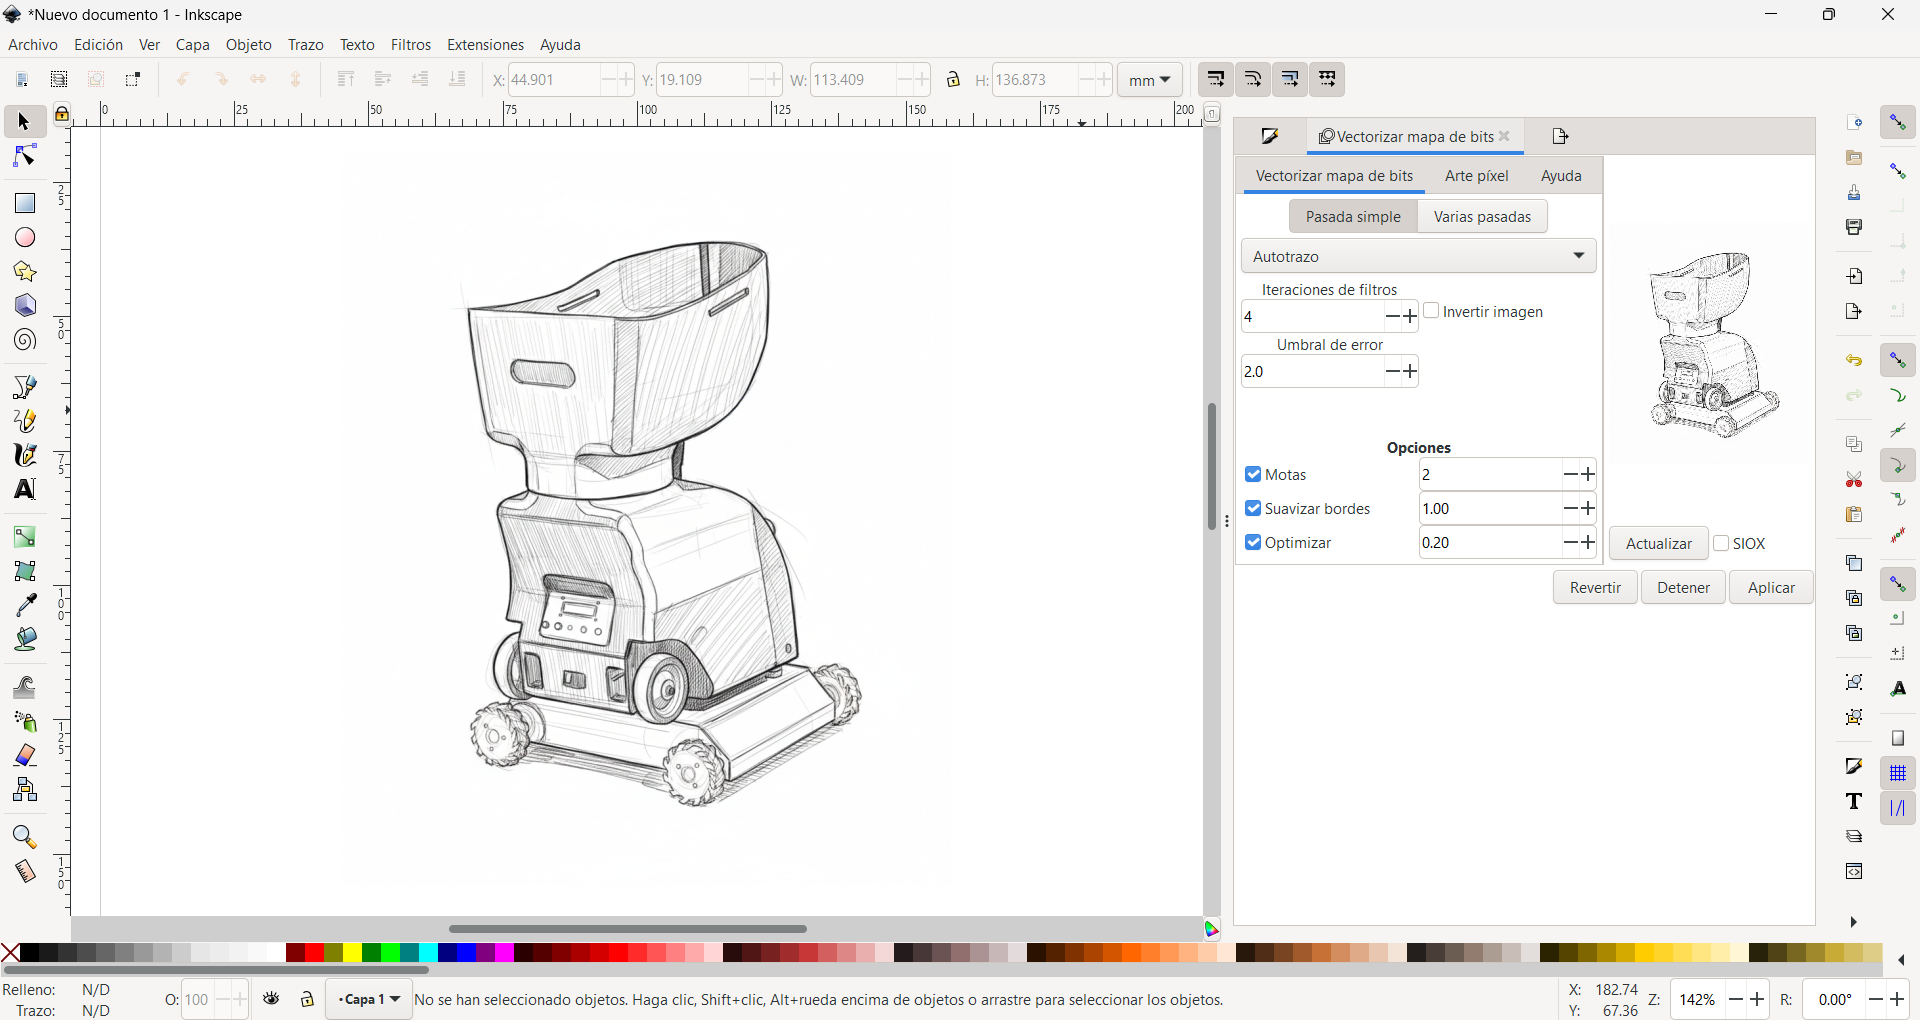
In Inkscape we open the application and import and embed our image that we want to use.
Bitmap Tracing
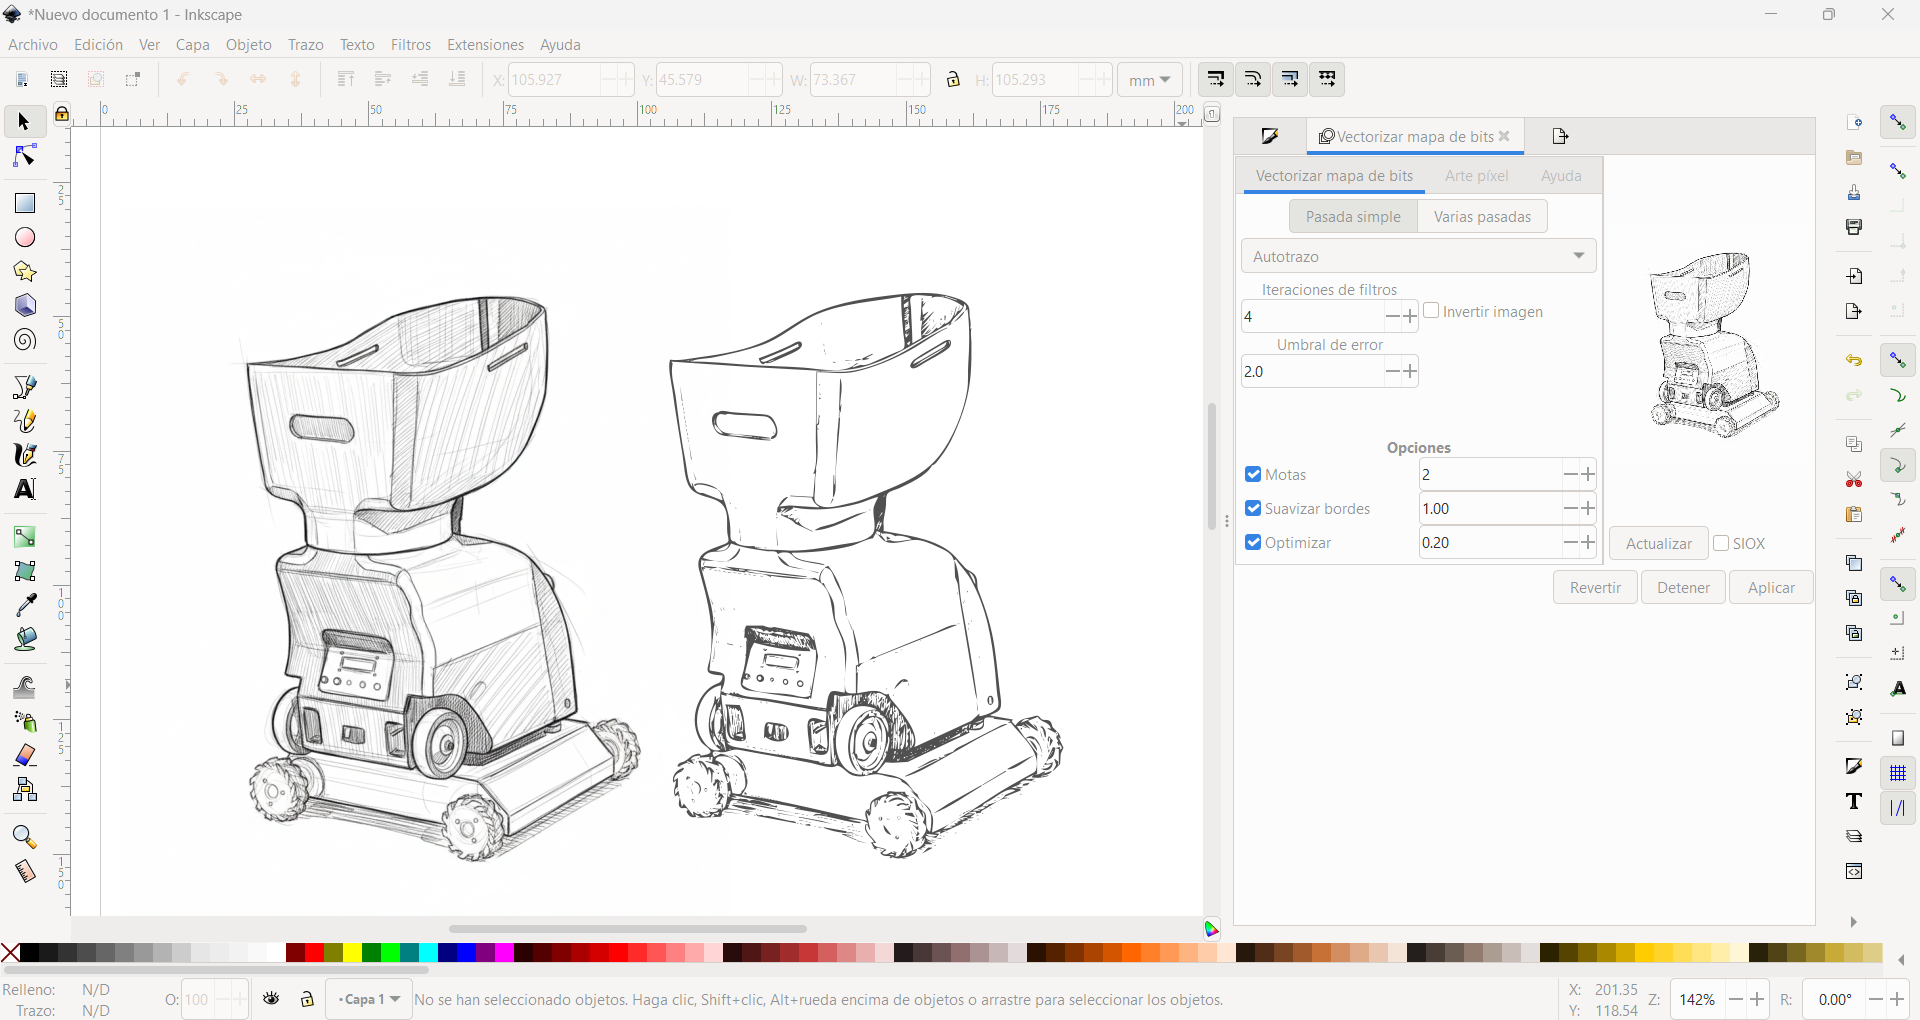
And the trace tab, we choose vectorize Bitmap, we open a panel where we can play with the brightness threshold to get a better vectorized.
Node Editing
Once we have the bitmap, we can edit the nodes, to match or modify the quality of these.
Export for Manufacturing
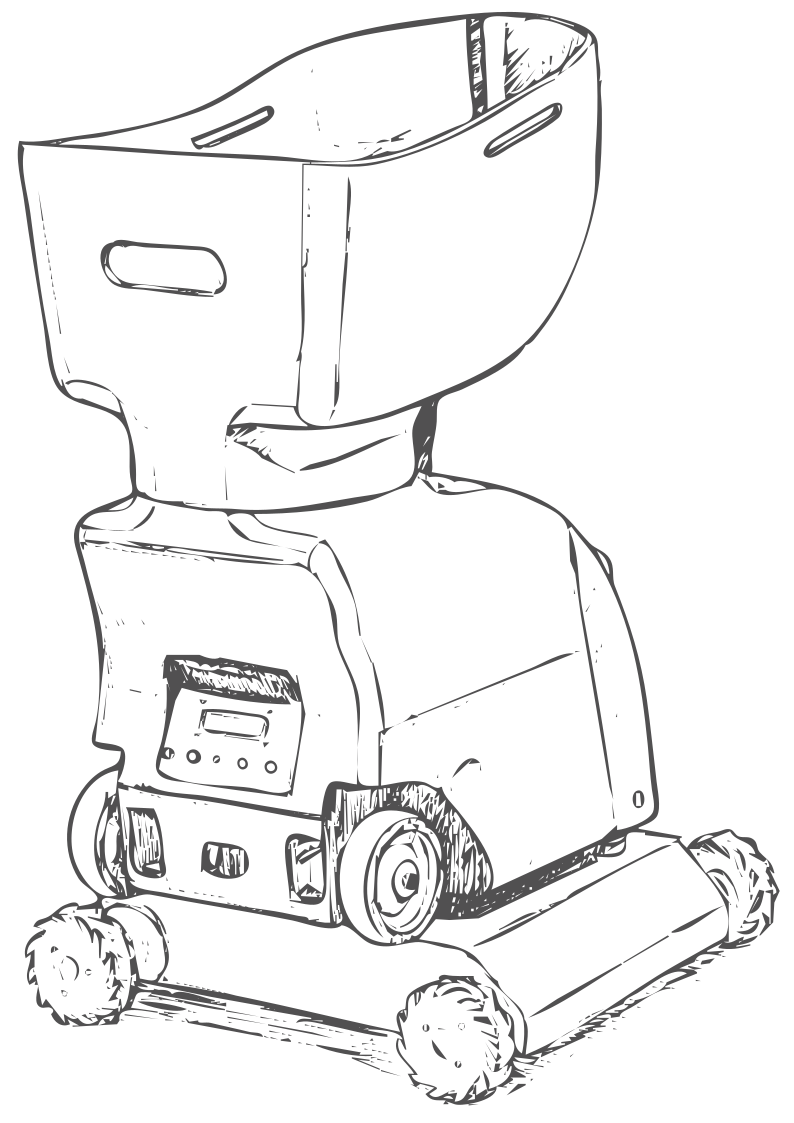
Configure SVG export for laser cutting or further editing.
Fusion 360 Parametric CAD
Parametric 3D modeling software for mechanical design and manufacturing. Why Fusion over SolidWorks? Free for students, integrated CAM, and cloud-based collaboration.
Constrained Sketch
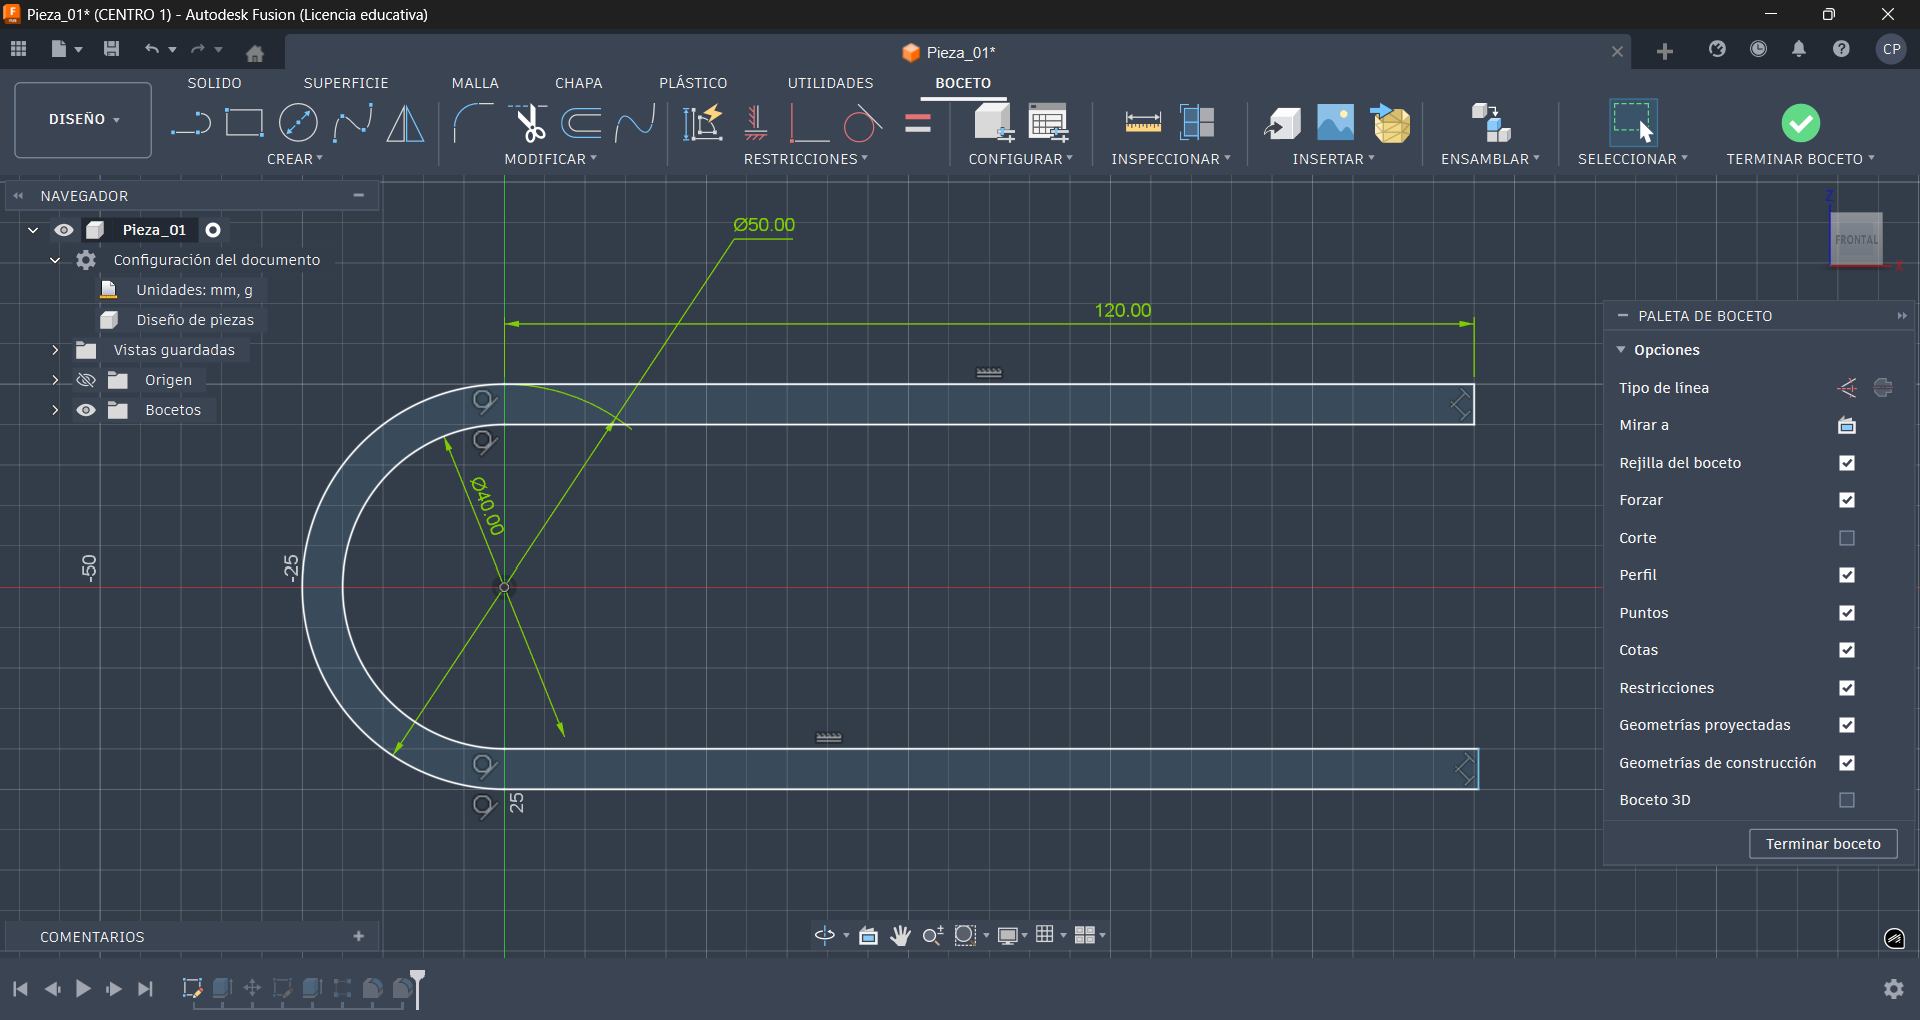
Create 2D sketch with geometric and dimensional constraints.
Extrusion to 3D
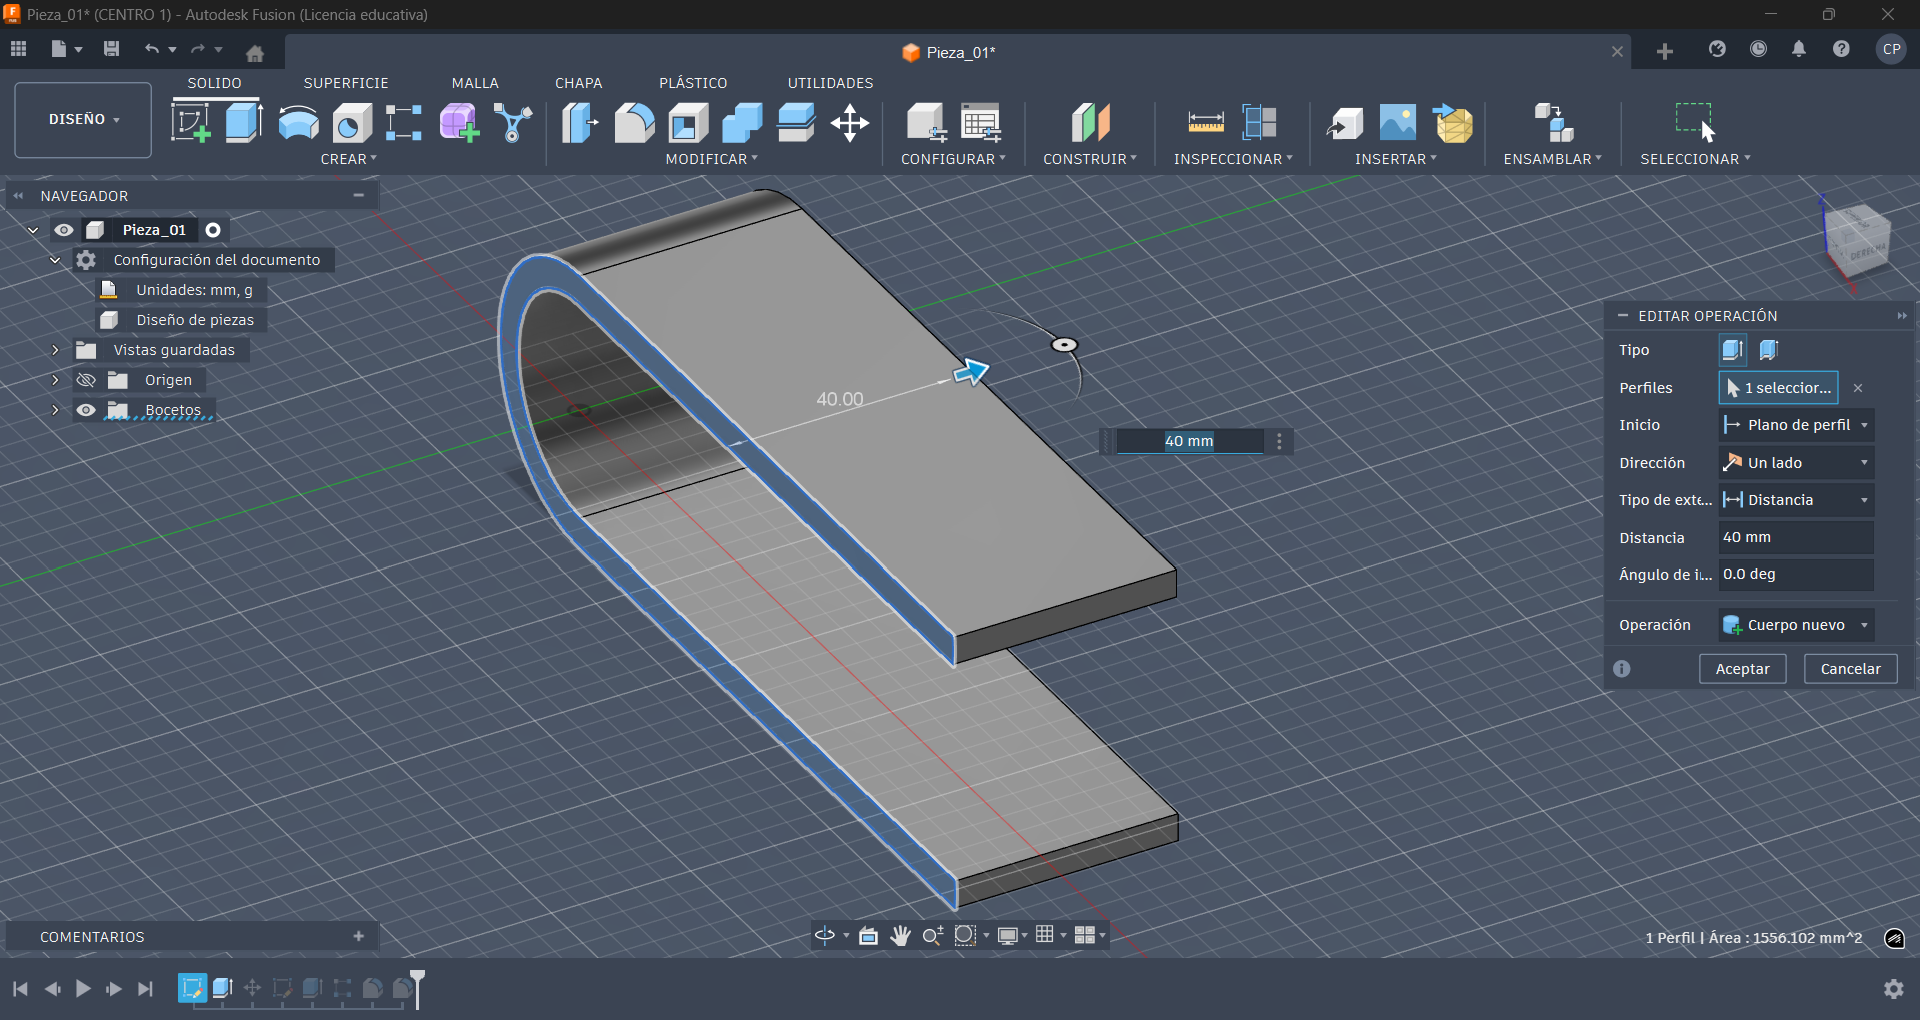
Extrude 2D profile with direction, taper angle, and operation options.
Pattern
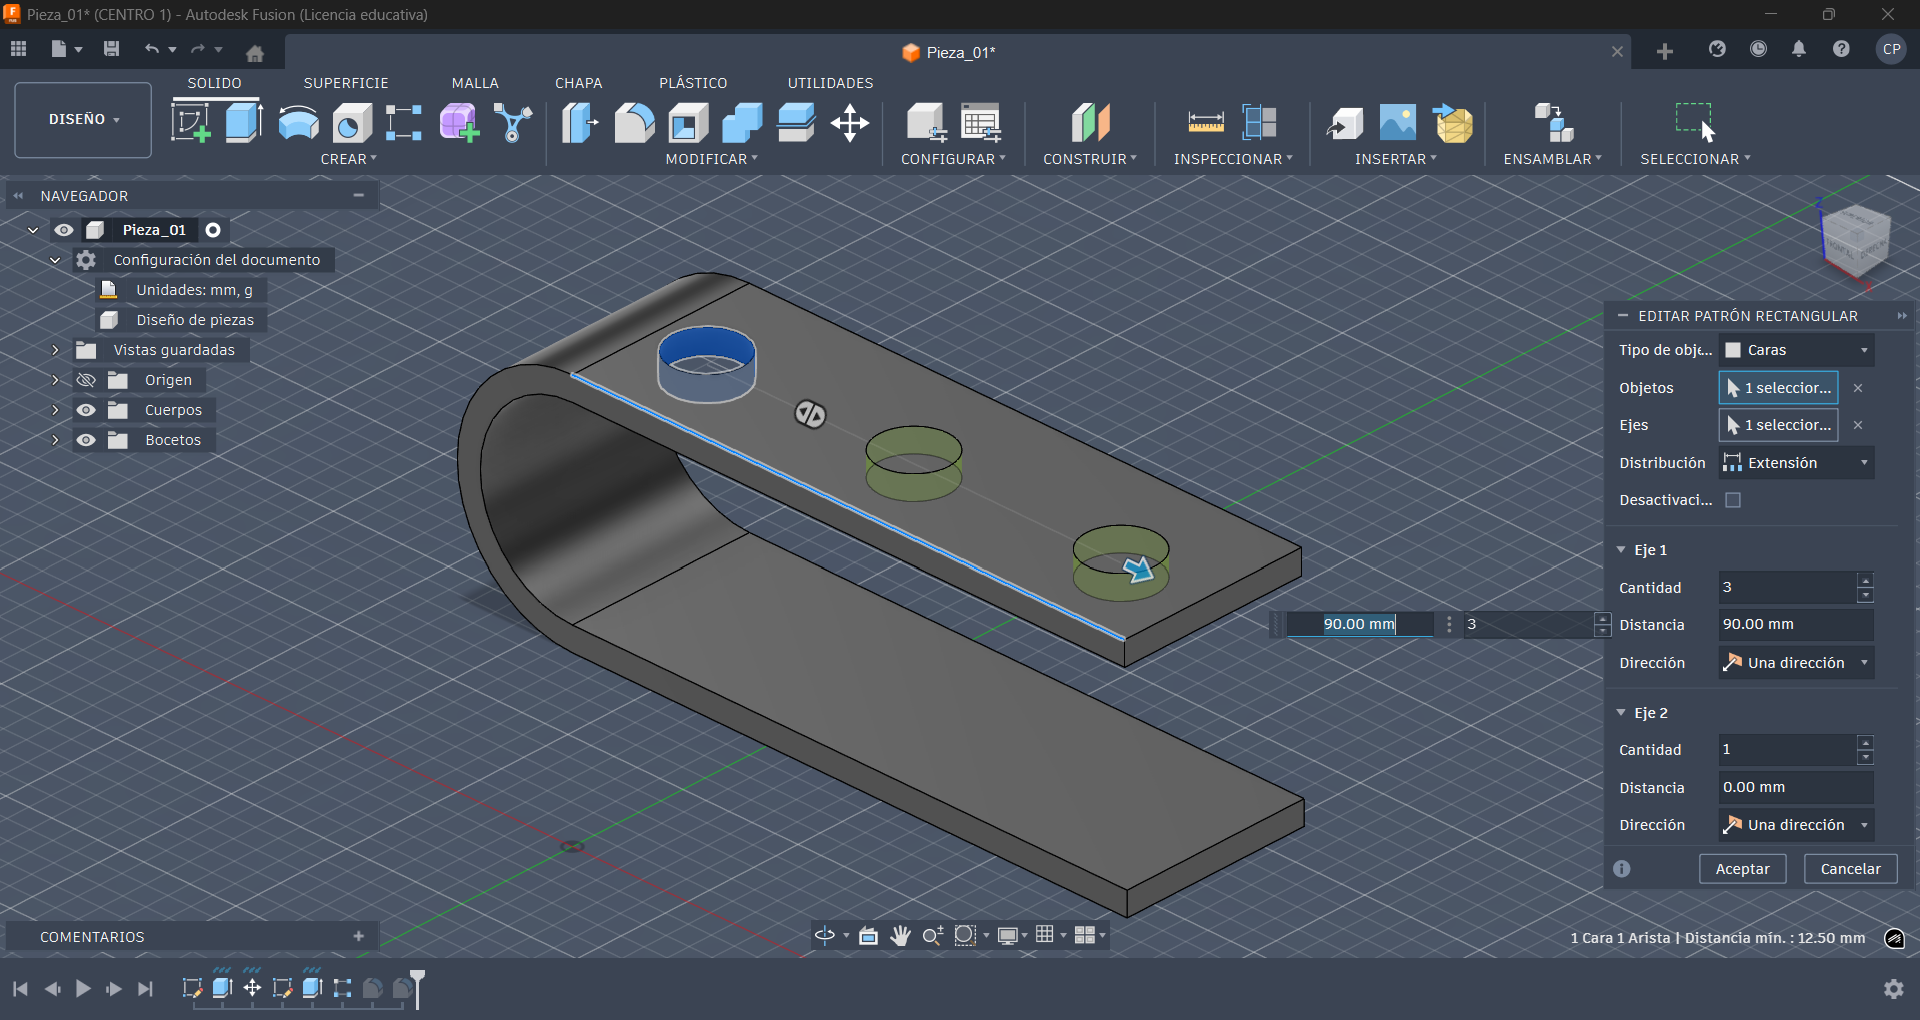
Once we have made a new sketch of the selected face and extruded or cut it, we can apply a pattern, so that we do not draw the same thing several times.
Fillet
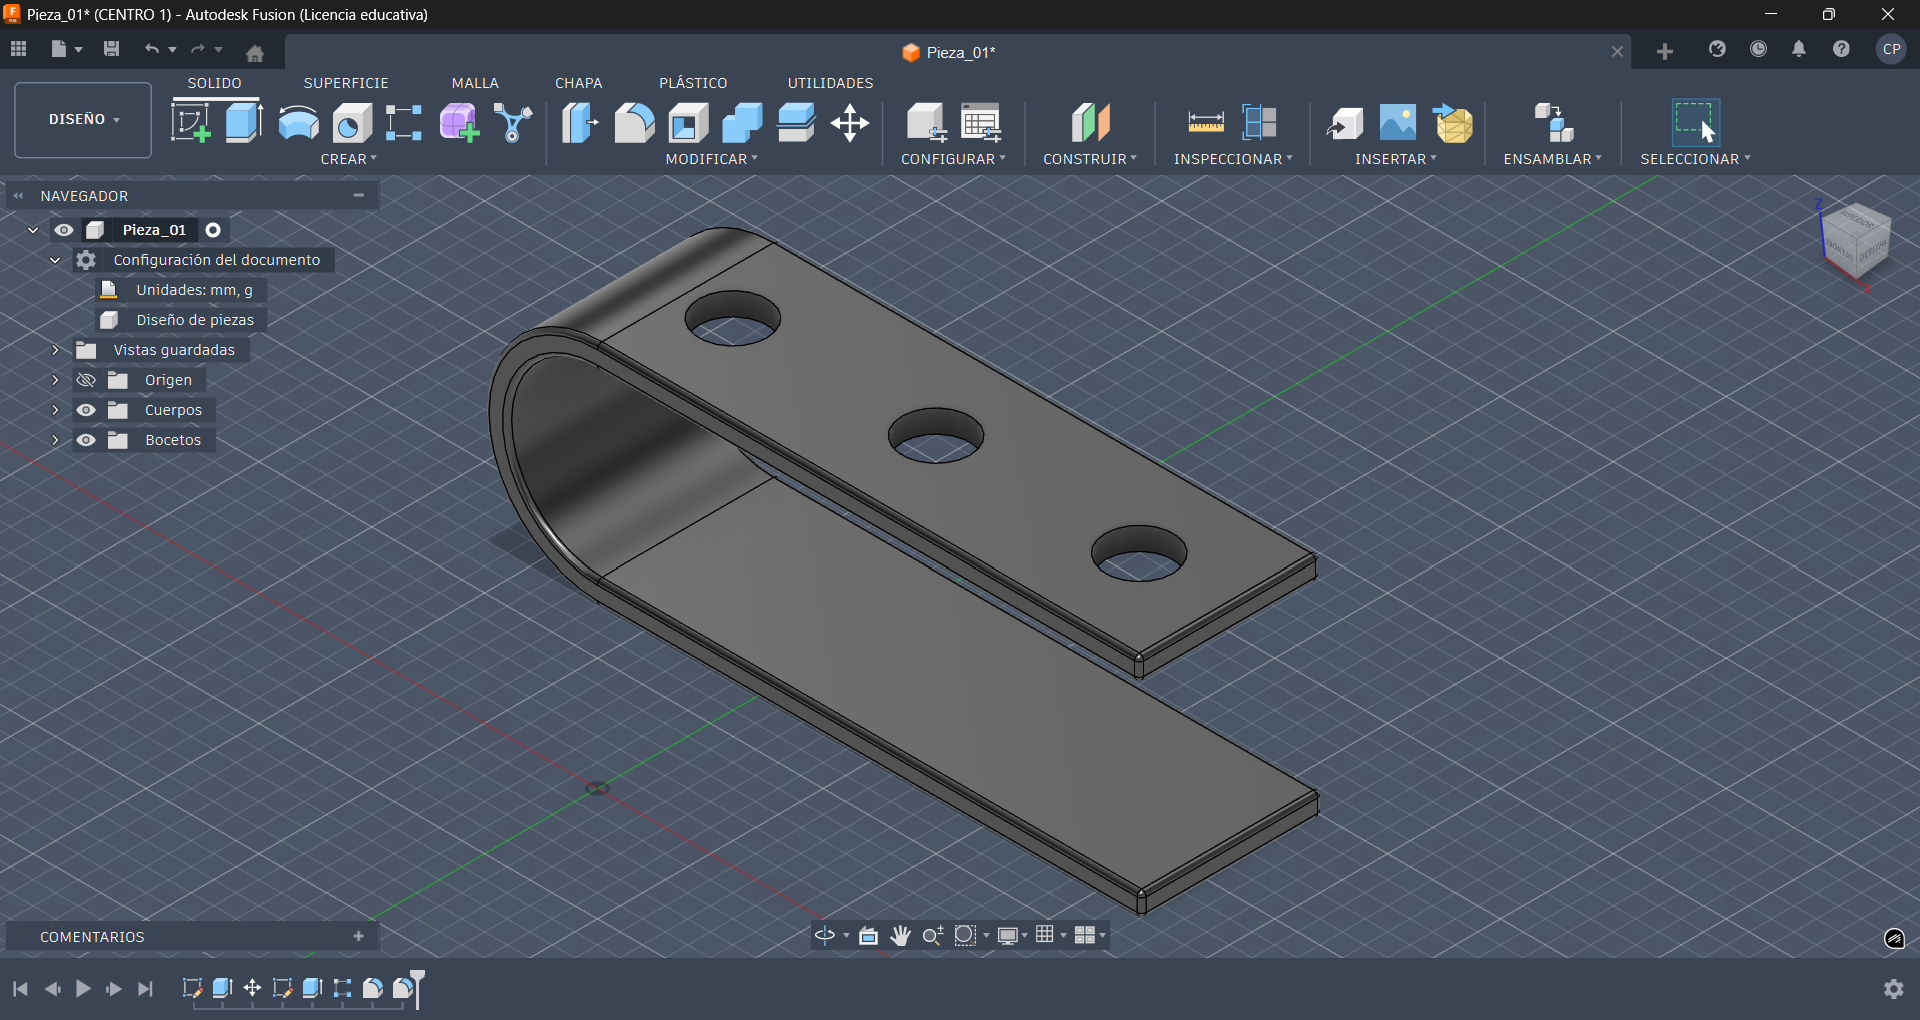
The option "Fillet" allows us to round objects, we apply it to all edges of our piece.
Onshape 3D Modeling (Cloud)
Fully cloud-native CAD. Uniqueness: No installation, real-time collaboration, and powerful version control. Ideal for team-based projects.
Constrained Sketch
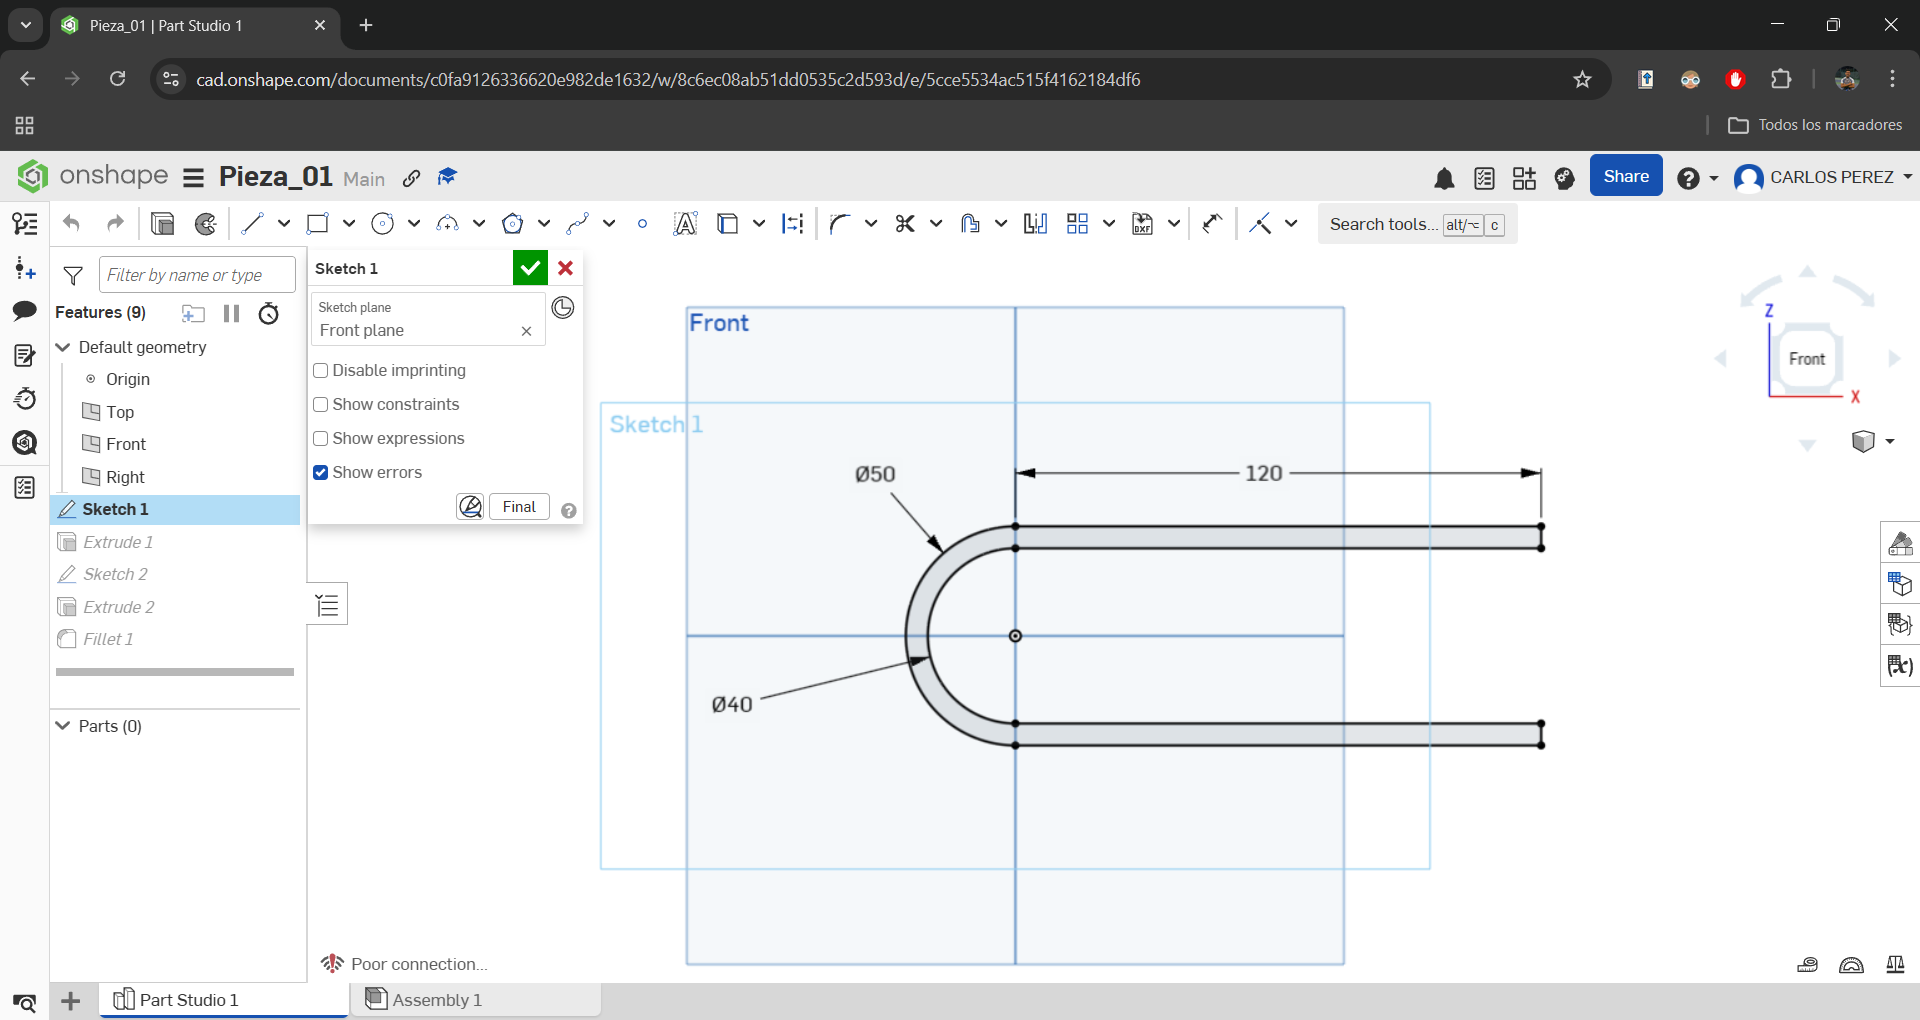
Create 2D sketch with geometric and dimensional constraints.
Extrusion to 3D
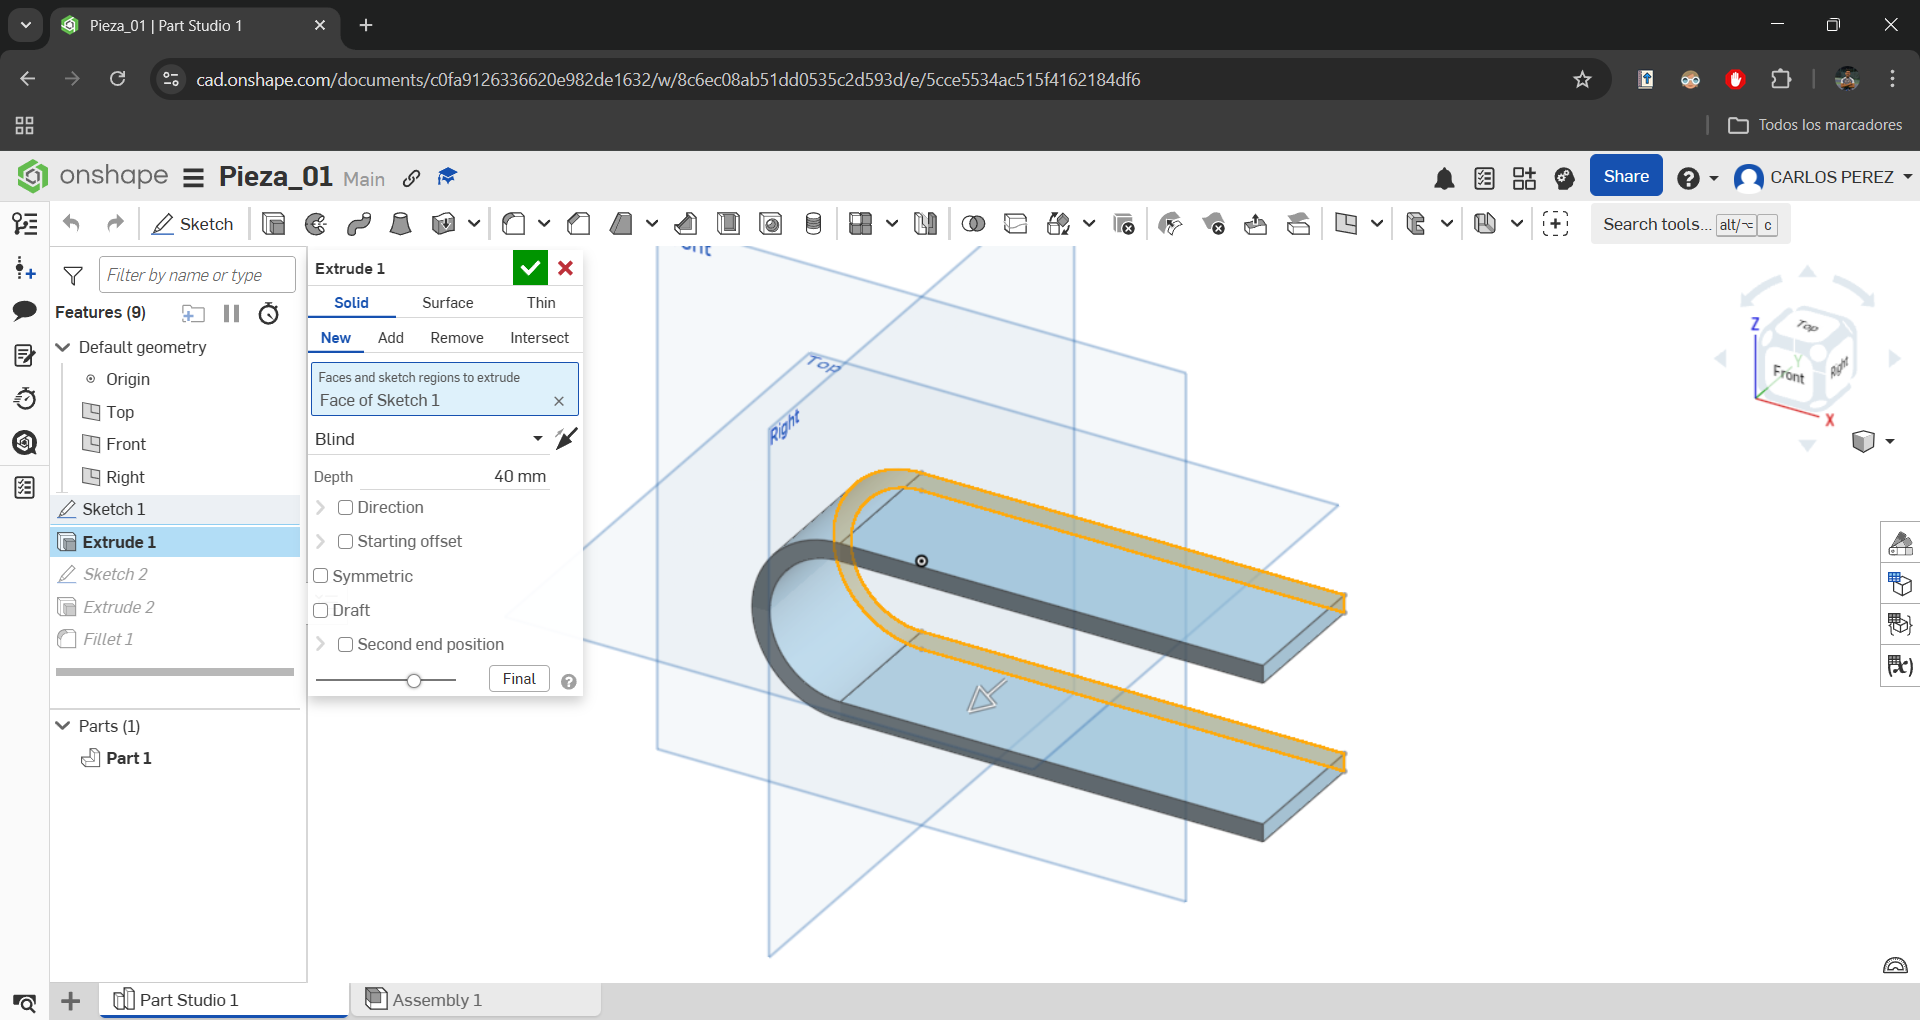
Extrude 2D profile with direction, taper angle, and operation options.
Pattern
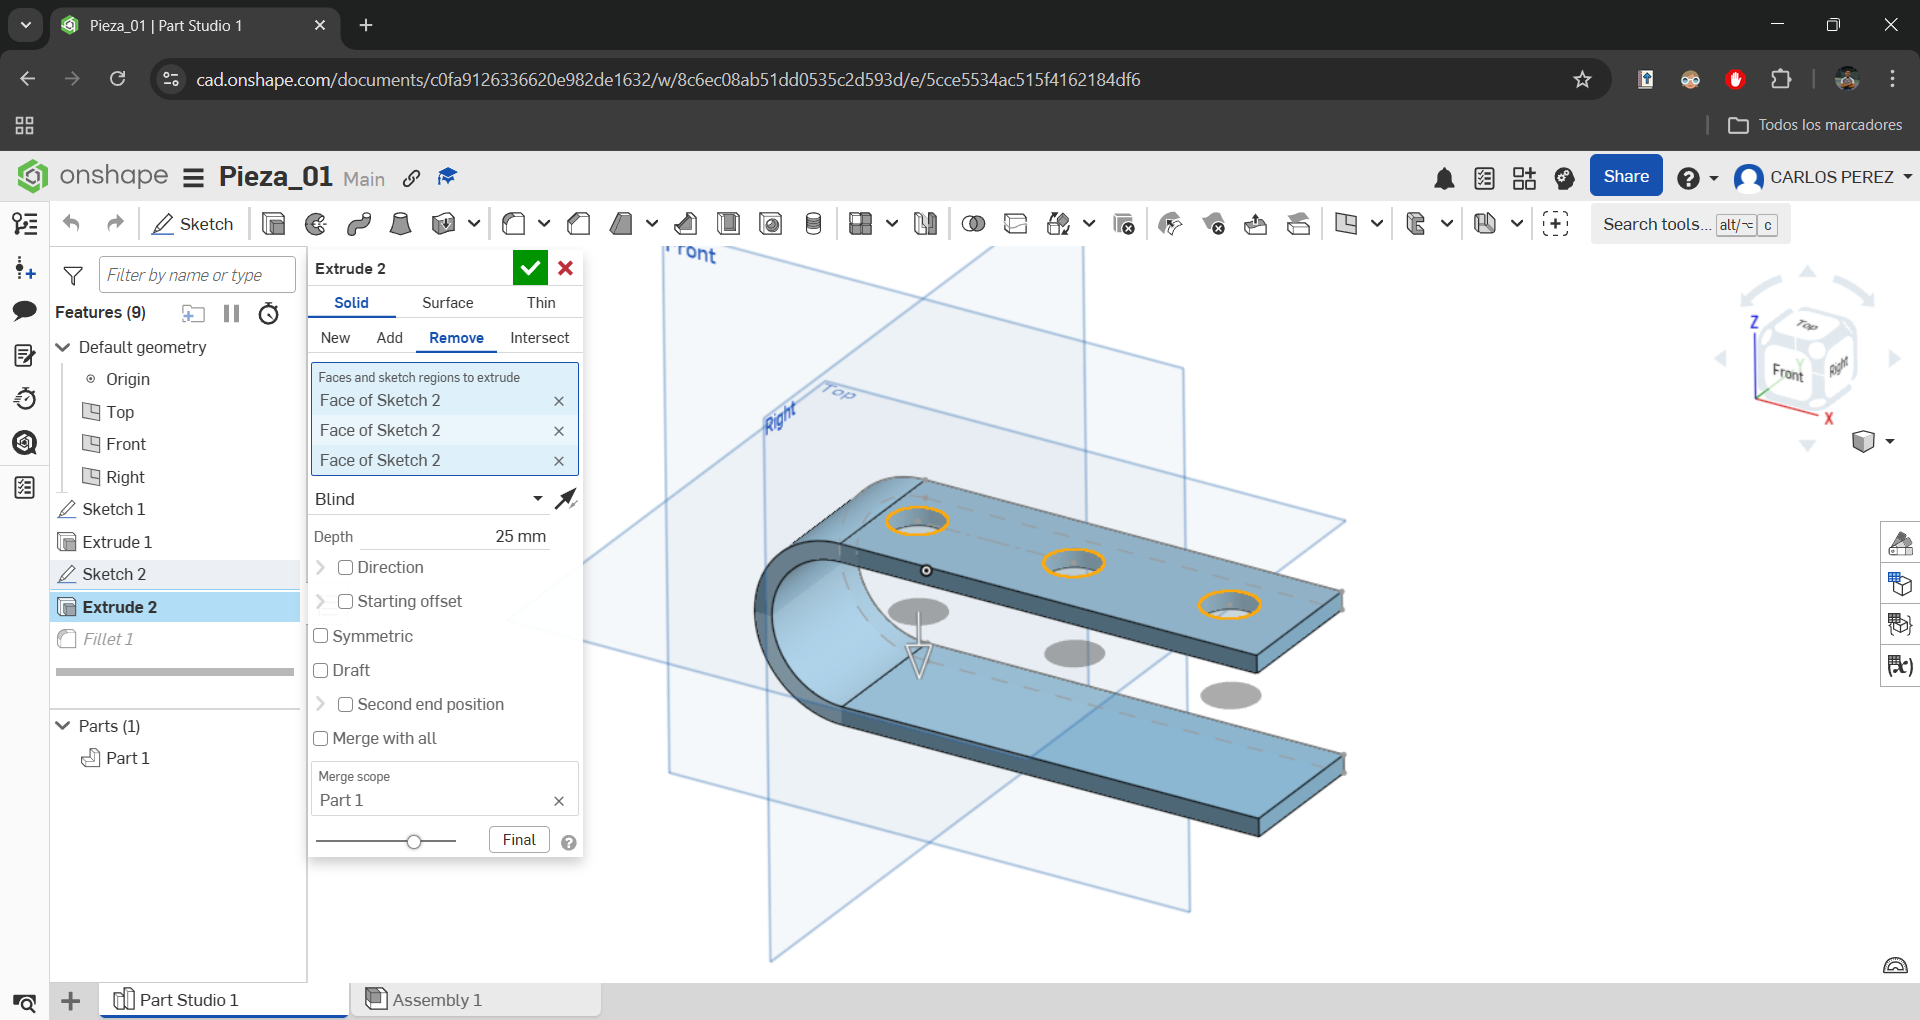
Once we have made a new sketch and extruded, we apply a pattern to avoid repetition.
Fillet
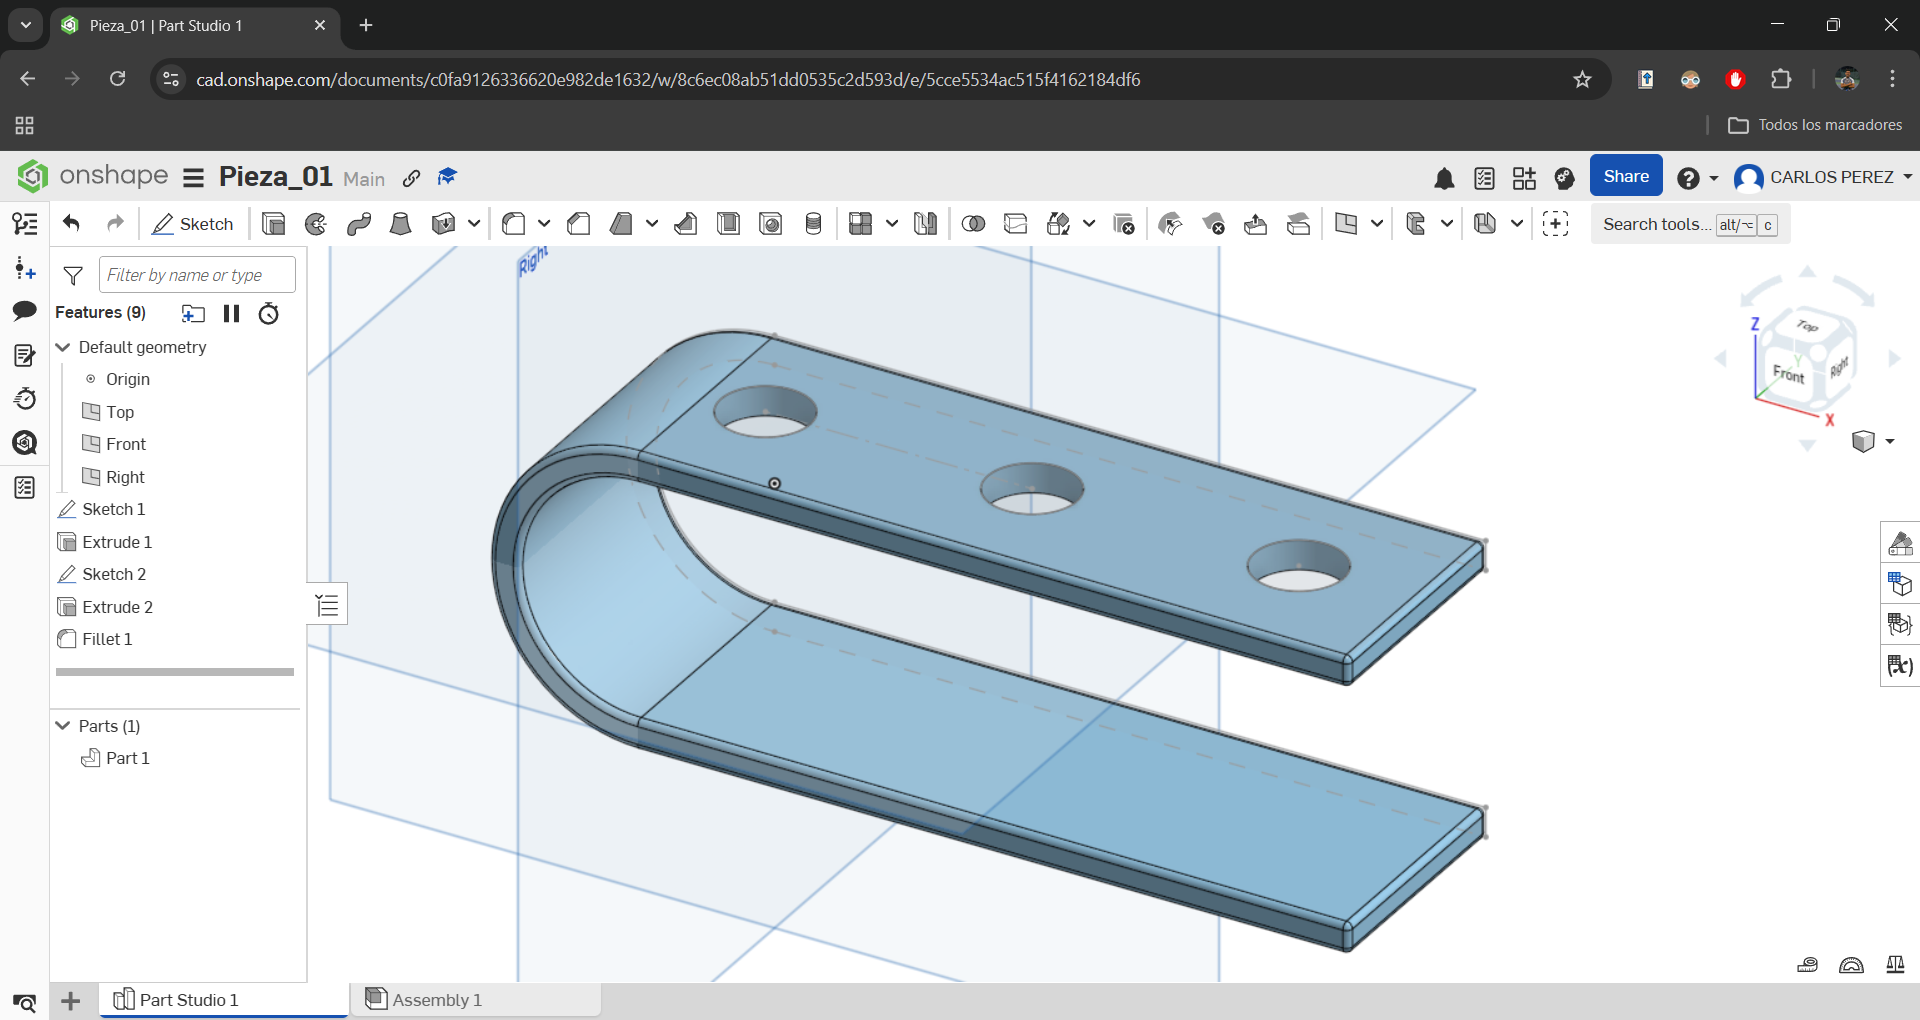
Apply fillet to all edges for improved aesthetics and safety.
Compress Photos Compress JPEG
This website is a free online tool designed to reduce the size of images. Why this over TinyPNG? Simpler UI and supports both JPEG/PNG with adjustable quality slider.
Choose your photo
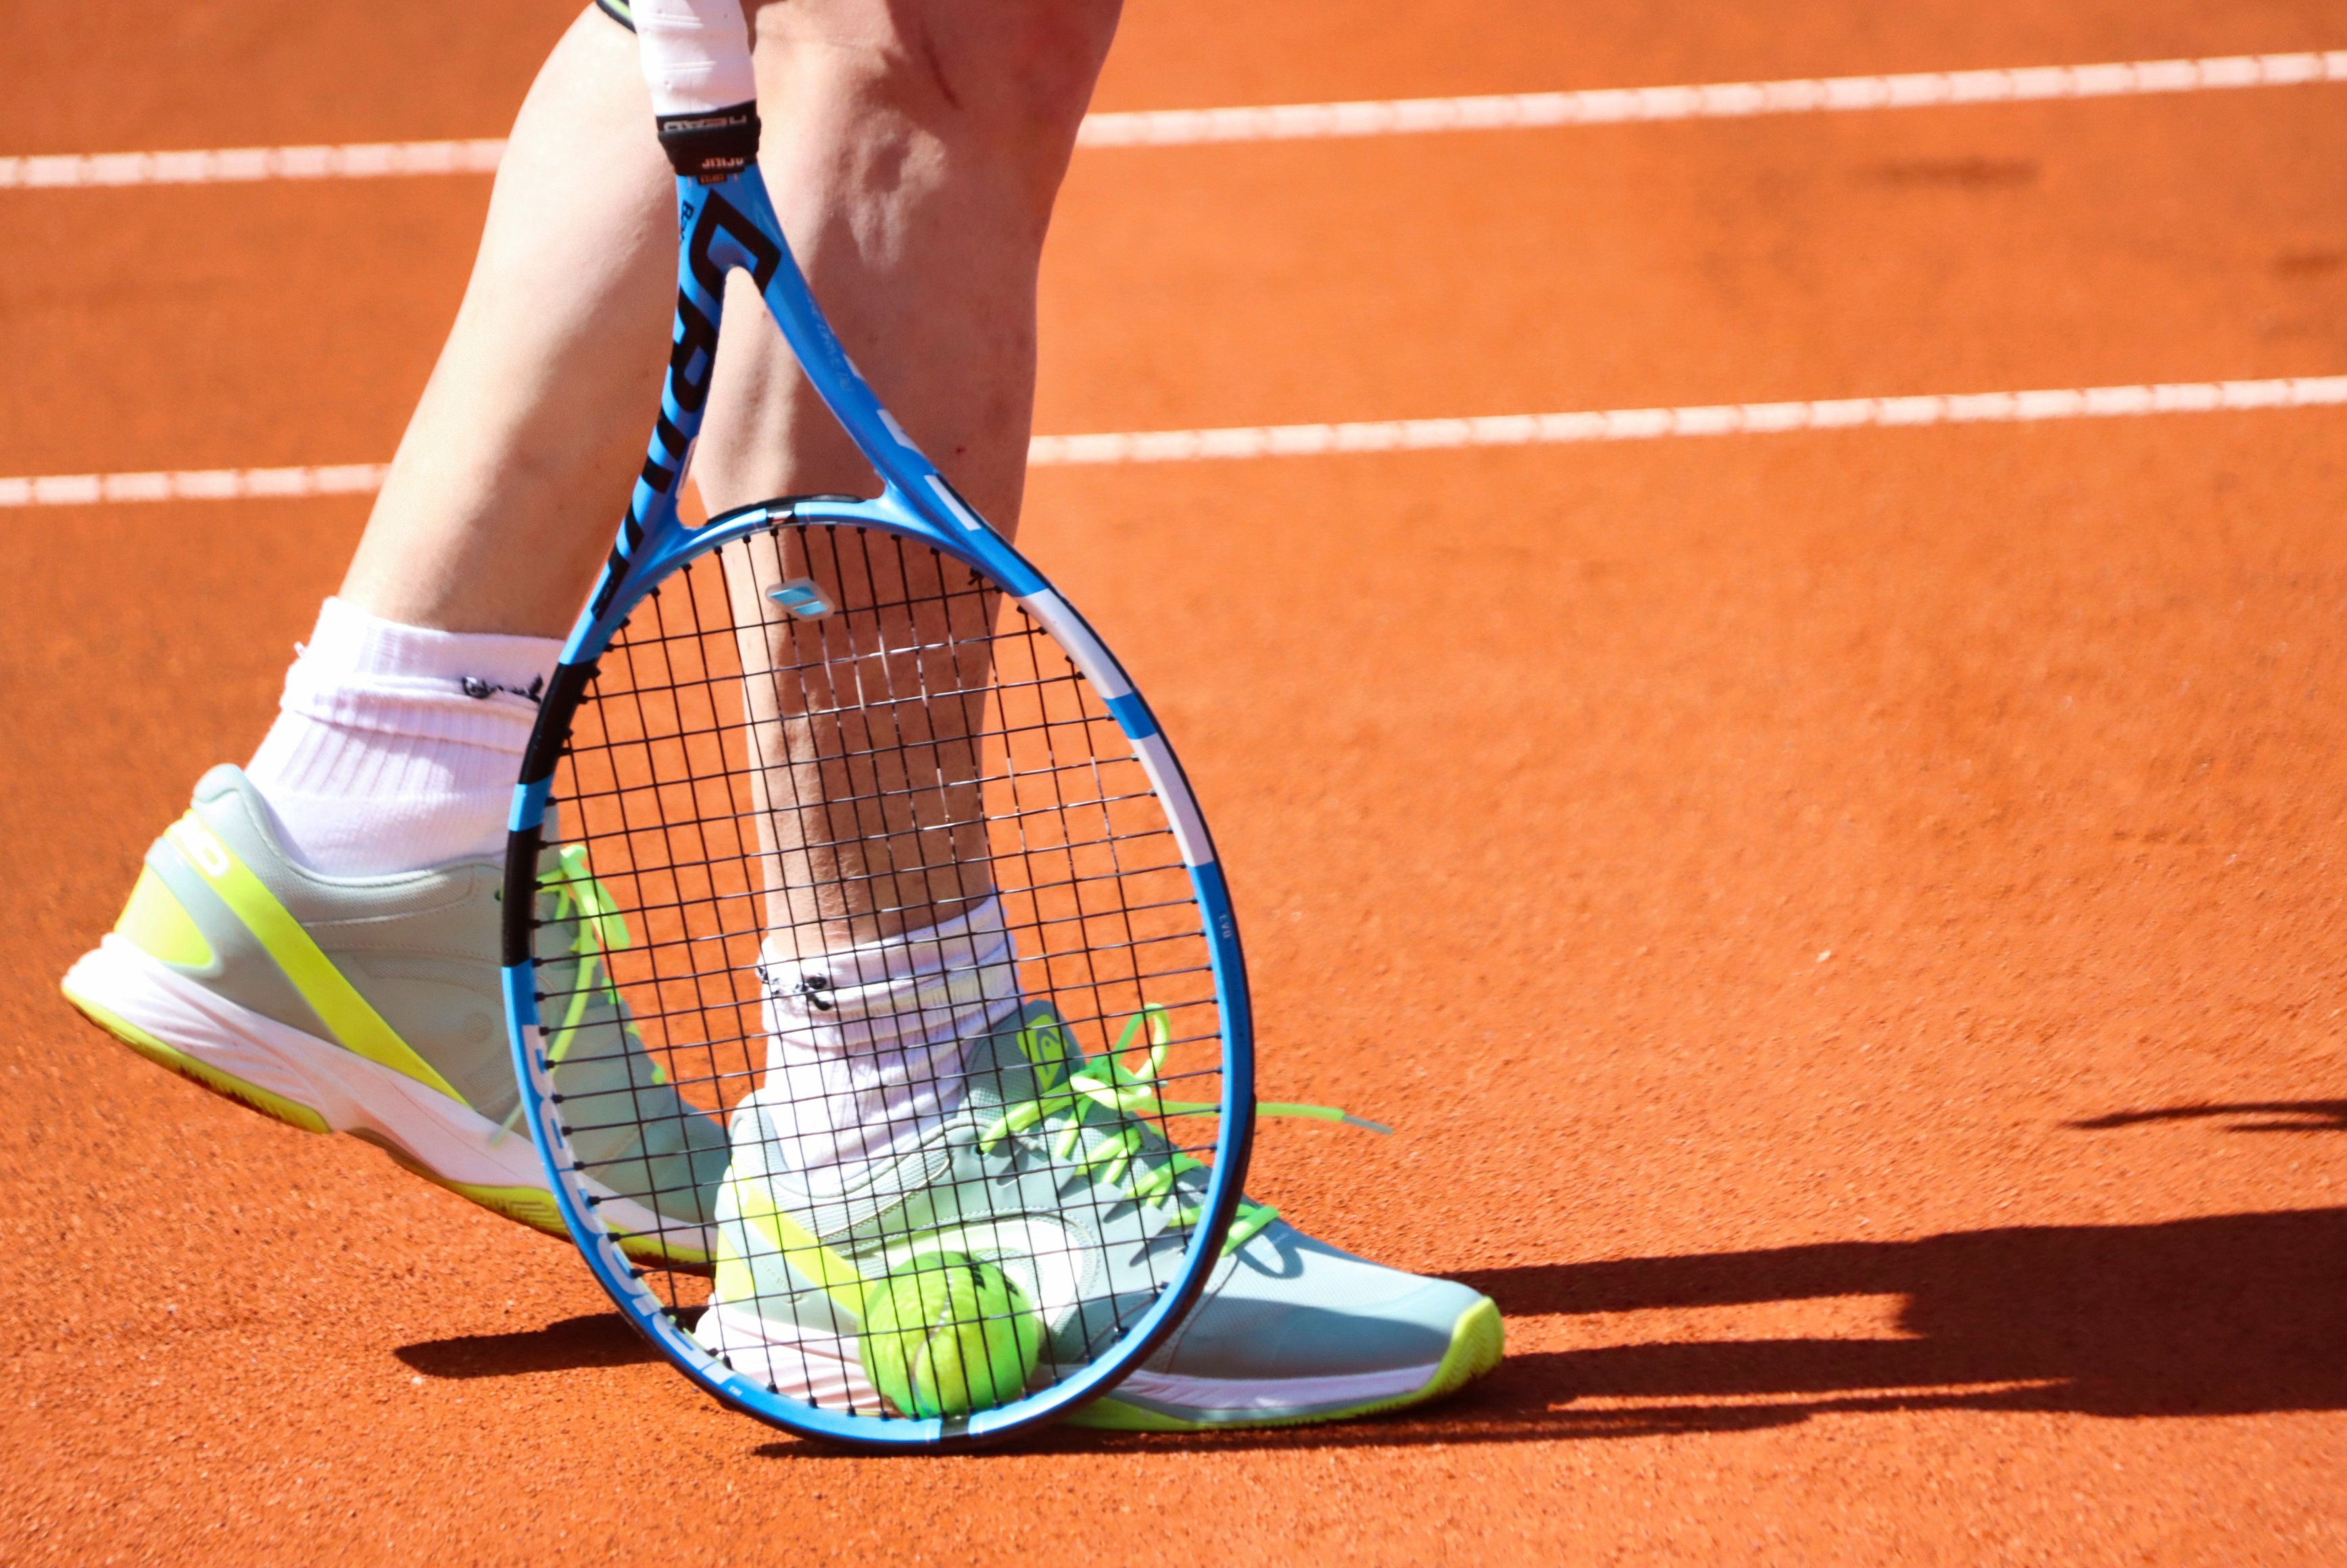
I use Pixabay to download copyright-free images.
Check the size
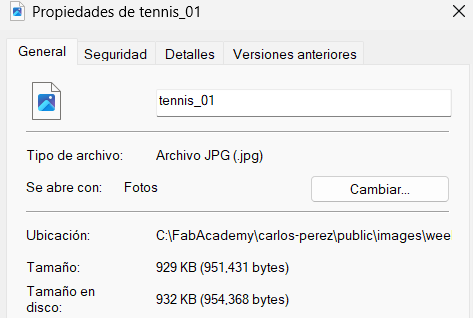
In downloads, check the image size via properties.
Upload to website
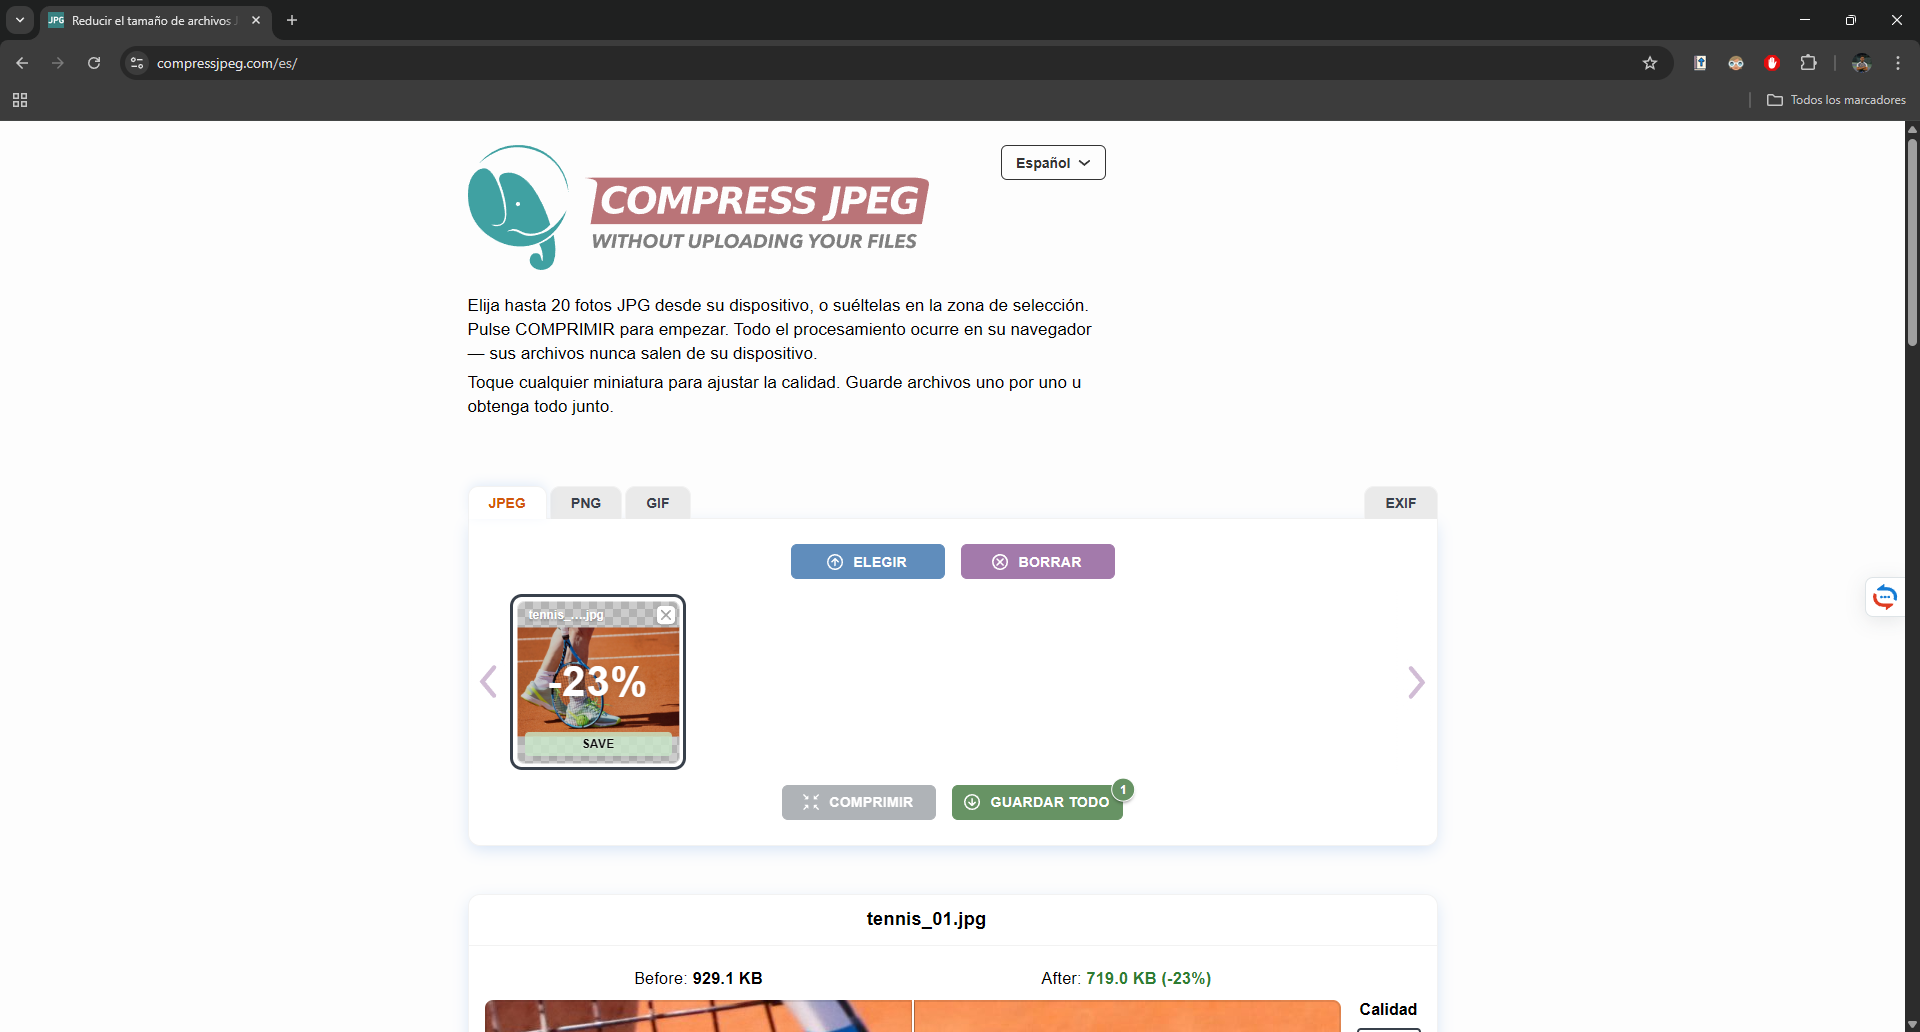
Upload to "COMPRESS JPEG", compress, and download.
Check new size
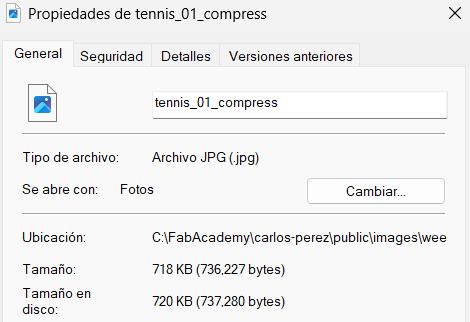
Compare: original ~500KB, compressed ~350KB — 30% reduction.
Compress Videos Free Convert
Online tool for MP4 compression. Why FreeConvert vs Clideo? No watermark, supports larger files up to 1GB, and allows resolution presets.
Choose your video
Sample video from Youtube (fair use for education).
Check size
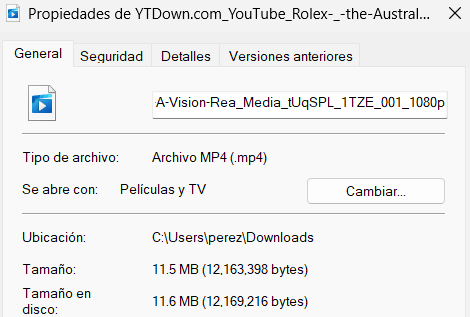
Original size: 12.4 MB.
Upload to website
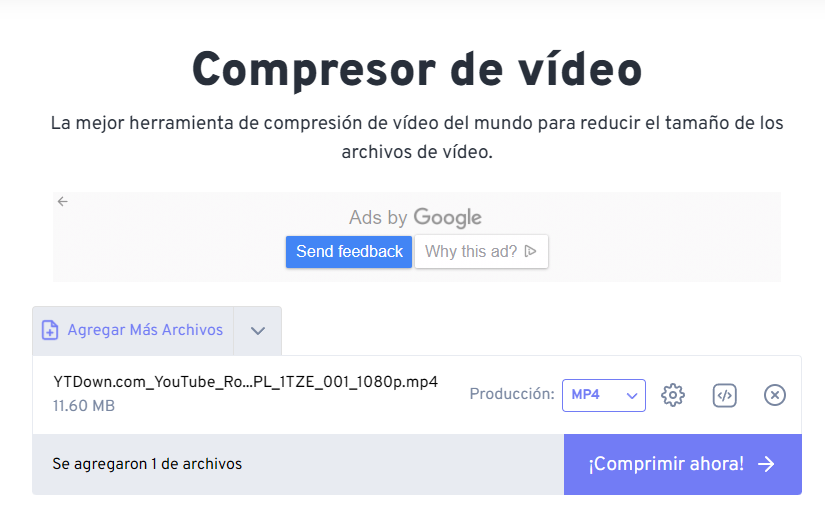
FREE CONVERT reduces file while maintaining H.264 codec.
Check new size

Compressed size: 8.1 MB (saved 35%).
Final Video Result
Comparison confirms minimal quality loss with significant size reduction — optimal for web portfolio.