This week, I explored the I2C (Inter-Integrated Circuit) protocol to establish communication between two microcontrollers. My goal was to create a Master-Slave network where one board controls the physical actions of another through a digital bus.
Group Assignment
Design, build, and connect communication nodes.
Master-Slave Workflow I2C Protocol
The Networking Concept
In electronic networking, boards don't just "connect"; they need a common language. I chose I2C because it allows multiple devices to be controlled using only two wires: SDA (data) and SCL (clock), synchronizing the exchange of information at a specific frequency.
Hardware Selection
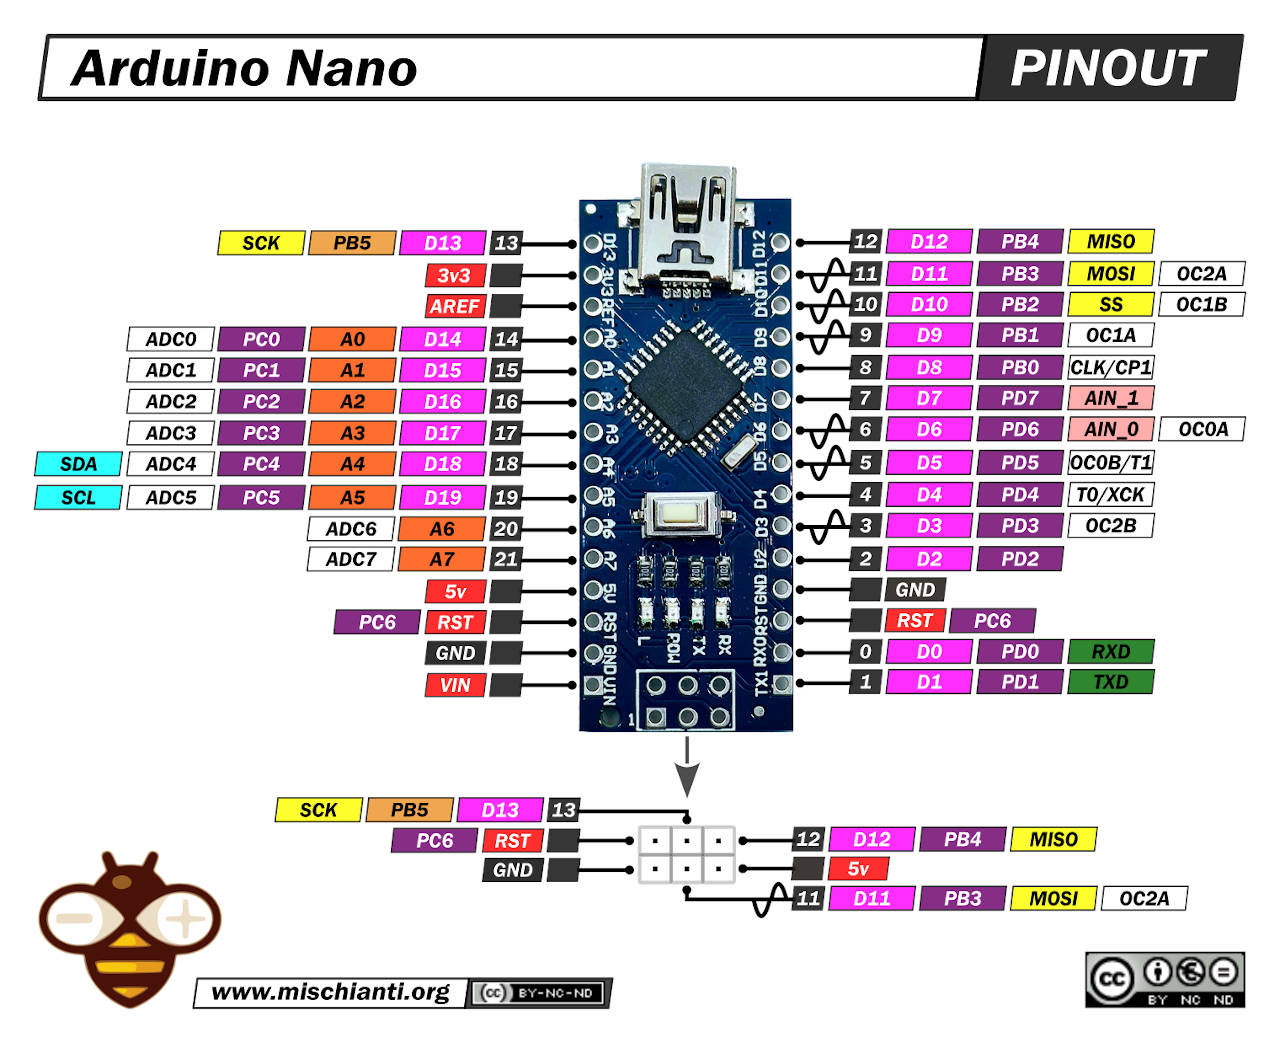
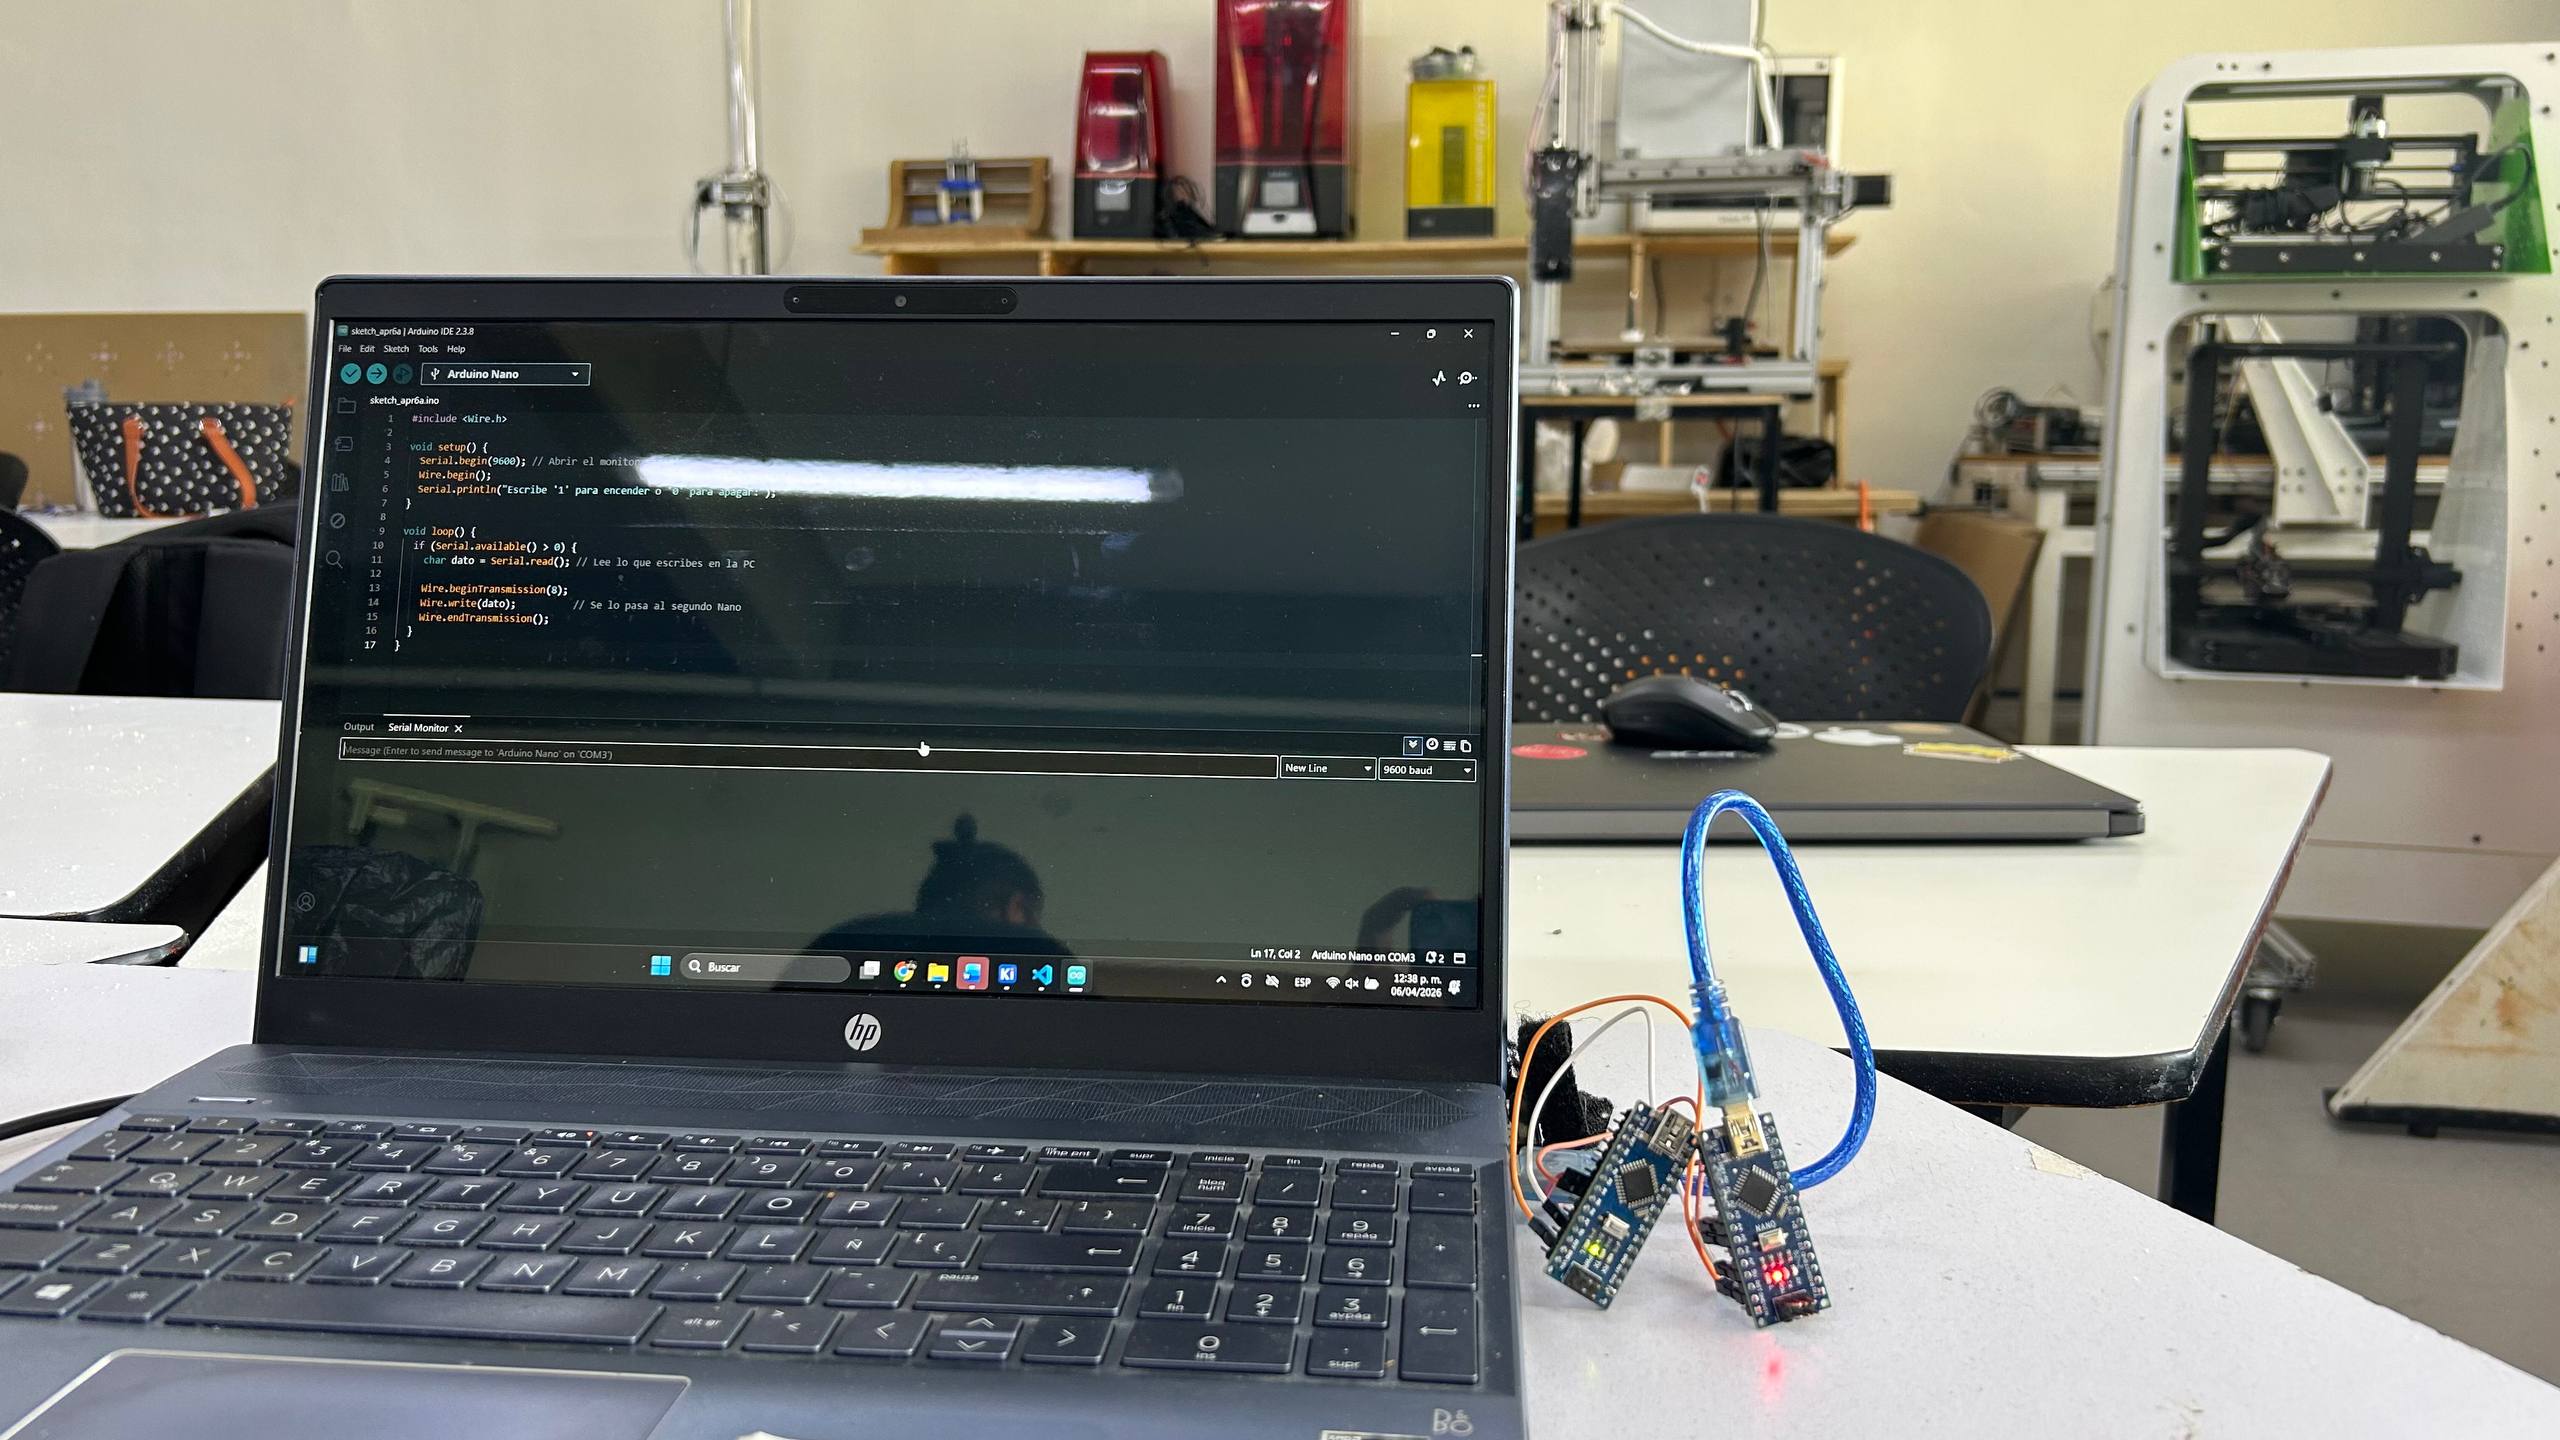
I used two Arduino Nano microcontrollers. These boards are widely used in prototyping and feature dedicated hardware for I2C communication (Pins A4 for SDA and A5 for SCL), providing a reliable platform for local networking and data exchange.
Wiring and Ground Unity
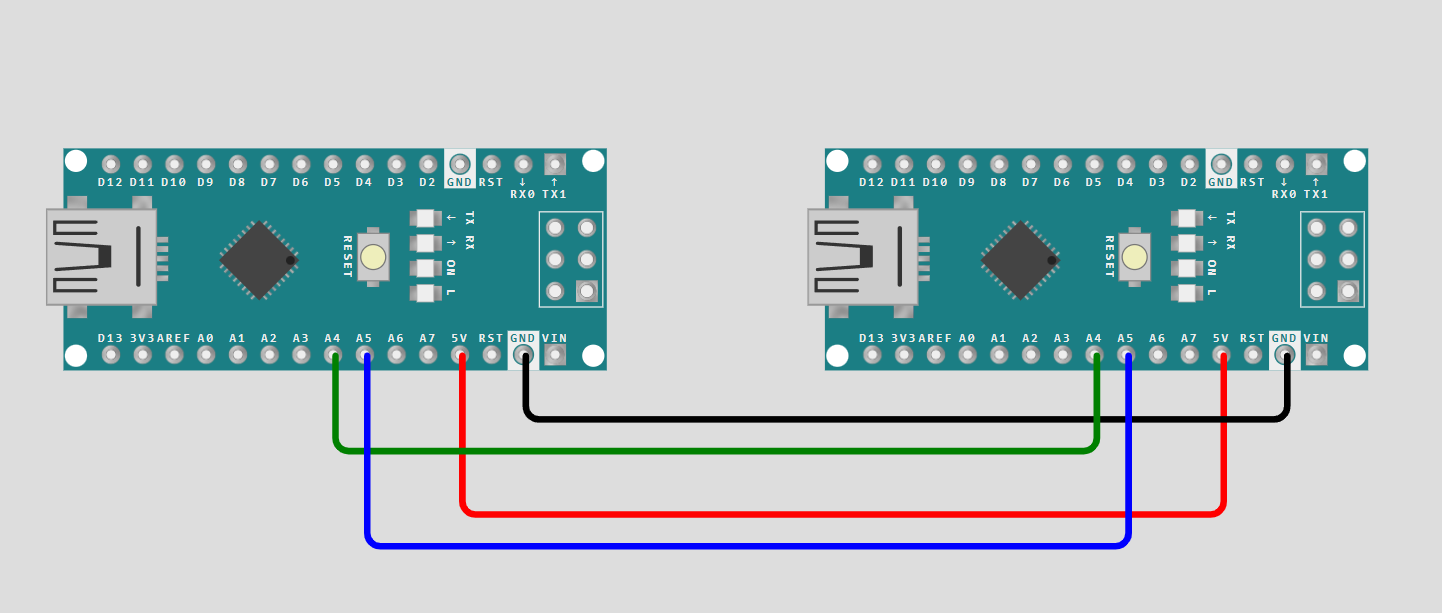
Communication requires a shared reference point. I connected SDA to SDA and SCL to SCL. Crucially, I bridged the GND (Ground) of both boards. Without a common ground, the boards cannot accurately interpret the high/low voltage signals of the data line.
The "Address" Logic
Every device on an I2C bus needs a unique ID. For this project, I assigned the address 0x08 to the Slave board. This ensures that when the Master sends data, only the board identified as '8' will listen and respond, preventing data collisions if more boards were added later.
Developing the Master Code
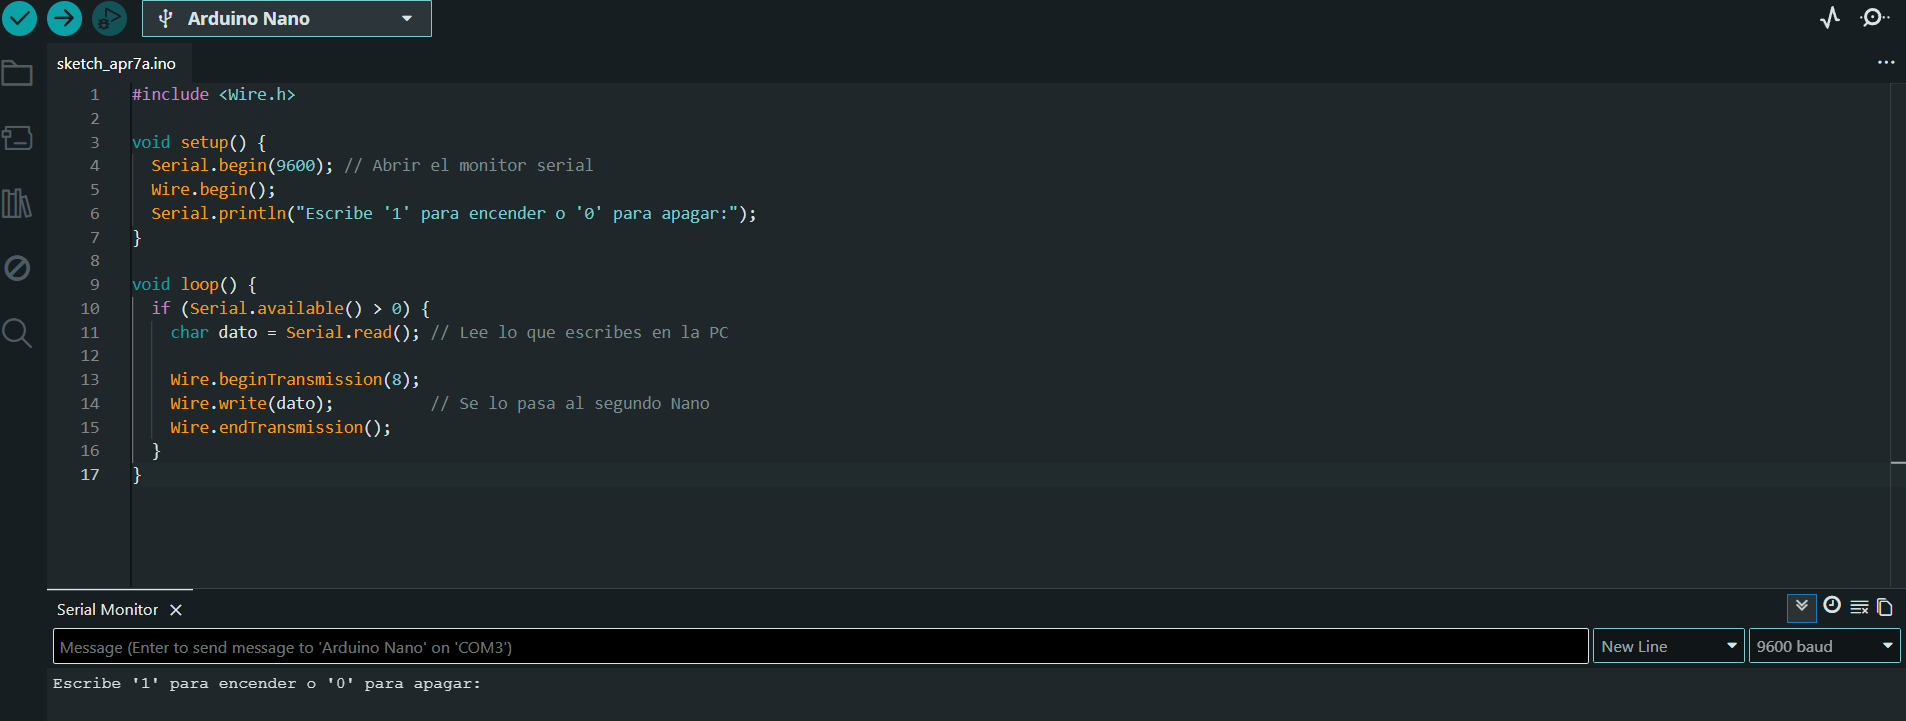
#include <Wire.h>

void setup() {
  Serial.begin(9600); // Abrir el monitor serial
  Wire.begin();
  Serial.println("Escribe '1' para encender o '0' para apagar:");
}

void loop() {
  if (Serial.available() > 0) {
    char dato = Serial.read(); // Lee lo que escribes en la PC

    Wire.beginTransmission(8);
    Wire.write(dato);          // Se lo pasa al segundo Nano
    Wire.endTransmission();
  }
}
The Master's role is to initiate every conversation. I programmed it to wait for a user input from the Serial Monitor and then transmit it as a byte (1 or 0). The logic uses the 'Wire' library to handle the communication protocol automatically.
Developing the Slave Code
#include <Wire.h>

void setup() {
  Wire.begin(8);
  Wire.onReceive(receiveEvent);
  pinMode(LED_BUILTIN, OUTPUT); // Usaremos el LED que ya trae la placa
}

void loop() { delay(100); }

void receiveEvent(int howMany) {
  while (Wire.available()) {
    char c = Wire.read();
    if (c == '1') digitalWrite(LED_BUILTIN, HIGH);
    if (c == '0') digitalWrite(LED_BUILTIN, LOW);
  }
}
The Slave is passive. I used an "Interrupt-driven" approach: the code waits in a loop, but as soon as the I2C hardware detects its address (8), it triggers the 'receiveEvent' function to process the Master's command and toggle the LED immediately.
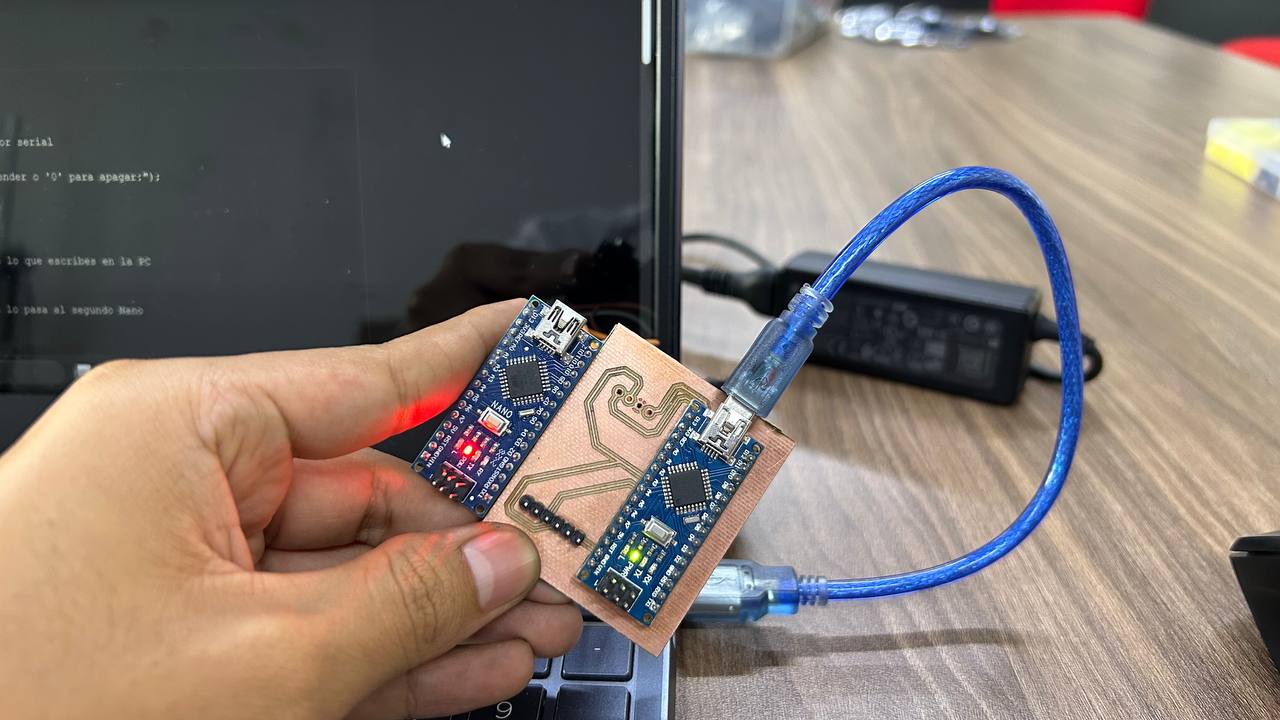
Firmware Upload & Console Debugging
I used the Arduino IDE to upload separate sketches to each Arduino Nano. By using the Serial Monitor on the Master board, I could send commands in real-time and observe how the Slave reacted to the incoming data packets.
Power Distribution Analysis
In a network, power stability is key. I powered the Master via USB and shared the 5V and GND rails with the Slave. I ensured the total current draw of both Nanos remained within the limits of the USB port to prevent communication errors or unexpected resets.
Testing Signal Integrity
To ensure the communication was clean, I kept the jumper wires short. This minimizes electromagnetic interference and maintains the signal integrity of the SDA and SCL lines, which is vital for the microcontrollers to interpret the bits correctly.
Final Integration and Result
The system works perfectly. The Slave board successfully toggles its internal LED based on the data sent by the Master. This foundation allows me to scale the project, such as sending sensor data from the Slave back to the Master for processing in my final project.
Final Integration and Result
The system works perfectly. The Slave board successfully toggles its internal LED based on the data sent by the Master. This foundation allows me to scale the project, such as sending sensor data from the Slave back to the Master for processing in my final project.