Week01 | Principle and practice & project management
My Fab Academy journey finally begins, a path not of exploration, but of learning and developing the skills to create almost anything.
Overview
- Plan and sketch a potential final project
- Read, sign (add your name to) the student
- Agreement and commit it to your repo
- Work through a git tutorial
- Build a personal website
Some of important notes from Neil's presentation (21.01.2026 ):
-
What is a FabLab? What is FabAcademy? How can I make almost anything in Fab Academy?
-
The history of FabAcademy and the history of CNC machining.
-
Things from the meter scale down to nanometers can be made in a FabLab.
-
Transitioning things from the physical world to the digital world and back again.
-
We go to a FabLab to make machines, not just to see or access them.
-
Each week's topics could take a year to fully master, but that is not the aim of FabAcademy.
-
How to complete and manage the weekly assignments? Do documentation as progressing.
-
How to create documentation which is one of my personal goals in participating in Fabacademy.
-
What should be included in the final project.
-
In Fabacademy try do things, do not try just thinking, don't hesitate doing mistake
-
Discuss ideas for your own FabLab
Student Agreement
I downloaded, read, and signed the student agreement and using git added, committed, and pushed it in Gitlab Repo.
Git & Gitlab Setting up
Git is a distributed version-control system for tracking changes to files and coordinating work between developers (local repositories, branches, commits, history). GitLab is an open source end-to-end software development platform with built-in version control, issue tracking, code review, CI/CD, and more (Ref).
Git
As I did not have any previous experience working with Git, I did some basic pre-study before starting the course. I reviewed all the topics at a general level to become familiar with the course. I installed Git on my laptop, which was easy and only required two clicks, as I installed it from the software center of our university. I used this git tutorial to get familiar with what Git is and how it works.
Some primary and basic syntax getting start with git:
git status Git status shows the current state of files in the working directory.
git clone <repository-url> Git clone copies a remote repository to your local machine.
git add <file or folder> Git add stages file changes for the next commit.
git add . Update all your changes.
git commit -m "message" Git commit saves staged changes to the local repository.
git push origin main Git push uploads local commits to the remote repository.
git pull origin main Git pull downloads and merges changes from the remote repository.
Before starting first week of Fabacademy on 21 January 2026, I did cloning (with HTTPS) and followed the tutorial how to clone:

While doing this, I faced the following error:

What was the error and how did I solve it? My access token was not activated, so I activated it and then tried again. I opened the Command Prompt and repeated all the steps. This time, the process was successful, and I received the following message, which means everything went correctly:

On 22 January 2026, we had a productive two hour class with Ivan, who suggested using Git Bash instead of PowerShell. He also recommended cloning the GitLab repository using SSH, as SSH provides a more secure authentication method based on key pairs. This approach enables seamless, password-less access when pushing and pulling changes between the local and remote repositories during the Fab Academy course. So, I deleted my local repository and cloned it again using SSH.
Since I had no prior experience with Git Bash, I spent sometimes after class practicing with it to become more familiar. My local repository after installing MkDocs, which I will explain later:

And here is main directory of my Fabacademy in the local computer:

Generated the SSH Key
SSH keys are the only method available for authenticating Git operations in GitLab. I generated one using:

The private key is stored in the id_rsa file and must never be shared. The id_rsa.pub file contains the public key, which I copied and added to GitLab.

To verify the SSH connection, I ran the following command in Git Bash:
A welcome message confirms that the setup was successful:
VScode
I use VS Code as my code editor for working with MkDocs to create and manage assignments and documentation. Its features like syntax highlighting, extensions, and integrated terminal make it convenient for development and documentation tasks.
Creating Fab Academy website
For the webpage, I decided to use Markdown (MkDocs) to start building the site, as I think it is straightforward for those who are not very experienced in programming.
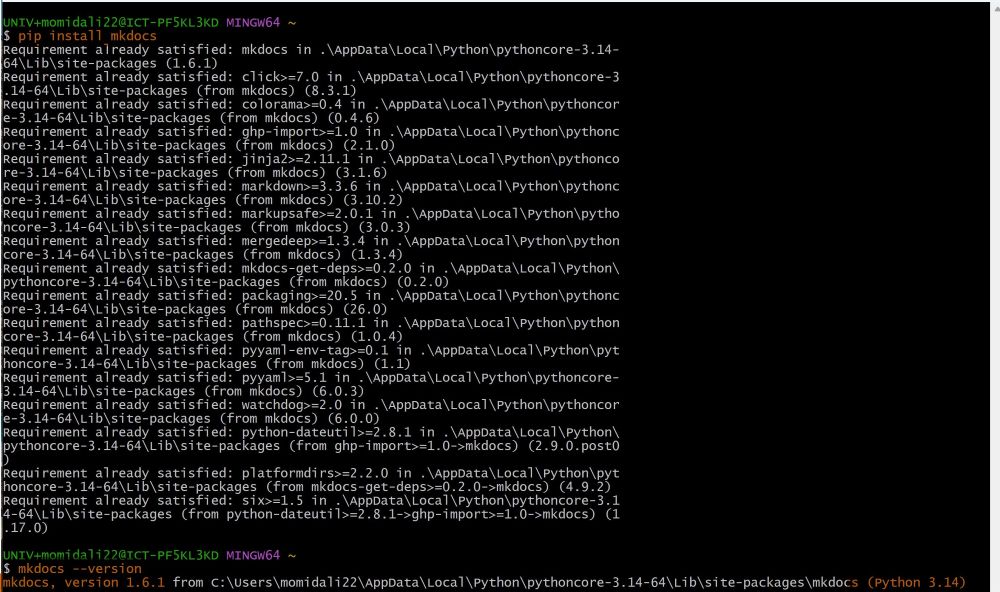
Mkdocs is a fast, simple and downright gorgeous static site generator that's geared towards building project documentation. Documentation source files are written in Markdown, and configured with a single YAML configuration file (reference). I installed mkdocs by following official MKDocs Installation and verified it.

I did not go and create a wheel from zero again, so I started using the Fabacademy Oulu template to speed setup Fabacademy Oulu students template and I will modify it based on my needs during the course.
Some basic syntaxes to start with markdown languages:
For headings, add numbers of # signs before title:
For bolding, add two ** before and after word, phrase, or sentence without space:**this is a part of first week Fabacademy course**
If you need list, put number dot, and space:
1. similar as word office
Code blocks, as I did in all above:
surround your code or syntax inside three backticks without indent
To link images:

this is an example of mine
<video controls style="width:480px; height:480px;">
  <source src="../../files/week04/microp-2.mp4" type="video/mp4">
  Your browser does not support the video tag.
</video>
How website built and published
I keep all my Markdown files and mkdocs.yml in my local repository. When I push to the project, GitLab runs a CI pipeline defined in .gitlab-ci.yml. That pipeline:
- Installs Python and MkDocs
- Runs mkdocs build, which converts the .md files into HTML pages (the MkDocs Markdown parser + theme templates turn Markdown into HTML files)
- Puts the built static site into a folder (public)
- A pages job publishes the public folder to GitLab Pages, so the site becomes available on the web.
The following file that must be in Repo root tells to Gitlab how build and published the site:

What is mkdocs.yml:
mkdocs.yml is MkDocs’ single configuration file. It sets the site name, theme, navigation order, where your Markdown files are, and where the build output goes. Make sure site_dir in mkdocs.yml matches the folder your CI writes to (public above). I watched this video and mkdocs website to slightly modify Fabacademy Oulu students template, based on my needs and favorite:

Here is a tree structure in repo, so MKdocs can find everything:
├───.vscode
├───docs
│   ├───about
│   ├───assignments
│   ├───css
│   ├───files
│   │   └───week04
│   ├───images
│   │   ├───final_project
│   │   ├───week01
│   │   ├───week02
│   └───projects
├───path
│   └───to
│       └───man
│           └───pages
├───public
│   ├───about
│   │   ├───about-me
│   │   └───agreement
│   ├───assets
│   │   ├───images
│   │   ├───javascripts
│   │   │   ├───lunr
│   │   │   │   └───min
│   │   │   └───workers
│   │   └───stylesheets
│   ├───assignments
│   │   ├───week01
│   │   ├───week02
│   │   ├───...
│   ├───css
│   ├───files
│   │   └───week01
│   ├───images
│   │   ├───final_project
│   │   ├───week01
│   ├───projects
│   │   ├───final-project
│   │   └───sample-project
│   └───search
└───site
    ├───about
    │   └───agreement
    ├───assets
    │   ├───images
    │   ├───javascripts
    │   │   ├───lunr
    │   │   │   └───min
    │   │   └───workers
    │   └───stylesheets
    ├───assignments
    │   ├───week01
    │   ├───week02
    │   ├───...
    │   └───week20
    ├───css
    ├───images
    │   ├───final_project
    │   ├───week01
    ├───projects
    │   ├───final-project
    │   └───sample-project
   └───search
Before performing a Git push, I checked the website locally using local-ip to preview how it would appear. During this process, several warnings were displayed, which were caused by incorrect image file paths while configuring and preparing the MkDocs setup:

After correcting the navigation paths, everything worked as expected, as shown in the message below:

I used AI for grammar correction.
Reflection
Week 01 focused on building the digital foundation for the entire Fab Academy journey. Instead of fabrication, the emphasis was on workflow, documentation, and project management systems.
A key learning outcome was understanding Git and GitLab. The HTTPS cloning error (inactive access token) helped me understand authentication mechanisms more clearly. Switching to SSH after Ivan’s recommendation introduced me to public–private key cryptography and secure, password-less repository access. Generating SSH keys and configuring them in GitLab gave me practical insight into secure version control workflows.
Setting up MkDocs with GitLab CI/CD was another major achievement. I learned how Markdown files are converted into static HTML through mkdocs build, how the .gitlab-ci.yml pipeline automates deployment, and how GitLab Pages publishes the site. Debugging broken image paths and navigation warnings improved my understanding of directory structures and configuration consistency between mkdocs.yml and the CI pipeline.
From a project management perspective, I understood the importance of documenting progress continuously. Documentation is not just a requirement, it is part of the engineering process that ensures clarity, reproducibility, and structured development.
Overall, this week strengthened my Git proficiency, introduced secure SSH workflows, improved my Markdown documentation skills, and gave me practical experience with CI/CD systems. More importantly, it shifted my mindset from simply using tools to understanding the systems behind them.