Design and produce something with a digital process, incorporating computer-aided design and manufacturing, that is not covered in another assignment.
Document the requirements that the assignment meets.
Include everything necessary to reproduce it.
Project developed:
Thermoformed acrylic cylinder for a compact spirulina photobioreactor.
Thermoformed Acrylic Cylinder for a Compact Spirulina Photobioreactor
For this week, I had several ideas, but I decided to experiment with thermoforming, mainly because a central part of my final project is to obtain a transparent cylinder made of acrylic. My first idea was to buy this cylinder, but since I live in the jungle, where this type of structure is not available, I requested quotations in Lima. However, the prices were very high, so I decided to try thermoforming acrylic and obtain a sealed cylinder to contain the liquid spirulina culture, which is a main part in the development of my bioreactor.
1) Assignment Description
For this week, I developed and fabricated a thermoformed acrylic cylinder intended for my final project: a compact photobioreactor for spirulina cultivation.
The main objective was to obtain a cylindrical chamber that is transparent, sealed, lightweight, and modular, using a digital fabrication workflow that combines CAD design, digital fabrication, and acrylic thermoforming.
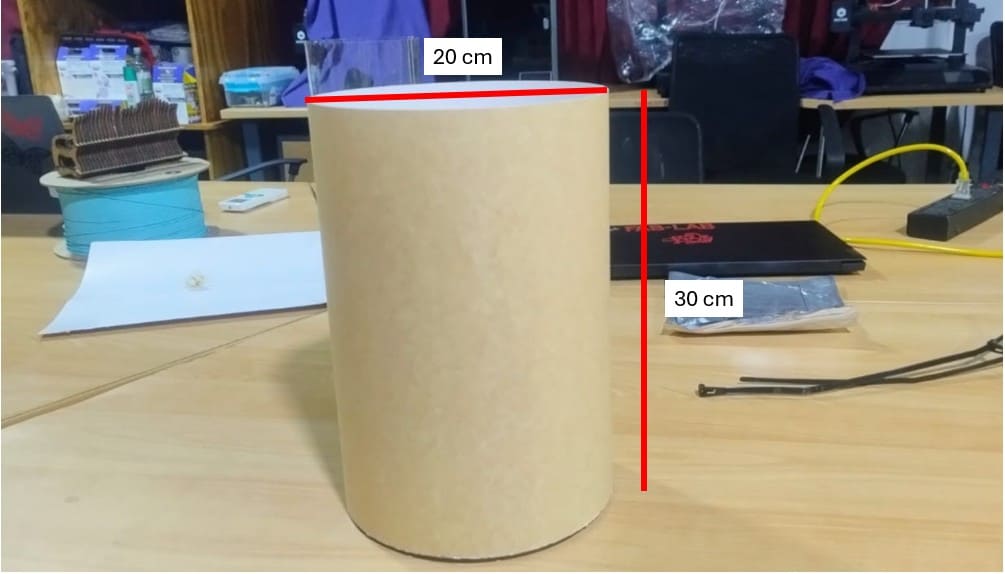
The final cylinder has the following dimensions. These dimensions were also established considering the working area of the available equipment, such as the laser cutter, 3D printer, electric oven, and other tools.
Parameter
Value
Internal diameter
20 cm
Height
30 cm
Material
Transparent acrylic
Thickness
3 mm
This cylinder will later be integrated with LED lighting, an aeration system, sensors, a harvesting system, and IoT monitoring.
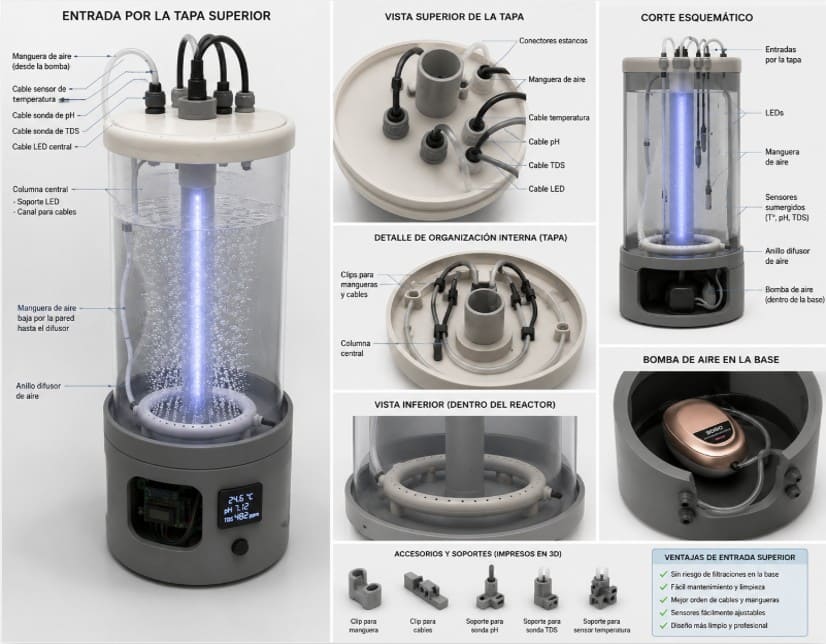
Img. 1: Image created with ChatGPT about my final project. It shows that a main part of the structure is to obtain a transparent and sealed cylinder. For the image generation, I had a chat about how I was advancing with my final project and I simply asked for an image of how it would look.
2) Why Does This Process Belong to Wildcard Week?
This assignment uses a digital fabrication process that was not directly covered in other Fab Academy weeks.
The main process explored was acrylic thermoforming using a digitally fabricated mold.
Unlike other weeks:
the acrylic was not used only as a flat piece cut with a laser,
nor as a 3D printed piece,
nor as a final CNC-machined piece.
In this case, a process was developed involving:
parametric design,
mold fabrication,
thermal experimentation,
and continuous curved surface forming.
The workflow combined:
CAD design,
digital fabrication,
thermoforming,
and material experimentation.
3) Workflow
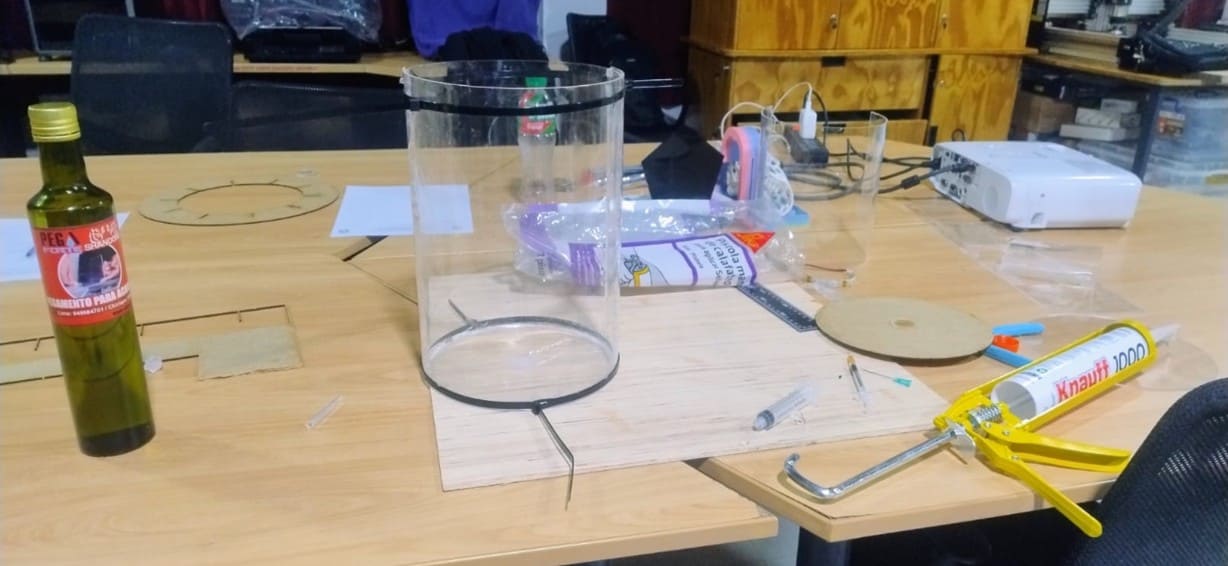
Img. 2: To get a real idea of the dimensions of my photobioreactor, I started by making sketches, and the first thing I did was make a cardboard cylinder.
4) Mold Fabrication
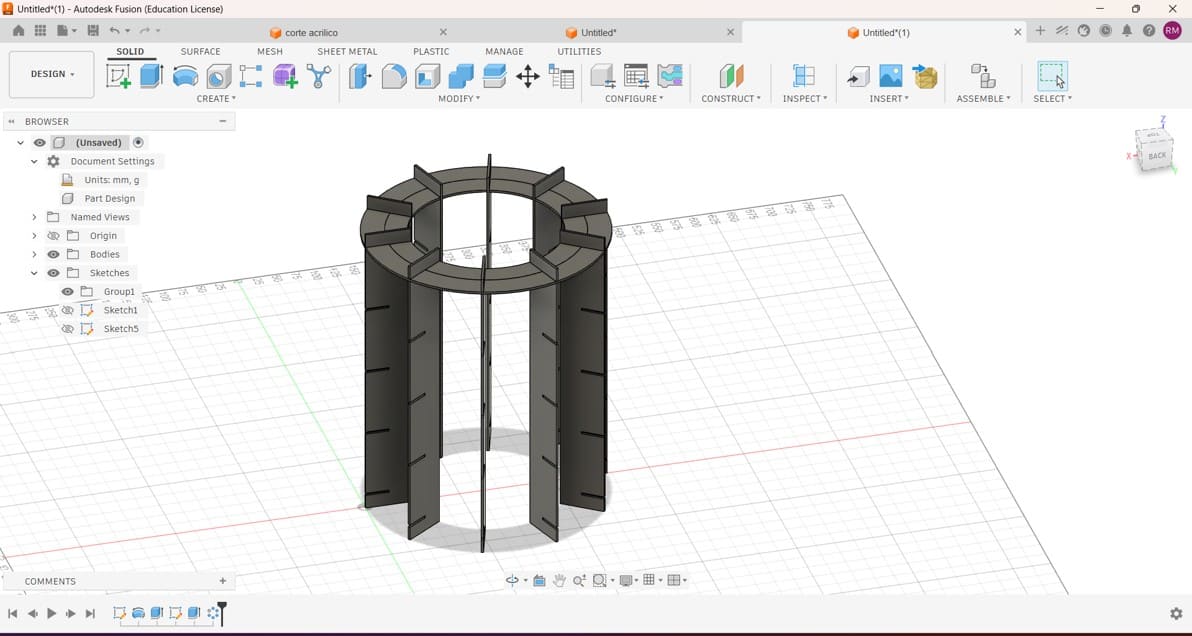
The thermoforming mold was designed in Fusion 360. The design included circular ribs, assembly slots, and a modular structure. The structure was parametrically designed to maintain the cylindrical geometry, resist deformation, and withstand the heating process of the acrylic.
Main considerations:
internal diameter of 20 cm,
compensation for acrylic thickness,
modular assembly,
and fabrication by laser cutting using 2 mm MDF.
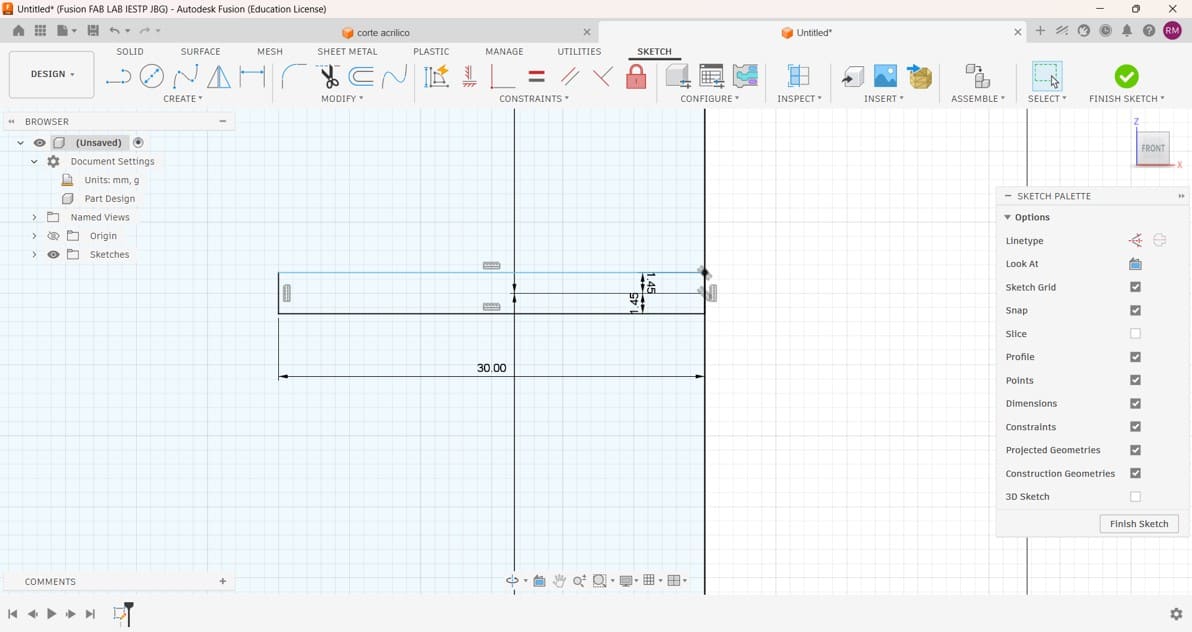
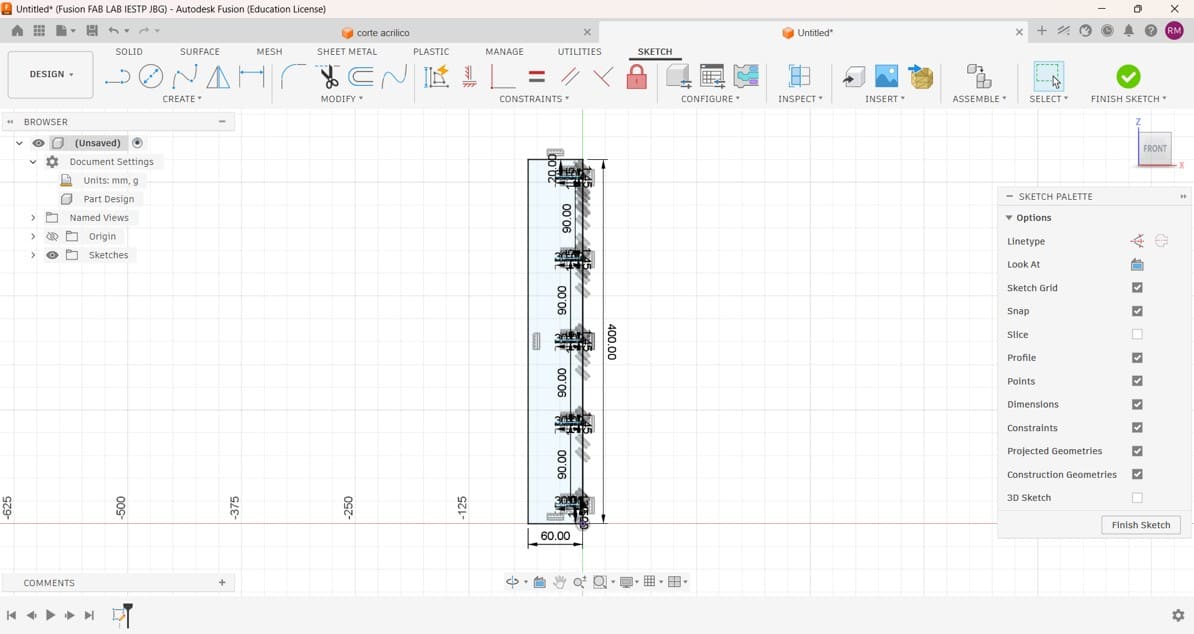
Img. 3: I started by designing the ribs of my mold. For this, I drew a rectangle measuring 40 cm high and 6 cm wide.
Img. 4: Then I drew the slots measuring 3 cm long by 1.8 mm wide so that they would press-fit with the 2 mm MDF.
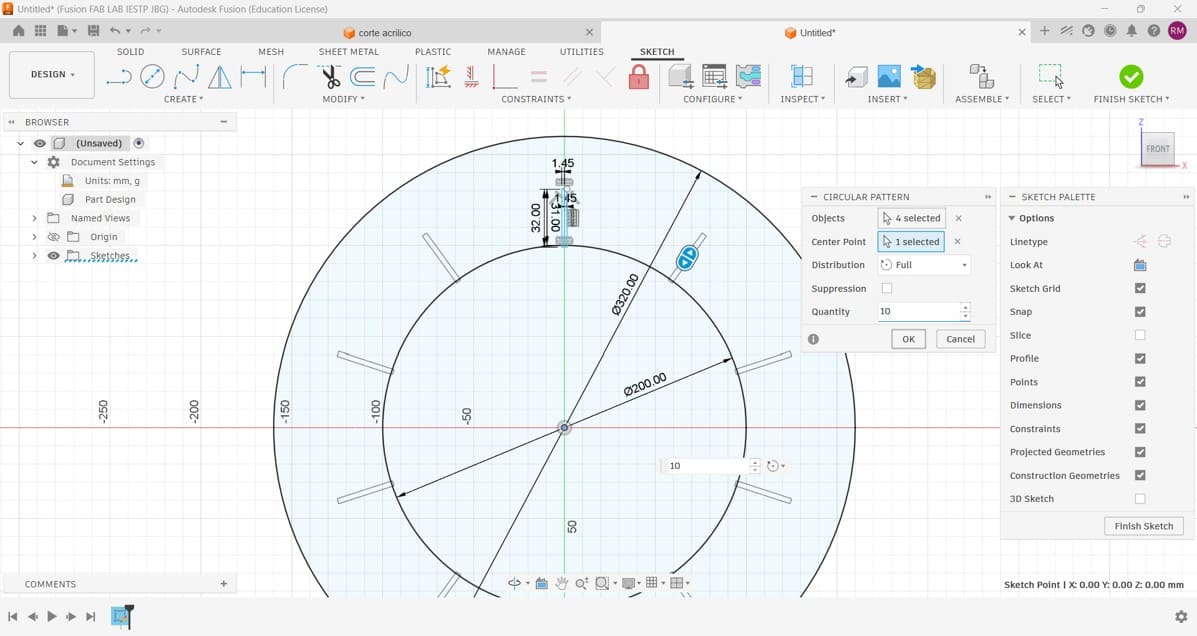
Img. 5: Then I drew a 20 cm diameter circle and another 32 cm circle to give the circular ribs a thickness of 6 cm. I also drew the slots in the circular ribs, measuring 3 cm long and 1.8 mm wide.
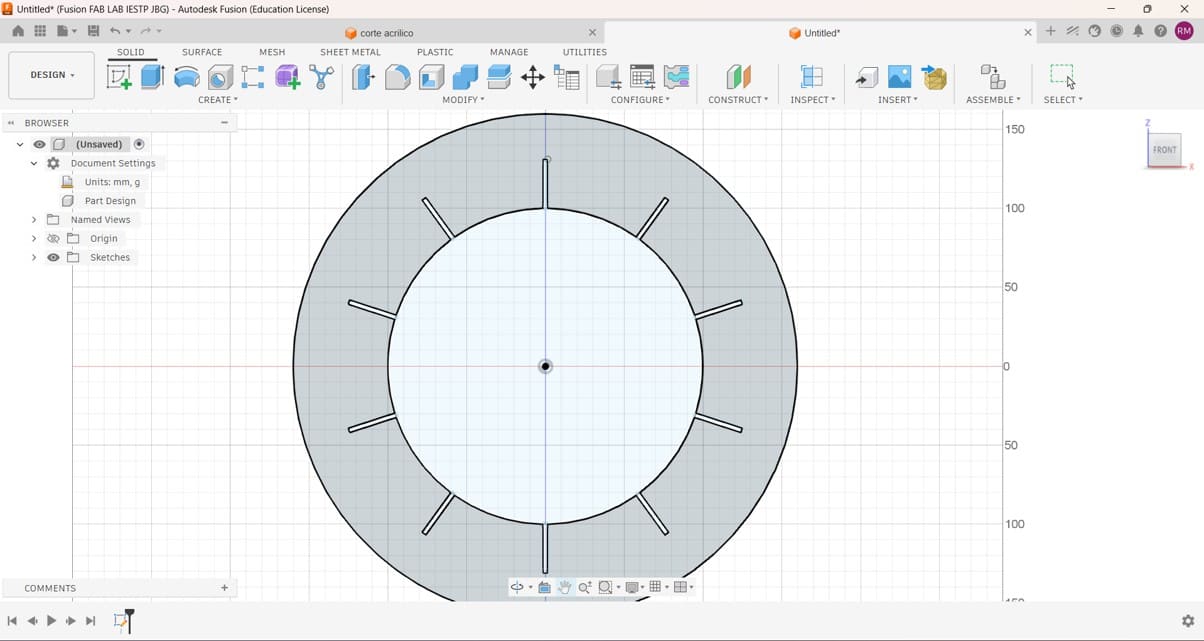
Img. 6: Then I applied a circular pattern and placed 10 slots along the circular rib.
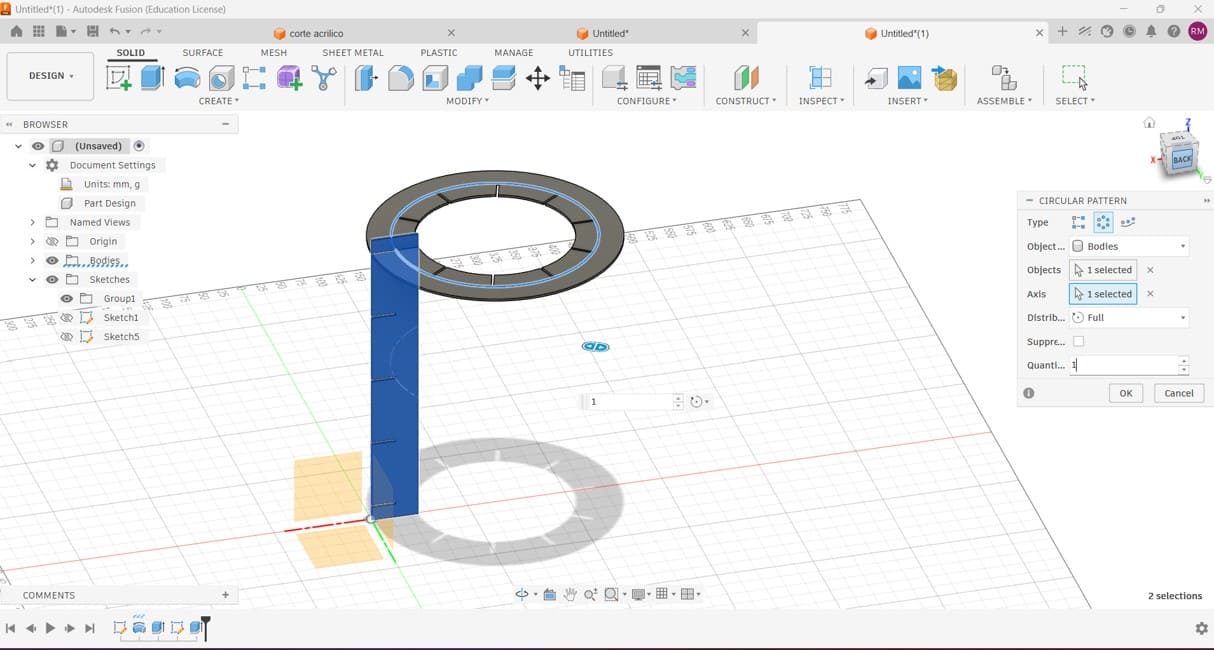
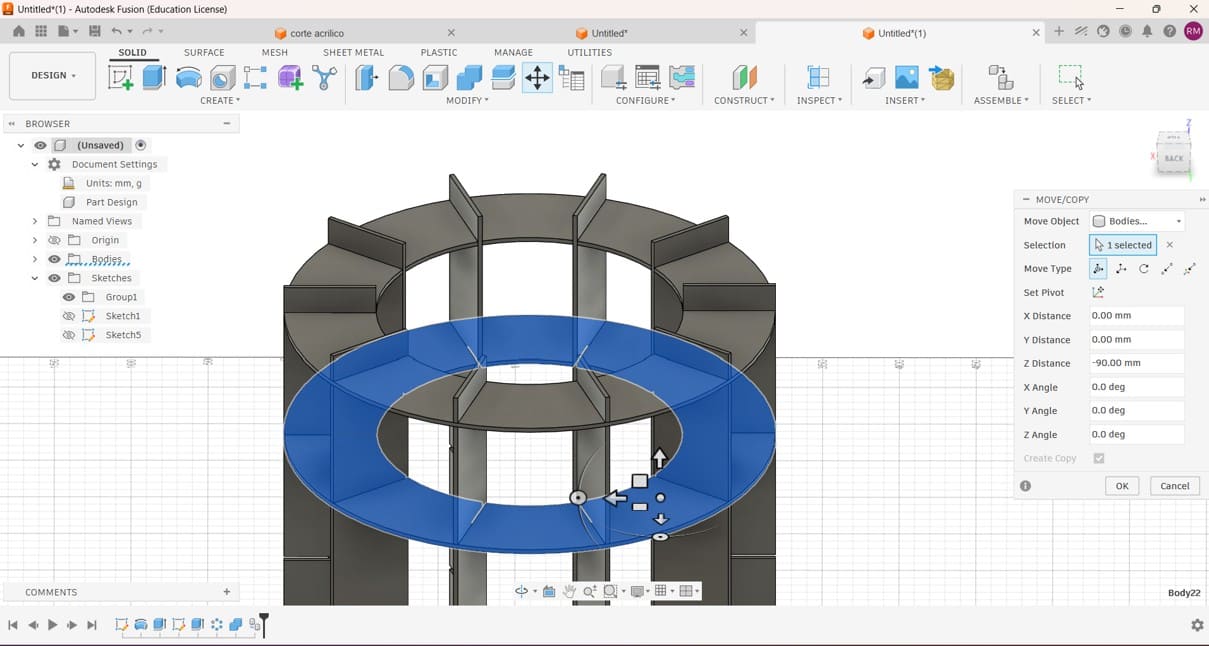
Img. 7: I joined the circular ribs with the transverse ribs.
Img. 8: I replicated the pattern of the transverse ribs.
Img. 9: I replicated the pattern of the circular ribs.
Img. 10: Finished support structure of the mold, ready for cutting in MDF.
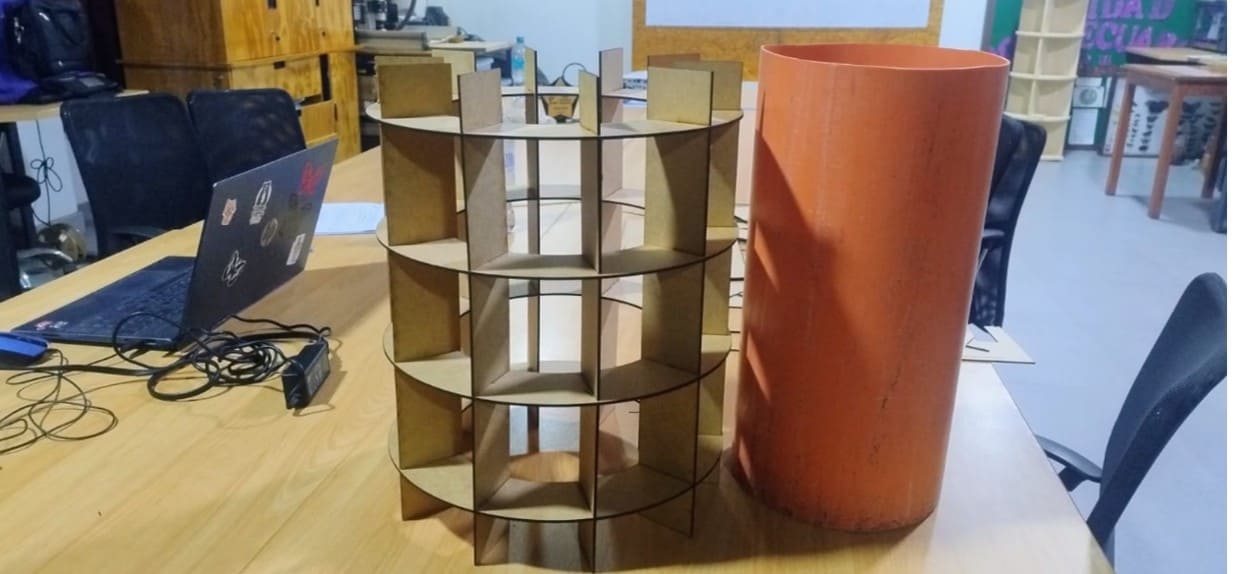
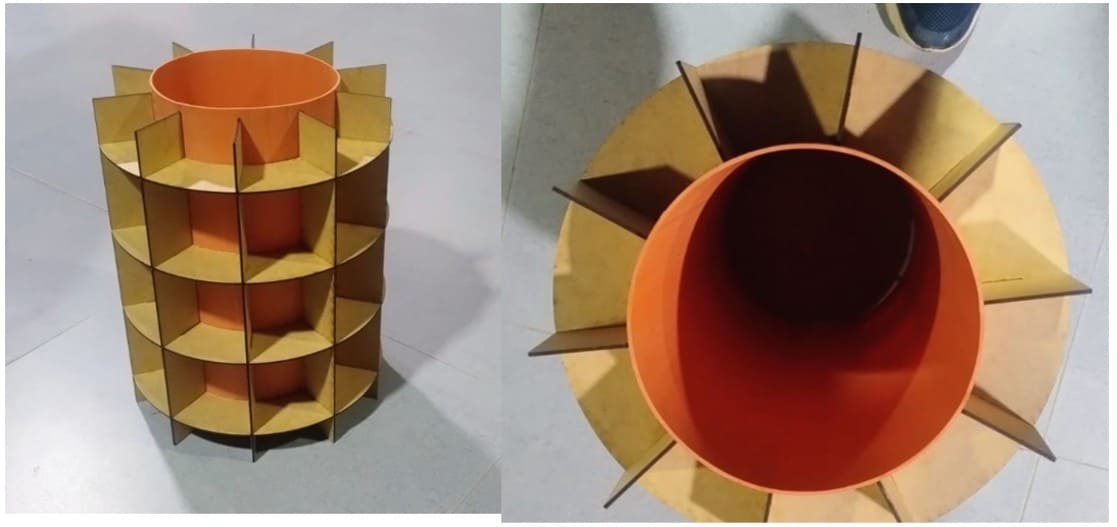
Img. 11: Assembled structure. It fit well by pressure. An 8-inch drainage pipe will be used as the internal base of the mold so that the acrylic can maintain a smooth shape.
Img. 12: Perfect fit.
5) Thermoforming Tests
Multiple thermoforming tests were performed using:
transparent acrylic of 2 mm and 3 mm,
an electric oven,
and manual forming.
Different temperatures and exposure times were tested.
Initial parameters
Temperature
Time
120 °C
2–10 min
130 °C
3–10 min
140 °C
2–10 min
The best results were obtained approximately at 130 °C. At this temperature, the acrylic became flexible, maintained its transparency, and could be curved without generating bubbles or severe deformations.
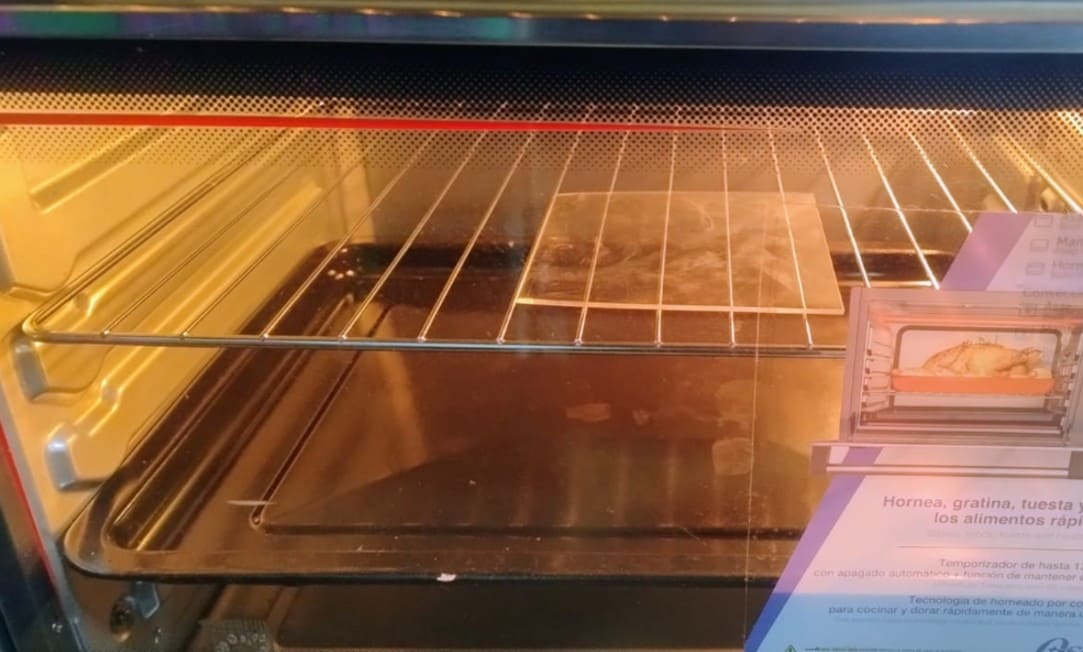
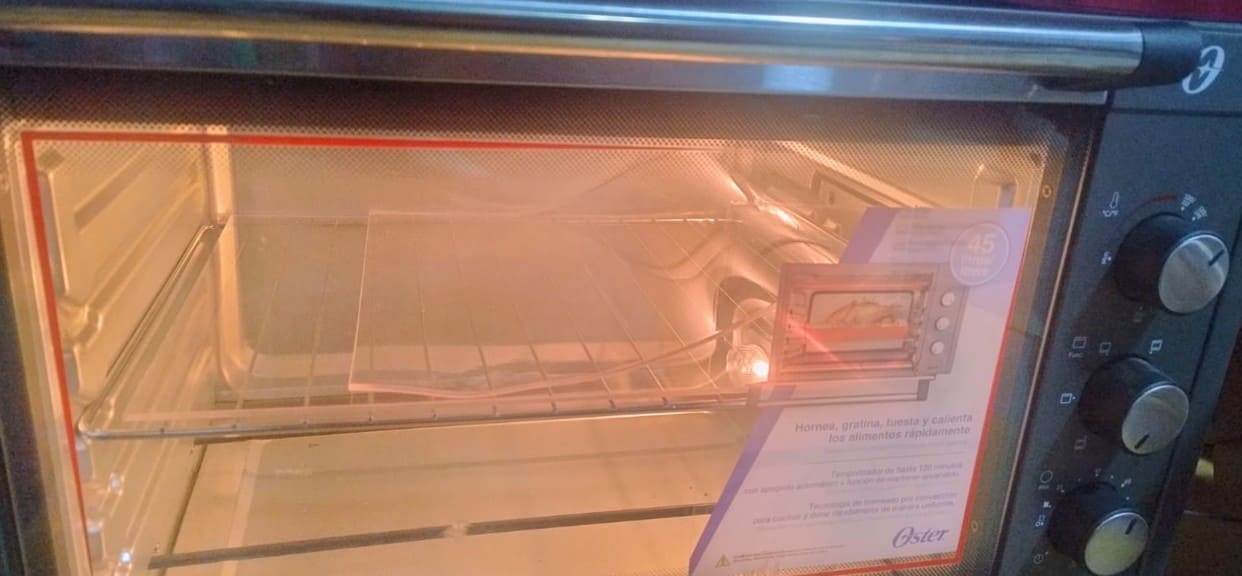
Img. 13: Temperature and time tests in the electric oven.
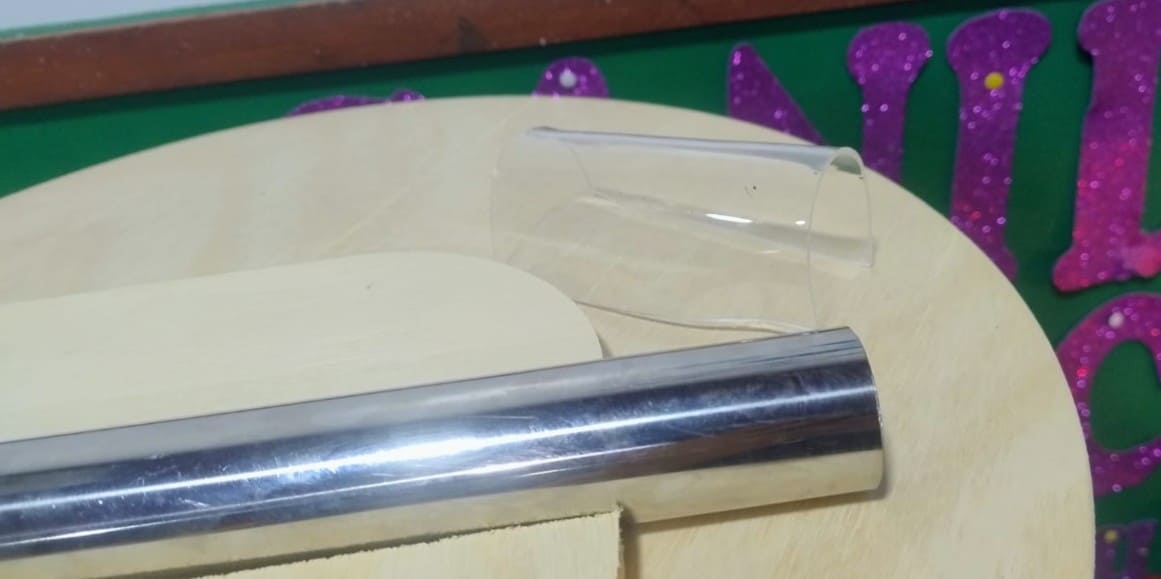
Img. 14: Thermoforming tests. I must admit that it was difficult at the beginning.
The methodology was to heat the oven, place the acrylic piece inside, wait 8 minutes, remove it, place it inside the mold, and press from the inside to achieve the cylindrical shape.
6) Photobioreactor Cylinder Fabrication
The moment arrived. To obtain a tube with an internal diameter of 20 cm, I had to cut the acrylic to 63.1 cm long by 30 cm high. However, I only had 50 cm x 50 cm acrylic sheets left, so first I made a test by joining two thermoformed parts. For this, I decided that it should have an overlap so that the acrylic glue could bond properly, because edge-to-edge there was very little surface area and it did not hold well.
First, two acrylic pieces of 33 cm x 30 cm were cut, considering a 1.45 cm overlap.
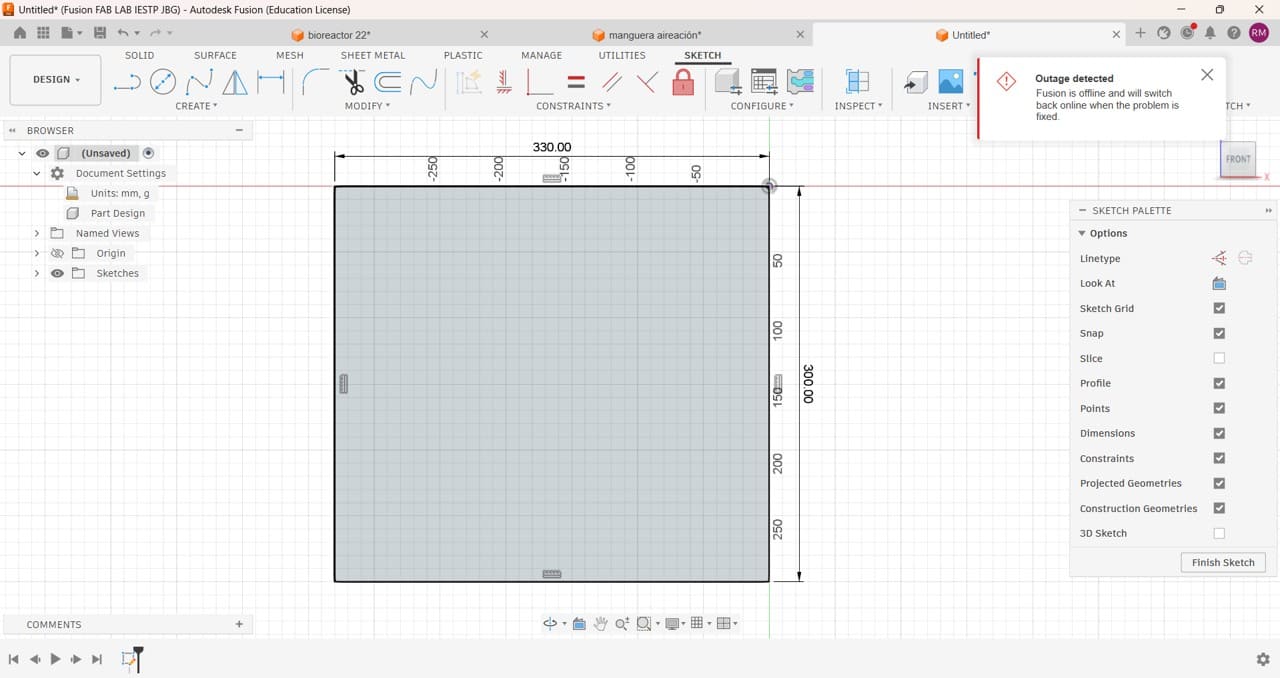
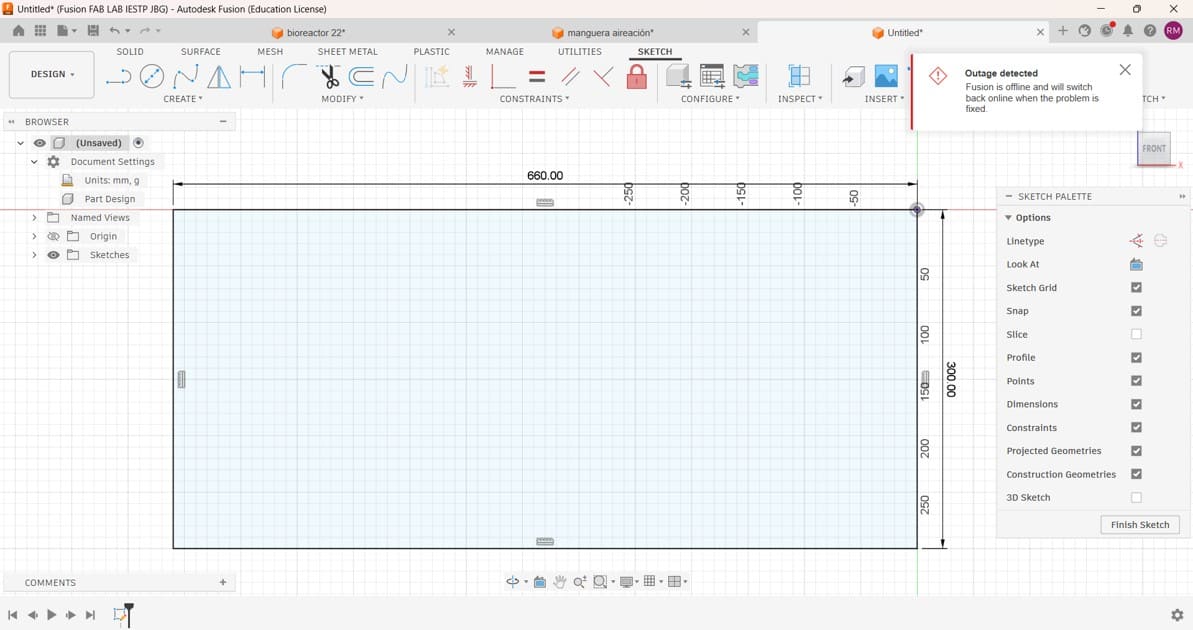
Img. 15: Design of the rectangle for acrylic cutting, measuring 33 x 30 cm, in Fusion 360.
Img. 16: Thermoforming result. It was glued with acrylic adhesive and reinforced with silicone. The acrylic adhesive dries in 5 minutes, while the silicone had to be left to dry for 24 hours.
Although it was functional, I did not really like that it had two overlaps. Also, since it was my first time gluing with silicone, the finish looked very rough and had lumps. So I decided to do one more test, but this time with acrylic measuring 66 cm long by 30 cm wide, to have only one 1 cm overlap and make it look less unattractive.
Img. 17: Design of the new dimensions.
Img. 18: To do this, I had to buy more acrylic. Once the acrylic was cut, I realized it would not fit in the oven. Therefore, I had no choice but to heat it a little first, bend it, and then place it in the oven.
Problem and Solution
Problem: When bending the acrylic, it stuck together.
Solution: I searched for information and was told that using a little chuño could solve it. It was true; after applying a little chuño, the acrylic no longer stuck and the process worked.
7) Cylinder Assembly
The final cylinder was assembled using:
1 cm overlap,
acrylic adhesive.
The obtained cylinder achieved:
good structural rigidity,
transparency,
and an adequate sealed geometry for the photobioreactor.
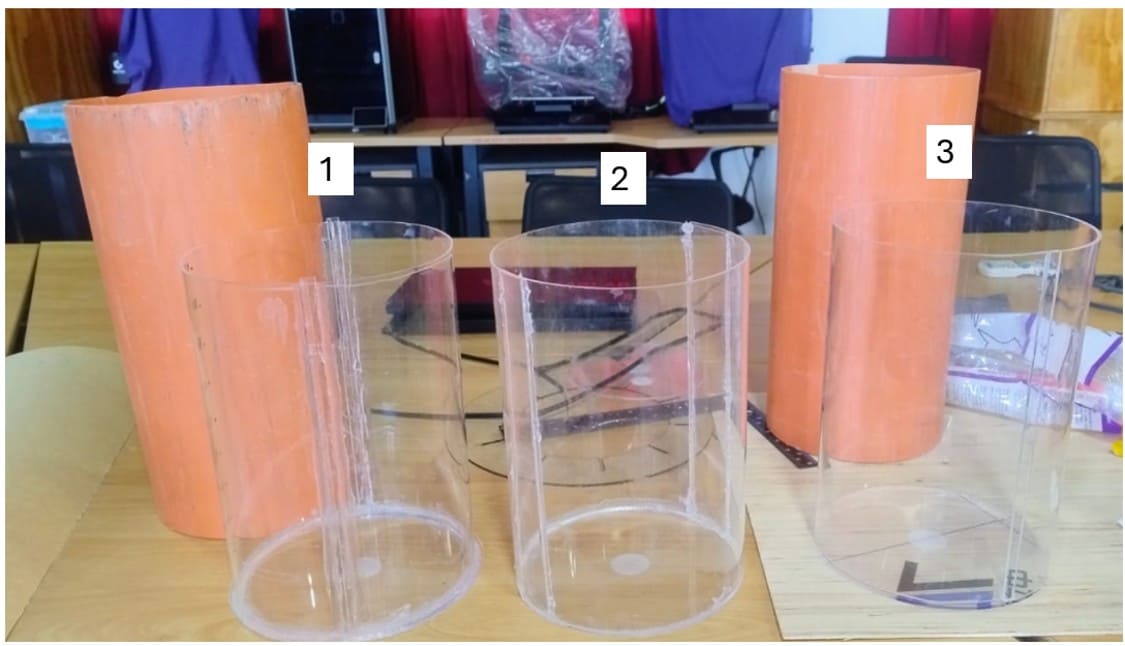
Img. 19: Tests 1 and 2 looked very rough in finish. Although functional, I did not like seeing so much silicone everywhere. Test 3 had a much better finish, and I hope to continue testing to achieve an excellent finish.
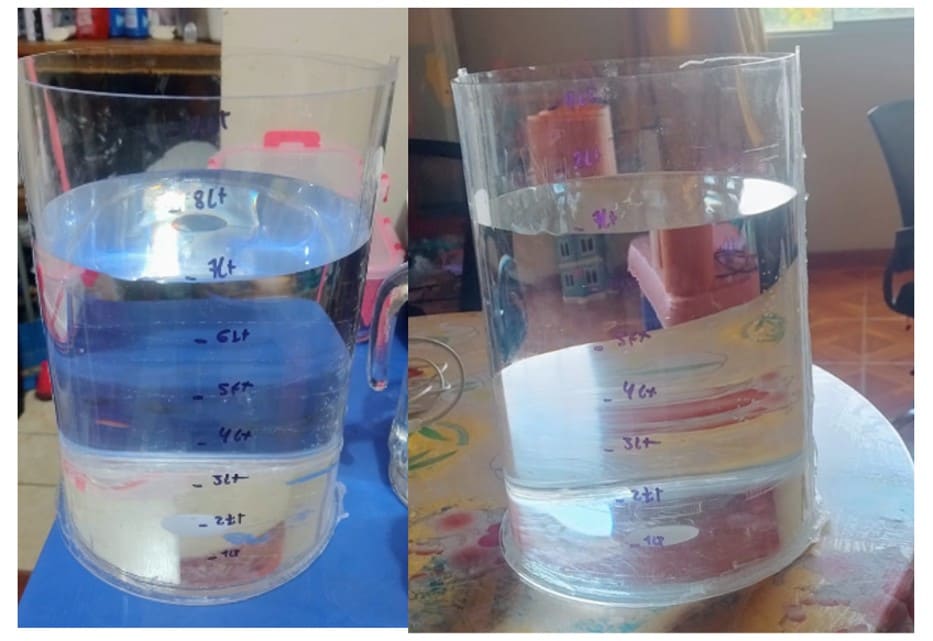
Img. 20: Sealing test of the photobioreactor cylinder. It did not leak at all. I left it for 3 days, and I think it is ready to be used for my final project. At this point, I wondered why I had not engraved liter measurements on it.
Video 1: Aeration and cylinder sealing test.
8) Conclusion
This assignment allowed me to explore thermoforming as a digital fabrication workflow integrated with CAD design and modular fabrication.
The process demonstrated how digitally fabricated molds can be combined with thermal forming techniques to produce custom transparent structures oriented toward biotechnological applications.
The obtained cylinder will be used as the main chamber of the photobioreactor system for spirulina cultivation in my final project.
Files & Downloads
This section includes the design and fabrication files used during Wildcard Week for the thermoformed acrylic cylinder and mold fabrication process.