Assignment requirements
Group assignment
- Demonstrate and compare the toolchains and development workflows for available embedded architectures
- Document your work to the group work page and reflect on your individual page what you learned
Individual assignment
- Browse through the datasheet for a microcontroller
- Write and test a program for an embedded system using a microcontroller to interact (with local input &/or output devices) and communicate (with remote wired or wireless connections)
Progress status
Demonstrate and compare the toolchains
Develop workflows
Write and test a program for an embedded system using a microcontroller
Upload source files.
1) Introduction
New topic
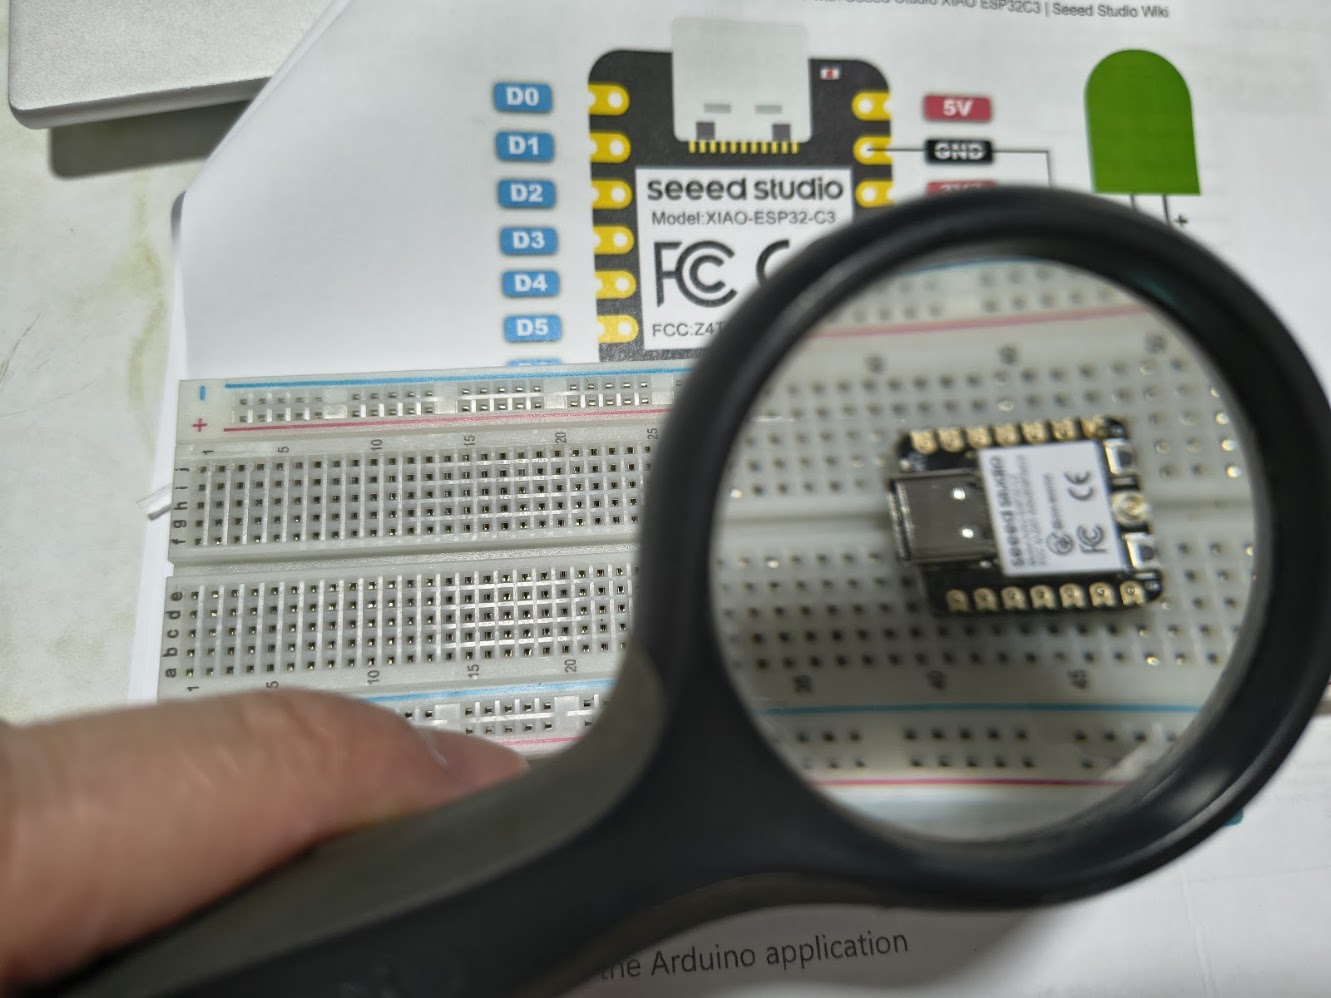
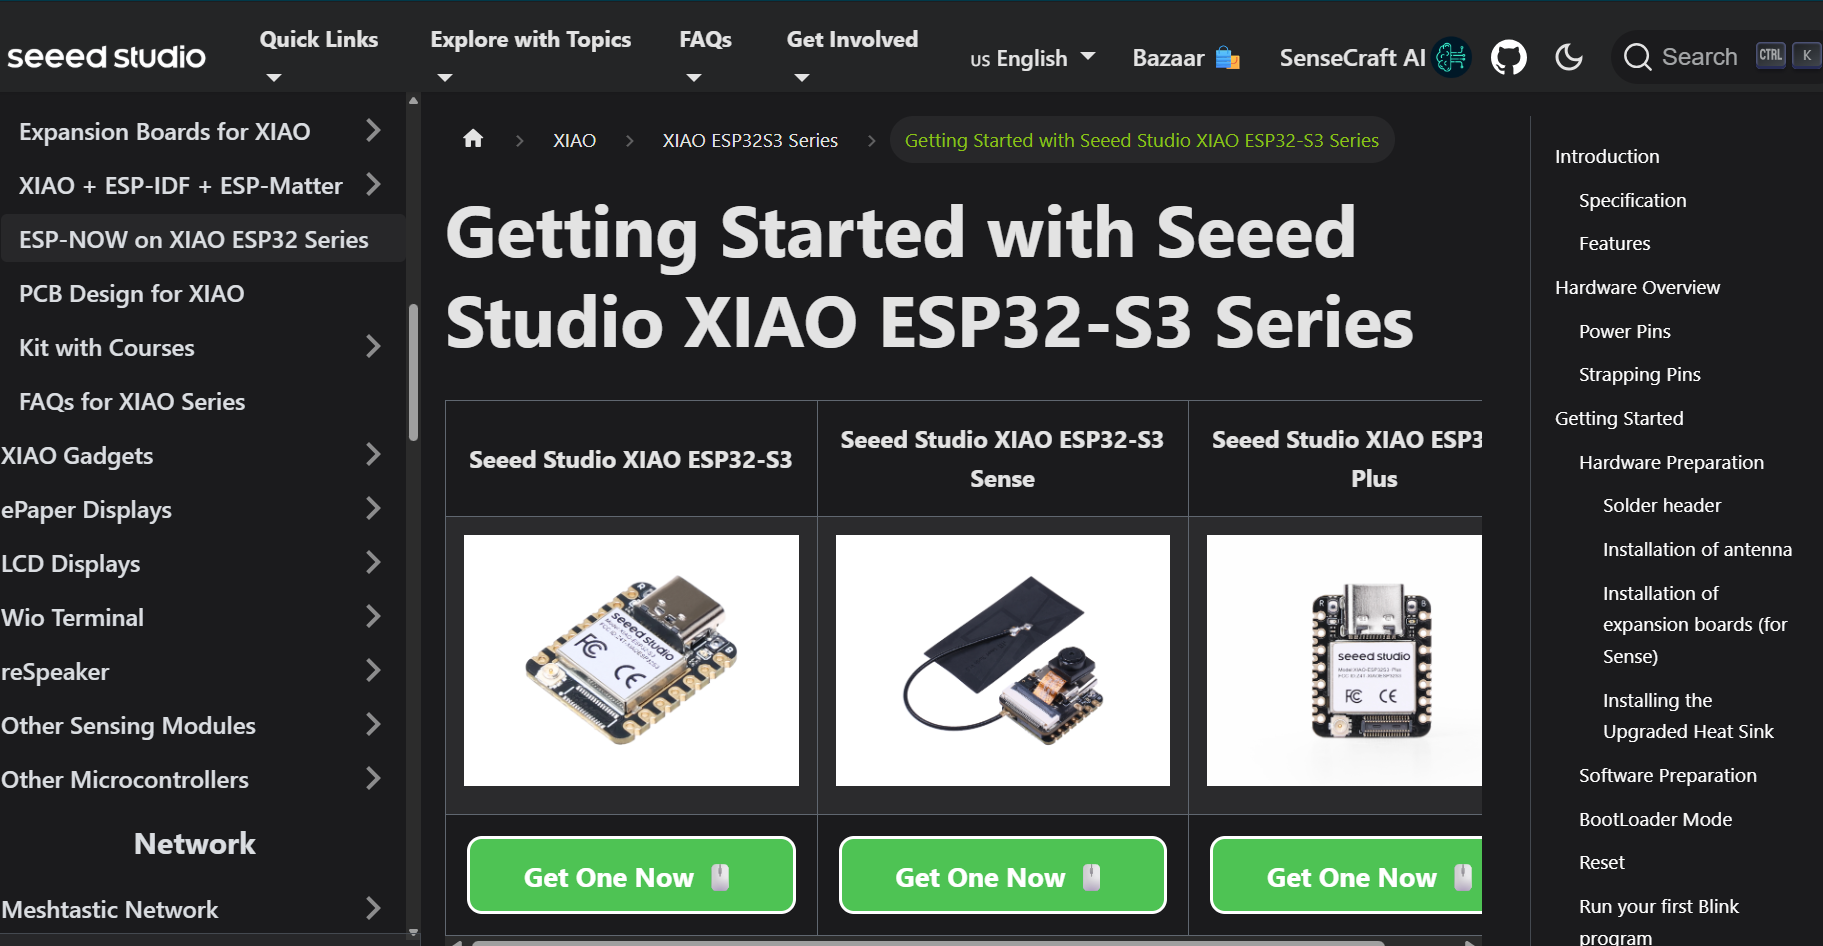
- Learn about Xiao Seed ESP32-C3
- Review projects with Xiao Seed ESP32-C3
- Discuss the group project
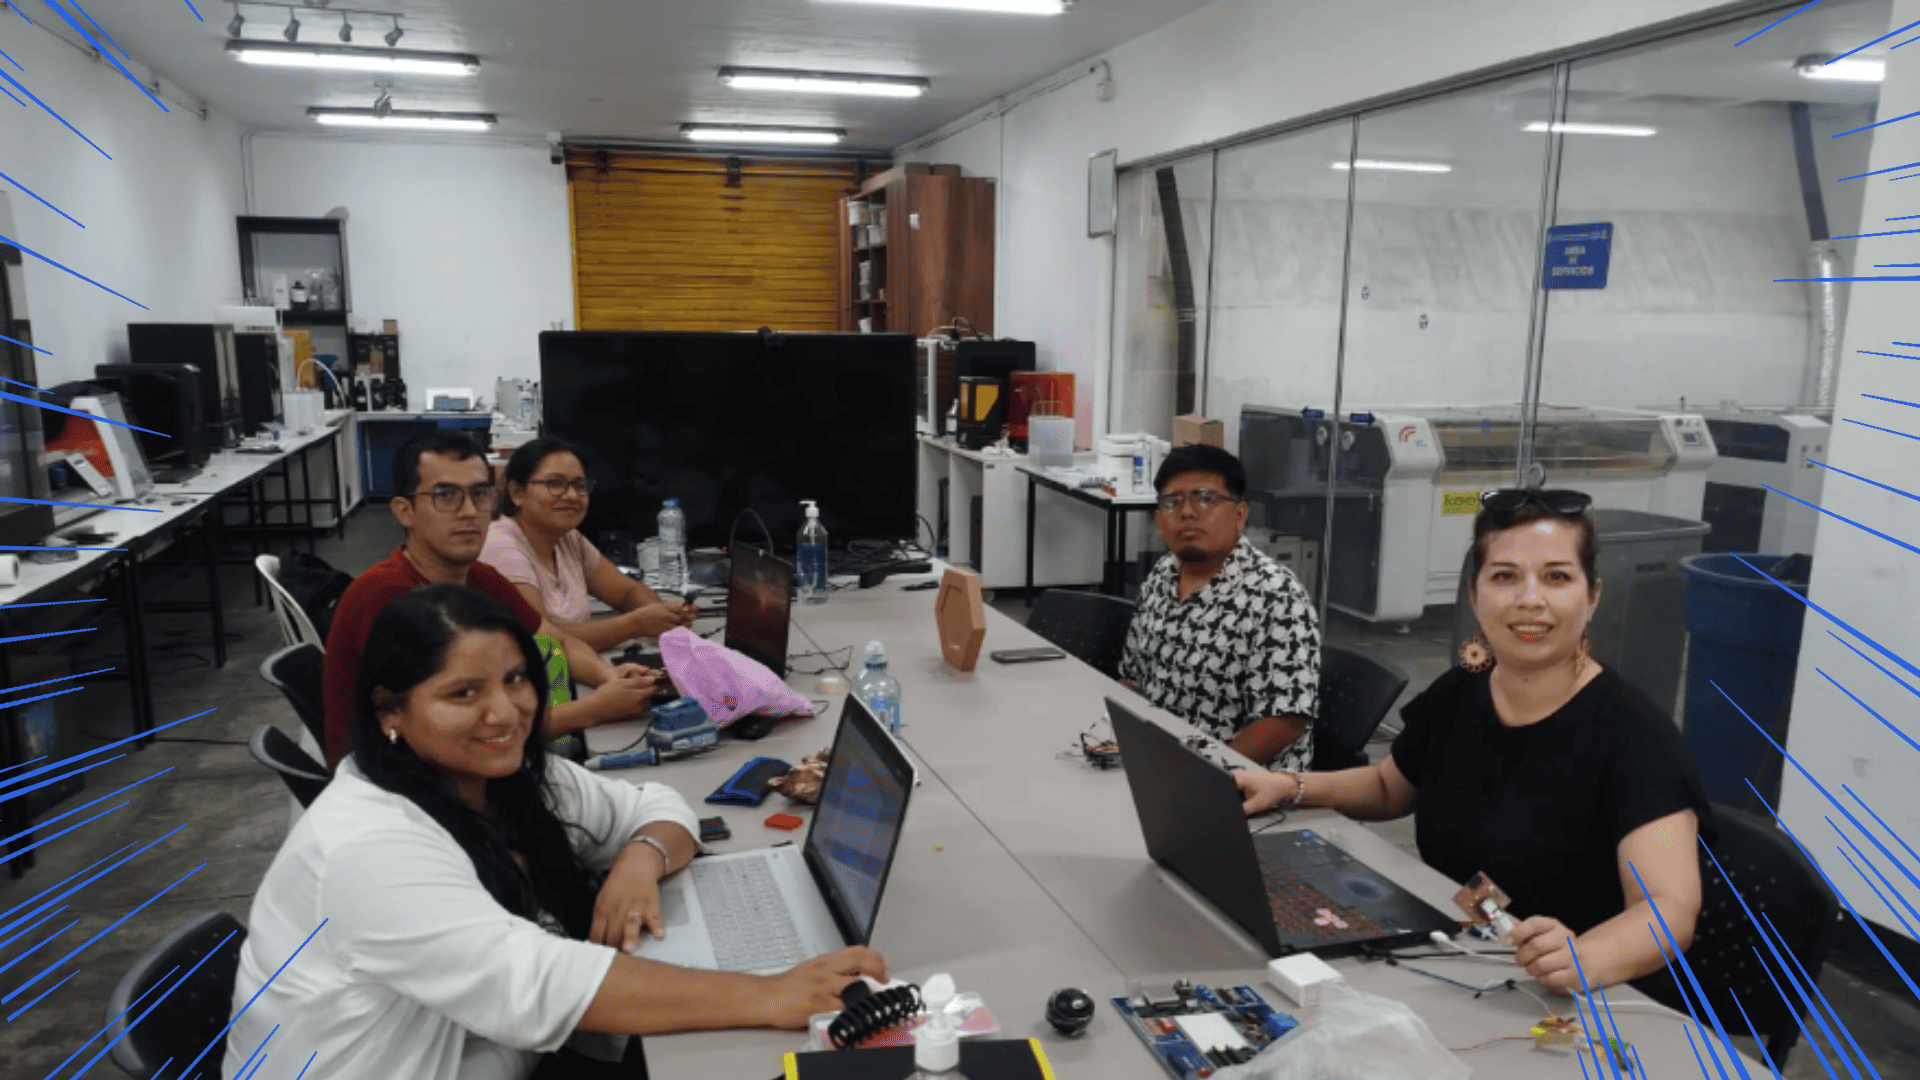
- Interact and collaborate

2) Group assignment - Demonstrate, compare and development embedded architectures
For more details visit Fab Lab Peru Week 4 Group assignment
Compare performance
- RP2040 is well balanced: it has dual-core processing, good speed (up to 133 MHz), and enough memory (264 KB SRAM + 2 MB Flash) for medium projects. It’s ideal for local control (LEDs, buttons, sensors, PWM, ADC) and quick development with Arduino or MicroPython
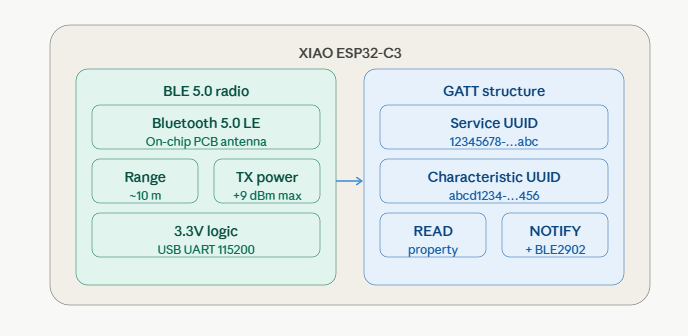
- ESP32-C3 is a good option when wireless connectivity is required, since it includes Wi-Fi and Bluetooth (BLE). It is strong enough for basic IoT applications, and its main advantage is the ability to connect to a network or a phone. The workflow usually includes network setup (Wi-Fi credentials or BLE services).
- ESP32-S3 is the most powerful option: it offers higher speed and significantly more memory available on the board (large Flash + PSRAM). This is helpful for heavier tasks, larger libraries, or advanced features, while still maintaining Wi-Fi/BLE connectivity.r
- ATSAMD11 is the most basic and limited in terms of resources (lower speed and memory). However, it is very useful for learning because it encourages writing efficient firmware and often involves a more “technical” workflow using ARM tools and SWD debugging. It is a good option to demonstrate a workflow different from simply uploading via USB
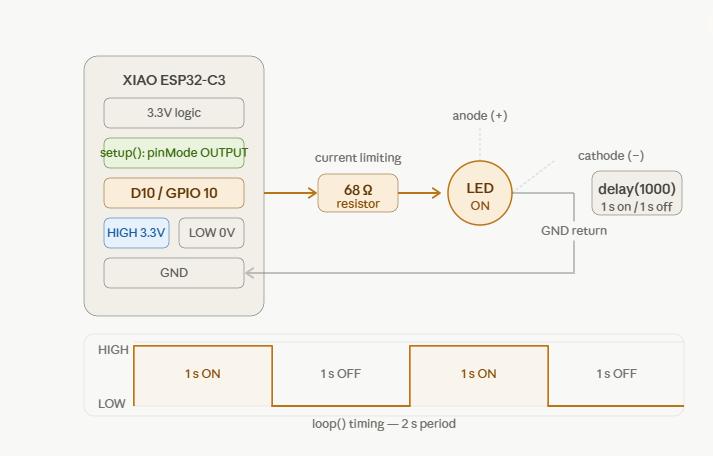
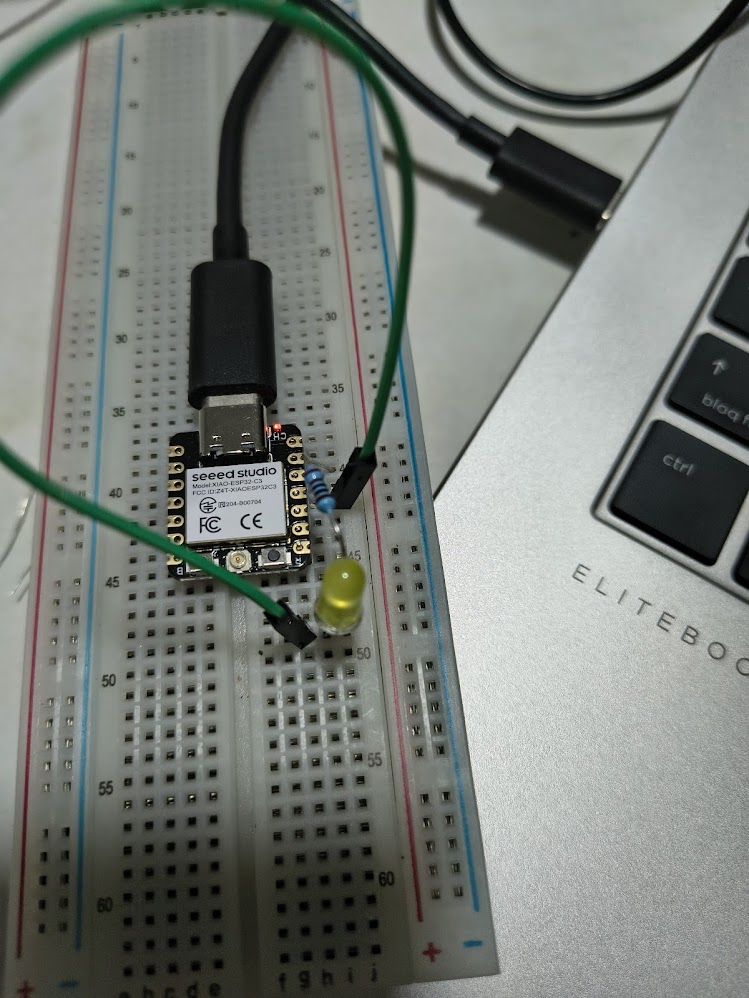
// define led according to pin diagram in article
                  const int led = D10; // there is no LED_BUILTIN available for the XIAO ESP32C3.

                  void setup() {
                    // initialize digital pin led as an output
                    pinMode(led, OUTPUT);
                  }

                  void loop() {
                    digitalWrite(led, HIGH);   // turn the LED on
                    delay(1000);               // wait for a second
                    digitalWrite(led, LOW);    // turn the LED off
                    delay(1000);               // wait for a second
                  }
Video demonstration
3) Individual assigment
Problems
Unknow basic concepts
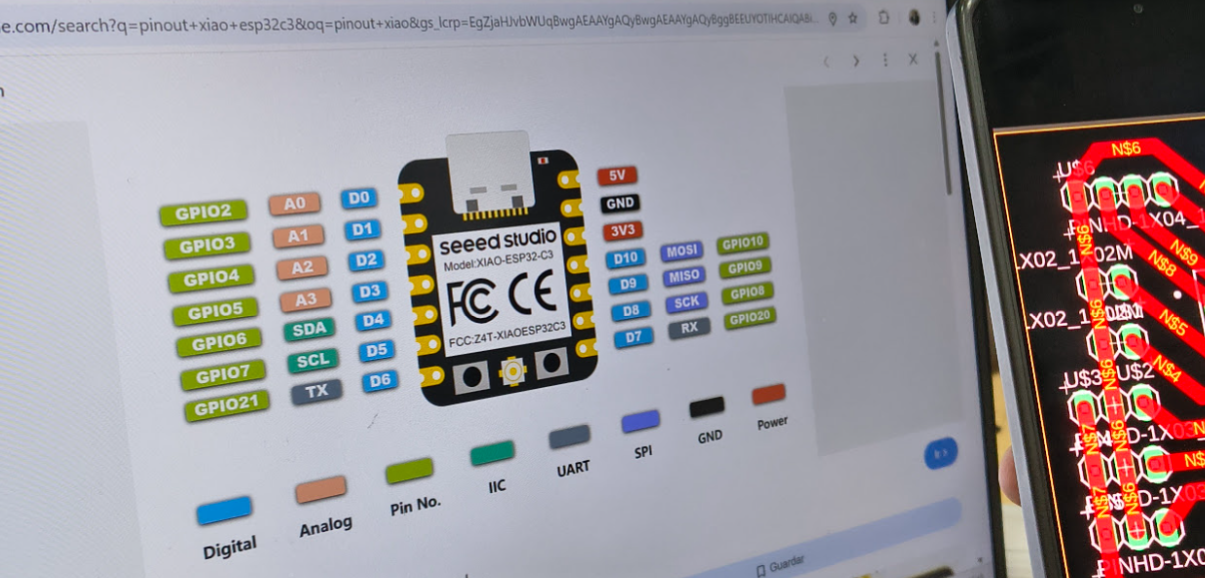
Unknow microcontroller Xiao ESP 32 C3 architecture
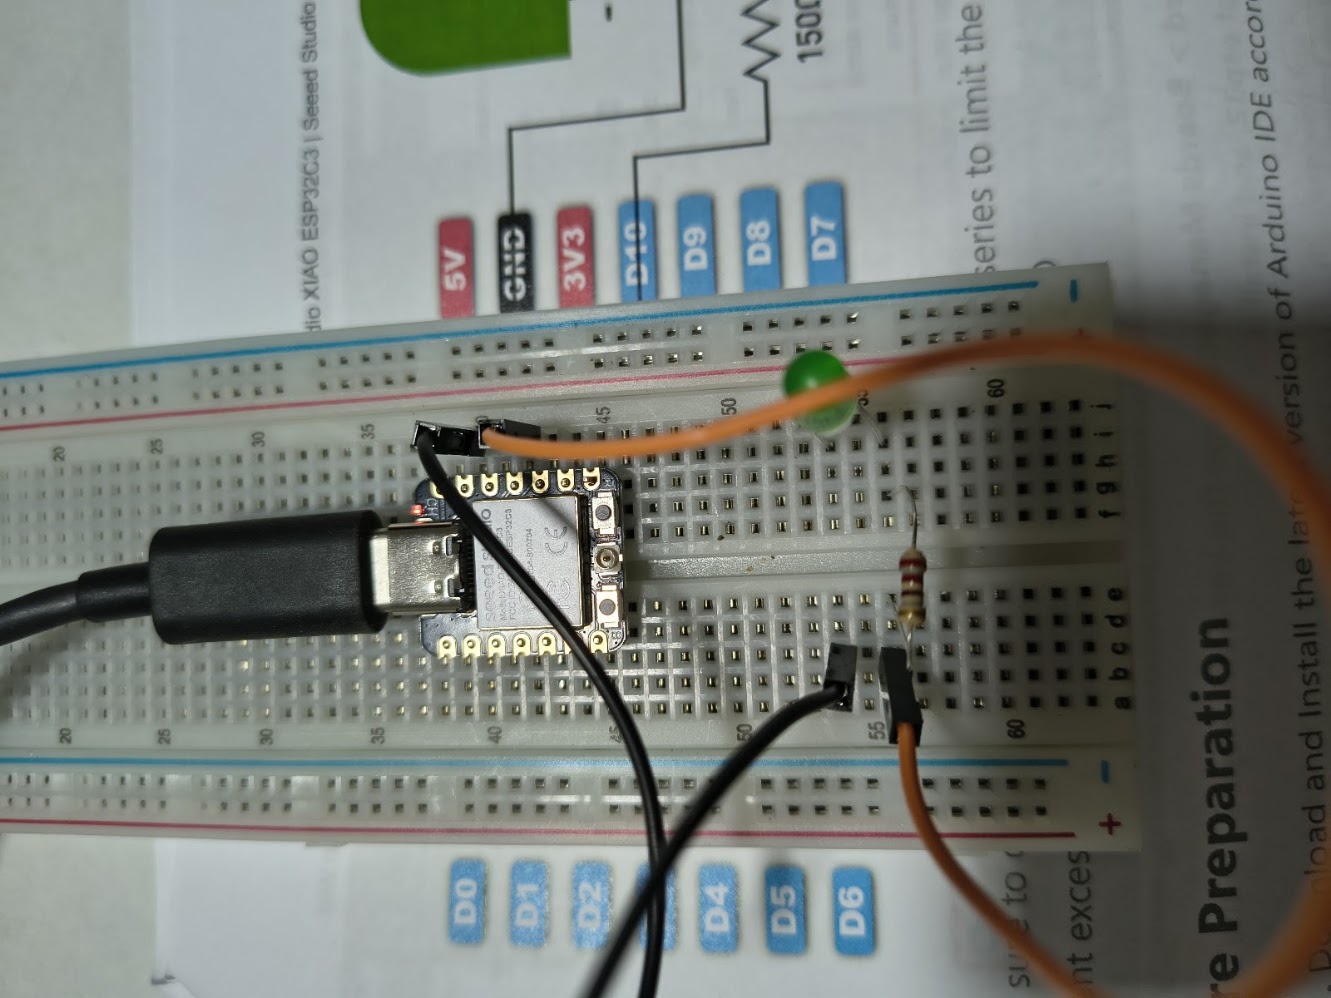
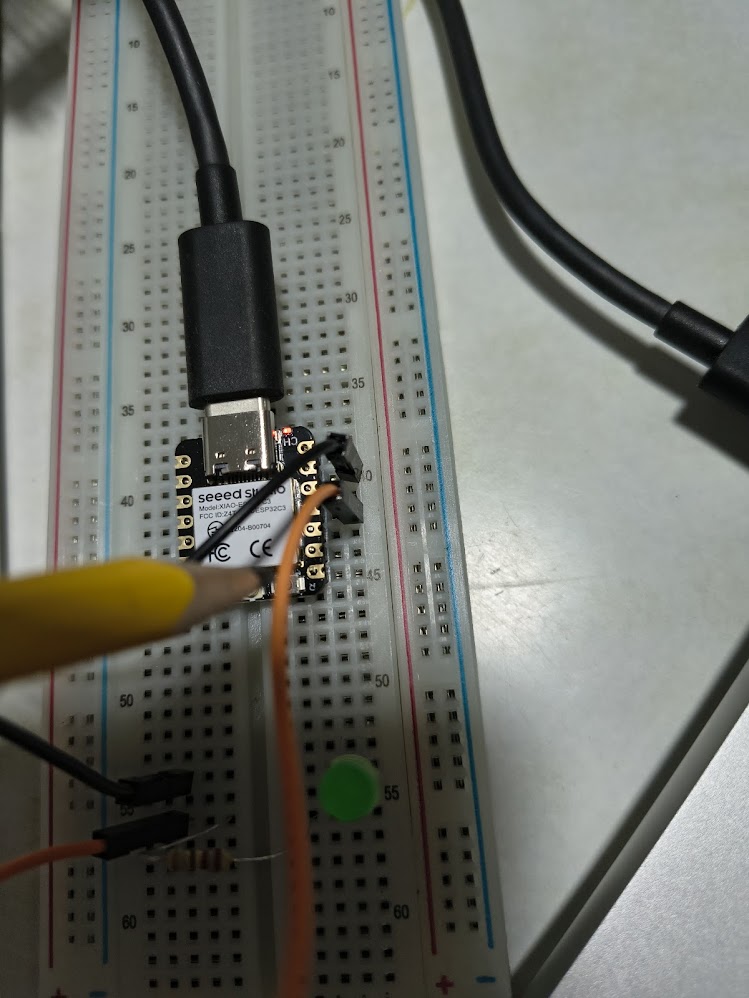
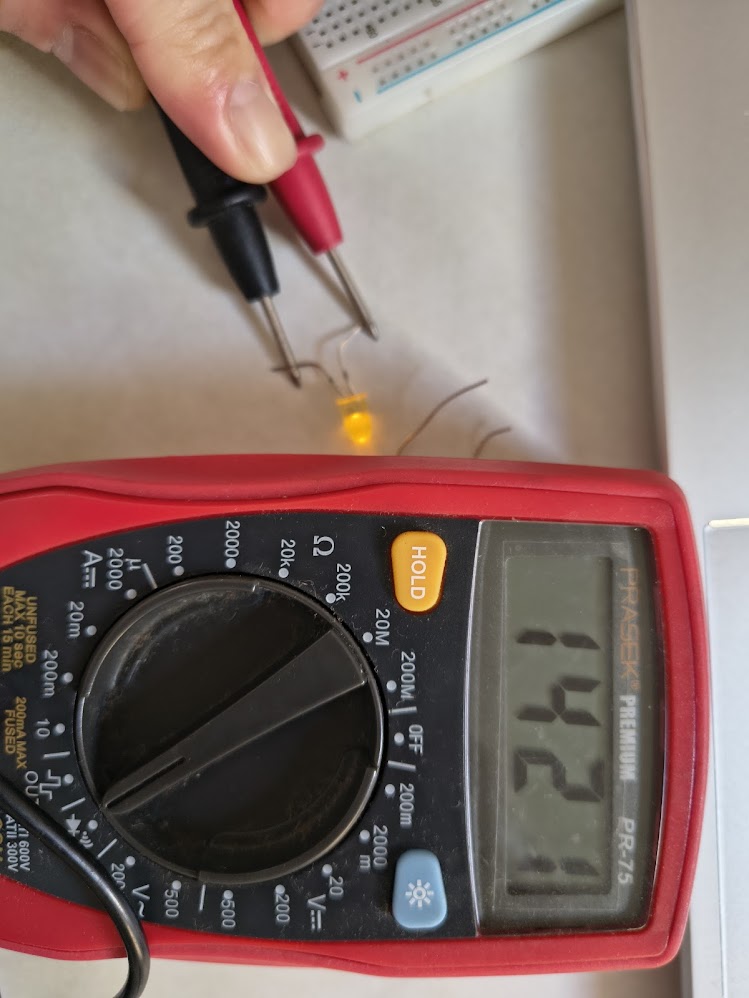
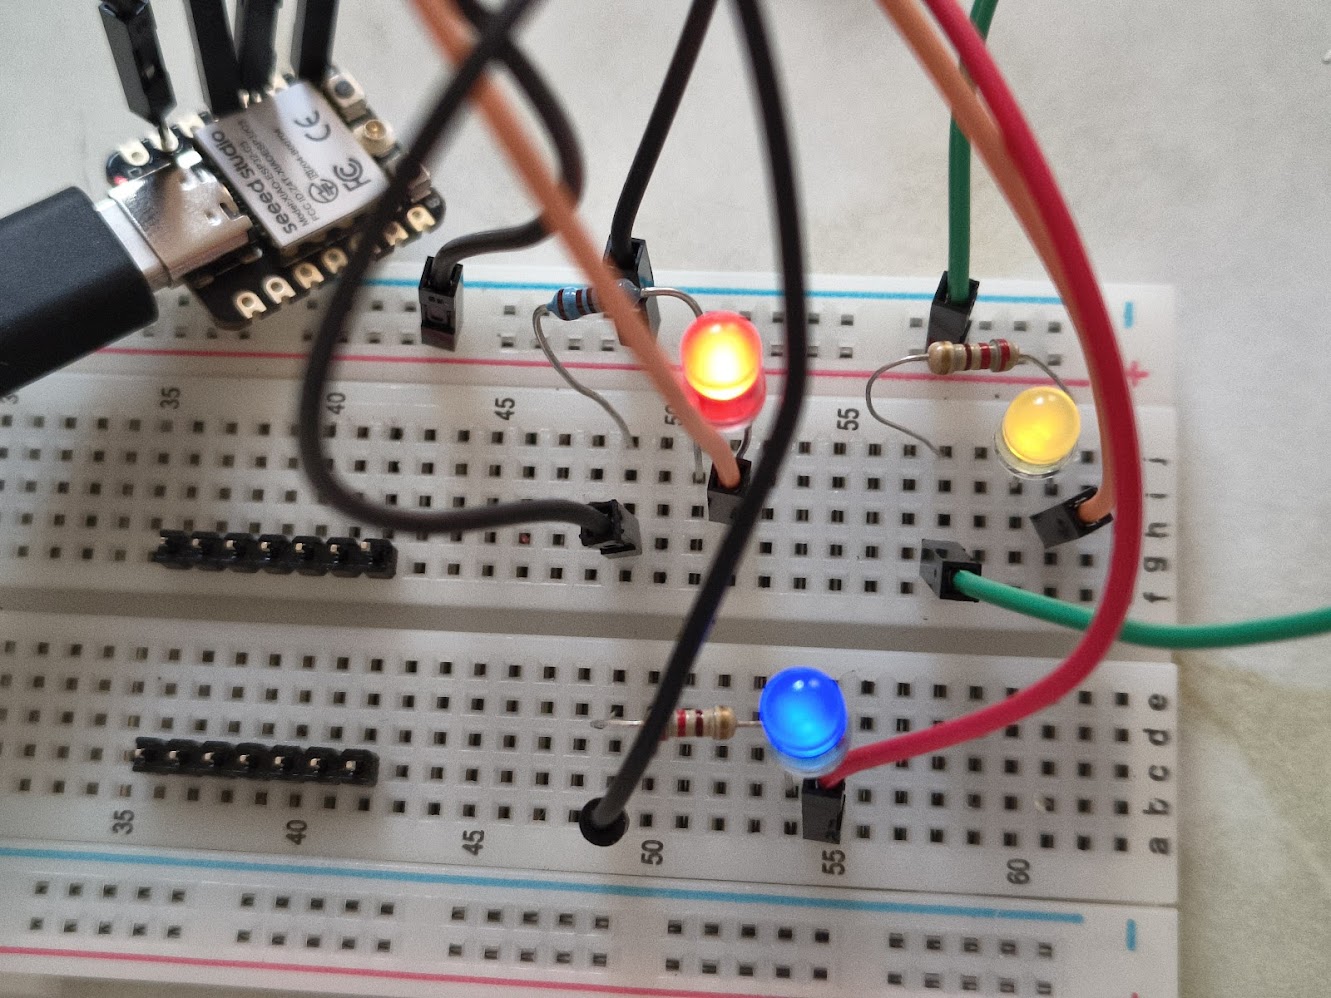
Failed leds
Poor connections
Solutions
Review Xiao ESP 32 C3 documents
Review connections using a voltimetimeter
This Wiki was useful https://wiki.seeedstudio.com/xiao_esp32s3_getting_started/
// define led according to pin diagram in article
                  const int led = D10; // there is no LED_BUILTIN available for the XIAO ESP32C3.

                  void setup() {
                    // initialize digital pin led as an output
                    pinMode(led, OUTPUT);
                  }

                  void loop() {
                    digitalWrite(led, HIGH);   // turn the LED on
                    delay(1000);               // wait for a second
                    digitalWrite(led, LOW);    // turn the LED off
                    delay(1000);               // wait for a second
                  }
void setup() {
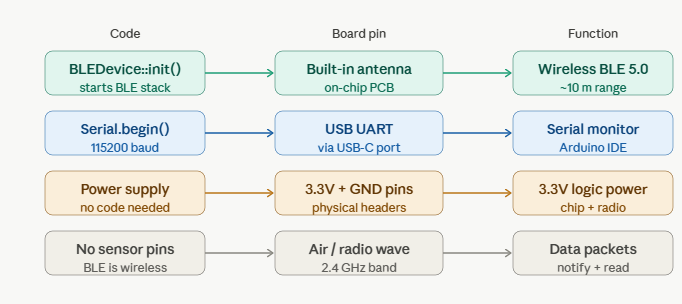
Serial.begin(115200); // start serial communication
}
void loop() {
Serial.println("Hello, Hello Fab Academy!");
delay(2000); // repeat every 2 seconds
}
4) Additional individual assigment
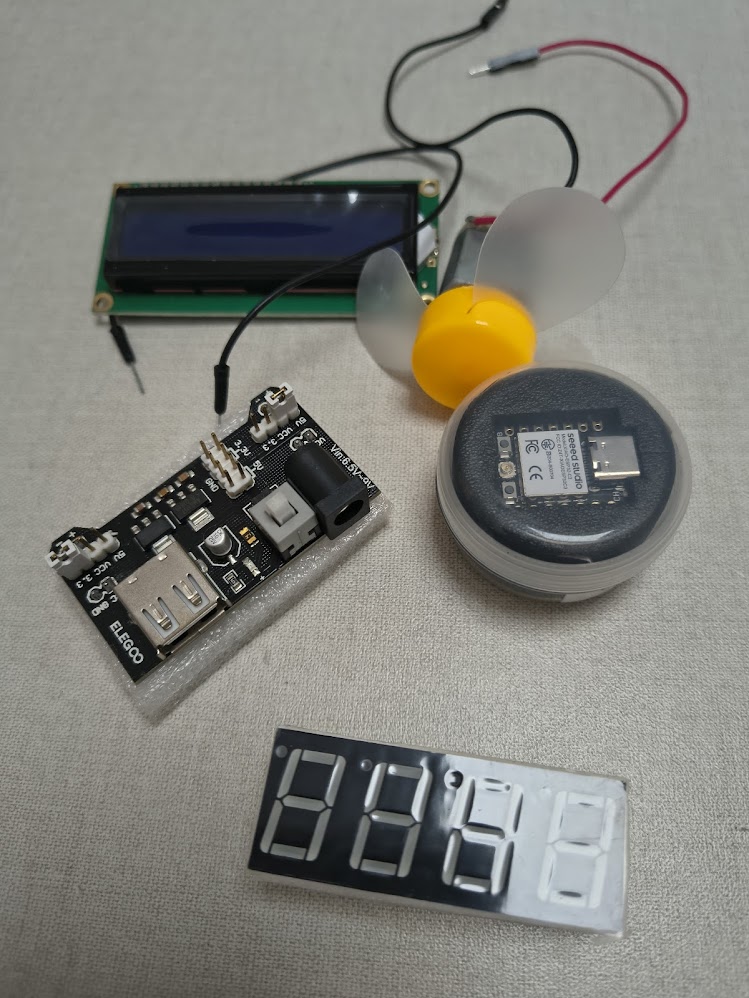
- Add input device (button, sensor)
- Demonstrate communication (serial / Wi-Fi)
- Upload screenshots of serial monitor output
- Explain code logic clearly
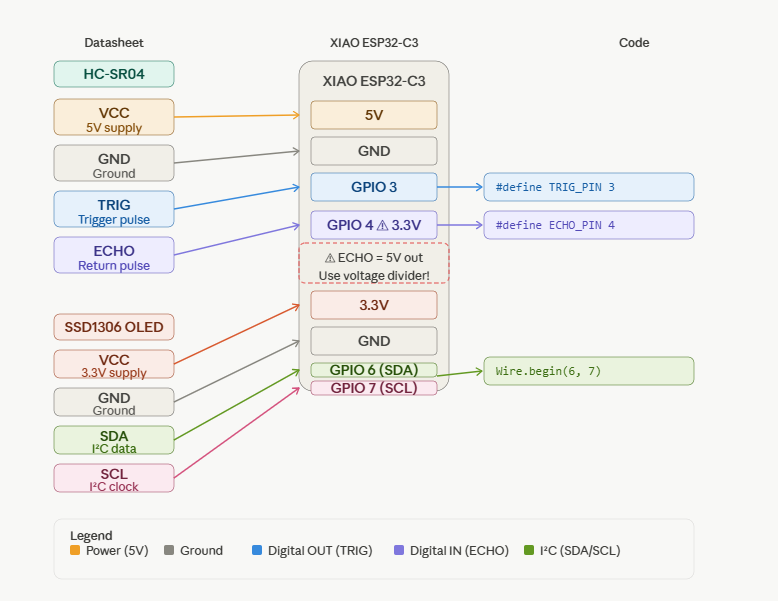
- Show datasheet → pin mapping → code usagets
- Add debugging or error-solving steps
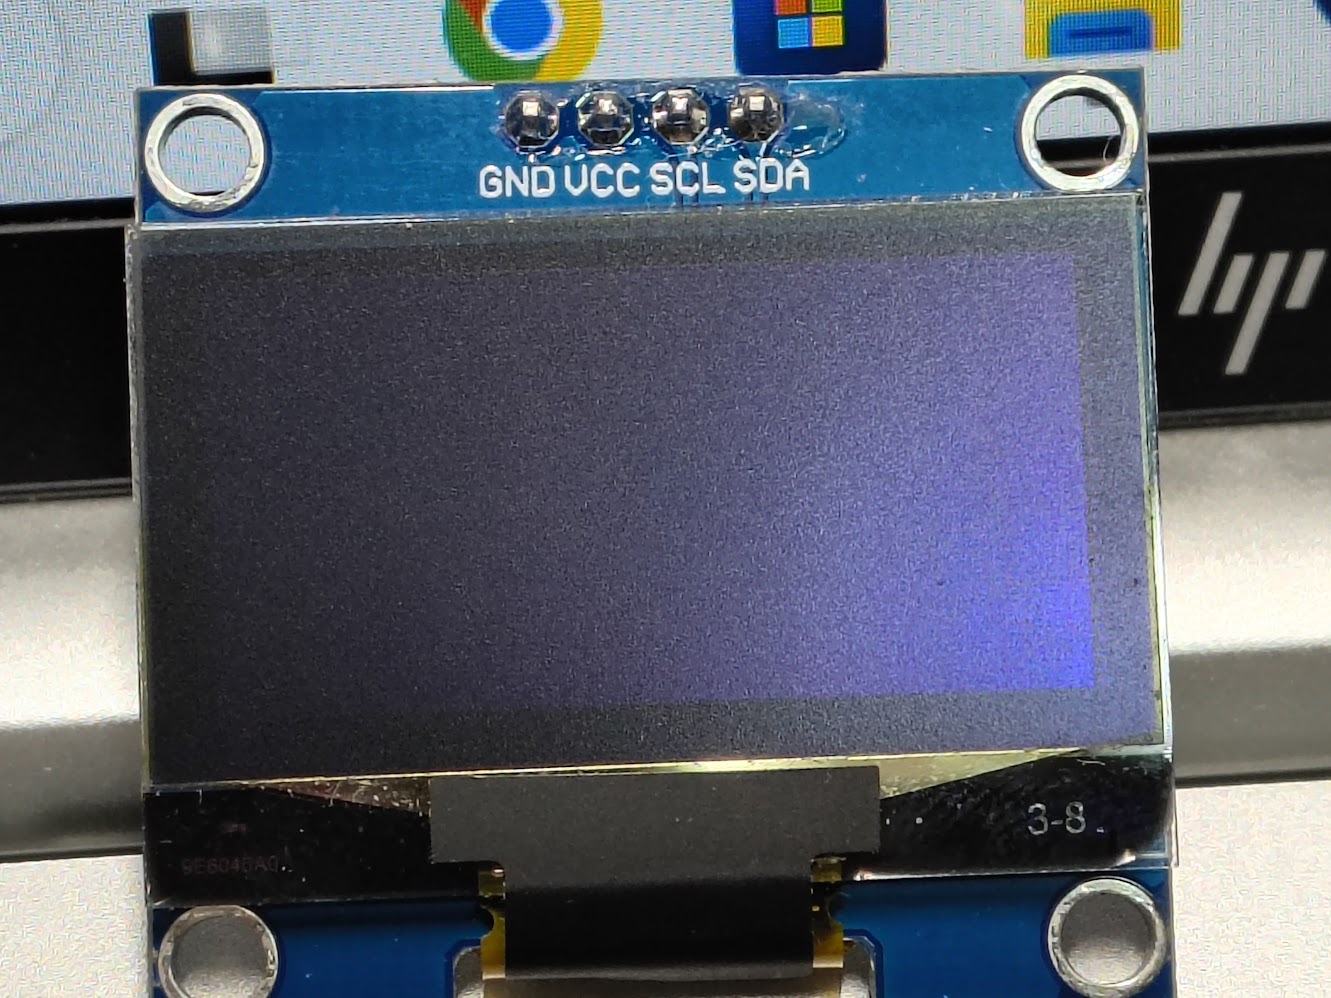
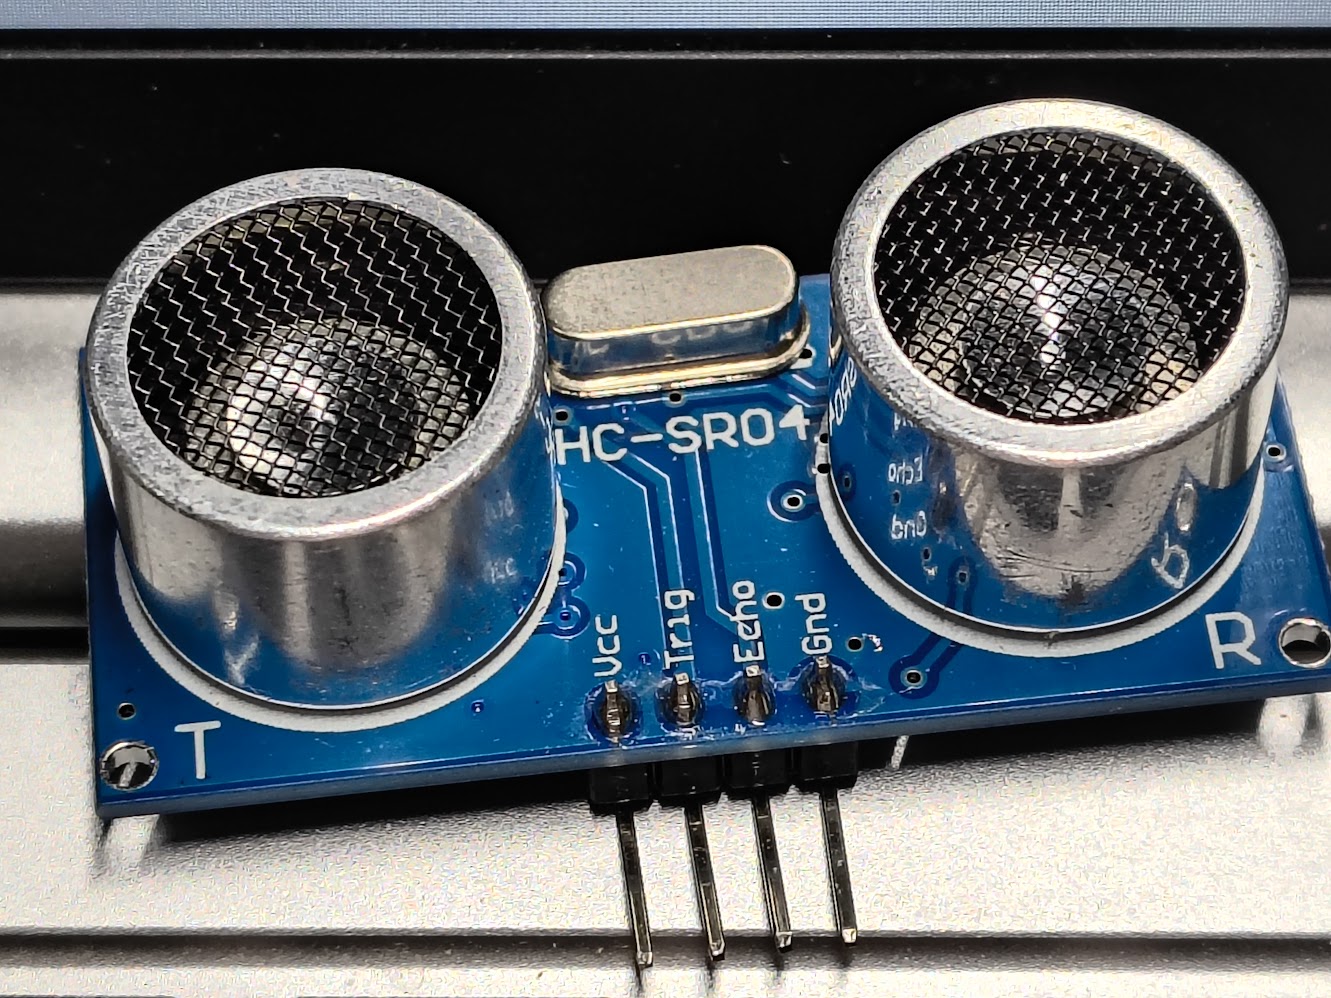
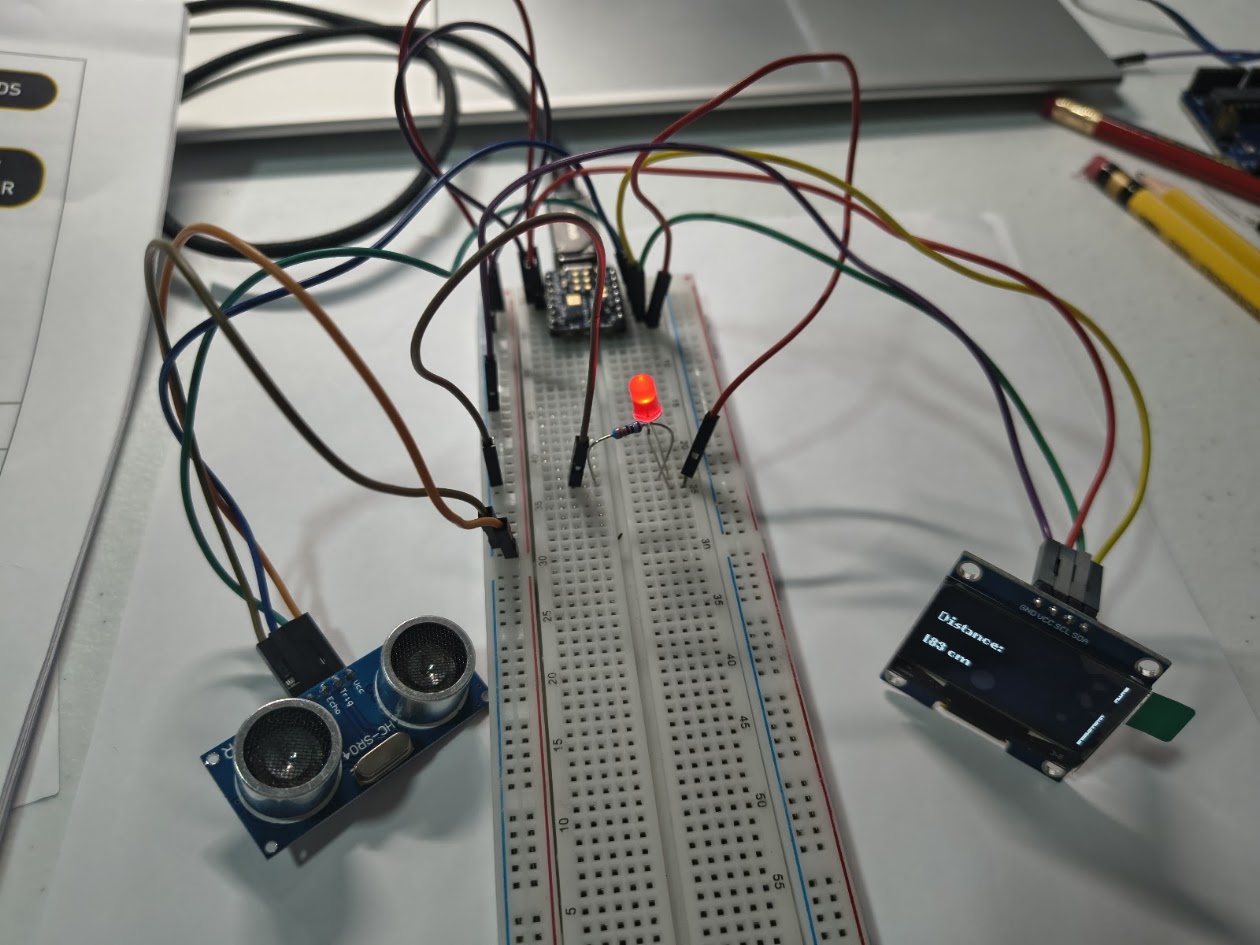
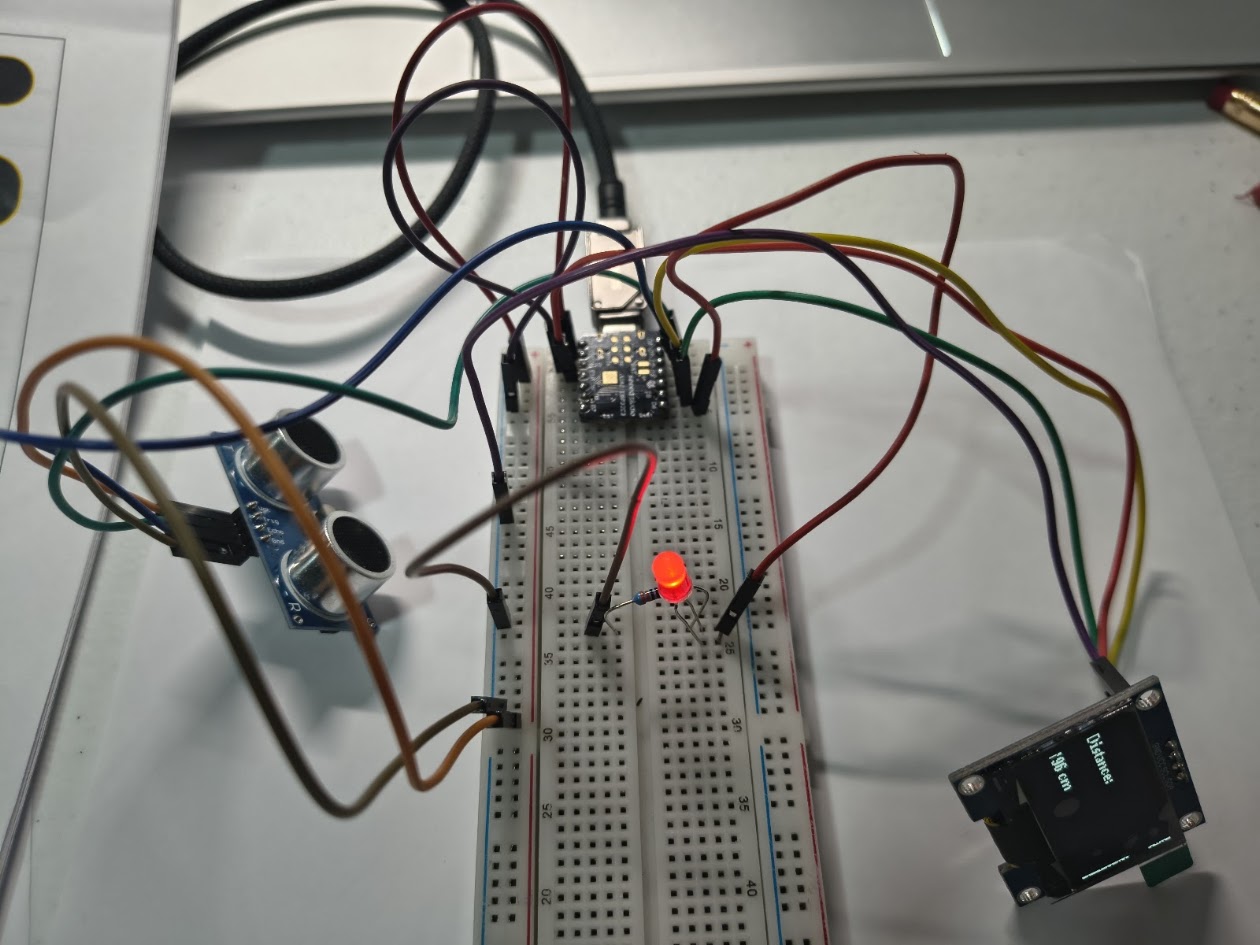
// HC-SR04 sensor & OLED display
// Input devices
// Board: Seeed Studio XIAO ESP 32 C3
#include
#include
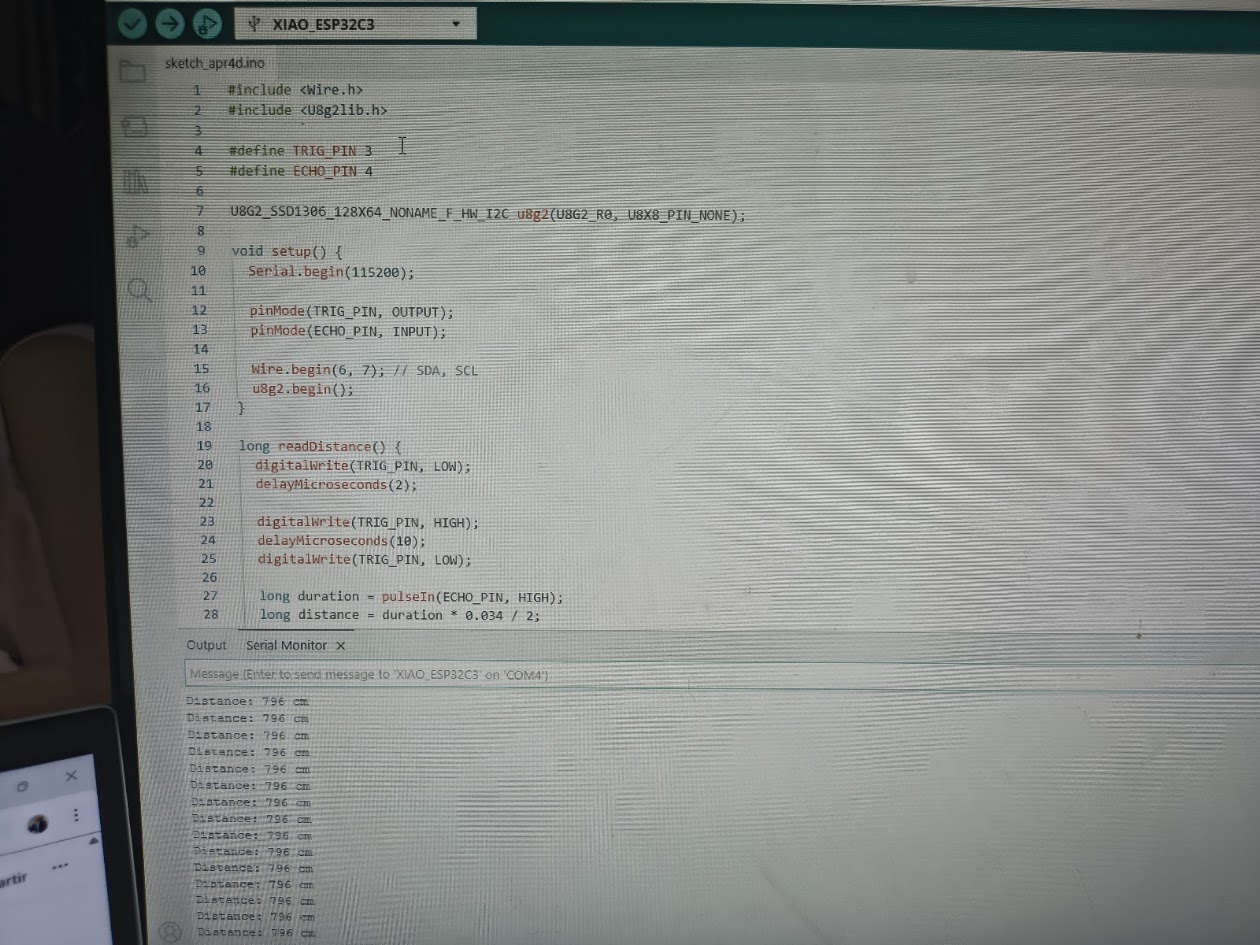
#define TRIG_PIN 3
#define ECHO_PIN 4
U8G2_SSD1306_128X64_NONAME_F_HW_I2C u8g2(U8G2_R0, U8X8_PIN_NONE);
void setup() {
Serial.begin(115200);
pinMode(TRIG_PIN, OUTPUT);
pinMode(ECHO_PIN, INPUT);
Wire.begin(6, 7); // SDA, SCL
u8g2.begin();
}
long readDistance() {
digitalWrite(TRIG_PIN, LOW);
delayMicroseconds(2);
digitalWrite(TRIG_PIN, HIGH);
delayMicroseconds(10);
digitalWrite(TRIG_PIN, LOW);
long duration = pulseIn(ECHO_PIN, HIGH);
long distance = duration * 0.034 / 2;
return distance;
}
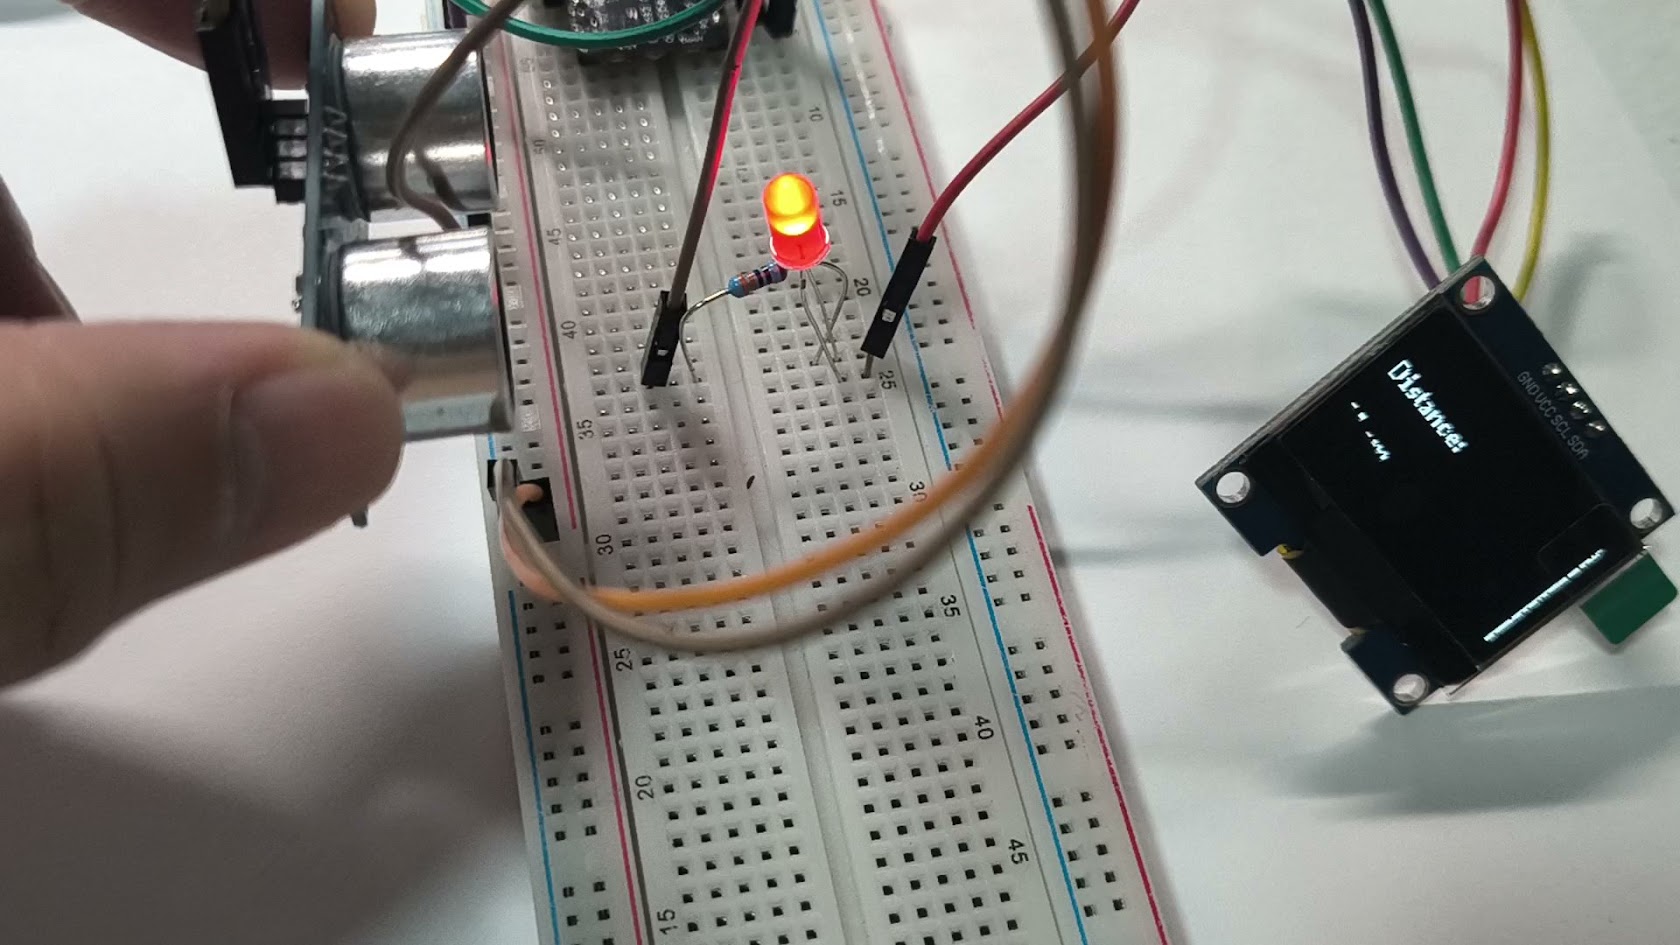
void loop() {
long distance = readDistance();
Serial.print("Distance: ");
Serial.print(distance);
Serial.println(" cm");
u8g2.clearBuffer();
if (distance < 20) {
u8g2.setFont(u8g2_font_logisoso24_tr);
u8g2.drawStr(0, 40, "CLOSE!");
} else {
u8g2.setFont(u8g2_font_ncenB08_tr);
u8g2.drawStr(0, 25, "Distance:");
char buf[20];
sprintf(buf, "%ld cm", distance);
u8g2.drawStr(0, 50, buf);
}
u8g2.sendBuffer();
delay(300);
}
Video demonstration
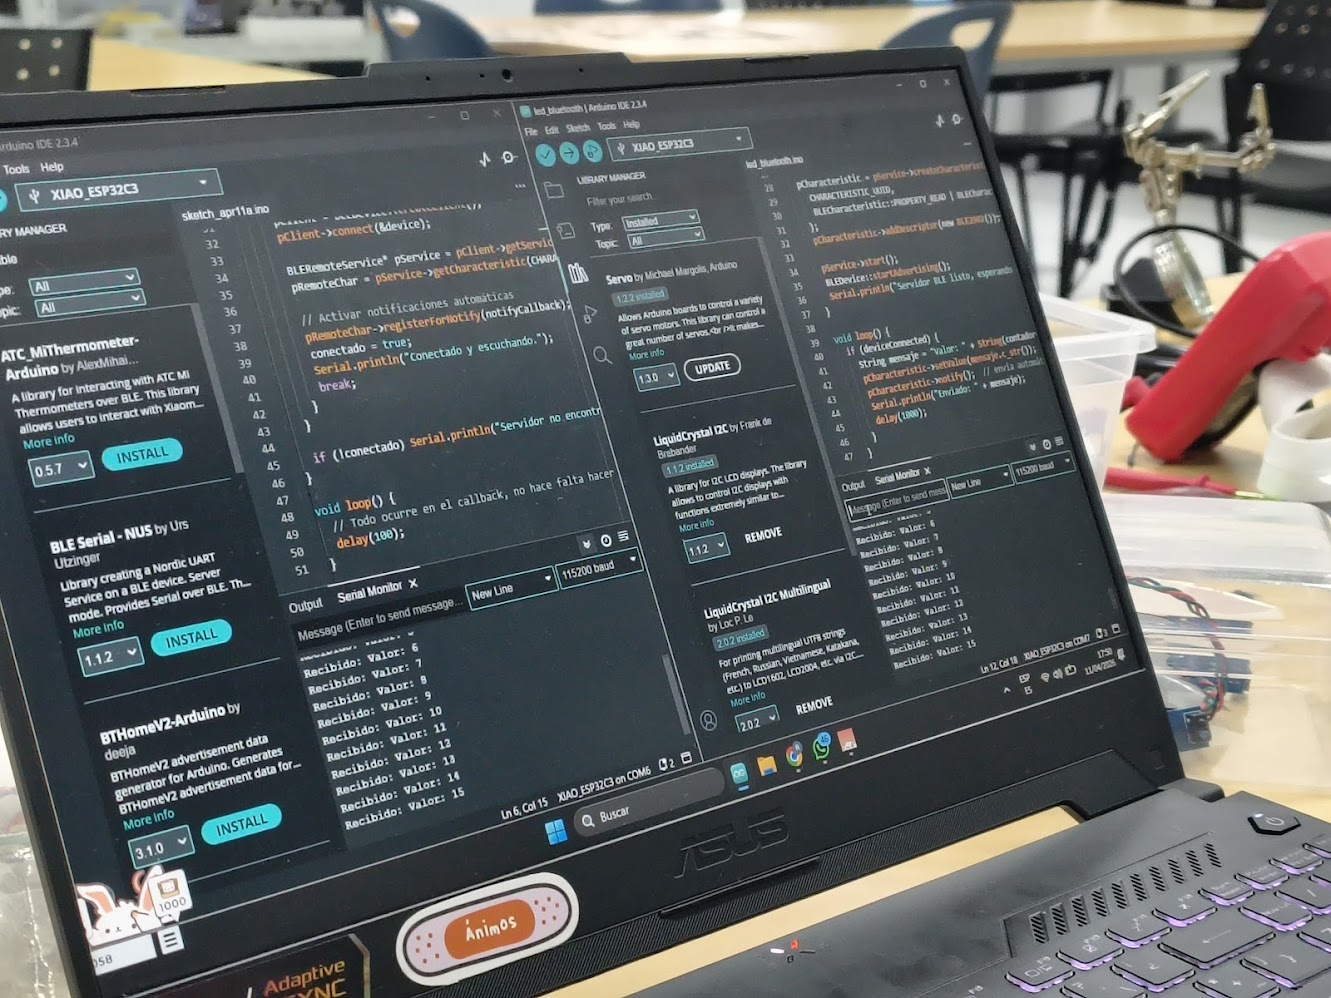
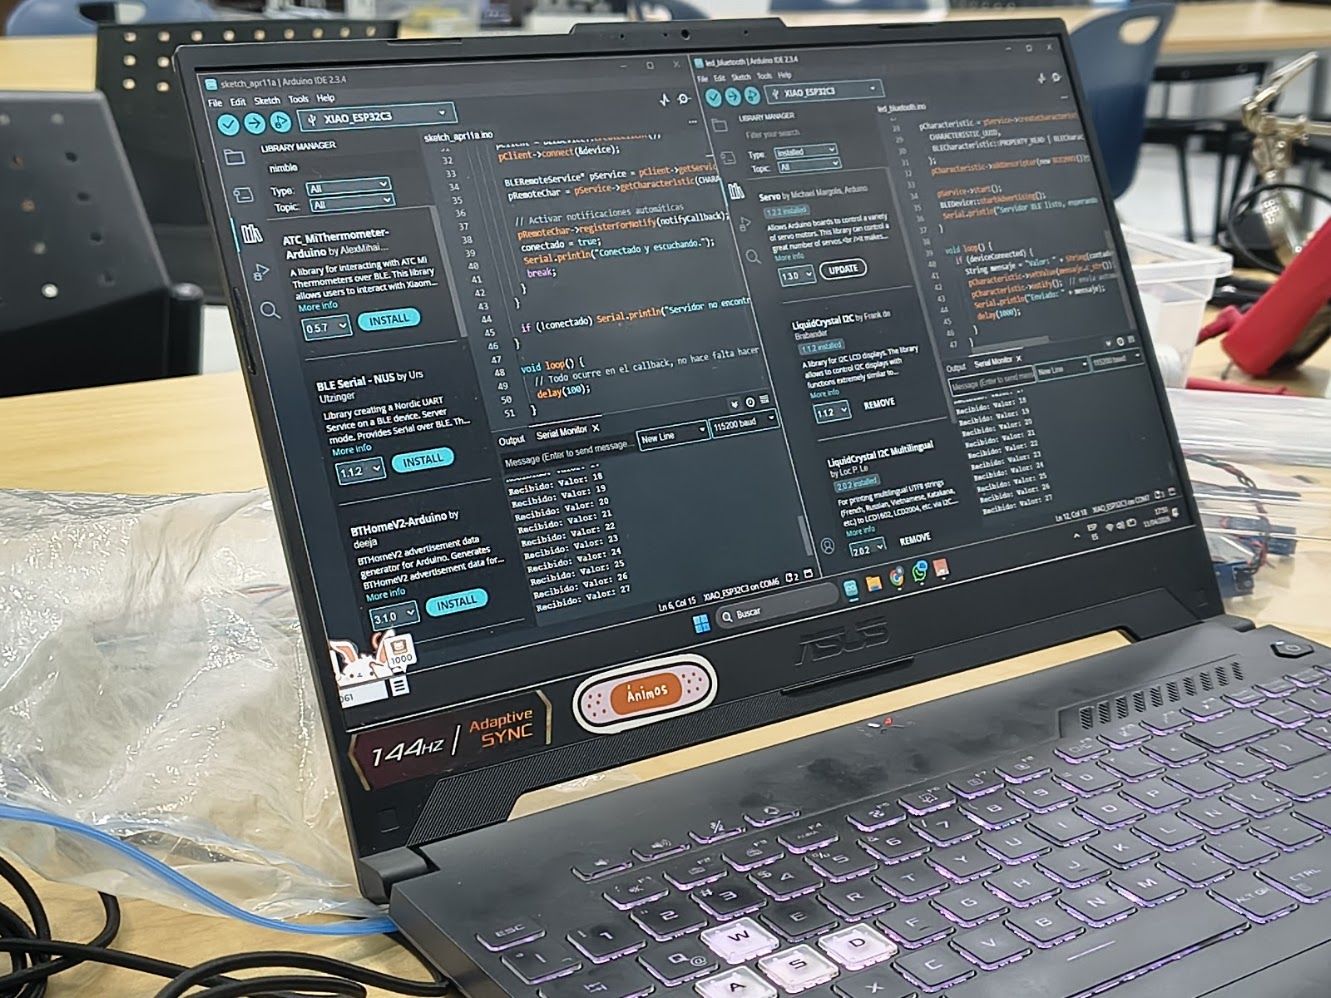
Client
- - Loads the BLE libraries needed to scan, connect, and communicate. These must exactly match the server's UUIDs — it's how the client knows which service and data channel to connect to
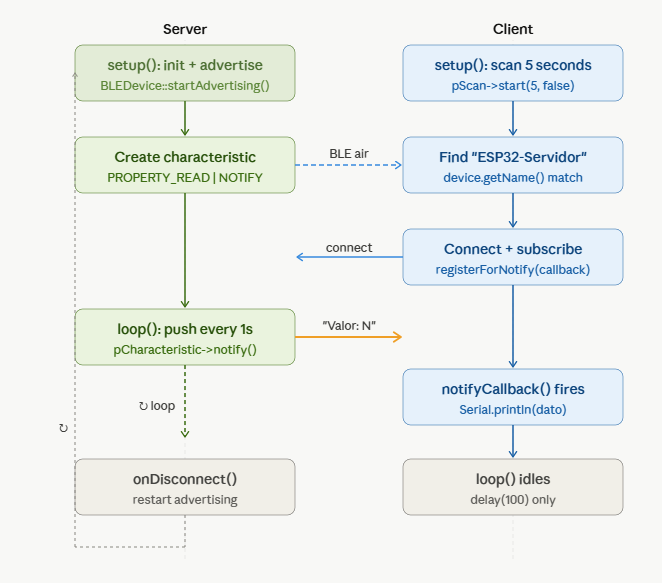
- - Scans for BLE devices nearby for 5 seconds and stores all found devices in results.
- - Loops through every found device and checks if any is named "ESP32-Servidor".
- - Navigates to the specific service and characteristic on the server using the UUIDs — like finding a specific folder and file on a remote machine.
// Code 1 - Xiao ESP 32 C3 - Client
#include
#include
#include
#define SERVICE_UUID "12345678-1234-1234-1234-123456789abc"
#define CHARACTERISTIC_UUID "abcd1234-ab12-ab12-ab12-abcdef123456"
BLEClient* pClient;
BLERemoteCharacteristic* pRemoteChar;
bool conectado = false;
// Callback que se ejecuta al recibir un dato
void notifyCallback(BLERemoteCharacteristic* pChar, uint8_t* pData, size_t length, bool isNotify) {
String dato = "";
for (int i = 0; i < length; i++) dato += (char)pData[i];
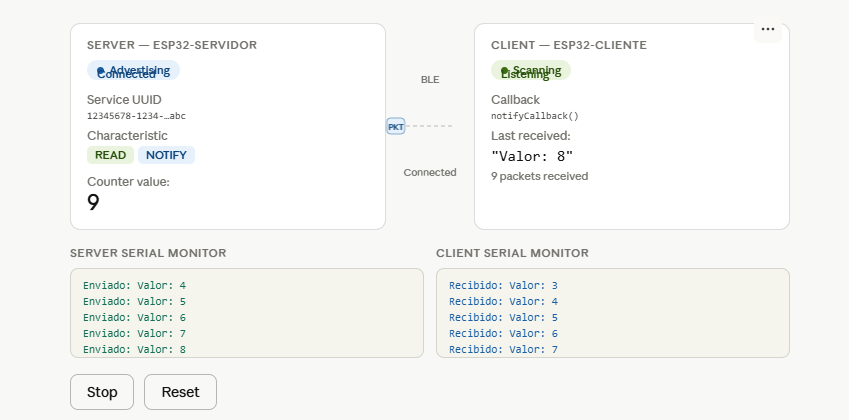
Serial.println("Recibido: " + dato);
}
void setup() {
Serial.begin(115200);
BLEDevice::init("ESP32-Cliente");
BLEScan* pScan = BLEDevice::getScan();
BLEScanResults* results = pScan->start(5, false); // escanea 5 segundos
for (int i = 0; i < results->getCount(); i++) {
BLEAdvertisedDevice device = results->getDevice(i);
if (device.getName() == "ESP32-Servidor") {
Serial.println("Servidor encontrado, conectando...");
pClient = BLEDevice::createClient();
pClient->connect(&device);
BLERemoteService* pService = pClient->getService(SERVICE_UUID);
pRemoteChar = pService->getCharacteristic(CHARACTERISTIC_UUID);
// Activar notificaciones automáticas
pRemoteChar->registerForNotify(notifyCallback);
conectado = true;
Serial.println("Conectado y escuchando.");
break;
}
}
if (!conectado) Serial.println("Servidor no encontrado.");
}
void loop() {
// Todo ocurre en el callback, no hace falta hacer nada aquí
delay(100);
}
Server
- - Initializes a BLE device named "ESP32-Servidor"
- - Creates a characteristic with READ and NOTIFY properties — meaning a client can read the value and also receive automatic updates
- - Once a client connects, every second it builds a message like "Valor: 0", "Valor: 1", "Valor: 2" ... and so on
- - Sends that message to the client via notify() — the client doesn't need to ask, it gets pushed automatically
 // Code 2 - Xiao ESP 32 C3 - Server into a BLE (Bluetooth Low Energy) server that continuously sends a counter value to any connected client.
                      #include
                      #include
                      #include
                      #include

                      // UUIDs — puedes generarlos en https://www.uuidgenerator.net/
                      #define SERVICE_UUID        "12345678-1234-1234-1234-123456789abc"
                      #define CHARACTERISTIC_UUID "abcd1234-ab12-ab12-ab12-abcdef123456"

                      BLECharacteristic *pCharacteristic;
                      bool deviceConnected = false;
                      int contador = 0;

                      class MyServerCallbacks : public BLEServerCallbacks {
                        void onConnect(BLEServer* pServer)    { deviceConnected = true; }
                        void onDisconnect(BLEServer* pServer) { deviceConnected = false; pServer->startAdvertising(); }
                      };

                      void setup() {
                        Serial.begin(115200);
                        BLEDevice::init("ESP32-Servidor");

                        BLEServer *pServer = BLEDevice::createServer();
                        pServer->setCallbacks(new MyServerCallbacks());

                        BLEService *pService = pServer->createService(SERVICE_UUID);

                        pCharacteristic = pService->createCharacteristic(
                          CHARACTERISTIC_UUID,
                          BLECharacteristic::PROPERTY_READ | BLECharacteristic::PROPERTY_NOTIFY
                        );
                        pCharacteristic->addDescriptor(new BLE2902());

                        pService->start();
                        BLEDevice::startAdvertising();
                        Serial.println("Servidor BLE listo, esperando cliente...");
                      }

                      void loop() {
                        if (deviceConnected) {
                          String mensaje = "Valor: " + String(contador++);
                          pCharacteristic->setValue(mensaje.c_str());
                          pCharacteristic->notify();  // envía automáticamente al cliente
                          Serial.println("Enviado: " + mensaje);
                          delay(1000);
                        }
                      }
Problems during this week
- - Choose the correct libraries
- - Understand libraries configuration
- - Communication problems between microcontrollers
- - Different documents information
5) Final results
- Linked to the group assignment page
- Documented what you learned
- Documented your design and fabrication process
- Explain how your code works
- Explained any problems and how you fixed them
- Include original design filess and source code
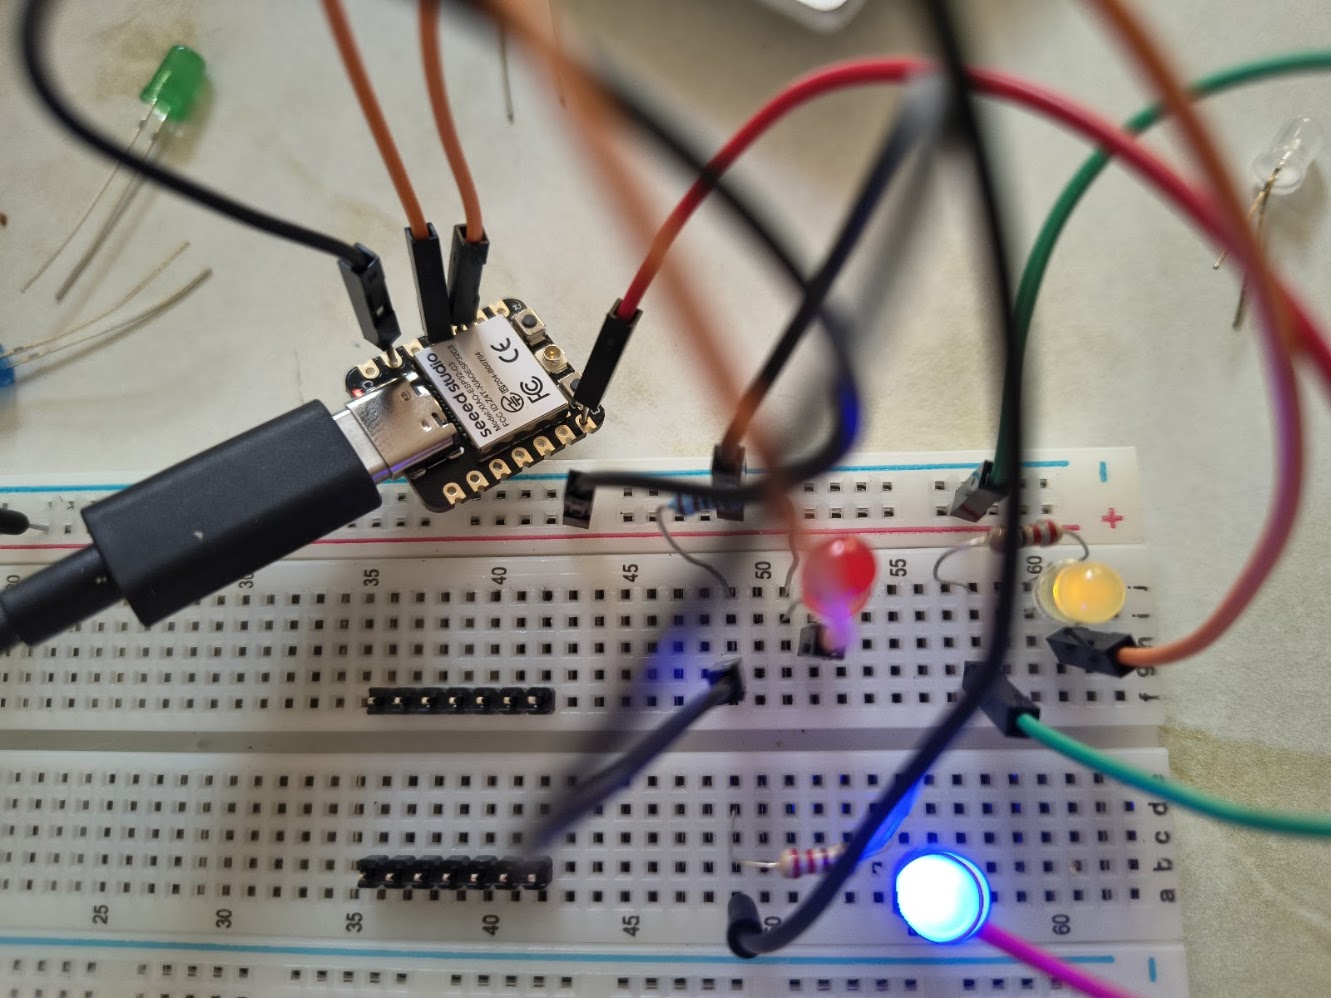
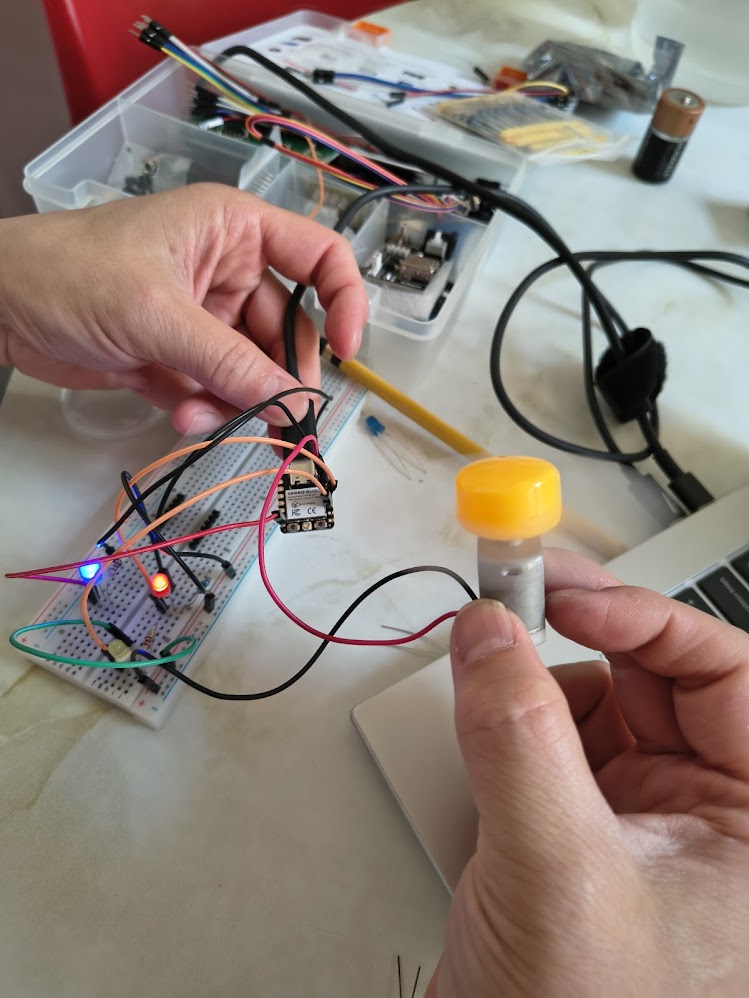
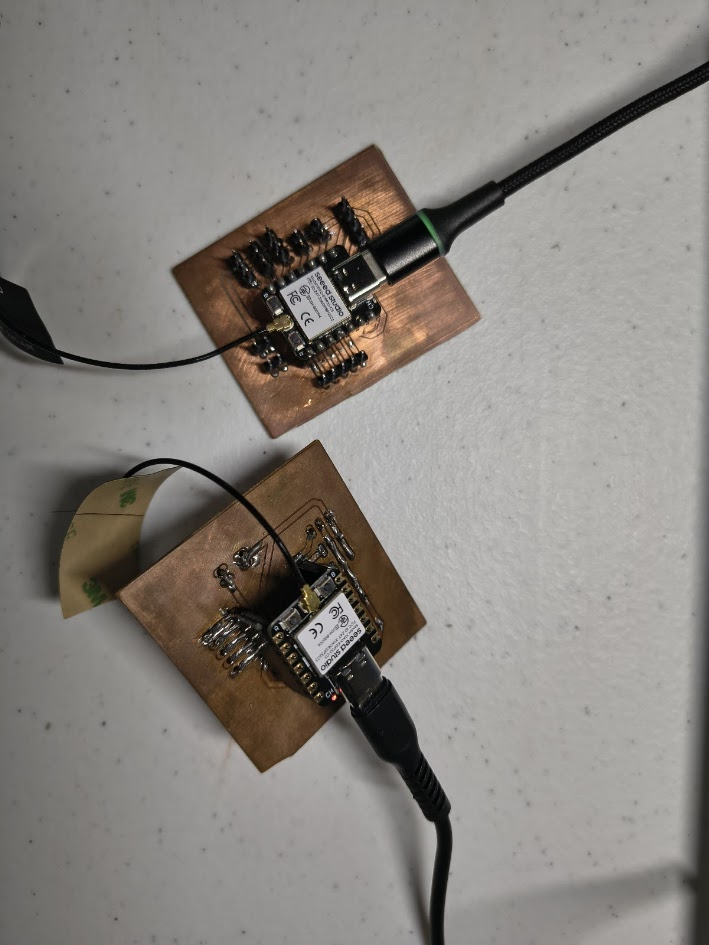
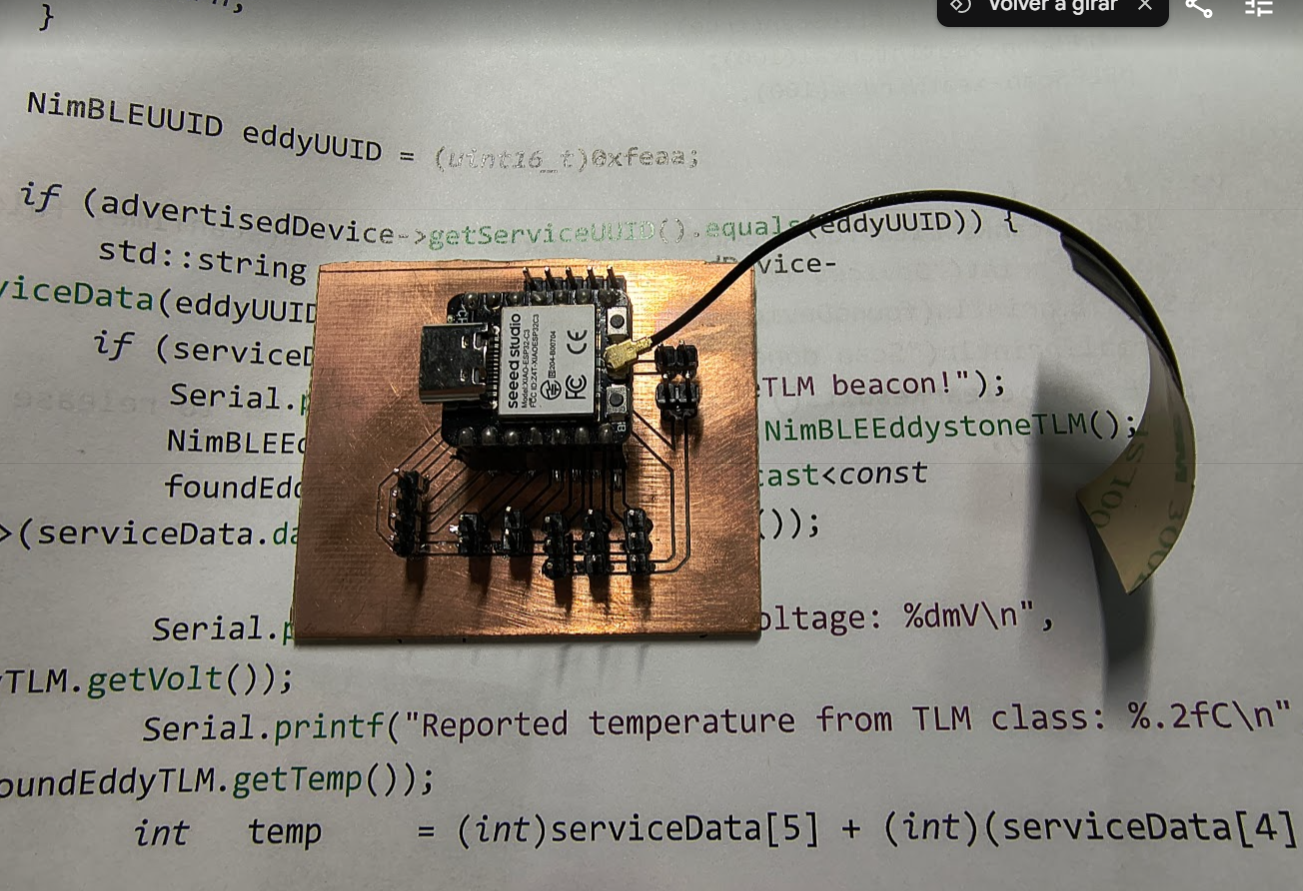
- Included a 'hero shot' of your board
6) References files
We learn how to test a program for an embedded system using a microcontroller