WEEK 15
Interface and Application Programming
Group assignment:
- Compare as many tool options as possible.
- Document your work on the group work page and reflect on your individual page what you learned.
What I Learned From Teamwork
Comparing Tools
This week I learned to explore different tools for creating user interfaces that communicate with microcontrollers. I tested tools like MIT App Inventor and Processing, and I understood that each one has advantages depending on the type of application.
MIT APP INVENTOR
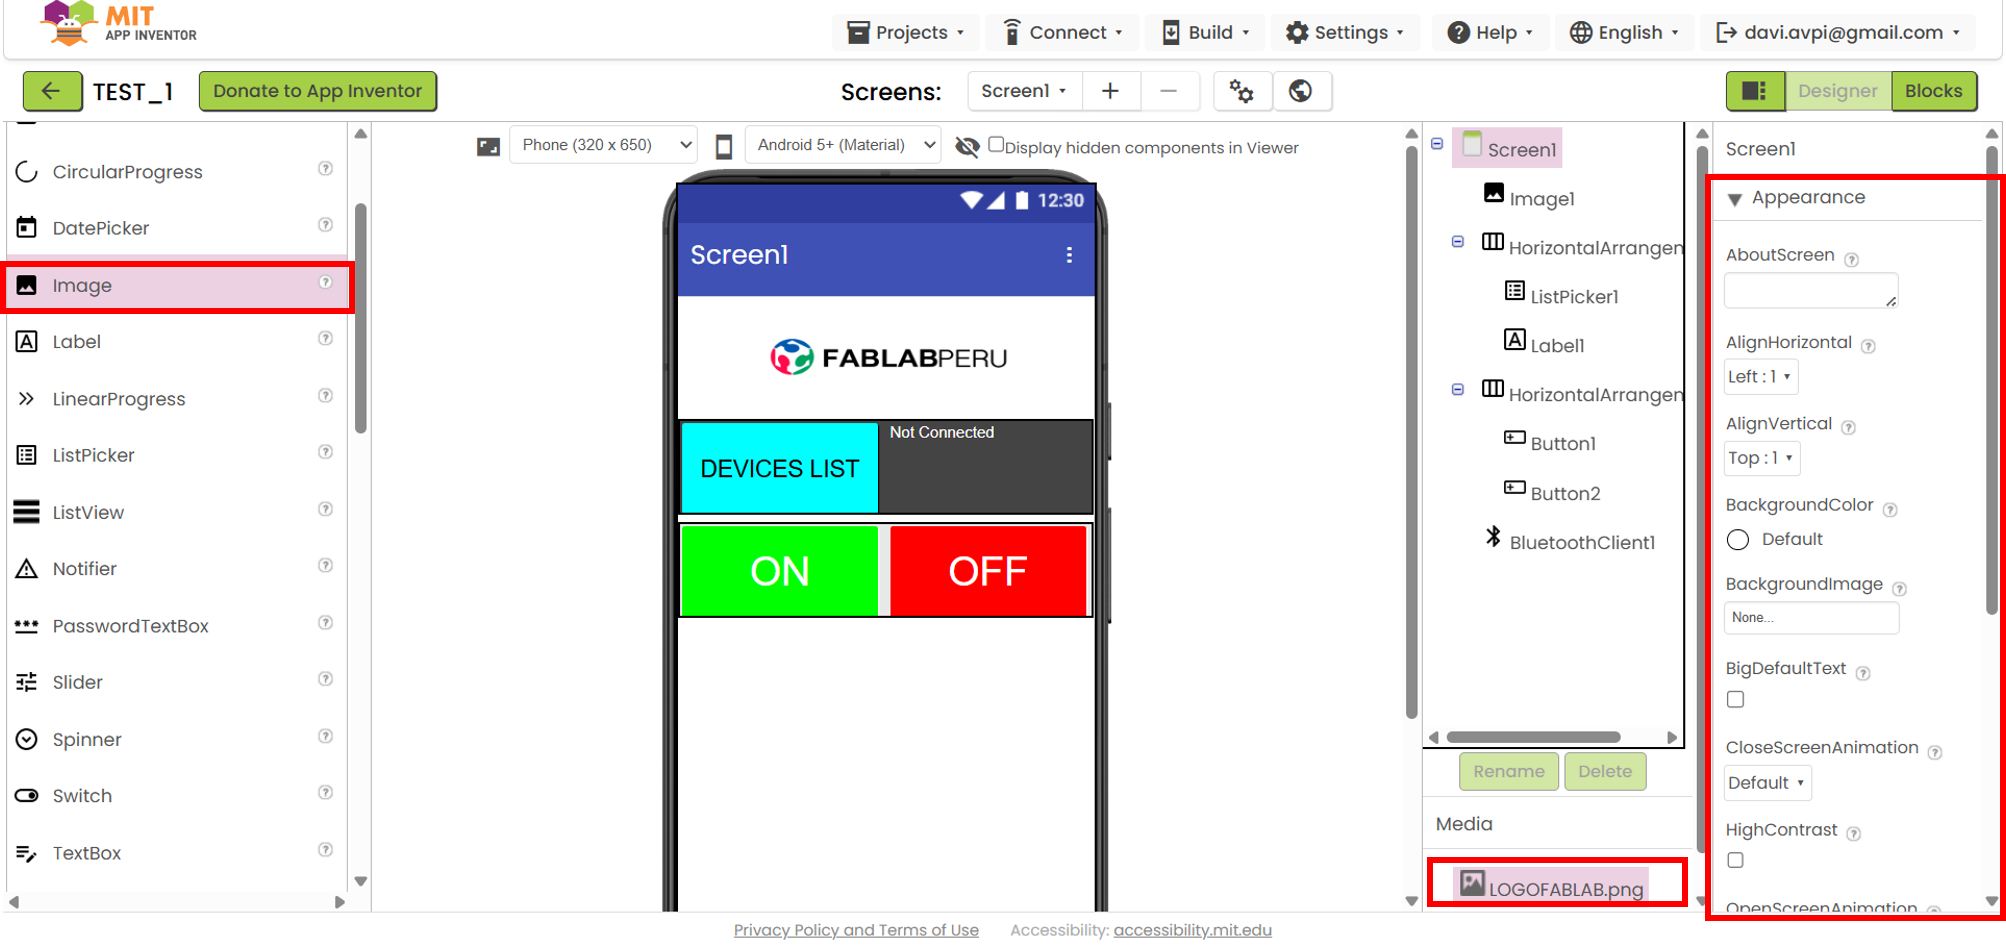
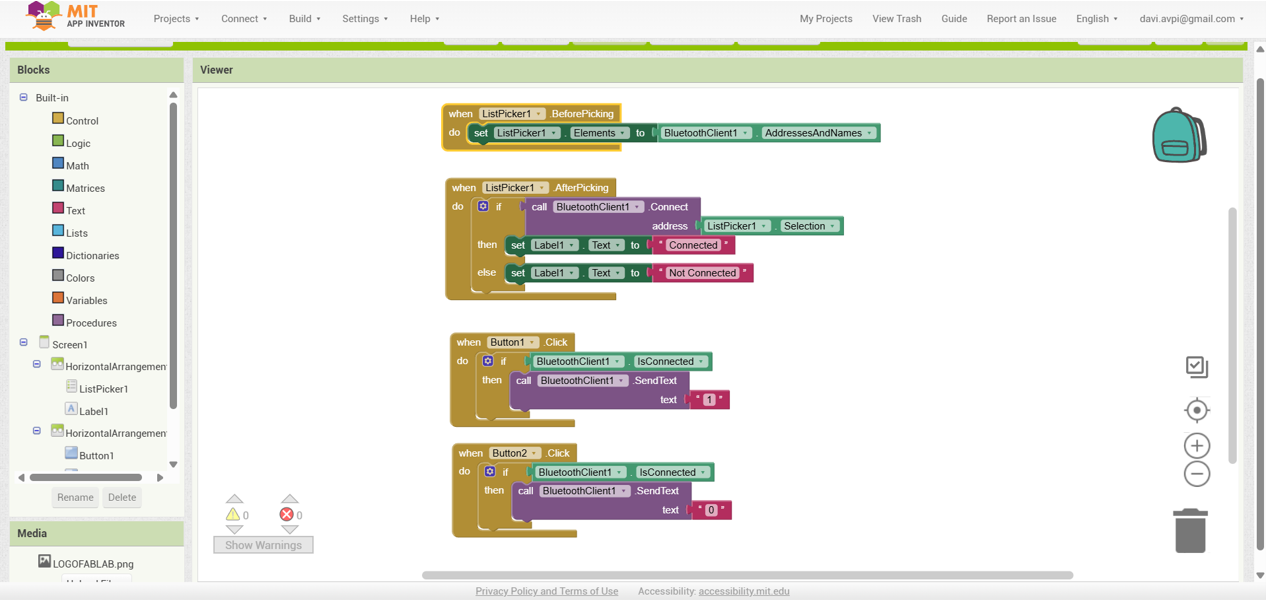
- While using it, I learned that the workflow is divided into two main parts: interface design (where buttons, sliders, labels, etc. are added) and programming in the blocks section, where the behavior of each element is defined. This makes it very intuitive for creating applications quickly.
- One of its biggest advantages is that it allows easy integration of communication with external devices, especially through Bluetooth, which is very useful for projects with microcontrollers such as Arduino or ESP32. For example, you can configure a button to send a specific value to the board to turn on an LED or control a motor.
- However, I also noticed that it has limitations when you want to create more complex applications or more customized designs, since the level of control is lower compared to code-based tools. Even so, it is an excellent option for rapid prototypes and educational projects where a functional interface is needed in a short time.
PROCESSING
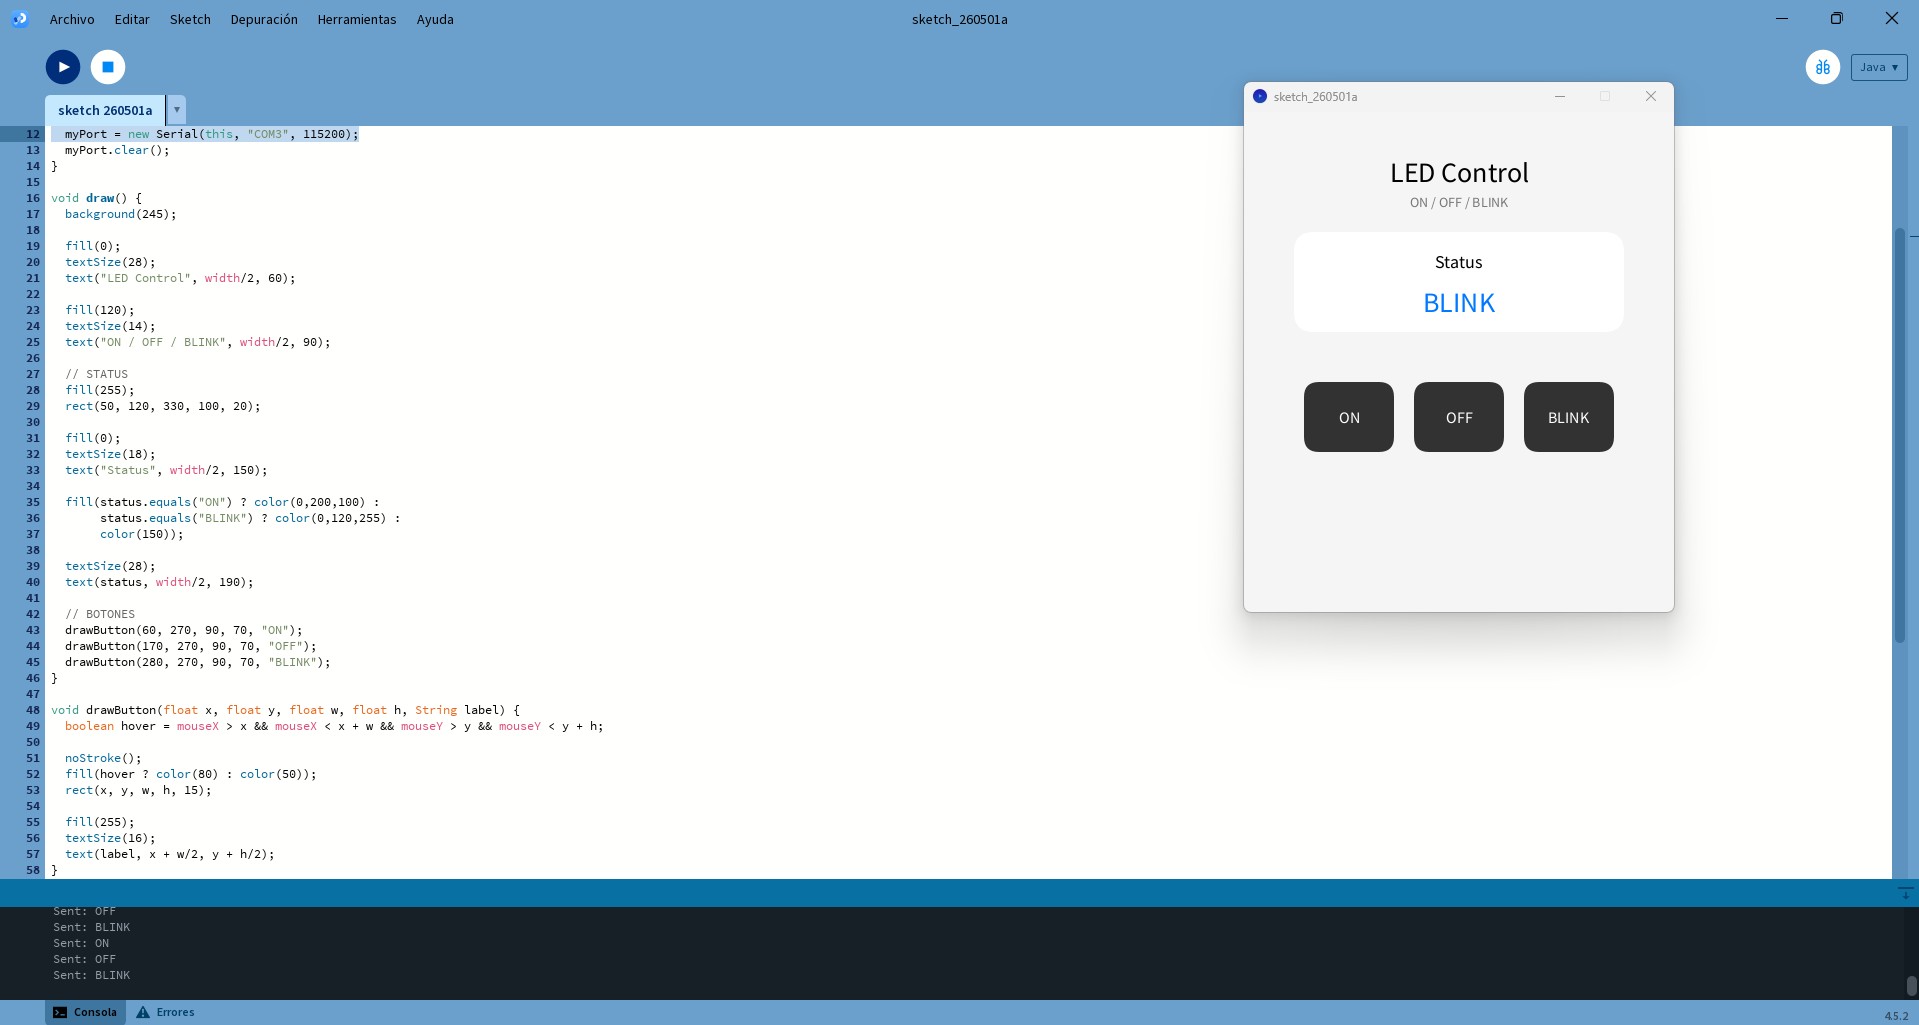
One of Processing's main advantages is its flexibility, since it allows fully customized interface design and real-time graphics handling. This makes it especially useful for projects that require data visualization or precise control from a computer.
However, it also has some disadvantages, such as the need for programming knowledge and manual handling of aspects like serial communication. During development, a common issue was found related to serial port usage, since it cannot be shared between Arduino and Processing at the same time, which was solved by closing the serial monitor before running the interface.
| Feature | MIT App Inventor | Processing |
|---|---|---|
| Programming Type | Visual (blocks) | Code-based (simplified Java) |
| Difficulty Level | Very low (ideal for beginners) | Medium (requires programming logic) |
| Platform | Mobile applications (Android/iOS) | Computer applications (PC) |
| User Interface | Designed with draggable components | Drawn manually with code |
| Communication with Microcontrollers | Bluetooth, WiFi, Web | Serial (mainly USB) |
| Flexibility | Limited | High (more control and customization) |
| Development Speed | Very fast | Medium |
| Typical Use | Mobile apps to control devices | Graphical interfaces and data visualization |
| Technical Requirements | No prior experience required | Requires basic programming knowledge |
Conclusions From My Group Work
MIT App Inventor is an ideal tool for beginners who want to quickly develop mobile applications with simple interfaces and device connectivity through Bluetooth or the internet, thanks to its block-based programming system that removes the complexity of code.
On the other hand, Processing offers greater flexibility and control by working directly with code, allowing the creation of more customized and dynamic interfaces, especially useful for data visualization and hardware control through serial communication.
In conclusion, the choice of tool depends on the type of project: MIT App Inventor is better suited for fast and simple mobile applications, while Processing is better for computer interfaces with a higher level of customization and control.
Individual assignment:
- Write an application for the embedded board that you made. that interfaces a user with an input and/or output device(s).
Mi App con RemoteXY
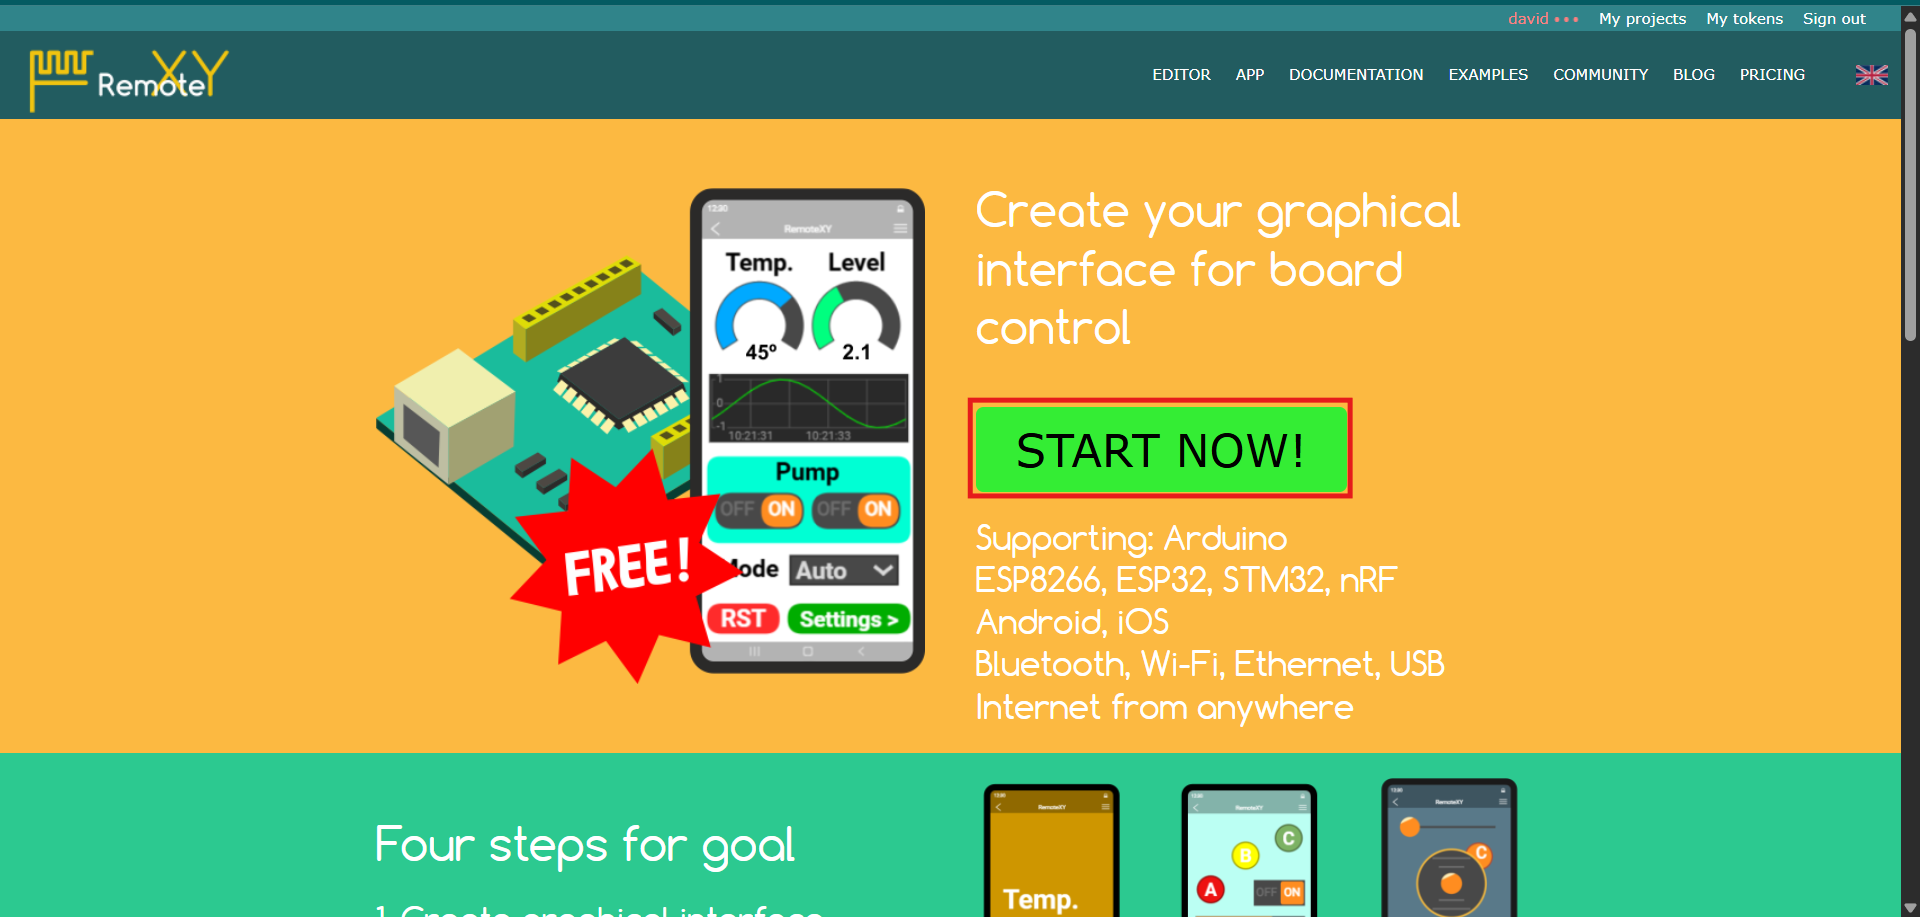
In this occasion, to create my app I will use the "RemoteXY" tool, which is a platform that allows you to create graphical interfaces to control embedded devices through Bluetooth, WiFi, or USB. It is a very popular option for projects with microcontrollers such as Arduino or ESP32, since it offers a simple way to design the interface and program communication without needing advanced knowledge of mobile app development.
Damos clic en "Star Now".
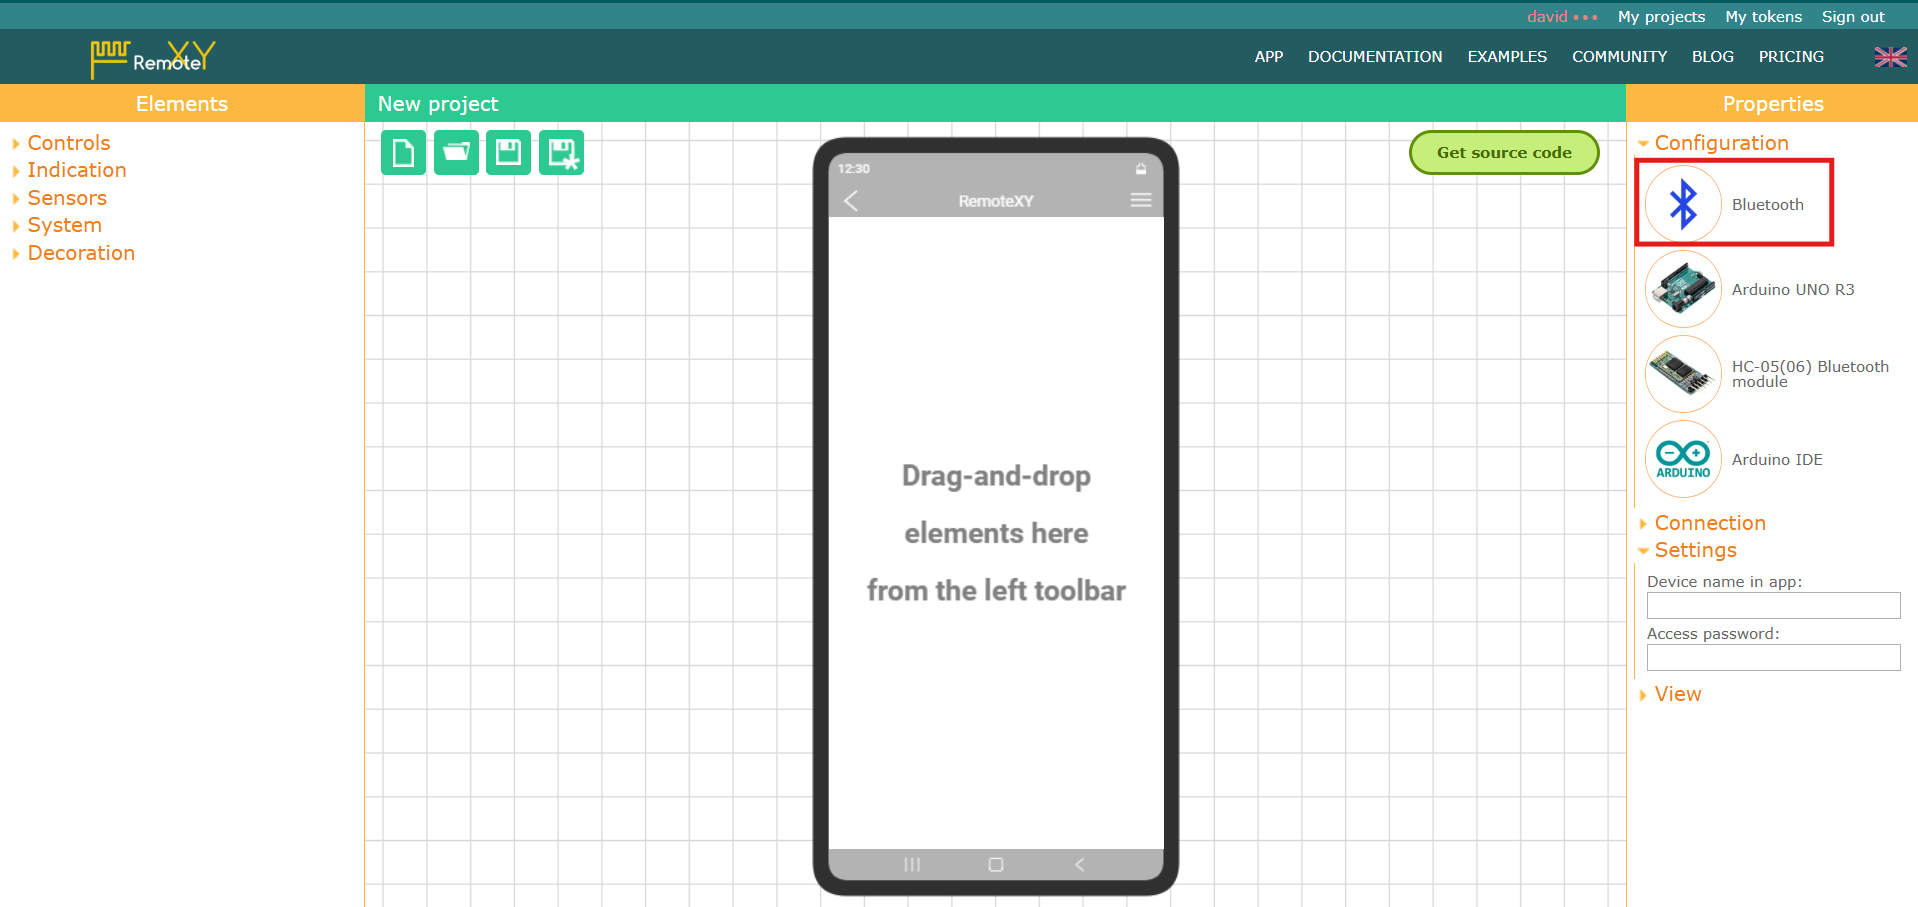
The new project interface will appear, but first we will change the initial configuration by clicking on any of the devices, in this case "Bluetooth".
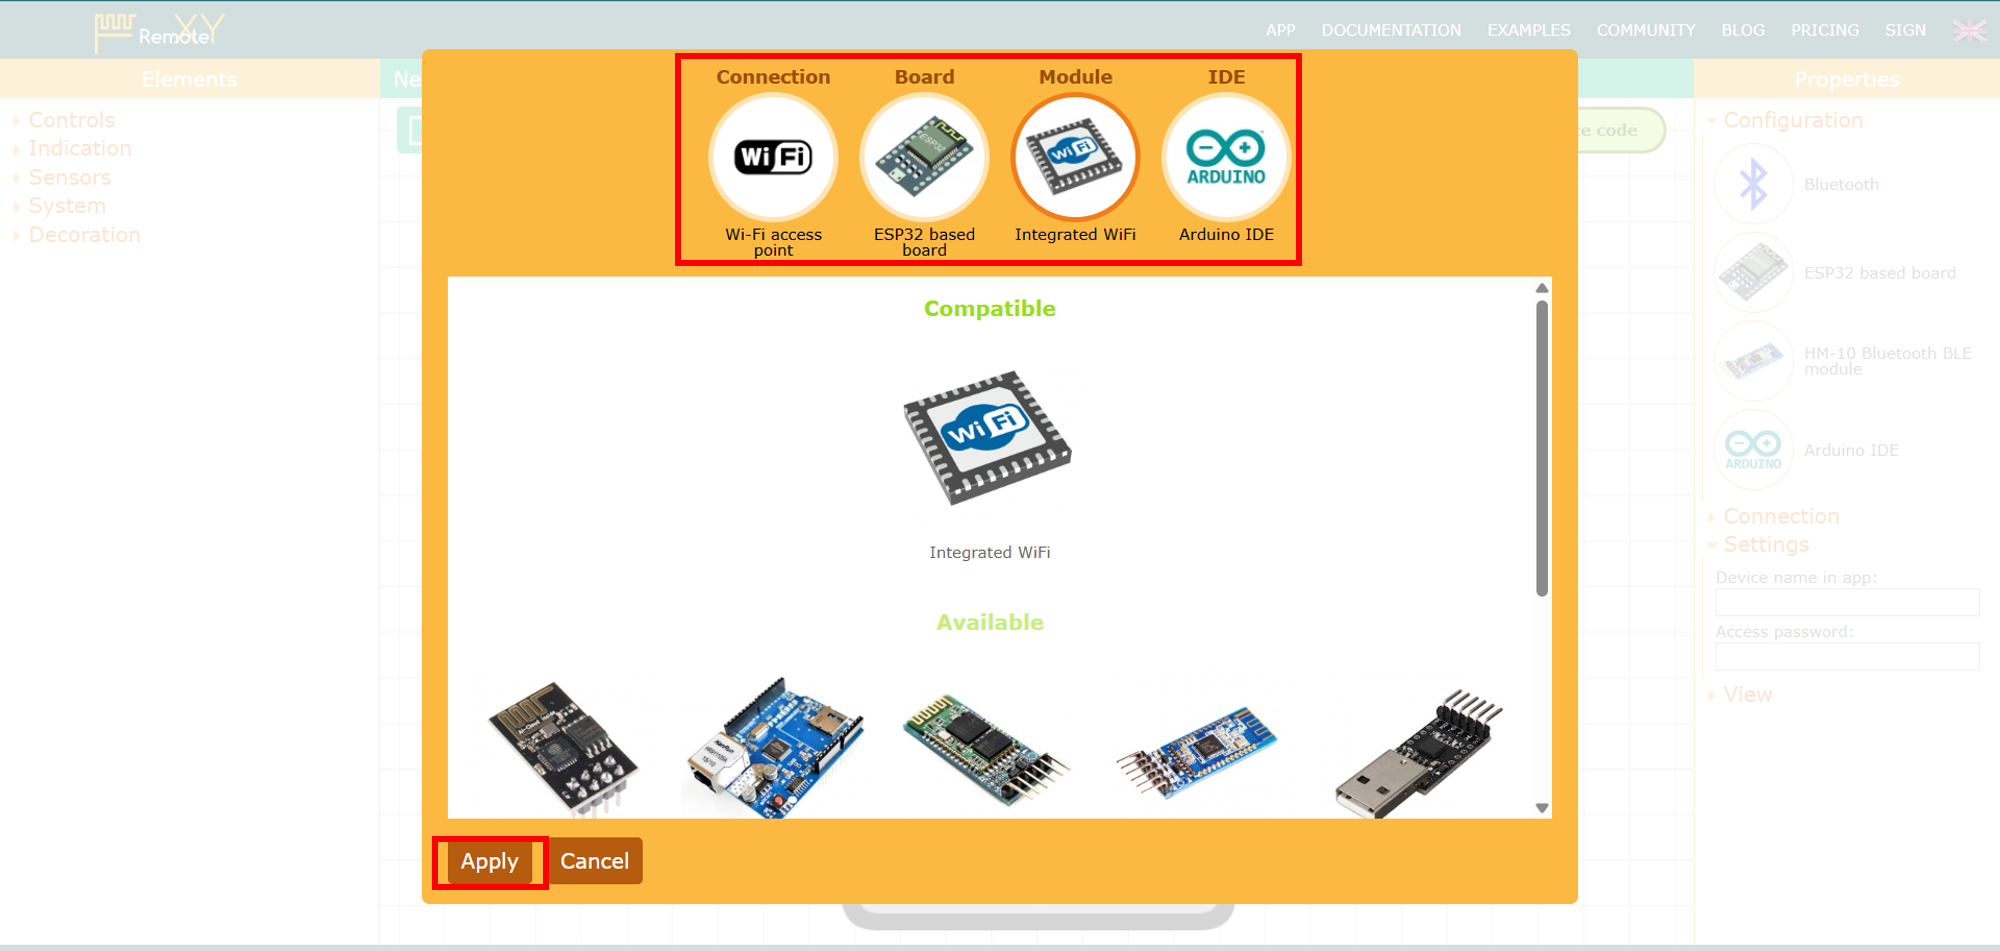
Then we will choose in the window the devices we will use; in my case it is the WiFi connection, the ESP32 board, and the Arduino IDE, and finally we click "Apply".
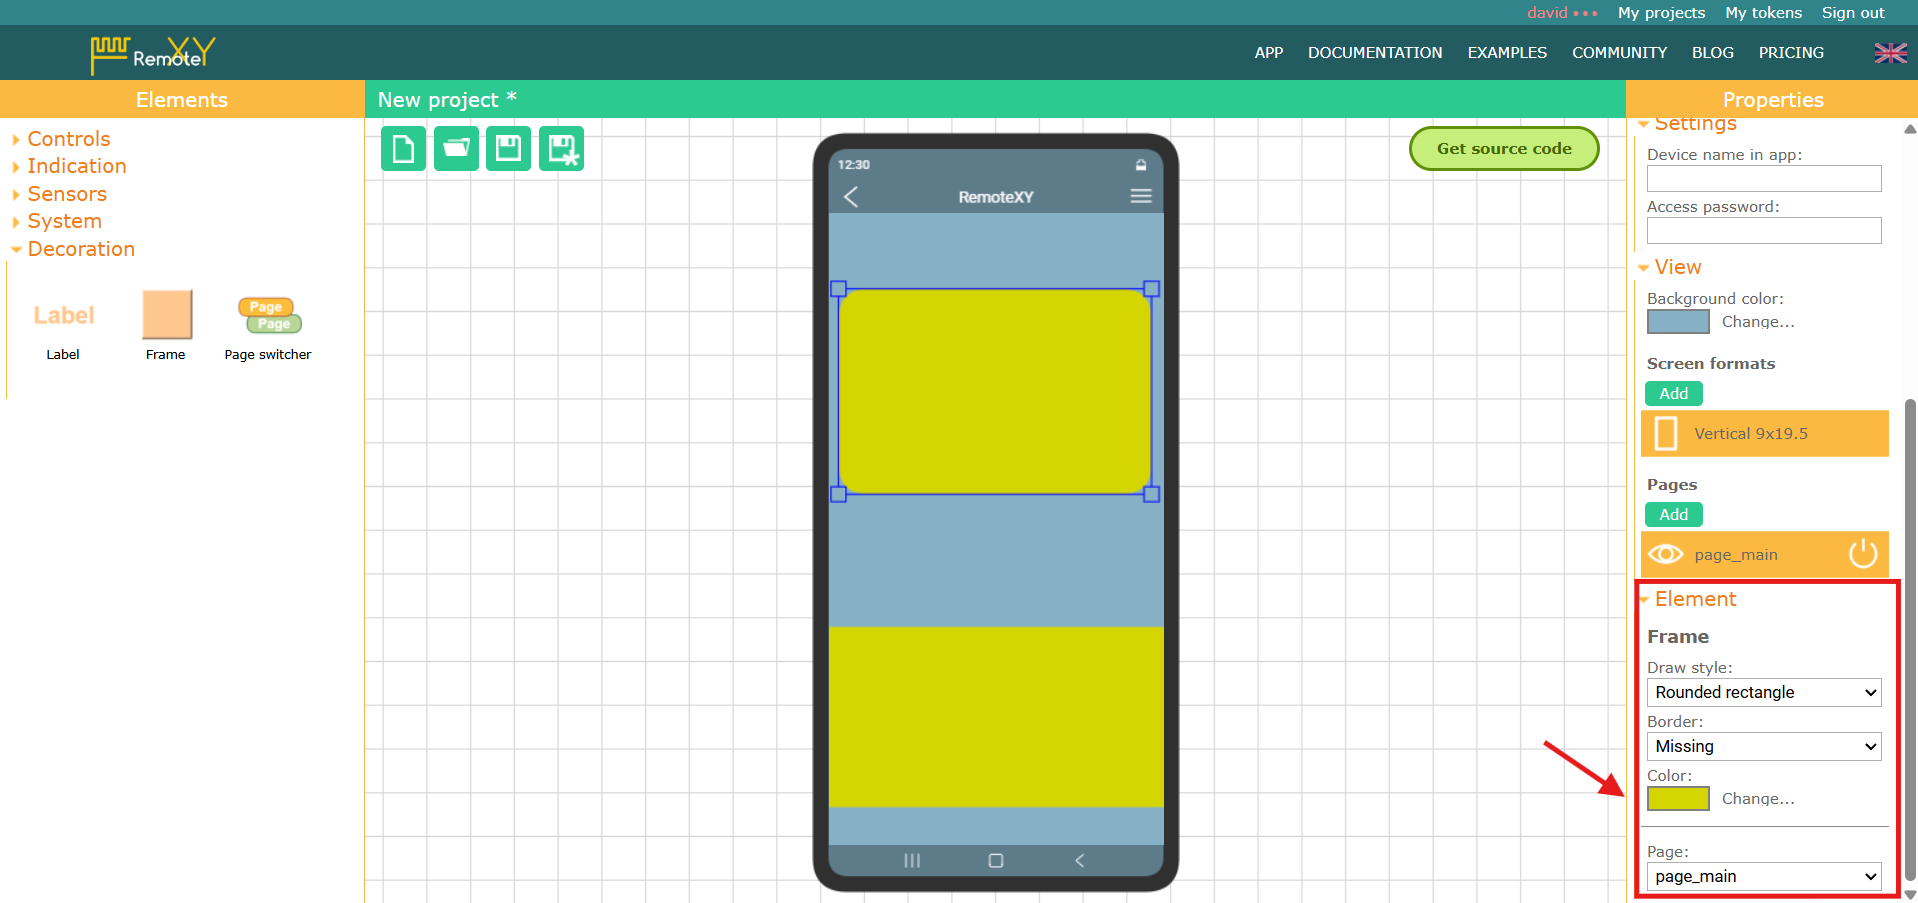
Now we will start editing the app's visual style, changing the background color, and we can also add some "Frame" elements that will serve as containers.
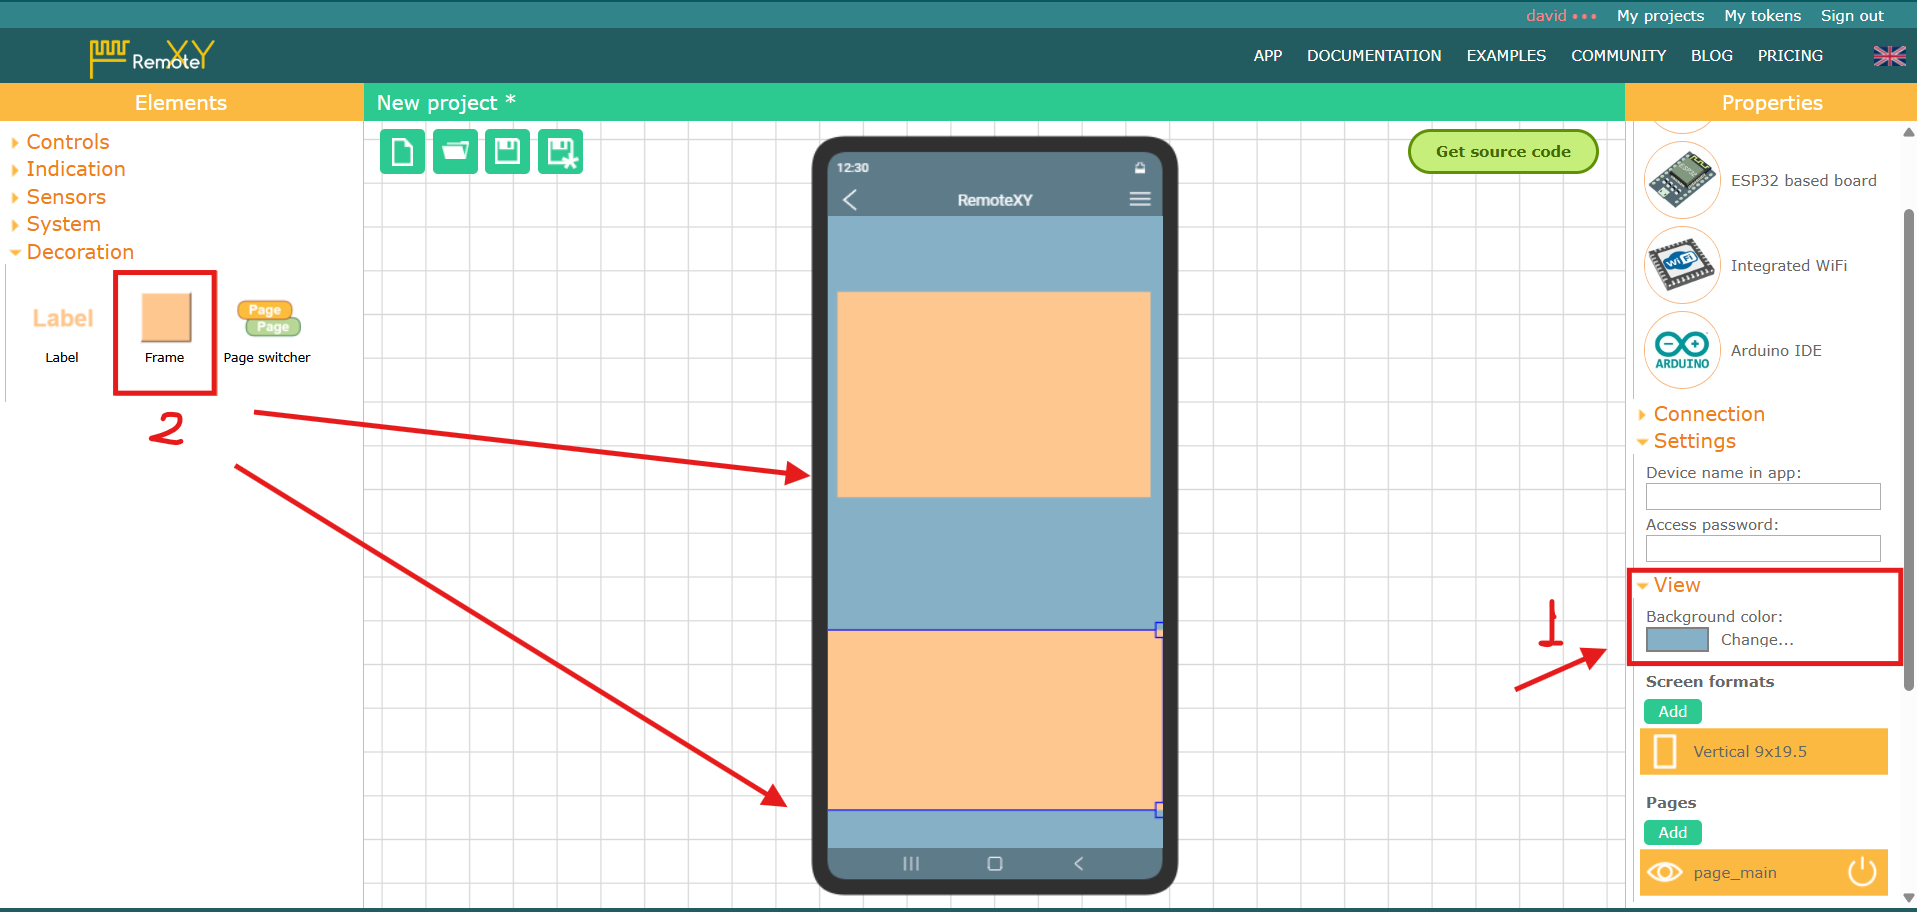
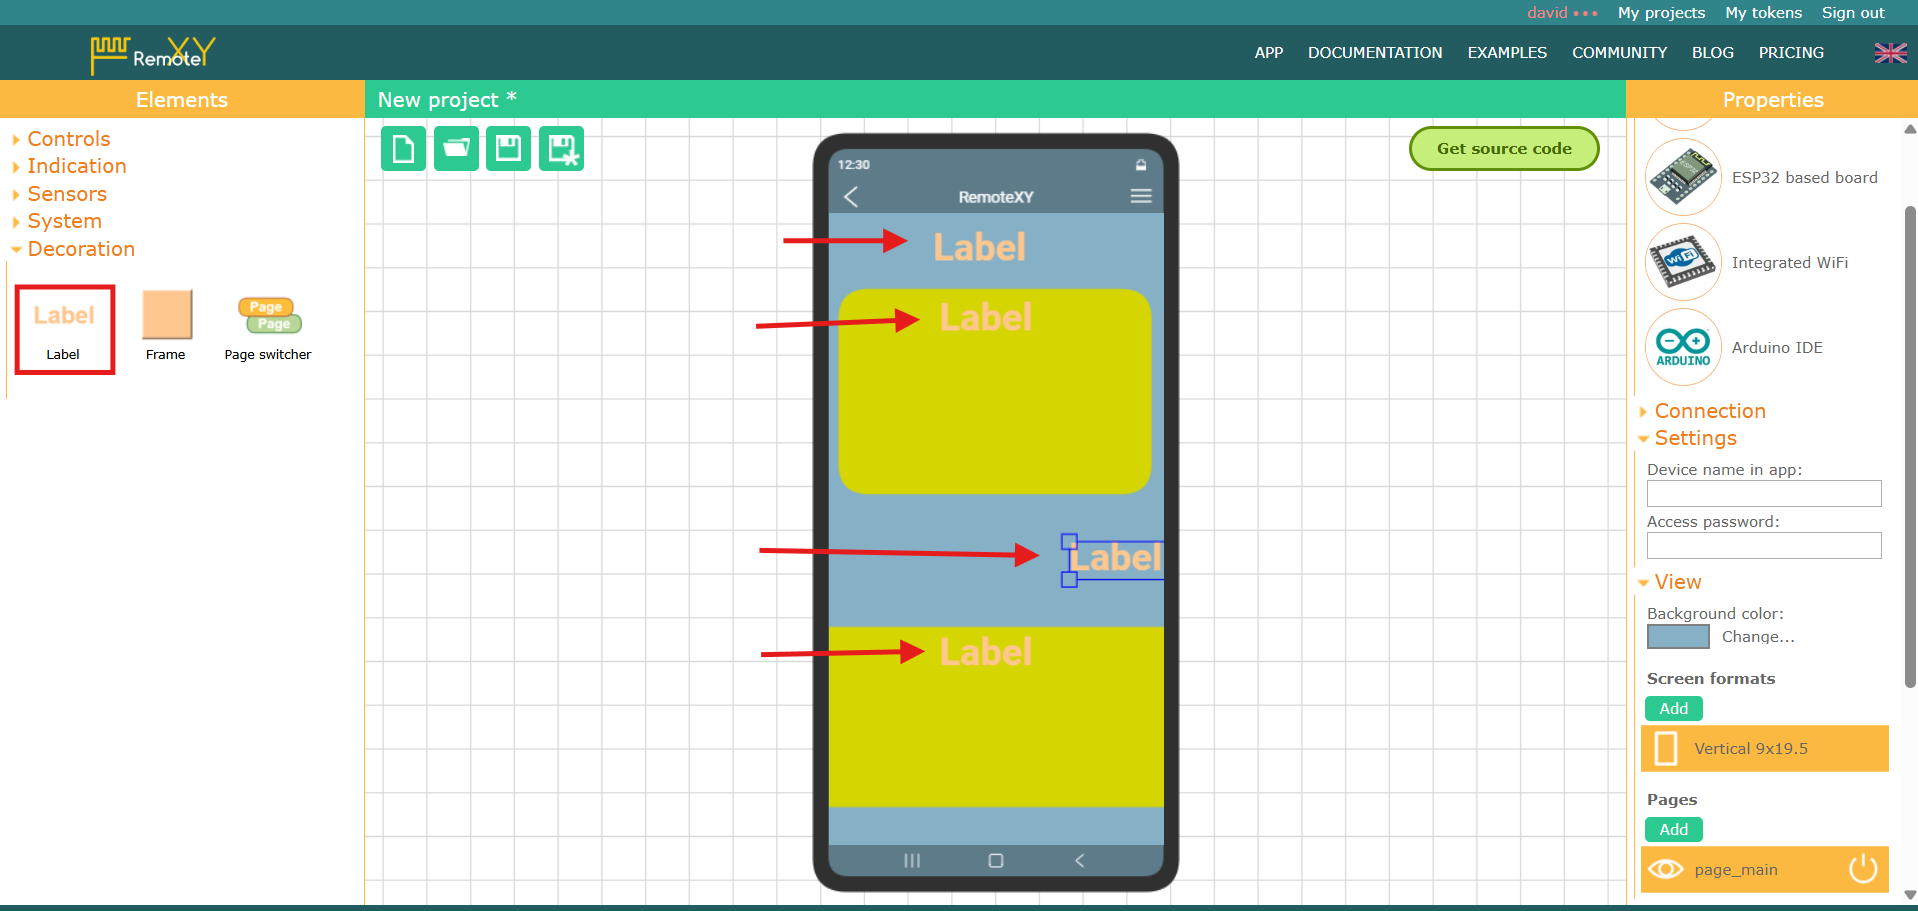
Then we will add some "Label" elements and edit them to show the types and values of our input and output devices.

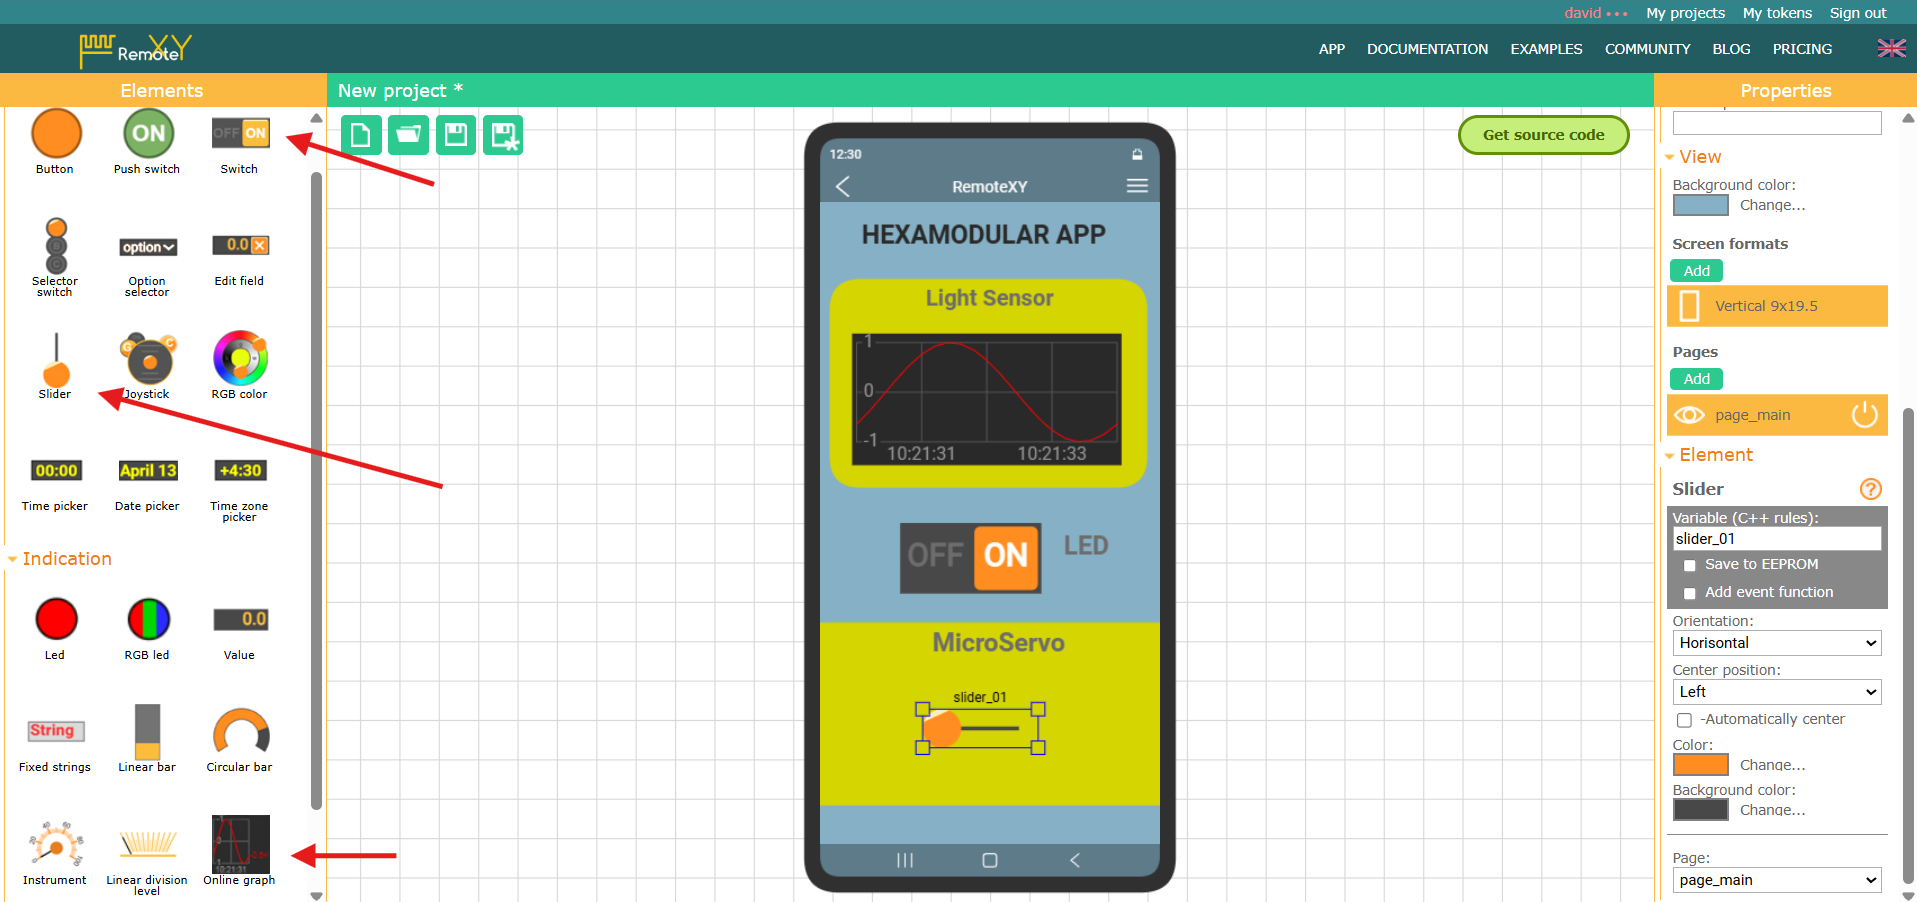
We will also add some "Controls" elements such as "Switch" and "Slider" to control our output devices, and we will also add an "Online graph" to visualize the data from our input device.
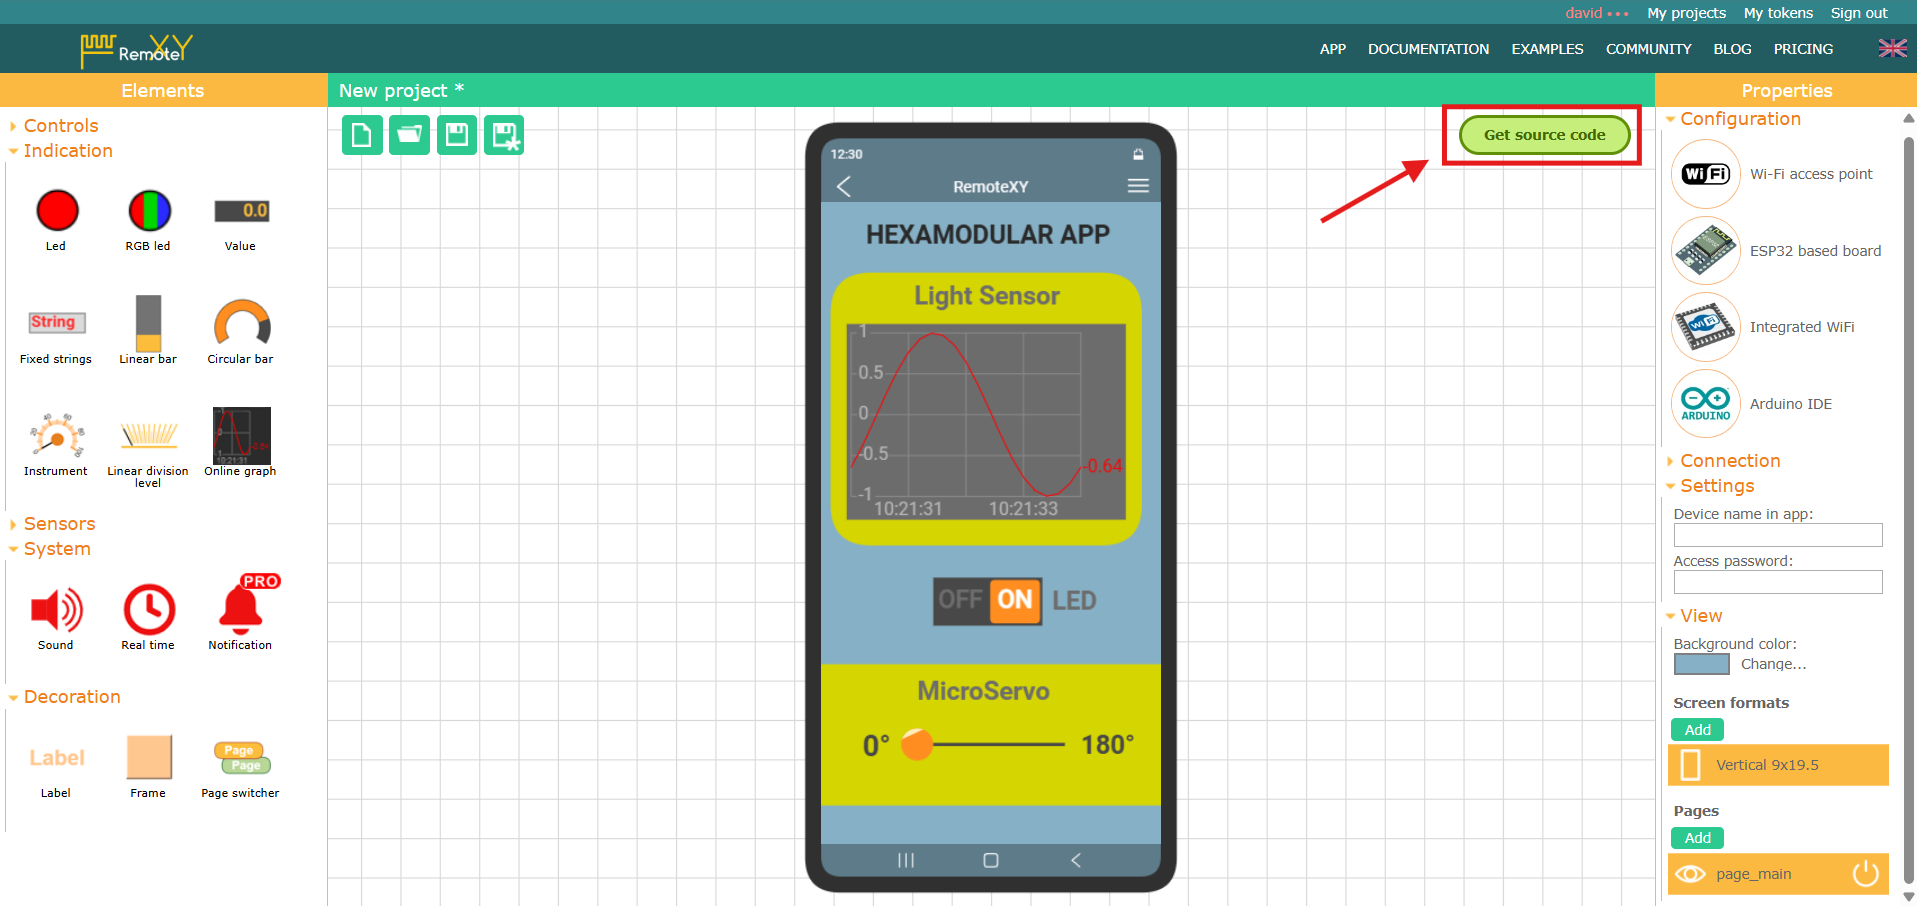
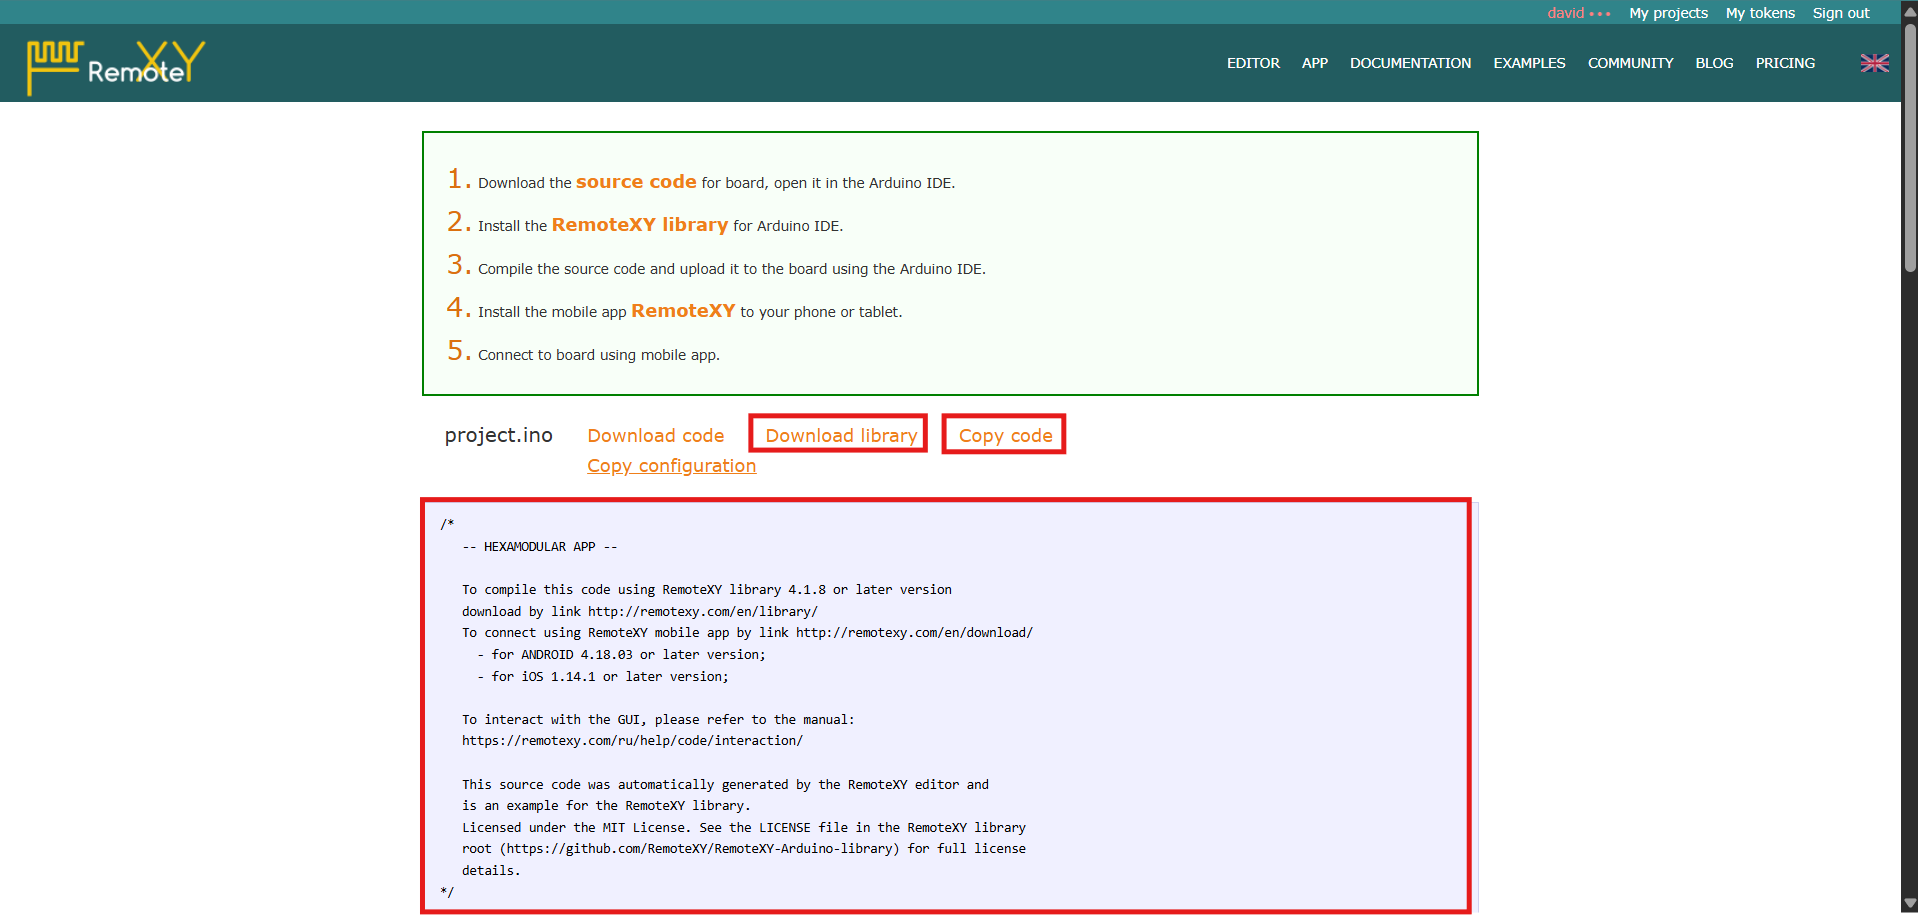
Once the design has been edited and finished, we will click "Get source code" to download our app code.
We can download or copy the source code to paste it into the Arduino IDE.
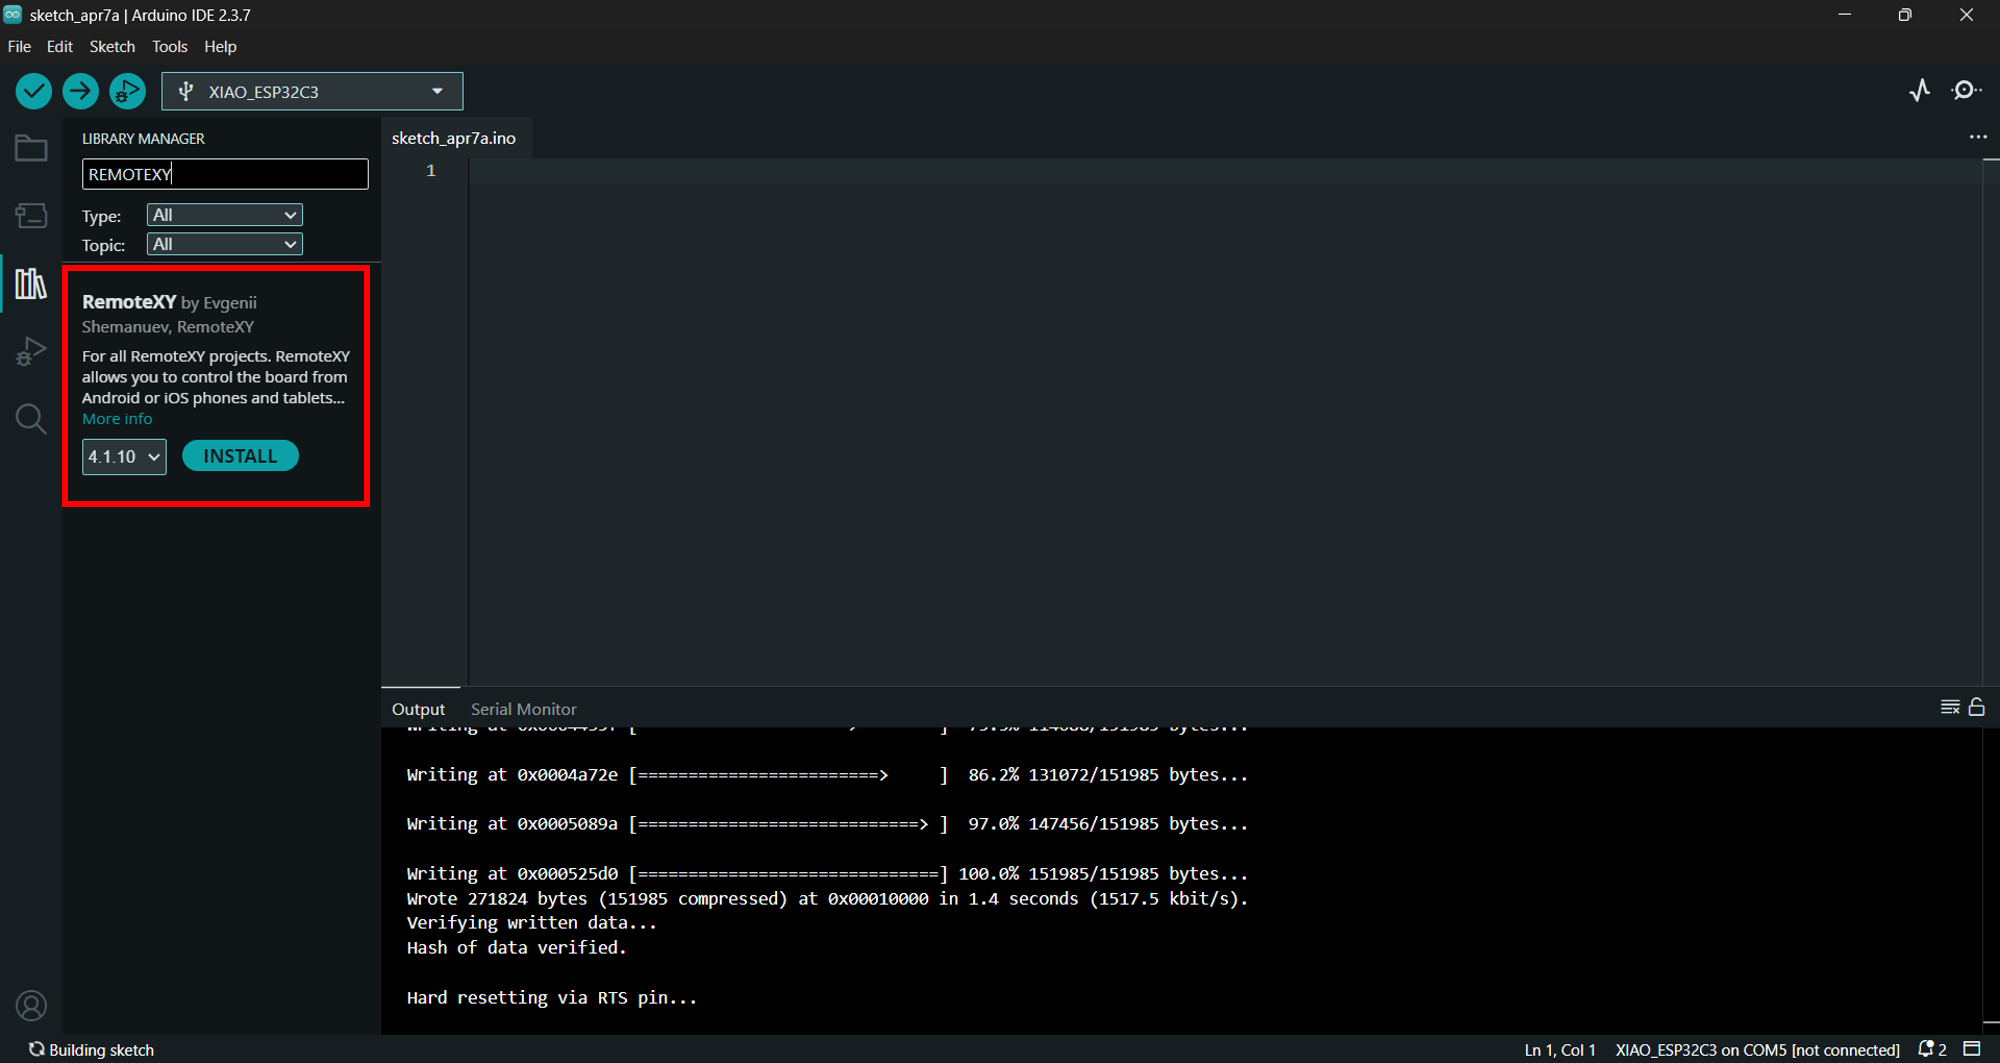
We will install the RemoteXY library in the Arduino IDE so we can compile the code, and then connect our ESP32 board.
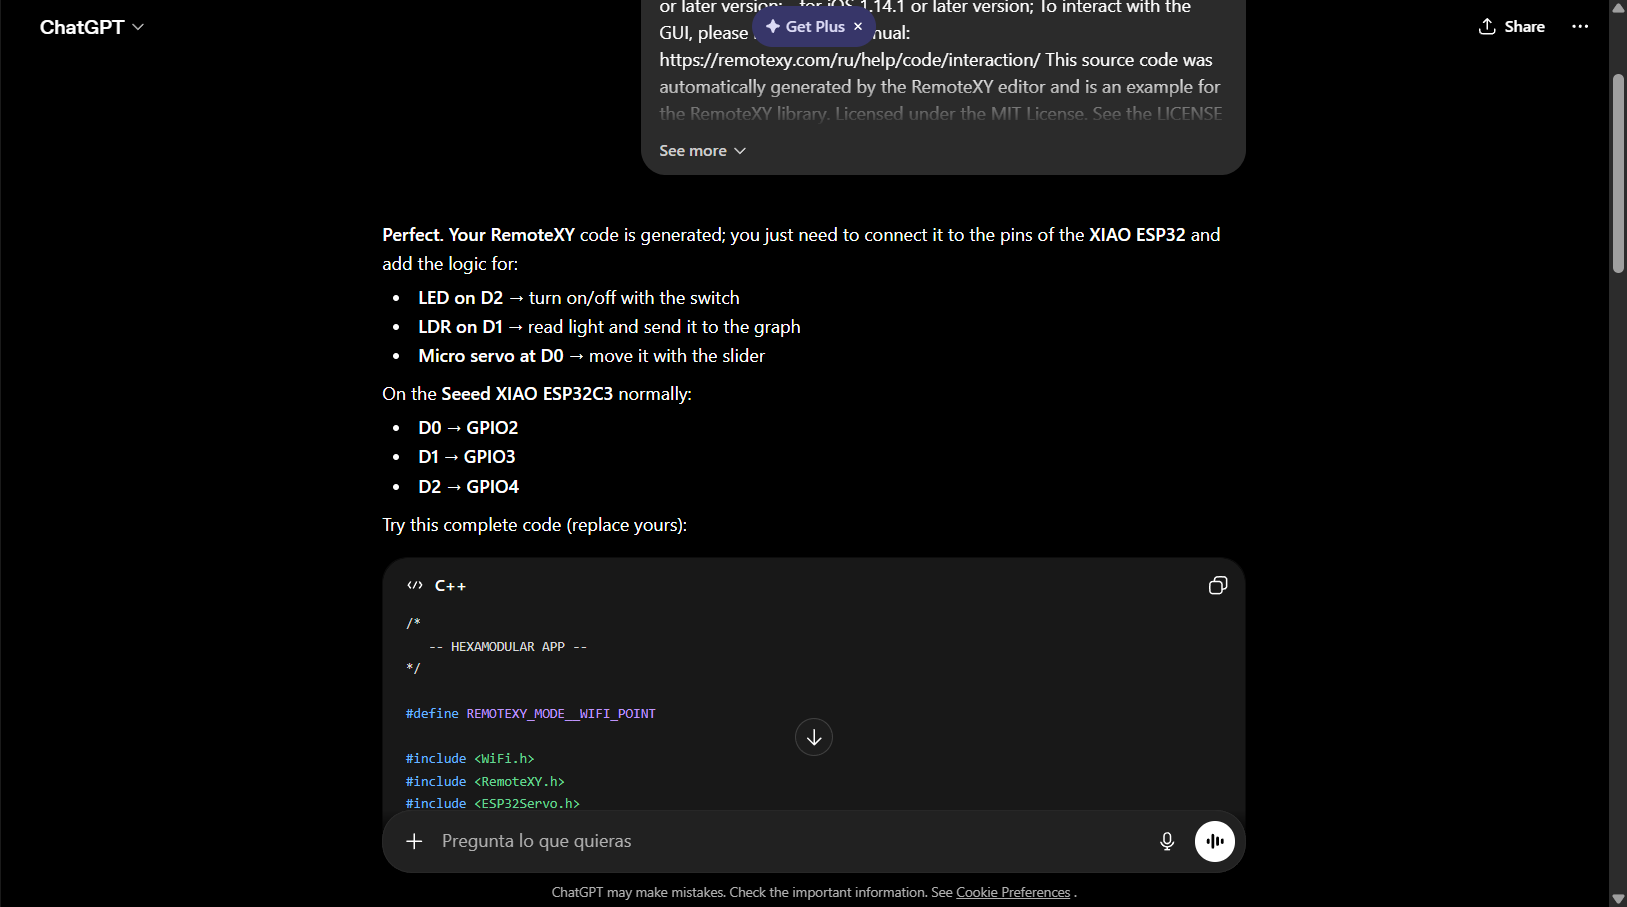
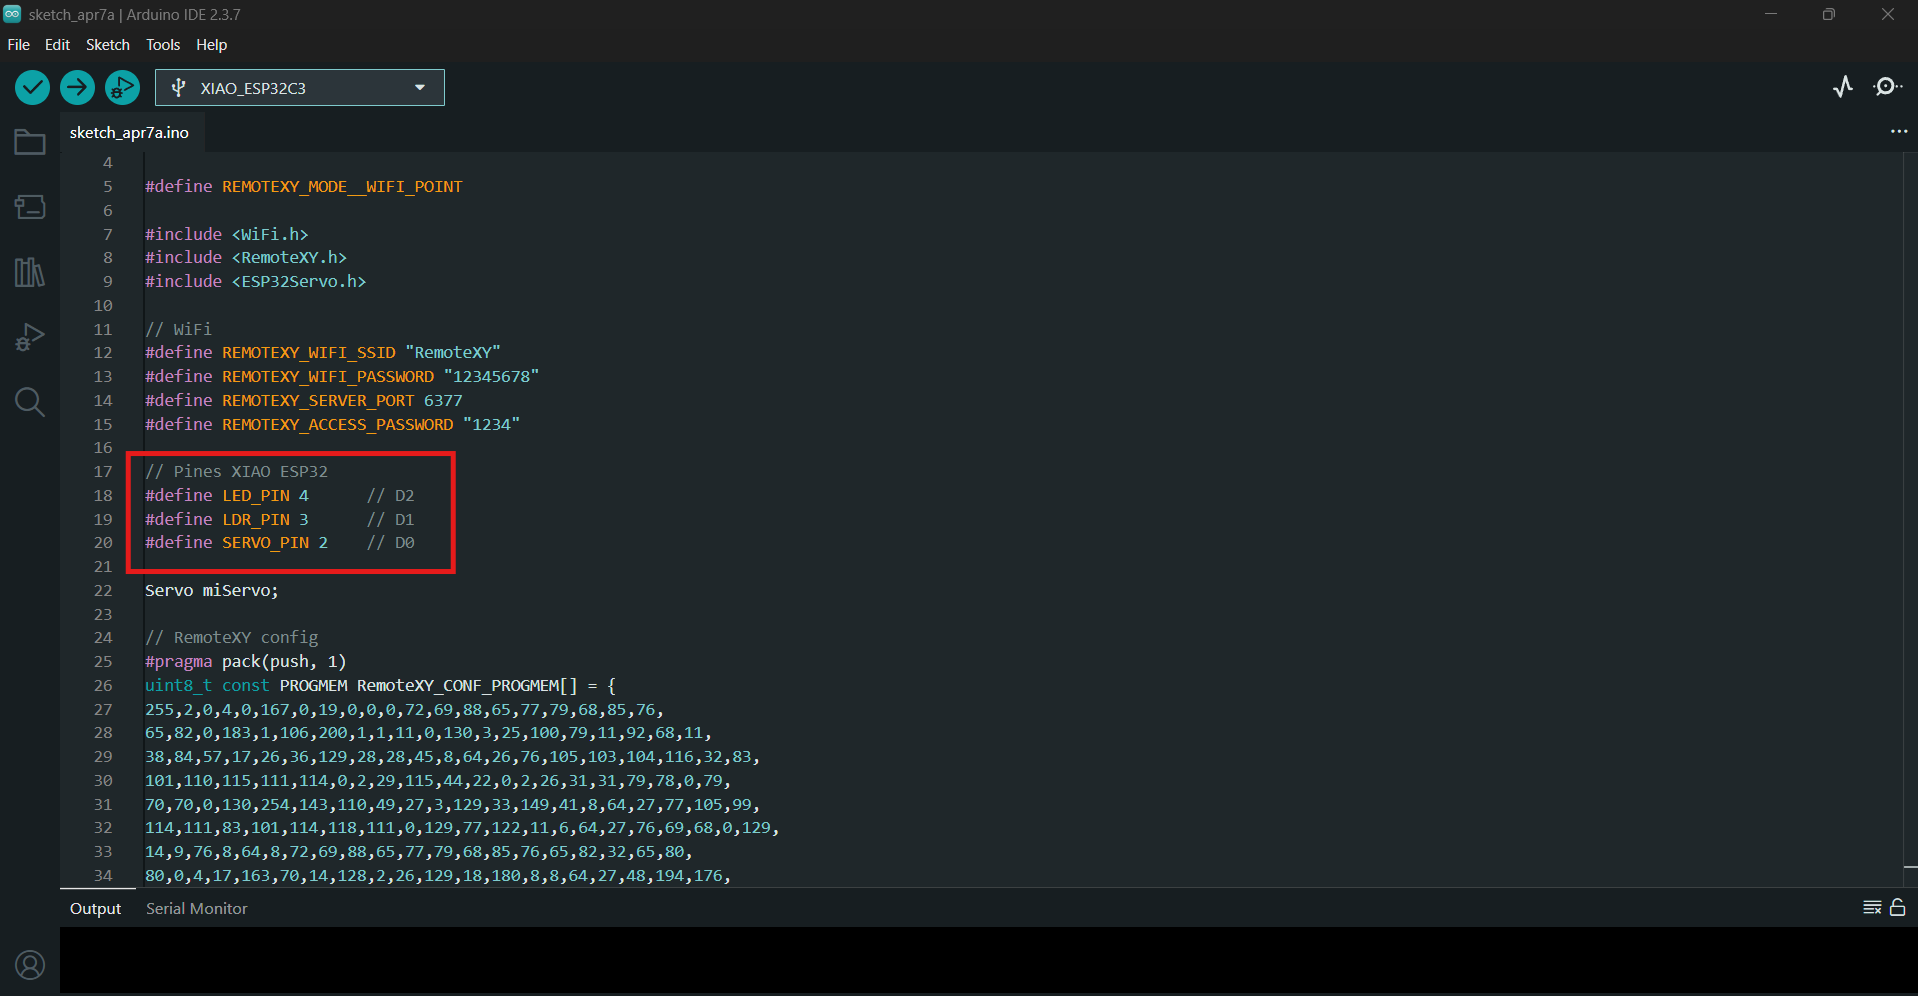
We will ask ChatGPT to help us understand the code generated by RemoteXY so we can make the necessary modifications to add and edit the pins of the input and output devices on my PCB.
           /*
   -- HEXAMODULAR APP --
*/

#define REMOTEXY_MODE__WIFI_POINT

#include <WiFi.h>
#include <RemoteXY.h>
#include <ESP32Servo.h>

// WiFi
#define REMOTEXY_WIFI_SSID "RemoteXY"
#define REMOTEXY_WIFI_PASSWORD "12345678"
#define REMOTEXY_SERVER_PORT 6377
#define REMOTEXY_ACCESS_PASSWORD "1234"

// Pines XIAO ESP32
#define LED_PIN 4      // D2
#define LDR_PIN 3      // D1
#define SERVO_PIN 2    // D0

Servo miServo;

// RemoteXY config
#pragma pack(push, 1)
uint8_t const PROGMEM RemoteXY_CONF_PROGMEM[] = {
255,2,0,4,0,167,0,19,0,0,0,72,69,88,65,77,79,68,85,76,
65,82,0,183,1,106,200,1,1,11,0,130,3,25,100,79,11,92,68,11,
38,84,57,17,26,36,129,28,28,45,8,64,26,76,105,103,104,116,32,83,
101,110,115,111,114,0,2,29,115,44,22,0,2,26,31,31,79,78,0,79,
70,70,0,130,254,143,110,49,27,3,129,33,149,41,8,64,27,77,105,99,
114,111,83,101,114,118,111,0,129,77,122,11,6,64,27,76,69,68,0,129,
14,9,76,8,64,8,72,69,88,65,77,79,68,85,76,65,82,32,65,80,
80,0,4,17,163,70,14,128,2,26,129,18,180,8,8,64,27,48,194,176,
0,129,71,177,17,8,64,27,49,56,48,194,176,0
};

struct {
  uint8_t switch_01;
  int8_t slider_01;

  float onlineGraph_01_var1;

  uint8_t connect_flag;
} RemoteXY;

#pragma pack(pop)

void setup()
{
  RemoteXY_Init();

  pinMode(LED_PIN, OUTPUT);

  miServo.attach(SERVO_PIN);

  analogReadResolution(12);
}

void loop()
{
  RemoteXY_Handler();

  // LED ON/OFF desde app
  digitalWrite(LED_PIN, RemoteXY.switch_01);

  // Servo 0-180°
  int angulo = map(RemoteXY.slider_01, 0, 100, 0, 180);
  miServo.write(angulo);

  // Leer LDR y mandar al gráfico
  int ldrValue = analogRead(LDR_PIN);
  RemoteXY.onlineGraph_01_var1 = ldrValue;

  RemoteXY_delay(50);
}
}
We will copy the code generated by ChatGPT, compile it, and upload it to our ESP32 board.
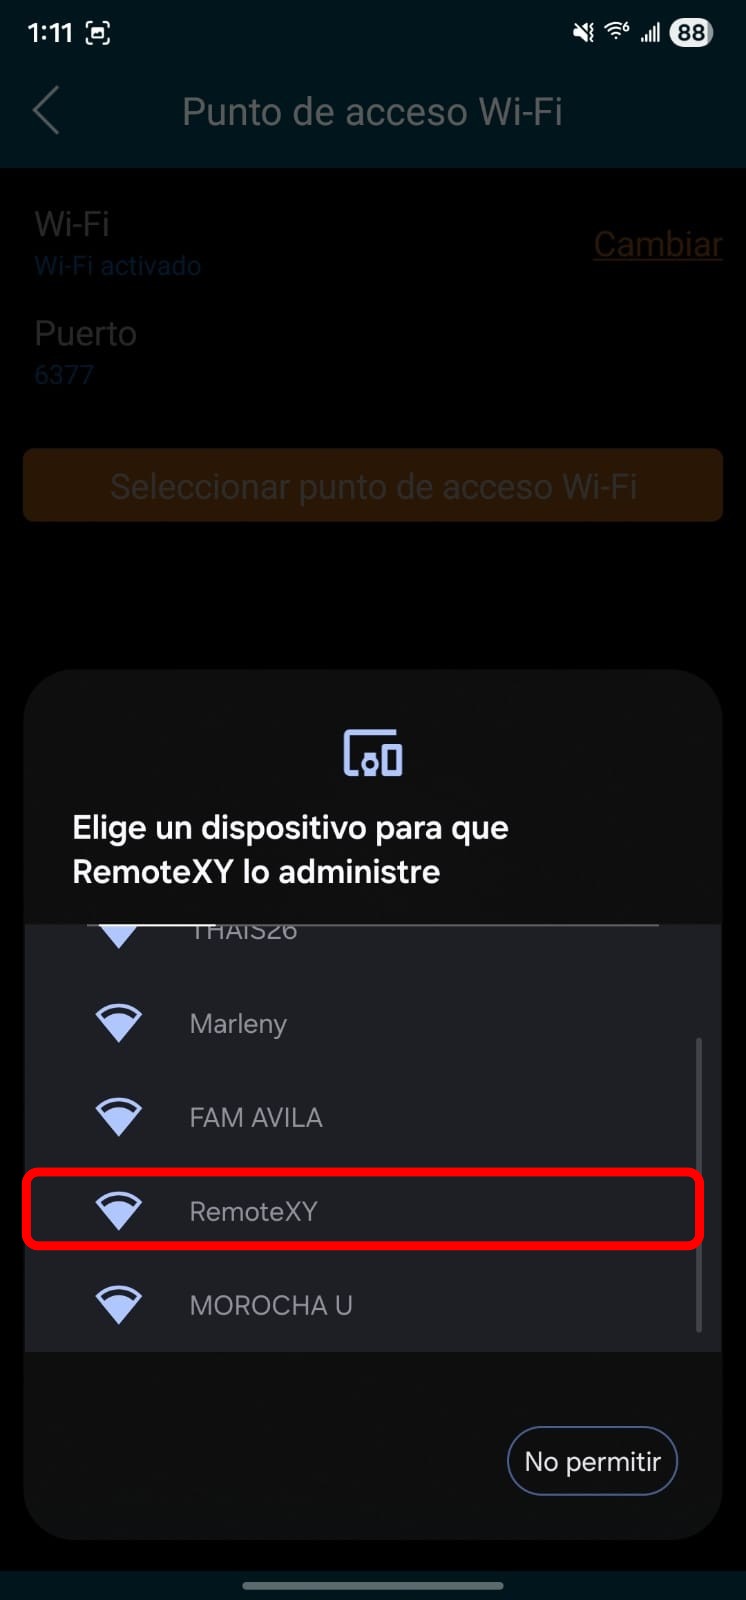
We will install the "RemoteXY" app on our phone from the Play Store, and then choose the WiFi hotspot option.

We will select the "RemoteXY" network and connect using the password "12345678". Then we will open the app and click "Connect", enter the access password "1234", and that is it, we will be able to see our "HXAMODULAR" app.
Below is a demonstration video of my app in operation, where you can see how the LED turns on and off with the "Switch", the servo moves with the "Slider", and the LDR value is shown in the "Online graph".