WEEK 03
Computer-Controlled Cutting
Group assignment:
- Do your lab's safety training
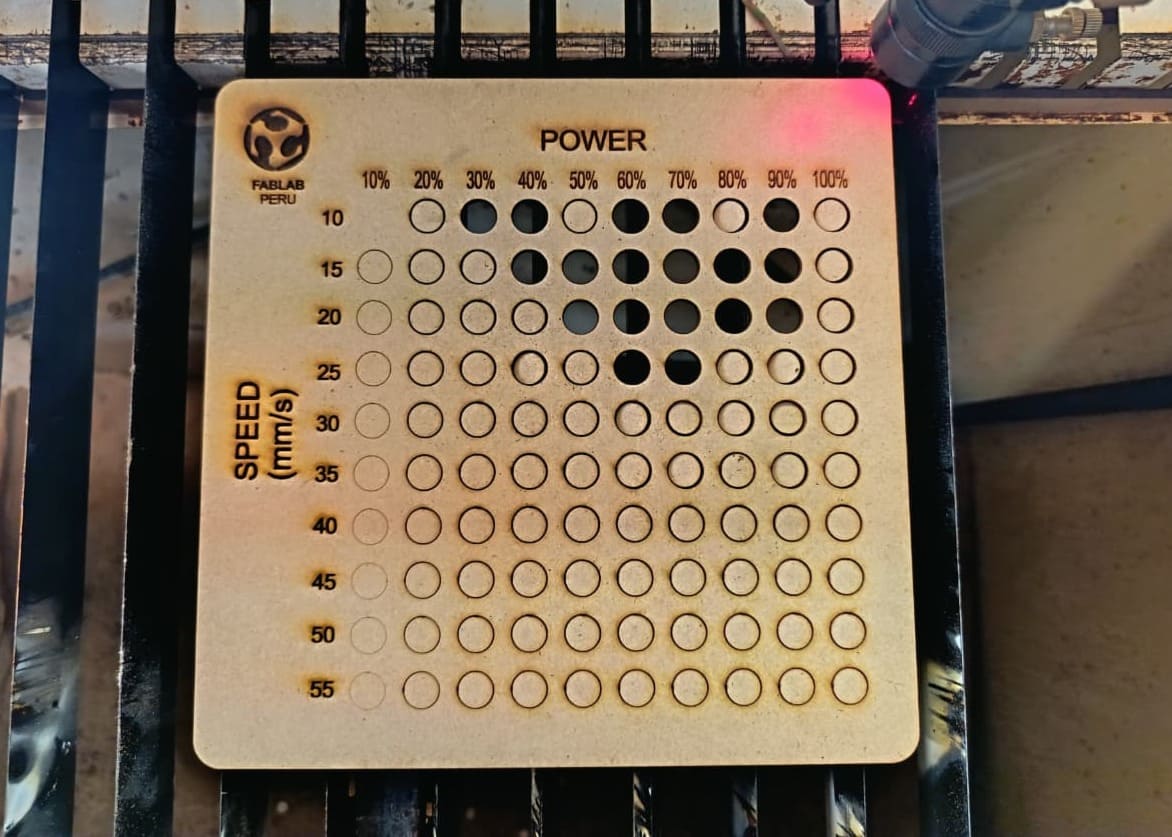
- Characterize your lasercutter's focus, power, speed, rate, kerf, joint clearance and types.
- Document your work to the group work page and reflect on your individual page what you learned.
What I Learned From Teamwork
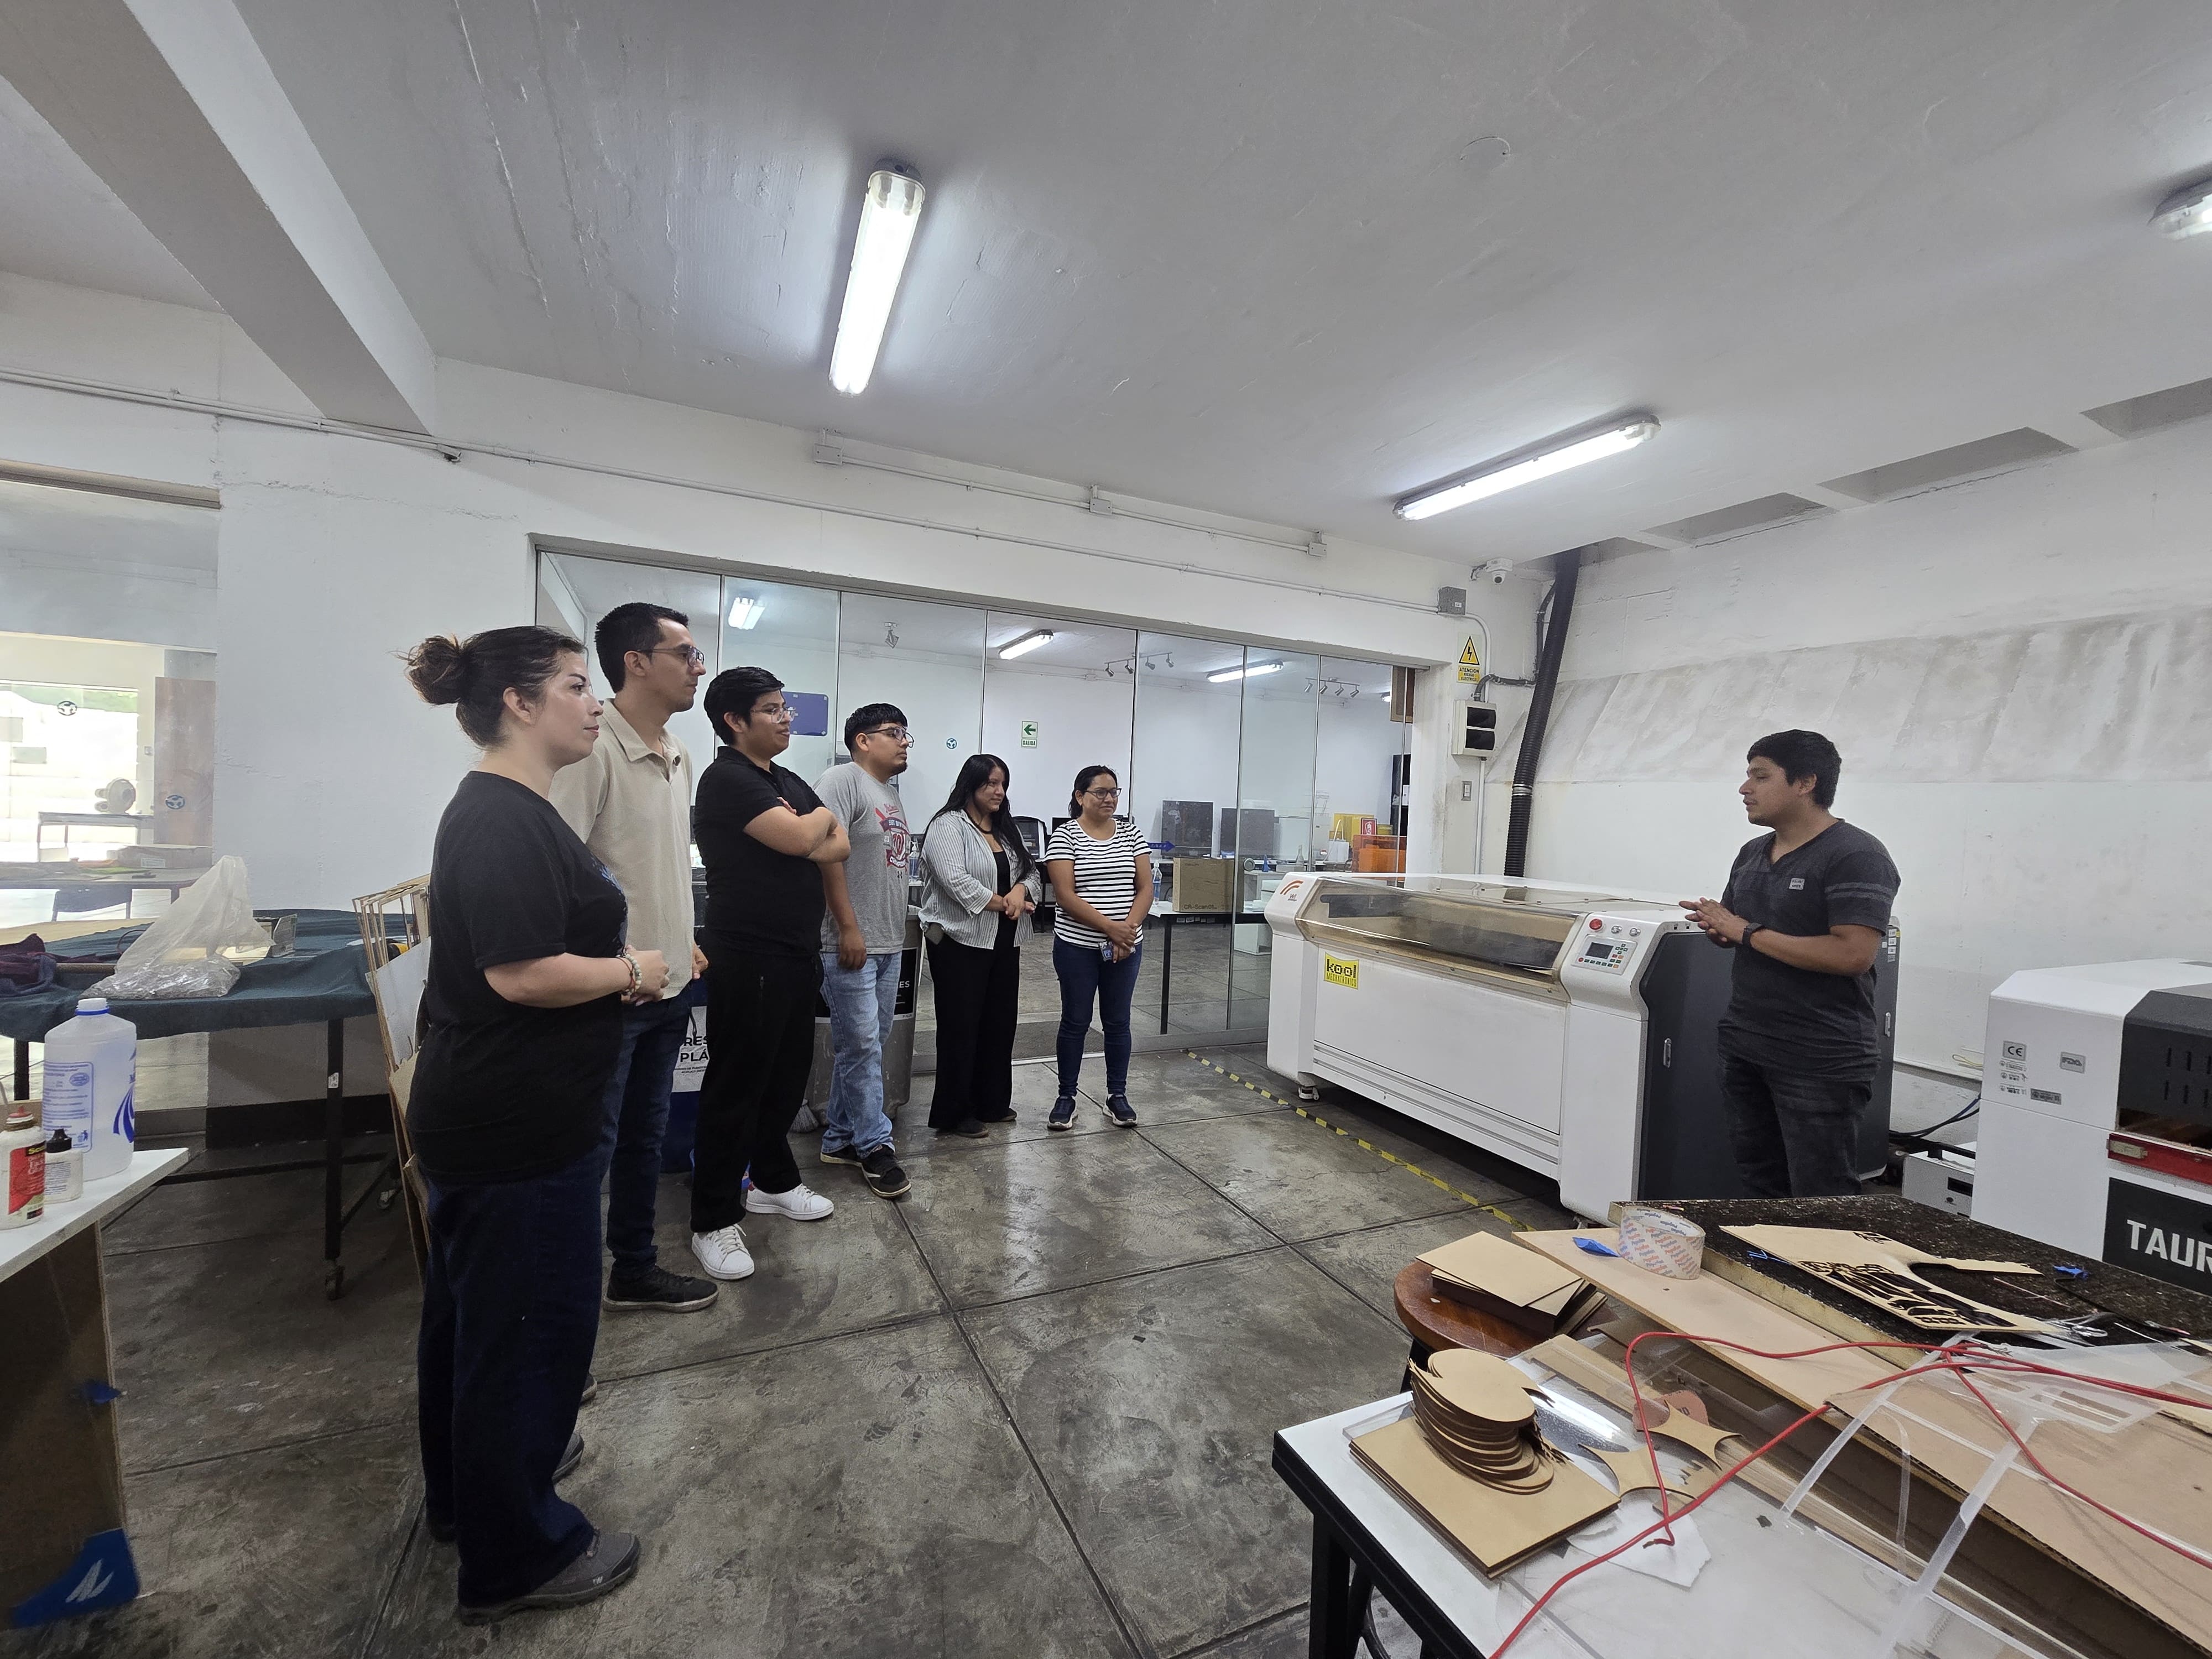
Training on the safety and use of laboratory equipment is essential, even though I already have some knowledge. Each machine is different, and each laboratory has its own regulations. The instructor was very specific and helped me differentiate between the types of PPE.
Calibration tip 1
You can use MDF circles as a center guide.

Calibration tip 2
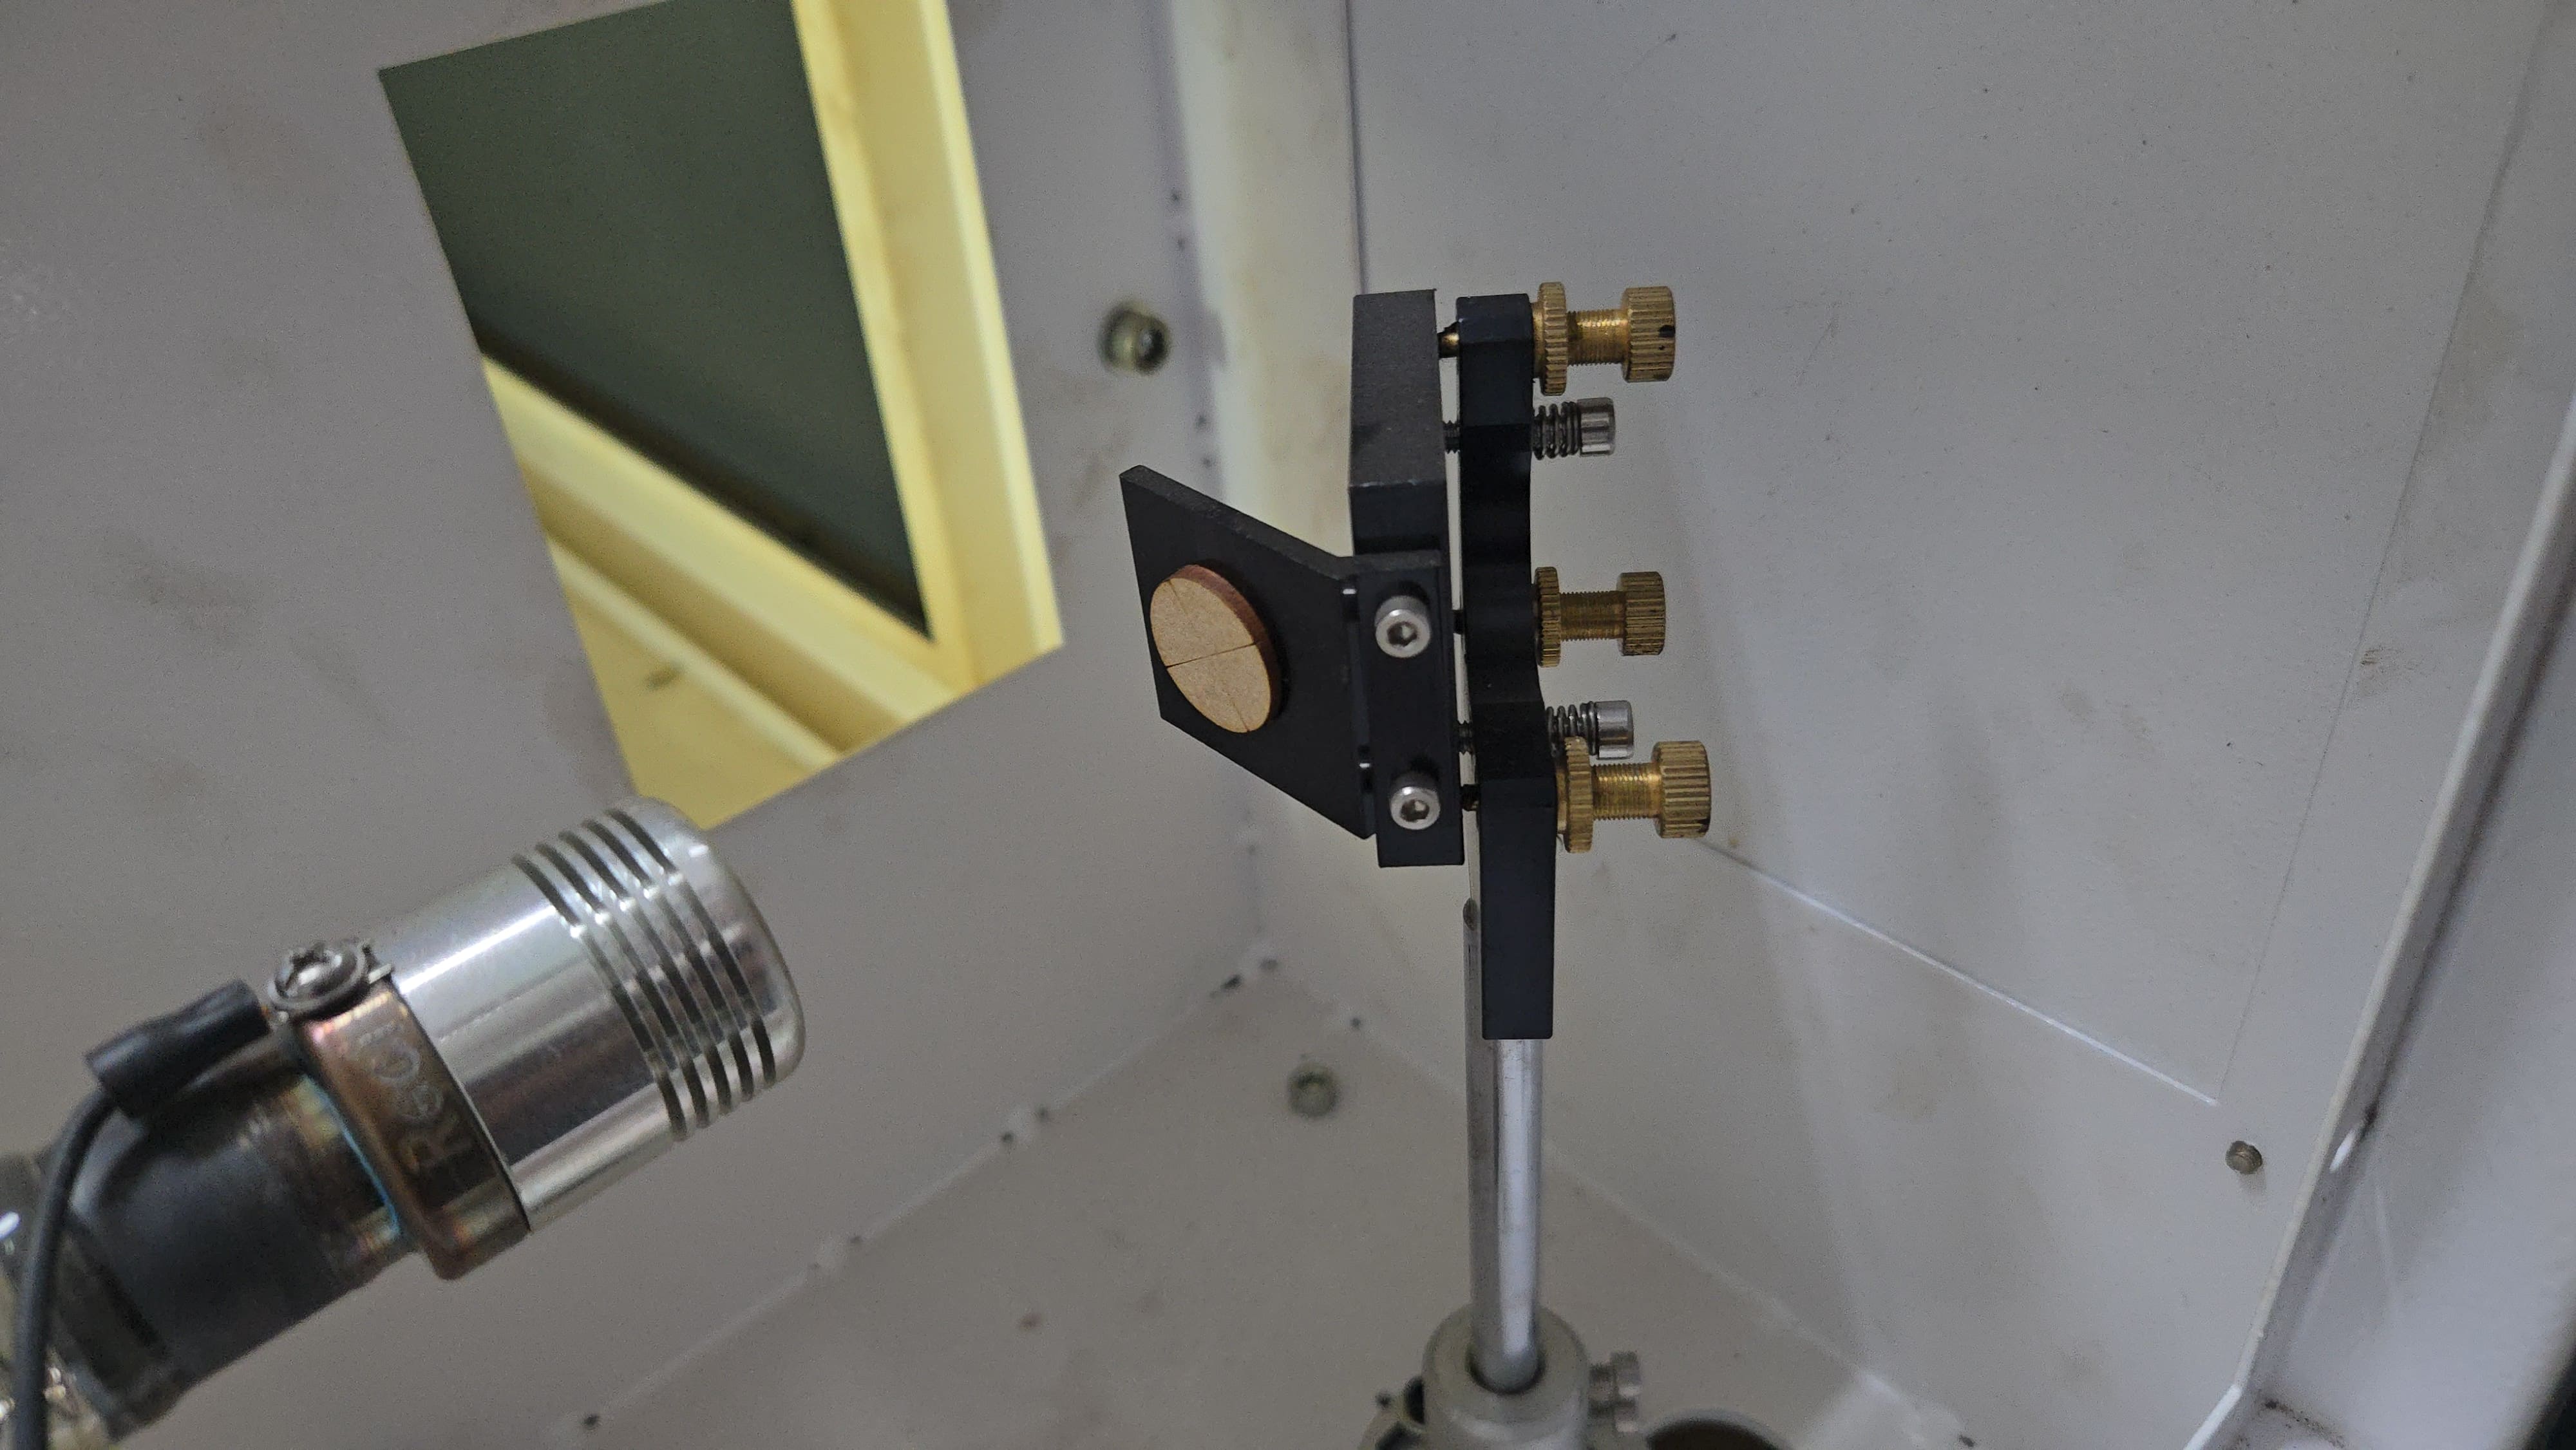
Check the focal distance with the smallest laser pulse.
If you are using a laser cutter for the first time, it is necessary to do a quick check to see if it is properly calibrated. This can be done with a laser pulse, observing that at the focal distance used, the dot appears as small as possible.
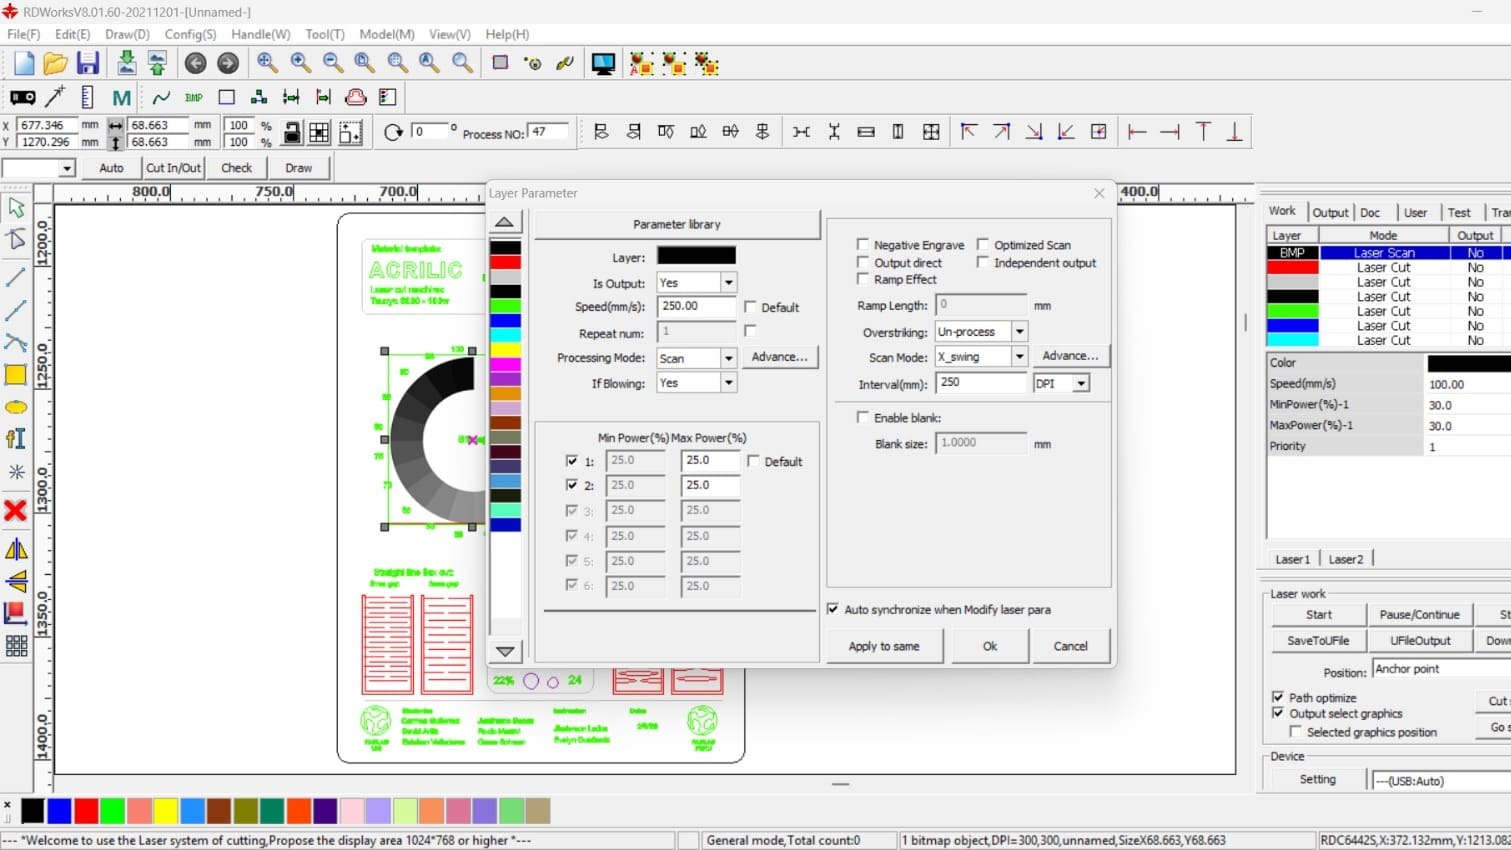
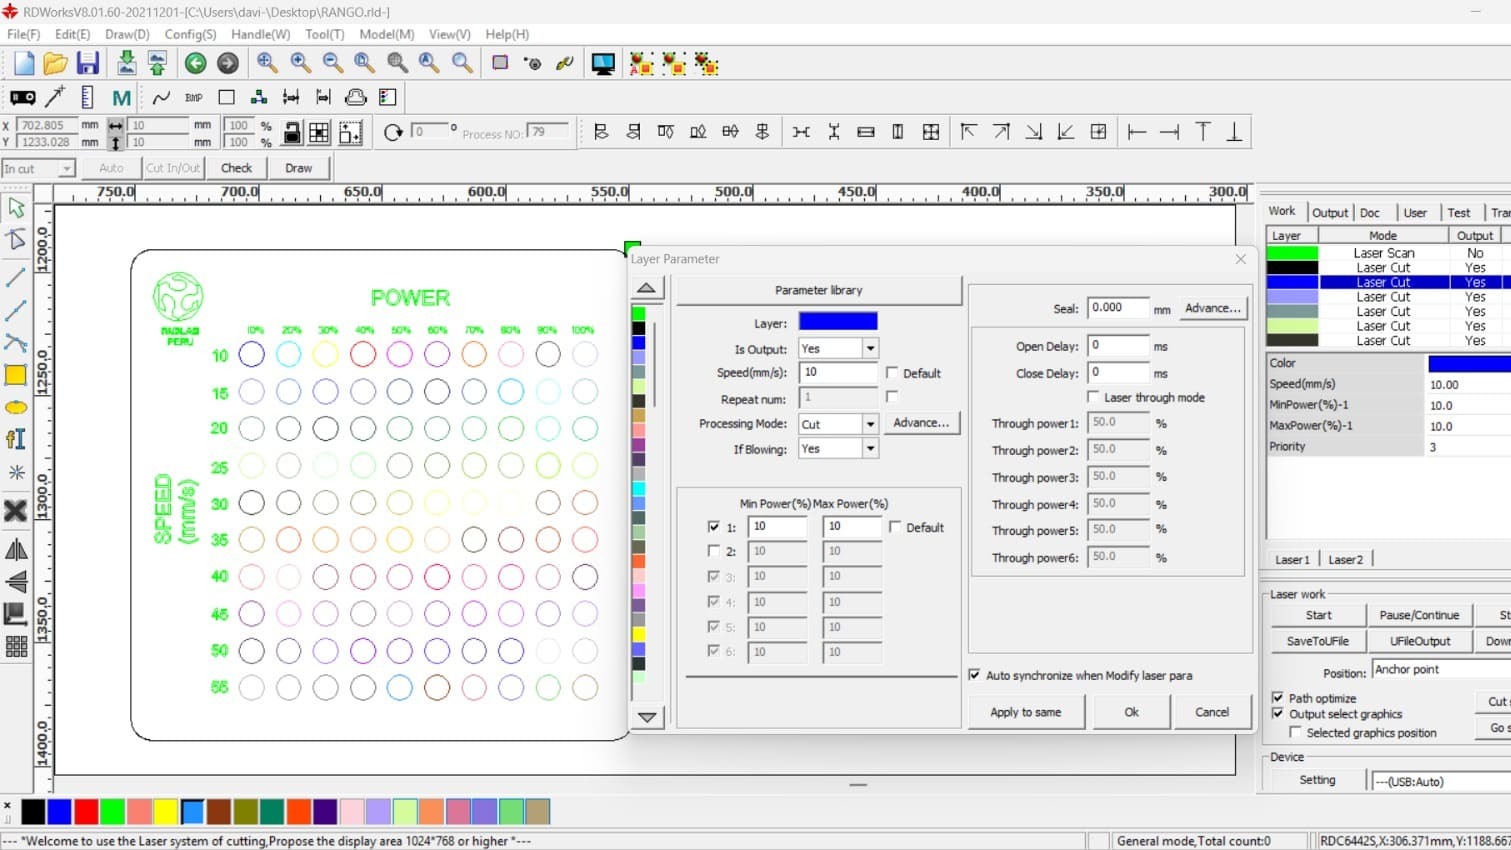
Template parameters 1.
Template parameters 1.
Template parameters 2.
Template parameters 2.
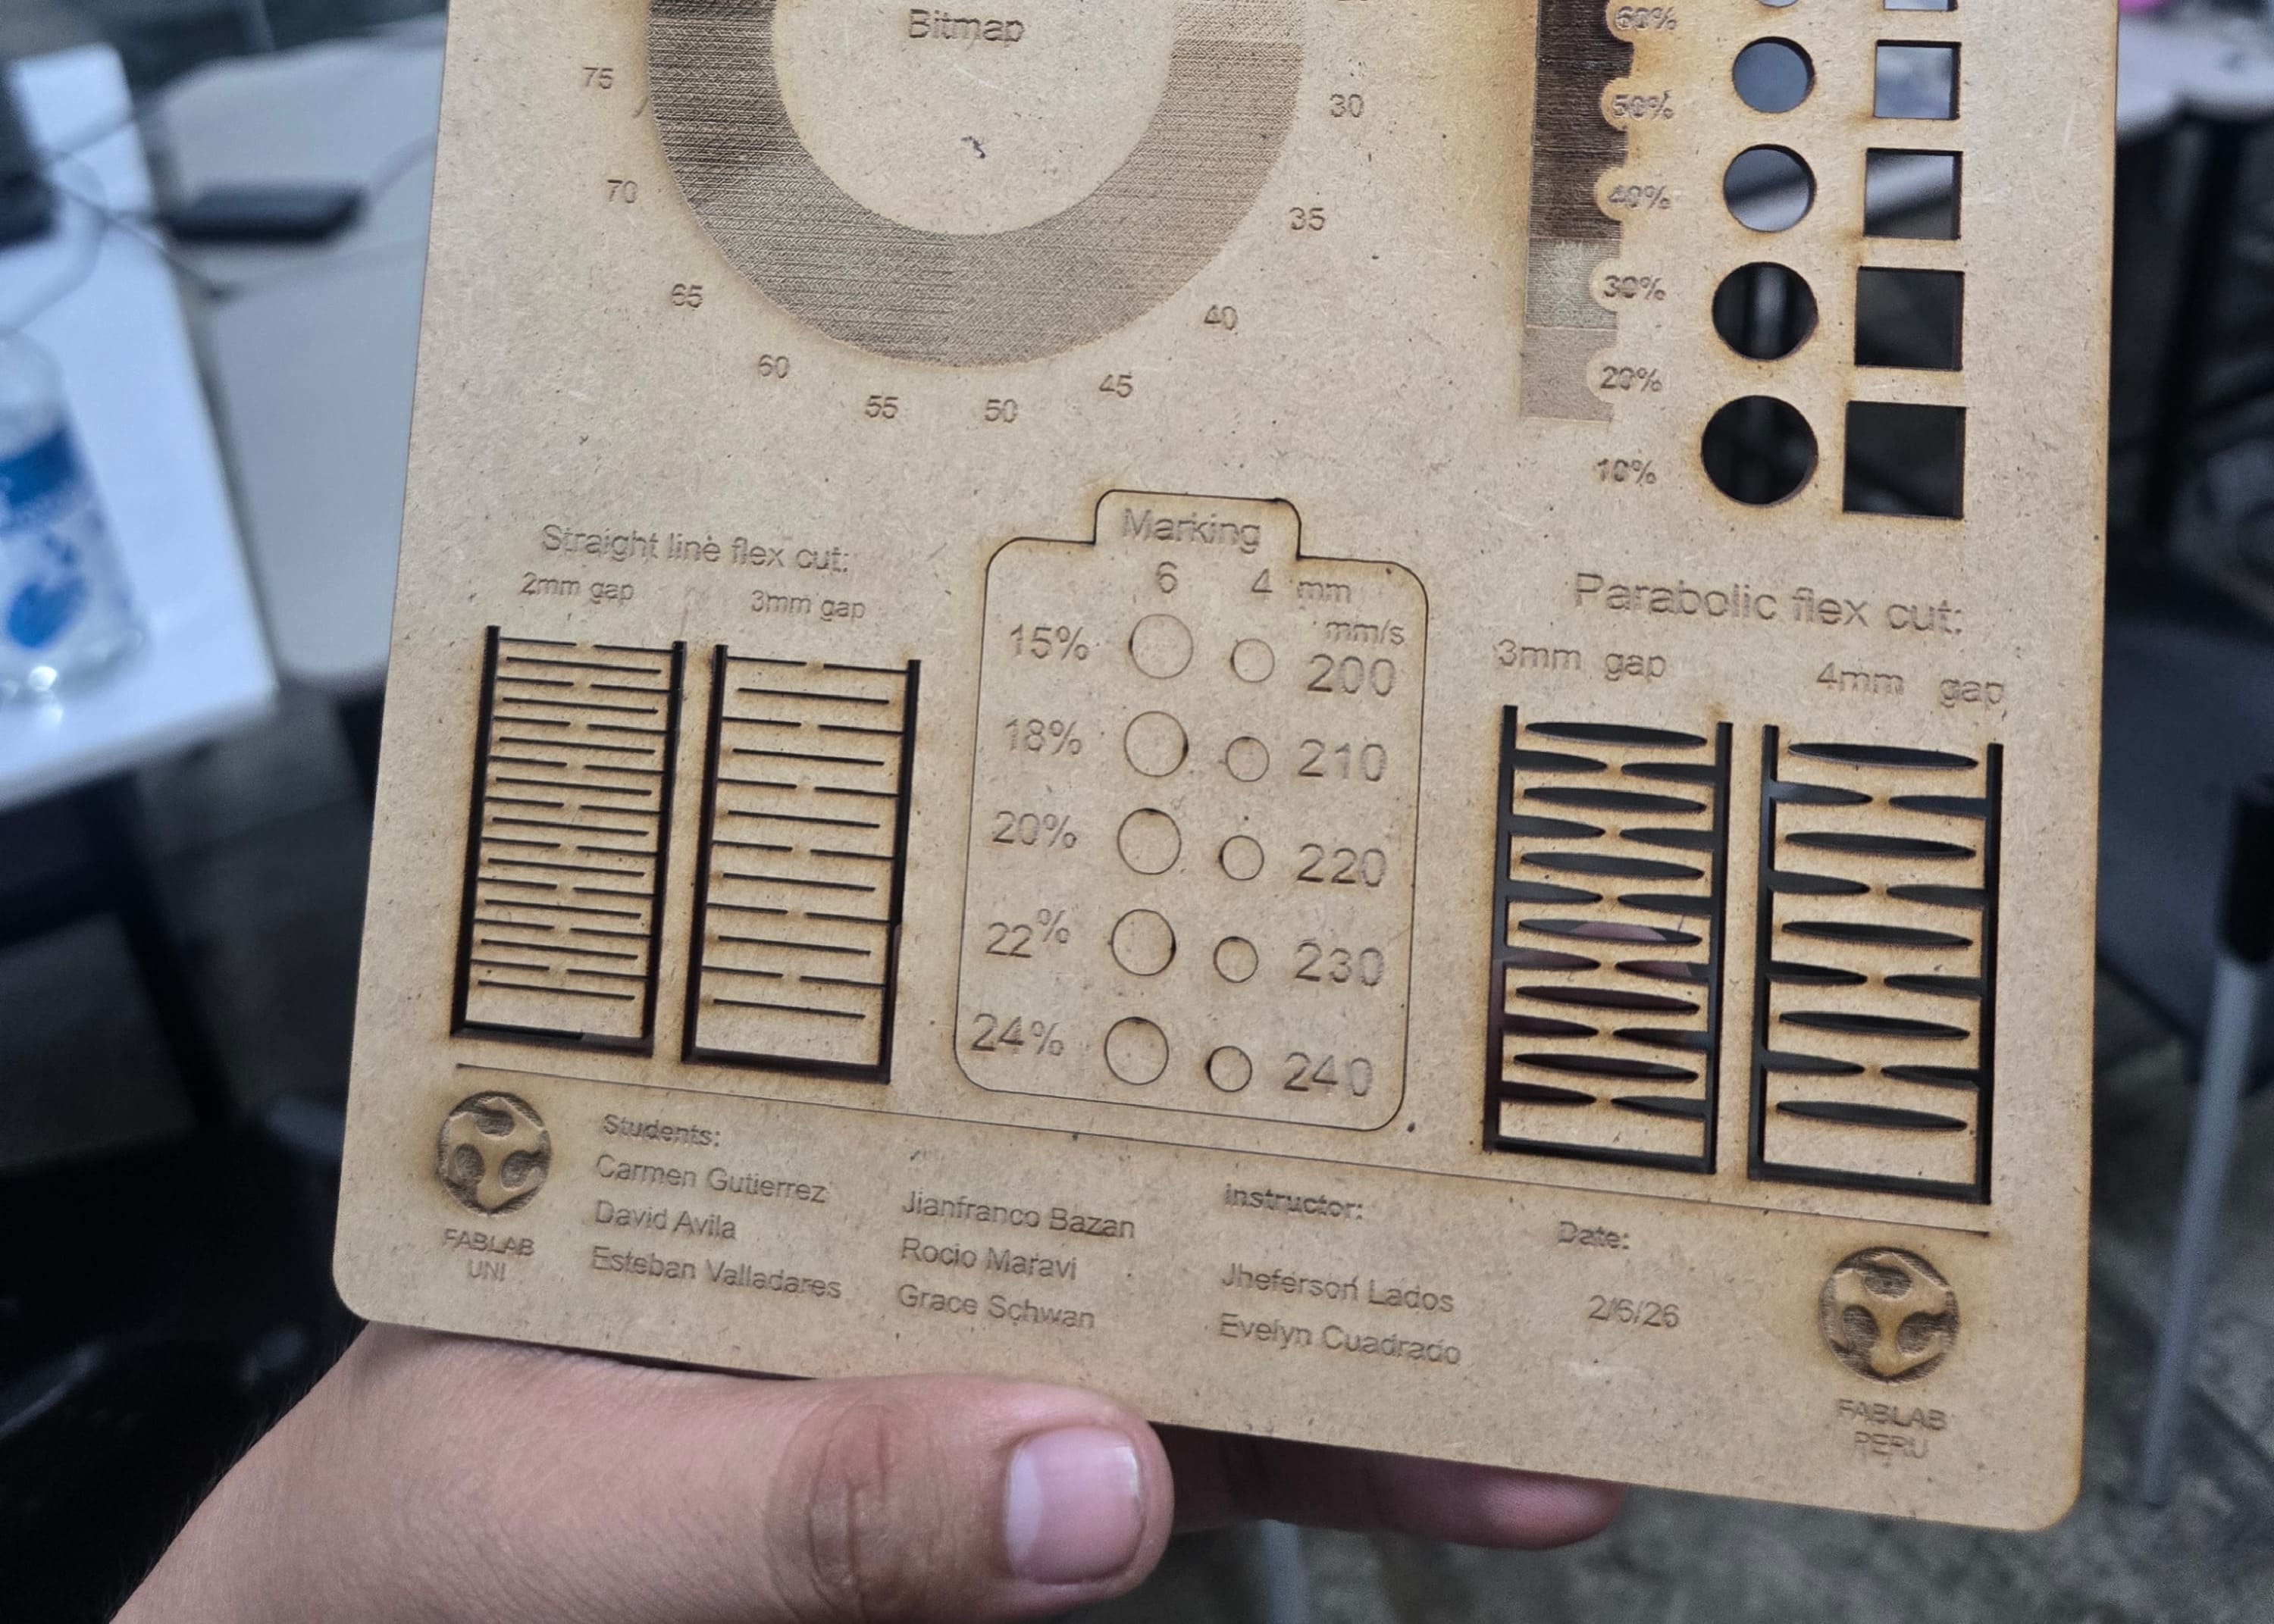
CUTTING AND ENGRAVING PARAMETERS
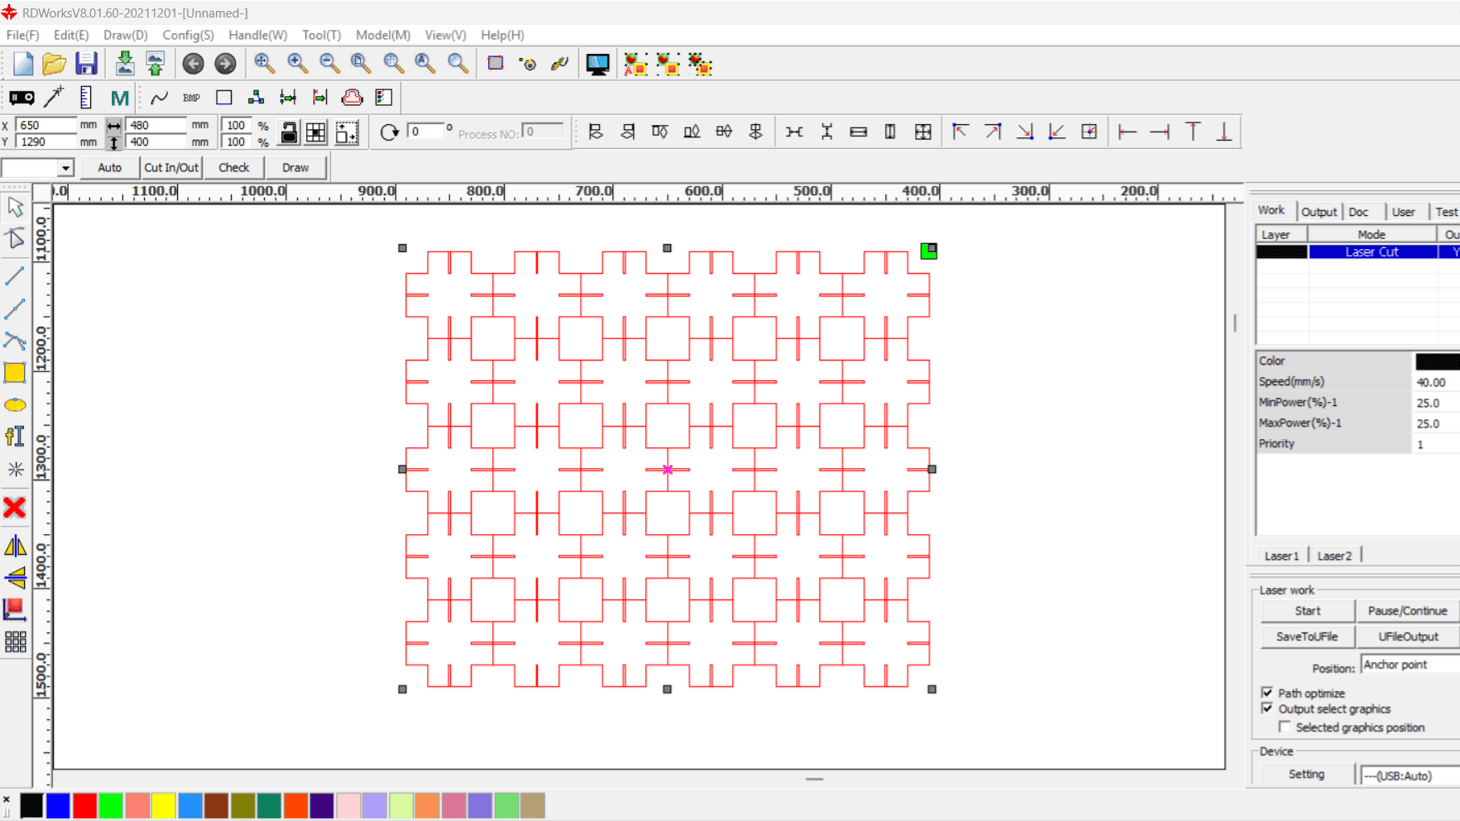
I found the RDworks program easier to understand and configure its layers; it helps create a library to keep it saved, and the preview makes it easy to see how the order and timing of the two test templates will be arranged.
Title 1
Template 1
Title 2
Template 2
In this group assignment I was able to meet great professional friends with whom I can co-create. The FabLab Uni is a great, well-organized laboratory with incredible machines. The instructors in charge are qualified and guided us and invited us to continue working on the next Academy project.
Individual assignments:
- Design, lasercut, and document a parametric construction kit, accounting for the lasercutter kerf.
- Cut something on the vinyl cutter.
Parametric construction kit
Parametric design - SOLIDWORKS
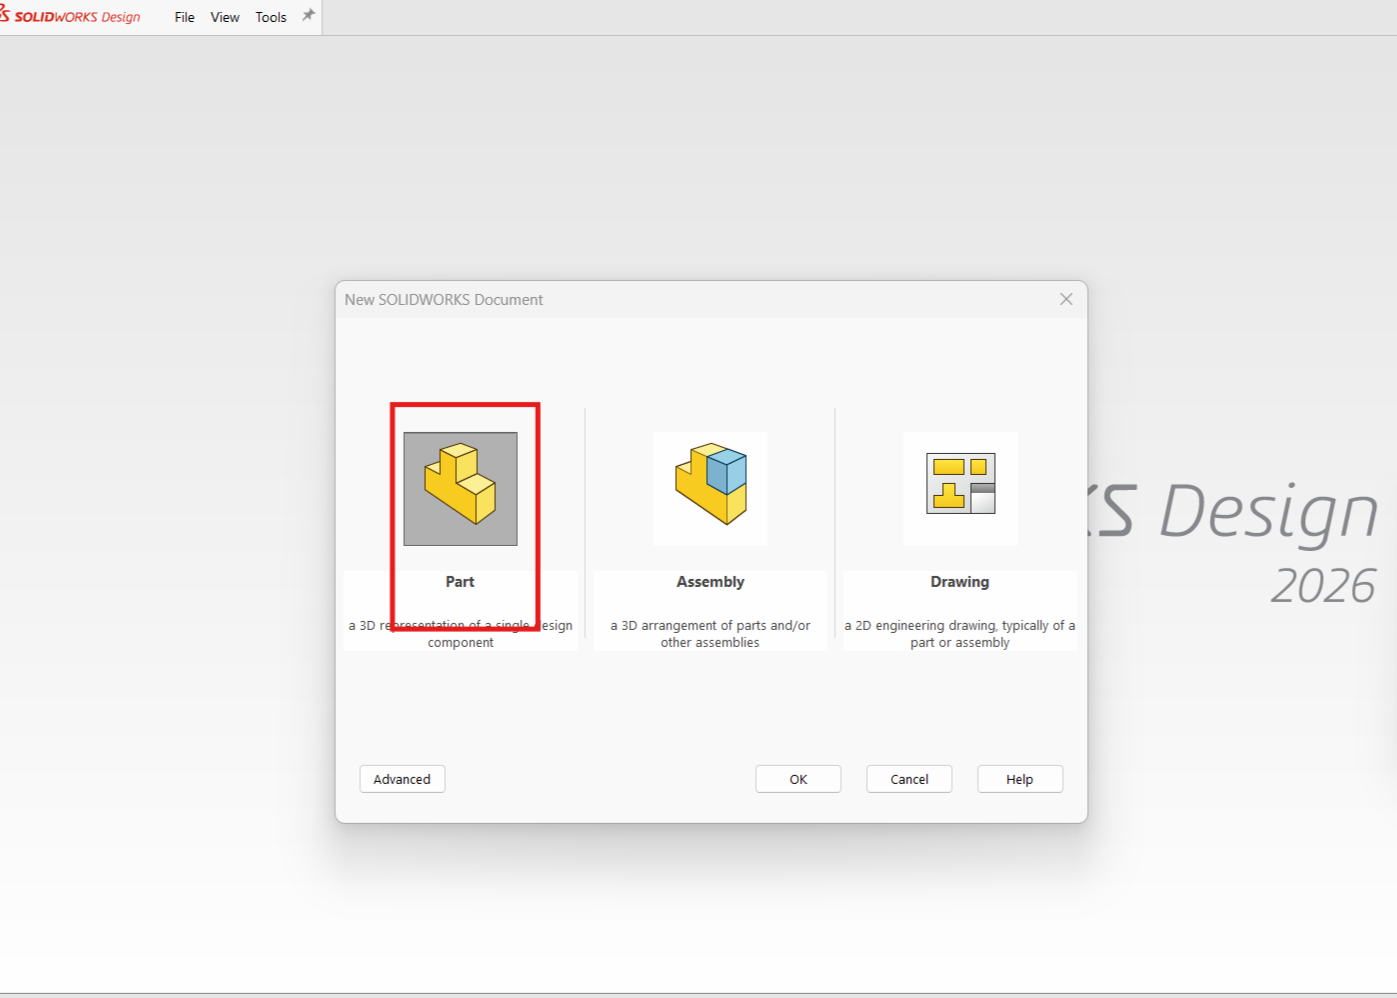
I used the SolidWorks program to create my parametric construction kit. To do this, we opened the program and created a part. Then we followed these steps:
Title 1
We open a new document, in this case a "Part".
Title 2
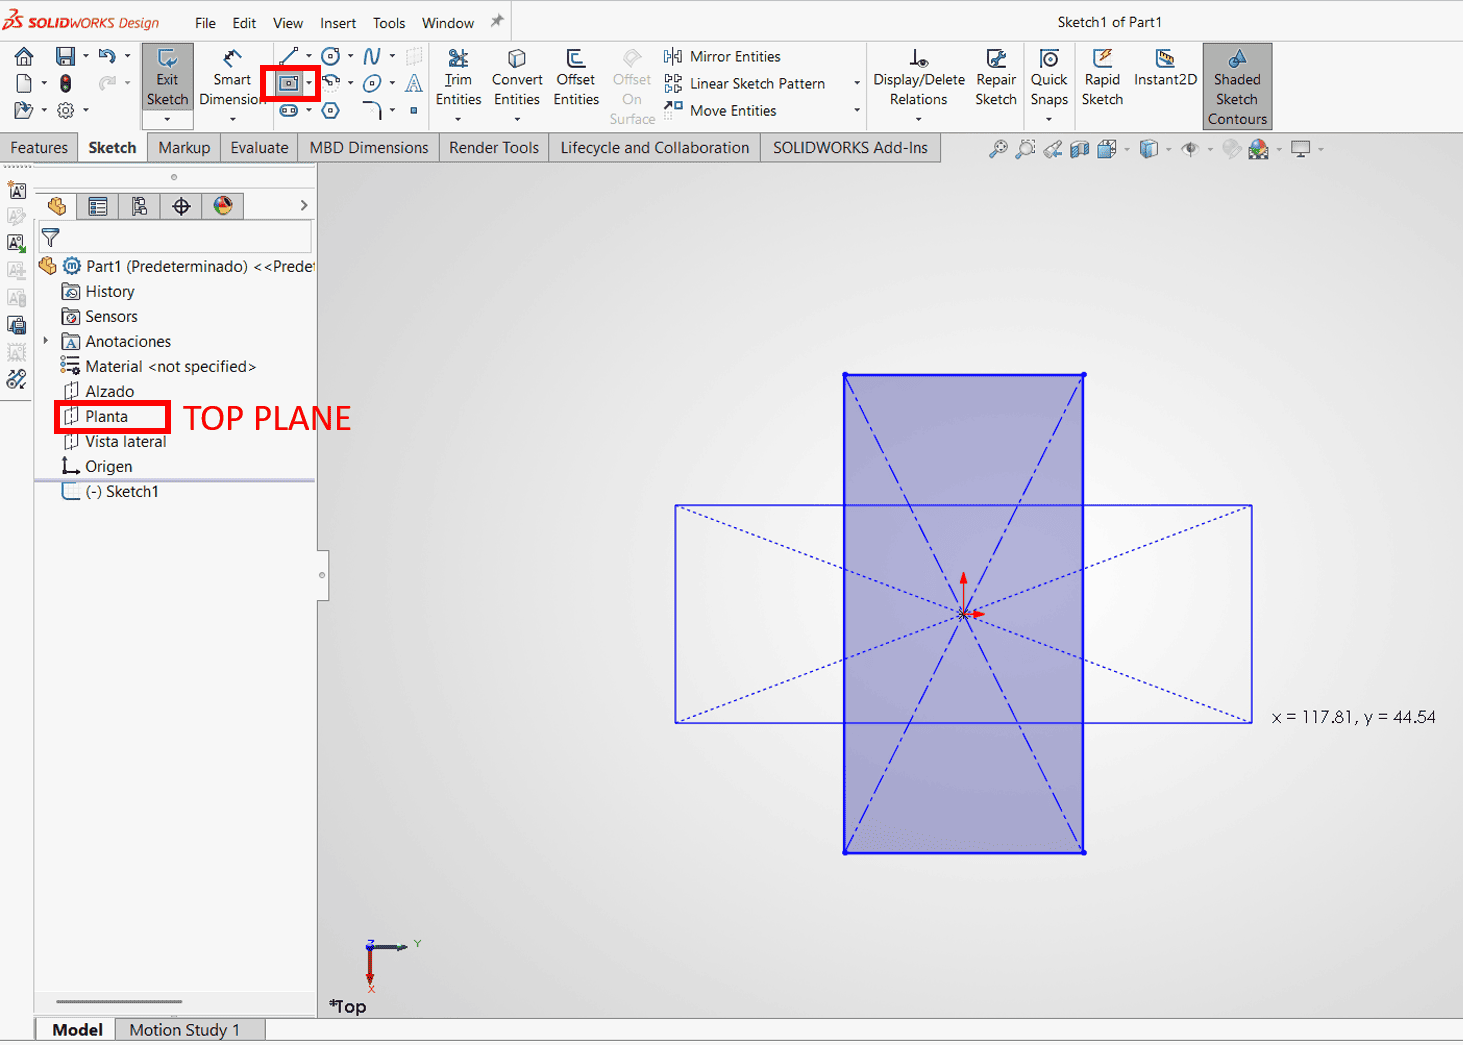
We click on the "Top Plane" and then draw 2 rectangles using the "Rectangle" command.
The shape will be that of a cross, so we will erase the extra lines; the use of restrictions is necessary to apply them so that the object meets the proportional parameters.
Title 1
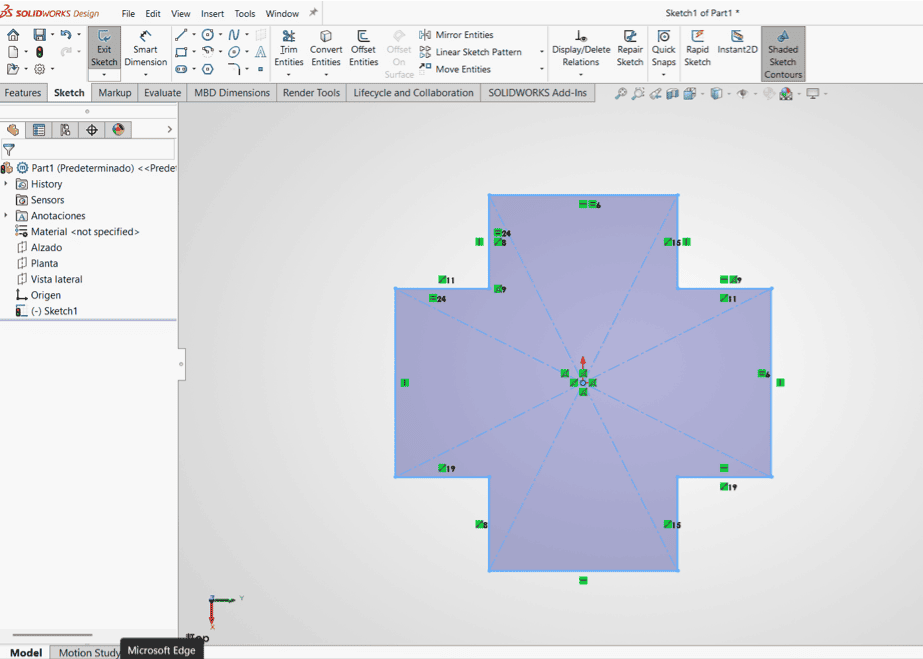
Next, we erase the inner lines with the trim command to generate the following geometry.
Title 2
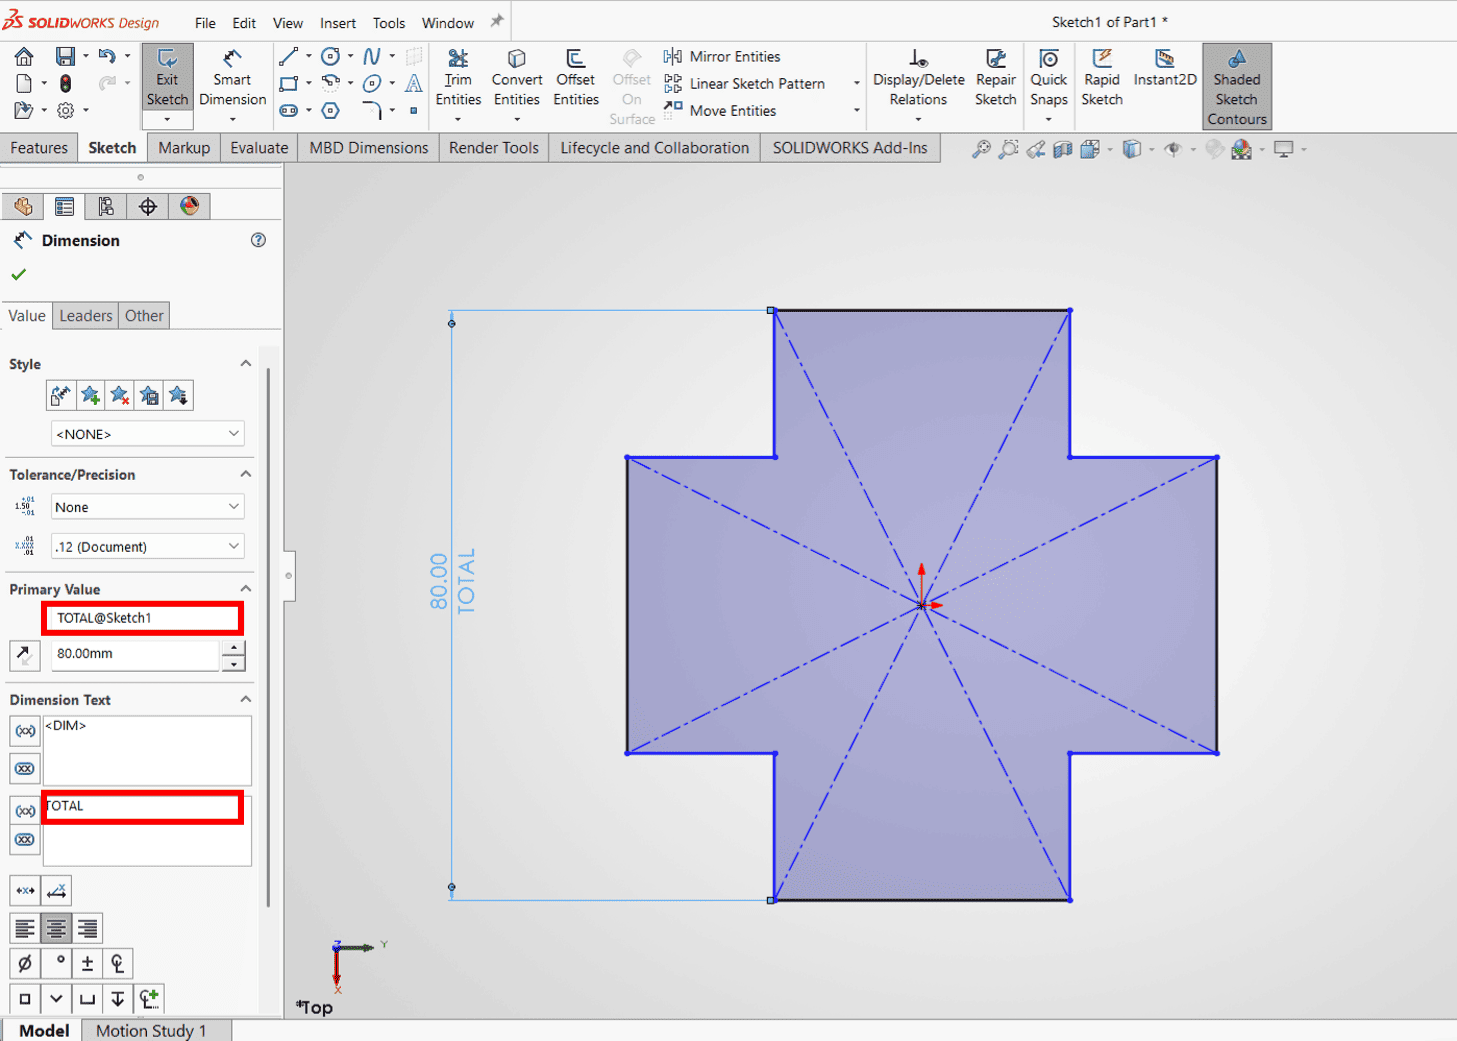
We click "Dimension" to apply the constraints shown on the screen.
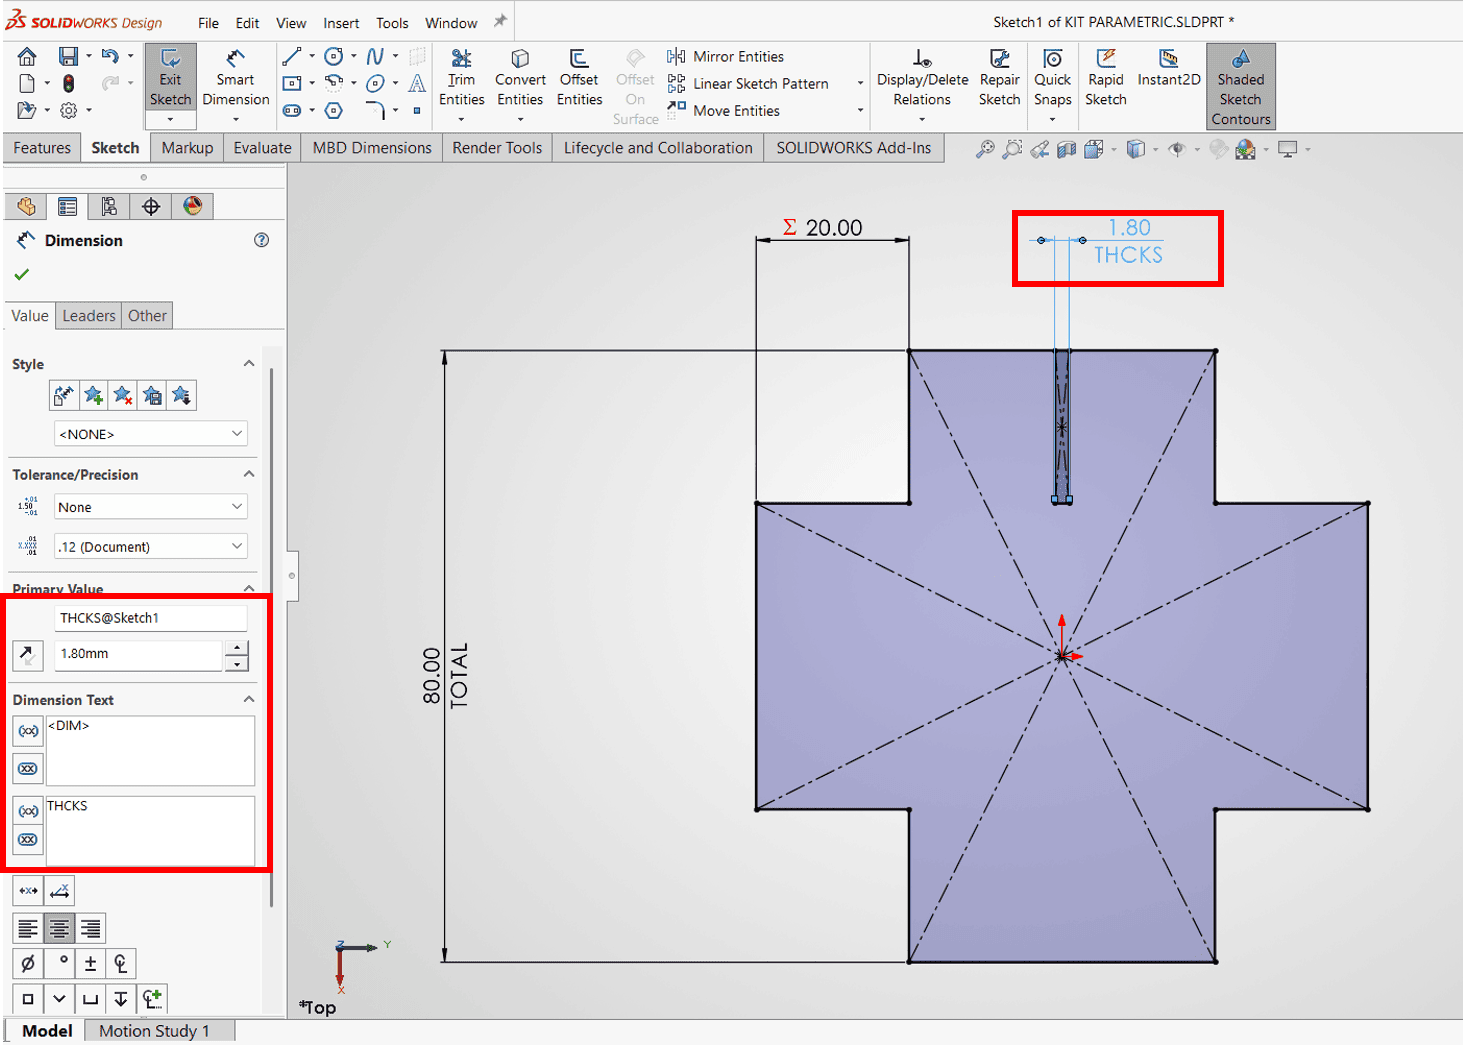
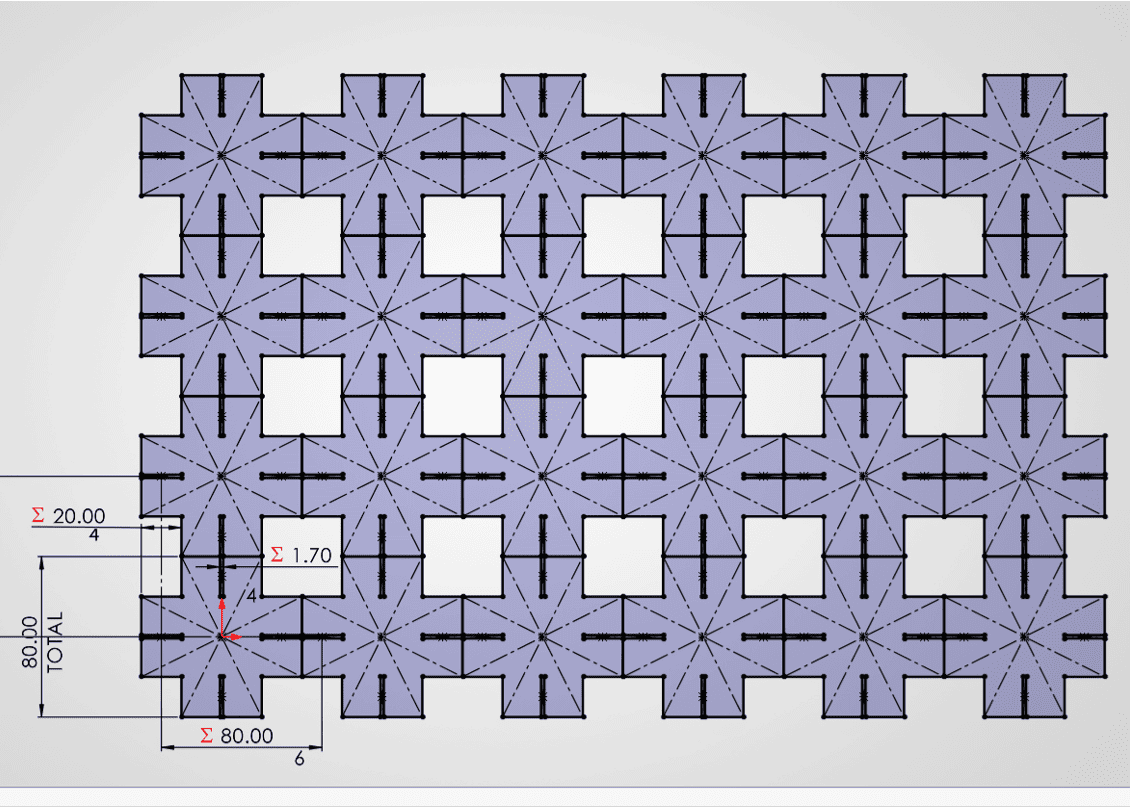
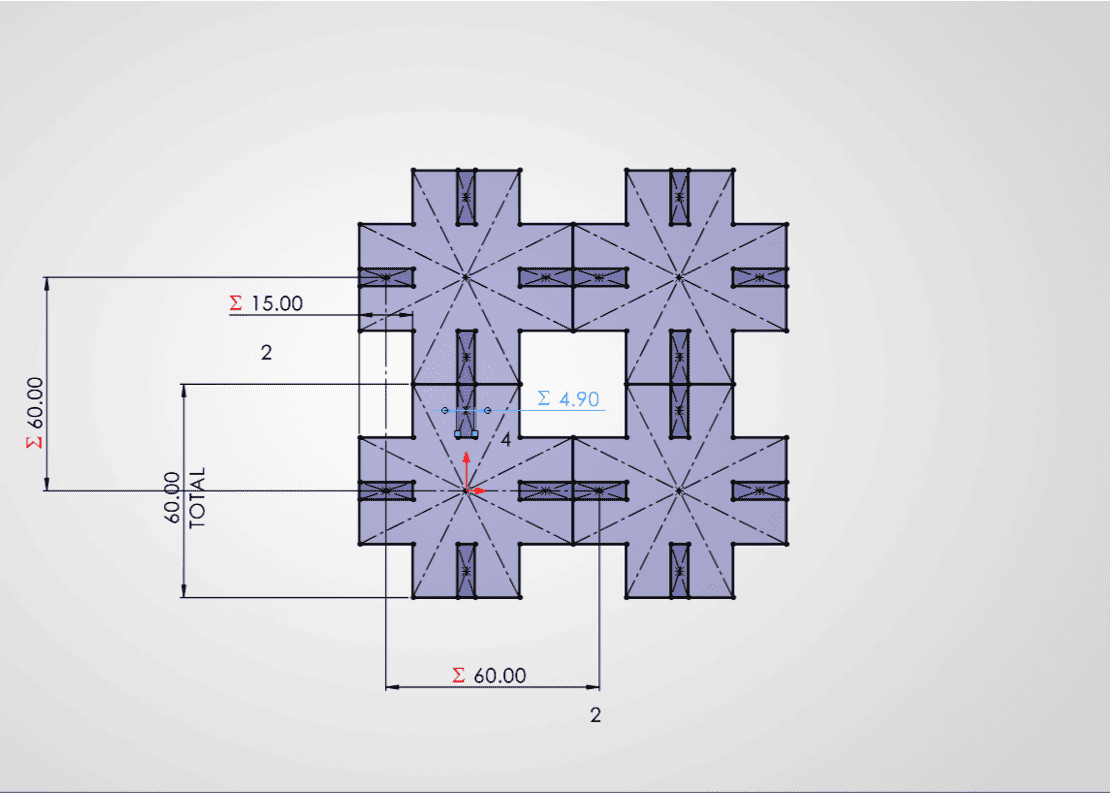
I proceeded to parameterize the dimensions and named some dimensions to identify them, I also used the actions command to provide the measurements of our base module.
Title 1
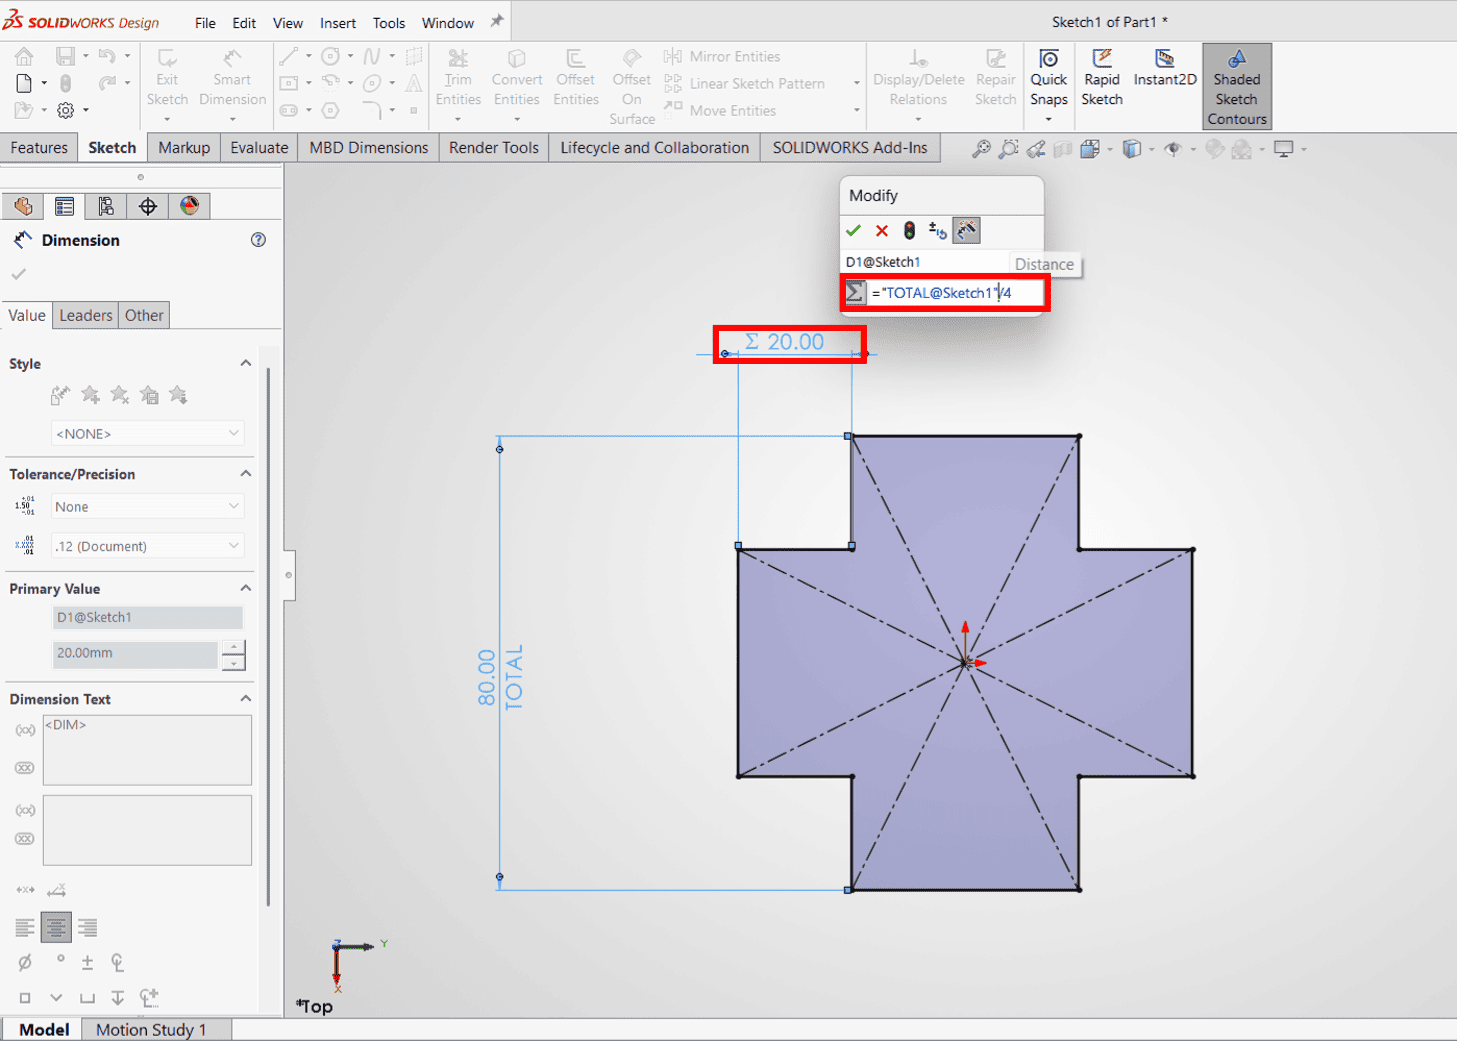
We can name the constraints and use some formulas.
Title 2
We edit the material thickness dimension constraint using its name.
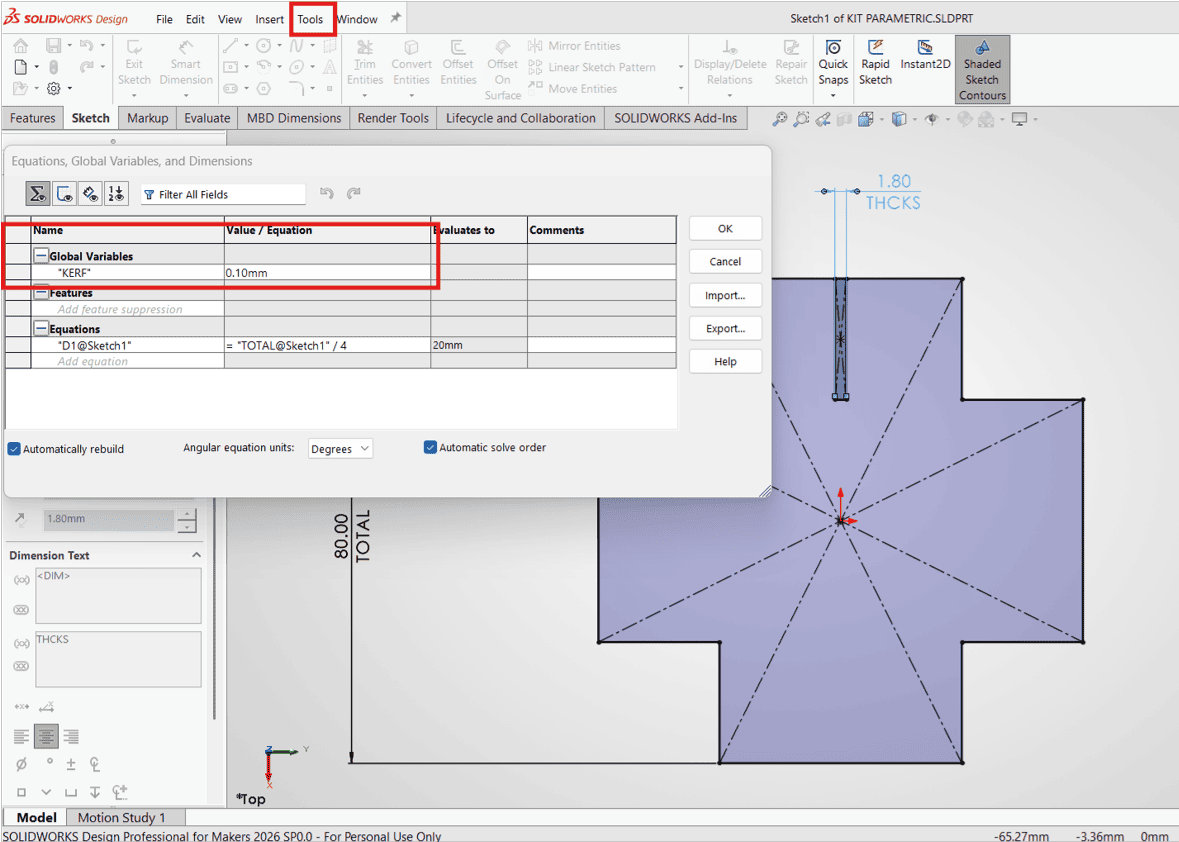
I opened the equations and values option in the toolbar so I could enter the "kerf" of the joints in my base module. Then I dimensioned using the kerf reference to subtract it from the joint.
Title 1
We click on Tools and then Equations to open the equations window, and we assign the name "KERF" to the thickness.

Title 2
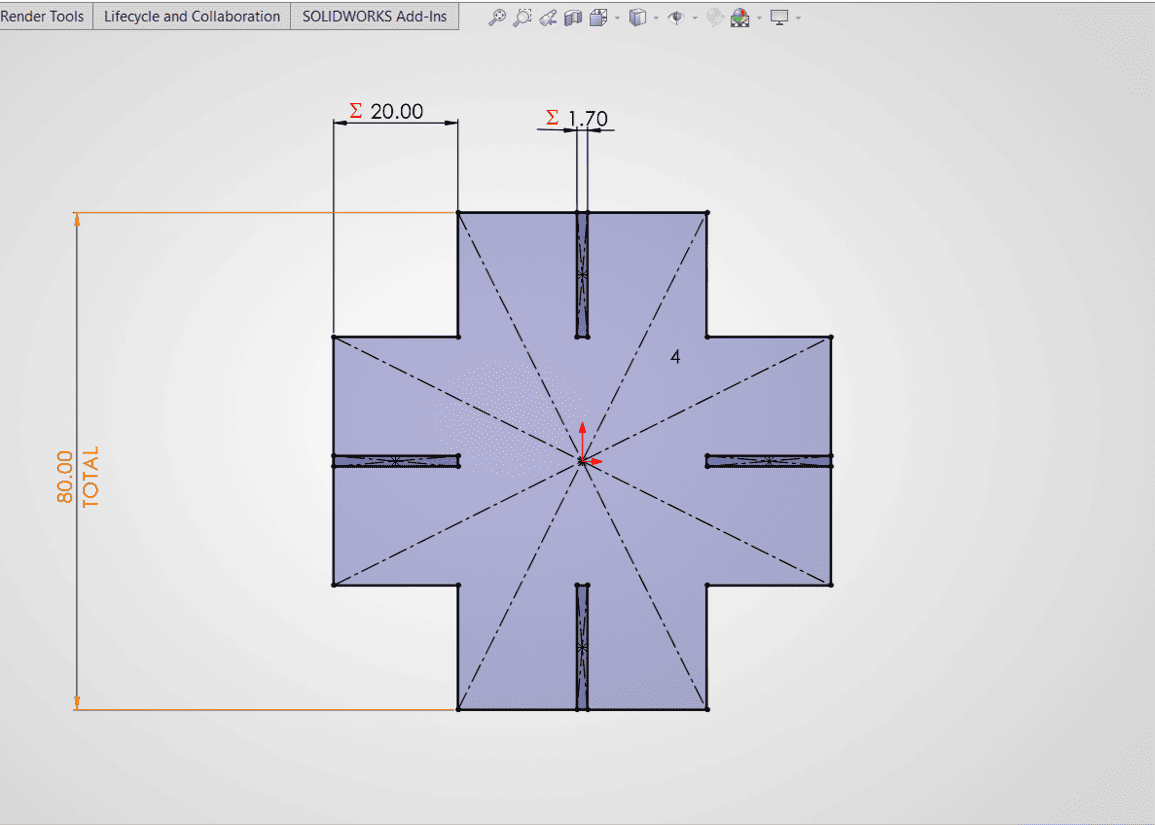
We edit the joint dimension using the previously created equation.
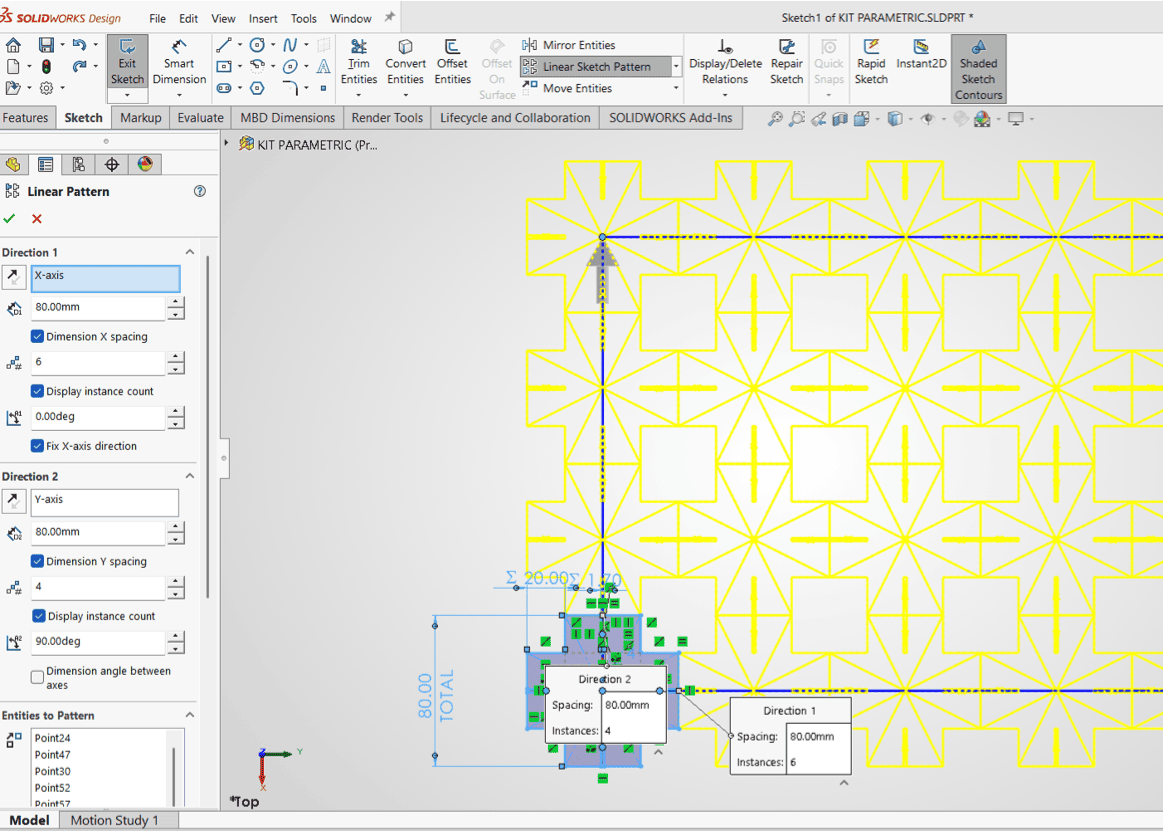
Once the base module was configured, I proceeded to parameterize the array of copies, also limiting their separations and repetitions so that they could be edited.
Title 1
We review the applied dimensions and constraints.
Title 2
We click on "Linear Sketch Pattern" to create an array of copies.
I did a final test to check all the editable parameters such as the module size, the fit with its kerf, and the number of modules I want.
Title 1
We add the dimension constraints of the linear pattern.
Title 2
We can edit them according to the requirements we want.
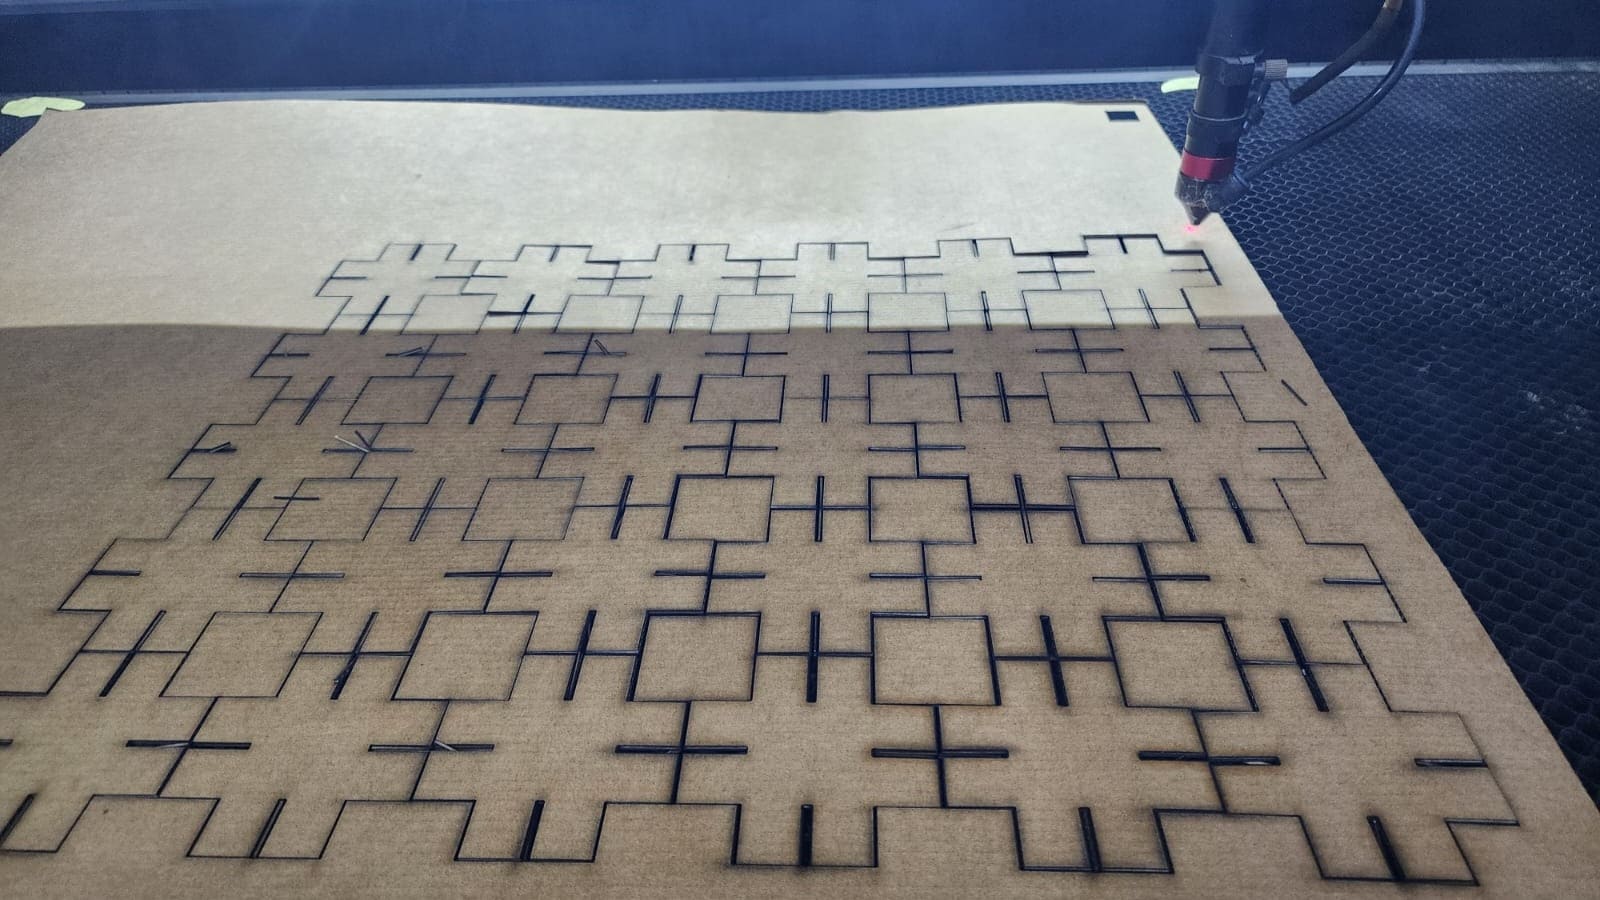
I then proceeded to export the file so that I could laser cut it with the RDworks program. I adjusted the settings to cut with cardboard that I had left over from a model; I made a total of 30 modules.
| Material | Process | Power (%) | Speed (mm/s) | Passes | Notes |
|---|---|---|---|---|---|
| Cardboard | Cut | 25 | 40 | 1 | Config used for 30 modules |
Title 1
We import the file into RDworks for laser cutting.
Title 2
Cutting while optimizing material usage.
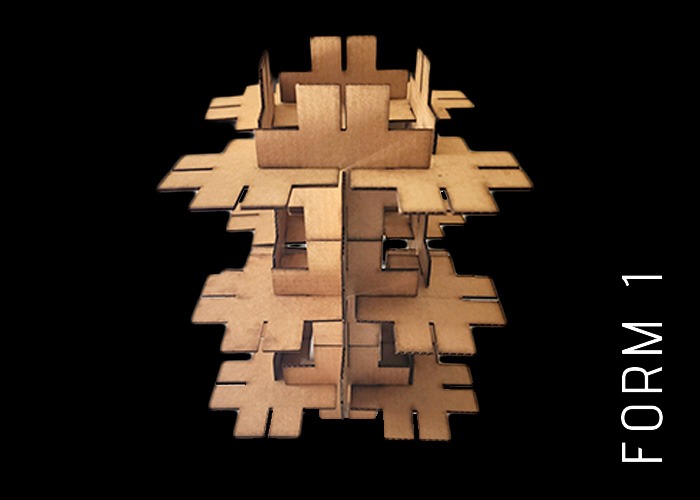
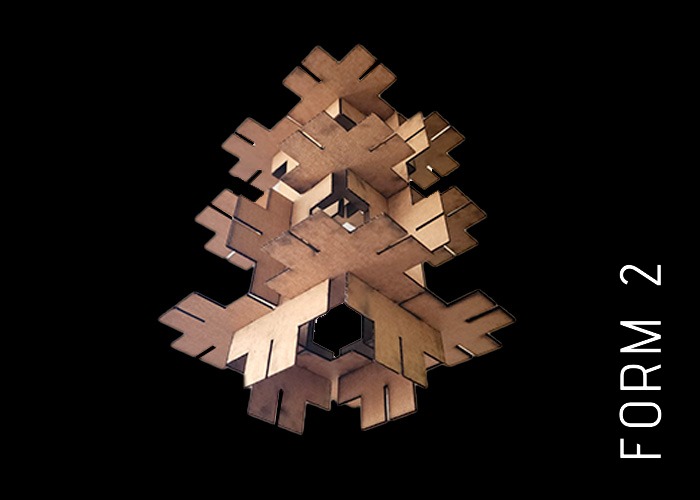
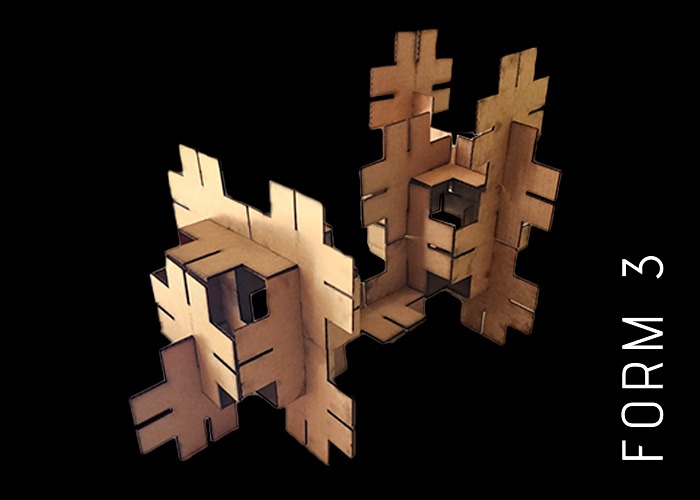
I was able to create some shapes with my parametric construction kit, since it can also be rotated to take on different shapes. For this example, I found 3, but I know that many more shapes can be created.
Vinyl Cutting
I was able to cut vinyl at FabLab Uni using the Roland G-X 24 machine. This machine can handle vinyl up to 60 cm wide, and the instructor guided me through its use and operation. Check out my results:

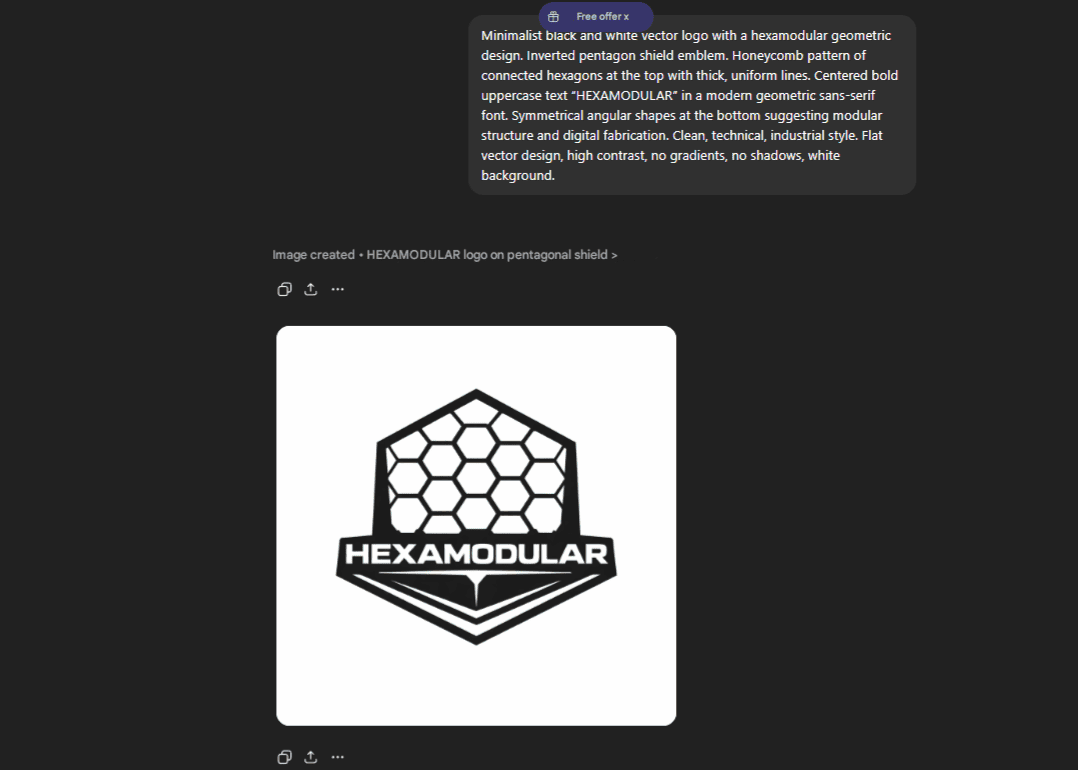
I wanted to have my final project logo in vinyl, so I asked Chat gpt to design my logo with the name of my project "HEXAMODULAR", which gave me the following result:
PROMPT:
Minimalist geometric logo design for a brand named “HEXAMODULAR”, developed in a clean vector style using only solid and bold shapes without thin lines. The design features a central hexagonal panel slightly rotated to suggest movement, surrounded by a modular hexagon structure arranged in a symmetrical composition. It conveys an industrial and technological aesthetic with a flat single-color approach, such as black or gold, without gradients or shadows. The logo avoids small fragile details to ensure durability and precision, making it fully optimized for vinyl cutting and laser cutting applications. The overall identity is modern, futuristic, engineering-inspired, and balanced through strong and intentional negative space.
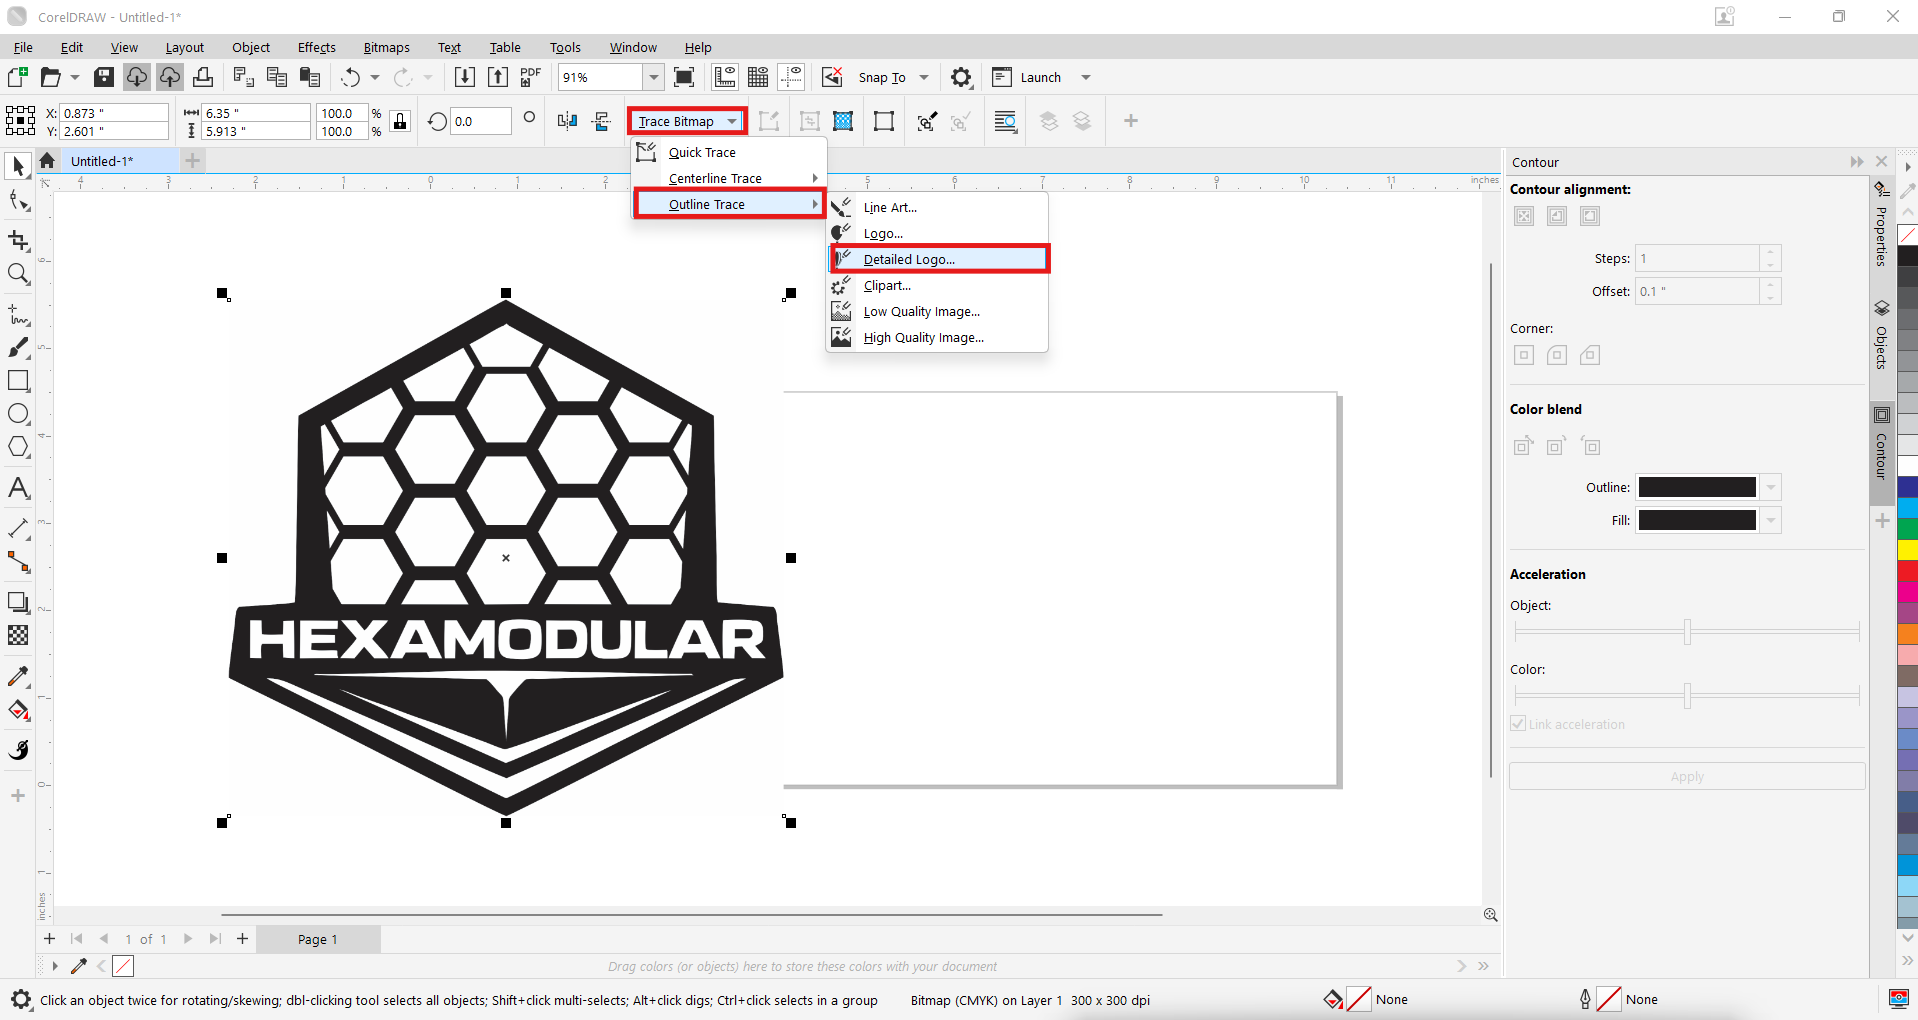
We downloaded the generated .jpg image and imported it into CorelDRAW to edit it and convert it to .svg.
We selected our image and vectorized it by first clicking "Trace bitmap" and then "Outline trace." Finally, we chose the "Detailed logo" option to get a more accurate result.
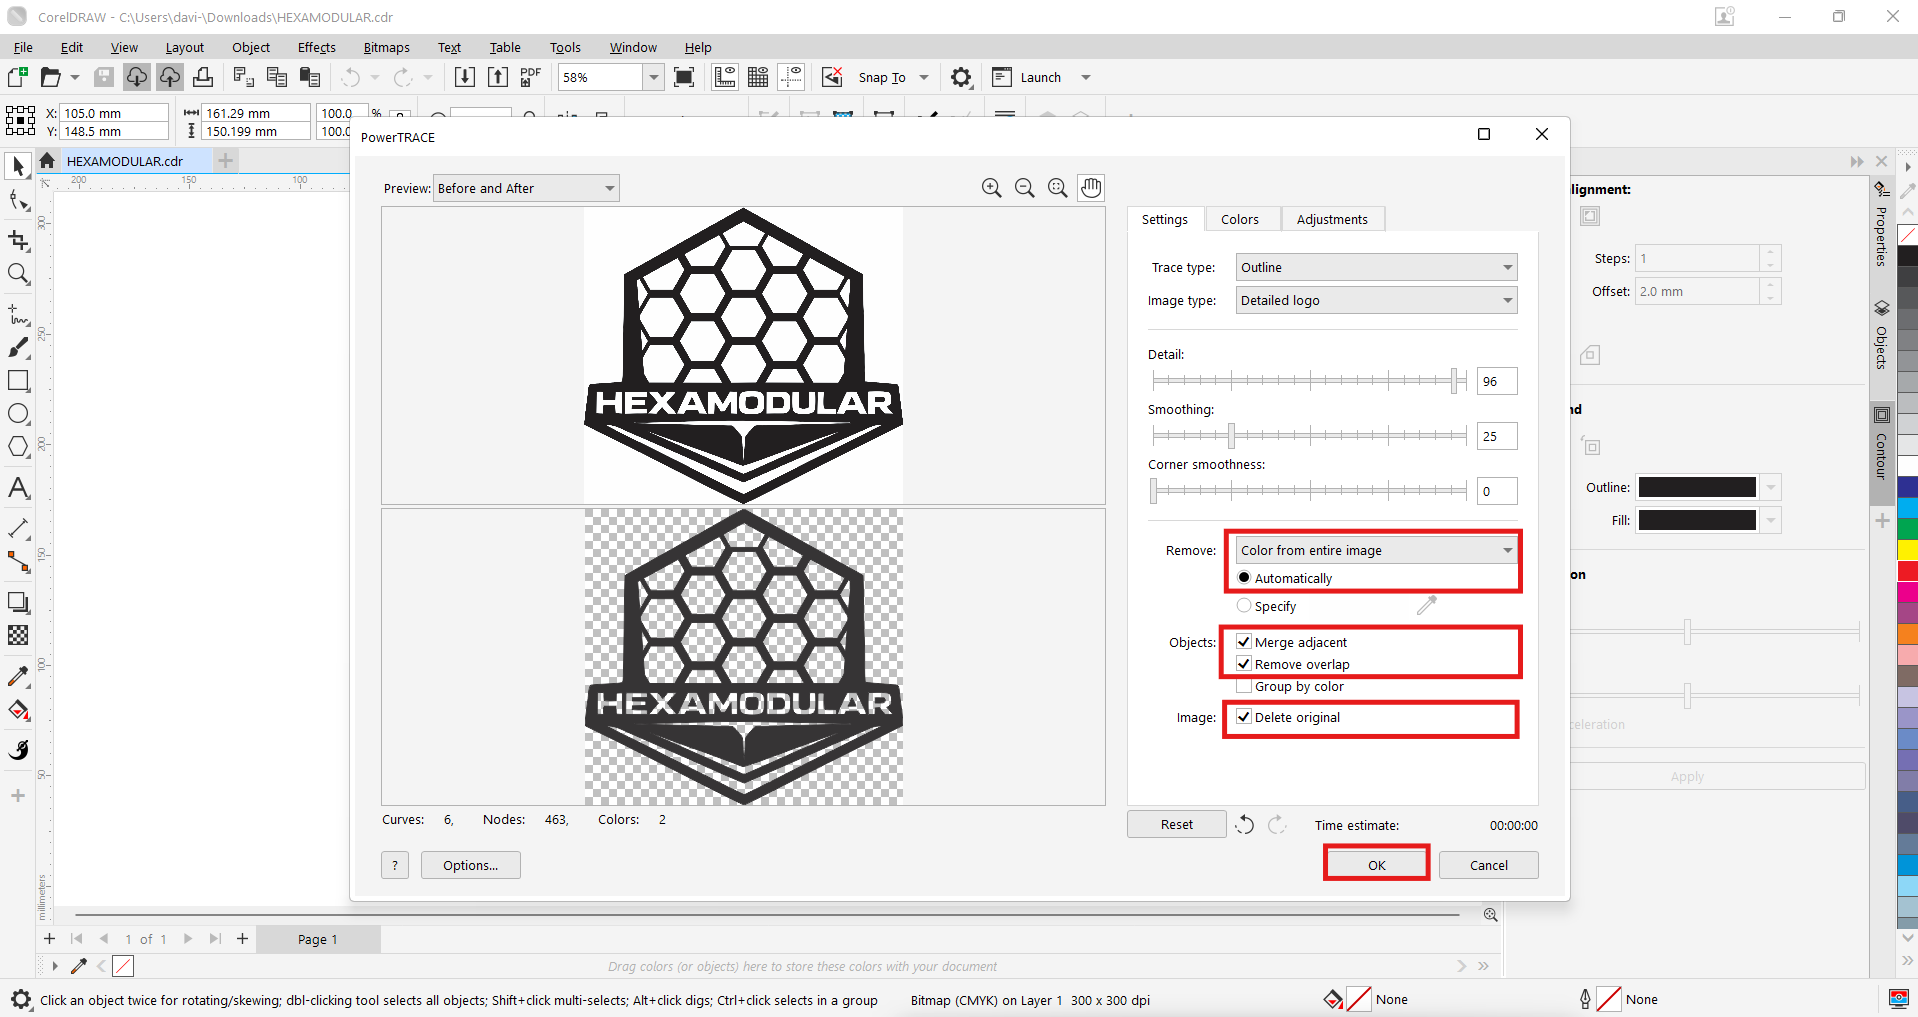
A window appears with the vectorization result, where we can remove the elements we do not want and keep only the logo outline. Once configured, we click "OK."
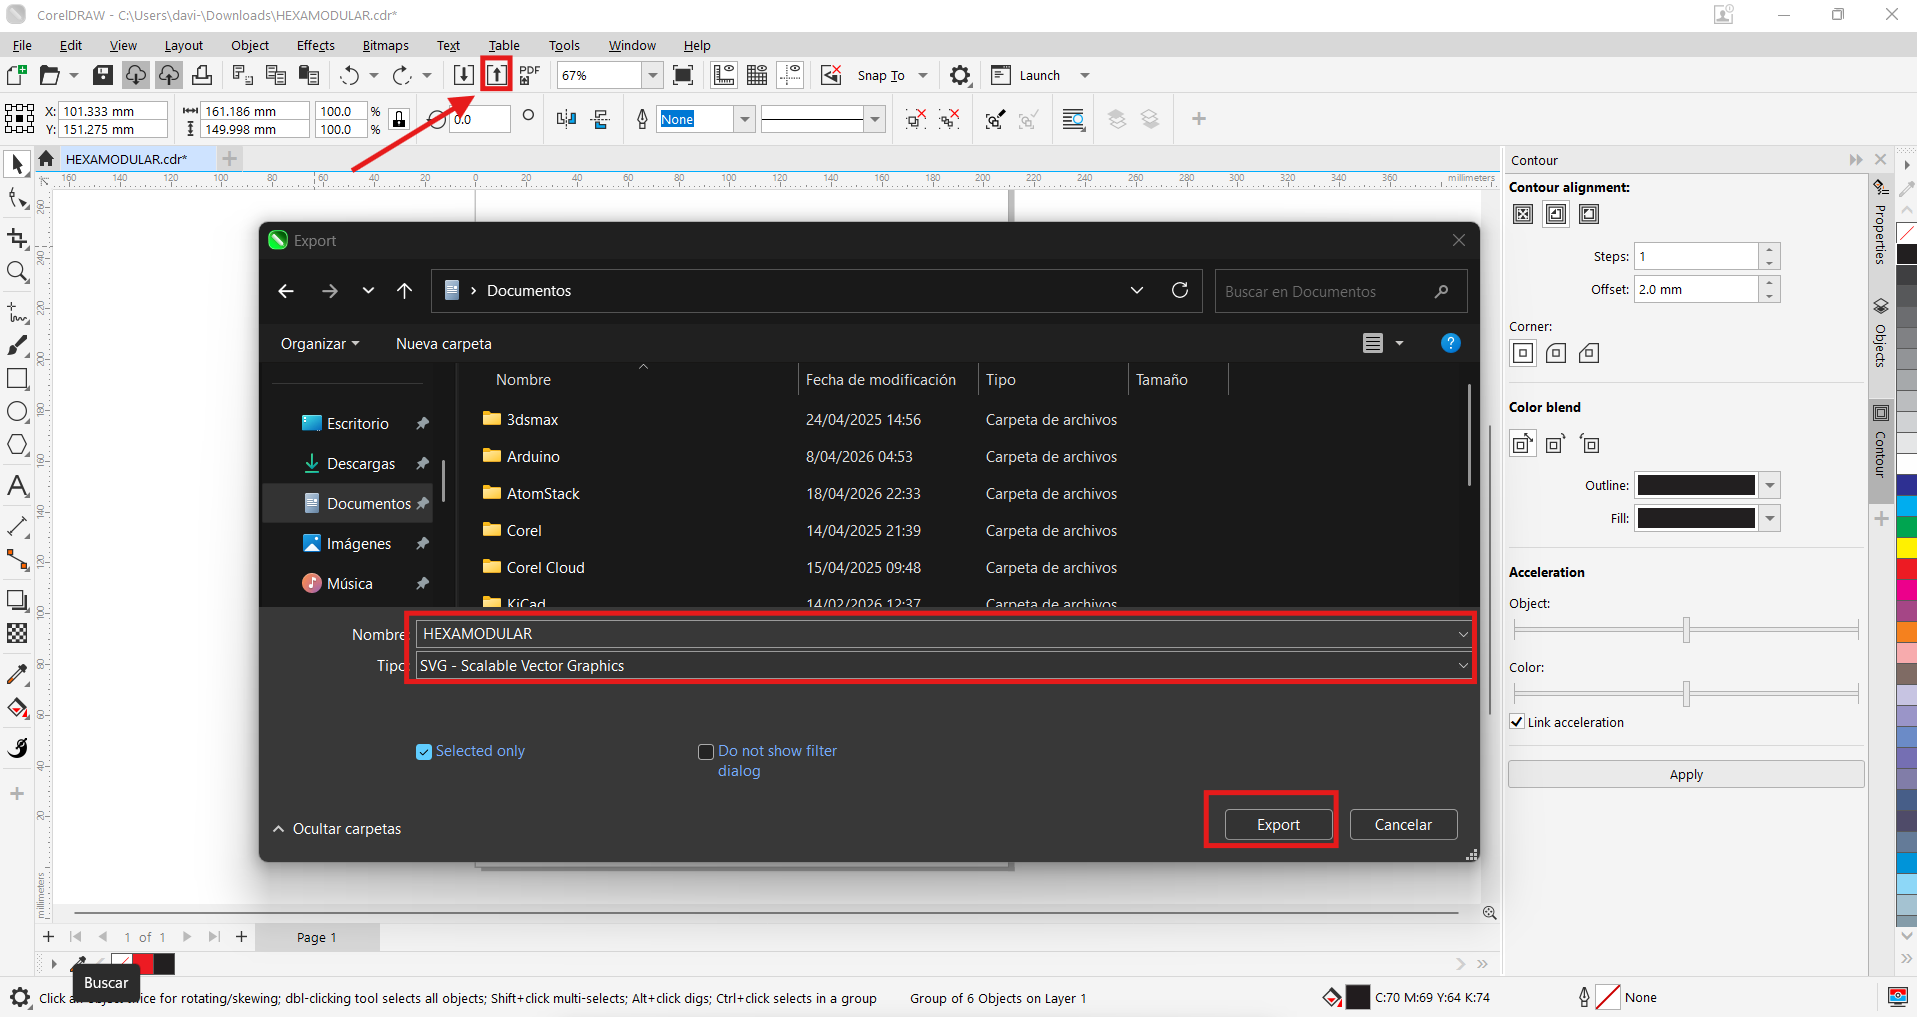
We click the "Export" icon and select the .svg format to save it to our computer. This format is compatible with the vinyl cutting software and allows us to configure the cutting settings for an optimal result.
Applying the vinyl is simple: just release the locking lever on the back to allow the vinyl to pass through, and then press it again. I chose black. Then, import your logo's .svg file and configure the cropping settings for optimal results.
| Machine | Material | Force | Speed (cm/s) | Passes | Notes |
|---|---|---|---|---|---|
| Roland GX-24 | Black vinyl | 80 gf | 20 | 1 | Logo HEXAMODULAR cut settings |

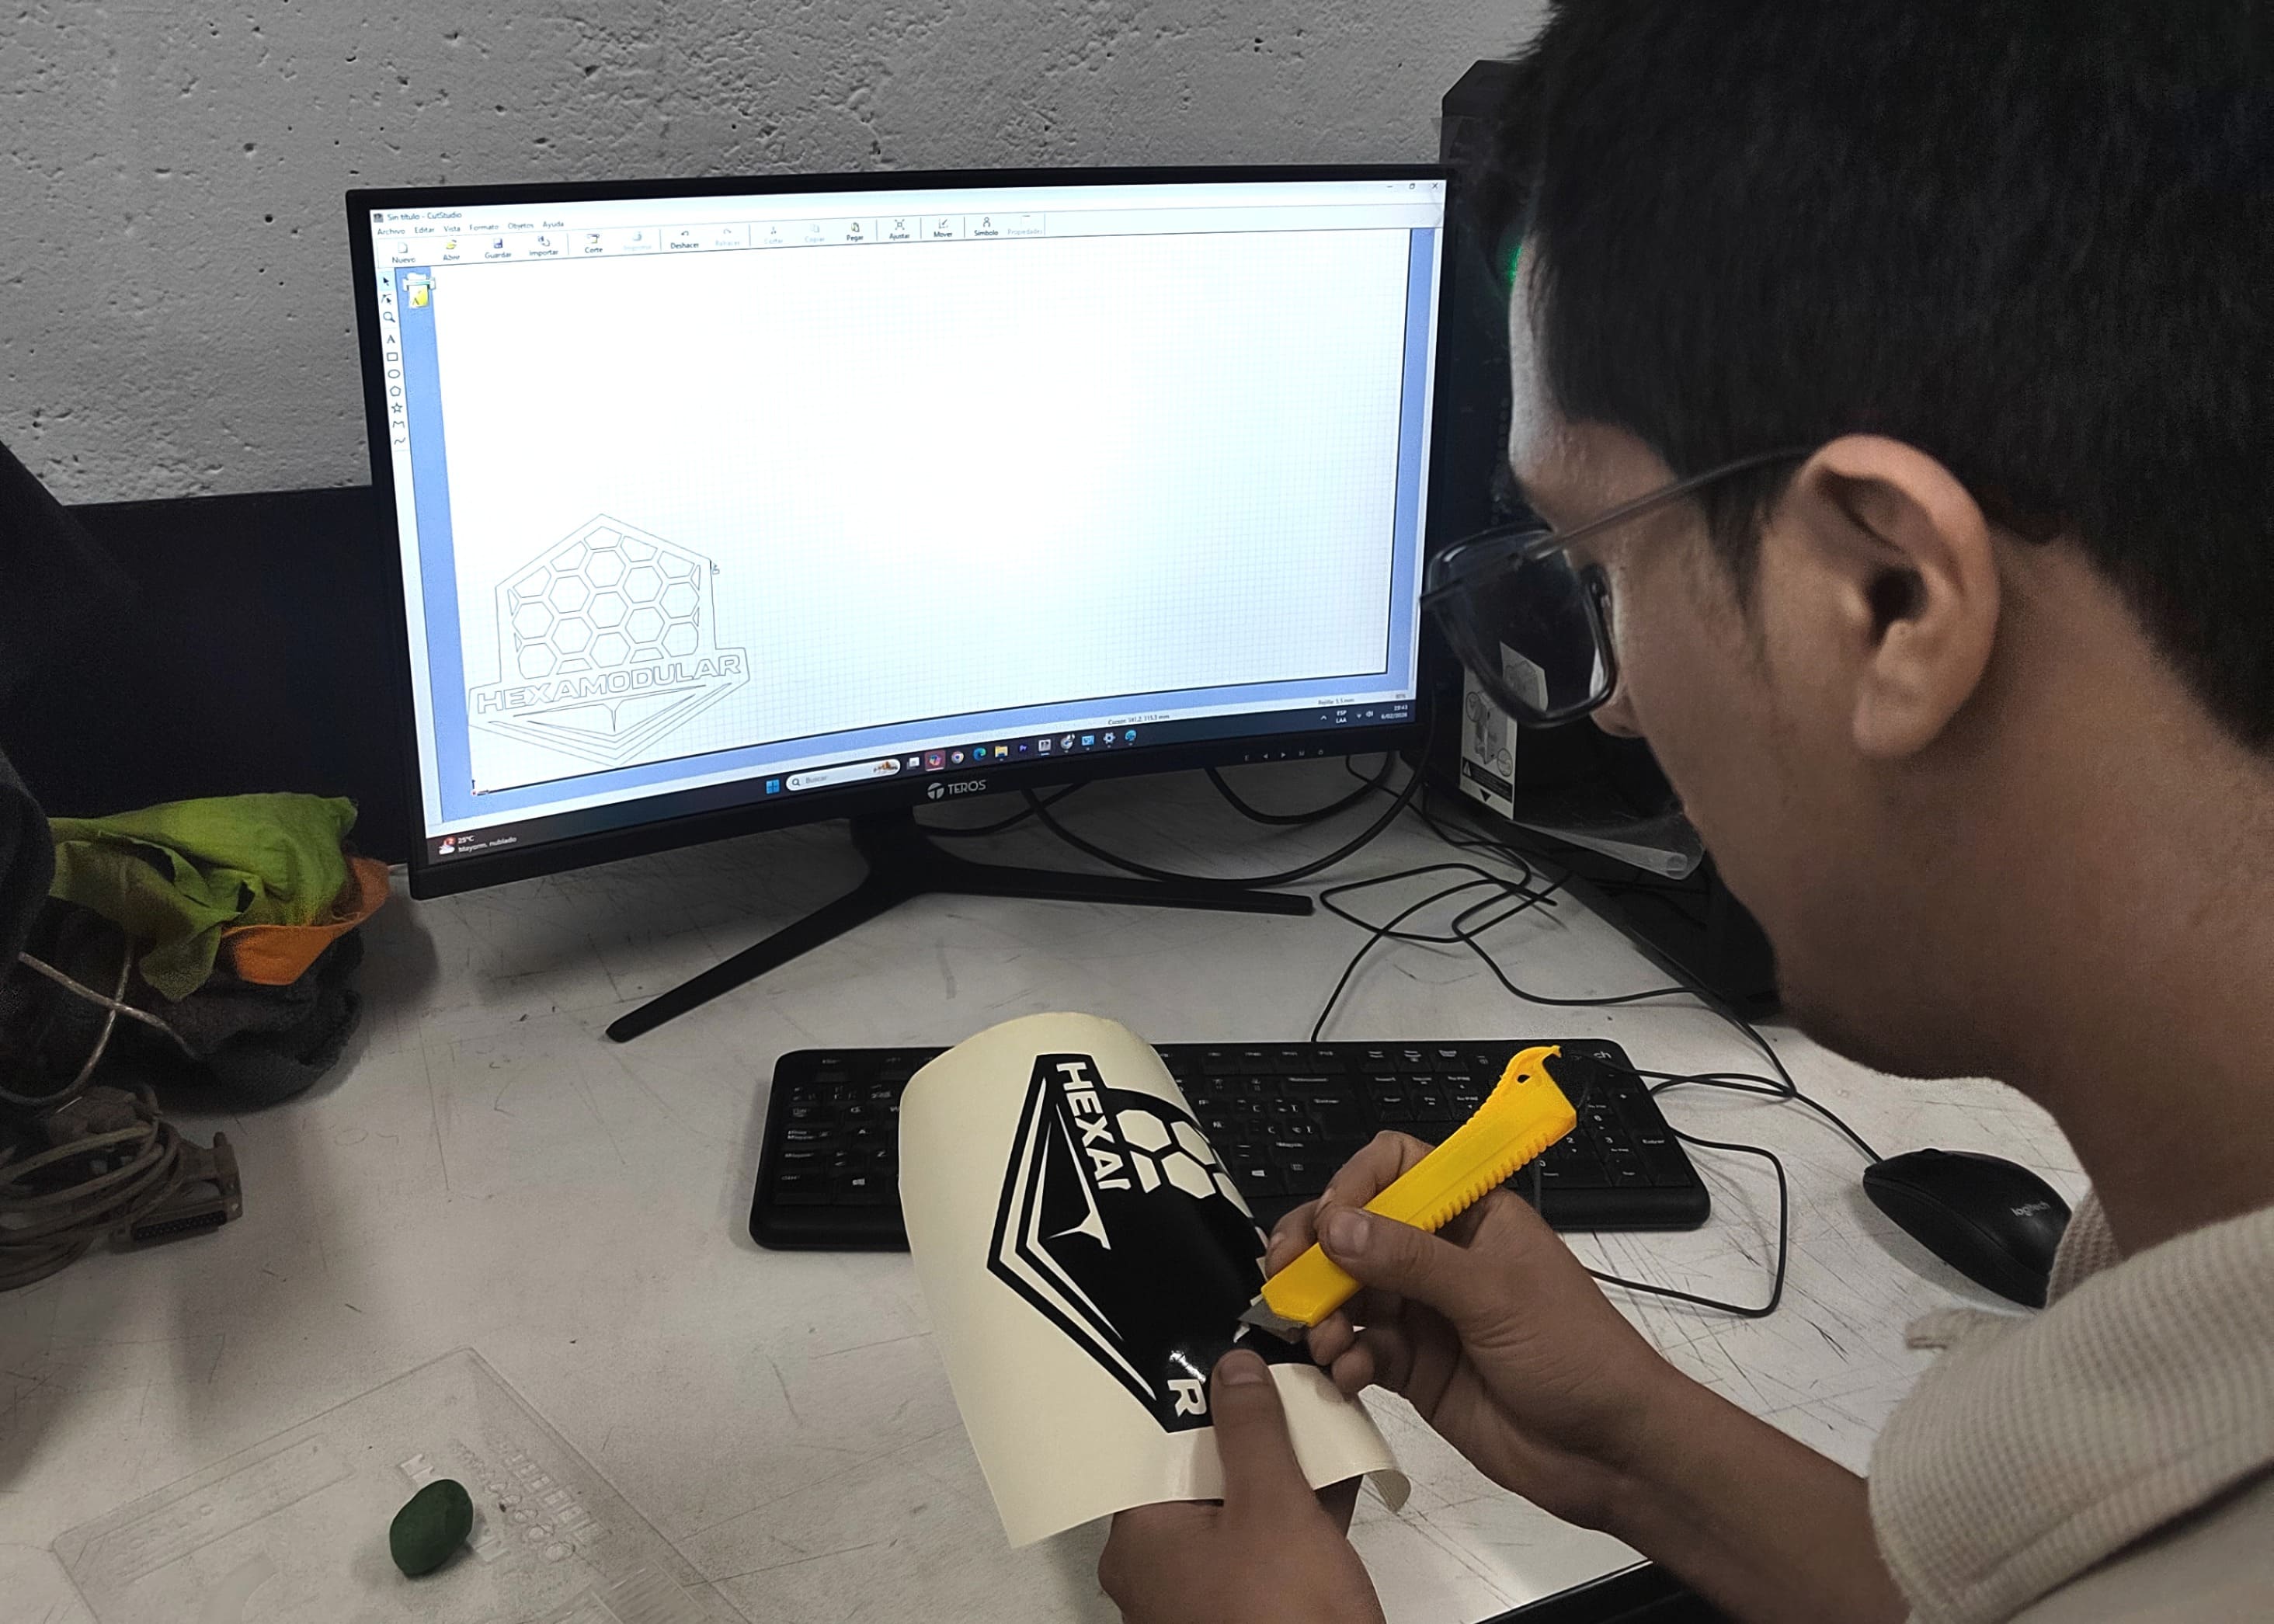 My cut turned out great thanks to the prompt's design, which made it a single piece without very thin lines to avoid breaking it when cleaning to glue it. I compared it with my vector and it turned out very fine.
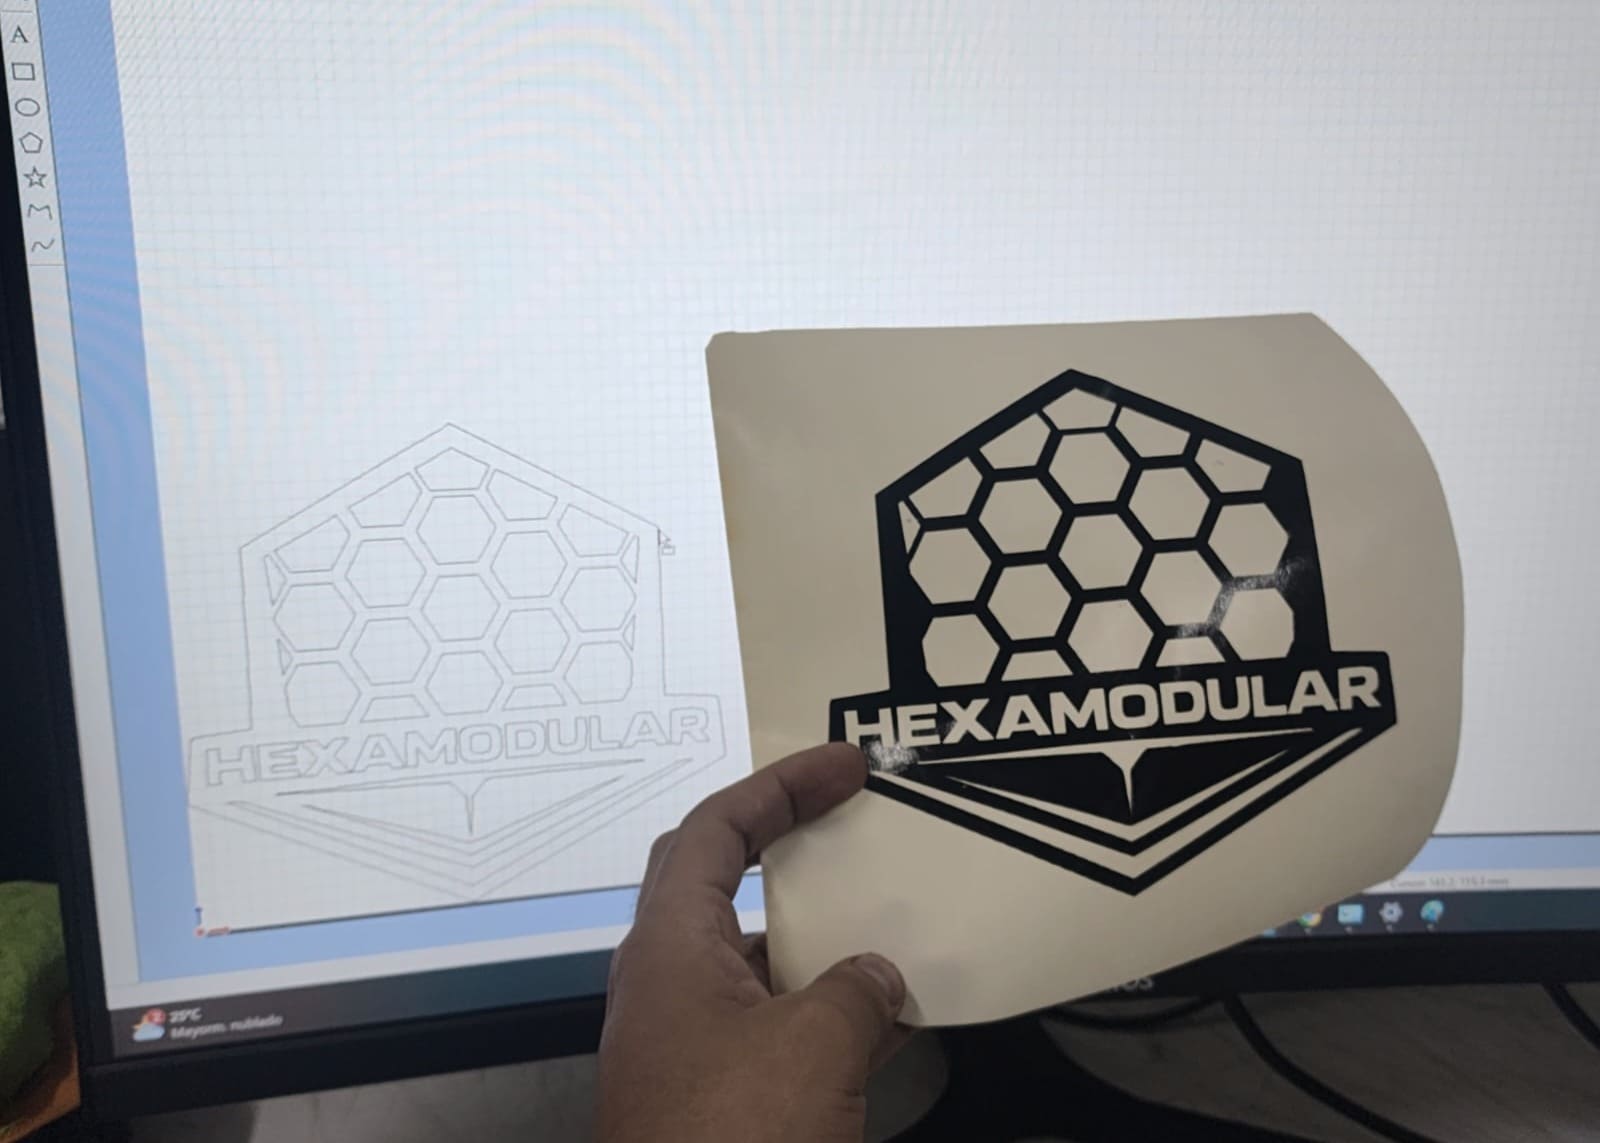 I glued it onto an MDF hexagon the same size as the base panel module, which allowed me to see the scale of my module for the project. It turned out great!
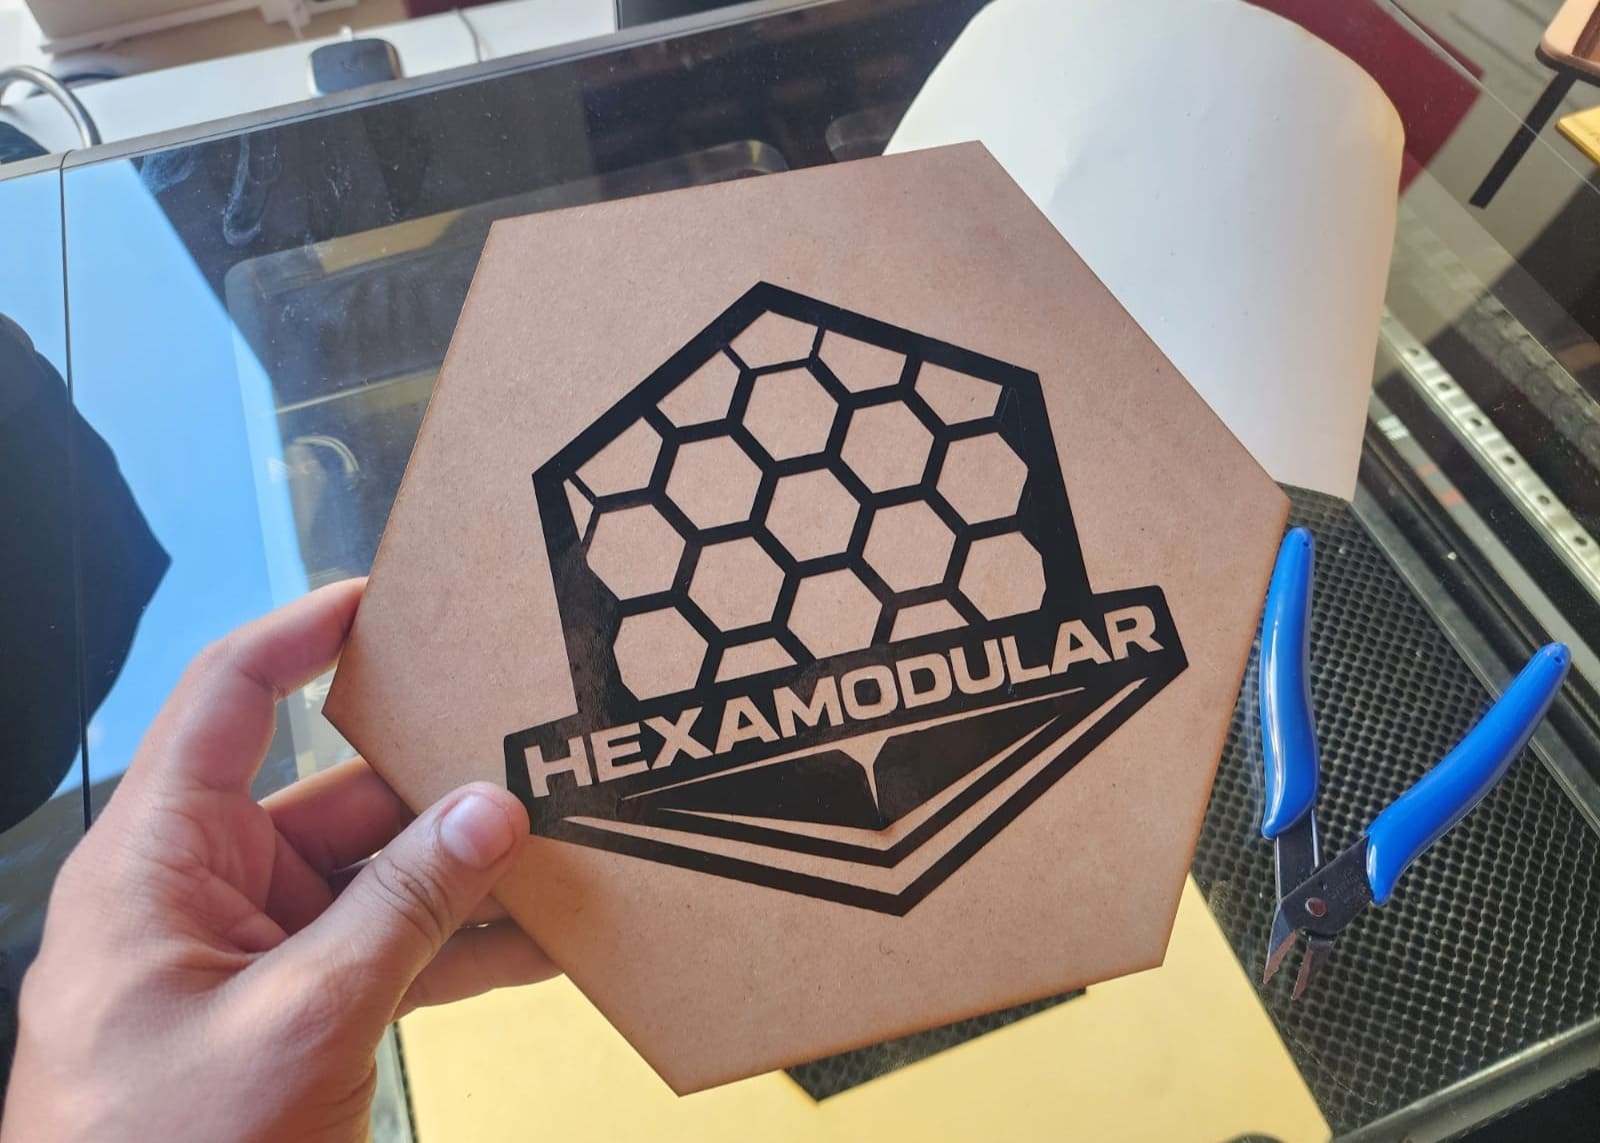
Conclusions and Reflections
This group project allowed me to learn about new machines as a team, including their use and operation. We received recommendations for my safety and health, as well as instructions on the laser cutter parameters at the FabLab UNI. The results we tested on the materials varied, leading us to conclude that it's essential to maintain a parameter library for each material and to remember the necessary maintenance procedures. Using the parametric kit, I was able to configure a module that can be edited to any required dimensions, taking into account the kerf, which is independent of each material. The module I created allowed for some very cool shapes, and many more can be explored.
I met great colleagues who supported me in teamwork, instructors who trained me and gave me the best advice to continue exploring in fab labs. I know I'll be back soon for more assignments there!
FILES