Assignment Requirements
Learning outcomes
- Reviewed.
- Assess progress in the documentation of preceding assignments.
- Communicate your final project proposal and progress.
- Communicate a plan for your project management.
Have you answered these questions?
- Show progress in documenting the assignments.✅
- Show progress on your final project idea/s and planning.✅.
- Made a schedule for remaining tasks.✅.
- Meet with your local and global instructor.✅.
Midterm Review
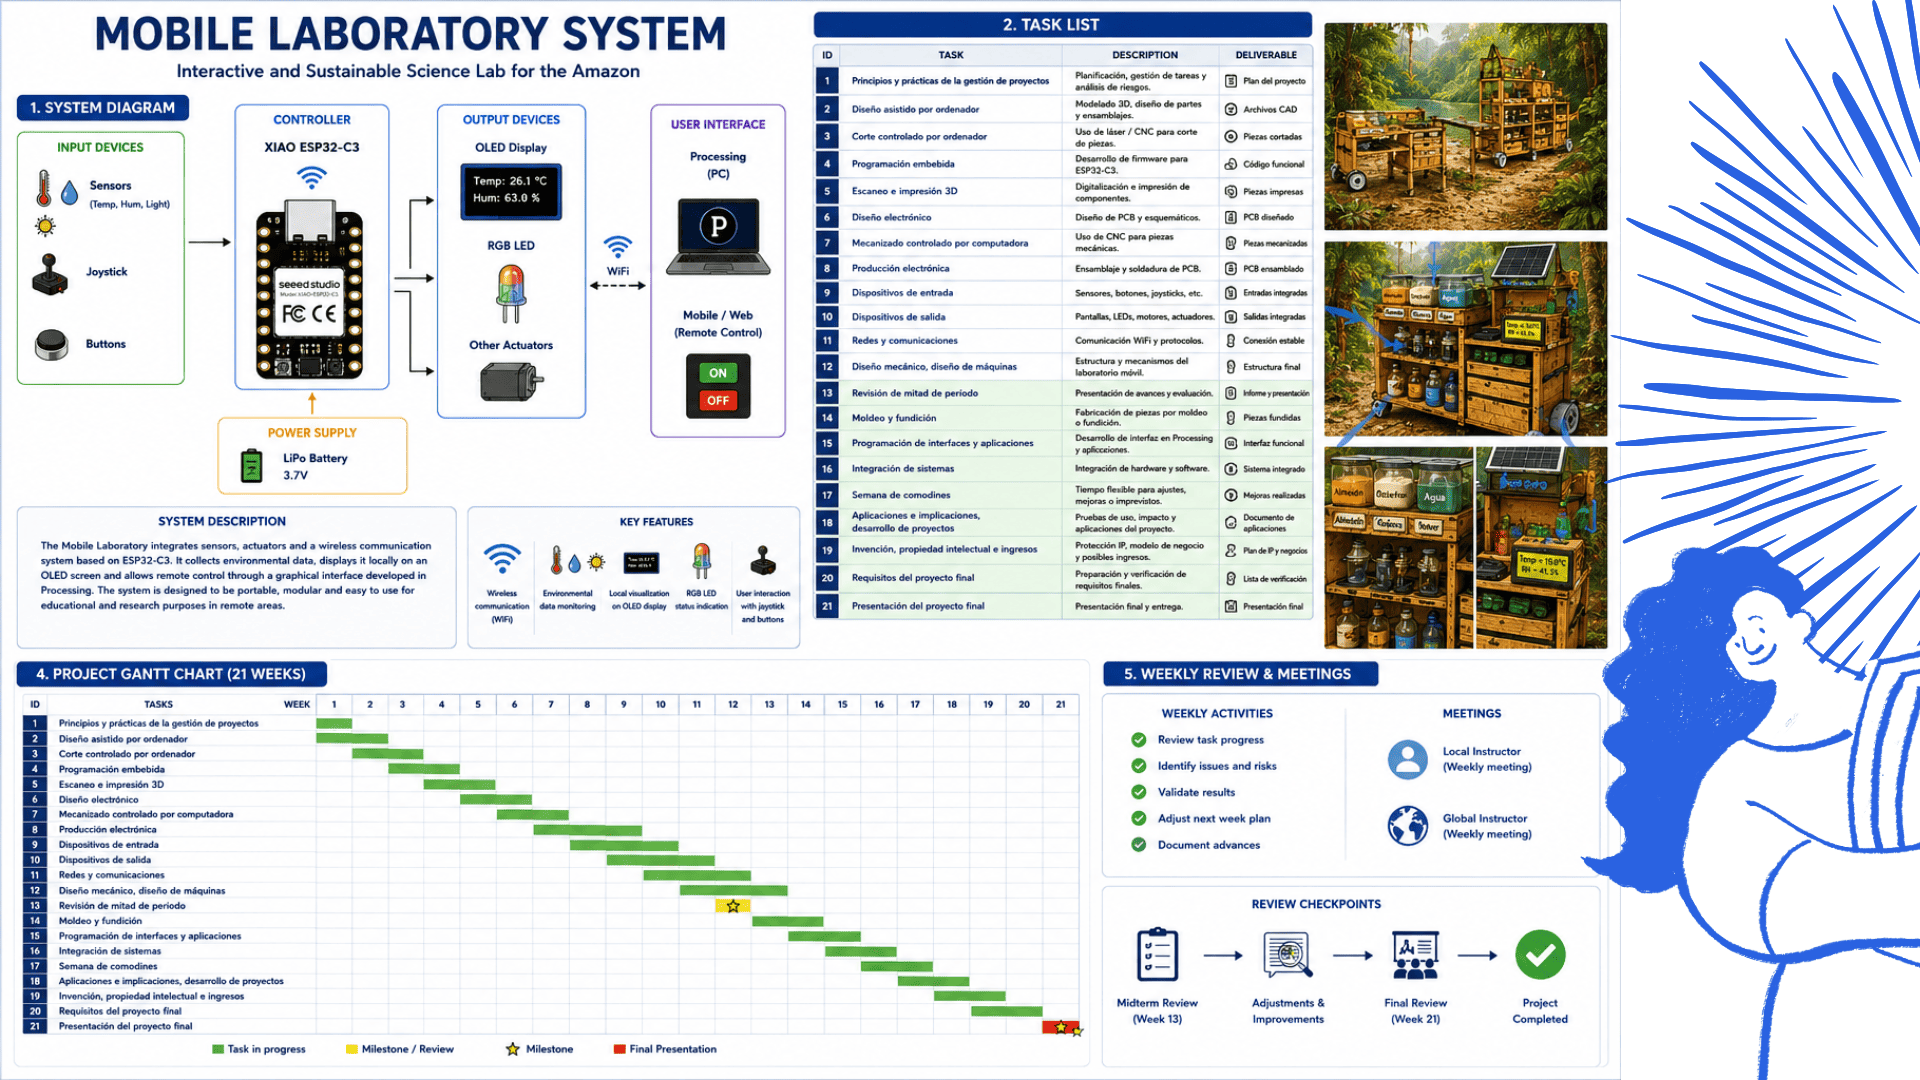
The midterm review represented a very important milestone in the development of our final project. During this stage, we organized and published the complete system diagram, the pending tasks, and the project schedule on the website in order to clearly visualize the workflow and the progress achieved throughout the different weeks of the Fab Academy process.
The review allowed us to analyze the progress made during the weekly assignments, including electronics production, embedded programming, input and output devices, networking and communications, interface development, and system integration. Each weekly activity contributed to the construction of the final project and helped strengthen both the technical implementation and the project documentation.
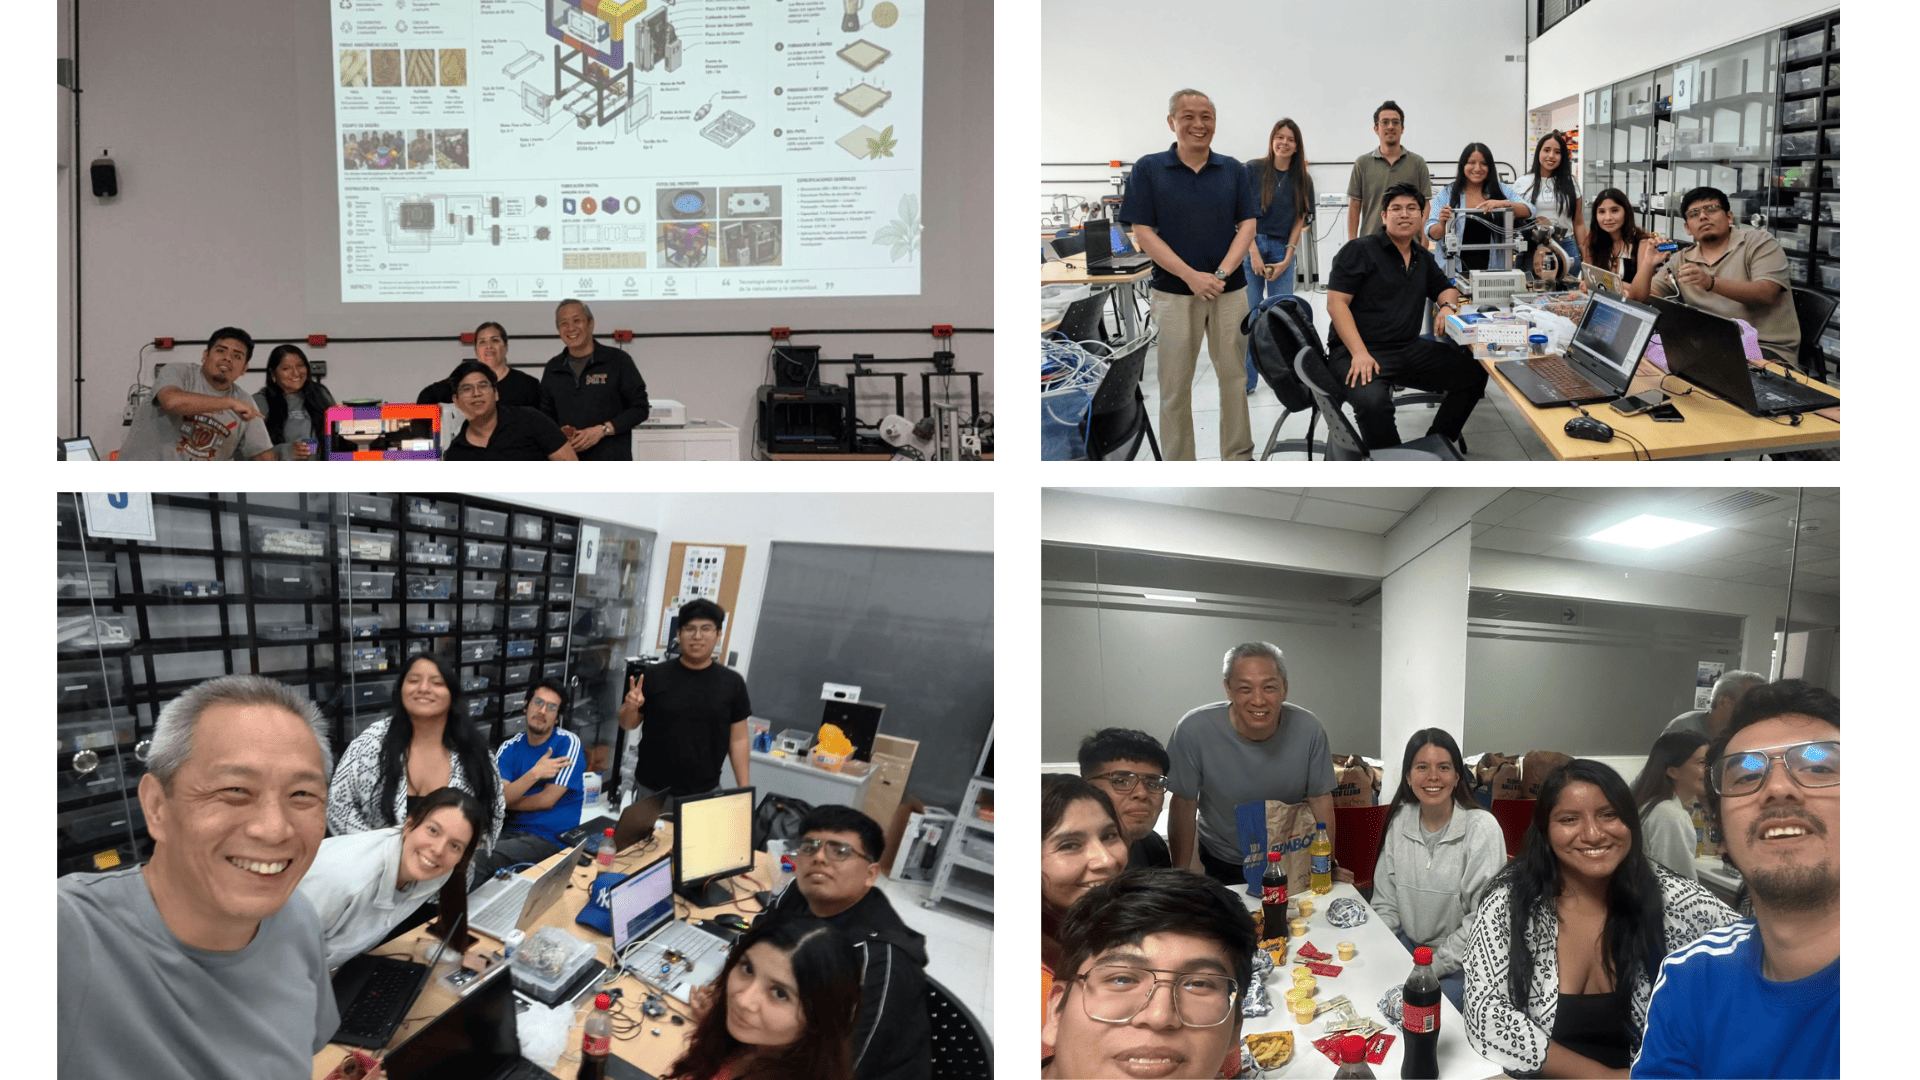
In addition, meetings were held continuously with local instructors, global instructors, and teammates. These review sessions were extremely valuable because they provided observations, technical recommendations, and improvement suggestions related to both the weekly tasks and the final project development.
Through these meetings, it was possible to identify mistakes, solve technical problems, improve the organization of the documentation, and better structure the workflow. The feedback received also helped define clearer objectives for the following weeks and improve communication within the team.
The Gantt chart and task planning became very useful tools during the review process because they allowed us to monitor completed activities, identify pending tasks, and maintain a more organized development timeline. This planning also helped balance the integration of hardware, software, communication systems, and interface design.
One of the most important aspects of the midterm review was understanding how all the weekly assignments are connected and contribute directly to the final system. The integration of sensors, wireless communication, OLED visualization, Processing interfaces, and interactive controls demonstrated the gradual evolution of the Mobile Laboratory System project.
Overall, this review process helped improve the quality of the project, strengthen technical knowledge, and continue advancing in a clearer and more structured way toward the final presentation and implementation of the system.
Personal Reflection – Midterm Review
My personal reflection about the midterm review is that it has been a very important and enriching learning experience throughout the development process. During these weeks, I was able to learn many new things related to programming, electronics, documentation, and the development of interactive systems.
I also understood that developing a project is not always easy. In some weeks, the process became challenging due to errors, corrections, and observations that needed improvement. However, little by little, through practice, dedication, and the support of instructors and teammates, it was possible to overcome these difficulties and continue progressing.
The reviews and feedback I received helped me improve both the organization of the project and the quality of the documentation and technical implementation. Thanks to this process, I now have a better understanding of teamwork, problem-solving, and the importance of continuous learning.
This experience motivated me to continue developing new skills and to keep improving during every stage of the final project.