Assignment Requirements
Group assignment
- Test the design rules for your 3D printer(s)
- Document your work on the group work page and reflect on your individual page what you learned about characteristics of your printer(s).
Individual assignment
- Design, document and 3D print an object (small, few cm3, limited by printer time) that could not be easily made subtractively
- 3D scan an object (and optionally print it)
Progress Status
This is for reporting progress (not for visitors to click).
Group page link + notes added.
Missing final photos and conclusions.
Upload .zip with source files.
Assignment Requirements
Learning outcomes
- Identify the advantages and limitations of 3D printing.
- Apply design methods and production processes to show your understanding of 3D printing.
- Demonstrate how scanning technology can be used to digitize object(s).
Have you answered these questions?
- Linked to the group assignment page✅
- Explained what you learned from testing the 3D printers✅.
- Documented how you scanned an object.✅.
- Included your original design files for 3D printing.✅.
- Included your hero shots.✅.
Weekly planning
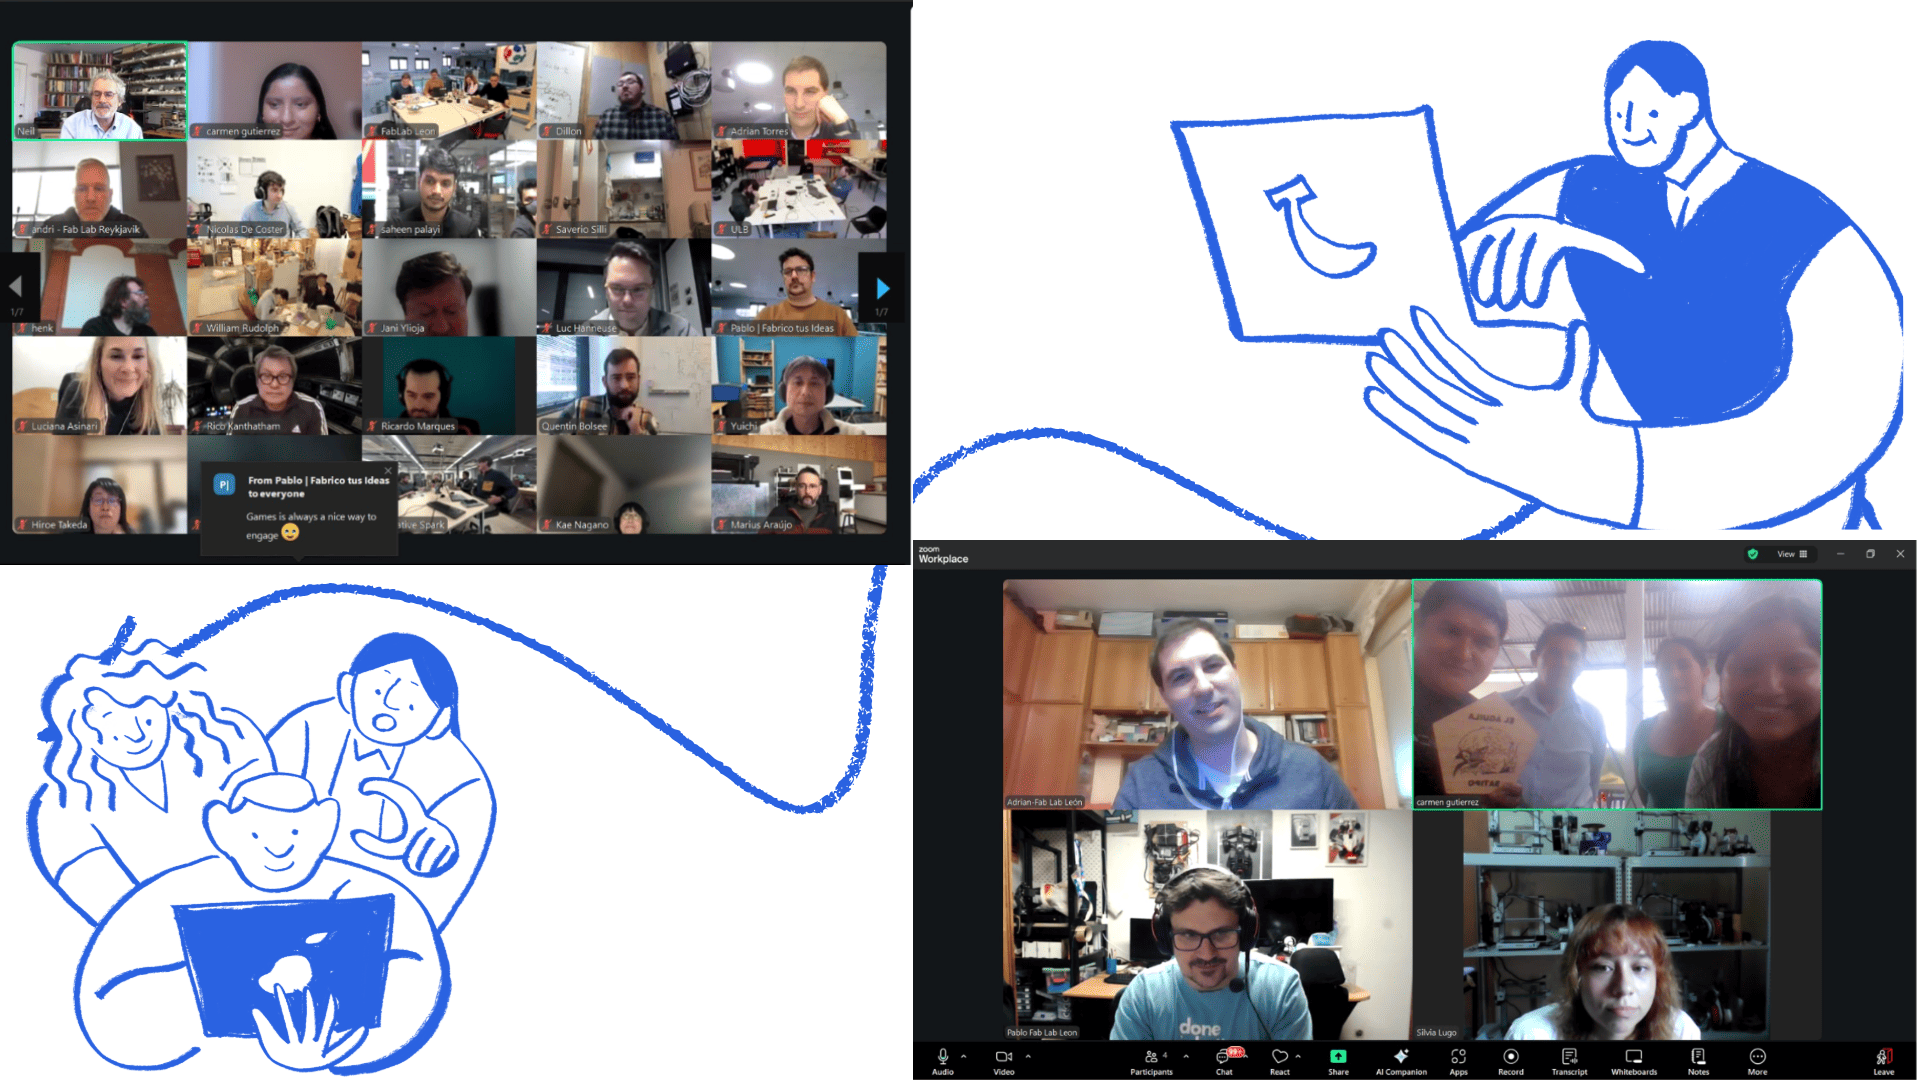
During the week, we carried out various activities that presented significant challenges but were also very rewarding, especially due to the opportunity to share and learn together. We met virtually with our colleagues in the node and also participated in Open Lab meetings with Iquitos, Satipo, and Lima, which allowed us to organize and conduct open workshops in the different labs. In these sessions, we were able to review the software necessary for the work, as well as the machines, materials, and instruments required for each activity. This experience strengthened coordination between nodes and allowed us to better understand the importance of planning and managing resources effectively in digital fabrication processes.

Open Lab
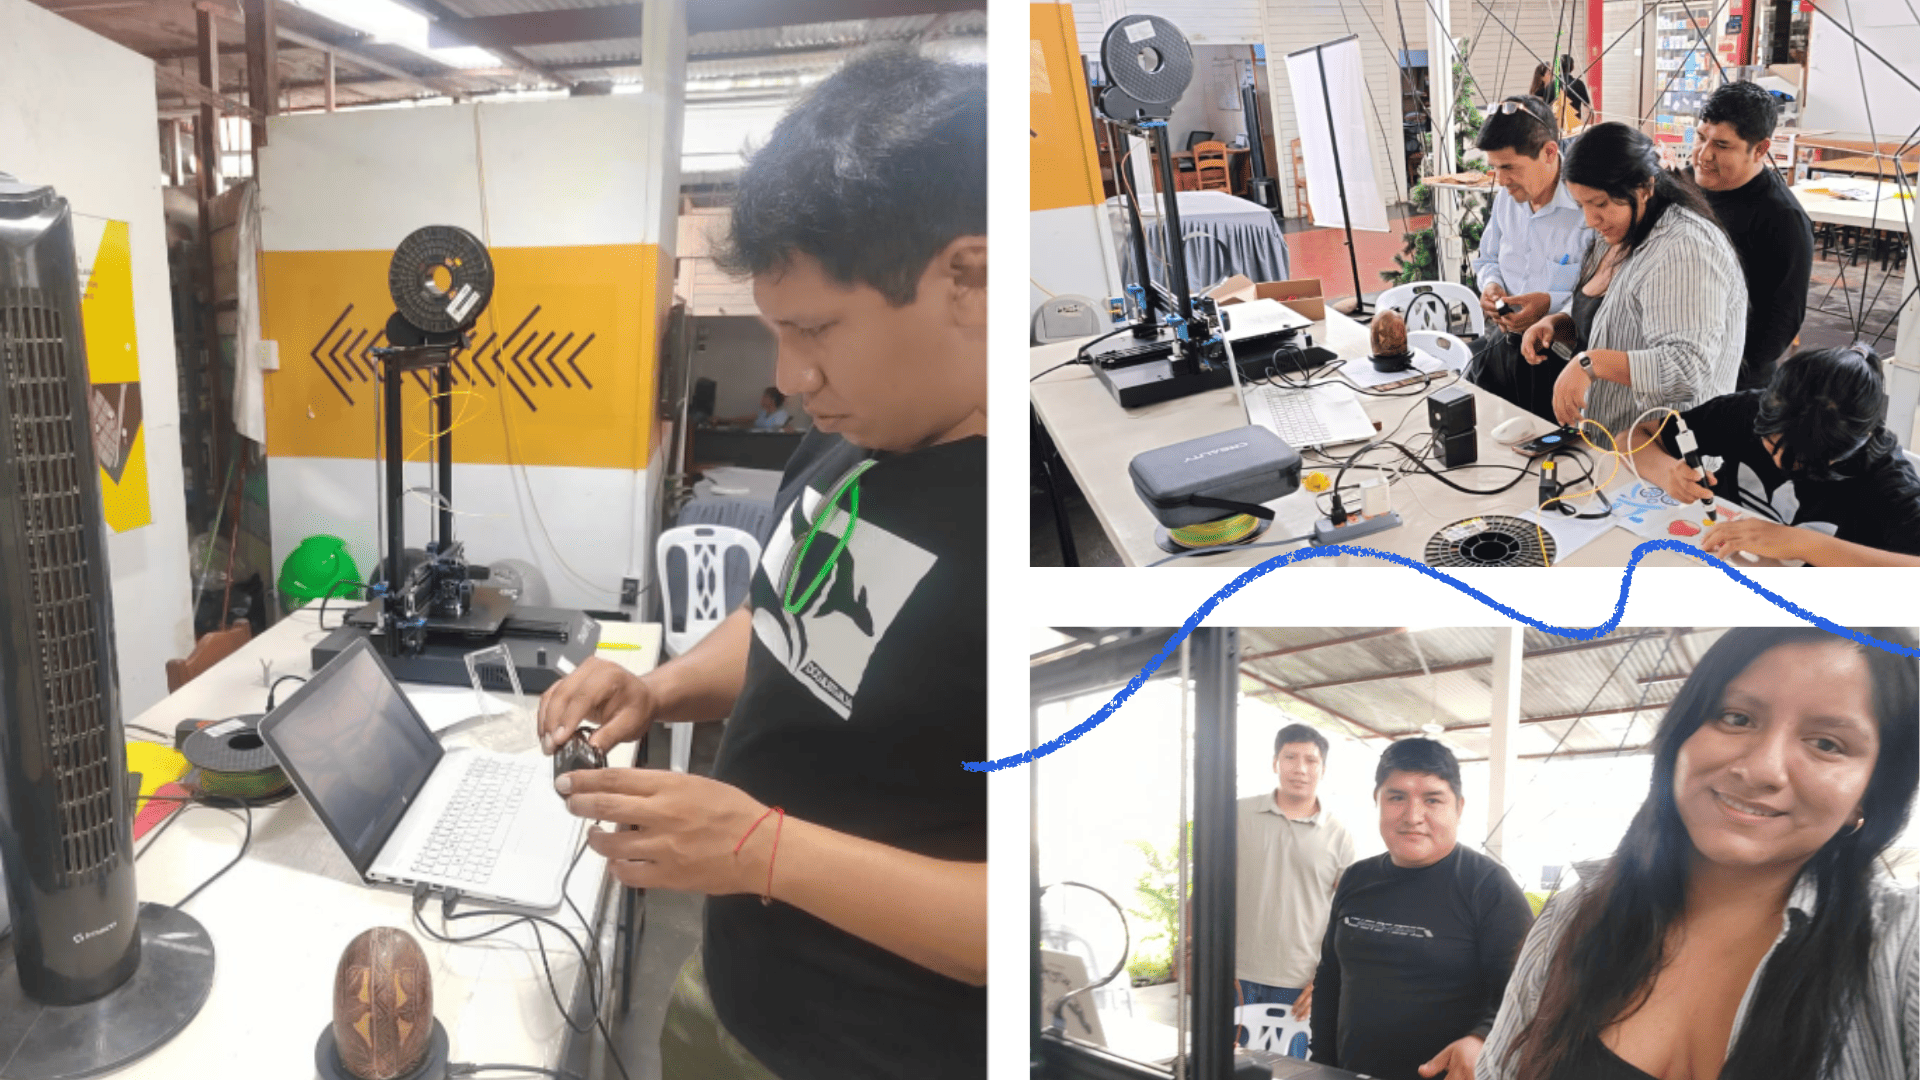
The Open Lab is a node initiative that seeks to share knowledge openly with the public, promoting access to digital fabrication and new technologies. This time, as a node, we were able to develop it in three cities where we have the mobile lab: in Lima at the National Museum of Archaeology, Anthropology and History of Peru, in Satipo at the Koajika Fab Lab, and in Iquitos with the mobile lab. This allowed us to develop training activities in different contexts, adapting to each community. During the sessions, we offered workshops on 3D printing and scanning, as well as spaces for symbiotic creation, aimed at reflecting on the possible uses of technology and how to channel information to generate local opportunities. In Satipo, we received a visit from the association of sacha indigo farmers, master artisans, entrepreneurs, and children, who were able to explore design programs like Tinkercad, an accessible and easy-to-use tool. We also worked with 3D printers, 3D pens, and scanners, even using mobile applications to digitize handicrafts. For many it was a new but very enriching experience, as it allowed them to see how craftsmanship and traditional knowledge can merge with technology to innovate without losing cultural identity..
Open Lab
Group Work
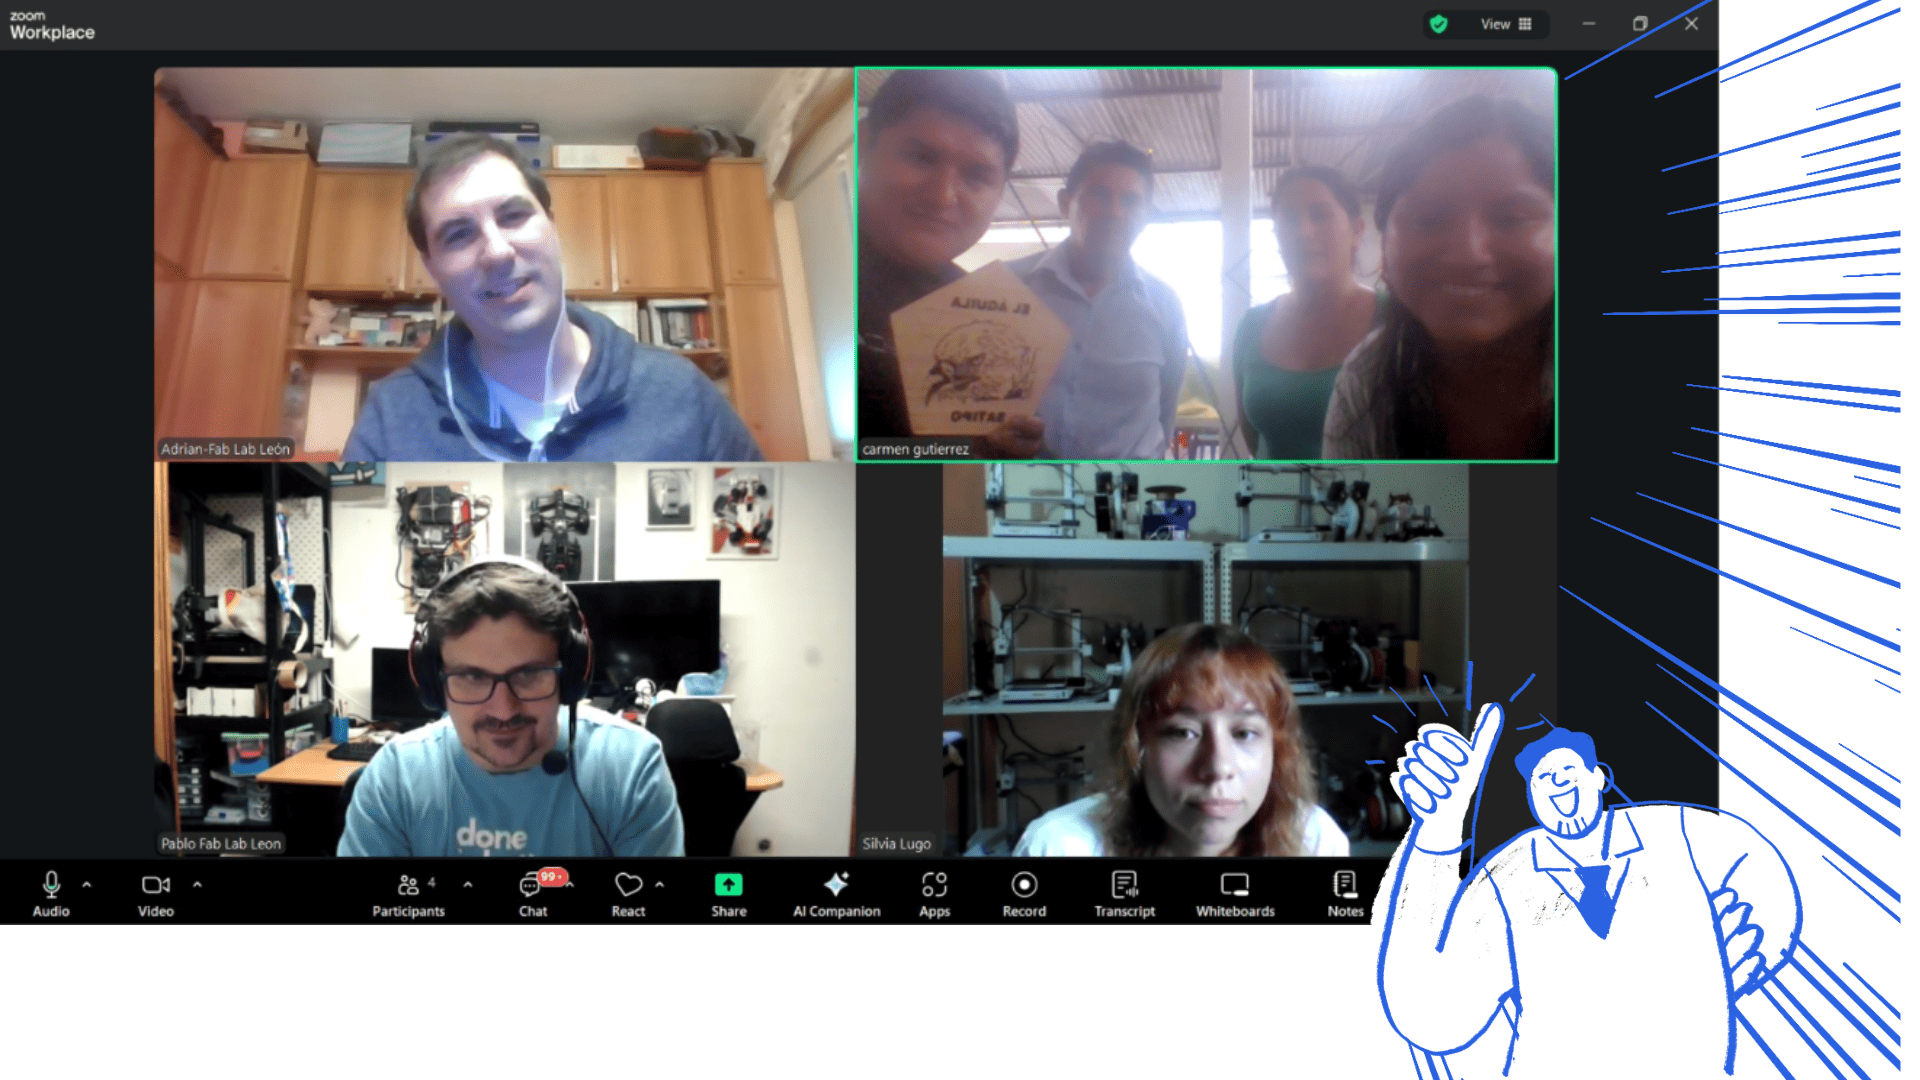
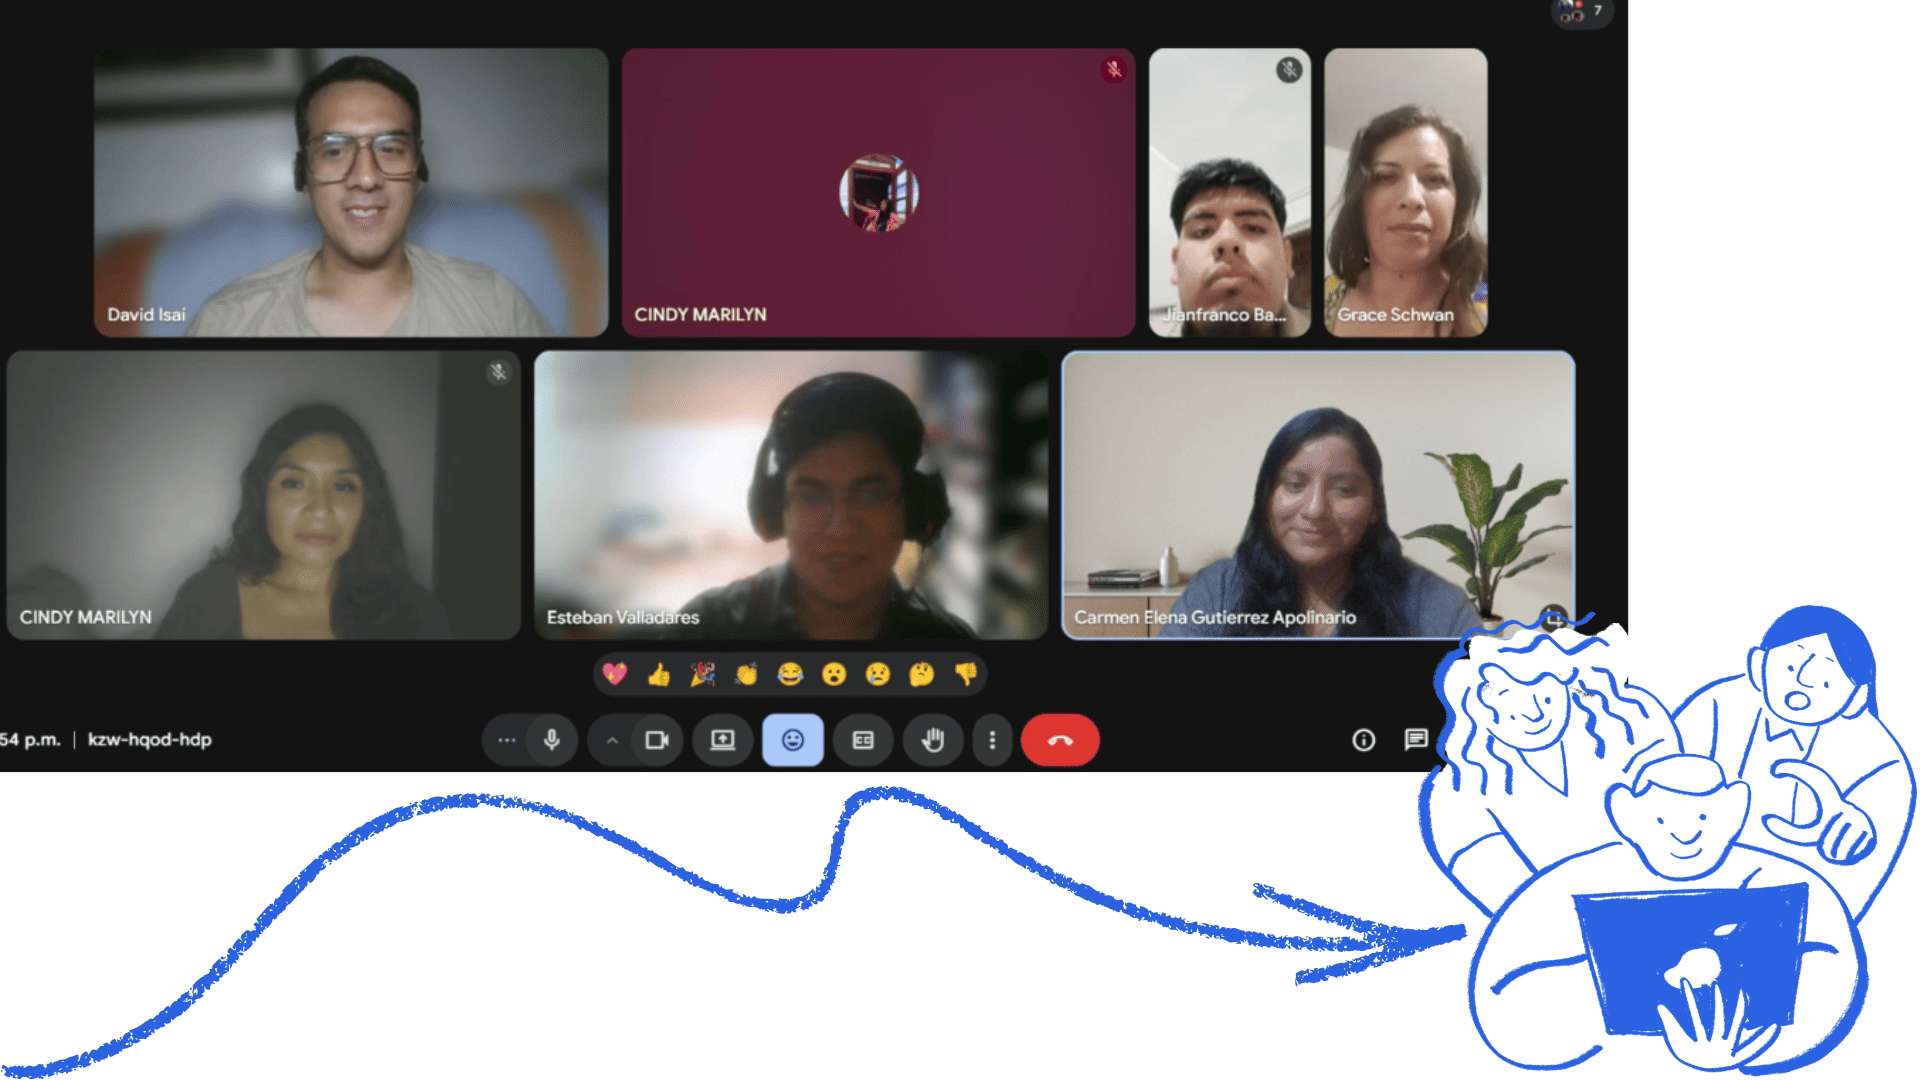
During this week of 3D scanning and printing, we collaborated from different virtual labs, allowing us to use various 3D printers and strengthen our hands-on learning. This dynamic facilitated the exchange of experiences and knowledge among the different nodes, significantly enriching the learning process.
We also participated in the Open Lab held in cities like Lima, Satipo, and Iquitos, where we continued developing our projects and applying the knowledge acquired in class.
We also participated in Open Global, a space where we shared progress and experiences among the different nodes nationwide. This activity was especially enriching, as it allowed me to share what I've learned so far; although much of this knowledge is new to me, the process has been motivating and stimulating.
Group Task: Testing Distributed Design Rules (Traveling Fab)
This week's group work was developed using a distributed manufacturing approach, within the framework of the Traveling Fab initiative. The activity consisted of testing and characterizing the design rules of different FDM 3D printers.
Unlike a traditional environment, we didn't work in a single physical laboratory. Each participant carried out the tests in their own fabrication space, located in different regions of Peru. This decentralized approach reflects the Fab Lab network's philosophy: local production combined with digital collaboration and shared documentation.
Distributed Manufacturing Context
- Carmen — Fab Lab Koajika Satipo (Satipo, Peruvian Amazon)
- David — Fab Lab Museum of Archaeology (Pueblo Libre, Lima)
- Esteban — Personal workshop (home environment)
- Jean Franco — Fab Lab UNI
- Cindy — Independent workspace
- Rocío — Fab Lab ESAN
Due to this distributed structure, it was not possible to meet physically in a single Fab Lab. Instead, we coordinated virtually to define the tests assigned to each member, thus ensuring the comprehensive evaluation of critical manufacturing variables across the entire group.
For more detailed information about the group work, please visit: View Group Assignment
Individual Reflection on Group Work
Participating in this group assignment helped me better understand how distributed collaboration can be just as effective as working in a shared physical space. Even though each member worked from a different location, we were able to coordinate efficiently, share results, and collectively analyze the behavior of different 3D printers. One of the most valuable aspects of this experience was learning how different environments and machines can influence the final results. Comparing outcomes allowed me to recognize the importance of design rules and machine calibration in digital fabrication. Additionally, this process strengthened my communication and documentation skills, as it was essential to clearly explain procedures and results to the rest of the team. Overall, this experience reinforced the importance of teamwork, adaptability, and clear documentation in a distributed fabrication context.
Individual Task
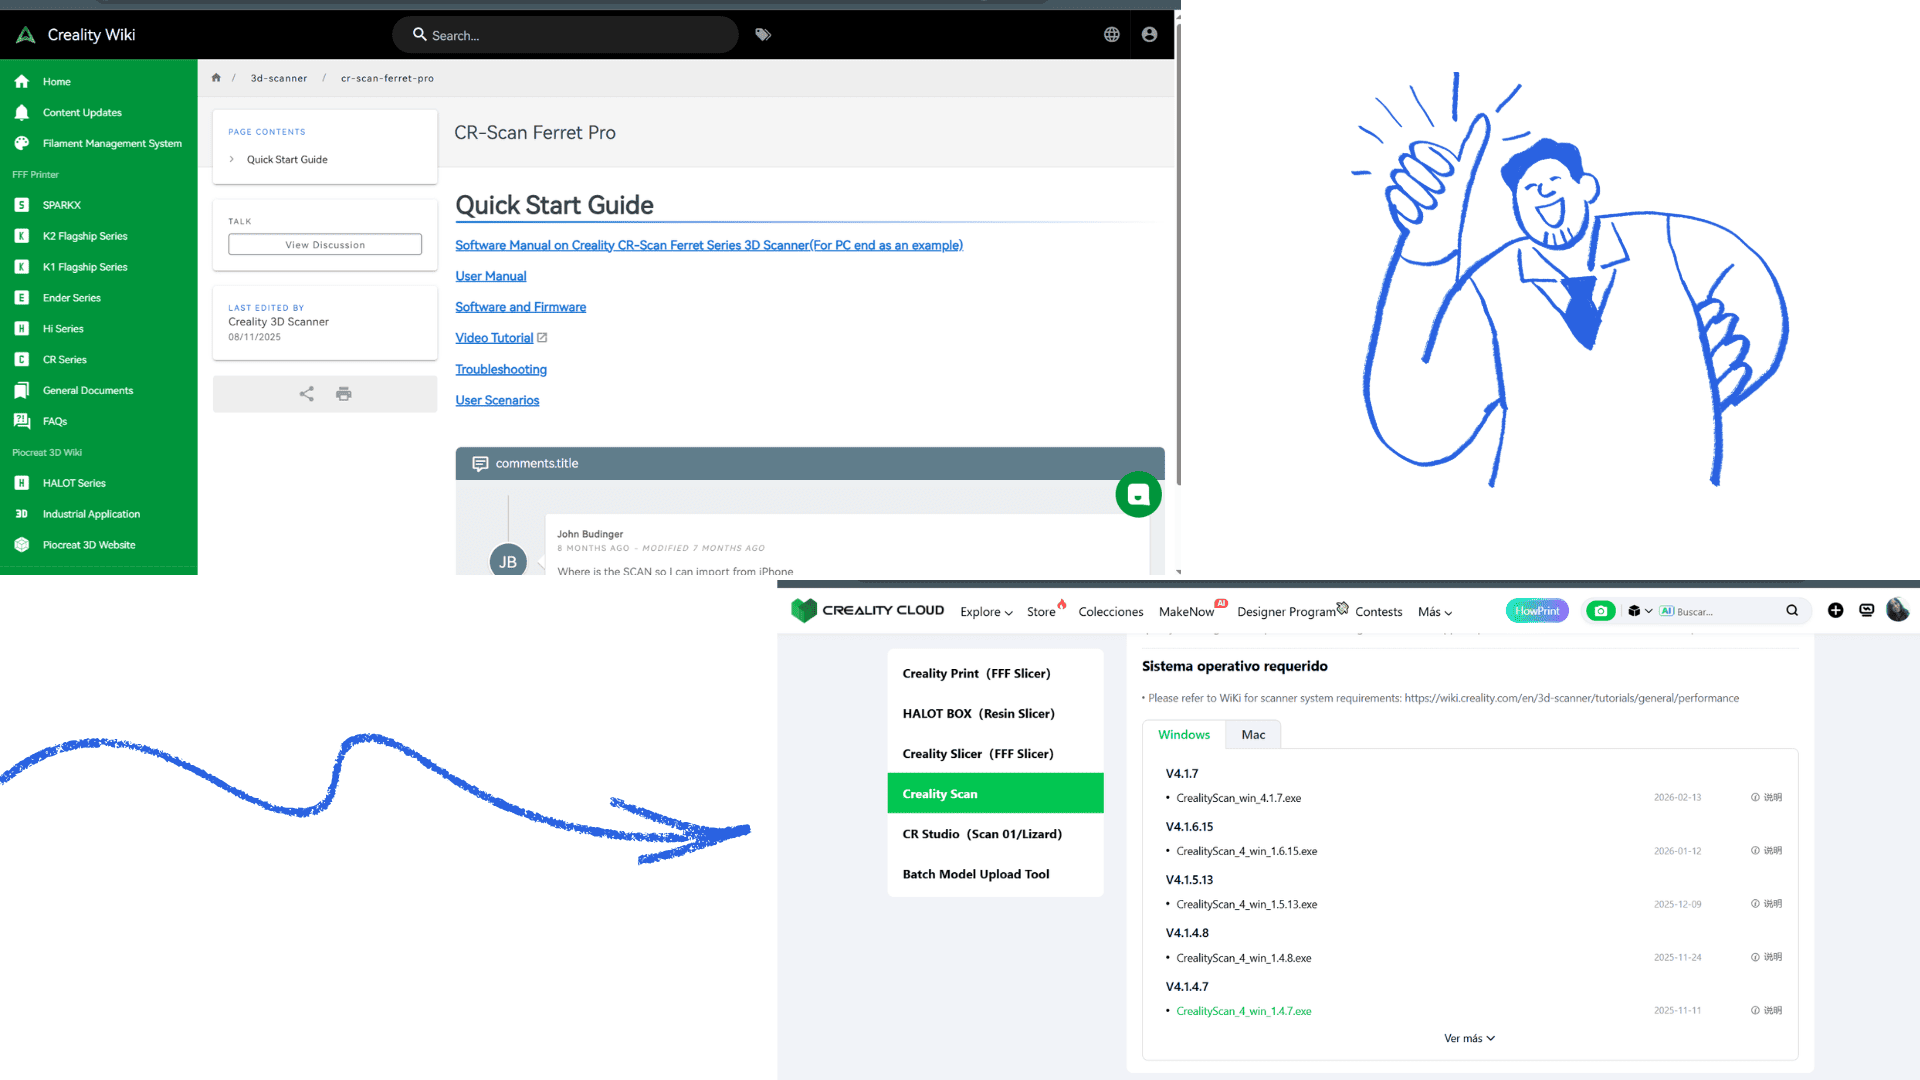
Step-by-Step Guide: Creality SC 3D Scanner
1. Software Download and Installation
- Go to the official Creality website: Creality 3D
- Go to the Downloads section or search for Creality Scan (the SC software).
- Download the version compatible with your operating system (Windows).
- Run the installer and follow the installation steps.
- Once finished, open the software.
2. Scanner Preparation
- Connect the Creality SC to your PC using the included USB cable.
- Turn on the scanner and verify that the status light is on (usually blue or green).
- Place the scanner on a stable, well-lit surface.
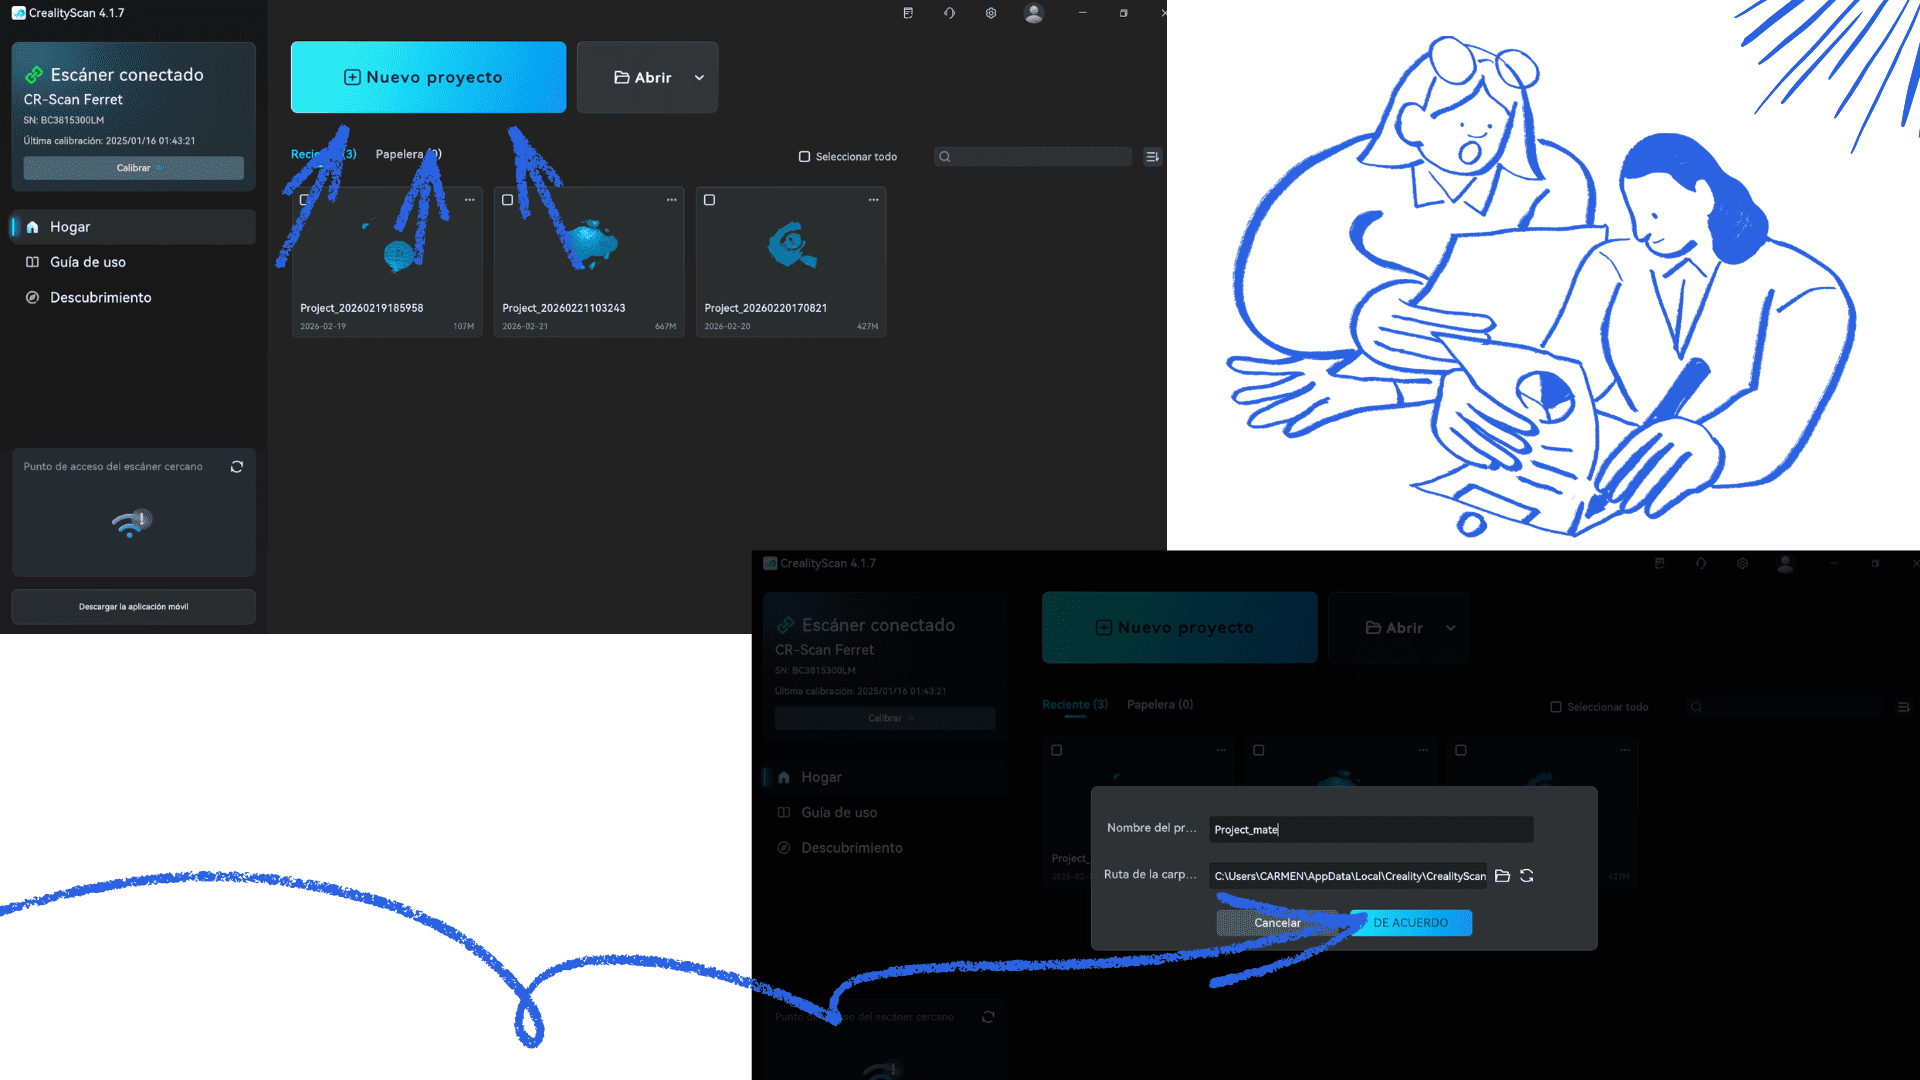
3. Initial Software Setup
- Select New Project or New Scan.
- Choose the scan mode according to the object:
- Small object (less than 20 cm)
- Medium/Large object (20–50 cm)
- Adjust basic parameters:
- Resolution: High, Medium, or Low (high for fine details)
- Scan type: Color (if you want textures) or Geometry only
- Calibrate the scanner if prompted (usually using the included reference object).
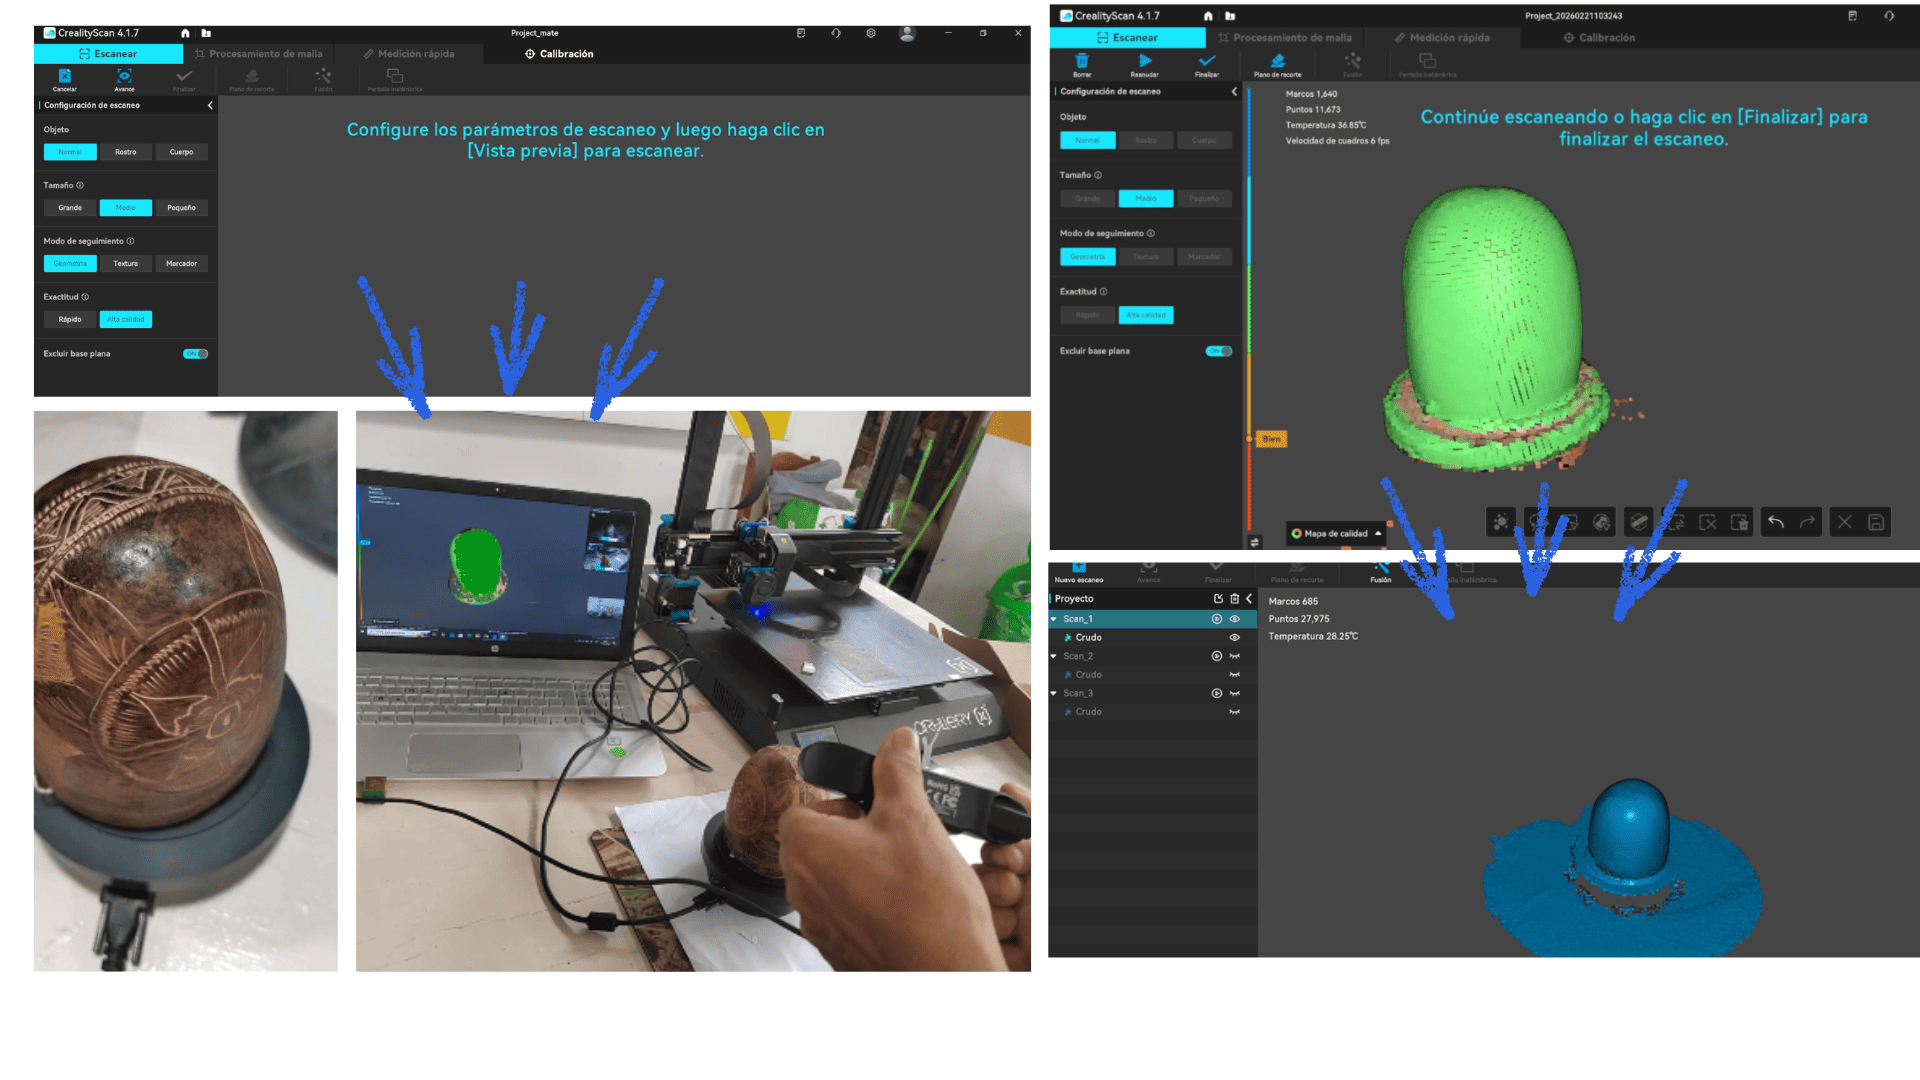
4. Preparing the Object to be Scanned
- Place the object on the turntable, if available.
- Ensure it is stable and that the ambient light is even (avoid harsh shadows).
- If the object is reflective or transparent, apply a temporary matte spray (optional).
5. Scanning
- Select Start Scan.
- Watch as the software records the object's geometry in real time.
- If the object is on the turntable, the software usually synchronizes rotation automatically.
- Once scanning is complete, review the preview.
6. Model Processing
- The software will generate a 3D mesh model.
- Clean the model by removing artifacts or unwanted points.
- Fix holes or incomplete areas using Fill Holes / Smooth tools.
- Adjust the scale and orientation as needed.
7. Exporting
- Save the scanned model in compatible formats:
- STL (for 3D printing)
- OBJ (for animation or rendering)
- PLY (to preserve color and textures)
- Choose the destination folder and confirm.
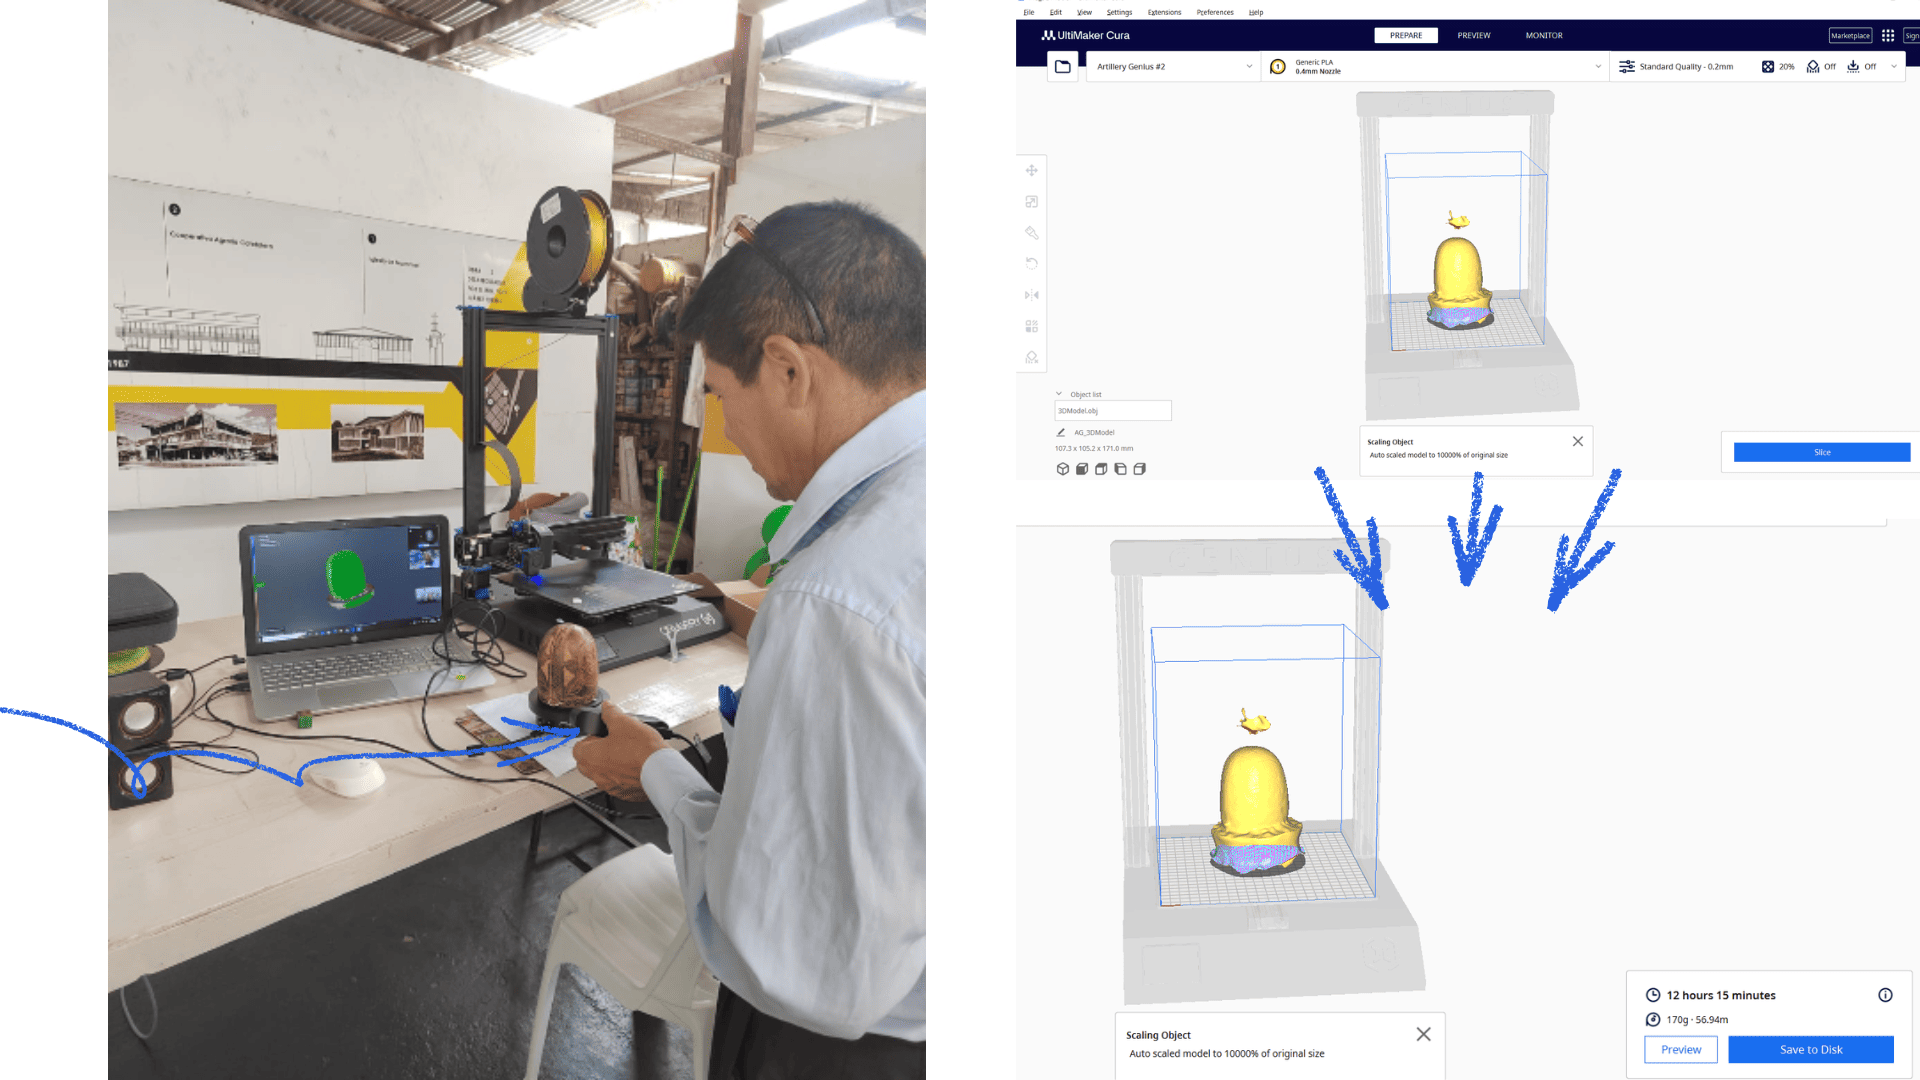
8. Using the Model
- Import the exported file into your 3D printing software (e.g., Ultimaker Cura or Creality Print).
- Adjust printing parameters: layer height, infill, supports.
- Send the file to the 3D printer to bring your scan to life.
Step-by-Step Guide – 3D Scanner with KIRI ENGINE
1. Download the application
From the App Store (iOS):
- Open the App Store on your iPhone or iPad.
- Search for “KIRI ENGINE” in the search bar.
- Download and install the official application.
- Open the app once the installation is complete.
From the website (Android or PC):
- Go to the official KIRI ENGINE website: kiri-engine.com
- Find the downloads section or direct installation links.
- Download the version corresponding to your device or platform.
- Install the app following the operating system's instructions.
2. Account creation and access
- Open the KIRI ENGINE application.
- Register with your email address or log in if you already have an account.
- Verify your email if requested (you will receive a confirmation code or link).
- Once inside, access the main panel.
3. Preparing the object to scan
- Place the object on a stable surface.
- Ensure the object is well-lit without harsh shadows.
- If the object is shiny or reflective, apply a temporary matte spray (optional).
4. Capturing video or photos for scanning
- Select “New Scan” or “Start Scan” in the app.
- Choose the capture mode:
- Multiple Photo: Take several photos around the object.
- Video: Record while moving your phone around the object.
- Follow app instructions for camera movement:
- Keep the object centered.
- Slowly rotate around the object to capture all sides.
- Cover 360° from all angles.
5. Processing in the app
- After capture, the app will process the scan and generate a 3D mesh.
- You can preview the model during processing.
- If unsatisfactory, repeat the scan.
6. Reviewing the 3D Model
- Rotate the model on screen.
- Check for large gaps or holes.
- Verify all important parts are well-defined.
- Use app tools if needed to:
- Fill gaps
- Smooth surfaces
- Crop unnecessary areas
7. Exporting and Sending the File
- Select the Export option.
- Choose the format:
- STL (for 3D printing)
- OBJ (for rendering or animation)
- PLY (for color and texture)
- Start the export process.
8. Email Delivery
- Enter your email address.
- Select download link or attachment.
- Send the email.
- Check your email and download the generated 3D file.
Tips for Best Results
- Keep your hands steady when capturing video or photos.
- Ensure proper lighting from multiple angles.
- Avoid backgrounds that match the object color.
- Practice with simple objects before scanning complex pieces.