Week 1
Principles and Practices, Project Management
Assignment documentation
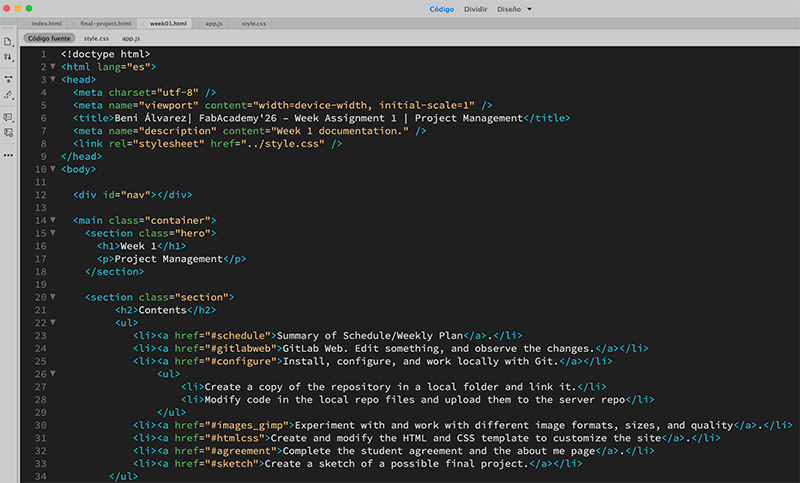
Contents
- Schedule / Weekly Plan
- Week questions / tasks
- GitLab Web · Edit something and observe the changes
-
Install, configure, and work locally with Git
- Create a copy of the repository in a local folder and link it
- Modify code in the local repo files and upload them to the server repo
- Experiment with different image formats, sizes, and quality
- Create and modify the HTML and CSS template to customize the site
- Complete the student agreement and the about me page
- Create a sketch of a possible final project
- Downloads
All of this content was written in plain text files in Spanish. The most important steps have been summarized here. If you wish, you can view the original PDF document ↗️ (in Spanish).
Week questions/tasks
GitLab Web
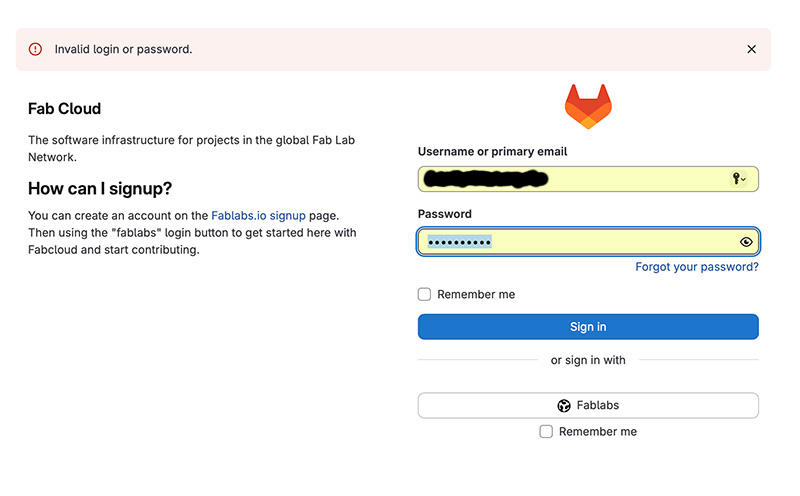
We're going to GitLab: https://gitlab.fabcloud.org/ ↗️
Put Username/email & password and log in by clicking “Fablabs” (do not click the “Sign in” button as it will cause an error).
Logged in!!!
Once inside, we click on “Projects” and the projects we have permissions for are listed.
In my case, it's my personal space within FabAcademy 2026.
If we click on “Academy / Fab Academy / 2026 / Fab Academy 2026 Labs / Fab Lab Leon / Fab Lab Leon students / Beni Álvarez ↗️” we access the section for managing our personal space.
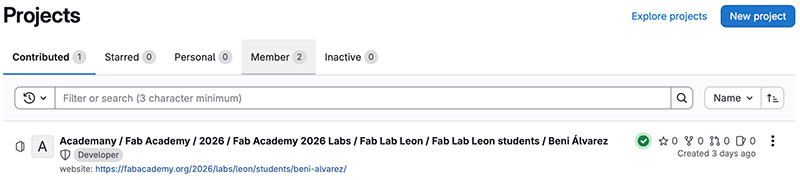
Clicking on the “website” link opens the public website published in our space in a new window.
Let's first access the space management section and we see the first level of files that make up our personal space and a quick message about the last modification, in my case, a "commit" from Nuria made as a test.
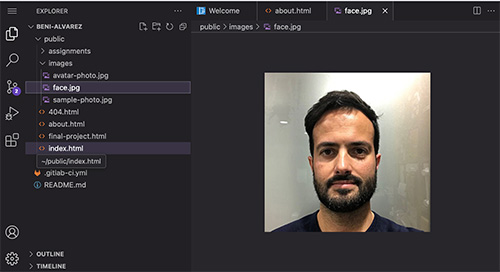
As a first test, we're going to modify the code of an HTML file directly on the GitLab website. Specifically: “public/about.html”. Clicking on it displays the source code. Clicking the “Edit” button and selecting “Open in Web IDE” from the two options that appear.
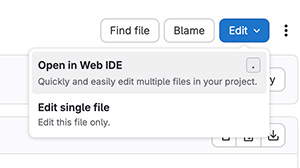
We're going to make several modifications: change the page title (title tag), add a new heading (h1 tag in this case) and add a profile picture to replace the example one.
This is how it looks
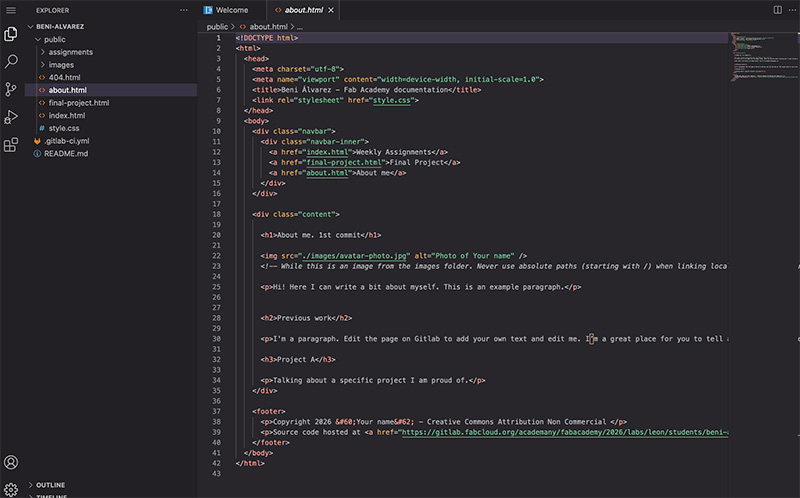
We're going to upload the file to the "images" folder. To do this, in the left-hand column, you'll see the current file/folder structure of the site. Right-click on the "images" folder, select "Upload...", locate your file, and upload it.
We see that it has been uploaded correctly and that it now indicates that we have 2 pending changes.
We click on the “Source control” button (the pending changes appear) and then click the “Commit and push to ‘main’” button. A confirmation warning appears; we accept it by clicking “Continue”.
In the bottom right corner, a pop-up window appears indicating the status of the action we just performed. Once completed, it displays a notification with the options to close or with two shortcuts: one to the project and another to continue.
We click on “Go to Project” to check and view the changes made. Another confirmation message appears, and we click “Open” to see our site.
We verified that the changes had been made correctly and that we could see the new image.

Install, configure, and work locally with Git
We're going to download and configure GitLab locally.
In my case, I'm using a computer with Mac OS 26.2 (January 2026), and if necessary, I'll use the following tutorial from the GitLab for macOS website ↗️ and FabLabs Academy Tutorials ↗️.
I need to download and configure the local GitLab client on my computer. Then, to configure it, I need to generate and add an SSH key to pair with my GitLab account.
To do this, we'll use the Terminal app within the system utilities. A prerequisite for installing the Git client on macOS is having the Homebrew app installed. In my case, I think I have both installed due to previous needs that I honestly don't remember.
I'll run the commands to check if I have Homebrew and Git installed.
brew --versiongit --version
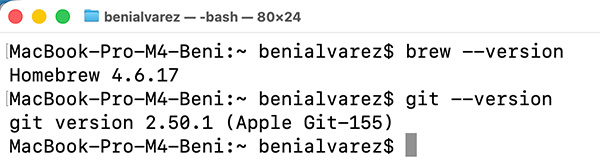
I see that I don't have the latest version of Homebrew and that the installed version of Git is the Apple version (not linked to Homebrew).
I'll update Homebrew first and then install Git from within Homebrew.
brew install git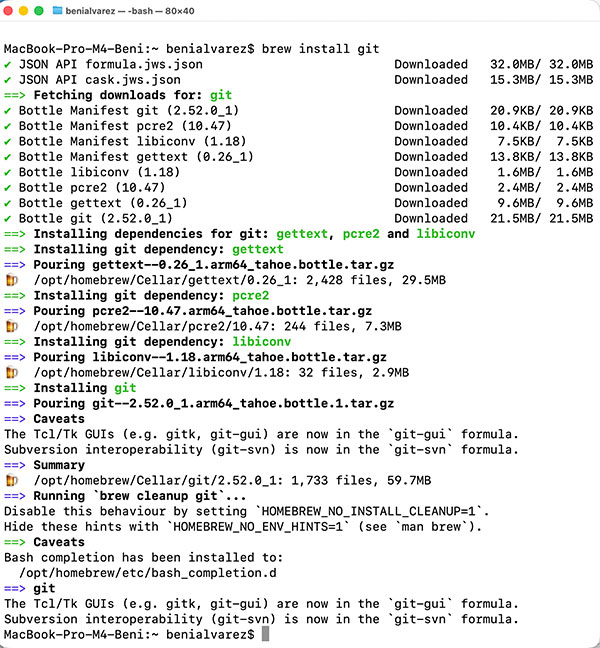
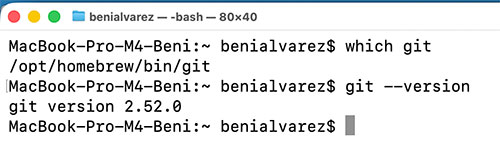
I look for documentation and run the following command to prioritize the version of Git installed by homebrew instead of Apple's Git ↗️.
echo 'eval "$(/opt/homebrew/bin/brew shellenv)"' >> ~/.bash_profile
eval "$(/opt/homebrew/bin/brew shellenv)"
hash -r
I run “which git” and “git –version” and verify that the changes were successful.
Git configuration on local
We started configuring the local Git application, continuing with the GitLab Docs manual ↗️.
First, we configure the user and email with the following commands:
git config --global user.name "my_user"
git config --global user.email "my_email"
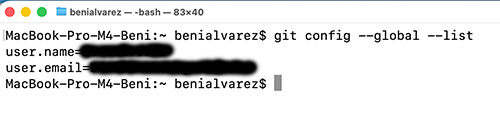
And I run this other command to verify that the changes were successful:
git config --global –list
Now we need to generate a private key to sign commits and send them to the remote repository.
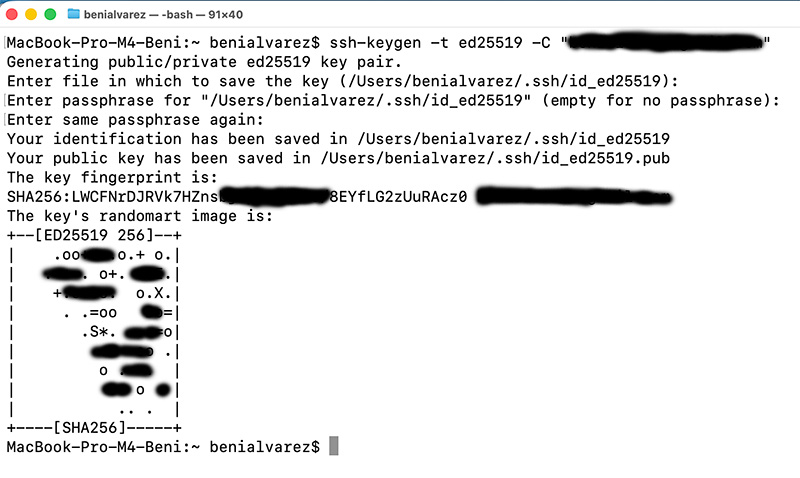
To do this, we'll use the ED25519 algorithm associated with the email address registered in GitLab by running the following command (entering the email used in the gitlab account):
ssh-keygen -t ed25519 -C *******@***.**
It will ask us which directory we want to store the keys in. If we accept the default directory (/.ssh/id_ed2519), we press Enter.
It will ask for an encryption password and ask us to confirm it.
If everything is correct, it will have generated a private and a public key.
Now, we will start the agent and add the key with the following command:
eval "$(ssh-agent -s)"
ssh-add --apple-use-keychain ~/.ssh/id_ed25519
Next, we need to copy the public key to the clipboard so we can paste it into the GitLab website. To do this, we run the following command:
pbcopy < ~/.ssh/id_ed25519.pub
Now we go to the website and, logged in with our user account, we access the settings/preferences by clicking on our user icon in the upper right corner.
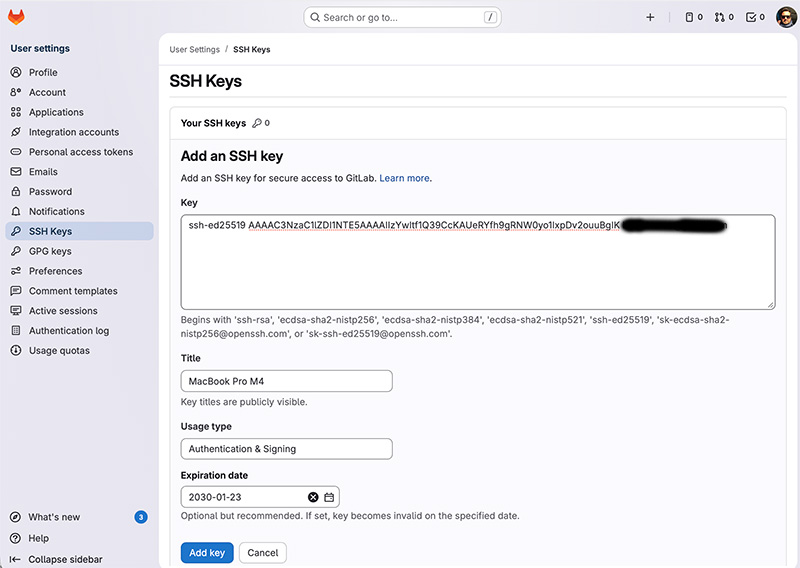
Once there, in the menu in the left column, click on the “SSH Keys” option and then click the “Add new key” button.
A form opens for us to fill in the key. In the “key” field, we paste the public key that we copied from the clipboard and fill in the following fields.
And we click the “Add key” button.
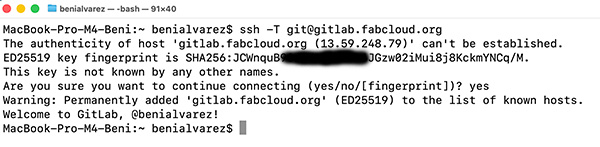
Now, to check if everything is set up correctly, we return to the Terminal app and run the following command:
ssh -T git@gitlab.fabcloud.org
If it's your first time, it's normal to see the message "authenticity of host can't be established" because it's the first time you're connecting to the GitLab server via SSH and you didn't have the host key saved on your computer, so click "yes".
If everything is correct, it will return your username, in my case: "Welcome to GitLab, @benialvarez!".
Now we're going to create a folder that we'll use in our local repository. In my case, inside my user folder, I've created one called "FA2026". To link the current project to the local folder, we need to initialize Git inside the folder by running the following command:
git init

Now we need to set the origin for this empty repository we just created. To do this, we run the command “git remote add origin” followed by our “Clone with SSH” code, which we will copy to the GitLab website within our user account.
Now we need to download and synchronize both repositories, so first we'll check the server's repository headers by running:
git ls-remote --heads origin
git fetch origin
git checkout -B main origin/main
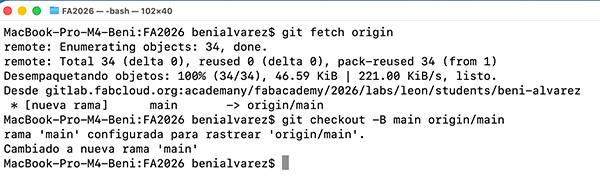
Therefore, if we go to our local folder, we should see all the contents of the downloaded server repository.
Modify code in the local repo files and upload them to the server repo
Now, let's modify a file in the local repository; for example, we'll edit the "about.html" file.
Once the modifications are made, we'll check the synchronization status between both repositories by running the following command:
git status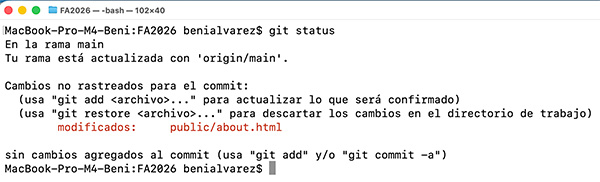
It indicates that the modification of the about.html file is pending synchronization; to do this, we execute the following commands:
git add .
git commit -m "......"
git status
git push
`git add .` → adds all changes (new, modified, and deleted files) to the staging area
• `git commit -m "..."` → saves all those changes in a commit with the comment
• `git push` → pushes them to the remote repository.
Between Git commit and Git push, it's recommended to run "git status" again. This helps verify exactly what will be uploaded before sending.
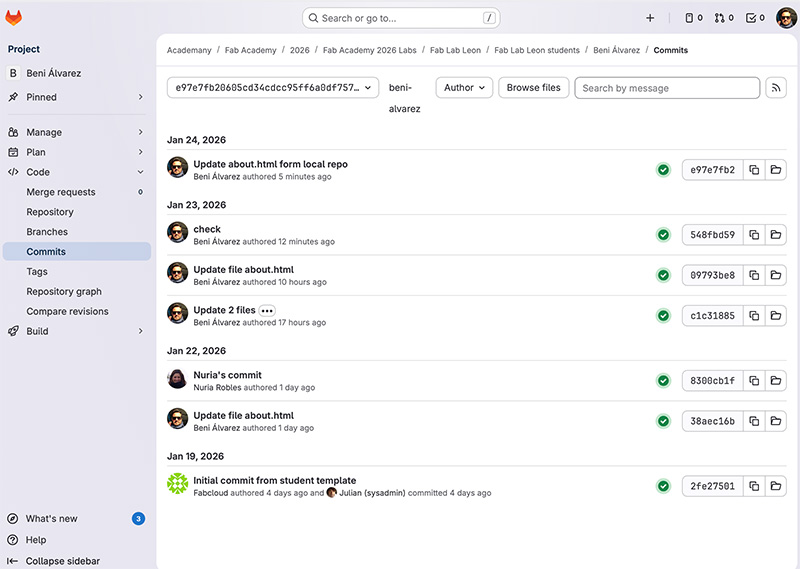
Accessing the public website, we see that the changes have indeed been made.
We also access the commit history and see that the one we just made, along with your comment, is there.
If we were to make changes directly to the server repository, the local repository would logically be outdated.
If we run "git status", it will tell us that our branch is up to date because the "git status" command doesn't check the server; it only checks the local copy, and indeed, we haven't made any changes to it.
Therefore, we first need to run the "git fetch" command to check for changes on the server, and then run "git status," which will tell us in this case that our local branch is behind the server branch, that we have a pending commit, and that we should use "git pull" to update it locally.
git fetch
git status
git pull
Experiment with and work with different image formats, sizes, and quality.
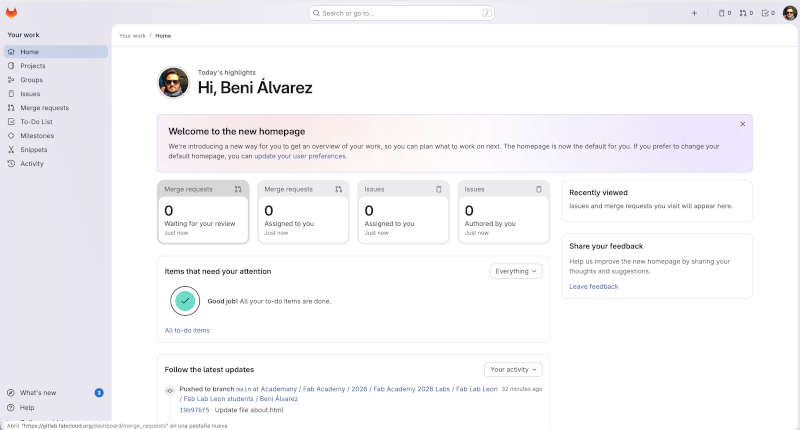
In all the previous images, we applied what we learned to the following test.
We have a PNG screenshot of our GitLab homepage, which we just created as a test. It's 2MB in size and has dimensions of 3438x1846 pixels (at a resolution of 144 pixels/inch). This is obviously too large to display on a website, both in terms of dimensions and file size.
To resize the image, we'll use GIMP (https://www.gimp.org ↗️).
We open the image and we'll go to the "Image" menu and select the "Scale image…" option.
We take as initial parameters 800 px wide (by the corresponding height proportionally) and at a resolution of 72 px/inch and press the “Scale” button and we will see the smaller image on the screen.
We have done several tests with the same image, exporting it in different formats and qualities, and this has been the result.
- Original PNG: 2MB
- PNG with maximum compression: 114KB
- JPG quality 100%: 109KB
- JPG quality 80%: 34KB
- JPG quality 60%: 24KB
Here you can see the four images (except the original) to try and spot the differences. Click on any of them and use the lightbox arrows (left and right) to navigate through them.


Do you see any difference? I honestly don't.
Therefore, in our case we opted to reduce the images and export them to JPG quality 80, because there may be slight differences in some images with quality 60.
Create and modify the HTML and CSS template to customize the site.
This website is a custom static HTML/CSS site developed for FabAcademy 2026.
The overall structure and design approach are inspired by documentation-oriented static site generators, particularly Hugo and its documentation themes. In particular, the conceptual reference is the Hugo Book Theme, which emphasizes clarity, typography, and modular layouts using reusable components (header, footer, content blocks).
Rather than using the theme directly, the site was built from scratch with plain HTML, CSS, and minimal JavaScript to better fit the specific needs of FabAcademy documentation and to maintain full control over structure and styling.
Reference theme: https://github.com/alex-shpak/hugo-book ↗️
I have extensive experience in web design, having worked in the field for over 20 years. Although much has changed over these years, I wanted to move away from the CMS platforms commonly used today and create something simple in terms of both programming and layout, while also being as functional as possible.
For this case, the website is fully responsive and designed following a mobile-first approach. Layouts adapt to different screen sizes using CSS Grid, flexible containers, and media queries, ensuring readability and usability on desktop, tablet, and mobile devices. Images are constrained to preserve their original resolution when smaller, while larger images are limited to improve visual consistency and performance.
I used parts of the .css files that I had generated from previous projects so I wouldn't have to recreate them.
JavaScript is used in a minimal and functional way, only where it adds clear value to the user experience. This includes loading shared components such as the navigation bar and footer across all pages, enabling copy-to-clipboard functionality for terminal commands or code blocks, and providing small interaction helpers like the “back to top” button. No external frameworks or libraries are used.
Documentation and software used:
- HTML Basics Tutorials ↗️
- Dreamweaver Code editor
- HTML Cheat Sheet ↗️
- W3 HTML Schools ↗️
- Some internet examples
- ChatGPT code generator
Complete the student agreement and the about me page
Here is my Student Agreement.
Sketch of a possible final project
Downloads
Files for download
You can download my template with the basic initial file structure (HTML, CSS, JS, etc.) for free use. As I add more css classes or other improvements, I will update this file with ready-to-use examples
You can download my template (for free use) in this specific site Fab Academy template
Creative Commons Attribution Non Commercial.
Updates
Date: 17Feb
As a Safari user, I've noticed that MP4 videos aren't playing in the browser. After consulting with local instructors, in this case Adrián, he recommended following this tutorial to change the code in my repository's .yml file to this: https://docs.gitlab.com ↗️
I made the change and it works correctly; MP4 videos from my repo can now play in Safari.
Credits
All texts were written in Spanish and translated into English using Google Translate and ChatGPT.