Wildcard Week
Task:-
- Design and produce something with a digital process (incorporating computer aided design and manufacturing) not covered in another assignment, documenting the requirements that your assignment meets, and including everything necessary to reproduce it.
Task Overview
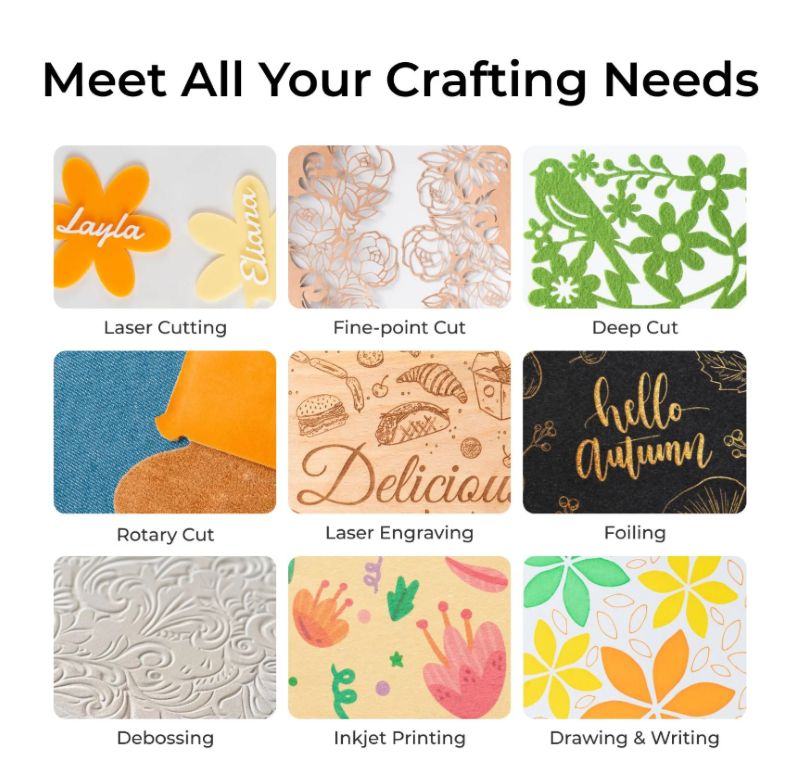
For this week's assignment, I explored different fabrication processes using the xTool M1 Ultra.
I wanted to see if I could create a raised embossing effect on thin aluminium sheets, even though the machine mainly
supports debossing.
To do this, I experimented with layered paper stencil,
different pressure and speed settings, and aluminium sheets made from beverage cans.
I also created my own illustrations, used them for the embossing tests, and finally made vinyl stickers from the same artwork.
Overall, this was a fun activity that gave me the opportunity to explore different materials,
tools, and creative workflows. It was interesting to experiment with the machine's different capabilities and
see how a combination of digital fabrication techniques could be used to create embossed artwork.

Workflow Overview
1
Prepare a flat aluminium sheet (approximately 0.12 mm thick) from a beverage can.
2
Create the artwork digitally and export it as a PNG.
3
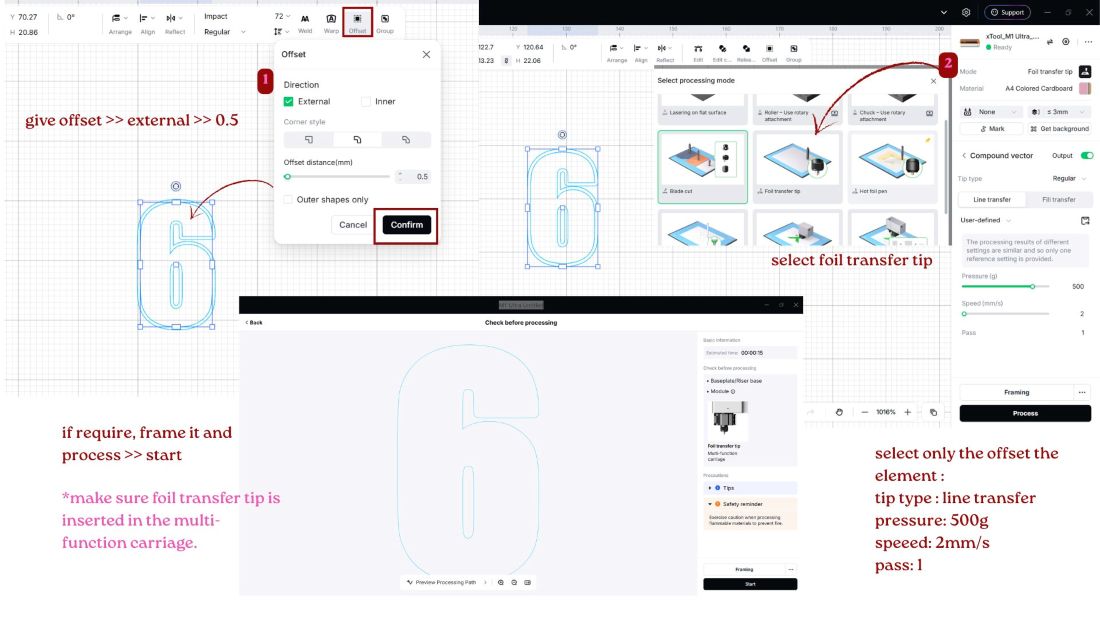
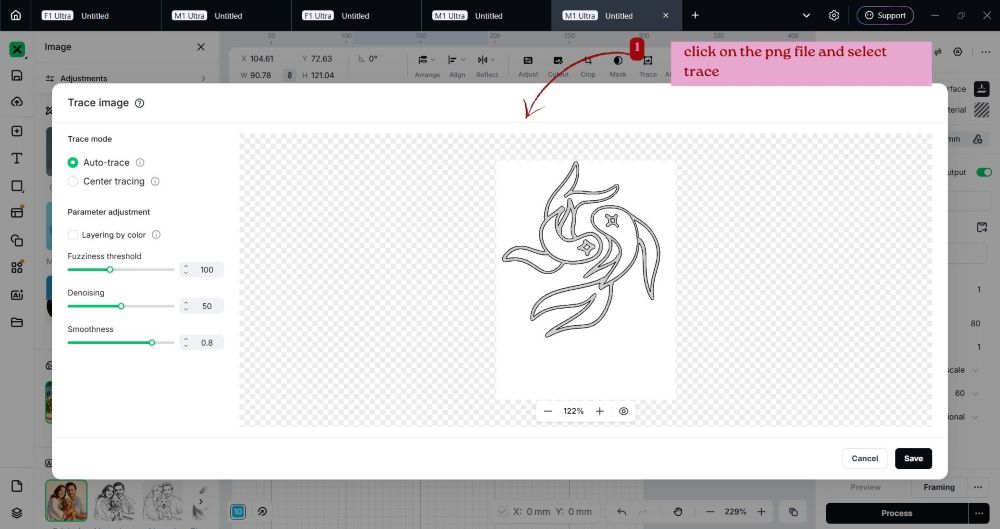
Import the artwork into xTool Creative Space and trace it into vectors. Create an offset around the design.
4
Cut the stencil using the Fine-Point Blade on 300 GSM paper.
5
Glue the stencil layers together to get thickness.
6
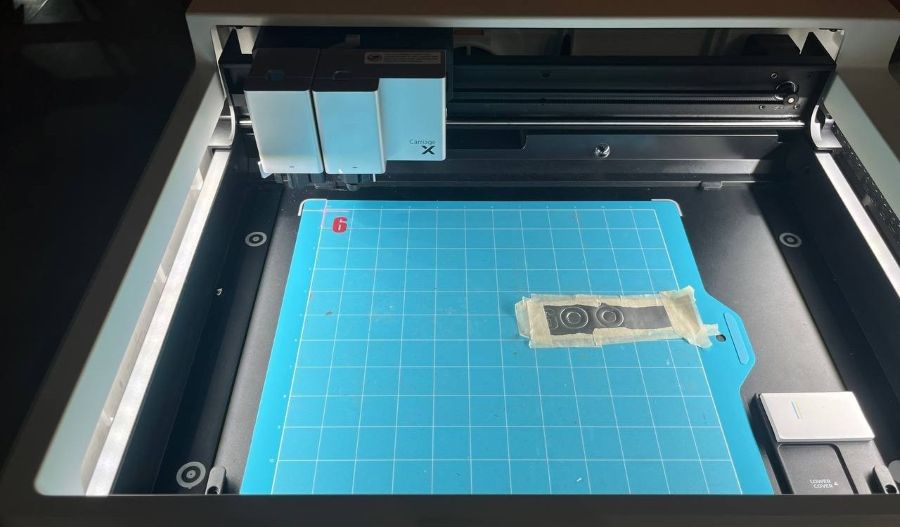
Tape the aluminium sheet over the layered stencil.
7
Assign the Foil Transfer Tip only to the offset path and use the required pressure and speed settings.
8
Cut coloured vinyl stickers and apply them to selected embossed areas.
xTool M1 Ultra
A beginner friendly 4-in-1 digital fabrication machine for cutting, engraving, drawing and printing.
User Manual: M1 ultra
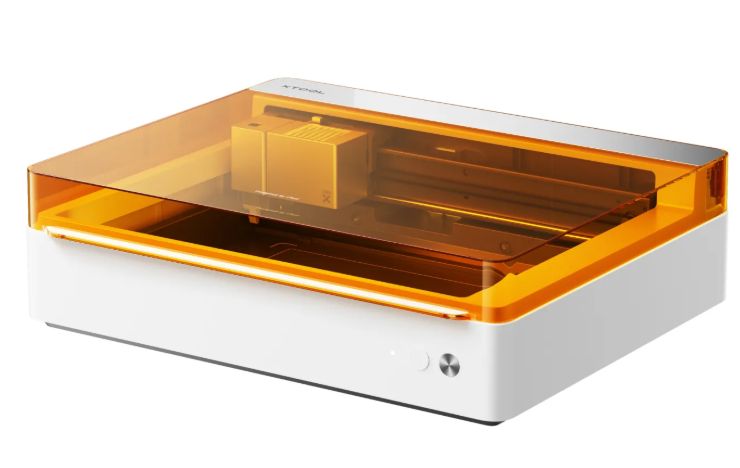
Photo credits: M1 ultra
Safety Measurements
Proper Ventilation
Laser cutting produces smoke and fumes, so the workspace should be well ventilated.
Avoid PVC
PVC and vinyl materials should not be used because they release toxic gases.
Hot Tool Safety
Foil transfer and debossing tips become hot during operation. Allow them to cool before touching.
Sharp Blade Safety
Rotary and fine point blades are sharp and should be handled carefully while replacing.
Keep Lid Closed
Keep the enclosure closed during laser cutting to reduce laser and smoke exposure.
Fire Safety
Never leave the machine unattended because some materials may catch fire.
Source: xTool M1 Ultra Safety First
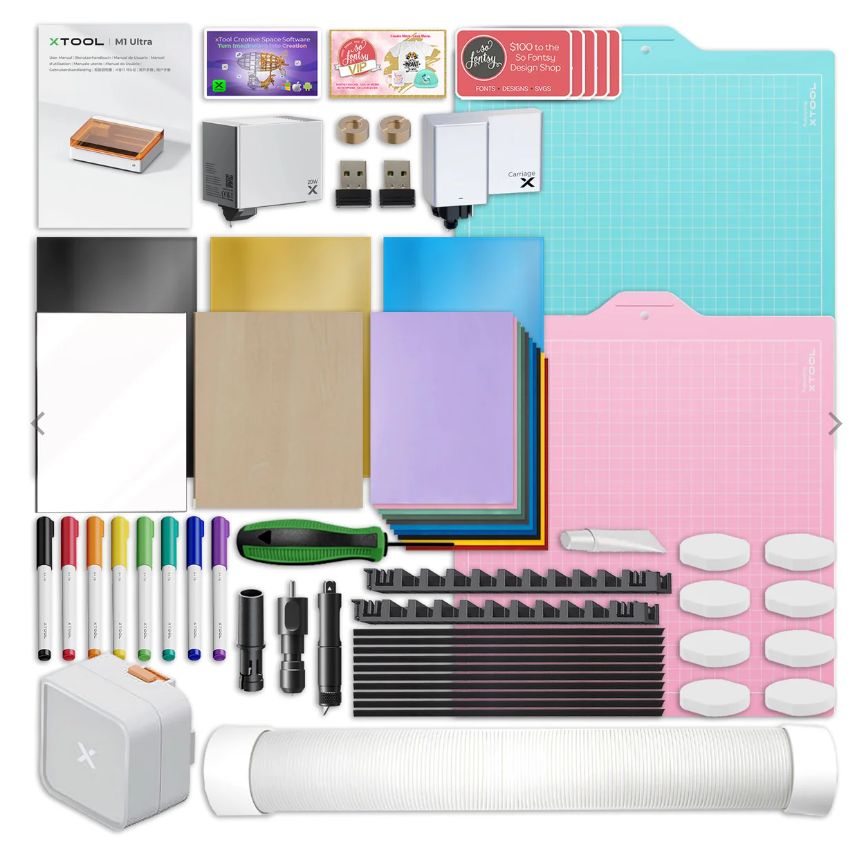
Tools & Accessories
The xTool M1 Ultra uses a modular 3-Second Easy Swap system which allows different processing modules and tools to be changed quickly depending on the material and application.
Source: swingdesign
Interchangeable Processing Modules
10W Diode Laser Module
Precision engraving and cutting for paper, cardboard and thin wood.20W Diode Laser Module
Higher power cutting for plywood, acrylic and leather.Ink Module
CMY inkjet printing for graphics, labels and artwork.Multi-Function Carriage
Main holder for blade tools, foil tools and pen attachments.Tools
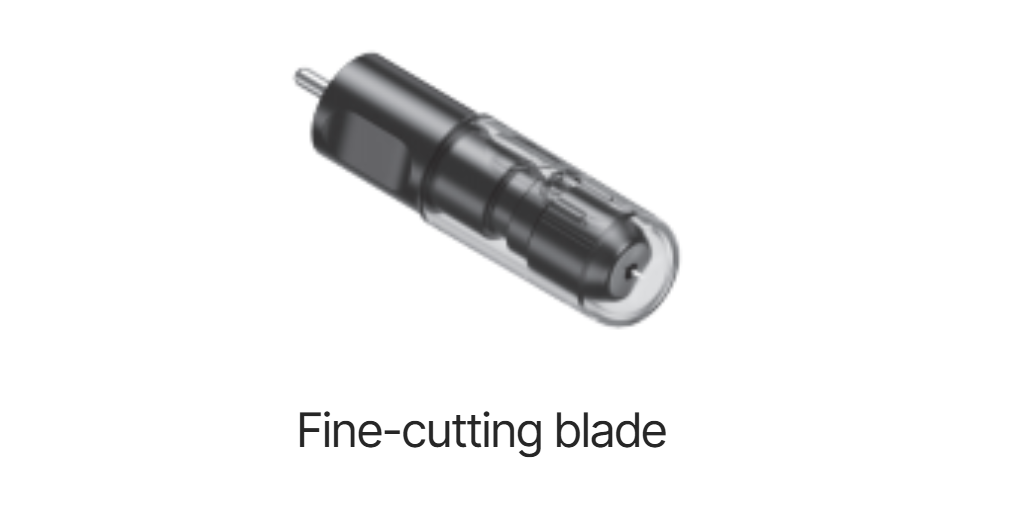
Fine-Point Blade
Precision blade for thin craft materials.
- Vinyl
- Sticker sheets
- Cardstock
- Paper crafts
Source: xTool M1 Ultra items
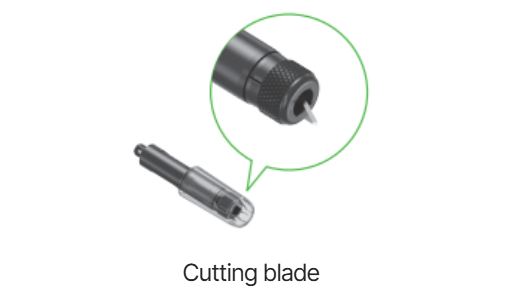
Cutting Blade
Deeper blade designed for thicker and denser materials.
- Leather
- Dense paper
- Cardboard
- Craft sheets
Source: xTool M1 Ultra items
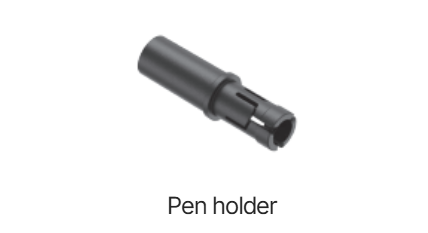
Pen Holder
Holds xTool pens and markers for automated drawing and sketching.
- Illustrations
- Calligraphy
- Line art
- Vector drawing
Source: xTool M1 Ultra items
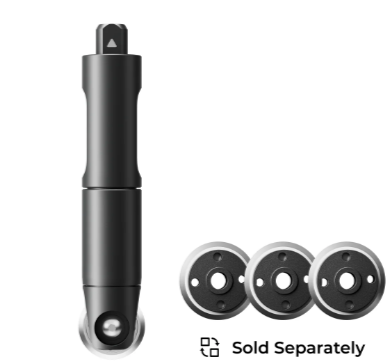
Rotary Blade
Rolling wheel blade for soft flexible materials.
- Fabric
- Felt
- Denim
- Cloth patterns
Source: Rotary blade
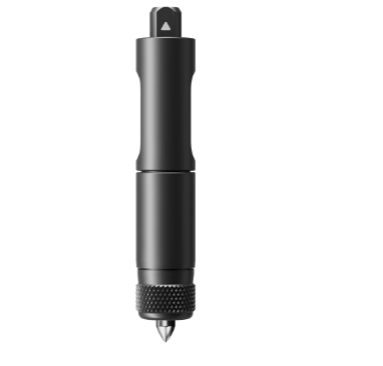
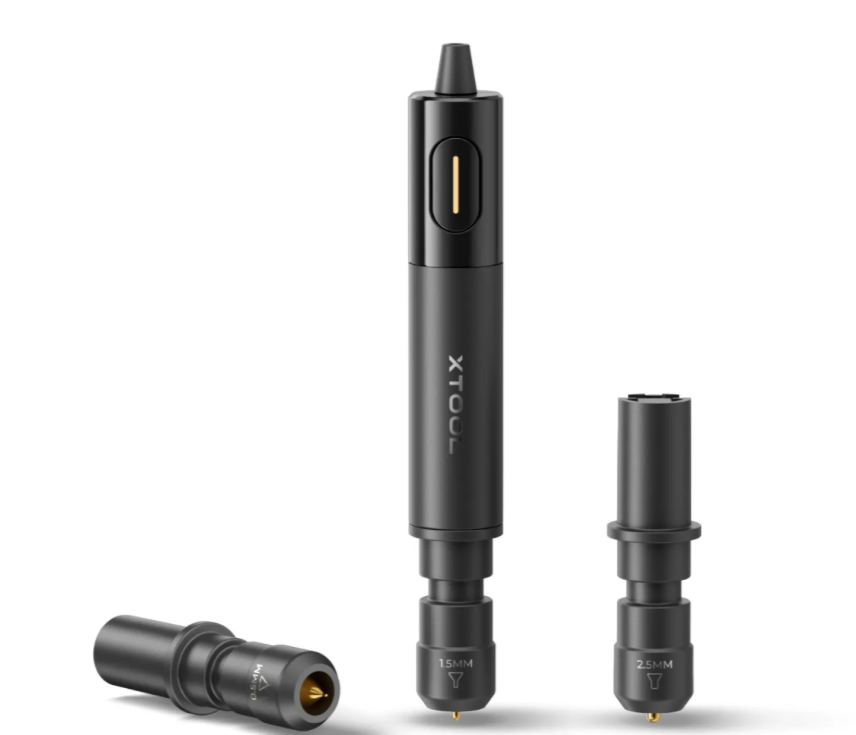
Foil Transfer Tip
Applies pressure onto foil sheets to create embossed foil lines.
- Foil detailing
- Decorative paper
- Packaging graphics
- Invitation cards
Source: Foil transfer tip
Hot Foil Pen
Heated pen tool that permanently heat-bonds metallic foil onto surfaces.
- Wood decoration
- Leather graphics
- Luxury finishes
- Typography
Source: Hot foil pen
Operational Accessories
Riser Base Kit
Raises machine height for thicker materials.Honeycomb Panel
Improves airflow and reduces burn marks.RA2 Pro Rotary Attachment
Engraves mugs, bottles and tumblers.Smart Air Assist
Provides cleaner cuts with airflow.Smoke Purifier
Filters smoke and laser fumes.Fire Safety Set
Helps detect and prevent fire hazards.Mats & Consumables
Electrostatic Mat
Holds lightweight materials using static charge.Adhesive Cutting Mats
Sticky mats for paper, vinyl and fabric cutting.CMY Ink Cartridges
Replacement cartridges for the ink module.Source: xTool M1 Ultra User Manual
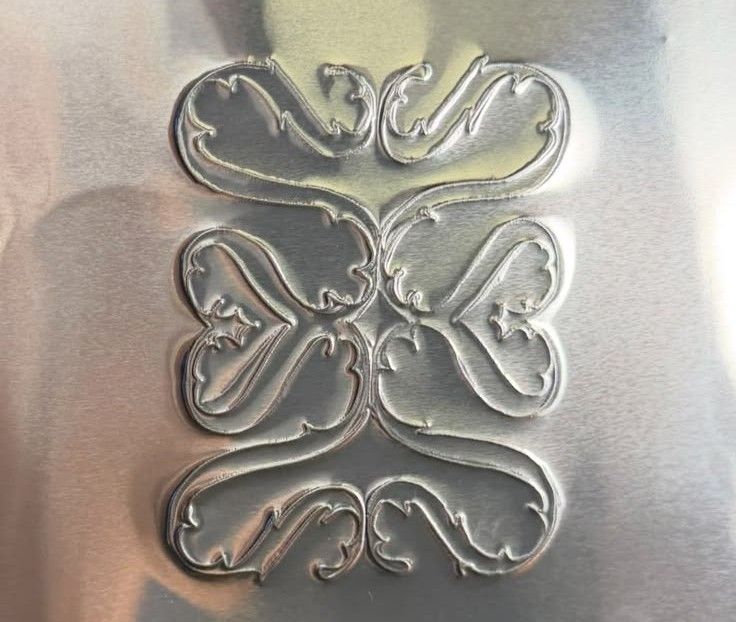
Testing embossing effect
For this week I wanted to try making embossed artwork on thin aluminium sheets, inspired by handcrafted metal embossing references.
Inspo:
Preparing material: flatten soda can
I used aluminium from Sprite and Red Bull cans approx. 0.12mm as it easily available and the material is thin, easy to shape using pressure. Cut and removed the top and bottom part of can, made a vertical cut along the side, and opened it for straightening the sheet using scale repeatedly press it and drag up-down.
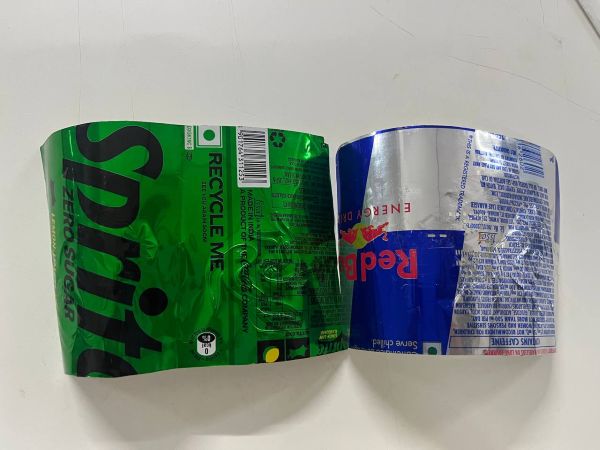
Youtube tutorial: Flatten soda cans
Understanding the Embossing Process:
Challenge
The xTool M1 Ultra mainly supports debossing using foil transfer tip, where the surface is pressed inward. But I wanted to create an embossed raised effect similar to metal embossing artwork.
Research
While searching for methods, I watched videos of Cricut machines doing embossing and debossing.
In one workflow, they first cut a stencil shape and then place the material in which to emboss effect over it.
After that, they use pressure around an offset path which slowly pushes the surface upward,
creating an embossed effect.
Since the M1 Ultra does not directly have an embossing feature,
I wanted to test if I could recreate a similar process.
Reference: Embossing Technique Reference How to Emboss with your Cricut!
Setting up the process
Inserting the tool
Changing and inserting tools in the xTool M1 Ultra is simple. The Fine Blade is inserted into the Basic Carriage, while tools like the Cutting Blade and Foil Transfer Tip are inserted into the Multi-Function Carriage.
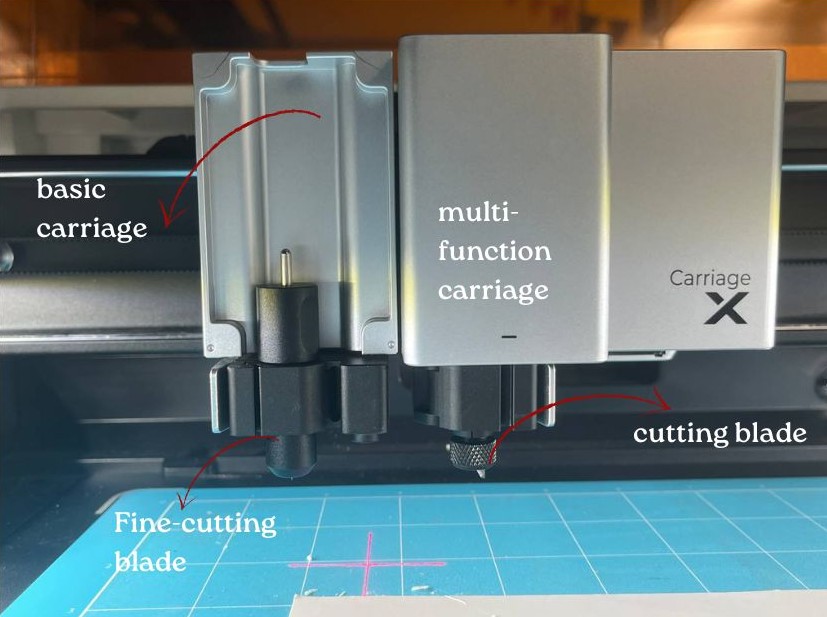
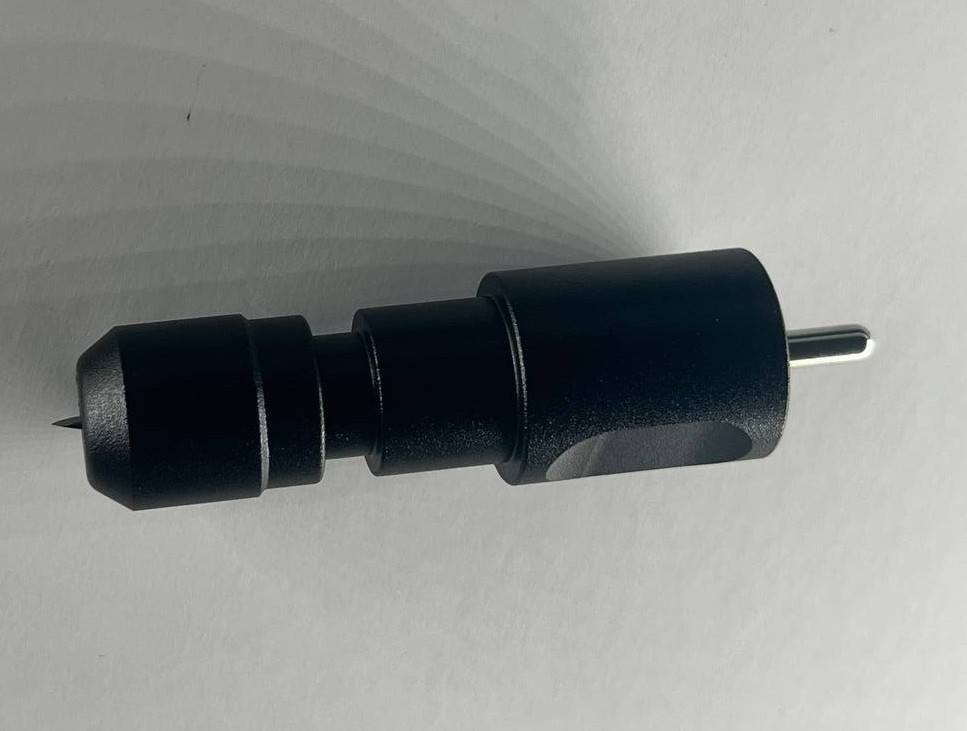
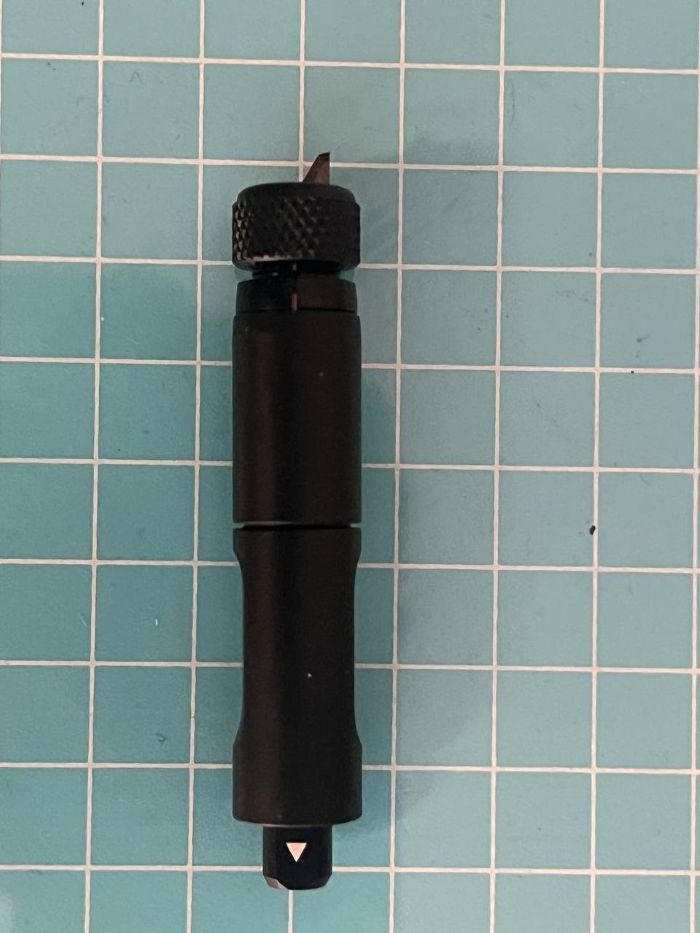
The tool in which has to inserted in multi-function carriage, it will having a small arrow mark near the end part of the tool - showing the correct insertion direction. Once inserted, the magnetic attachment automatically holds the tool in place securely. After inserting the tool properly, the machine lid should be closed completely before starting the process.
Software Setup
For setting up the process, used the xTool Creative Space software. Inside the software, I first selected the machine I was using and then selected the process type such as blade cutting, foil transfer.
Material Testing
I tested the process on two different materials. One was a normal chart paper whose exact gsm value I did not know, and the other was AuraFold premium 300 gsm paper.
GSM
GSM stands for Grams per Square Meter. It is used to measure the thickness and weight of paper. Higher GSM papers are usually thicker compared to lower GSM papers.
I also tried cutting 3mm thick cardboard using the Cutting Blade tool. However, the blade was not able to cut properly because the cardboard was too thick and hard for the blade-based cutting process.
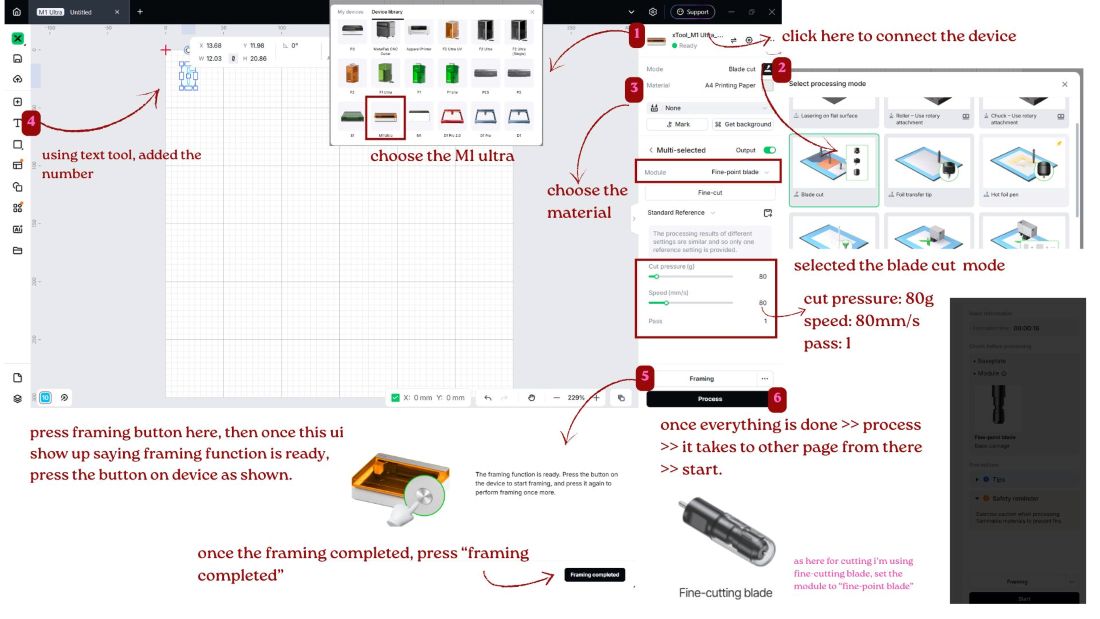
Framing
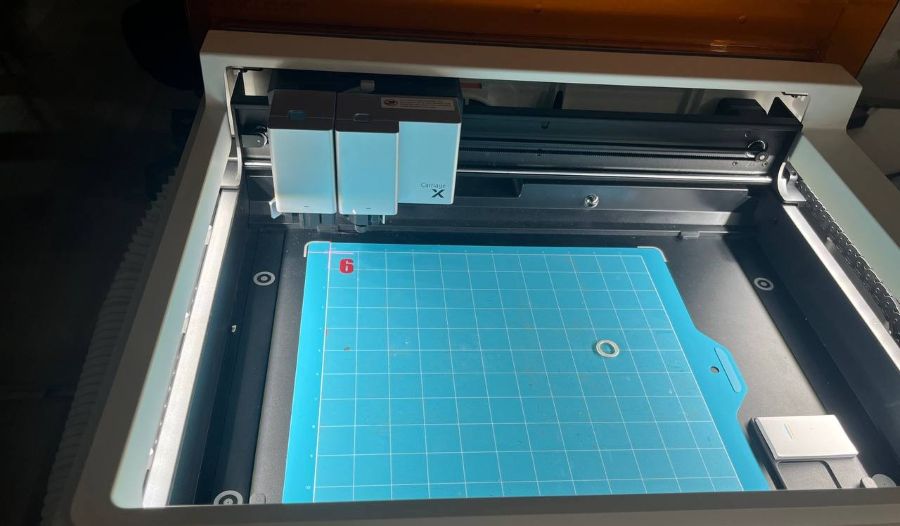
The machine shows the working area( previews where design will happen) before actually starting, so you can can visually confirm the position.
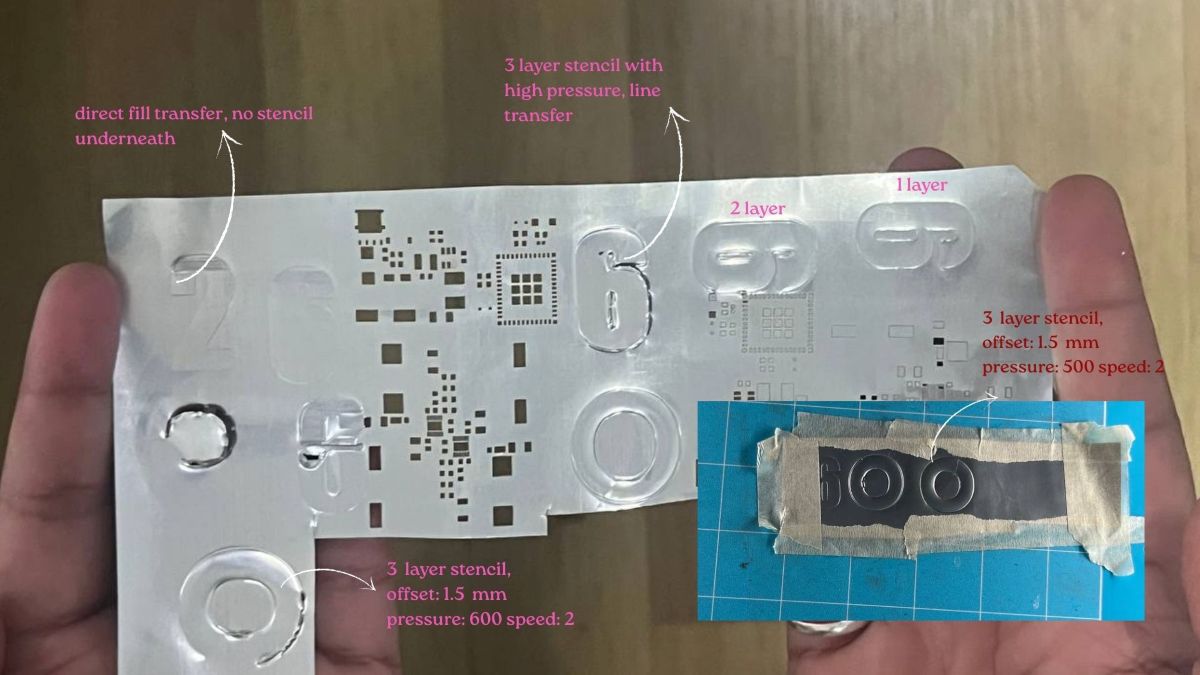
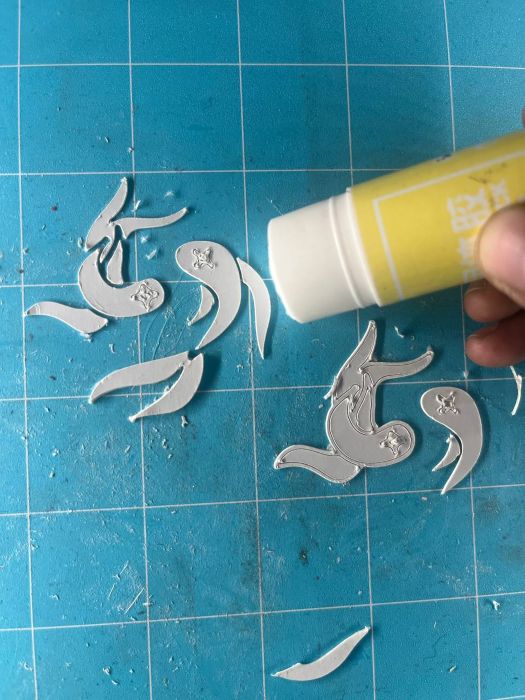
Creating the Layered stencil: fine blade tool
To create the embossing effect, I first cut the design shapes using the Fine Blade tool and pasted the cut pieces layer by layer to create thickness underneath the top sheet.
I tested both 2 layer and 3 layer setups, where the 2 layer setup used a 1mm offset and the 3 layer setup used a 1.5mm offset around the design.
Then I placed the aluminium sheet on top of these layered structures and used the Foil Transfer Tip pressure to press along the offset paths.
Since the xTool M1 Ultra supports debossing, I tested with using pressure and layered surfaces to create
a raised embossing effect on the aluminium sheet.
Debossing on Aluminium: foil transfer tip
Created the offset using offset tool, and give parameter only for the offset element. In the machine bed, stick the aluminium coil for debossing with foil transfer tip.
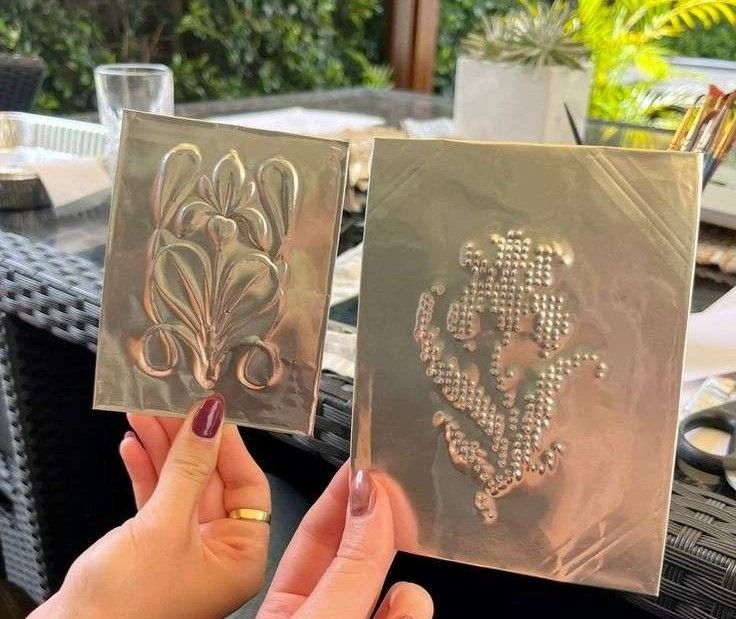
Observations
Pressure & Speed
If the pressure is too low or the speed is too high, the embossing effect will not press properly onto the surface.
High Pressure Issue
Too much pressure with low speed can sometimes tear or cut through the sheet because the tool stays pressing longer in one area.
Layer Thickness
For 2 layers I used a 1mm offset, and for 3 layers I increased the offset to 1.5mm.
Sheet Position
If the sheet is not taped properly and kept flat on the bed, uneven pressure can cause unwanted cuts and poor embossing.
Working Setting
Around 500 pressure and 2mm/s speed worked better for the 3 layered debossing setup.
Foil Tip Effect
The embossing effect mainly appeared only along the offset line path created using the foil transfer tip.
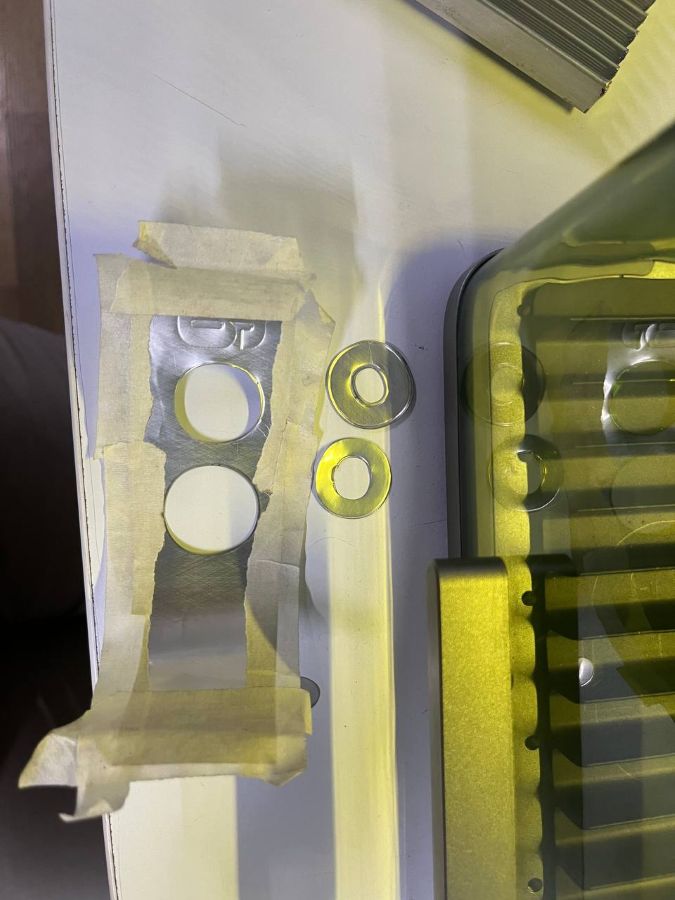
Cutting the Embossed Letter Using xTool F1 Ultra
Using the xTool F1 Ultra, I tried cutting an embossed letter “O”.
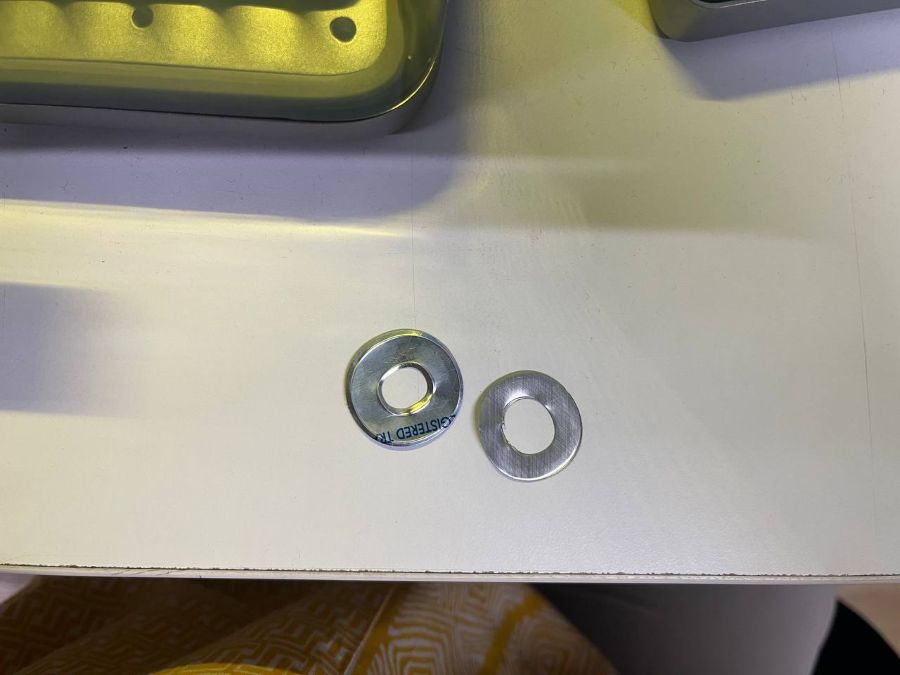
I created two embossed “O” shapes and planned to cut them separately and paste them together,
thinking the embossed surface would create depth and a hollow structure inside.
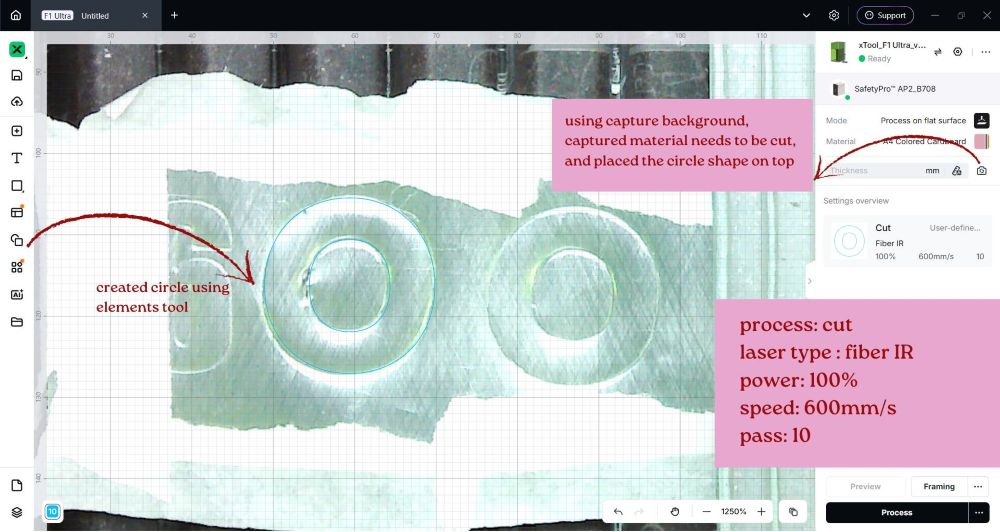
Laser Types in xTool F1 Ultra
Blue Diode Laser
Mainly used for cutting and engraving non-metal materials like wood, paper, cardboard, leather and dark acrylic.
Fiber Laser
Mainly used for engraving metals, aluminium, stainless steel, gold, silver and plastic surfaces.
However, the result was the opposite to what i wanted. After cutting, the embossed structure looks flattened instead of maintaining the raised form.
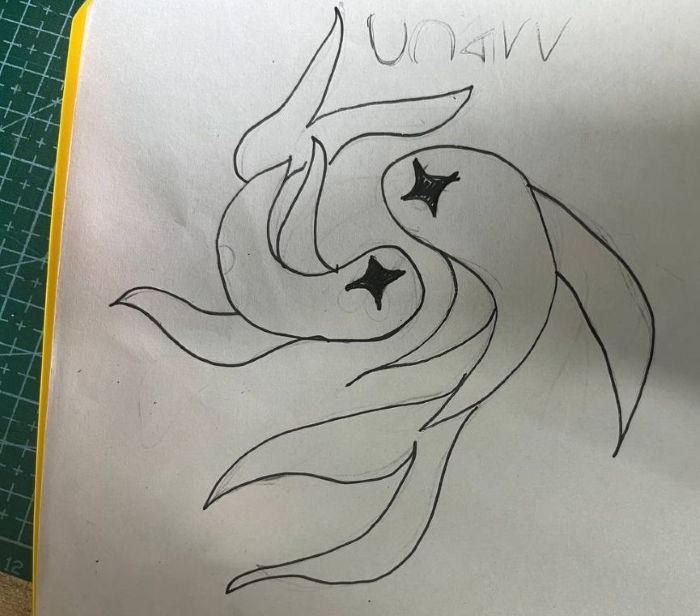
Sketching the Illustrations
I sketched it in paper, later using ardra's ipad created the digital version of illustration.
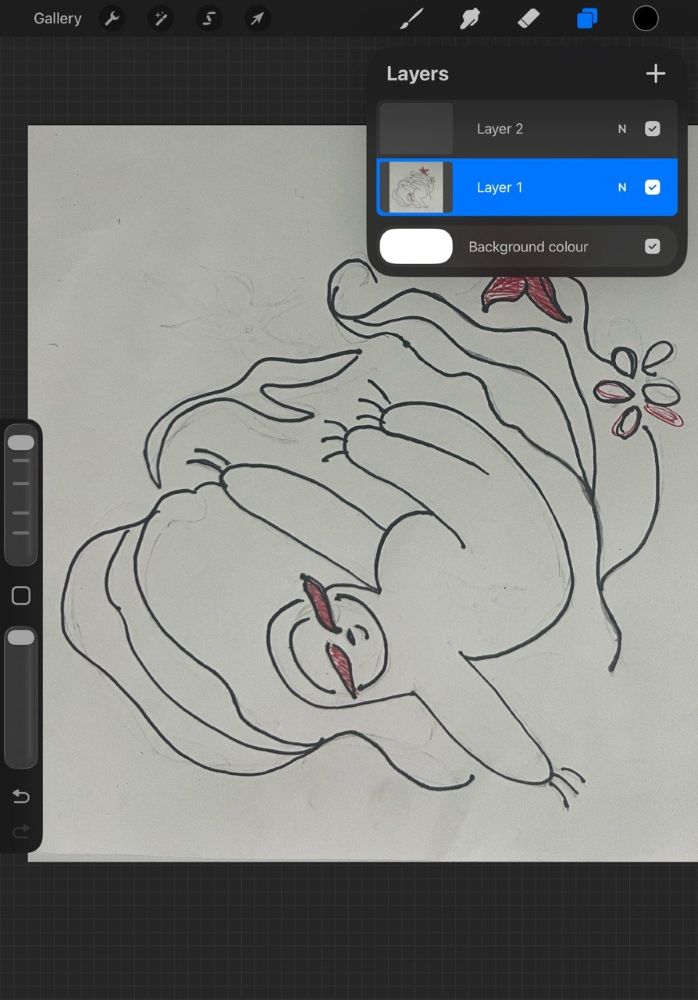
For sketching and creating the artwork digitally, I used Procreate on the iPad.
It is a subscription-free digital illustration, concept sketching and animation app designed for iPad.
Using procreate, traced it digitally, sketched elements in different layers, so that later i can adjust their position freely.
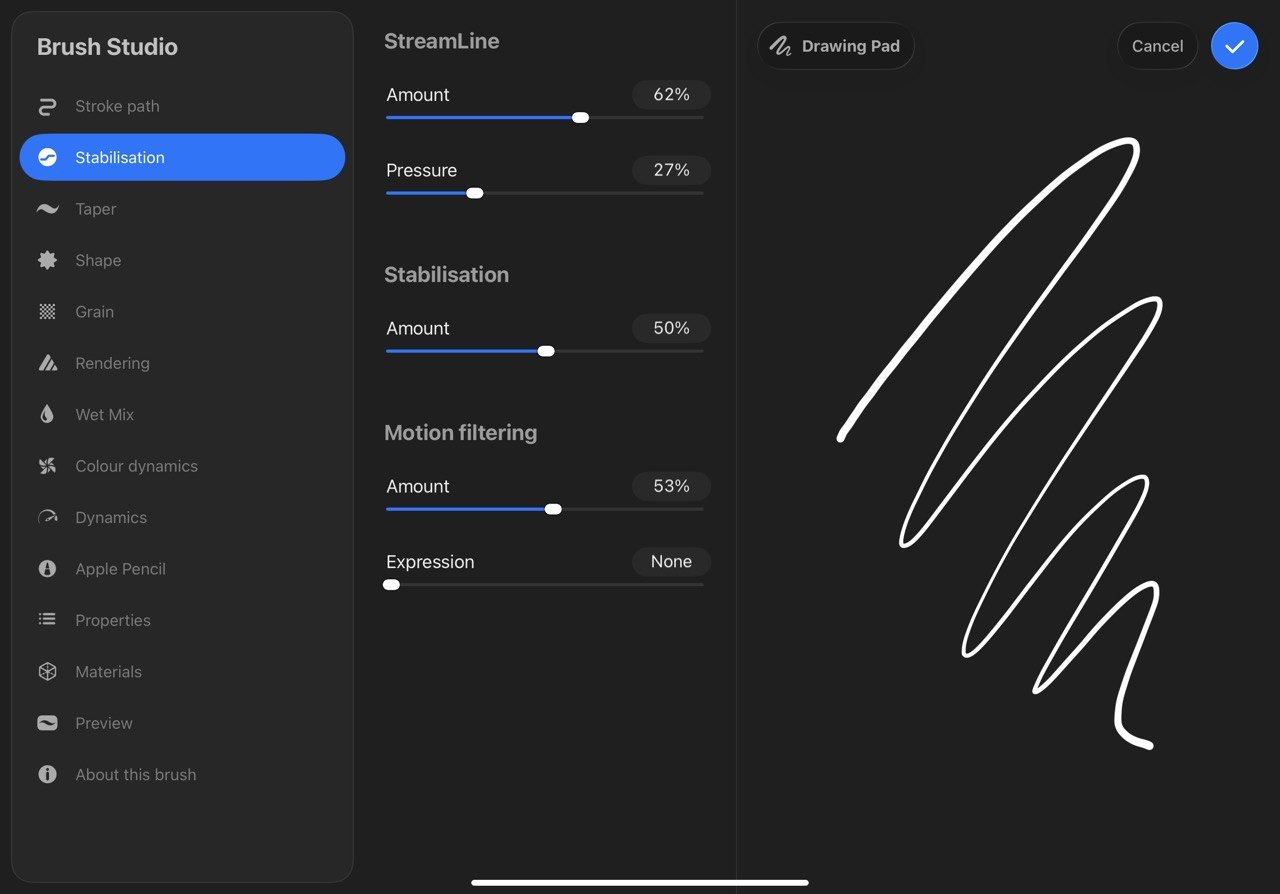
I used brush size about 70% for stroke, as it has to get debossed.
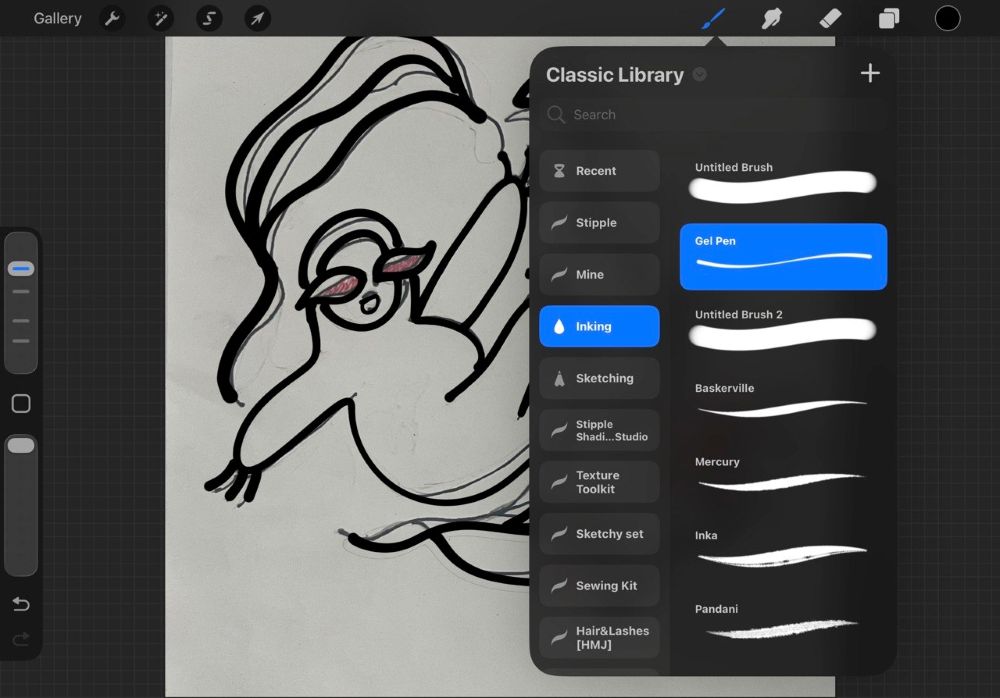
For stabilising and smoothing the strokes, lines: click on the brush you wanted >> brush studio >> stabilisation, adjust the values here. And downloaded them in png format.


Software setup and debossing
Koi Fish Embossing
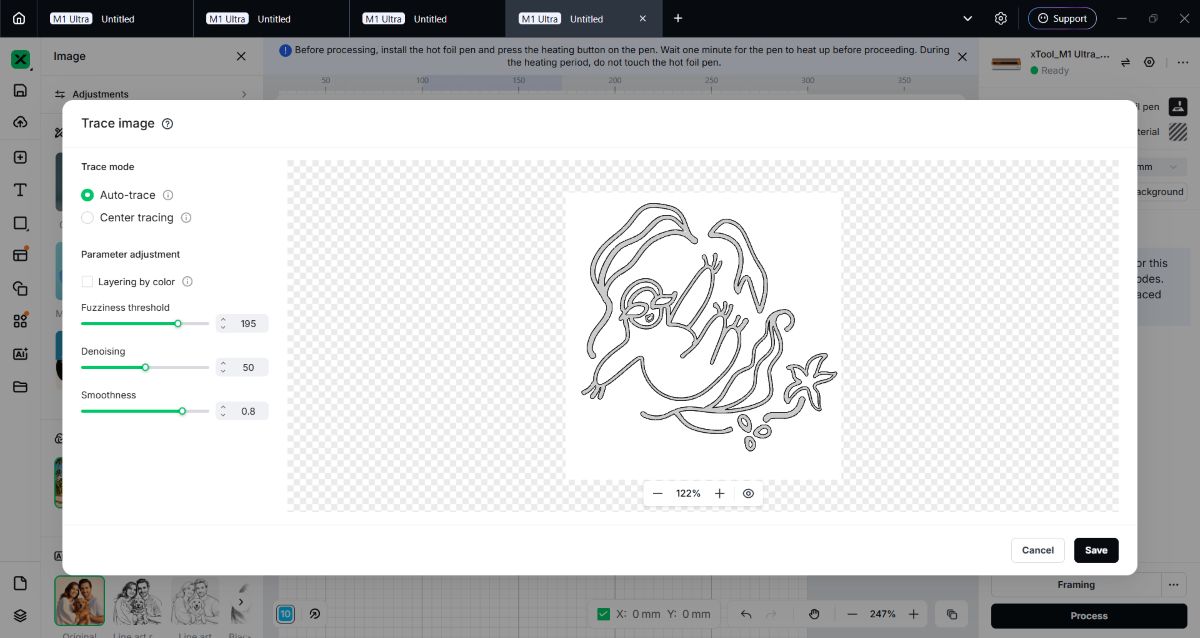
Imported the fish png file and for converting it to vector file, traced it in xtool.
Settings Used:
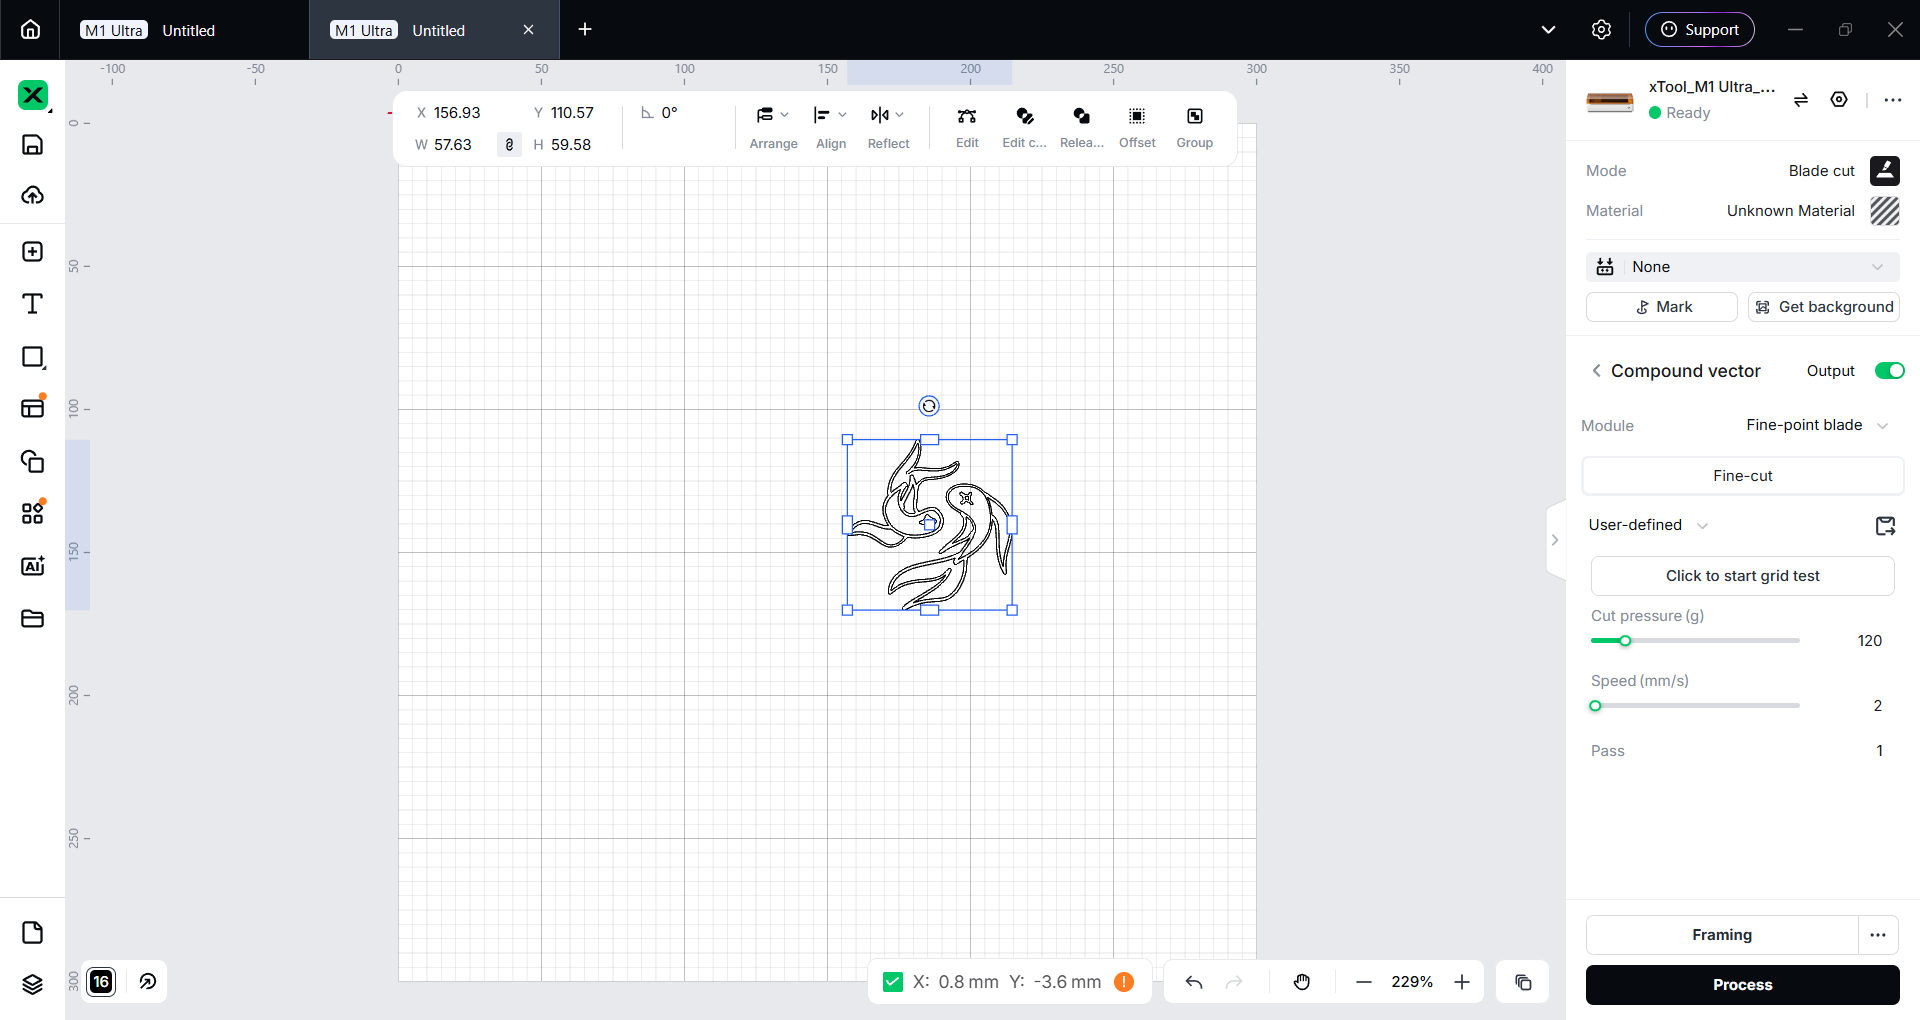
Blade Cutting
Mode: Blade Cut
Module: Fine-Cutting Blade
Pressure: 120g
Speed: 2mm/s
Pass: 1
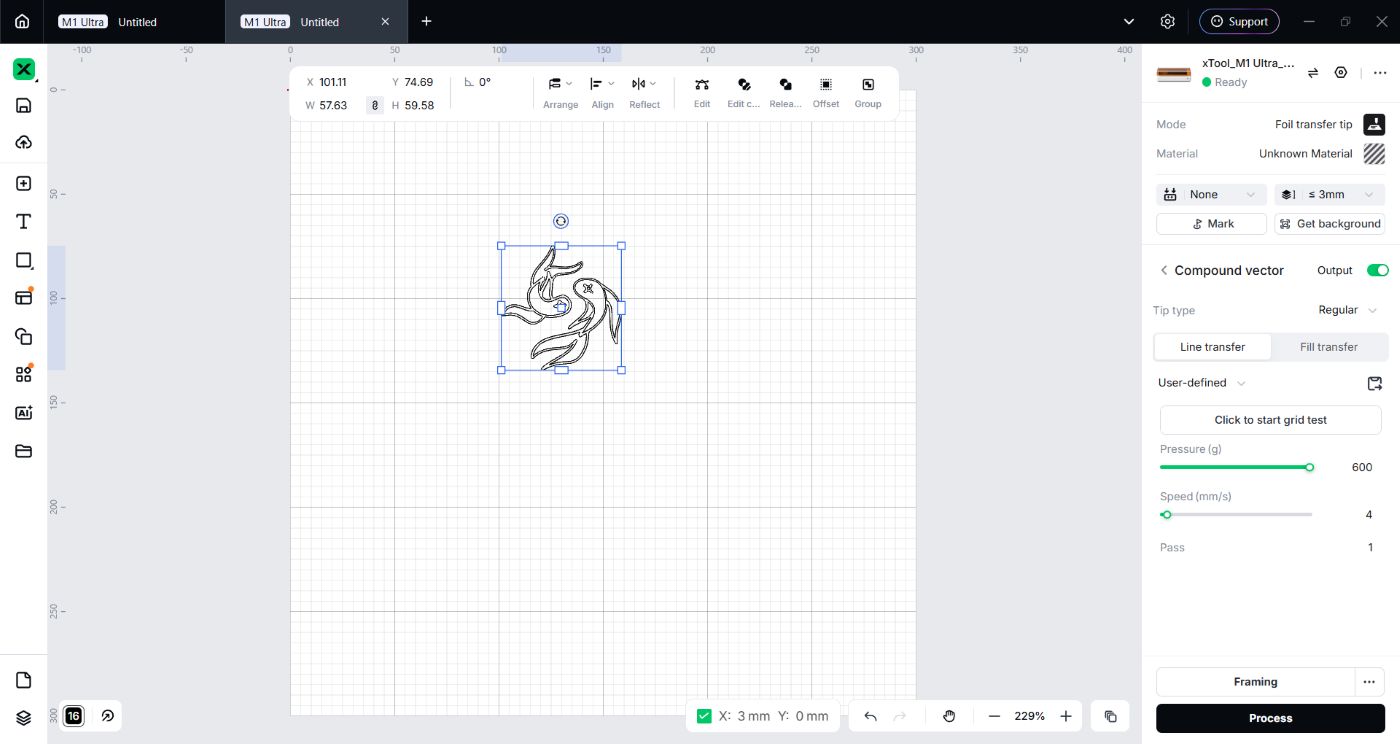
Foil Transfer Tip
Tip Type: Line Transfer
Pressure: 600g
Speed: 4mm/s
Pass: 1
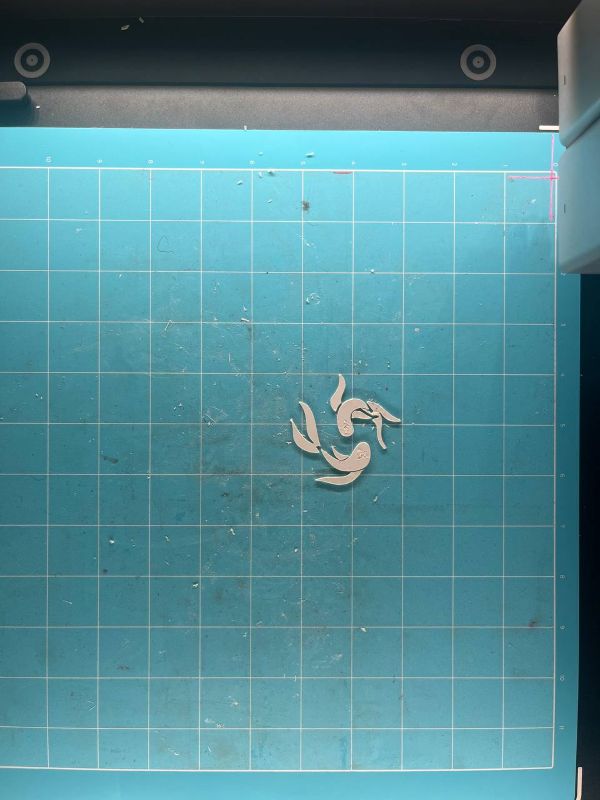
Cutting Fish stencil
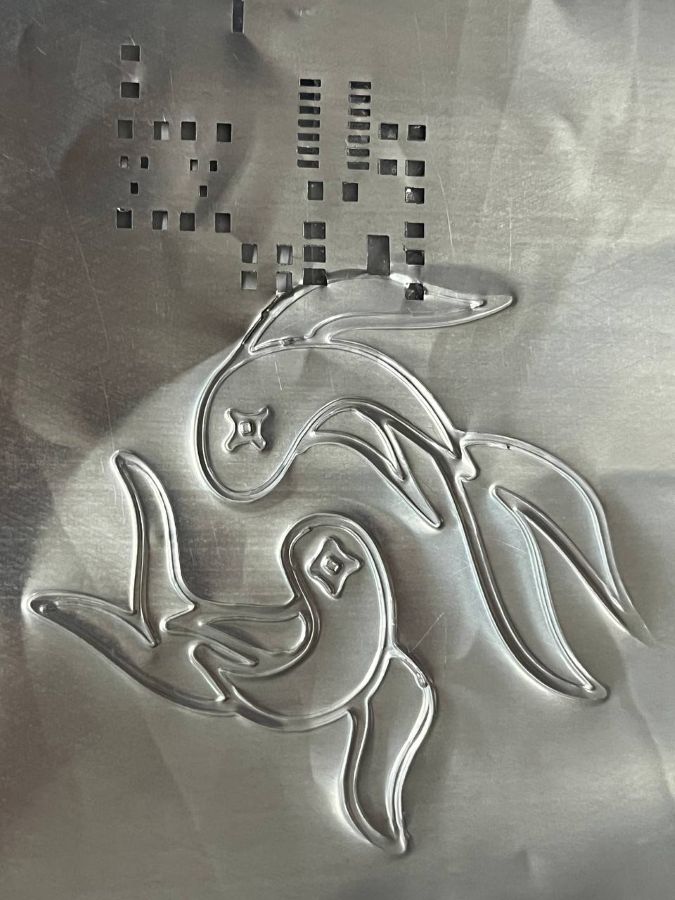
Debossing aluminium sheet to Fish stencil
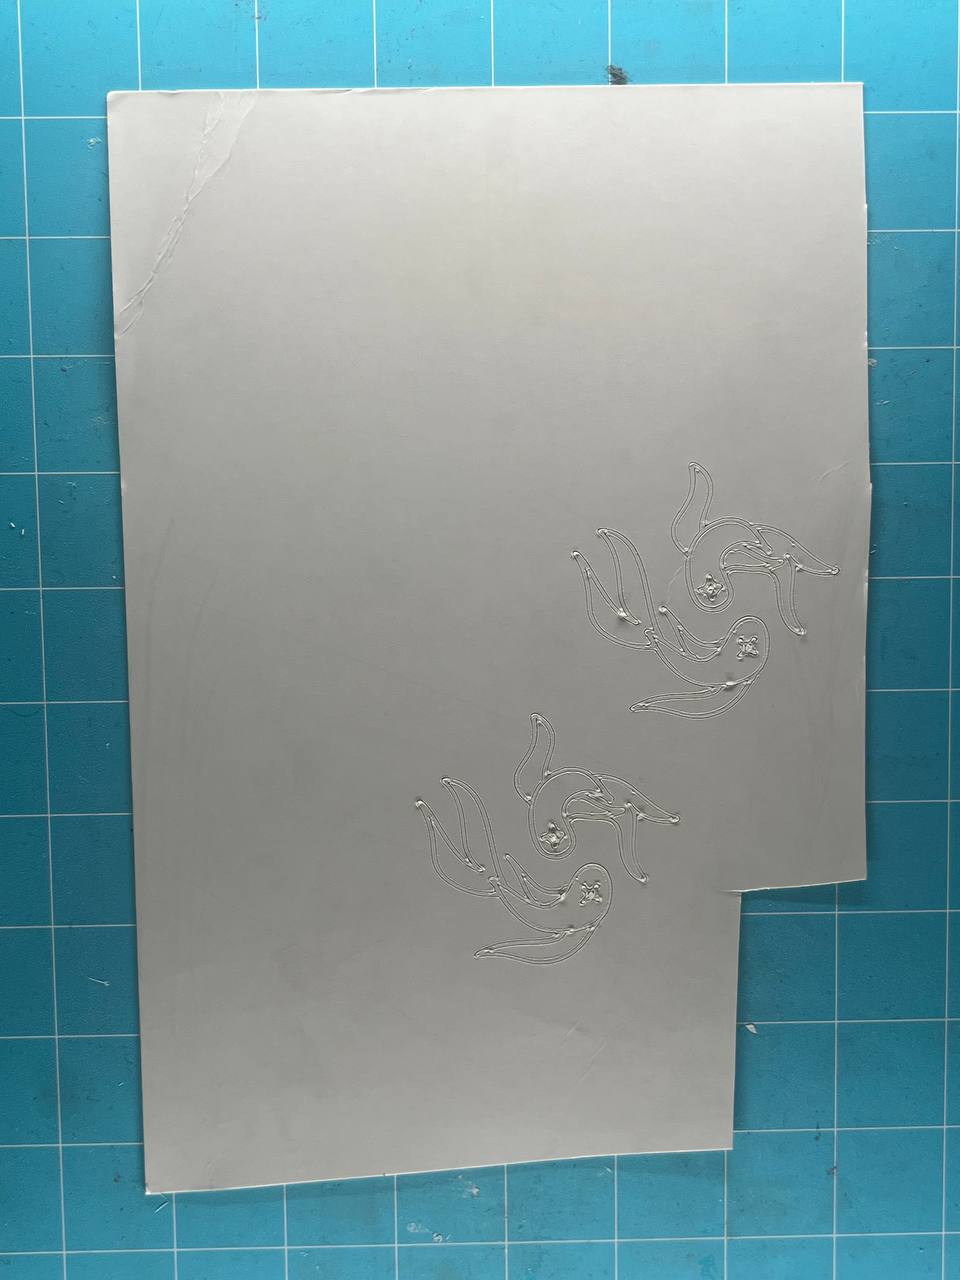
Layered stencil and debossing it
Next, I tested the embossing process using a 2-layer paper mould. I cut them twice in sheet, glued one on top of the other, and placed the aluminium sheet over the layered stencil. This time cutting settings were same, only the foil til trasfer setting's pressure value different.
Blade Cutting
Mode: Blade Cut
Module: Fine-Cutting Blade
Pressure: 120g
Speed: 2mm/s
Pass: 1
Foil Transfer Tip
Tip Type: Line Transfer
Pressure: 500g
Speed: 4mm/s
Pass: 1
Since the stencil thickness had increased, I reduced the Foil Transfer Tip pressure from 600 g to 500 g. I was concerned that using a higher pressure on the thicker mould might tear or puncture the thin aluminium sheet.
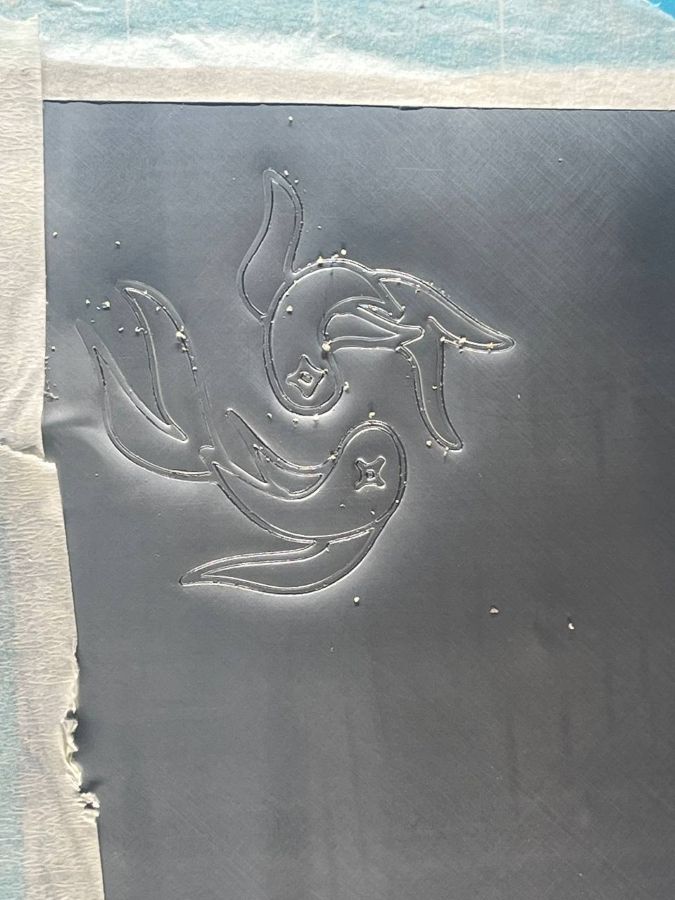
Results and Observations
The embossing was successful, but the raised effect was slightly less than my previous test using a single-layer mould with 600 g pressure. Although the additional layer increased the mould height, the reduced pressure produced a shallower embossed effect. Other reason could be first fish debossing was done on red bull can sheet and second was on spirite can sheet.
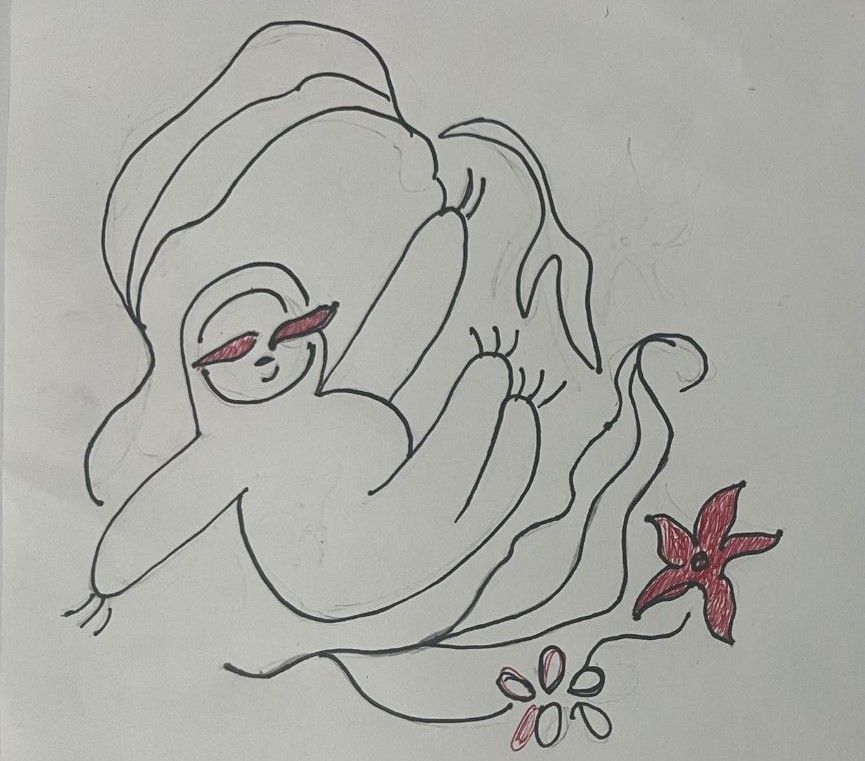
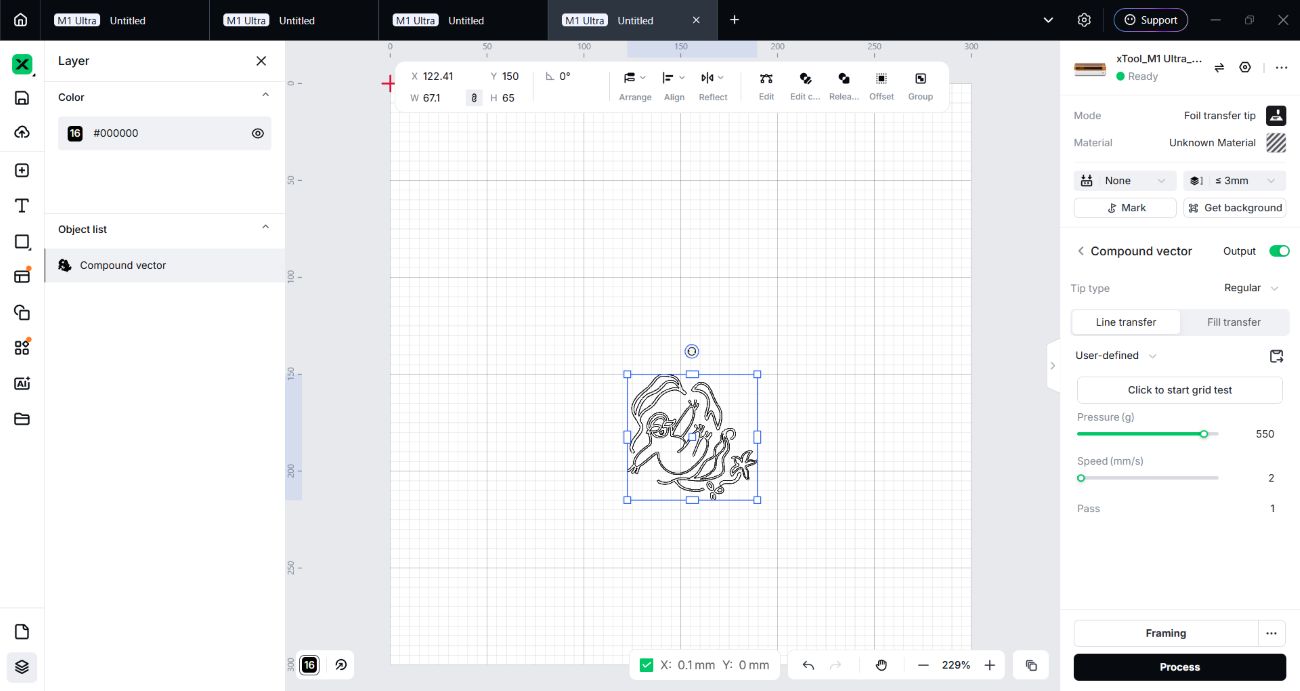
Sloth design
Blade Cutting
Mode: Blade Cut
Module: Fine-Cutting Blade
Pressure: 120g
Speed: 2mm/s
Pass: 1
Foil Transfer Tip
Tip Type: Line Transfer
Pressure: 550g
Speed: 4mm/s
Pass: 1
Cutting with cutting blade
I first tried cutting the sloth design using the Cutting Blade. As the illustration had small details and thin lines, the blade was dragging the paper instead of cutting it cleanly. This affected the stencil, as some of the delicate parts were pulled or damaged during cutting. I experimented with different pressure and speed settings, but the result did not that good.
Cutting with fine-Point blade
Finally, I switched to the Fine-Point Blade, which was better suited for detailed cuts. It produced much cleaner and more accurate results, making it the better choice for this design.
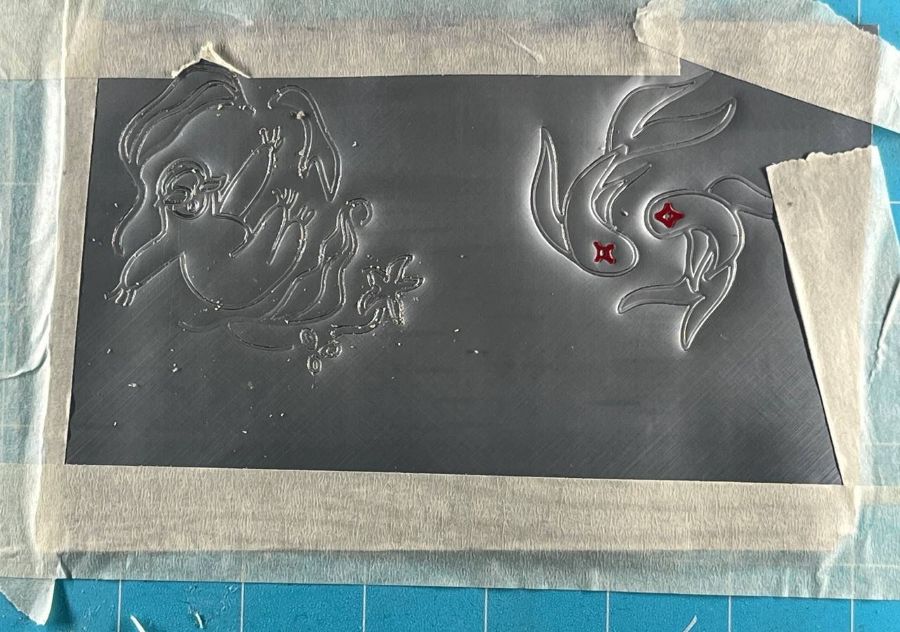
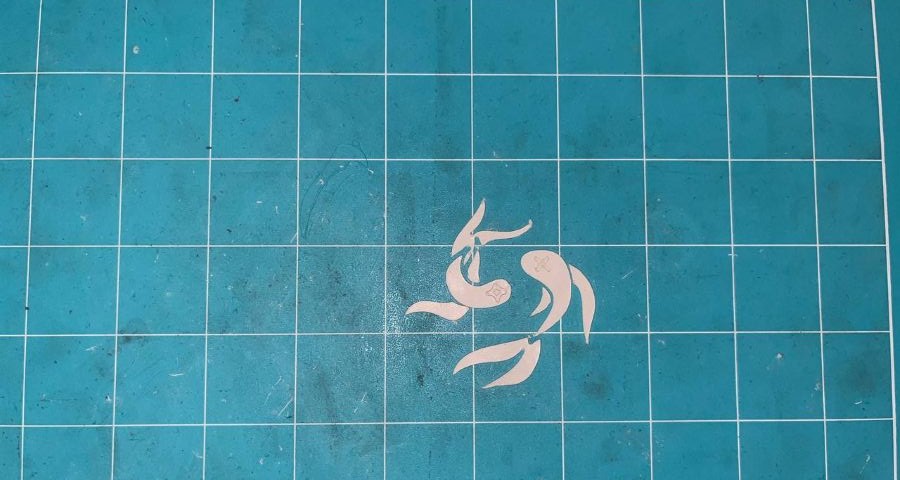
Adding Vinyl Stickers
Material used red vinyl sheet.
Blade Cutting
Mode: Blade Cut
Module: Fine-Cutting Blade
Pressure: 60g
Speed: 4mm/s
Pass: 1
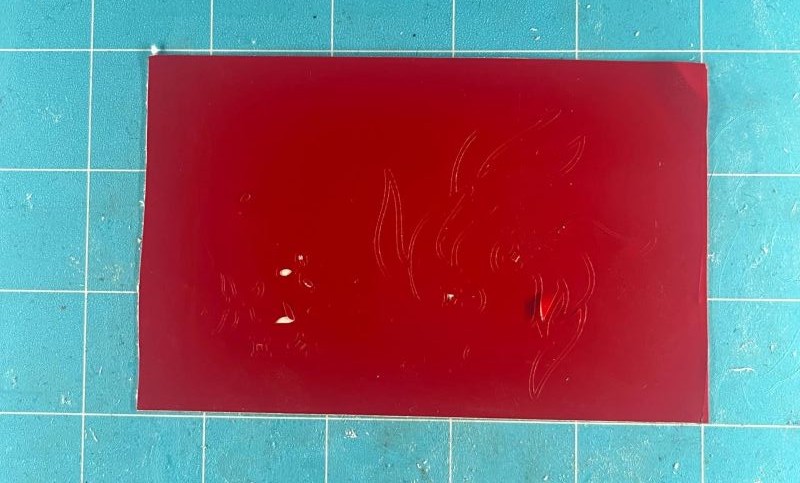
To make the embossed artwork more visually interesting, I decided to add contrasting coloured using vinyl sticker sheets. I cut the stickers using the Fine-Point Blade and carefully applied them to selected embossed areas. I added stickers to the sloth's eyes, the small flowers, and the fish's eyes. I felt that the coloured vinyl created a nice contrast against the aluminium surface and highlight the details of the design.