Input device
Task:-
Group assignment:
probe an input device's analog levels and digital signals.
Individual assignments:
measure something: add a sensor to a microcontroller board
that you have designed and read it.
Instructor for this week: Sibin, Ashish and Saheen.
Overview of Group Assignment
The group assignment was to probe input devices using an oscilloscope and study their signals. A rotary encoder and joystick were tested by connecting their output pins to Channel 1 and Channel 2 of the oscilloscope using probes with a common ground. This helped us observe both digital and analog signal behavior and understand how these devices give input to a system.
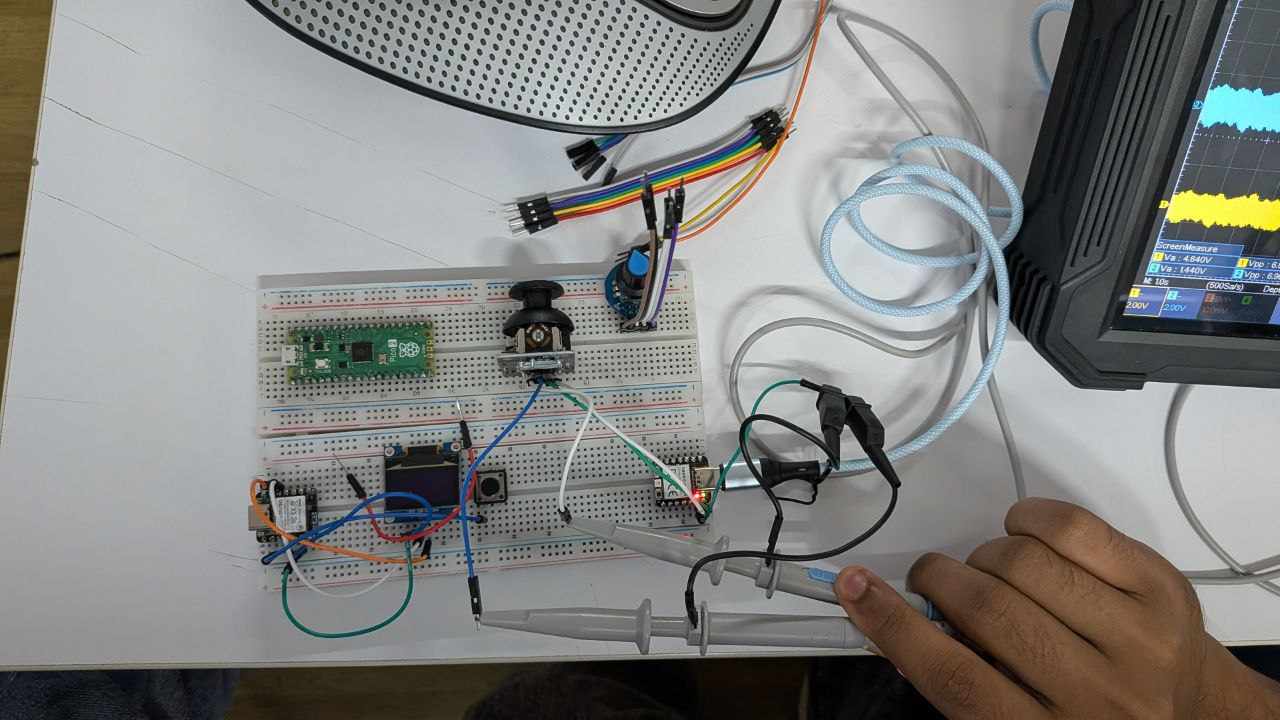
For detailed information, refer to: Input Week Group Assignment
Individual Assignment
Capacitive Touch Sensor
capacitance
From the basics, I have understood what capacitance is, it says that every object in the world stores a tiny amount of electric charge.
In Technical terms
Capacitance(C) is the amount of charge (Q) that can be stored at a given voltage by an electrical component called a capacitor. Unit - Farad(F).
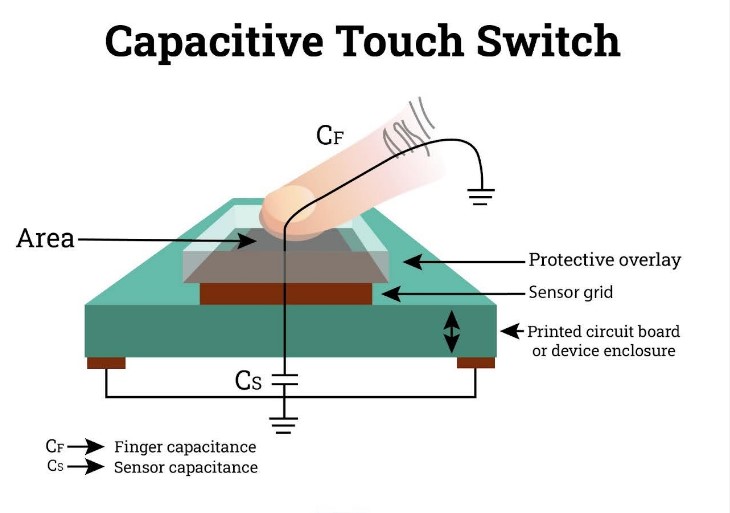
Source: capacitive-touch-screens
Capacitive touch works by sensing a change in capacitance when a finger touches a pad. The finger acts like a conductor, and when it comes near the copper pad, it increases the pad's capacitance. The microcontroller detects this change in value. When the pad is touched, it shows "touched", and when the finger is removed, the value goes back closer to normal and it shows "released".
- Touch : capacitance increases - "touched"
- Release : capacitance returns to normal - "released"
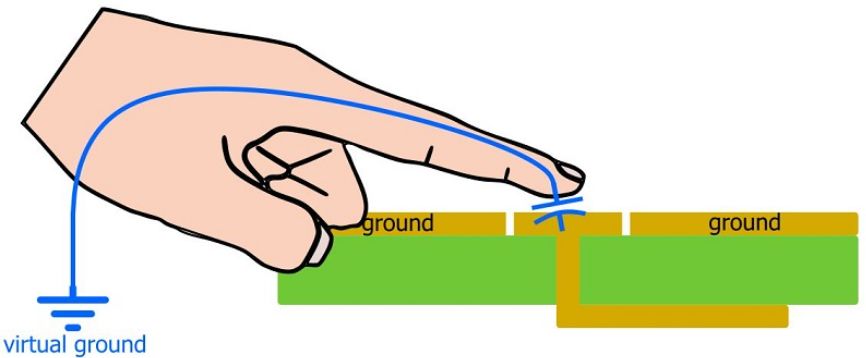
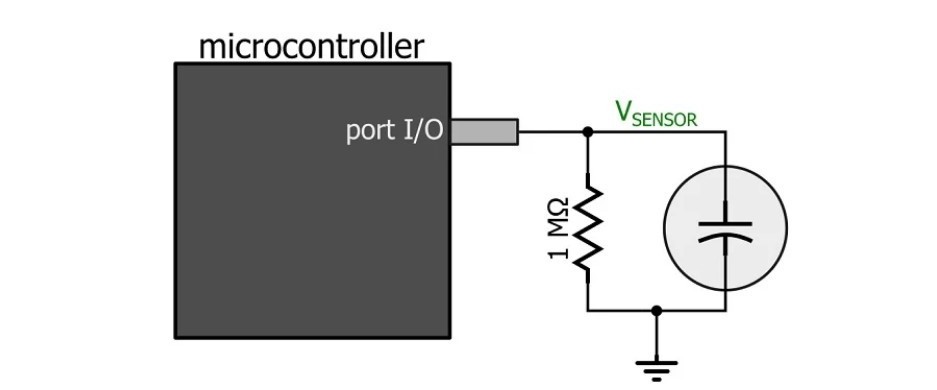
Source: introduction-to-capacitive-touch-sensing circuits-and-techniques-for-implementing-capacitive-touch-sensing
I made this board in electronic design and production weeks, while testing the capacitive touch pad, I realized that I had forgotten to add the required 1 MΩ resistor in the design. Because of this, the touch sensor was giving unstable readings and sometimes detected a touch even when I was not touching it. Another issue was that the two touch pads were placed too close to each other, so touching one pad sometimes also triggered the other.
To fix this, I redesigned the board by adding the resistor and adjusting the pad size and spacing.
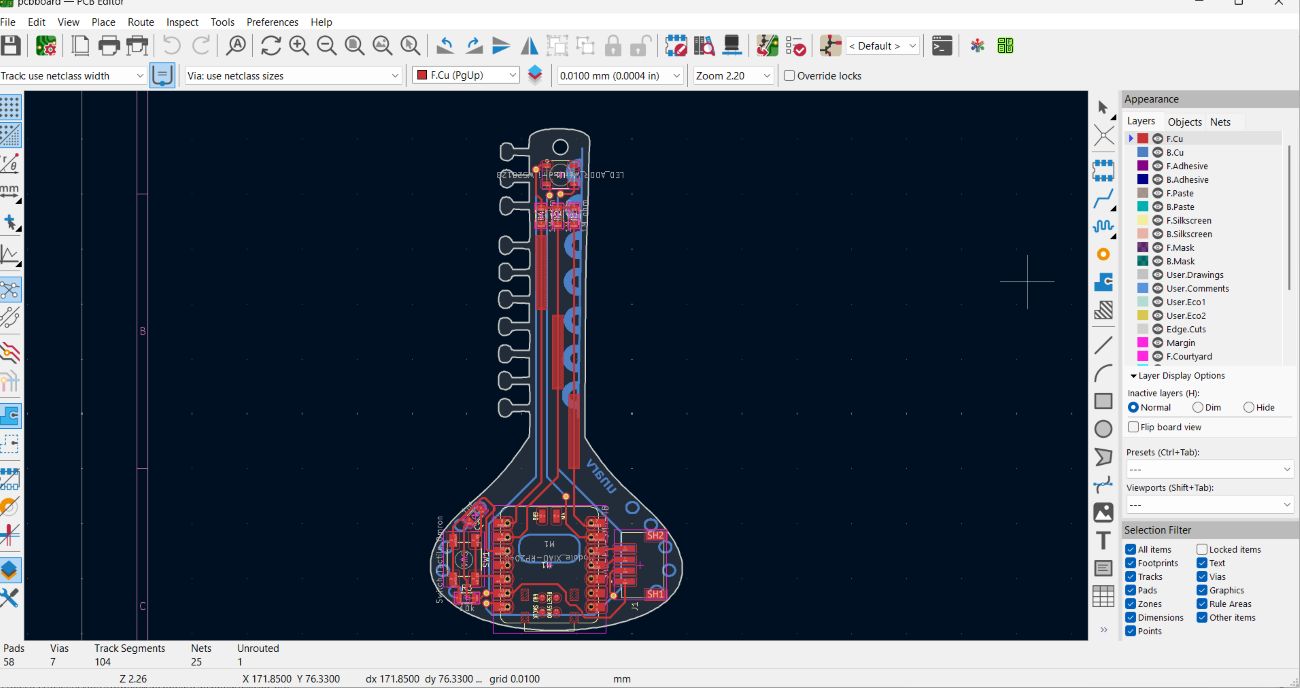
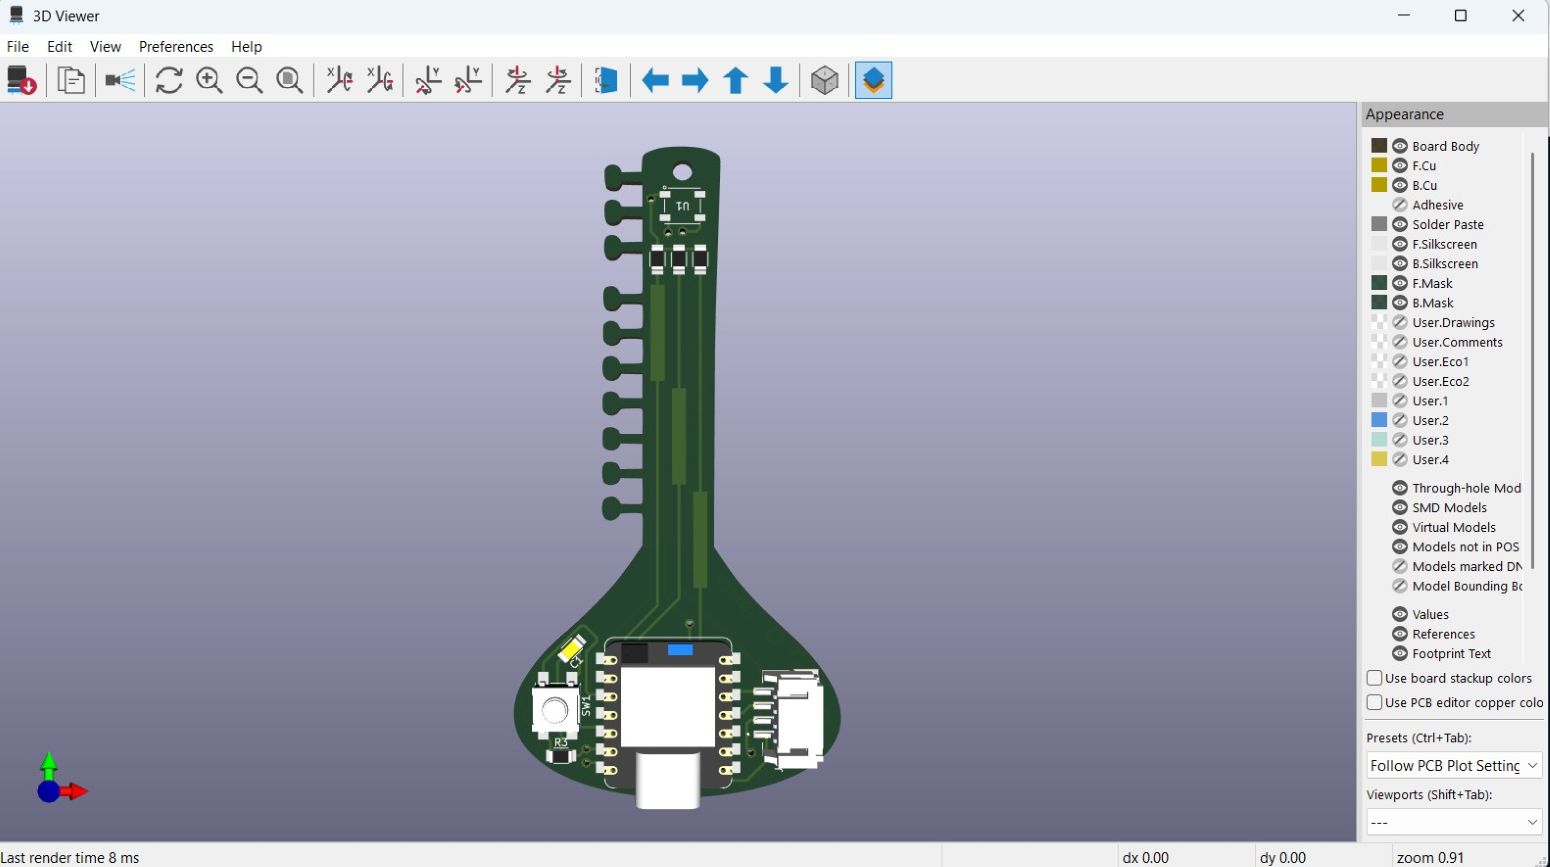
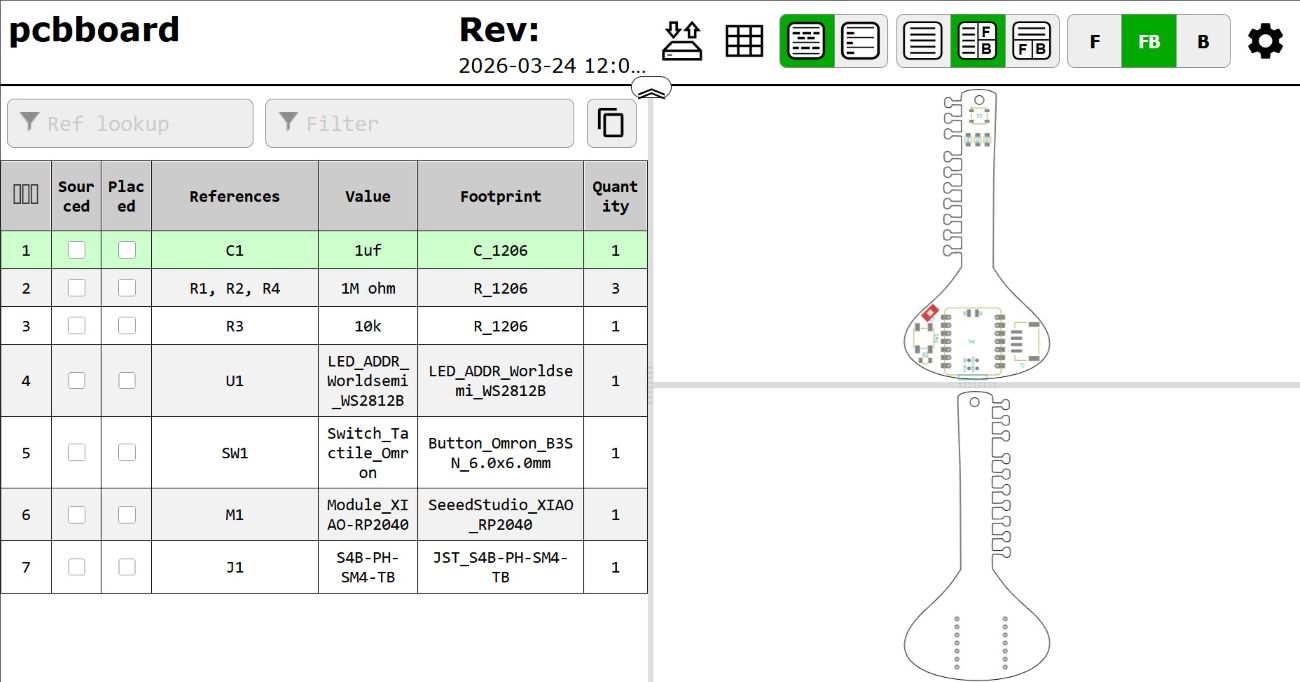
Download:gerber-to-pngfile View: BOM
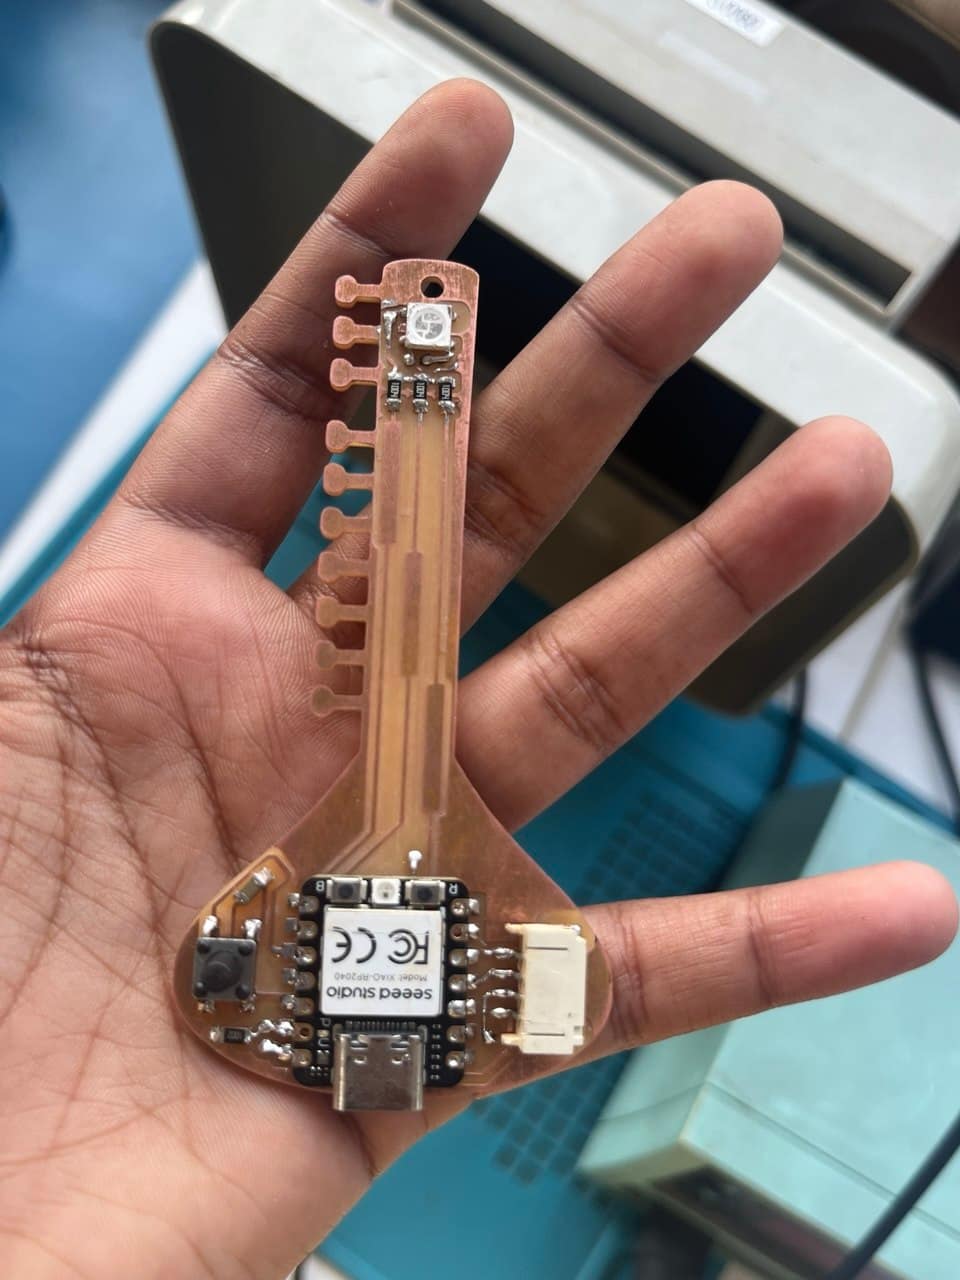
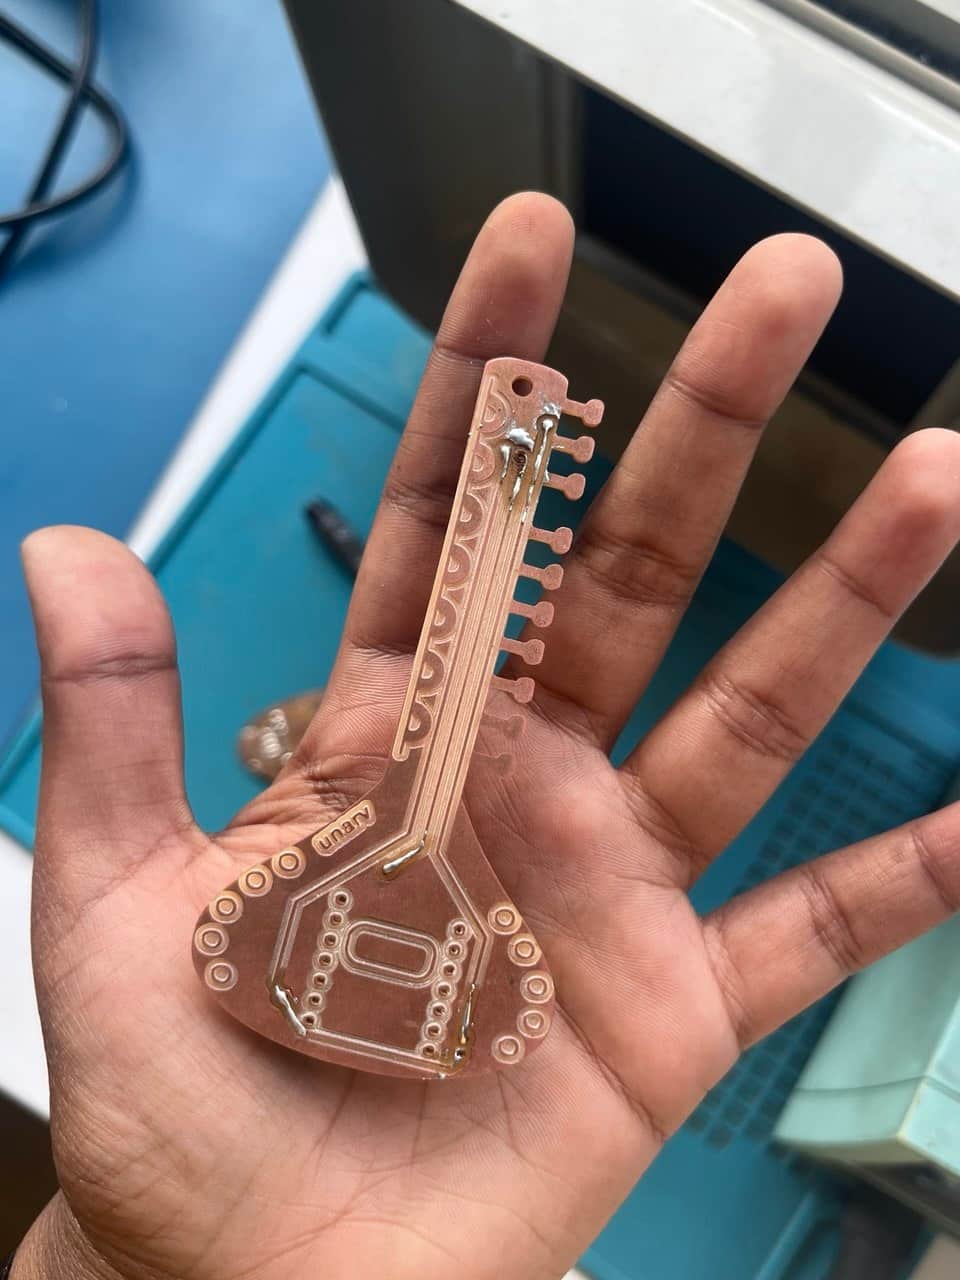
Reference from Flash Cards: Educational Toys
For my project, I need to create a story card system.
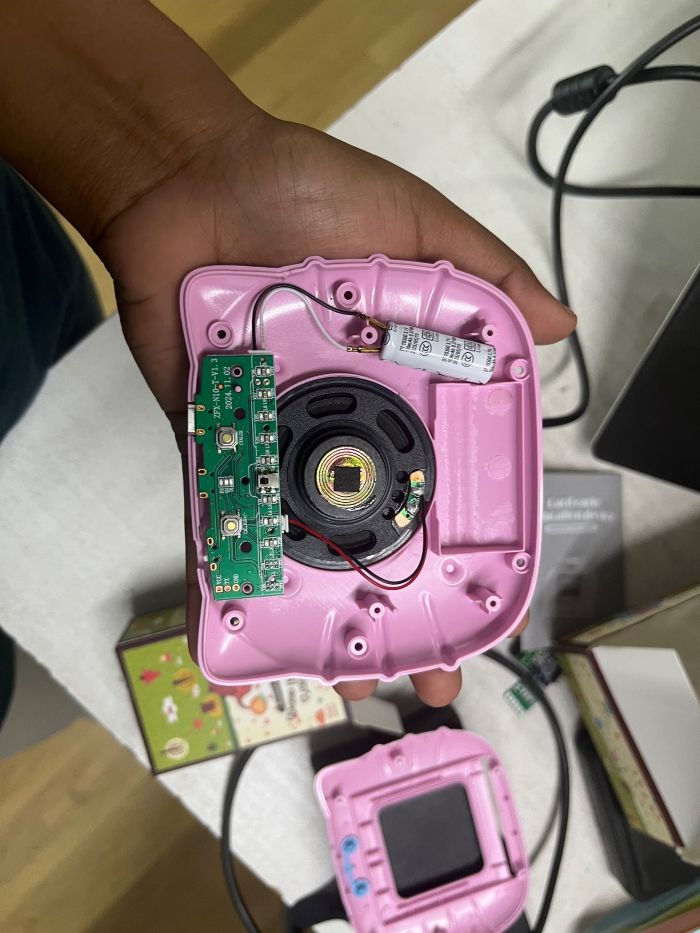
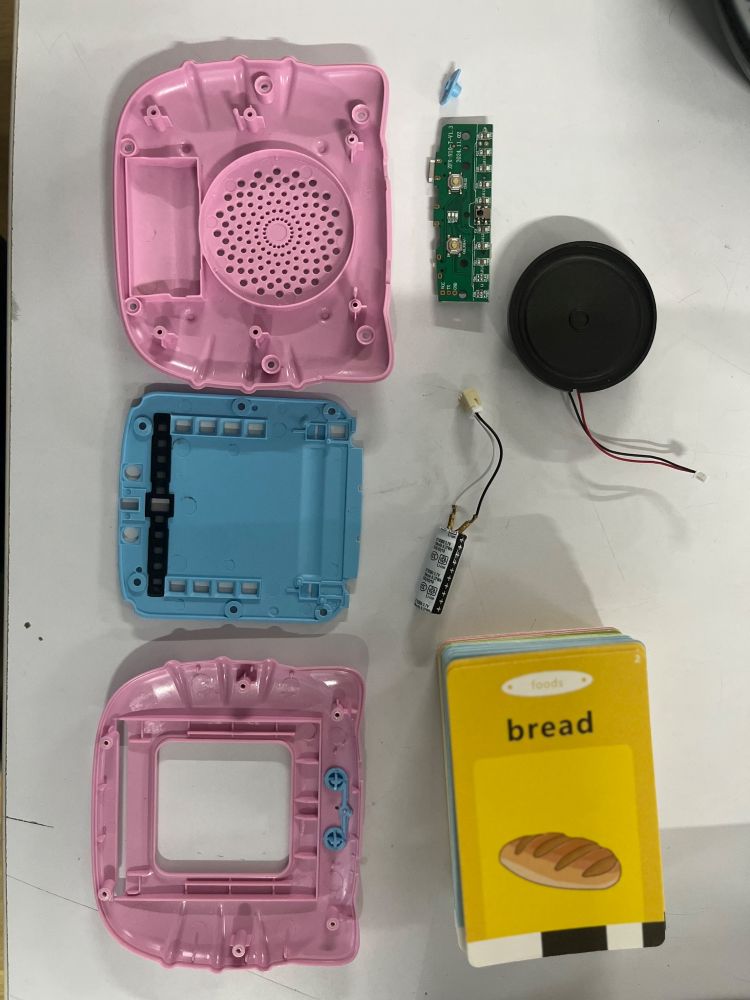
As a reference, my instructor showed a product (a learning device) that uses an IR proximity sensor to detect and read cards.
This system works by identifying black and white patterns printed on the card.
Using similar concept, I'm developing story card
To achieve this, designing a custom PCB circuit using an IR sensor, which will detect the patterns on the card when insert it and interpret them accordingly.

Source: amazon
Our instructor brought this an educational flash card toy, which we dismantled to study how the IR sensor and other components were arranged inside and how the system worked. This helped me understand the internal working and gave useful reference for developing my own story card system.
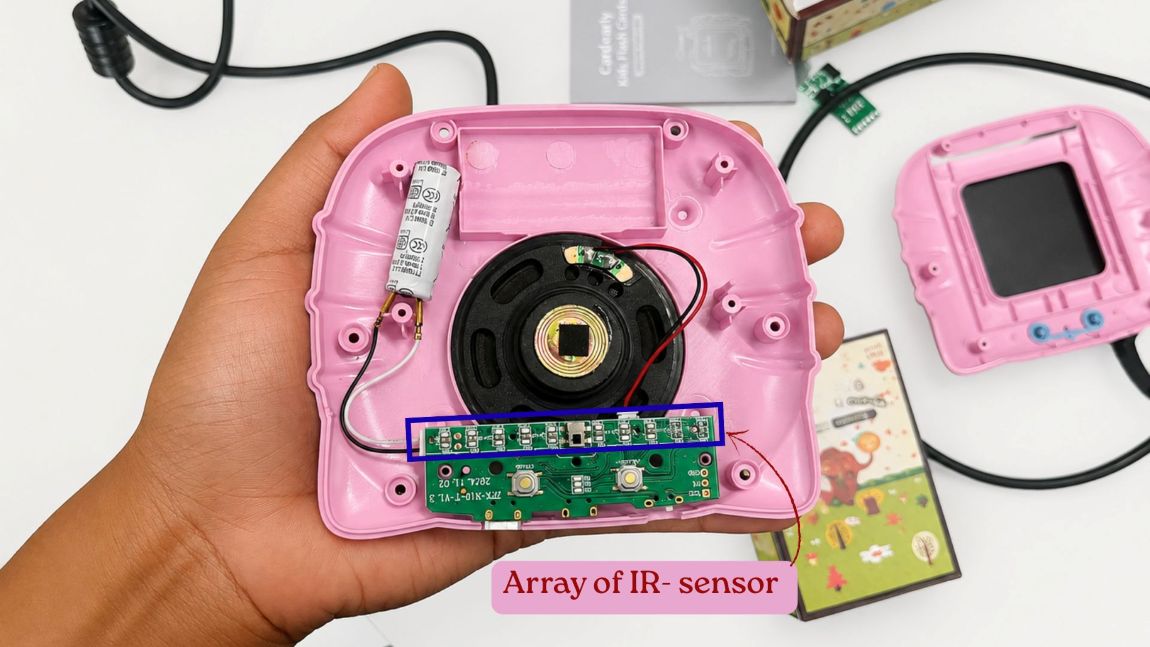
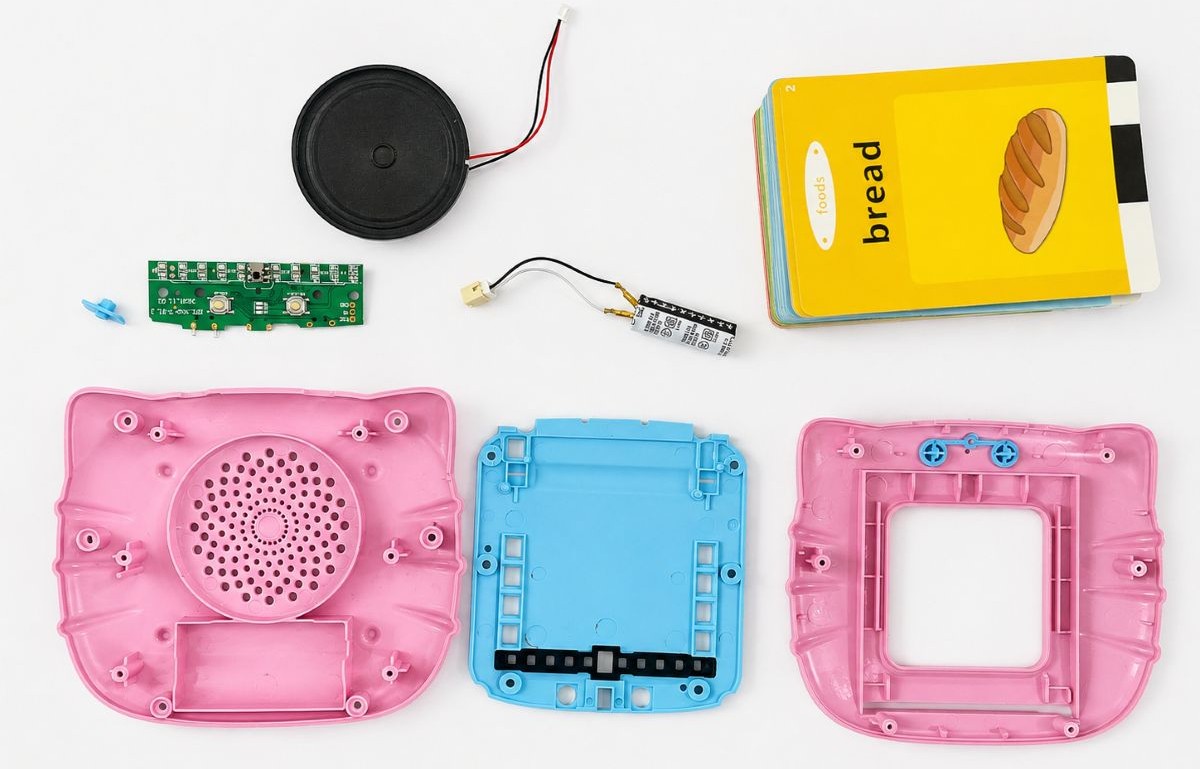
Chatgpt_AI Prompt Used
Remove the shadows from images
IR Proximity Sensor - IR detection circuit
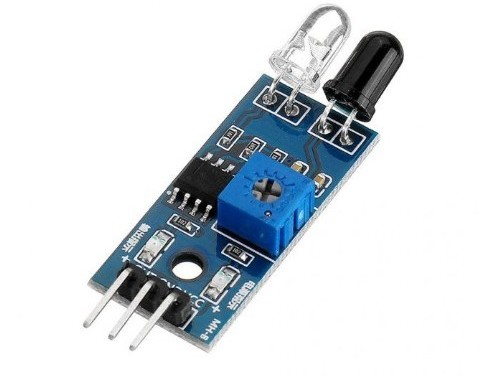
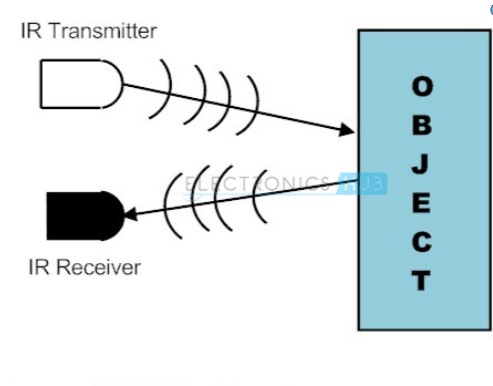
Photo Transistor
photo transistor
it senses light. It works like a switch that is controlled by light instead of a button.
When light falls on it, it turns “on” and allows current to flow.
When there is not much or no light, it stays “off” and very little current flows.
photo transistor
it senses light. It works like a switch that is controlled by light instead of a button.
When light falls on it, it turns “on” and allows current to flow.
When there is not much or no light, it stays “off” and very little current flows.
In an IR sensor system, a phototransistor is the receiver that detects the amount of infrared light sent by the IR LED.
Incase of story card, depending on the surface:
White surface
reflects more IR >> phototransistor recieves more light >> more current flows >> voltage drops at the reading point : lower reading
Black surface
absorbs IR >> photo transistor recieves Less light >> less current flows >> voltage stays higher : higher reading
Source: Phototransistor IR LED
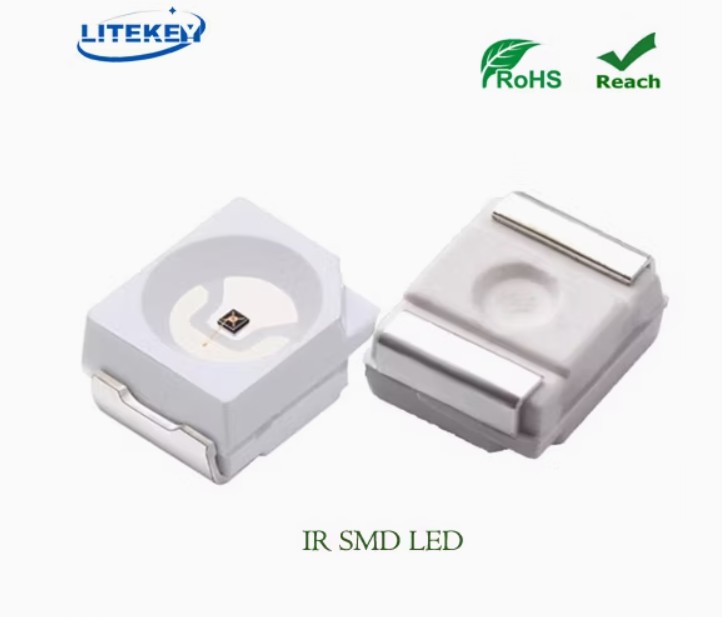
IR LED
An IR LED is a type of LED that emits infrared light, which cannot be seen by our eyes. It works by sending out IR light, and when an object comes in front of it, the light reflects back and can be detected by phototransistor.
Source: what is an IR-LED
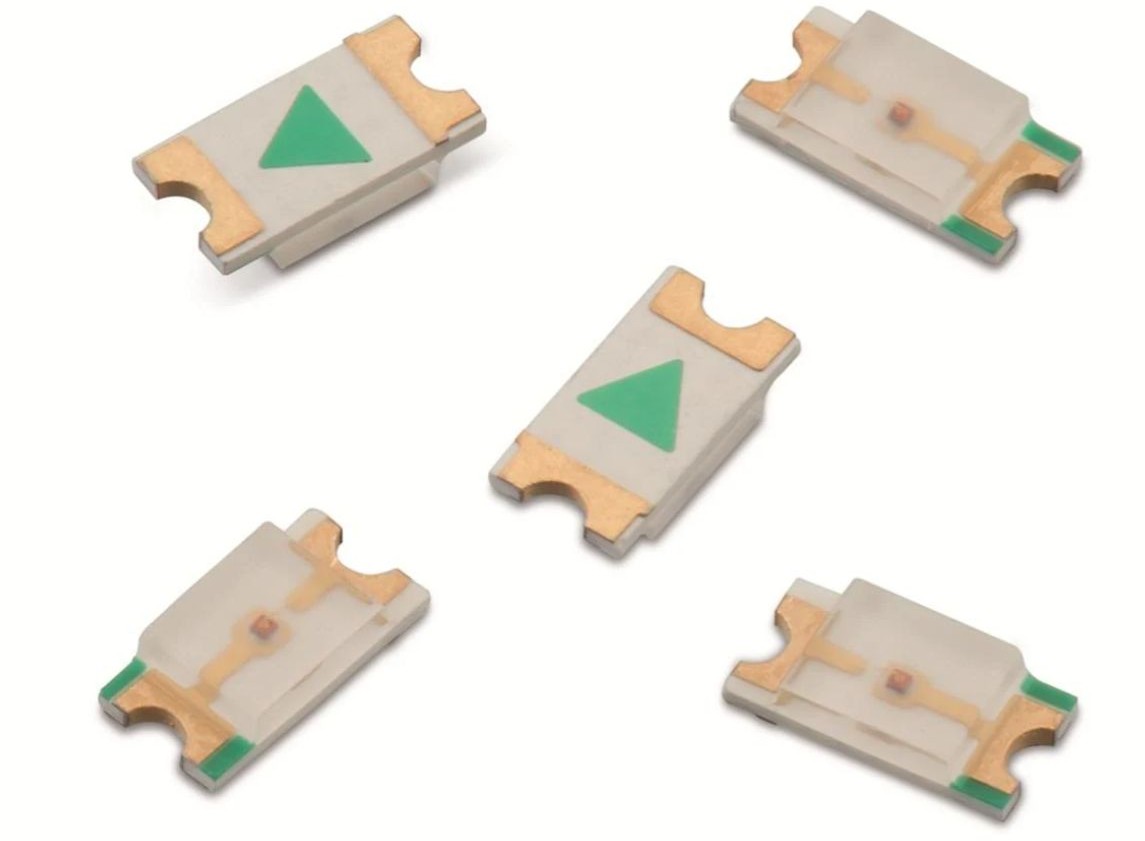
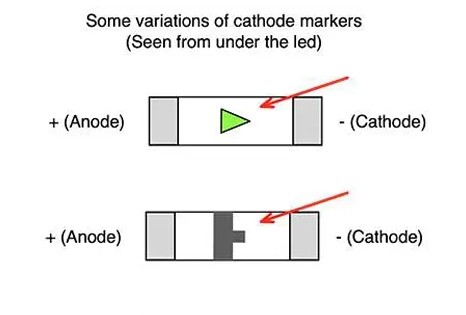
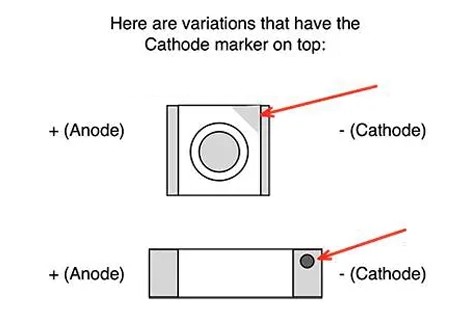
To identify the anode and cathode of the SMD LED, in it's package has a cut/marking( green arrow) symbol that indicates the cathode side(GND).
Source:SMD LEDs
Attiny-1614
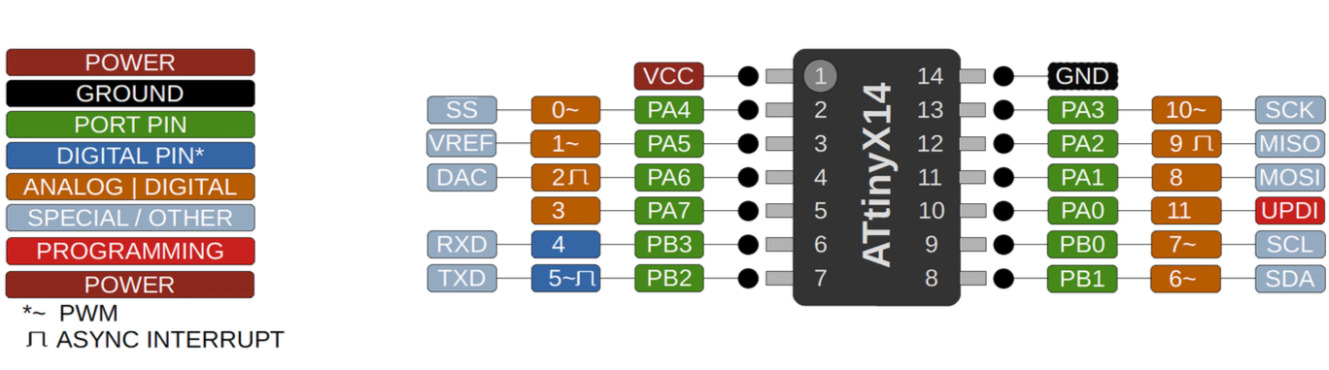
ATtiny1614, a compact 14-pin microcontroller from Microchip's tinyAVR 1-series. It offers 16 KB Flash, 2 KB SRAM, 256 B EEPROM, and supports communication protocols such as UART, SPI, and I2C, which made it suitable for my custom board as i need a small,compact pcb.
Source: Pinout_Mapping Datasheet
PCB designing and Production
Design Considerations:
Since the ATtiny1614 does not have a built-in USB programming interface, it needs an external programmer for uploading code. To make programming and serial communication easier, I added a pin header with UPDI, TX, RX, VCC (5V), and GND on the PCB. This allows the board to be programmed through UPDI and also connected to FTDI/UART for serial monitoring and debugging.
FTDI
USB-to-serial interface used to connect the microcontroller to a computer for serial communication, debugging. FTDI adapter/cable connects your computer's USB port to the microcontroller's UART serial pins (TX and RX) and UPDI(programming/data pin).
Also added a blue power LED to indicate when the board is powered, and a yellow debug LED for testing and output indication during development. For making IR Proximity Sensor - IR detection circuit referred Saheen's Input device.
Phototransistor
Qty.1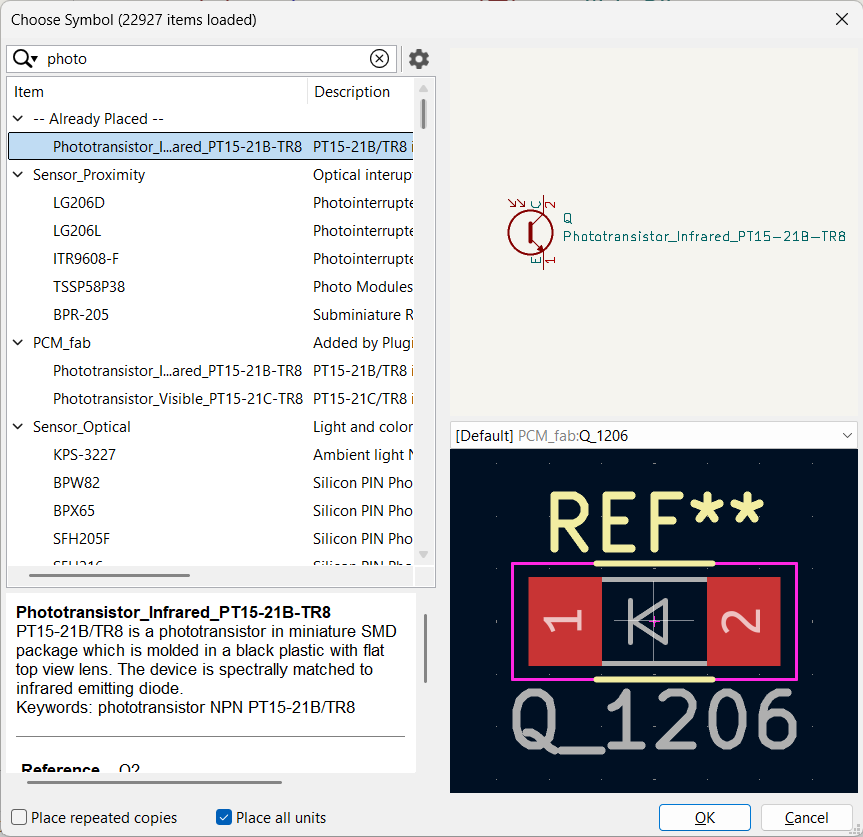
Phototransistor_Infrared_PT15-21B-TR8
IR_Led SMD
Qty.1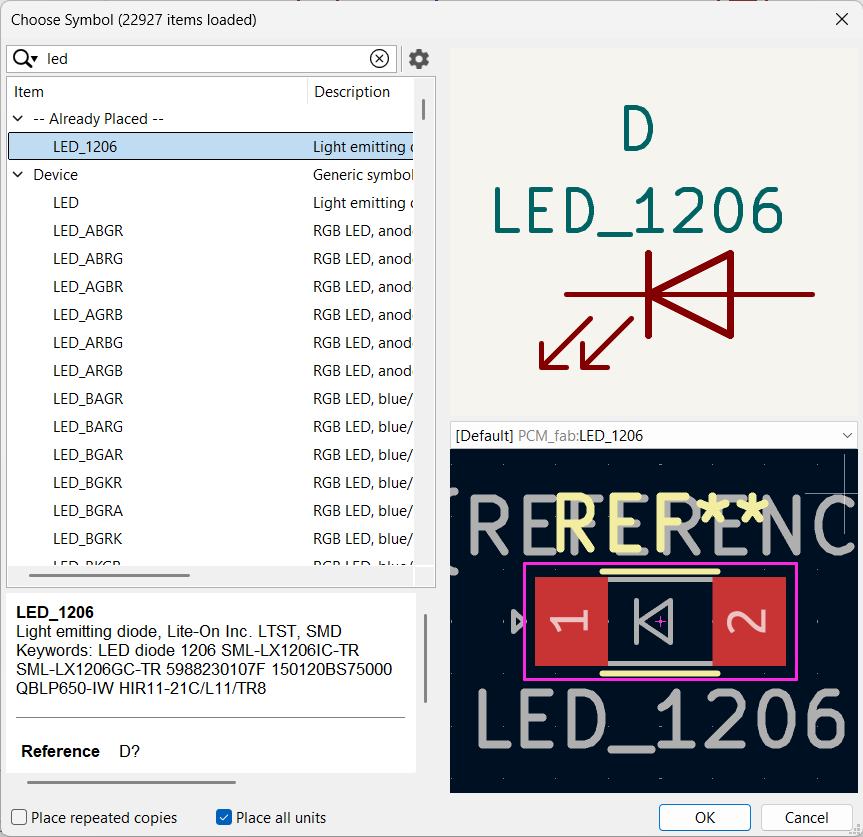
LED_1206
Resistor
Qty.4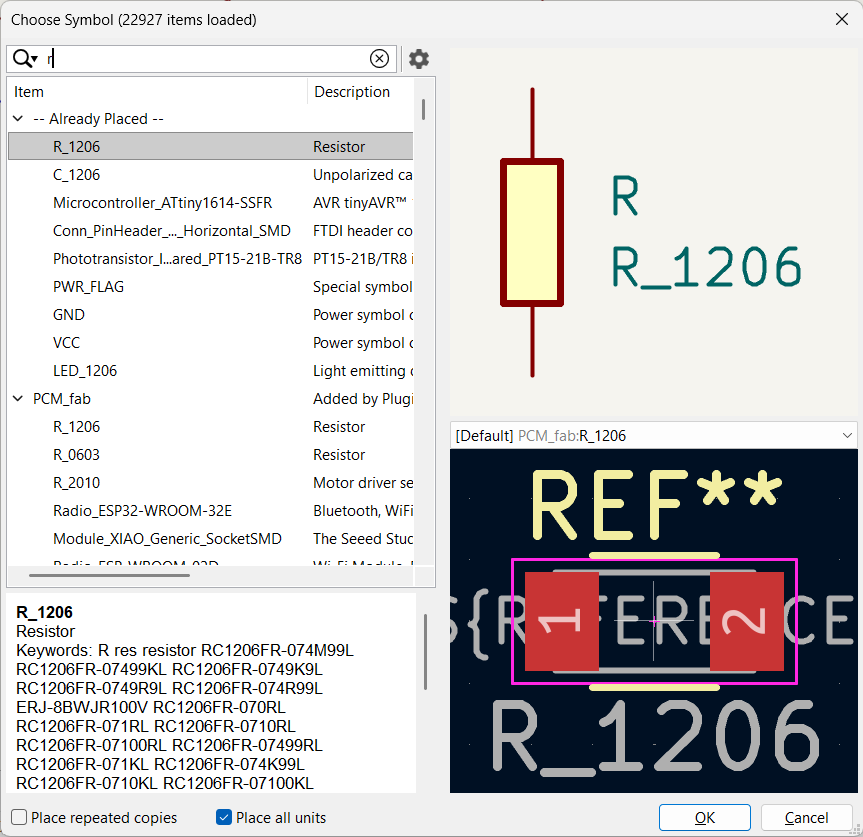
3:R_1206 499ohm
and 1:R_1206 1k
led
Qty.2
LED_1206
(yellow and blue)
Capacitor
Qty.1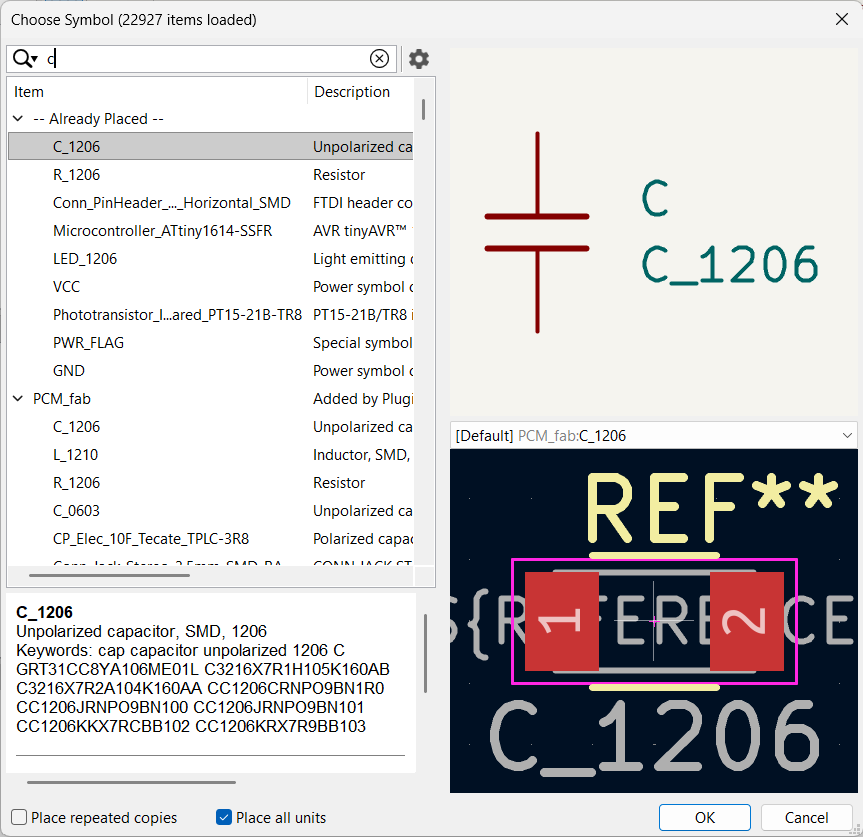
C_1206 1uf
PinHeader
Qty.1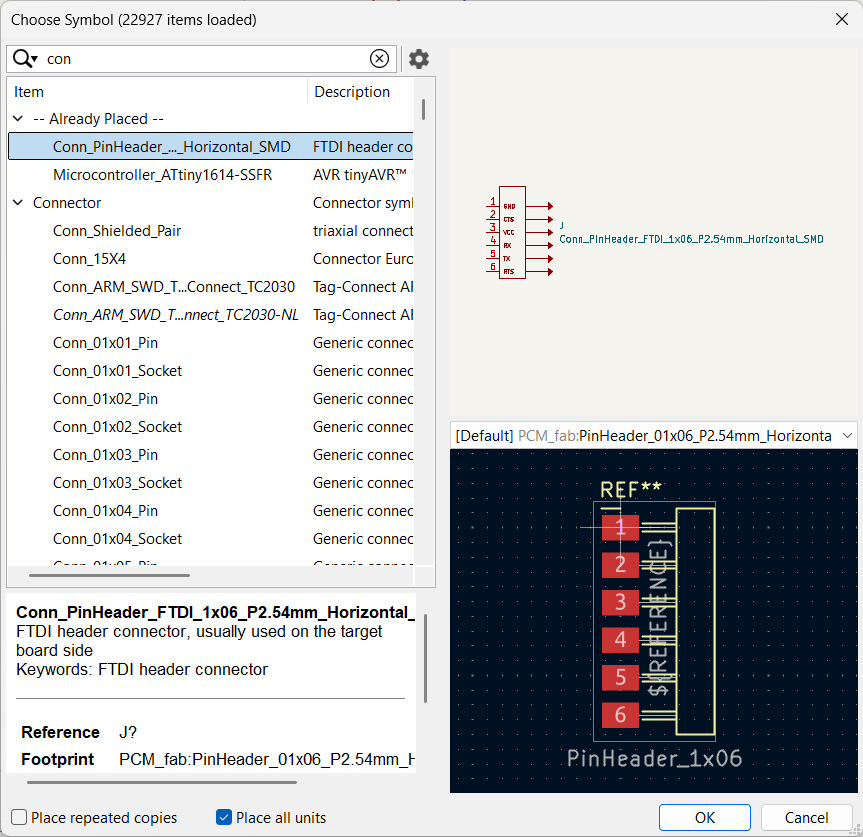
Conn_PinHeader_
FTDI_1x06_P2.54mm_
Horizontal_SMD
Attiny1614
Qty.1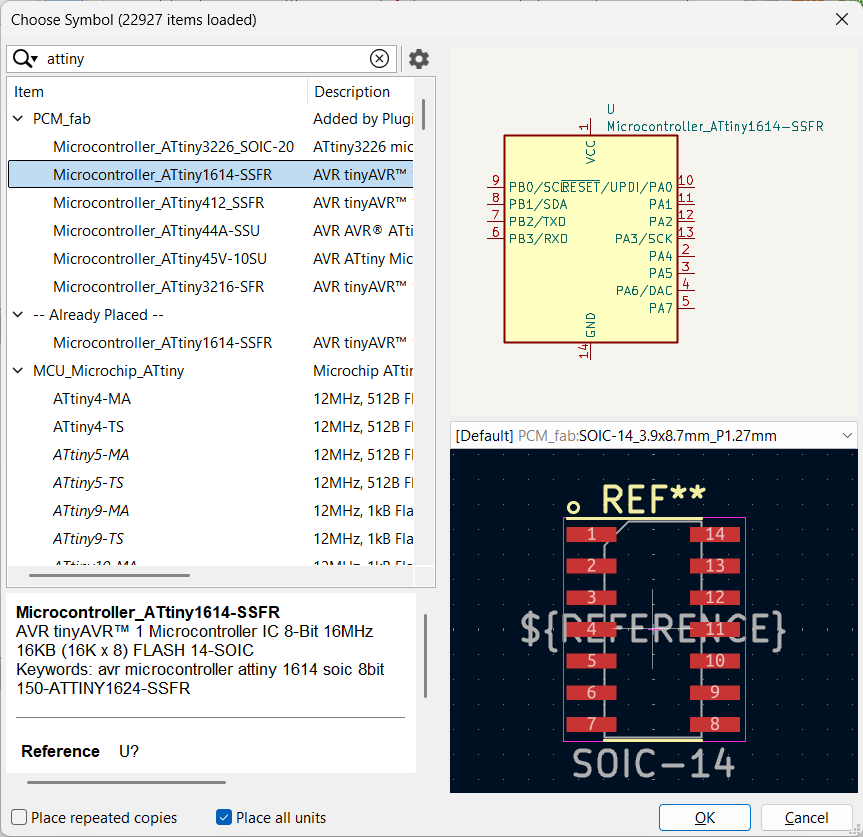
Microcontroller_ATtiny1614-SSFR
Ground(GND)
Qty.8
GND
VCC
Qty.7
+5v
Powerflag
Qty.2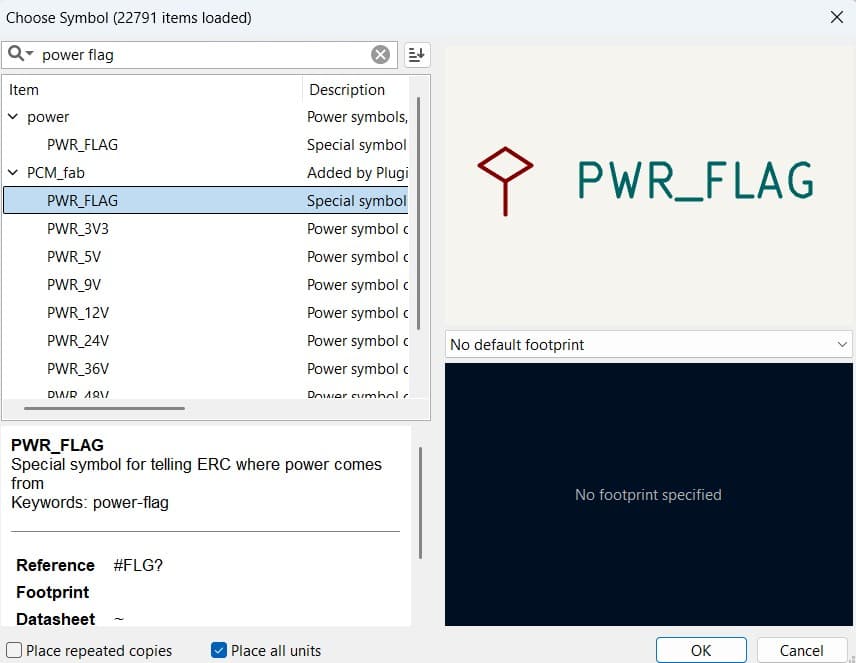
PWR_FLAG
Schematic design
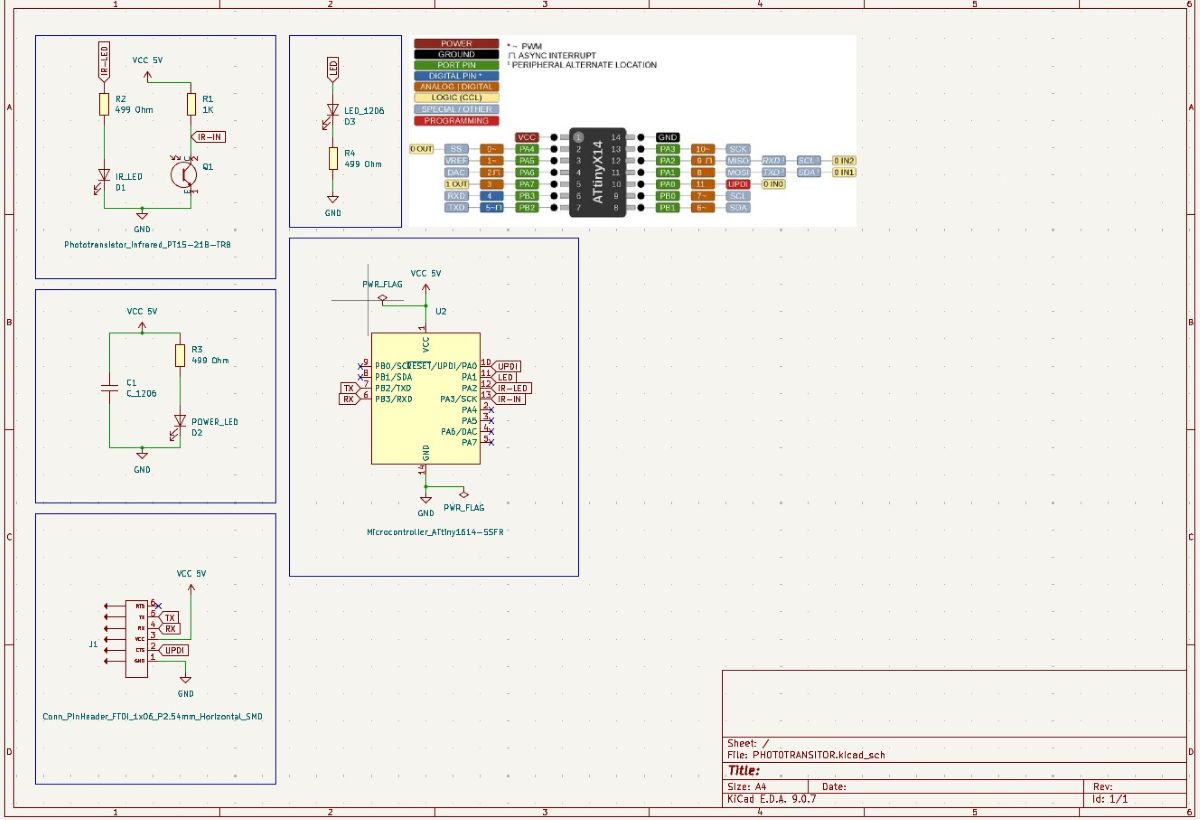
Download:schematic.pdf
PCB editor: routing
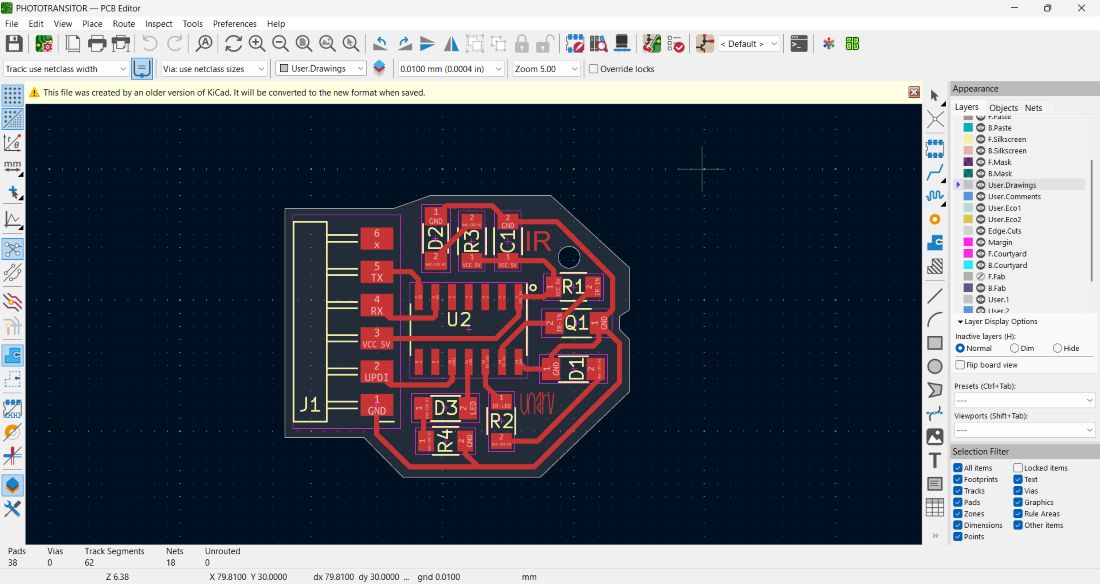
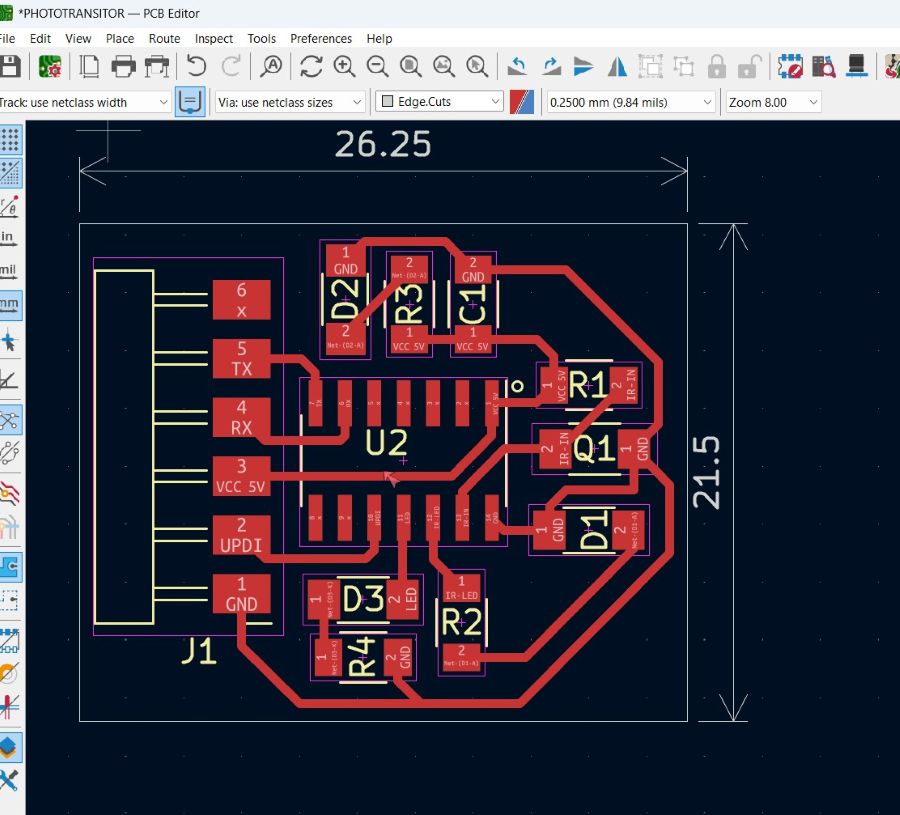
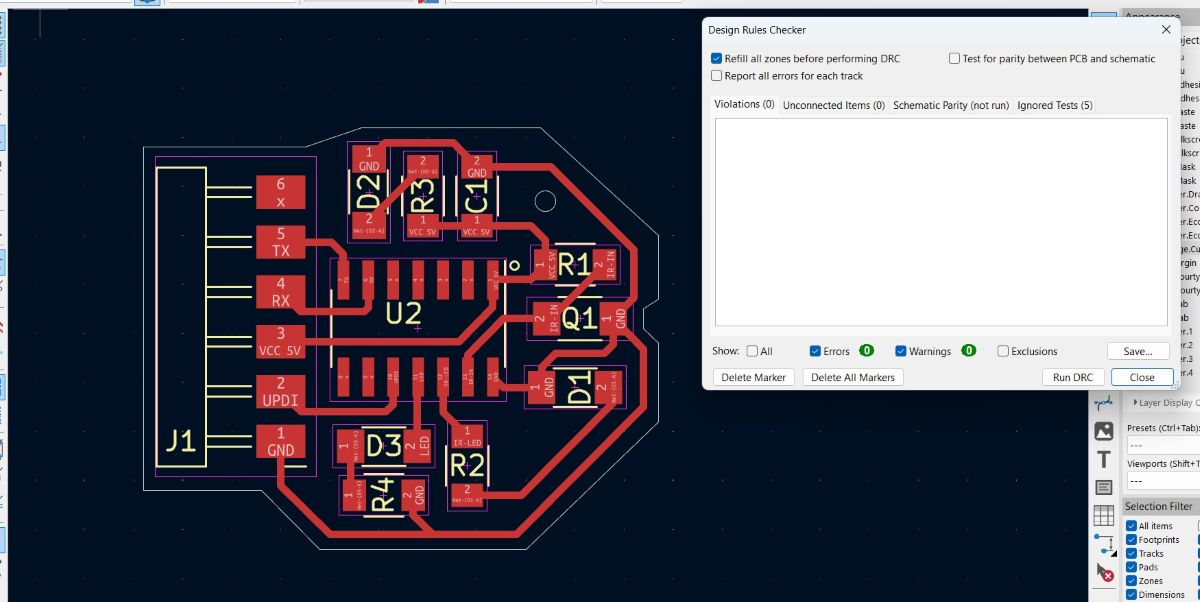
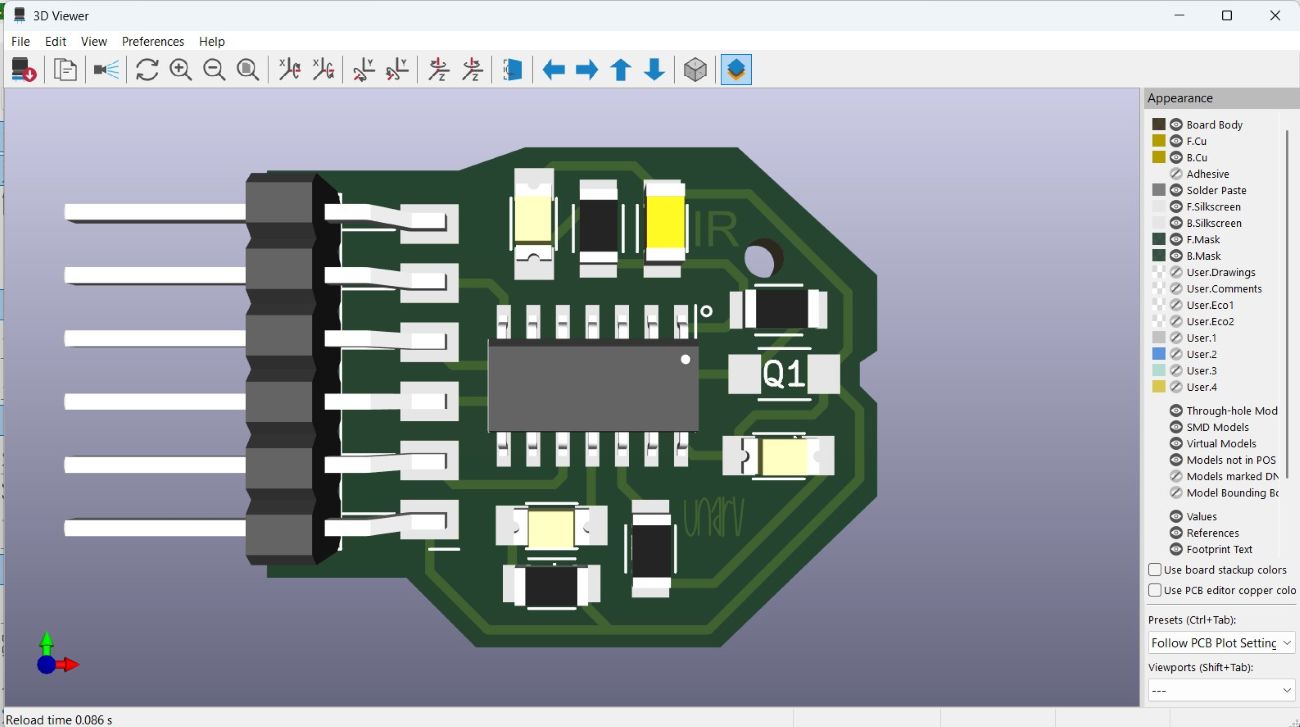
Production: Milling and soldering
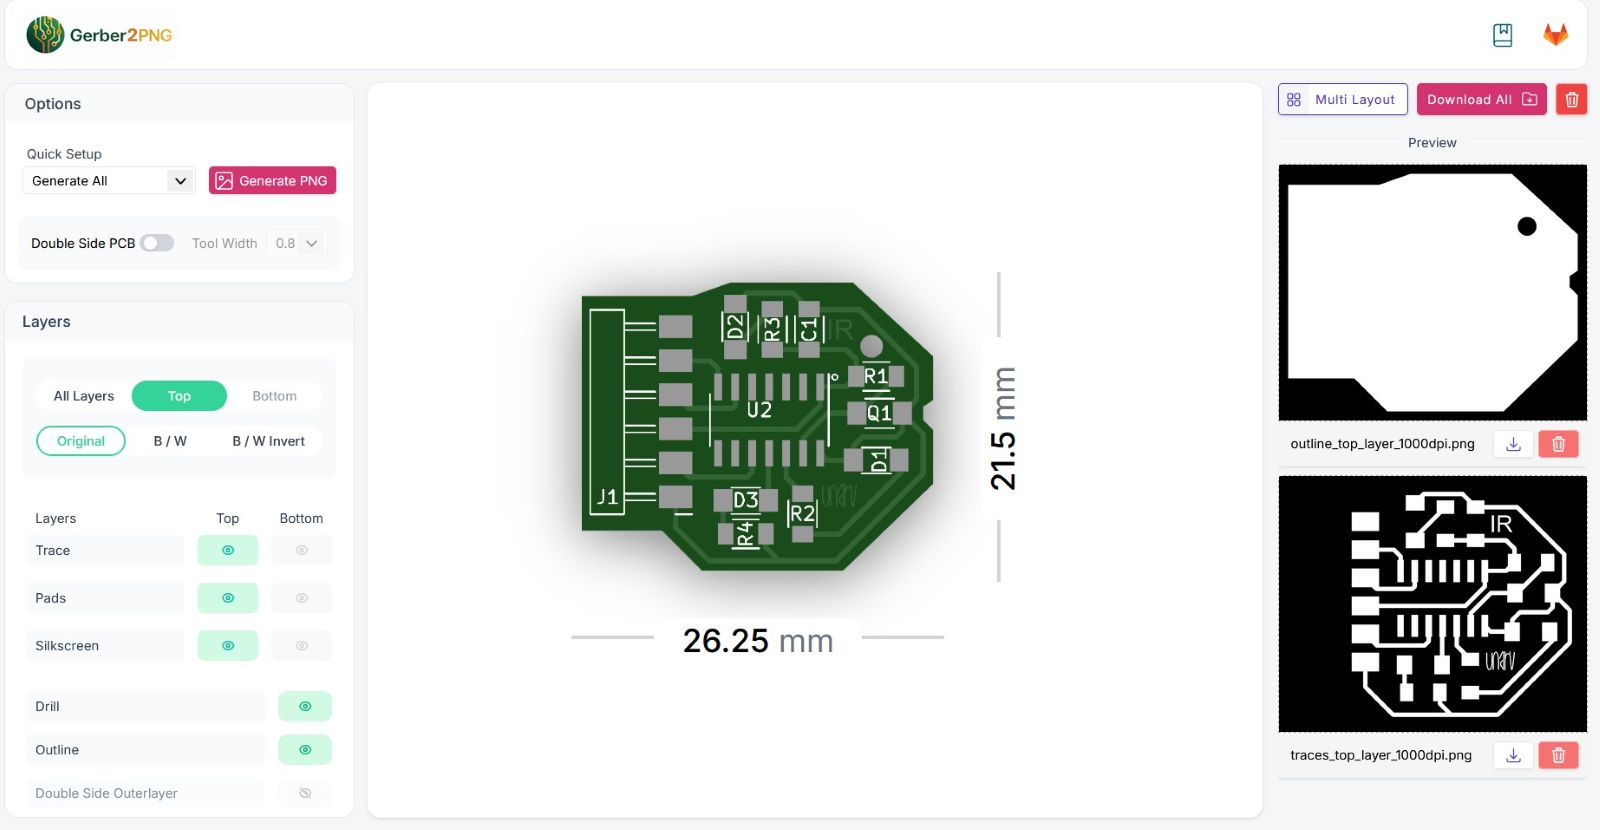
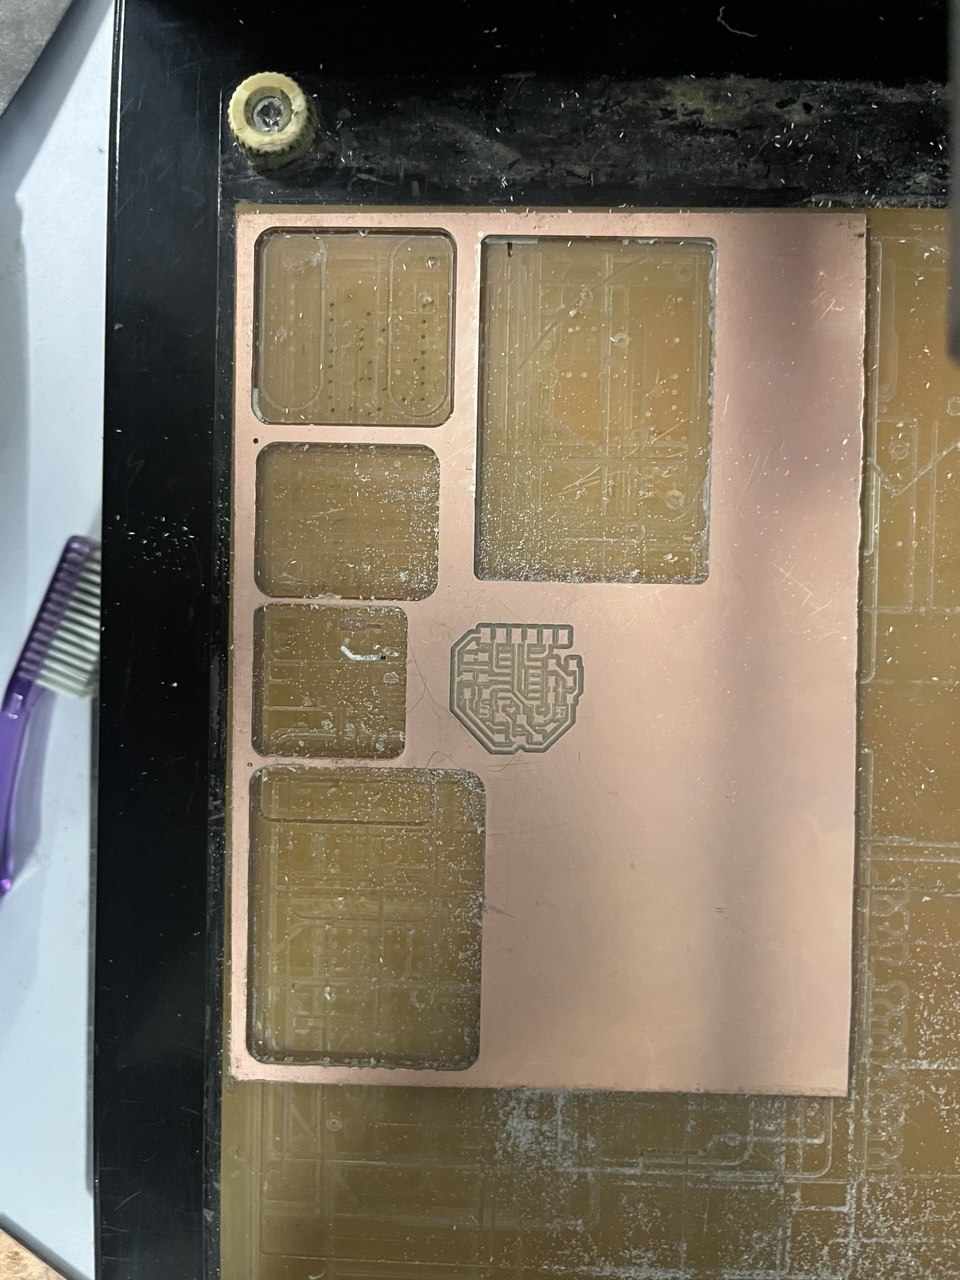
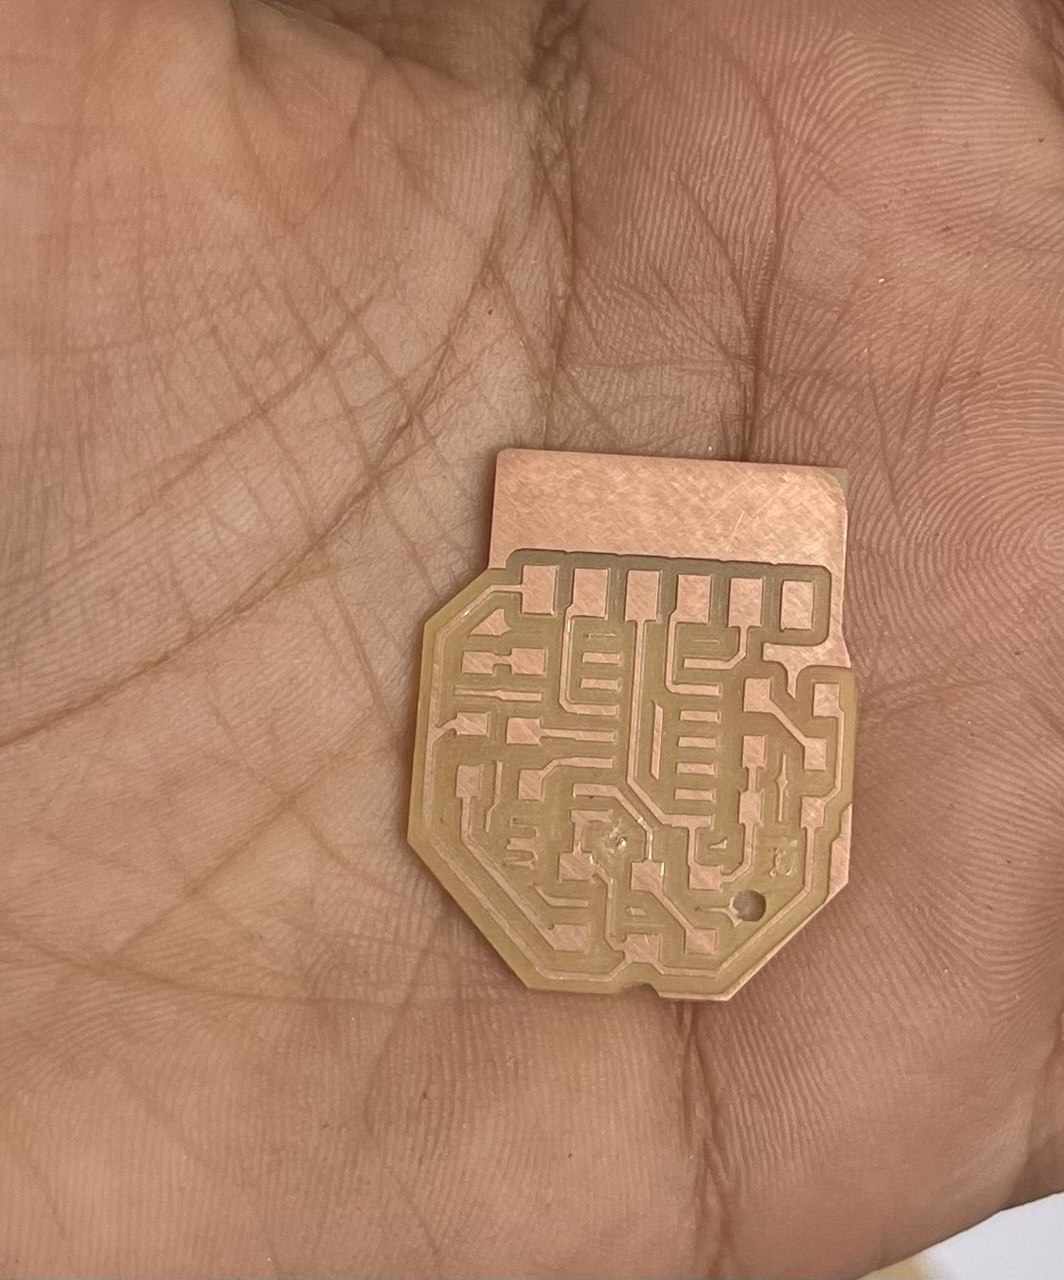
Download:gerber-to-pngfile
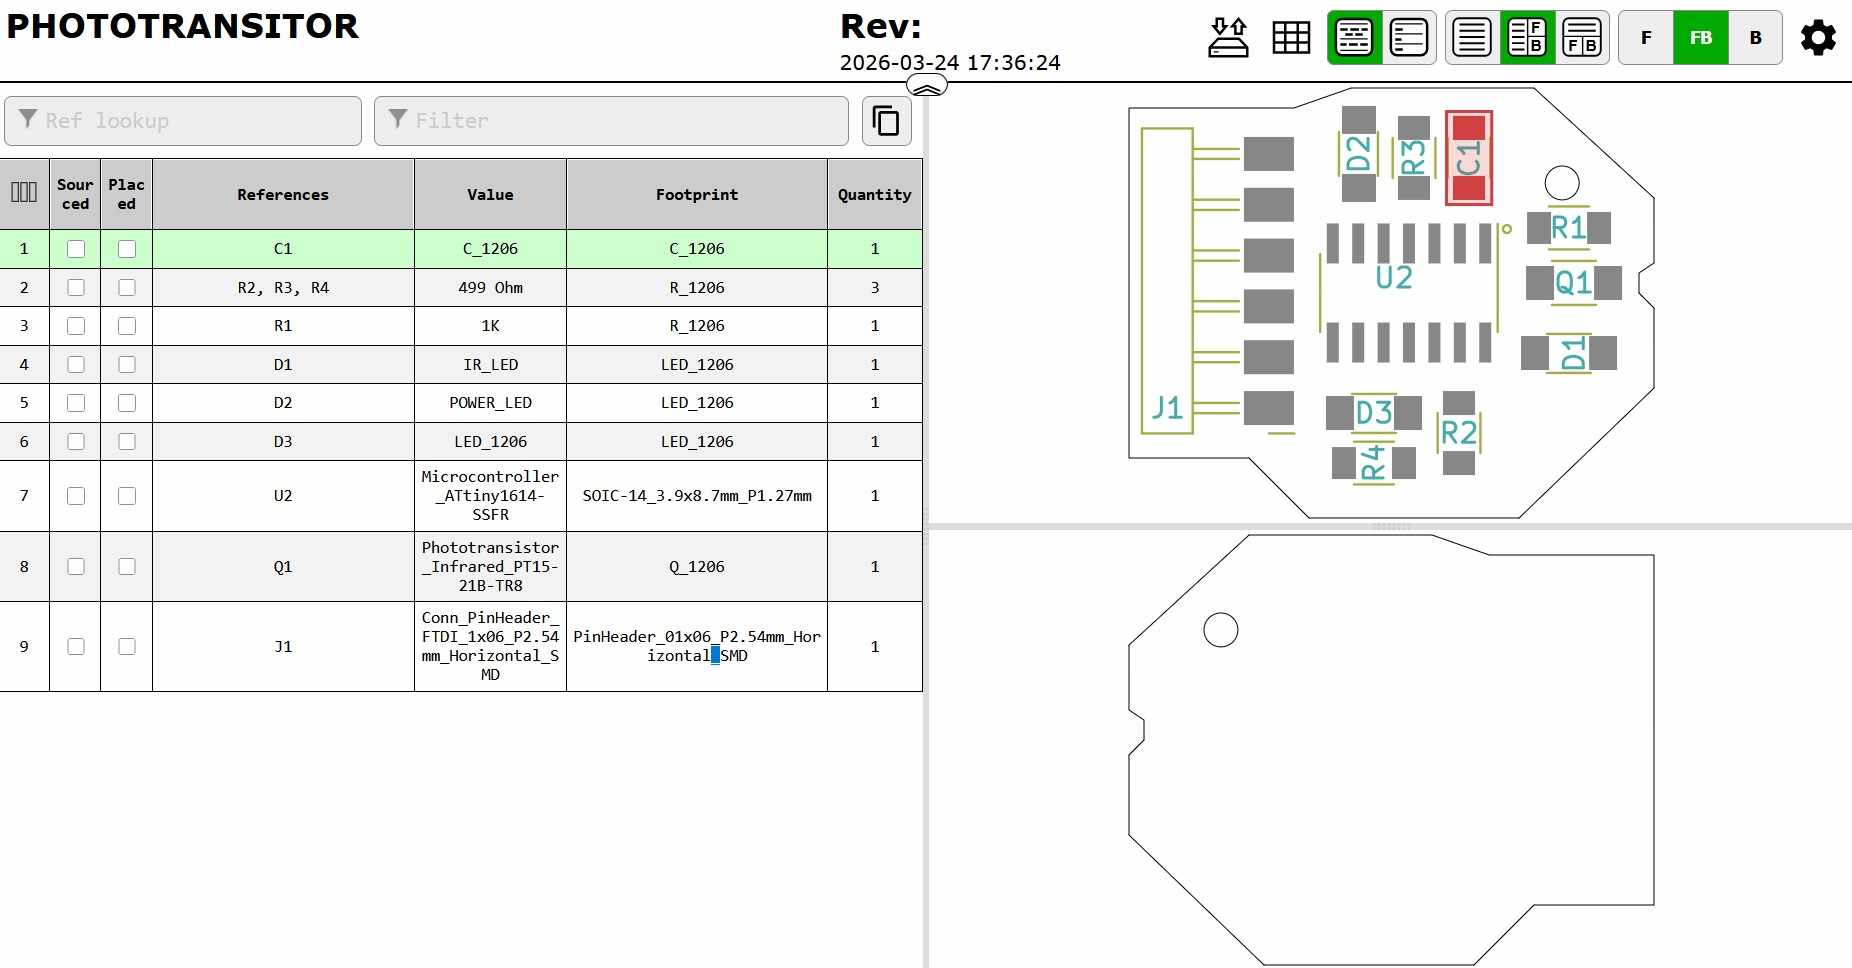
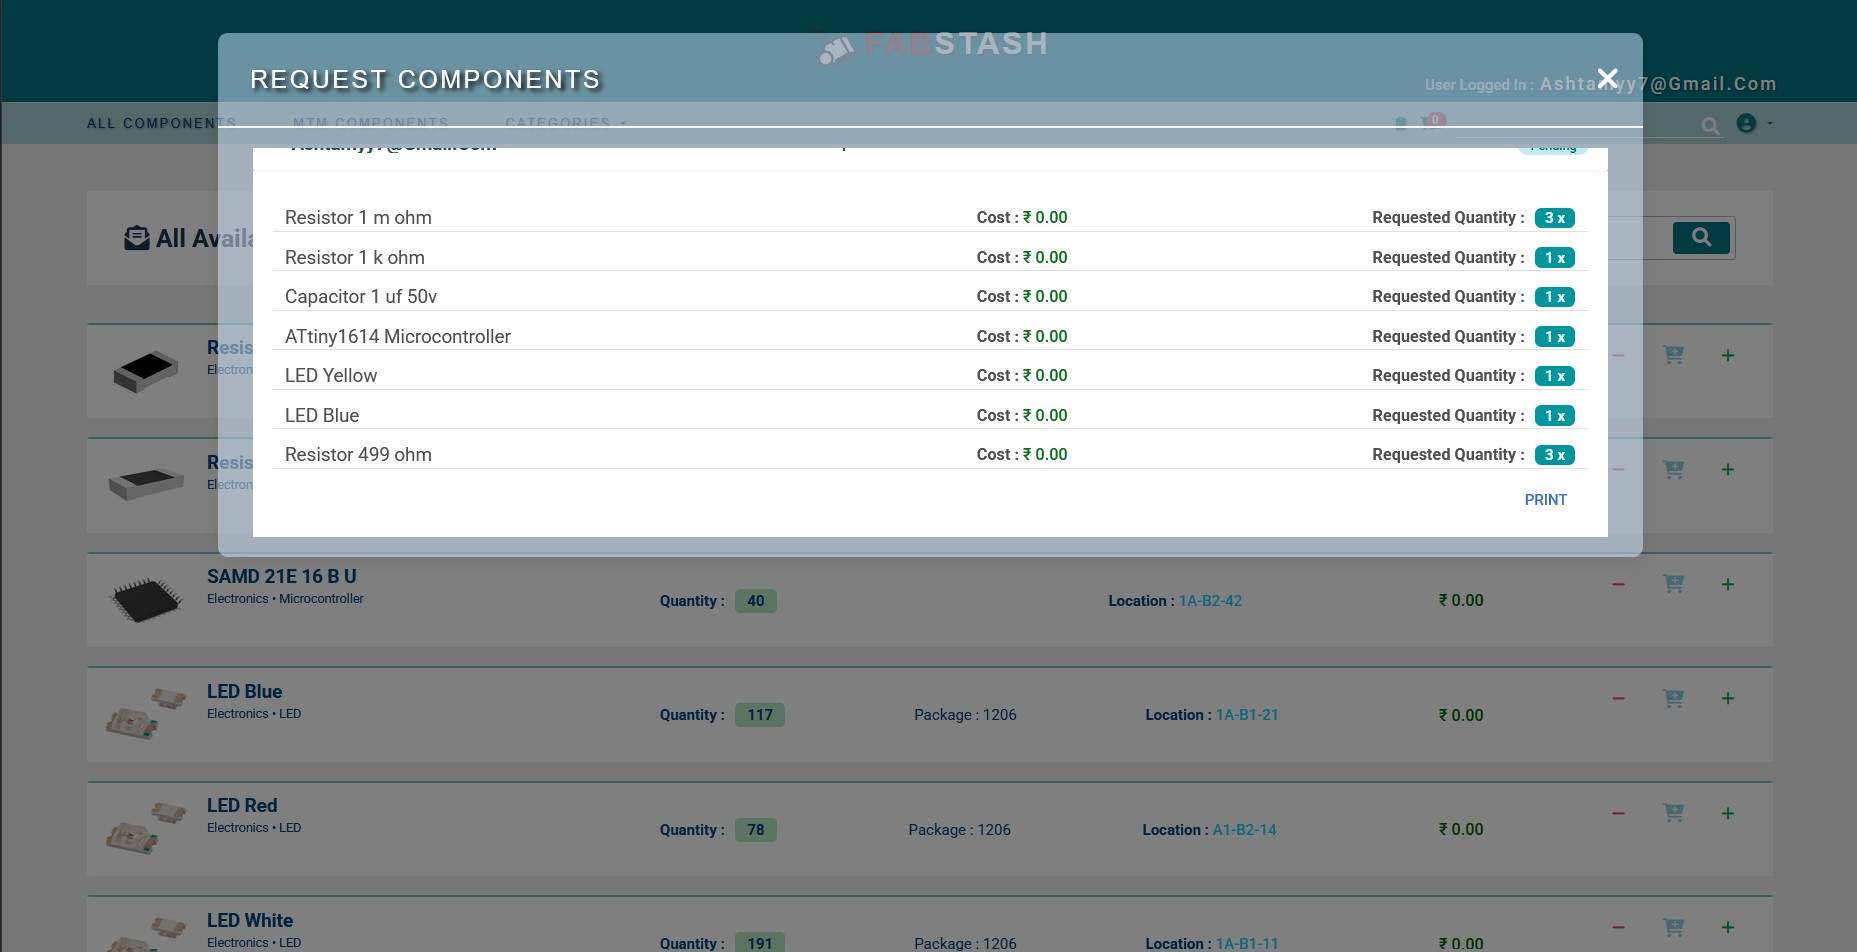
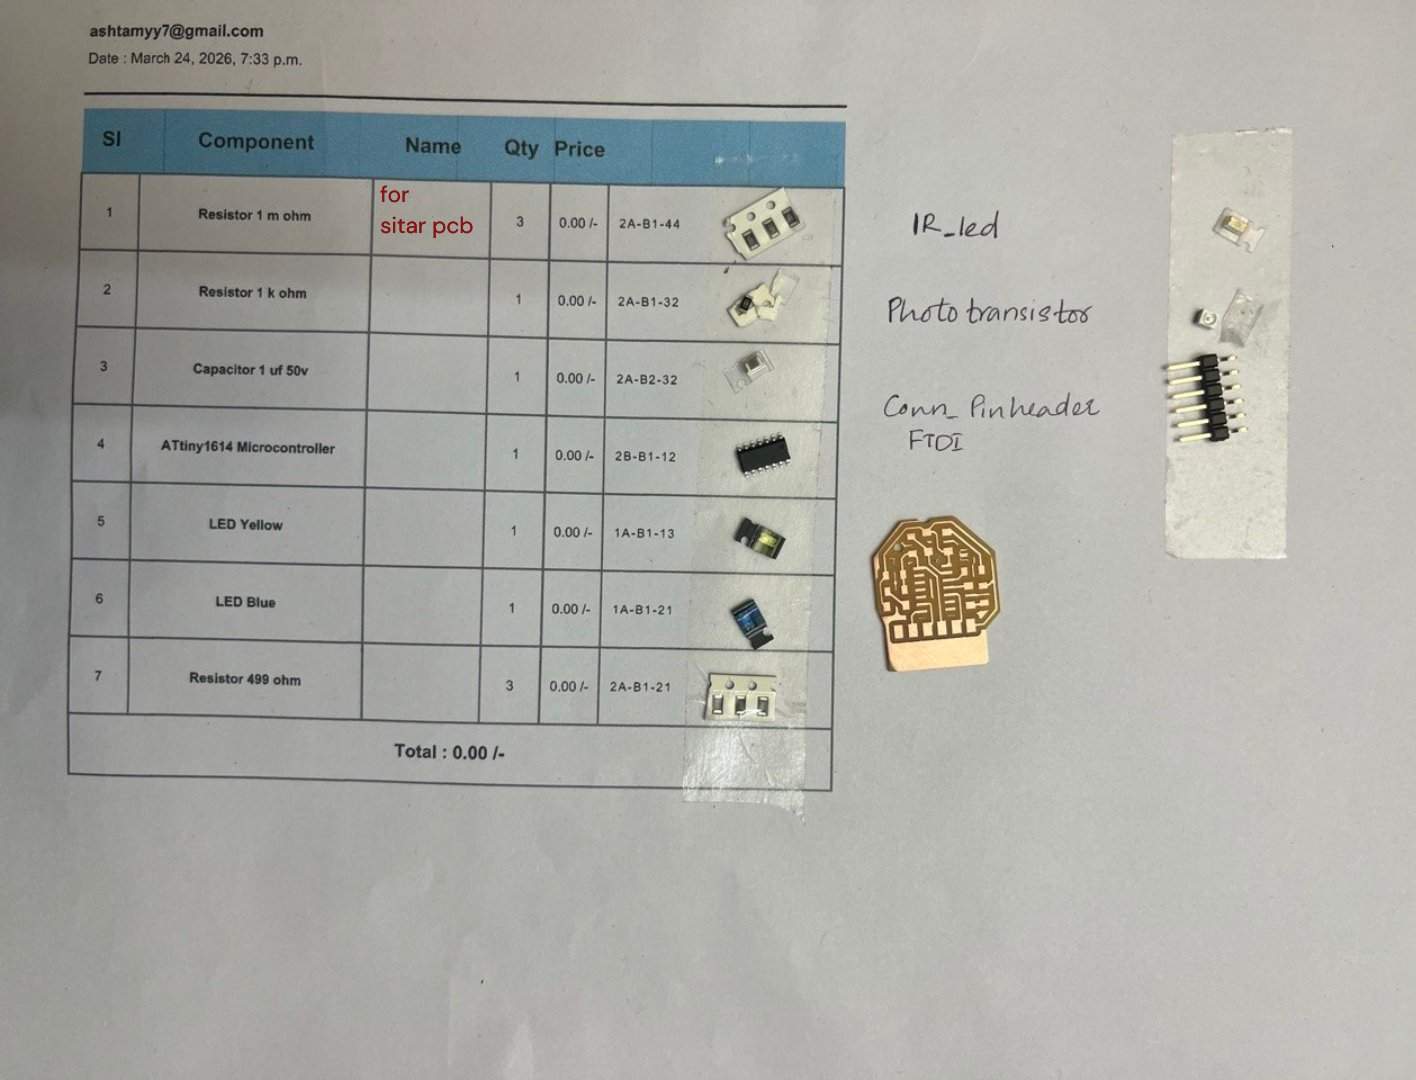
view:BOM
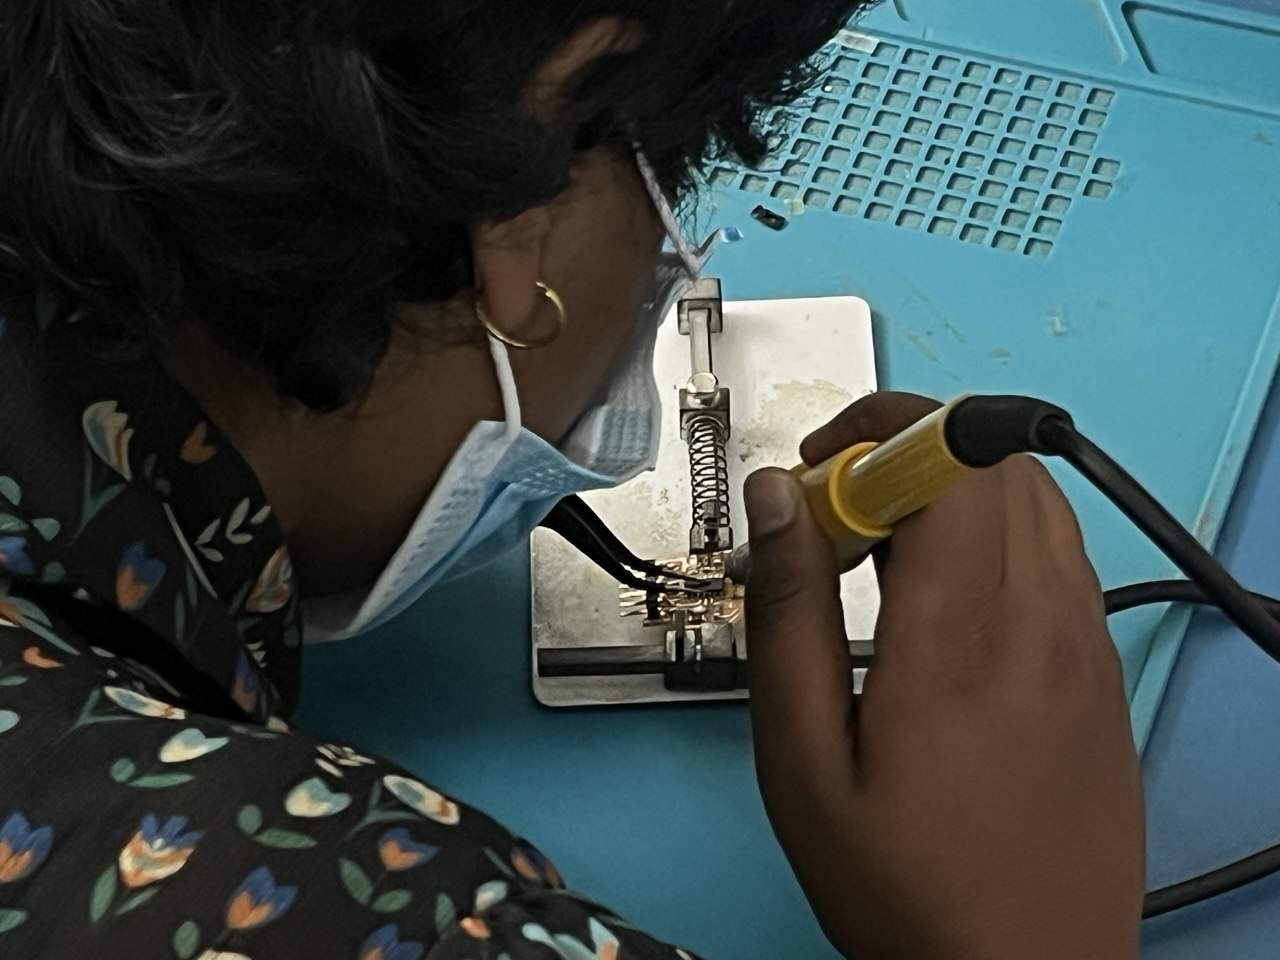
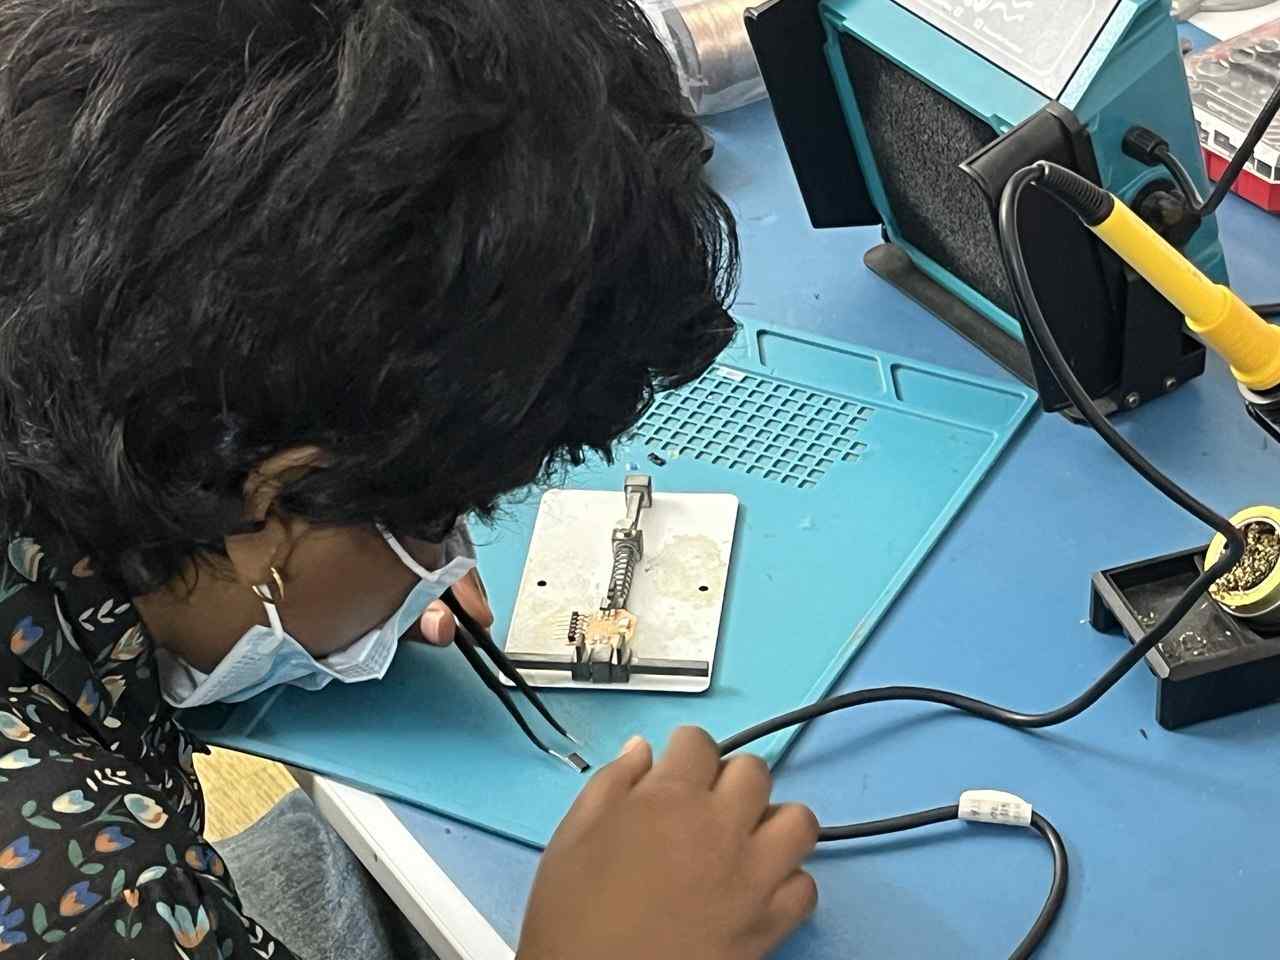
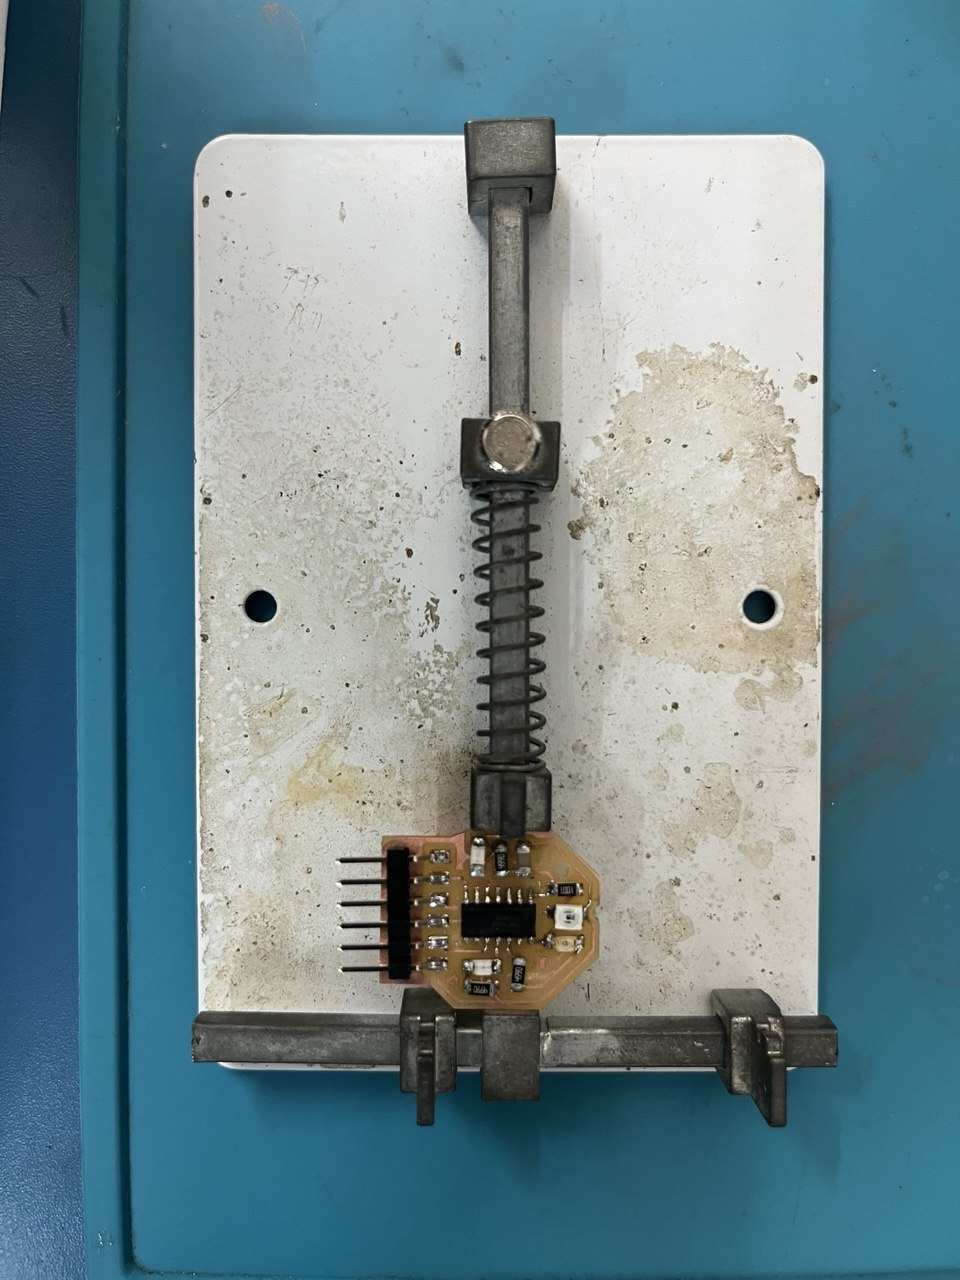
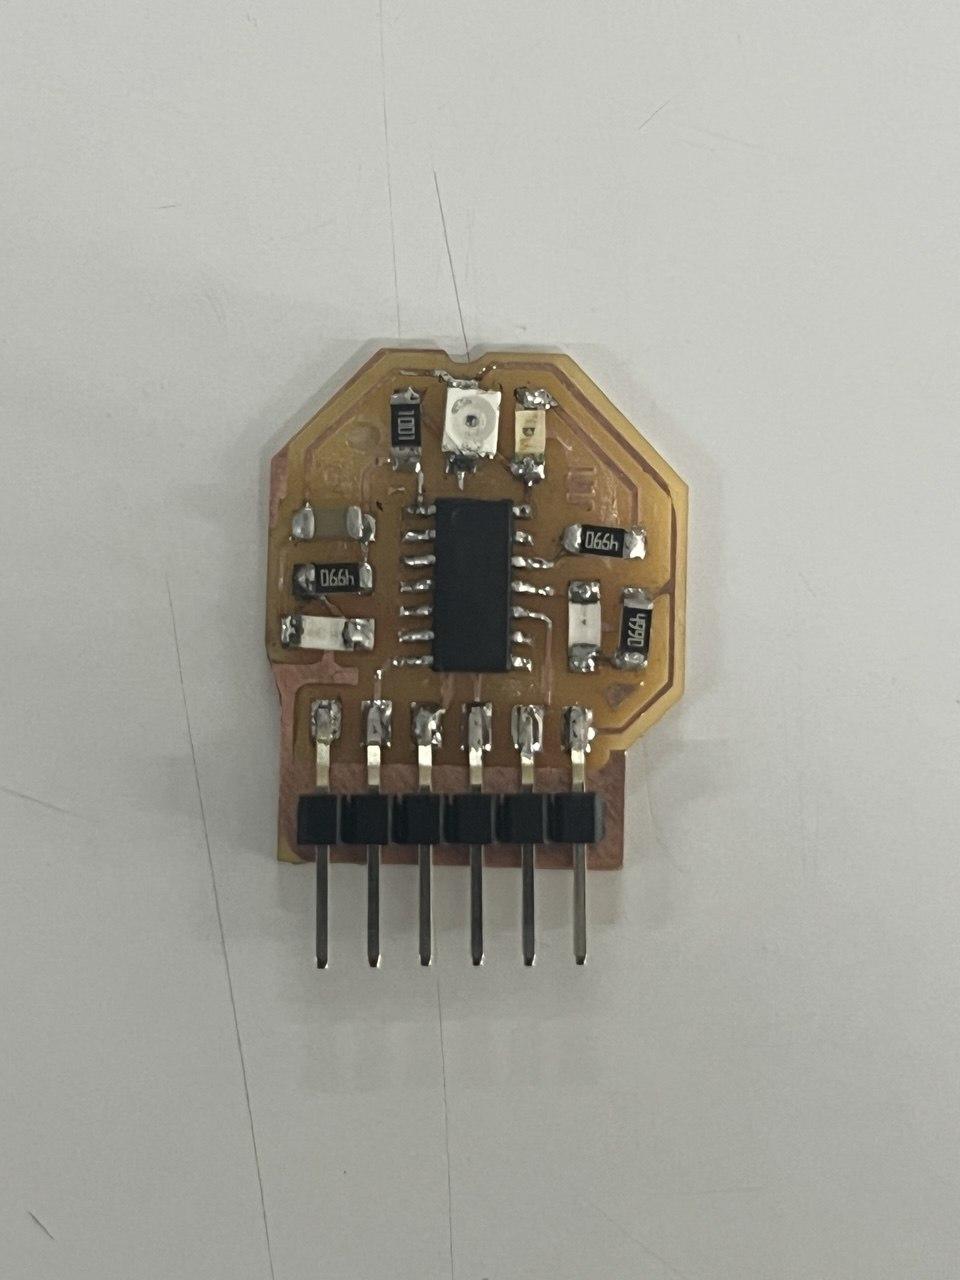
Testing and Programming
After soldering the PCB, I used a multimeter to test the board connections and check for continuity between traces, components, VCC, and GND. This helped verify that the connections were correct and that there were no unwanted shorts before powering the board.
ProshPlay-Type-C-Ch340C-FTDI-UPDI-Converter
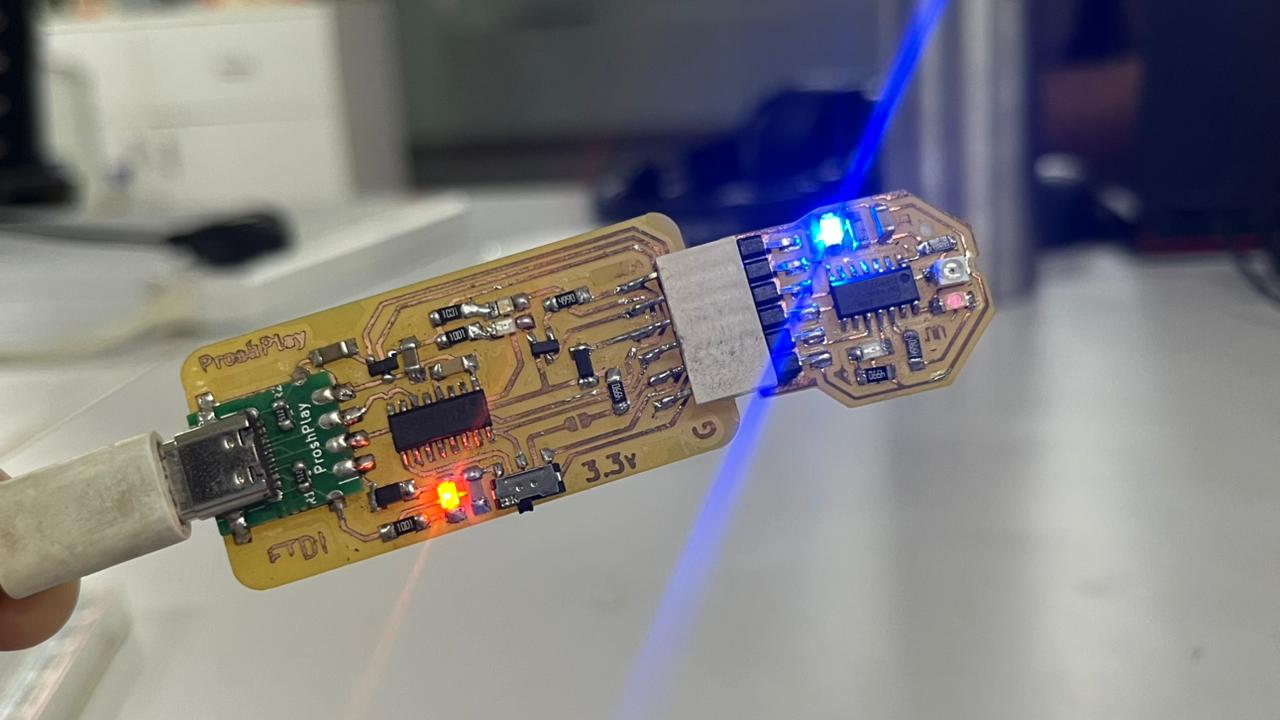
I used a ProshPlay Type-C CH340C FTDI-UPDI Converter to program the ATtiny1624 board and for serial communication. The UPDI pin is used to upload the code, while the TX and RX pins are used to view serial output from the board.
Installing Attiny library
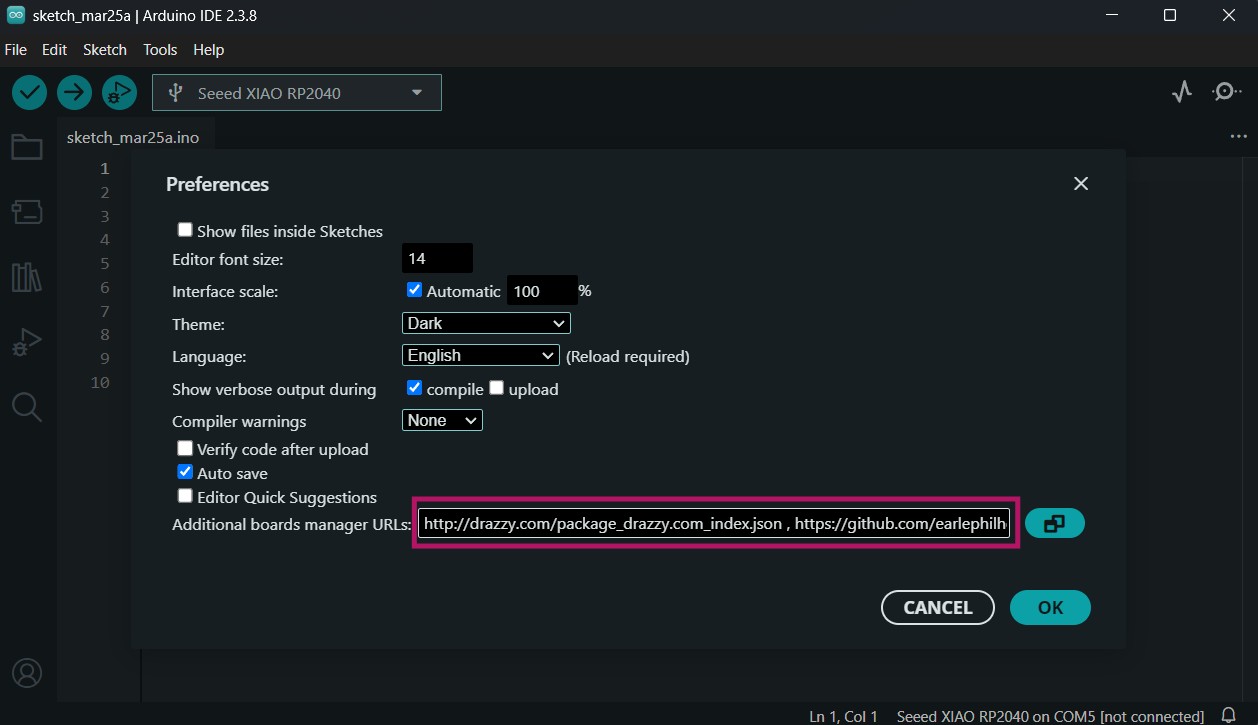
- Open Preferences: In the Arduino IDE, go to File > Preferences.
- Add the URL: In the "Additional Board Manager URLs" text box, paste the following URL:
url:
http://drazzy.com/package_drazzy.com_index.json
Source:github
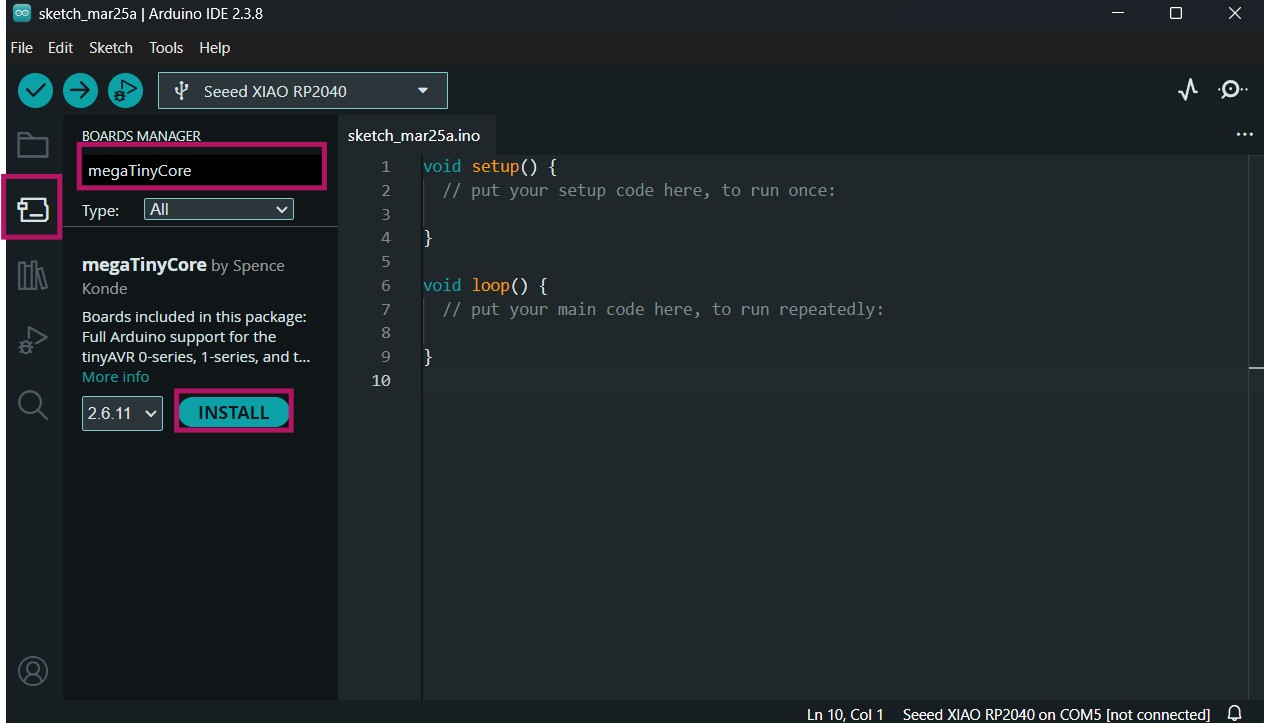
- Open Boards Manager: Go to Boards Manager.
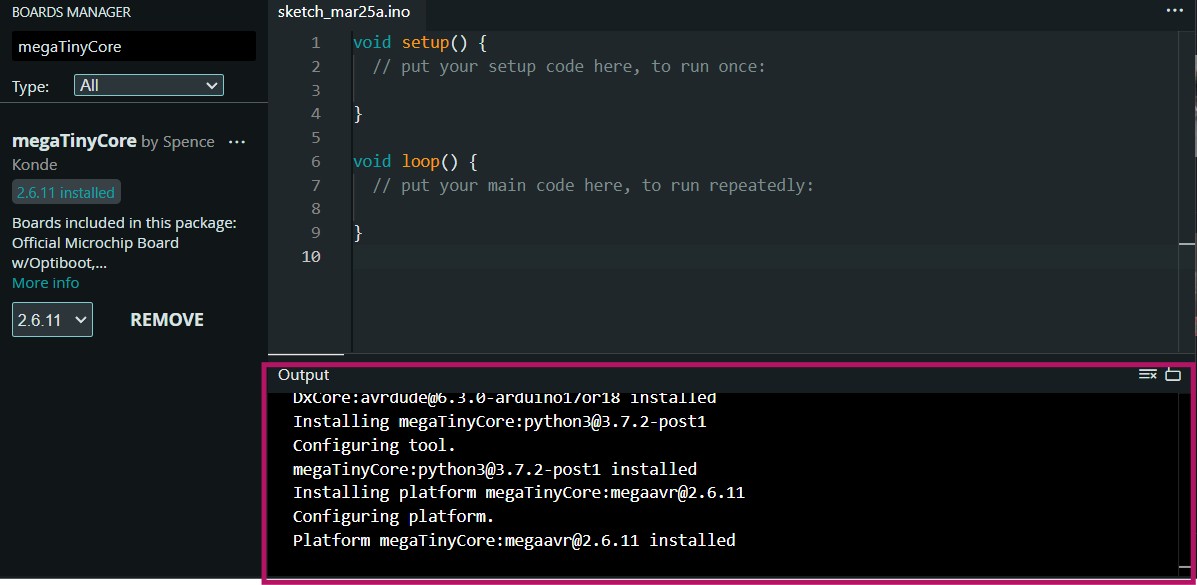
- Install megaTinyCore: In the Boards Manager, search for megaTinyCore(by Spence Konde) and click Install.
- After installation, the ATtiny1614 board will be available for selection under the Tools > Boards menu.
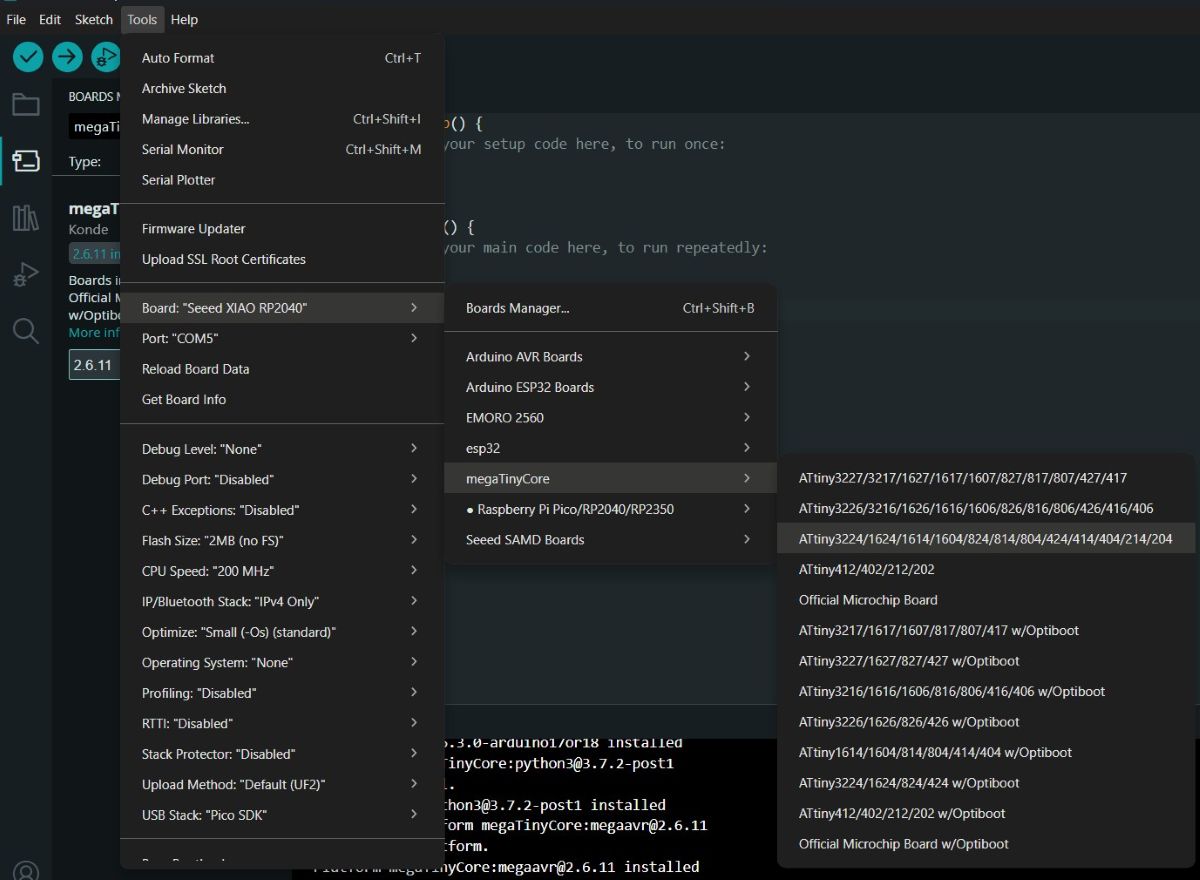
Board selection
Tools > Board > the megaTinyCore > chose the ATtiny3224/16241614/… family, then selected the correct chip.
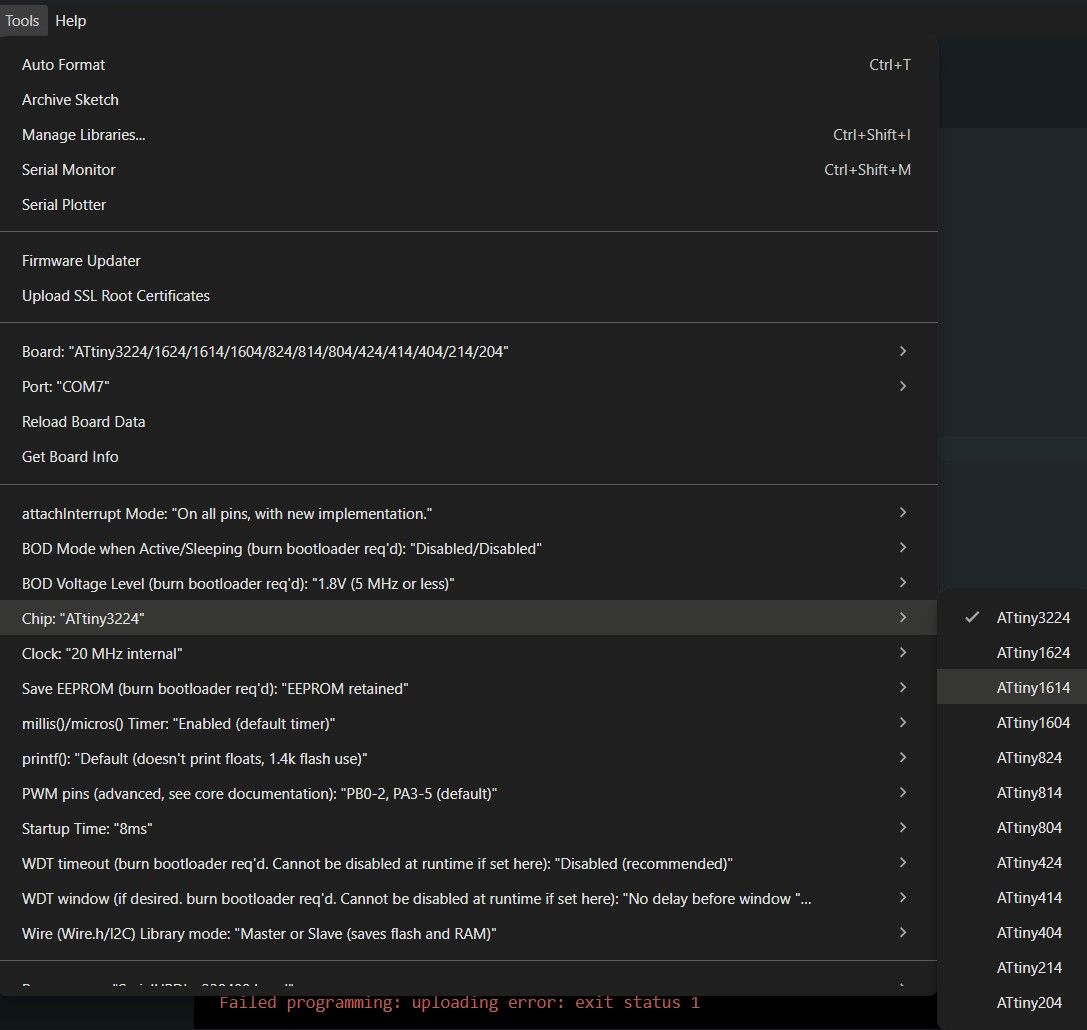
Chip selection
Tools > Chip > Attiny1614 : it is to tell the software exactly which specific microcontroller is on my board.
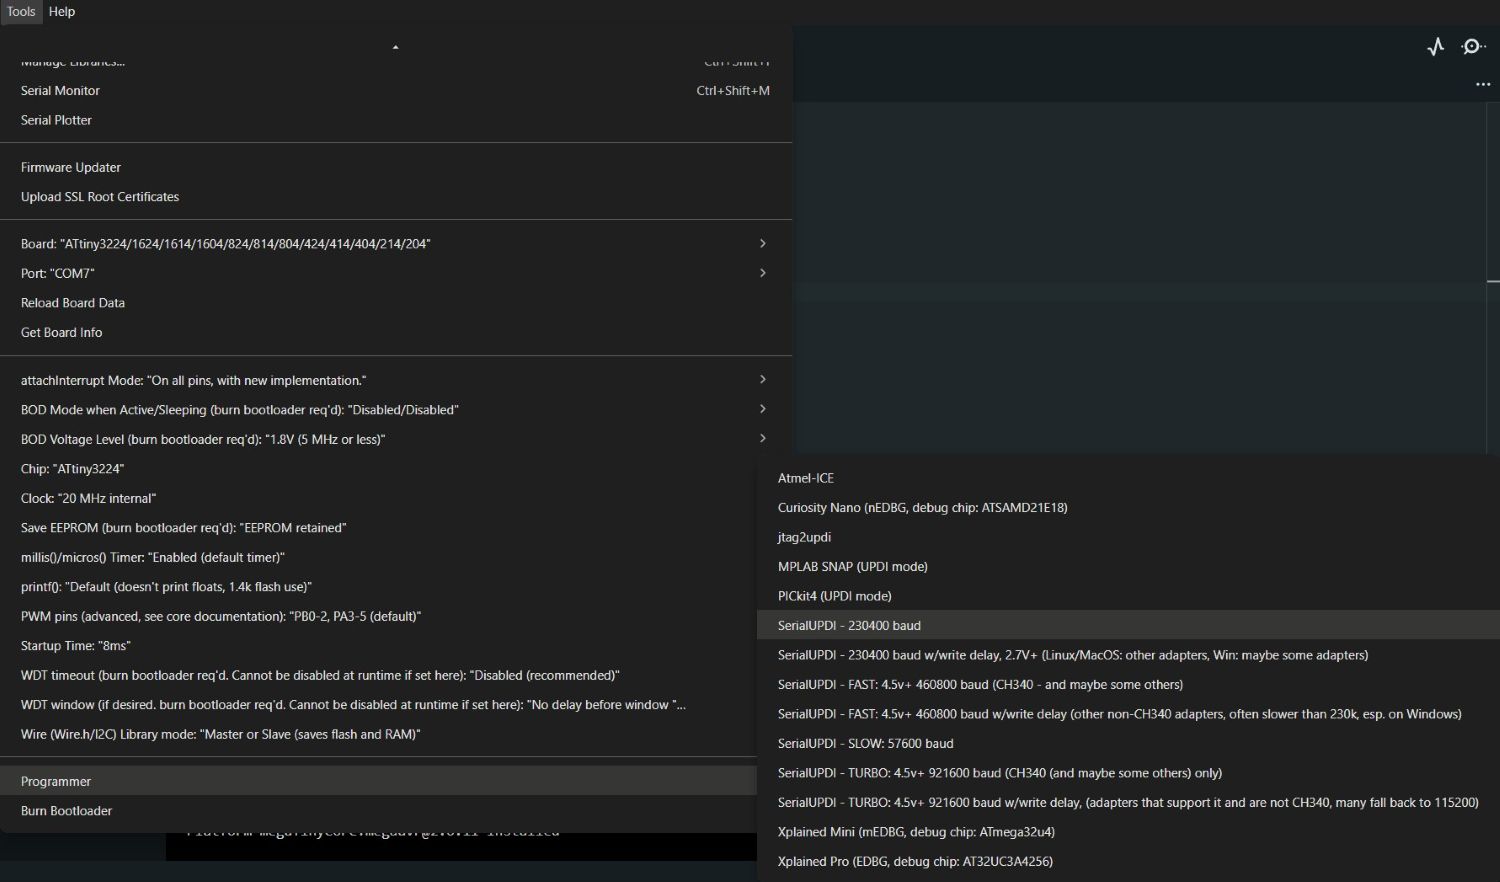
Programmer selection
Tools > Programmer > chose SerialUPDI as the programmer, and used a baud rate of 230400 to upload the code through the FTDI-UPDI converter.
Port selection
After connecting the ProshPlay Type-C CH340C FTDI-UPDI converter, I selected the COM port and uploaded the code to the board.
Blink Program
Next, I wrote a simple blink program for the debug LED to test whether the microcontroller was programmed correctly and whether the LED connection on the PCB was working properly.
              #define LED_PIN PIN_PA1

              void setup() {
                pinMode(LED_PIN, OUTPUT);
              }

              void loop() {
                digitalWrite(LED_PIN, HIGH);  // LED ON
                delay(1000);

                digitalWrite(LED_PIN, LOW);   // LED OFF
                delay(1000);
              }
Testing IR Sensor: Object Detection Program
Chatgpt_AI Prompt Used
              I have designed a PCB using the ATtiny1614 microcontroller with an IR sensing setup.
              It includes an IR LED connected from GND through a 499 Ω resistor to PA2,
              and a phototransistor (PT15-21B-TR8) connected to PA3 with a 1 kΩ resistor to VCC (5V).
              There is also a blue power LED with a 499 Ω resistor, a 1 µF capacitor between VCC and GND,
              and a debug LED connected from GND through a 499 Ω resistor to PA1.
              An FTDI header connected to default pin.

              Give program for IR sensor to detect if something hover on top of it and in serial monitor
              it has to show “shades” if it detect the object or “sunlight” - if nothing is hovered.
                void setup() {
                Serial.begin(115200);
              }

              void loop() {
                Serial.println(analogRead(PIN_PA3));
                delay(200);
              }

              // Define the sensor is connected to pin PA3
              #define SENSOR_PIN PIN_PA3

              void setup() {
                // Start serial communication at 115200 baud
                // also set the same value in serial monitor
                Serial.begin(115200);
              }


              // Function to get a stable sensor reading
              int readAverage() {
                int sum = 0;  // Variable to store total of readings

                // Take 10 readings to reduce noise
                for (int i = 0; i  < 10; i++) {
                // Read sensor and add to sum (like 920+940+.....)
                  sum += analogRead(SENSOR_PIN);
                  delay(5);
                }

                // Return the average value (total / number of readings)
                return sum / 10;
              }


              void loop() {

                // Call the function to get a smooth (averaged) sensor value
                int sensorValue = readAverage();

                // Print label to Serial Monitor
                Serial.print("Sensor: ");

                // Print the actual sensor value
                Serial.print(sensorValue);
                // for eg:  in serial monitor, it will show "Sensor:923"

                // Check if value is above threshold (990)
                // Threshold is chosen based on observed values
                if (sensorValue > 990) {
                  // If value is high :  object detected, it will print shade.
                  Serial.println(" shade");
                } else {
                  // If value is low: no object, it wil print sunlight.
                  Serial.println(" sunlight");
                }

                // Wait 200 milliseconds before next reading
                delay(200);
              }
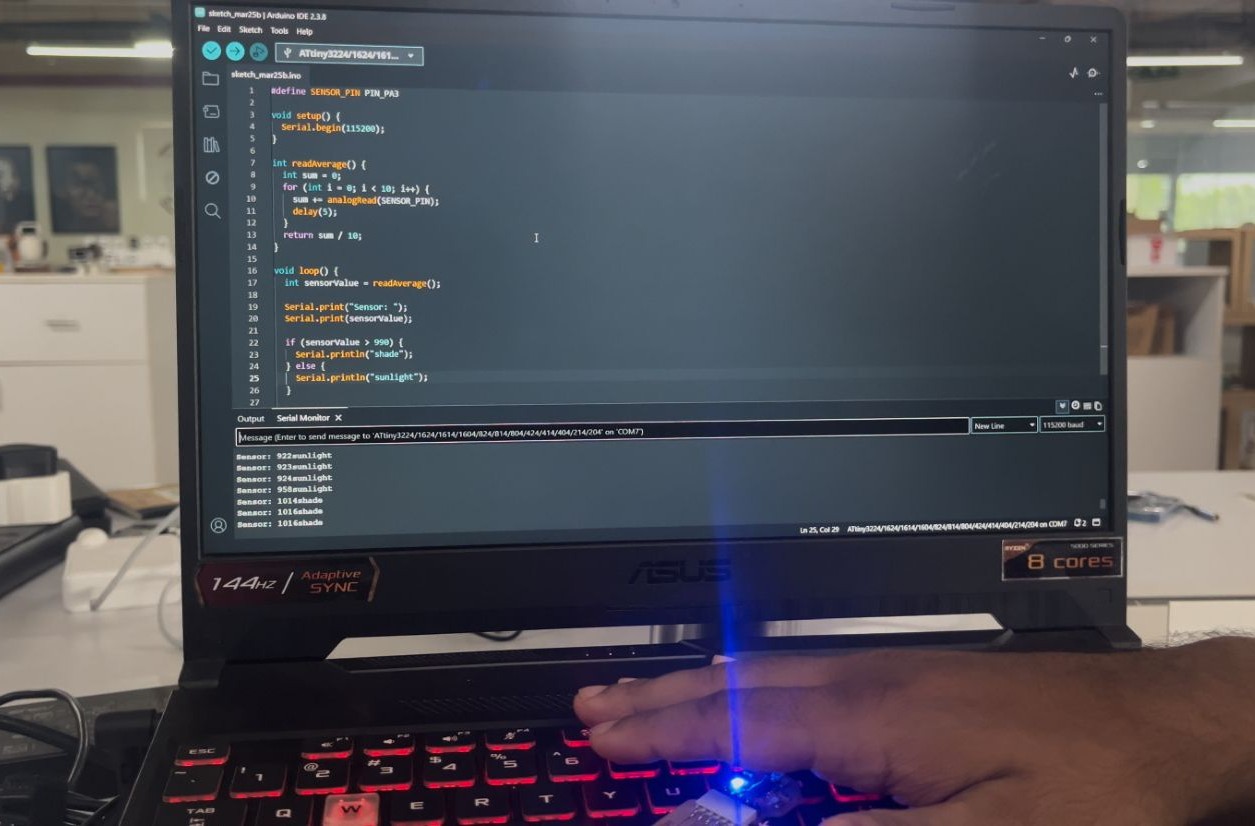
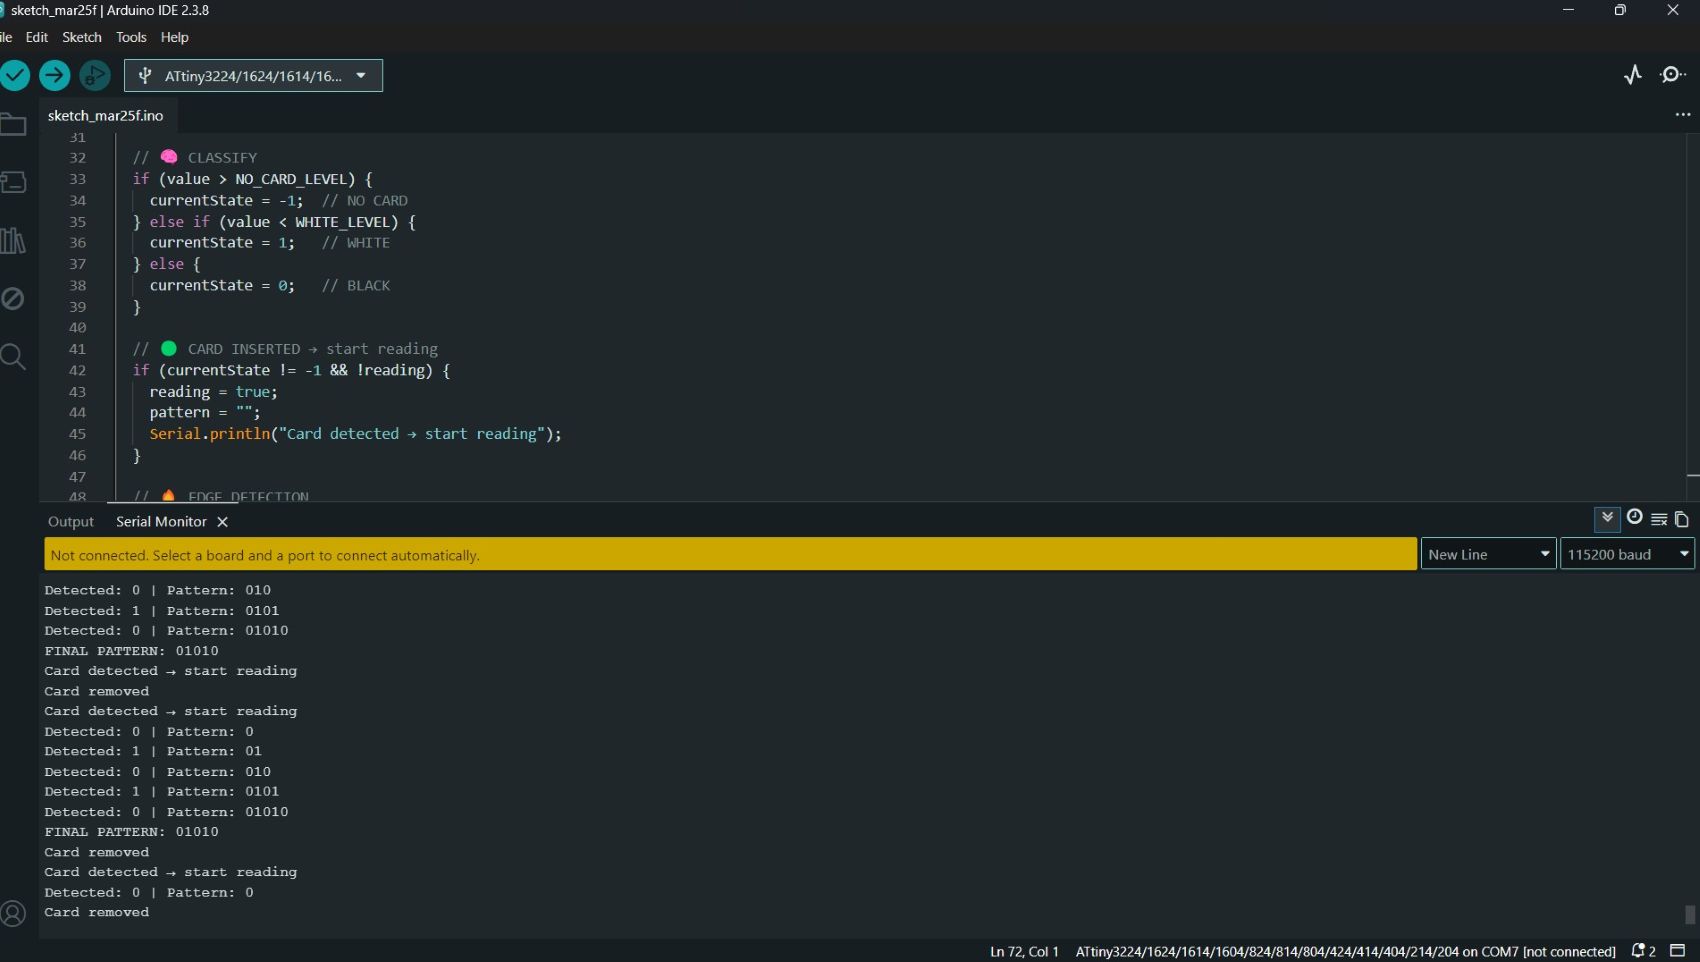
Program to find the threshold values, for no card detecting (air), black surface, white surface.
Chatgpt_AI Prompt Used
              I have designed a PCB using the ATtiny1614 microcontroller with an IR sensing setup.
              It includes an IR LED connected from GND through a 499 Ω resistor to PA2,
              and a phototransistor (PT15-21B-TR8) connected to PA3 with a 1 kΩ resistor to VCC (5V).
              There is also a blue power LED with a 499 Ω resistor, a 1 µF capacitor between VCC and GND,
              and a debug LED connected from GND through a 499 Ω resistor to PA1.
              An FTDI header connected to default pin.

              My project is a story card system where cards have black and white patterns,
              and the IR sensor should detect when a card is inserted and identify these patterns.
              I now want to write simple code to read the sensor values and distinguish between
              black and white areas on the card.
                #define SENSOR_PIN PIN_PA3
                #define IR_LED PIN_PA2

                void setup() {
                  Serial.begin(115200);
                  pinMode(IR_LED, OUTPUT);

                  digitalWrite(IR_LED, HIGH); // IR LED always ON

                  Serial.println("=== THRESHOLD TEST START ===");
                  Serial.println("Place AIR / WHITE / BLACK and observe values");
                }

                // Averaging for stable reading
                int readSensor() {
                  int sum = 0;
                  for (int i = 0; i < 30; i++) {
                    sum += analogRead(SENSOR_PIN);
                    delay(2);
                  }
                  return sum / 30;
                }

                void loop() {
                  int value = readSensor();

                  Serial.print("Sensor Value: ");
                  Serial.println(value);

                  delay(300);
                }
white detection
black detection
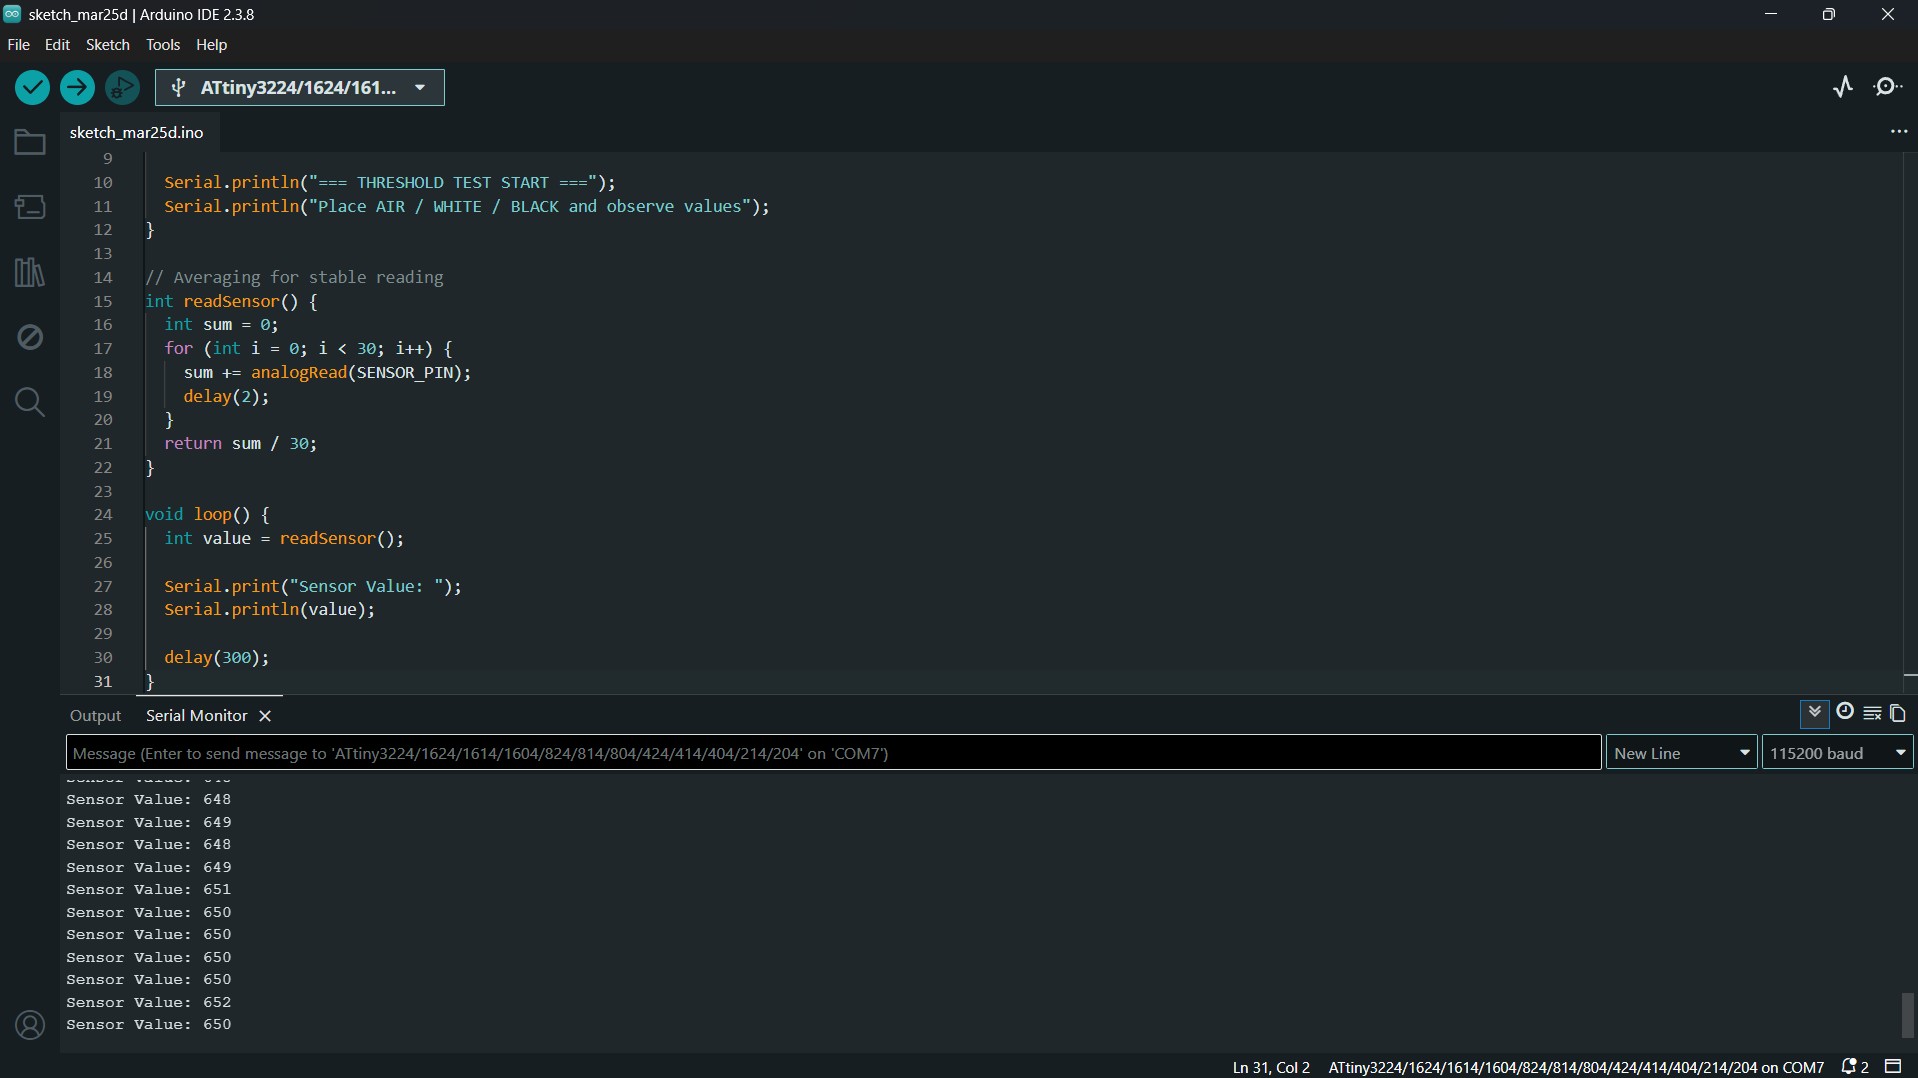
Sensor Reading Ranges from:
No card(air)
<630
Black surface
<410
white surface
<180
Card pattern detection
                if (value > 550) {
                  // NO CARD
                }
                else if (value < 250) {
                  // WHITE
                }
                else {
                  // BLACK
                }
Chatgpt_AI Prompt Used
              (I have designed a PCB using the ATtiny1614 microcontroller with an IR sensing setup.
              It includes an IR LED connected from GND through a 499 Ω resistor to PA2,
              and a phototransistor (PT15-21B-TR8) connected to PA3 with a 1 kΩ resistor to VCC (5V).
              There is also a blue power LED with a 499 Ω resistor, a 1 µF capacitor between VCC and GND,
              and a debug LED connected from GND through a 499 Ω resistor to PA1.
              An FTDI header connected to default pin.

              My project is a story card system where cards have black and white patterns,
              and the IR sensor should detect when a card is inserted and identify these patterns.)


              Now,Give Arduino code to detect the card pattern using an IR sensor.
              If the sensor value is greater than 550, show “NO CARD” or “CARD REMOVED” in the Serial Monitor.
               If the value is less than 250, show “WHITE”. Otherwise show “BLACK”.
               Also print the sensor reading value in the Serial Monitor and also print along with the card detection(reading, card removed).
              #define SENSOR_PIN PIN_PA3
              #define IR_LED PIN_PA2
              #define DEBUG_LED PIN_PA1

              void setup() {
                Serial.begin(115200);

                pinMode(IR_LED, OUTPUT);
                pinMode(DEBUG_LED, OUTPUT);

                digitalWrite(IR_LED, HIGH);
              }

              int readSensor() {
                int sum = 0;
                for (int i = 0; i < 20; i++) {
                  sum += analogRead(SENSOR_PIN);
                  delay(2);
                }
                return sum / 20;
              }

              void loop() {
                int value = readSensor();

                Serial.print("Value: ");
                Serial.print(value);

                // 🔴 NO CARD (AIR)
                if (value > 550) {
                  Serial.println(" → NO CARD");
                  digitalWrite(DEBUG_LED, LOW);
                }

                // ⚪ WHITE
                else if (value < 250) {
                  Serial.println(" → WHITE");
                  digitalWrite(DEBUG_LED, HIGH);
                }

                // ⚫ BLACK
                else {
                  Serial.println(" → BLACK");
                  digitalWrite(DEBUG_LED, LOW);
                }

                delay(100);
              }