Computer-Aided Design
Task:
- Model (raster, vector, 2D, 3D, render, animate, simulate, ..) a possible final project, compress your images and videos, and documenting with your design files.
Raster vs Vector
What is raster?
It is made of tiny dots called pixels. Each pixel has a color, and together they form an image.
Raster images are used for photos and web images,
but they become blurred or pixelated when zoomed in or enlarged. Formats: JPEG, PNG, GIF.
Eg for raster sofwares: Photoshop, GIMP, Photopea.
What is vector?
It is made using mathematical lines and curves. Because of this, it can be scaled to any size without losing quality. Vector images are used for logos, icons, illustrations, and diagrams. Format: SVG, EPS, PDF. Eg for raster sofwares: Illustrator, Inkscape Coreldraw.
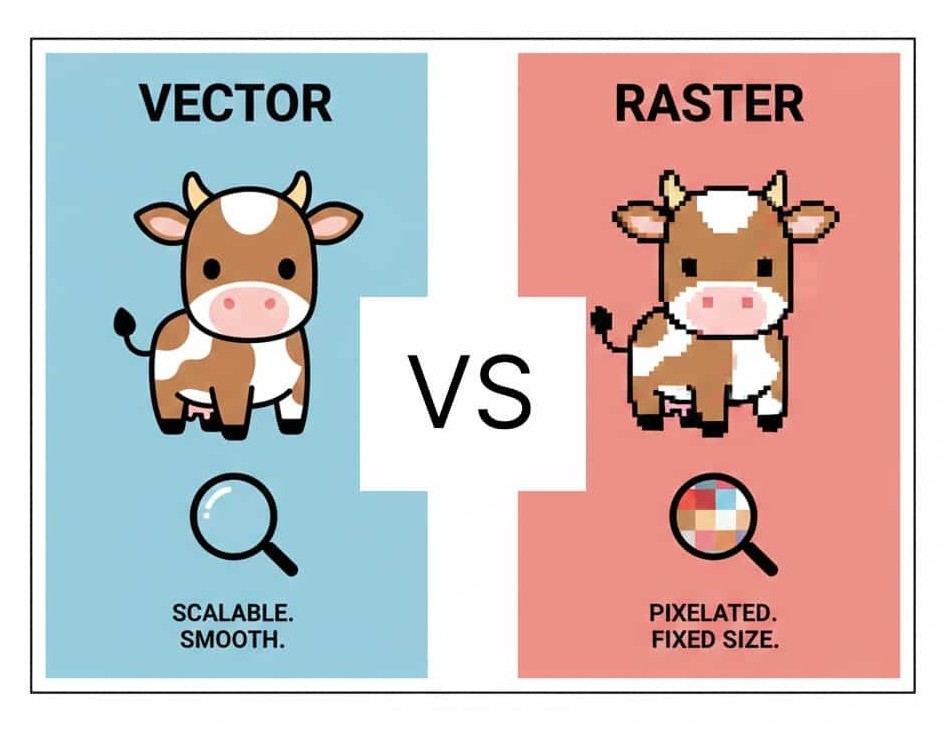
Chatgpt_AI Prompt Used
create a image having vector vs raster comparison that is funny and simple one with exact same element maybe a baby brown cow to represent vector and raster file with design clean like swiss design
2D Software
Inkscape:
A free and open-source vector graphics editor used to create vector images, primarily in Scalable Vector Graphics (SVG) format.
You can create logo, illustrations, paintings and many more.
Where i did start from?
I hadn't used inkscape before, so it was a little tricky to understand the tools. It looks very similar to other vector tools like illustrator but it's not exactly the same.
Even simple as crop feature which isn't directly available in inkscape.
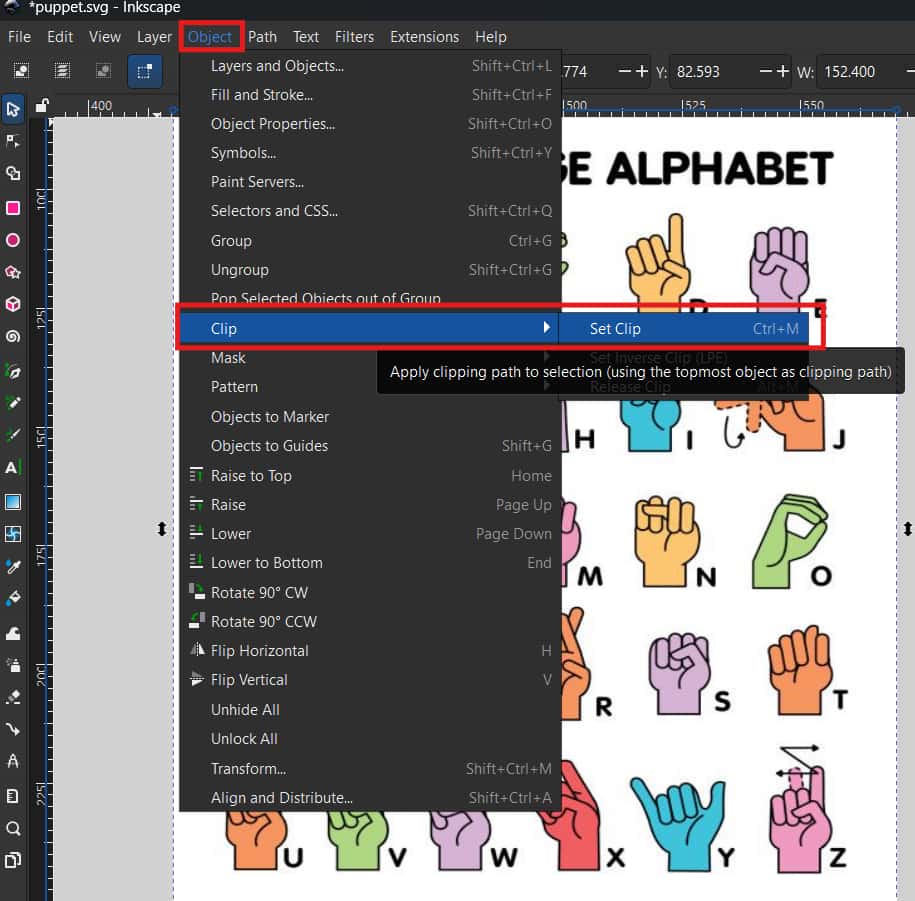
How to crop in inkscape?
To crop in Inkscape, you need to create a shape on top of the area you want to crop.
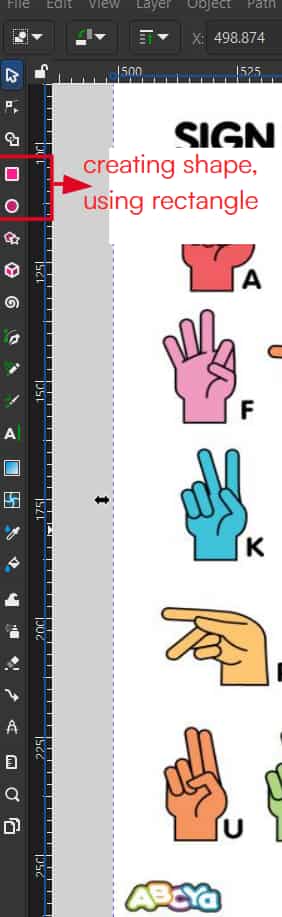
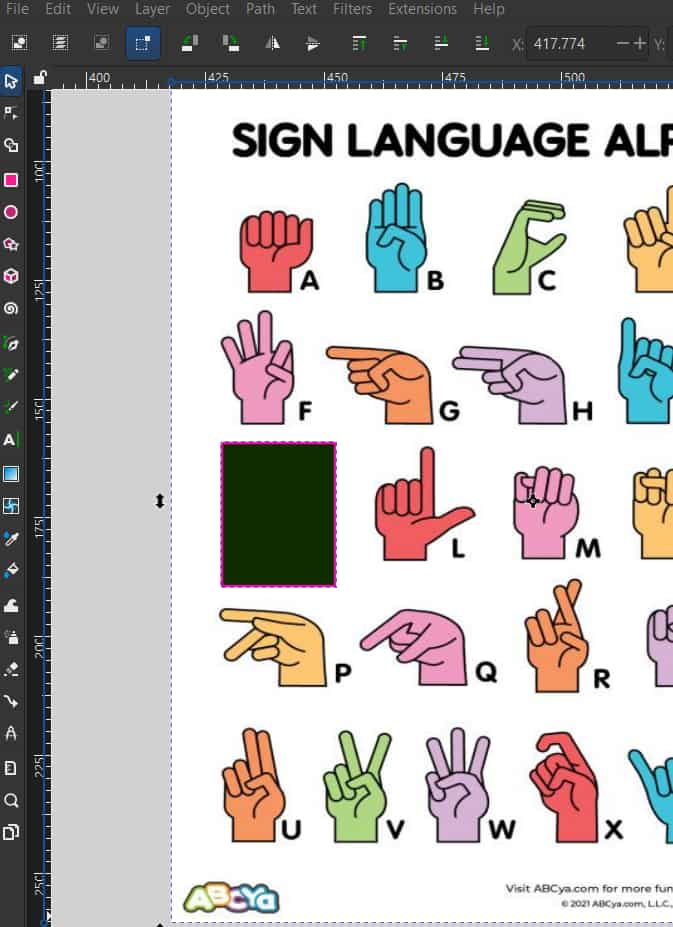
Then select both elements—the shape and the image. From menu bar >> object >> clip >> set clip
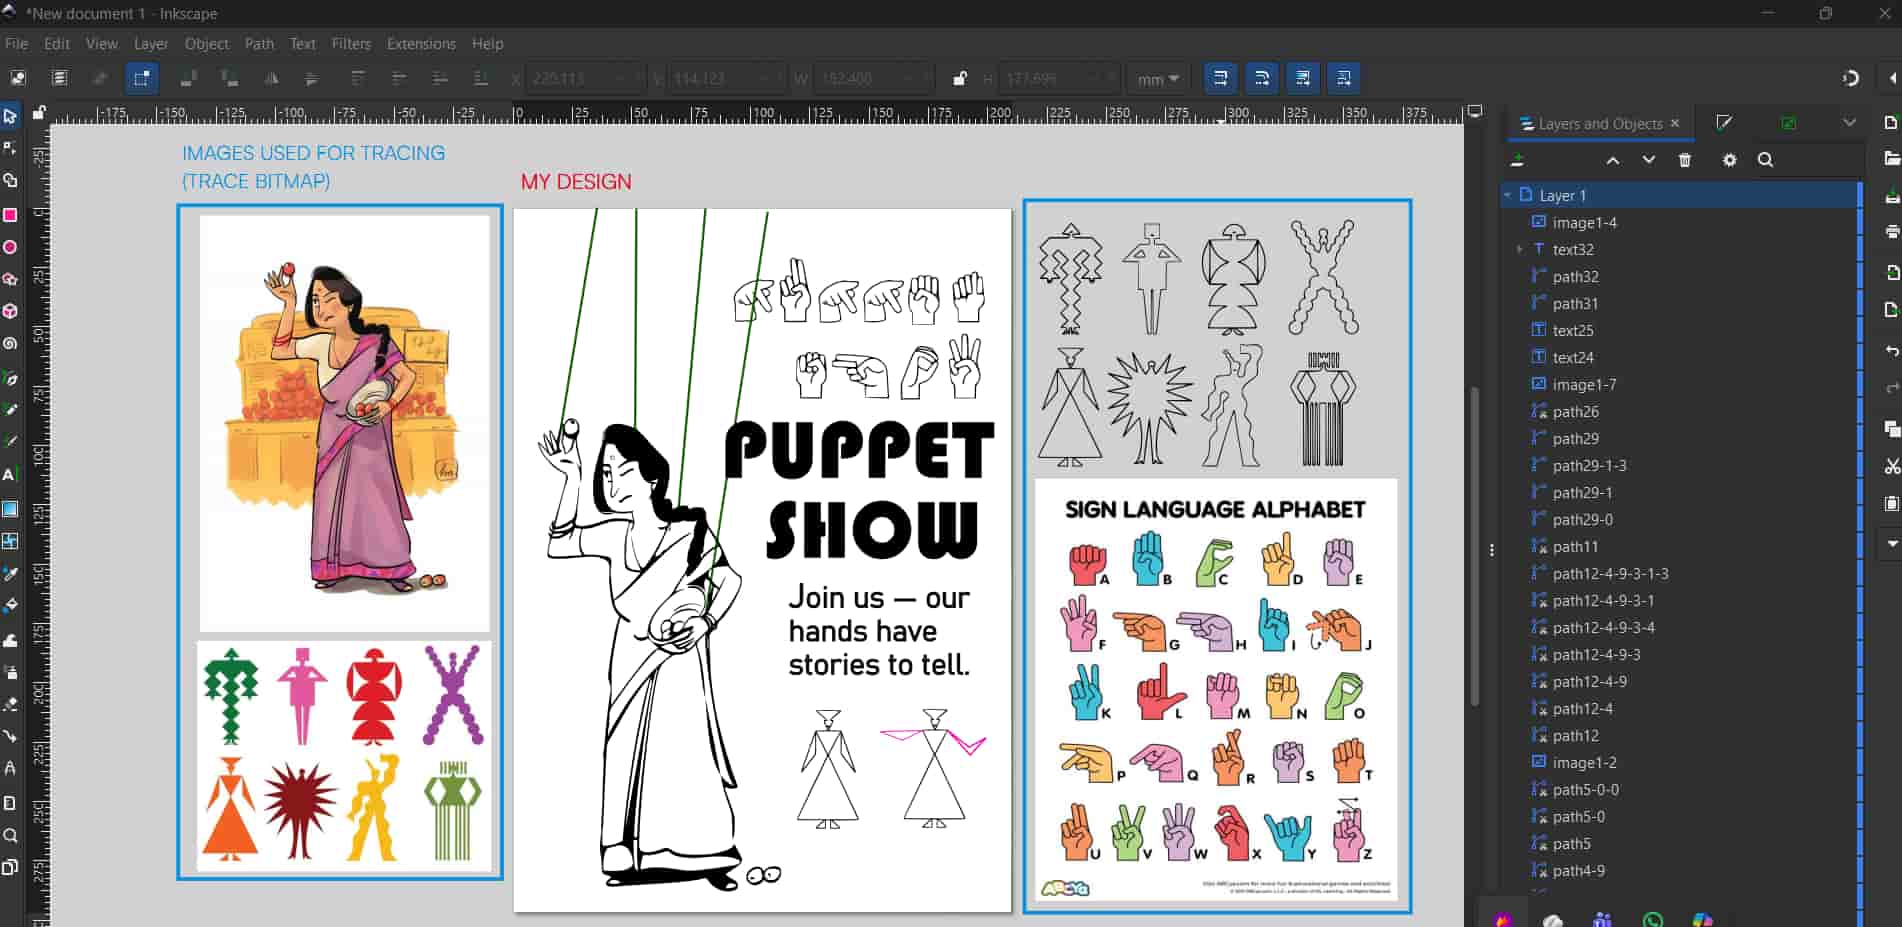
I decided to make a poster for puppet show.
Downloaded images from pinterest to trace using "trace bitmap" tool.
Used text tool to add text, then use pen tool to draw puppet's green strings and pink hands.
.jpg)
Photopea
Photopea is a free, web-based photo editor that works in your browser to edit images, apply effects, add text, and supports formats like PSD, AI. It's like an alternative free version of photoshop.
where did i start from?
I am familiar with photoshop, photopea's tools look very similar. But in photoshop,
transfrom is ctrl + t, whereas in photopea it appears when you select the move tool
from tool bar>> then tick on the "transfrom control" option on top menu bar.
I created a meme on my current condition on documenting the assisgments. For that downloaded images of minions from google chrome.
.jpg)
.jpg)
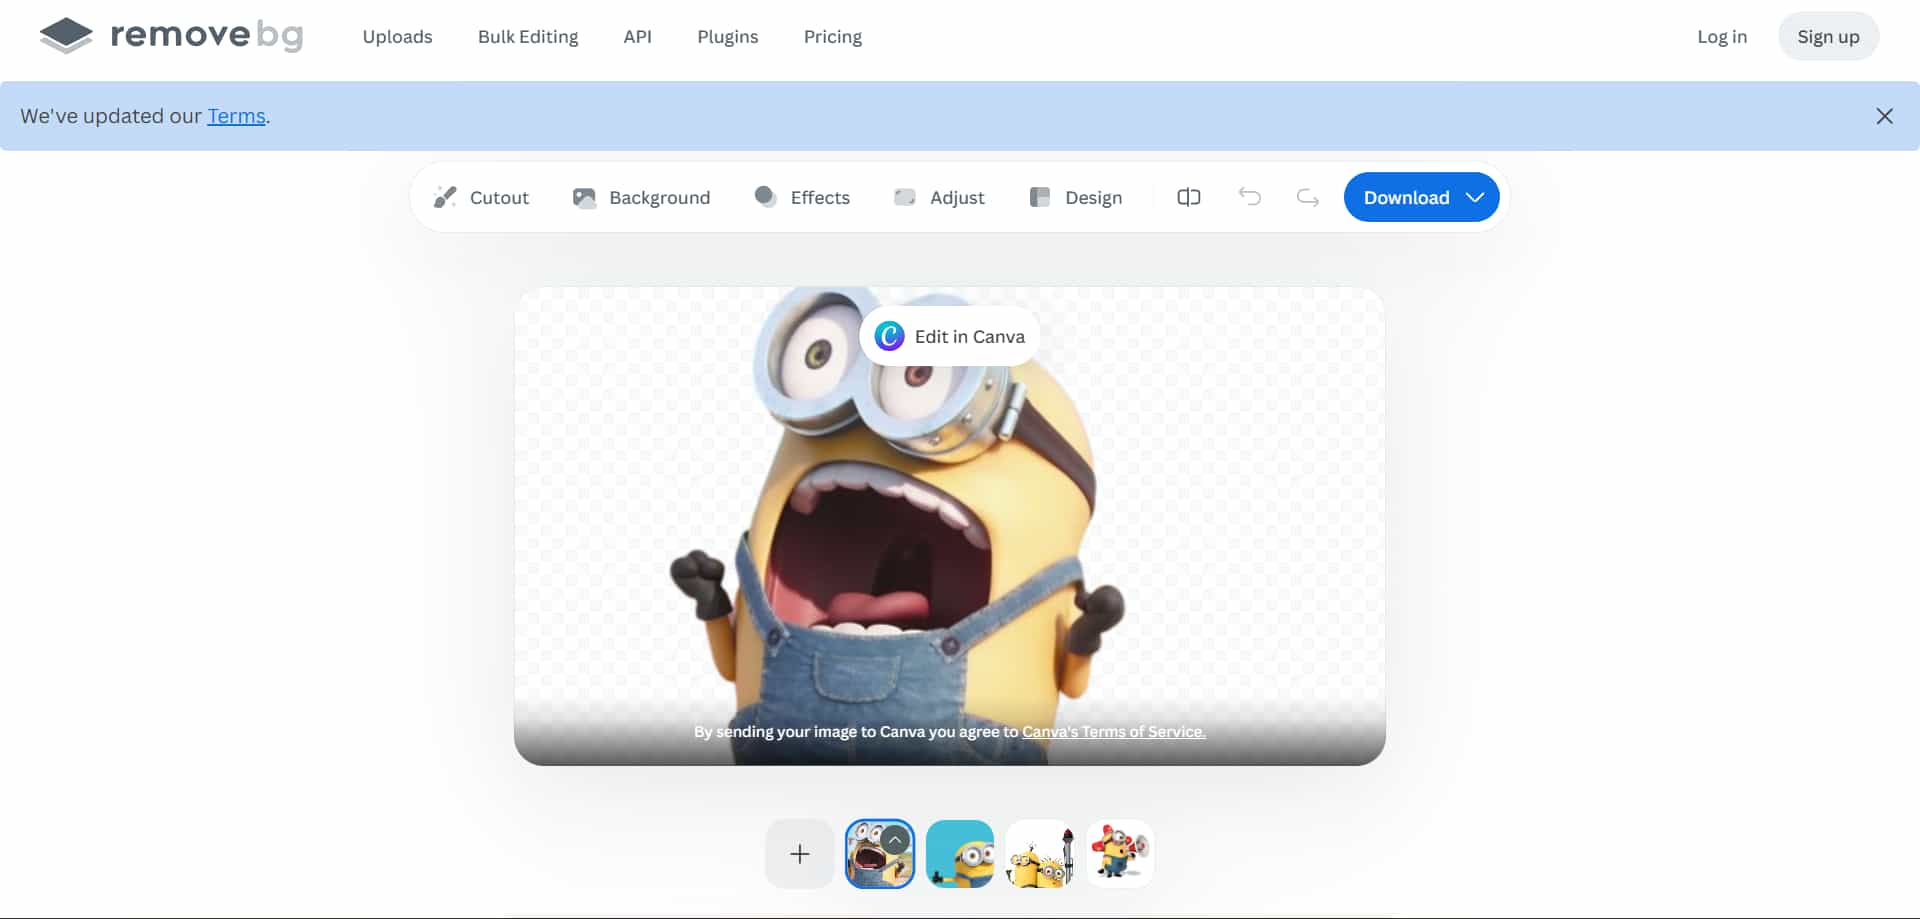
Background can be removed using tools like "Magic Wand , Quick Selection or Object Selection tool". Alternatively, AI-based websites can remove backgrounds quickly and efficiently, like Remove bg, Photoroom.
.jpg)
3D Softwares
Fusion 360
A cloud-based 3D design software from Autodesk that integrates CAD
(Computer-Aided Design), CAM (Computer-Aided Manufacturing), CAE (Computer-Aided Engineering), and PCB (Printed Circuit Board)
design into one platform
It is parametric CAD software, also has history timeline.
What is parametric design and how to make it parametric?
A computational design method that uses algorithms, rules, and parameters to define relationships between design elements.
.jpg)
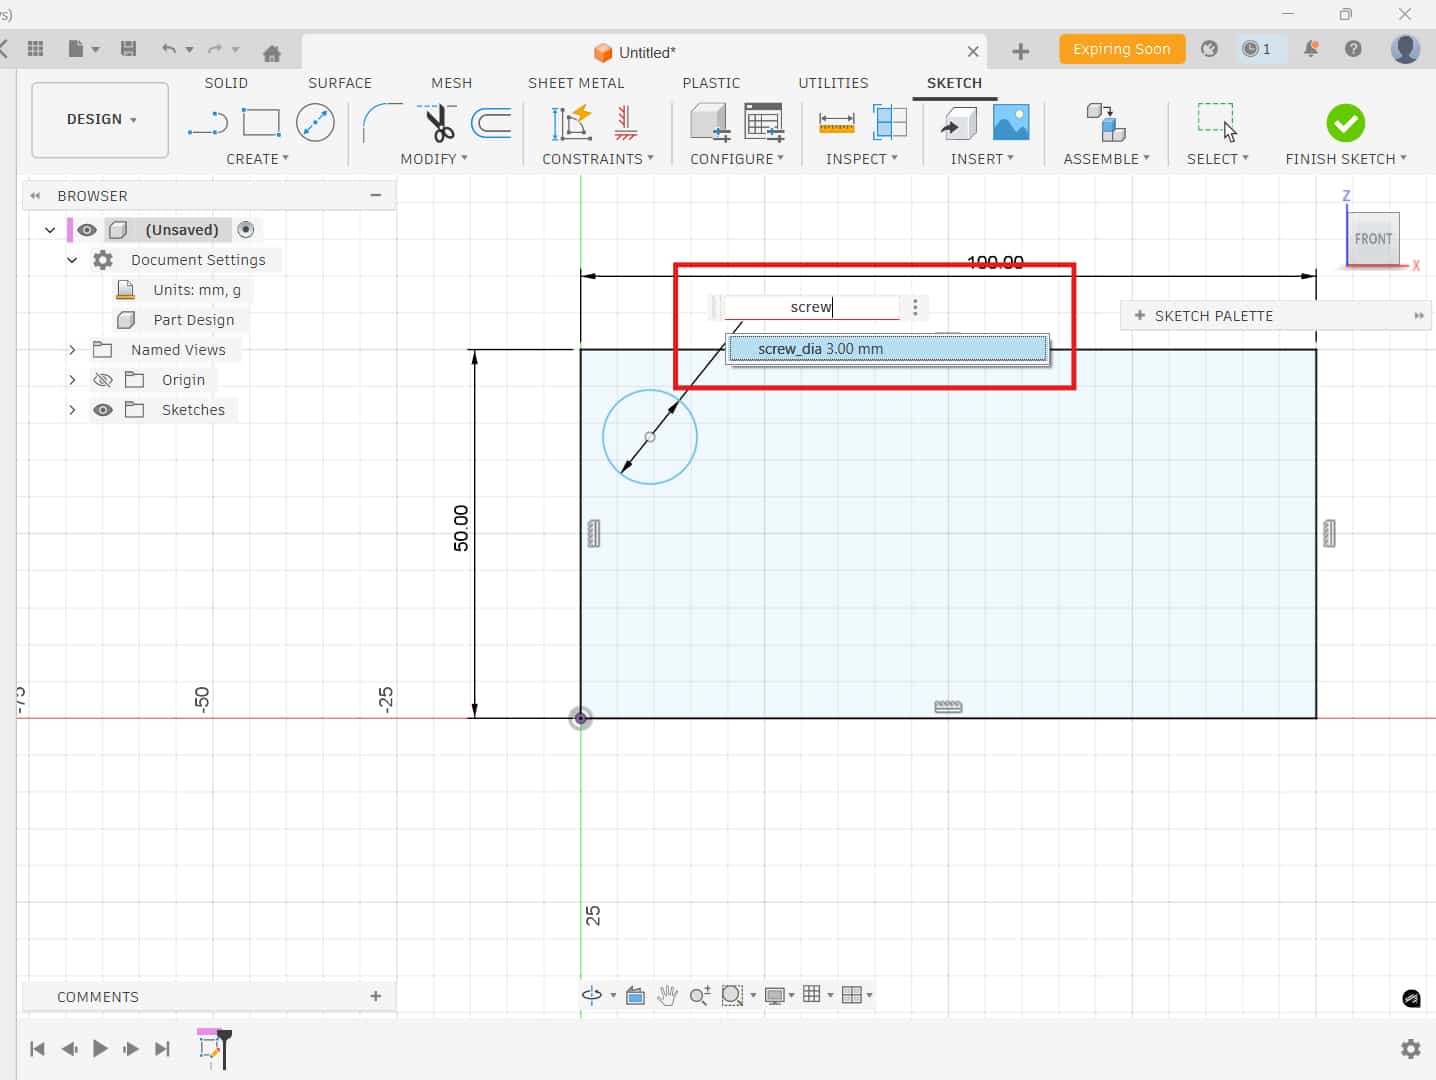
In parametric design, if you are using an M3 screw and you have 10 holes, instead of giving
each hole a fixed dimension, you can create a parameter called screw_dia= 3mm
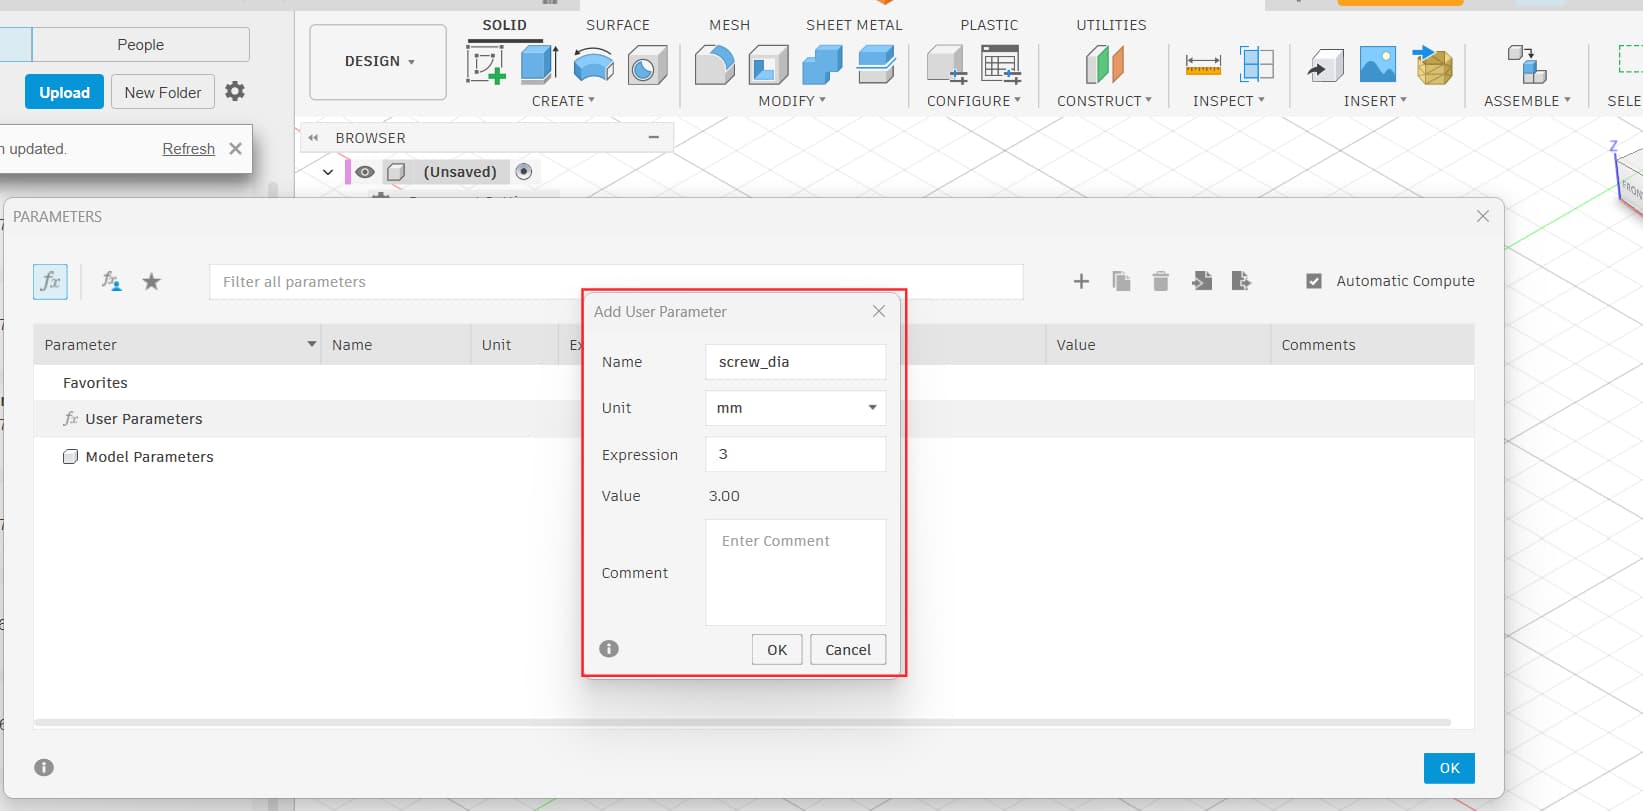
Then, while sketching, you use the parameter name instead of typing the number.
Later, if you want to change the screw size to M4 or M5, you just change the parameter value once, and all 10 holes update automatically.
Dimension + constraints : using this you can make a sketch fully defined - means degree of freedom = 0.
Encloser
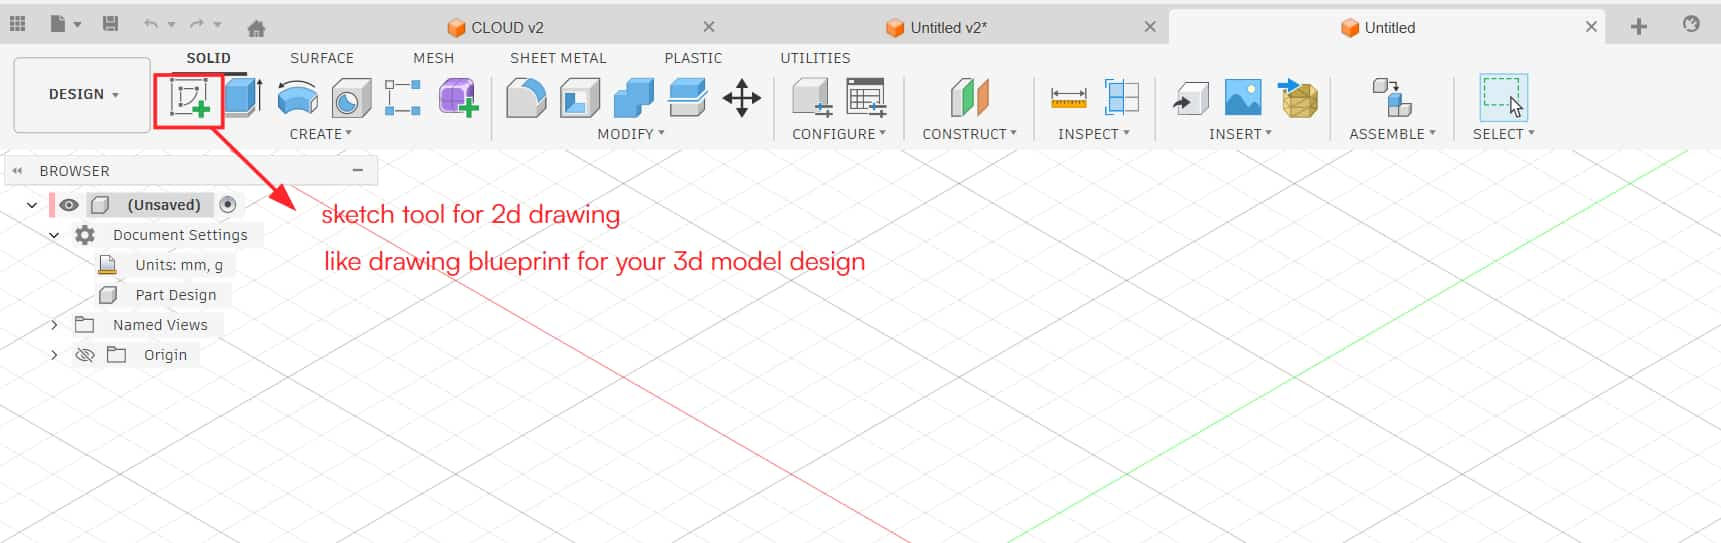
I started with creating a 2D sketch of the body.
For that click on “create sketch”, then choose the plane in which you have to draw the sketch.
It will allow you to create sketch on the selected plane.
I sketched on front plane.
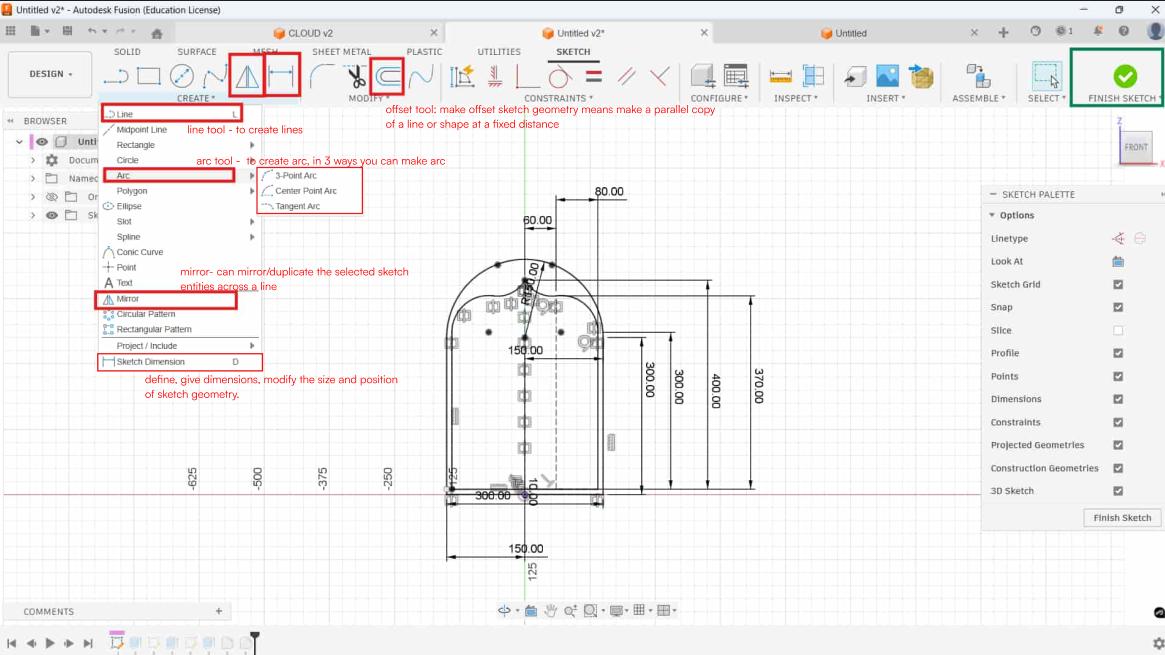
Line
Creates lines and specify the length and angle of the line segment
Arc
Creates arc,3 type of arc can be created" 3-Point Arc, Center Point Arc, and Tangent Arc"
Mirror
Can mirror/duplicate the selected sketch entities across a line.
Select the entities and the mirror line.
Sketch Dimension
Add and define dimensions, constrain geometry, used to contorl the size and position of geometry in the active sketch.
Offset tool
Create offset sketch geometry means make a parallel copy of a line or shape at a fixed distance.
You can select direction of offset.
About chain selection, you can able and enable it, if is on select one line, and the entire connected sketch gets offset automatically;
if it is off, select each line/edge manually, select only the parts you want will be offset.
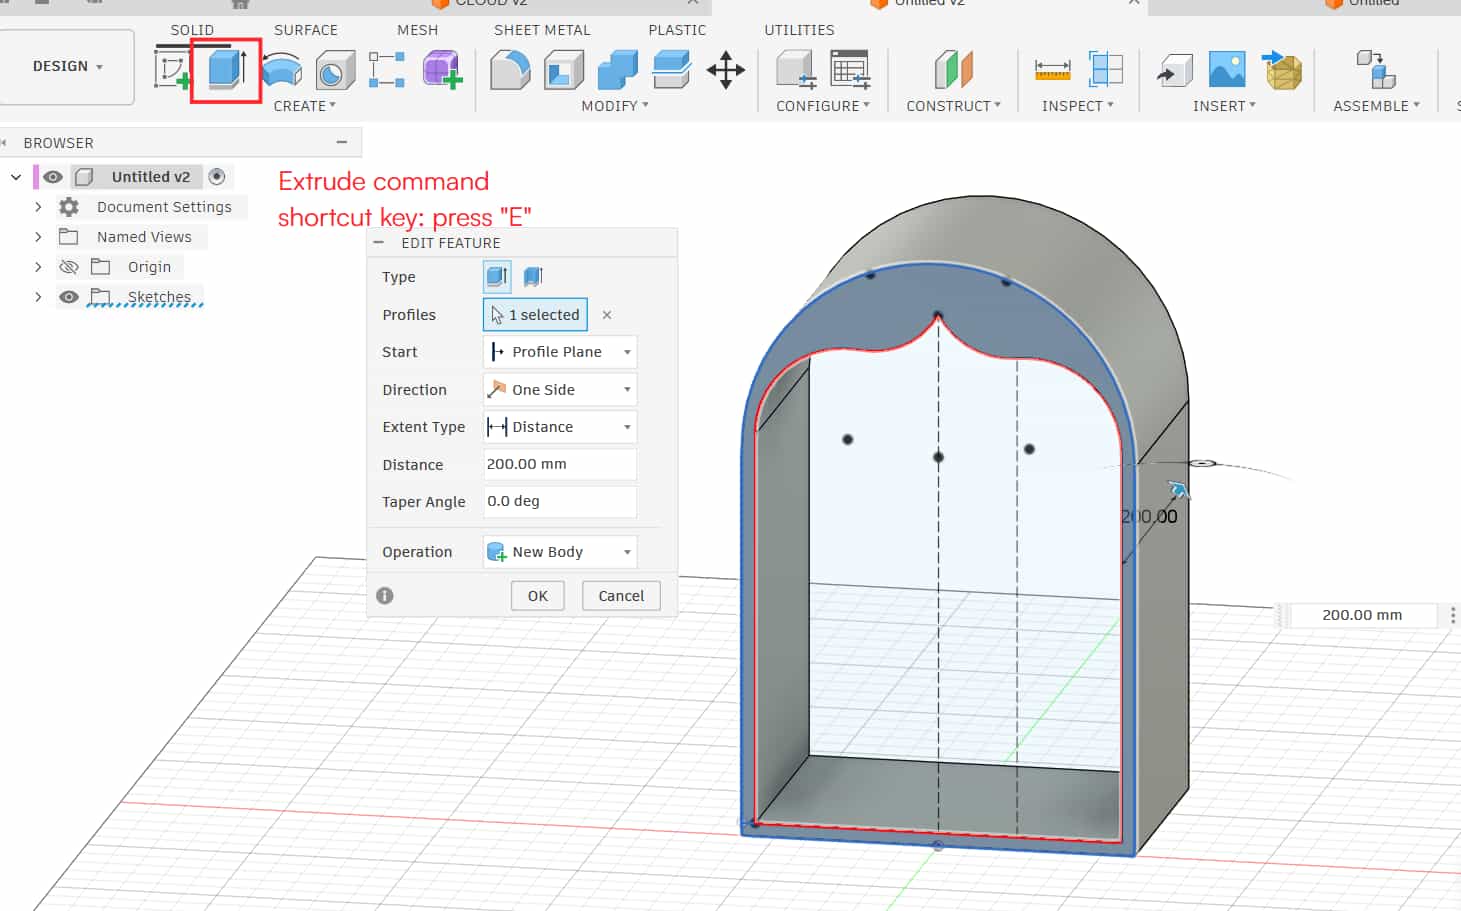
For make 3d mdoel from constructed sketch used extrude and to round of edges used fillet.
Extrude
create solid bodies from sketches or planar faces, also can join or cut from the existing solid bodies.
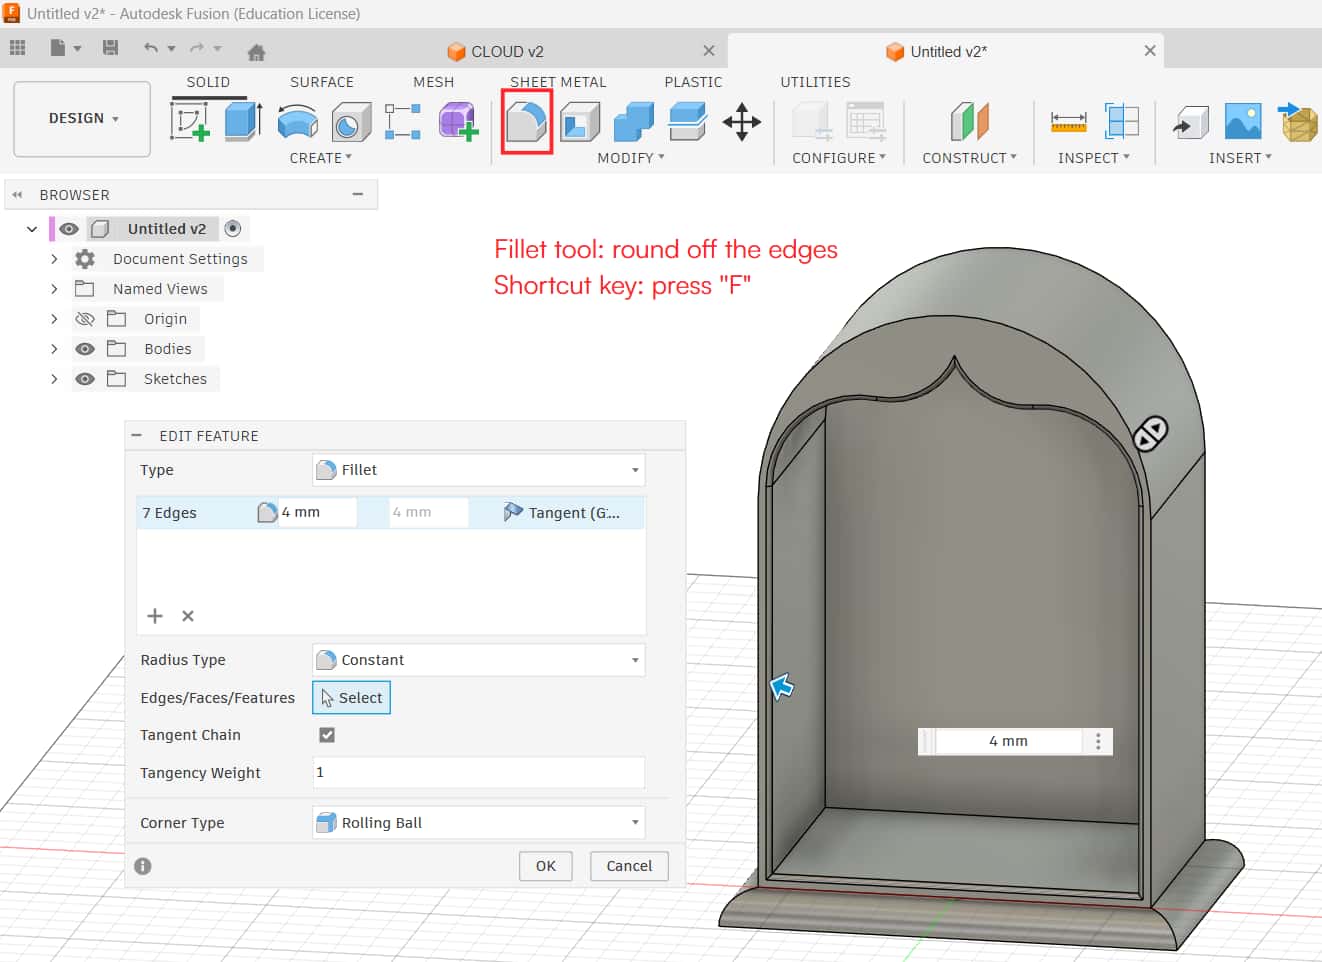
Fillet
create round egde, if you want smooth and curved edges use fillet.
Boat
For creating boat i used loft tool to creates a 3D shape that transitions between two different 2D sketches or faces. Loft can be used for making organic, complex or tapered designs. Mirror tool can access for 2d sketching as well as solid modeling too.
Inserting svg file and extruding to make 3D model
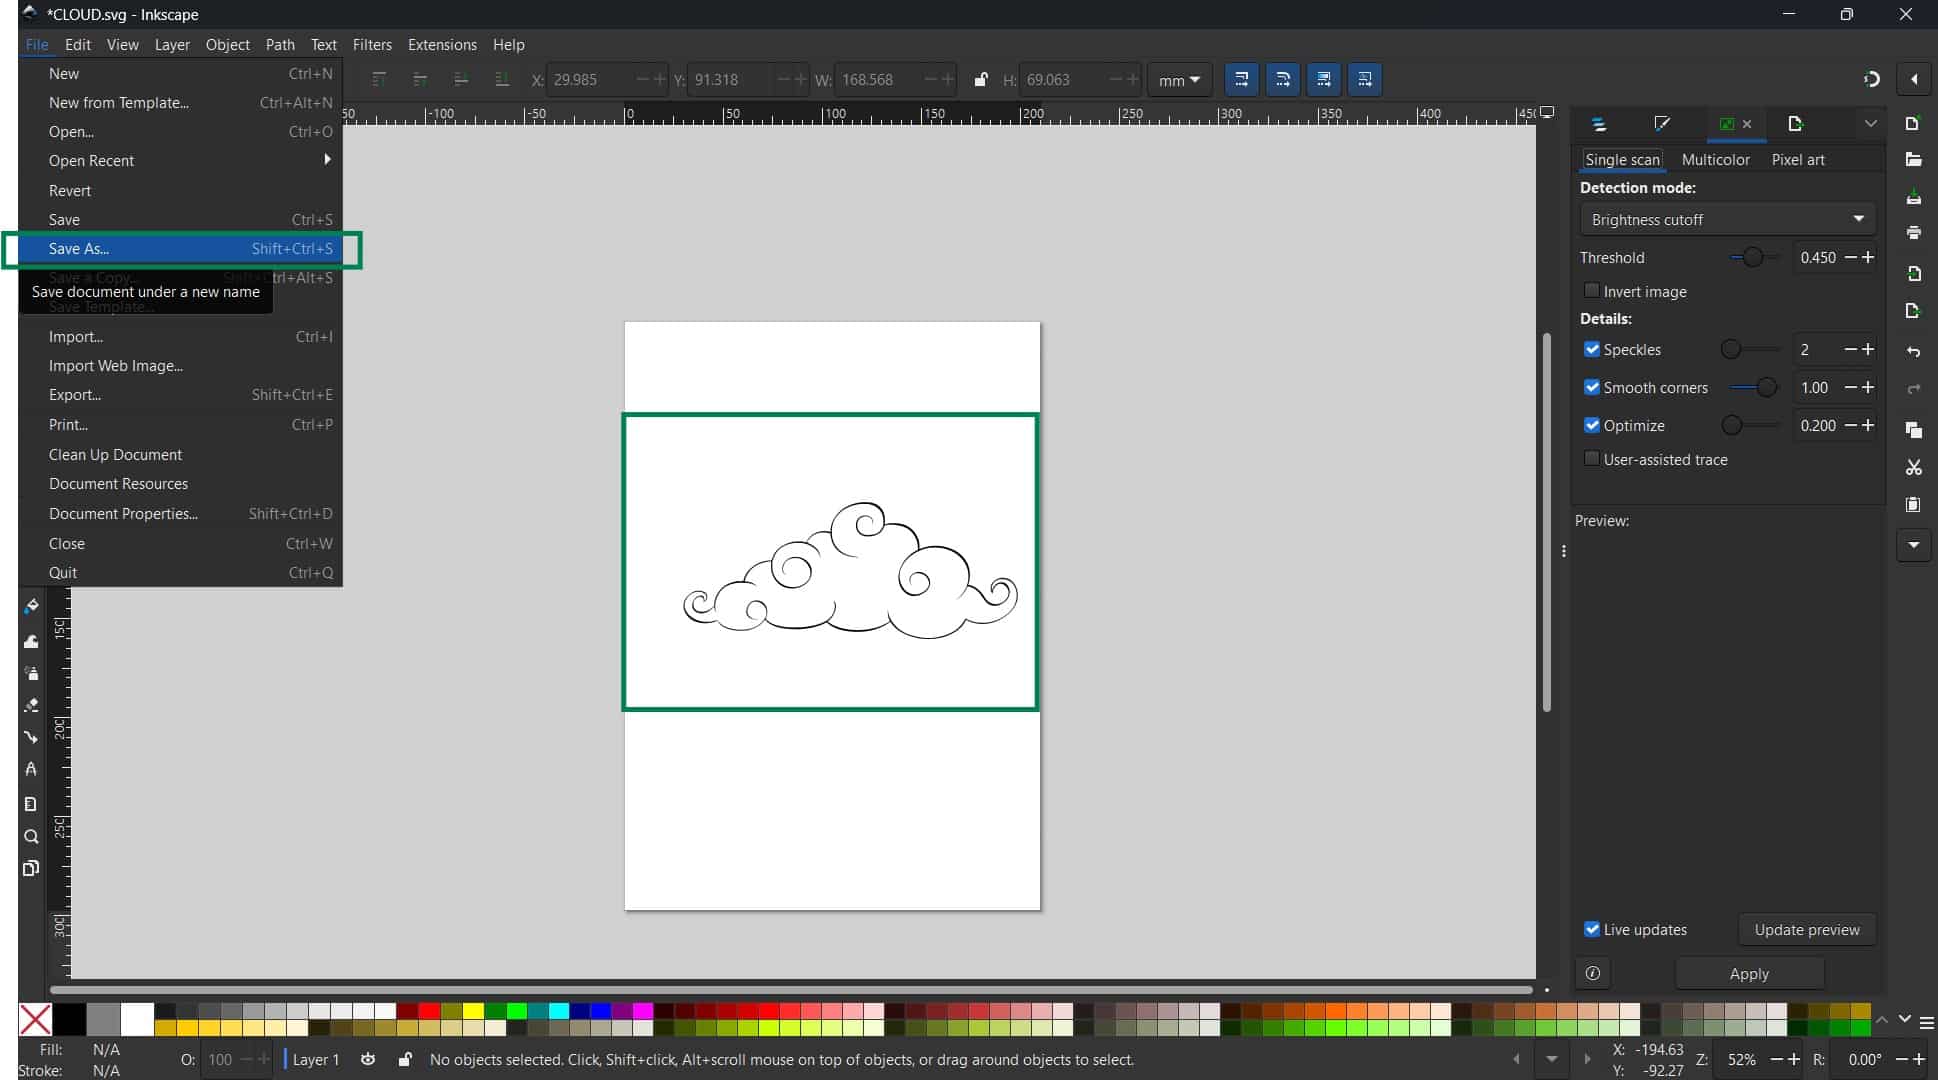
To insert an SVG file, we first need to create one.
We can download an SVG from the internet or design it ourselves using vector software.
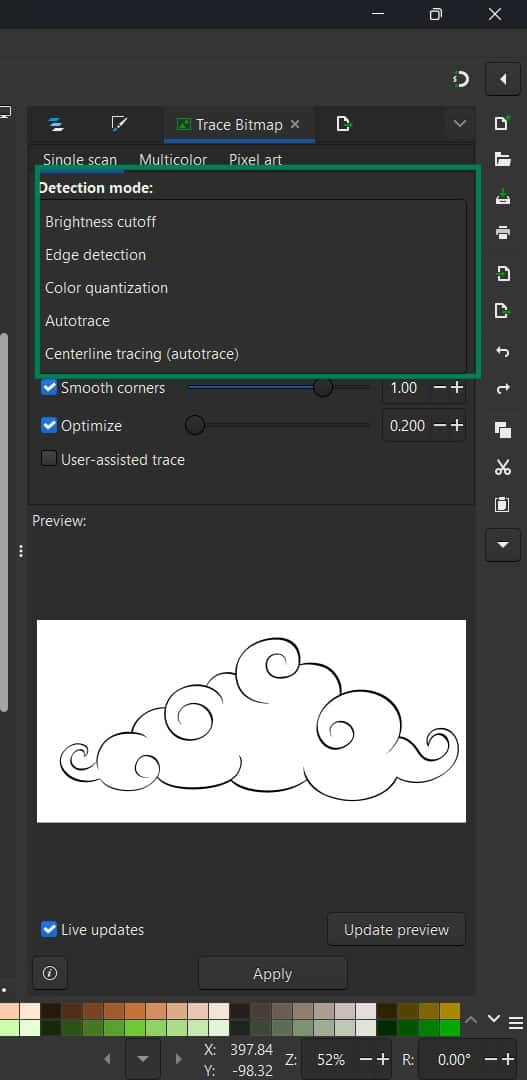
For this model, I created using Inkscape to make vector design, used trace bitmap tool to trace raster file to vector.
I downloaded cloud image from freepik and character img from pinterest by Aayna Vinaya.
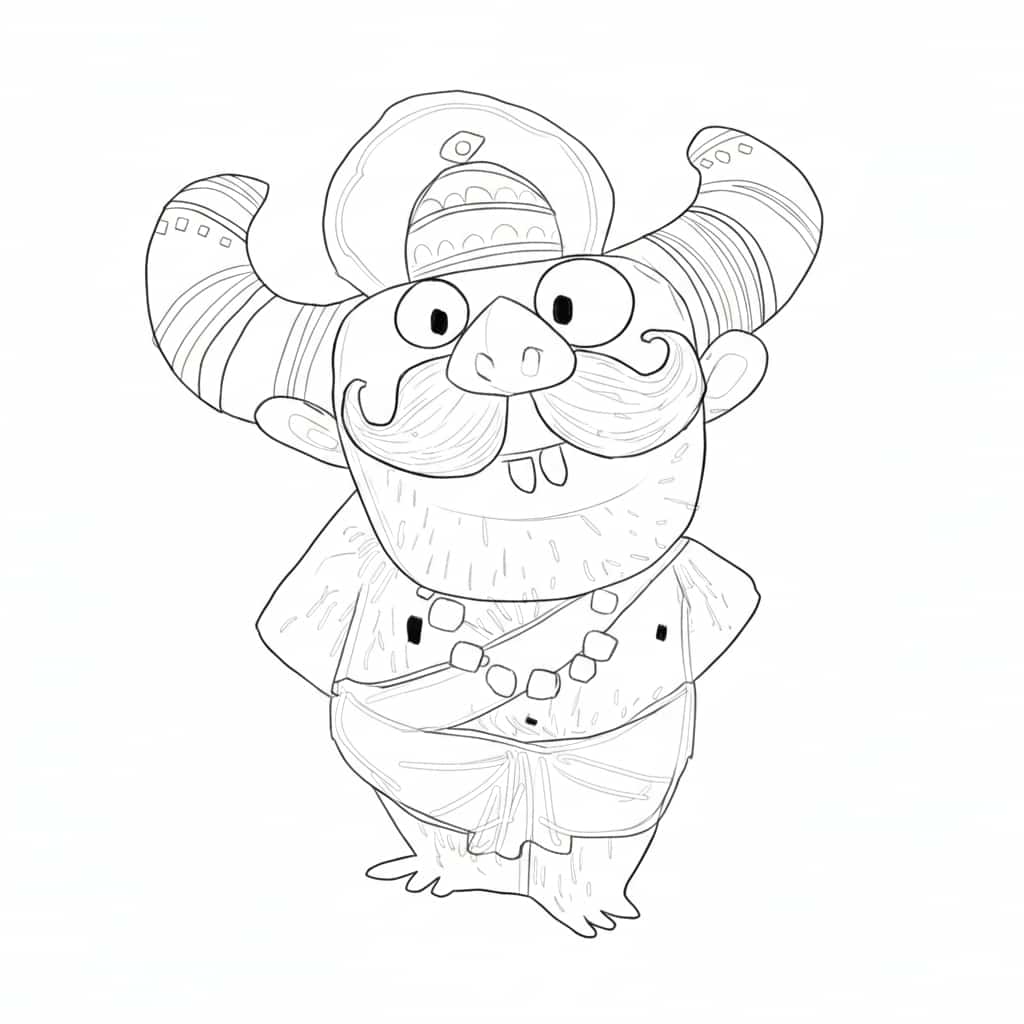
As the character img wasn't getting traced properly, so i used gemini to create line sketch of the charcter.
Then insert it in inkscape and traced it.
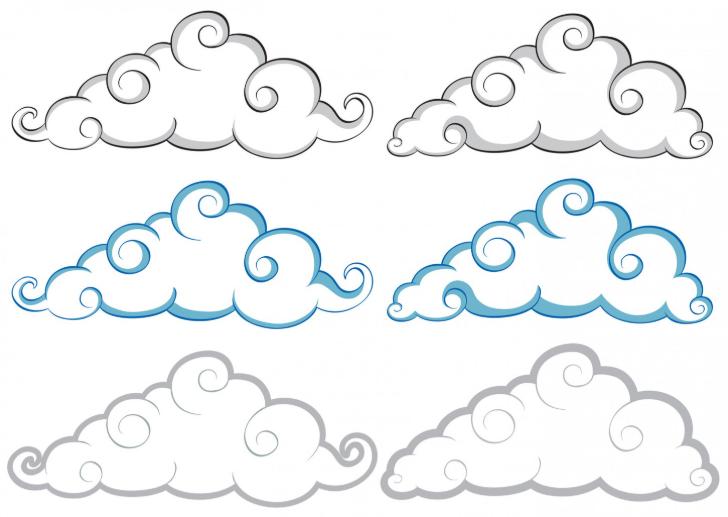
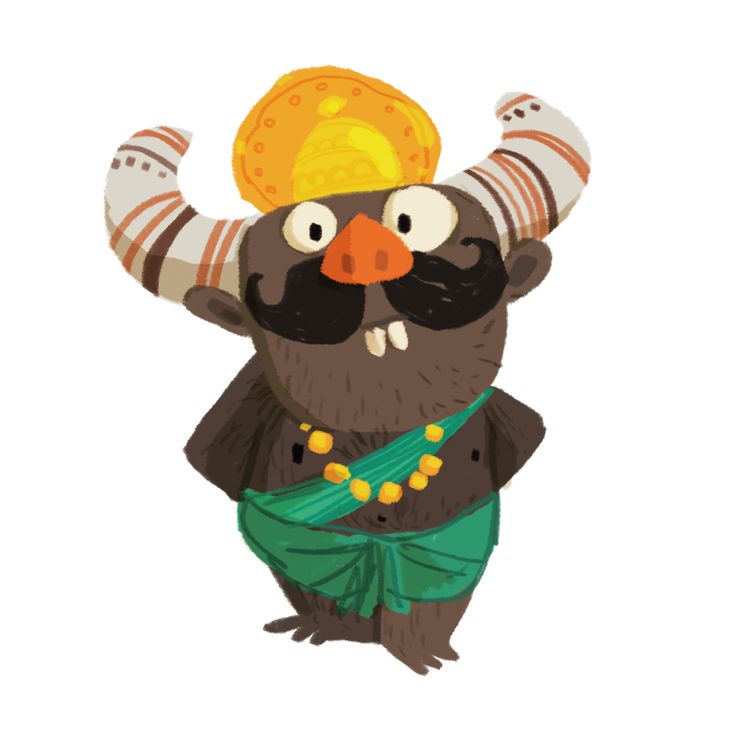
source: Cloudfreepik ndian Folktales Retold - Aayna Vinaya
Prompt: "Create vector sketch of this given image using pen tool without fill just using strokes."
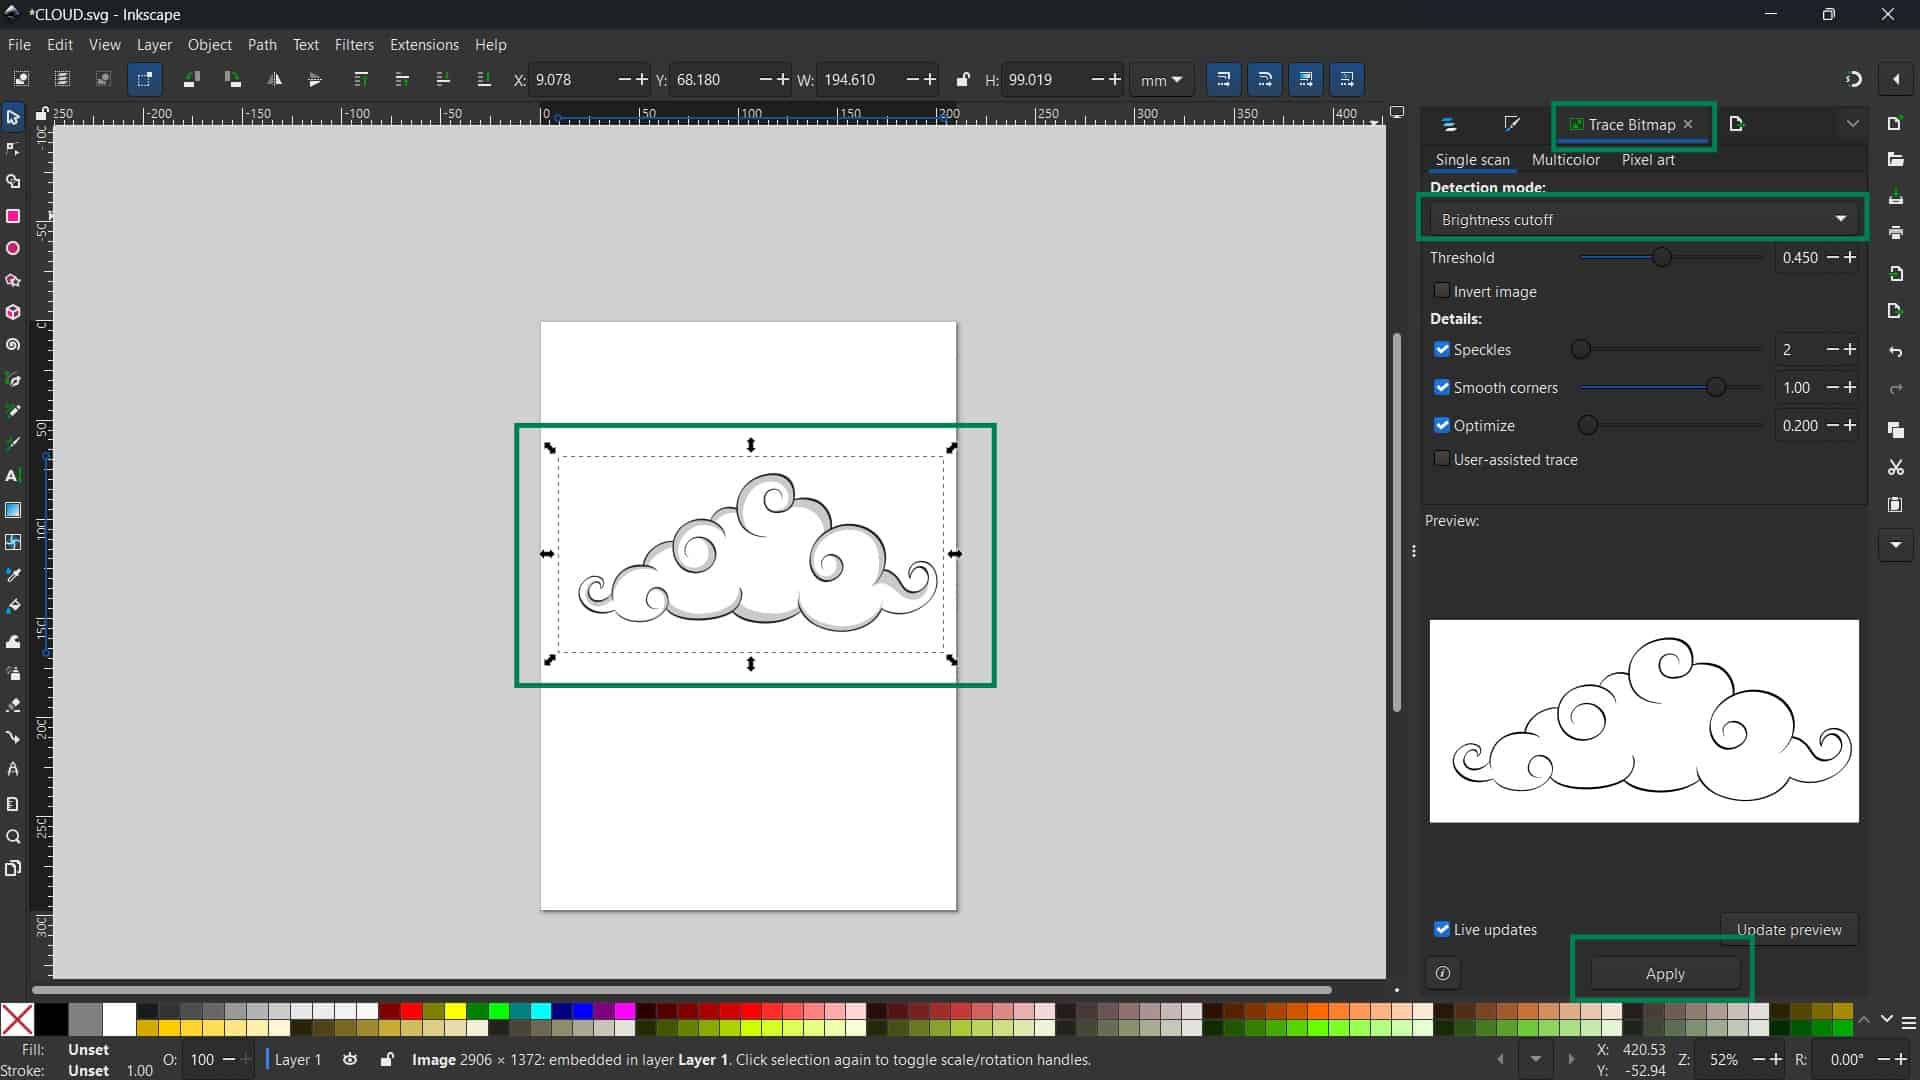
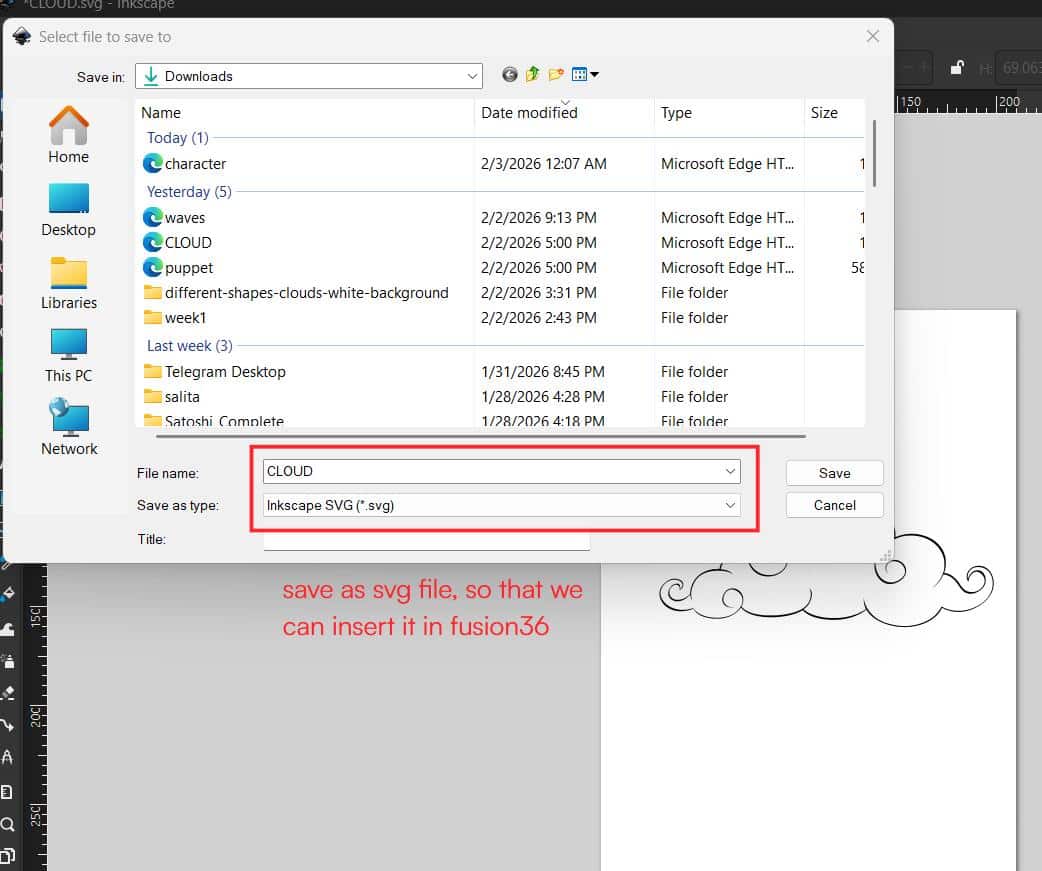
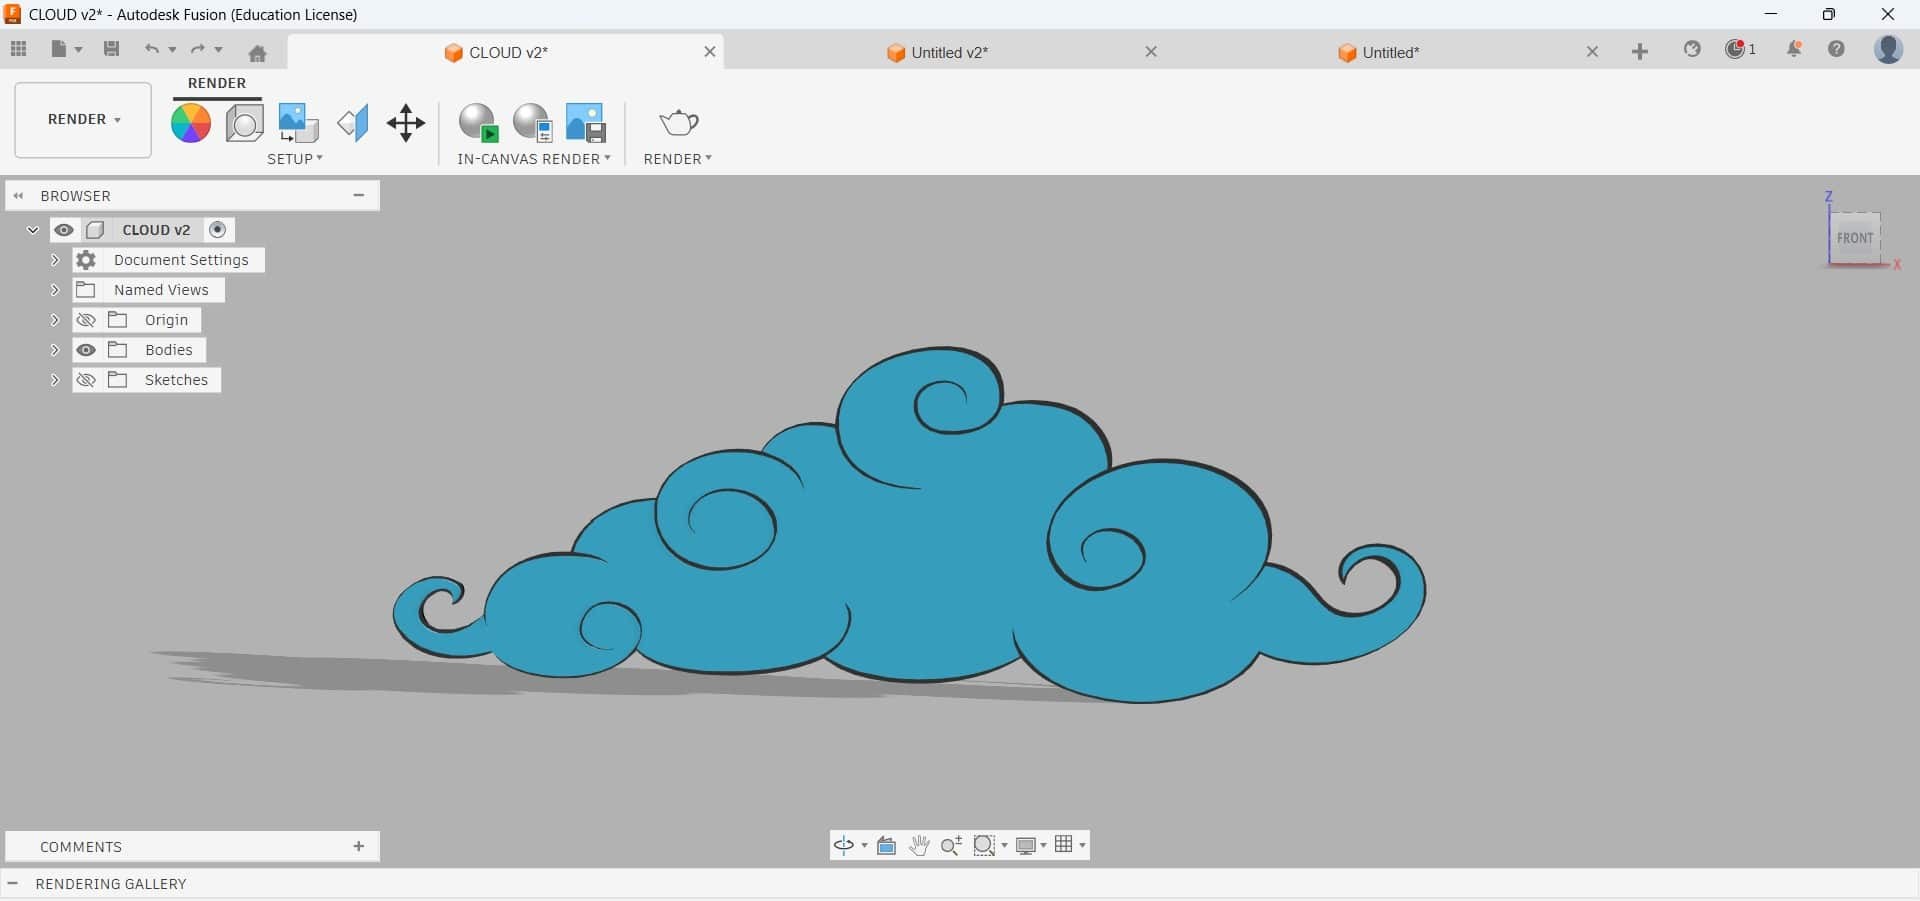
You can open this svg file using "insert svg" opt. Then select the plane, got option for transfrom, scale as per requirements.
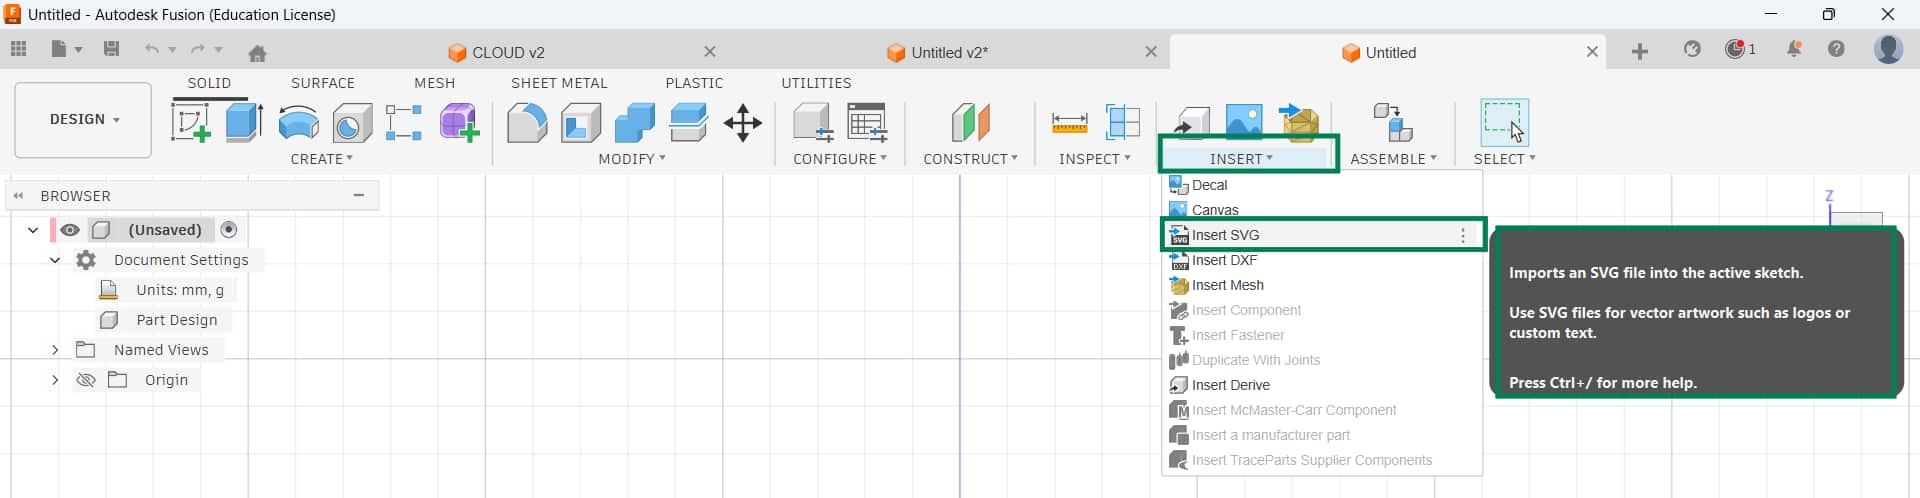
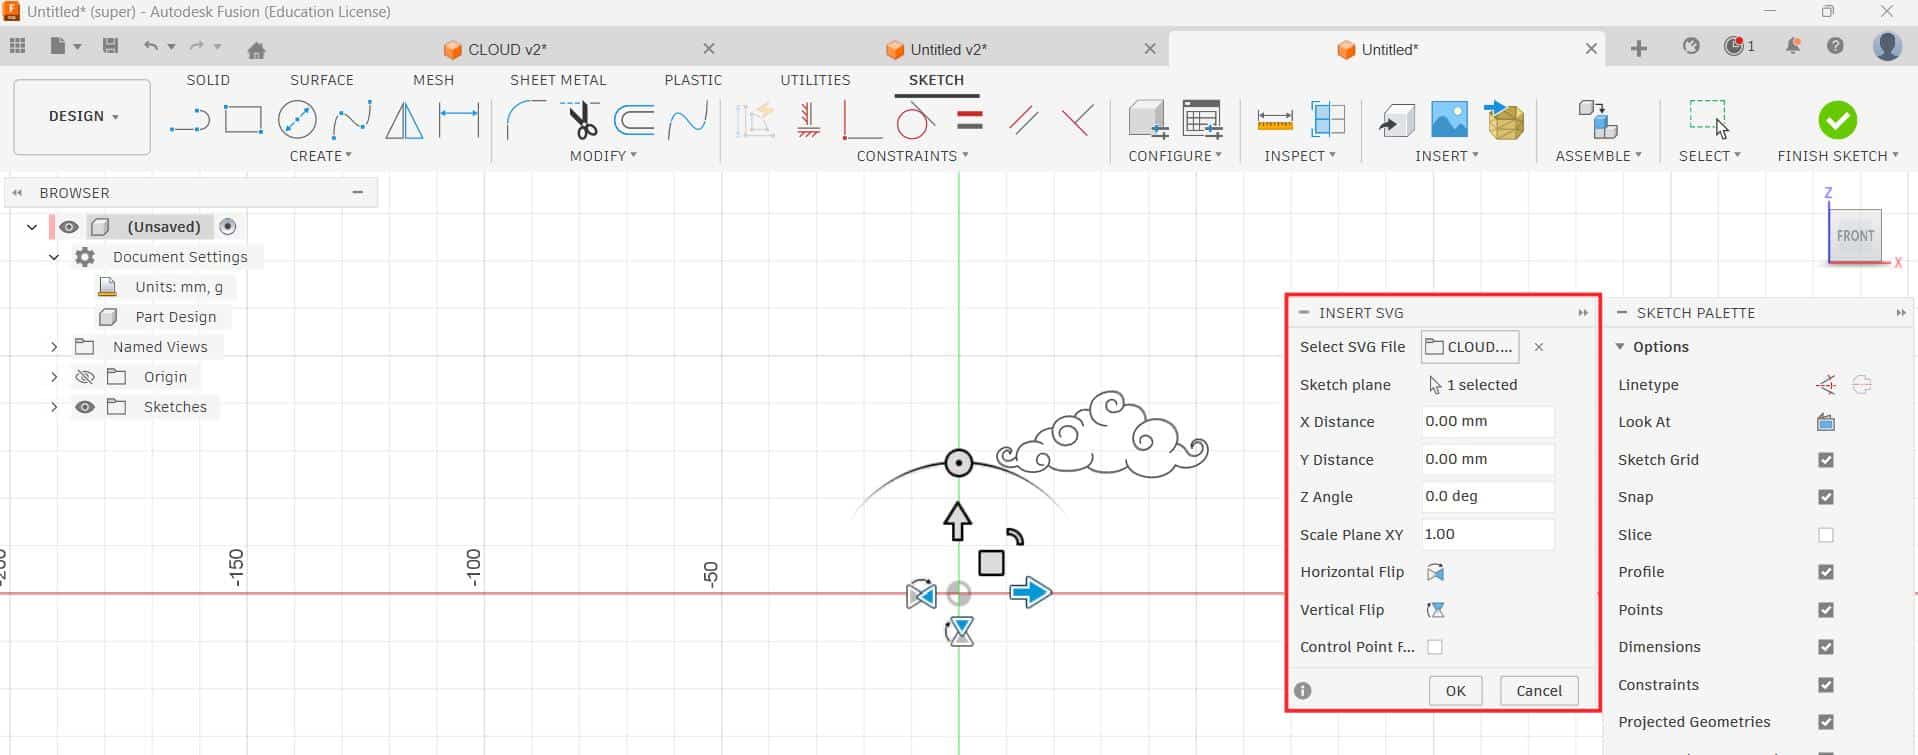
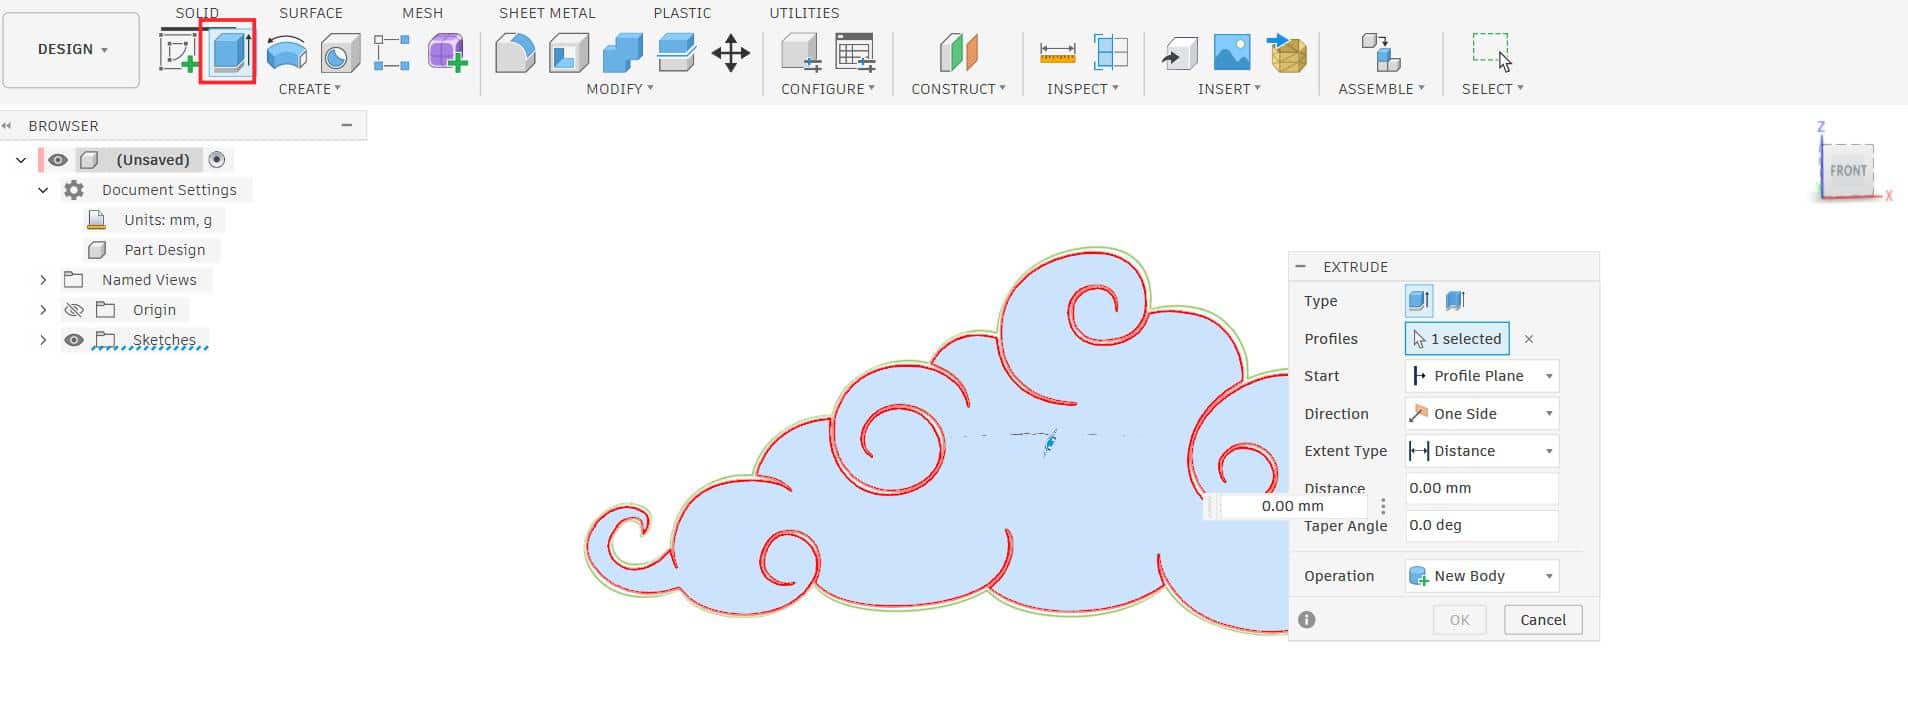
It automatically switches to the Create Sketch interface, where the SVG file's vector design opens as a sketch. From this sketch, you can extrude to create the 3D model.
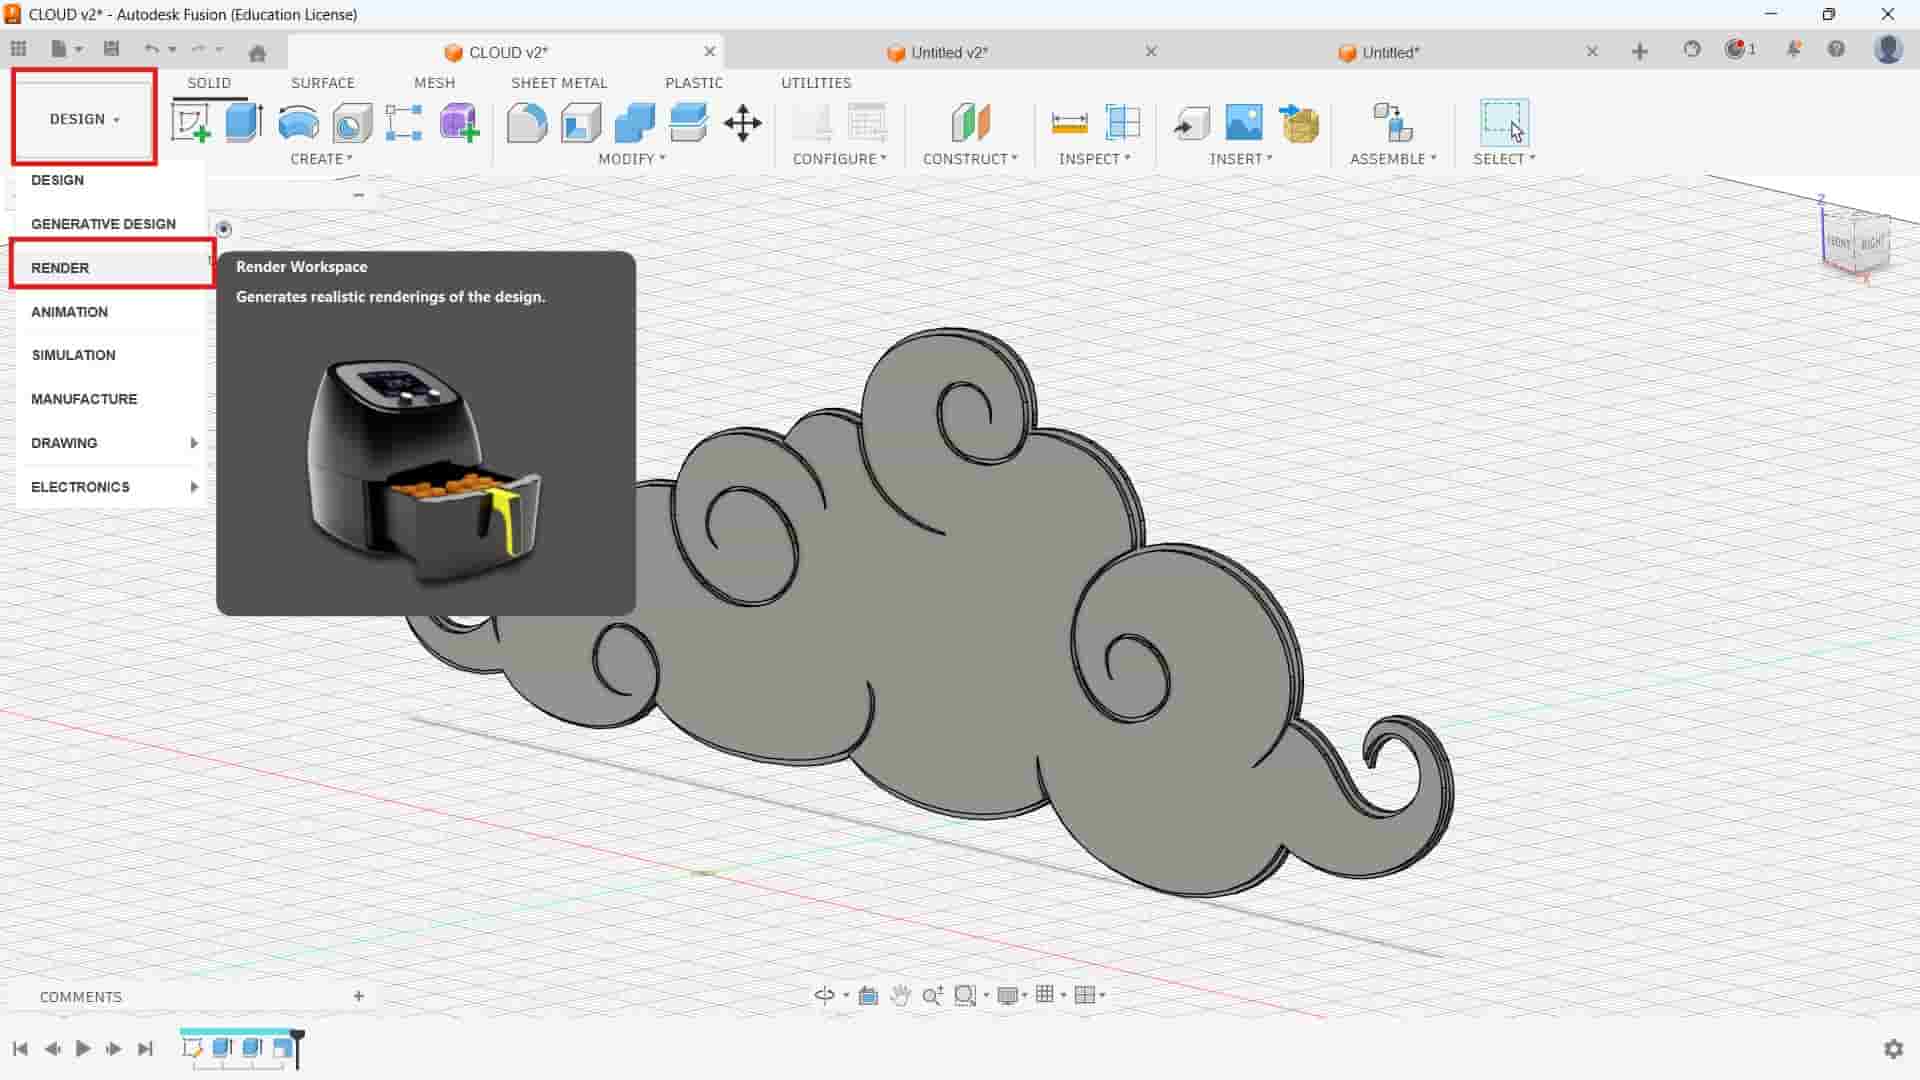
In fusion, for switching from Design environment to Render environment: by clicking on drop-down arrow next to Design. This will divert you to render workspace.
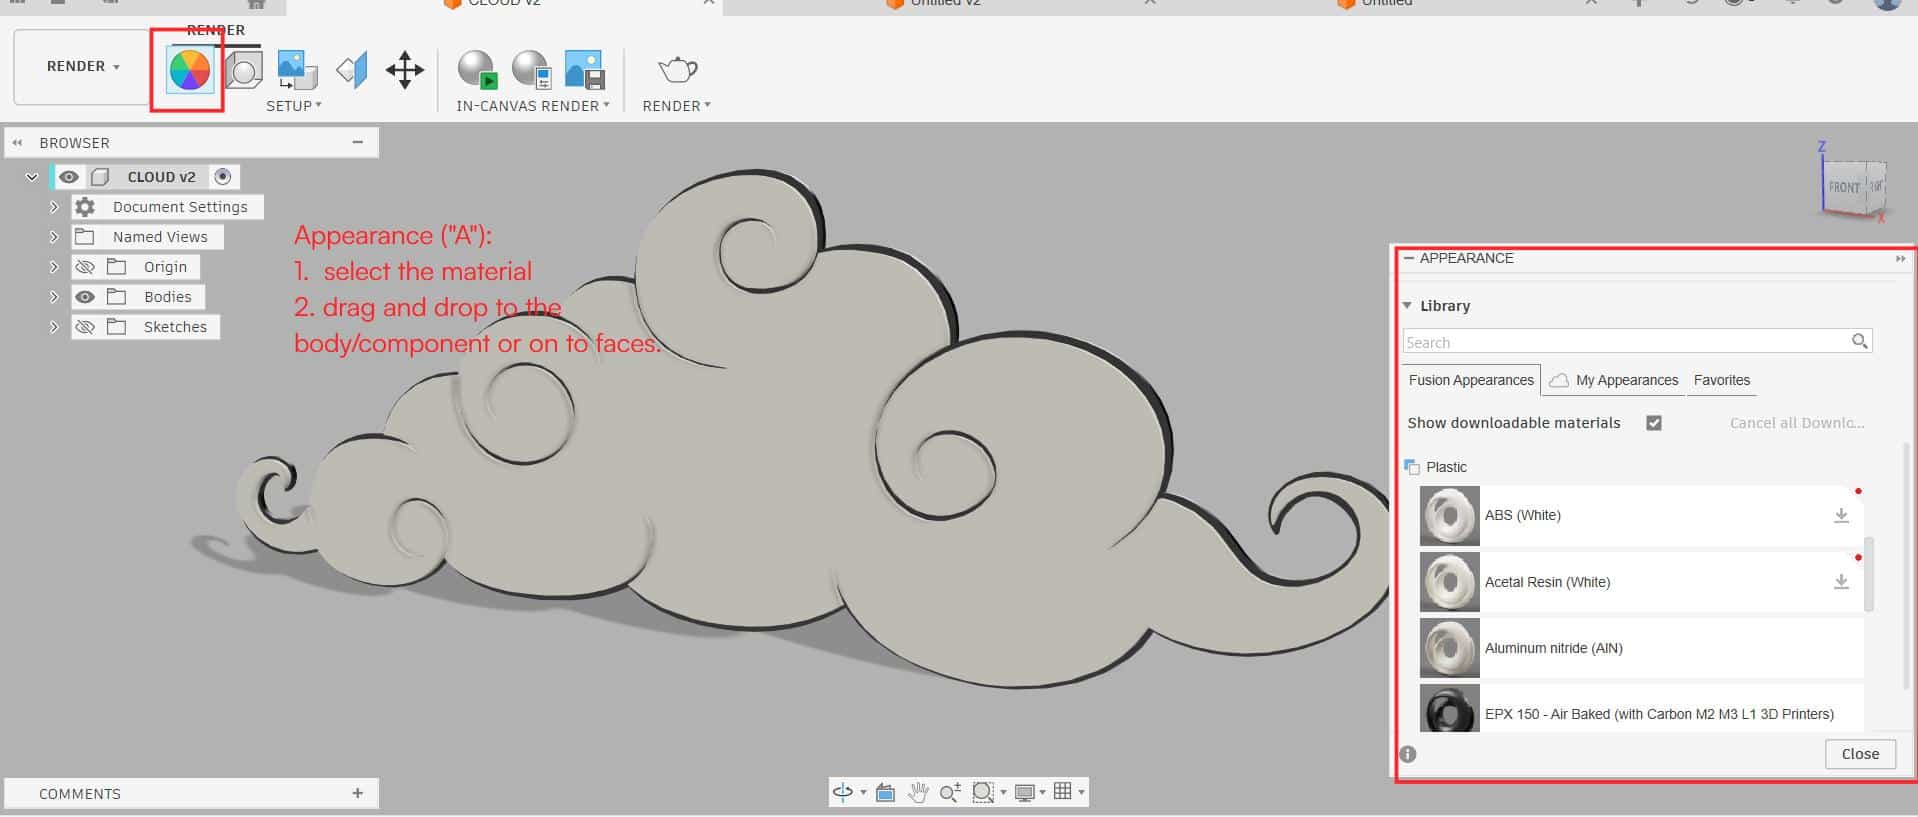
For adding materials:
Appearance
Either press "A" or click on Appearance. Just select the required material, drag and drop on the body/component/face.
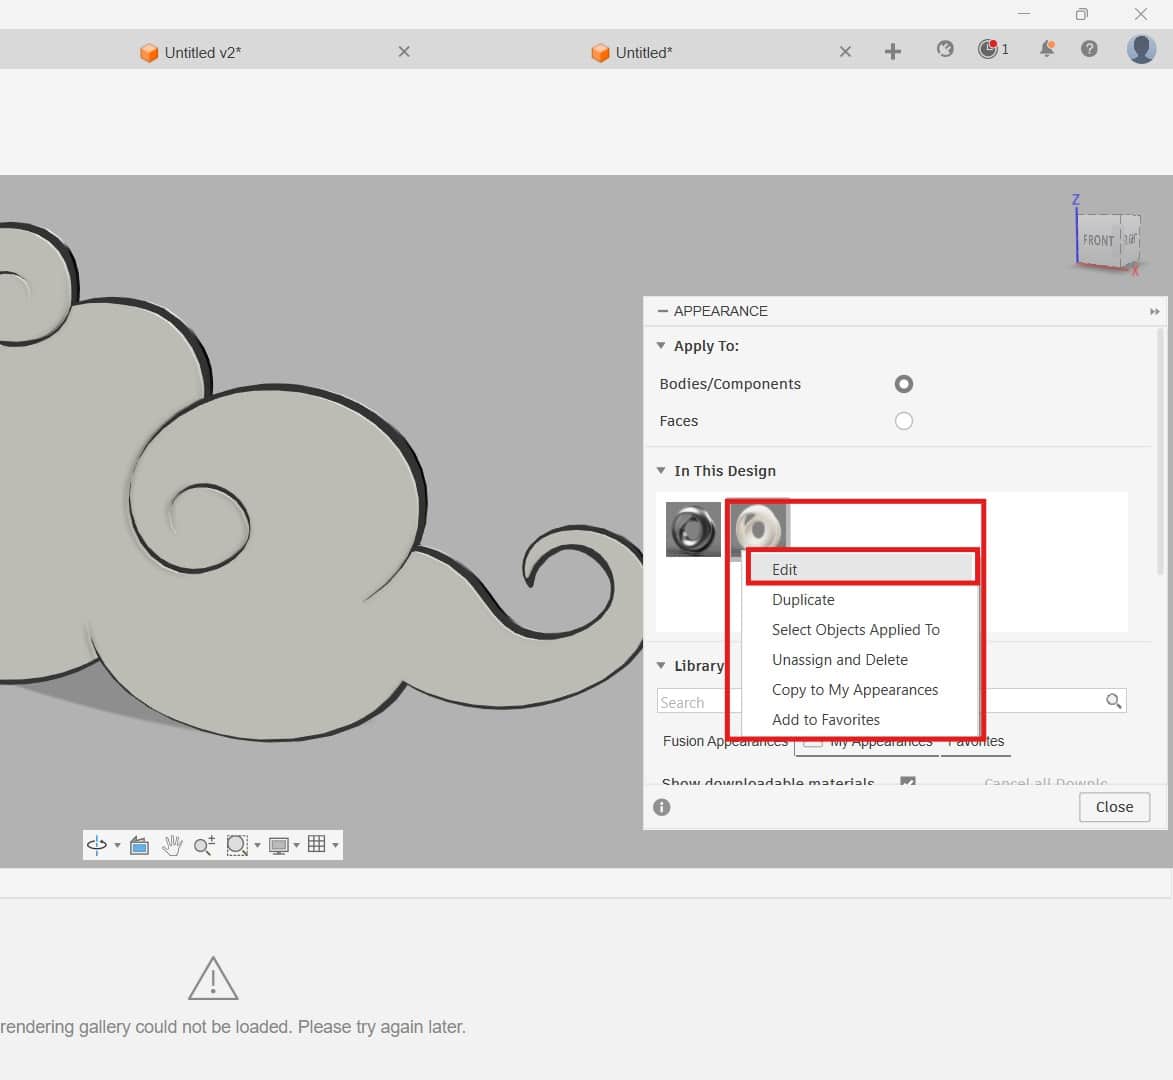
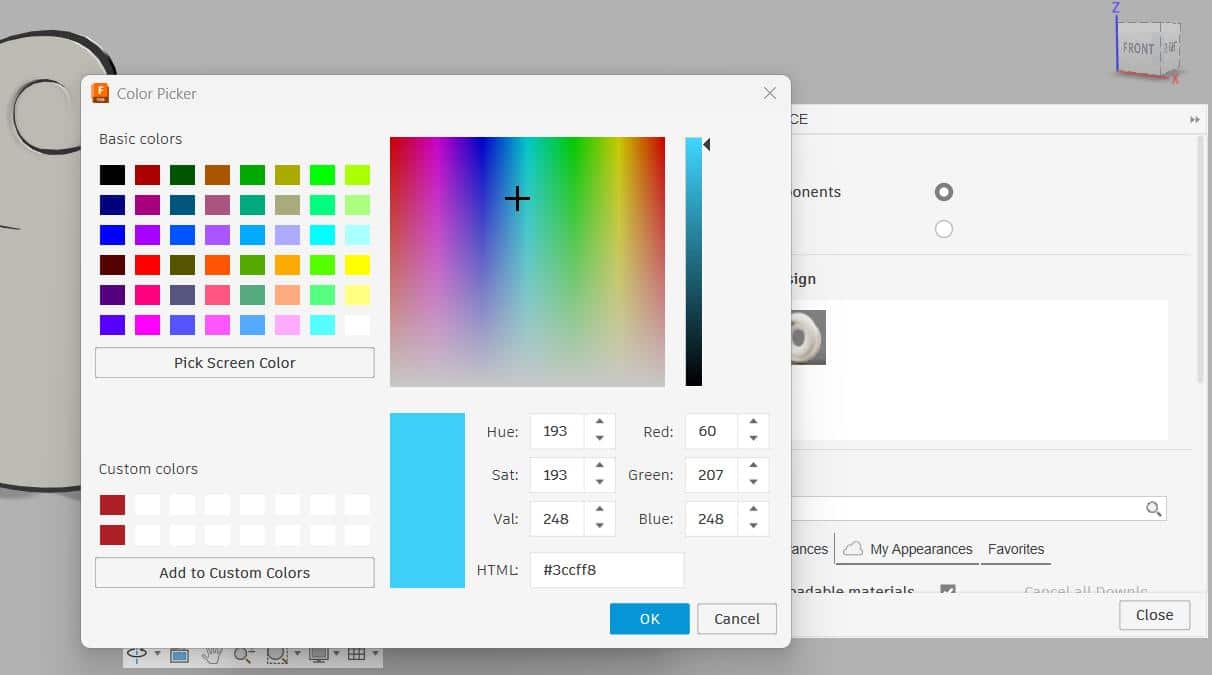
Materials have a default color, but I wanted to change it.
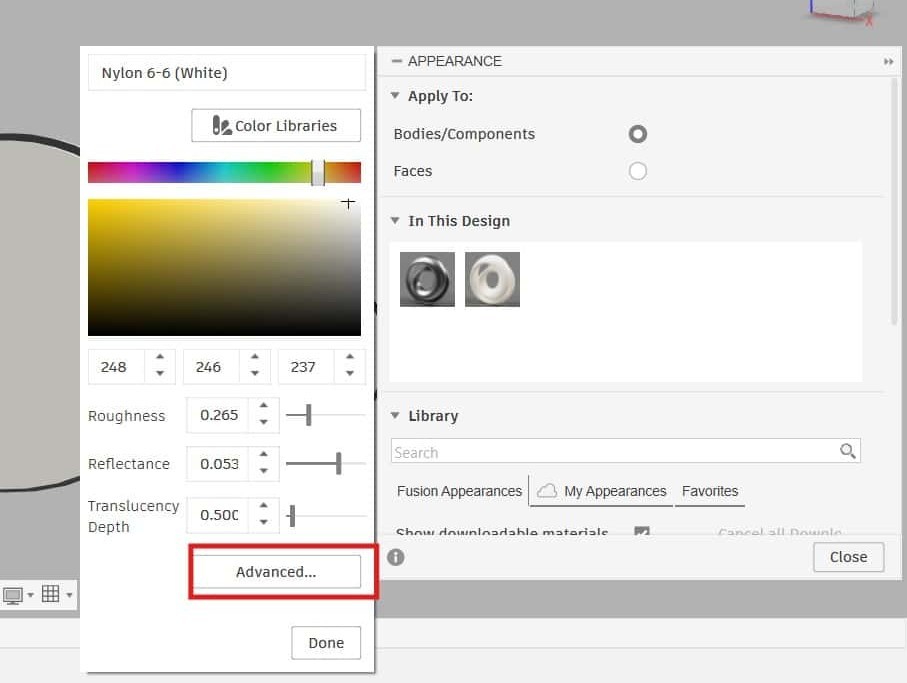
- For that, right-click on the specific material and select Edit. You will see options to change roughness, color, reflectance, and more.
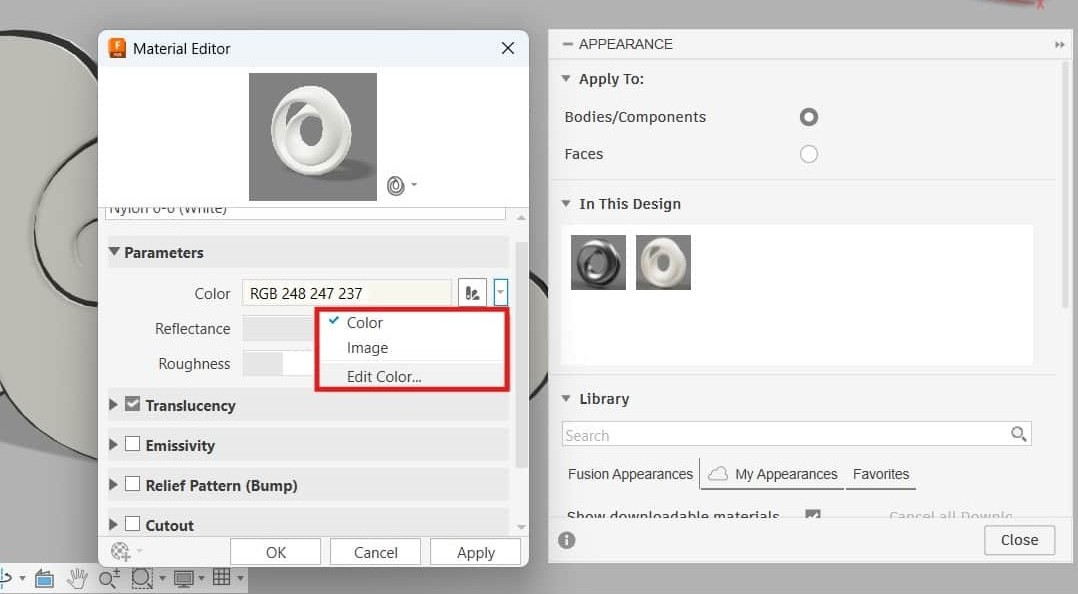
- Go to Advanced >>Parameters>> Color, then from the color drop-down select Edit Color. Now you can paste HTML/hex color codes.
Assembly and Rendering
There are two ways to assembly, top-down and bottom-up.
Top-down is like making every body and component at one place.
Bottom-down is making each bodies/component independently, then insert them at one place.
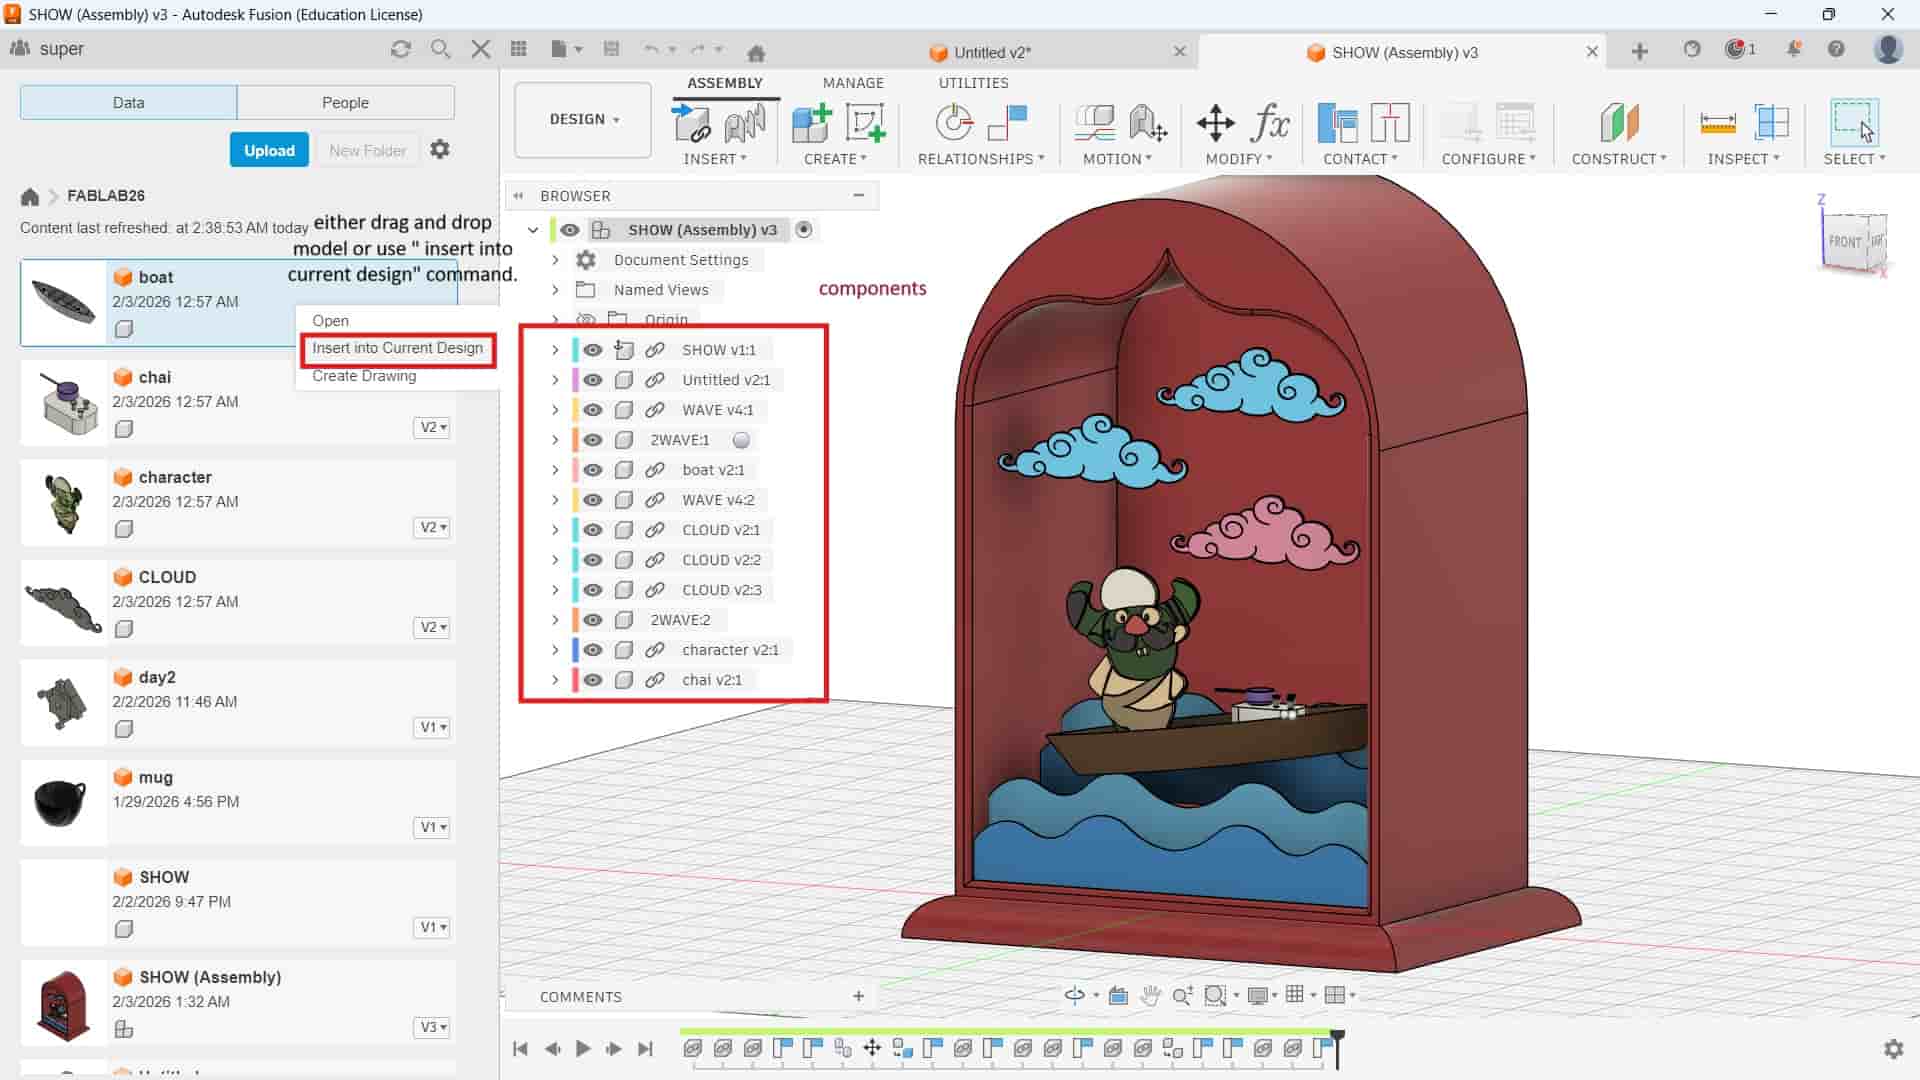
I used bottom-down method.
For inserting the models, you can either drag and drop or use "insert into current design" opt which you can find from each models drop-down button.
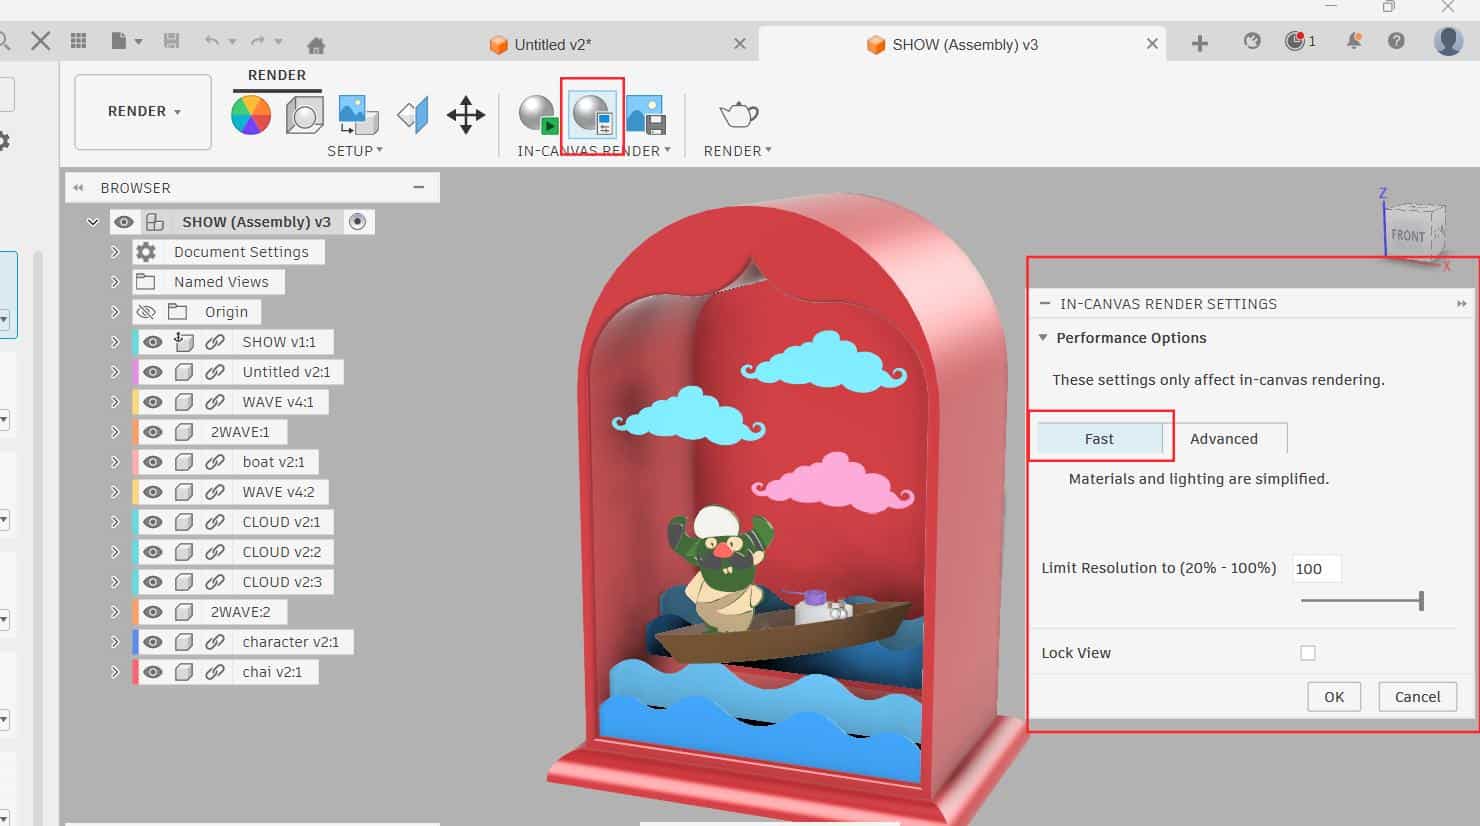
In the Canvas render settings, there are two modes: Fast and Advanced. Choosing Fast results in quicker rendering with fewer iterations, while Advanced provides higher quality with more iterations with slow rendering speed. i setted to fast.
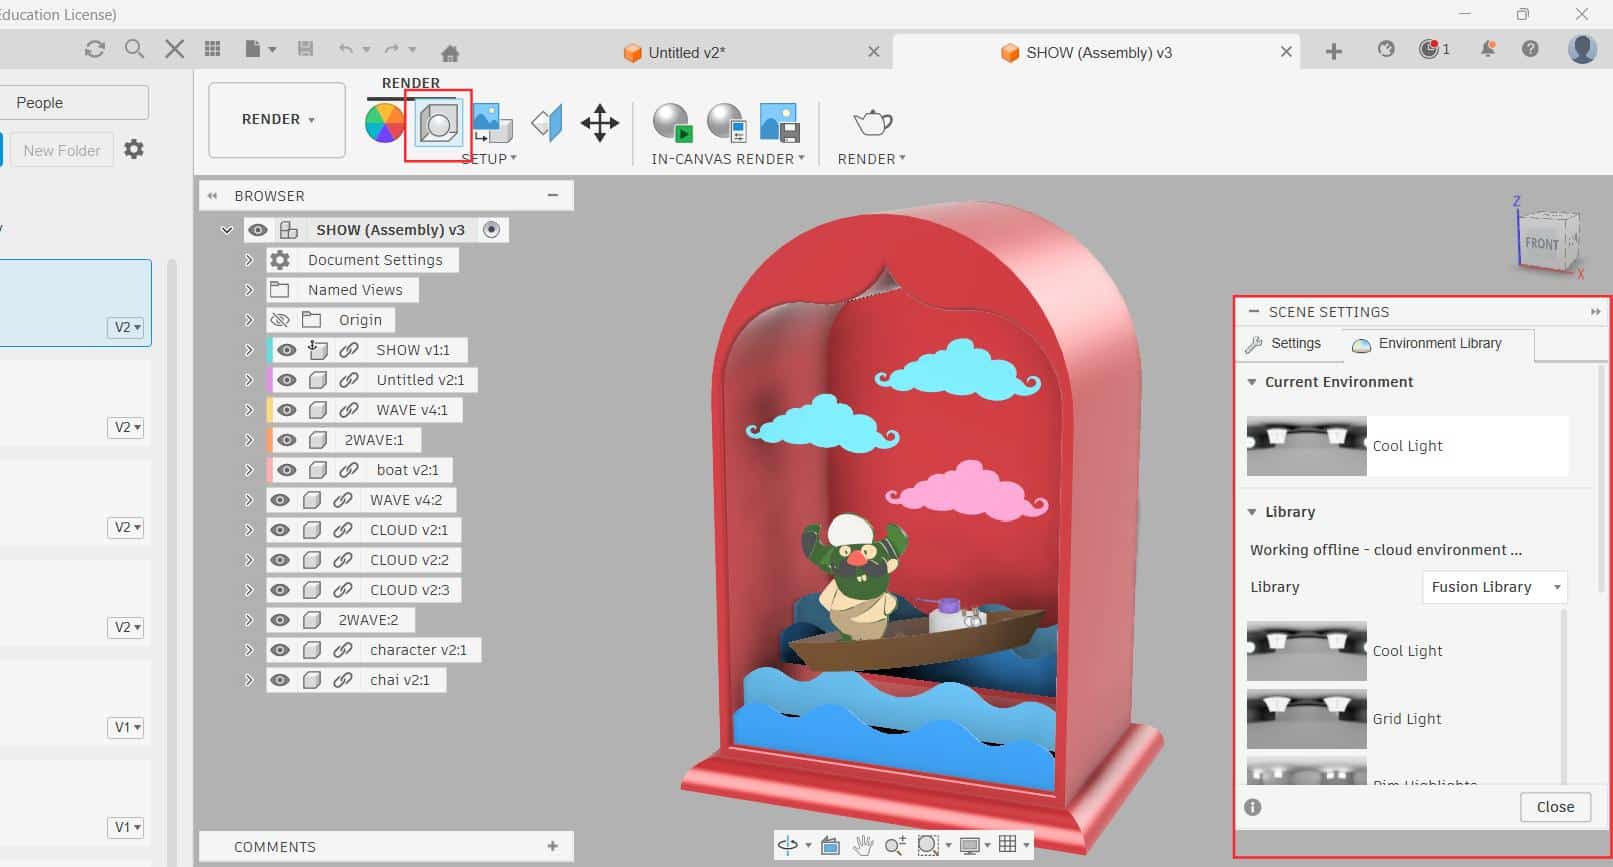
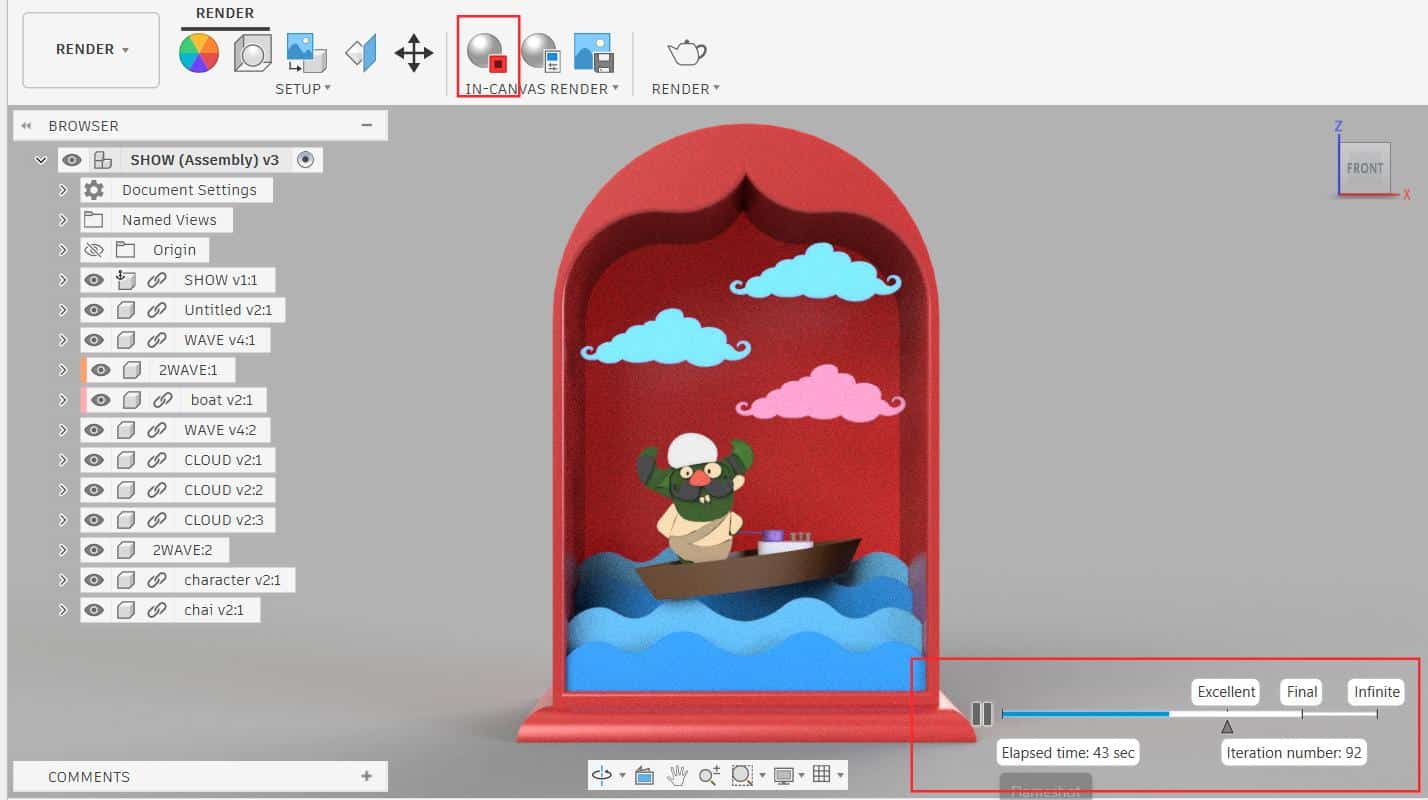
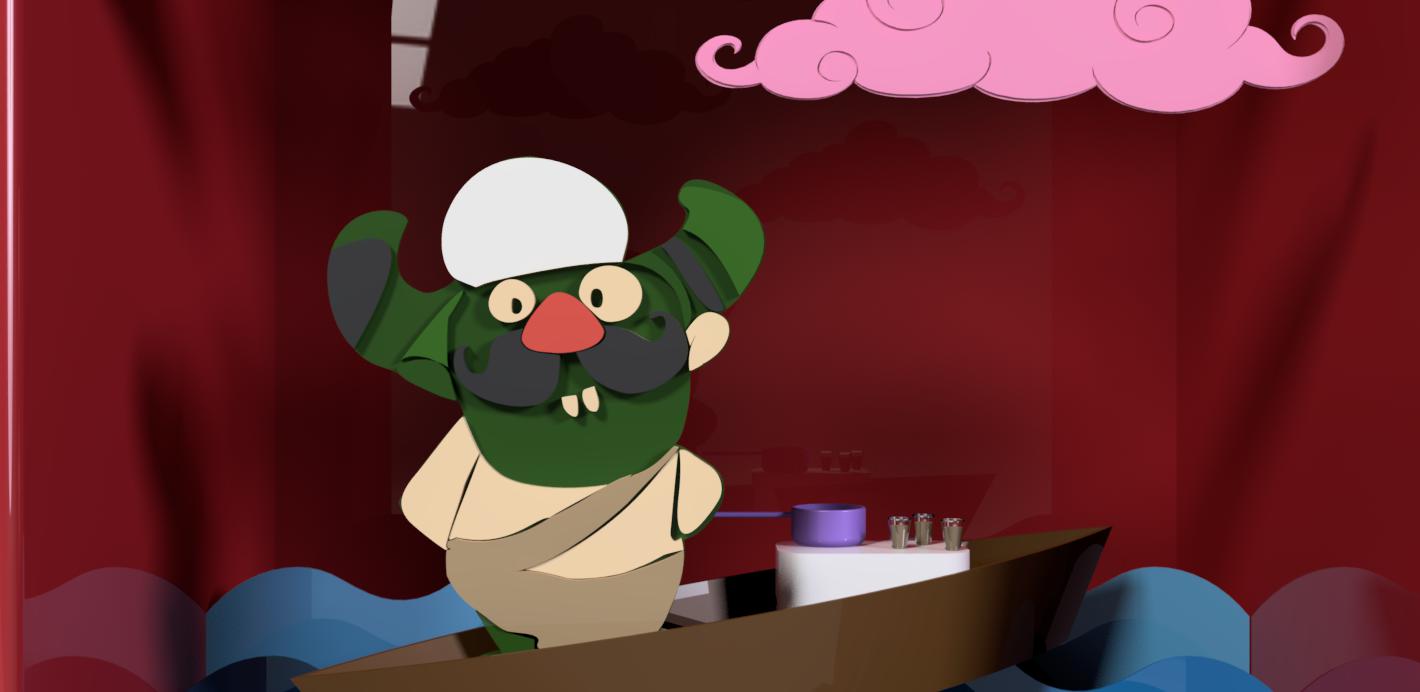
In the setup >> Scene Setting, you can control the brightness, camera exposure, focal length and change the environment lighting. You can also upload a custom environment. Once the setup is done, use "Capture Image" to export and save the rendered image to your computer.
 v2.jpg)
Blender
Rendering and Animating
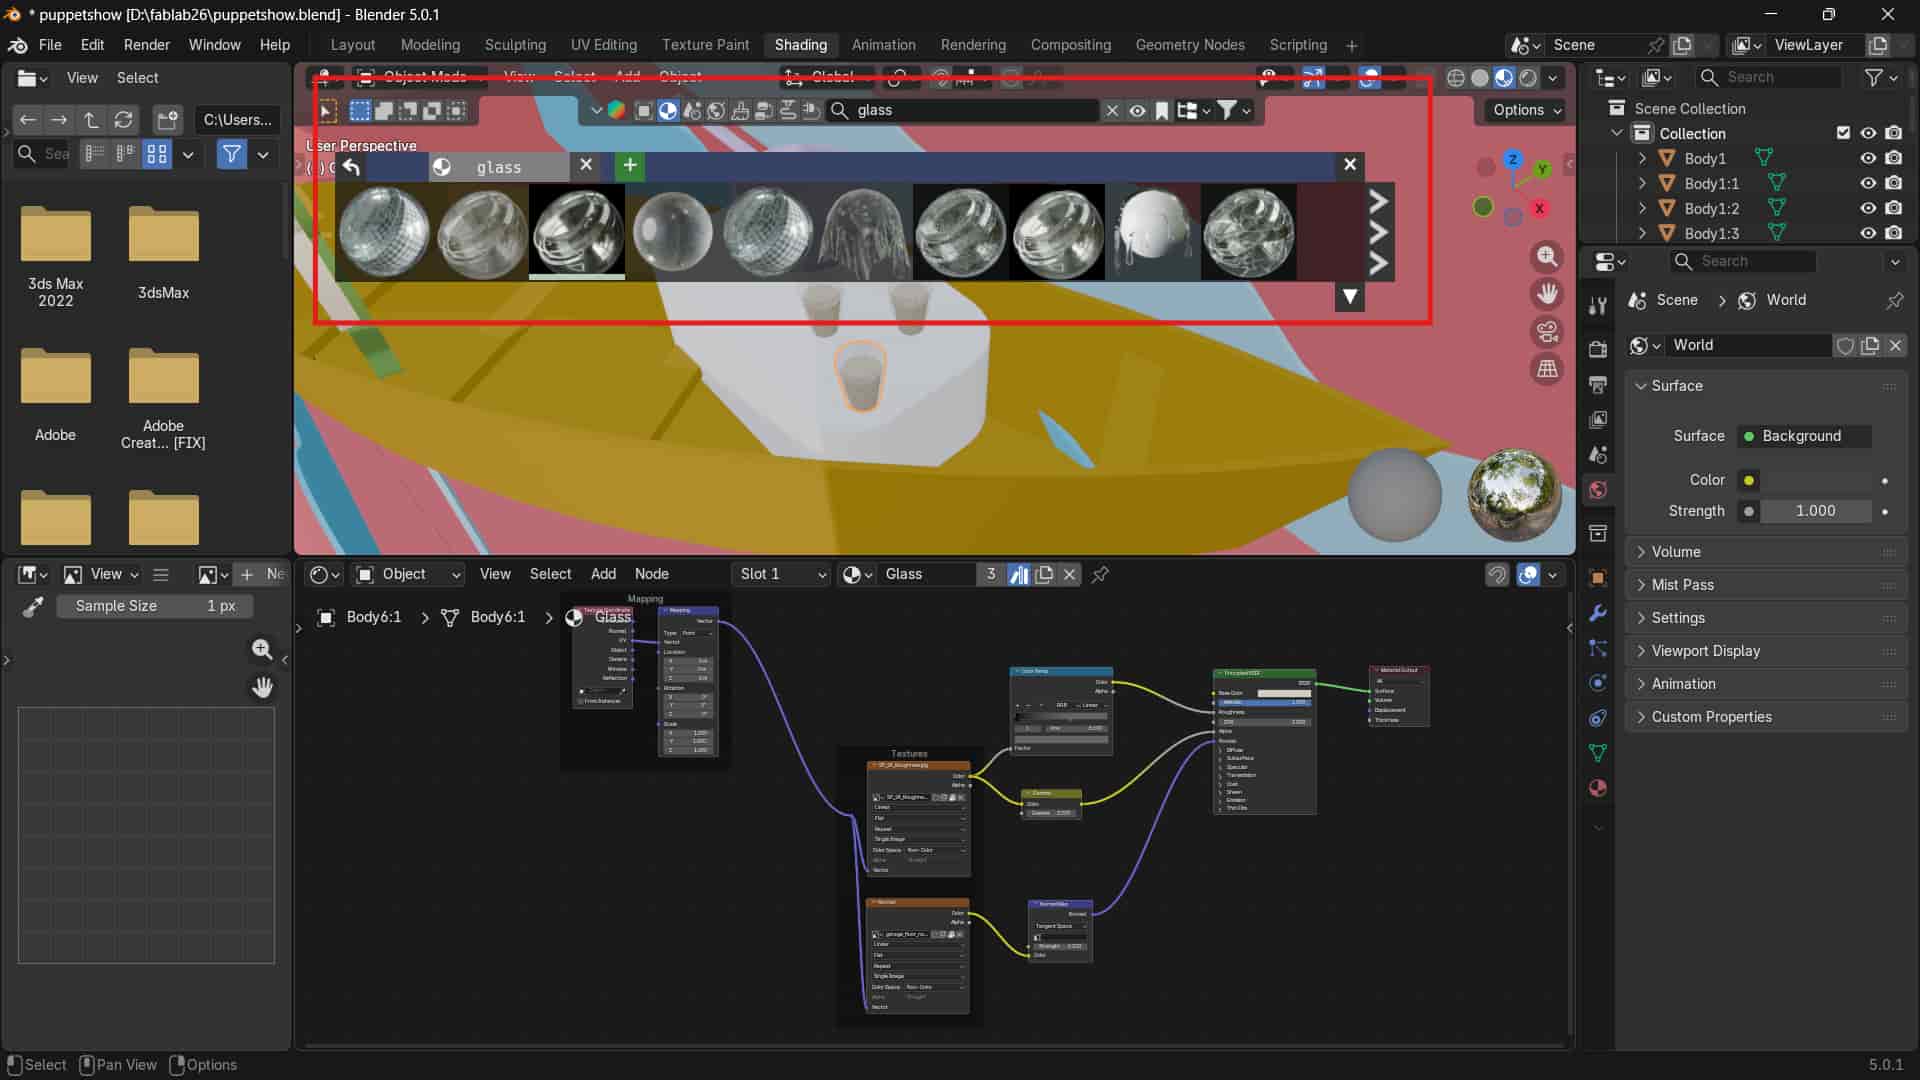
I download an add-on blender kit which has paid and free 3D models, materials, brushes and HDRs for Blender.
To access it, I opened Blender and simply dragged and dropped the downloaded ZIP file into the software. After that the add-on is ready to use.
BlenderKit works like a search engine for assets inside Blender. You can search for assets such as models or materials and drag and drop them directly into your scene.
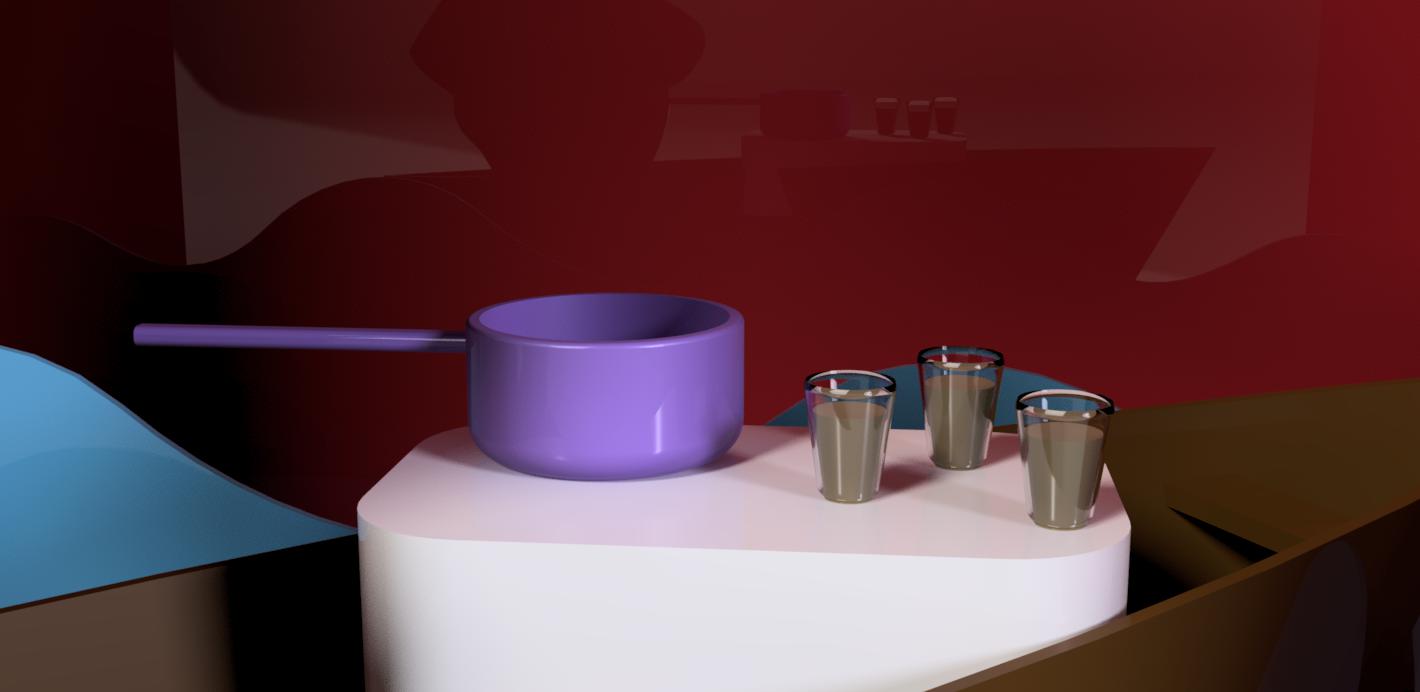
For example, i wanted glass material, so if you search for “glass”, it shows multiple glass material options that you can apply instantly.
This is very useful because it saves time—you don't need to create complex materials or geometry nodes from scratch.
.jpg)
For animating in Blender, I first select the object I want to animate and add keyframes using the shortcut key "I".
To move the object, use G (grab), and to move it in a specific direction - press X, Y, or Z. After moving the object, i add another keyframe.
Press N to open the transform panel, where values of the X, Y, and Z can change manually. This method was used to animate clouds and waves.
I also needed the character, sauce pan, and chai glasses to move along with the boat.
For this, I selected all the objects and selected the boat at the end, then pressed Ctrl + P to set the boat as the parent.
Now all the objects move together with the boat.
For animating the boat, I wanted to rotate it, but the rotation was not working properly because the origin wasn't placed on it. So right-clicked on the boat and selected Set Origin >> Origin to Volume.
After setting the origin, I was able to rotate the boat correctly.

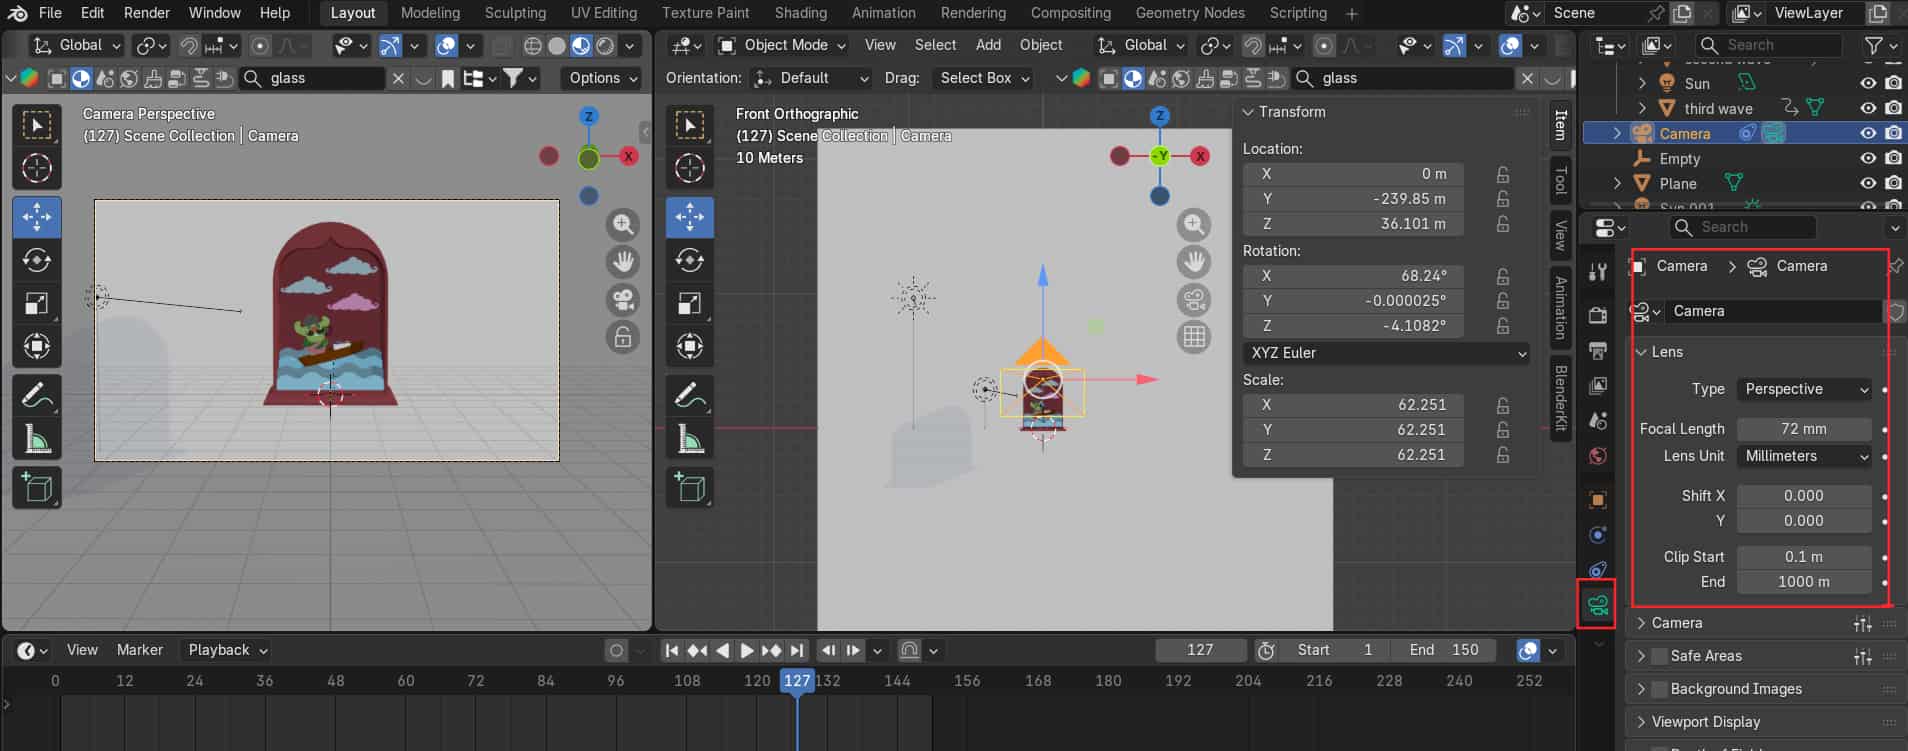
For setting up the camera for rendering, I used an Empty object, which can be added using Shift + A >> Empty >> Empty Cube.
This Empty helps the camera to focus or track a specific point in the scene.
By using the Empty, I was able to bring my whole object into the center of the frame, as my whole object was big.
I added a constraint to the camera using Track To, and selected the Empty as the target.
This way, the camera always stays focused on the Empty.
.jpg )
In Blender, there are three main render modes: Workbench, Eevee, and Cycles. You can access them from the Render Properties panel (camera icon) on the right side. Workbench is mainly for modeling and basic viewing. Ee vee is very fast and good for quick previews or animations. Cycles is slower but gives realistic lighting and better quality. I chose Cycles for my final render.
Image compressor
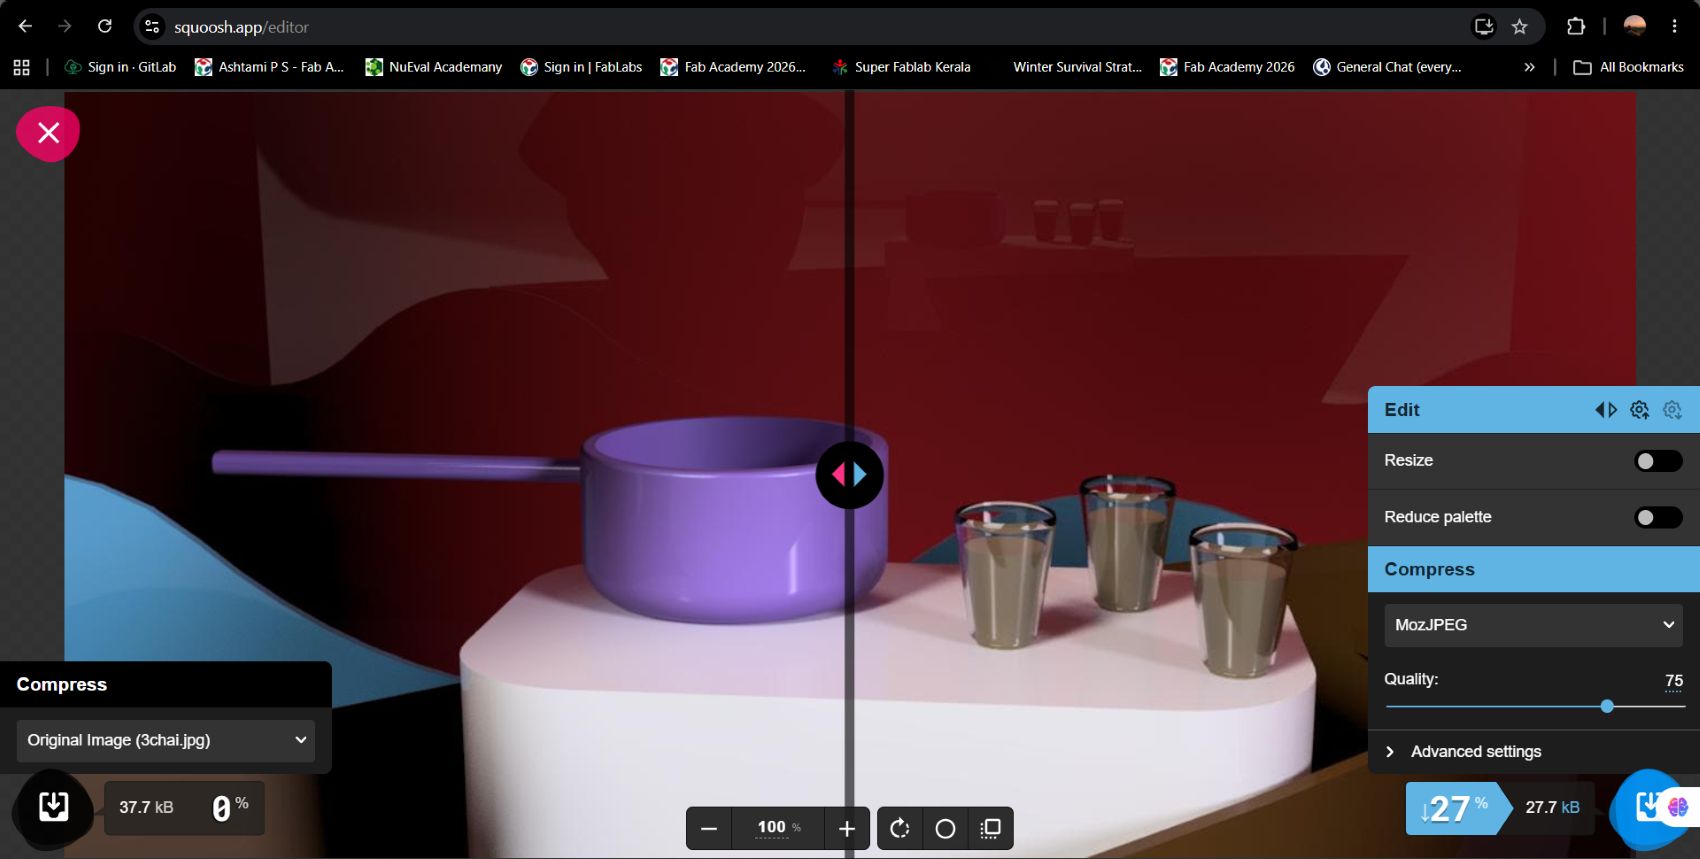
Squoosh
Squoosh is a free web-based image optimization tool that allows images to be compressed and converted into different file formats. It also allows to adjust image quality to reduce file size, resize images, reduce the color palette.
Video compressor
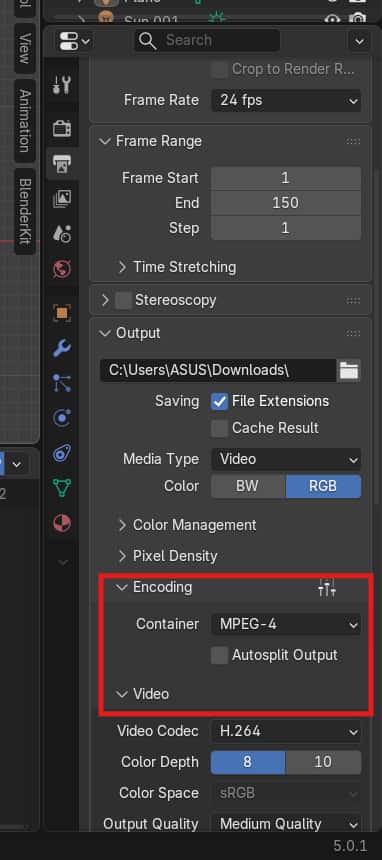
Handbrake
A free, open-source video converter used to change video formats, compress files, and optimize videos.
It has preset setting in which you can control the speed of video encoding, for eg : HQ 720p30 Surround = High quality HD video at 30 fps with surround audio;
Fast 1080p30 = Full HD video encoded quickly at 30 fps.
Video settings has options to adjust quality, framerates(how many frame/image per sec - 30fps, 60fps..), encoder(eg: H.264 (most common),H.265 (smaller size, better compression)).
Using "start encode": start converting and compressing the video.
.jpg)