Week 1: Principles and Practices, Project Management
What did I do this week?
This week's assignment is to plan and sketch a potential final project, download, read, and sign the student agreement, commit the file to the repository, work through a Git tutorial, and build a personal site in the class archive describing myself and my final project.
Project Selection
To choose a topic for the Fab Academy final project, there are some Fab criteria that need to be followed:
- Must have at least 1 output and 1 input
- Project must include a hardware component and a mechanical part
- It's better to have something moving controlled by electronics according to particular events
- It should use maximum fablab tools and machines as possible during the production
Based on these instructions, I shared 5 ideas with the instructors and they helped me choose one for the final project.
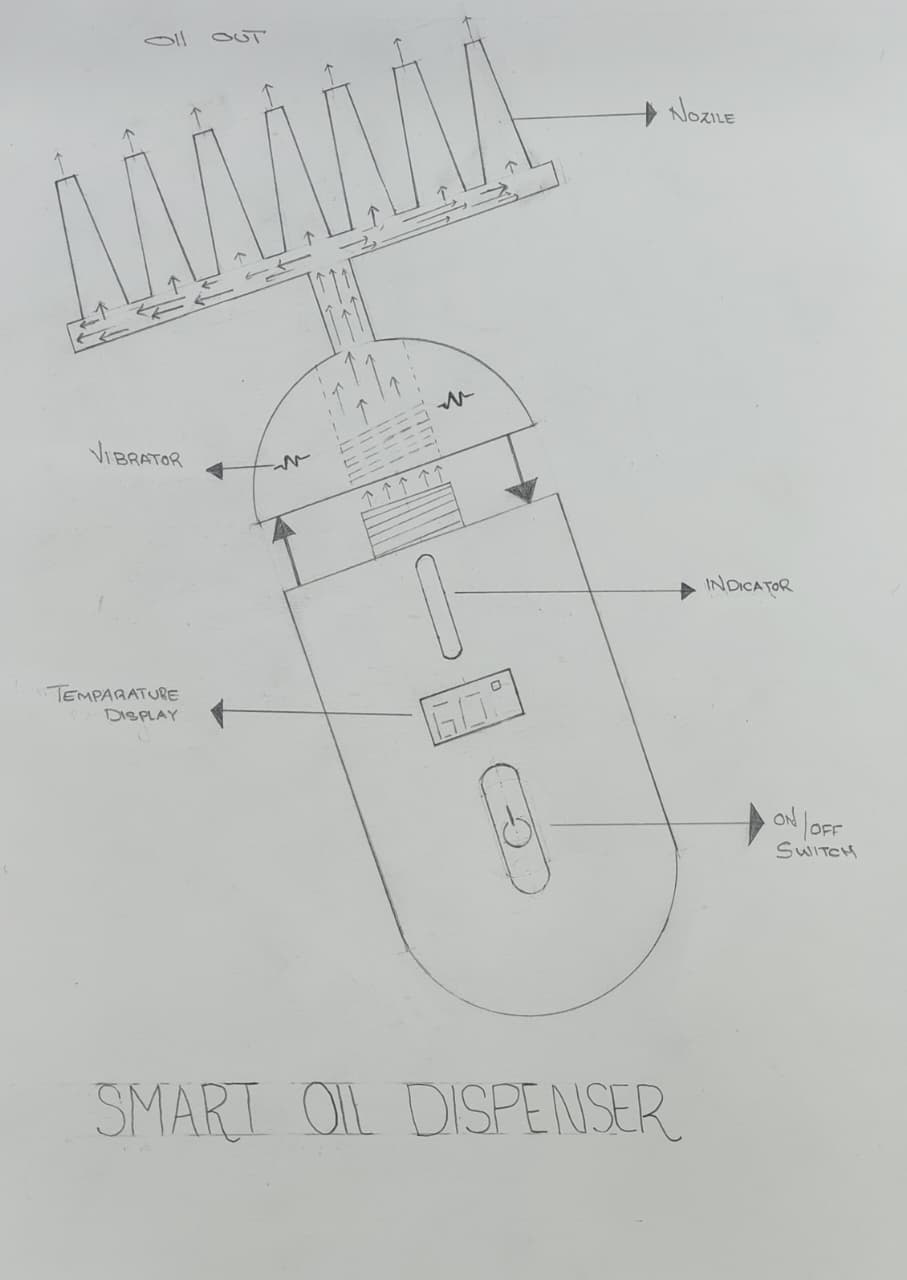
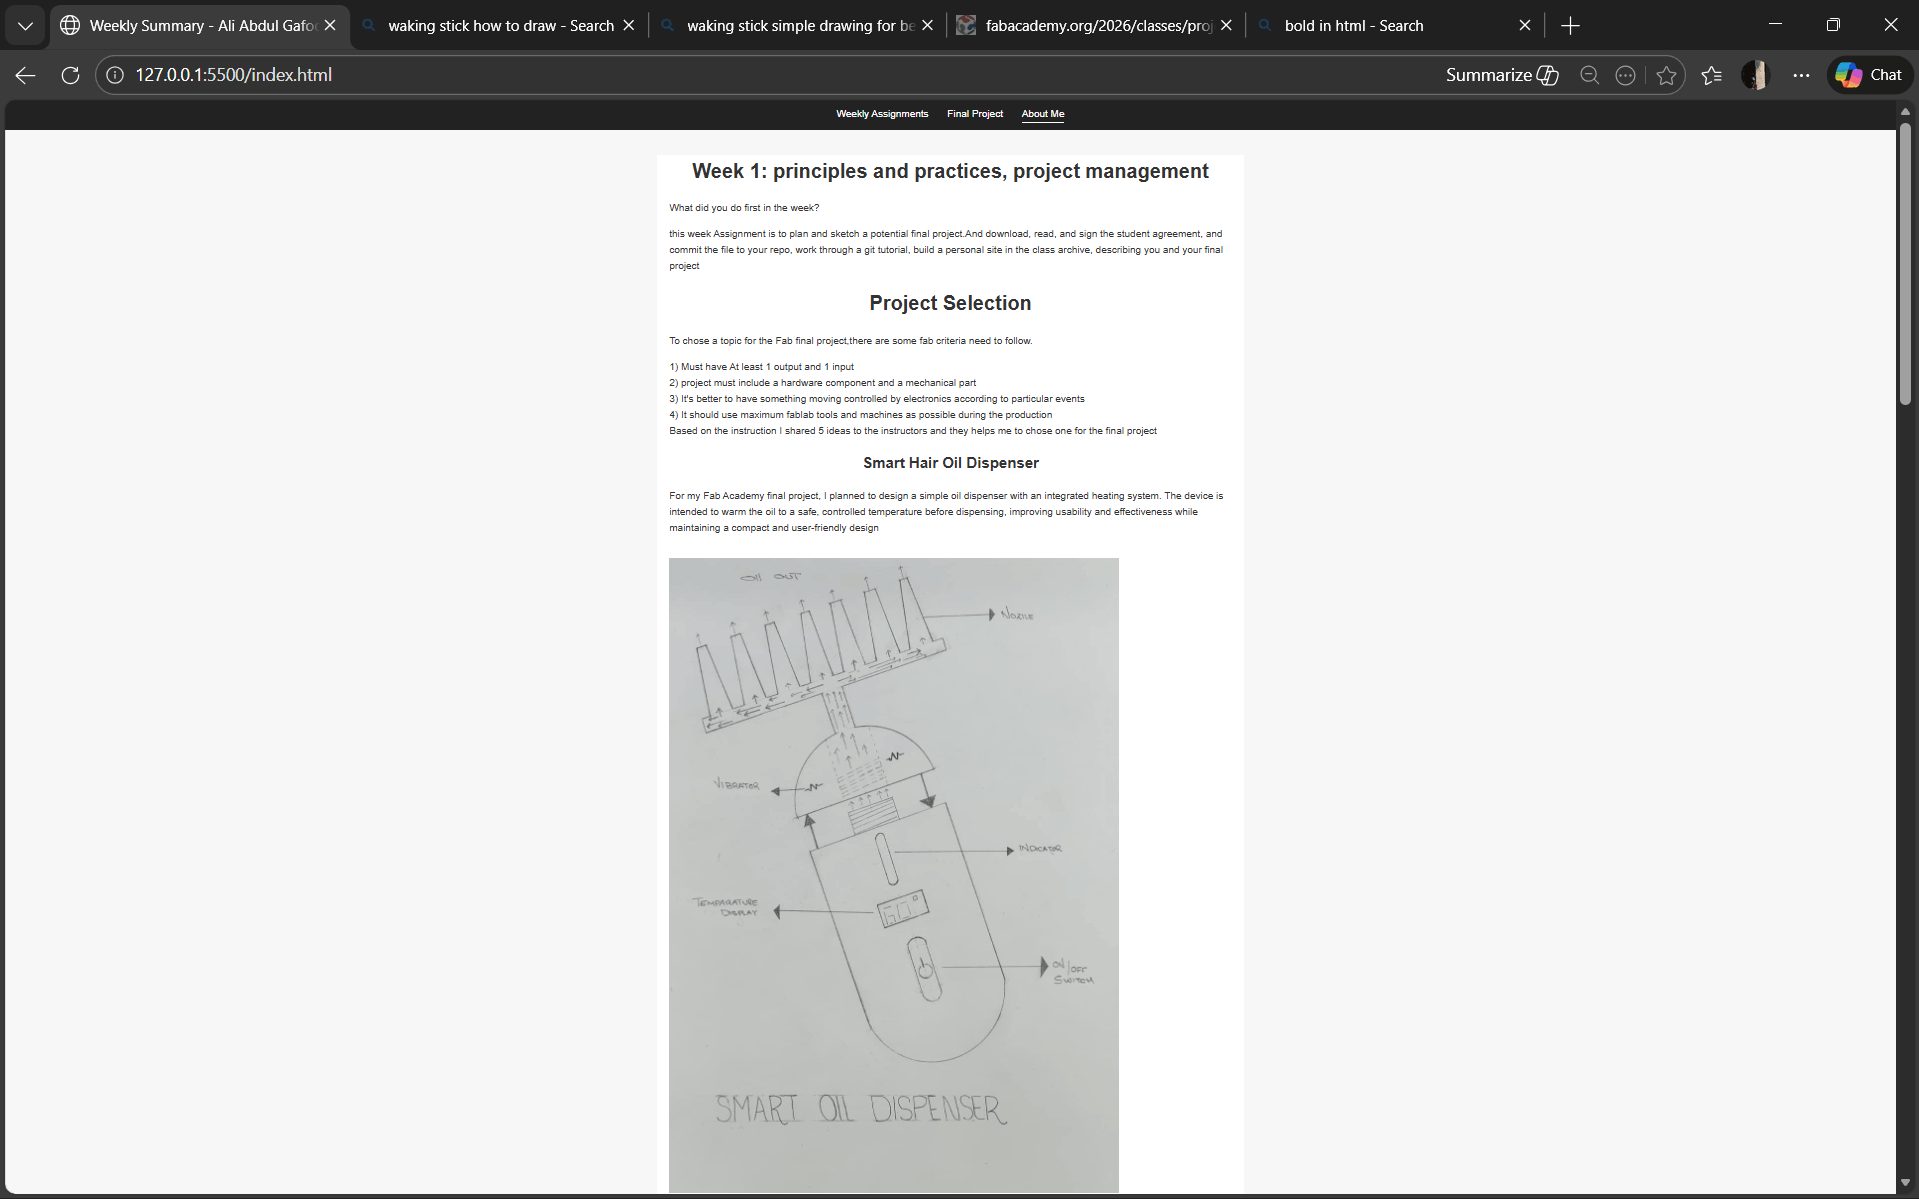
Smart Hair Oil Dispenser
For my Fab Academy final project, I planned to design a simple oil dispenser with an integrated heating system. The device is intended to warm the oil to a safe, controlled temperature before dispensing, improving usability and effectiveness while maintaining a compact and user-friendly design.
Abstract:
The Smart Hair Oil Dispenser is an innovative personal care device designed to improve hair nourishment and scalp health through controlled oil heating, precise dispensing, and therapeutic massage. It features a 20 ml aluminum chamber with a maximum temperature of 60°C to ensure safety and effective absorption. A precision nozzle delivers oil directly to the hair roots, while an integrated vibration motor enhances blood circulation. Wireless charging eliminates spark risks, and a rechargeable battery ensures uninterrupted operation.
Who Will Use This Project?
The Smart Hair Oil Dispenser is designed for:
- Home users – People who apply hair oil as part of their daily or weekly hair care routine and want controlled heating and precise application.
- People with hair/scalp issues – Individuals dealing with hair fall, dry scalp, or slow hair growth who benefit from warm oil therapy and scalp massage.
- Elderly users – Older adults who may have difficulty applying oil manually.
- Beauty salons and spas – Professional establishments offering heated oil treatments.
- Caregivers – Those who assist others with hair care.
The other proposed projects are given below:
Smart Pill Dispenser
Abstract:
This project presents a Smart Pill Dispenser designed to improve medication adherence through automated, time-based dispensing. It includes 21 individual compartments for three daily doses over a 7-day period, ensuring accurate dosage and preventing medicine mixing. The system is particularly useful for elderly users and chronic disease management.
Assistive Smart Keyboard
Abstract:
The Assistive Smart Keyboard supports communication for differently abled individuals by integrating both QWERTY keys and Braille input. It enables effective interaction between disabled and non-disabled users through language conversion and includes a display for Braille visualization. This inclusive design promotes accessibility and independence.
Anti-Vibration Spoon
Abstract:
The Anti-Vibration Spoon assists individuals with hand tremors by minimizing involuntary shaking during eating or tool handling. Its compact and portable design improves stability, reduces spillage, and enhances daily independence for users with motor control challenges.
AI Walking Stick
Abstract:
The AI Walking Stick is an intelligent assistive device for visually impaired individuals. Using sensors and artificial intelligence, it detects obstacles and analyzes surface conditions such as soil, water, and rocks to guide users safely. This device improves independent mobility, safety, and confidence.
Git/GitLab & VS Code Setup
The entire Fab Academy documentation is written and presented through a website, allowing students to experience real-world online web documentation while improving their web development skills. As part of this week's assignment, we focused on creating a basic website and uploading it to a GitLab repository.
The Fab instructors recommended using a Linux operating system, as it is generally more suitable for this course. However, for my setup, I used Windows OS.
During the first week, the following setups were completed:
- Installed Git and configured global username & email
- Created GitLab account and connected local repositories
- Generated SSH keys and added to GitLab
- Cloned initial project repositories from GitLab
- Added, committed, and pushed the student agreement
- Installed VS Code and set up necessary extensions
- Built and pushed the personal website
1. Git Installation (Git Bash)
Git is a free and open-source distributed version control system that efficiently manages projects of any size. It is easy to learn, lightweight, and fast. On Windows, Git can be installed easily using the official Git installer.
Download Git from: https://git-scm.com/downloads
After installation, open the Git Bash terminal and verify the installation by running:
git --version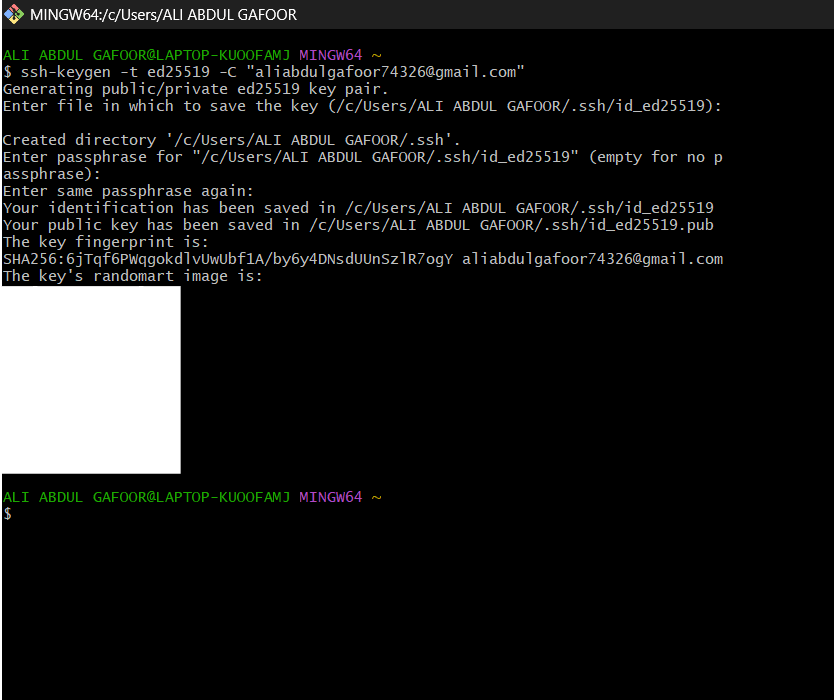
The above screenshot shows Git Bash terminal after successful installation, displaying the Git version.
To view all Git configurations, use:
git config --list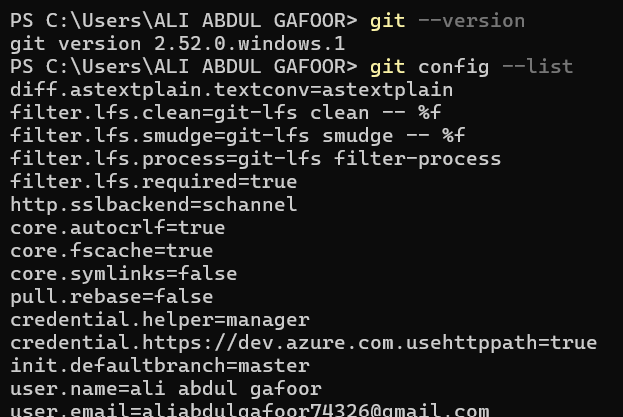
The screenshot above shows the Git version (2.52.0.windows.1) and the complete configuration list including the global username and email settings.
2. Configuring GitLab using Git Config Commands
Before using Git locally with GitLab, it is necessary to configure a global username and email. This can be done using the following commands in Git Bash:
git config --global user.name "Your Username"git config --global user.email "your.email@example.com"The configuration can be verified with:
git config --global --listGitLab, GitHub, and Bitbucket are services that provide remote access to Git repositories. Besides hosting code, they offer additional features such as collaborative code sharing, bug tracking, wikis, and other tools for team development.
3. Generating SSH Key and Adding to Remote Repository
To securely connect with GitLab, SSH keys are used. SSH provides an encrypted connection between your computer and the remote server. On Windows, an RSA SSH key can be generated using:
ssh-keygen -t rsa -b 2048 -C "your.email@example.com"The generated key is saved in a hidden folder (~/.ssh/) under your user directory. The public key file is named id_rsa.pub. GitLab supports RSA, DSA, ECDSA, and ED25519 keys.
Copying the SSH Public Key
To copy the SSH public key, use the following command in Git Bash:
cat ~/.ssh/id_rsa.pubThis command displays the entire public key in the terminal. Select and copy the entire output starting from ssh-rsa to the end of your email.
Alternatively, on Windows, you can use:
clip < ~/.ssh/id_rsa.pubThis command directly copies the key to your clipboard.
Adding SSH Key to GitLab
After copying the SSH key, follow these steps to add it to GitLab:
- Log in to your GitLab account
- Click on your profile picture (top right corner)
- Go to Preferences
- In the left sidebar, click on SSH Keys
- Paste your copied public key in the "Key" field
- Add a title (e.g., "My Windows PC")
- Click Add key
.png)
The above screenshot shows the GitLab SSH Keys settings page under Profile > Preferences > SSH Keys where I pasted my public key.
Testing SSH Connection
After adding the SSH key to GitLab, verify the connection using:
ssh -T git@gitlab.fabcloud.org
The message "Welcome to GitLab, @aliabdul-gafoor!" confirms that the SSH key was successfully added and the connection to GitLab is working.
4. Cloning Repository
To clone the Fab Academy repository, first copy the SSH URL from GitLab:
.png)
Then use the following command in Git Bash:
git clone git@gitlab.fabcloud.org:academany/fabacademy/2026/labs/kochi/students/aliabdul-gafoor.gitClone Failure Explanation
.png)
Note: In the screenshot above, you can see that the clone operation failed twice. The reasons for these failures were:
- First failure: The SSH key was not yet added to GitLab. Without the SSH key configured in GitLab, the authentication failed and access was denied.
- Second failure: There was a typo in the repository URL. The SSH address was not copied correctly from GitLab.
After adding the correct SSH key to GitLab and using the correct repository URL, the clone was successful on the third attempt.
.png)
The repository has been successfully cloned into the user's folder.
5. Adding Student Agreement - Add, Commit and Push
As part of the Fab Academy requirements, I needed to download, read, sign the student agreement, and commit it to my repository.
Steps to Add Student Agreement:
- Downloaded the student agreement from the Fab Academy resources
- Read and signed the agreement
- Placed the signed agreement file in my local repository folder
Git Commands Used:
Navigate to the repository folder:
cd aliabdul-gafoorCheck the current status to see untracked files:
git statusAdd the student agreement file to staging:
git add student-agreement.pdfOr to add all files:
git add .Commit the changes with a meaningful message:
git commit -m "Added signed student agreement"Push the changes to the remote repository:
git push origin mainAfter pushing, the student agreement was successfully uploaded to my GitLab repository.
6. VS Code Installation and Setup
There are many text editors available for web development, such as Brackets, Visual Studio Code, and others. For this course, I am using Visual Studio Code (VS Code).
VS Code is one of the most popular code editors, offering a wide range of extensions and features that make web development easier. It is a Microsoft product and works smoothly on Windows, Linux, and macOS.
Download VS Code from: https://code.visualstudio.com/download
After installing Visual Studio Code, a live server is required to preview the website in real time. VS Code provides a Live Server extension that can be easily installed by searching for it in the Extensions panel.
I installed useful VS Code extensions such as:
- Live Server – for real-time preview of HTML pages
- Code Spell Checker – to correct spelling during documentation
- Prettier – for code formatting
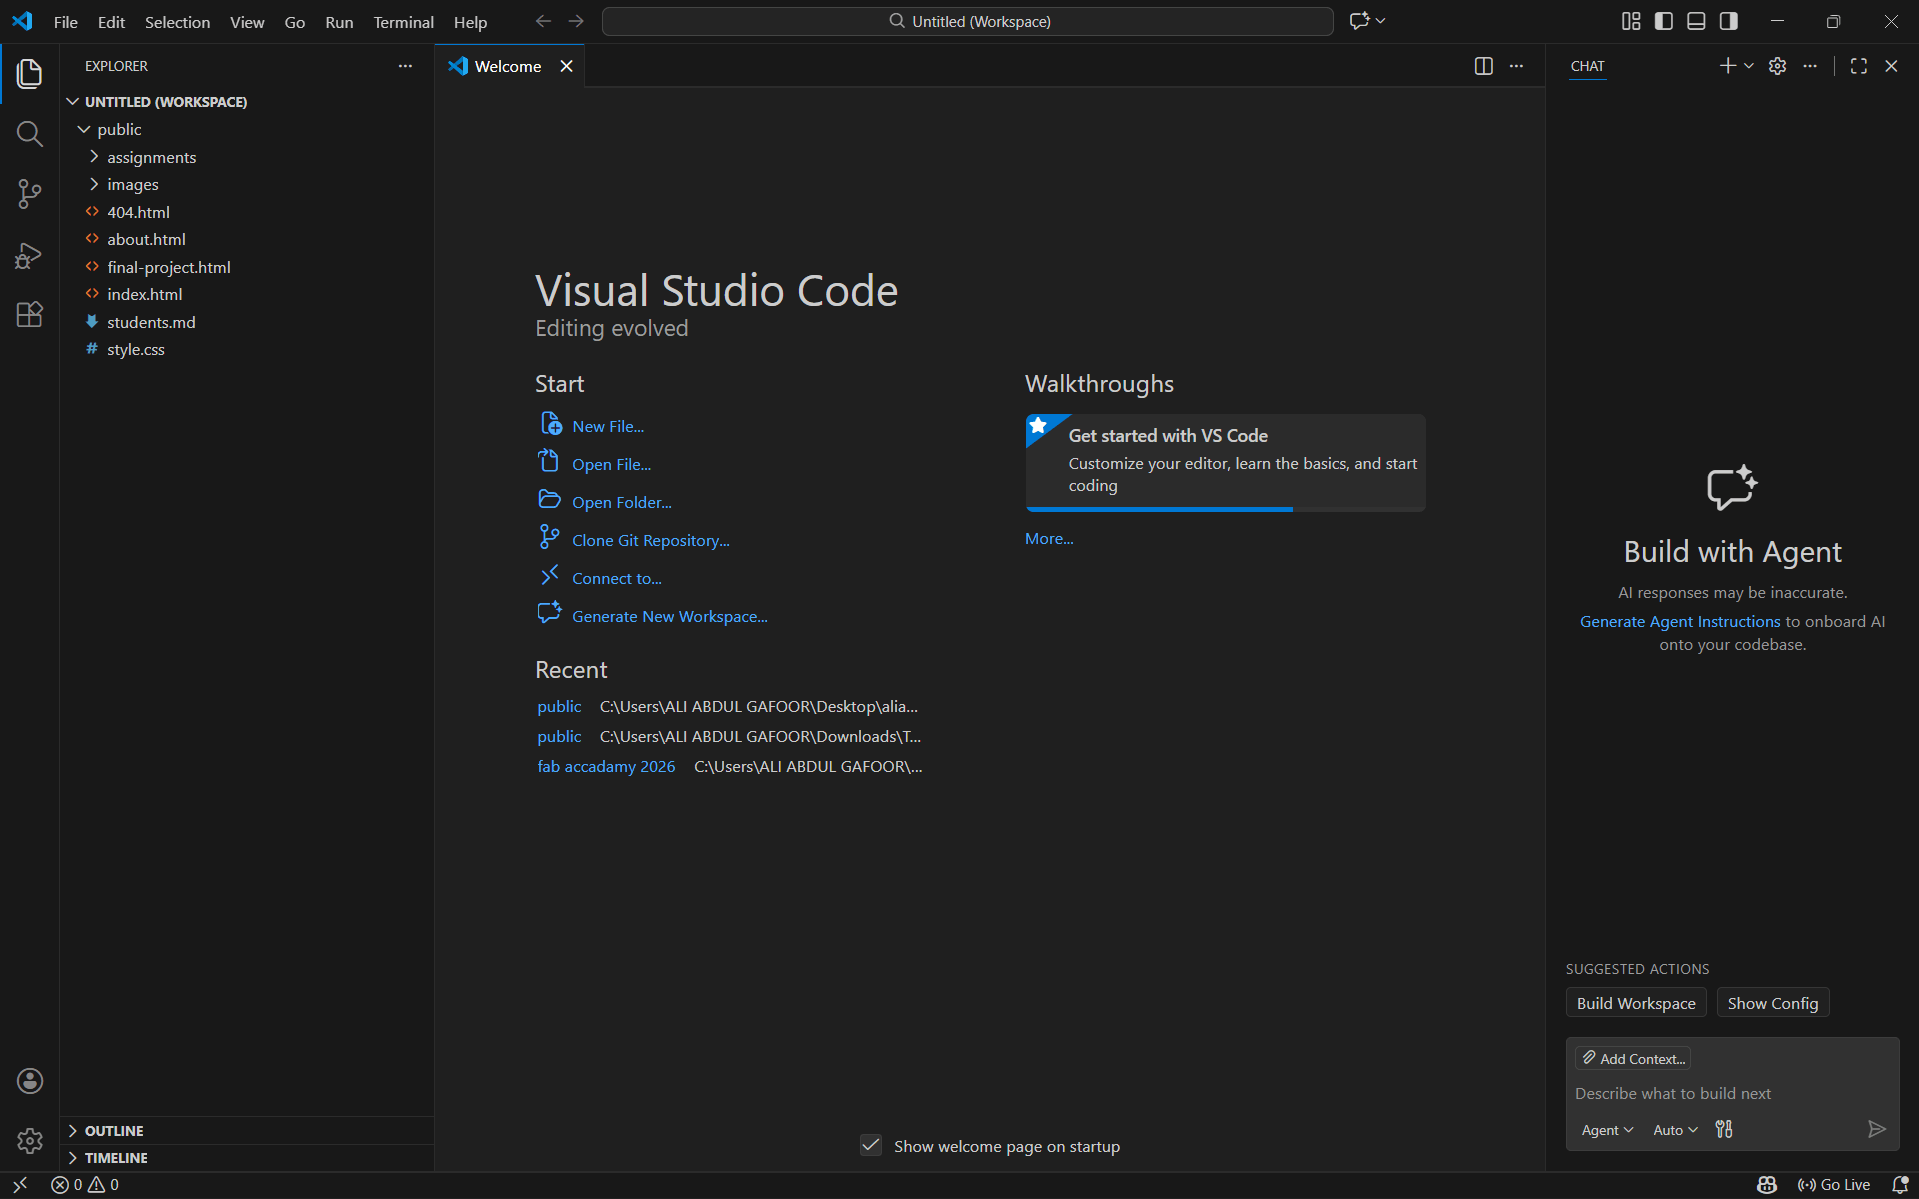
Directory Structure
I organized the project files into a structured directory that includes separate folders for CSS, images, and JavaScript, along with the main HTML pages:
.png)
index.html– Home pageabout.html– About Me sectionfinal-project.html– Final project pagestyle.css– Main stylesheetassignments/– Folder containing weekly assignment pagesimages/– Folder containing all images
Using references from W3Schools and my prior HTML experience, I developed a home page with the required navigation menu and linked pages.
After completing the setup, I hosted the website on my PC's local server by clicking the "Go Live" button located at the bottom of Visual Studio Code:
.png)
The web page opened in a browser using a local host IP address (http://127.0.0.1:5500/index.html). The page was not developed in a single attempt; it required multiple tests and iterative code modifications to achieve the desired results.
This is the first assignment completed during this week's documentation, and the same website template will be used for upcoming assignments throughout the course.
7. Website Commit and Push
After creating the website files locally, I pushed them to GitLab using VS Code's integrated terminal (PowerShell).
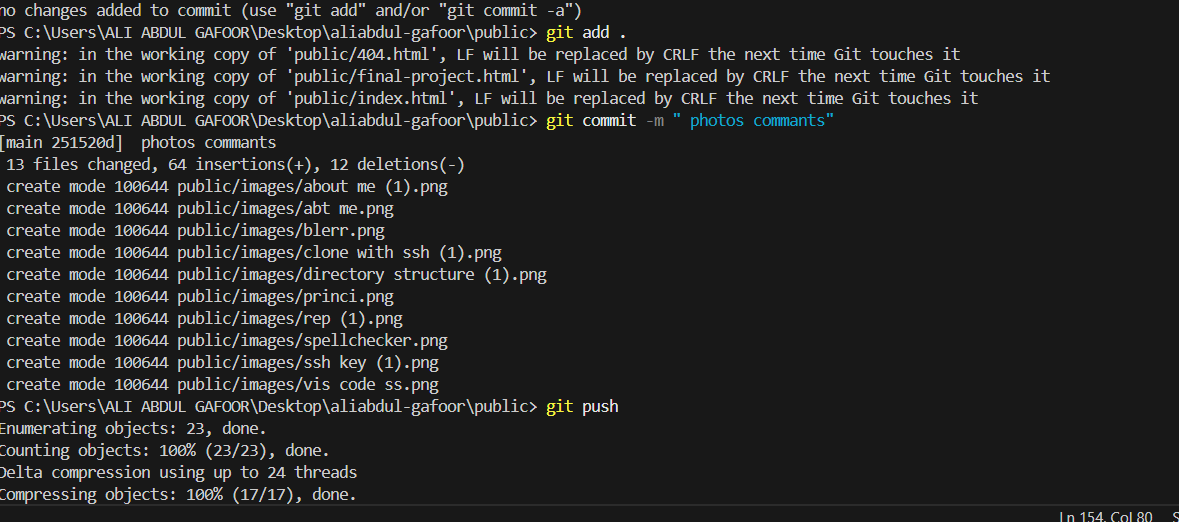
The terminal shown in the screenshot above is VS Code's integrated terminal running PowerShell. I used the following commands to push my website:
git add .git commit -m "Added website files"git push origin mainWith this, the website was successfully pushed to GitLab.
This is the final version of the website after it has been pushed to the GitLab cloud. The web address is automatically generated by the FabAcademy GitLab Pages service.
Website Link
Live Website: https://fabacademy.org/2026/labs/kochi/students/aliabdul-gafoor/
Website Design Changes - Before and After
I made several changes to my website's appearance using HTML and CSS. Here's what I modified:
What I Changed:
- Navigation Bar: Created a fixed navigation bar at the top with links to Home, About Me, Final Project, and Assignments
- Color Scheme: Changed the background color and text colors to improve readability
- Layout: Used CSS flexbox and proper margins/padding for better content organization
- Typography: Applied consistent fonts and font sizes across all pages
- Images: Added proper image sizing and borders for visual appeal
- Footer: Added a footer section with copyright information
Explanation of "Before" and "After":
The "Before" state refers to the default HTML structure without any custom styling – just plain text, basic links, and default browser formatting. The "After" state is the styled version with custom CSS applied, showing improved layout, colors, navigation, and overall visual design.
The changes I made include:
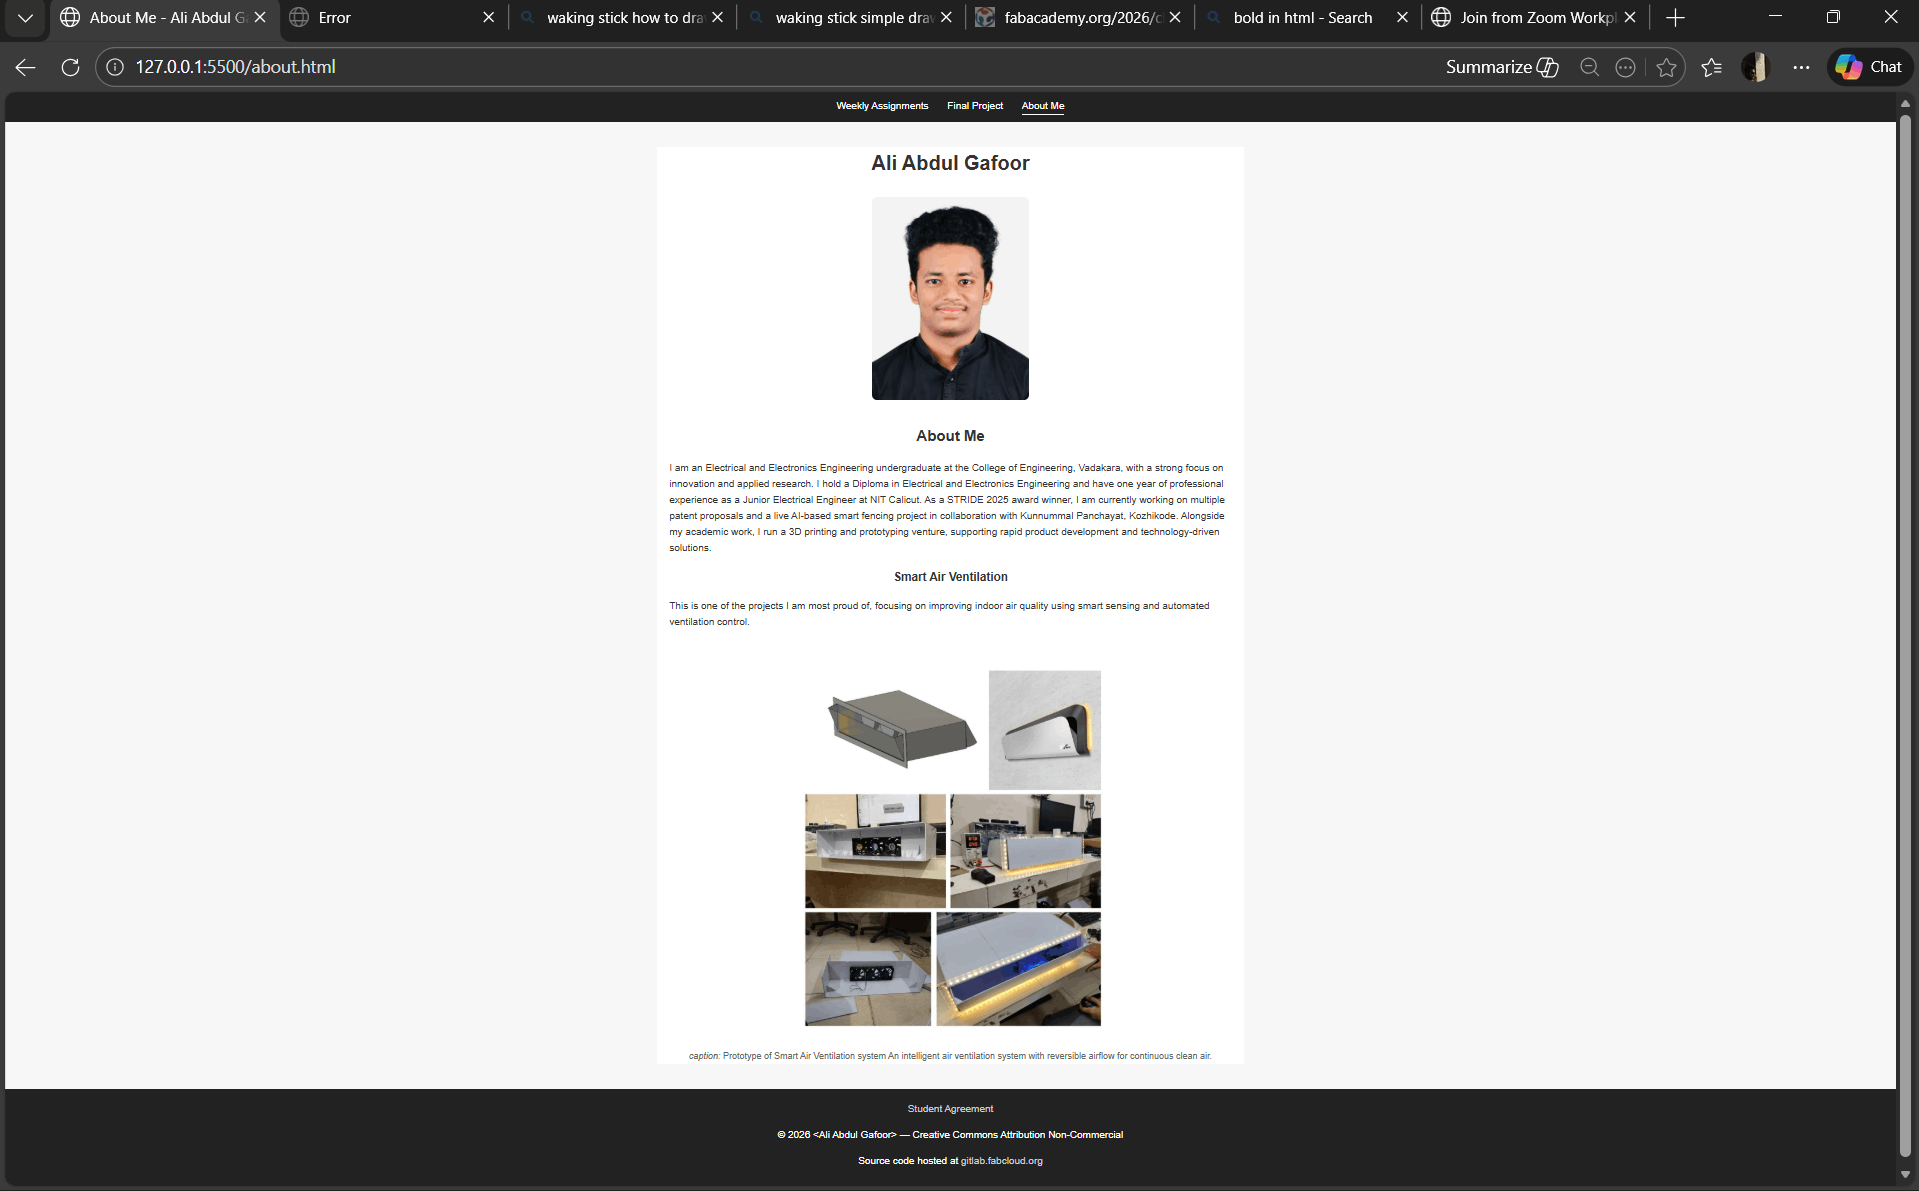
- Home Page: Added a styled header, organized weekly assignment links in a clean list format, and added visual hierarchy with proper headings
- About Me Page: Added profile section with image, formatted biographical information, and styled the layout
- Assignment Pages: Created consistent styling across all weekly pages with proper headings, image formatting, and code highlighting
CSS Code - Before and After
Here are the existing CSS codes I used to style my website. These screenshots show the actual CSS implementation:
CSS Code Screenshots:
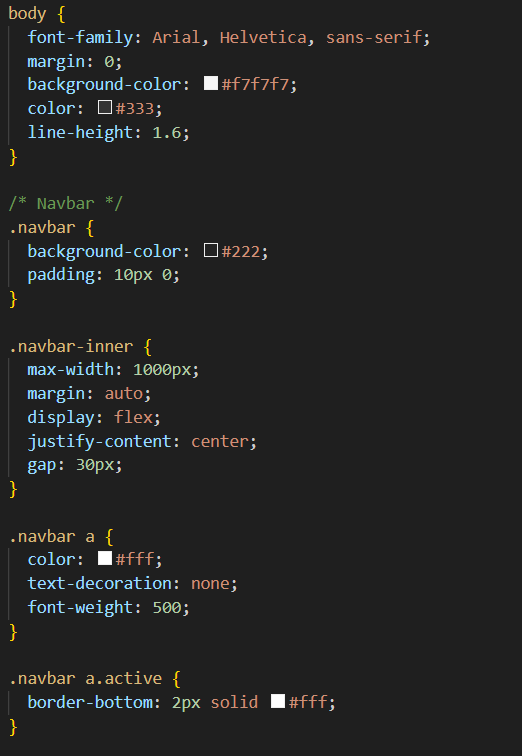
The first part of the CSS code shows the base styling including body, navigation bar, and general layout properties.
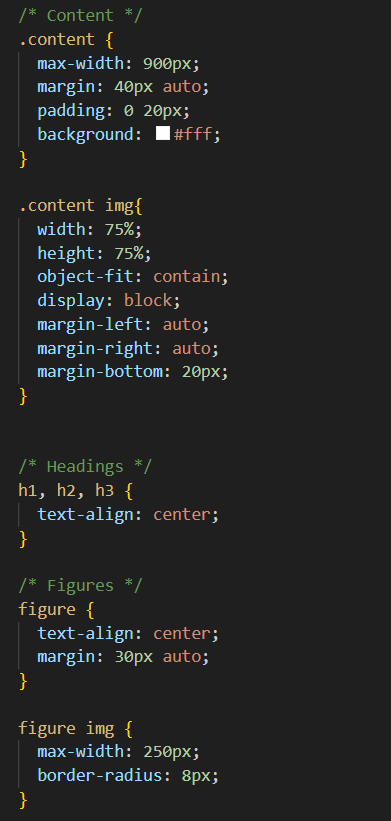
The second part contains styling for content sections, headings, images, and text formatting.
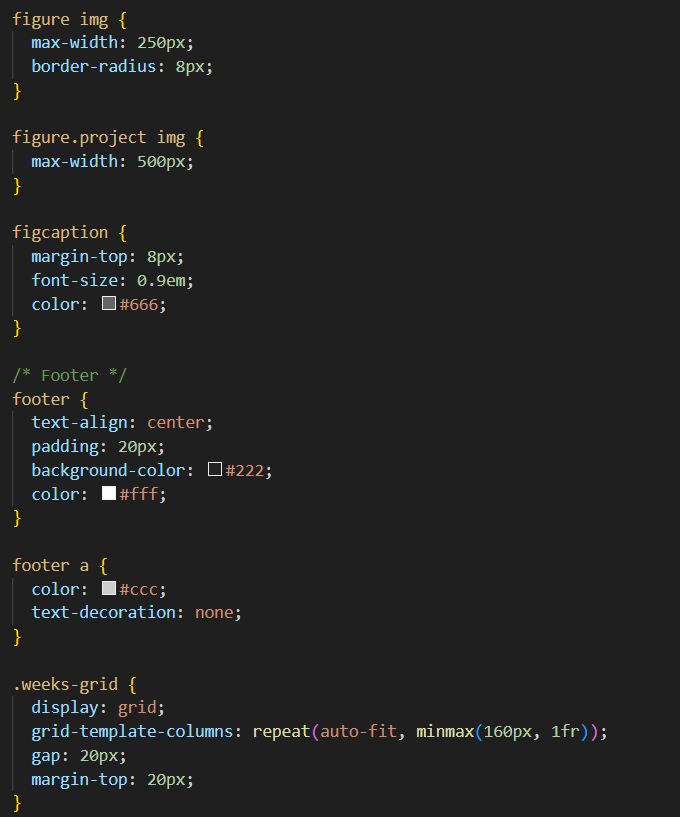
The third part includes footer styling, responsive design rules, and additional visual enhancements.
References
Resources & Documentation
- W3Schools – HTML, CSS, and JavaScript tutorials
- GitLab Documentation – Git and GitLab guides
- Git Documentation – Official Git documentation
Software & Tools
- Visual Studio Code – Code editor by Microsoft
- Git – Version control system
- ChatGPT – AI assistant for documentation help
Courses & Classes
- Fab Academy – Principles and Practices classes
- Fab Academy – Project Management classes