6. 3D Scanning and printing


Group assignment:
- Test the design rules for your 3D printer(s)
- Document your work on the group work page and reflect on your individual page what you learned about characteristics of your printer(s)
Learning outcomes
-
Identify the advantages and limitations of 3D printing
Choose 3DP test model
We chose 3DP test model from the list from Neil’s class, and picked following two test models in our trial.
Slicing the model
Open the “STL” file by “Bambu Studio”.


Choose “Bambu Lab A1” from the Printer List.

You may “Slice” the model by clicking top right “Slice plate” button.

To reduce the required support as much as possible, we decided to 3D‑print the model on its side.

“Enable support” was chosen as it’s default support setting.

We decided to print both models at the same time, so sliced them.

There we had a “warning” telling that there has floating cantilever, it must be due to the clearance test parts. We proceeded with this condition.

Since the sliced model is not obvious if there happened to have support at the clearance area, we changed the model color into white.

Changed channel “1” into white color.

Since FABLAB Kamakura does not allow using Wifi for 3D-Printing, we needed to export the data into a file and transport the data via USB.
Choose “Export plates sliced file” from the pull down menu, and click the button again to export the date into a file.

The sliced data shows it needs 1h41minutes for total printing.
As the initial settings could be lost when a 3D‑printing file created by someone else is downloaded and executed in the future, the current settings are saved as “Initial Setting” for reference.

3DP operation
Here under are the 3D Printer in FABLAB Kamakura; One at the left is Bambu Lab A1-Mini, and One at the right is Bambu Lab A1

Set Filament (this time PLA white) in the real.
This Filament real condition is actually not good condition with loose part in the surface…–> Better to maintain the surface of filament with flatly winding condition.

Install filament into the tube until it stops at the end.

Operation window of Babu Lab A-1
Press “Filament” button.

Press “Load” button.

Loading Filament by heating the nozzle.

Observe the nozzle if the filament has been extruded, then tap “Done”.
If not, push the filament forward slightly and tap “Retry”.

Message in widow shows the processing.

Filament is coming out from the nozzle.

Confirm the slot setting by pressing “Edit”.

Confirm the content of Filament at “Edit slot”.
In this case, Filament: Generic, PLA
Dynamic pressure control: Default

Wipe the printer bed with a water‑dampened cloth to remove any possible fingerprints or oils.

Select the model you want to print.

Check the printing time.
In this case it tells “1h40minutes”.
Then, press “Print”.

Initial filament is coming out.

Normally, those filaments should be removed automatically by the tray function…but, it was somewhat broken and could not be removed…

In such case, you’d better remove the filaments manually from the tray.

3DP started printing.

3DP completed on the bed.

We confirmed that the 3D‑printed part was little bit warped.
Daisuke Hanamido was considering the atmosphere must be cold for this printing.

Top view of printed result on the bed.

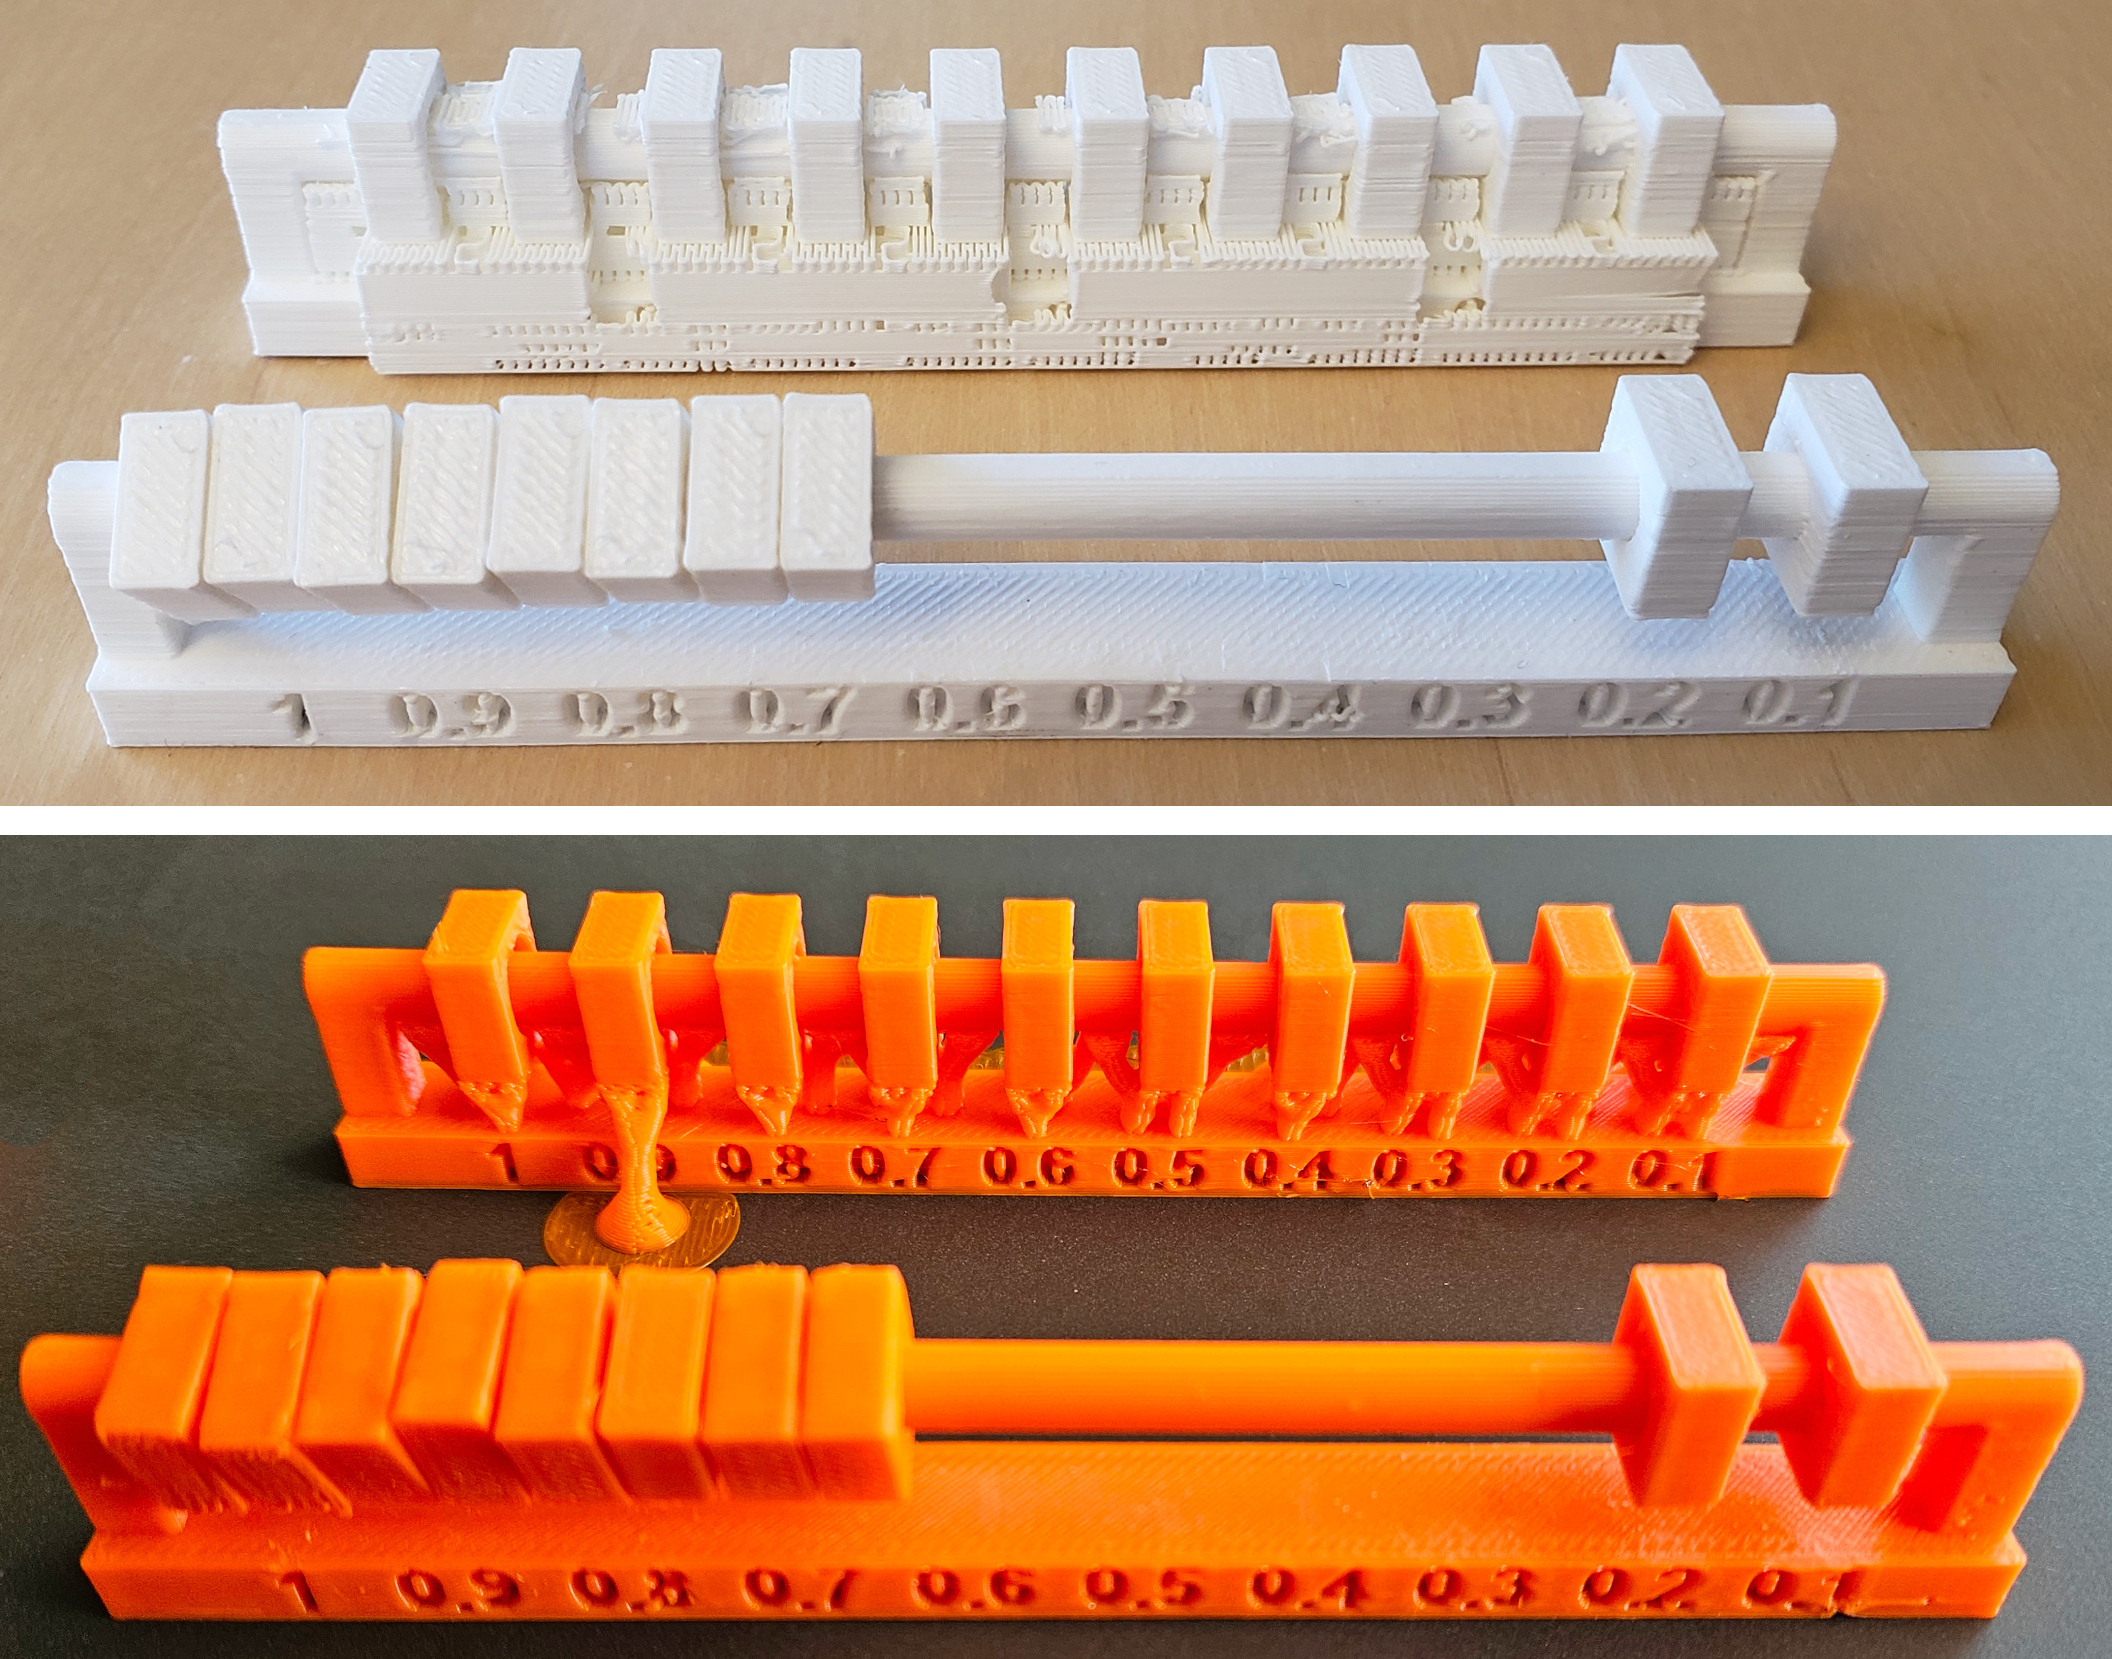
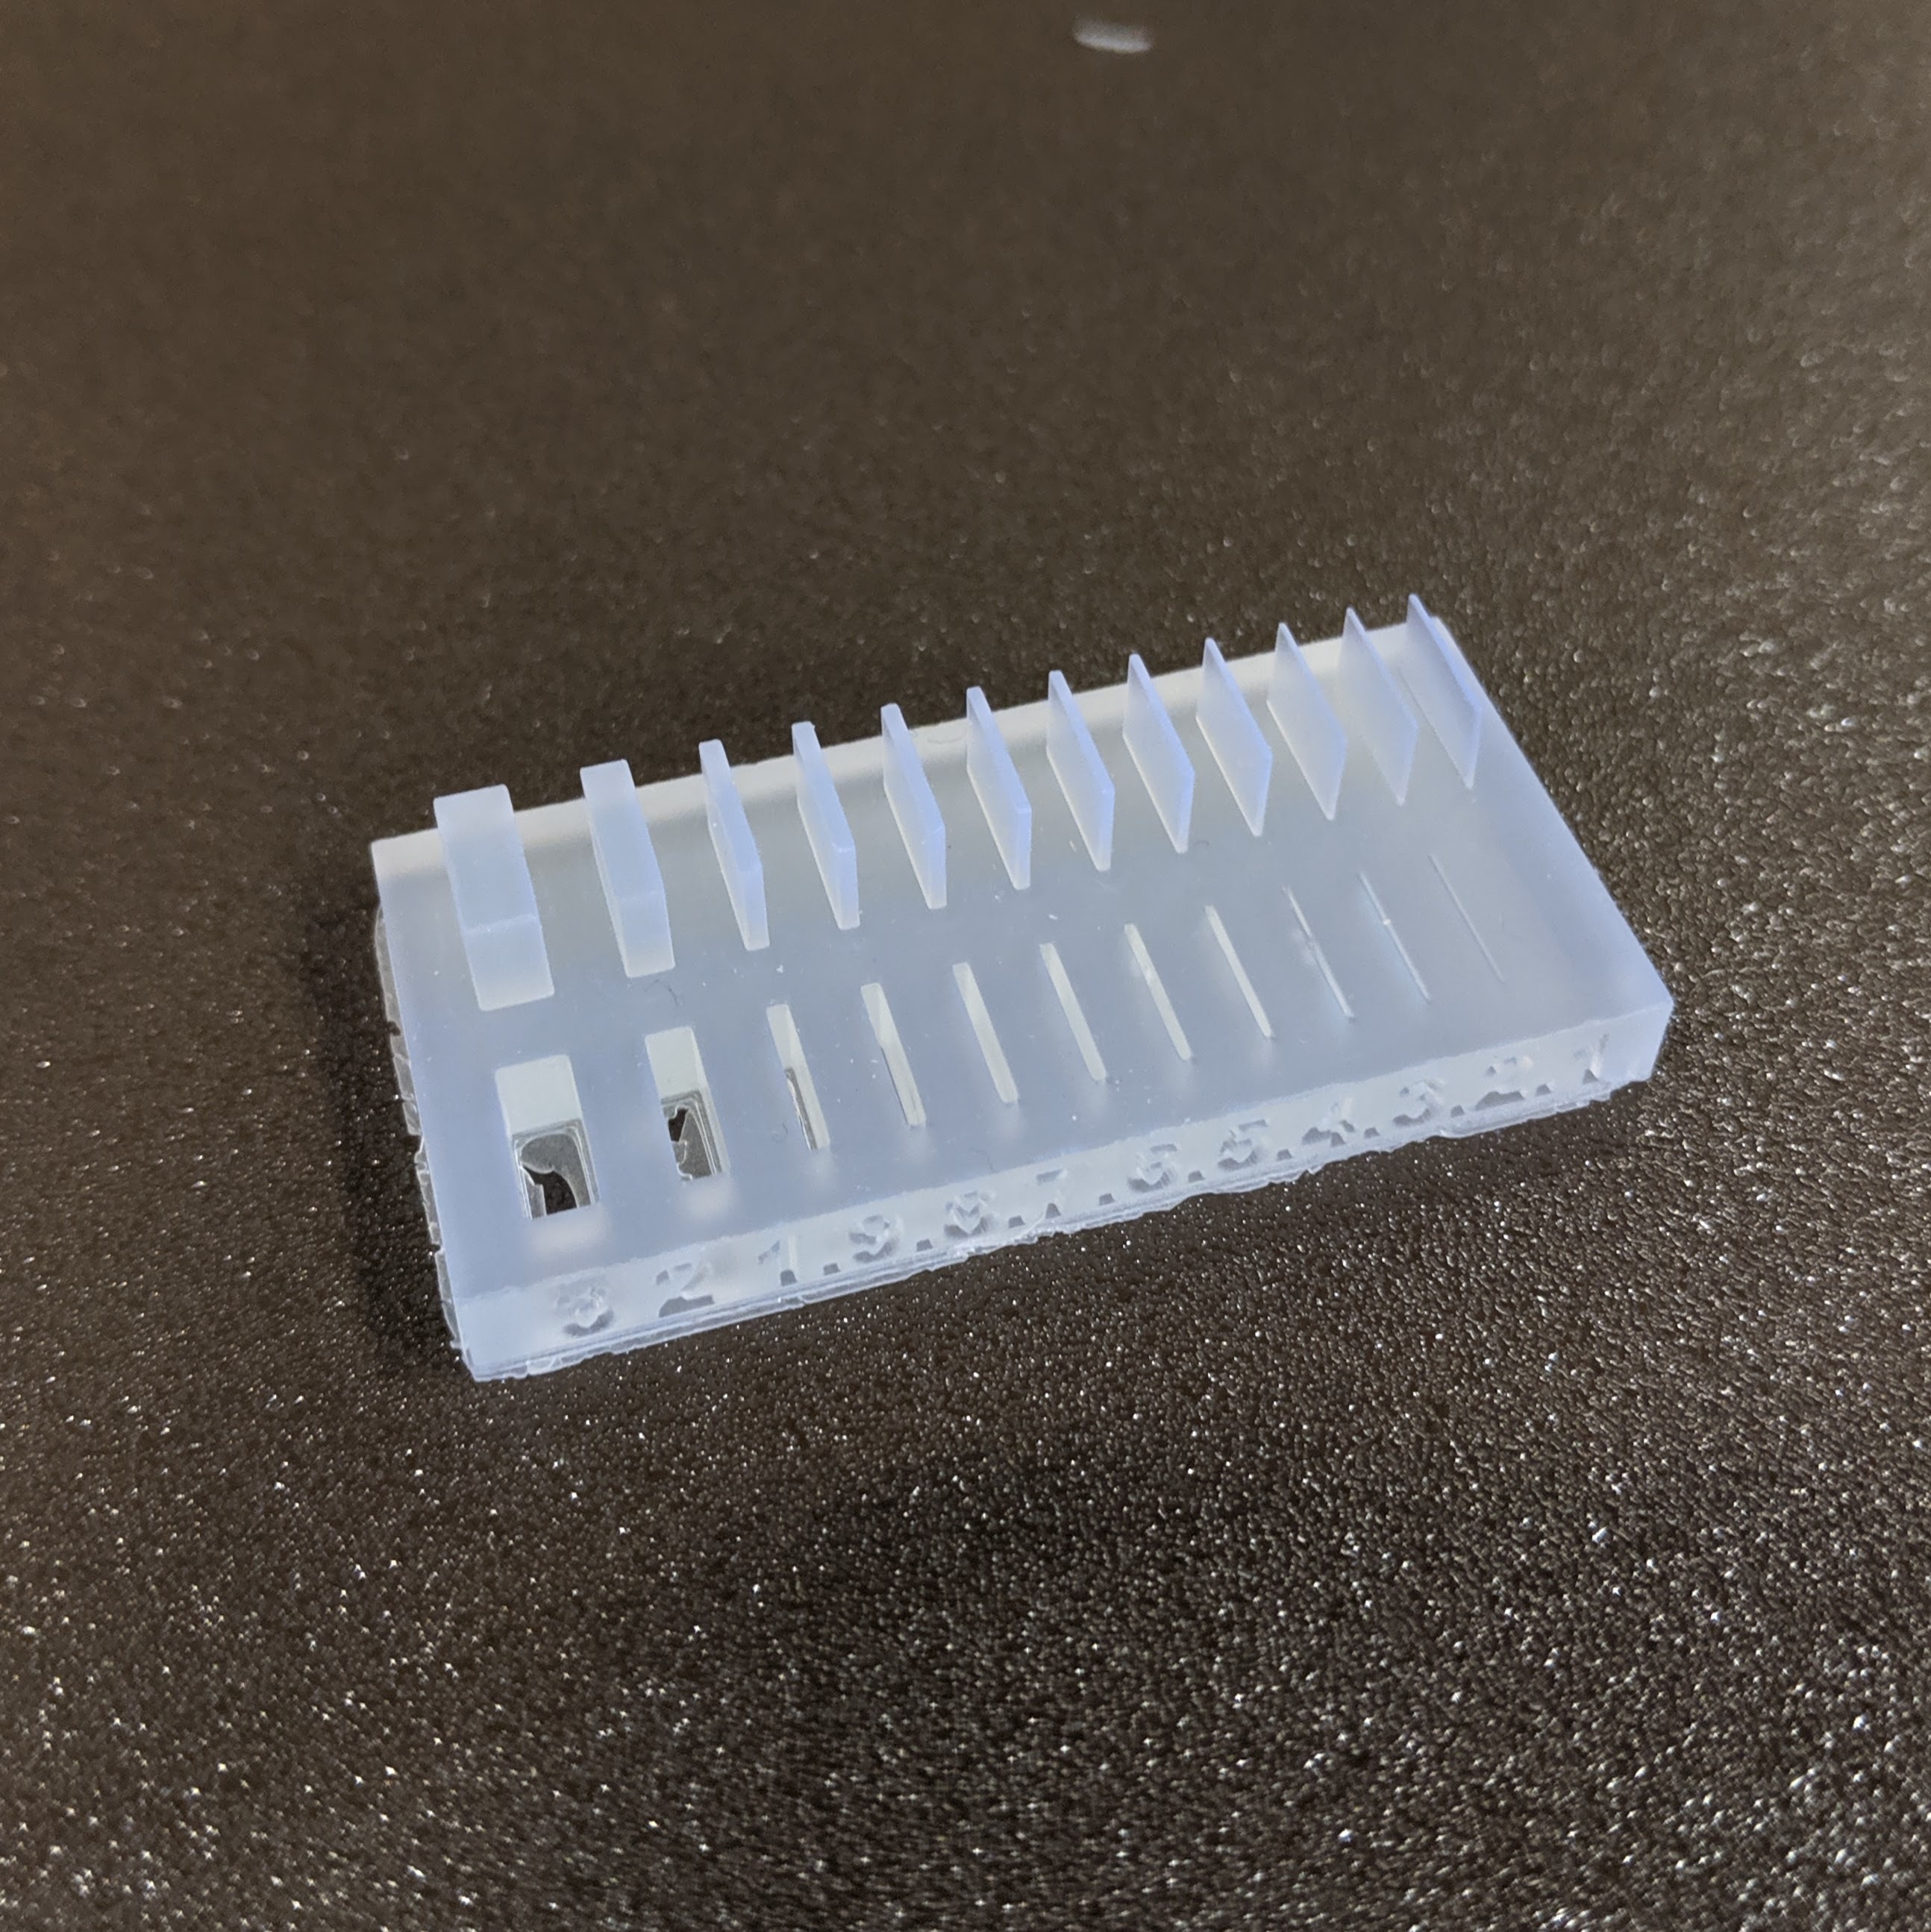
After removal of support, “clearance test” shows;Models with a clearance of 0.3 mm or more in diameter have sufficient clearance to fall under their own weight.

0.2mm clearance in diameter also moves to some extent.
“Thickness test” resulted less than 0.3mm wall was not able to print.