Week 10 — Output devices
Group assignment for this week is on the Chaihuo Week 10 group assignment page. The rest of this page is my individual work.
Individual assignment
The output device is a 1602 character LCD (16 columns × 2 rows) with an
I2C backpack based on the PCF8574 I/O expander. It is
driven by the Arduino sketch pcb_testing. Long-press the encoder switch to reach
the W10 OUTPUT page, where rotation updates a Val field on
the LCD.
Assembled circuit
The LCD backpack connects to the XIAO carrier with four wires (GND, VCC, SDA, SCL) while the board is powered over USB.
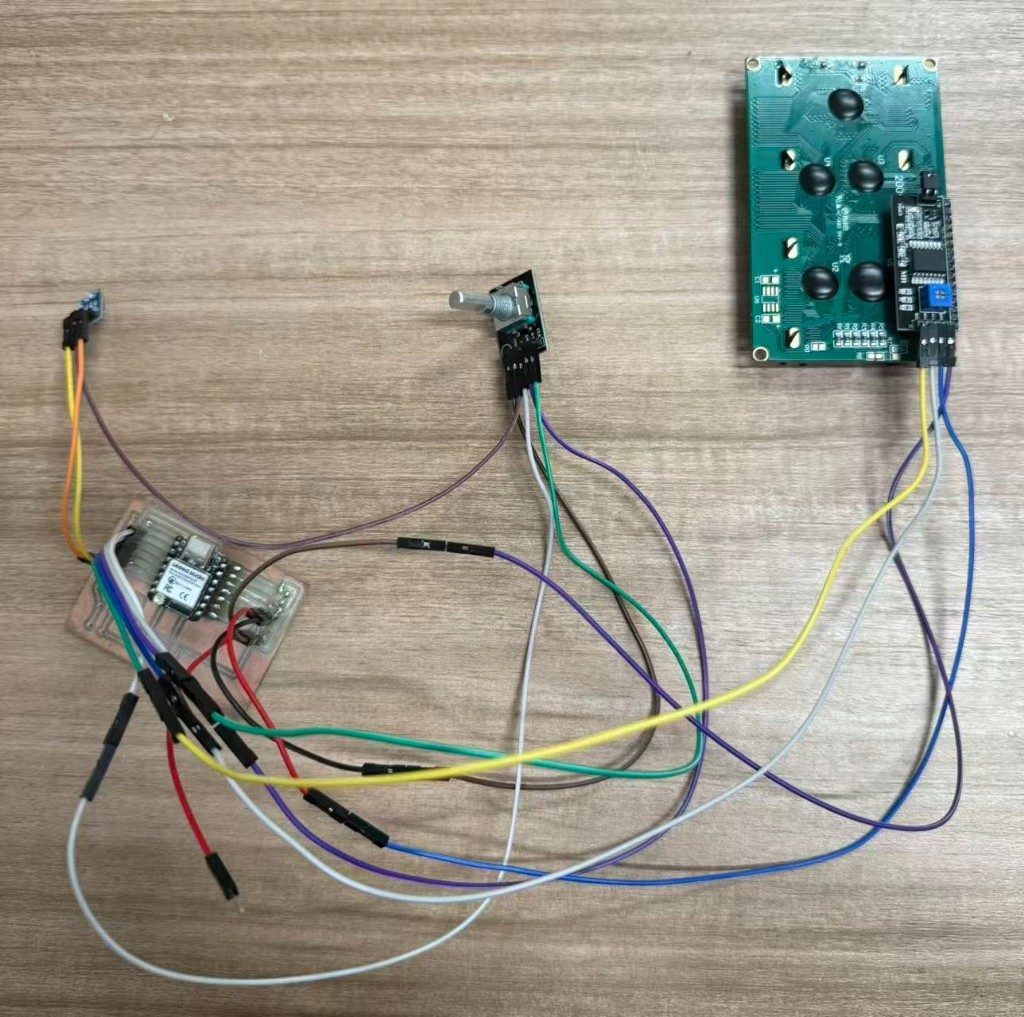
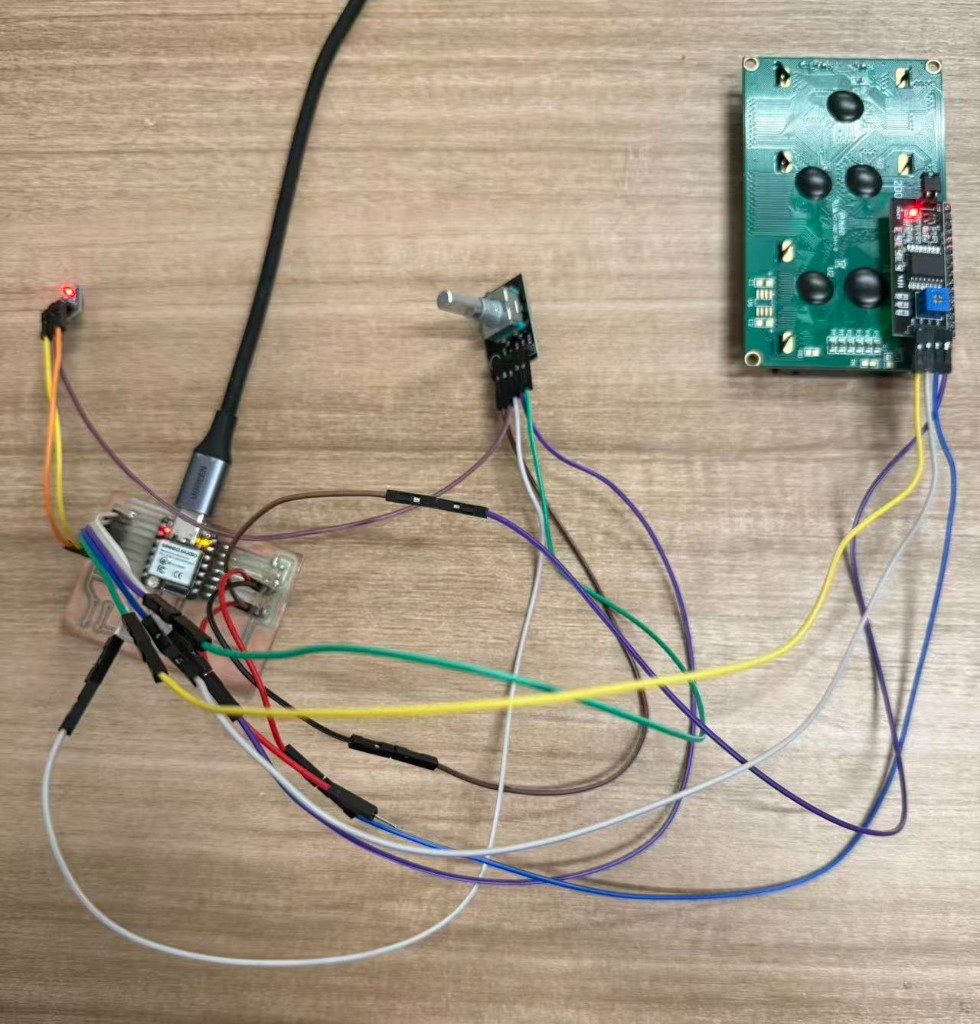
Wiring
The LCD uses four wires from the I2C backpack. Pin numbers match
pcb_testing.ino: Wire.begin(5, 6) maps to
D4/D5 on the XIAO silkscreen.
LCD I2C backpack → XIAO
| Backpack pin | XIAO / rail | In code |
|---|---|---|
| GND | GND | Common ground |
| VCC | 5 V | Backlight; not a GPIO pin |
| SDA | D4 (GPIO 5) |
I2C_SDA — Wire.begin(5, 6) |
| SCL | D5 (GPIO 6) |
I2C_SCL — bus clock at 100 kHz |
Learning the LCD1602 and I2C backpack
The module follows the Hitachi HD44780 controller standard, the same command set most Arduino LCD libraries assume. The front panel exposes the familiar 16-pin parallel header (GND, VDD, VO, RS, RW, E, D0–D7, backlight anode/cathode). Rather than wiring eight data lines to the XIAO, I soldered a compact I2C adapter (“backpack”) to the rear header so the display shares a two-wire bus with the MCU.
I looked up wiring and behavior in:
- The Arduino LCD display guide for HD44780 basics and contrast adjustment.
- Common PCF8574 backpack tutorials (for example Last Minute Engineers — 1602 LCD) for the four-pin header: GND, VCC, SDA, SCL.
- The Seeed XIAO ESP32-S3 wiki for default I2C pin mapping on this board.
- The NXP PCF8574 datasheet for the I/O expander on the backpack: I²C address pins A0–A2, quasi-bidirectional ports, and why SDA/SCL are the only MCU wires needed.
- Fab Academy’s output devices class notes for how character displays fit the “actuator / indicator” category.
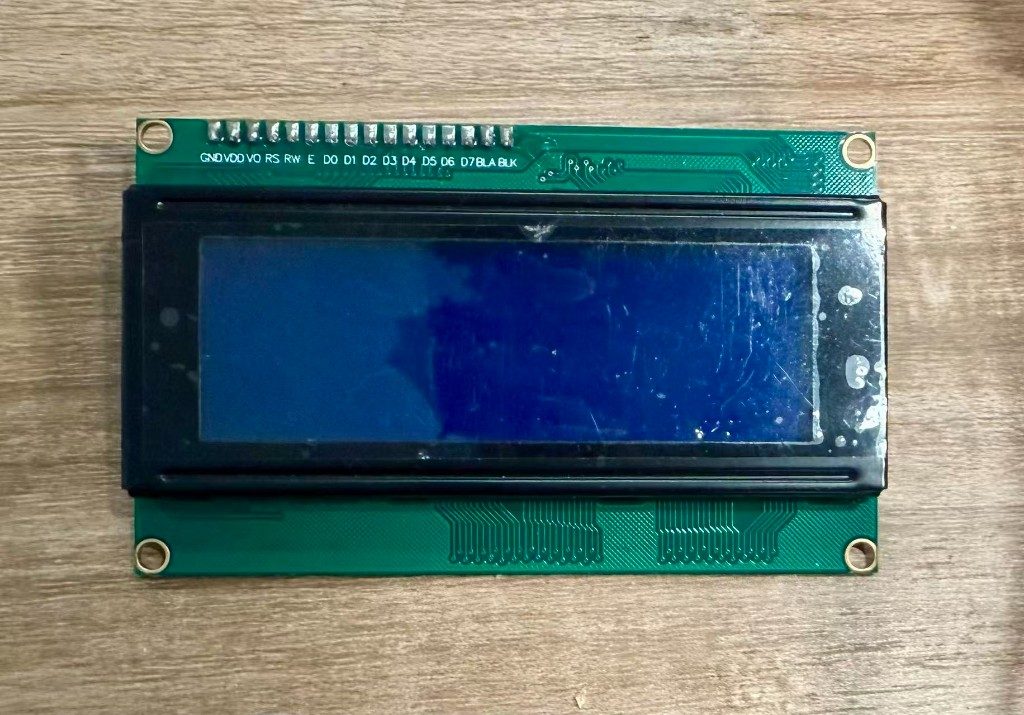
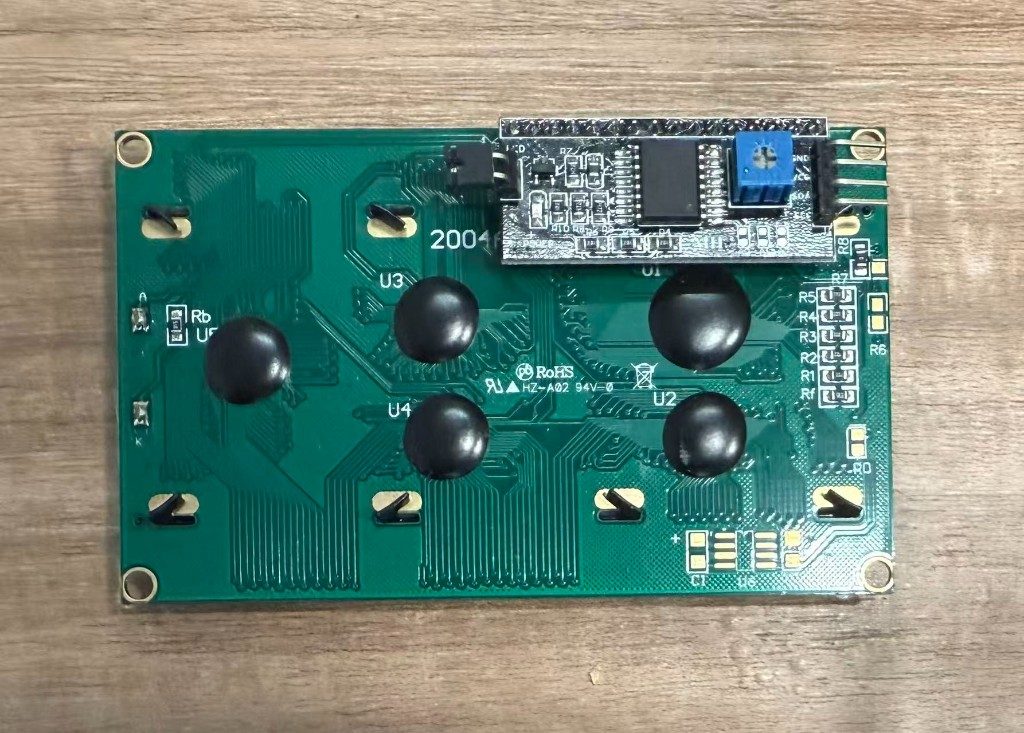
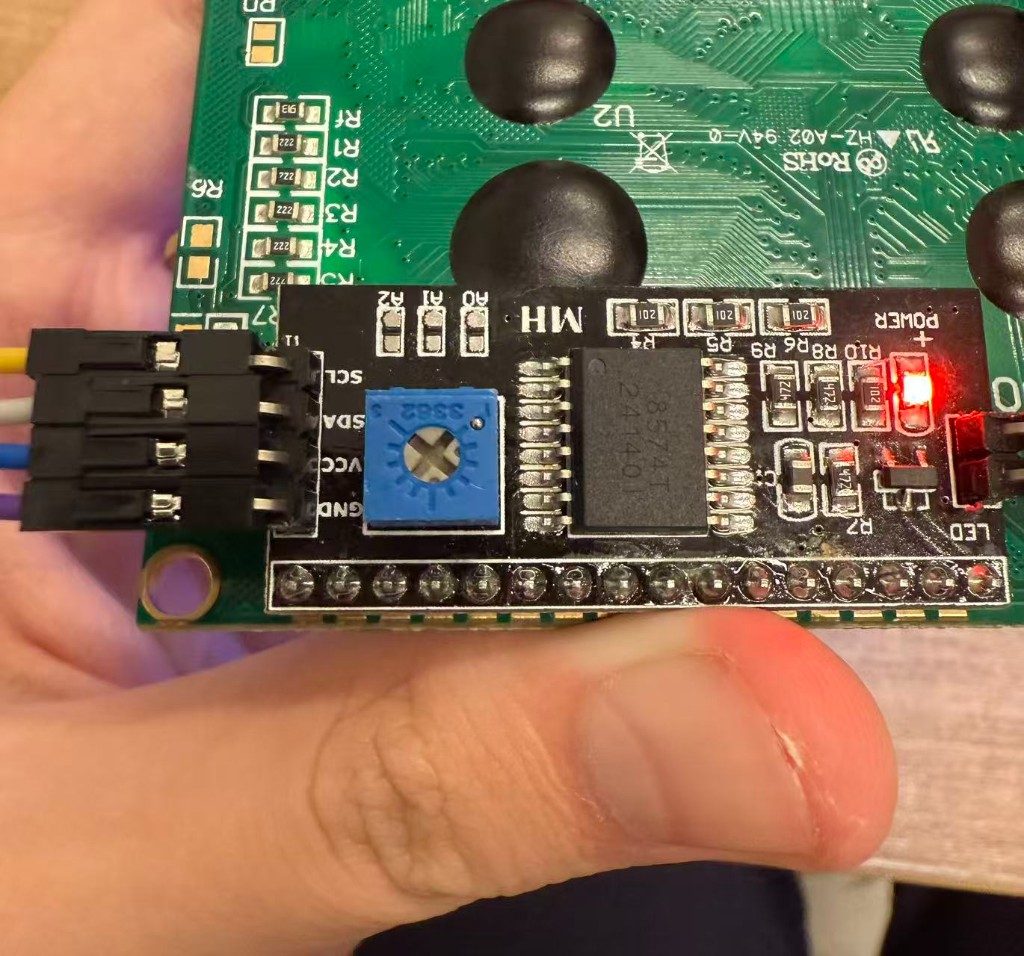
The backpack photo shows the PCF8574T chip, address-select pads A0–A2, a
backlight jumper, and the blue contrast potentiometer. Most modules ship with address
0x27 or 0x3F; my firmware tries both on boot.
I2C bus notes
I2C is a shared two-wire bus: SDA carries data, SCL carries the clock. The backpack
chip is a PCF8574 at address 0x27 or 0x3F. The
sketch tries both on boot. Contrast is set with the blue pot on the backpack, not over I2C.
On startup the sketch scans addresses 1–126, then initializes
LiquidCrystal_I2C at the first responding candidate. Serial prints the
detected address so I can confirm the backpack without guessing.
Bring-up: blue screen and contrast
First power-on is misleading: the backlight turns on and the glass looks like a solid blue rectangle with no characters. That usually means the HD44780 is running but the contrast voltage (VO) is wrong, not that I2C failed.
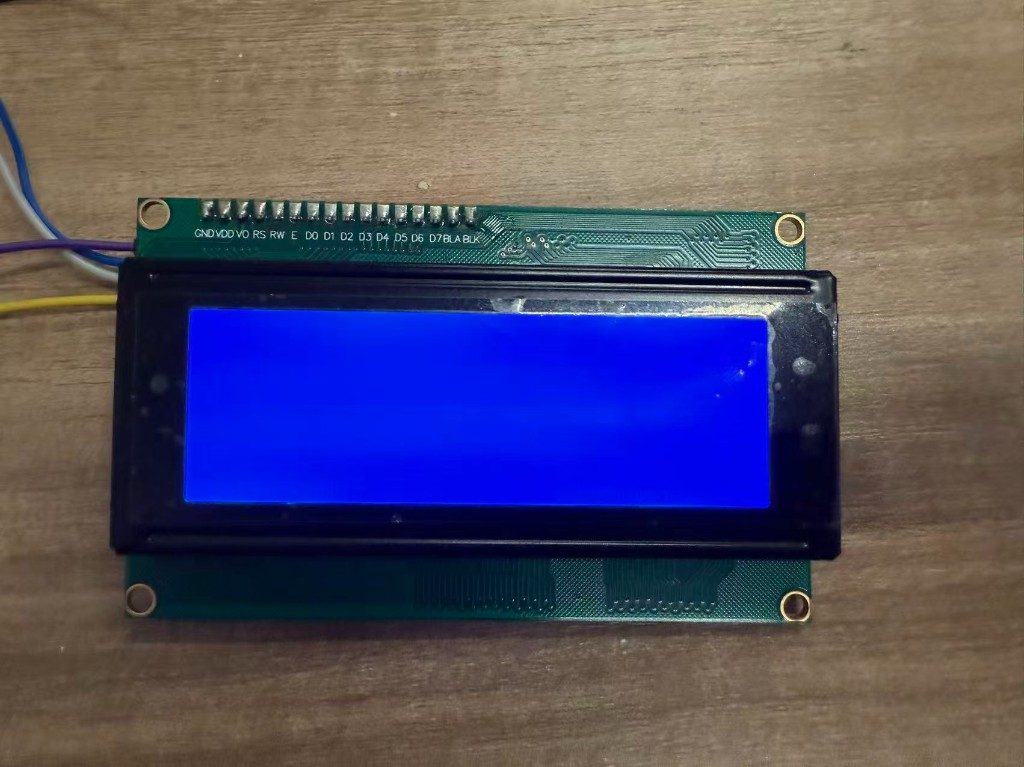
The fix is the small blue potentiometer on the backpack. Turning it with a screwdriver shifts the threshold until the pixel pattern becomes visible. I adjusted slowly while the sketch printed its splash screen, then left the pot where both lines stayed readable.
W10 OUTPUT: Val on the LCD
One more long press on the encoder switch reaches W10 OUTPUT. On this page
rotation changes an internal val variable clamped between 0 and 999; the LCD
second line shows Val: followed by the current number. In
pcb_testing.ino, every encoder step calls applyEncoderStep(): that
always increments encoderSteps, but only updates val when
page == PAGE_OUTPUT. The display refreshes when val changes or on a
120 ms timer, so the screen tracks each detent without blocking the rest of the loop.
Serial commands VAL n and READ can also set or query the counter from
a host.
Download Arduino sketch (pcb_testing.ino)
Reflection
Character LCDs look archaic next to OLED or e-paper, yet they force you through power, contrast, the HD44780 command set, and how an I2C backpack collapses that onto two wires. A lit blue panel with no glyphs usually means contrast, not code. Documenting the potentiometer step kept me from debugging firmware when only VO needed a turn.
Our group power measurements spelled out what “output device” means on the bench: wait for the supply to settle, log V and I, multiply. The open-circuit baseline caught a wiring mistake that could have masqueraded as a mysterious LCD current later; I kept the same habit when sizing the USB bench setup for this board.