Week 1 — Principles and practices, project management
Week 1 was about getting the documentation habit in place before any fabrication: set up version control, publish a student website, sign the lab agreement, and sketch where the final project might go. Most of the work was procedural, but it forced me to think about how each week’s files will land in one public repo.
Website setup
I built this site as plain HTML and CSS files in the GitLab repository
created for Fab Academy, with a shared style.css for navigation and layout.
There is no static-site generator. I edit pages directly, commit through Git, and let
GitLab Pages deploy from the main branch. The live URL comes
from the project’s Pages settings after the pipeline passes.
Navigation links to About Me,
Weekly Assignments, and
Final Project. Image assets live under
public/images/ and are compressed before upload so the site stays fast.
Git operations and GitLab upload
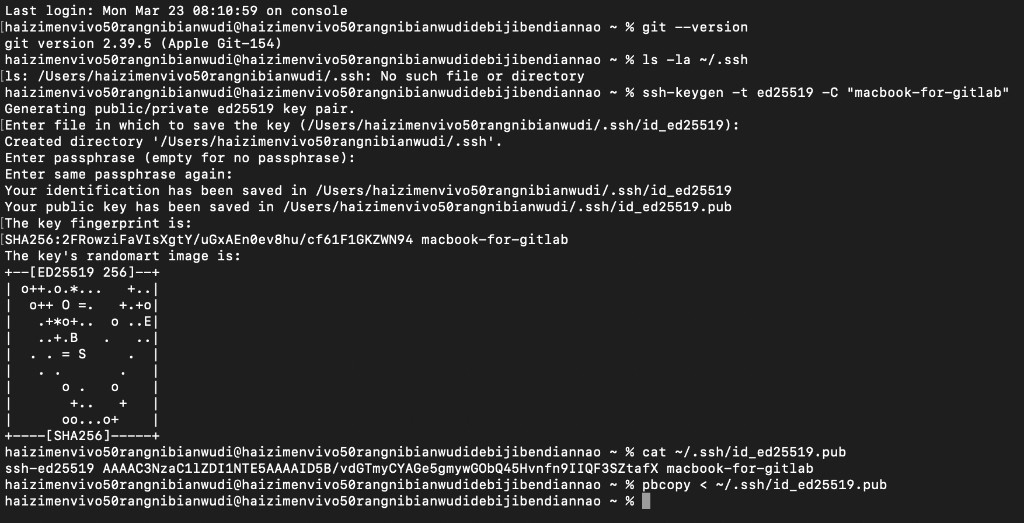
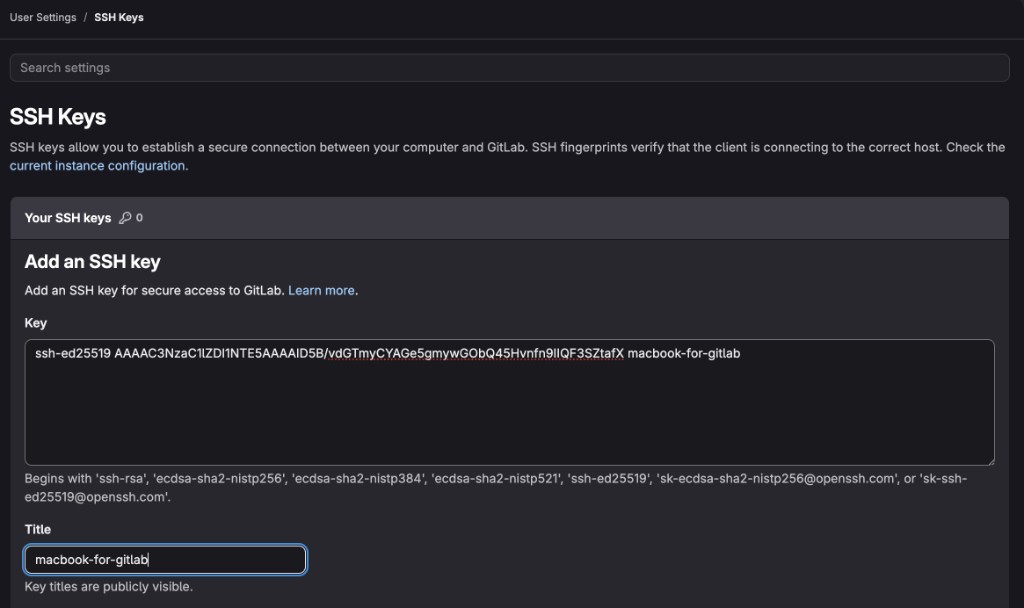
I first checked that Git was installed, then generated a new SSH key pair on my laptop, copied
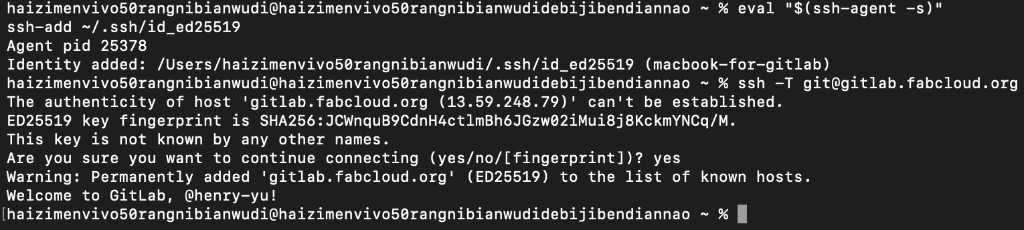
the public key, and added it to GitLab SSH settings. After that, I started the SSH agent, added
my private key, and verified the connection with ssh -T git@gitlab.fabcloud.org.
The terminal showed a welcome message, confirming that SSH authentication worked correctly.
- Check Git version and generate SSH key (
ssh-keygen -t ed25519). - Copy public key and add it to GitLab profile SSH Keys.
- Run SSH agent and test the connection until welcome message appears.


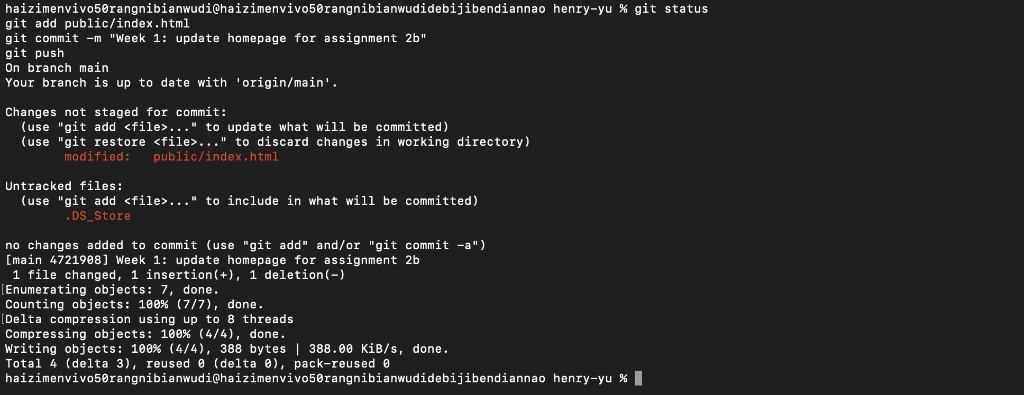
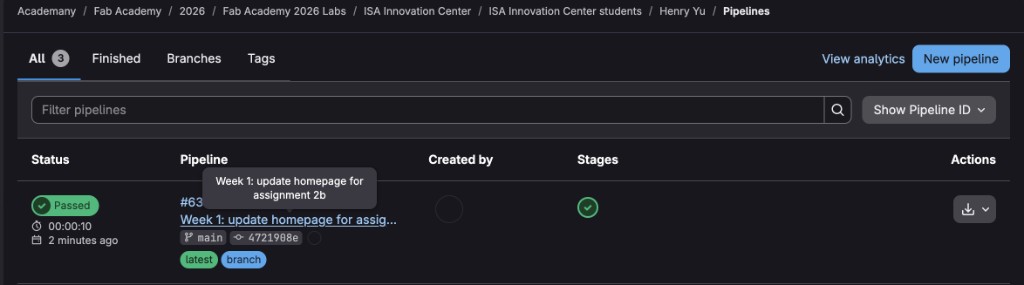
Next I edited the website content in the repository, committed and pushed the change to the
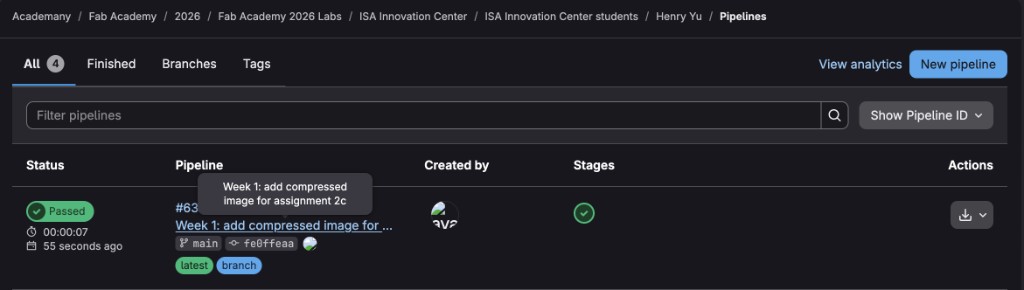
main branch, and checked GitLab Pipelines. The pipeline status was
Passed, so the deployment step completed successfully.
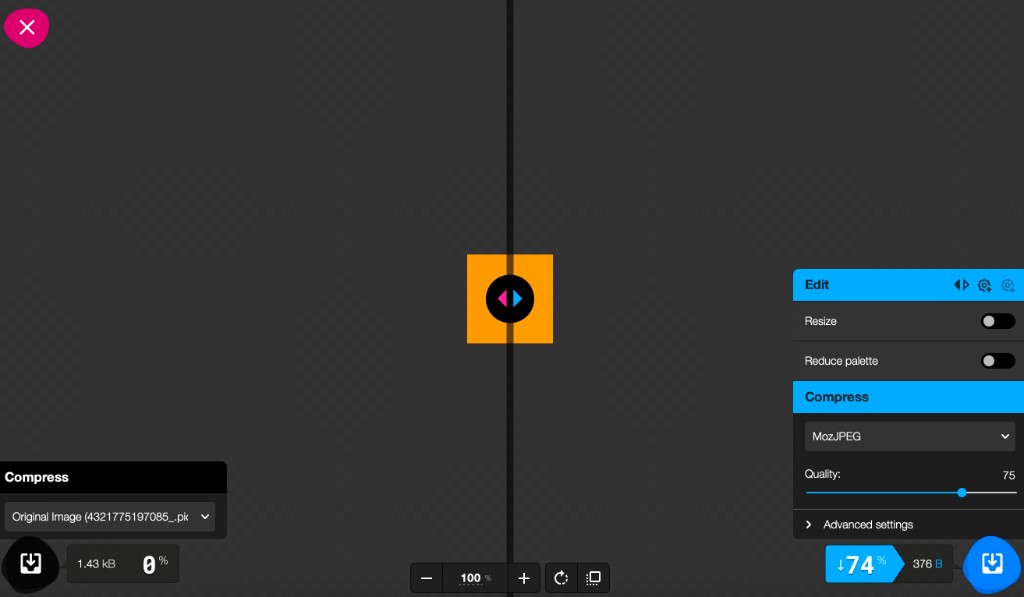
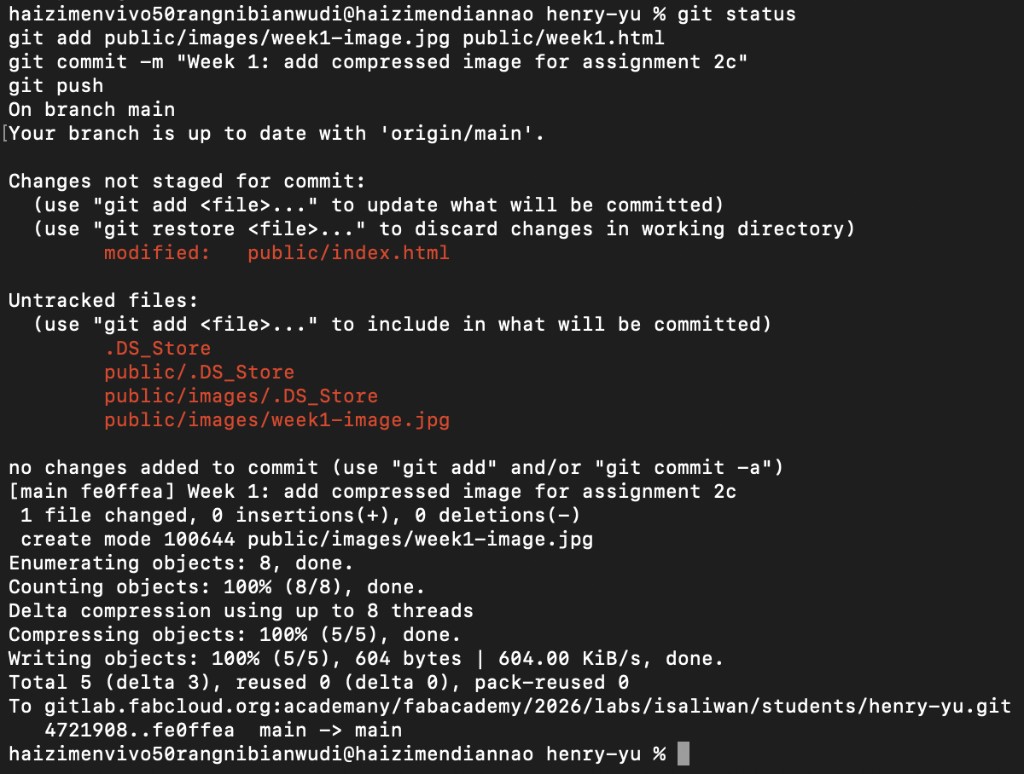
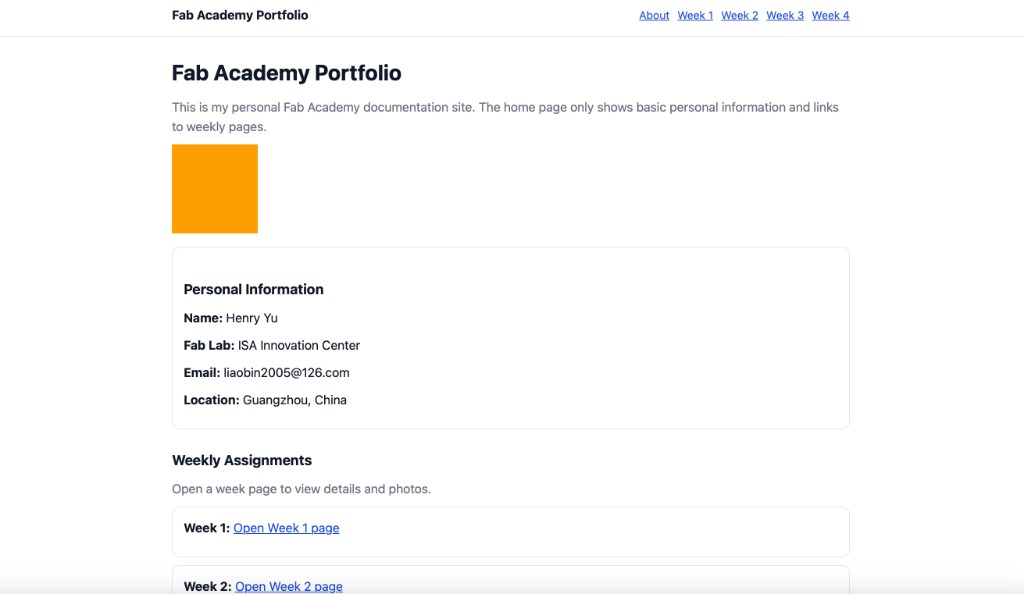
I compressed an image using Squoosh, added it to the repository and referenced it in HTML, then committed and pushed. I verified the pipeline again and confirmed the image appeared on the deployed website.
- Compress image with Squoosh before upload.
- Add image and HTML changes, then commit and push.
- Verify successful pipeline and check image on live site.
Student agreement
Click to view my signed agreement
Signed file path: documents/student-agreement-signed.md
Final project sketch
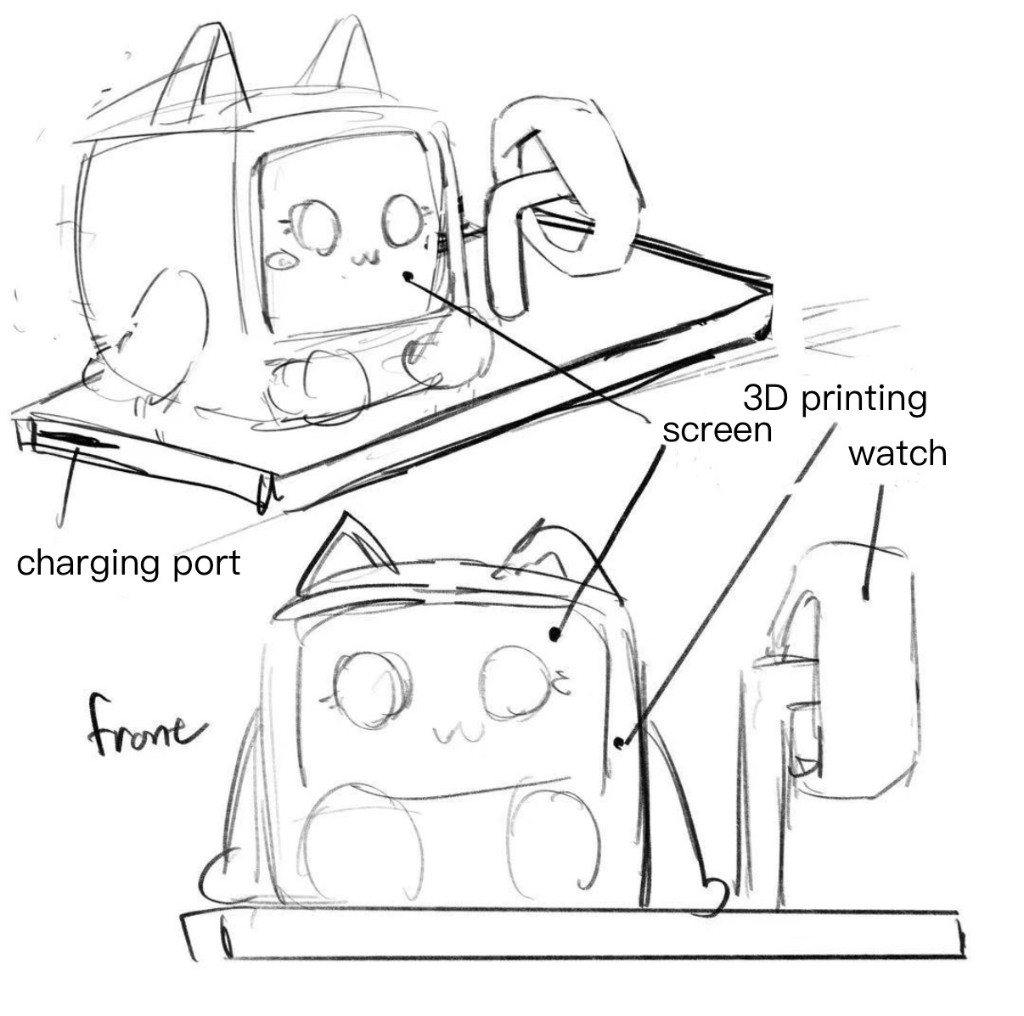
I also sketched an early concept for my final project: a desktop companion that pairs a friendly character body with a small screen and a dedicated spot for a wearable device. The idea was to keep the form approachable while leaving room for sensors, charging, and later UI work.
- Character body: cat-like figure planned as a 3D-printed shell with the face area reserved for a display.
- Base: flat platform with a side charging port for the main unit.
- Wearable dock: vertical stand on the right for a watch-style device.
This is a first-pass layout only—perspective and front views to fix proportions before moving into CAD. The current direction of the project is documented on the Final Project page.