FINAL VIDEO
Idea
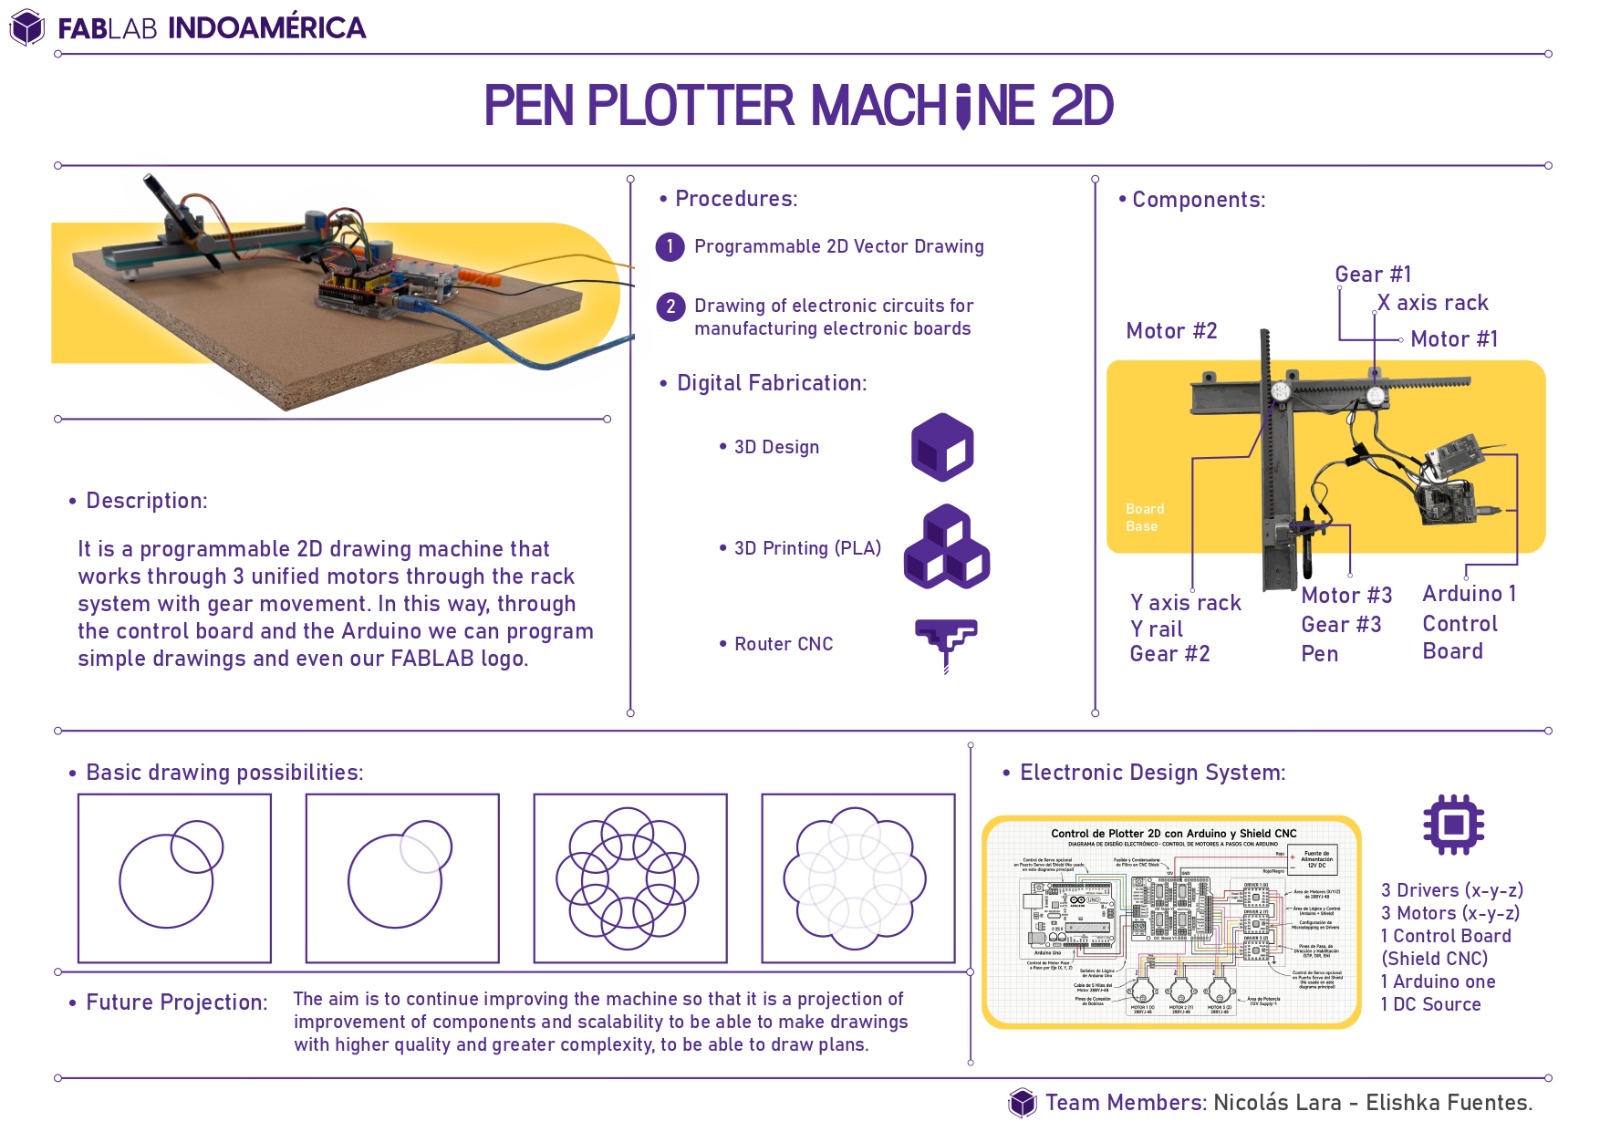
The idea for this machine stems from the need we have at the Indoamerica Fab Lab to be able to perform engraving
work on flat surfaces such as textured paper or cardstock, using different markers, pencils, and technical pens
of various colors. This machine will allow us to draw different 2D designs, such as letters, graphics, and even circuit boards.
The idea is also that we can manufacture this machine using existing processes in the lab, as well as electronic
components available in our warehouse or that we can easily purchase.
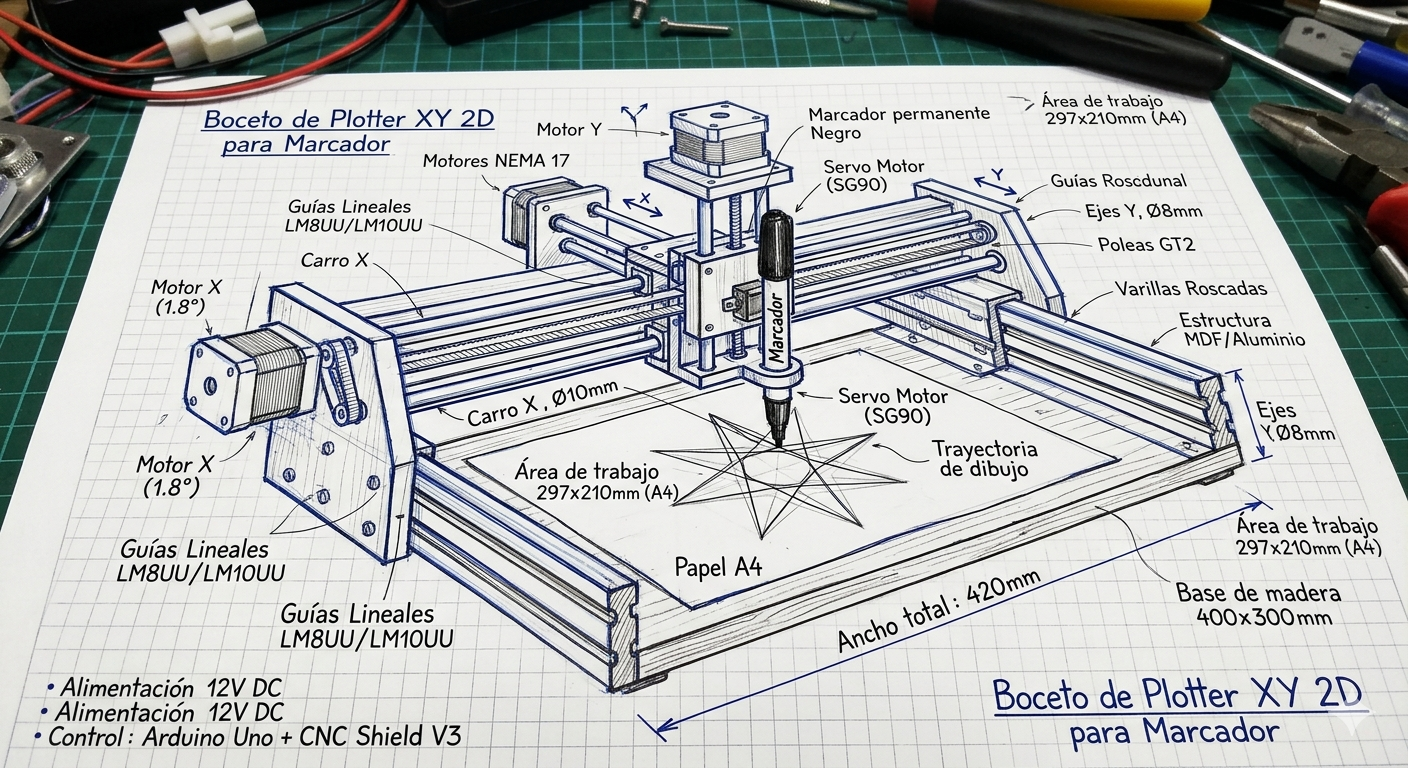
We had an initial idea of what the structure of our machine would be like, but it required buying many components
that were a bit difficult to obtain, so we opted for another design that we can mostly manufacture in our laboratory.
This new design also allows us to make the machine lighter, easier to transport, cheaper, and we can design it to have
a larger work area.
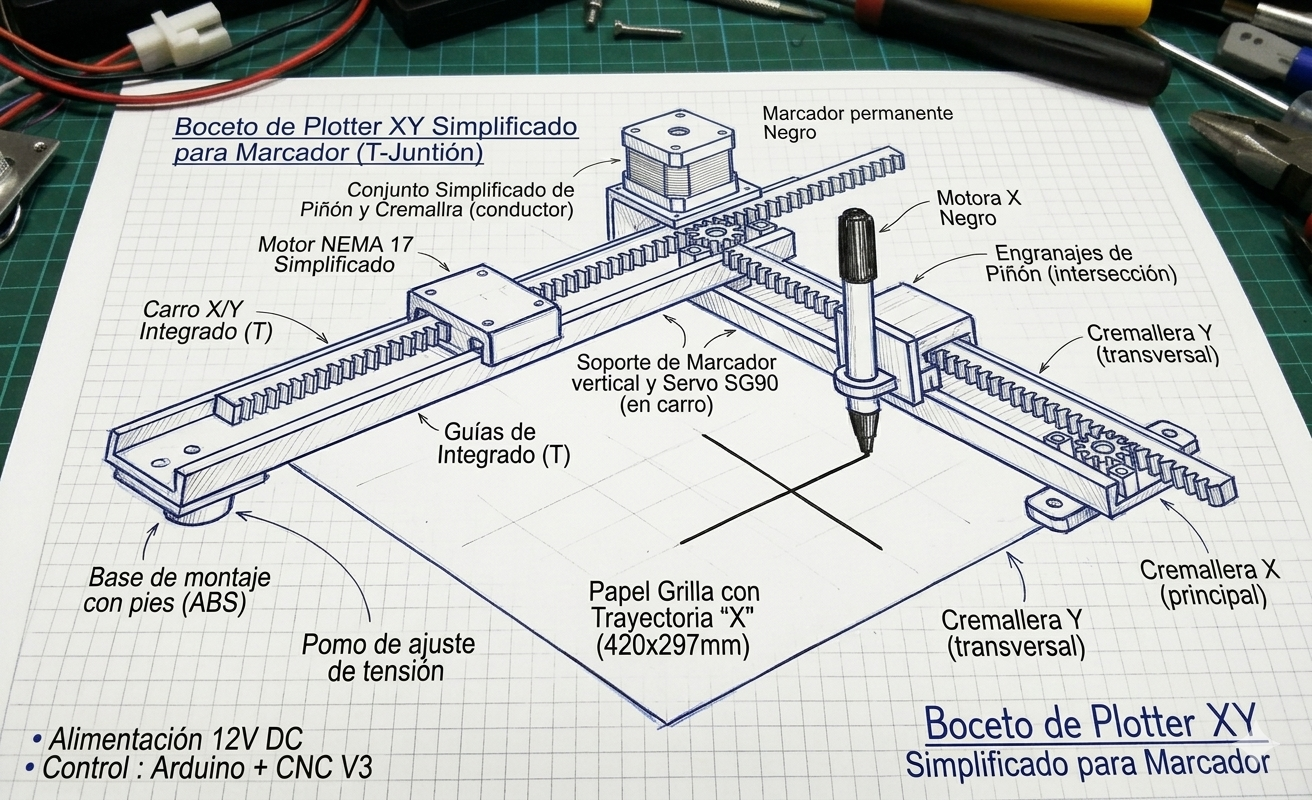
Now that we have a clearer idea of our machine's structure, we're getting down to work. In this team that Eli and Nico form,
each of us has a bit more experience in certain areas, and to speed up the machine's development process, we've divided
up specific tasks.
Nicolás: electronic part, size the electronic components, acquire the motors and electronic boards, connect the components
and the programming and control part.
Elizka: Mechanical part, design the machine in a CAD program to then print the components of the machine where the
electronic components will go.
Mechanical Design:
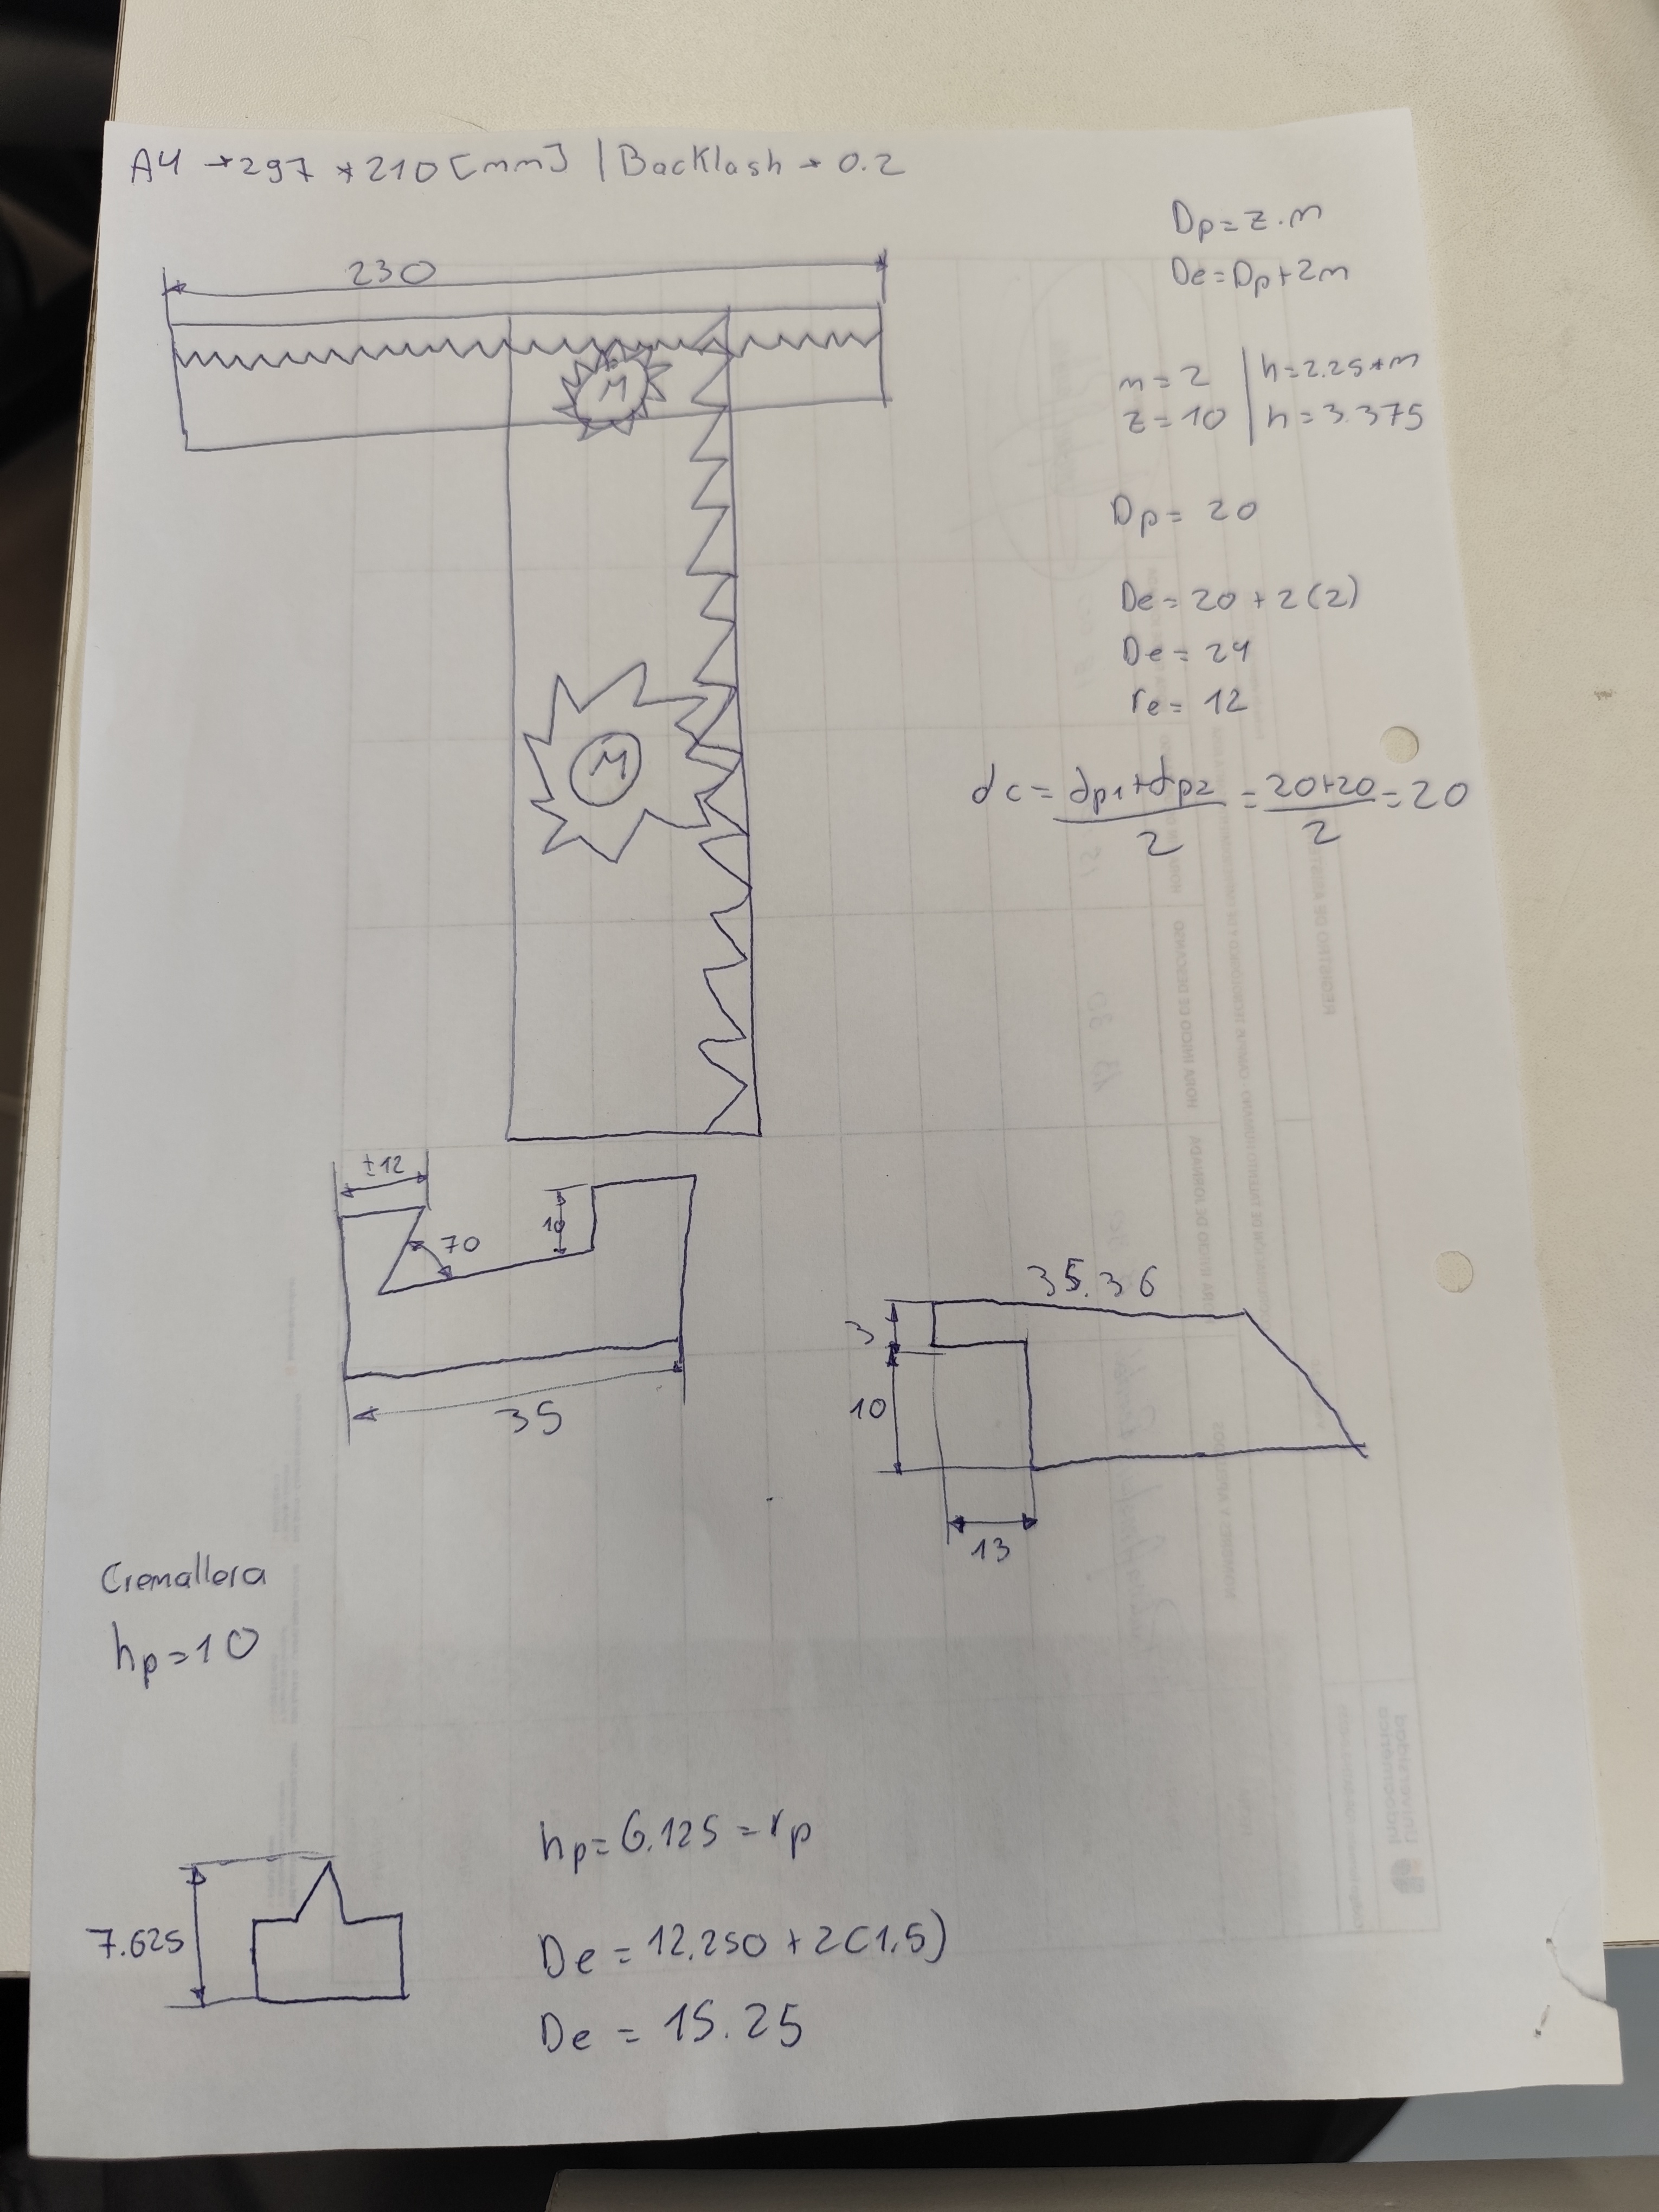
To begin designing the machine parts, and since I'll be using gears, it's necessary to perform some calculations to ensure
a good design and that the rack and pinion system functions correctly. For this, I needed to research gear theory, and based
on the estimated dimensions of my machine, I will continue sizing my gears.
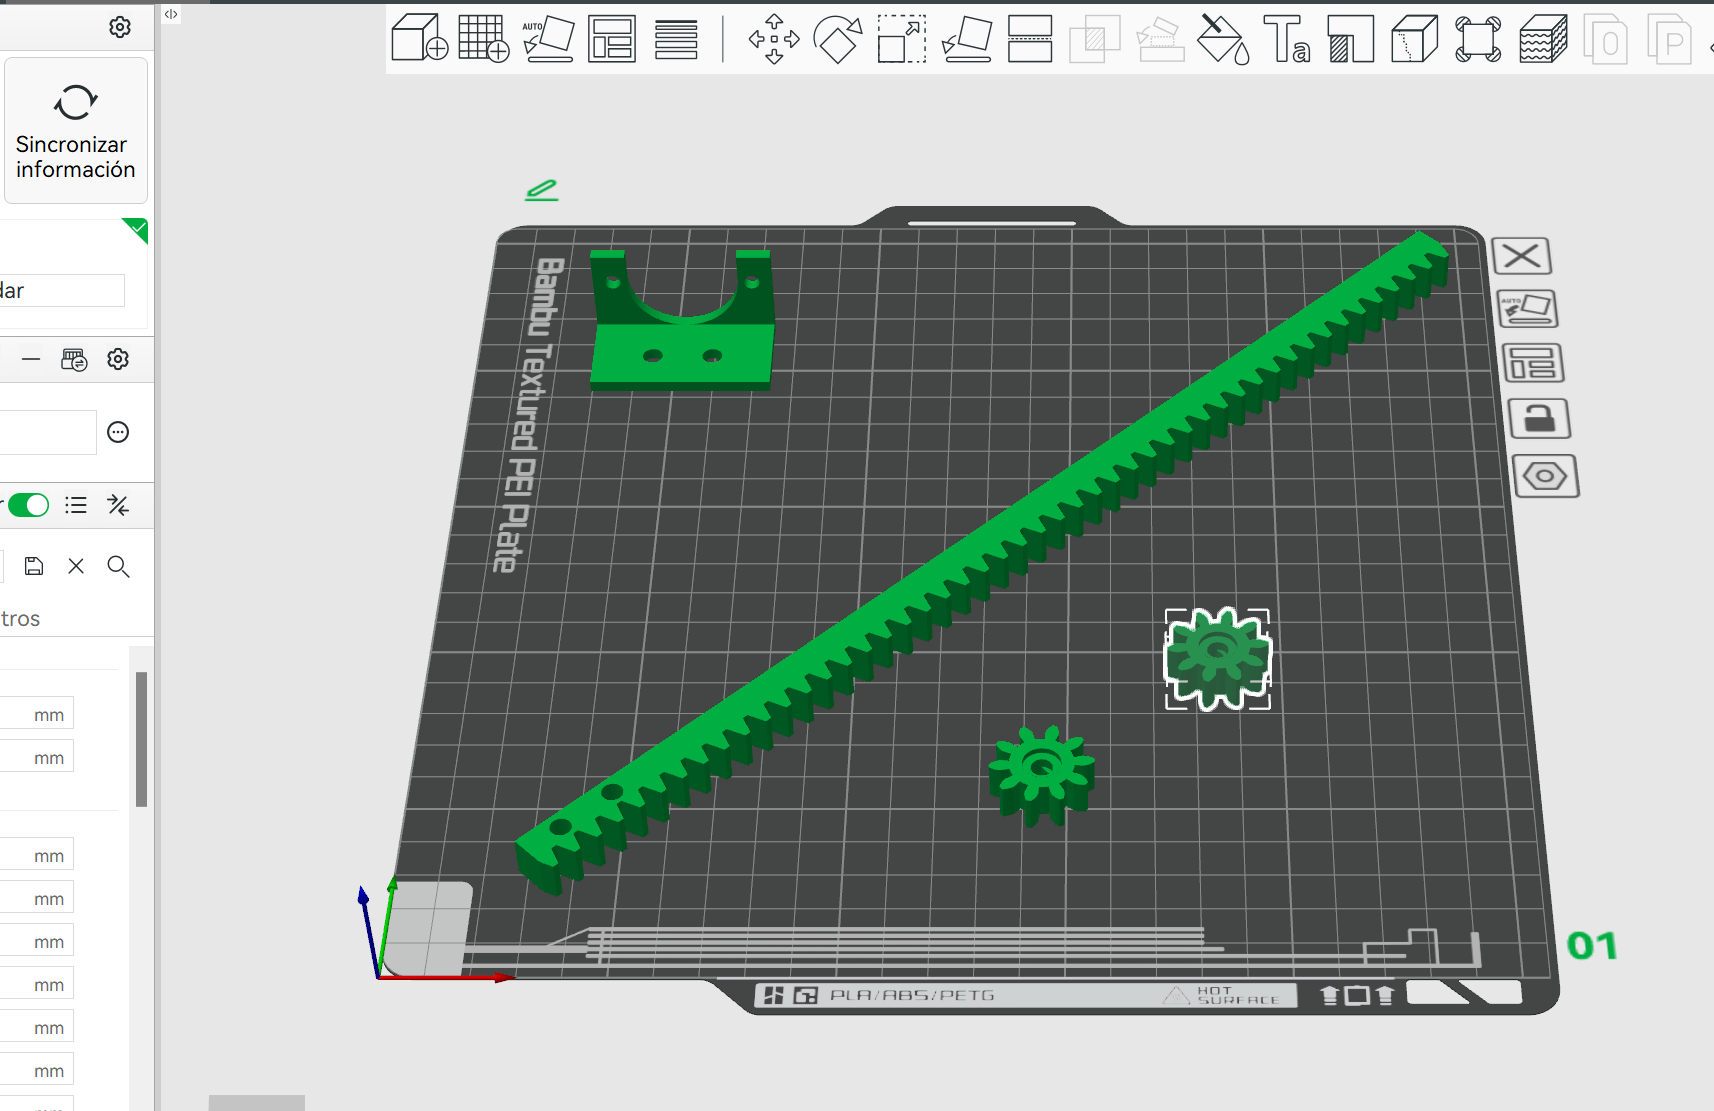
Now that we have calculated the gears and the size of the machine, we continue to design all the mechanical parts that we will 3D print for assembly.
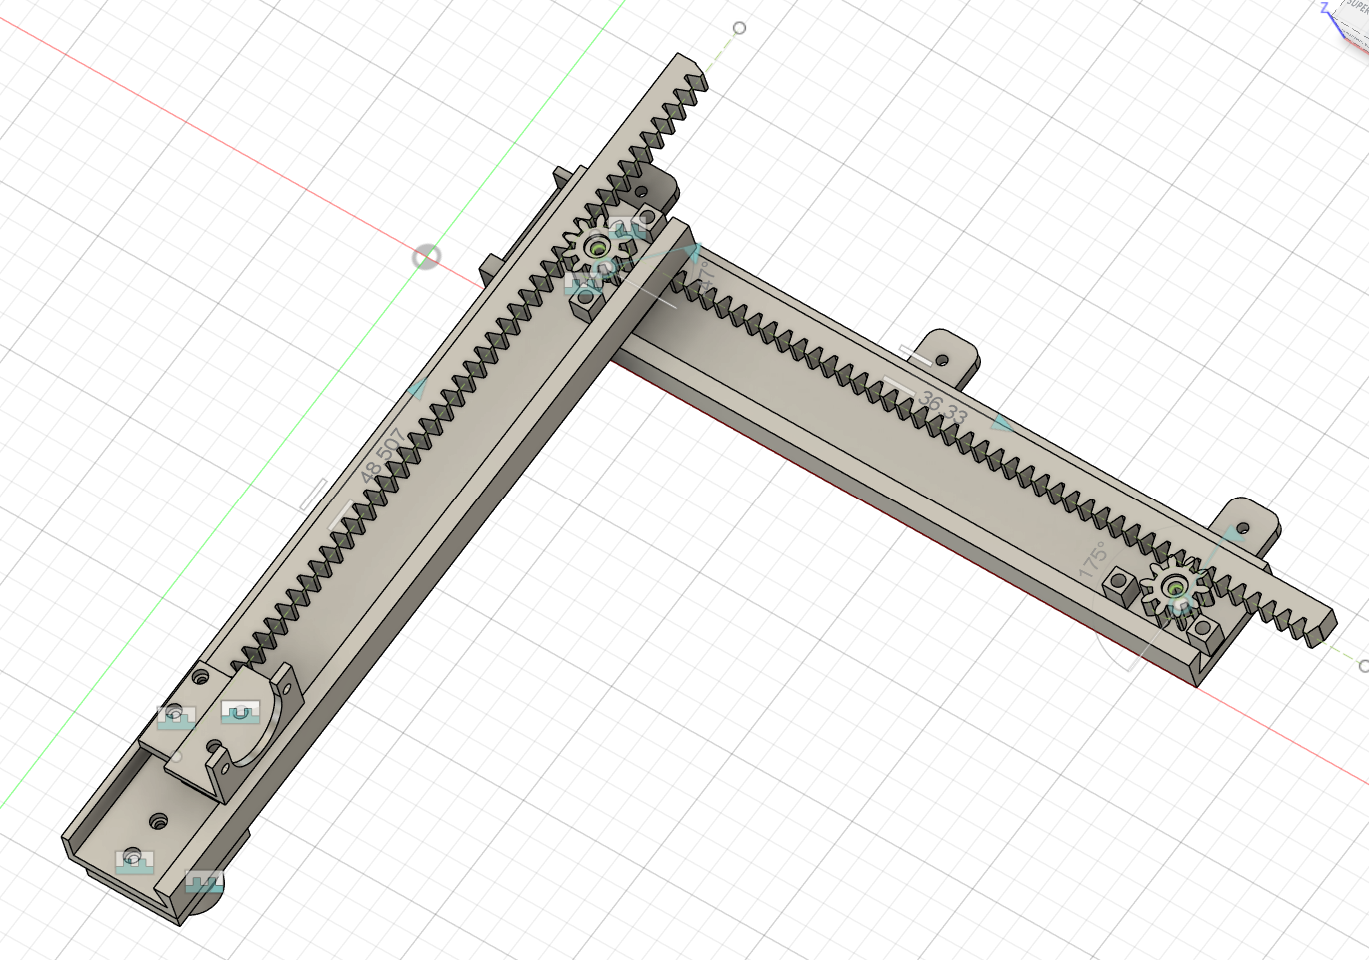
We proceed to print all the designed components in FUSION 360, taking into account that some parts are movable and will have friction,
so we will print at a low layer height and then sand to avoid the friction force as much as possible.
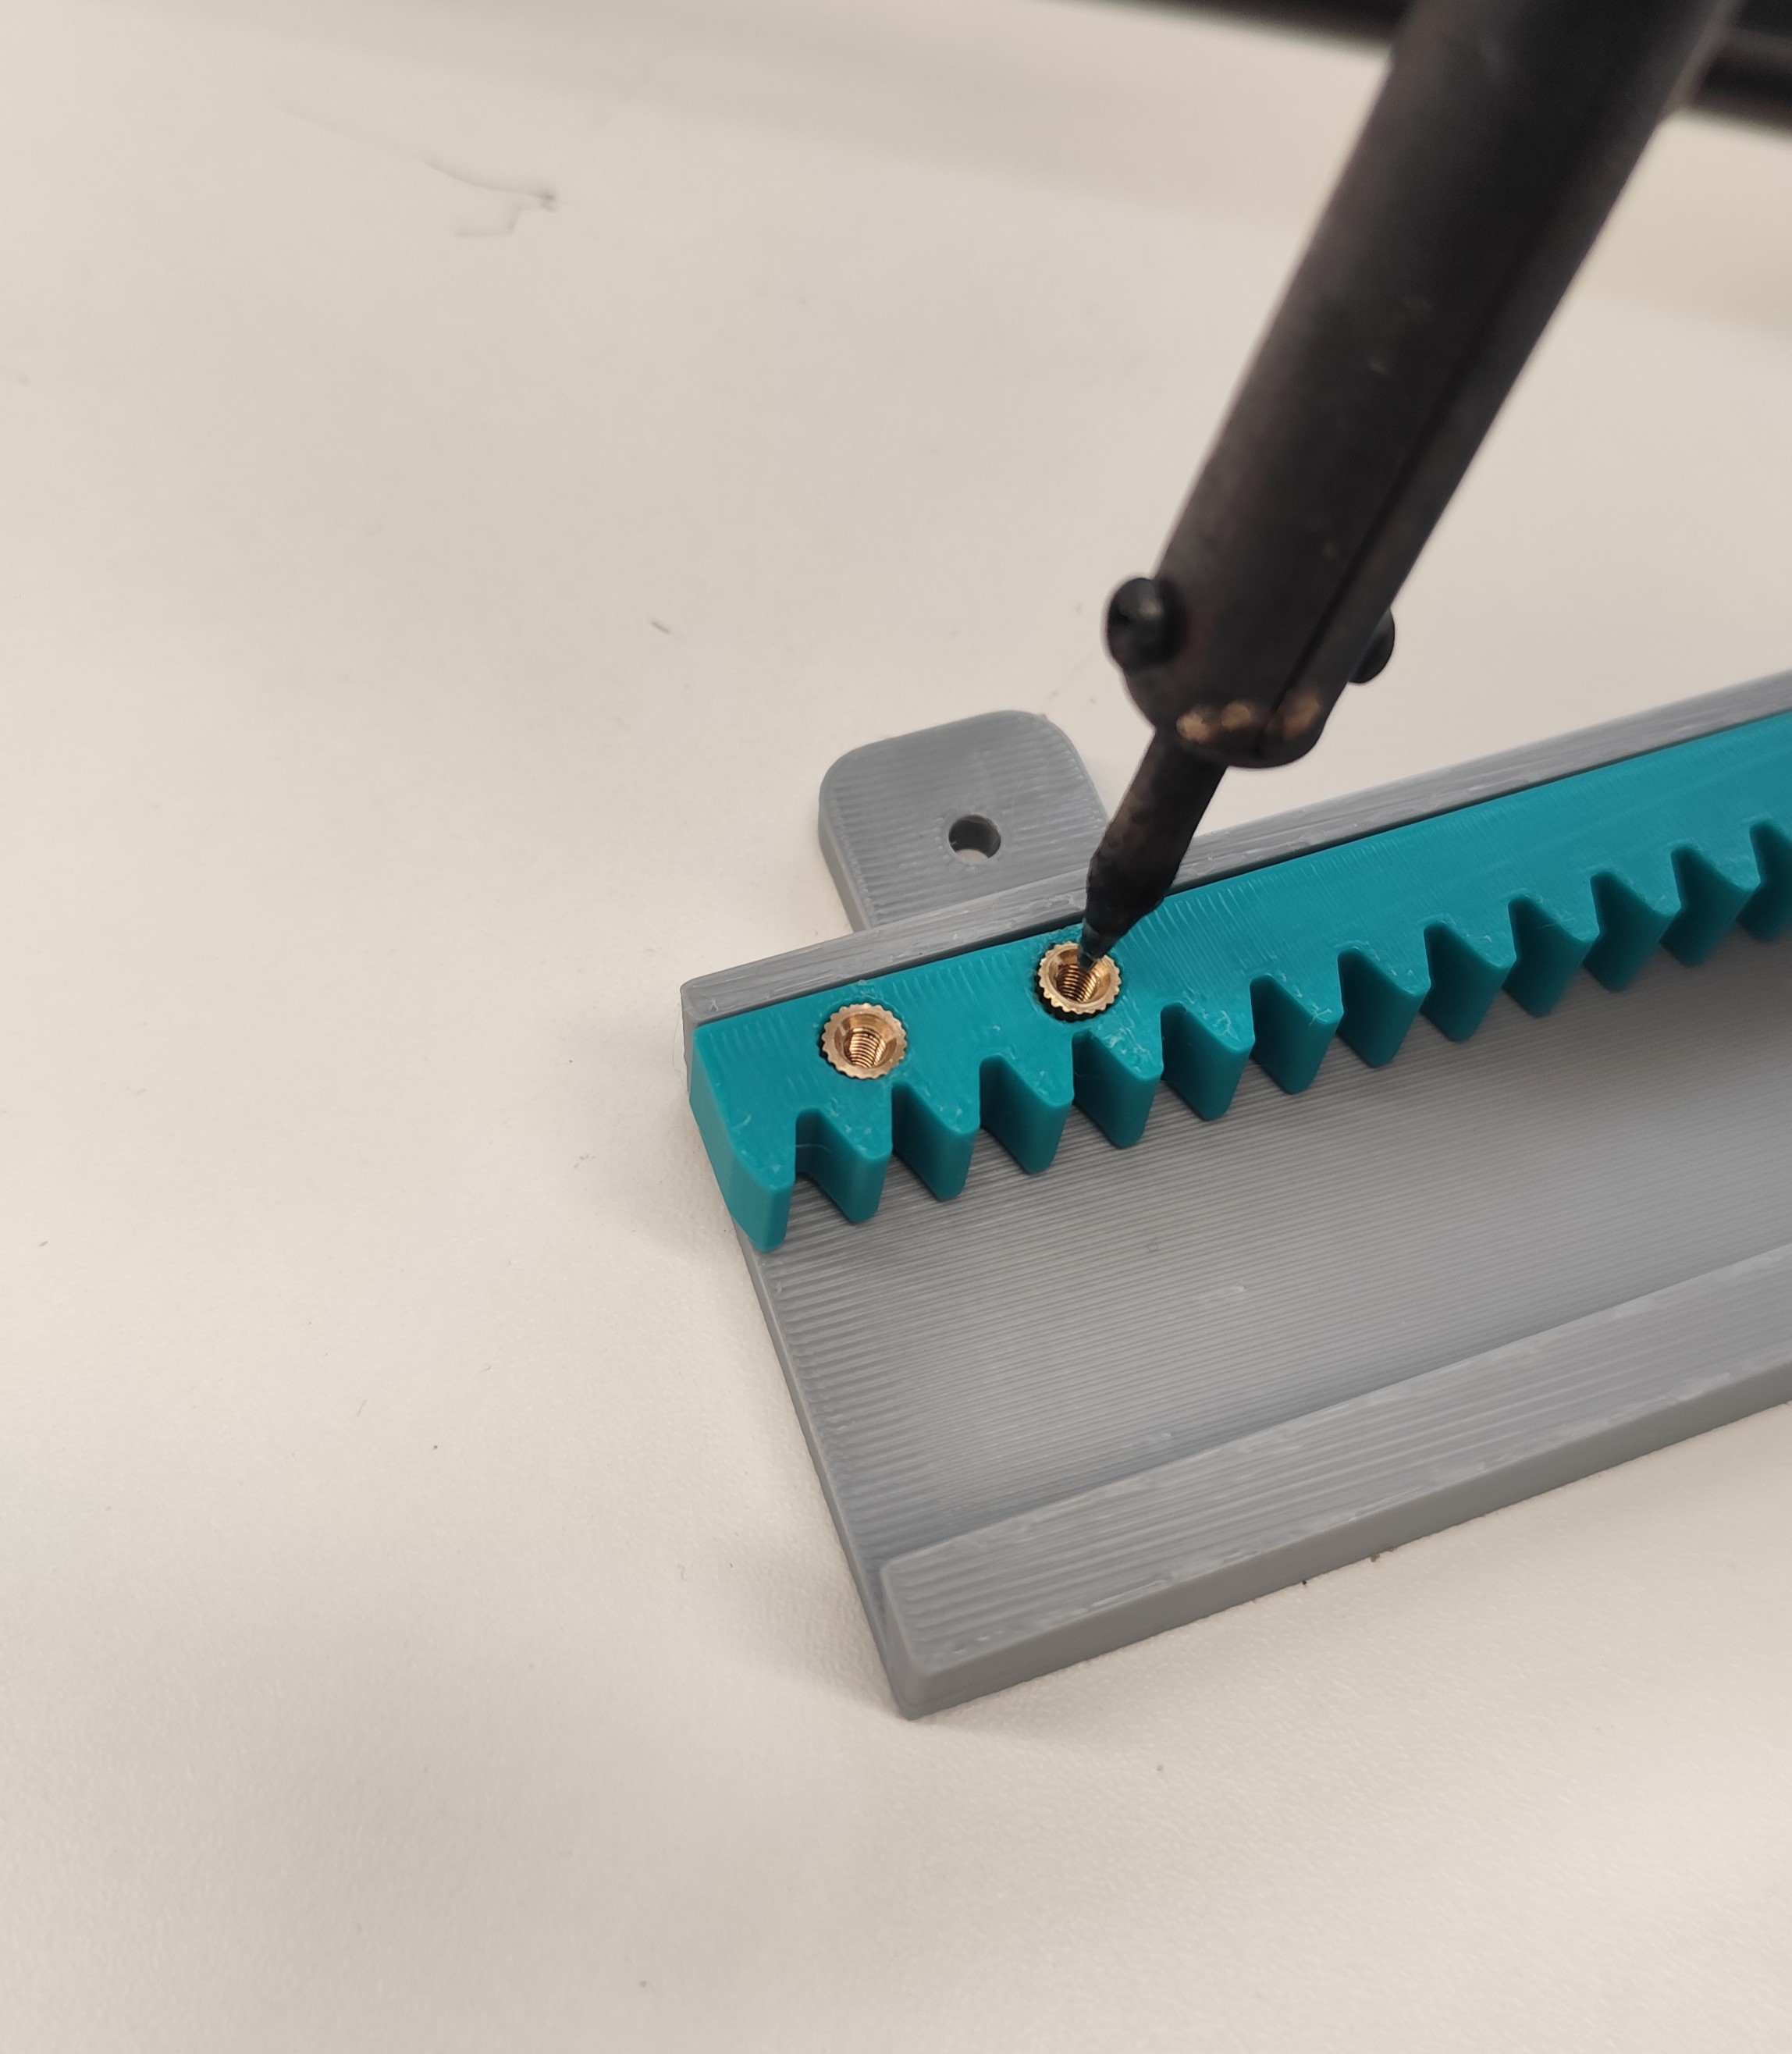
We made the design taking into account that when assembling we will use some special inserts for 3D printing which are placed with
a hot soldering iron and then we can put the screws to assemble all the pieces.
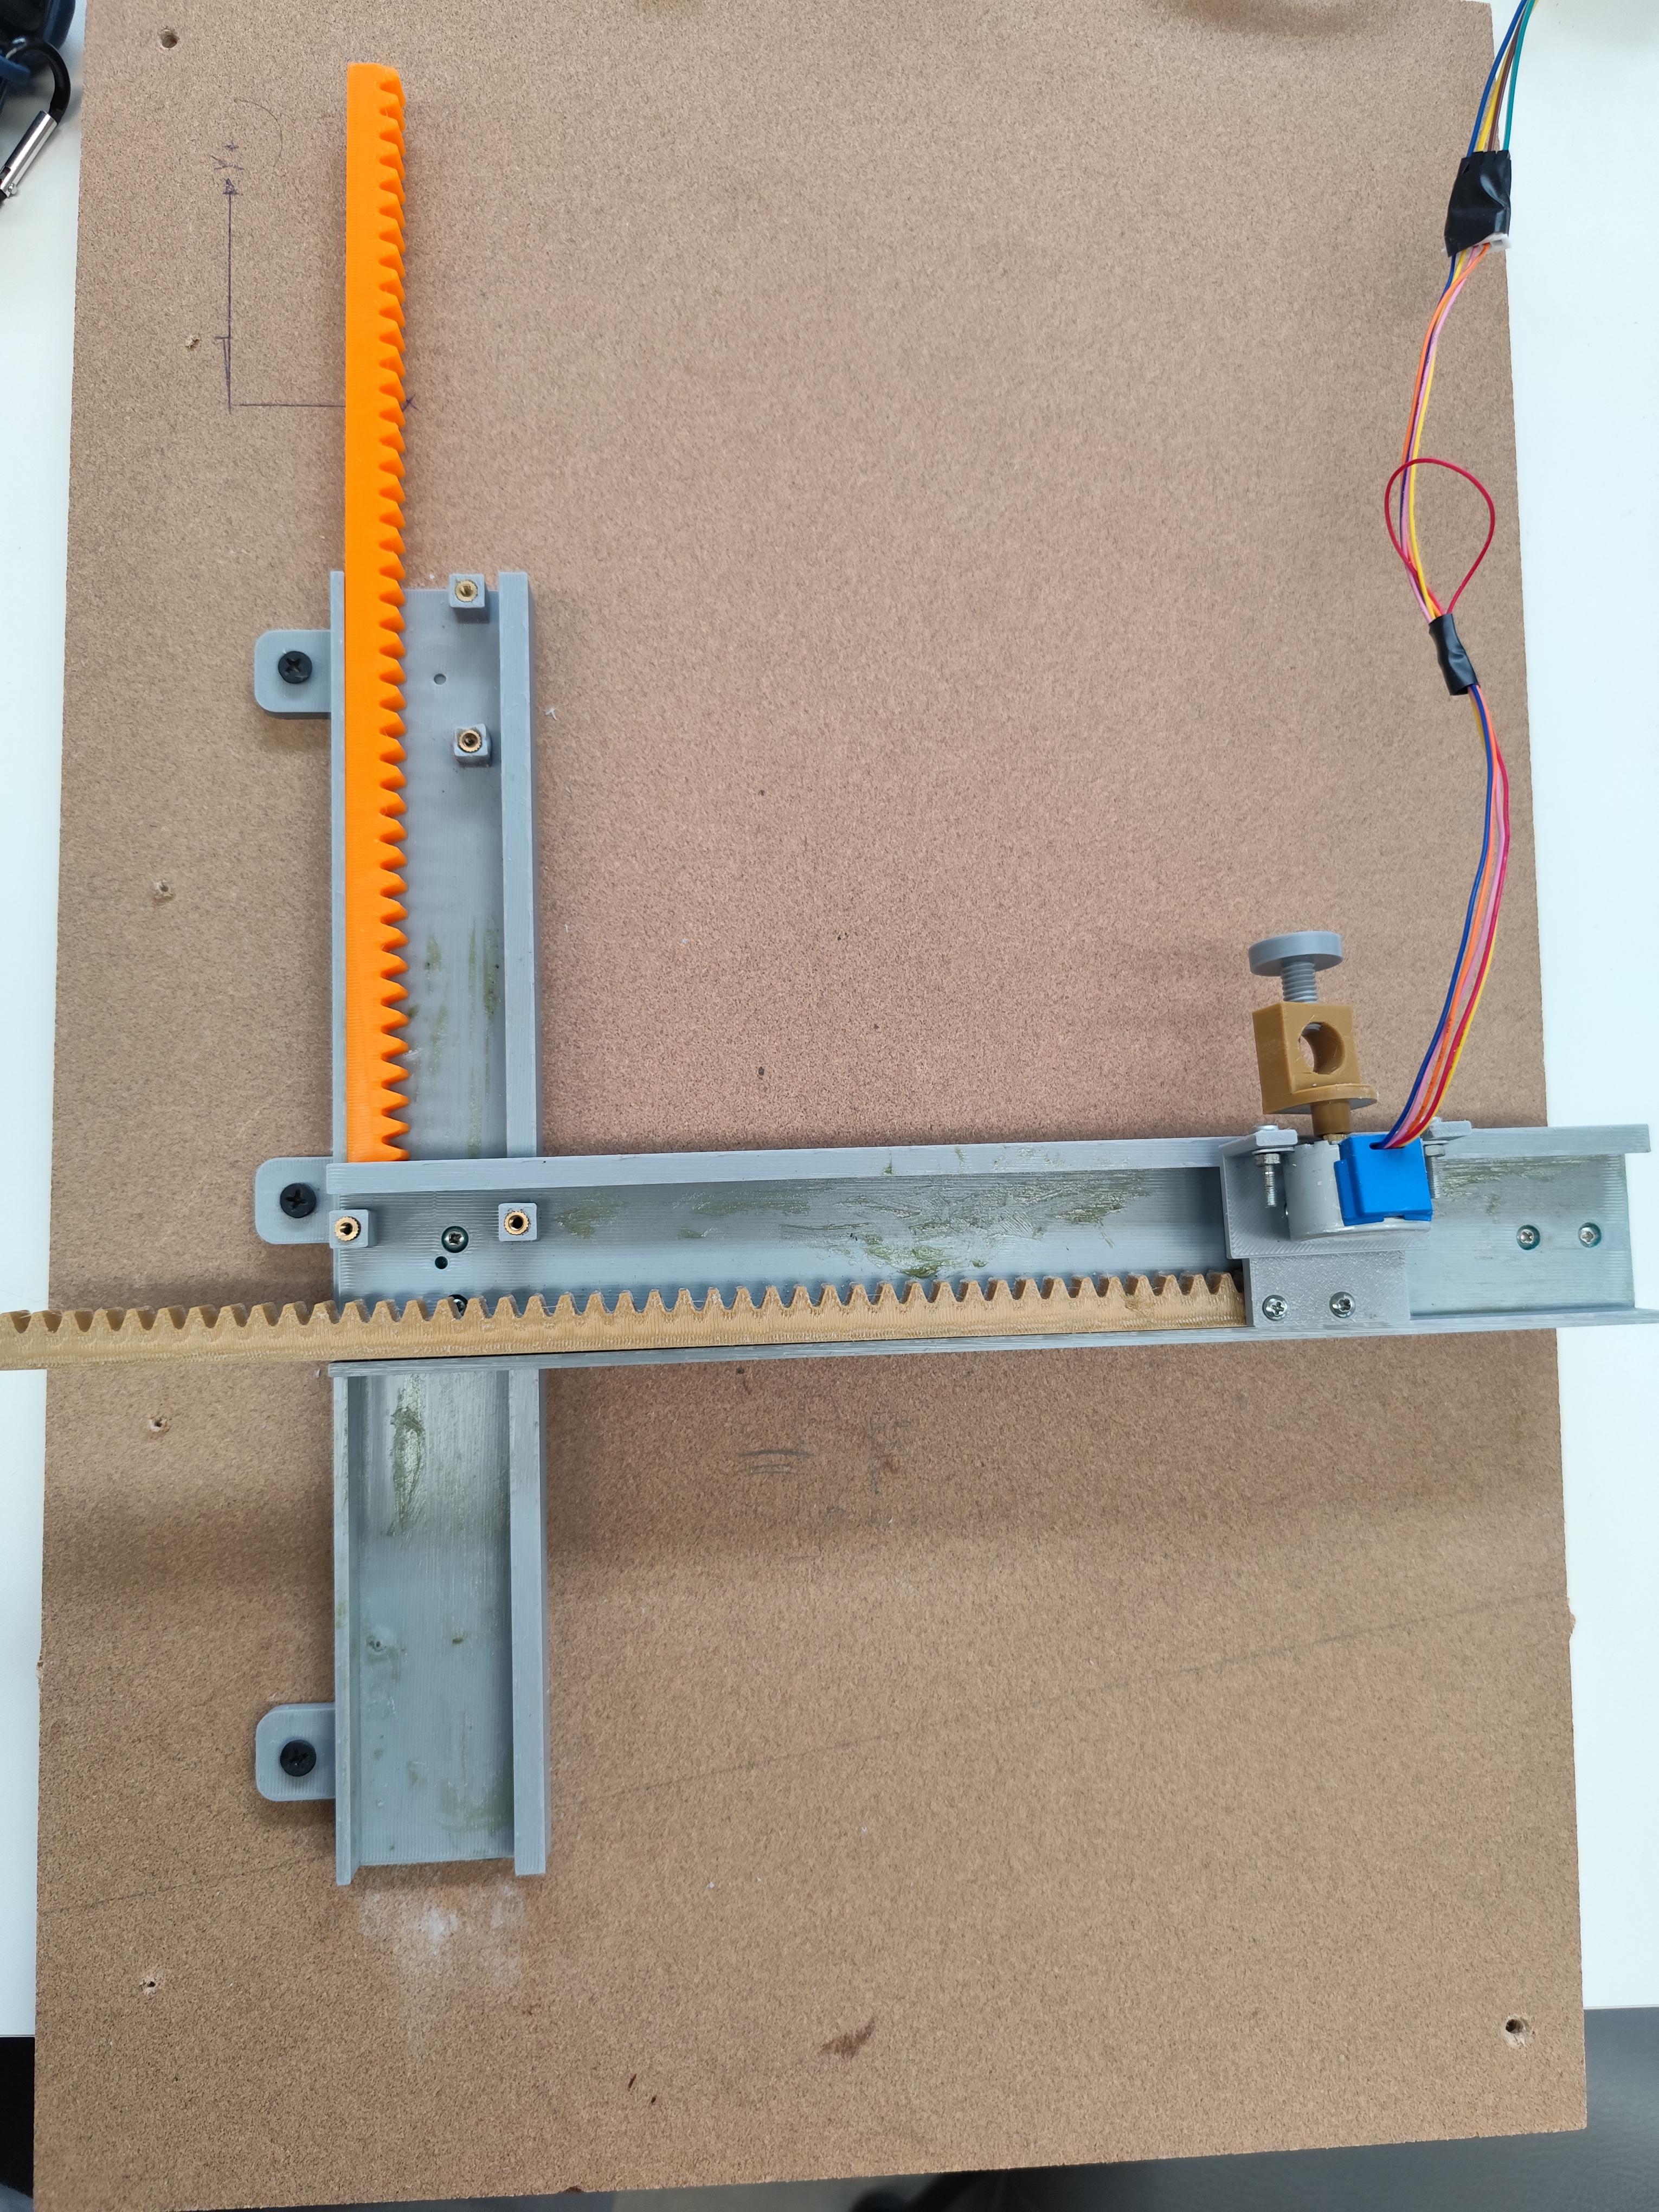
Finally, we assembled all the components and applied a little lithium grease to the sliding parts to improve their
mobility and prevent the motors from overworking.
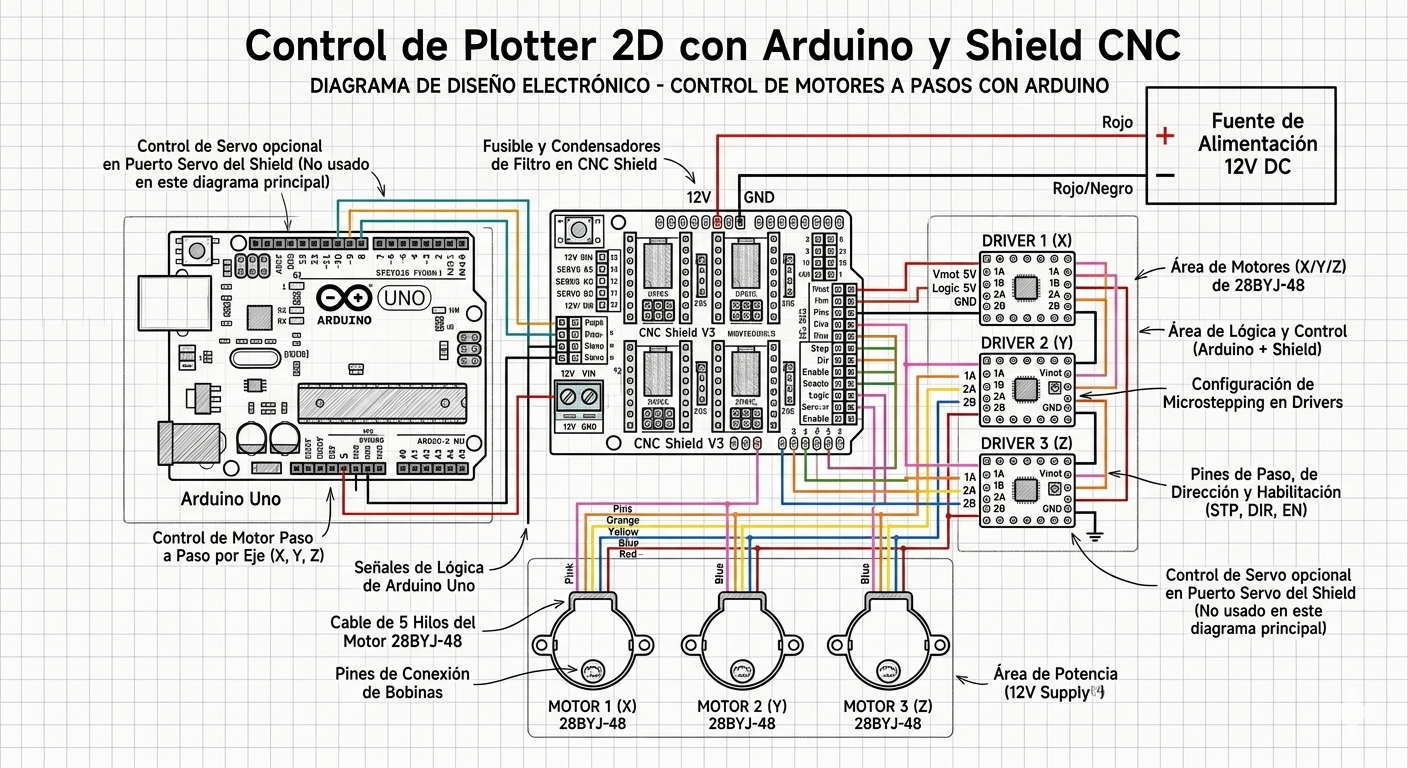
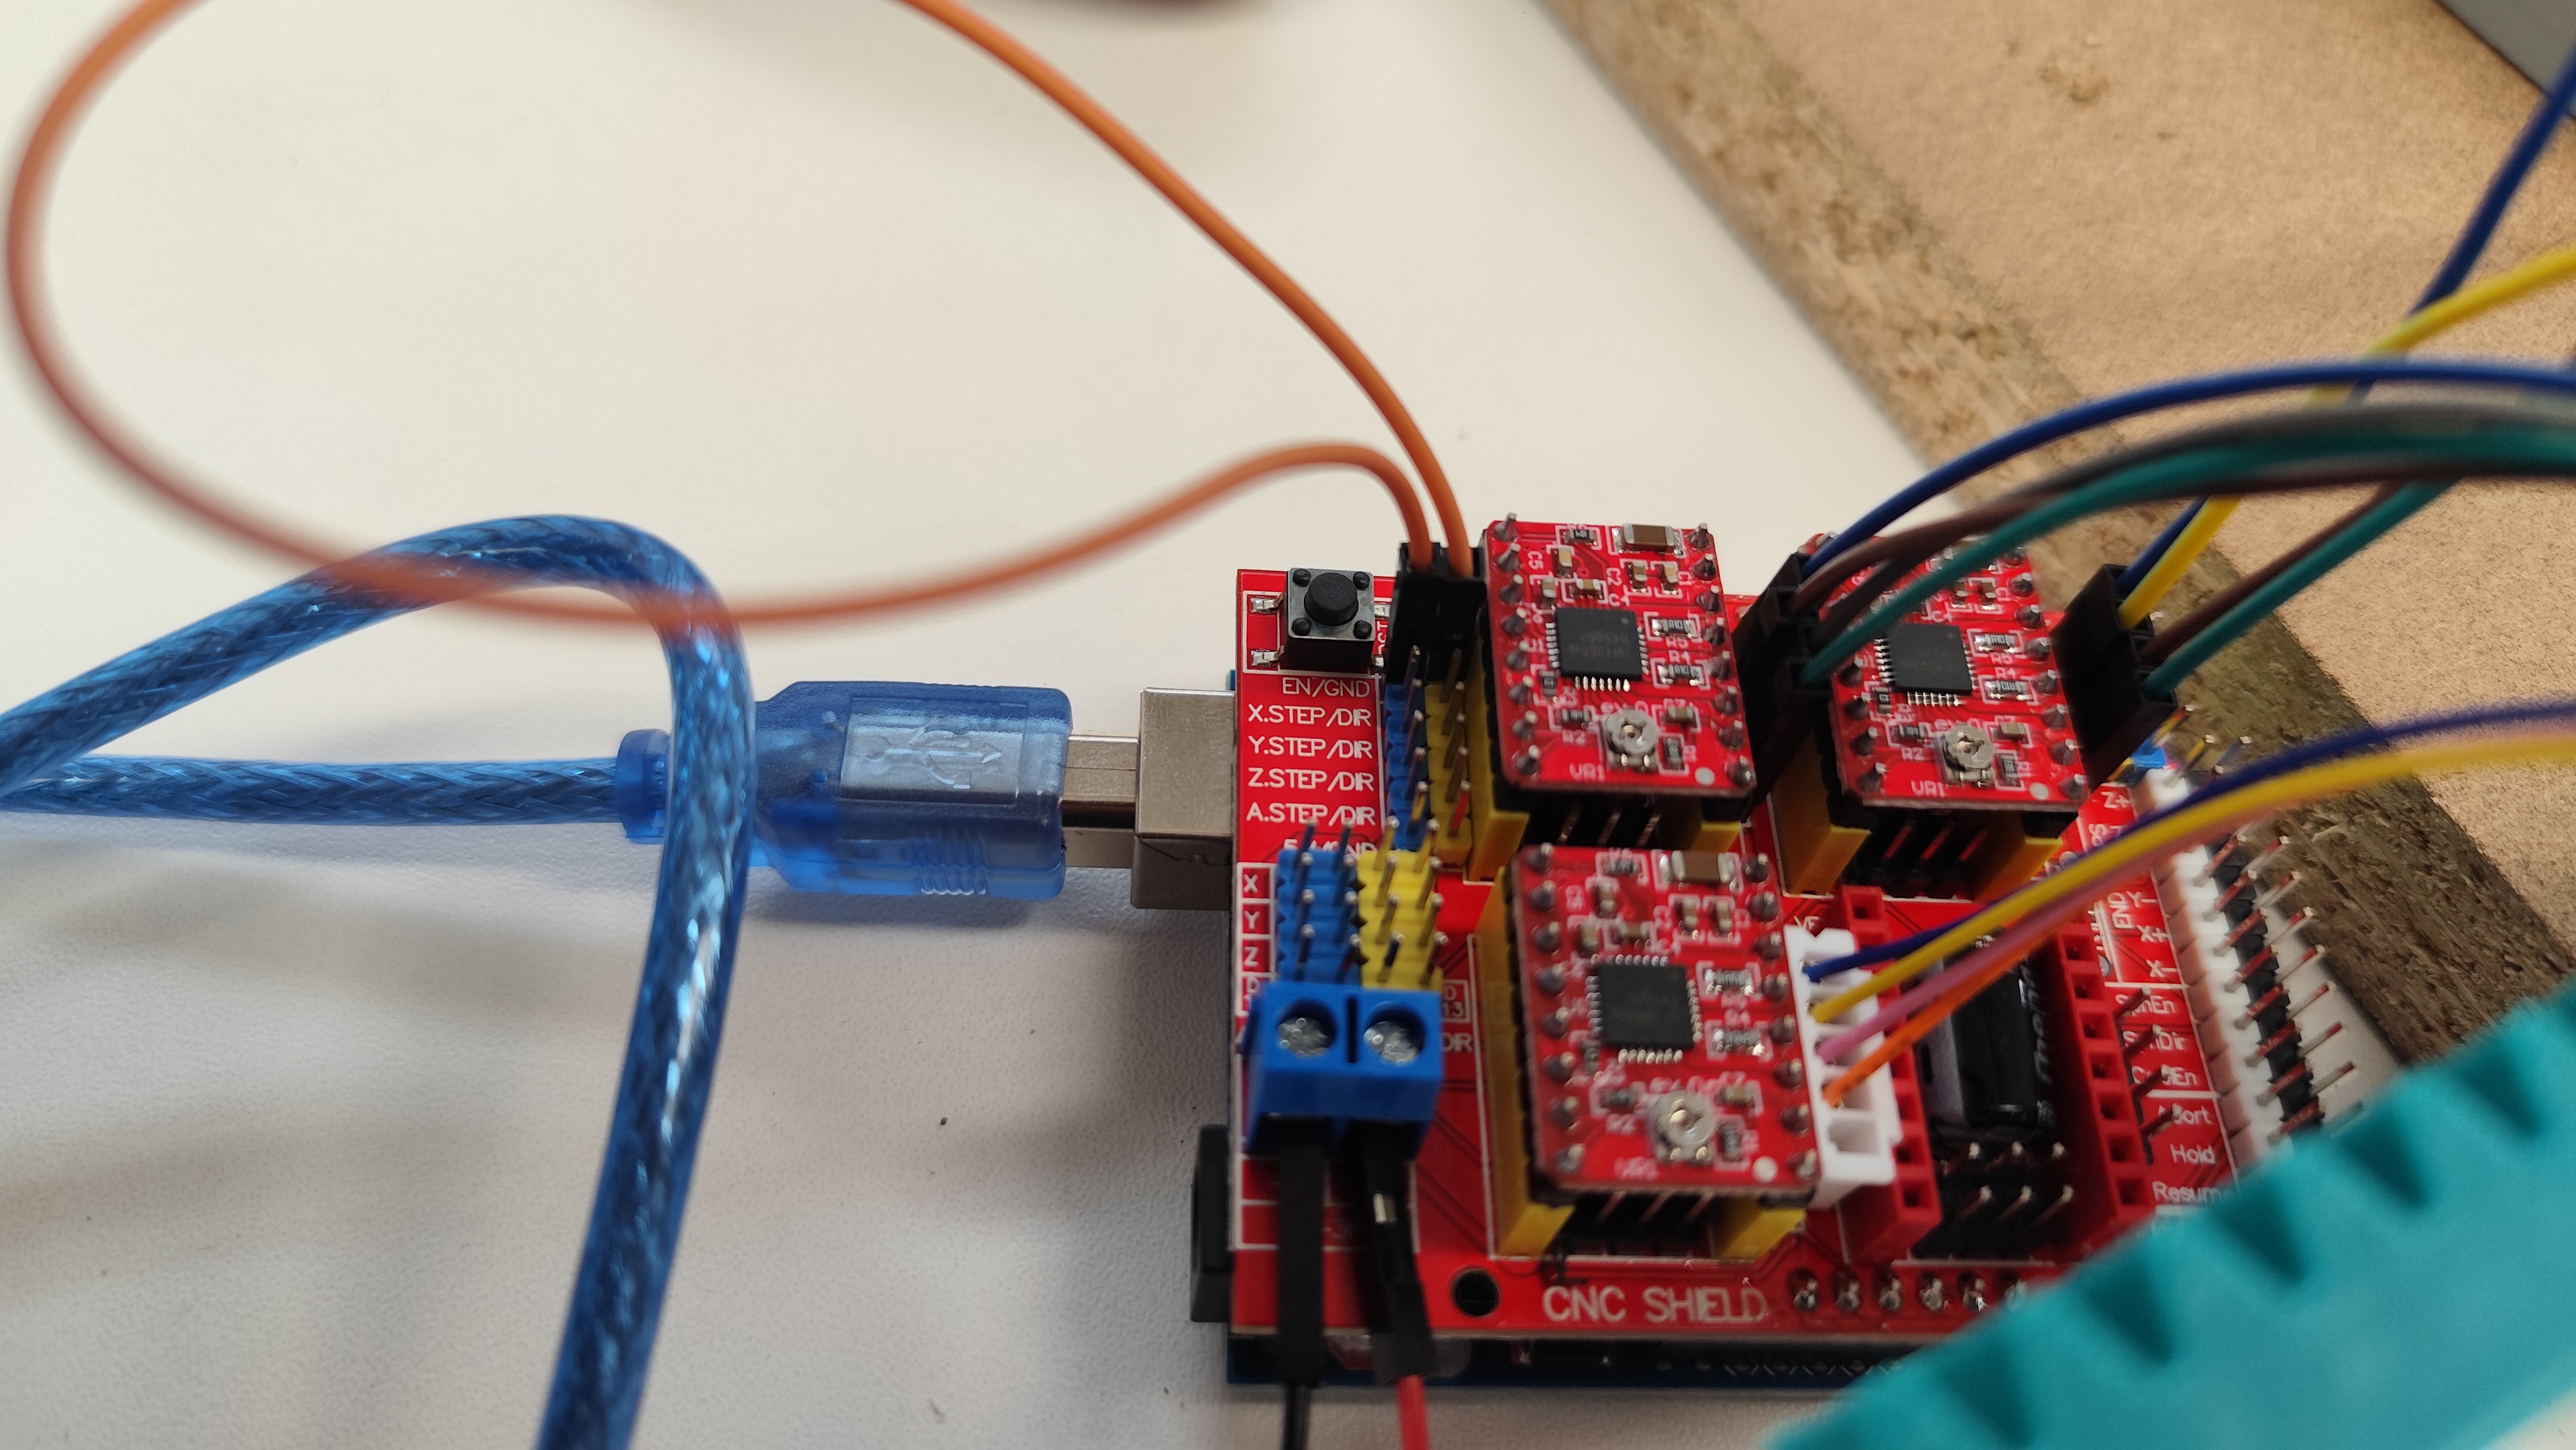
Electronic part:
For the electronics in our CNC router, it's important to know that, due to the high precision required,
we must use stepper motors. Each motor needs its own controller, and we need a control board to manage all the motors and
communicate with the computer. Finally, we need a power source. Therefore, we will use the following components: