Week 11, Networking and Communications
Table of Contents
- Overview
- Resources
- Group Assignment
- Setup
- Learning
- Coding
- Files
Overview
This week, I was able to make wireless communication to my week 10 PCB from Wi-Fi.
Resources
- I used ChatGPT to learn how to create a local website using a PCB.
- I used Arduino IDE.
Group Assignment
Here is the group assignment.
Setup
Learning
I started by asking ChatGPT How can I make a wireless connection from my computer to a XIAO ESP32C6? I'm using Arduino IDE..
I was given this code:
        #include

        const char* ssid = "YOUR_WIFI_NAME";
        const char* password = "YOUR_WIFI_PASSWORD";

        void setup() {
          Serial.begin(115200);

          WiFi.begin(ssid, password);

          Serial.print("Connecting");

          while (WiFi.status() != WL_CONNECTED) {
            delay(500);
            Serial.print(".");
          }

          Serial.println("");
          Serial.println("Connected!");
          Serial.print("IP address: ");
          Serial.println(WiFi.localIP());
        }

        void loop() {
        }
Then, I asked Why do I need to begin the Serial Monitor at 115200 specifically?. I was told that ESP32 boards often default to 115200 baud rate.
Then, I asked Can I make it so that I can control the actions of the XIAO ESP32C6 from an HTML website I'll create?.
I was given this code:
        #include
        #include

        const char* ssid = "YOUR_WIFI";
        const char* password = "YOUR_PASSWORD";

        WebServer server(80);

        const int ledPin = LED_BUILTIN;

        void handleRoot() {
          String html = R"rawliteral(
            <!DOCTYPE html>
            <html>
            <body>
              <h1>XIAO ESP32C6 Control</h1>

              <button onclick="fetch('/on')">LED ON</button>
              <button onclick="fetch('/off')">LED OFF</button>
            </body>
            </html>
          )rawliteral";

          server.send(200, "text/html", html);
        }

        void ledOn() {
          digitalWrite(ledPin, HIGH);
          server.send(200, "text/plain", "LED ON");
        }

        void ledOff() {
          digitalWrite(ledPin, LOW);
          server.send(200, "text/plain", "LED OFF");
        }

        void setup() {
          pinMode(ledPin, OUTPUT);

          Serial.begin(115200);

          WiFi.begin(ssid, password);

          while (WiFi.status() != WL_CONNECTED) {
            delay(500);
          }

          Serial.println(WiFi.localIP());

          server.on("/", handleRoot);
          server.on("/on", ledOn);
          server.on("/off", ledOff);

          server.begin();
        }

        void loop() {
          server.handleClient();
        }
From what I understand, the site generated by this code basically gives two buttons to turn a led on and off. The Wi-Fi connection code is basically the same as the code given previously. However, there are still things I don't understand. I asked in the line "server.on("/", handleRoot);", does "/" mean that it is activated when it is first started? Also, what does "server.on" do exactly?.
The "/" indeed meant that the function next to it ran by default when the site is first opened. Also, from what I understood from what I read, server.on() is a function that basically runs the thing in the second slot when the URL in the first slot is requested.
Then, I asked What does "server.send(200, "text/html", html);" and "server.send(200, "text/plain", "LED ON");" etc. mean?.
Apparently, 200 meant "Request Successful", kind of like how 404 has meaning. the ""text/html", html);" part basically sent the String named "html" above it in HTML format; as in, it defined the "html" variable as HTML before sending it. The ""text/plain", "LED ON");", on the other hand, basically sent a text, "LED ON", in plain text format.
Coding
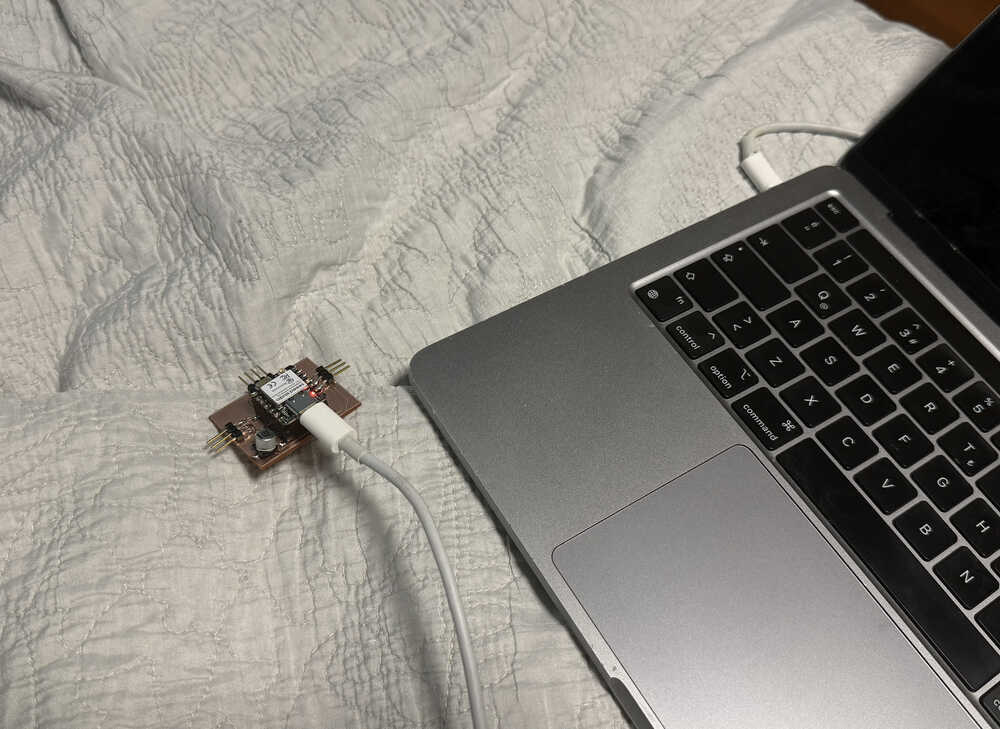
I'll be using the PCB I designed in week 10 to communicate through Wi-Fi.
From what I learned, I wrote this code:
        #include
        #include

        const char* ssid = "WIFINAME";
        const char* password = "WIFIPASSWORD";

        WebServer server(80);

        void handleRoot(){
          String html = R"rawliteral(
          <!DOCTYPE html>
          <html>
            <body>
              <h1>XIAO ESP32C6 Control</h1>

              <button onclick="fetch('/hello')">SAY HELLO</button>
              <button onclick="fetch('/bye')">SAY BYE</button>
            </body>
          </html>
          )rawliteral";

          server.send(200, "text/html", html);
        }

        void hello(){
          Serial.println("Hello");
          server.send(200, "text/plain", "HELLO");
        }

        void bye(){
          Serial.println("Bye");
          server.send(200, "text/plain", "BYE");
        }

        void setup(){
          Serial.begin(115200);

          WiFi.begin(ssid, password);

          while (WiFi.status() != WL_CONNECTED) {
            delay(500);
          }

          Serial.println(WiFi.localIP());

          server.on("/", handleRoot);
          server.on("/hello", hello);
          server.on("/bye", bye);

          server.begin();
        }

        void loop(){
          server.handleClient();
        }
After uploading, I got the following text in my serial monitor.
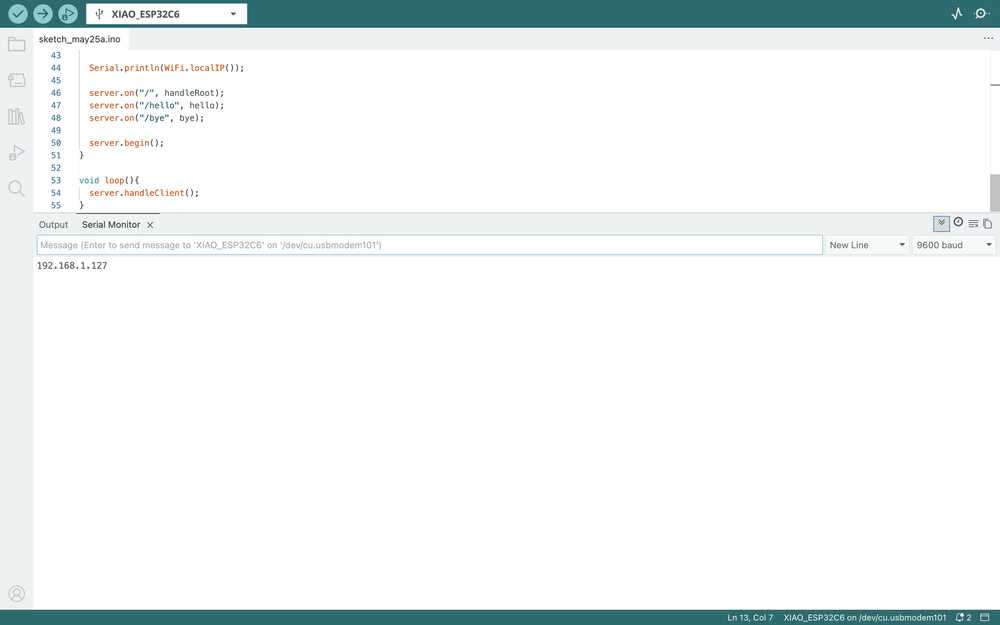
This meant the connection was successful.
However, after opening the link, I was presented with this:
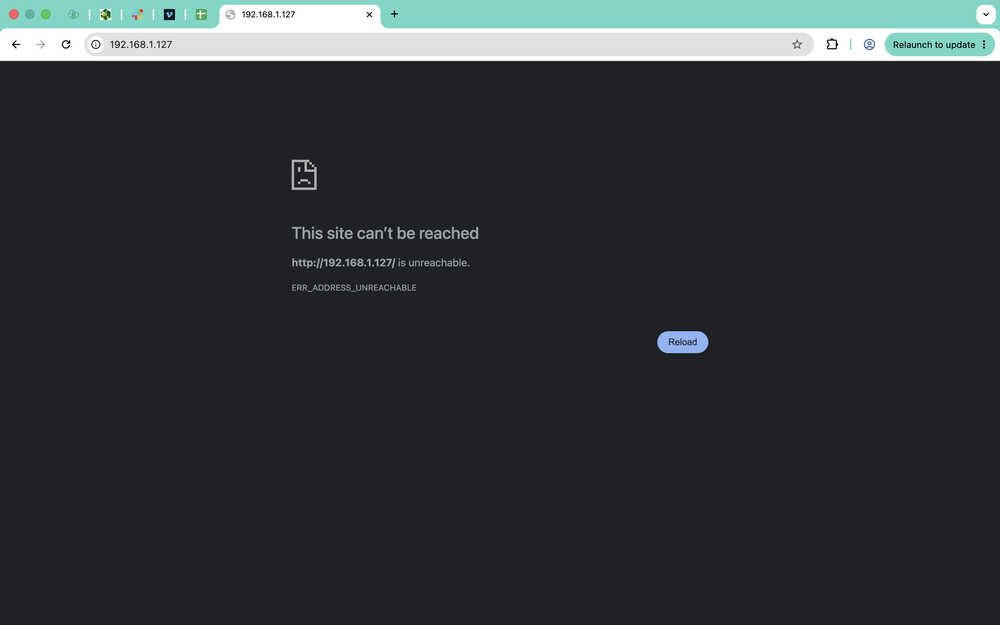
I sent my code to ChatGPT and asked When I try this, I get the message "This site can't be reached", why might this be?.
I tried some things using ChatGPT's responded but it seemed like there wasn't any problem with what I wrote. So, I thought of trying to connect to the site using my phone, and it worked. I'm guessing this is because the connection isn't secure, though I'm not sure.
I don't have a third camera, so I can't really show myself clicking the buttons; however, the video below clearly shows that the code works!
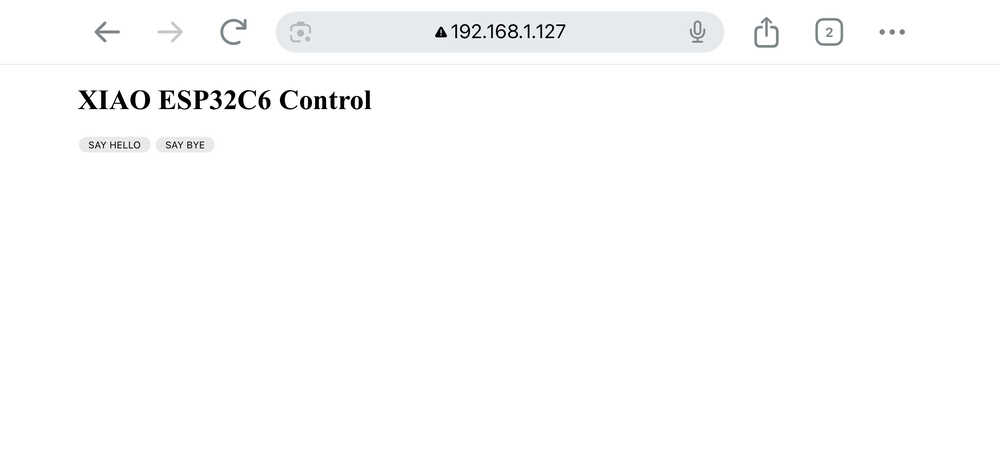
This is how the site looks:
Files
Here is the compressed code file.