Week 4, Embedded Programming
Table of Contents
- Overview
- Resources
- Group Assignment
- Datasheet
- LED Blink
- For Final Project
- Files
Overview
I wrote some code for my final project and turned an LED on.
Resources
- This is the XIAO ESP32C3 datasheet.
- This is where I learned how to create tables in HTML.
- This is Arduino IDE's downlaod page.
- This is where I learned about the serial monitor in Arduino IDE.
- This is where I learned about pointers.
- This is where I learned about returning arrays in Arduino IDE.
- This is where I learned about the random function in Arduino IDE.
- This is where I learned about how the array type works in Arduino IDE.
- This is where I learned about creating functions in Arduino IDE.
Group Assignment
This is the group assignment.
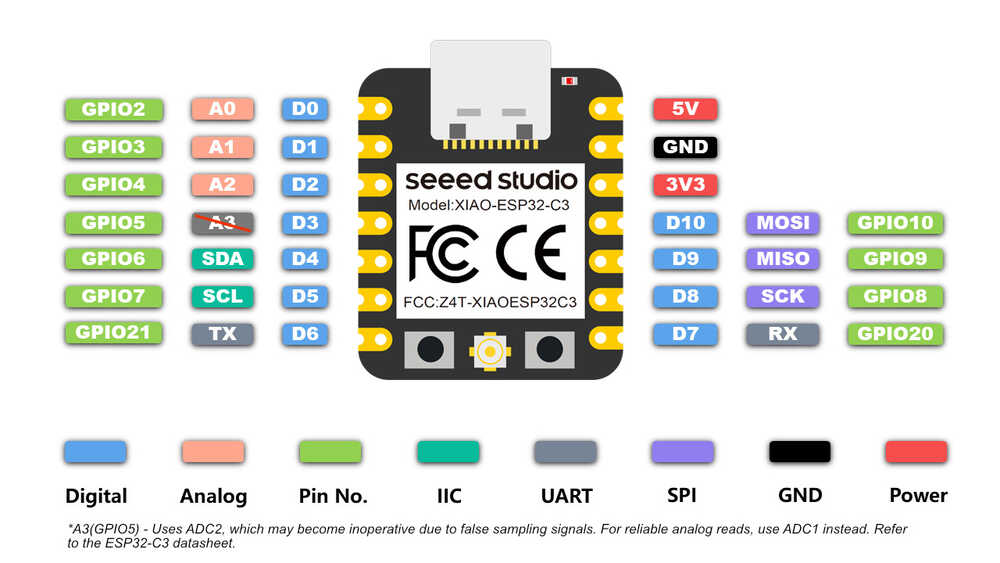
Datasheet
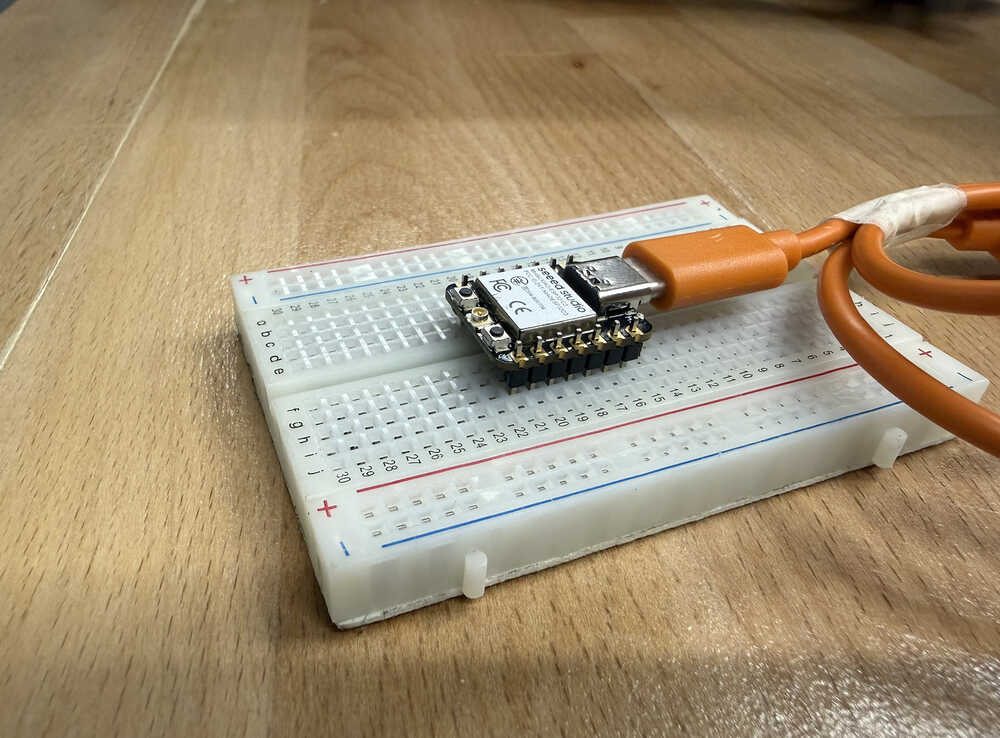
I'll be using XIAO-ESP32-C3 as my board.

| Parameter | Description |
|---|---|
| Processor | ESP32-C3 SoC RISC-V single-core 32-bit chip processor with a four-stage pipeline that operates at up to 160 MHz |
| Wireless | Complete 2.4GHz Wi-Fi subsystem Bluetooth Low Energy 5.0/ Bluetooth Mesh |
| On-chip Memory | 400KB SRAM & 4MB Flash |
| Interface | 1x UART | 1x IIC | 1x SPI | 11x GPIO(PWM) | 4x ADC | 1x Reset button | 1x Boot button |
| Dimensions | 21 x 17.8mm |
| Power(Typ.) | Max 3.3V Output Current: 500mA | Test Condition: BAT Pin Input @ 3.8V | Source Capability: 3A | Charging current: 380mA(Fast) / 40mA(Trickle) | Input voltage (VIN): 5V | Input voltage (BAT): 3.7V |
| Deep Sleep Power Consumption | Deep Sleep Mode: 44 μA |
| Wi-Fi Enabled Power Consumption | Active Mode: 75 mA | Modem-sleep Mode: 25 mA | Light-sleep Mode: 4 mA |
| BLE Enabled Power Consumption | Modem-sleep Mode: 27 mA | Light-sleep Mode: 10 mA |
| Working Temperature | -40°C ~ 85°C |
Pins:
Key Features:
- Powerful CPU: ESP32-C3, 32bit RISC-V singlecore processor that operates at up to 160 MHz
- Complete WiFi subsystem: Complies with IEEE 802.11b/g/n protocol and supports Station mode, SoftAP mode, SoftAP + Station mode, and promiscuous mode
- Bluetooth LE subsystem: Supports features of Bluetooth 5 and Bluetooth mesh
- Ultra-Low Power: Deep sleep power consumption is about 43μA
- Better RF performance: External RF antenna included
- Battery charging chip: Supports lithium battery charge and discharge management
- Rich on-chip resources: 400KB of SRAM, and 4MB of on-board flash memory
- Ultra small size: As small as a thumb(21x17.8mm) XIAO series classic form-factor for wearable devices and small projects
- Reliable security features: Cryptographic hardware accelerators that support AES-128/256, Hash, RSA, HMAC, digital signature and secure boot
- Rich interfaces: 1xI2C, 1xSPI, 2xUART, 11xGPIO(PWM), 4xADC, 1xJTAG bonding pad interface
- Single-sided components, surface mounting design
Using XIAO-ESP32-C3
Download Arduino IDE from here.
Navigate here:
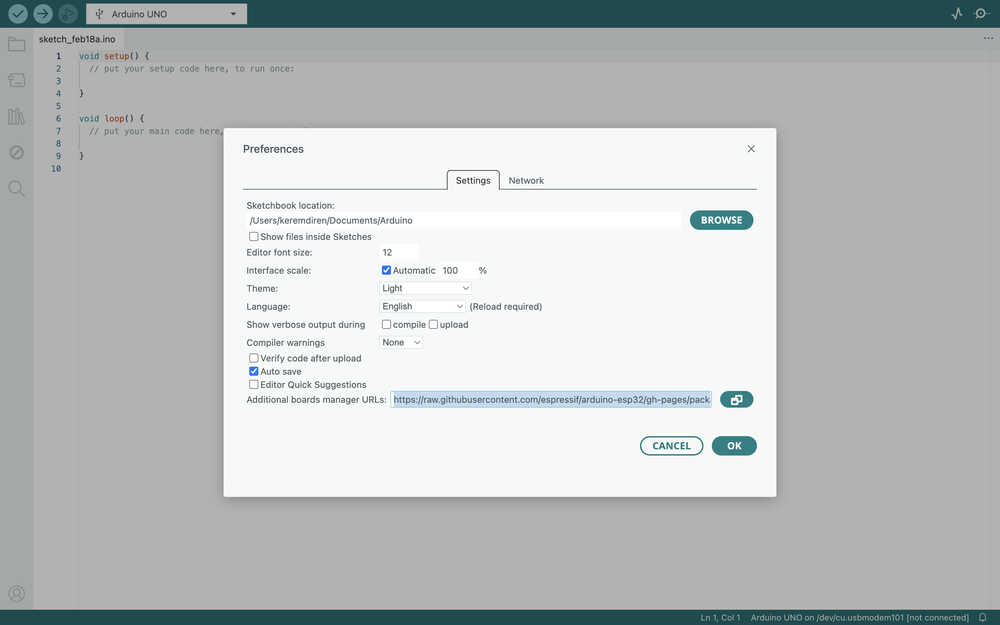
Paste "https://raw.githubusercontent.com/espressif/arduino-esp32/gh-pages/package_esp32_index.json" into the shown location.
Navigate to the boards manager tab and download esp32 by Espressif Systems.

LED Blink
I'll first create code for blinking an LED.
Wrote this code for blinking the LED.
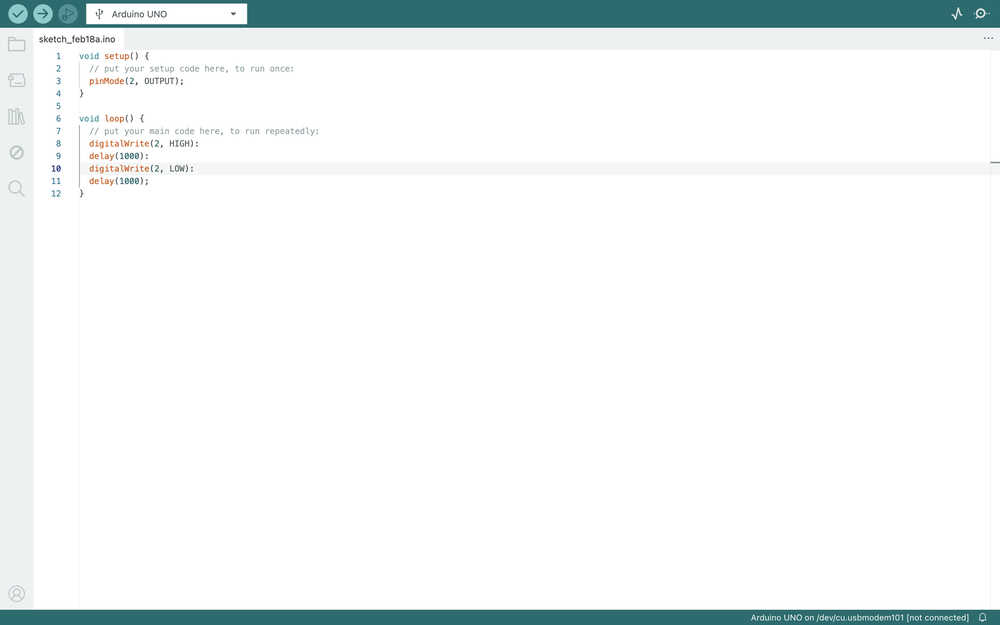
I later realized that I accidentally put ":" instead of ";" in some places. If you're writing this code, just replace the ":" with ";".
Connected the XIAO-ESP32-C3 to my computer.
Clicked here to connect the IDE to the board.
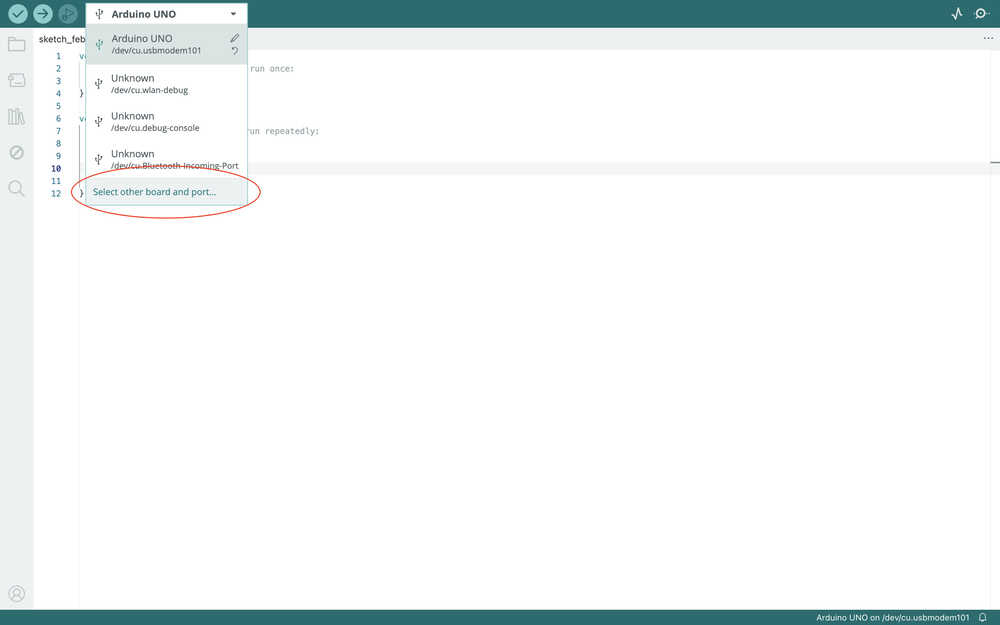
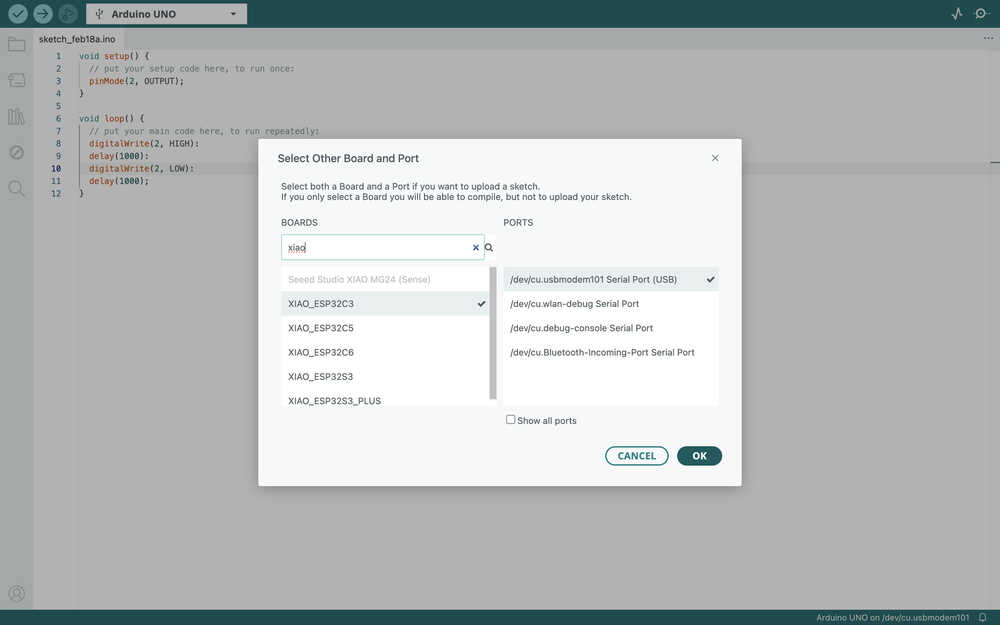
Selected the board and the port.
Changed the code because the legs of the LED wasn't long enough.
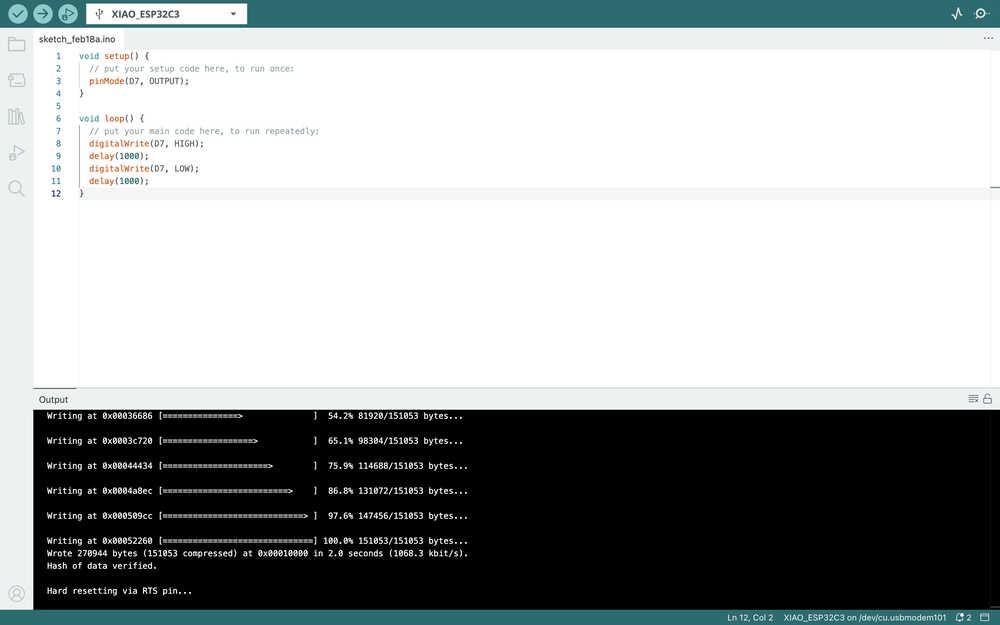
Pressed upload:
For Final Project
Idea
The code will decide where a bot will have to move to reach its goal. The movement will be simulated in a 2D array. While simulating, the code will also send signals to servos so that the movement in the simulation is also acted upon in real life. Because this is mostly a simulation, I will not be using ultrasonic sensors.
Process
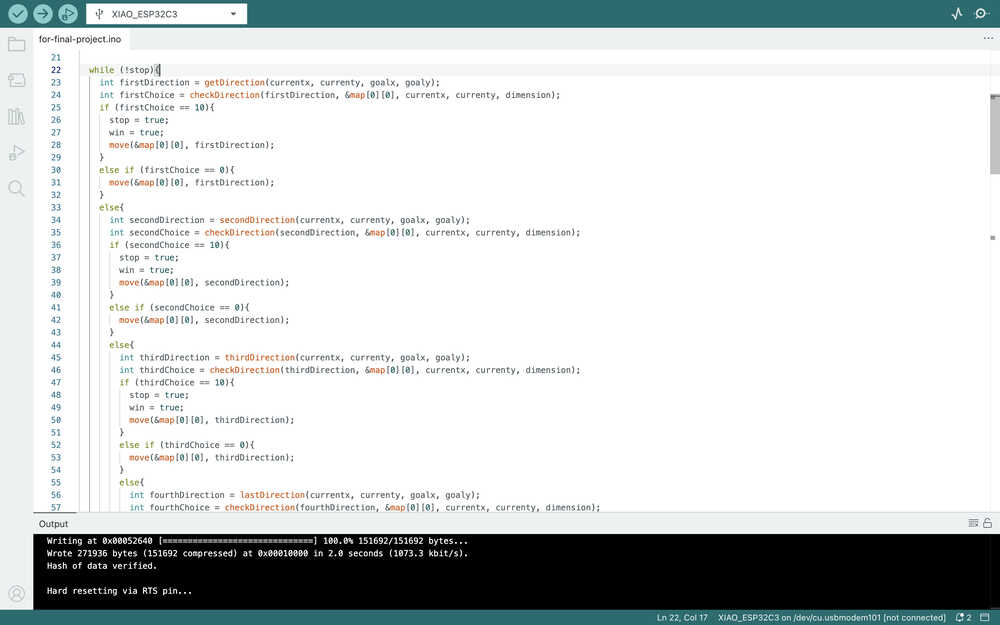
Here is how the program will work.
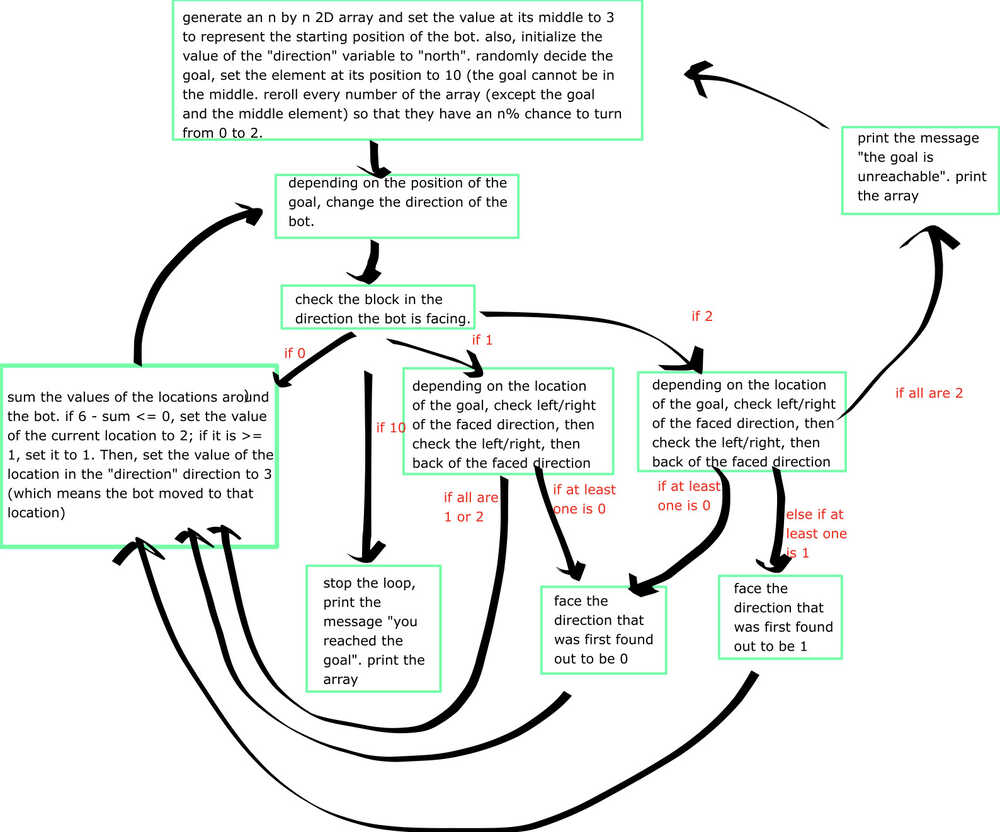
Some of these will be defined as functions to prevent the repetitiveness of code.
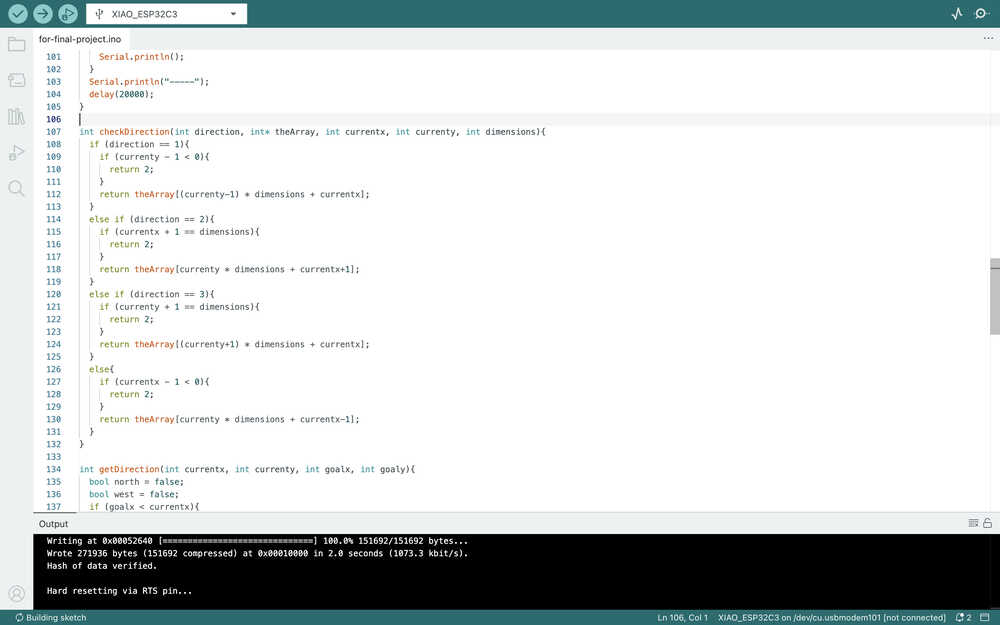
The program will basically work such that the bot will first face the direction that it has to move to get closer to the goal. If there's an obstacle there, the bot'll check other directions until it finds one without obstacle. Then, it'll move there. Also, if the direction the bot's facing is the location the bot came from, the bot'll try to find a direction it has not yet touched. if all four directions are either blocked or somewhere it came from, the bot'll move towards one of the directions it came from that's also the location that'll take it towards its goal. Also, some empty locations will be marked as an obstacle if needed. If all four directions are blocked, the bot'll stop the task and will say that it can't move.
Among the coding languages, I mainly know Java and some Python. I don't know much about C or C++, although I have some experience writing simple code with it. That's why I started with looking up how to use the serial monitor.
I also checked out how to create 2D arrays, the random function, pointers, and creating functions. I also asked ChatGPT `How can I make the function update the array? `, which is basically where I learned how to use pointers with 2D arrays.
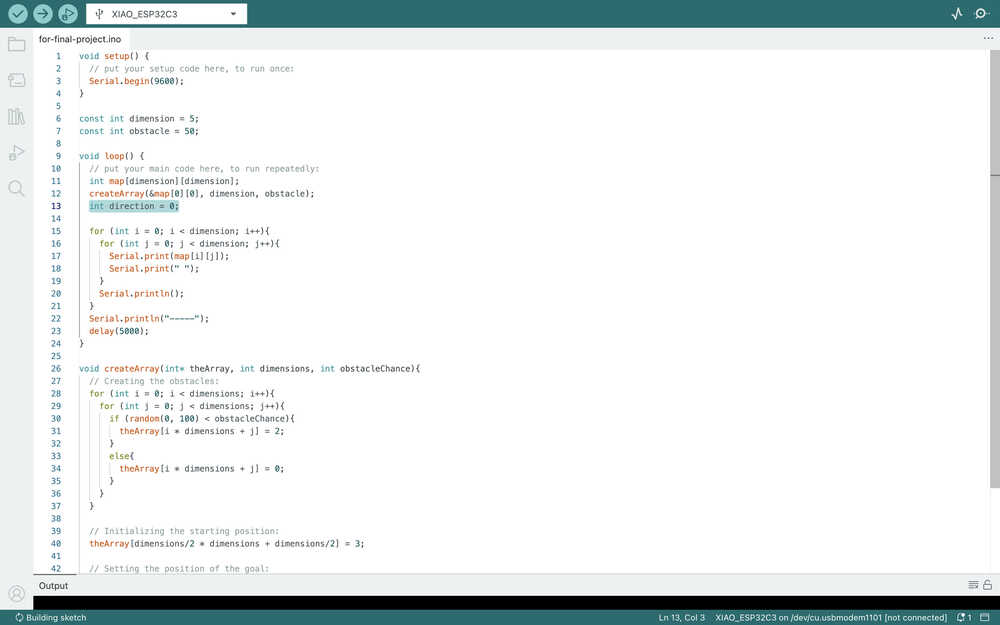
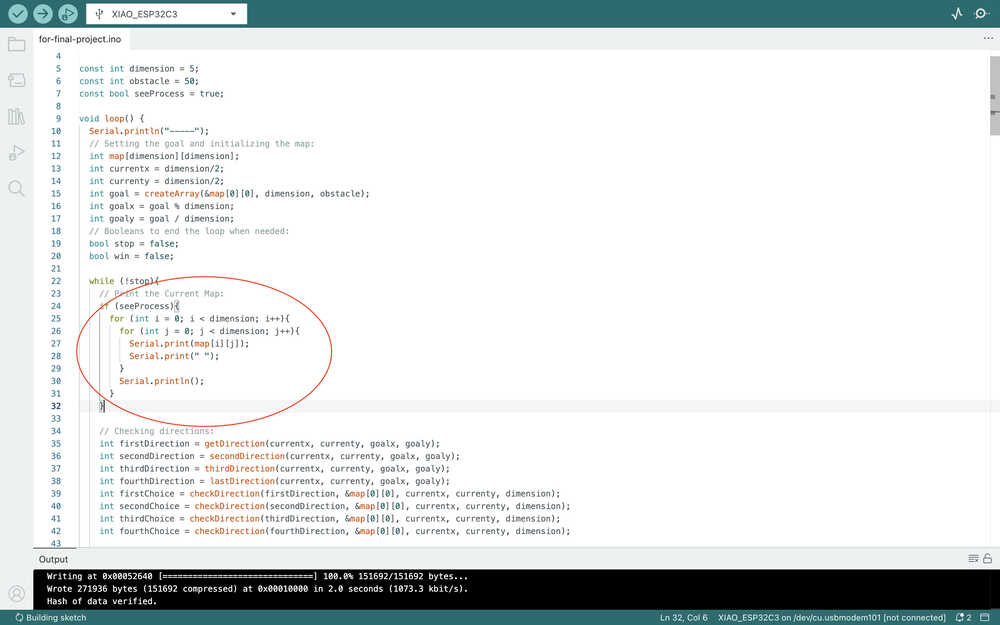
Also, there was a problem with my code which resulted in some elements of the array to become something similar to `1070137344`. I asked ChatGPT `Is there any reason for stuff like "107013734413110" to be printed along my code? `. Apparently, some of the elements in my array weren't being properly initialized. I changed some code and everything started to work correctly. The map being initialized:
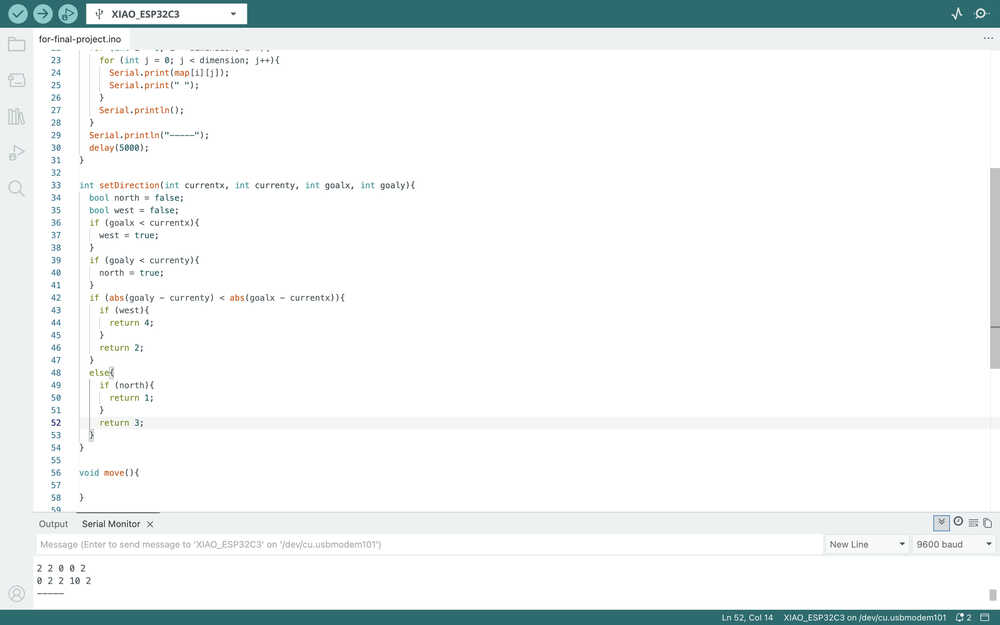
For directions, north will be 1, east will be 2, south will be 3, and west will be 4. I initialized the direction variable to 0 before making a function to set it according to the position of the goal.
The code you see will initialize the direction depending on which direction is longer.
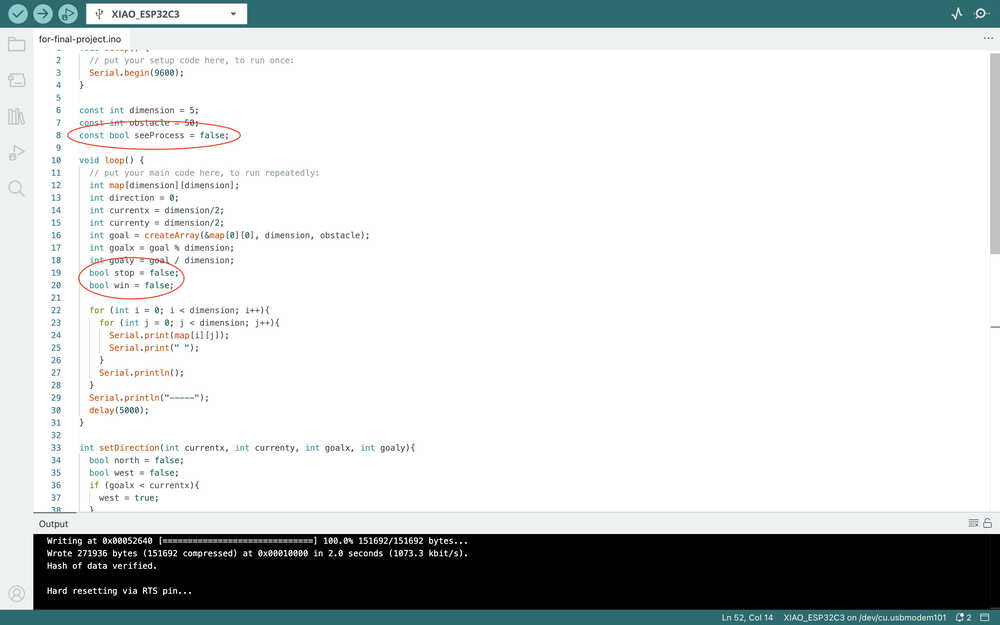
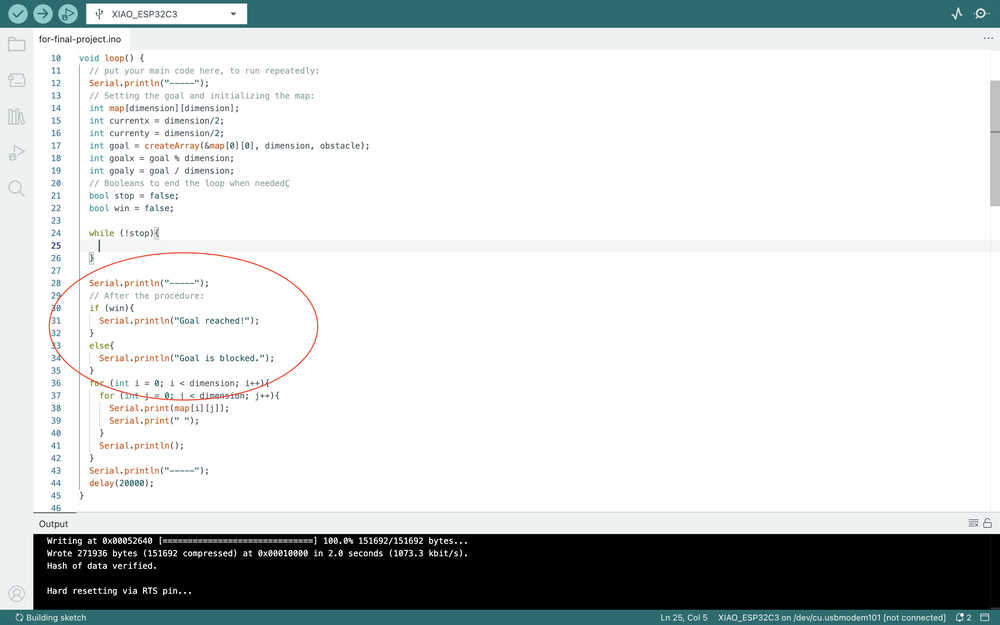
I added two variables and a constant that I'll use to decide whether the bot is stuck or it got to the goal, and whether the program should print each step of the bot.
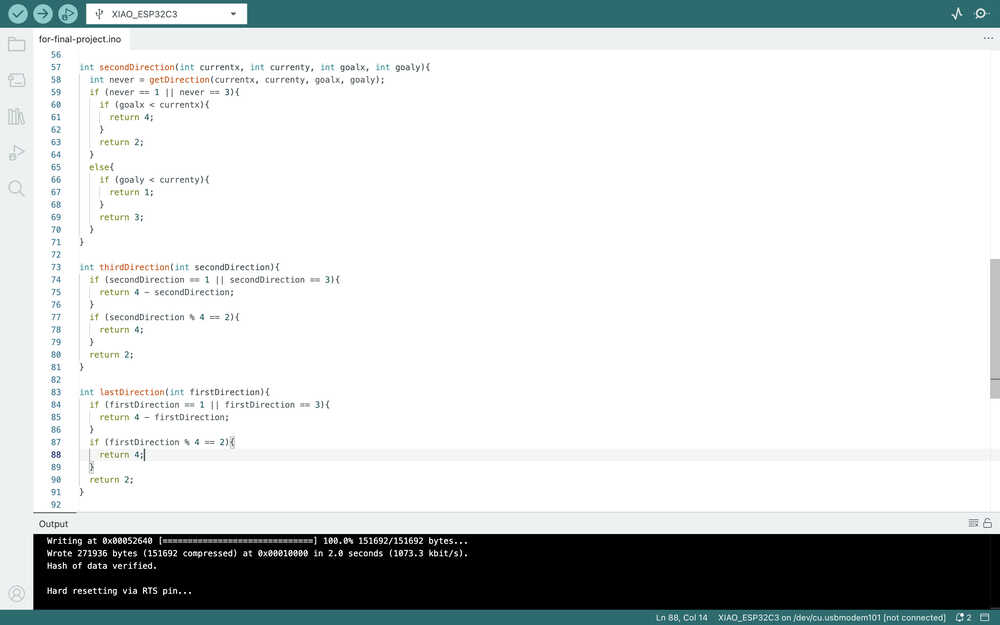
I added three more functions to get the other directions.
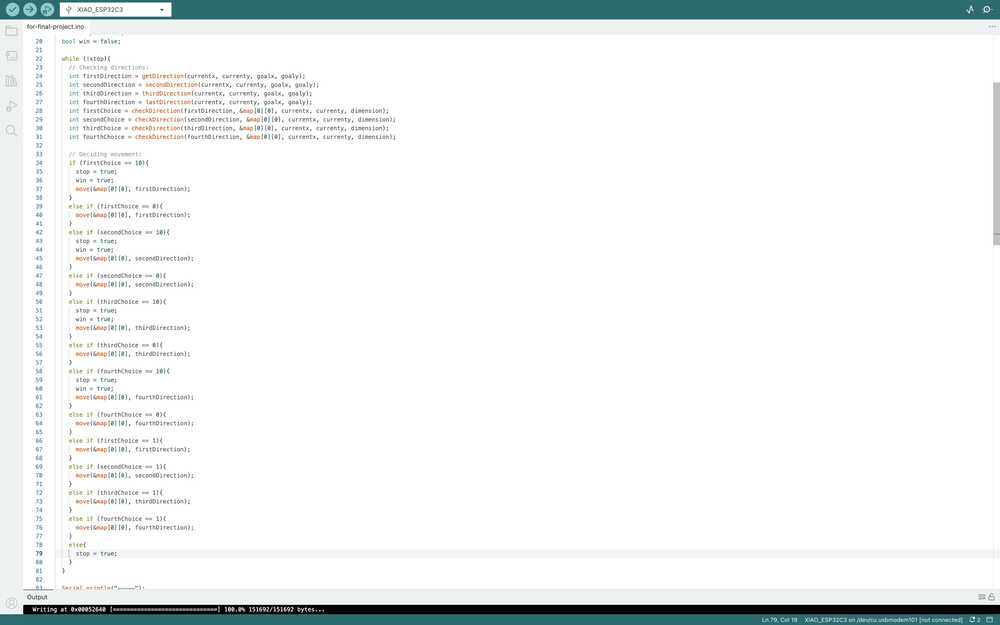
I wrote made the program write a message depending on the win status.
I wrote some code for the main direction. The bot'll move there depending on what's there. I'll create the move function you see below later.
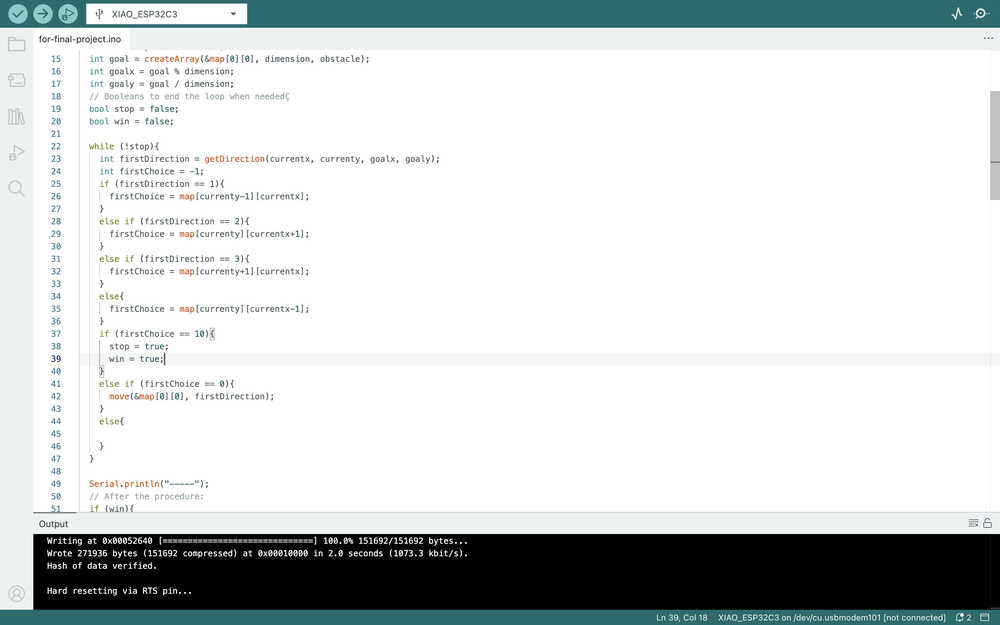
Since I'll repeat this code, I turned it into a function.
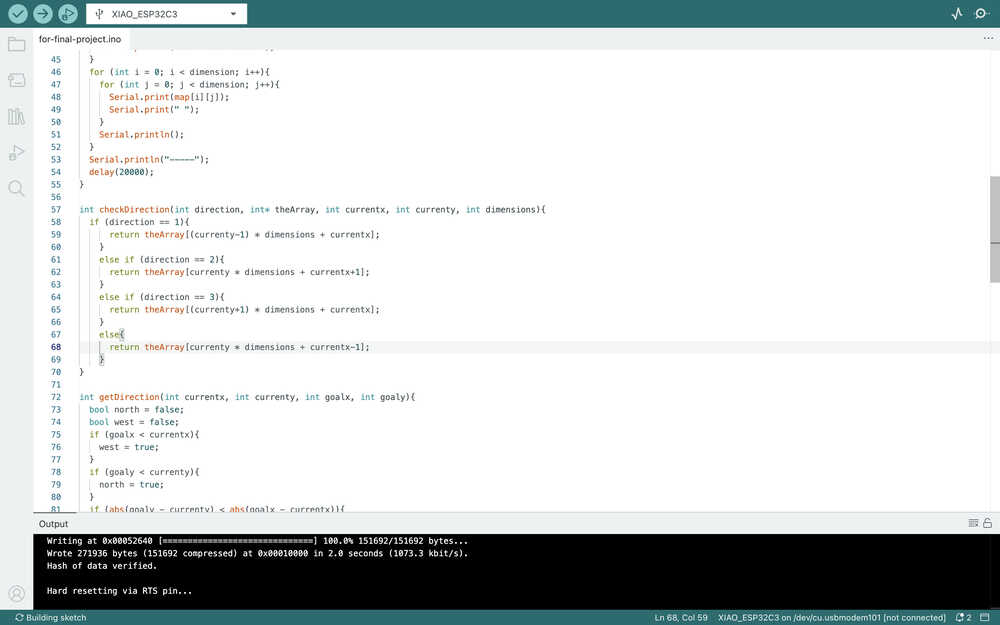
This is how the movement works when there's a 0 spot nearby.
If there's no 0 spots nearby, this part works, which checks for 1 spots.
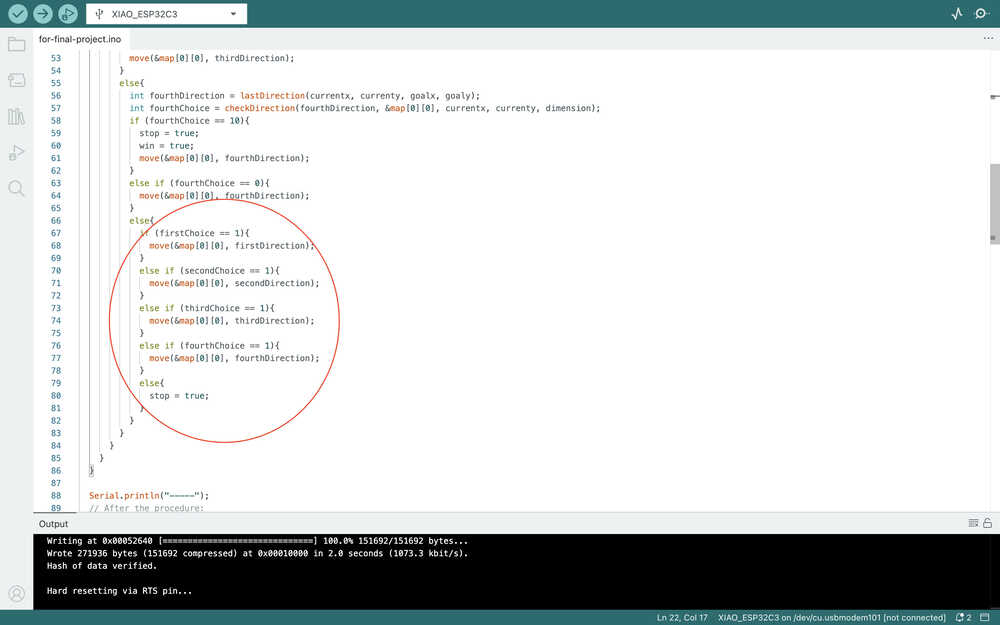
As you can see, if there's no 1 spot either, the bot just stops.
Now, I'll work on preventing any out of bounds errors when the bot is searching for where to move.
I added these if statements to give the value -1 to any locations that's out of bounds.
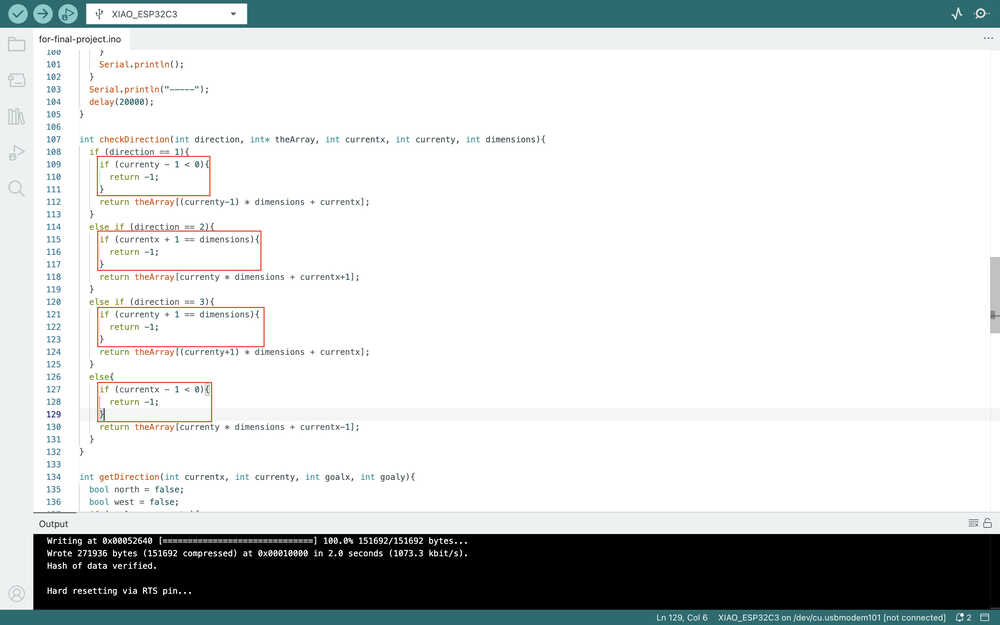
I changed the -1 to 2 since writing -1 would affect the movement calculations. This basically means that the out of bounds sections will be detected as obstacles.
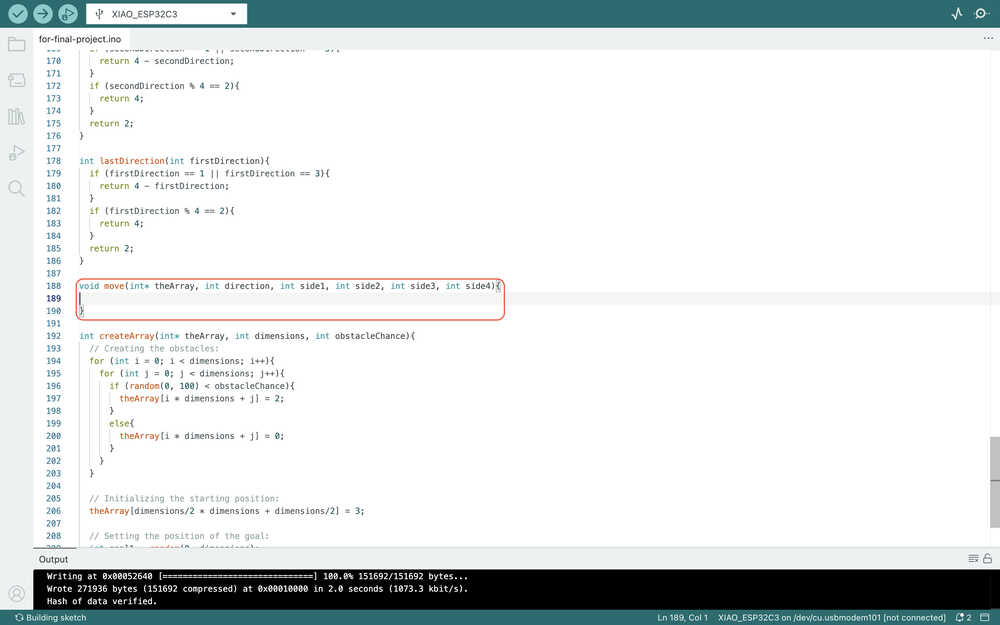
I'll now start writing the movement function. However, I realized I made a mistake while coding. You see, I made the movement deciding part such that the bot doesn't have to check other directions if it already saw 0 on the favorable direction. However, I'll need the information of the other directions for the move function. This means that I'll need to make the program check the directions once again if I don't fix this mistake, which is really inefficient, so I changed the program to this.
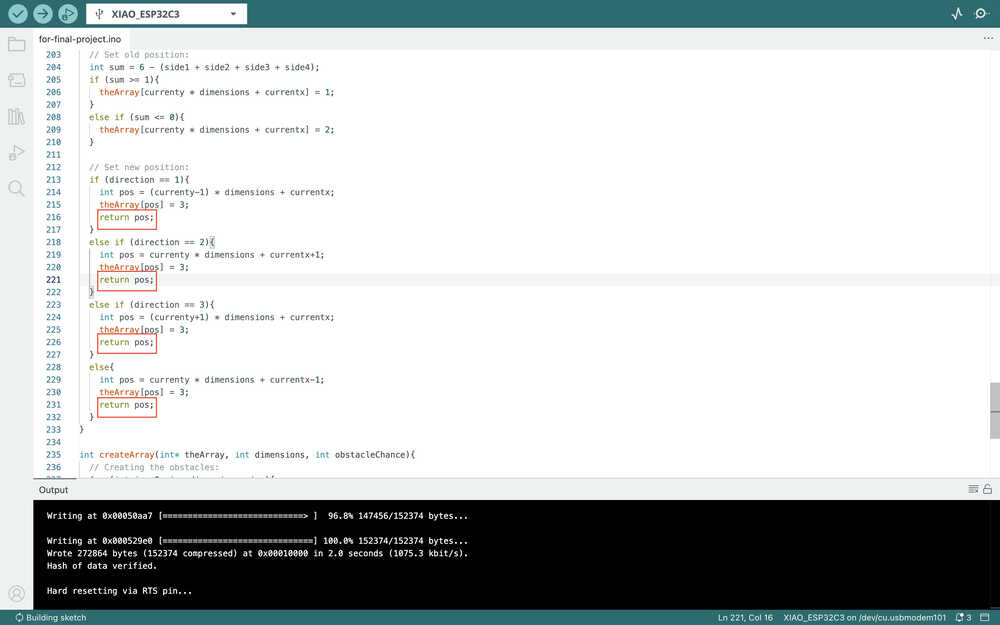
I created the first parts of the move function.
I also changed the code in the main loop depending on the header of this function. Also, I added currentx, currenty, and dimensions to the header later.
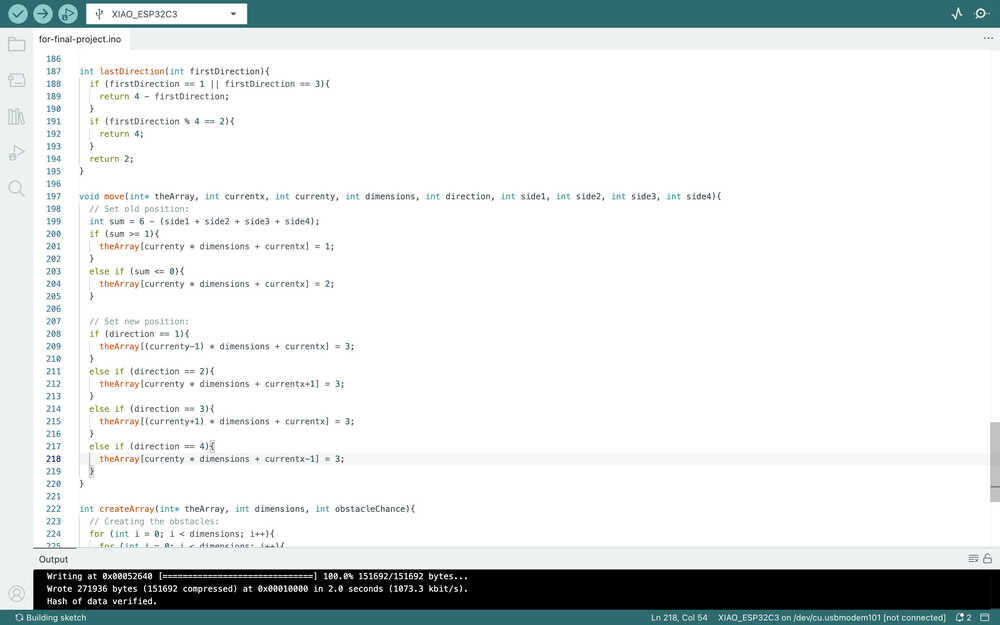
The move function:
I added the seeProcess boolean to the main loop.
I got an error because of the function names.

So, I added "get" to the beginning. I also realized that I wrote the parameters wrong for getThirdDirection() and getLastDirection(), so I fixed those.
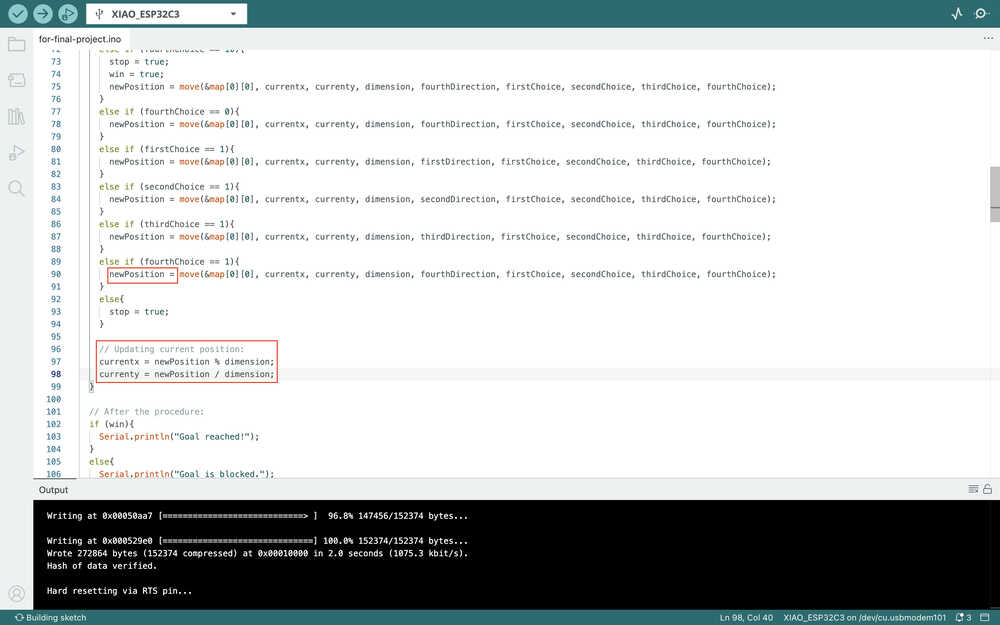
I ran the code. However, there were multiple 3s on the map. 3s represent the position of the bot, so :( .
The problem is that I forgot to update the value of the currentx and currenty variables. So, I fixed this issue by writing these:
And these:
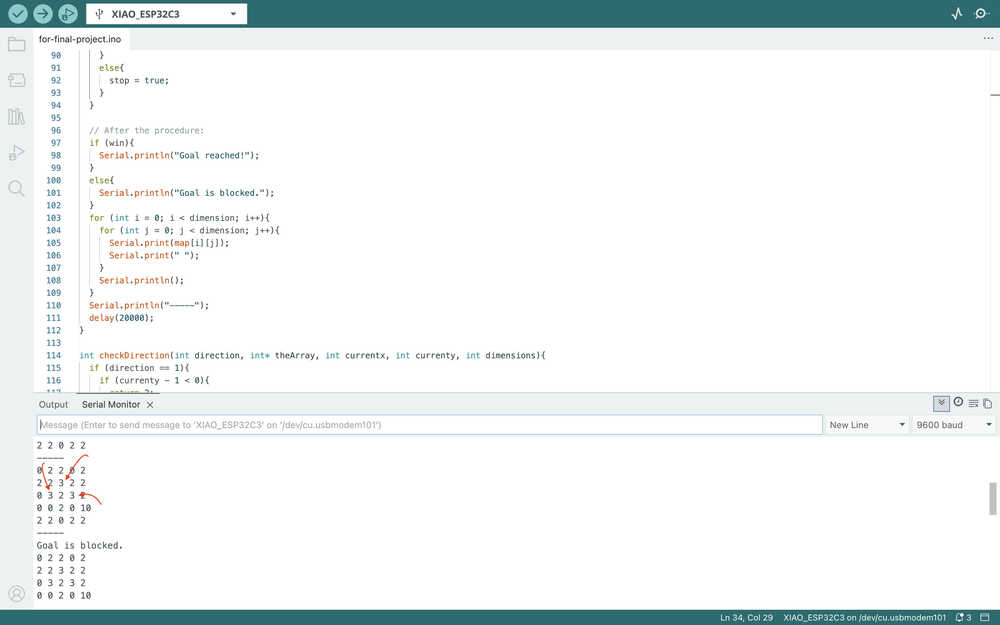
You can find some of the outputs here. You can also just download the code and start it.
Because I don't have any time left, I'll not implement servos to this code right now. However, I'll update the code according to ultrasonic sensors and either servos, stepper motors, or dc motors before finishing my project.
Files
You can find the codes here.