Week 17 – Wildcard Week
Han Ferik
Weekly Assignments:
Individual assignment:
- Design and produce something with a digital process (incorporating computer aided design and manufacturing) not covered in another assignment, documenting the requirements that your assignment meets, and including everything necessary to reproduce it. Possibilities include but are not limited to wildcard week examples.
Brother PR680W Embroidery Machine
How The Process Is Not Covered In Other Assignments
The Brother PR680W embroidery machine was not covered in my other Fab Academy assignments because embroidery is a distinct digital fabrication process that differs from the subtractive, additive, or electronic manufacturing methods previously used. Unlike laser cutting, CNC machining, 3D printing, or PCB production, this workflow focuses on textile fabrication through programmable stitching. The process required converting a vector-based digital design into embroidery stitch data that could be interpreted by the machine, introducing a different type of toolpath generation and material interaction. Since none of my previous assignments involved computerized embroidery or textile-based digital manufacturing, this machine and workflow qualify as a new fabrication process explored specifically during Wildcard Week.
My work this week meets the Wildcard Week requirements because it combines computer-aided design and digital manufacturing using a fabrication process that was not covered in another assignment. The workflow involved creating a digital design, converting it into machine-readable stitch instructions, and manufacturing a physical embroidered patch using a programmable embroidery machine.
My Brother PR680W Embroidery Machine Journey
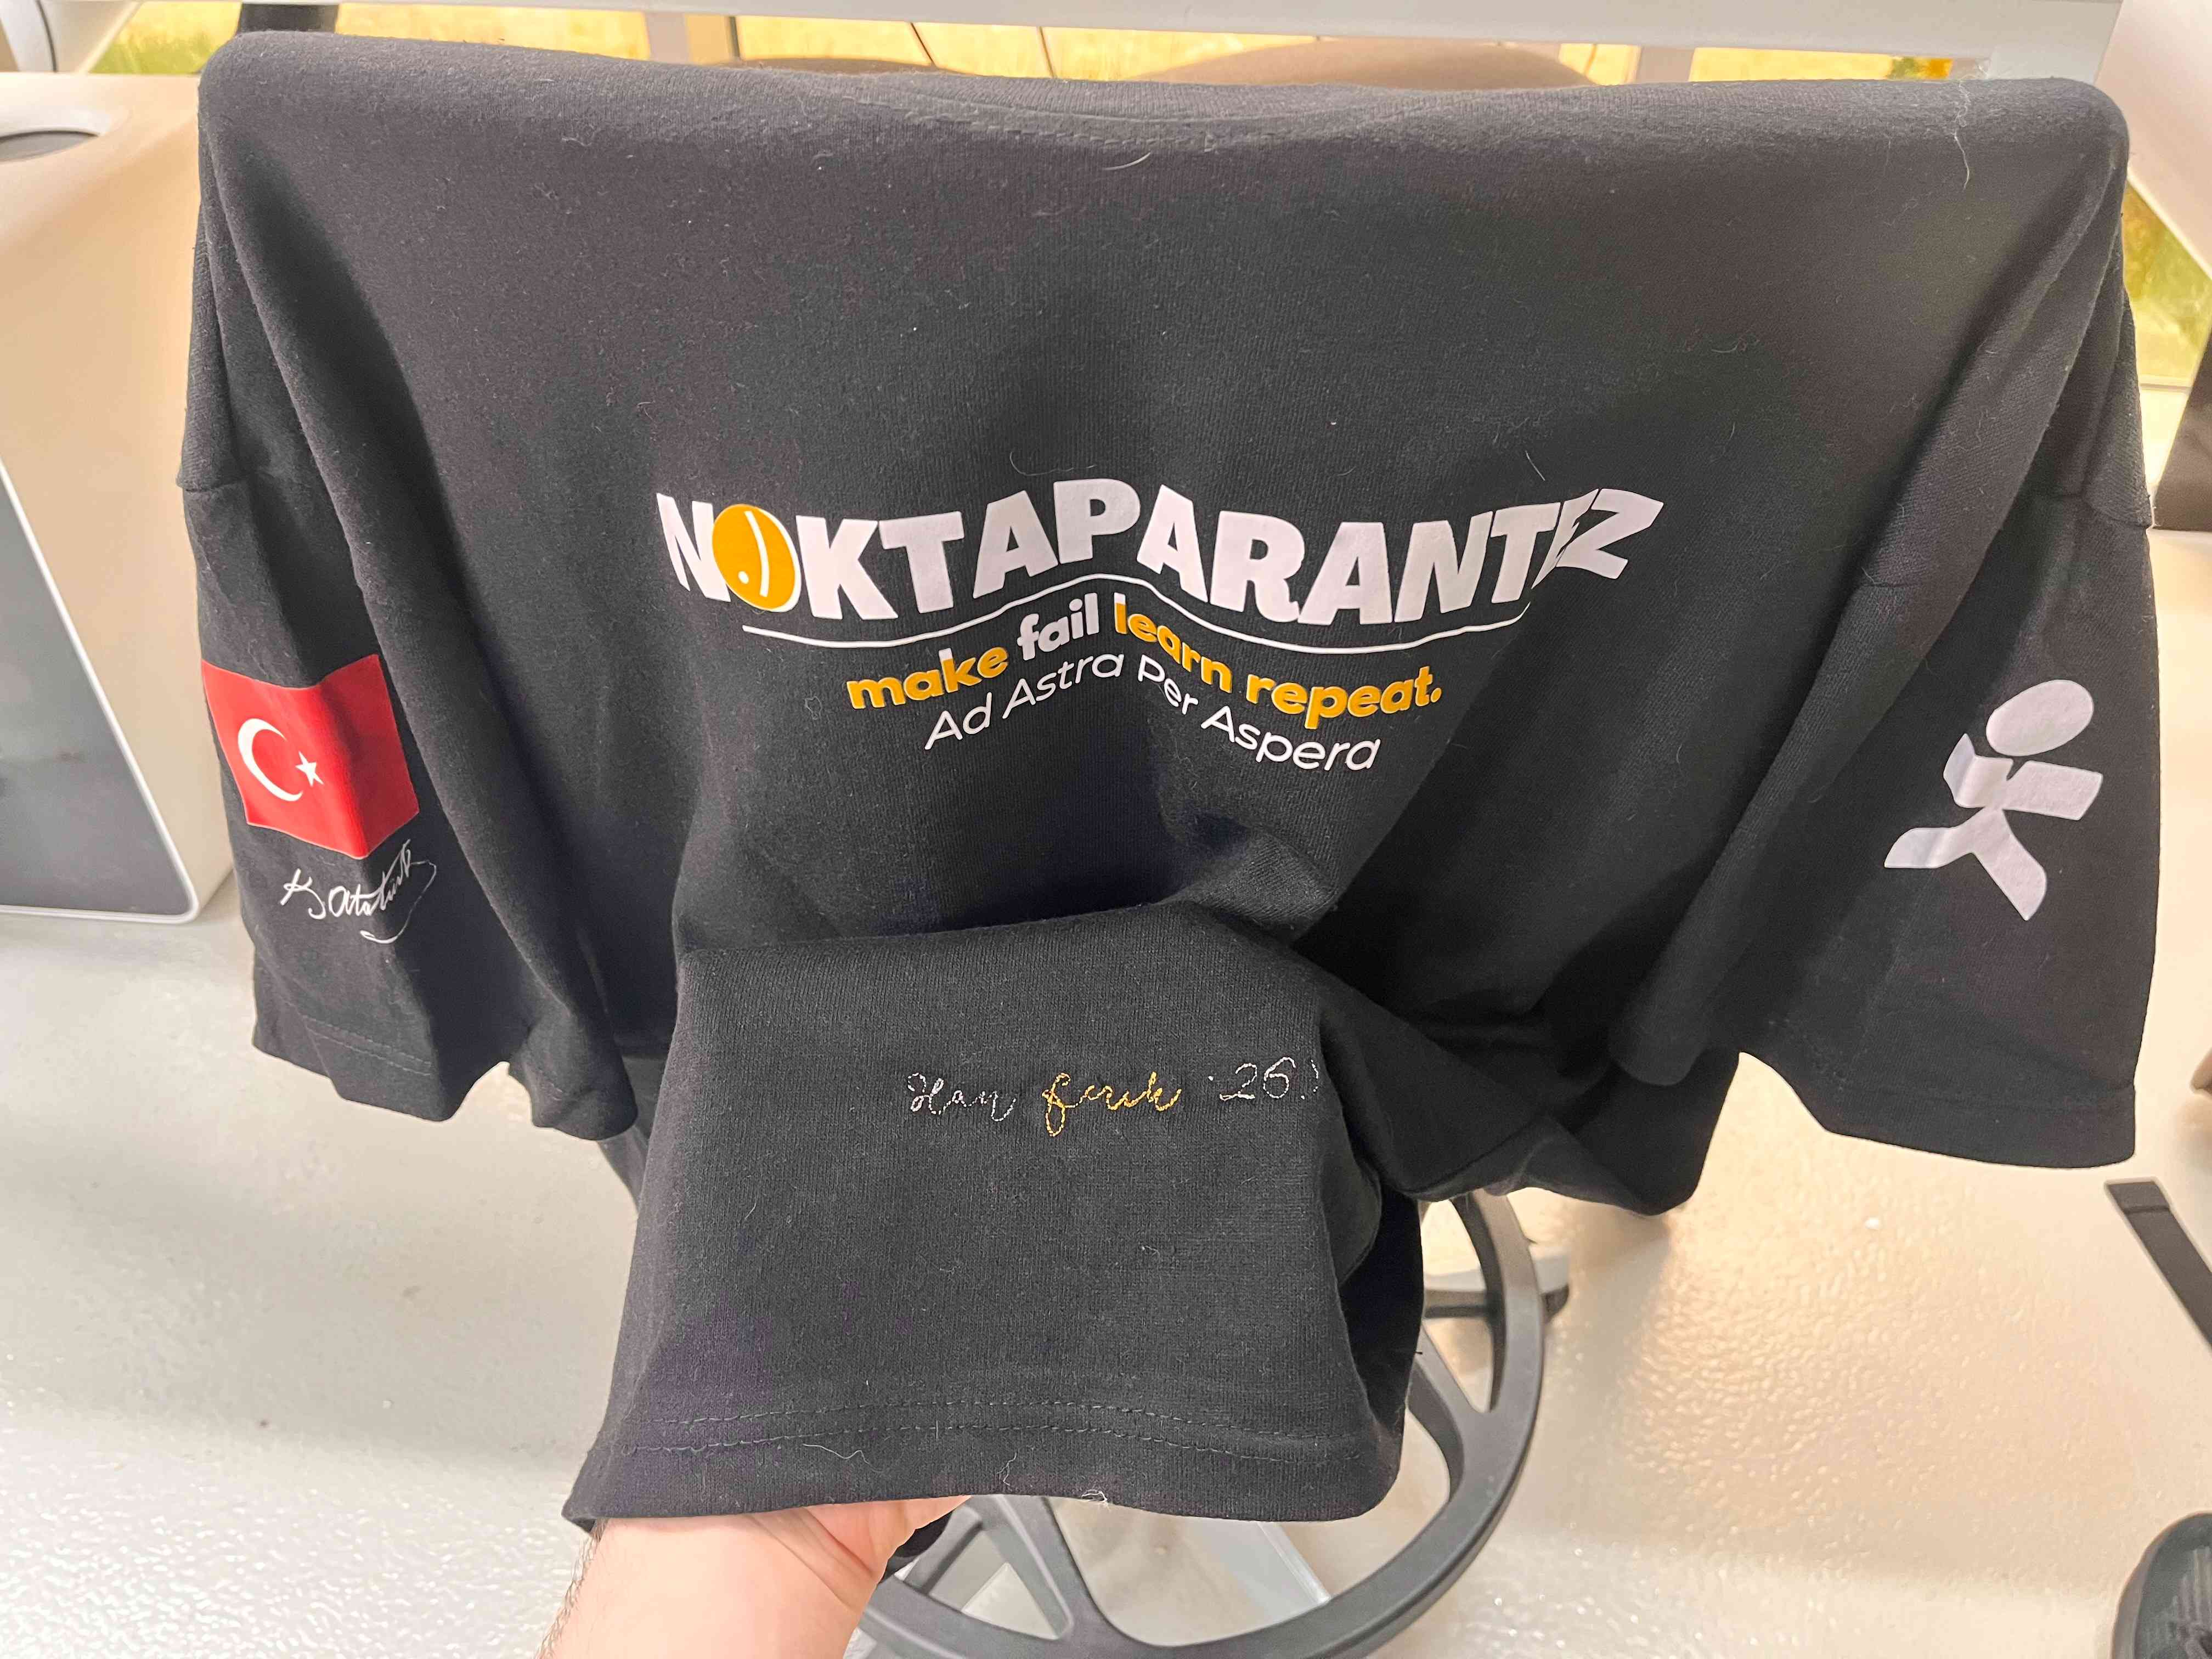
This week I will work with Brother PR680W Embroidery Machine to stitch my name into our school’s FRC team t-shirt.
At first, I had in my mind to create a Fab Academy patch, but this turn out to be great as well.
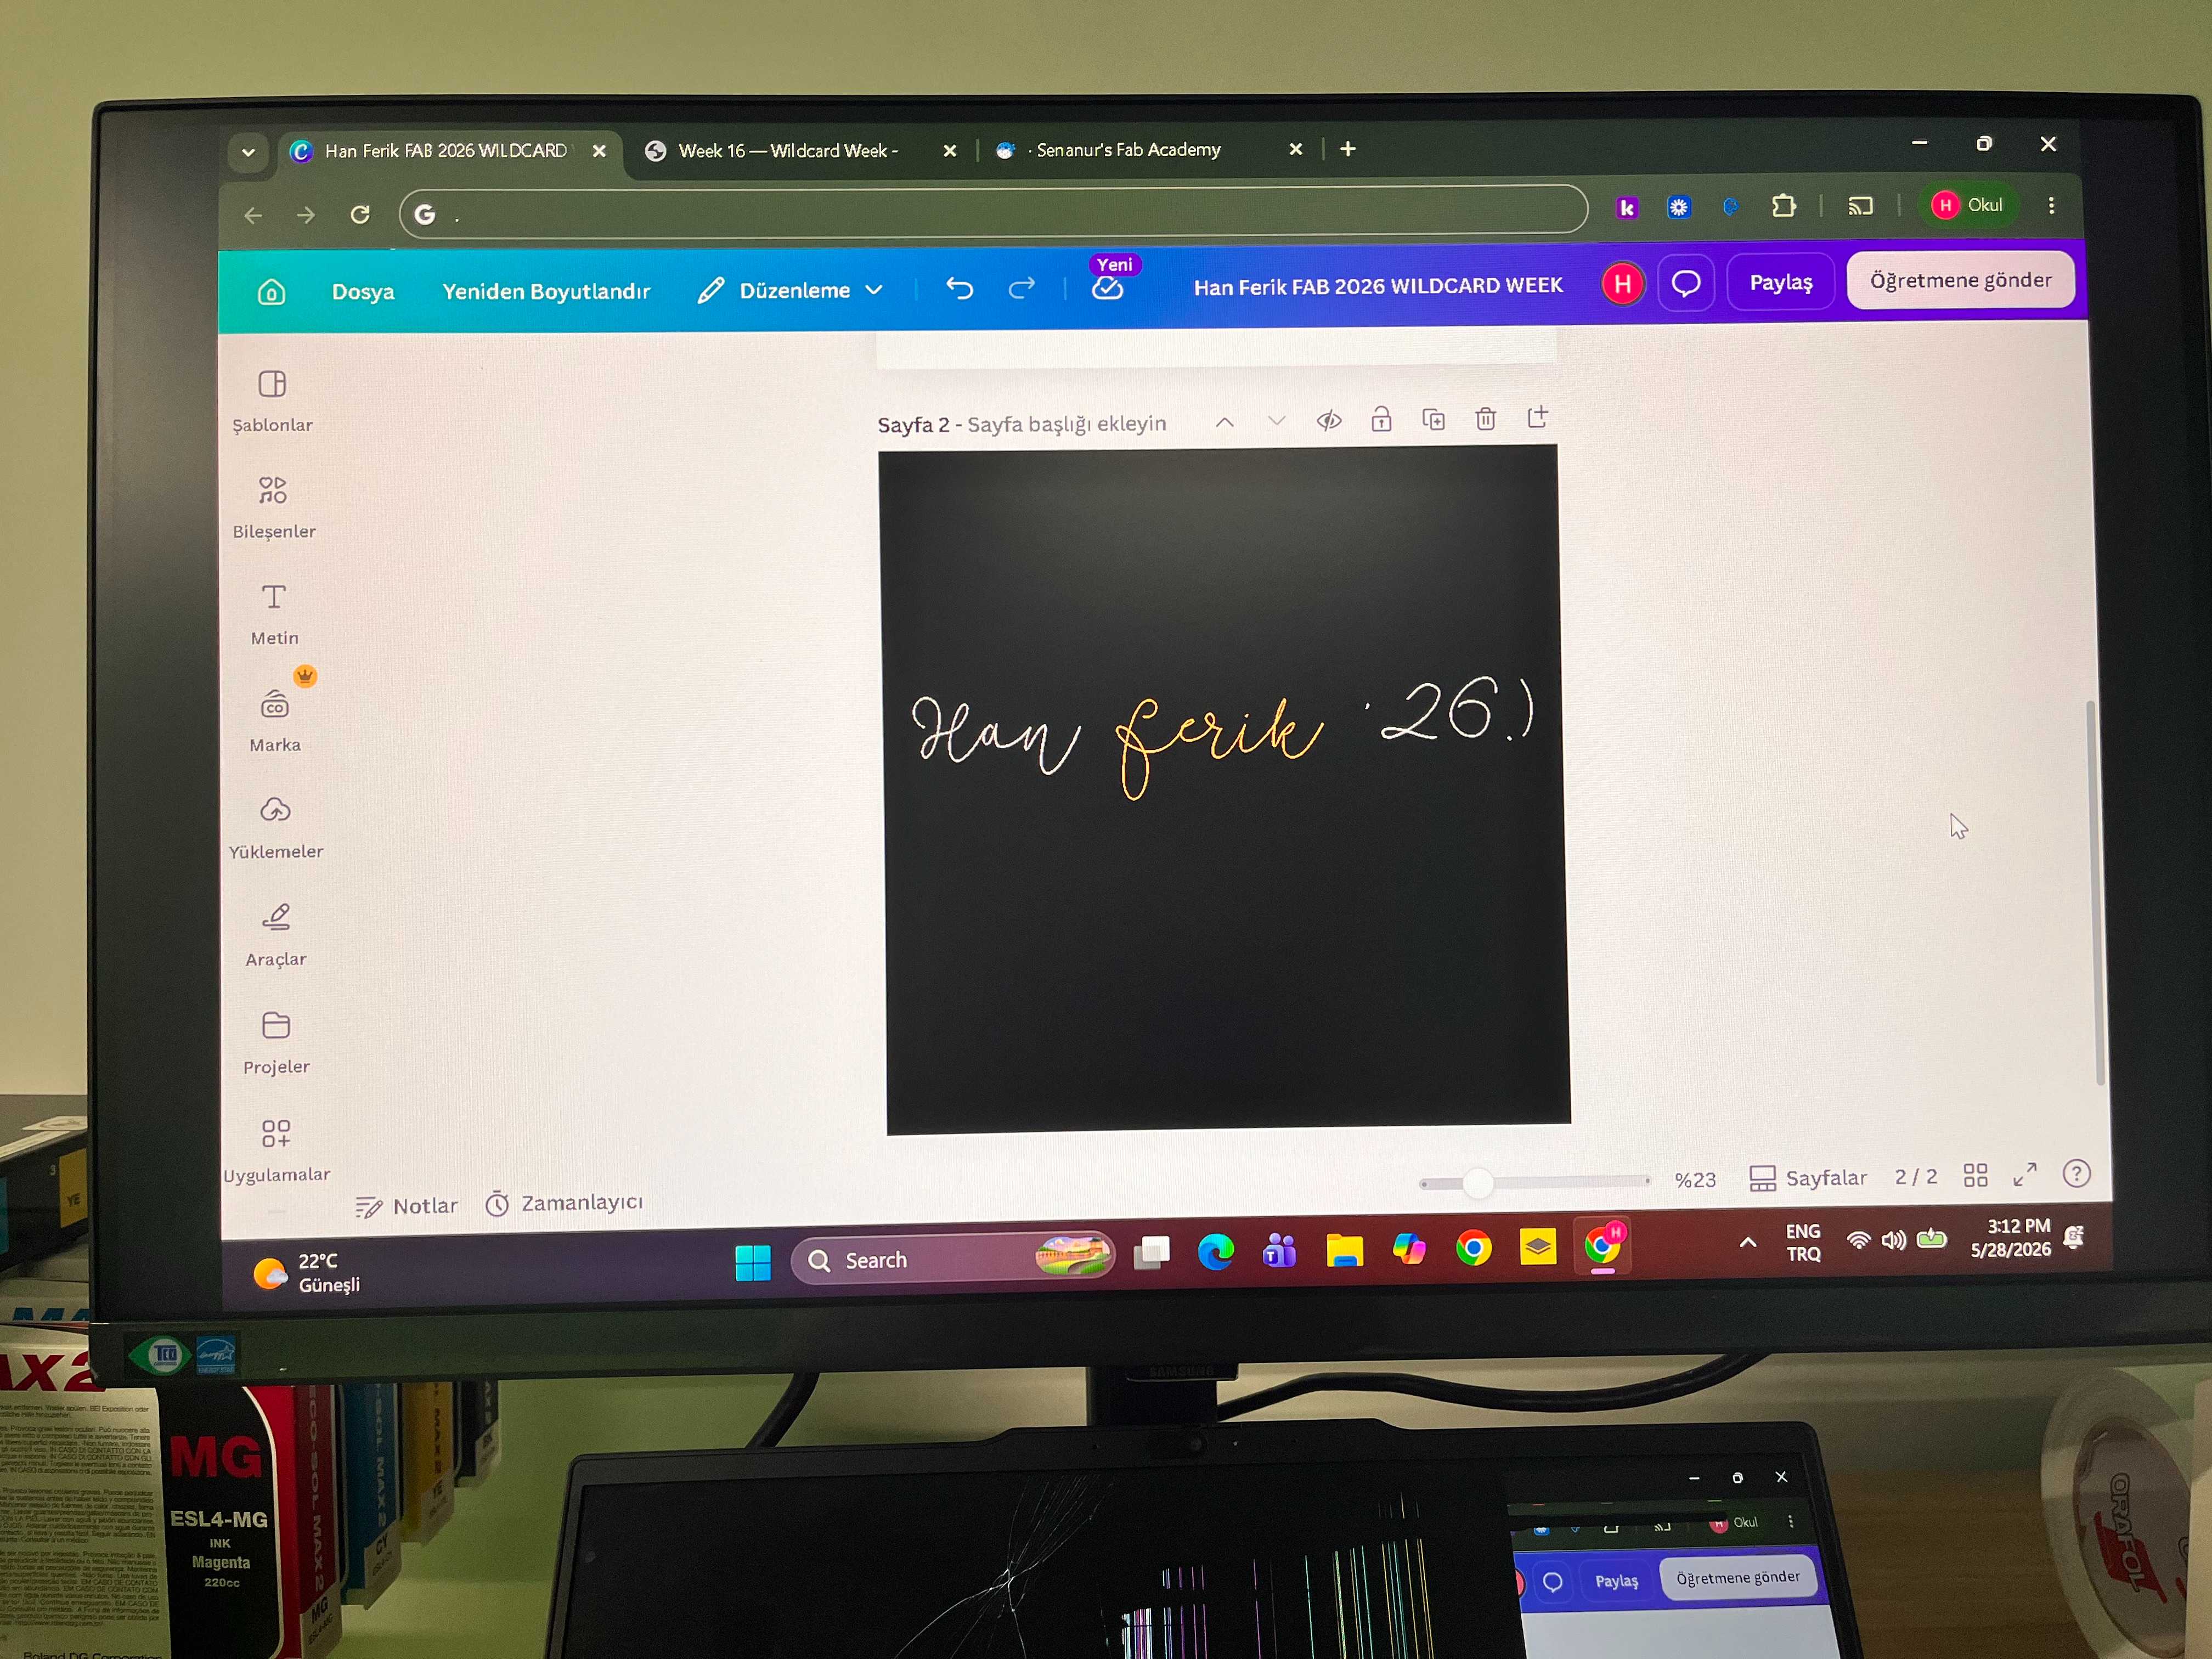
I designed my logos through Canva. And, these two designs were my initial designs.
Fab Academy Patch Logo

FRC Team T-Shirt Stitch Logo
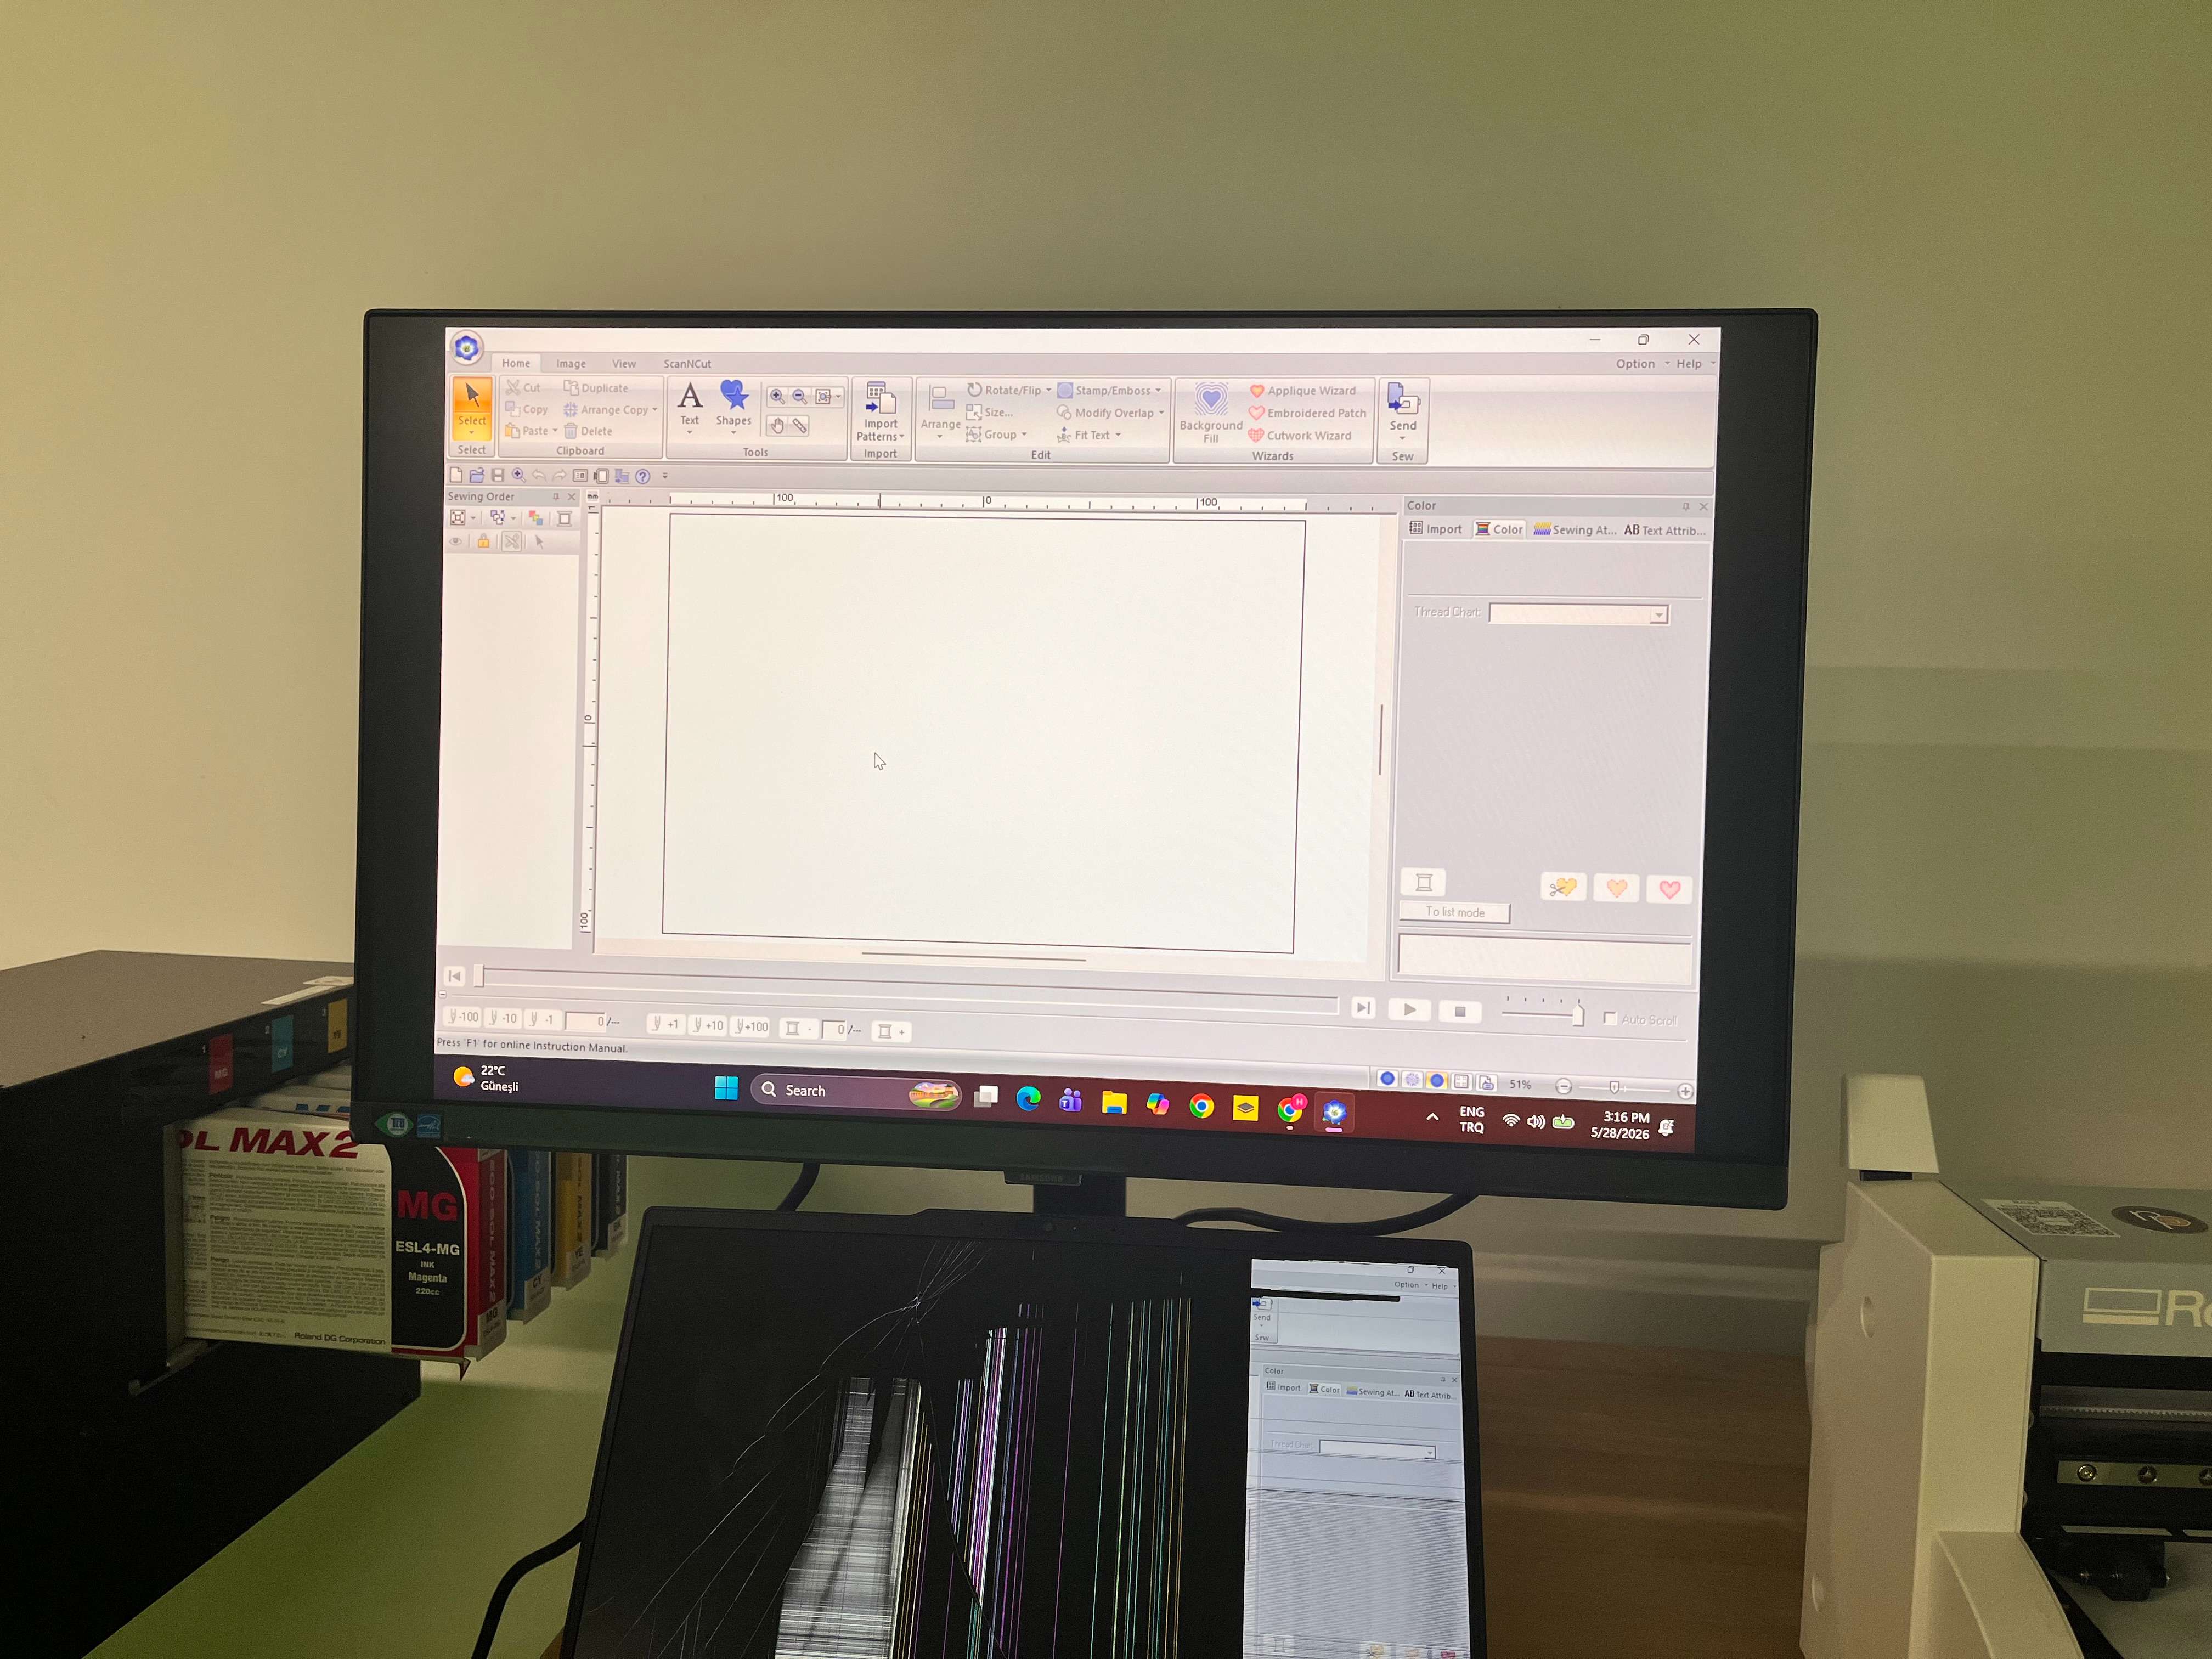
For the Brother PR680W Embroidery Machine, I used PE-Design 11 application.
When you are trying to open the application, the application requires a key. And, this is the USB stick key on your Brother PR680W Embroidery Machine. In order to open the application, remove that USB stick, and plug it into your computer.
This will be how it looks after you do that step.
Here, click on image. Then, I import the image into PE-Design 11.
After you import, click on Auto Punch.

This creates an embroidery pattern from shapes and colors in the image.
It will look like this.
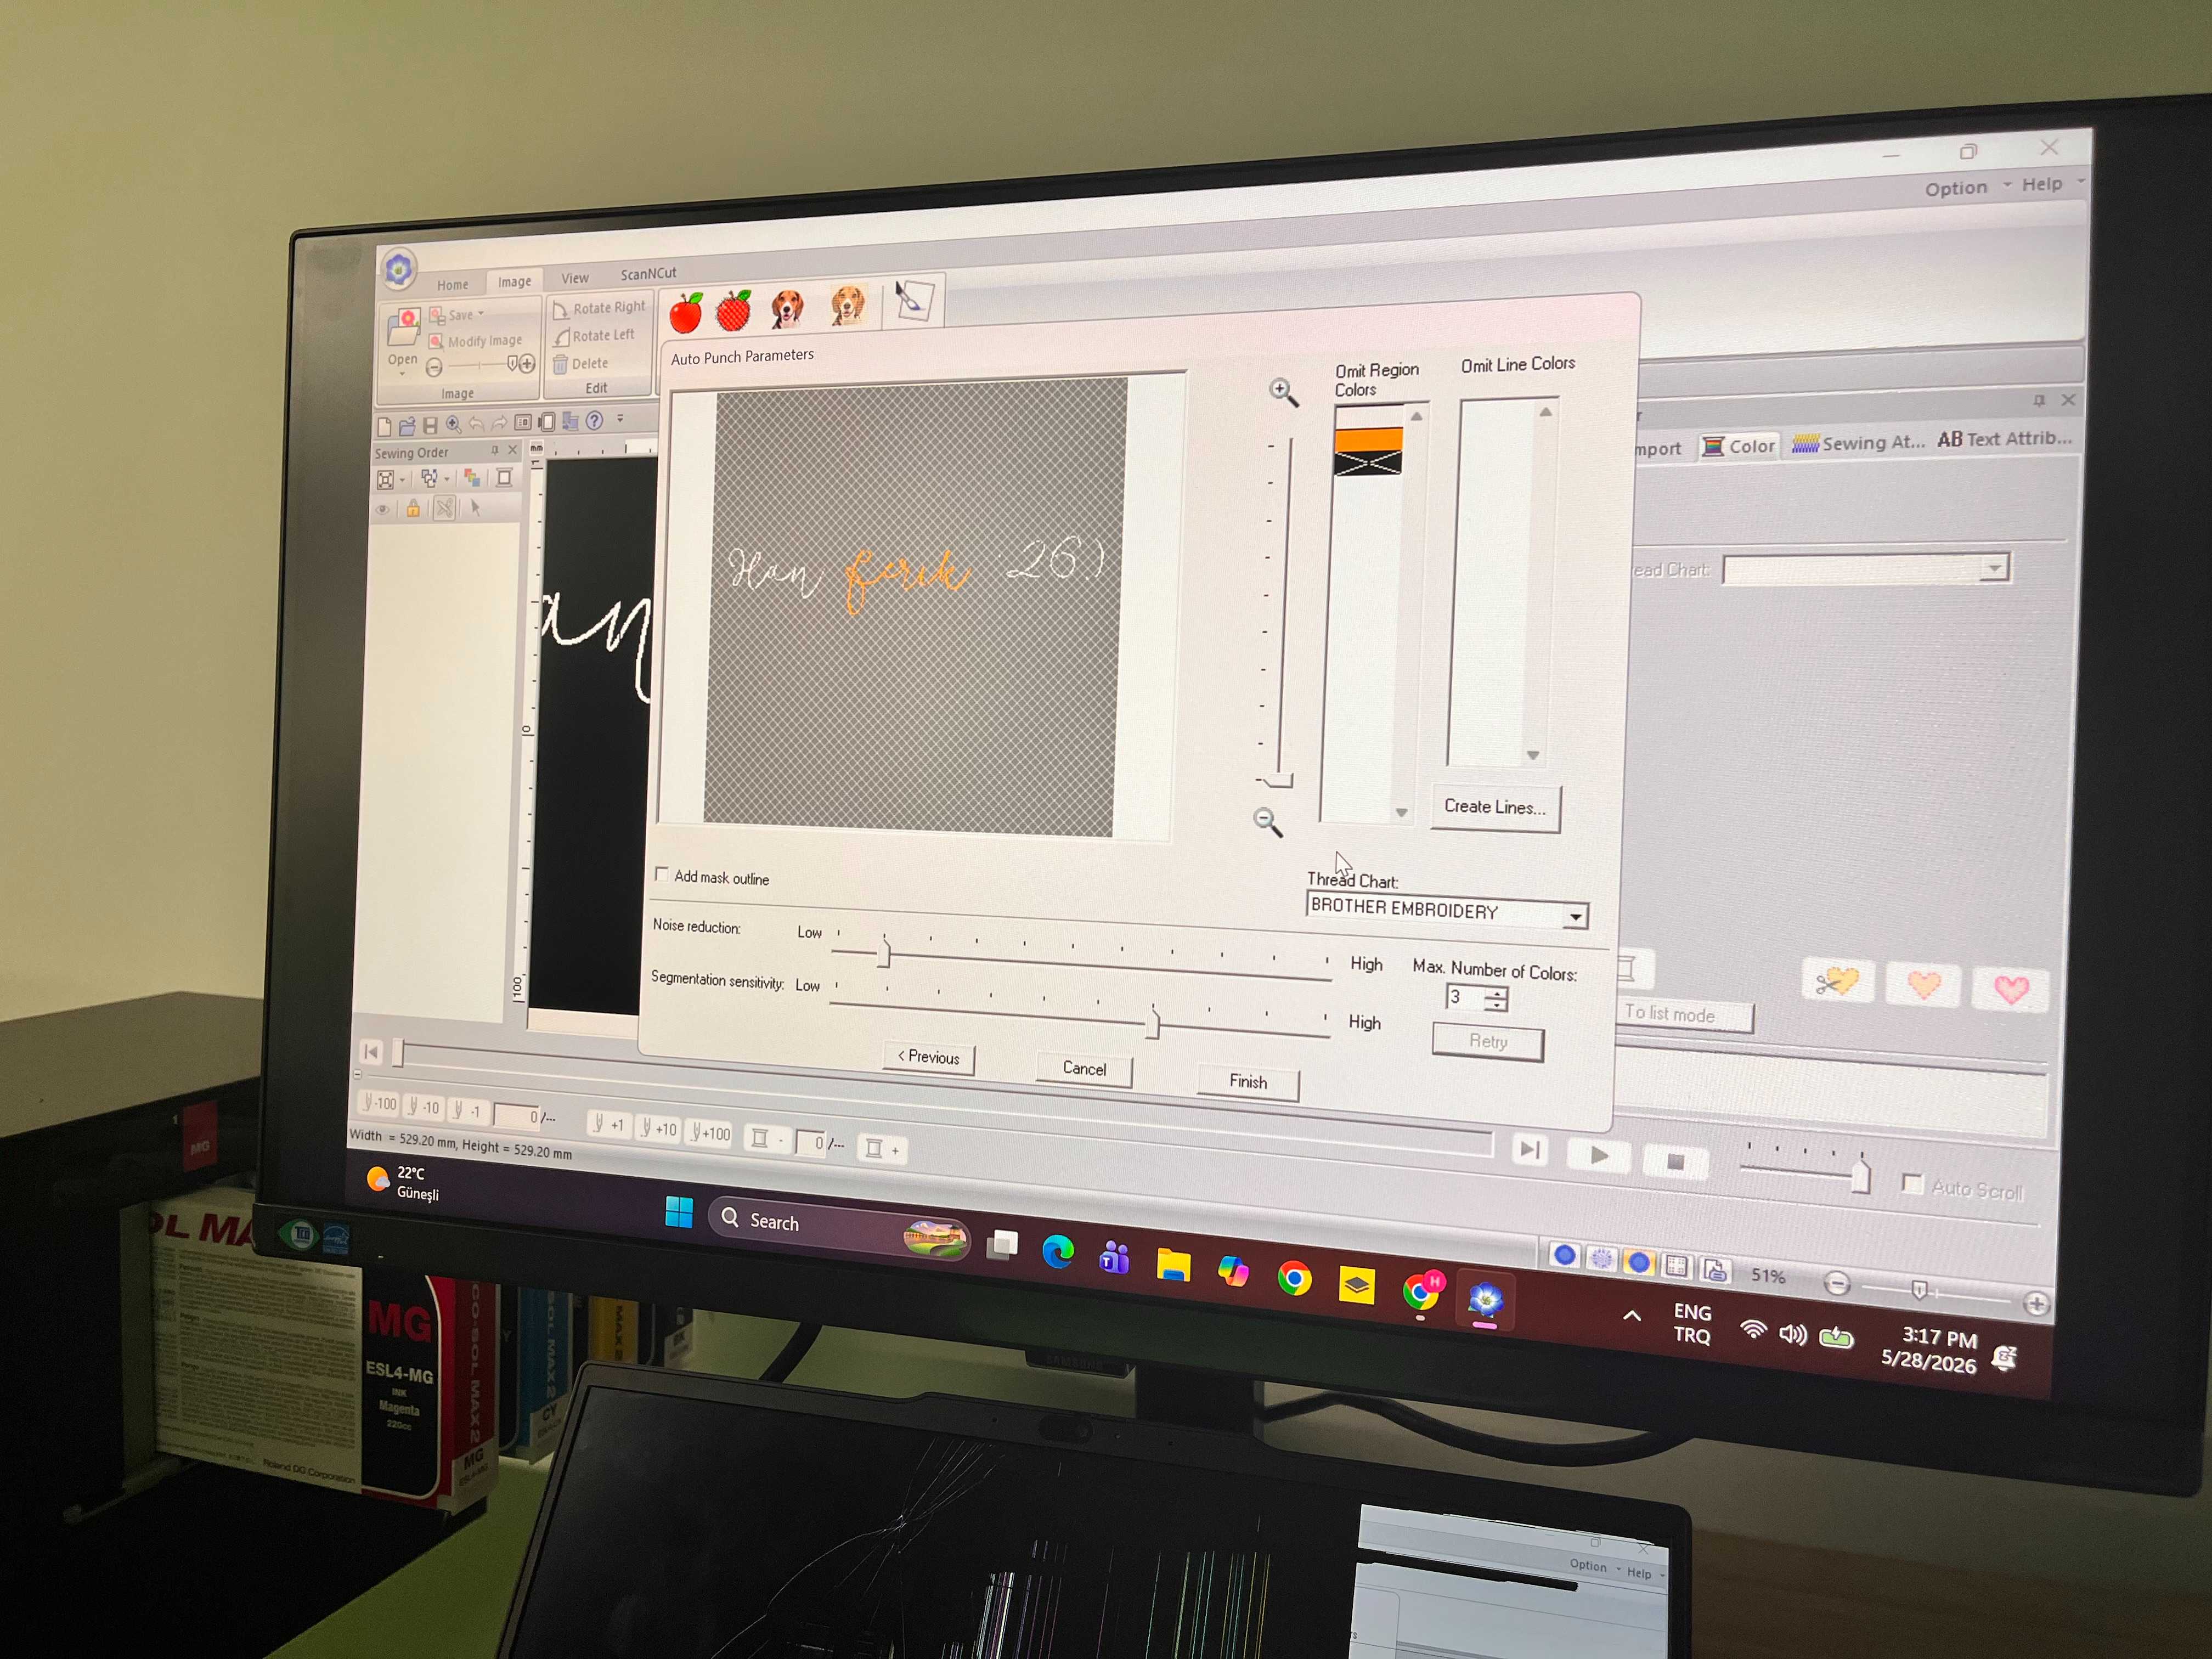
Here, on Omit Region Colors, I clicked on black because that was not needed, and if you do that, it won’t use that color.
You can also select the max number of colors.
Click finish when you are done.
You also need to resize your design into your liking. It doesn’t matter where you place it here on that square.
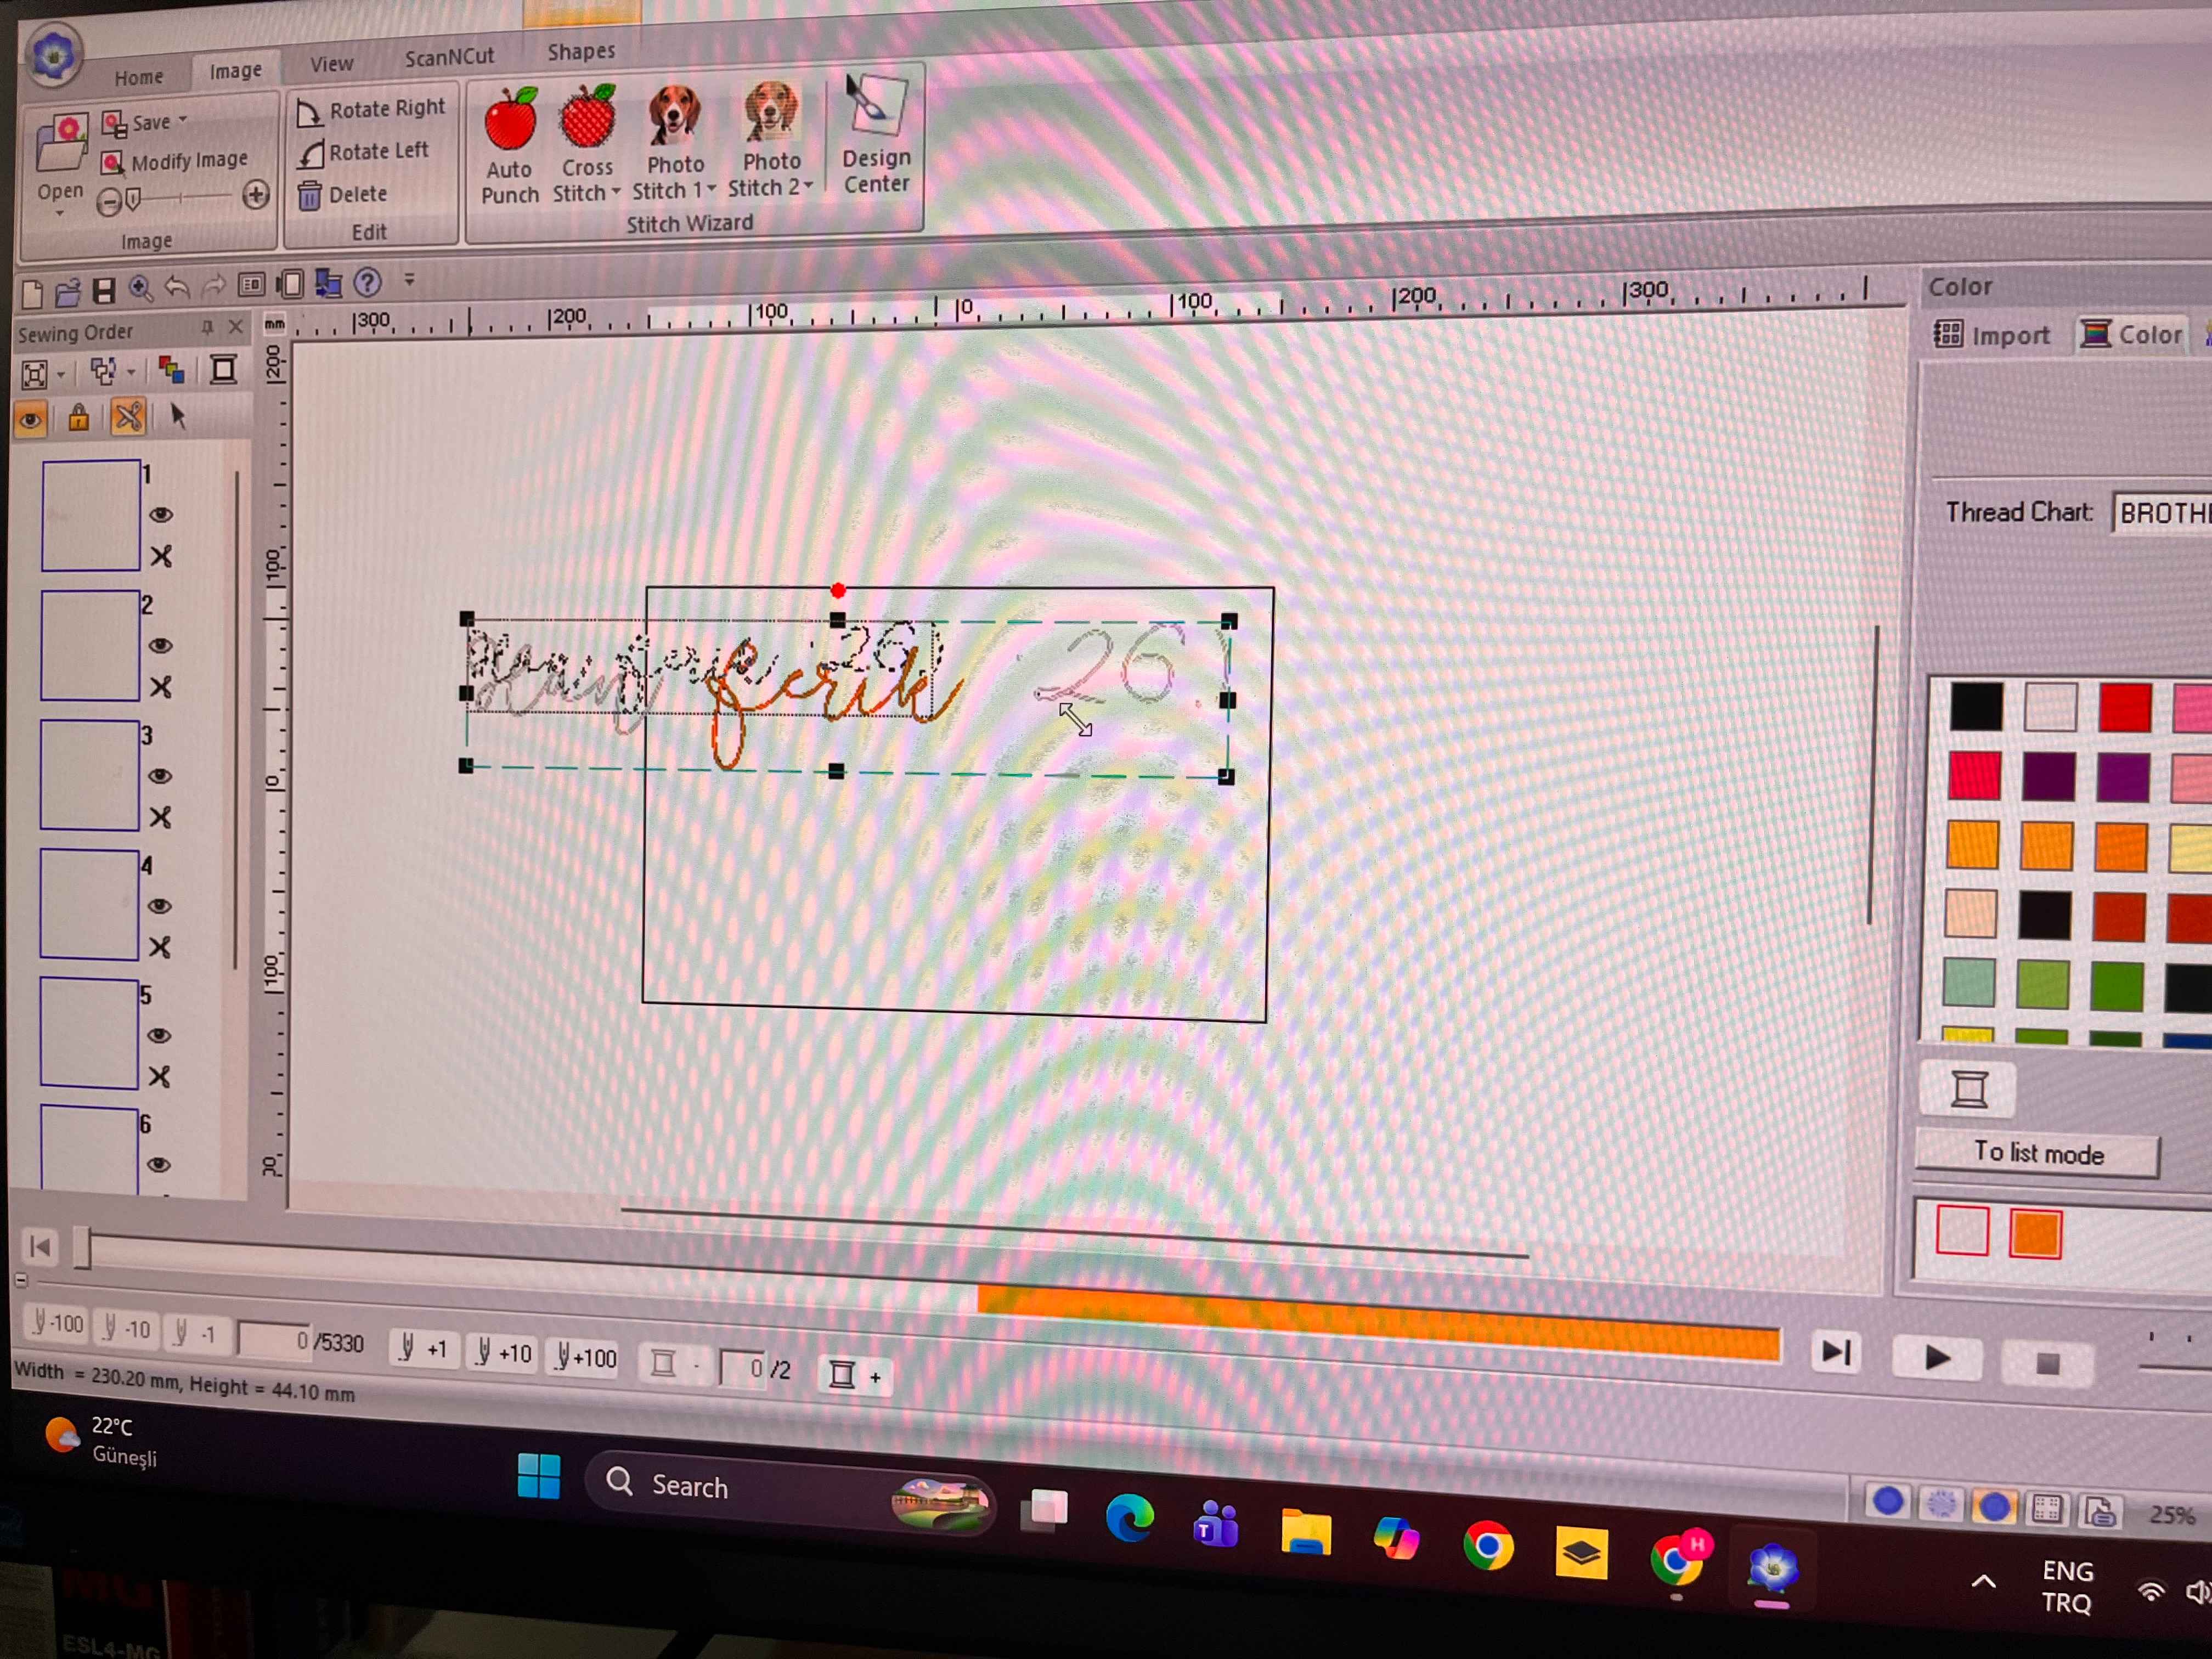
Later, select the type of stich that you are going to use in your design.
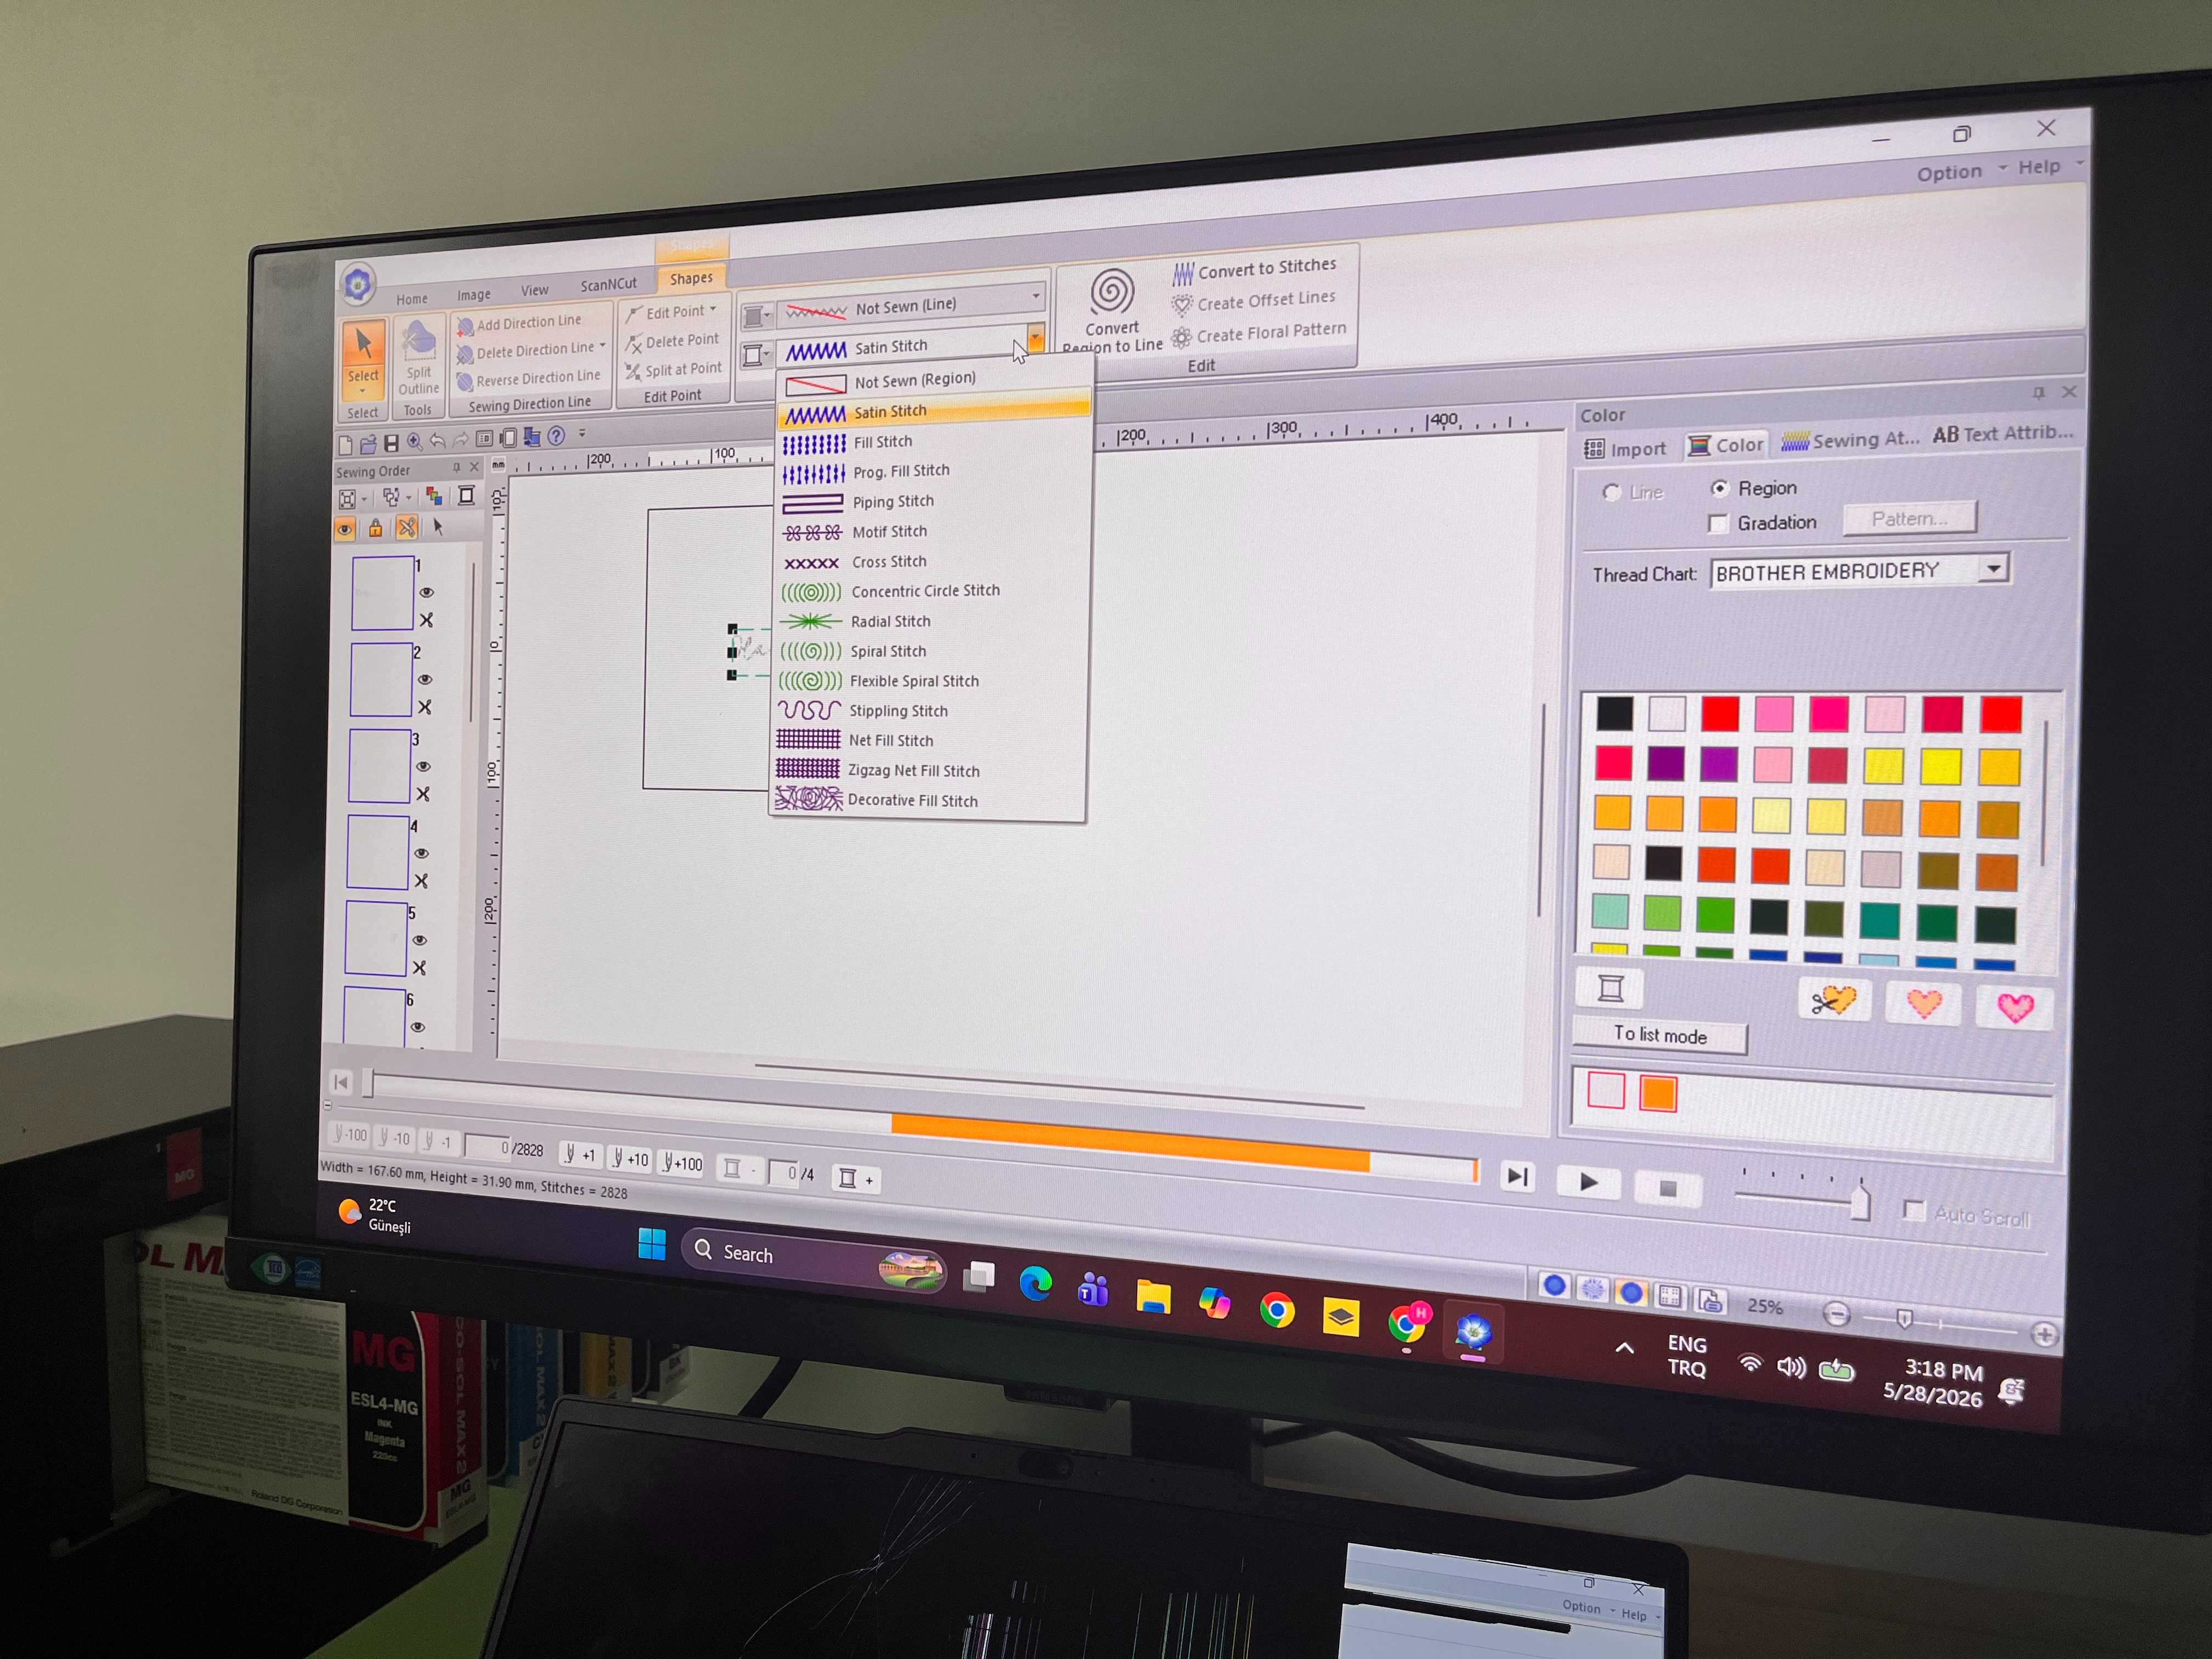
I selected Satin Stitch because the others had blanks in between stitches, and this looked better. You can also check each type of stitch by clicking into them.
Also, on my design, there were extra excess usage of stitch inside the circles of the letter designs. So, for each of those, I manually clicked and selected from left side bar, and changed its stitch type to Not Sewn (Region).
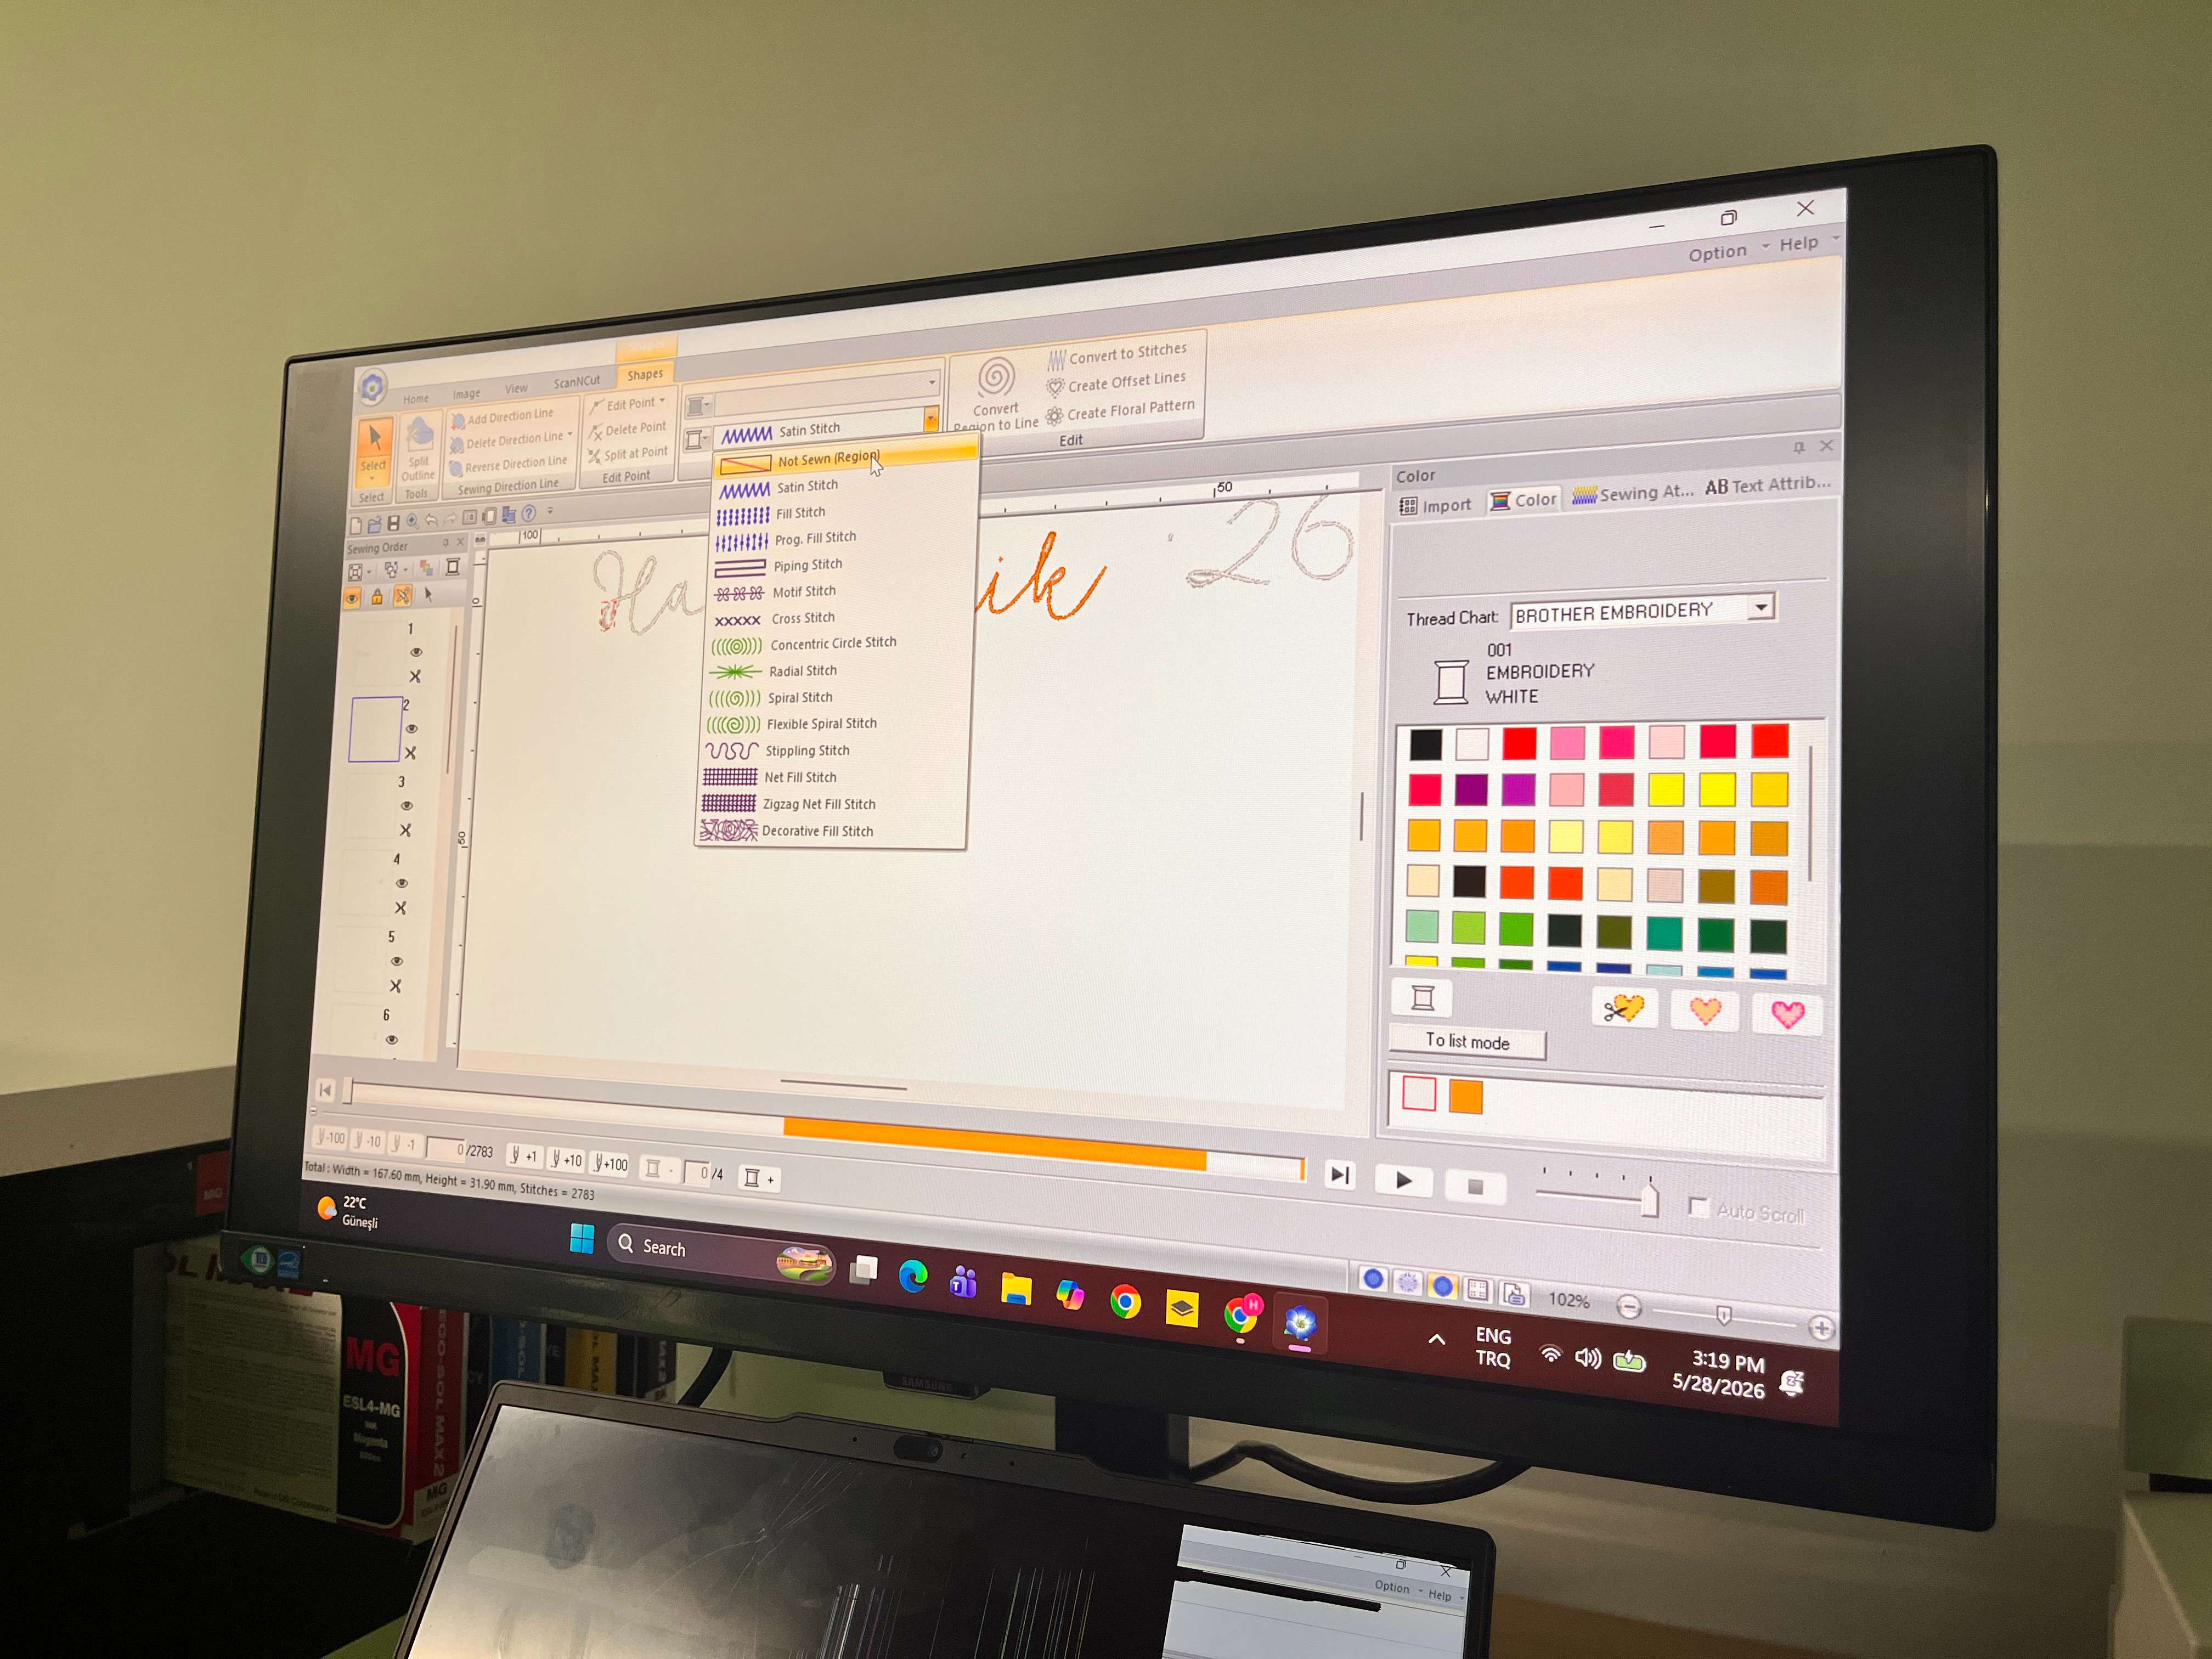
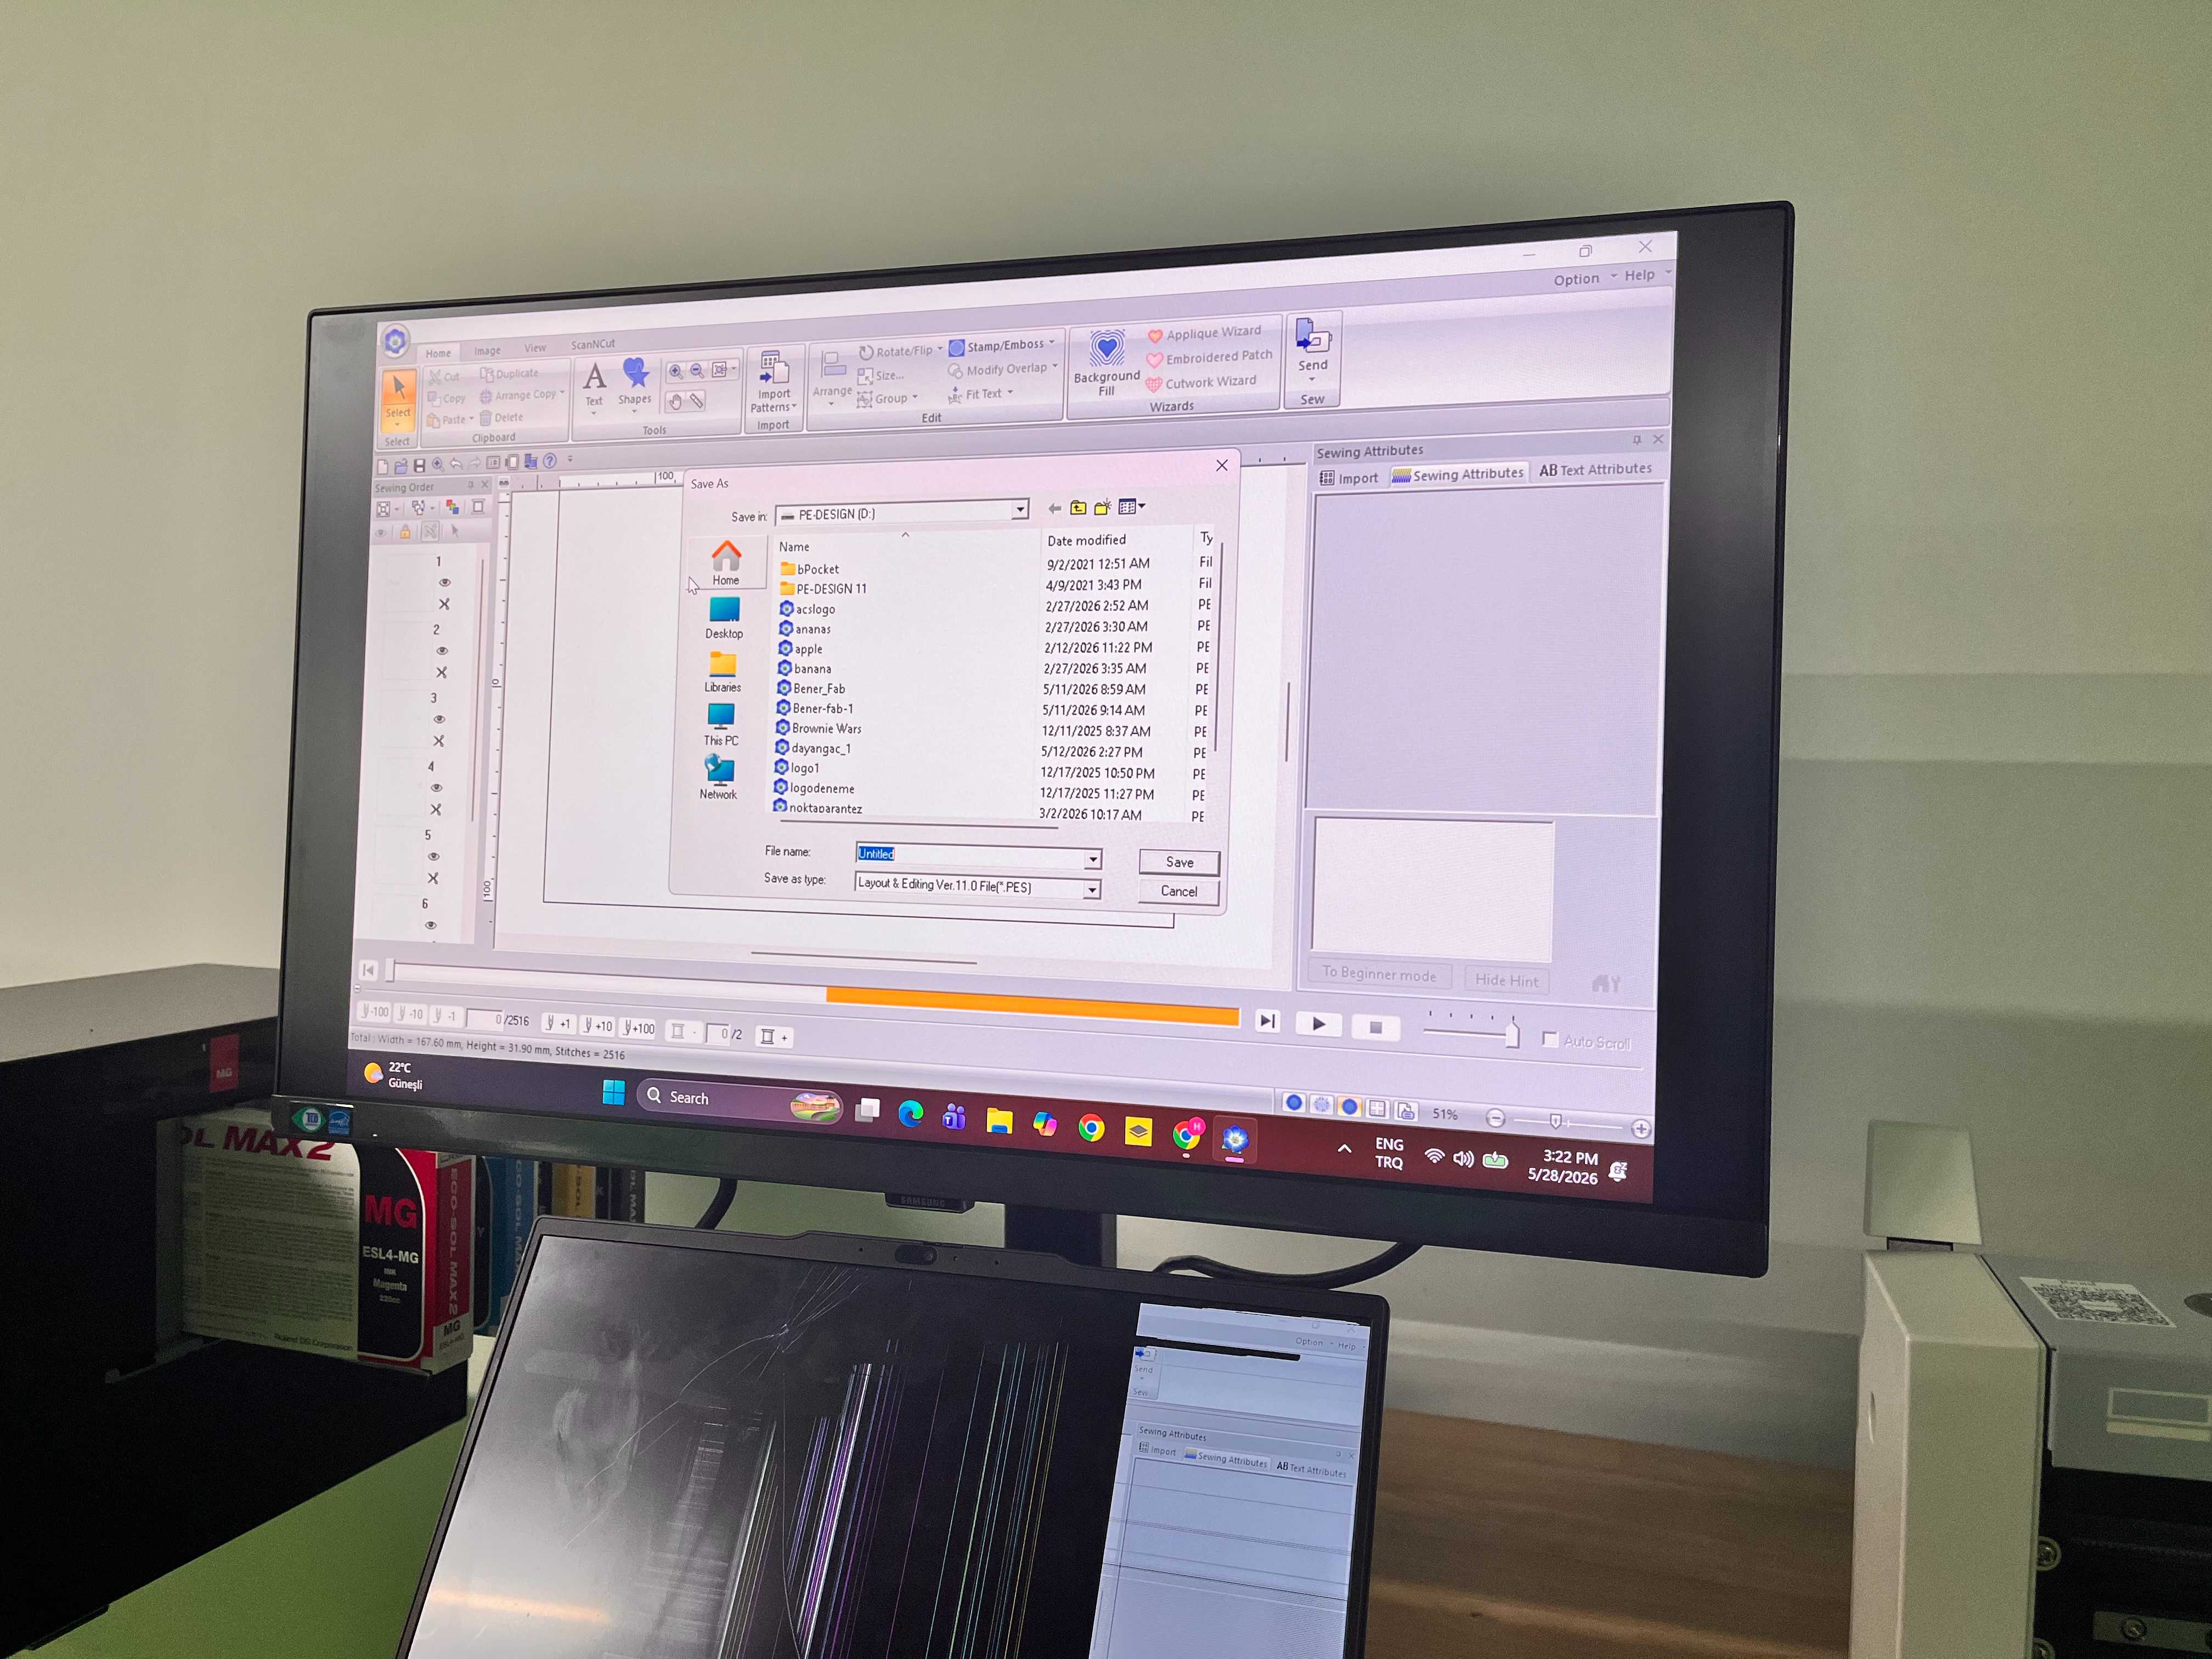
When you are done with the settings of your design, go to options and save your design into your USB stick with your desired name.
Remove that USB stick, and transfer the USB stick into Brother PR680W Embroidery Machine.
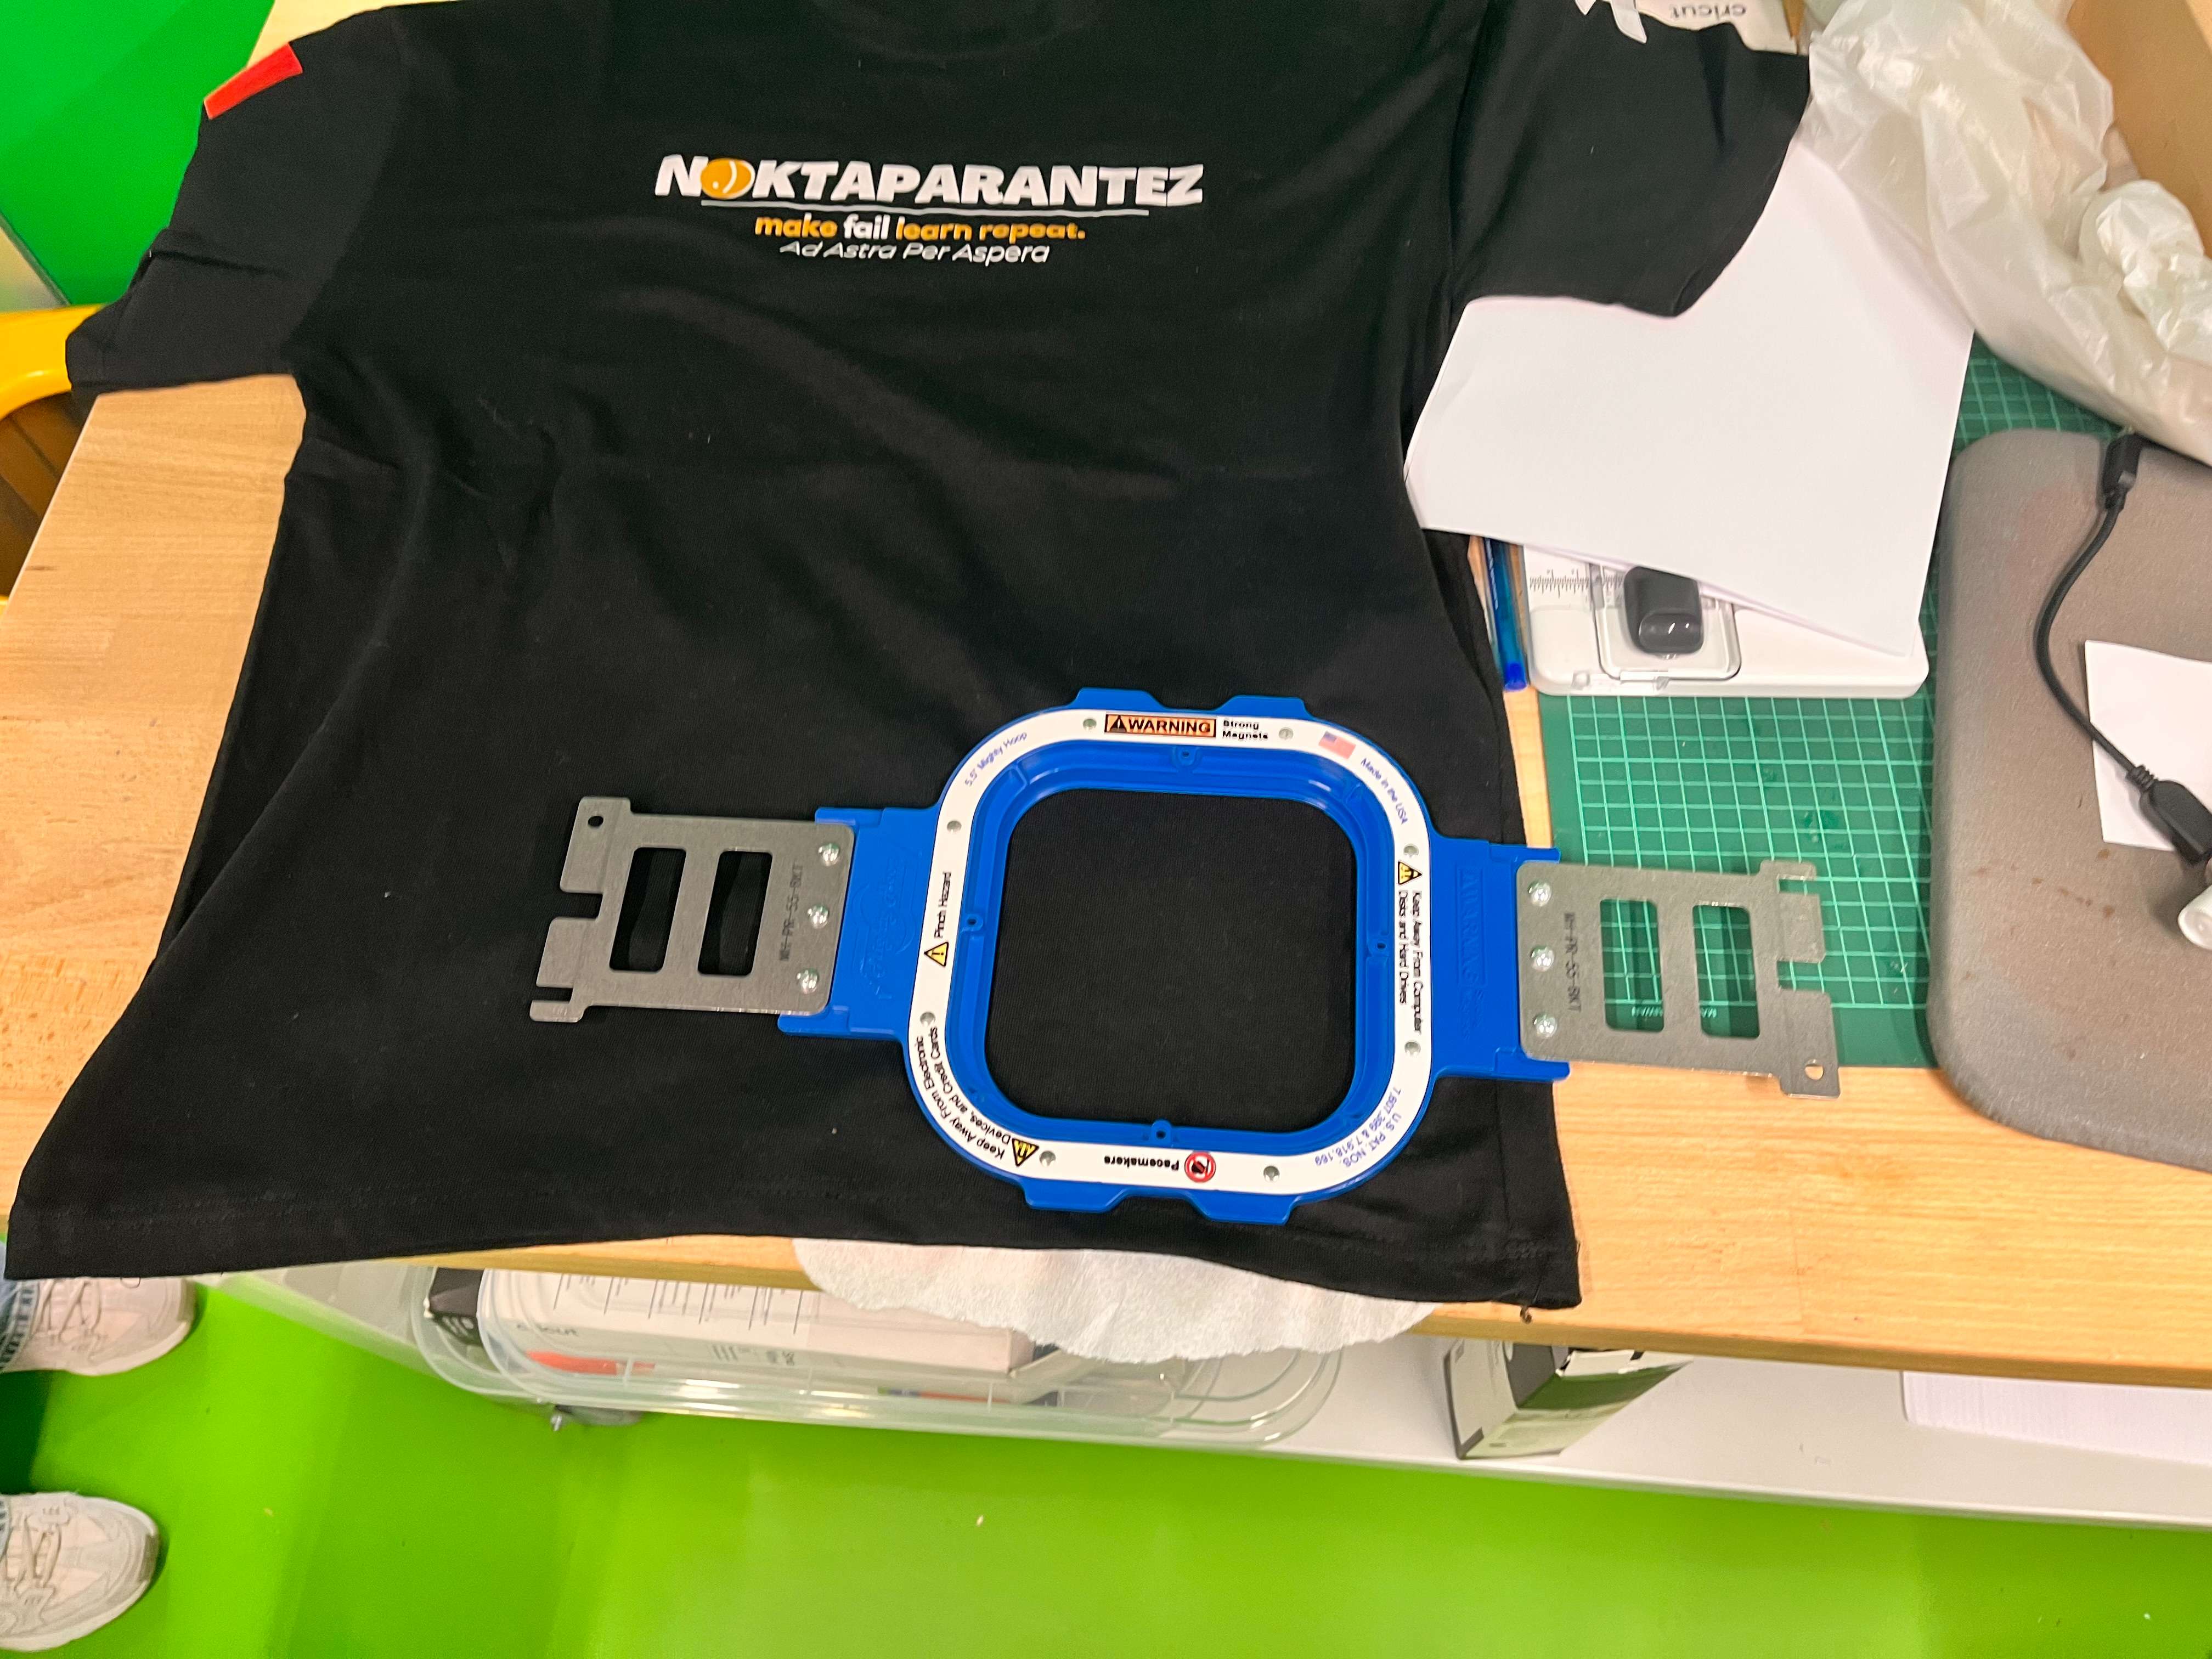
Now, I need to close the part that I want to stitch with the holders of the machine. There are also a few holder types, so you can choose it according to how big a design you want to do.
I cut down Felt Fabric(White Fabric), and put it over the first holder.

After that, I put that under the T-Shirt, and carefully put the other part on the top of the part that I put under the T-Shirt.
Here, you need be very careful because the magnets are very strong, so it will connect very rapidly, in which you can hurt your hands while it closes.
It will look like this when you are done. If the place isn’t good, you can remove the holder through the button under the Pacemakers warning sign. Or, you can try moving the T-Shirt too like it worked slighty for me, so for minimal changes you can do that.
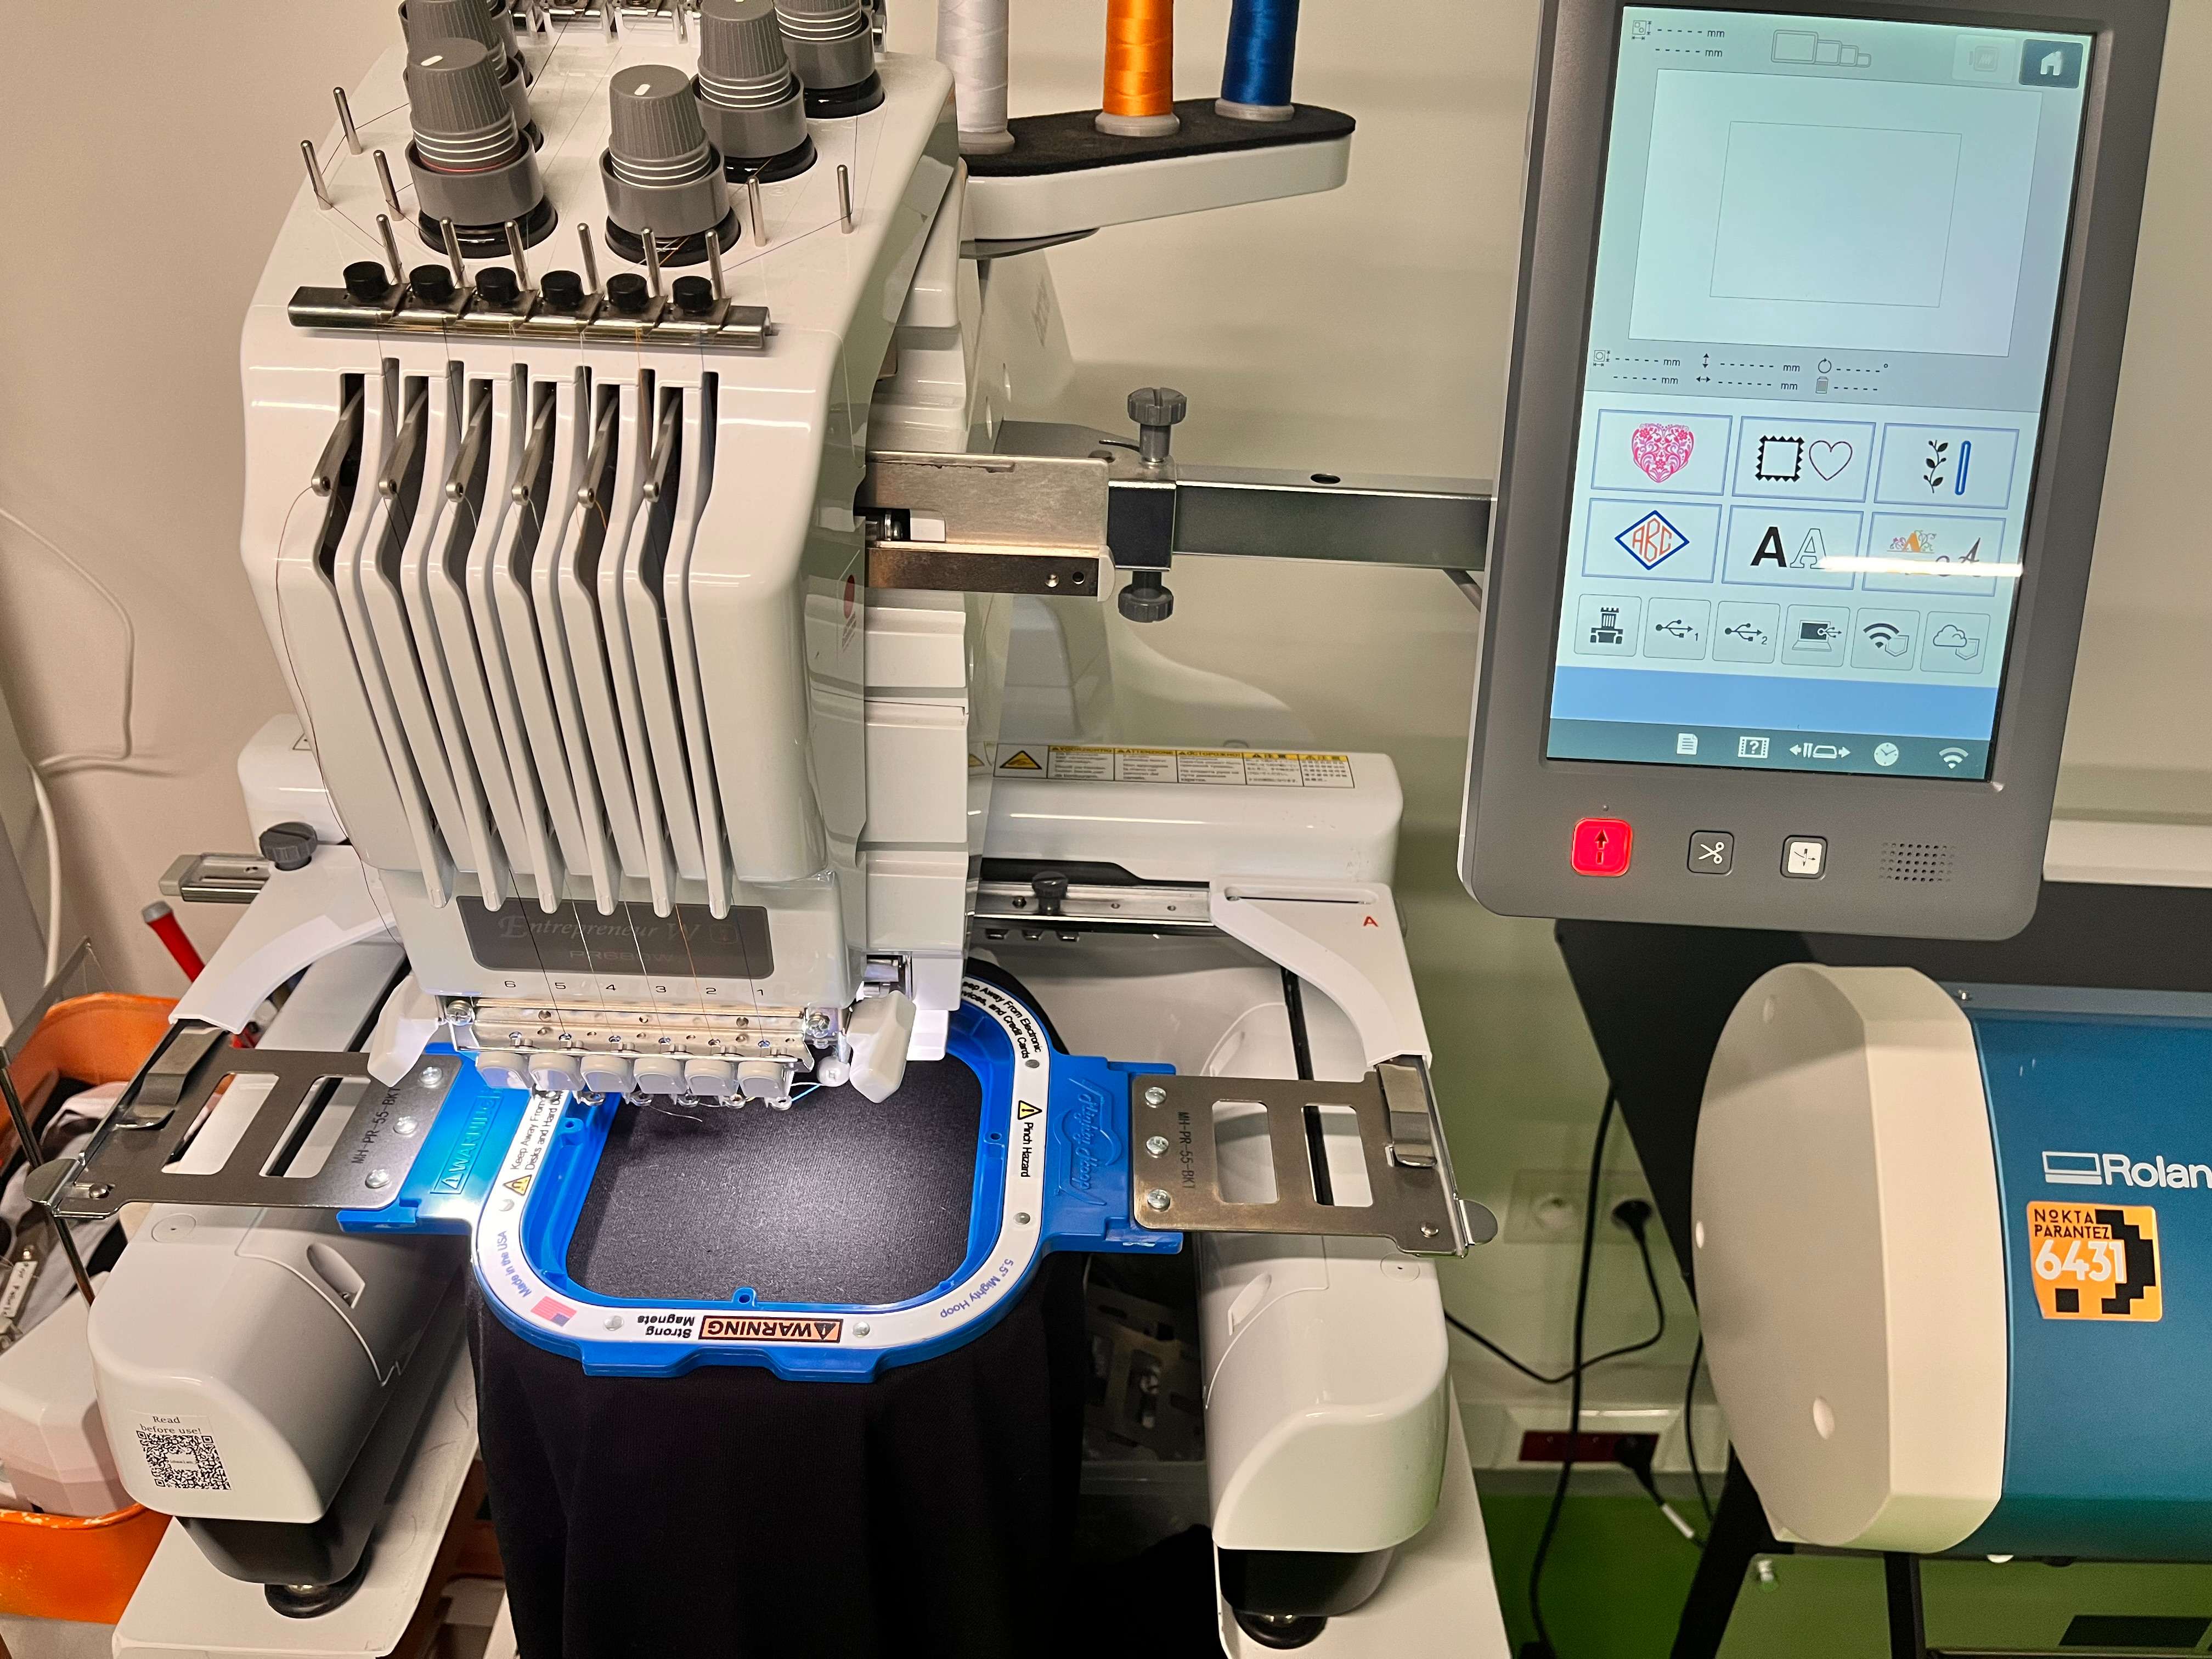
After that, place the holder magnet into the machine. You should slowly put it under the clamps on each side. And, when you push it enough, it will fit automatically on the circles on each corner.
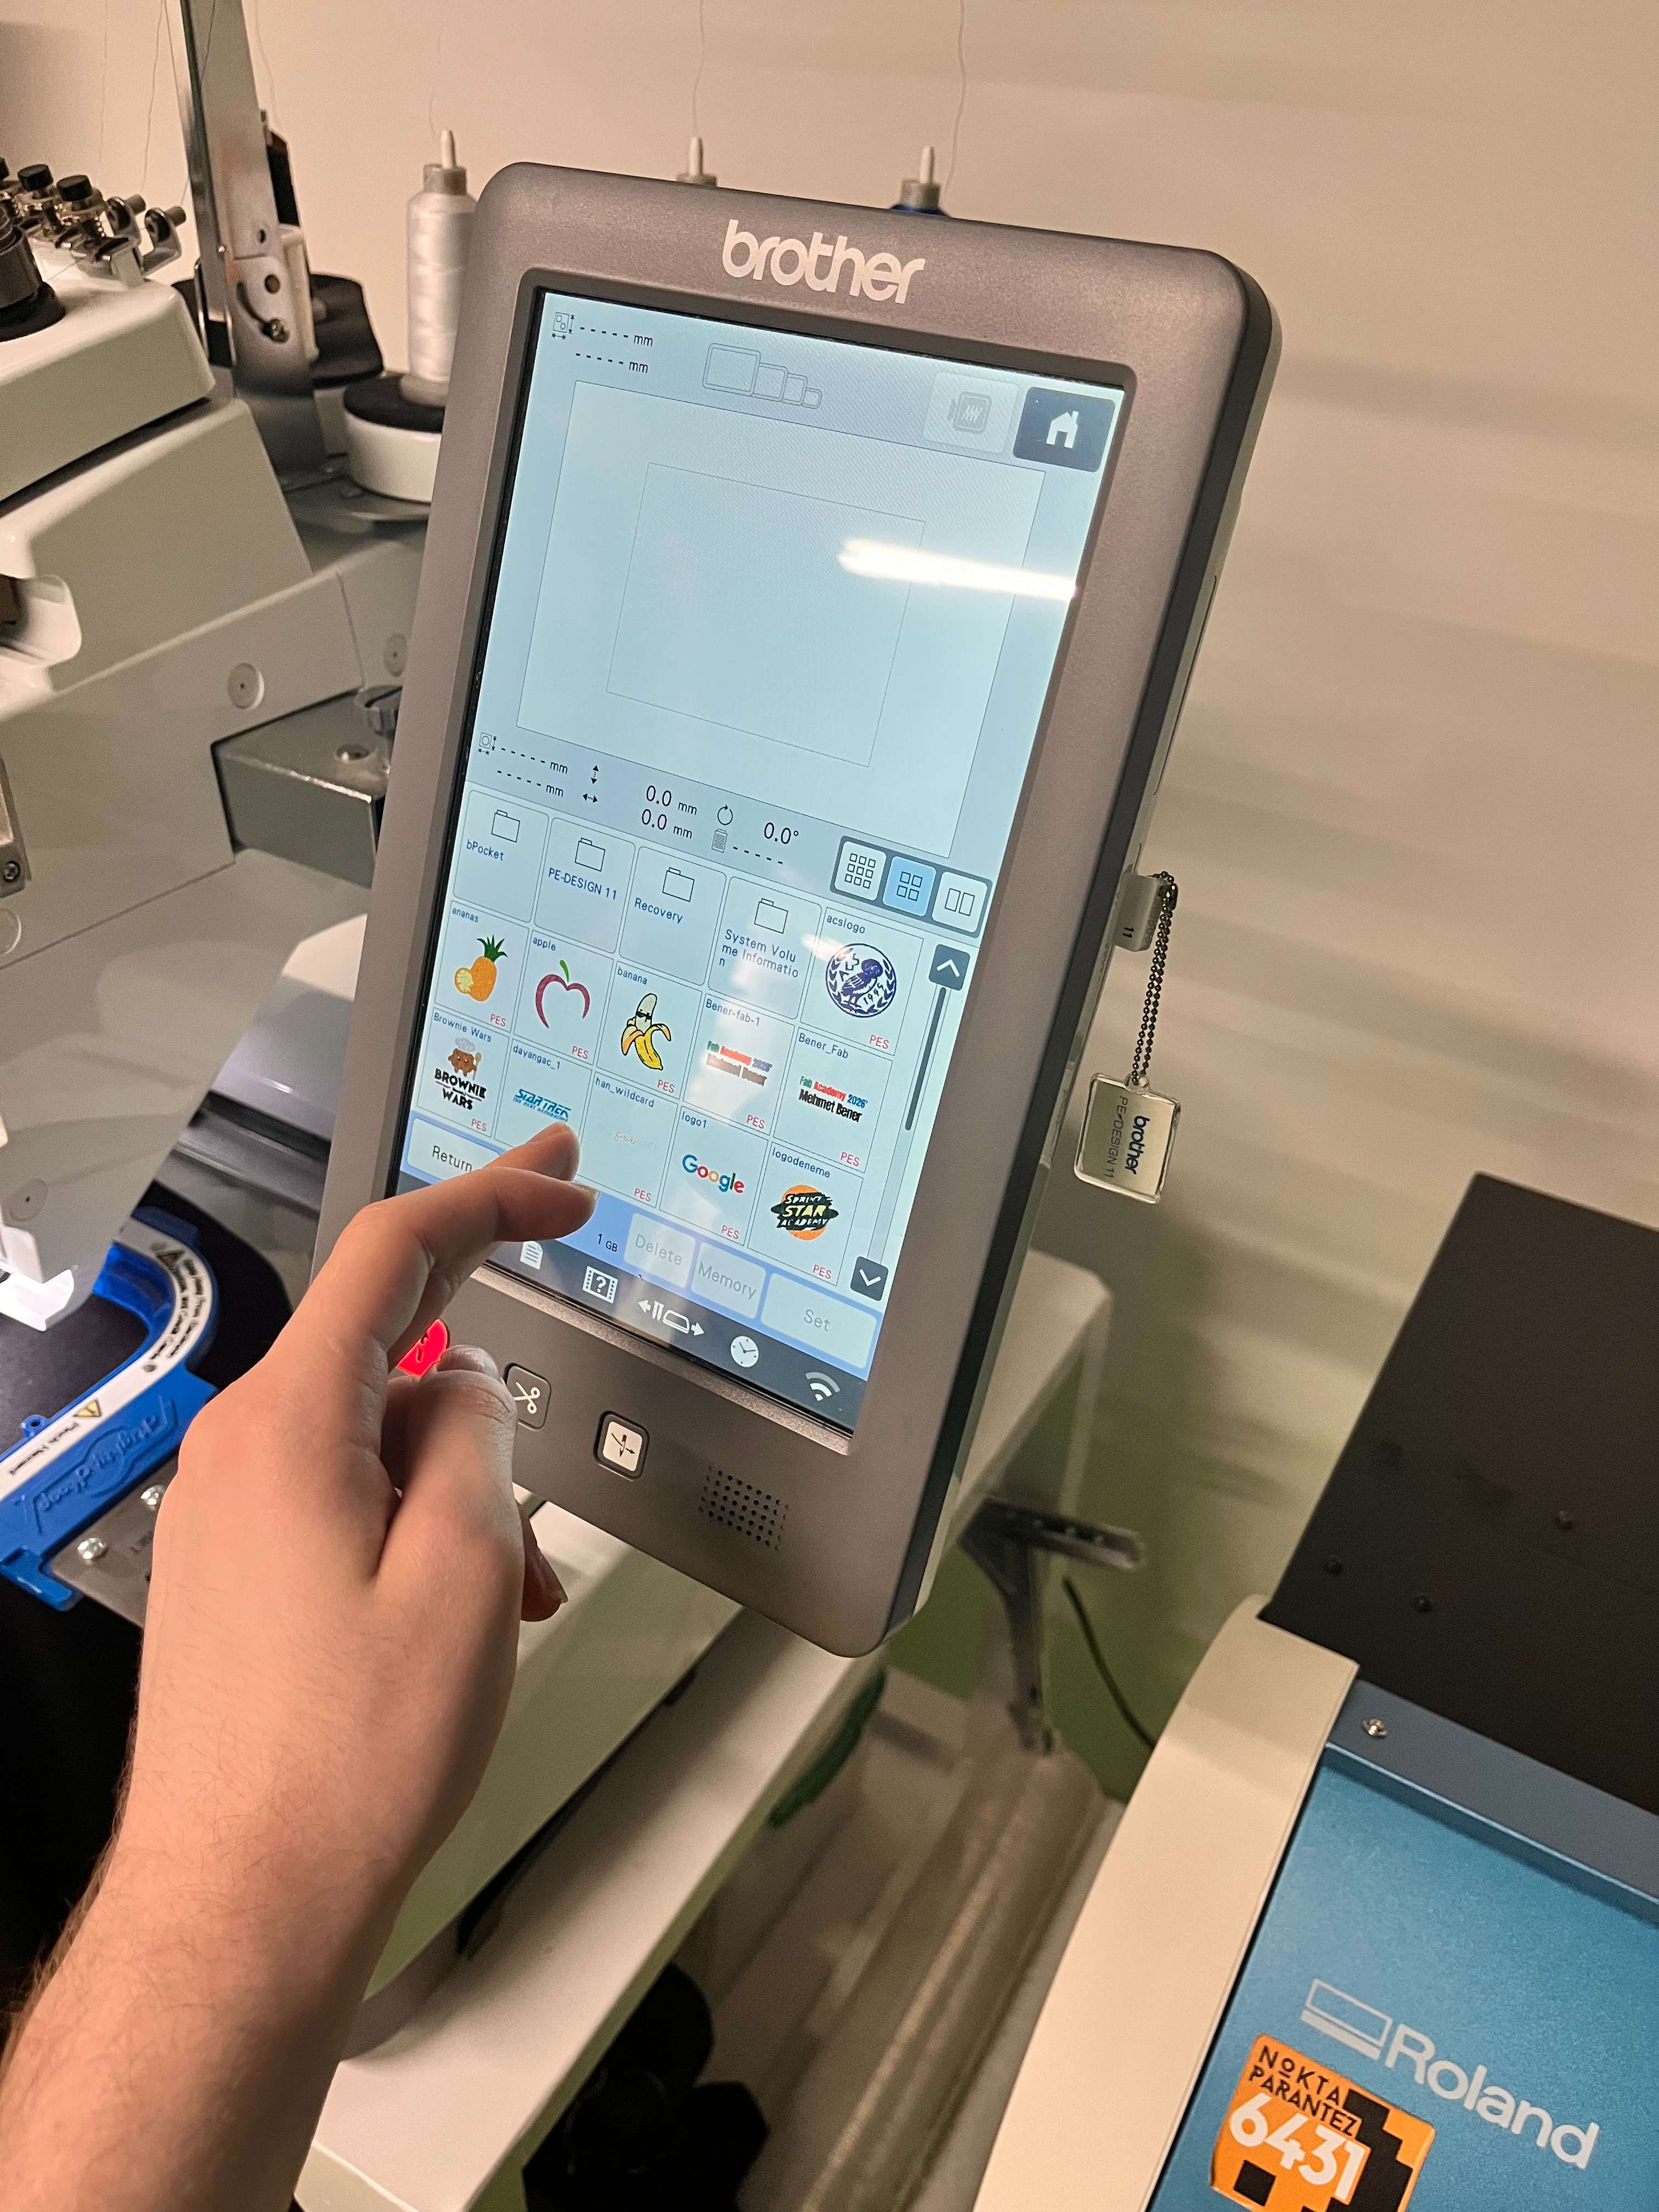
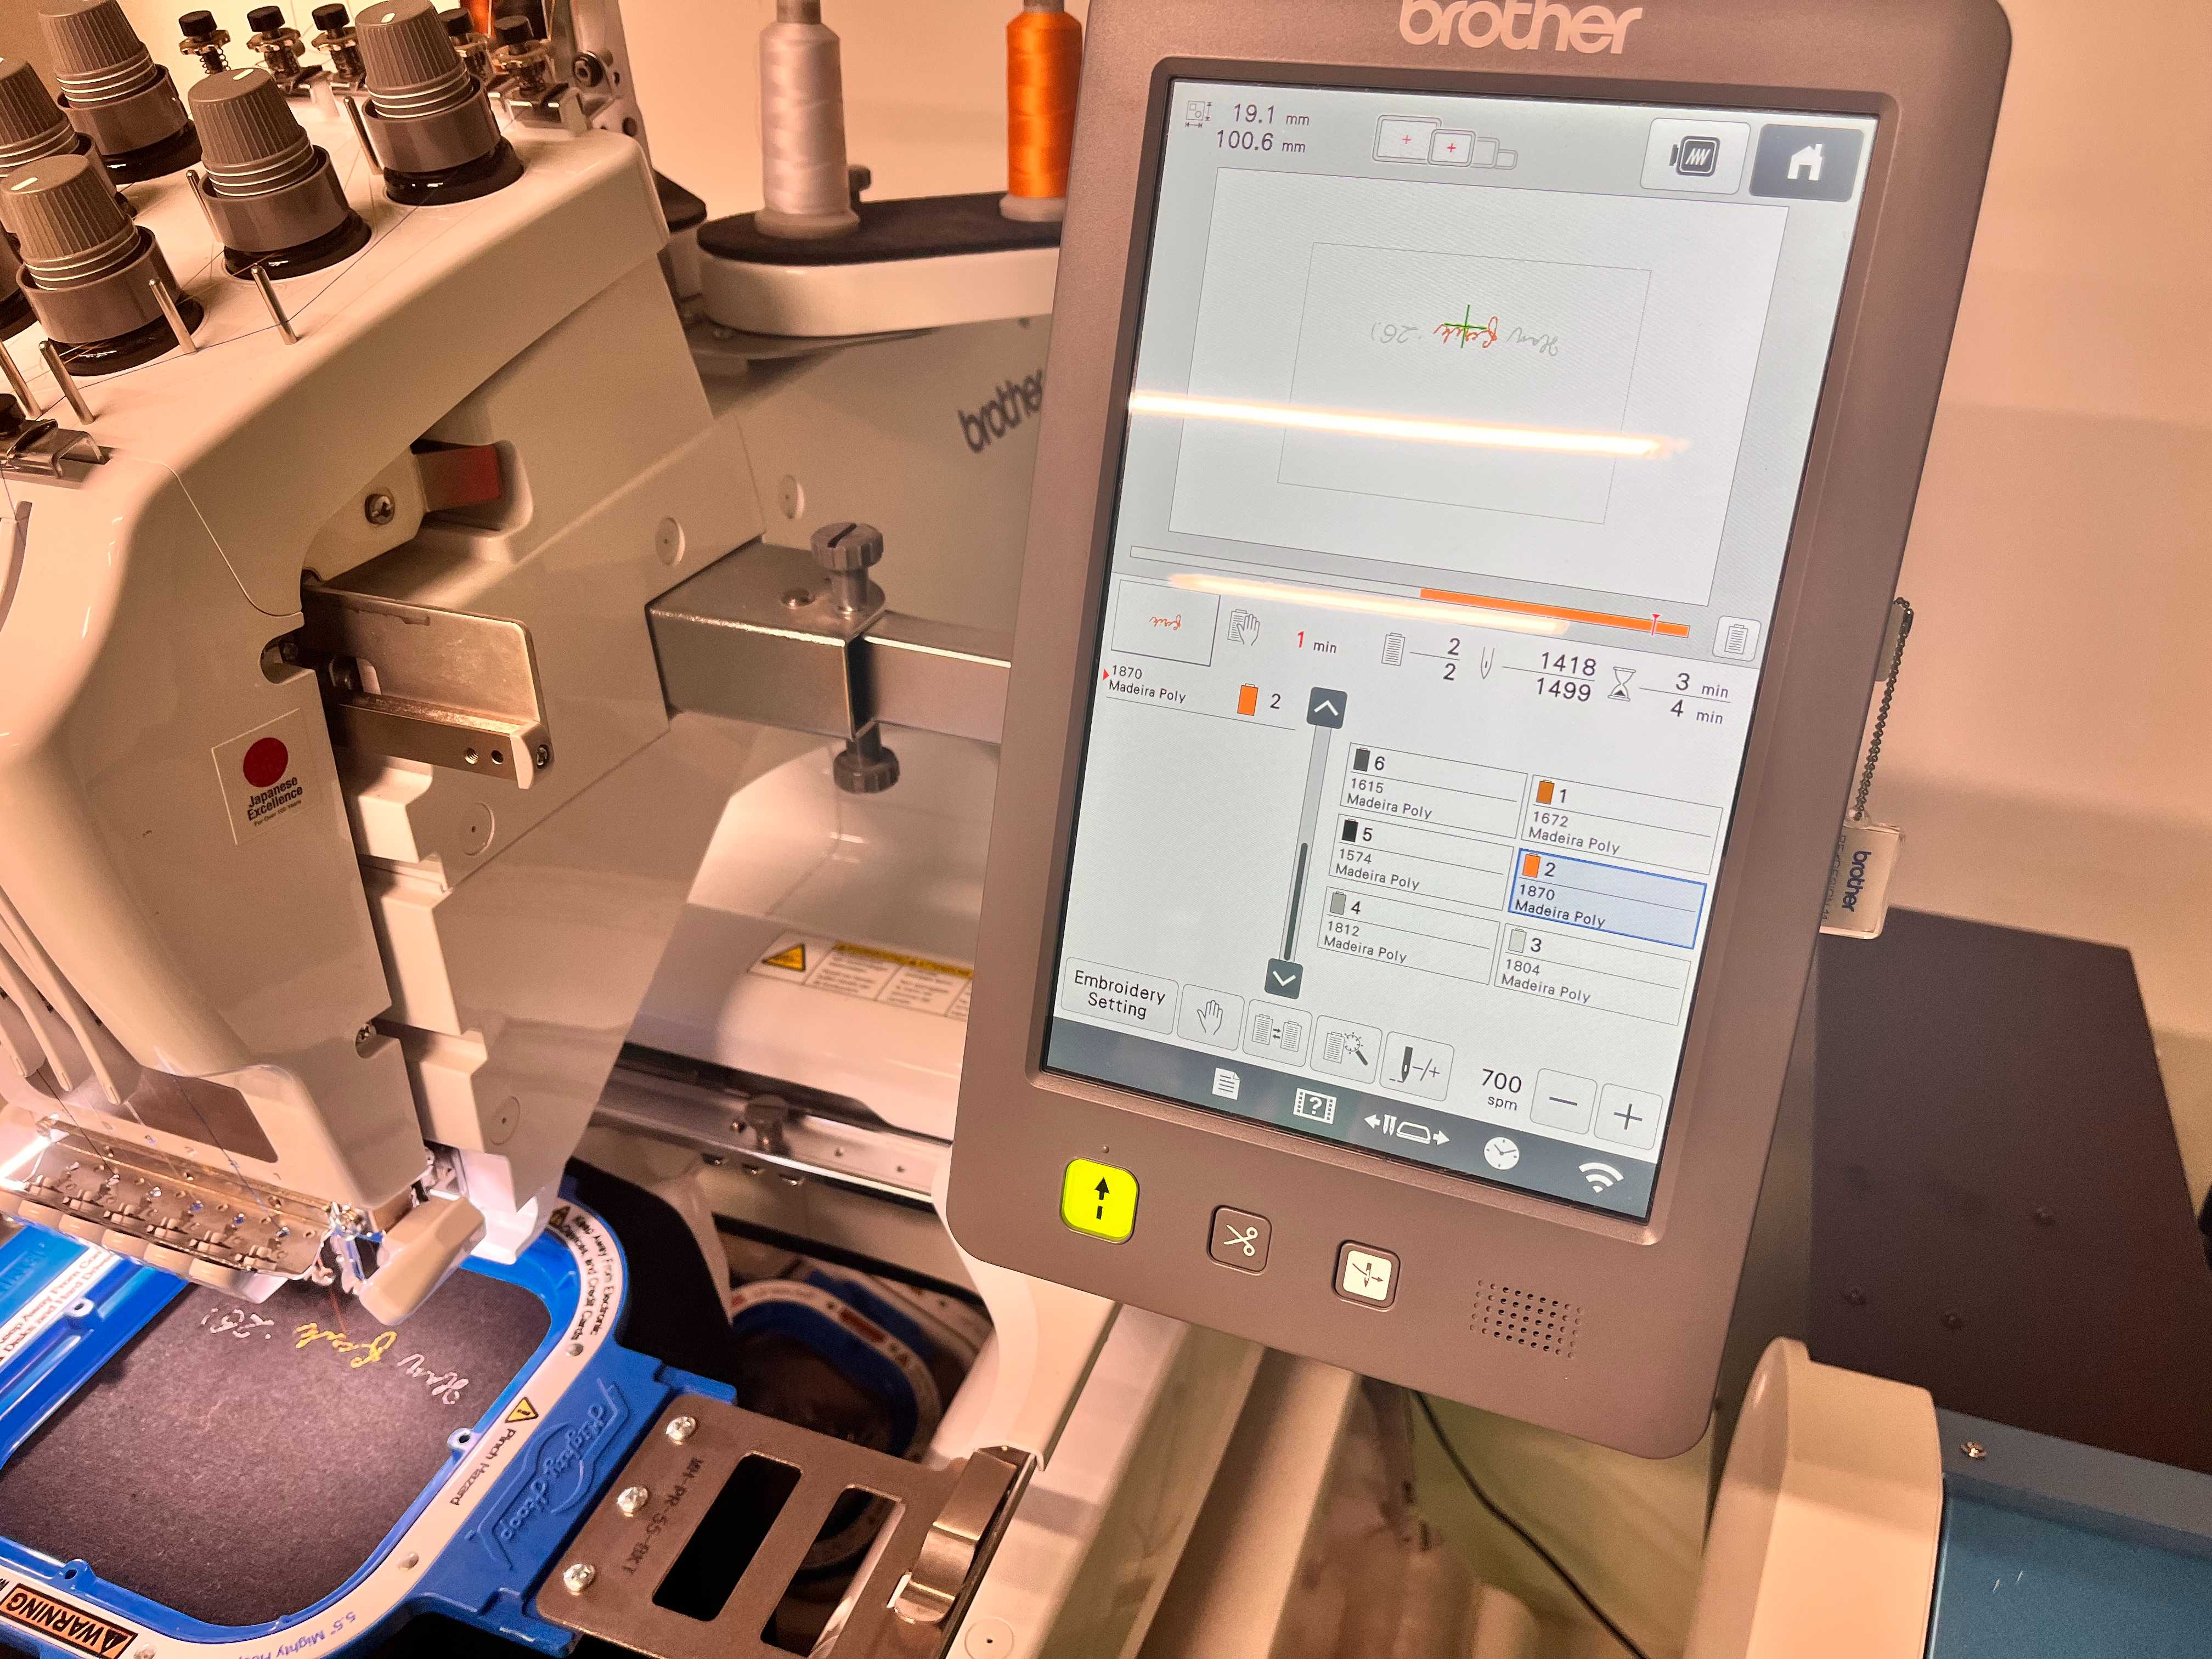
Click on the USB stick sign, which is the first sign.
And, choose the image that you want to stitch between your images.
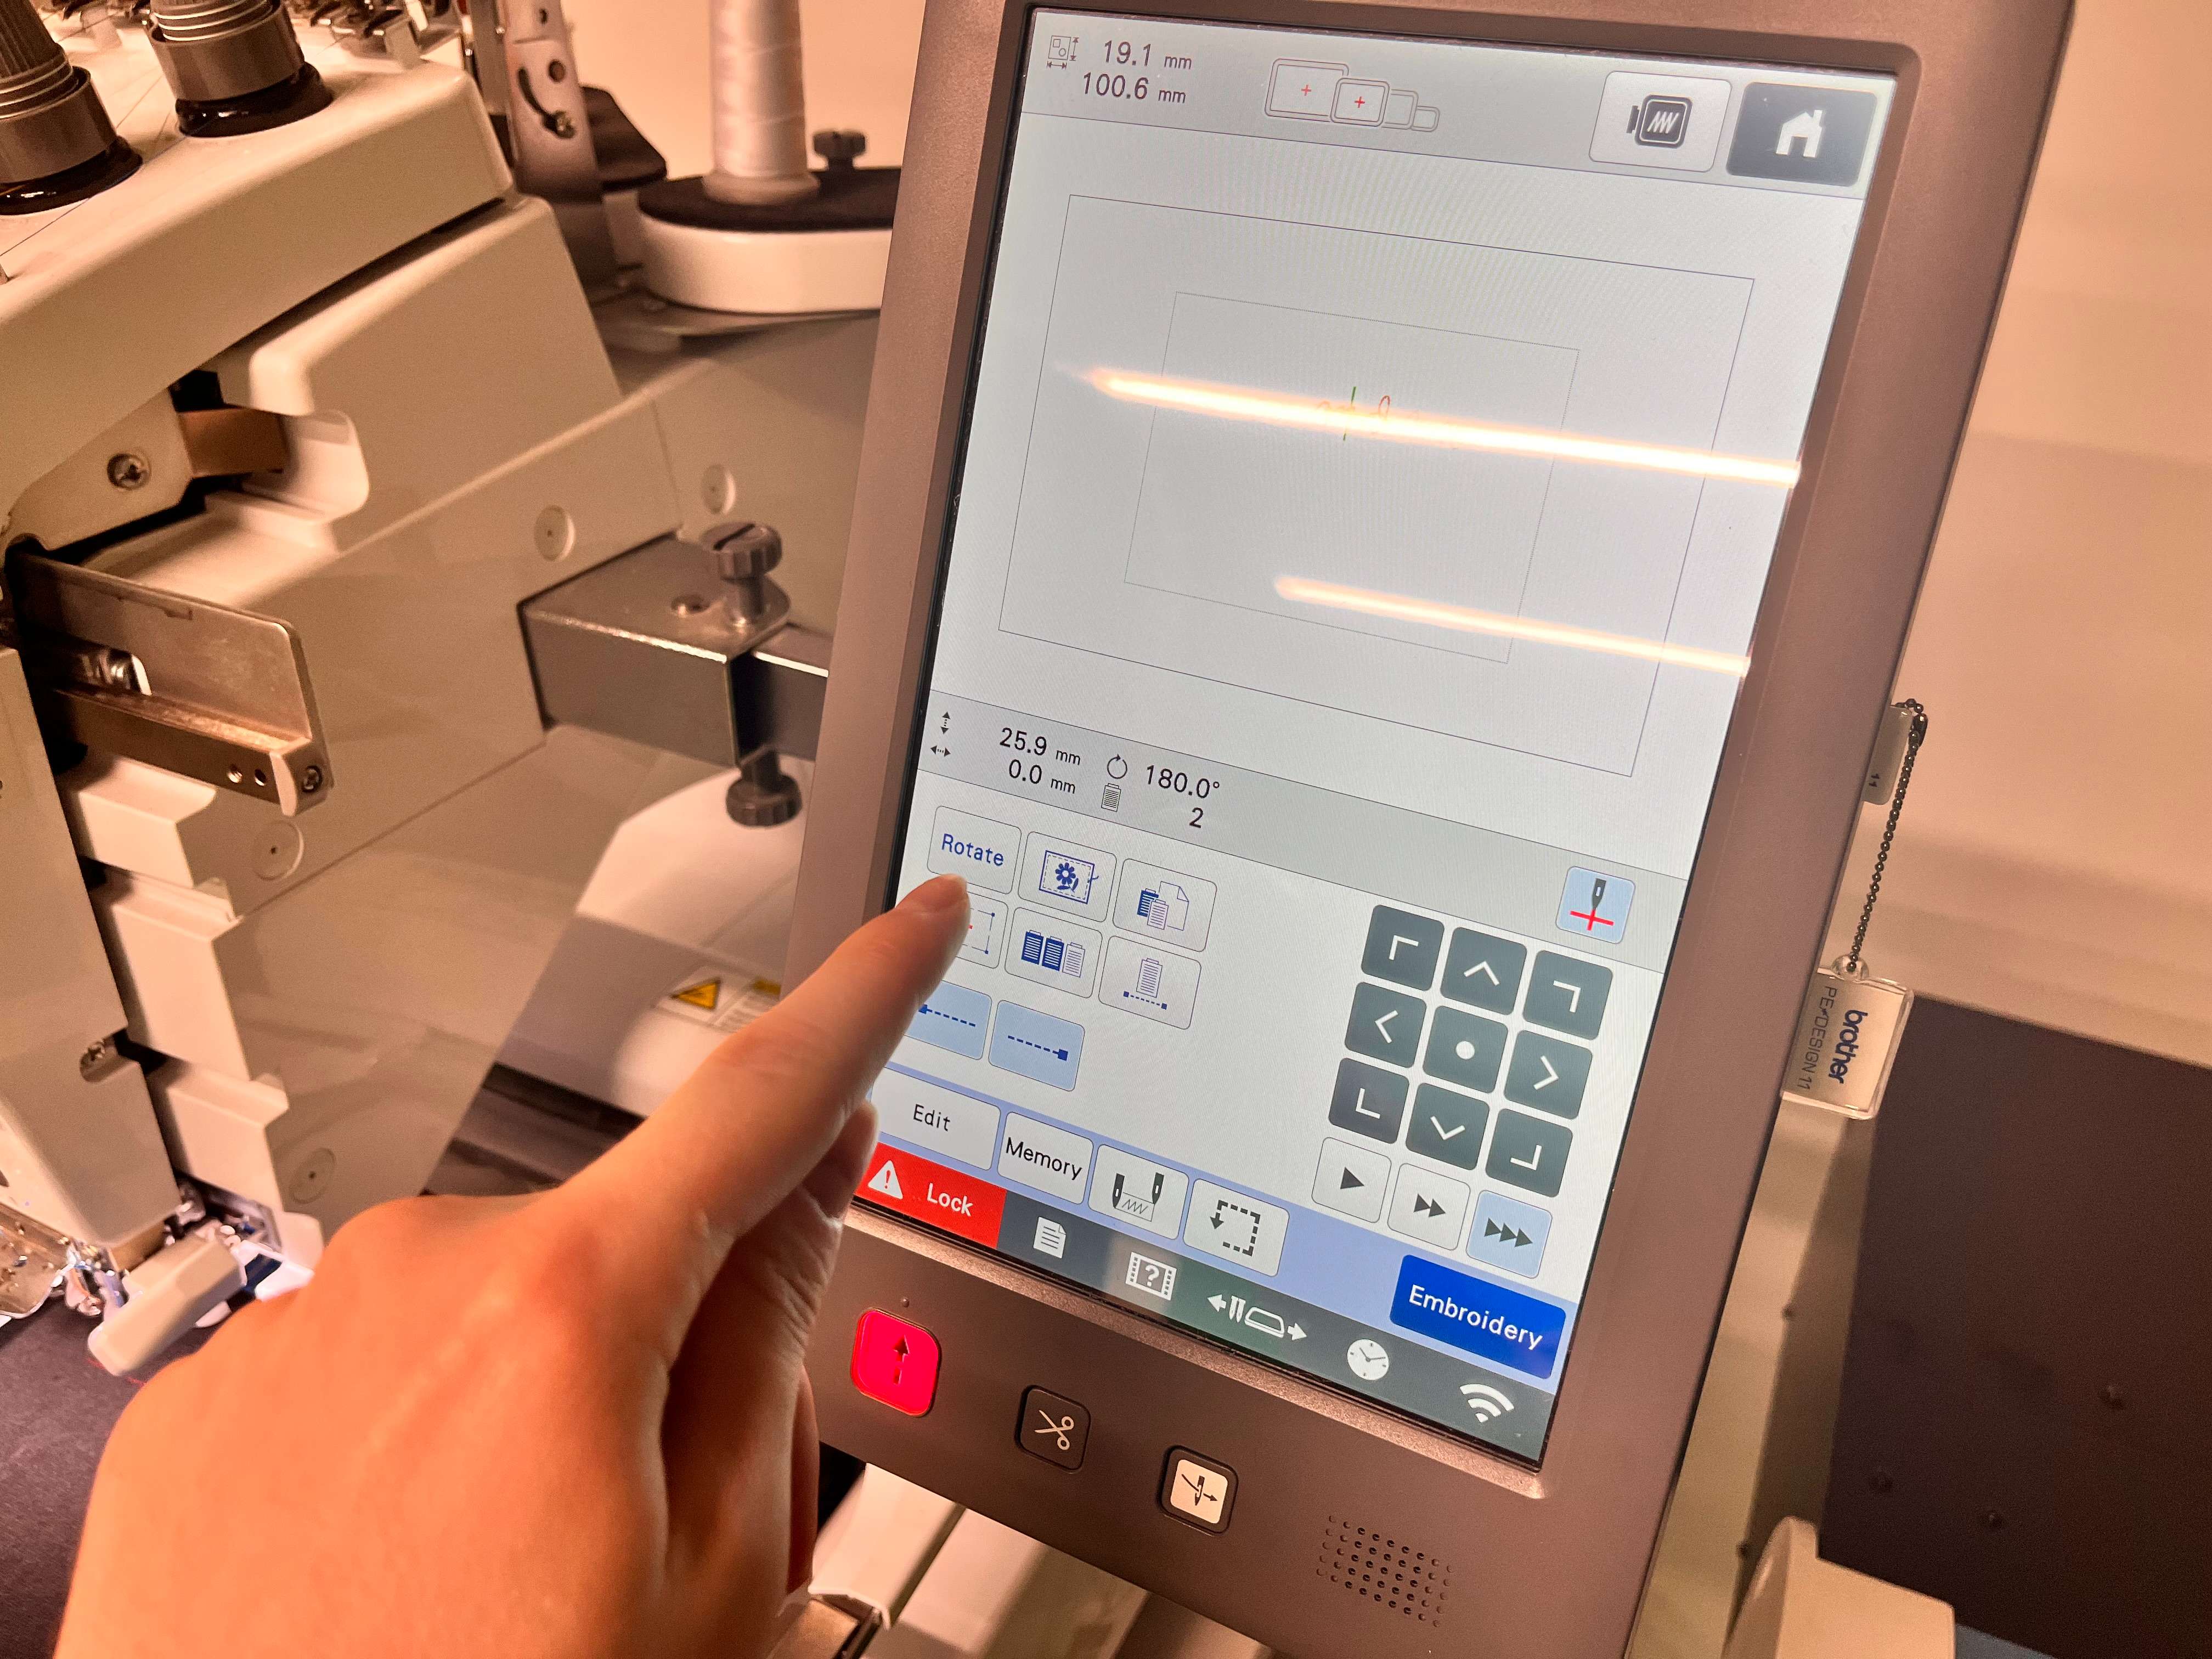
I framed my design by using the squareish arrow sign, which would show whether my design would exceed the area that it given to it, or not. It will be shown with a laser on the holder. I will turn around showing the space your design would use. Therefore, if it exceeds, or too small, or doesn’t fit etc., you can just resize it.
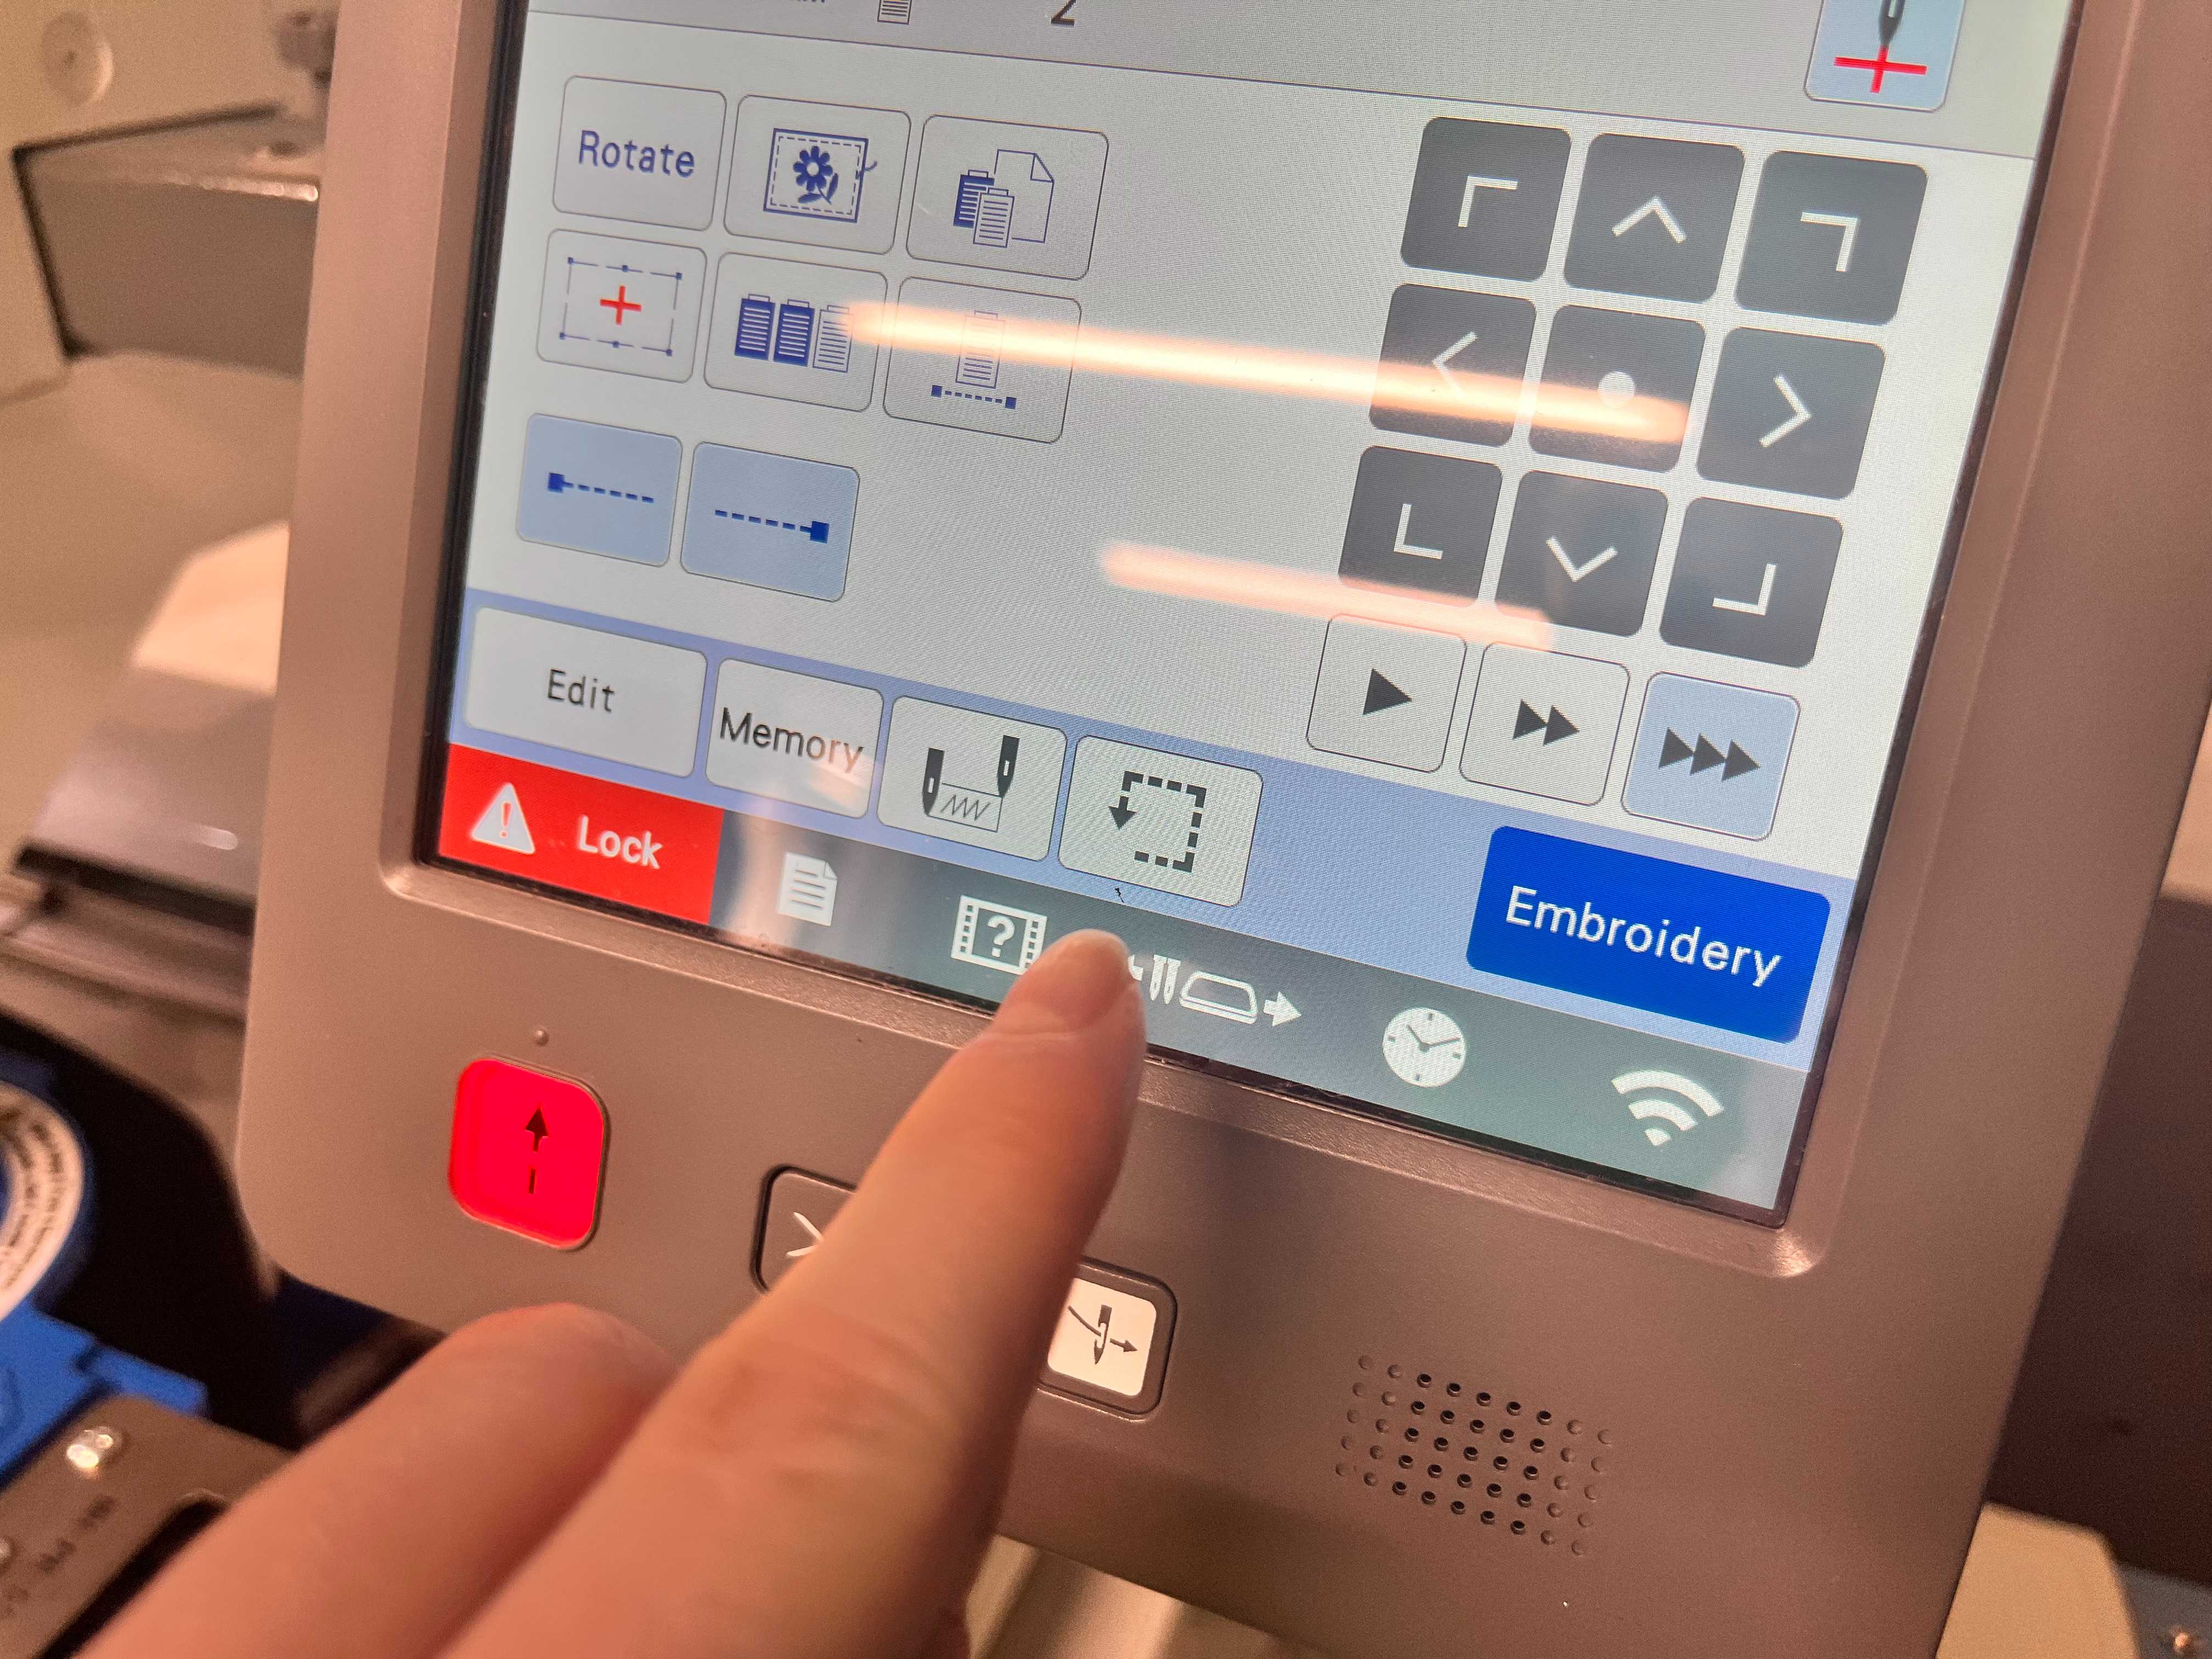
I also moved my design a little upwards through the arrow signs.
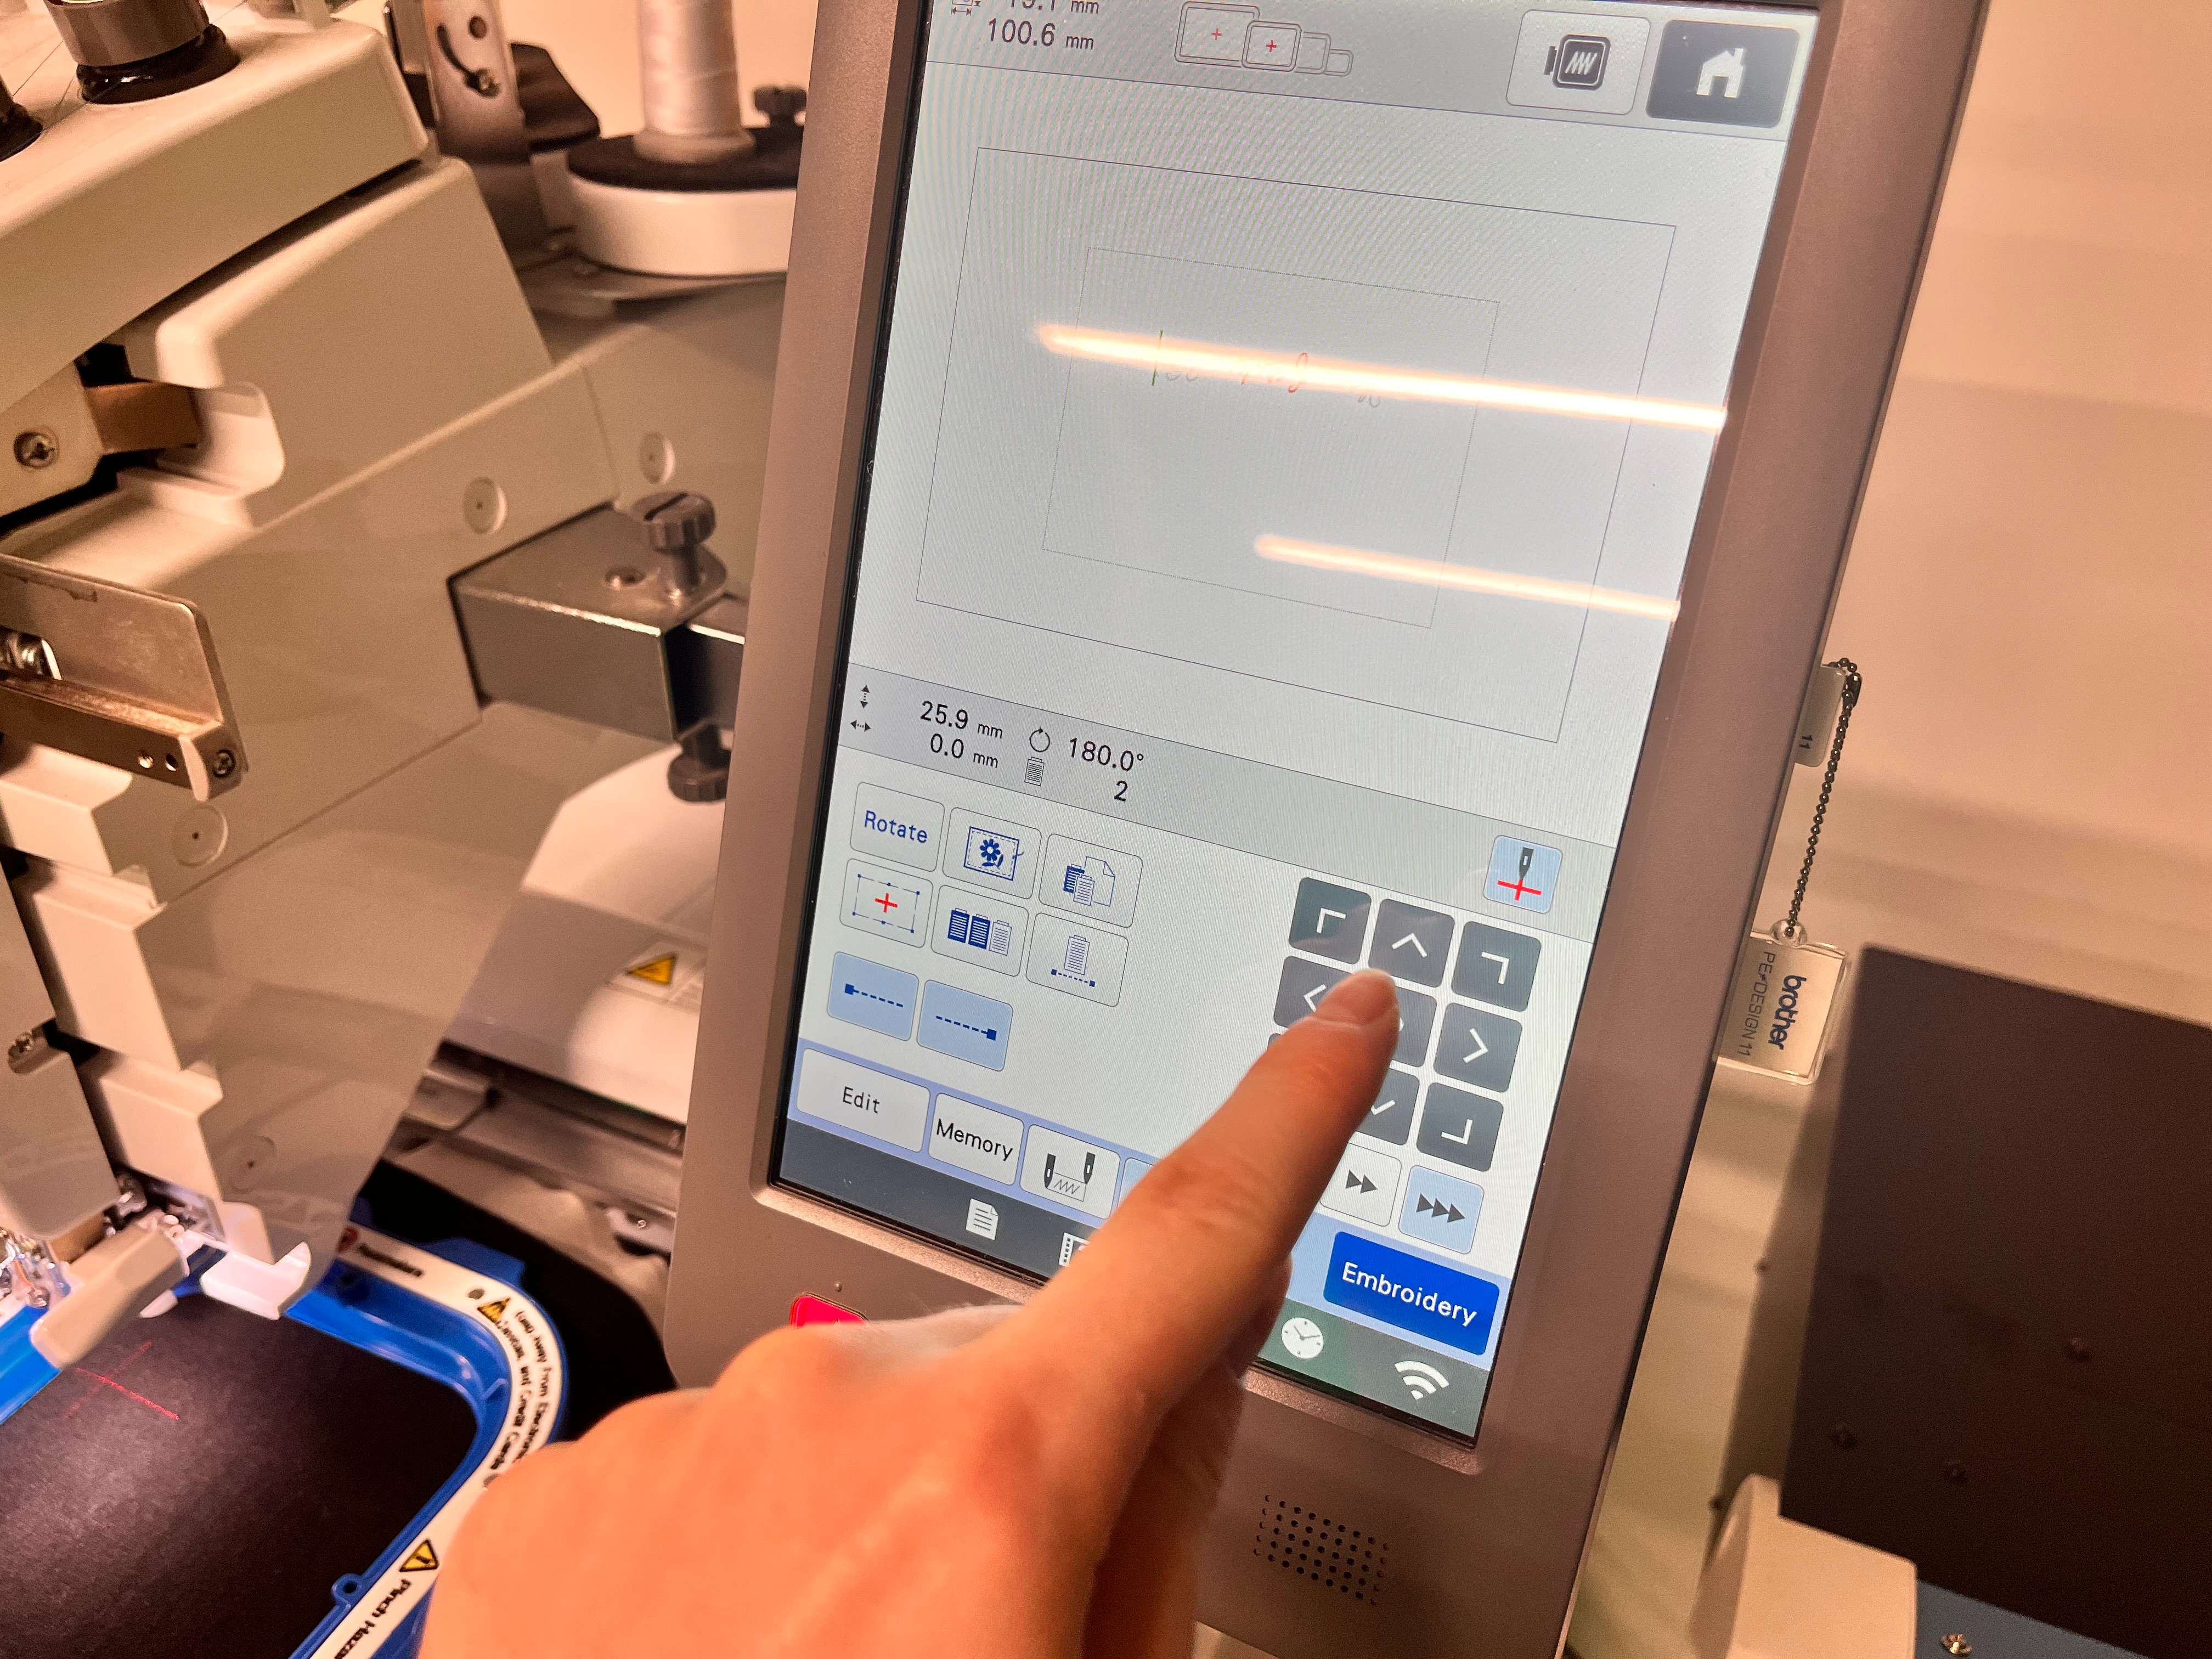
Also, since I put the T-Shirt in a inverted shape, I rotated the design through the rotate button.
After that, click Embroidery.
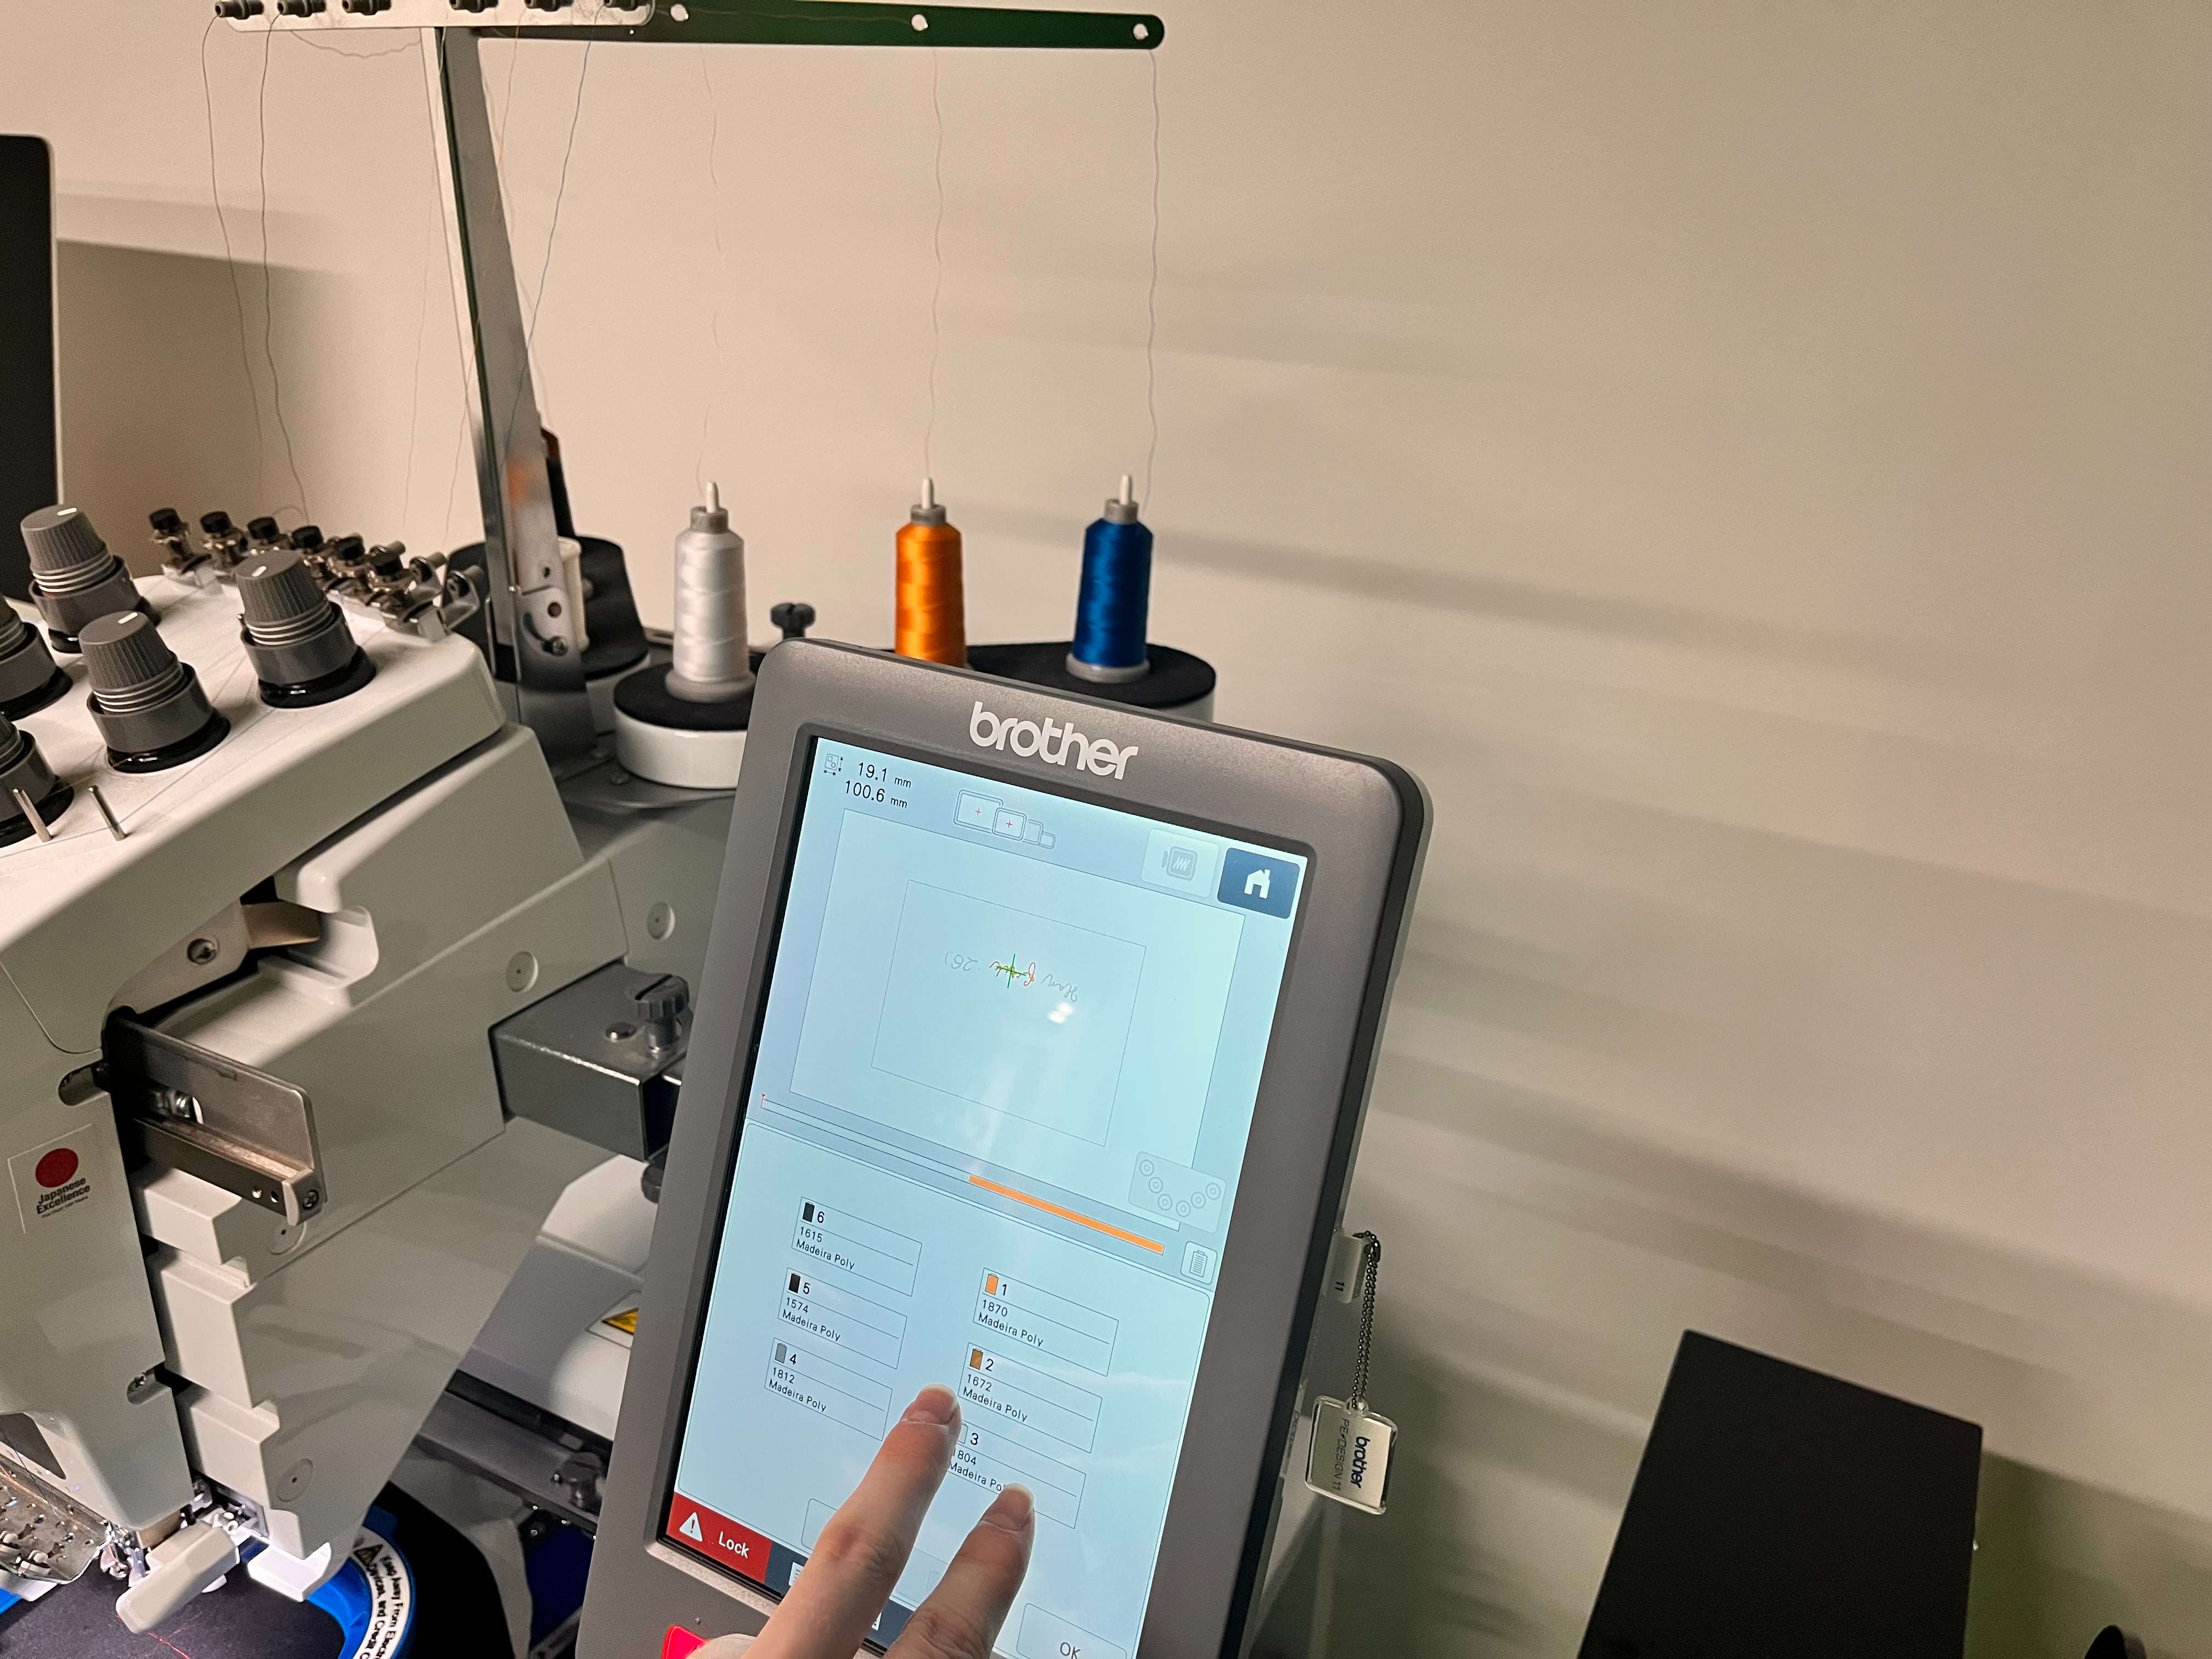
Now, you need to select the threads that you are going to use. This goes from 1 to 6 from right to left, respectively. So on the photo, the blue one is 1, and it goes on like that. Since my design is orange and white, I chose 2 and 3.
The Machine might show different color than your threads used, so be careful on which threads you are using. E.g., my first thread is blue, but the machine shows orange for that thread.
When you are done, click OK.
Finally, click Lock
And, the red button under the screen, which is also under the Lock. It will also light as green when you click to Lock.
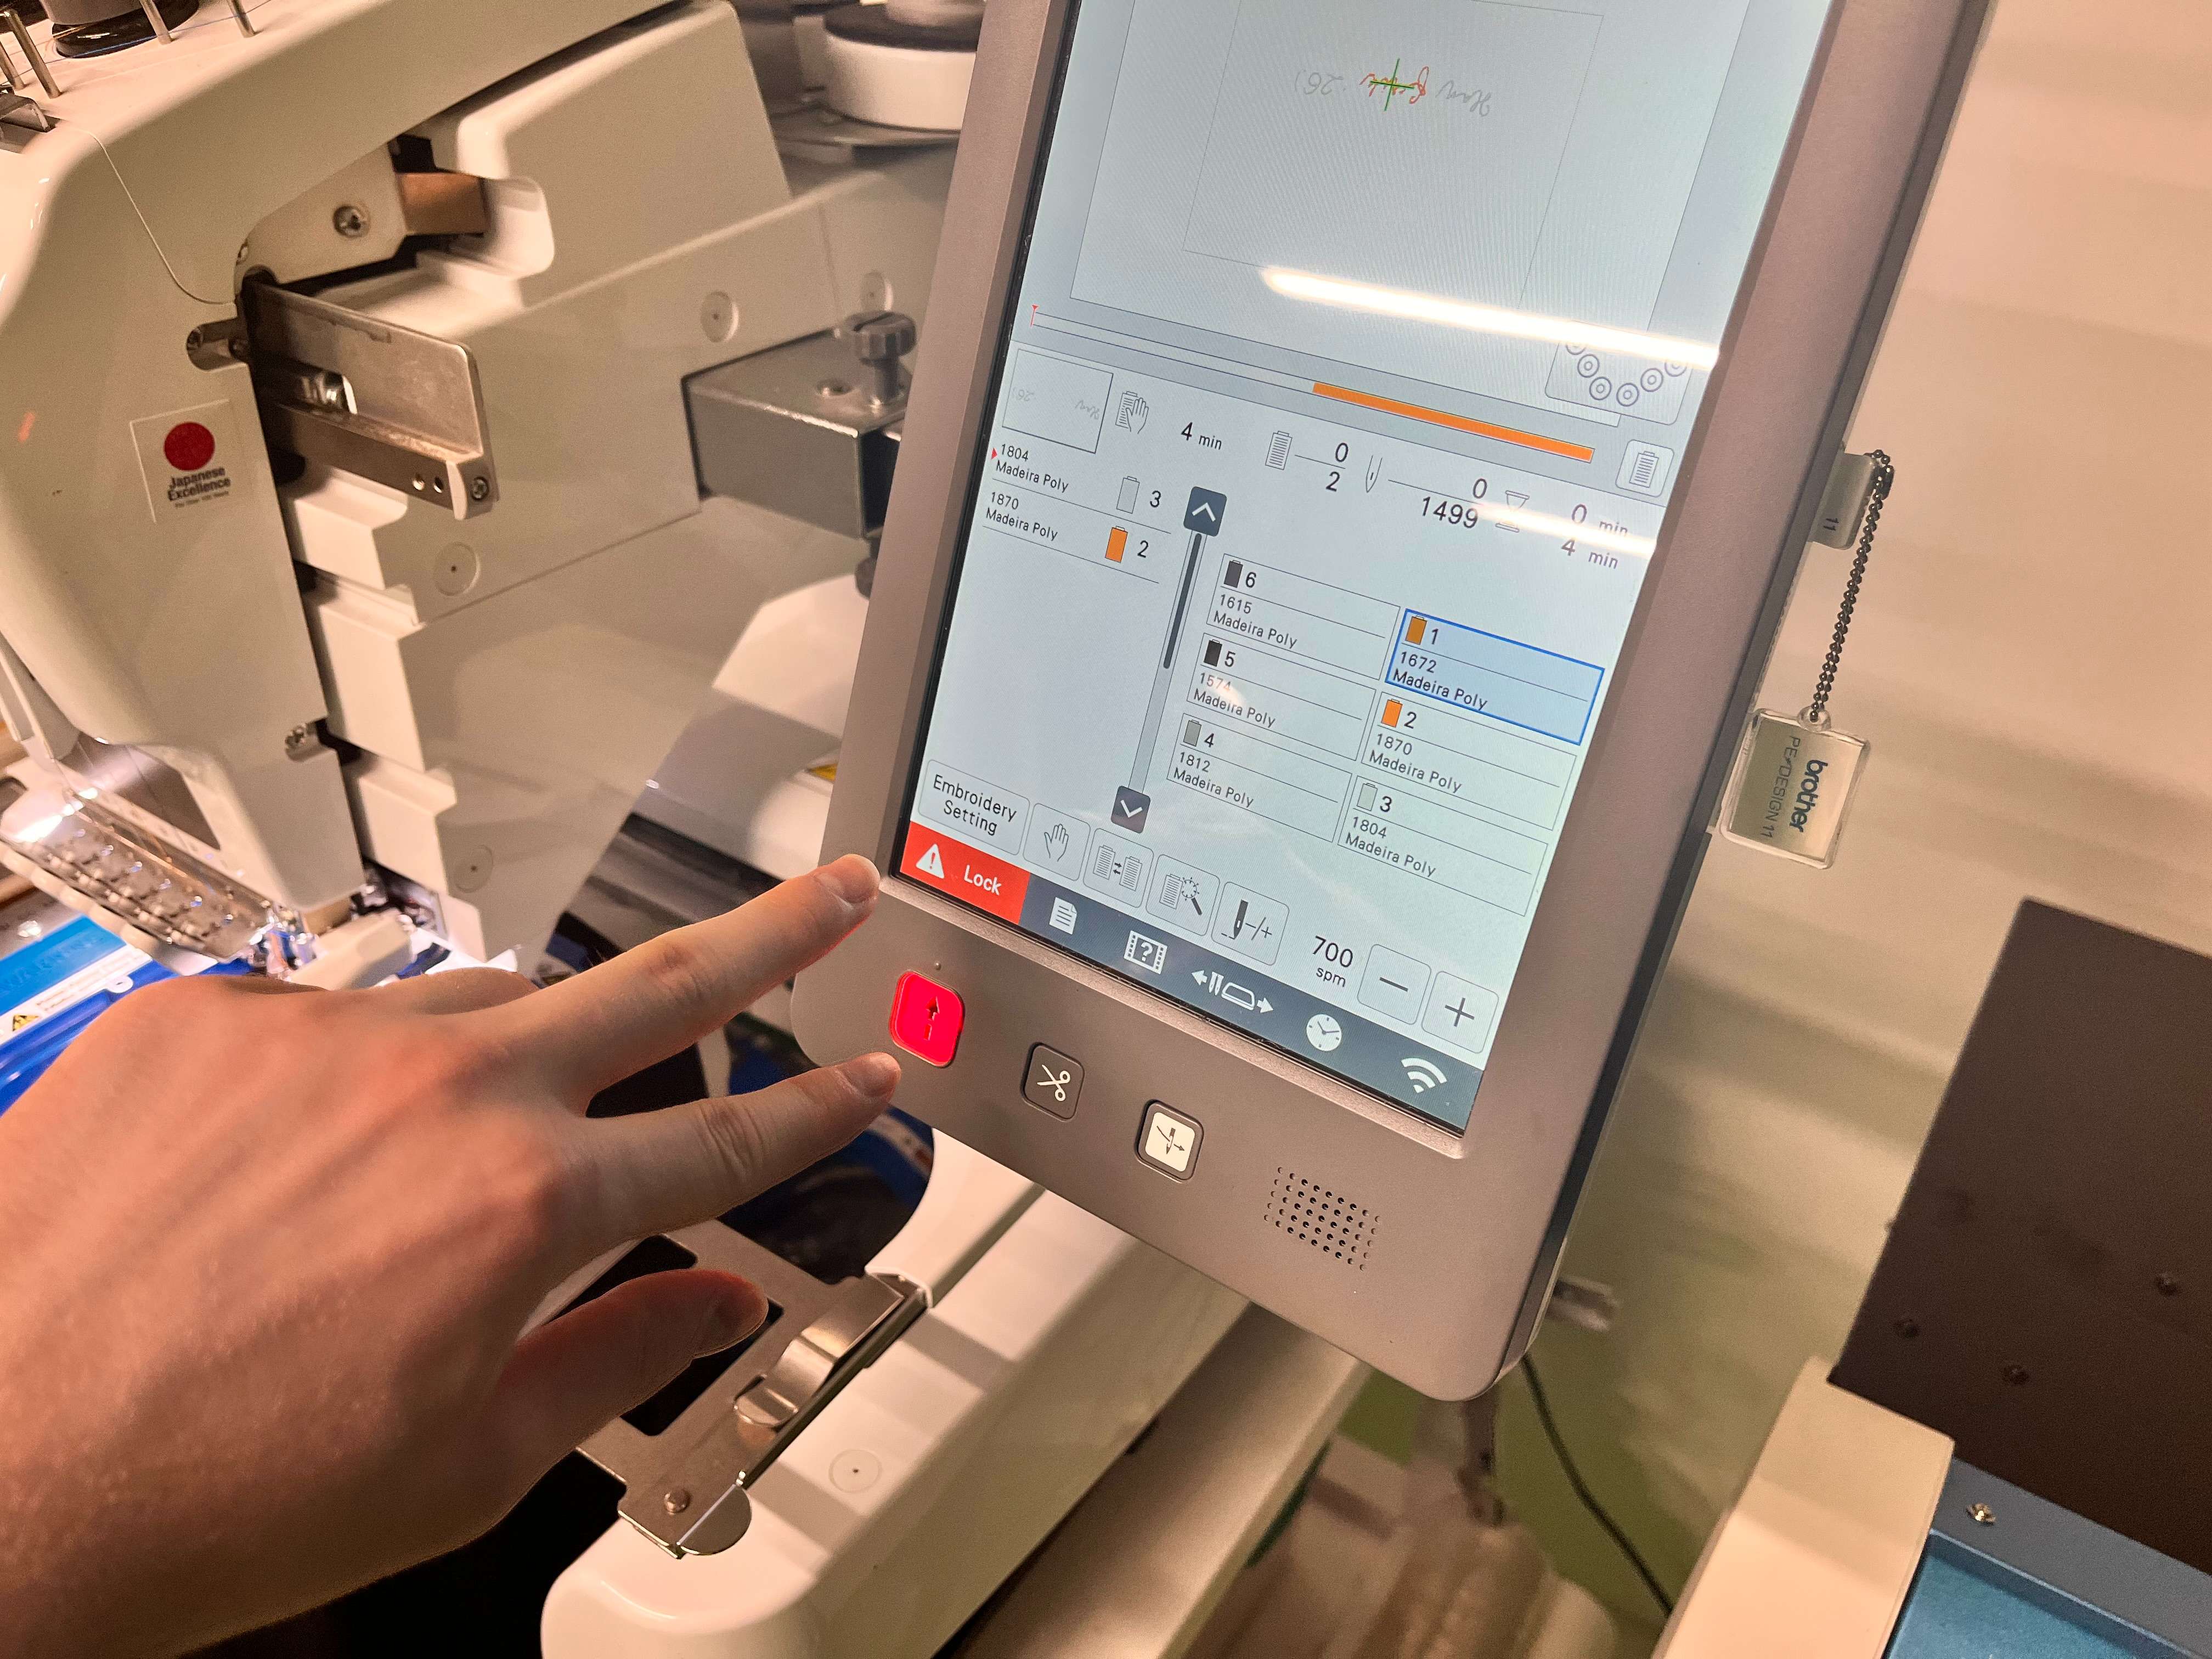
The machine will start after that.
This is a video of machine working.
The machine will also show its work progress on its screen such as how much time left and how many stitches left.
When you are done, remove the tray, and go to home page. After, that close your machine.
Later remove your product from its holders.
While doing that you need to tear the Felt Fabric.
Becareful to not to pull it hard, and if you can, just cut it with a scissor.
It will look like this when you tear it.
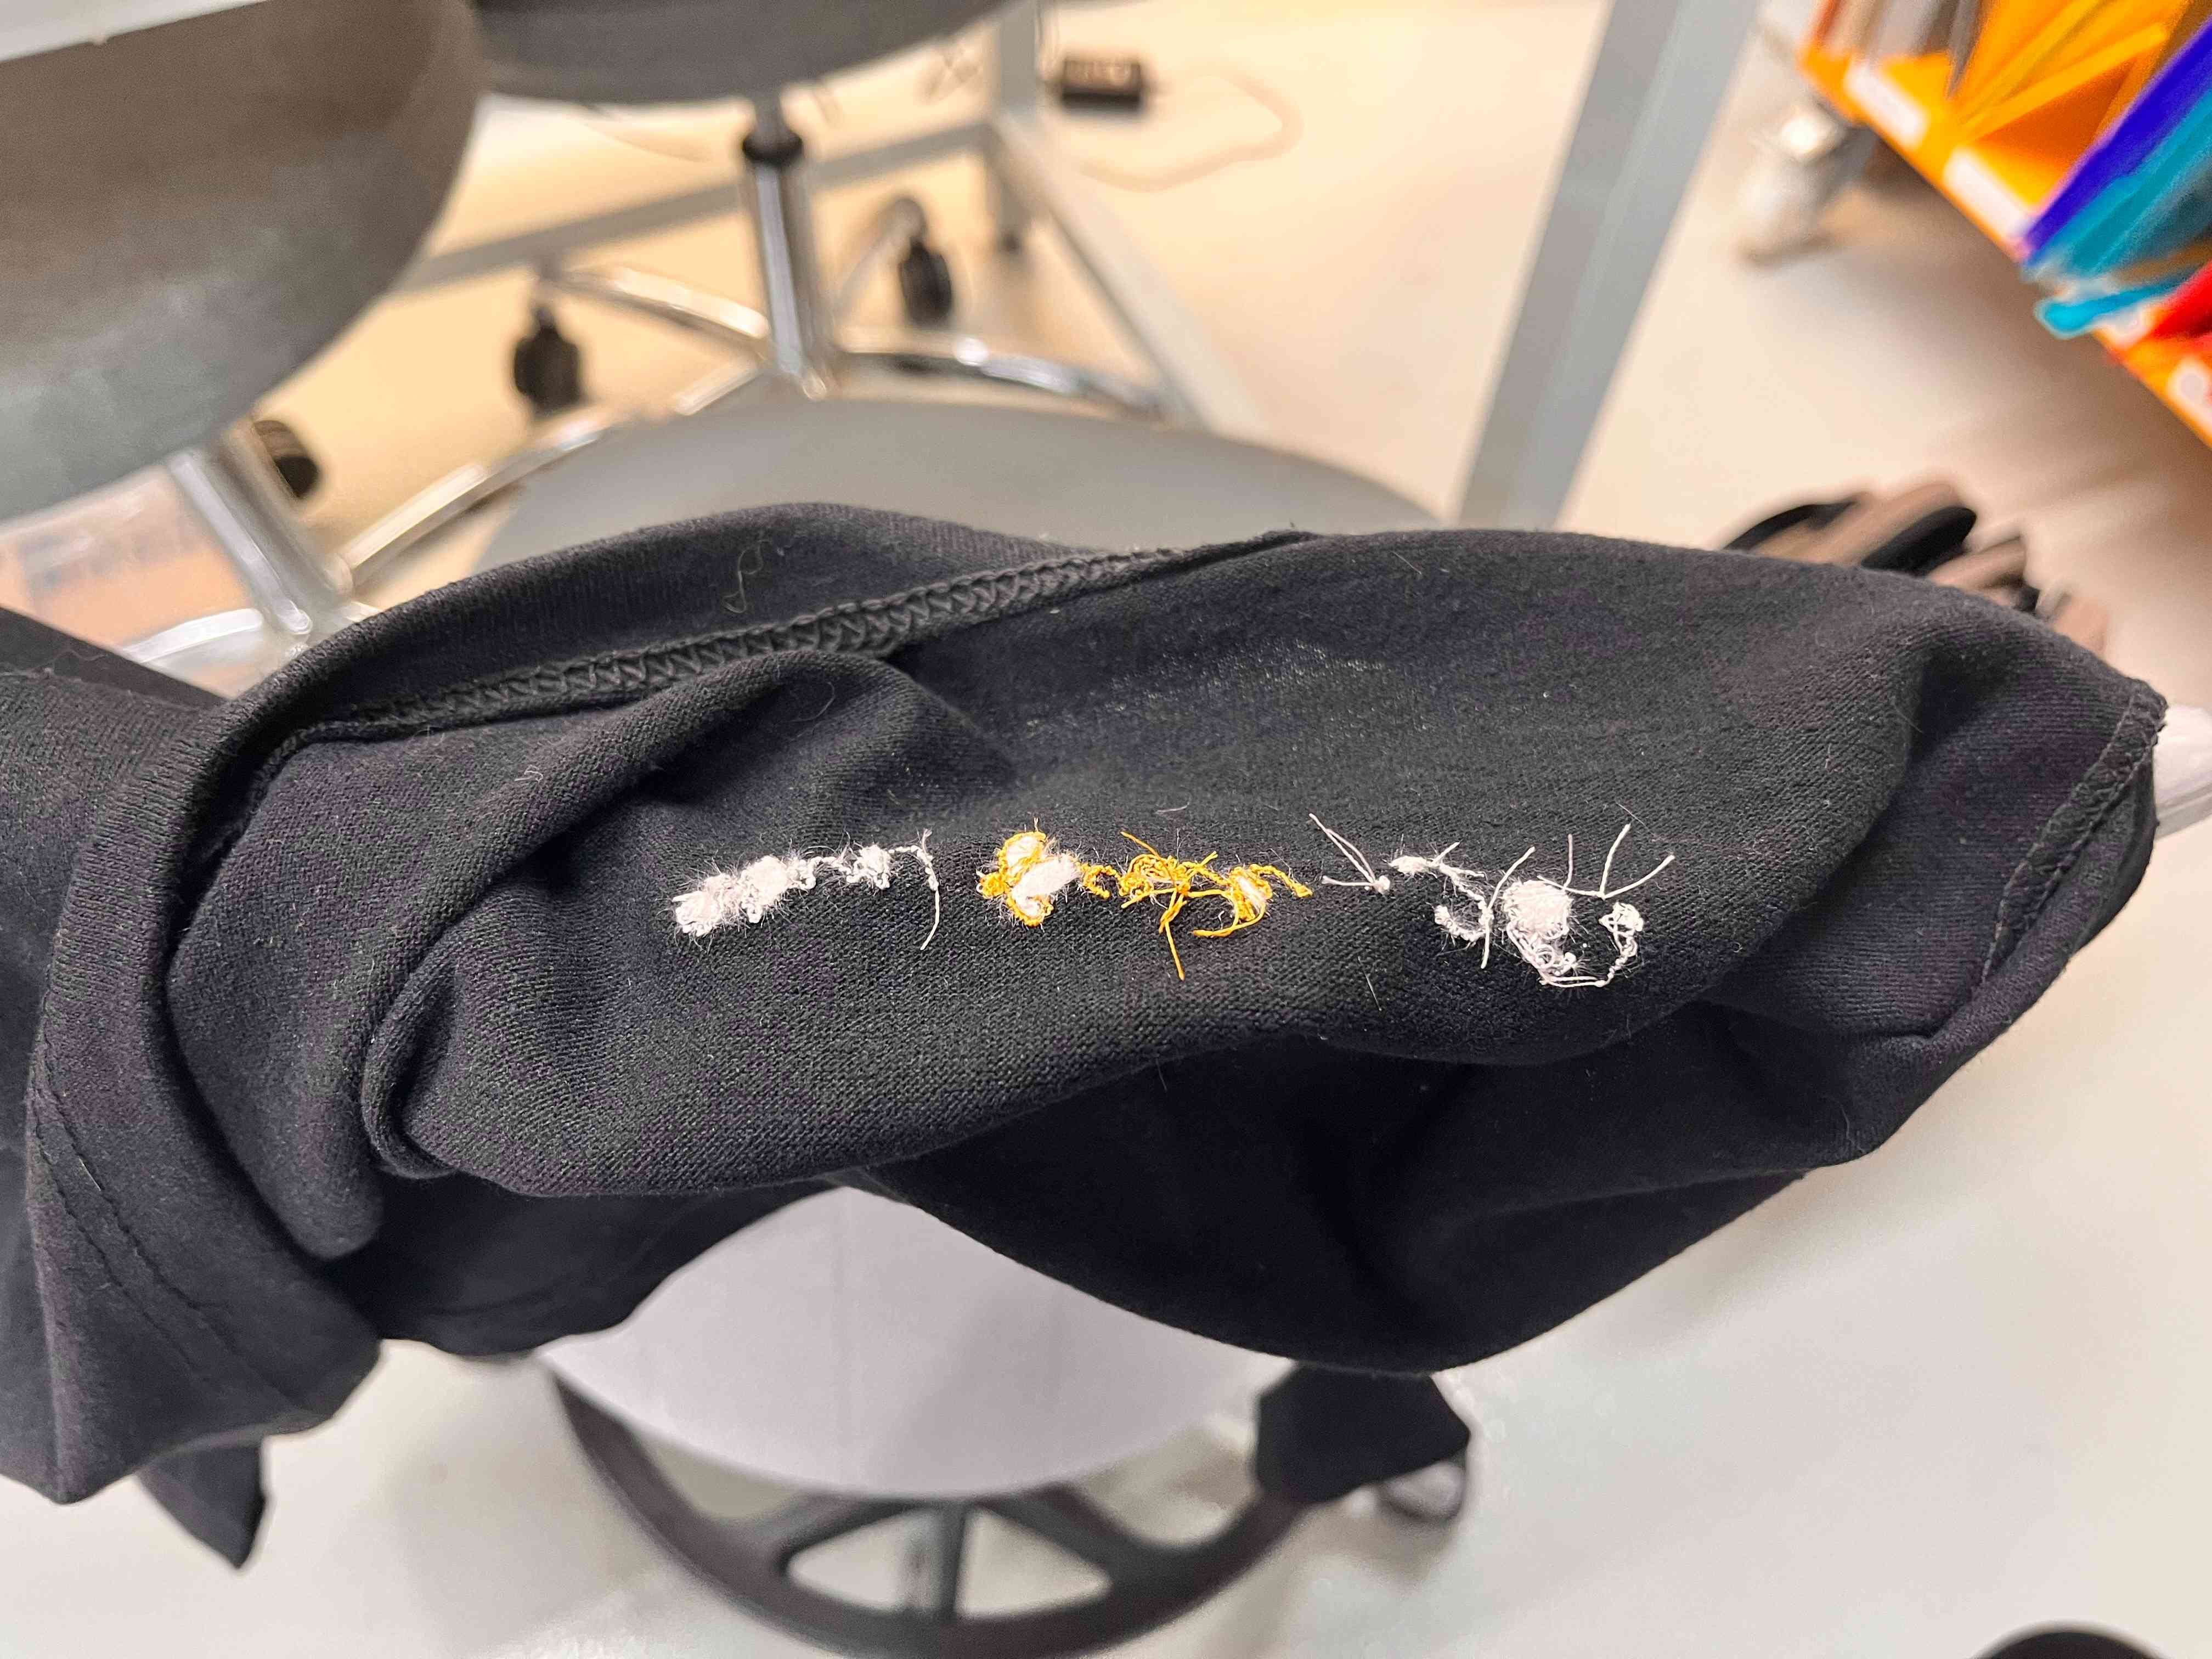
This is how my final T-Shirt looks like.

Files
You can access to the design files of this week from the link below.