Week 05 - 3D Scanning and printing
For this group assignment, we studied the design rules of our 3D printers and learned what they can and cannot print well. Our main goal was to understand printer limits before making our own prints. We focused on testing 3D printing behavior and explaining important print settings and design features.
1) 3D Printing Technology
3D printing is a way to make real objects from a digital design by adding material layer by layer. It is also called additive manufacturing. It is useful for making prototypes, models, tools, and custom parts quickly.
There are some different 3D printing technologies, such as:
- SLA, which is a technology that uses light to harden liquid resin.
- SLS, which uses a laser and powder.
- FDM is for melting plastic filament layer by layer
- DLP, MJF, PolyJet, DMLS, and EBM (other advanced methods)
At FabLab Hisar, we mainly use FDM-type printers for our 3D projects.
2) FDM Printers in the Lab
In FabLab Hisar, there are many FDM-type 3D printers for rapid prototyping, with a total of 19. Here are some machine types that are used in our lab:

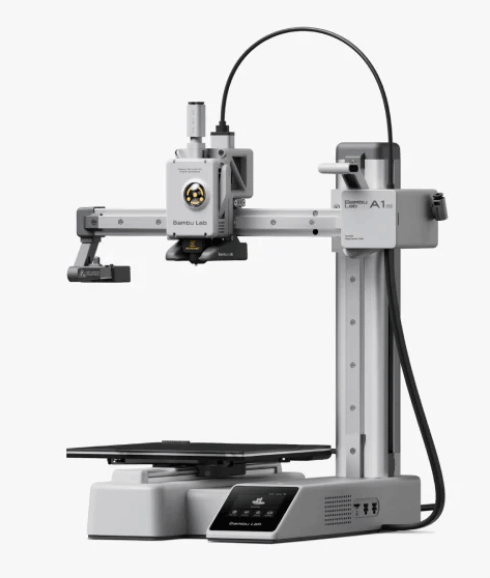
Bambu Lab A1
- Printing Technology: FDM
- Build Volume: 256 × 256 × 256 mm
- Max Printing Speed: Up to 500 mm/s
- Max Hot End Temperature: 300°C
- Nozzle (Included): 0.4 mm
- Optional Nozzles: 0.2 / 0.6 / 0.8 mm
- Filament Diameter: 1.75 mm
- Type: Open frame bed-slinger printer
Bambu Lab A1 Mini
- Printing Technology: FDM
- Build Volume: 180 × 180 × 180 mm
- Max Hot End Temperature: 300°C
- Nozzle (Included): 0.4 mm
- Optional Nozzles: 0.2 / 0.6 / 0.8 mm
- Filament Diameter: 1.75 mm
- Type: Compact open-frame printer
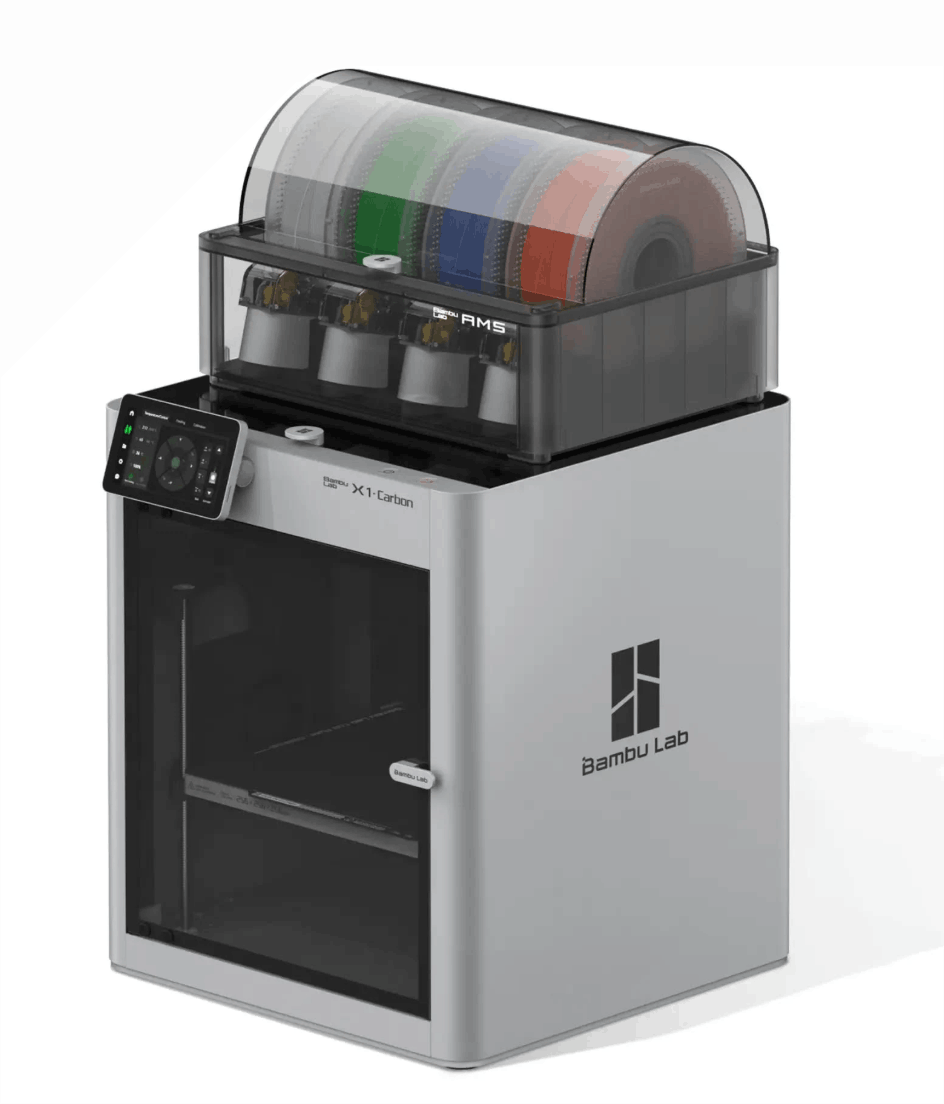
Bambu Lab X1
- Printing Technology: FDM (CoreXY)
- Build Volume: 256 × 256 × 256 mm
- Max Printing Speed: Up to 500 mm/s
- Max Hot End Temperature: 300°C
- Max Acceleration: Up to 20 m/s² (20,000 mm/s²)
- Enclosure: Yes
- Advanced Features: Lidar-assisted features, stronger material compatibility
But today, we will focus on the Bambulab P1S
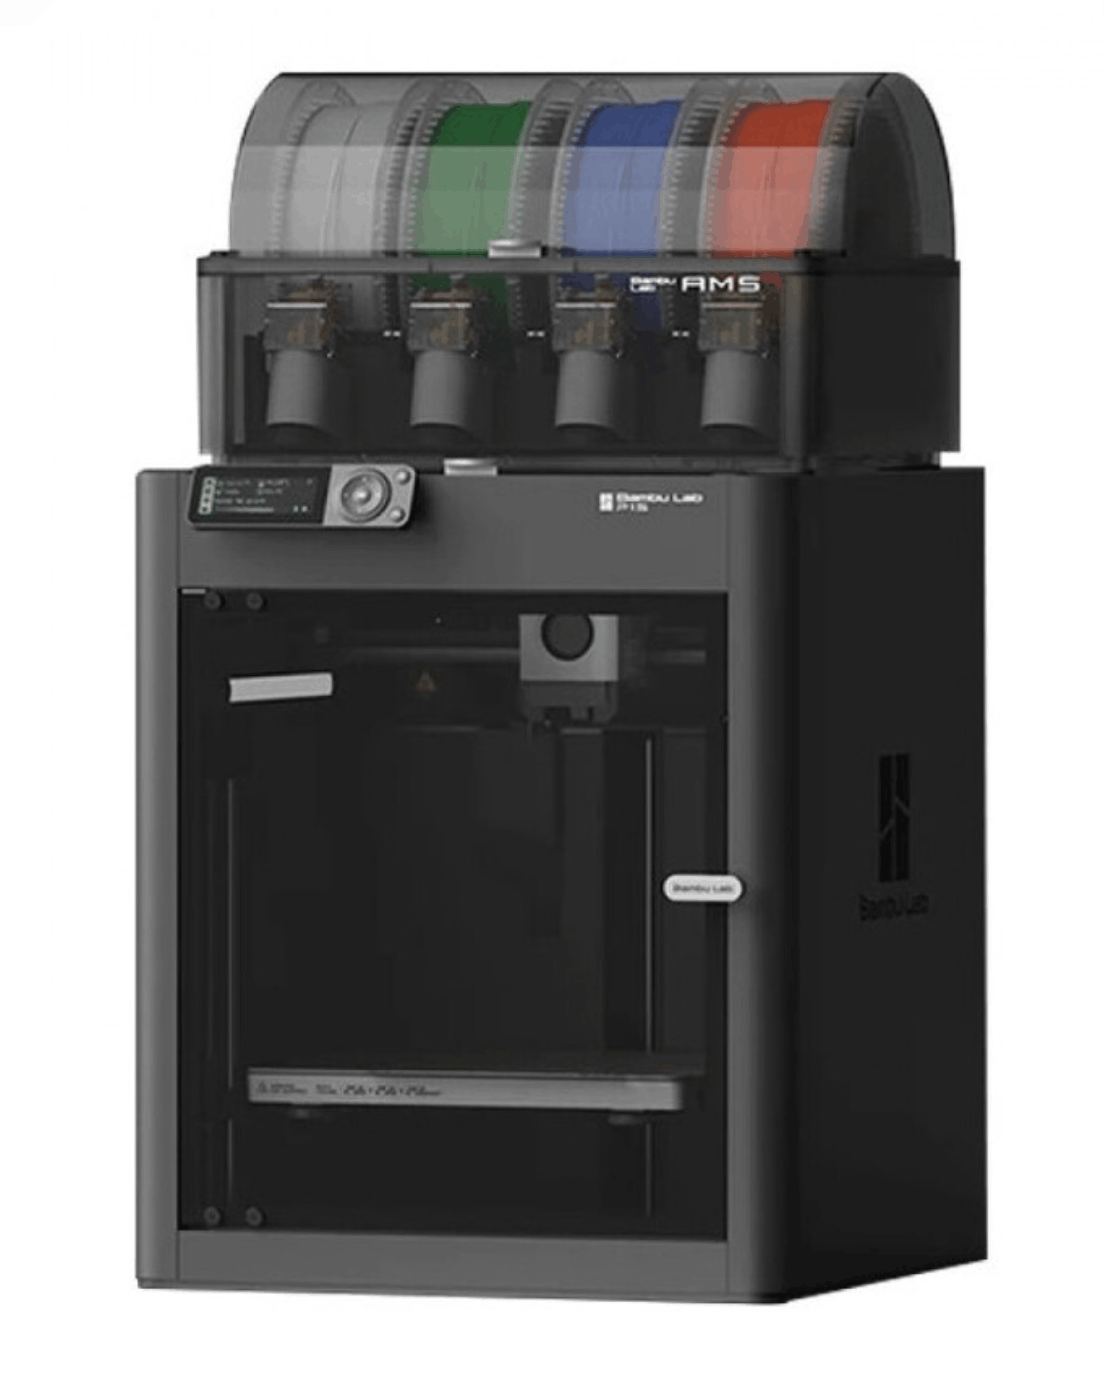
Bambu Lab P1S
- Printing Technology: FDM
- Build Volume: 256 × 256 × 256 mm
- Max Printing Speed: Up to 500 mm/s
- Max Hot End Temperature: 300°C
- Enclosure: Yes
- Typical Supported Materials: PLA, PETG, TPU, ABS, ASA (and more, depending on setup)
Short Analysis: P1S is a fast, enclosed printer that is very good for reliable prototyping and better printing with materials like ABS/ASA.
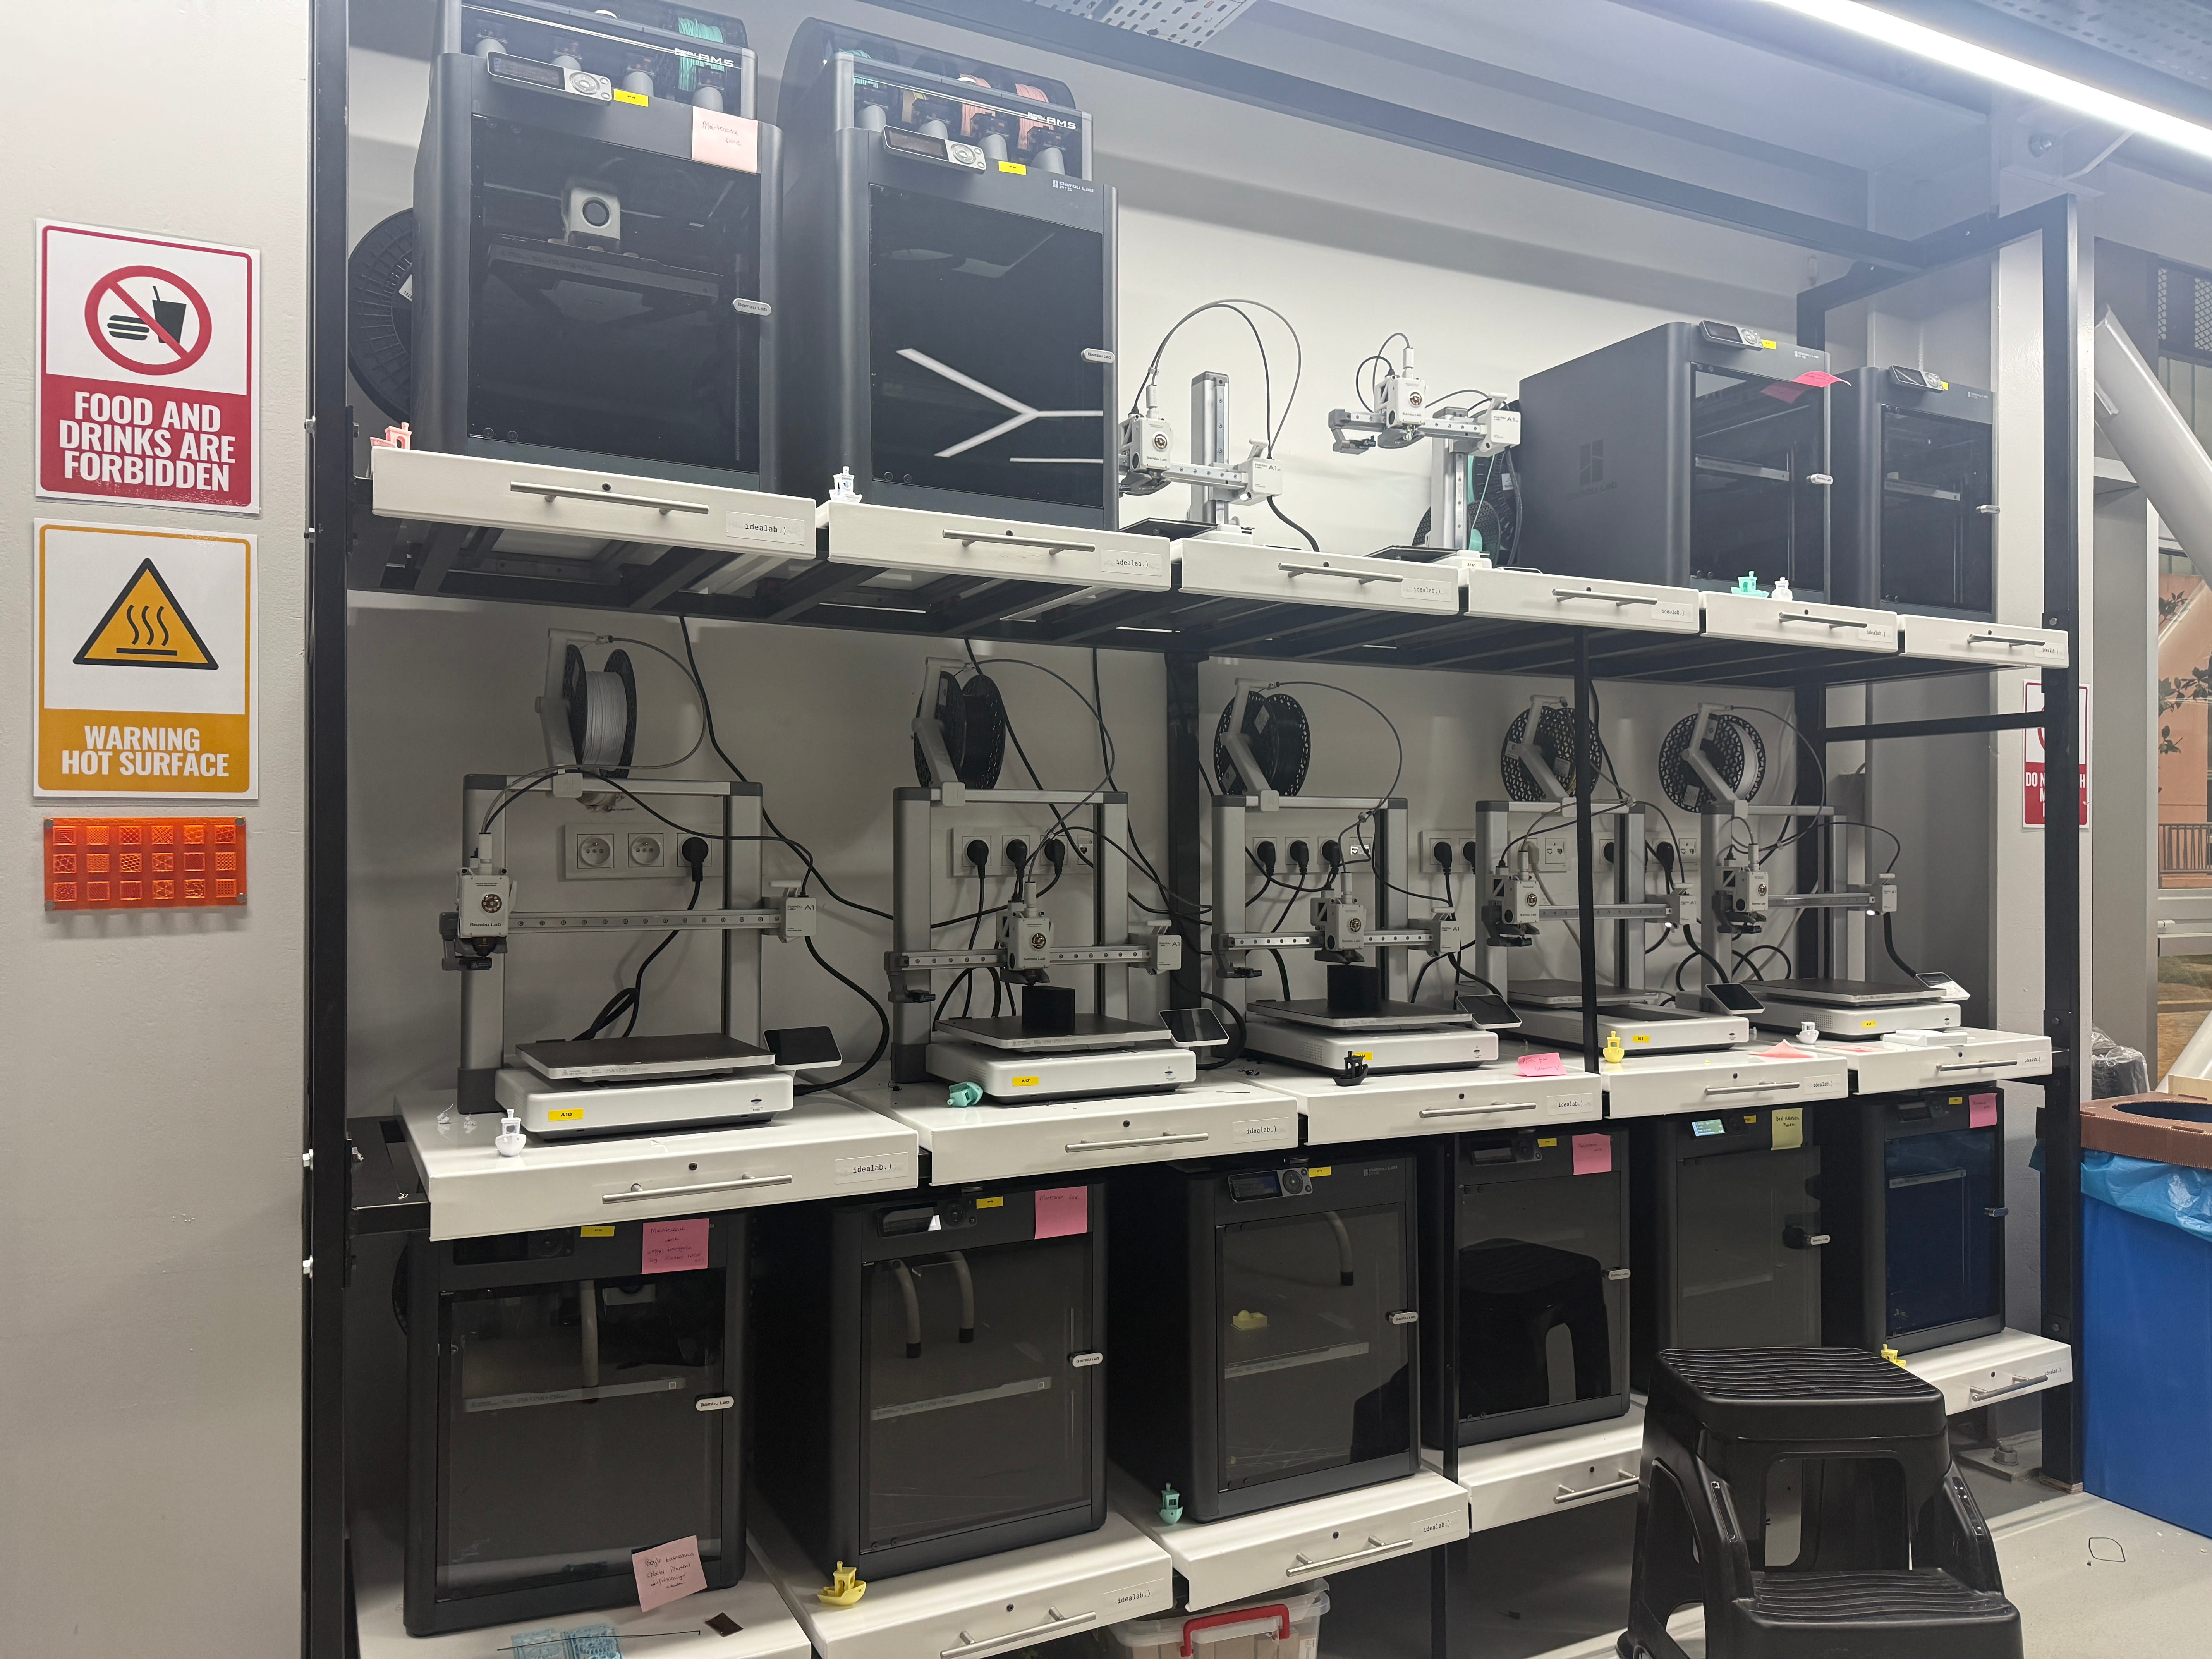
Here is a photo of our printer wall:
3) How To Add Filaments To Machines In Our Lab
3a) Bambu Lab A1
Firstly, for the Bambu Lab A1
- Get the filament that you are going to use in your machine.
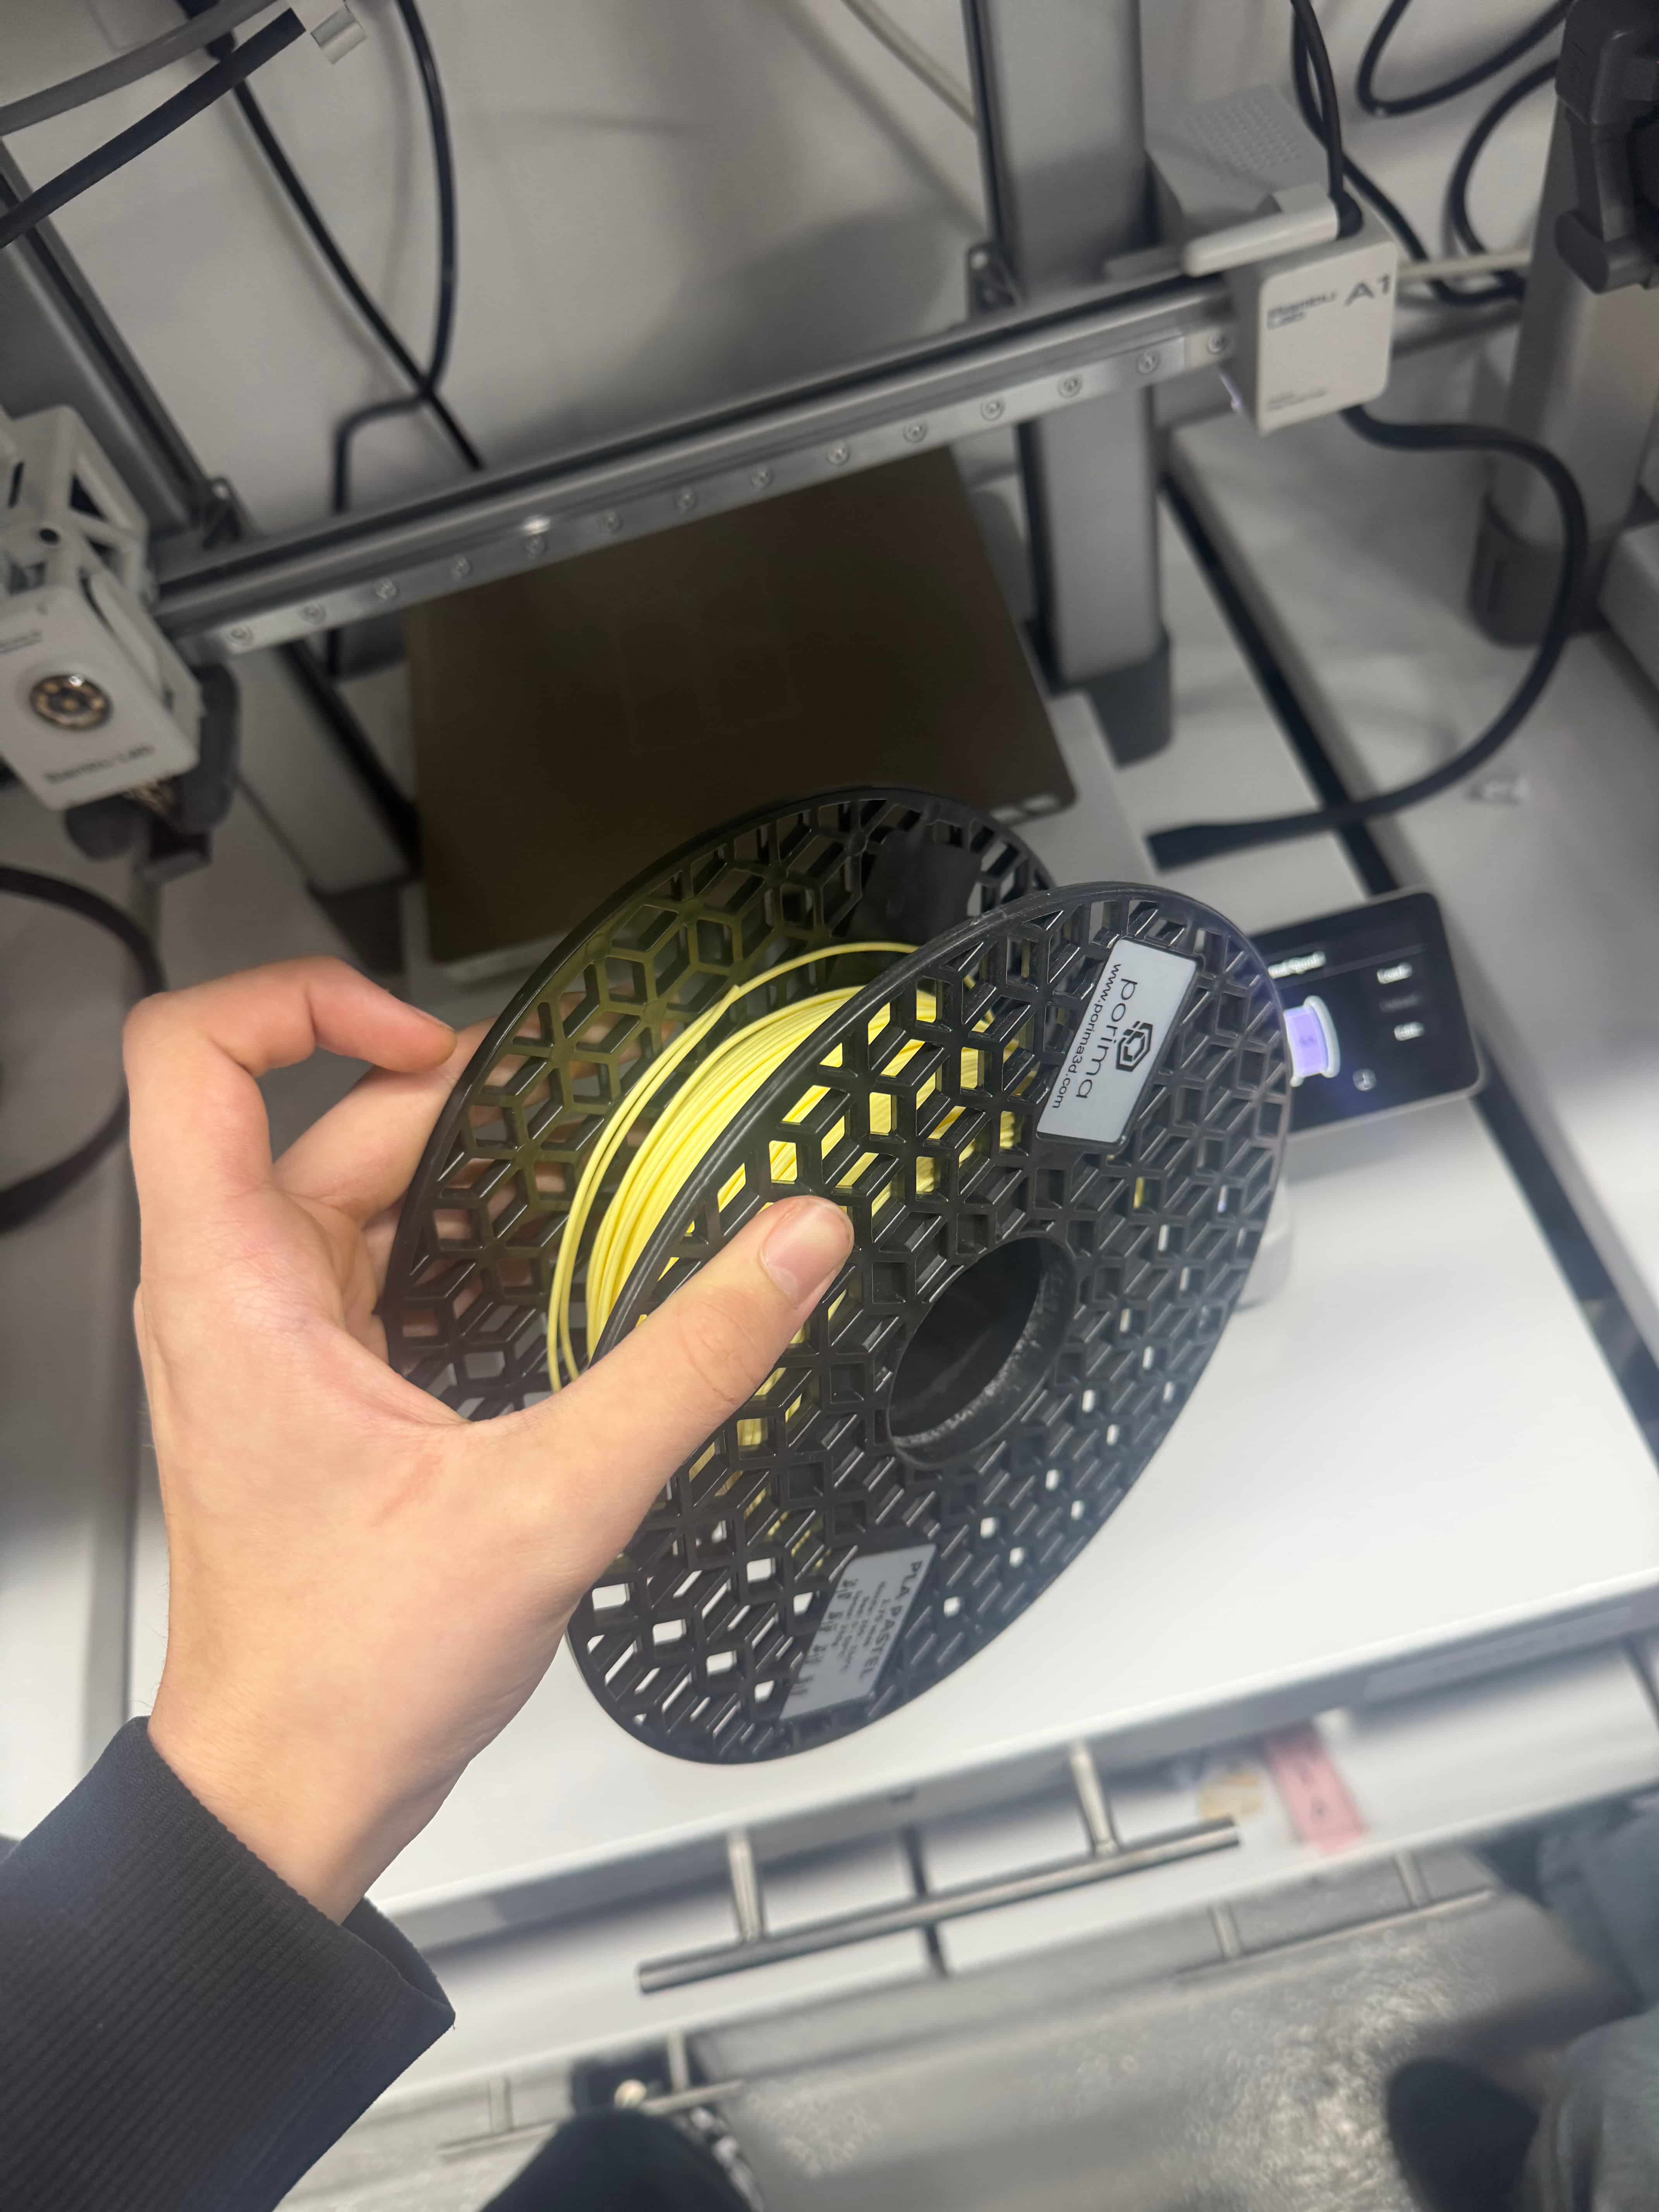
- Put the PLA type filament as I did, it should look to you like mine
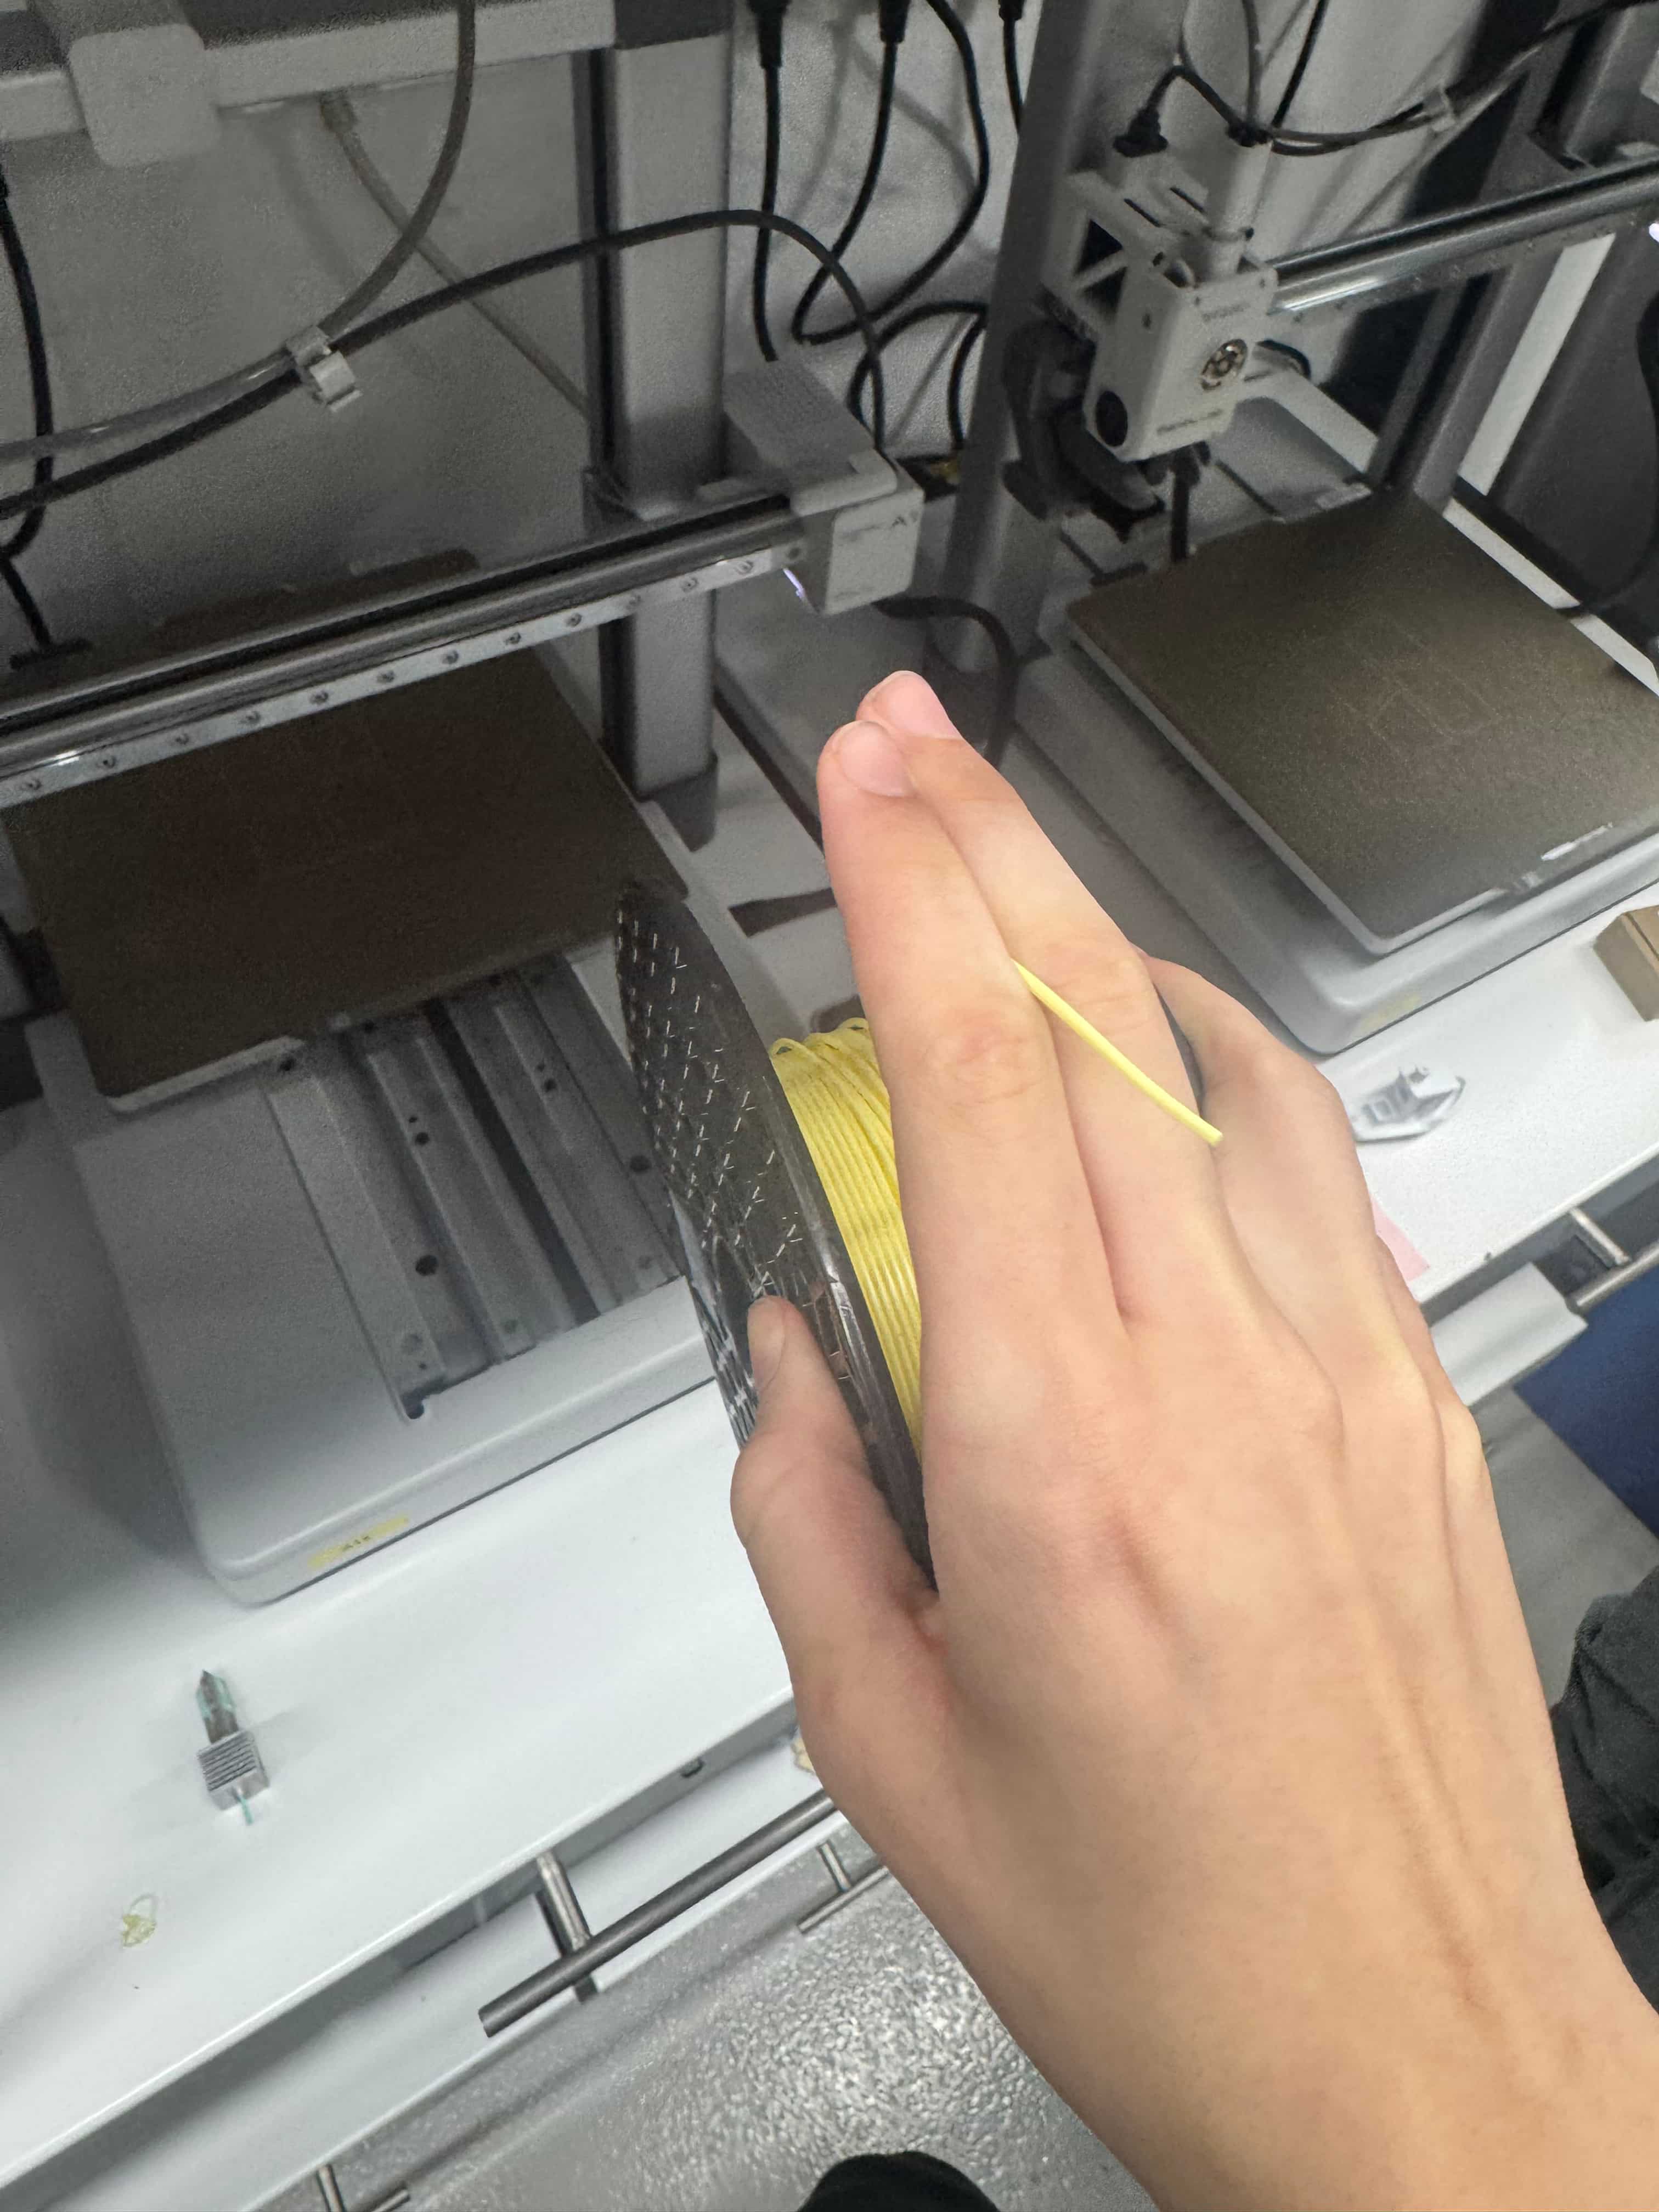
And put in through the tube like this:
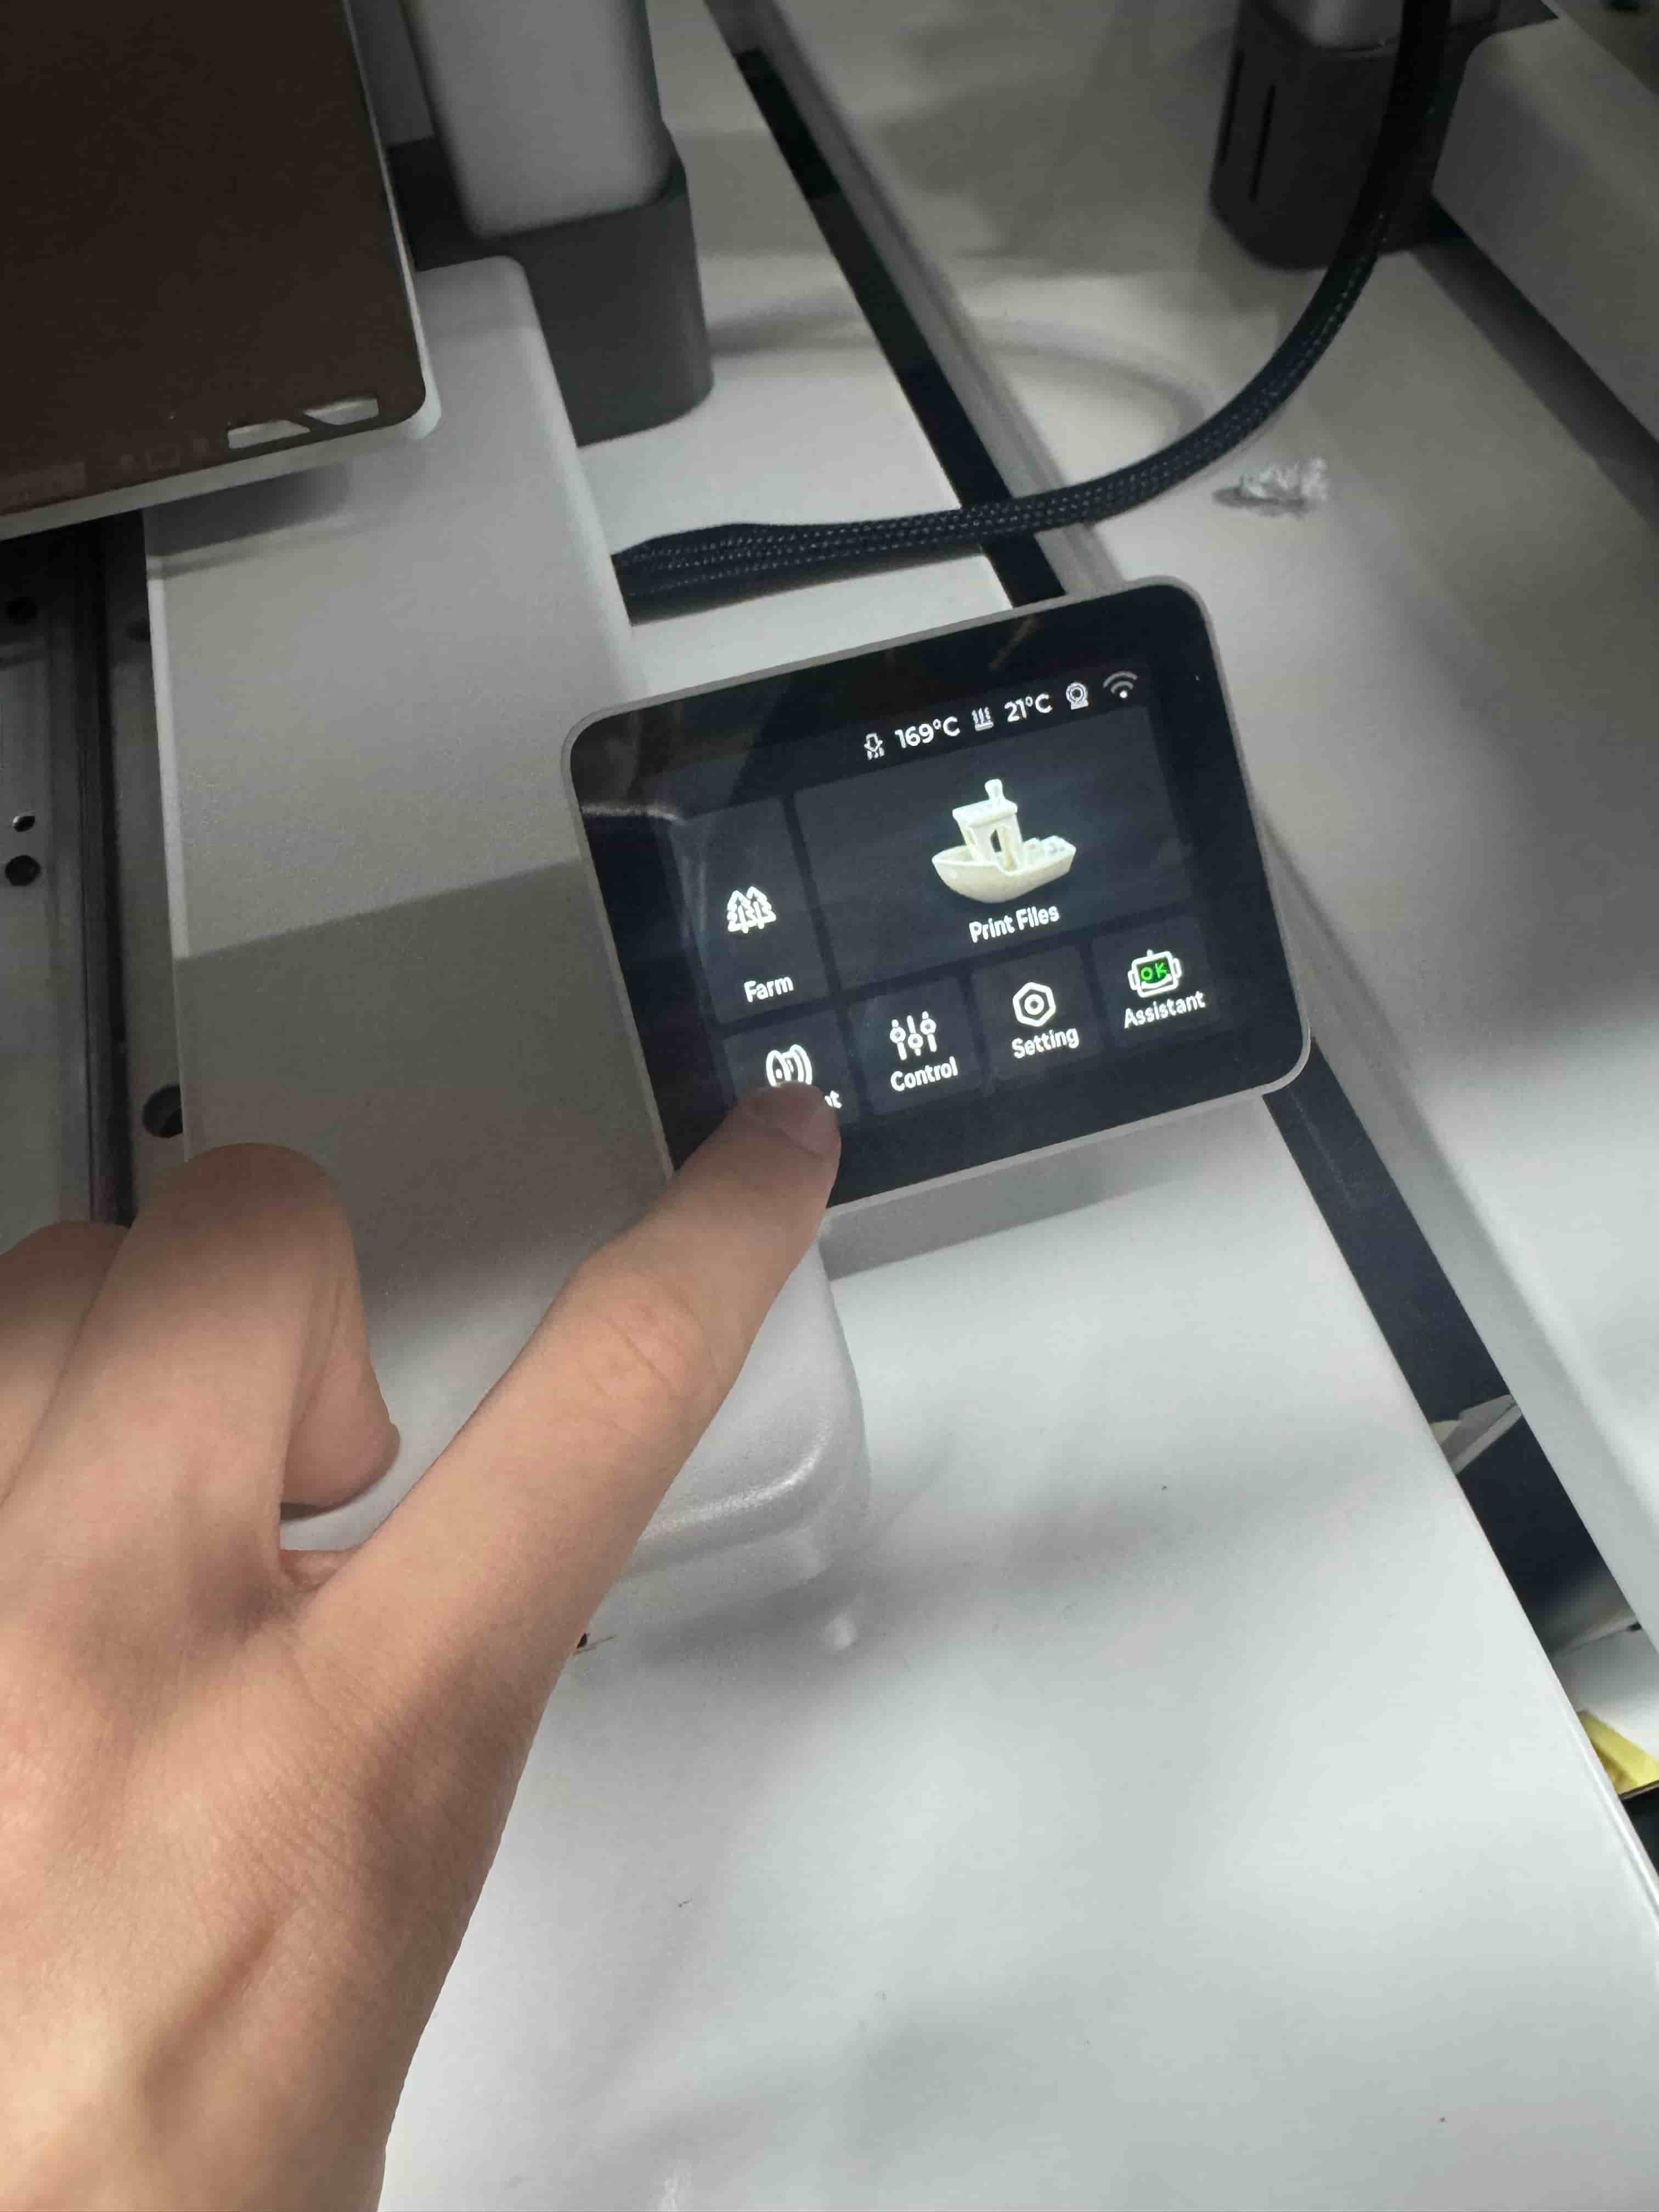
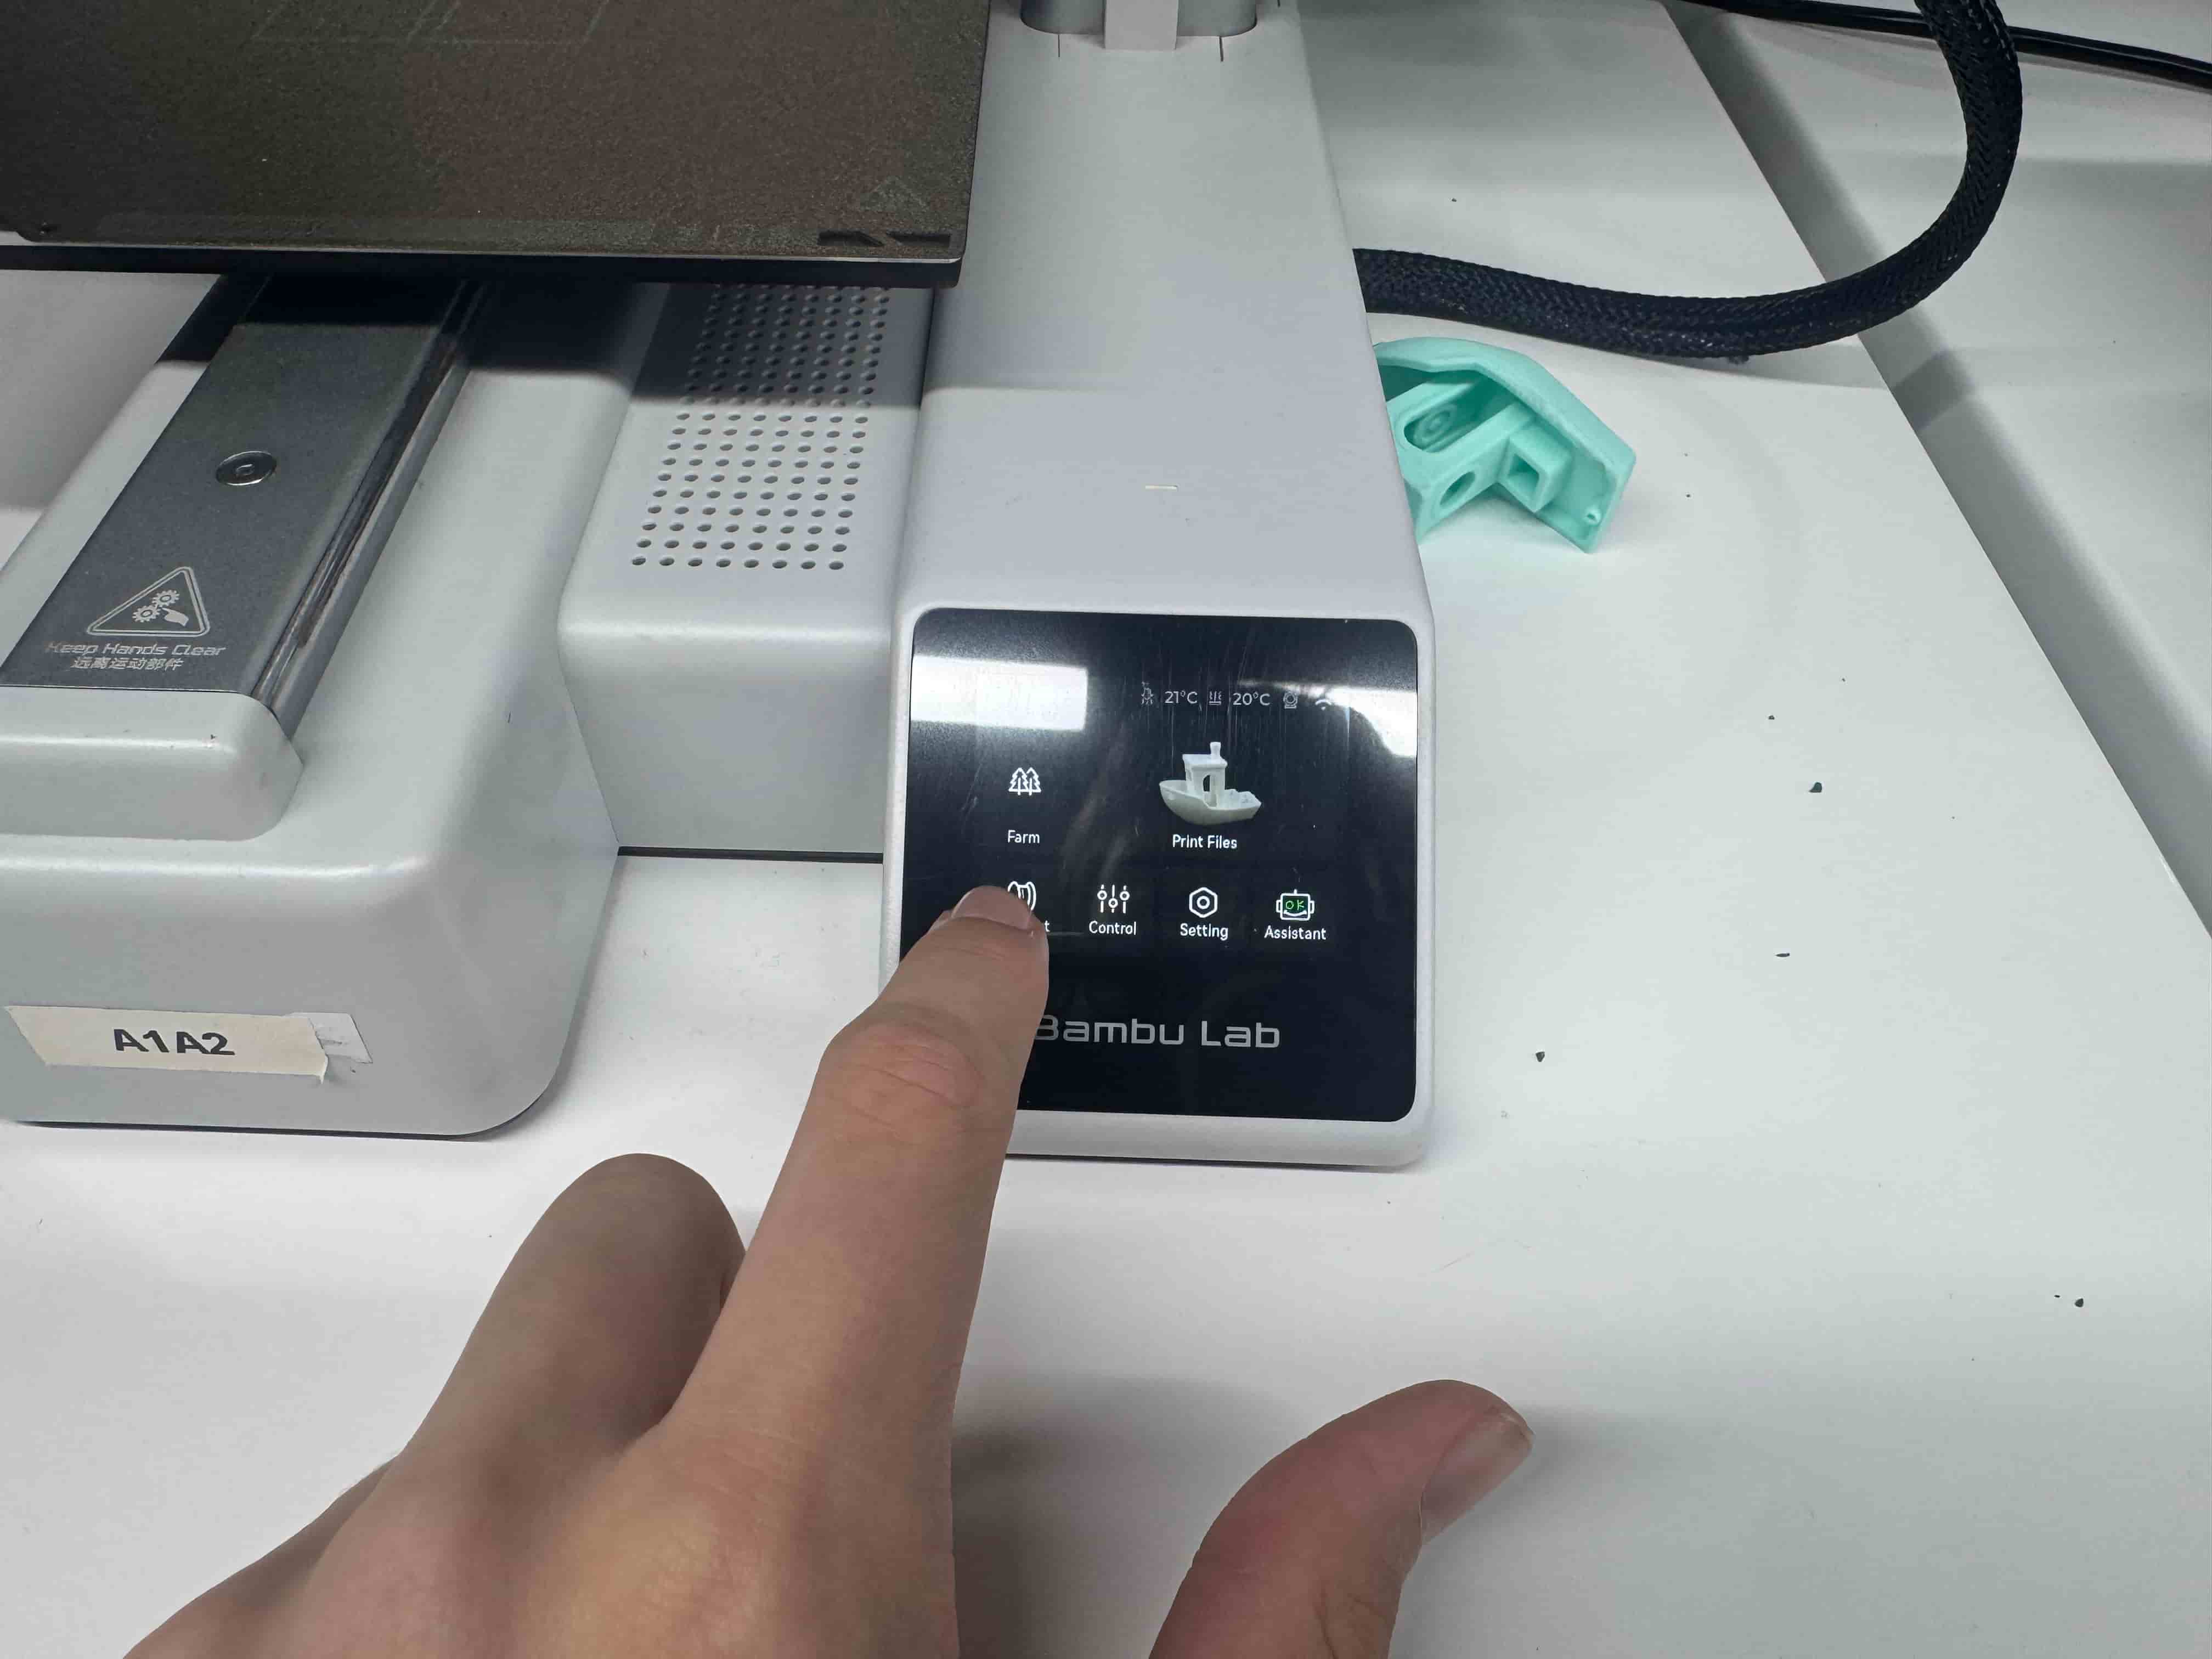
- Choose the “Filament” section in your printers oled screen and choose “Load” in it
First:
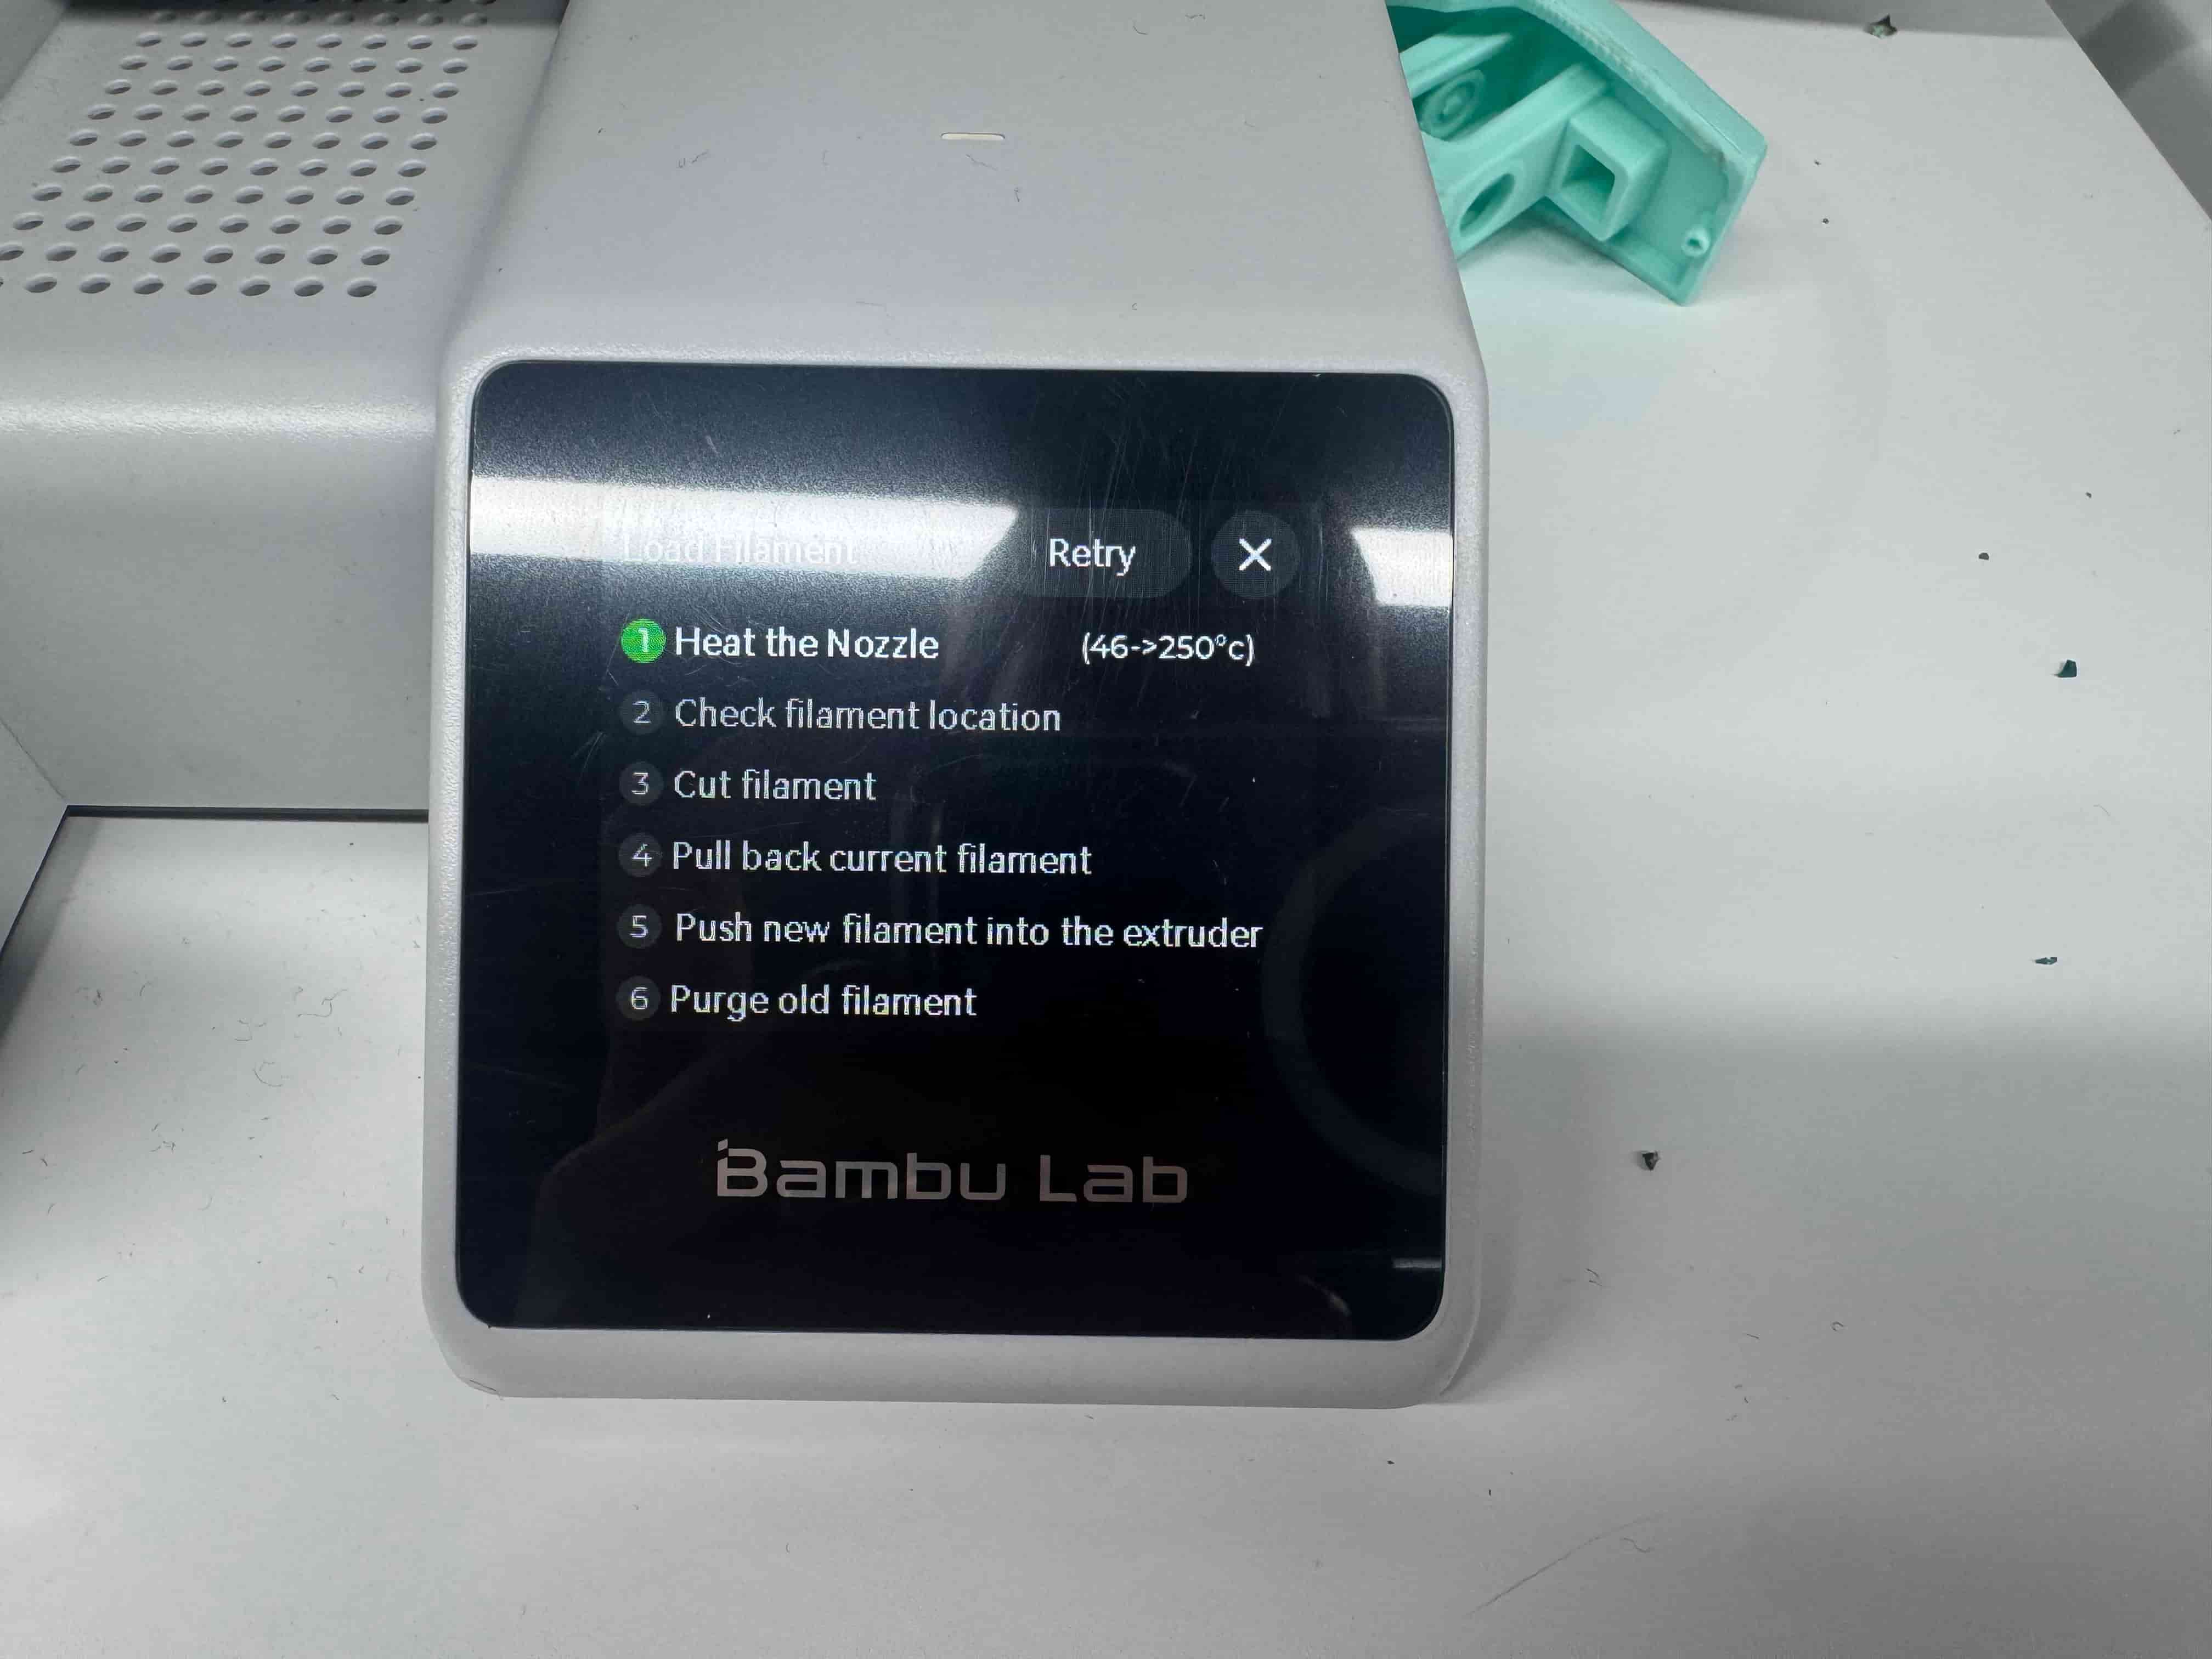
Second:
Second screen:
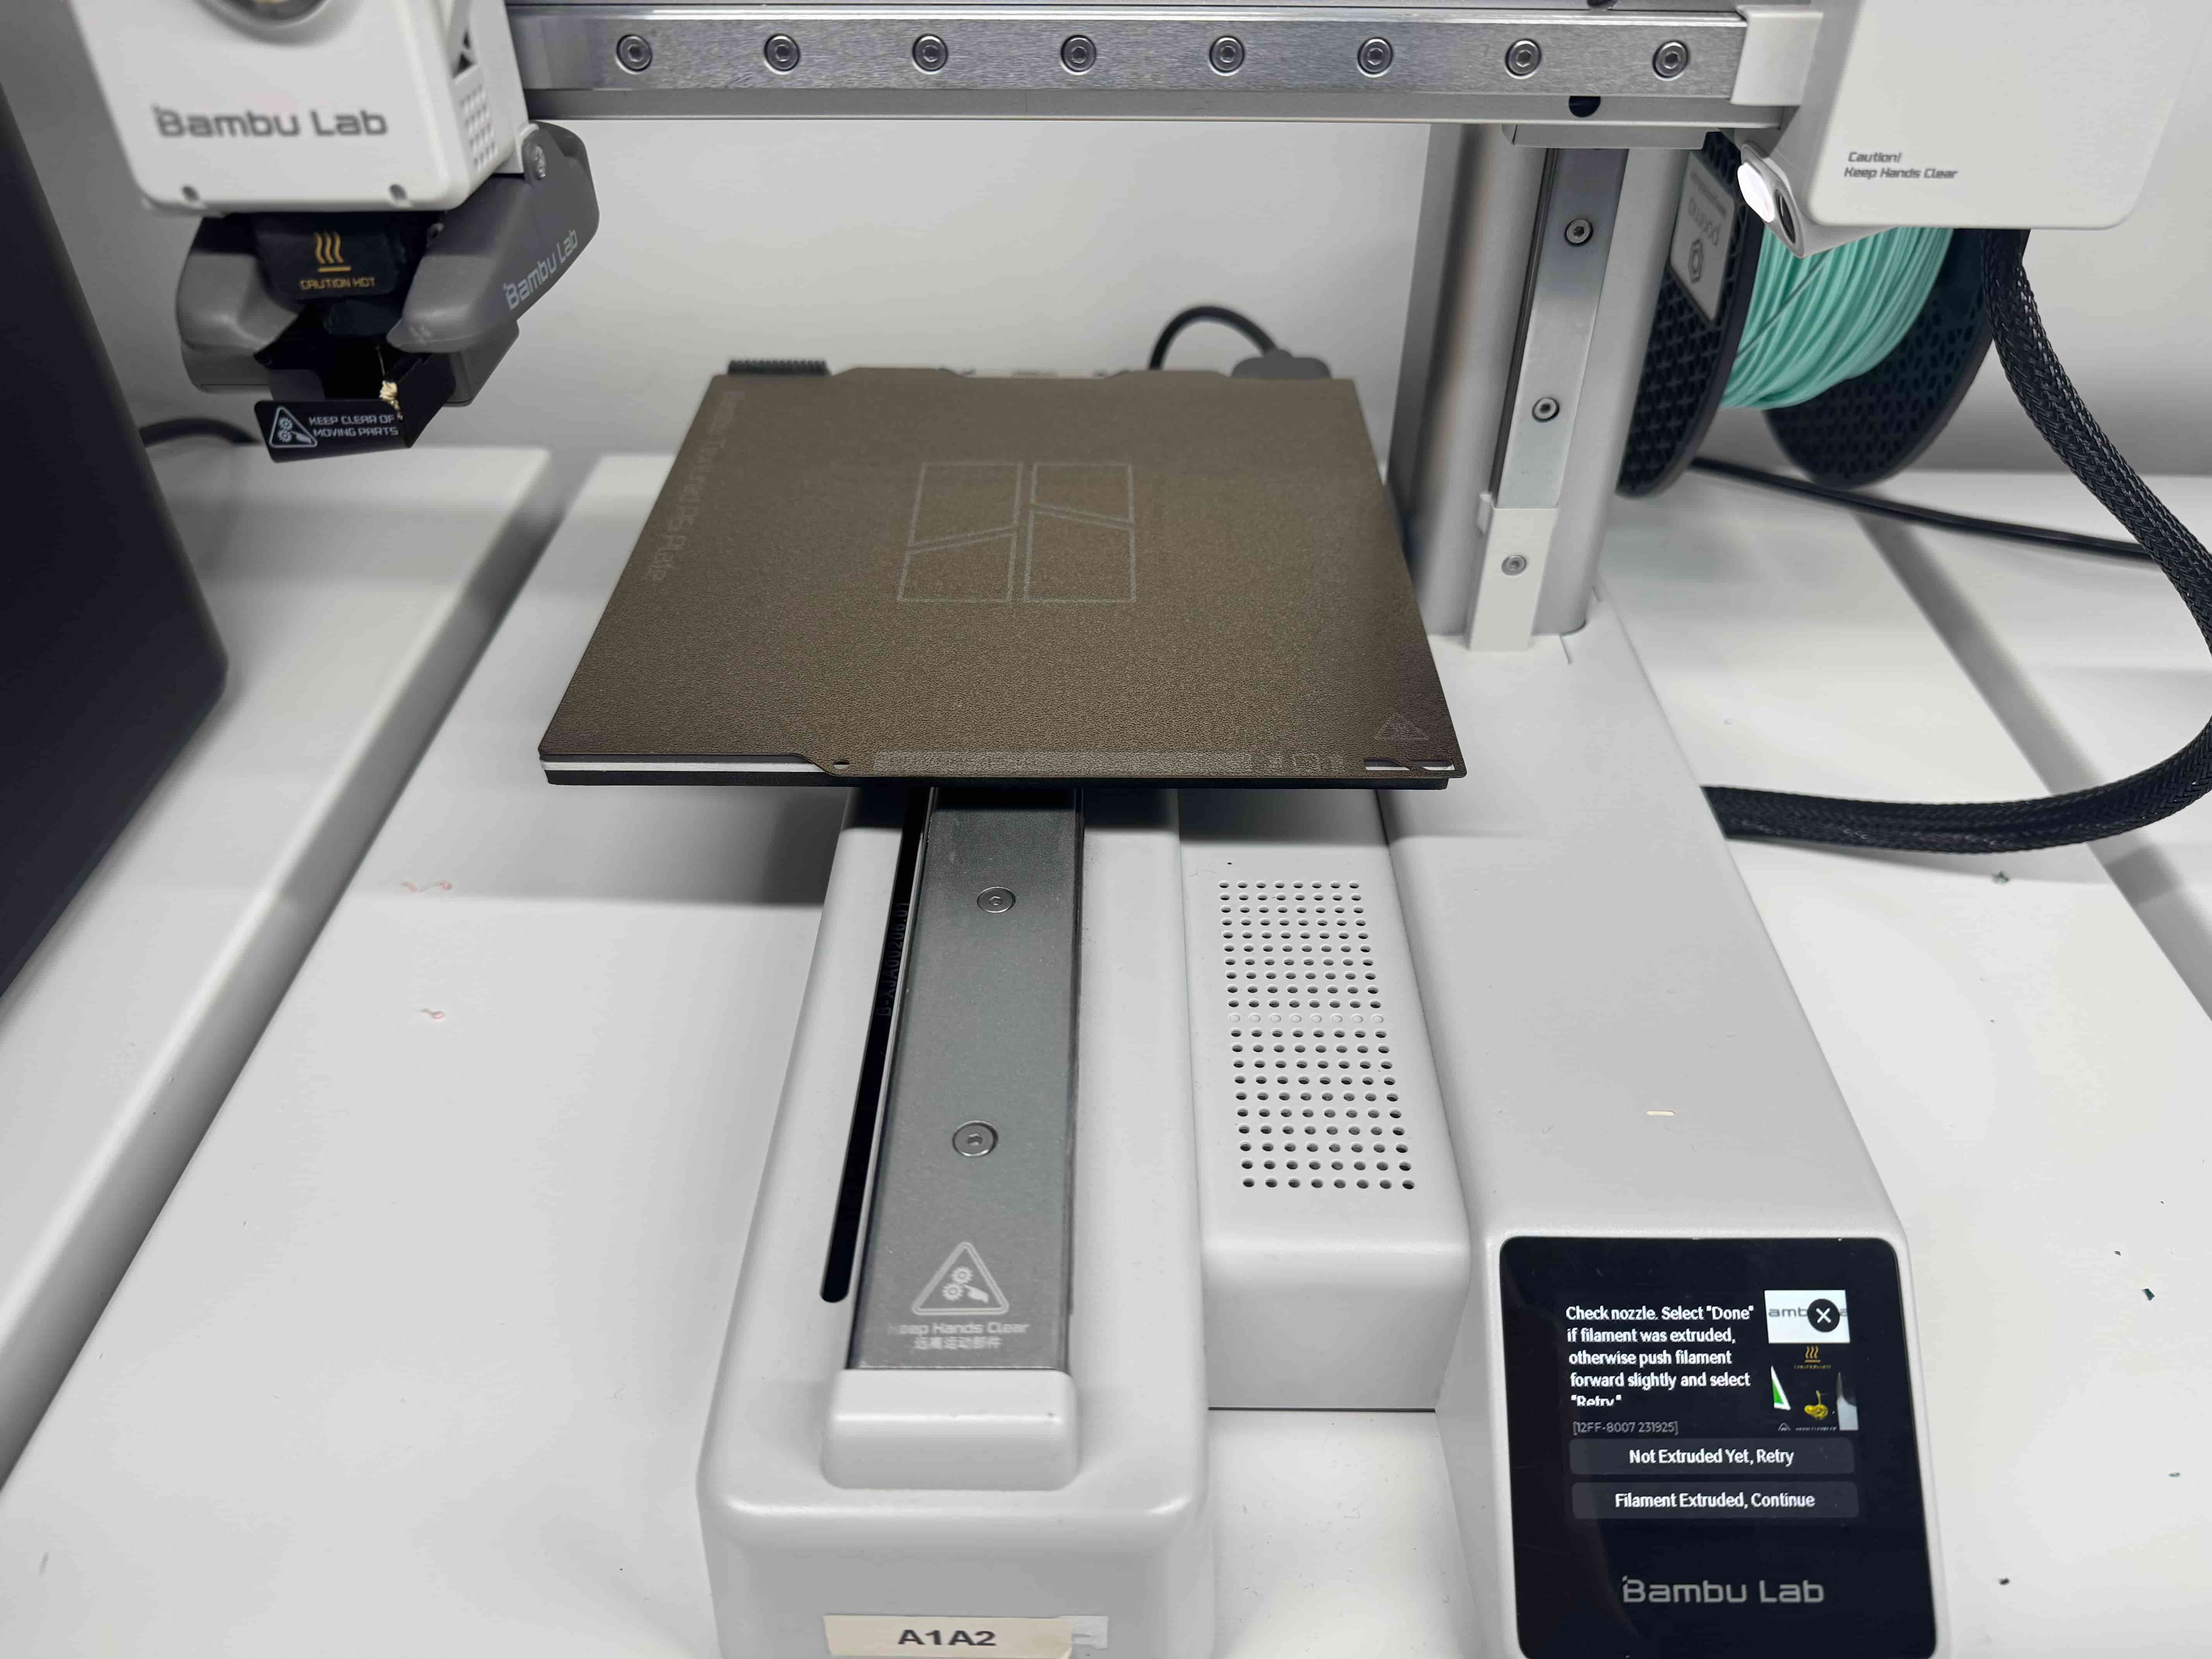
- And this should be your final screen after the load finishes, and a filament should get out from the needle:
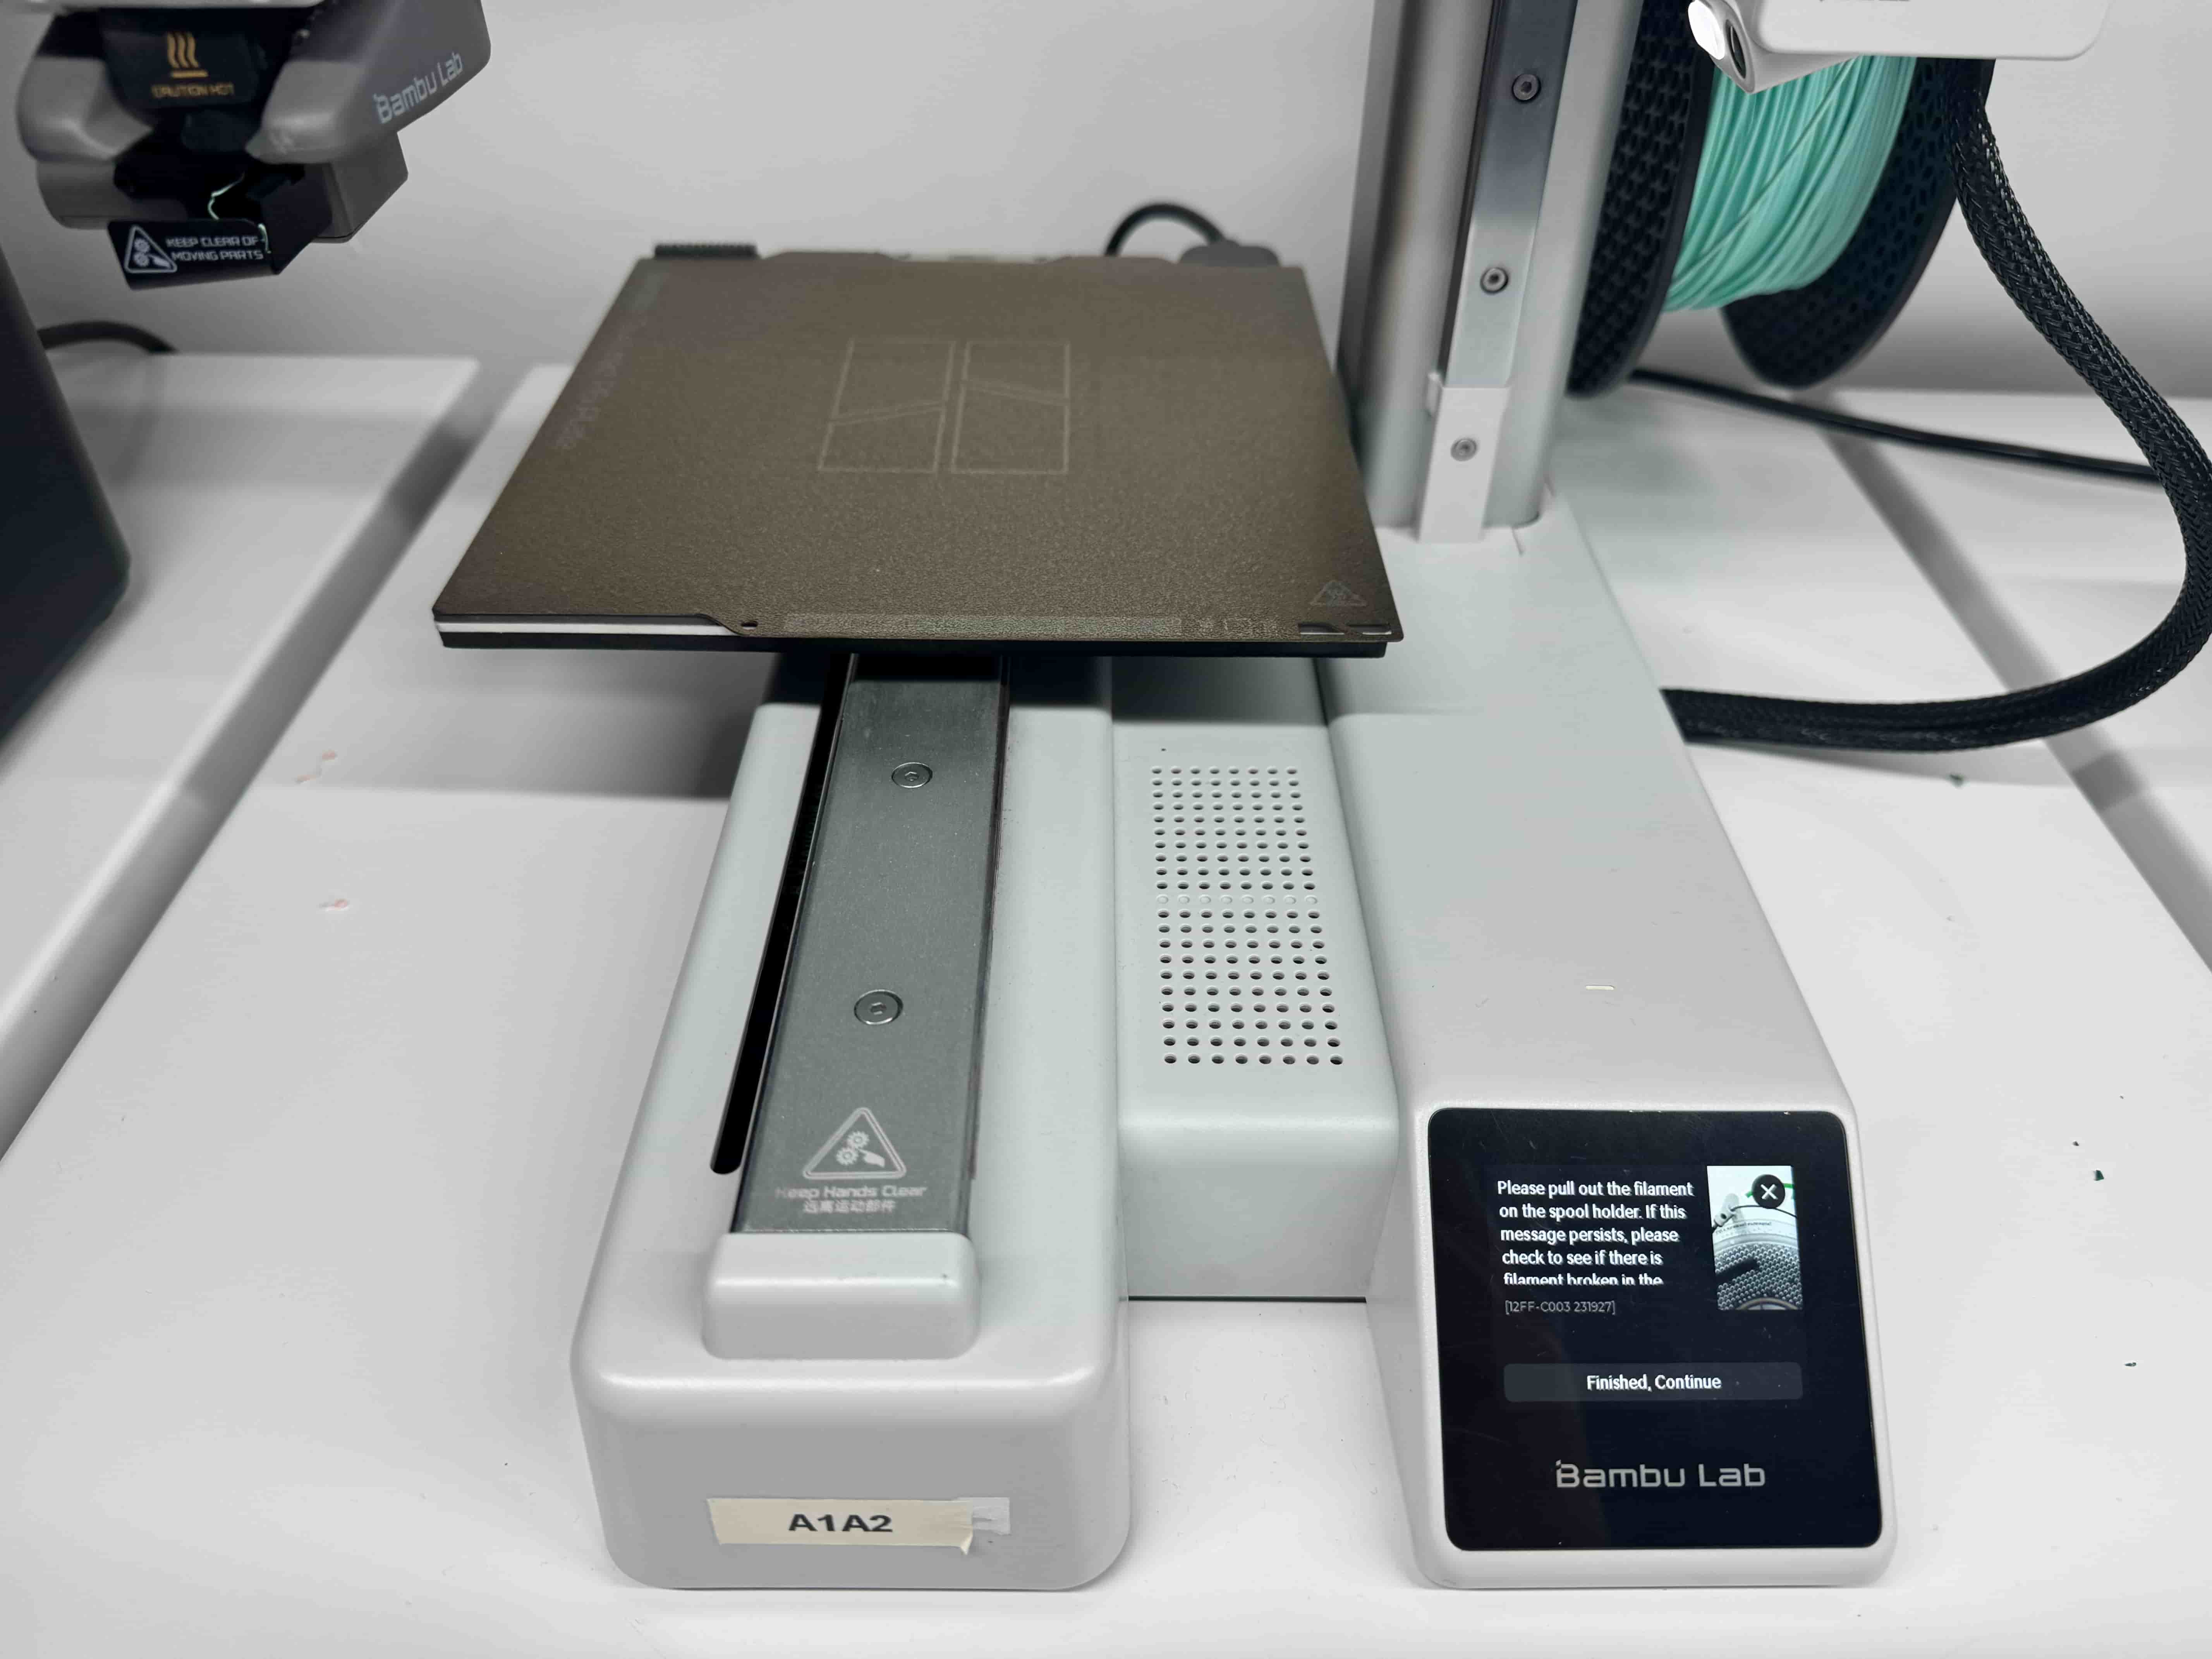
- Now it’s time for the unloading part, and this is like the same process you chose “Filament” from the screen and then “Unload”:
- After this process, there are going to be two screens, and they are for one to show the process and the other one for a reminder to remove the filament, and they should be like this. First:
Second:
Finally this is the tutorial for deploying or undeploying filament into the Bambu Lab A1 machine
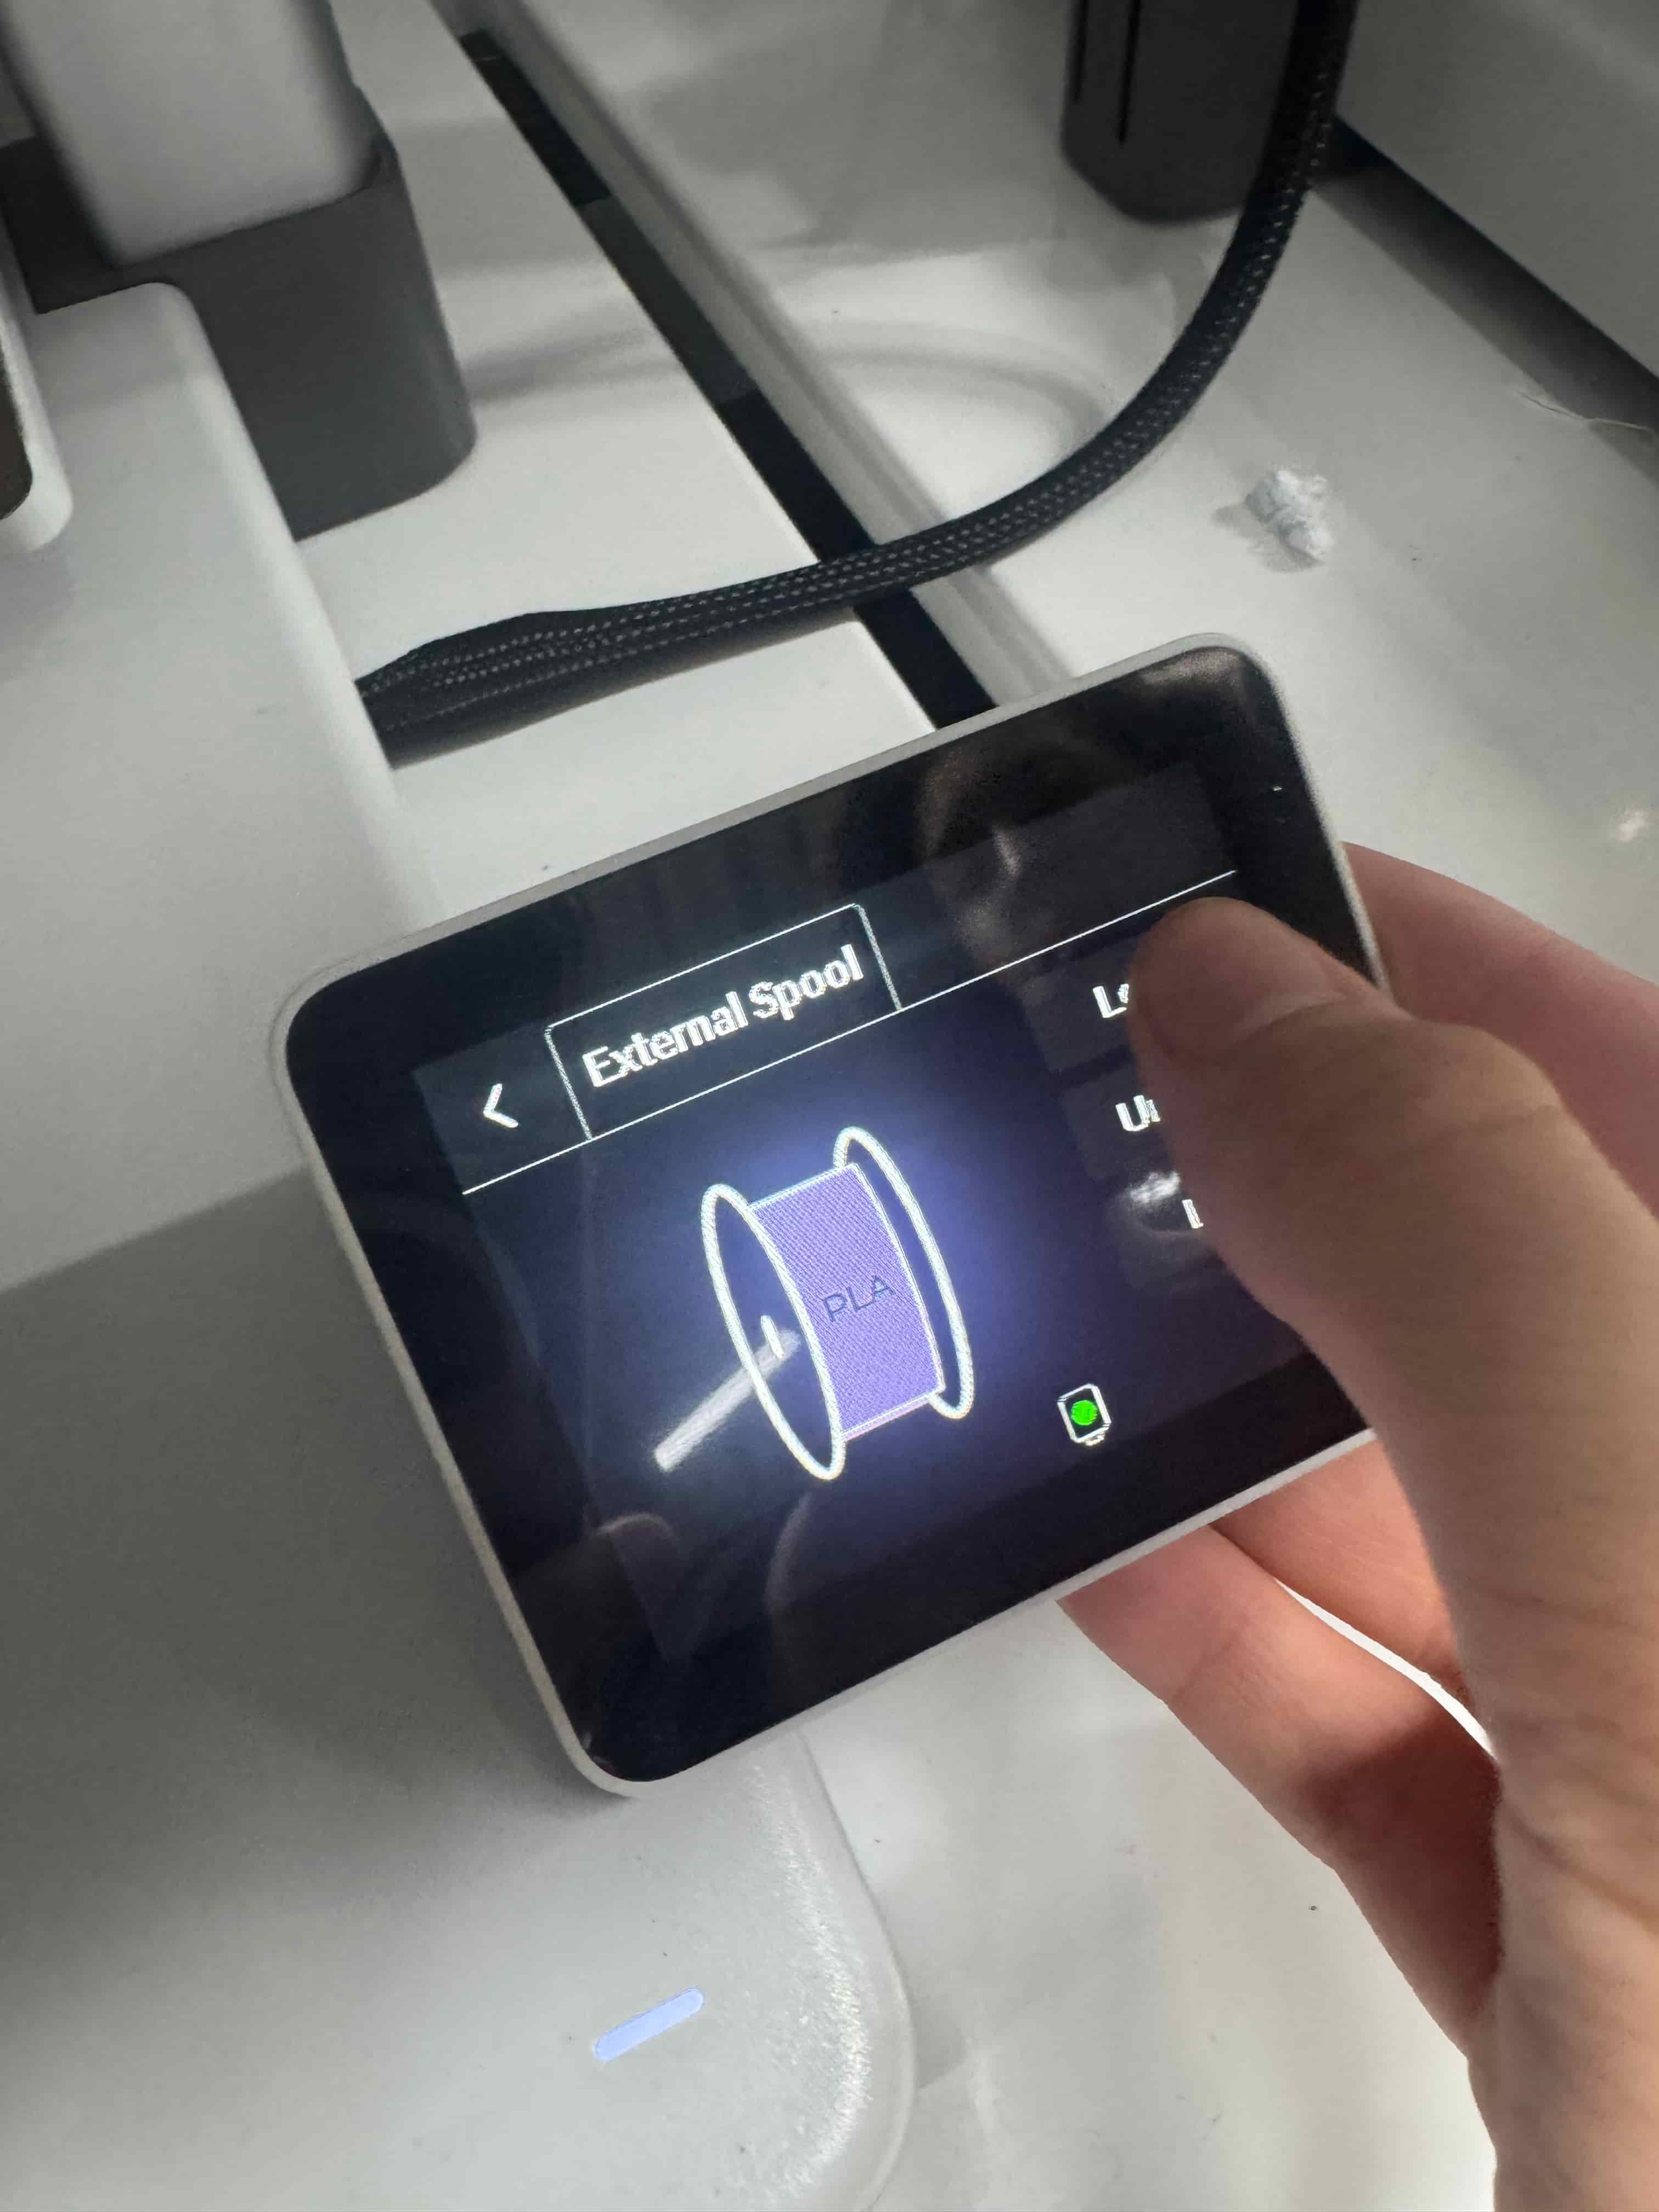
3b) Bambu Lab P1S
In the Bambu Lab P1S machine, the process is similar to the Bambu Lab A1, but the only two differences are the screen interface and the filaments’ placement.
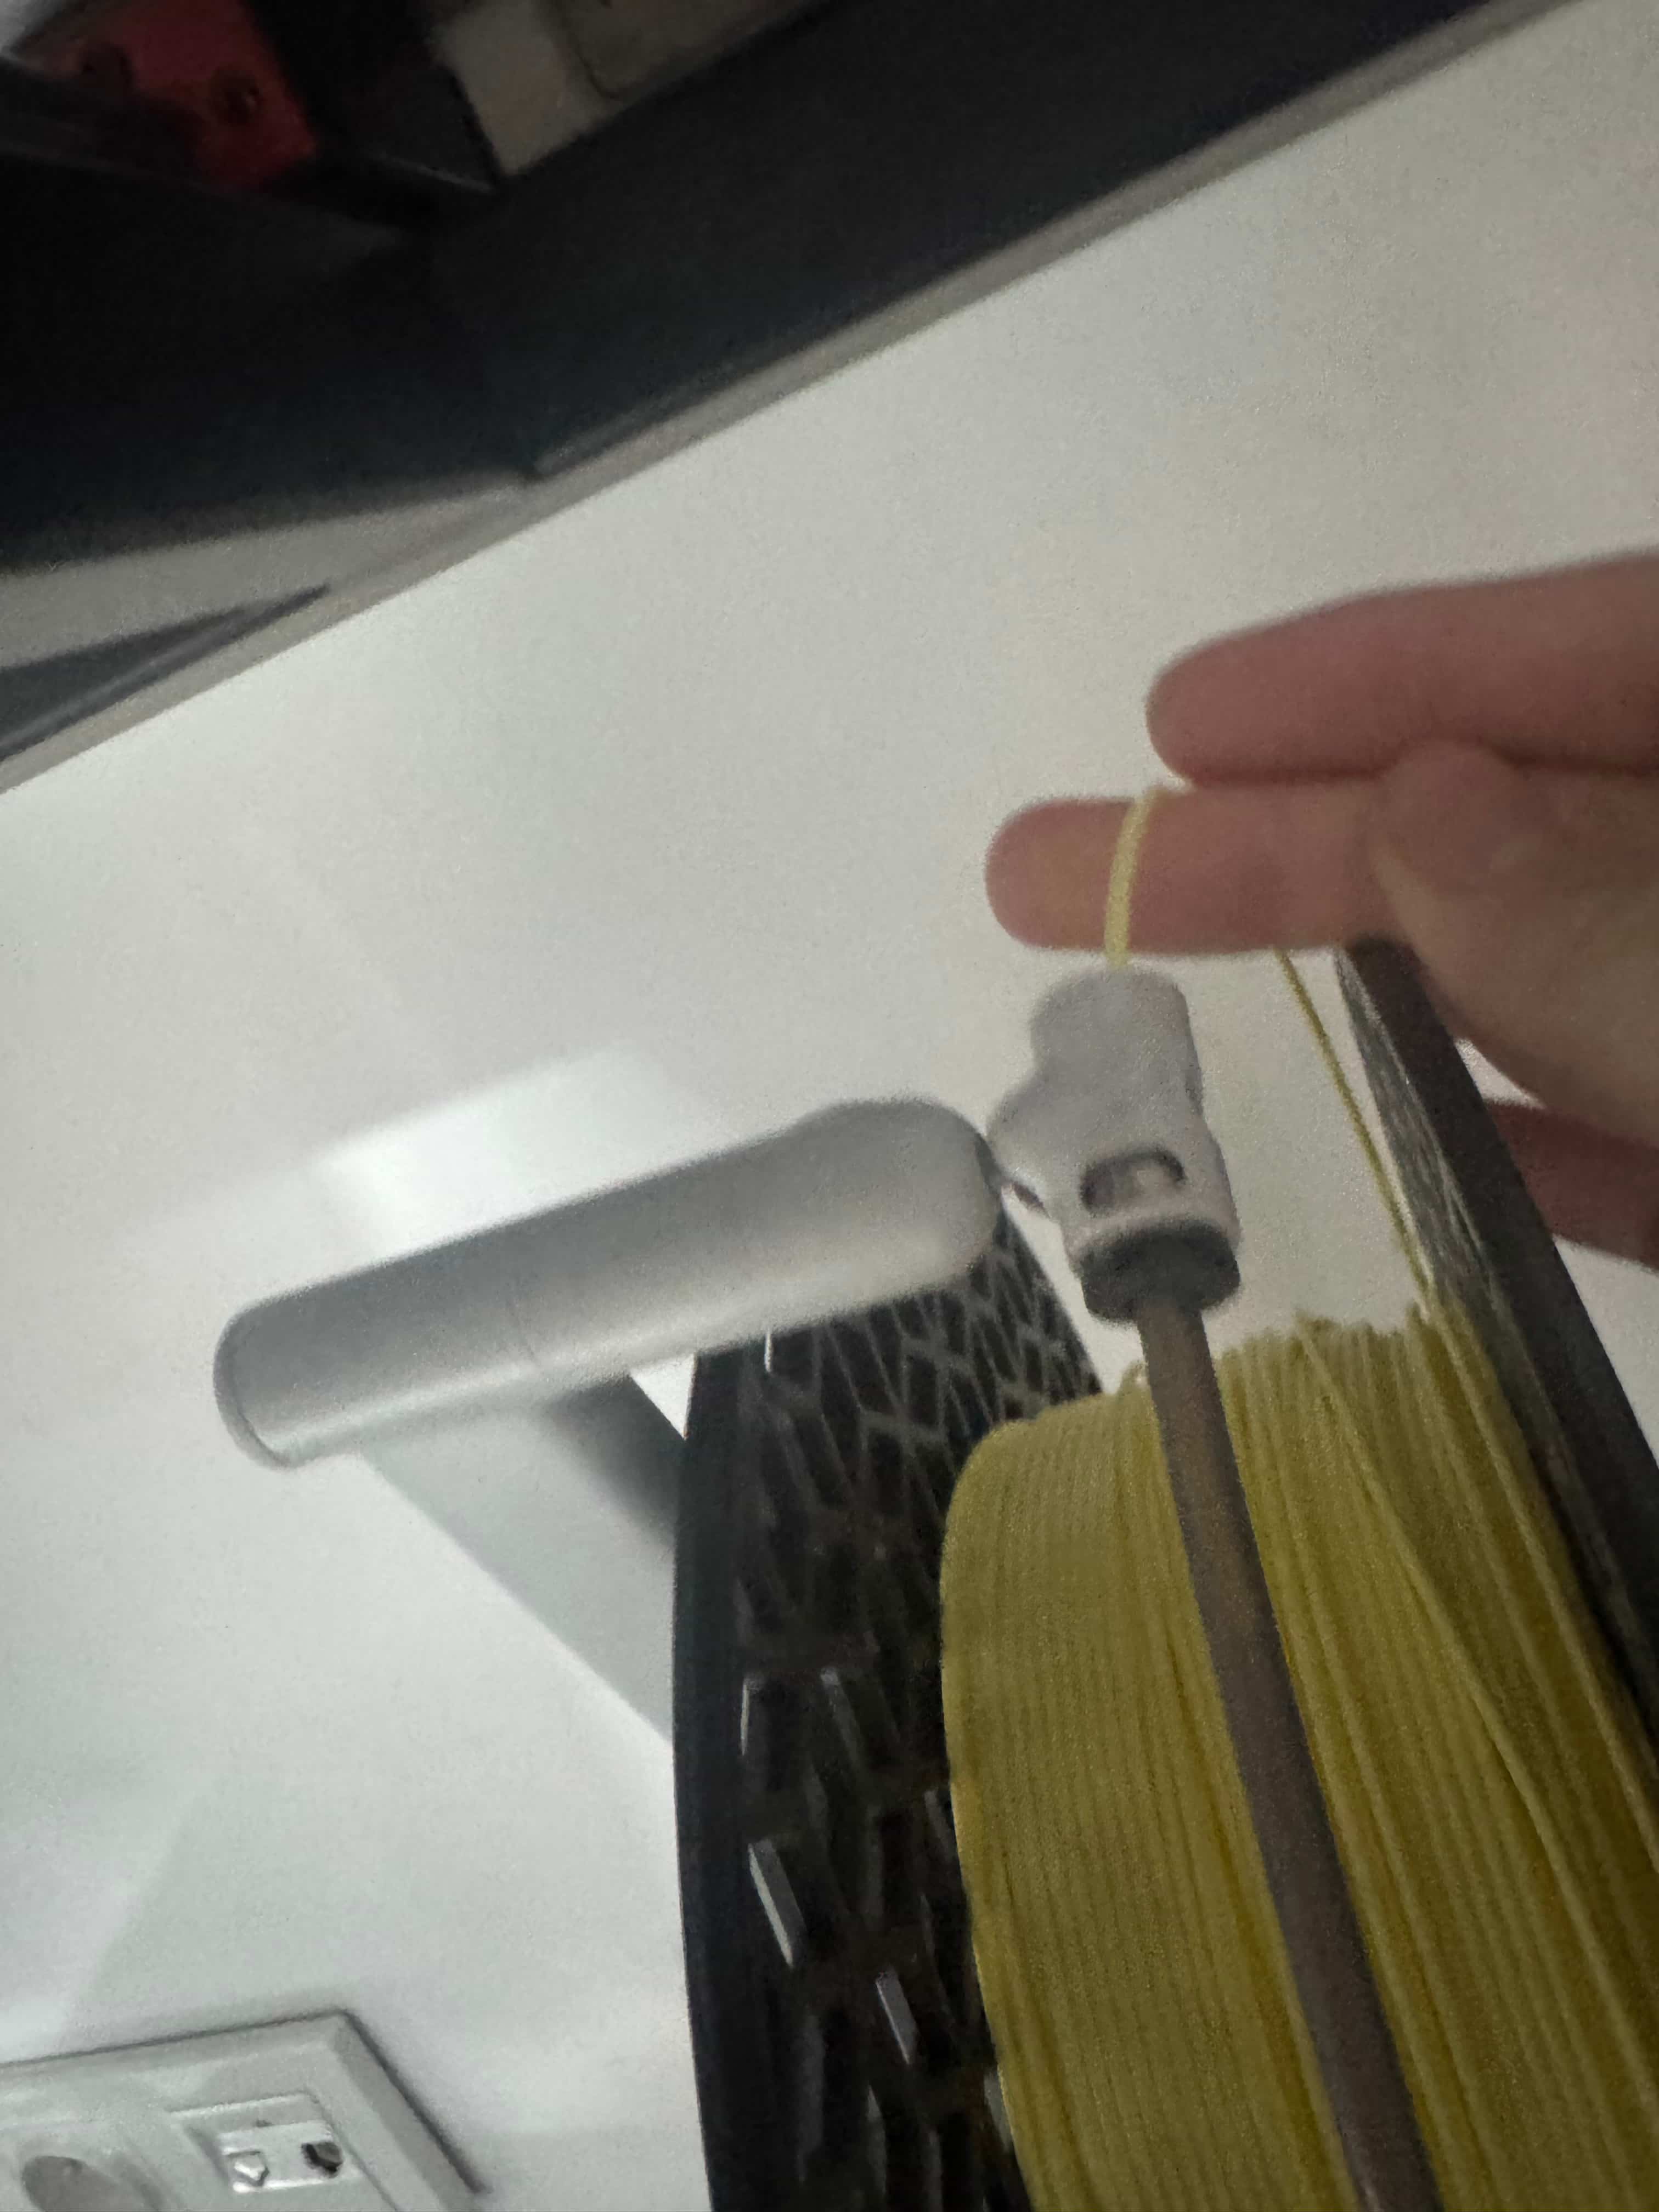
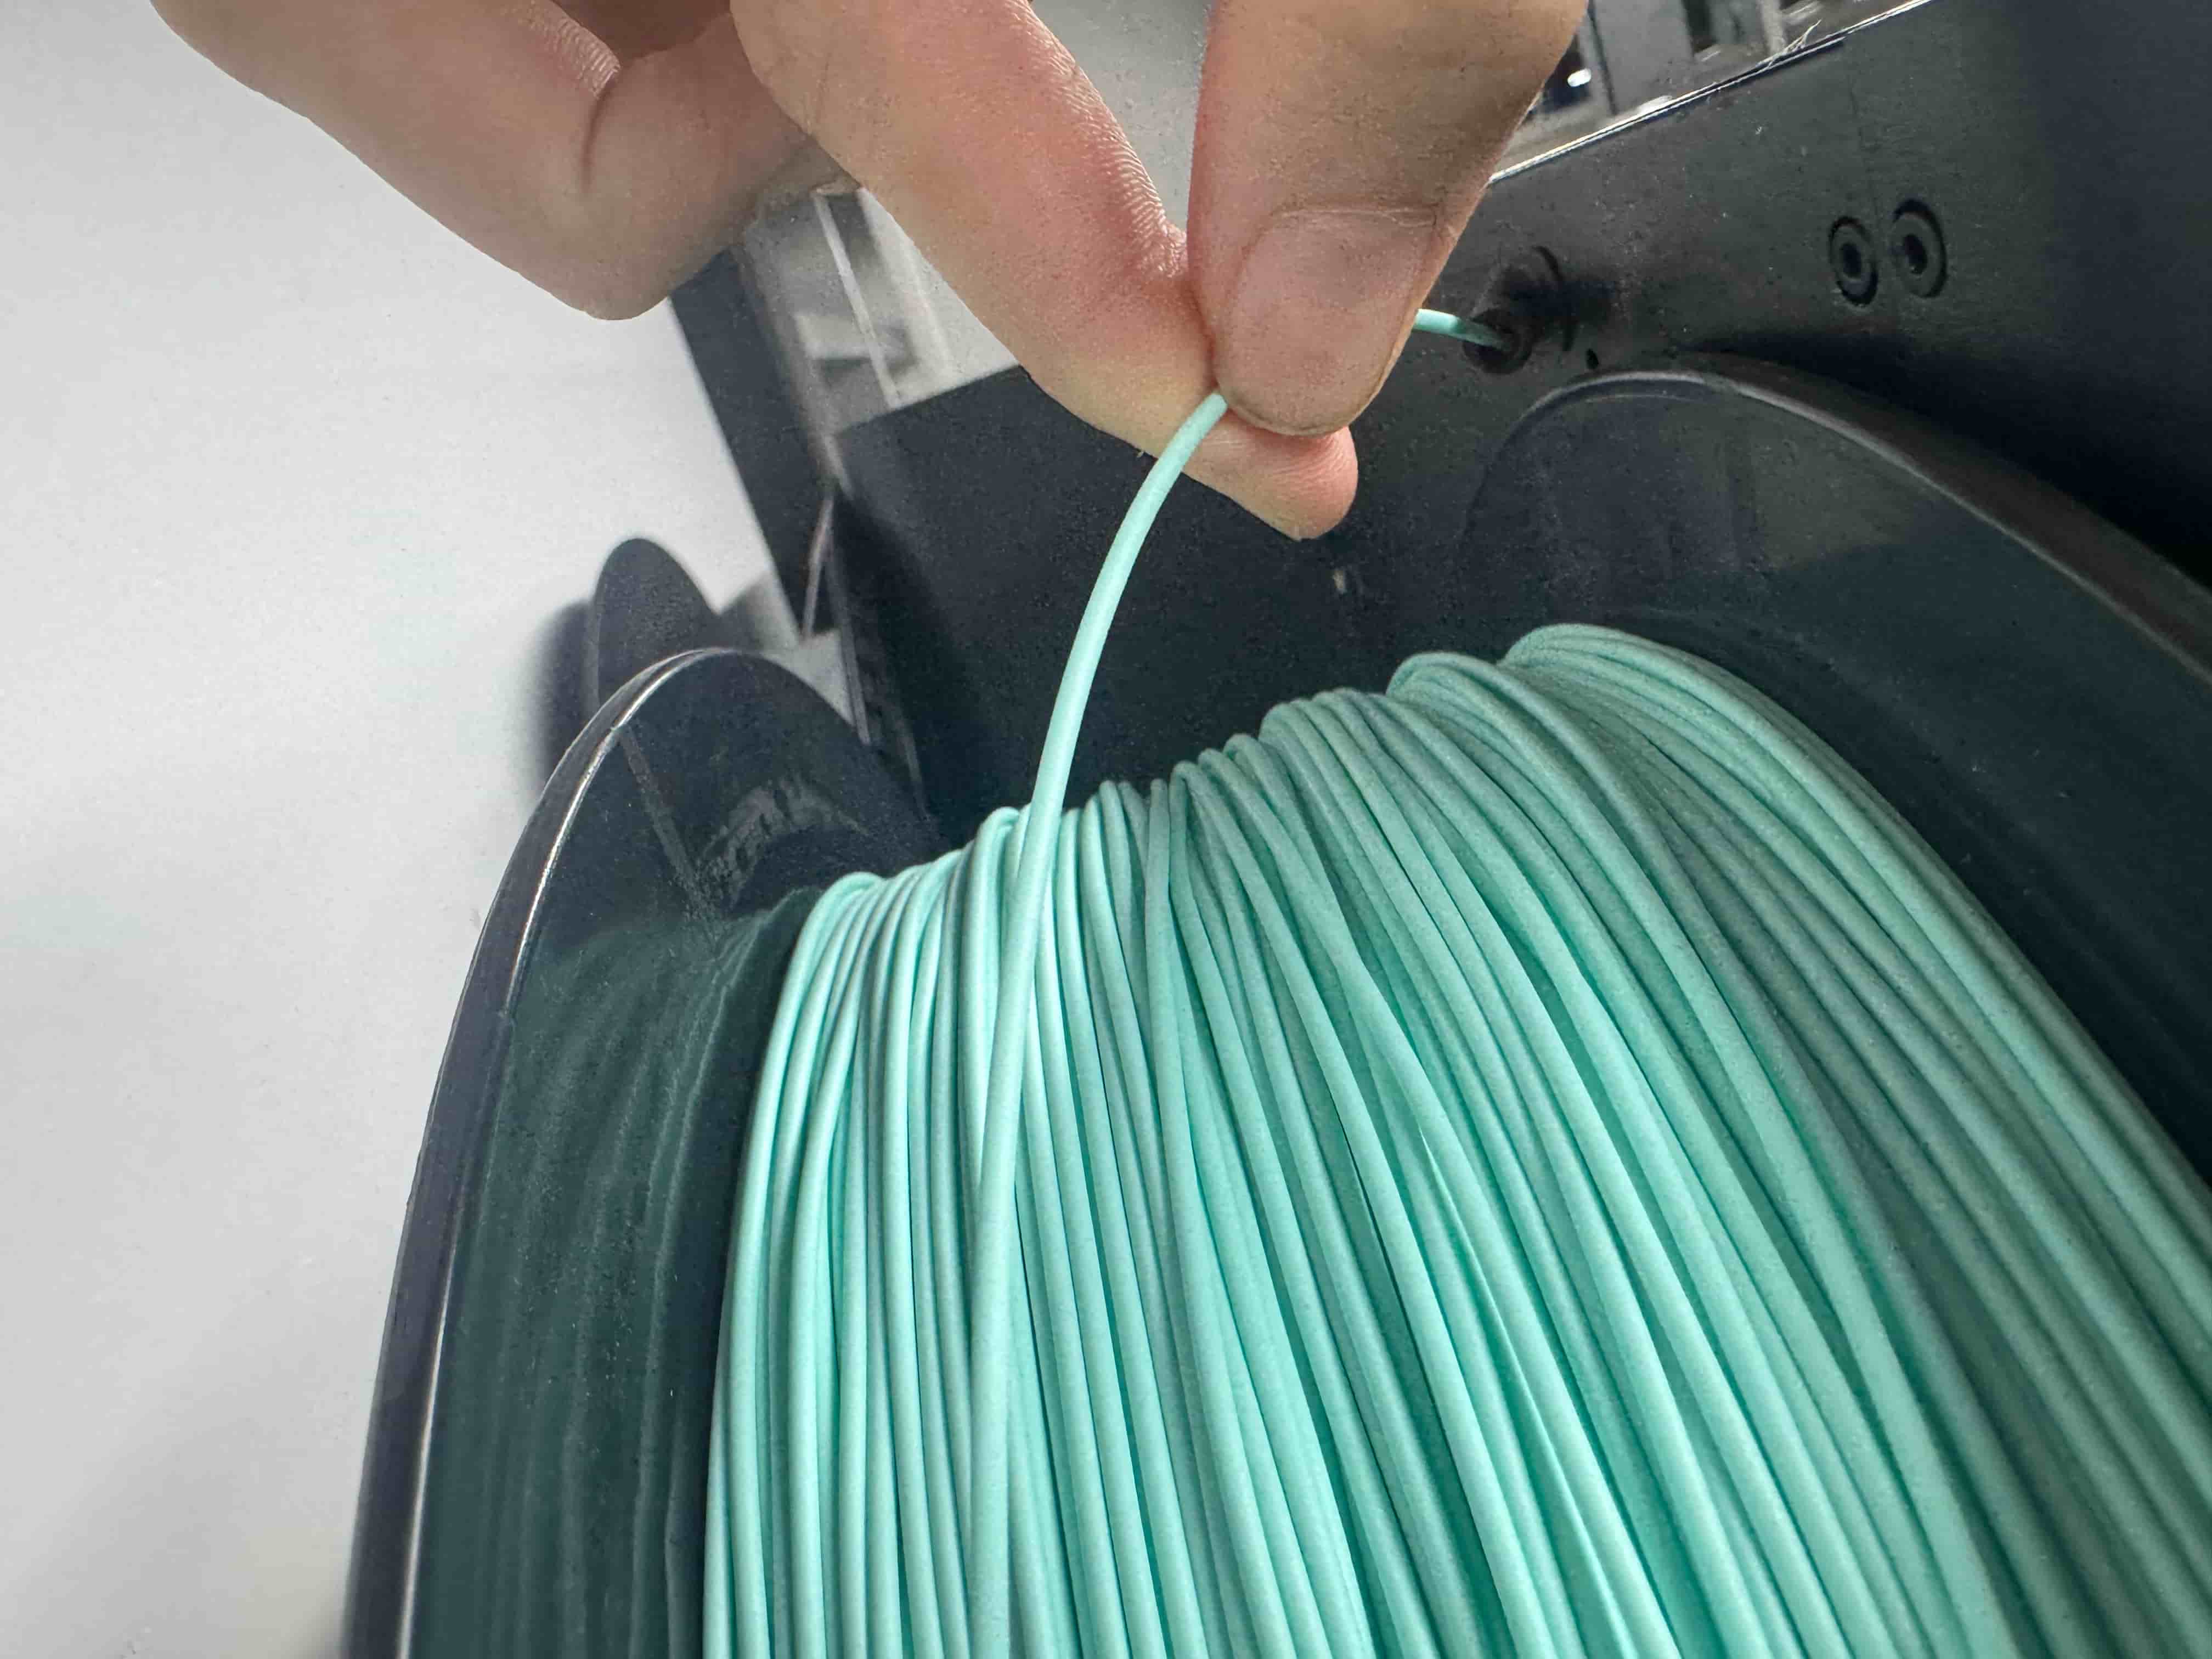
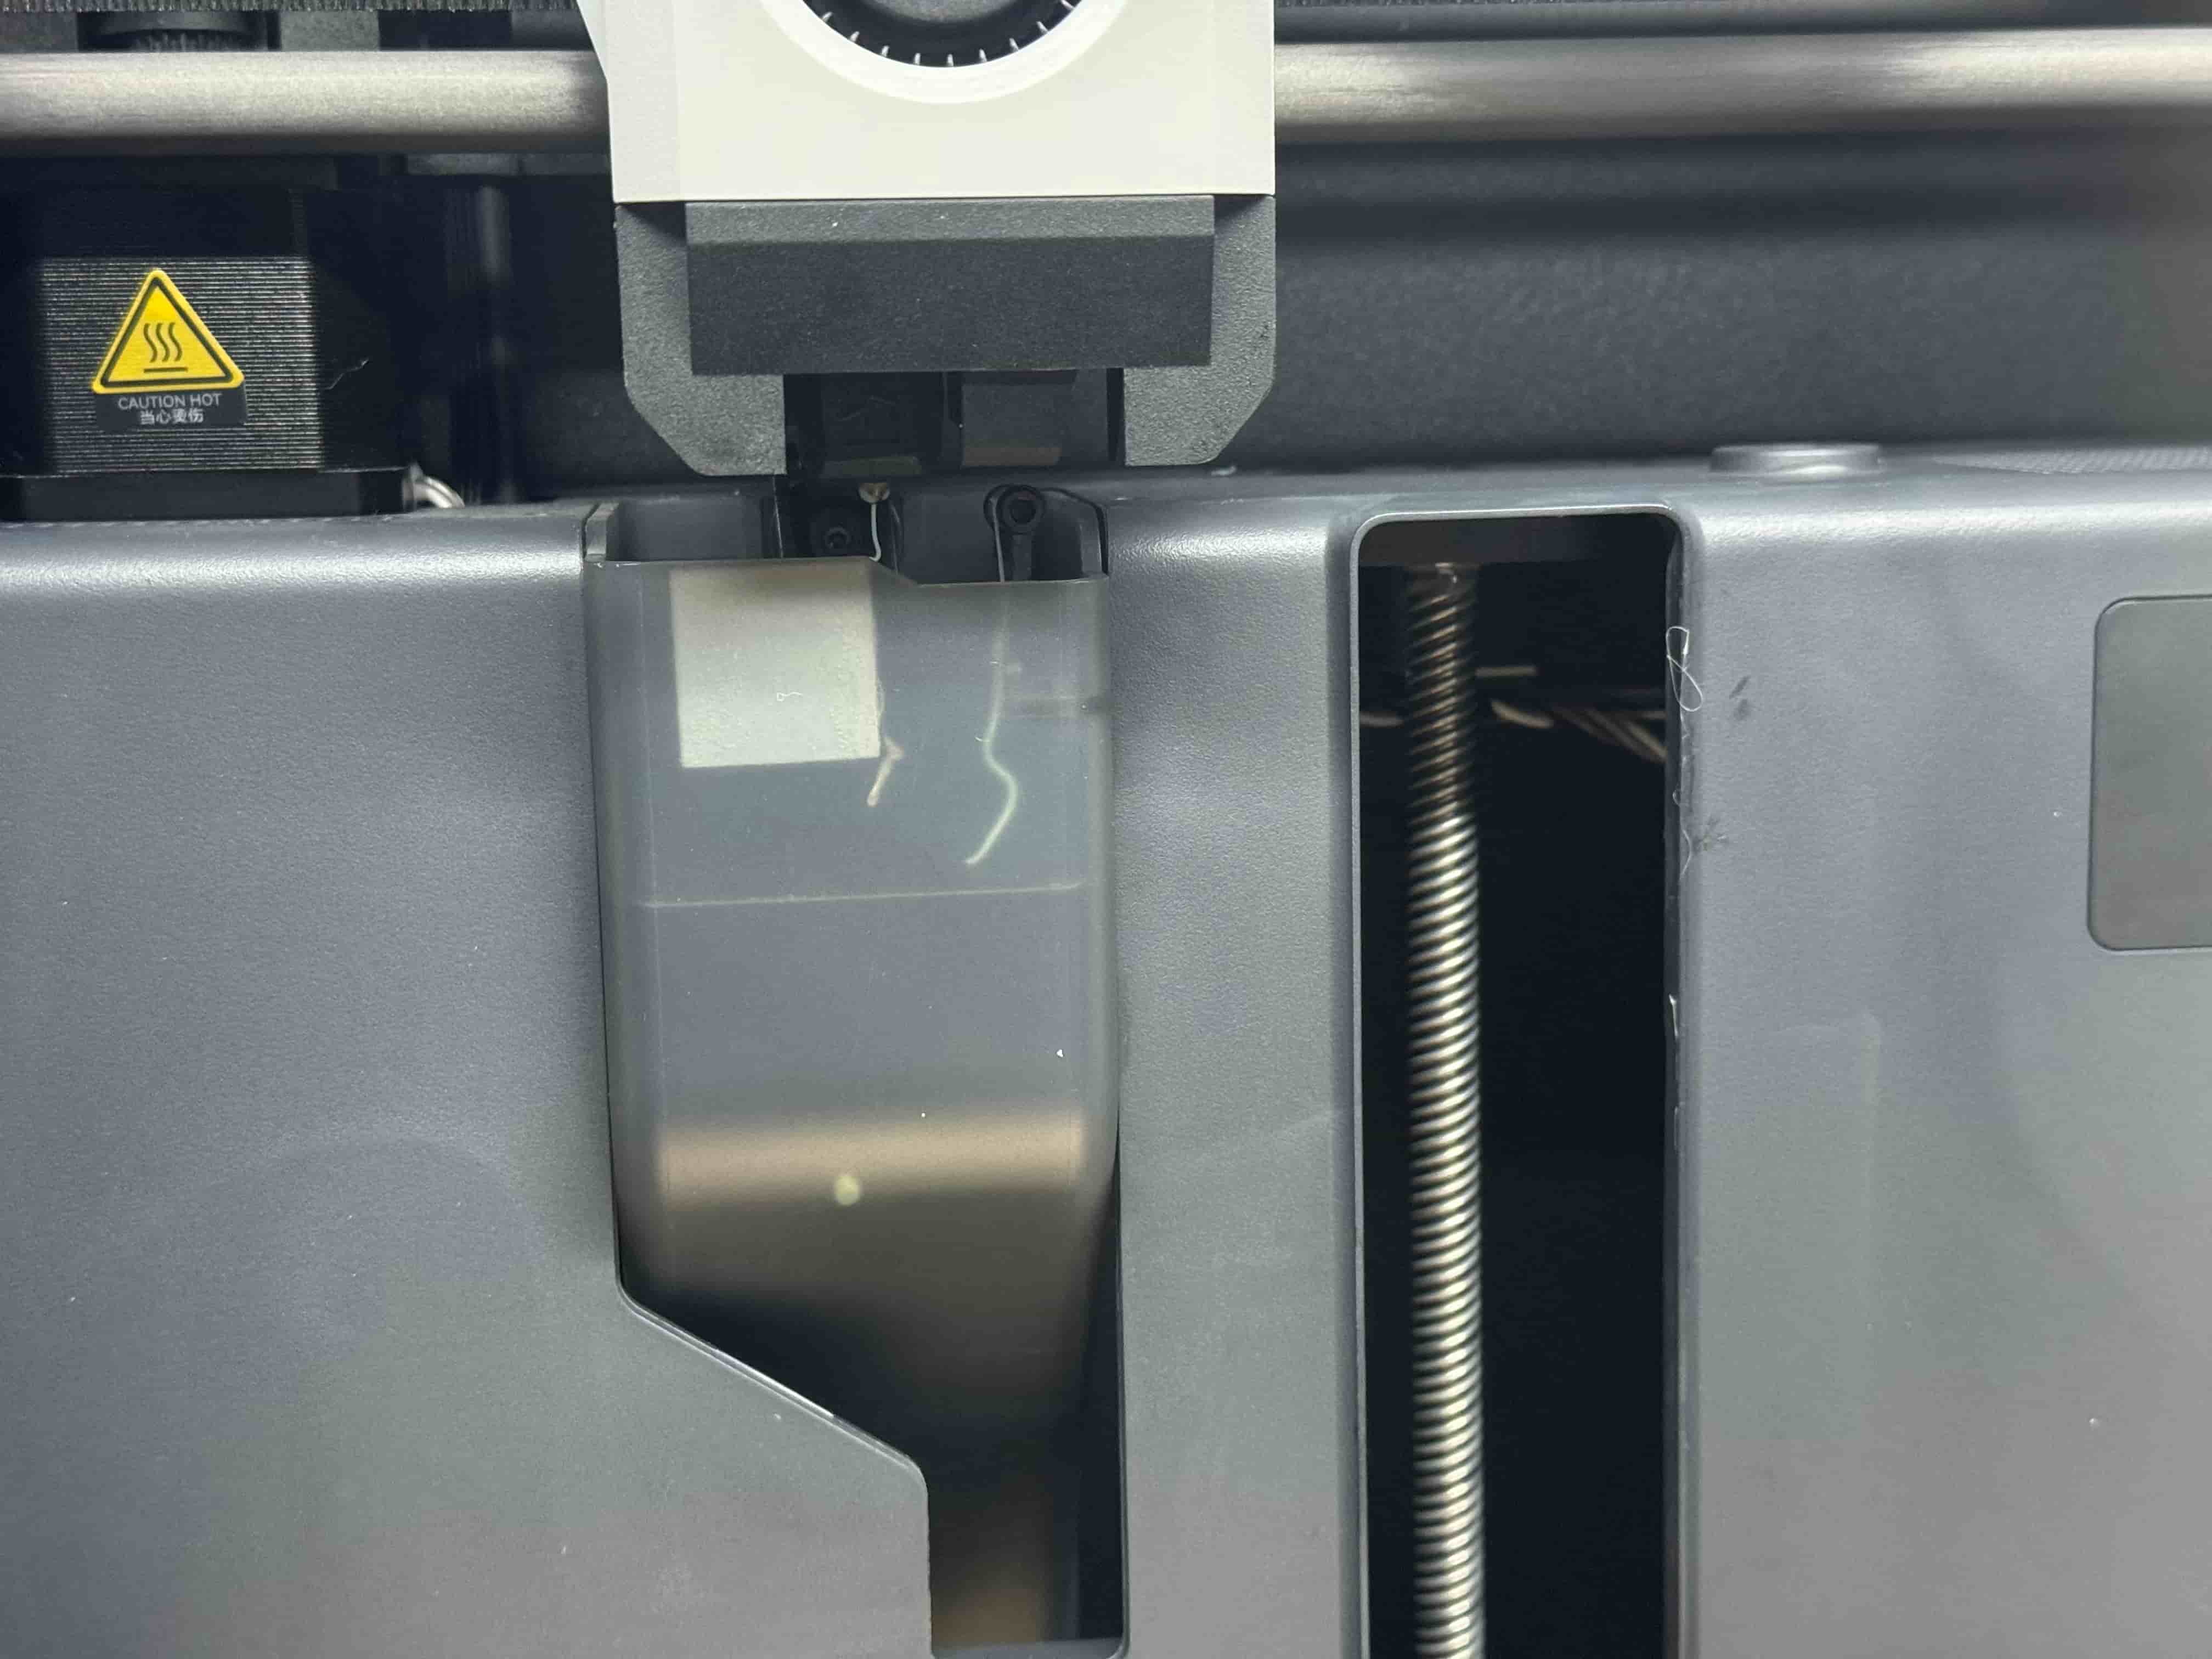
- Firstly, you import the filament from the back of the machine like this (the top going inside the tube), as you can see in the picture below:
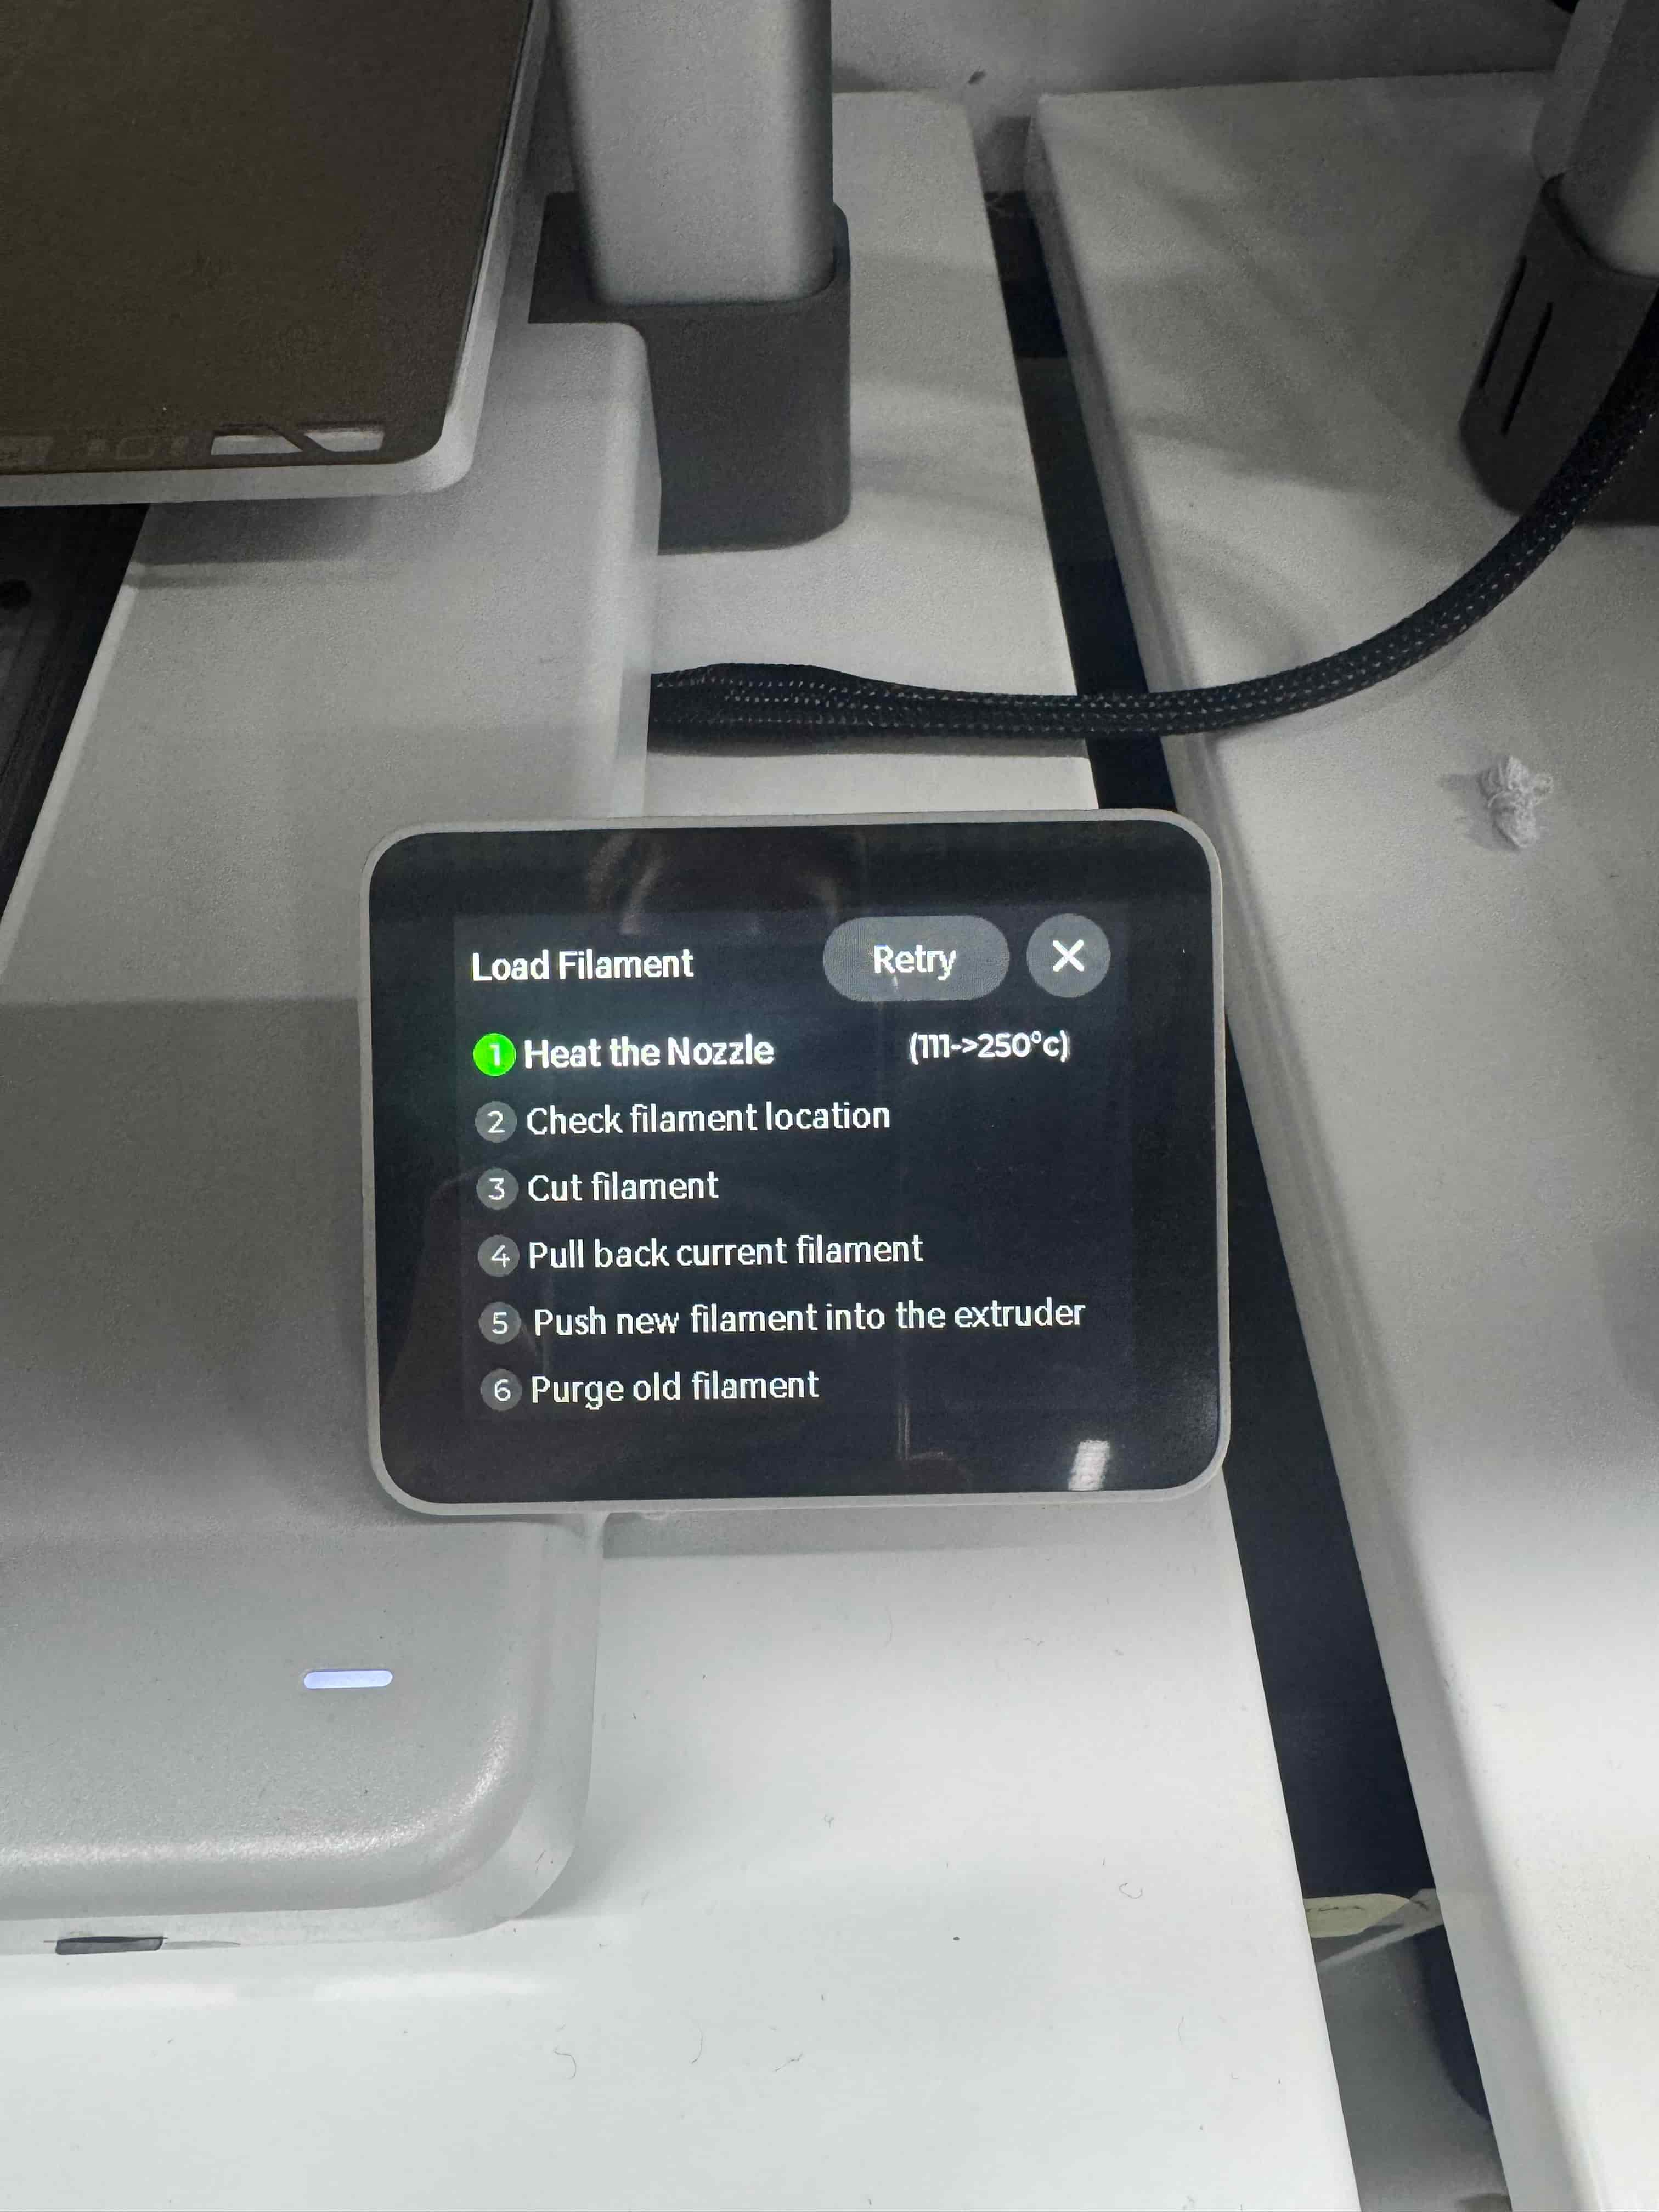
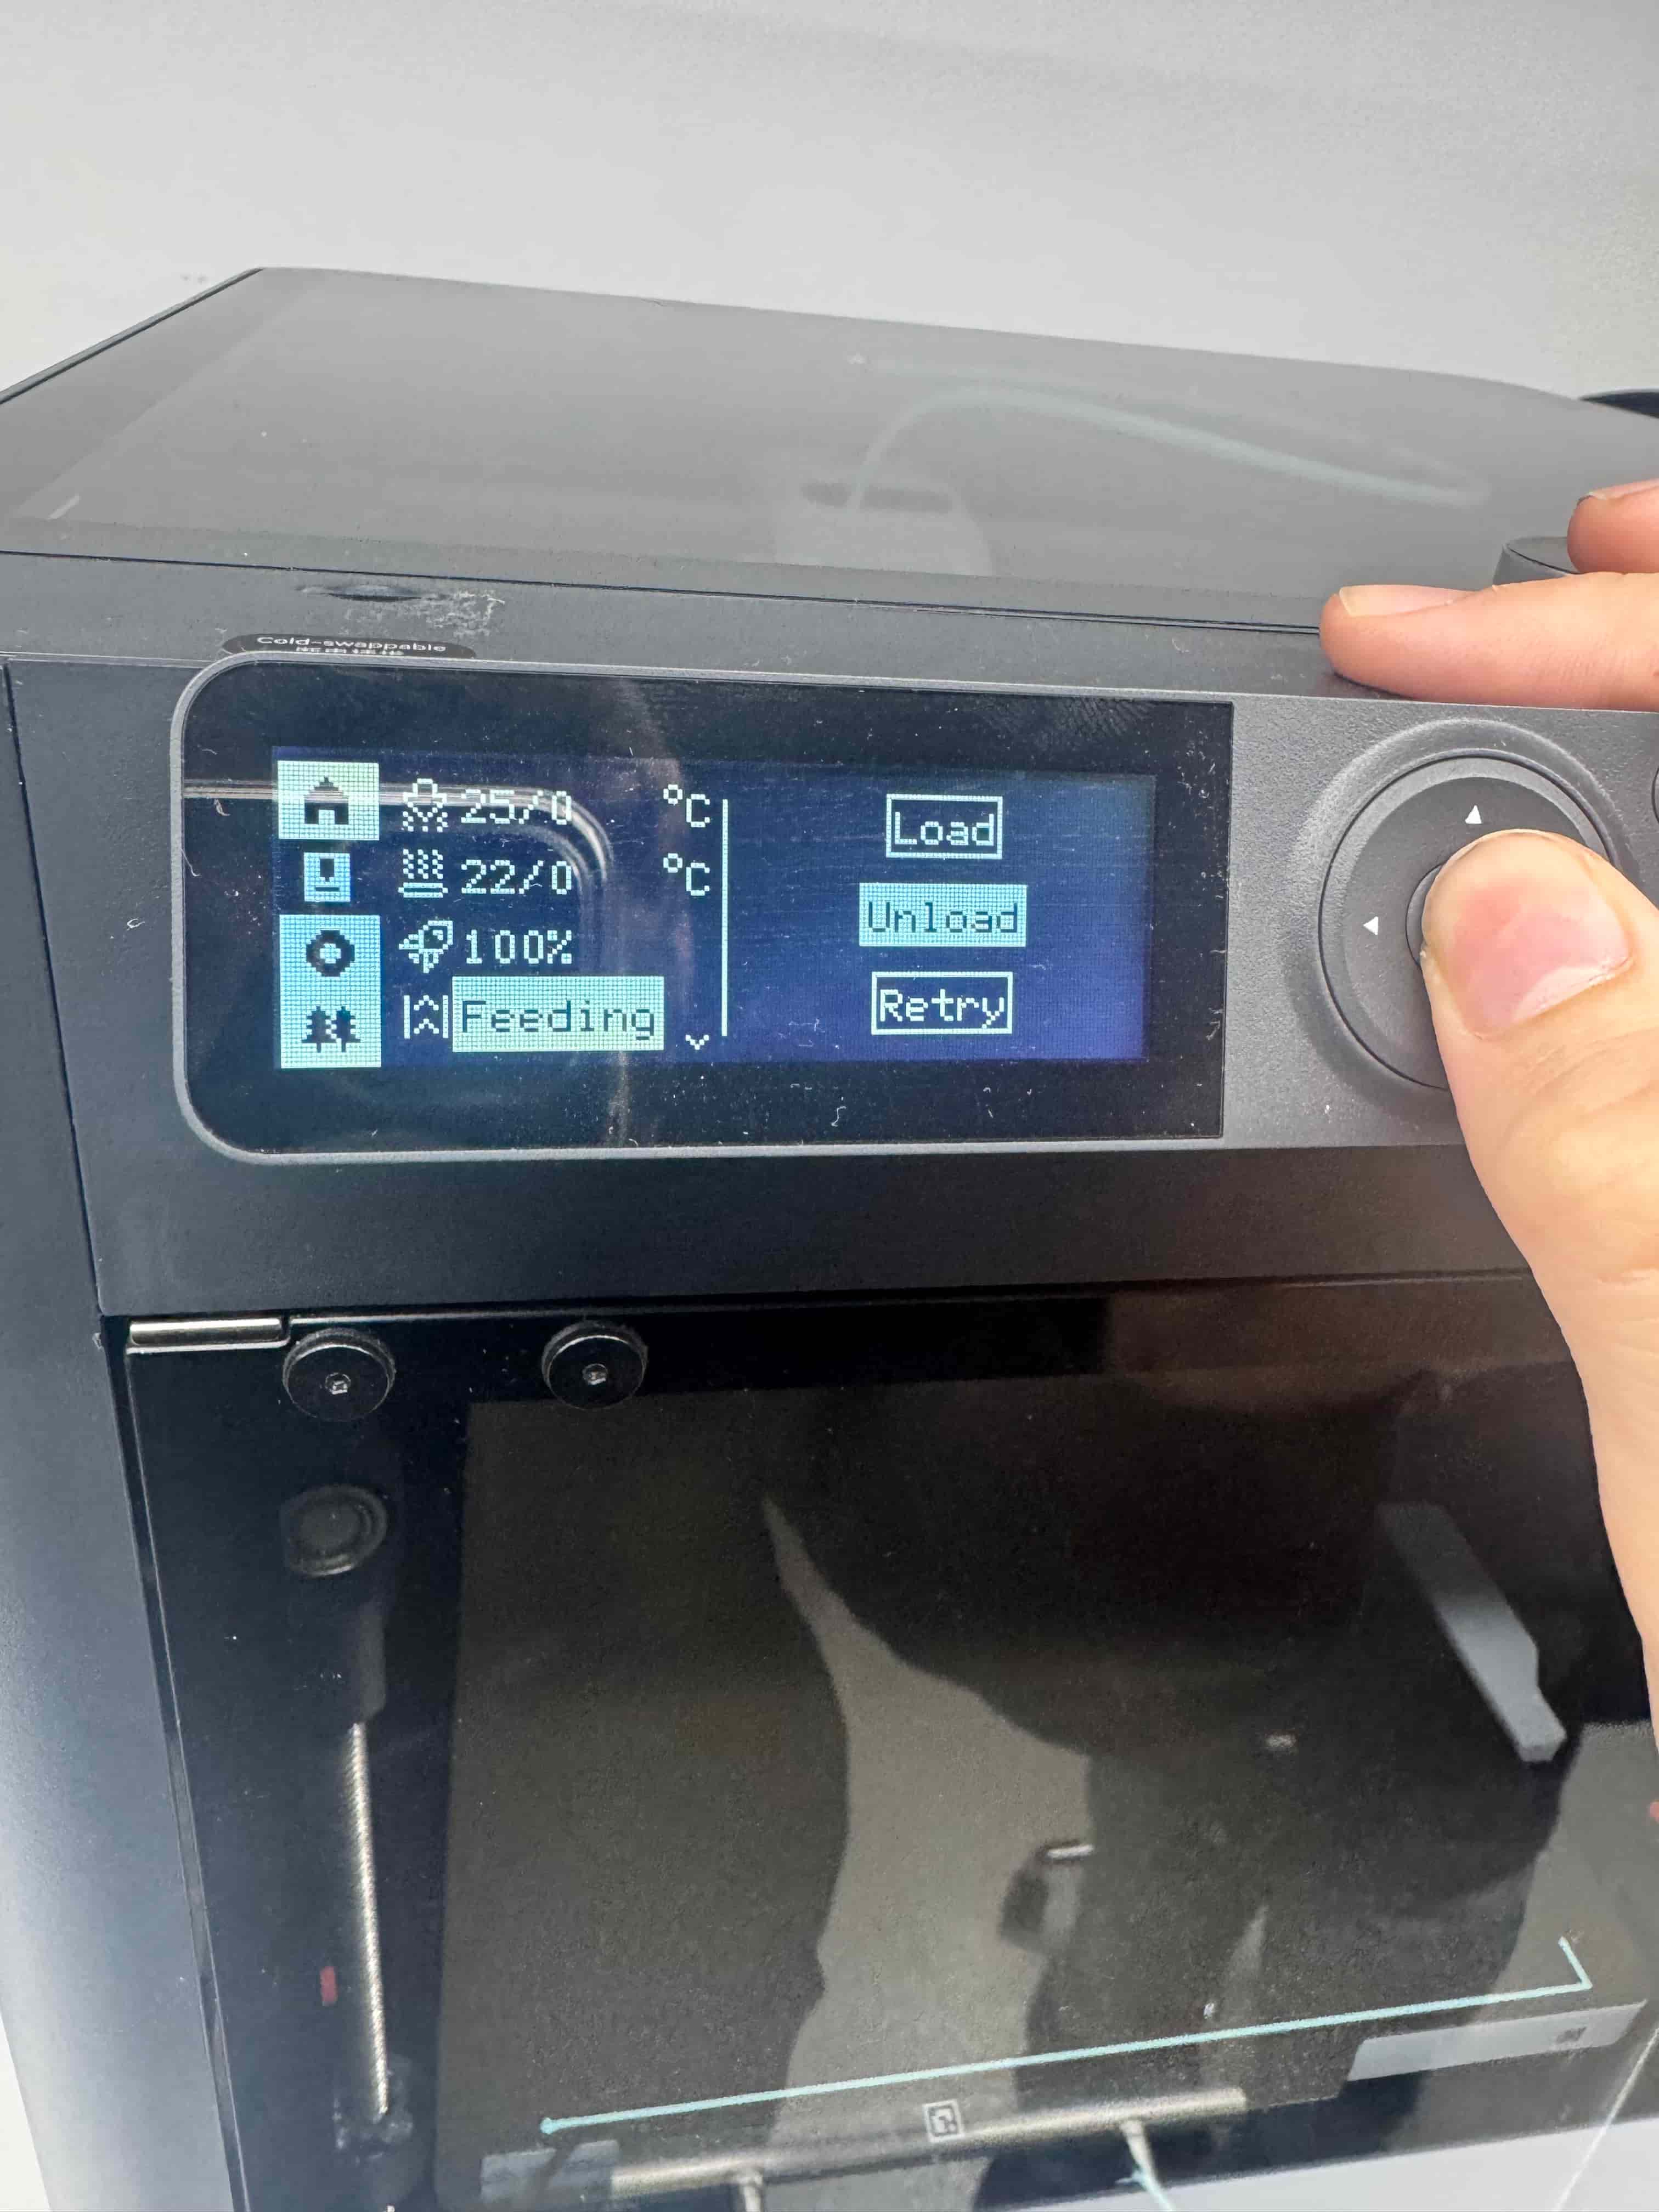
- Secondly, you choose “Feeding” then “Load” from the sections that are there. The screen should look like this:
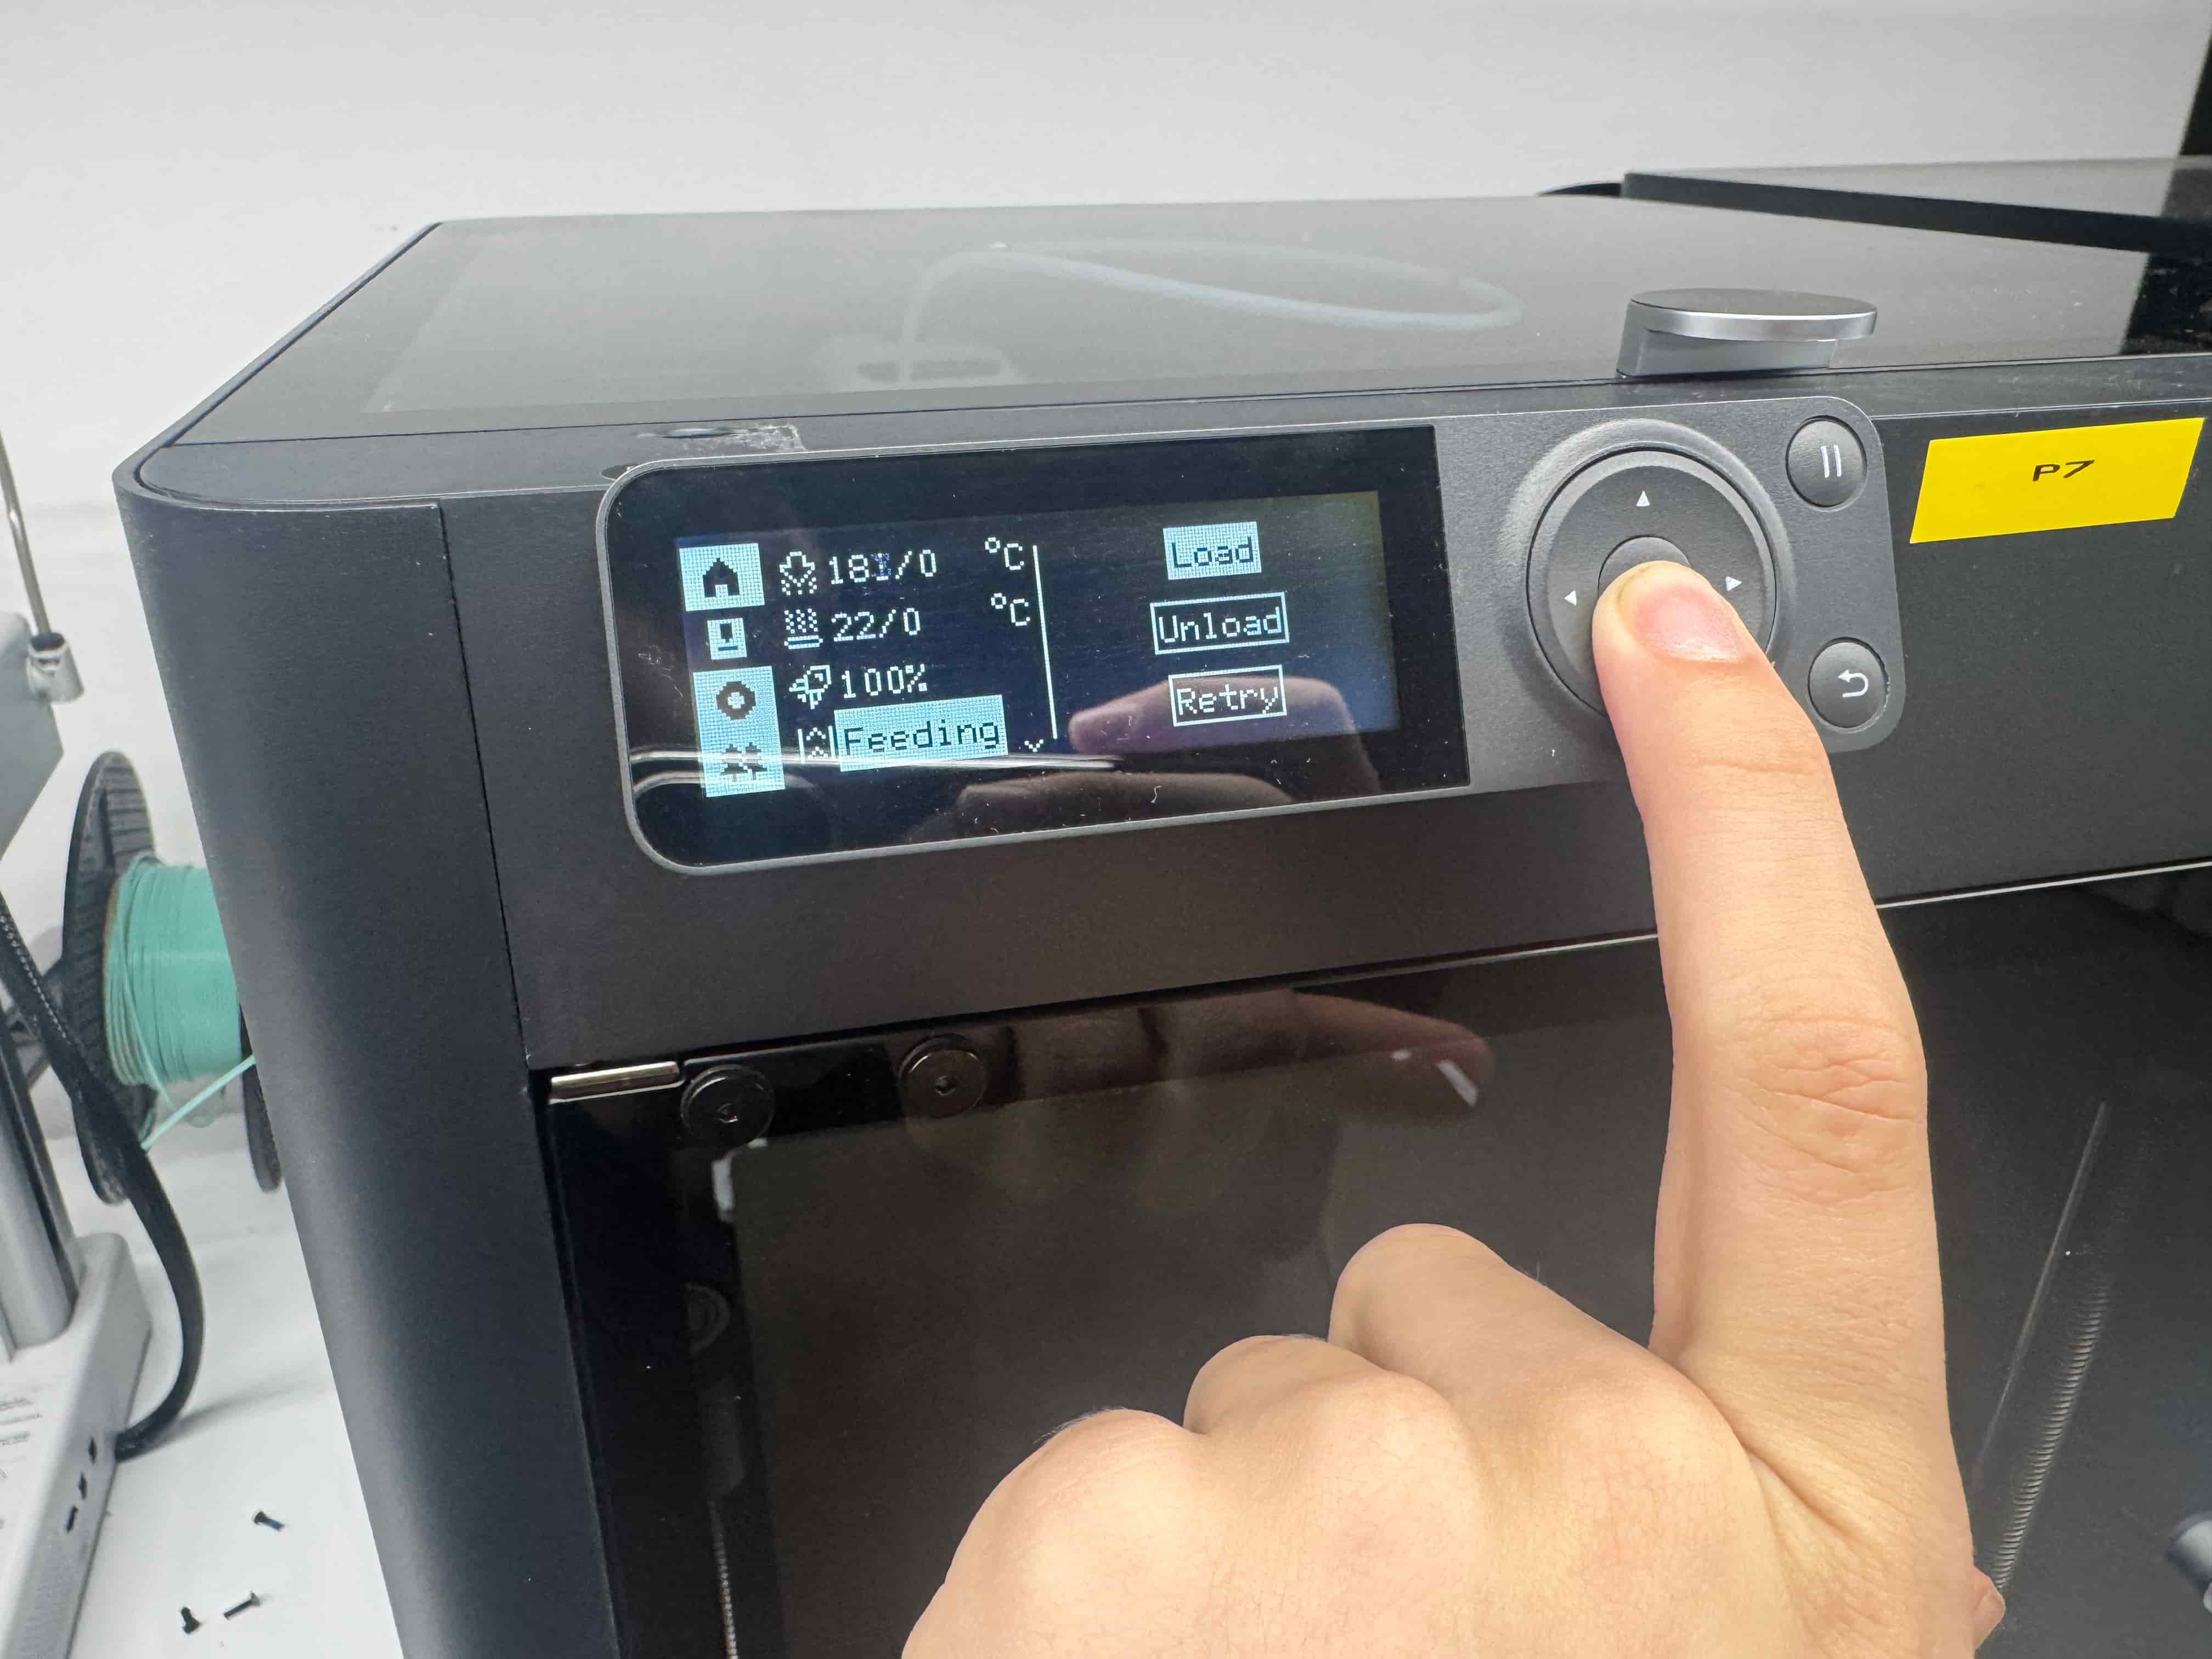
And you use the button and the arrows at the right side of the screen to move and sellect between sections.
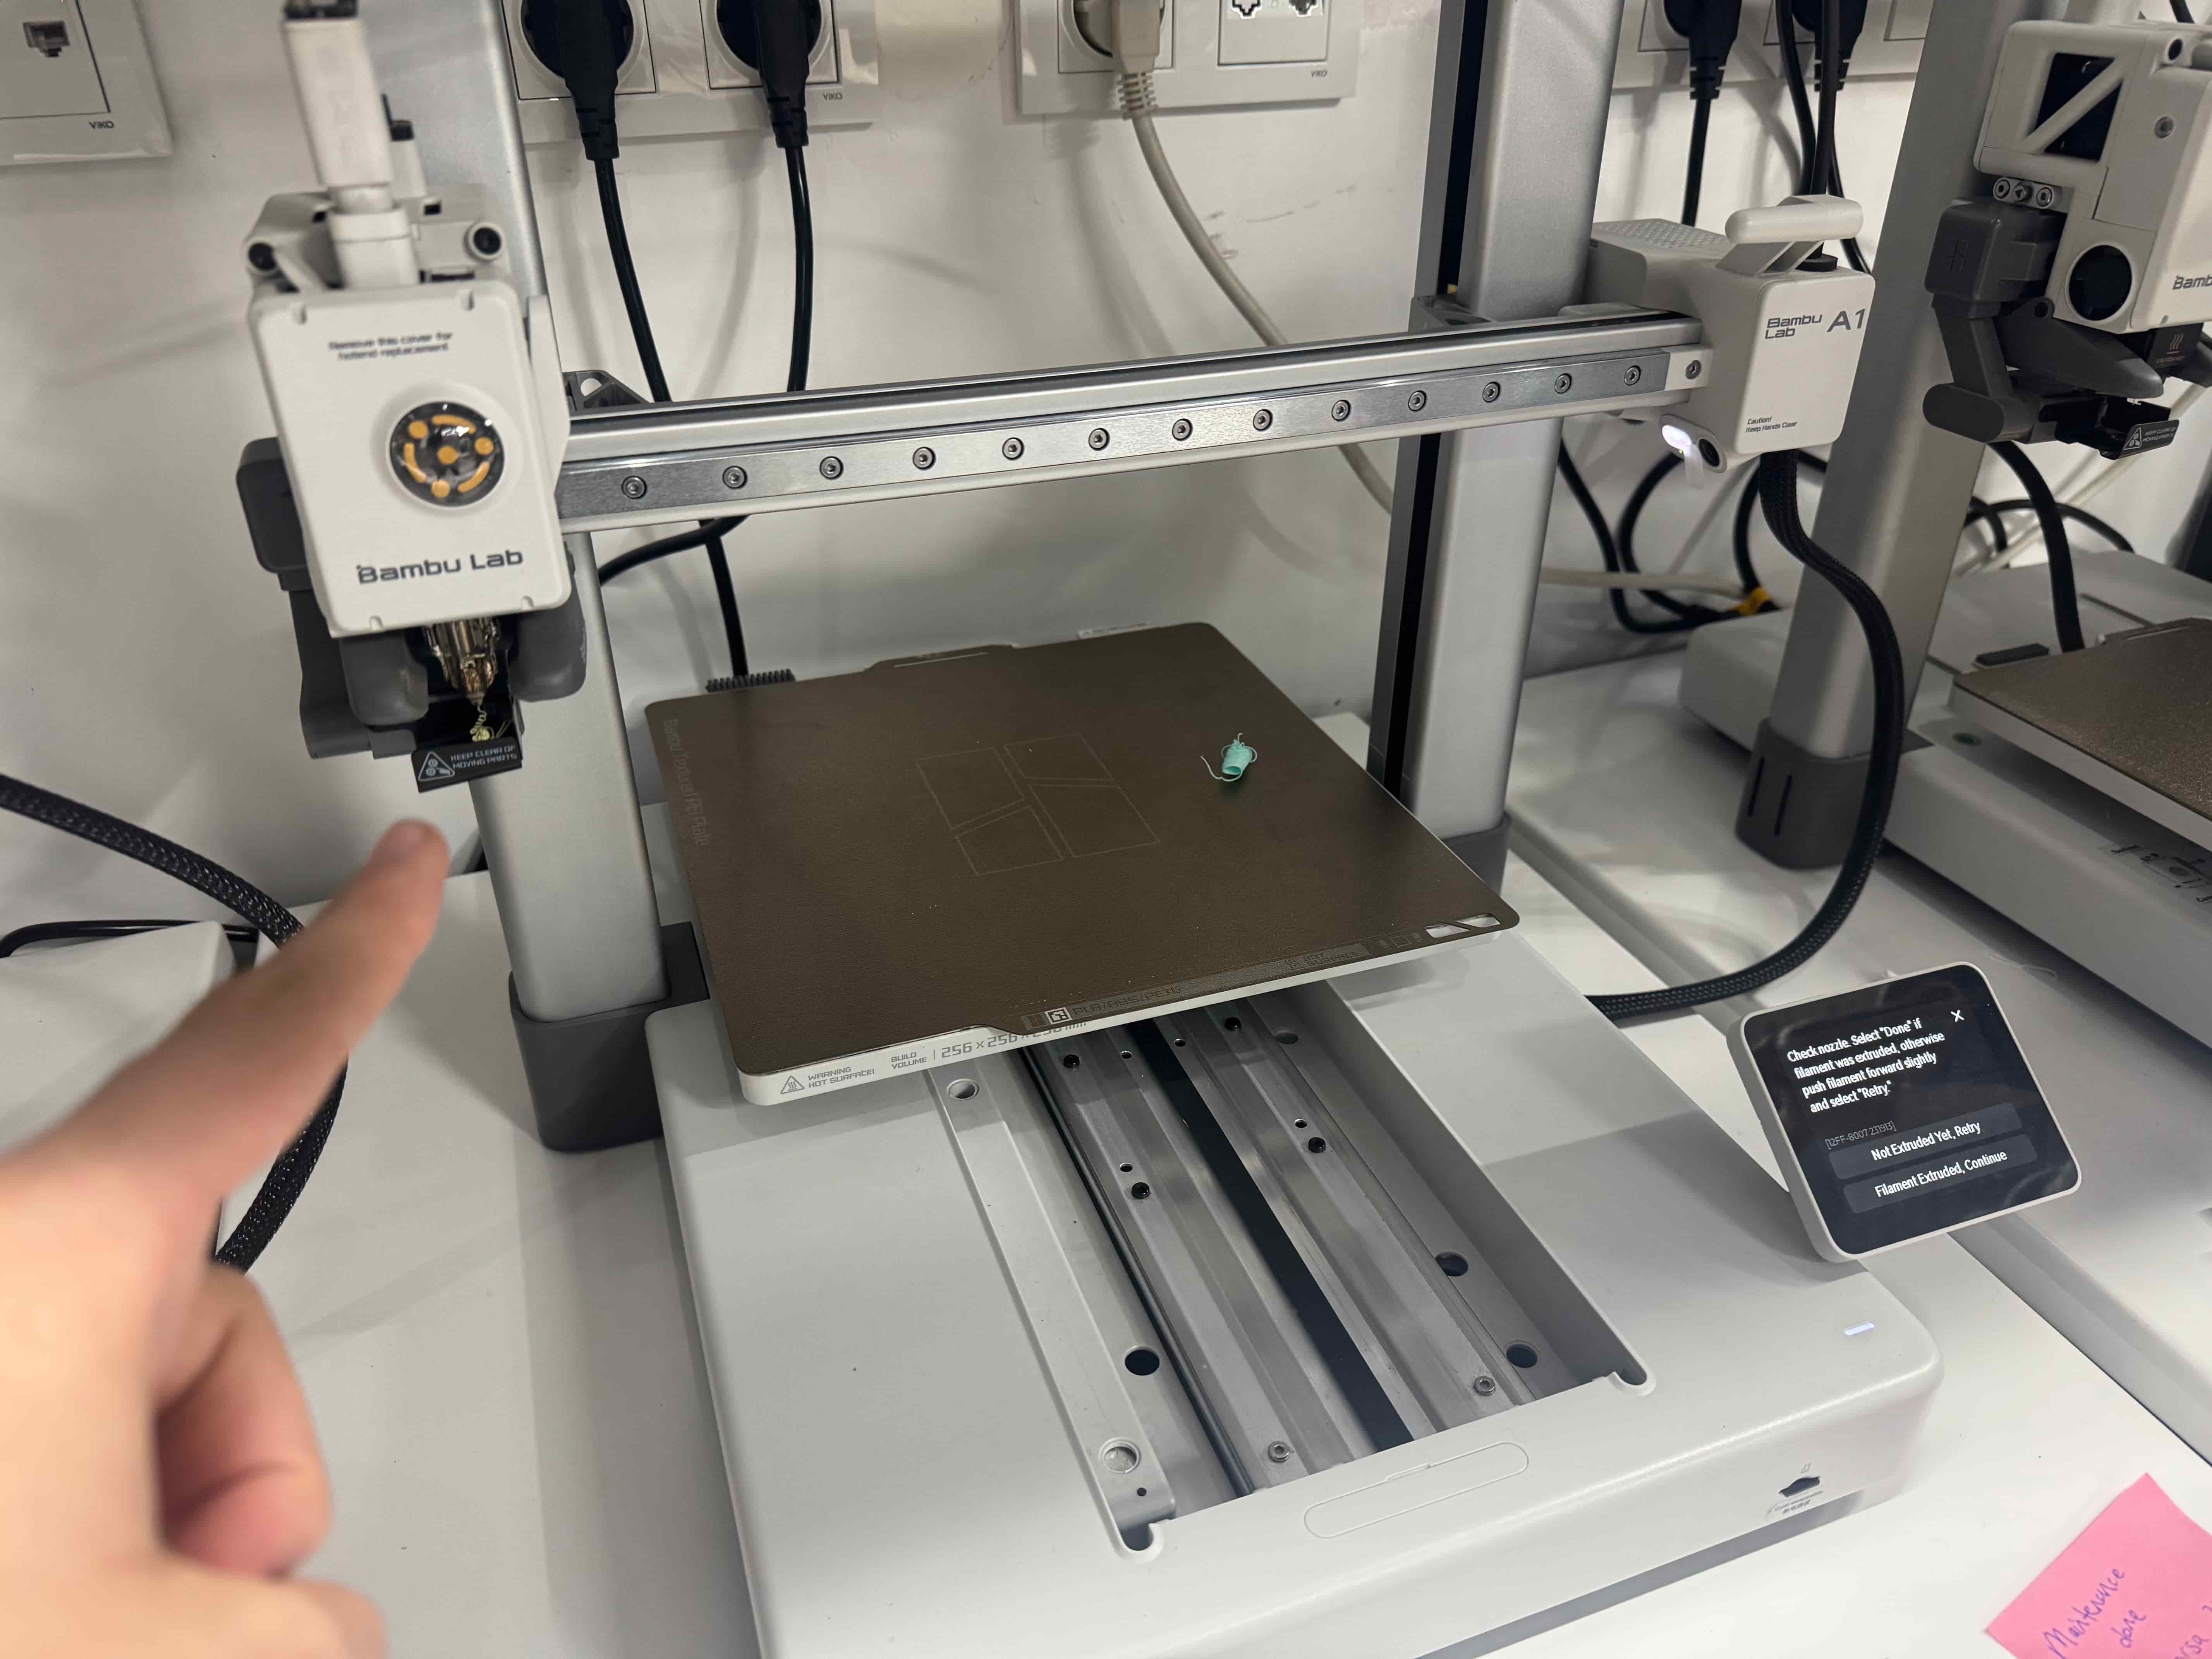
- You wait until you get a disclaimer from the screen that says, “Current filament is deploying,” like I saw on my screen, like this:
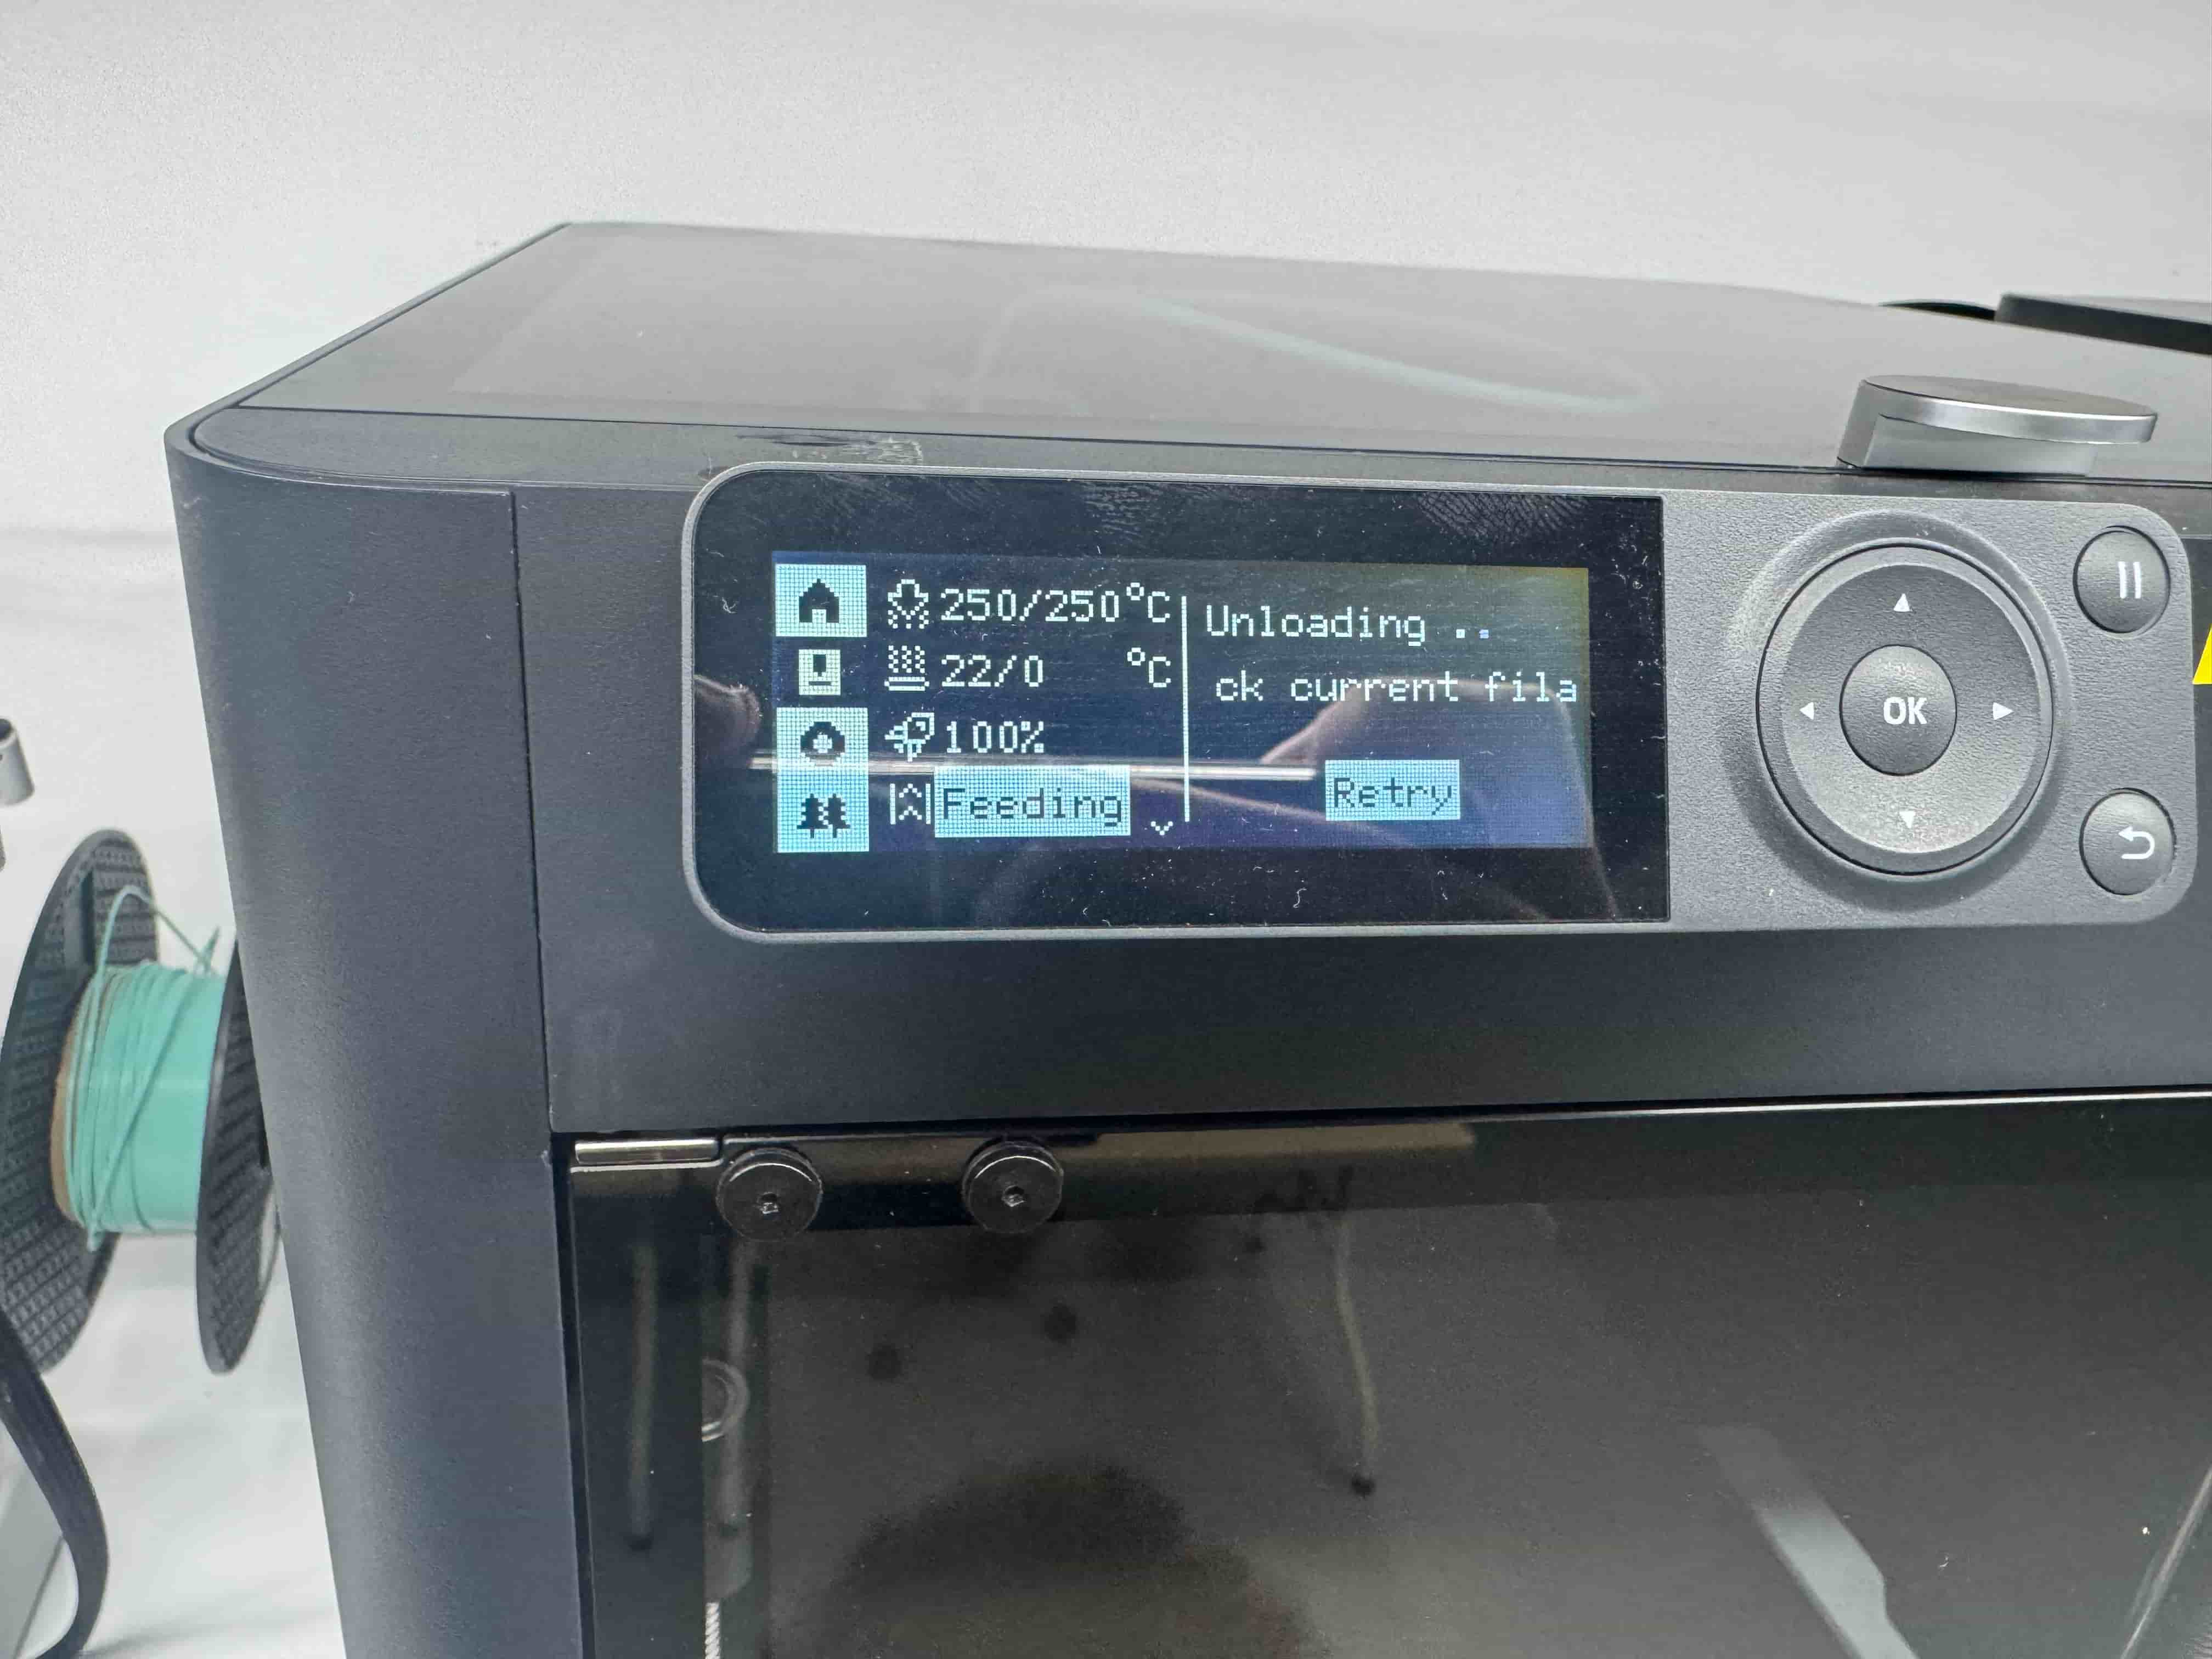
- After that for to confirm that the filament is totaly deployed to the machine, you should look at the machine’s needle and see a small part of filament coming from the tip of the needle:
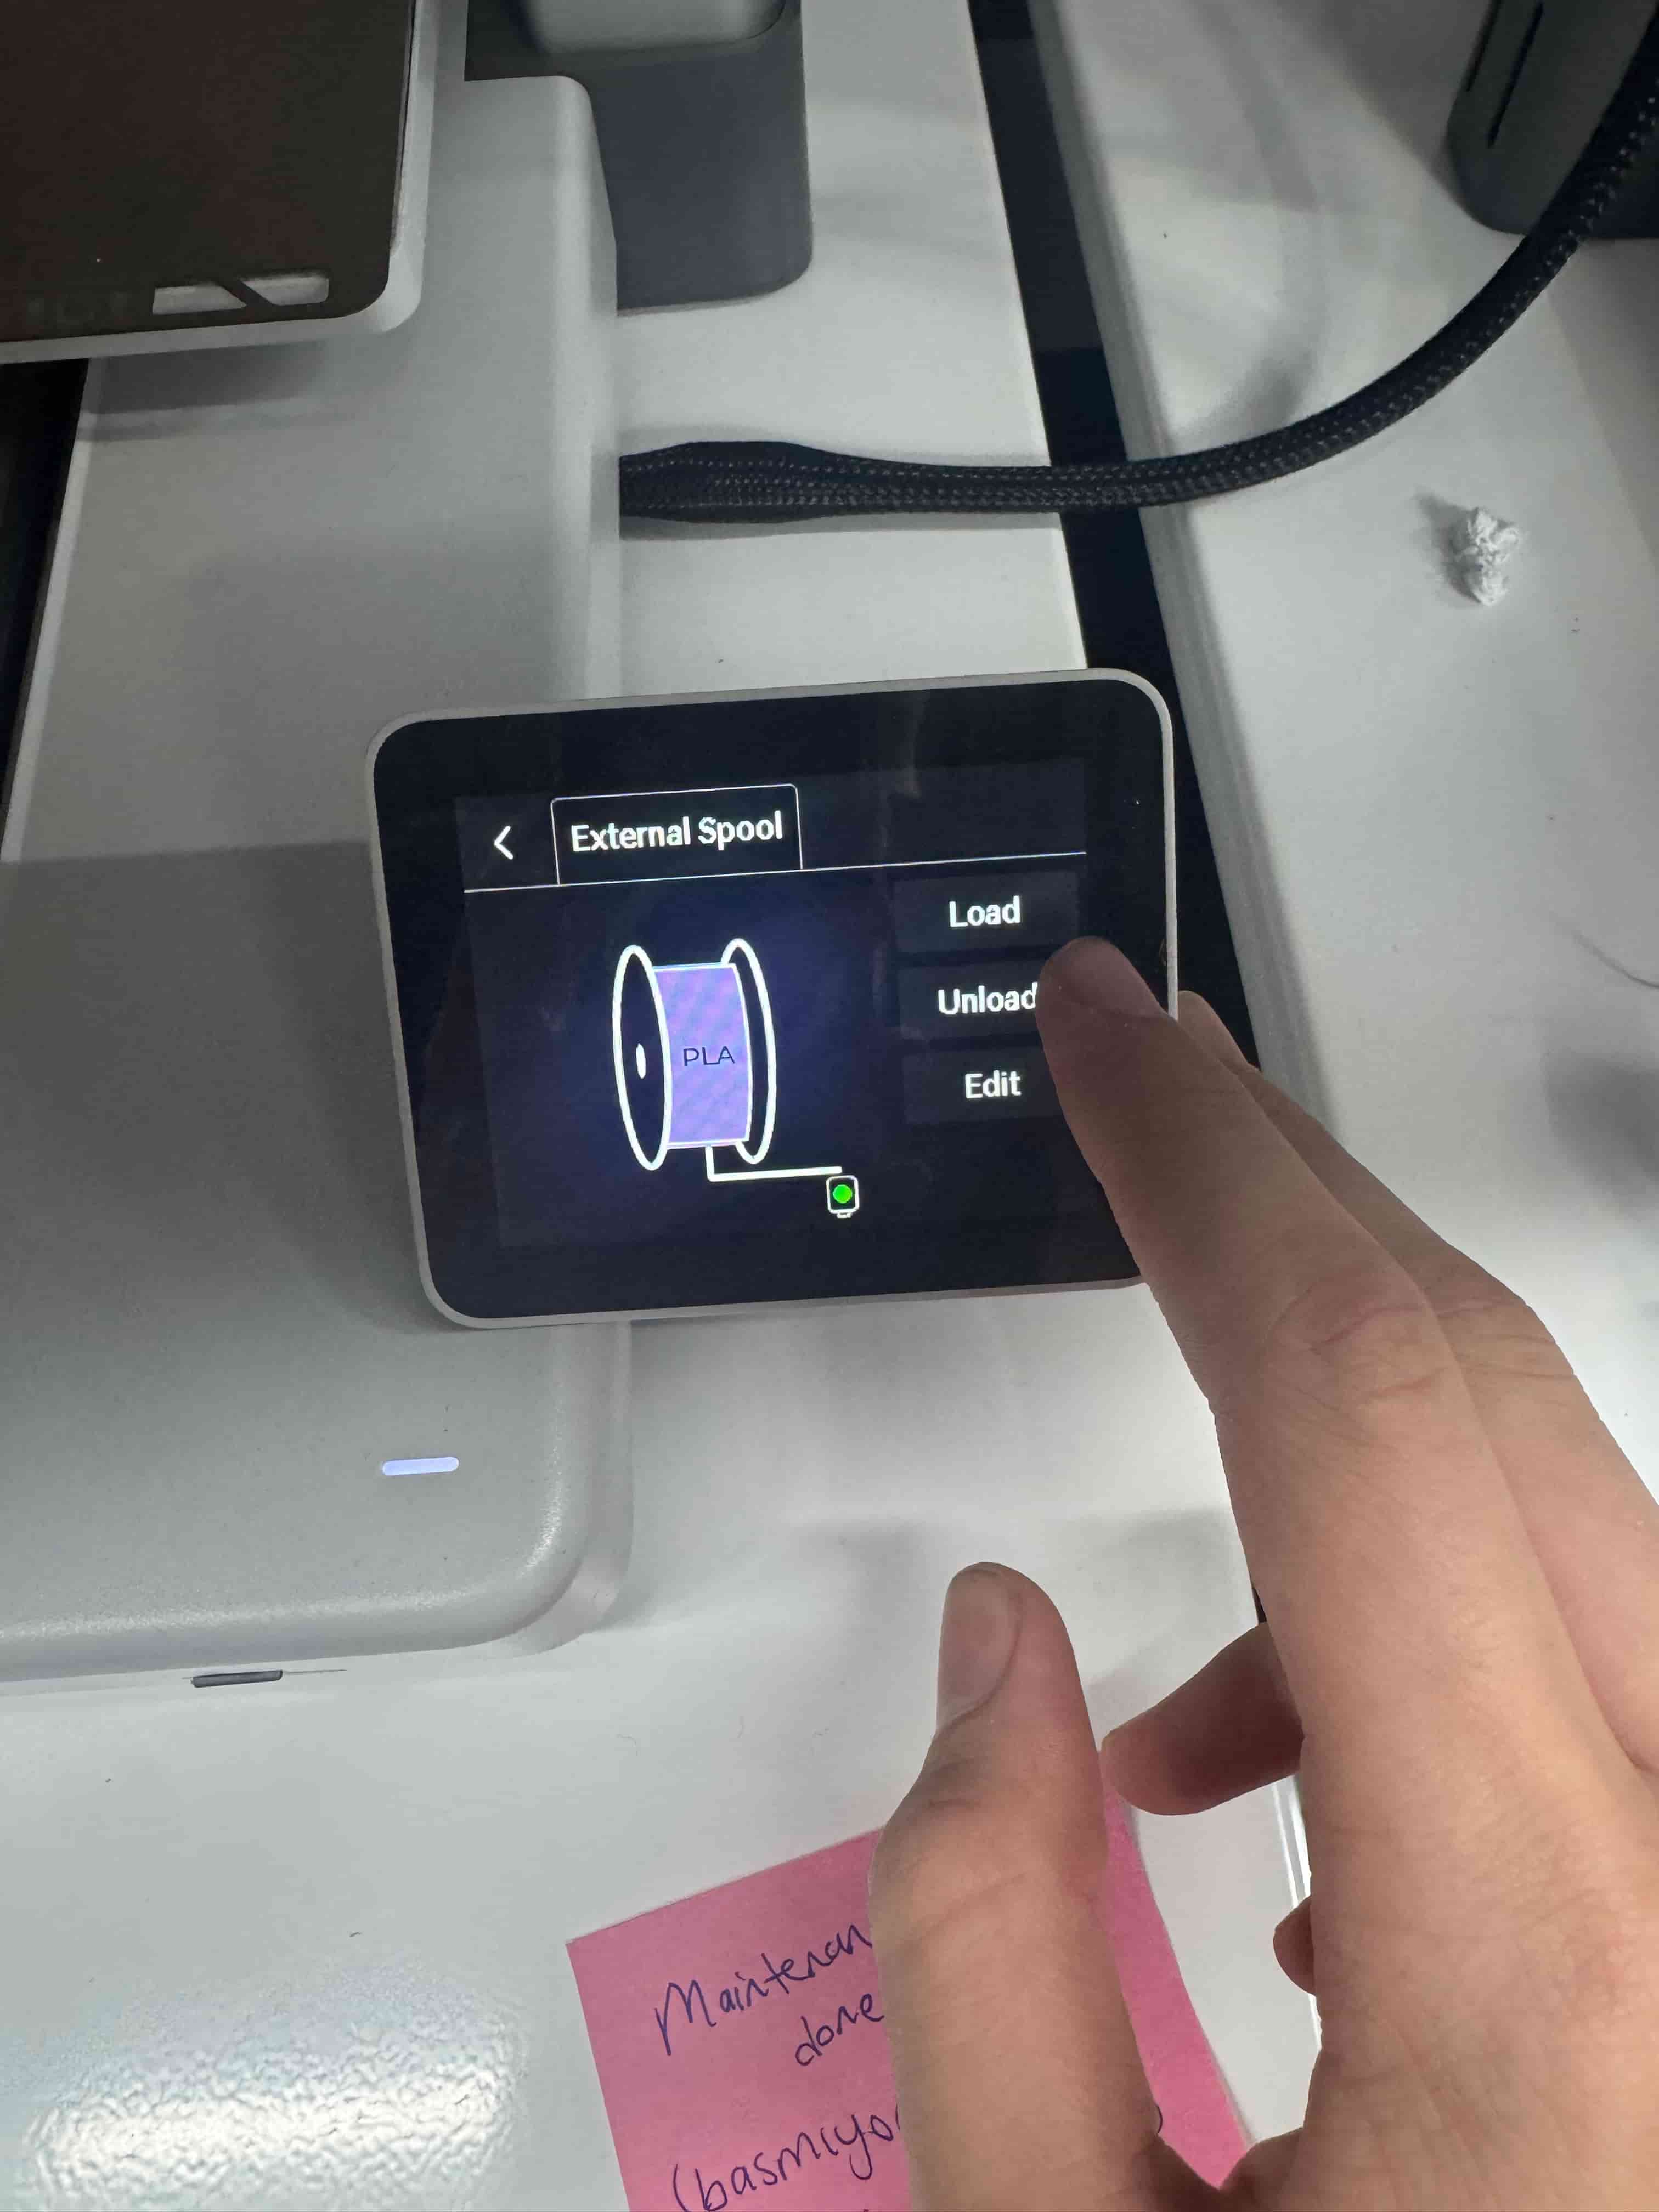
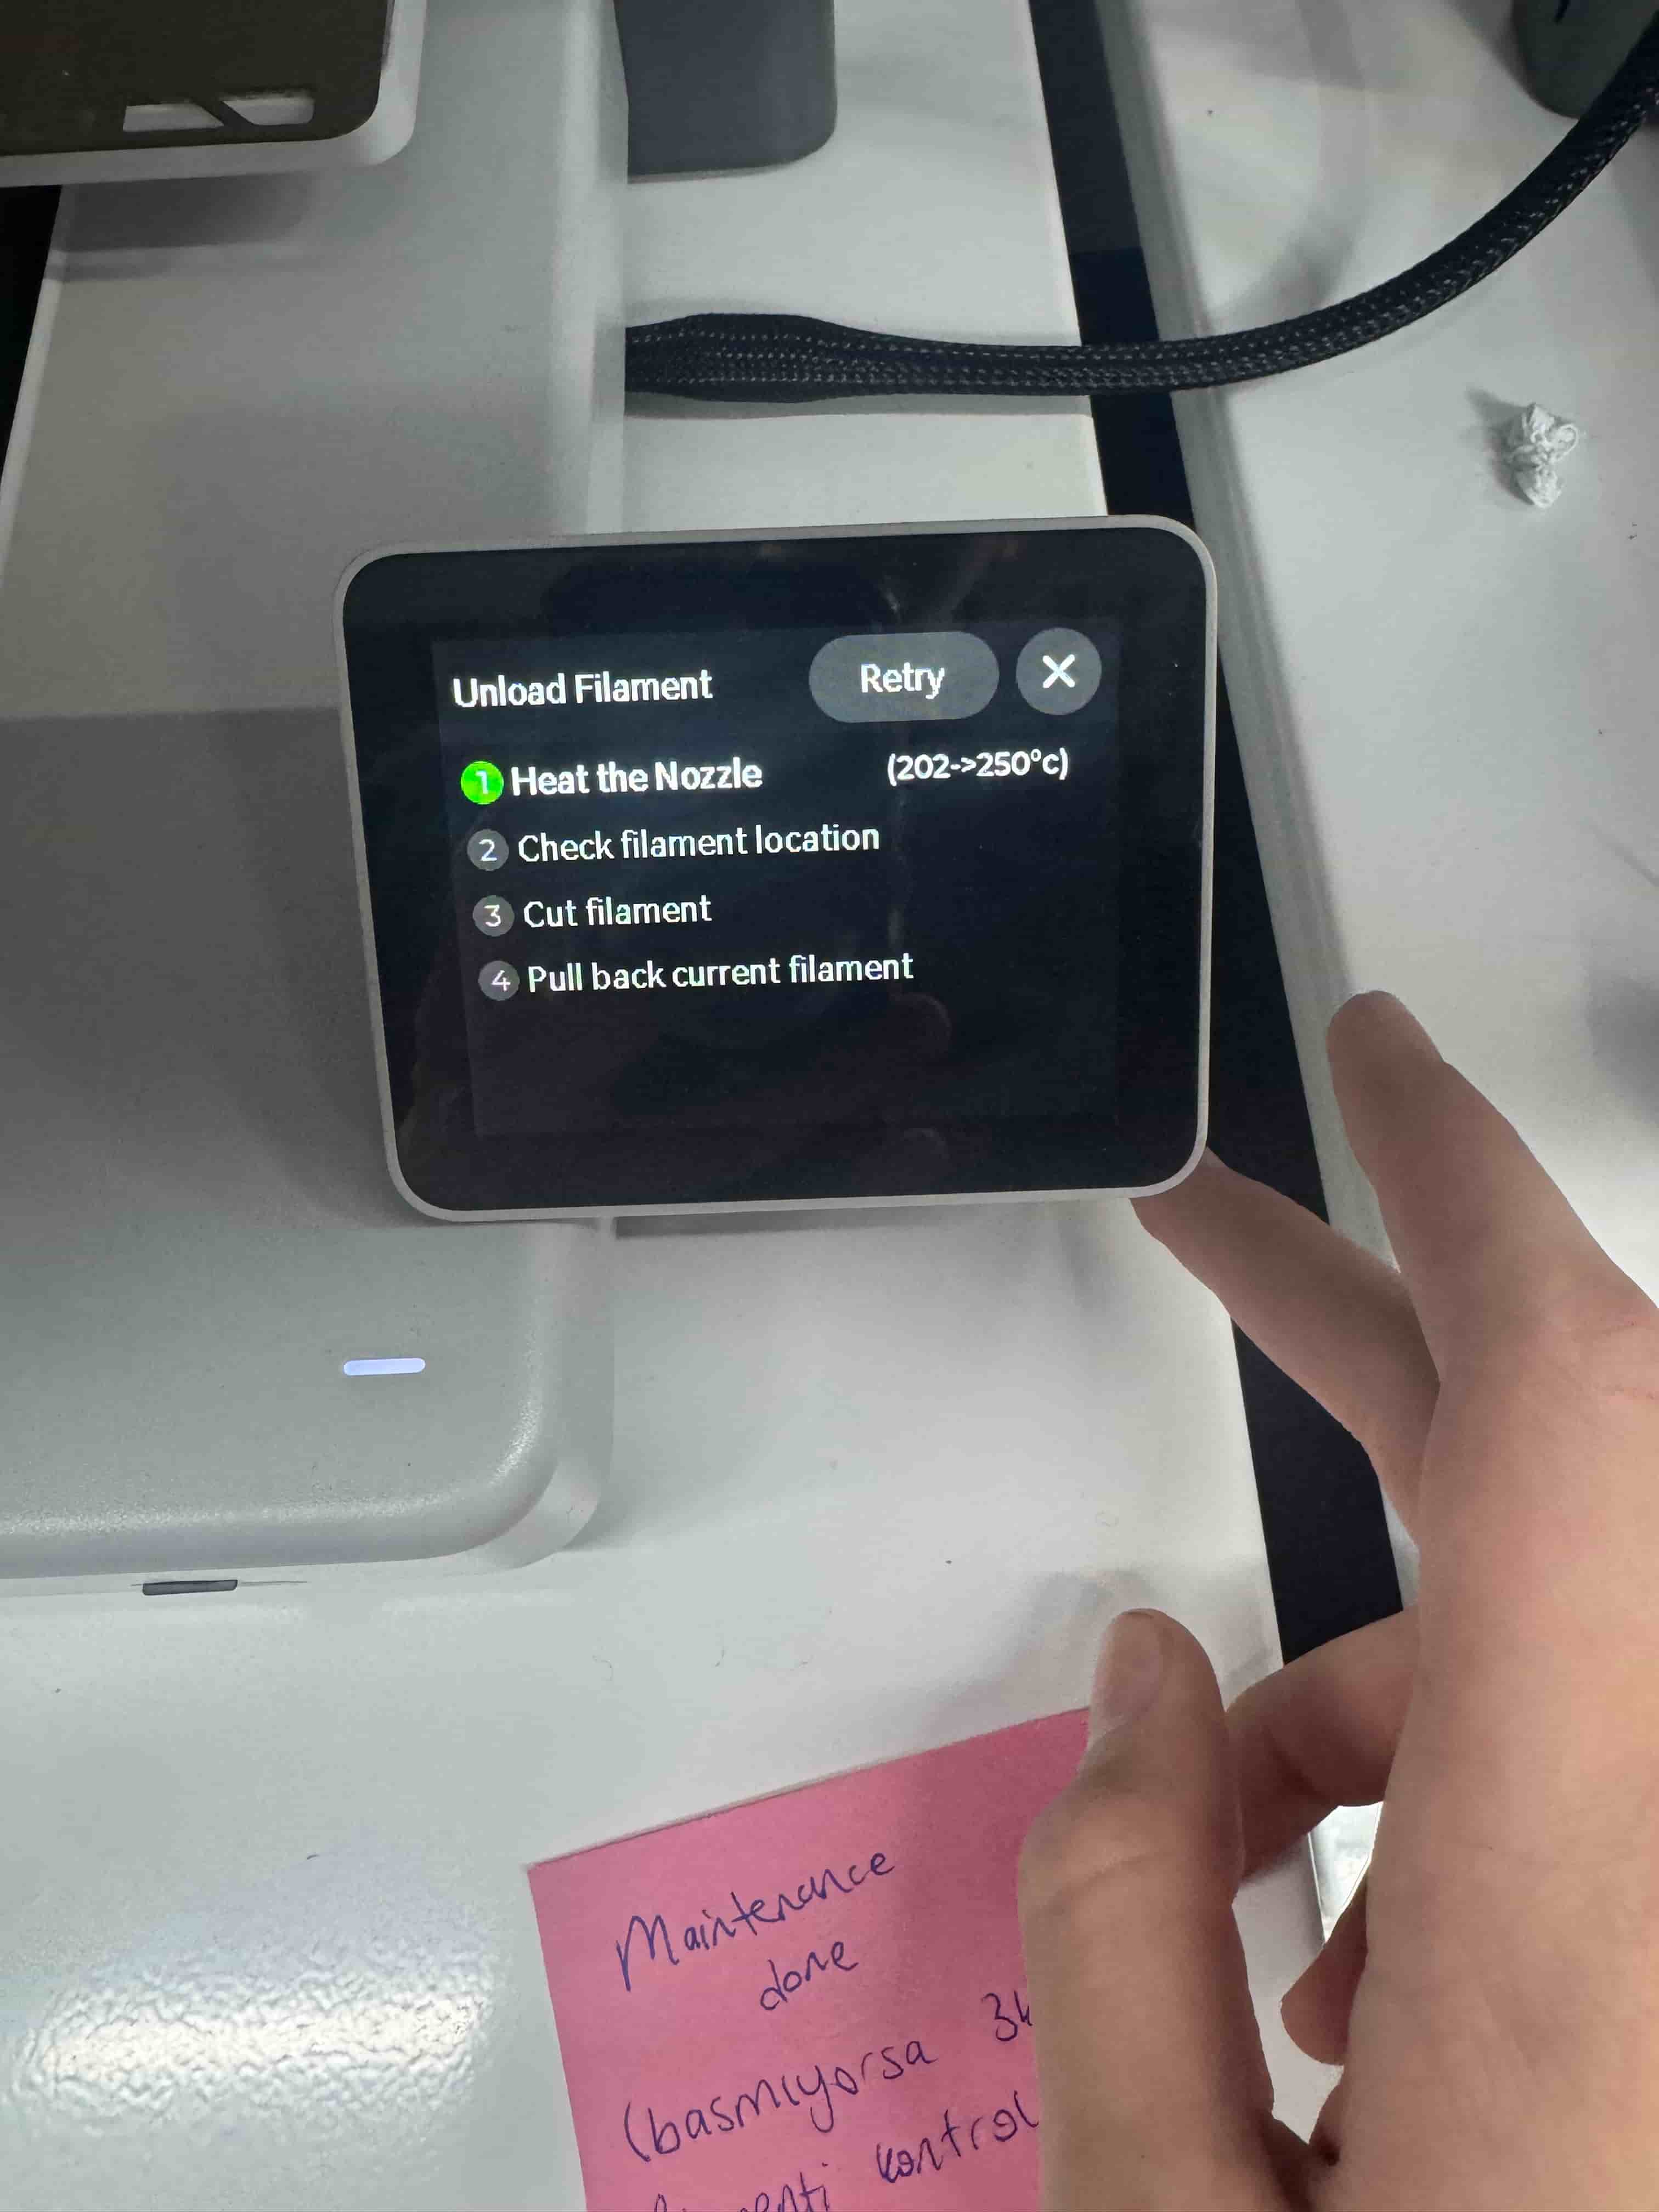
- Now for the unload, you should use the same menu that you used for the “Load” part, but you should select first “Feeding” and then “Unload” as you can see in the picture below:
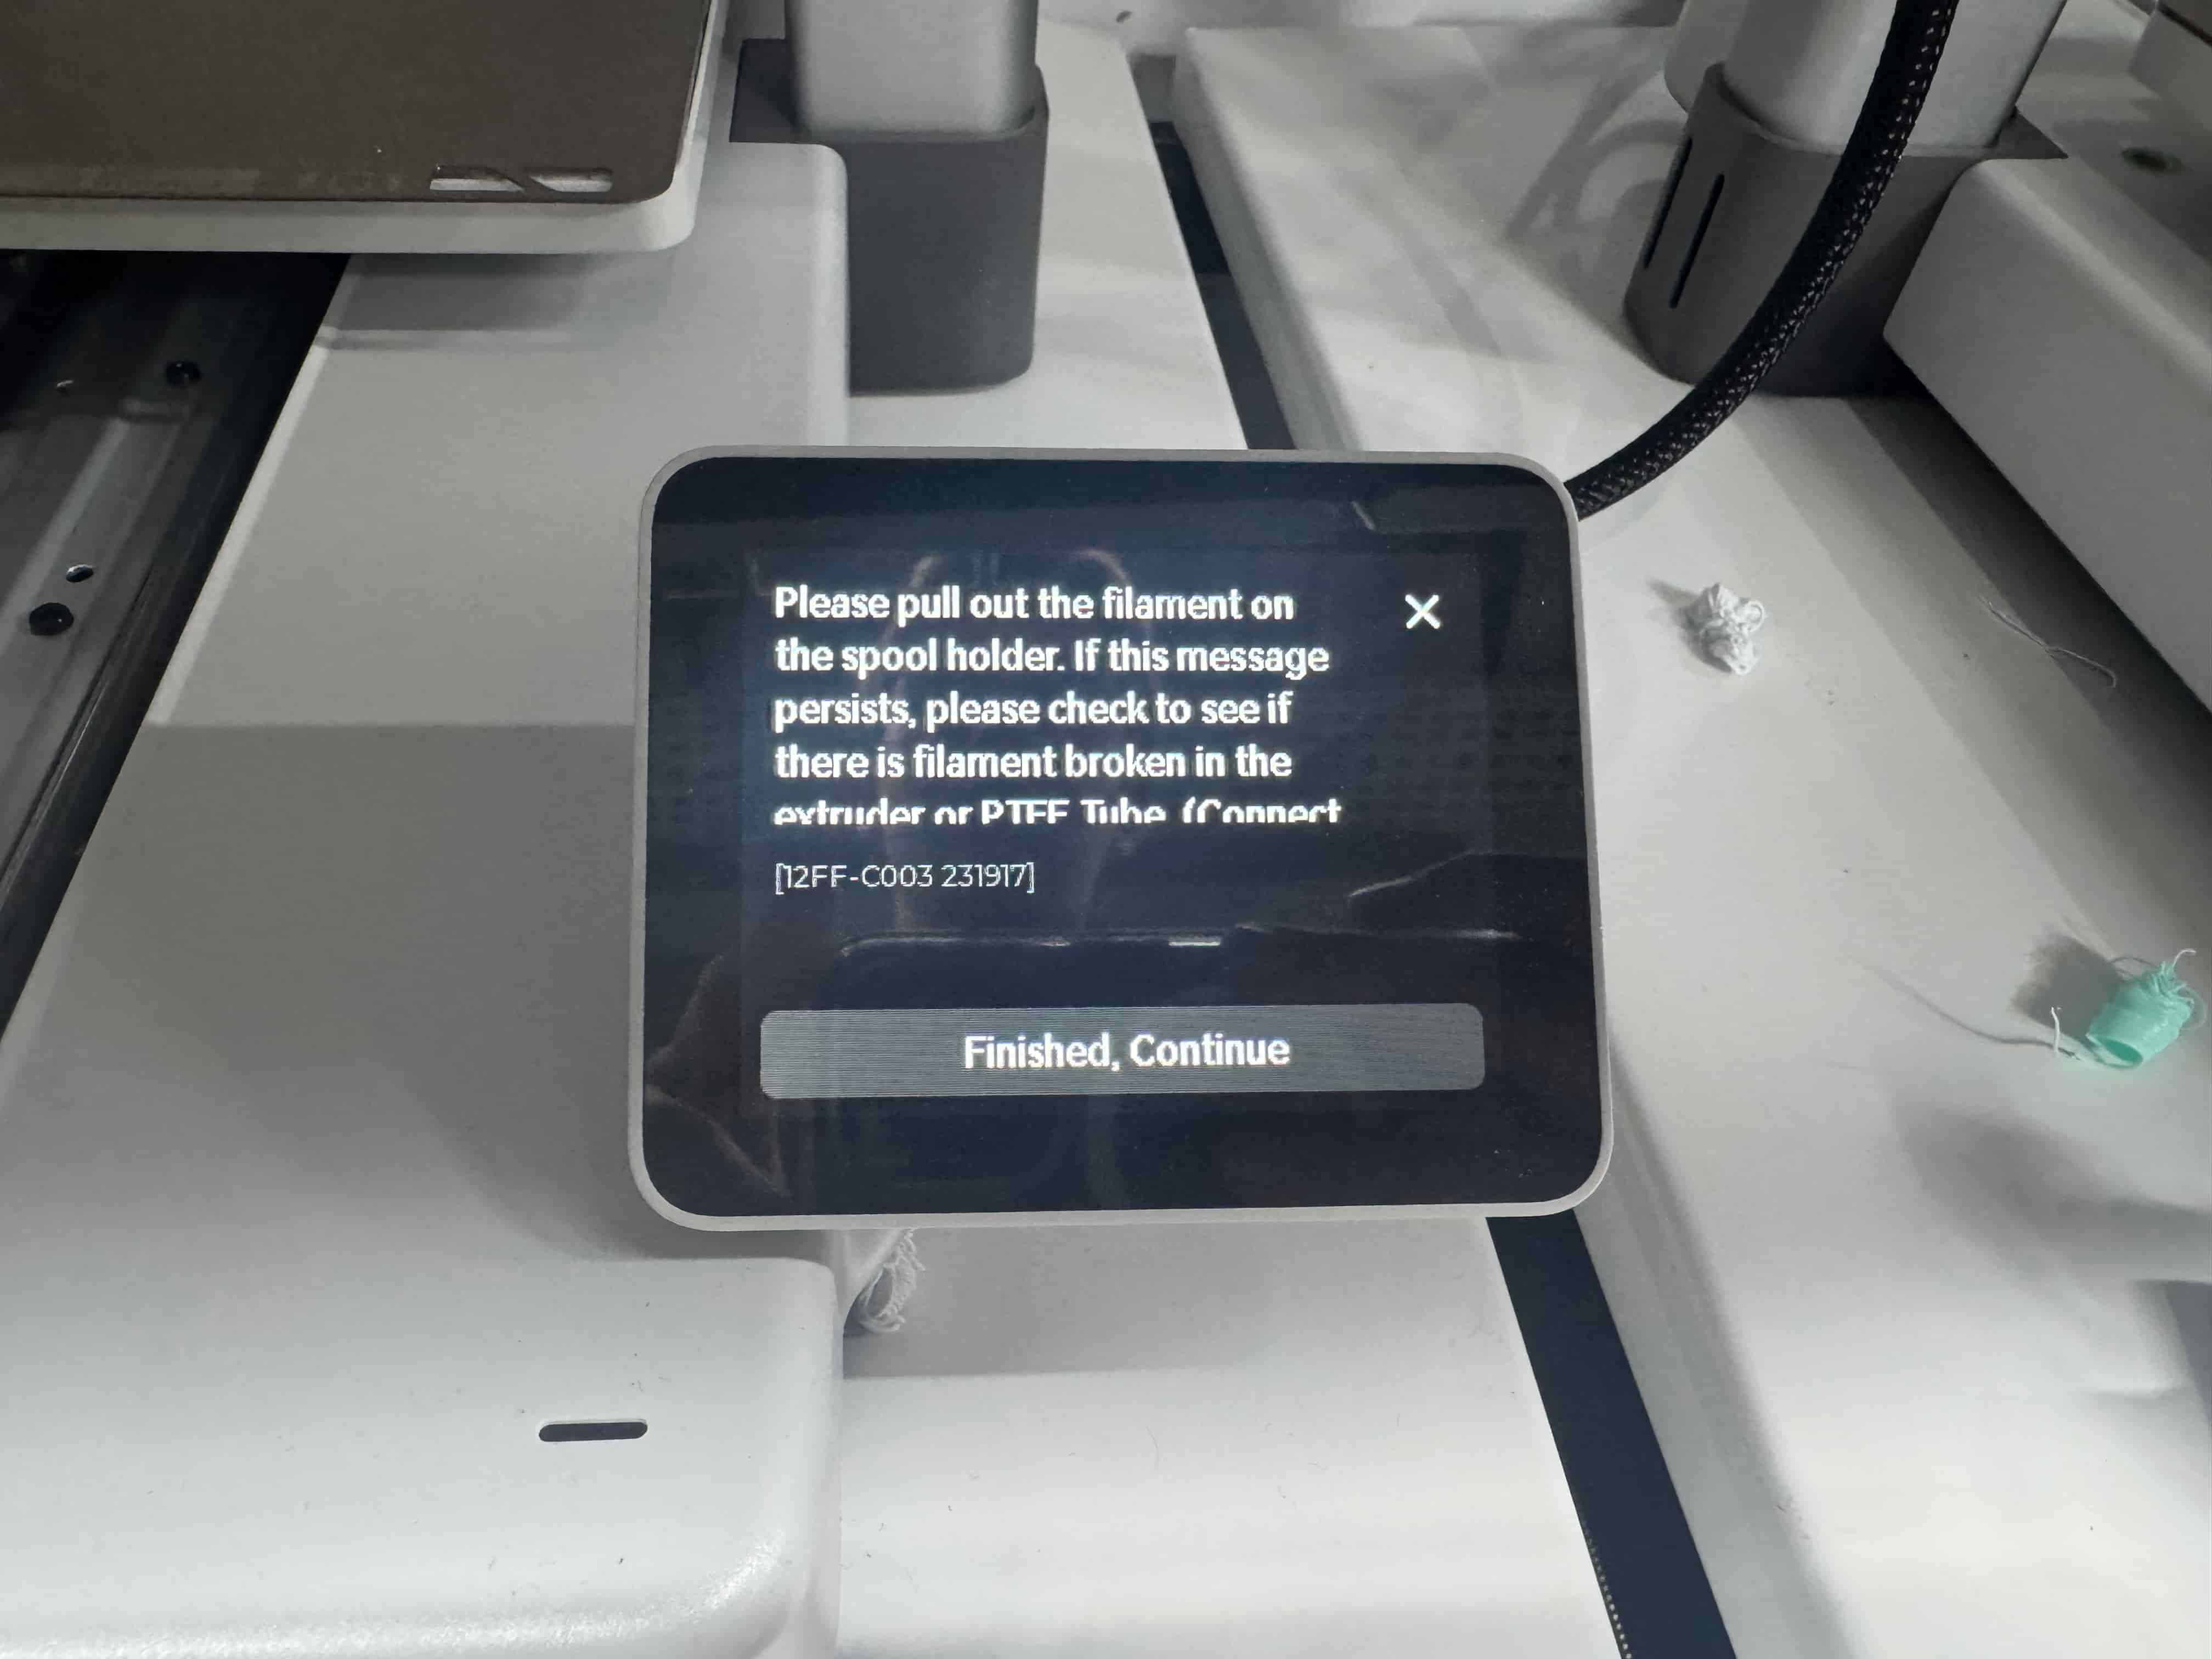
- After you get an alert letter that can be seen on the screen, you pull the filament from the tube, and it’s all done for this part too.
3c) Bambu Lab A1 Mini
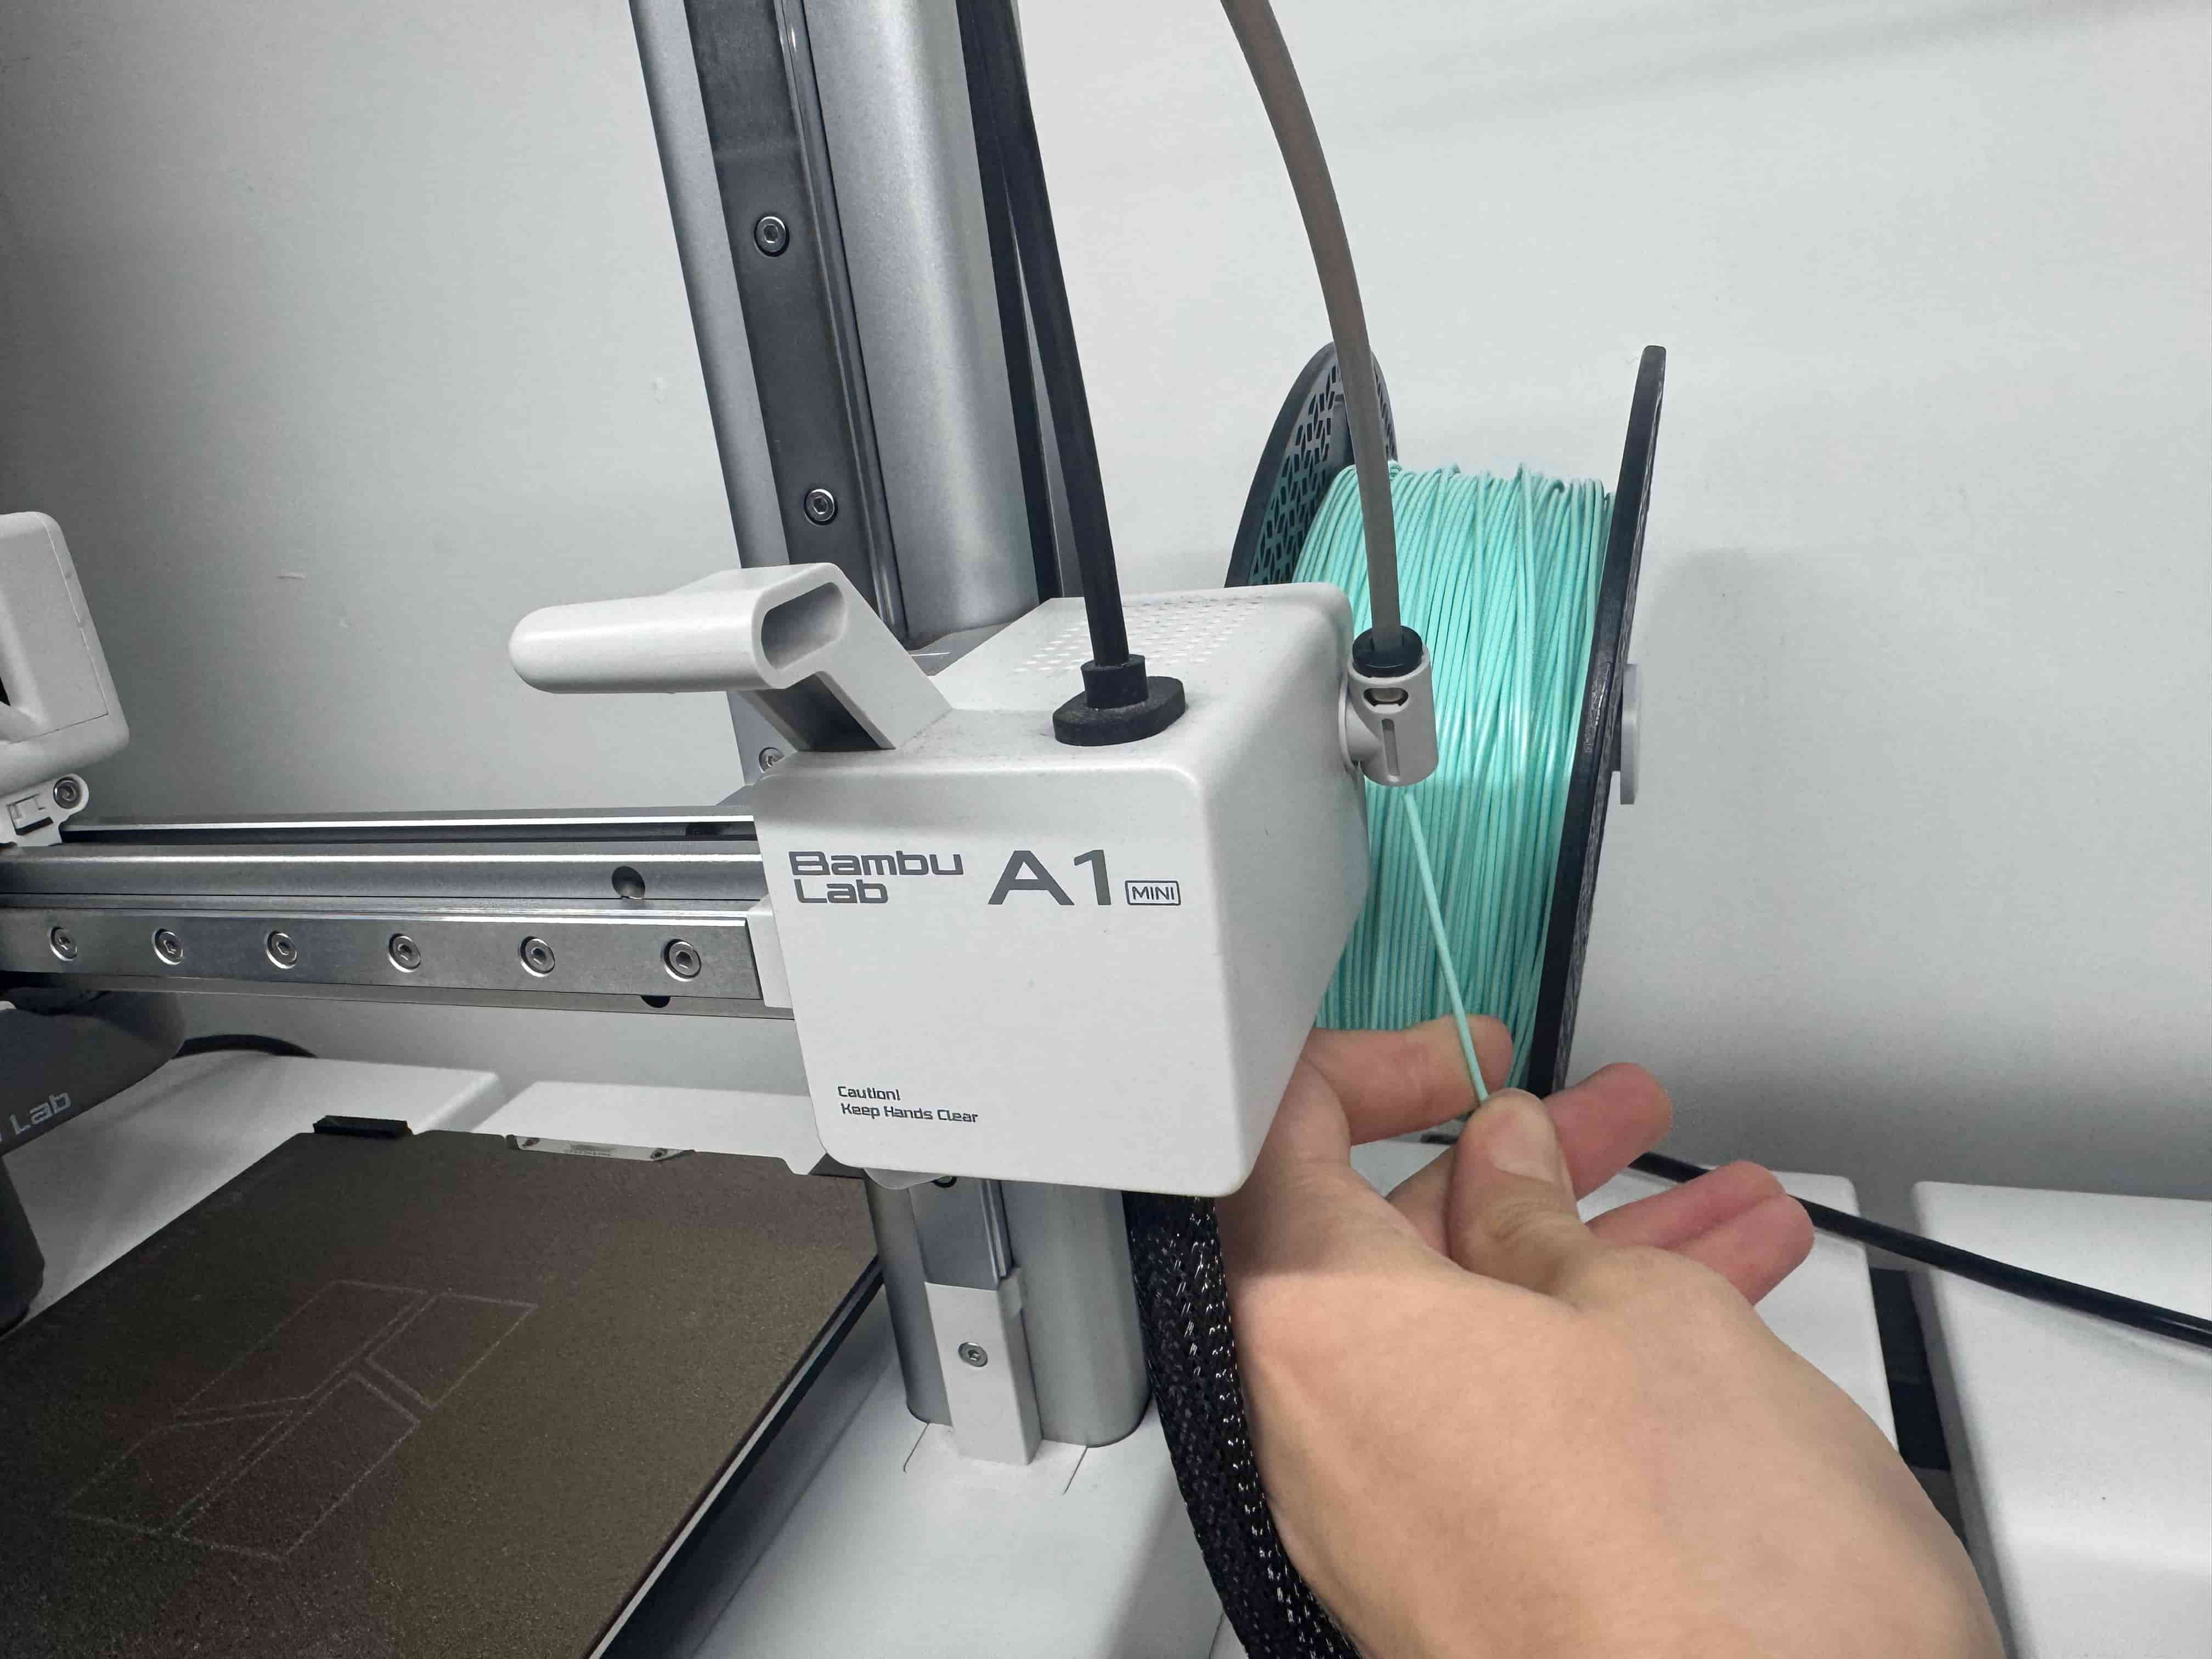
- As always firslt we get our filament and push it through to the tube for it to go to the needle from the tube.
- And then from the menus, you should select the “Filament” and then “Load” and you should see two screens like this:
First:
Second:
- Then you should see a screen like this that asks you to push the filament into the needle if you don’t see new filament that comes through the extruder:
And it should be loaded if you did everything right.
- Now, for the unload, you use the same menu as the load that says “Filament”, but you should select “Unload”, and a screen like this that shows when the process ends, like the photo below, should appear on the screen.
- After that, when you pull the filament out, as it says, you should be good and get a final screen like this:

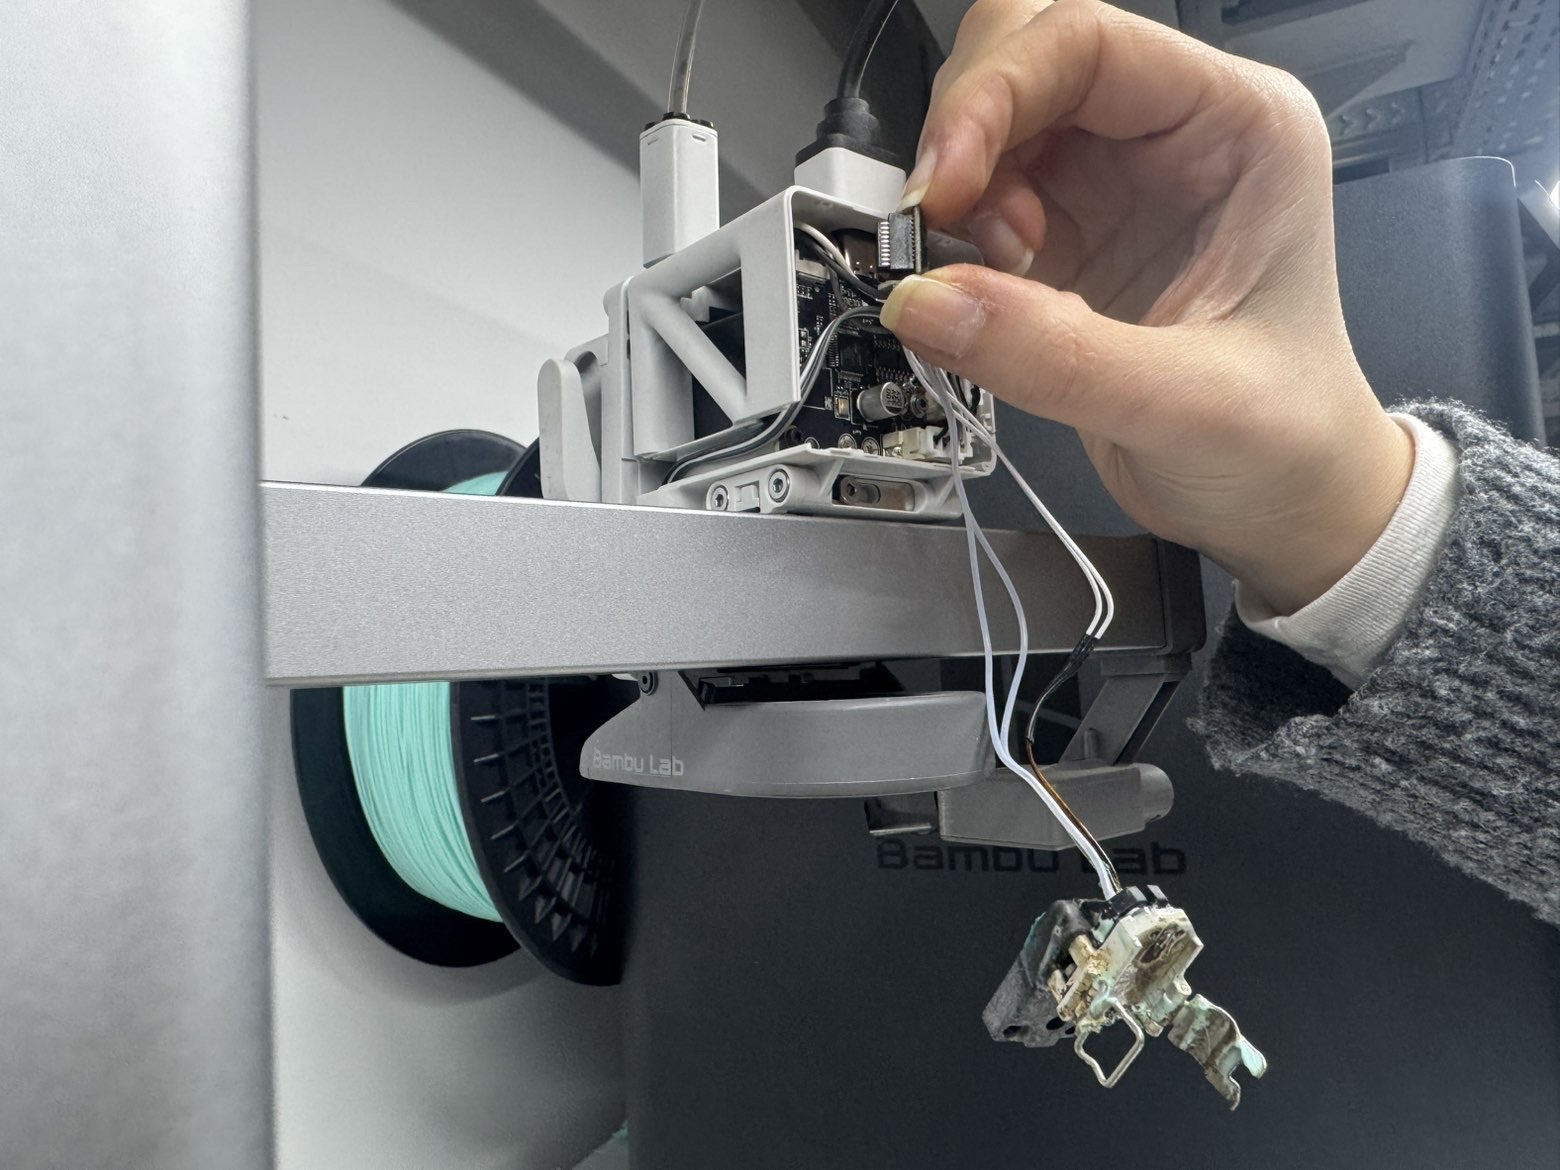
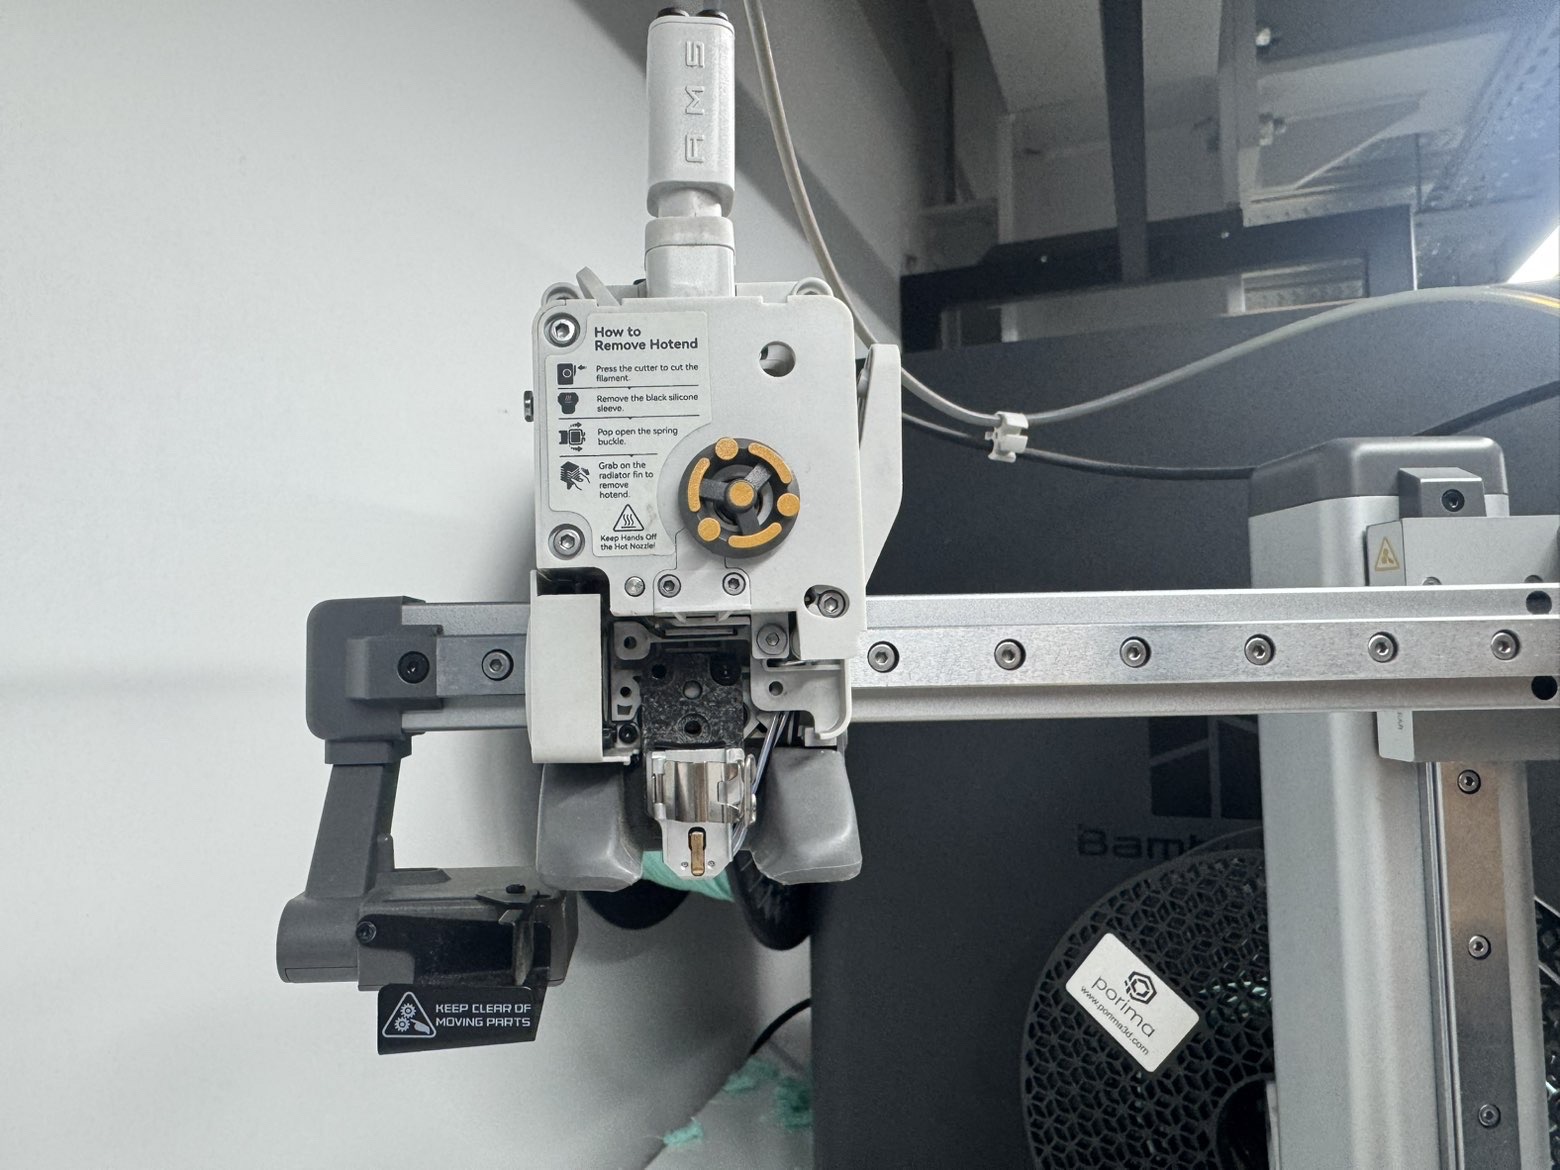
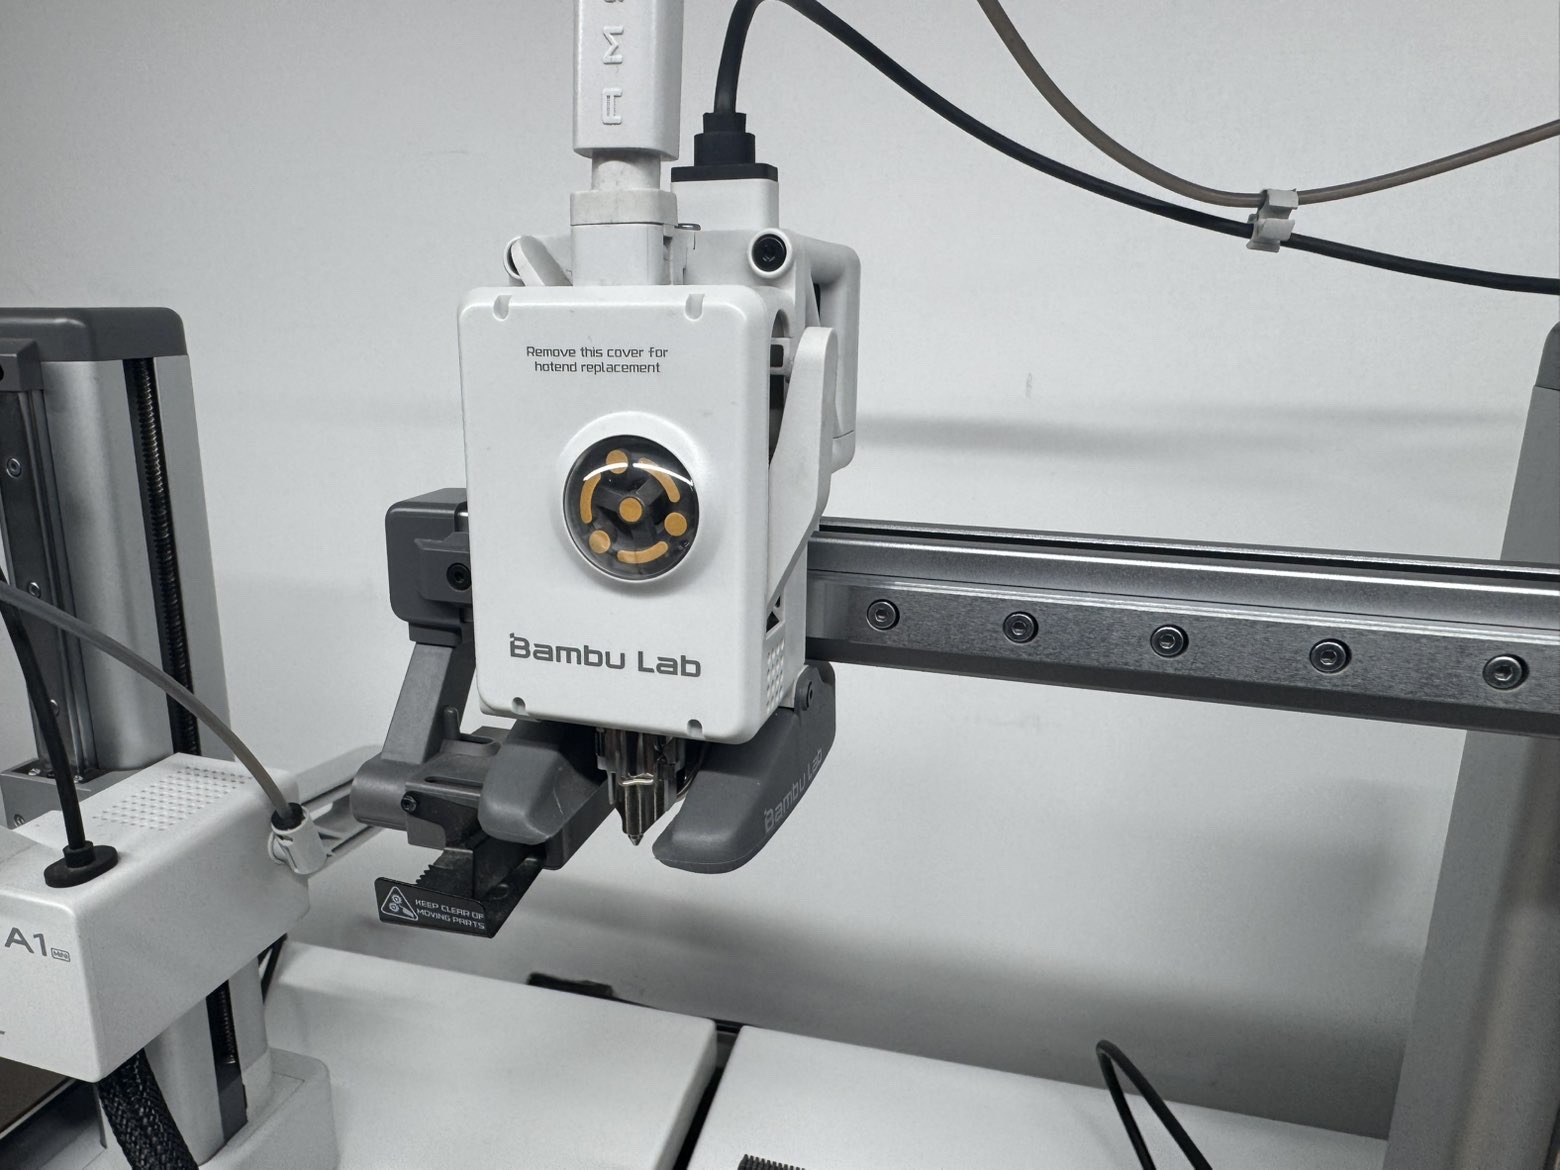
3 Extra ) How To Change The Part That Heats The Hotend And The Hotend In Bambu Lab A1 Mini
- Safety and Preparation
- First, unload the filamen like i explained. When it finishes, the printer will show an “unload completed” screen.
- Then turn the printer OFF and unplug it.
- Wait a bit so the nozzle/hotend is fully cool before touching anything.
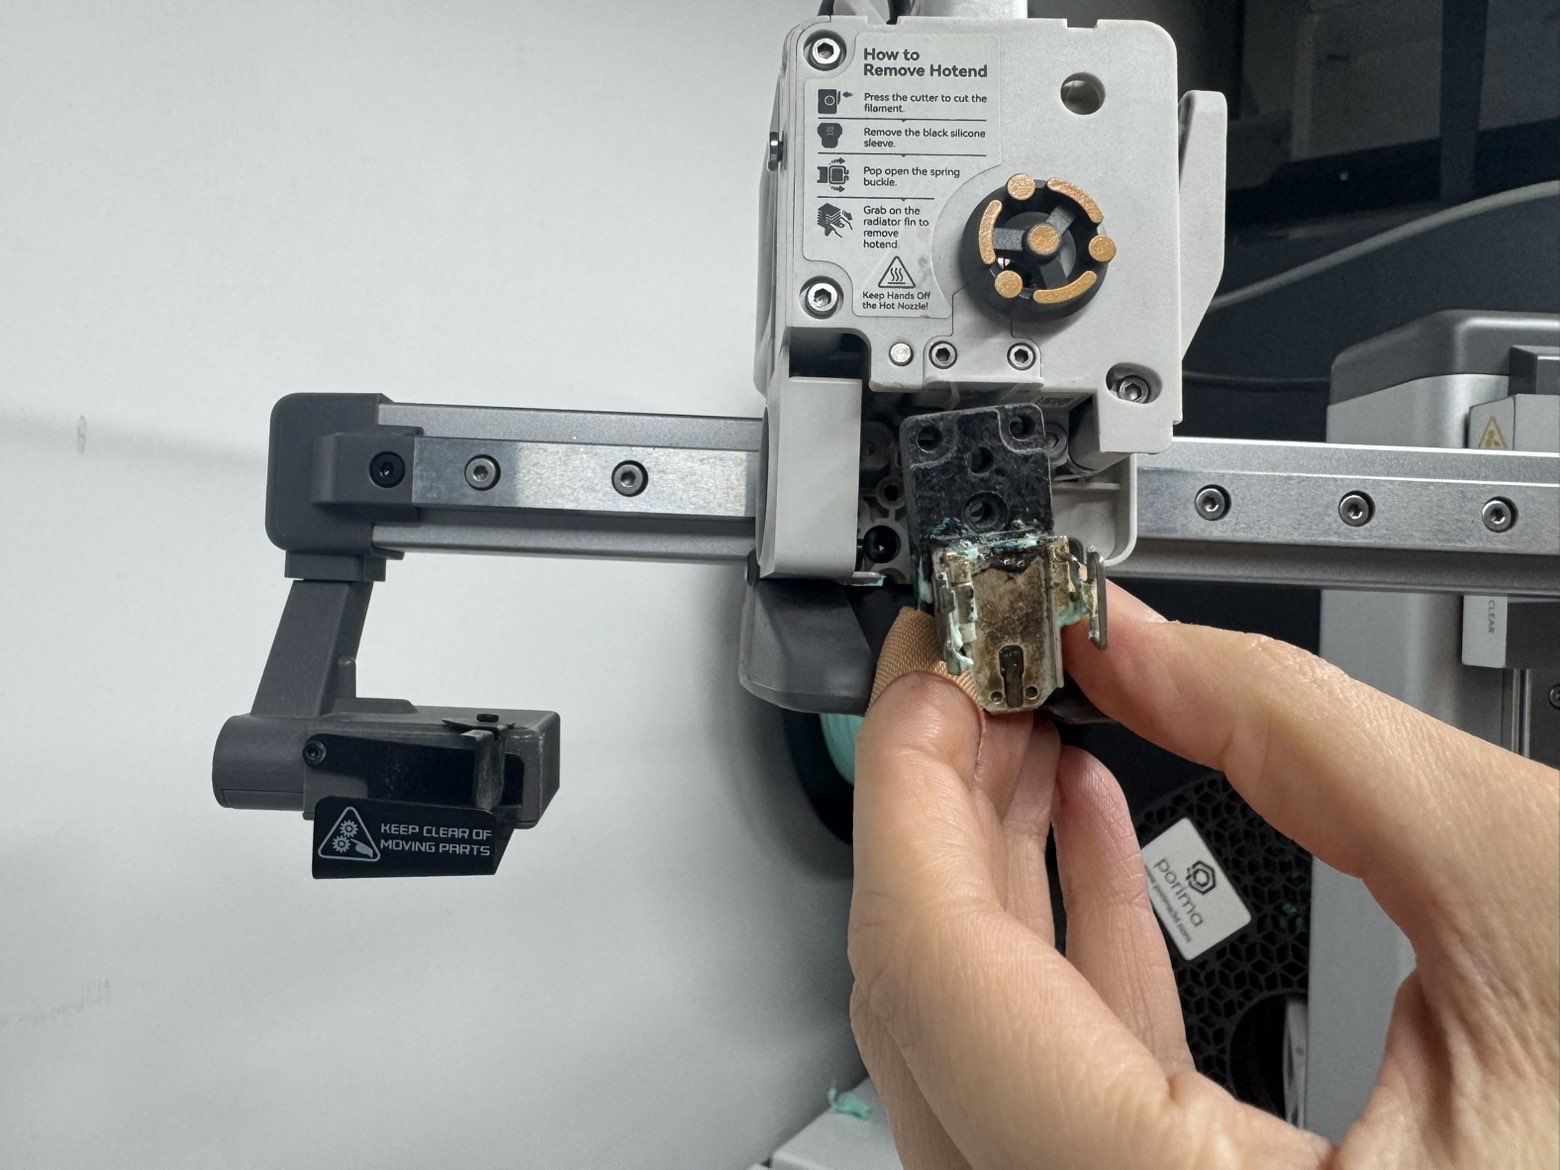
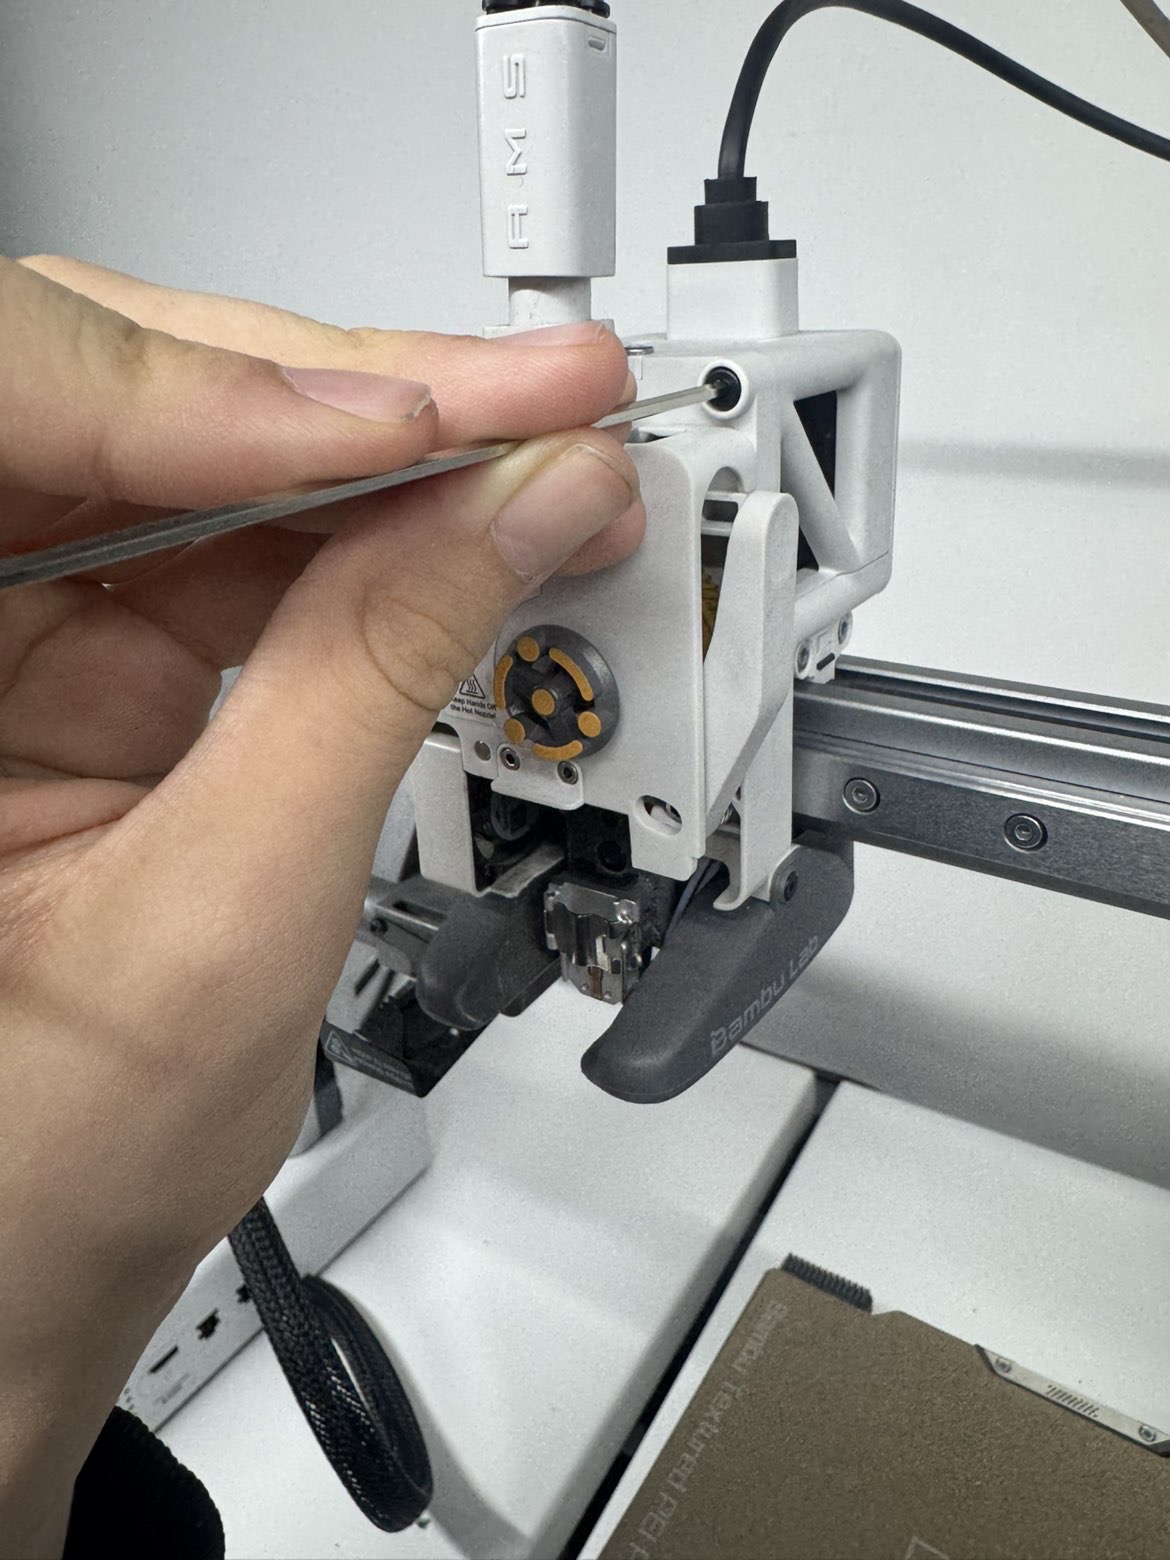
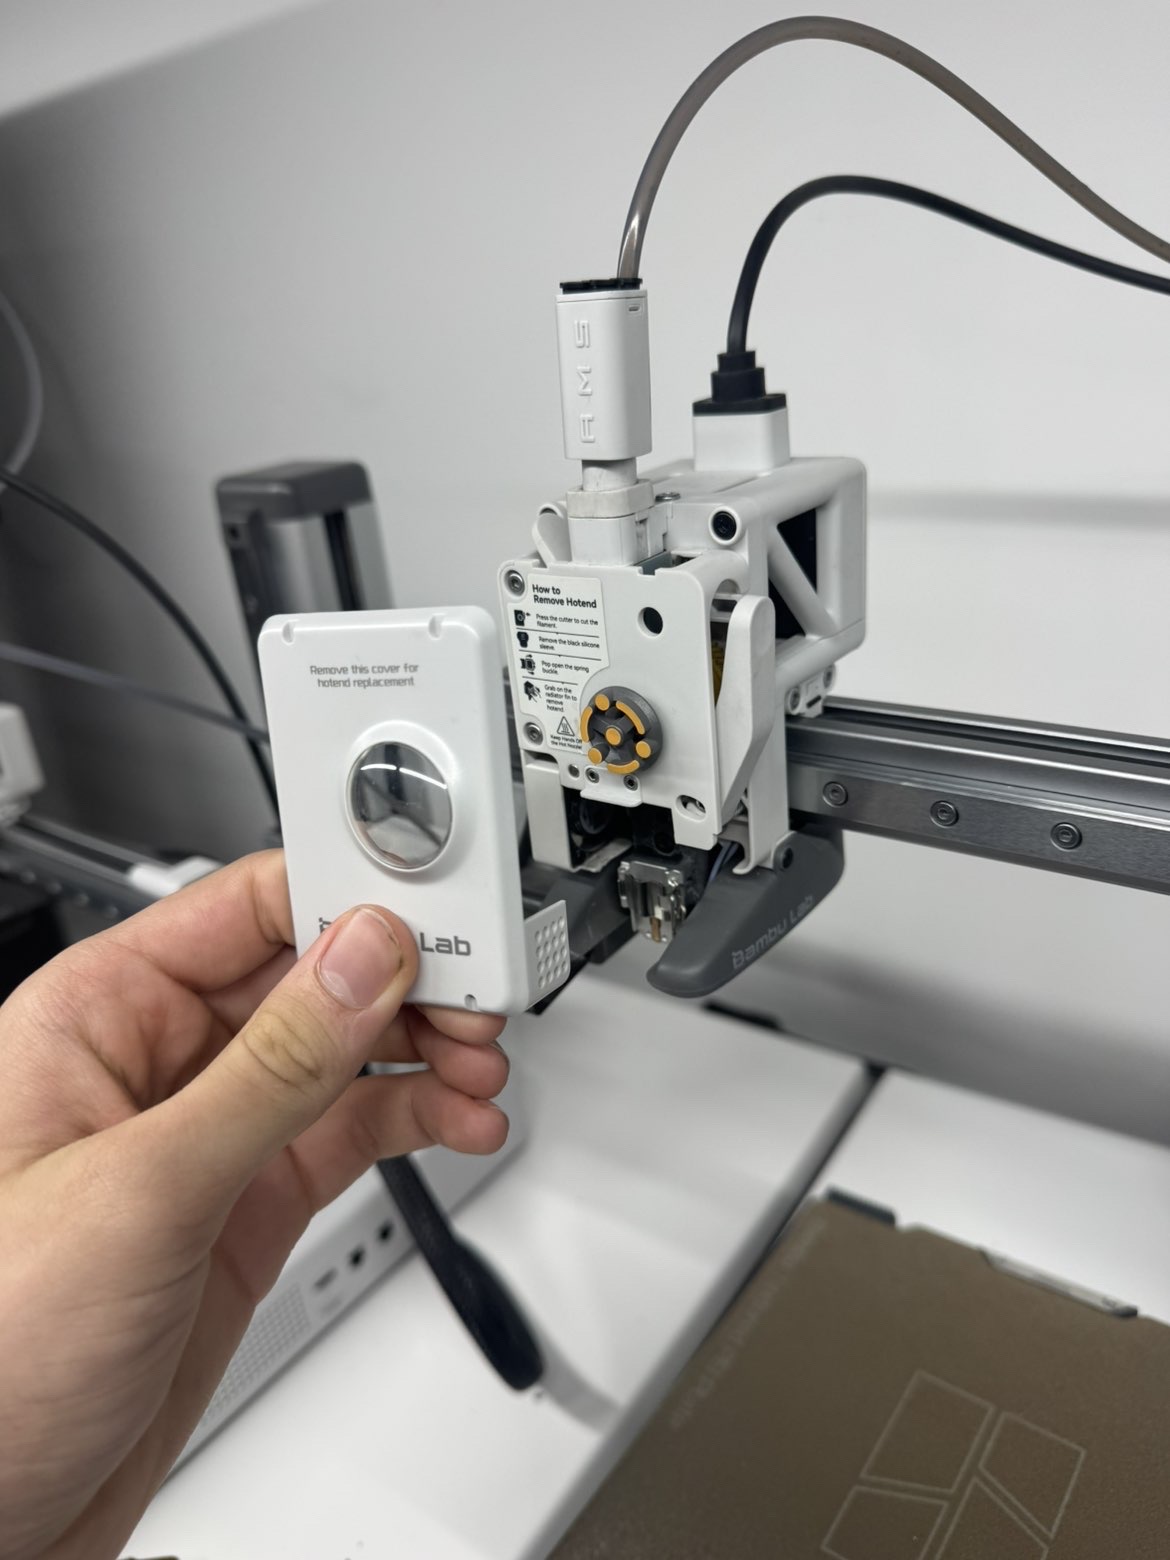
- Open the hotend replacement cover
- On the toolhead, open the front cover that says it’s for hotend replacement, and for this operation i used the small Allen key to loosen the screw on the top corner of the cover, then I pulled the cover away carefully until it came off.
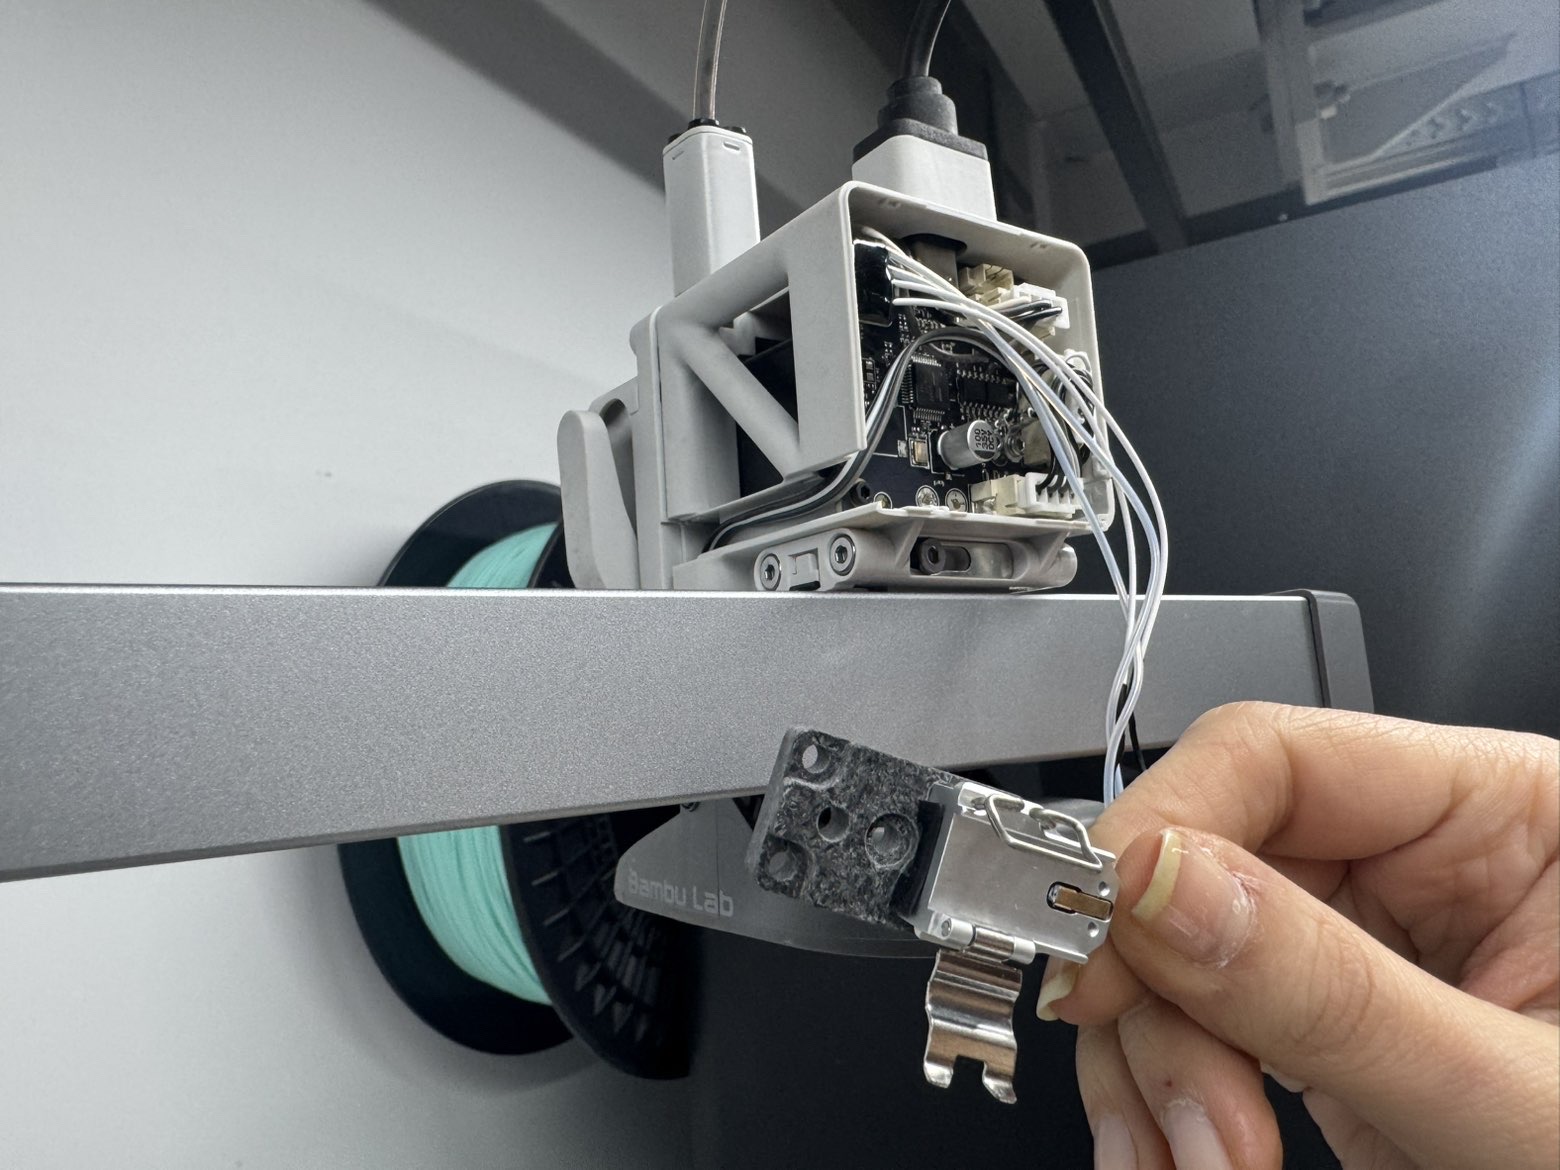
- Remove the hotend heater
- Once the cover is off, you can remove the hotend heater by pulling it down and out gently from the motherboard of the Bambu Lab A1 Mini
- Change The Hotend Heater
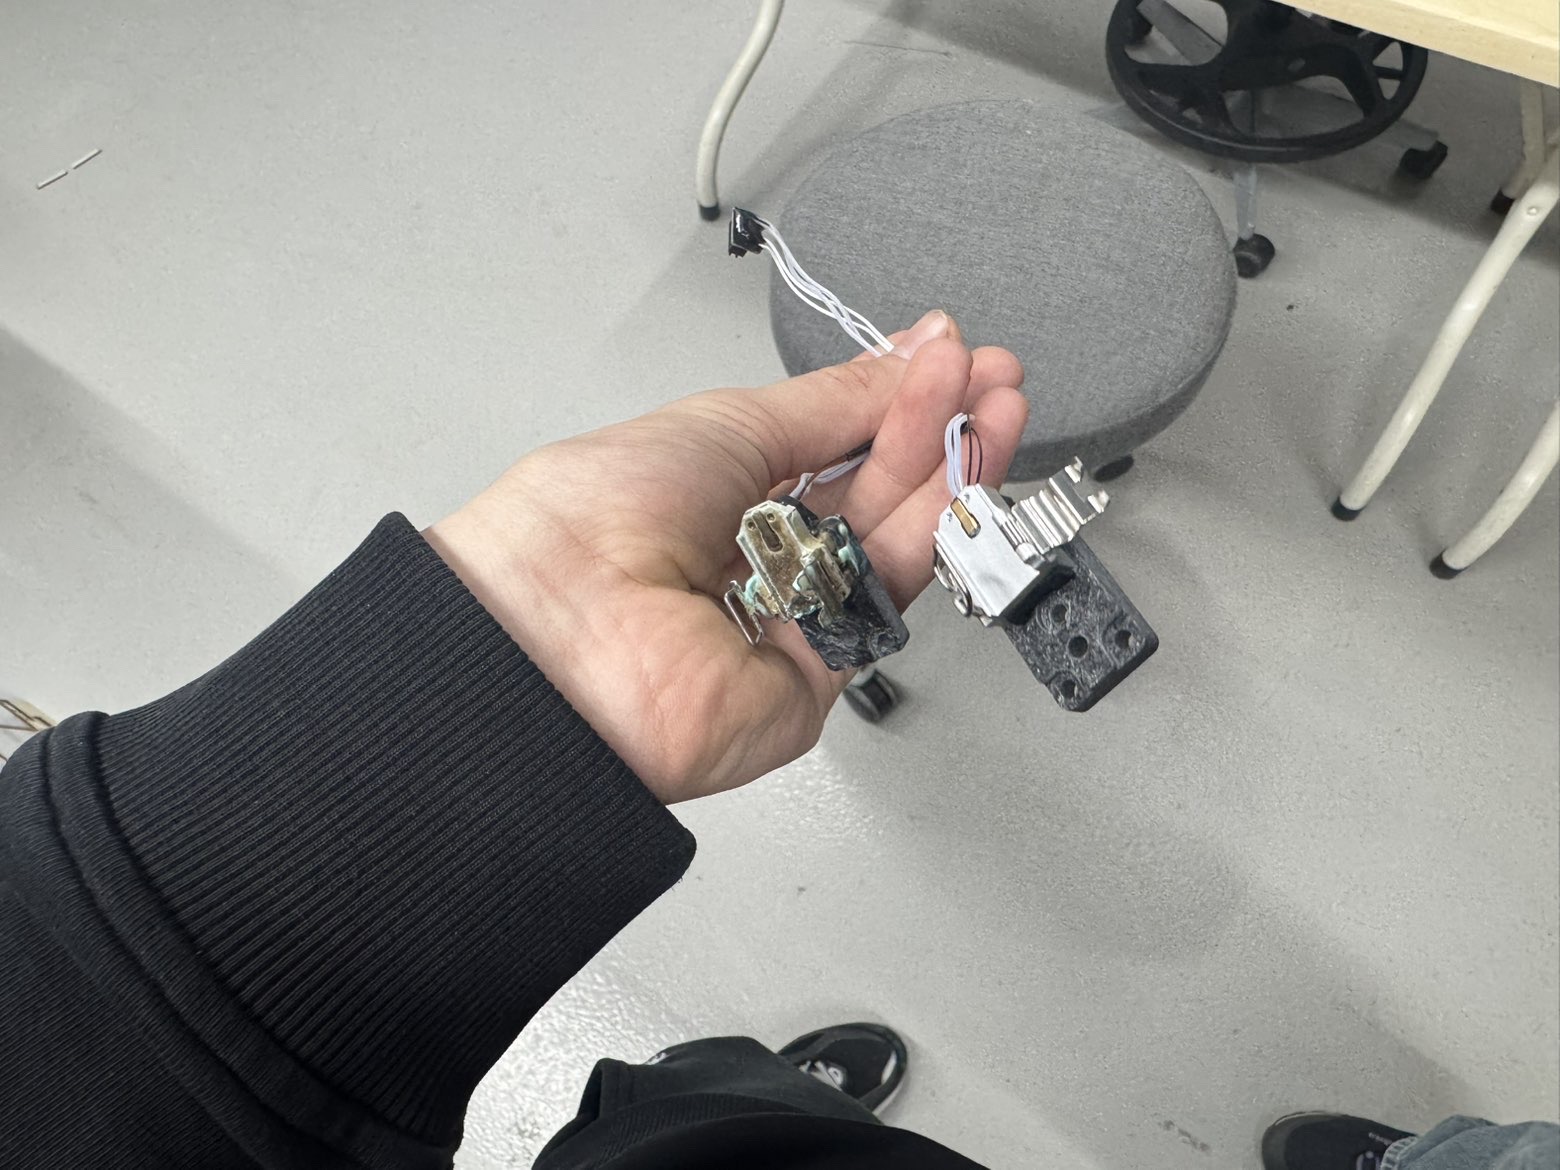
- To change the Hotend heater, put your brand new Hotend heater into the same place in the motherboard that I removed from, and btw here are the differences between a old and brand new one:
First:
Second:
- And when you add the screws, it should look something like this:
- After that, add your final long screws to the upper part so it does not move before inserting the needle into the heater and the case to close it.
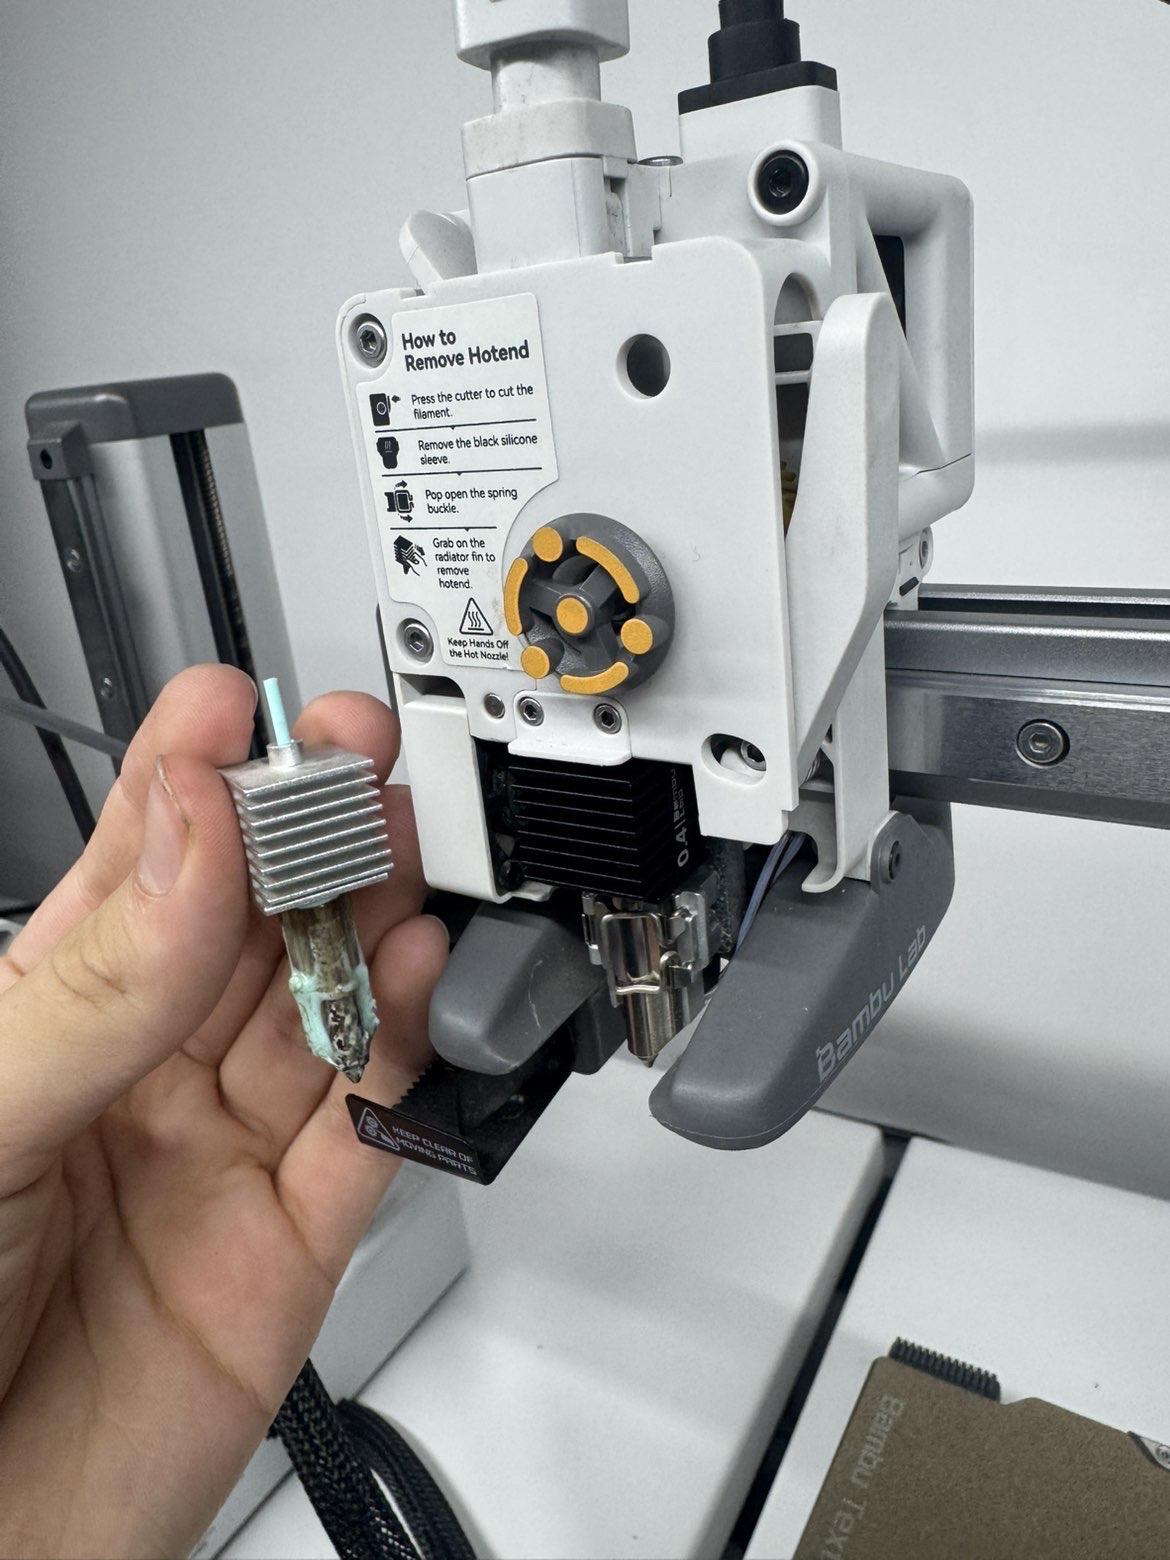
- Now it’s time to put the new hotend, and when adding the hotend, make sure that the hotend is parallel to the heater with no space between. If you ask what the difference is between the first and last needle, here is another photo that has both innit:
First:

Second:
- Now, to end the process, put the case back into place to end it:
Here is how it should look when the process ends, and after everything, here is the final pictutre:
4) 3D Printing Materials
There are various materials that can be used for FDM printing, each with its own characteristics and properties. Below is a cheat sheet of common materials used:
PLA: PLA is rigid, easy to print, and gives good print quality. It is good for decorative objects, prototypes, and parts that do not need high heat or heavy load resistance.
ABS: ABS is a tough and durable plastic with good impact resistance. It needs higher temperature printing and may warp, so a heated bed or closed chamber helps. It is good for functional and mechanical parts.
PETG: PETG combines some benefits of PLA and ABS. It is strong, durable, easier to print than ABS, and has good chemical resistance. It is useful for functional parts and general-purpose prints.
Nylon: Nylon is strong, durable, and resistant to impact. It is used for gears, mechanical parts, and functional prototypes, but usually needs a heated bed and closed chamber.
TPU: TPU is a flexible and elastic material. It can bend and return to its shape, so it is useful for prints that need flexibility and impact resistance.
The page also compares advantages, disadvantages, and hardware needs for different filaments, which helps users choose the best material for each project.
| Material | Advantages | Disadvantages | Printing Temperature | Hardware Requirements |
|---|---|---|---|---|
| PLA | - Cheap and easy to print | - Brittle - Degrades in outdoor environments | Bed: 50–60 °C | Extruder: 190–220 °C | Standard FDM printer |
| ABS | - Impact resistant - Wear-resistant - Low cost | - Difficult to print due to warping and poor bed adhesion. Release of toxic gas | Nozzle: 230–250 °C Heated bed: 80–110 °C | Standard FDM printer, heated enclosure recommended |
| PETG | - Excellent mechanical properties - Easier to print than ABS | - Imperfect layer adhesion | Nozzle: 230–250 °C Heated bed: 70–80 °C | Standard FDM printer |
| Nylon | - Excellent mechanical properties - Low friction | - Absorbs moisture | Nozzle: 240–260 °C Heated bed: 70–100 °C | May require a specialized hot end nozzle |
| TPU | - Rubber-like behavior | - High cost - Difficult to print | Nozzle: 210–230 °C Heated bed: 20–60 °C | Direct drive or Bowden extruder required |
(Note: We used only pla type filament at the design rule part since ABS releaes toxic gases which is harmfull in a lab enviroment)
Exploring Bambu Slicer
What is Bambu Studio?
Bambu Studio is a 3D slicing software used to prepare models for 3D printing.
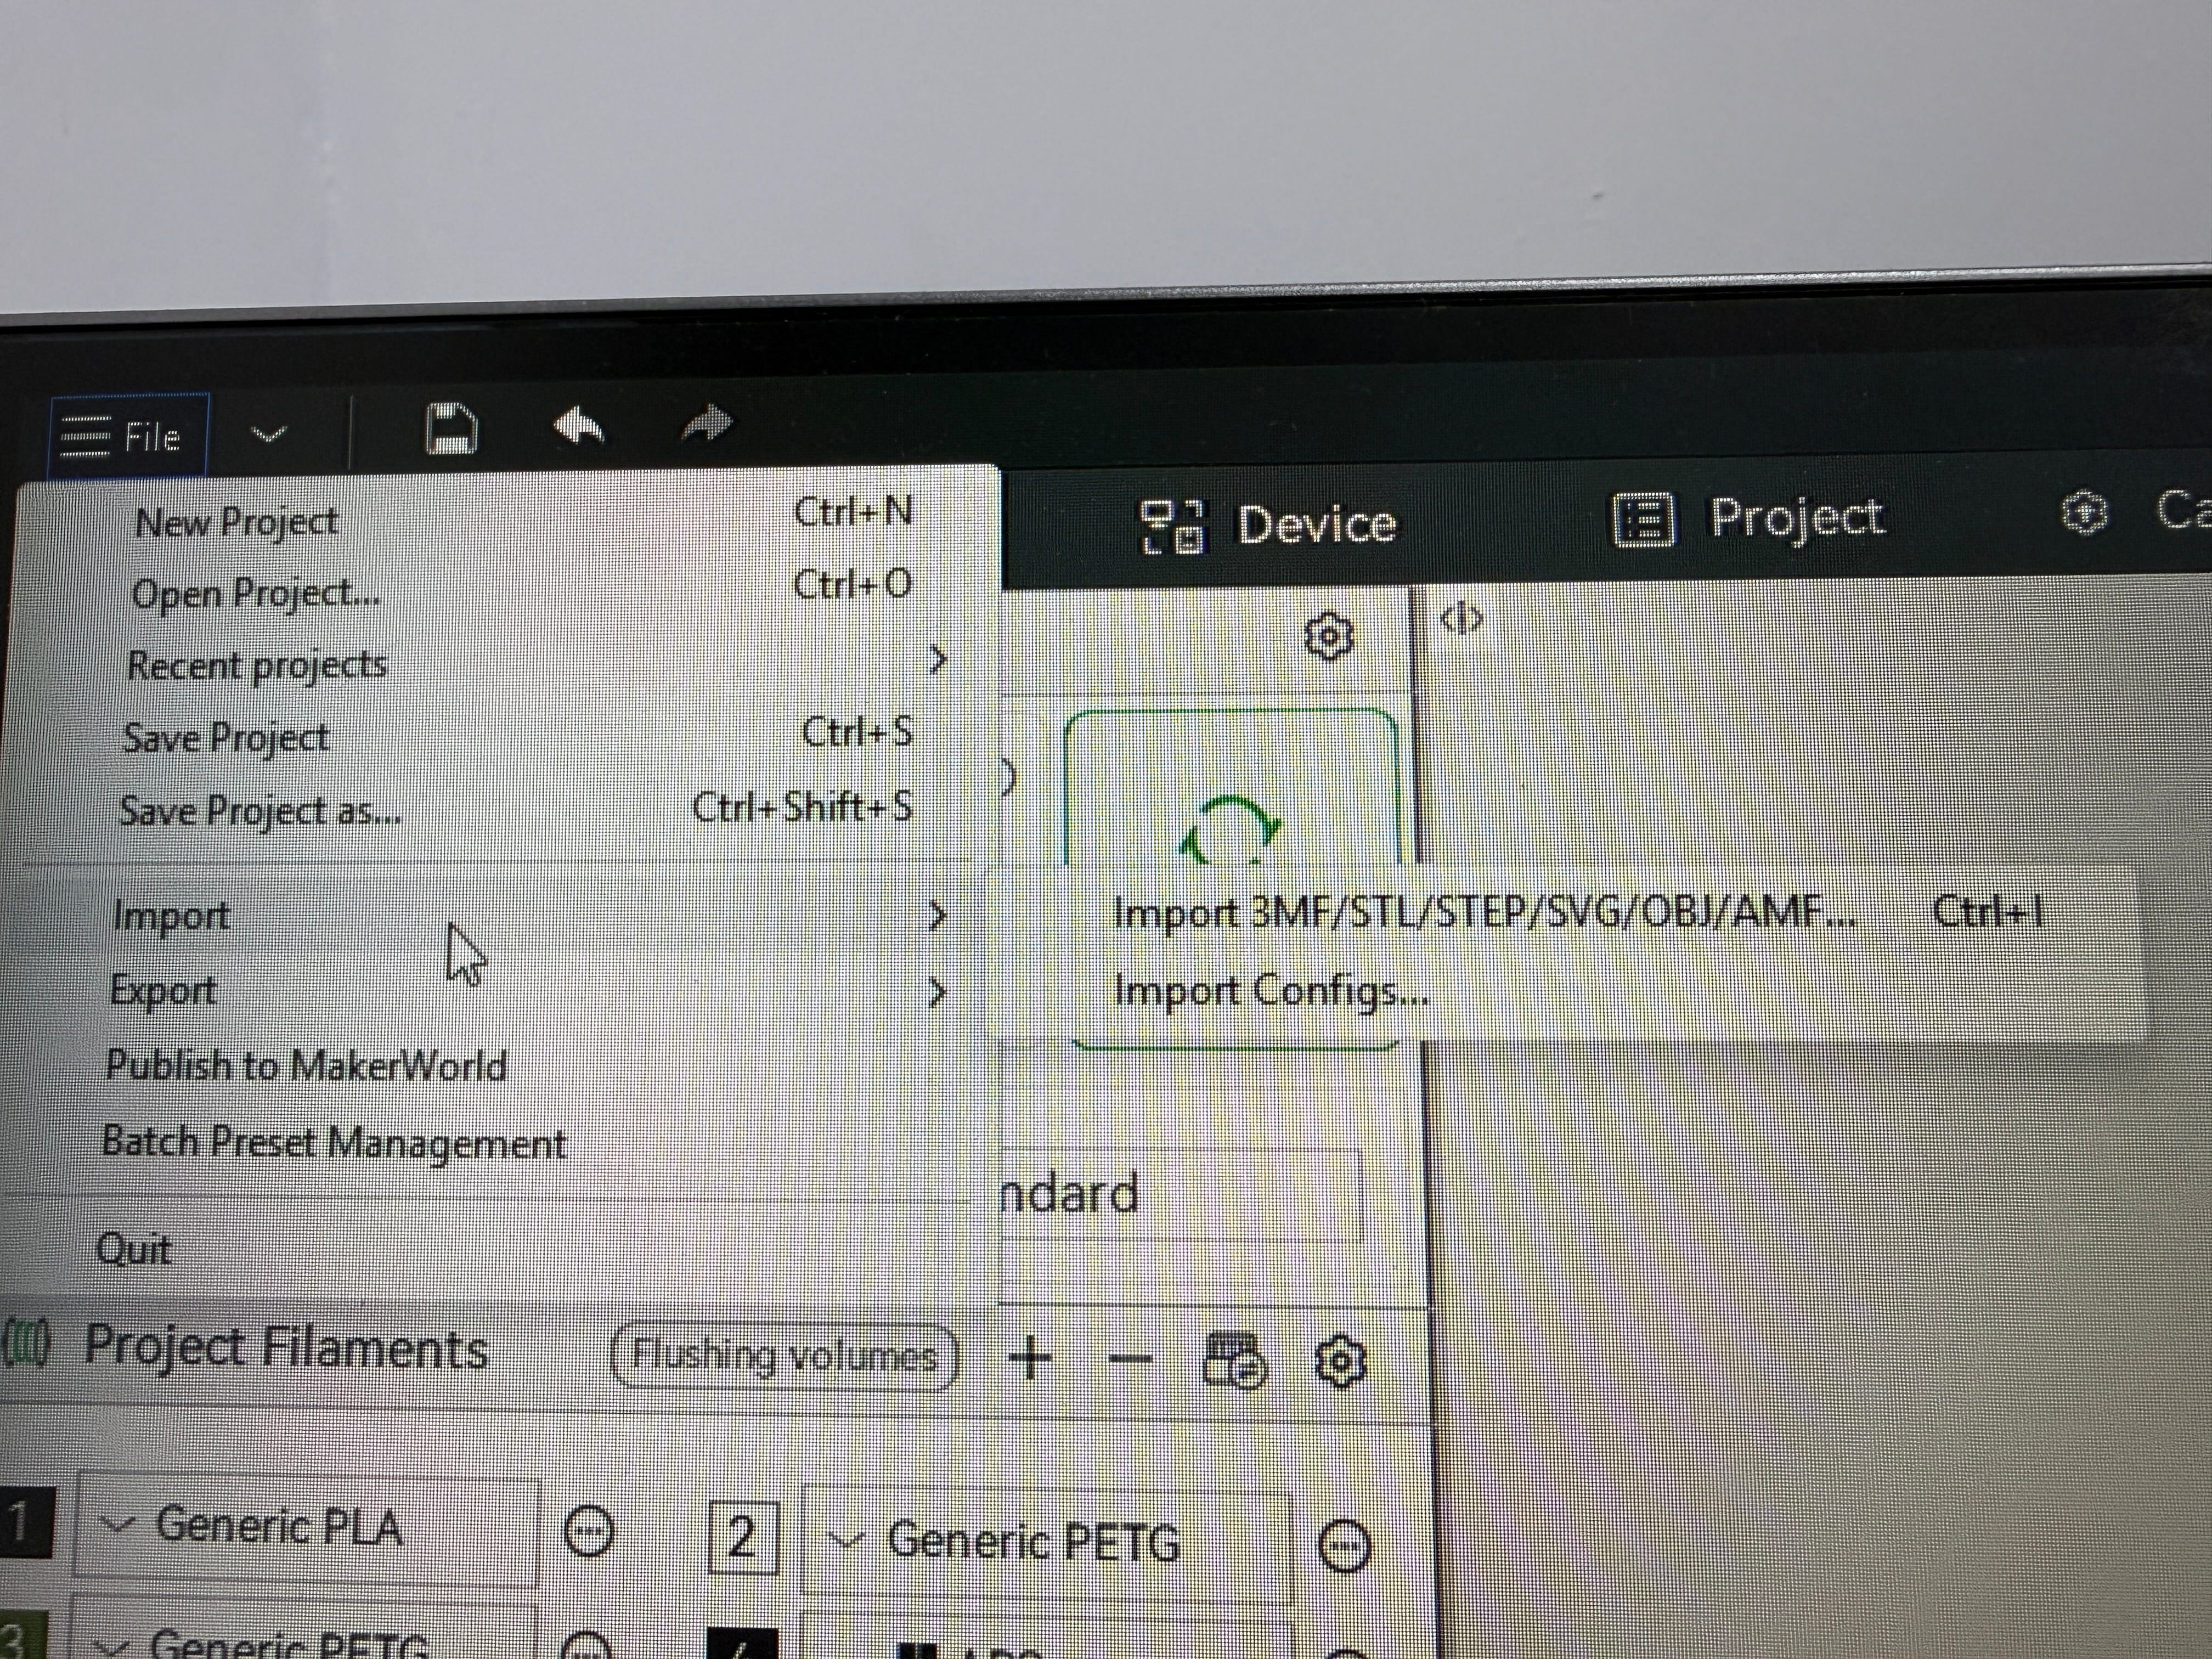
You import a 3D model (like .stl or .step), choose printer/material/settings, and the software converts it into printable toolpaths (layers + movement instructions).
Bambu Studio is described by Bambu Lab as a feature-rich slicer with tools like G-code preview, multiple plates, remote control/monitoring, auto-arrange, auto-orient, support generation, multi-material tools, and per-object/per-part settings. It is also based on PrusaSlicer/Slic3r and has builds for Windows, macOS, and Linux.
Bambu’s official resources also organize Bambu Studio docs into topics such as Quick Start, Remote Control & Monitoring, Multi-Color Printing, Flow Rate Calibration, and Flow Dynamics Calibration.
What Bambu Slicer is used for
You use Bambu Studio to:
- Import your 3D model
Select your printer
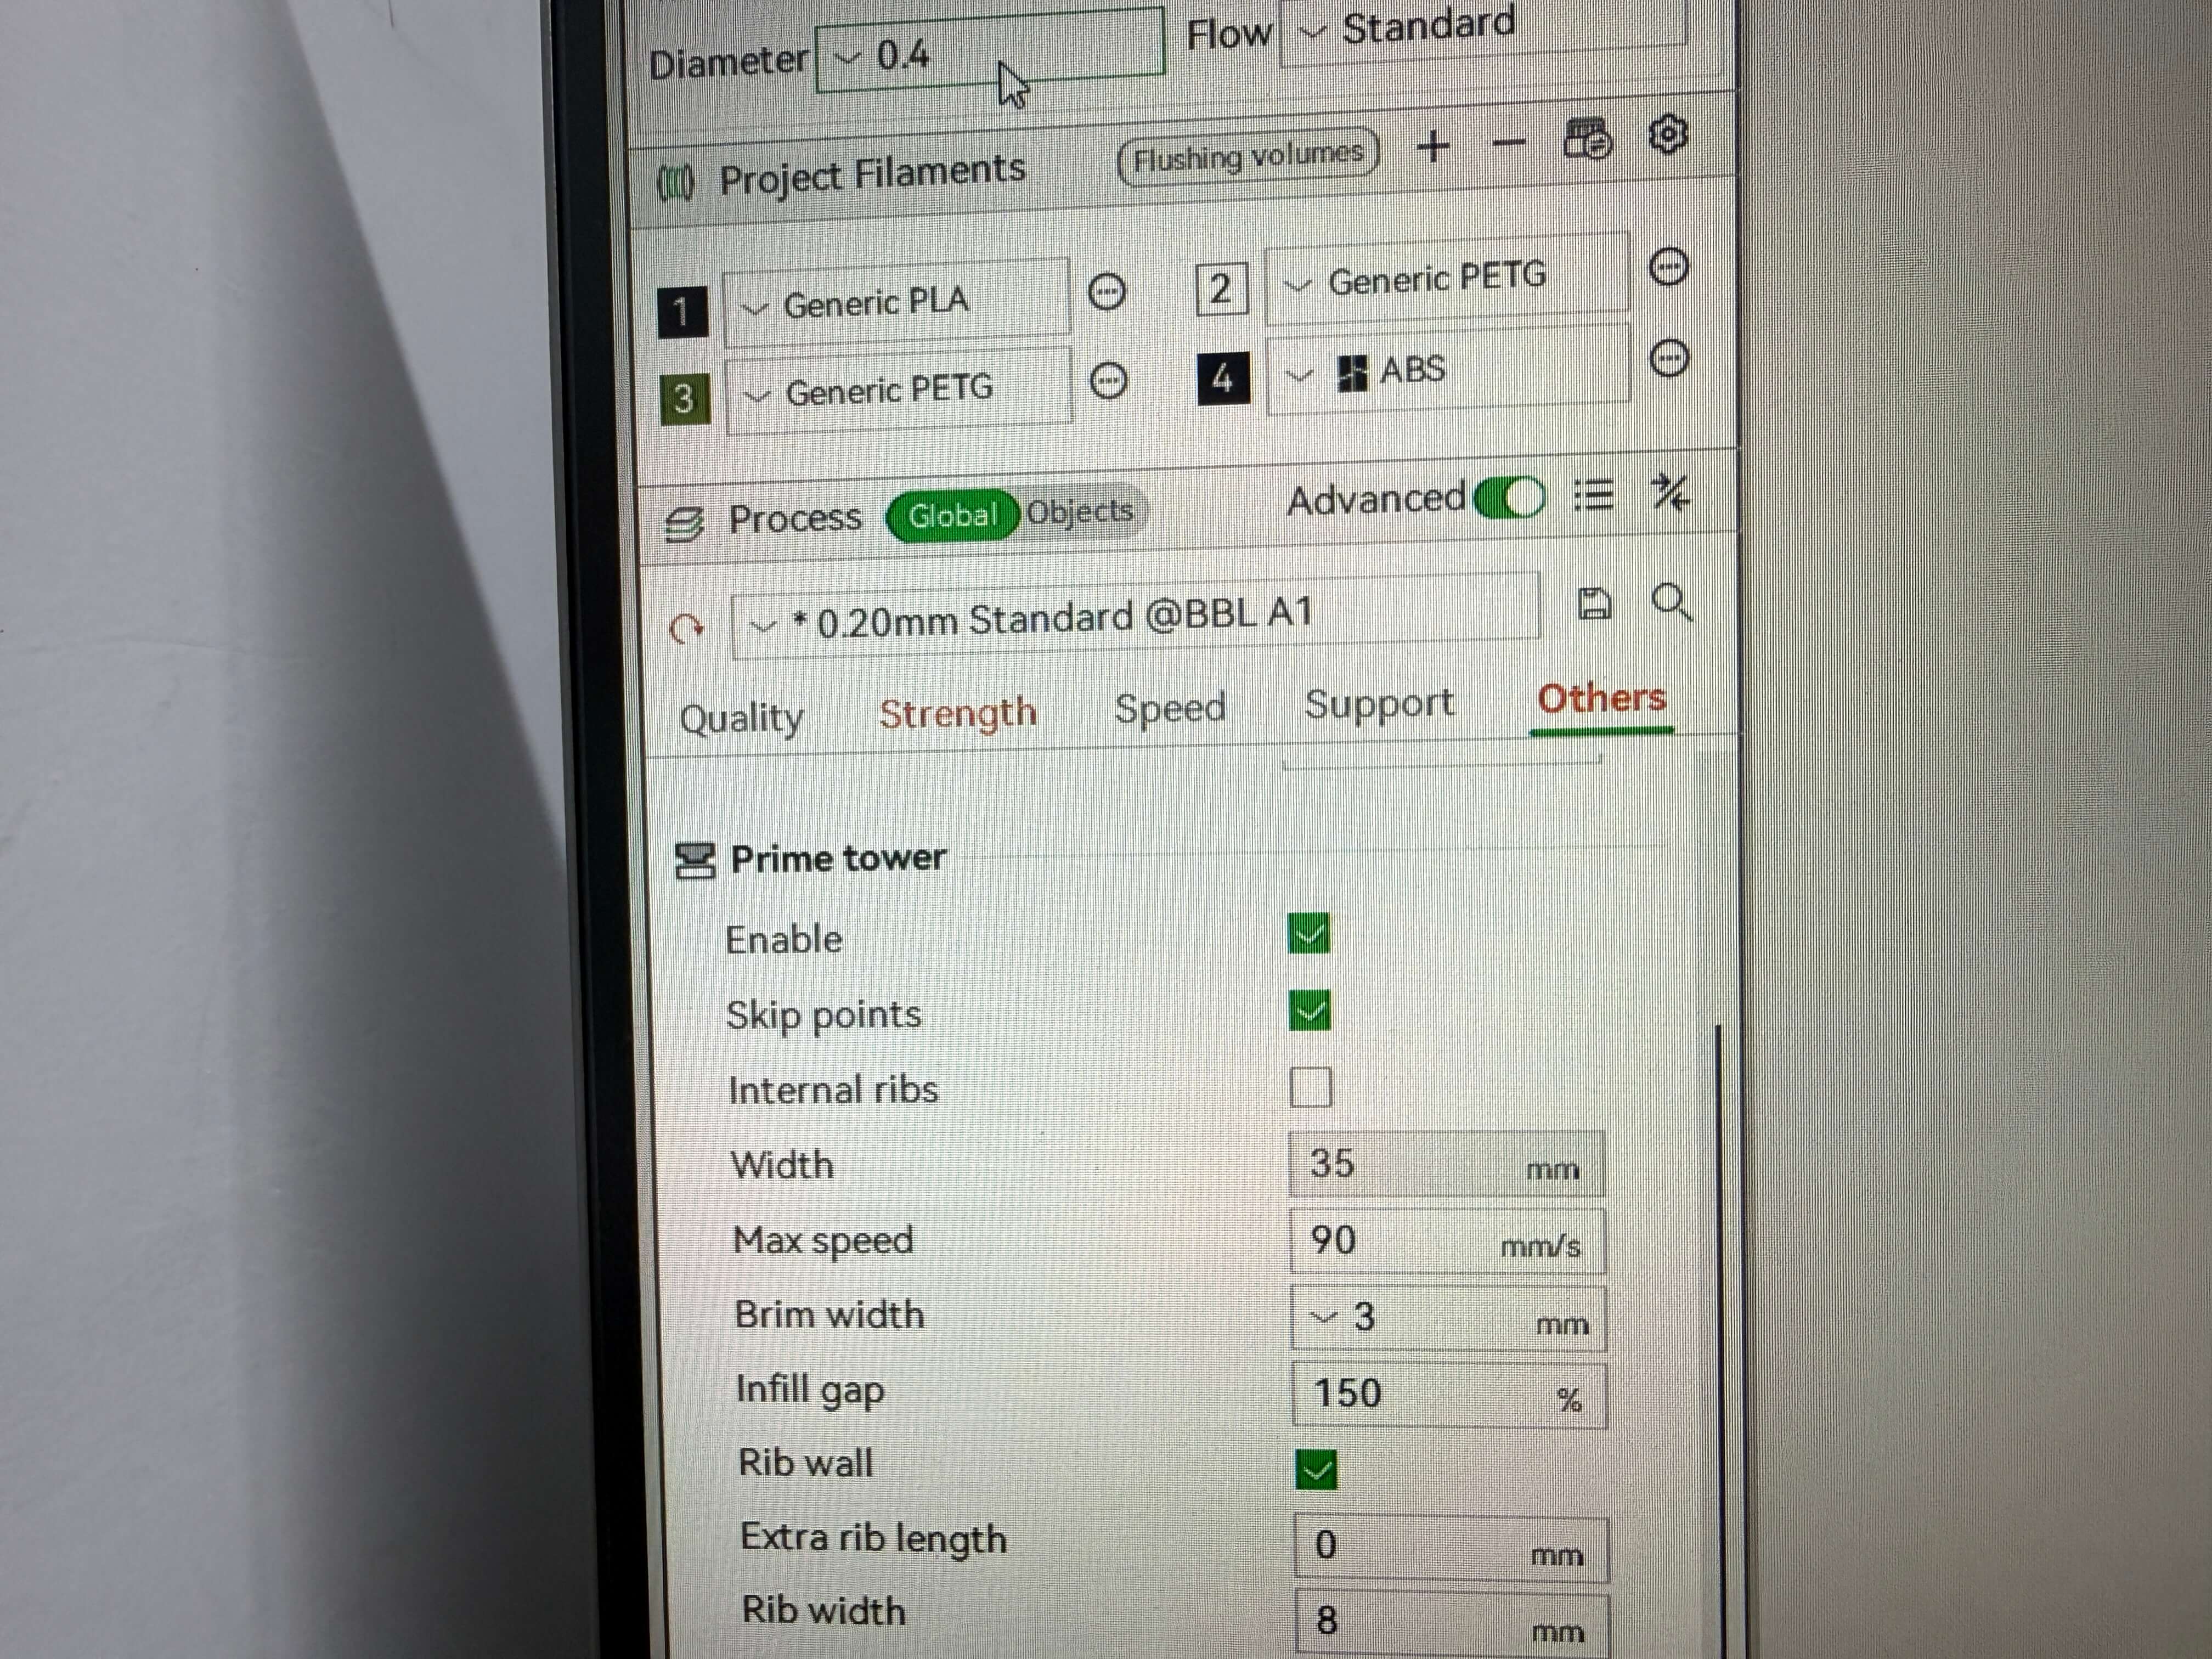
Select filament/material and Set printer settings (layer height, supports, infill, speeds, etc.)
- Slice the model
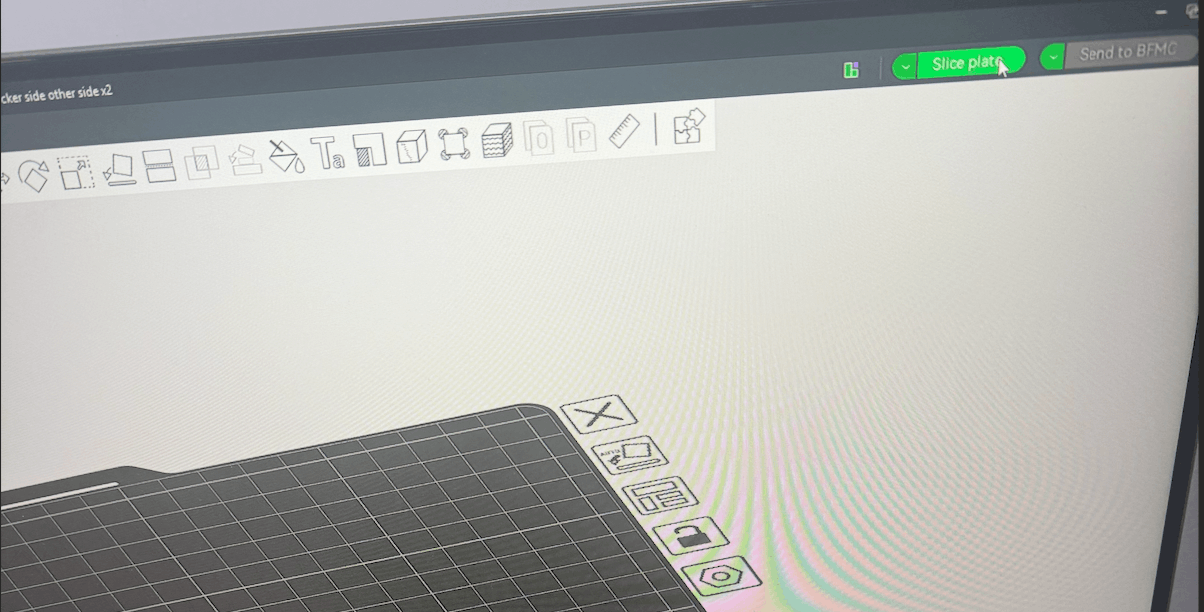
- Send to printer / export file

- And lastly monitor the print
Design Rules
Overhang / Angle Test
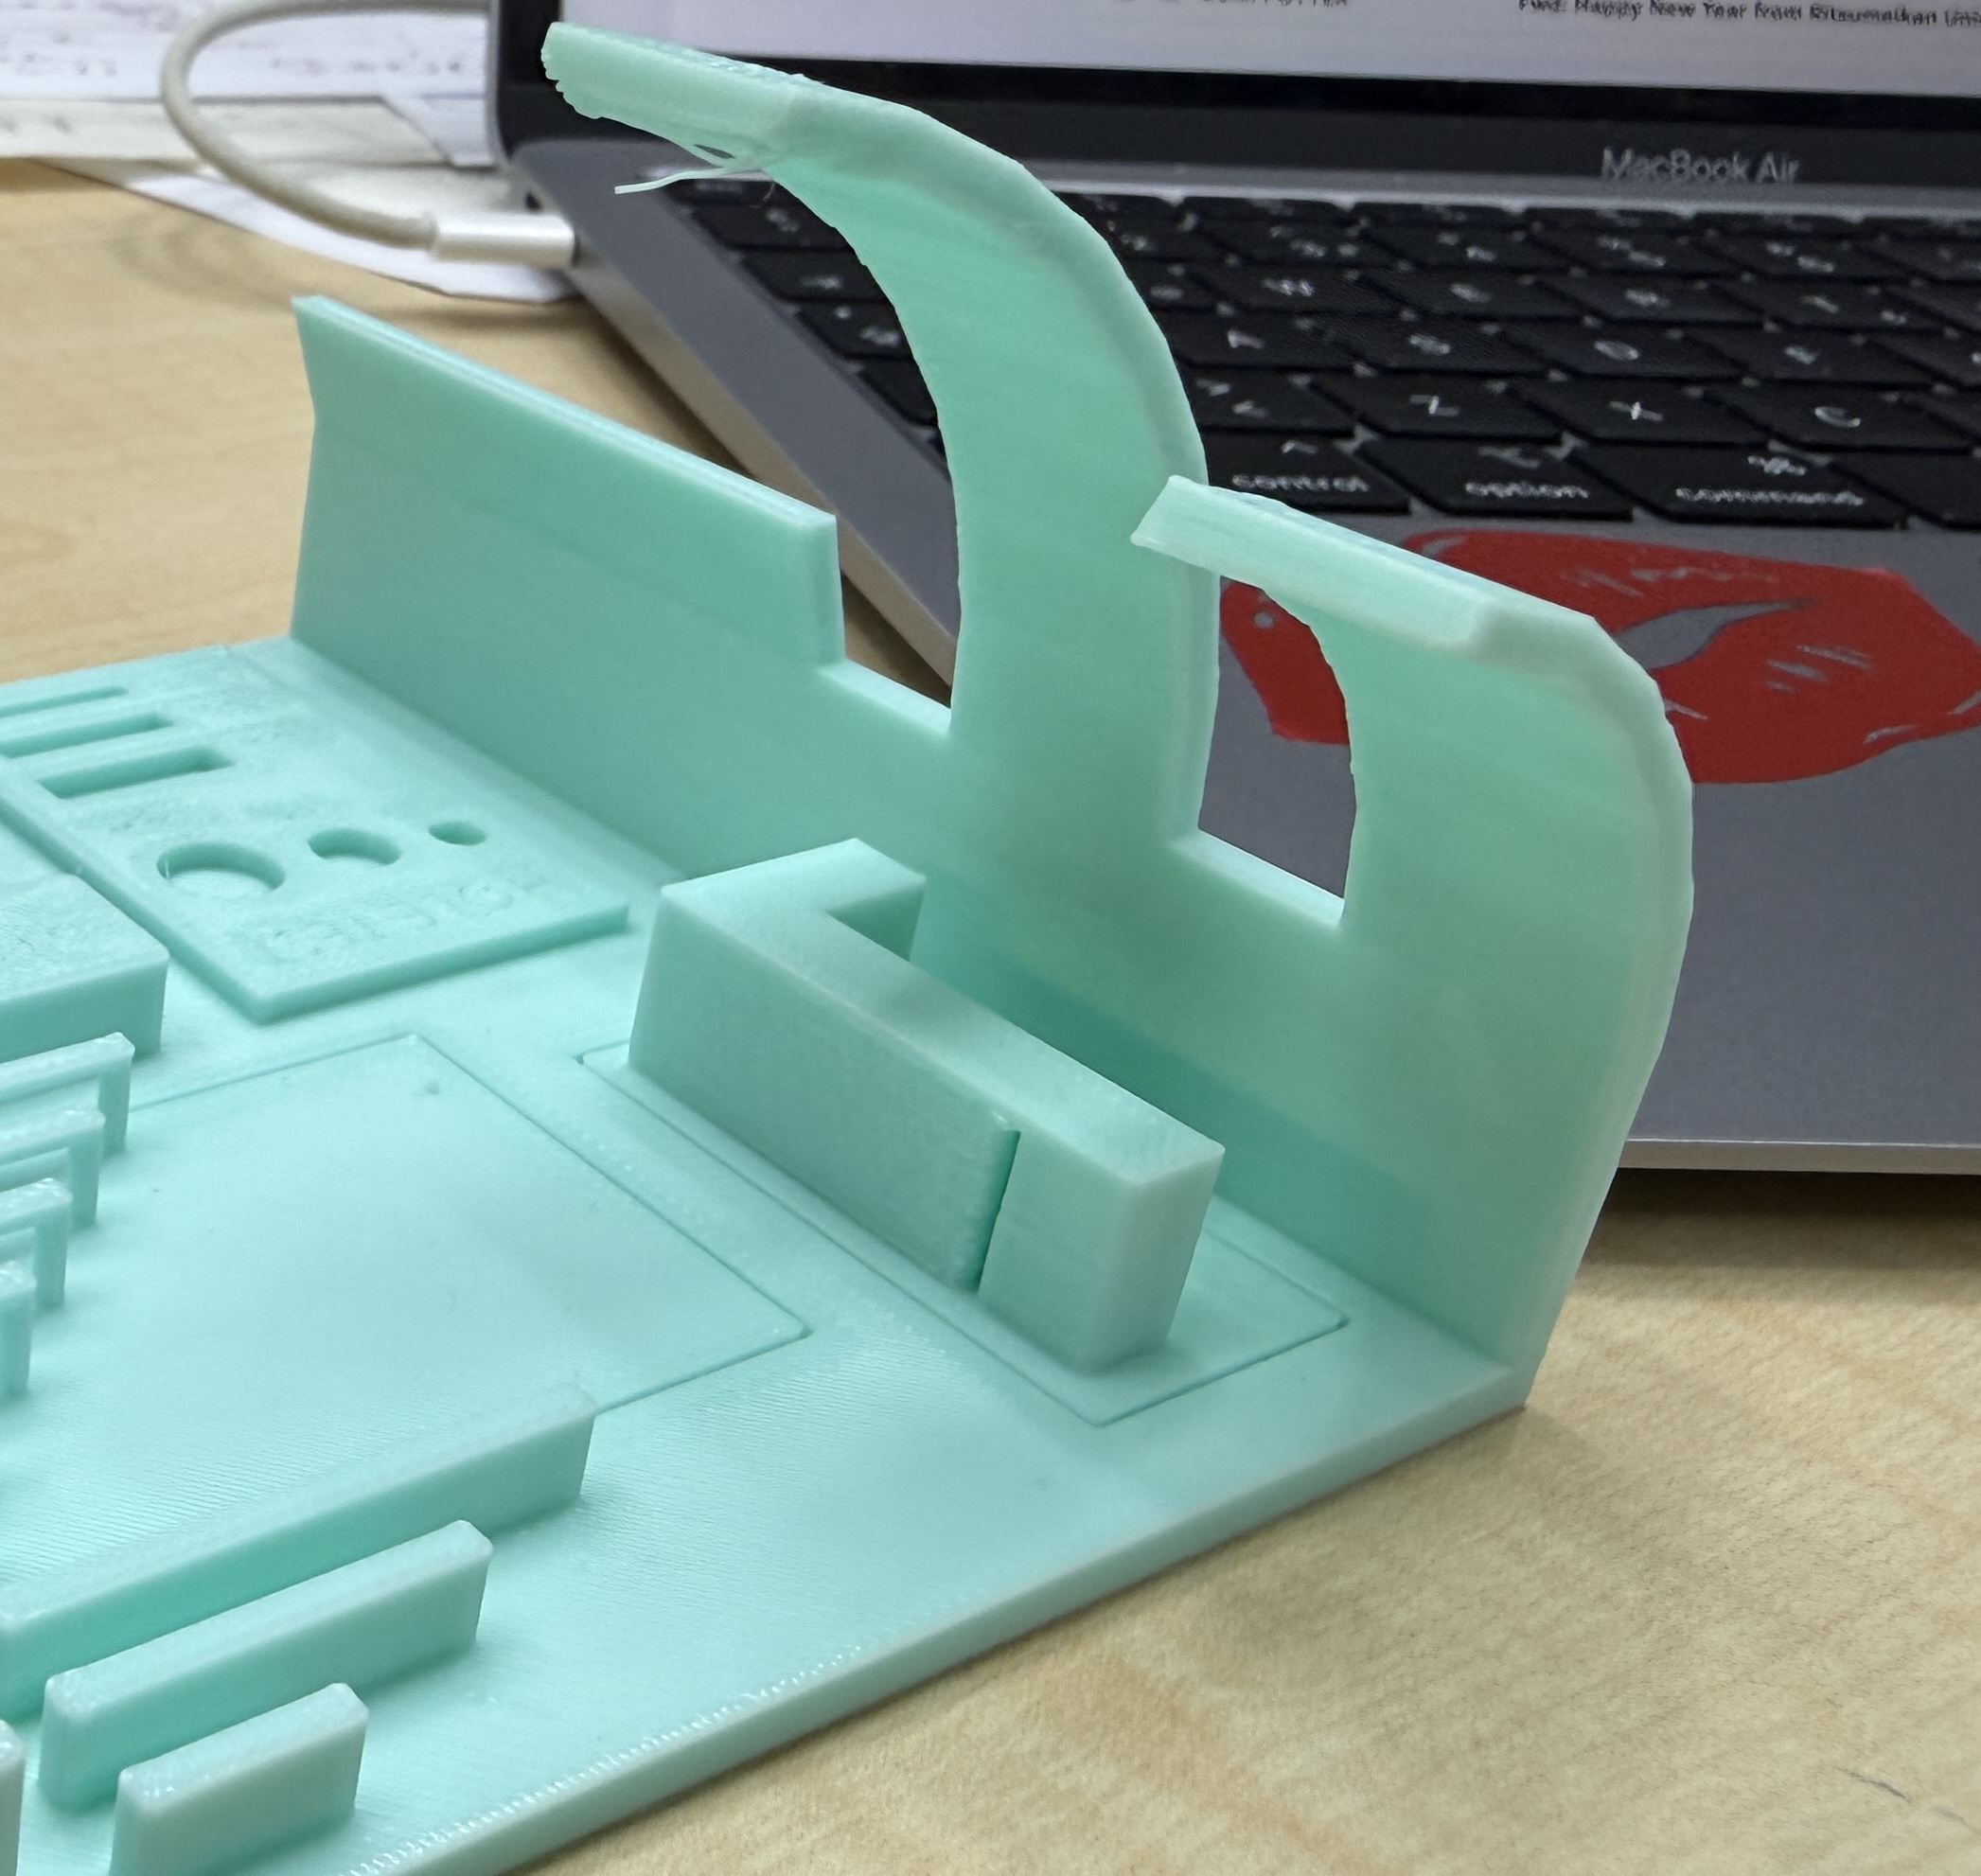
Overhangs are parts of a 3D model that extend outward without material under them, and the printing angle shows how far these features can be printed without support. In many cases, angles get up to about 45° can be printed without supports, but this depends on the material and the printer type. In our lab, we did a basic overhang test using the Bambu Lab P1 to observe this. Here is an example picture:
Bridging Test
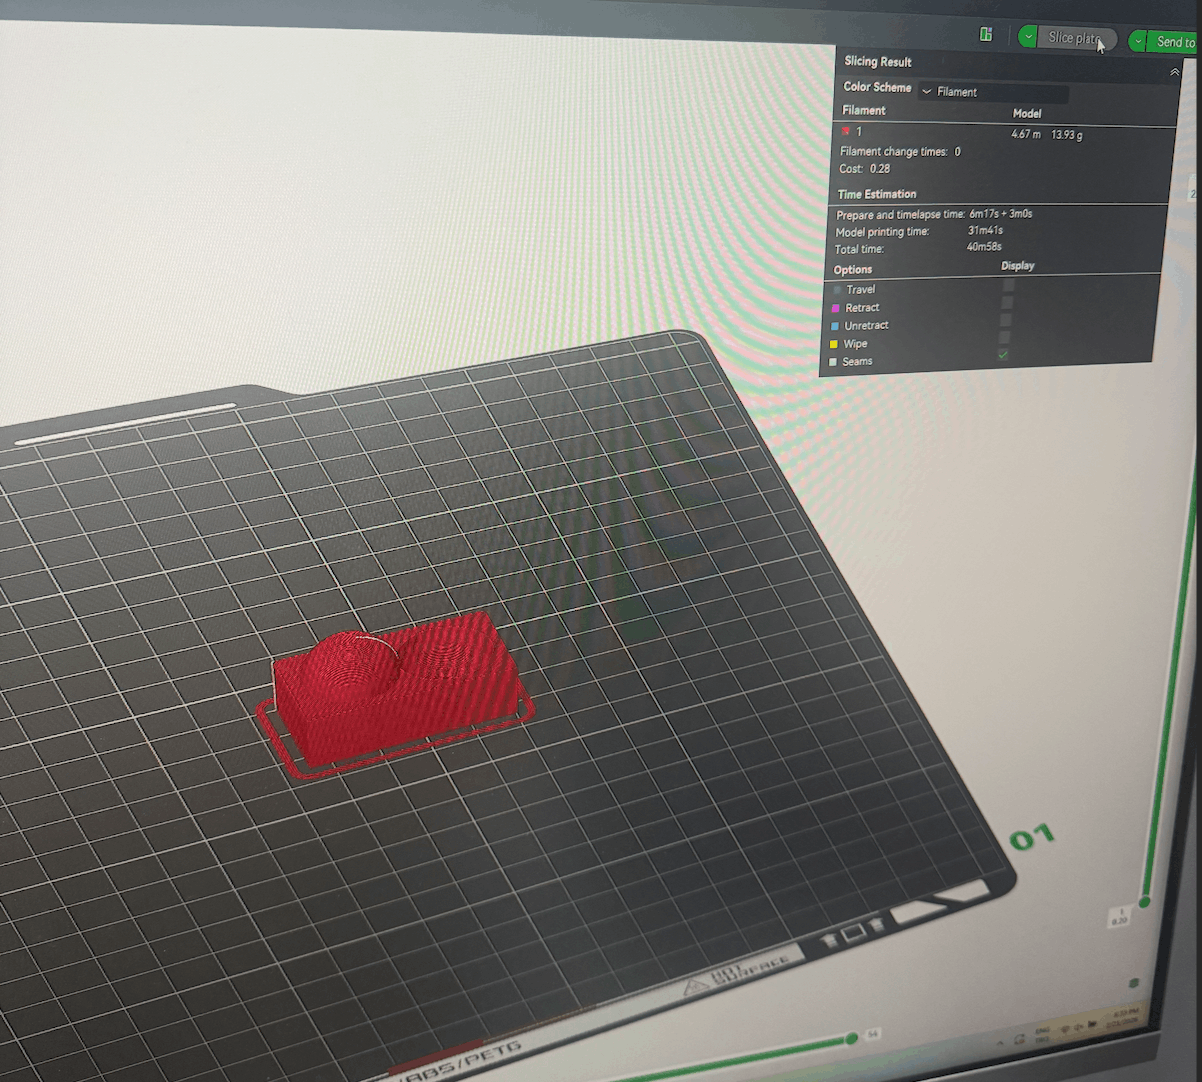
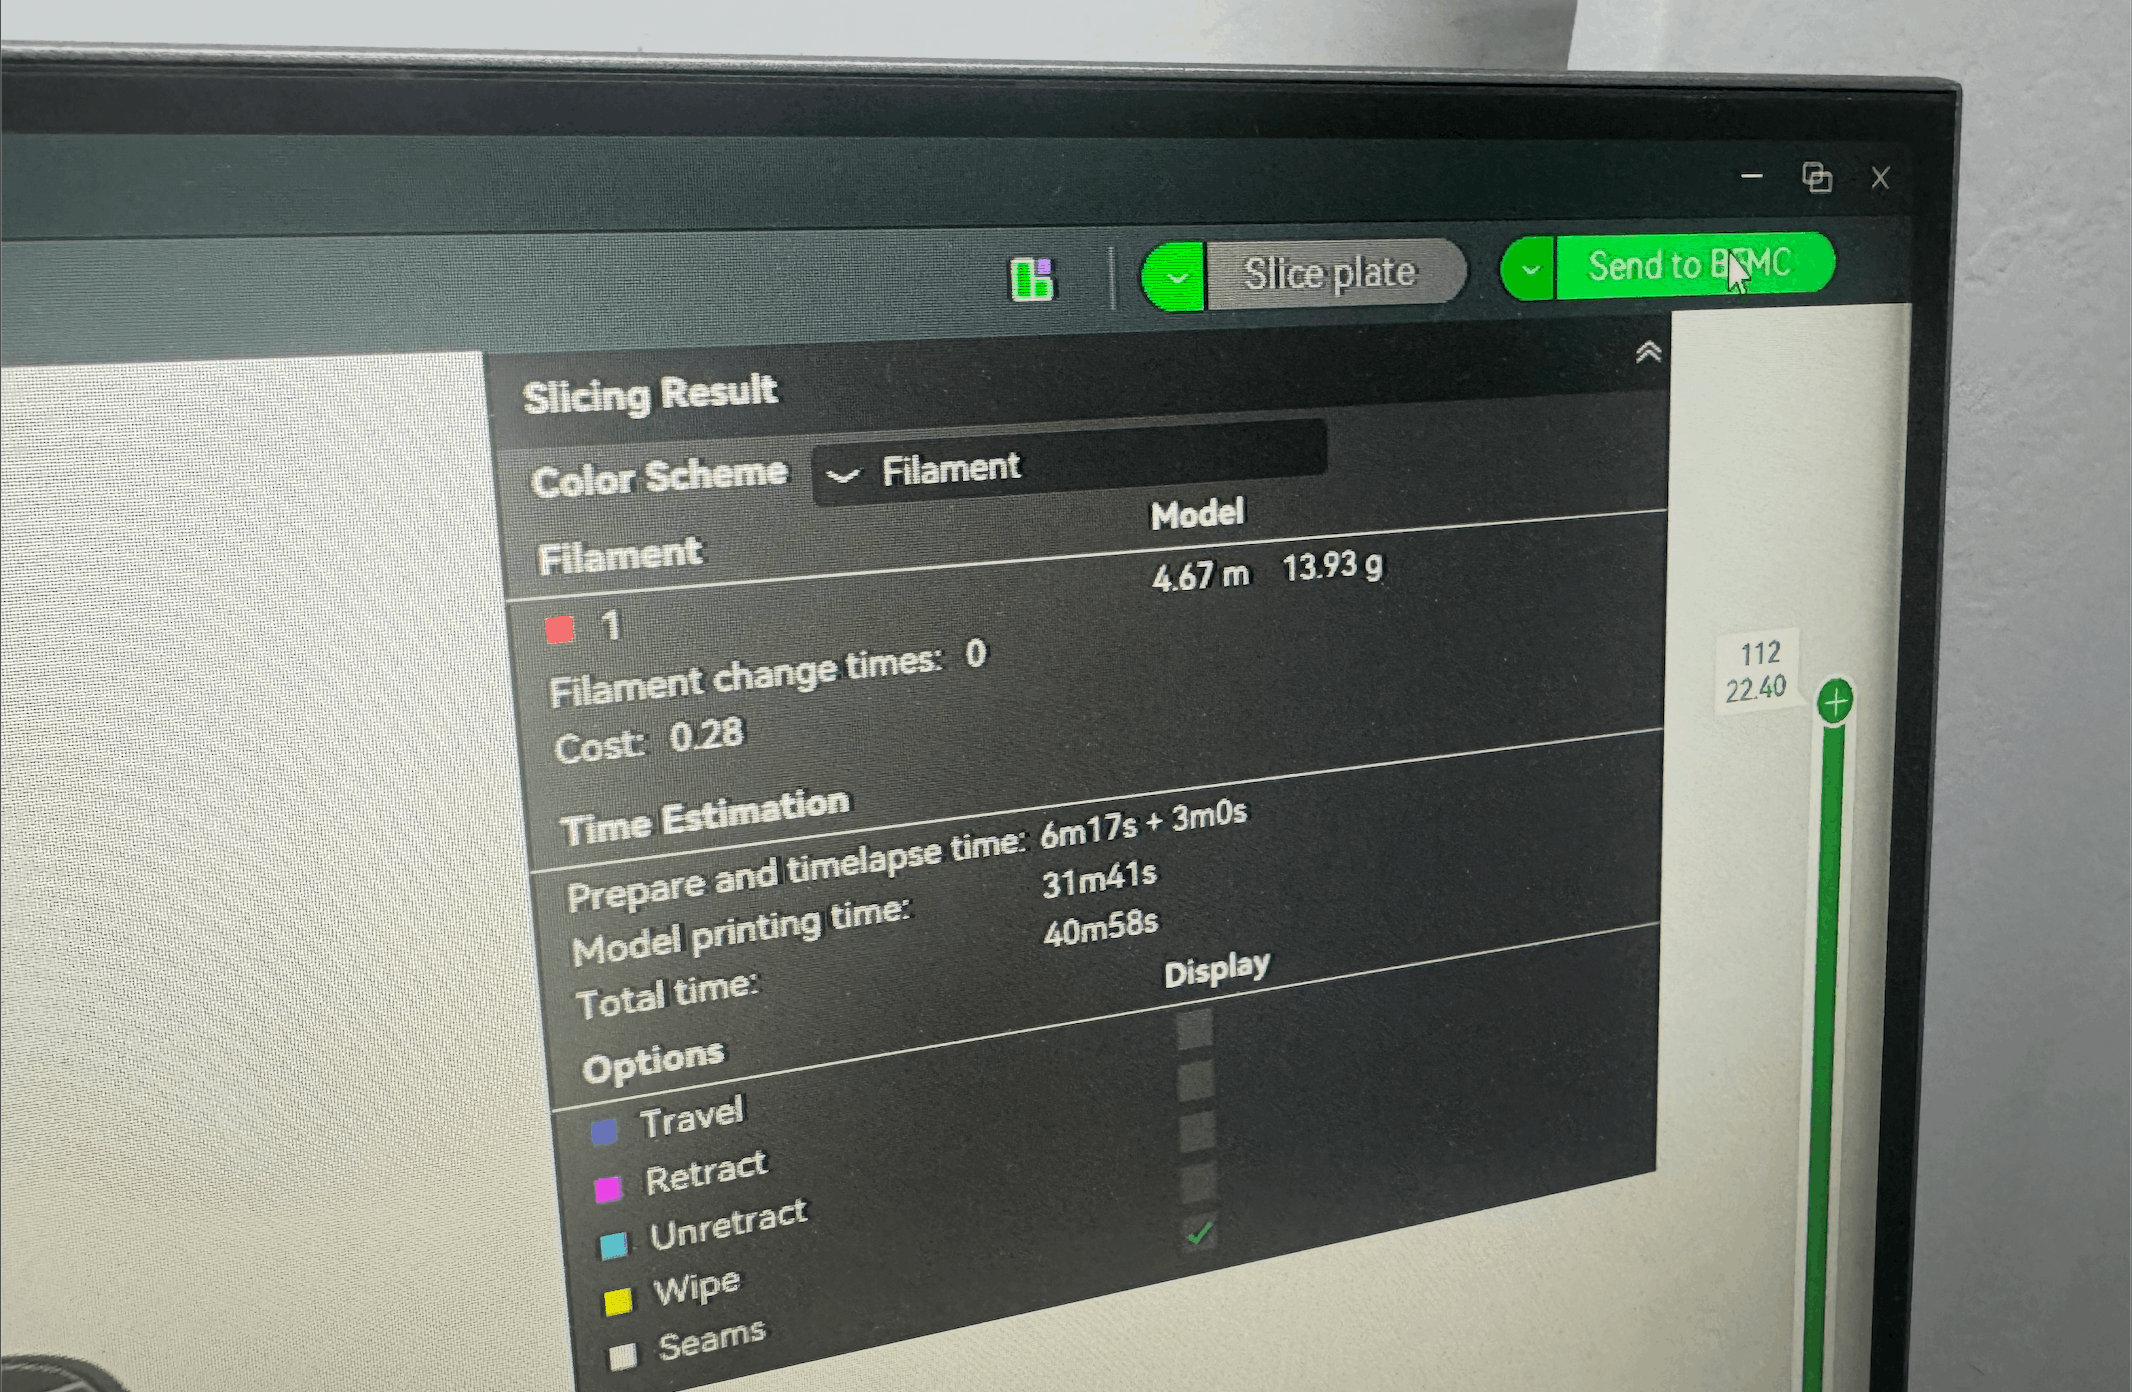
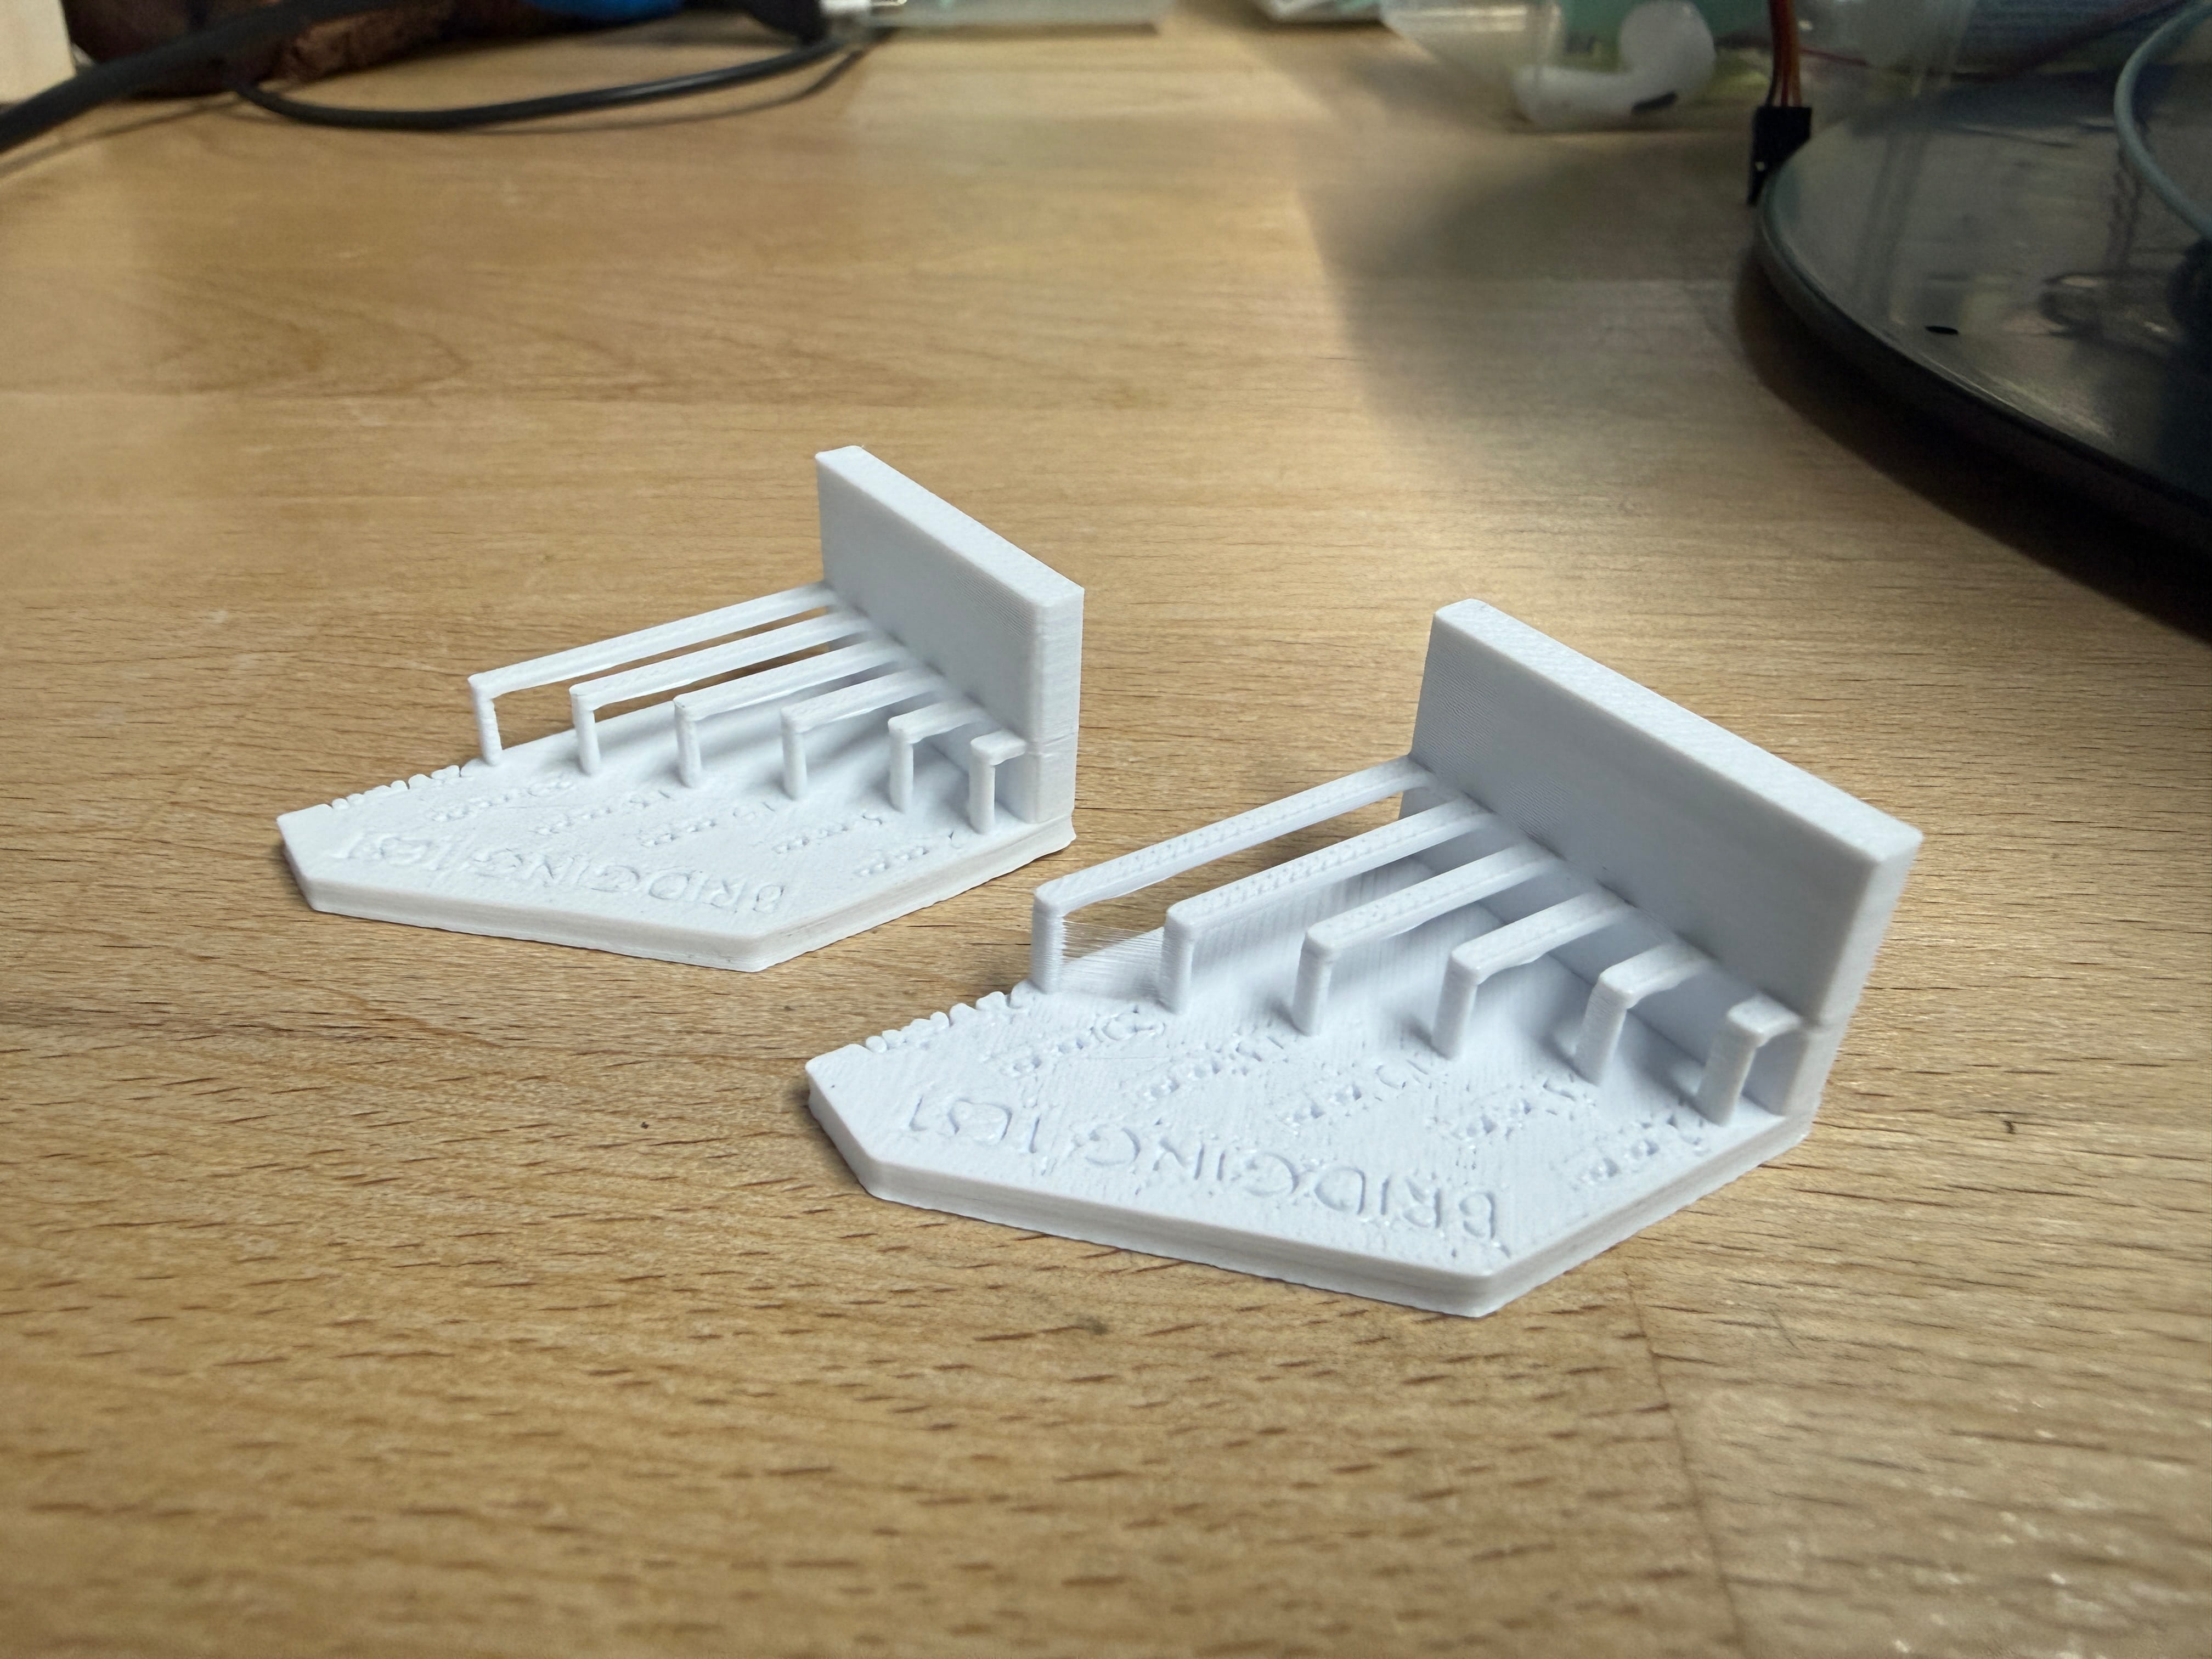
Bridging means printing across an empty gap between two parts without support underneath. It works better depending on the material and printer, and shorter gaps are usually easier to print successfully. Here is an example picture that we successfully did with the help of the Bambu Slicer:
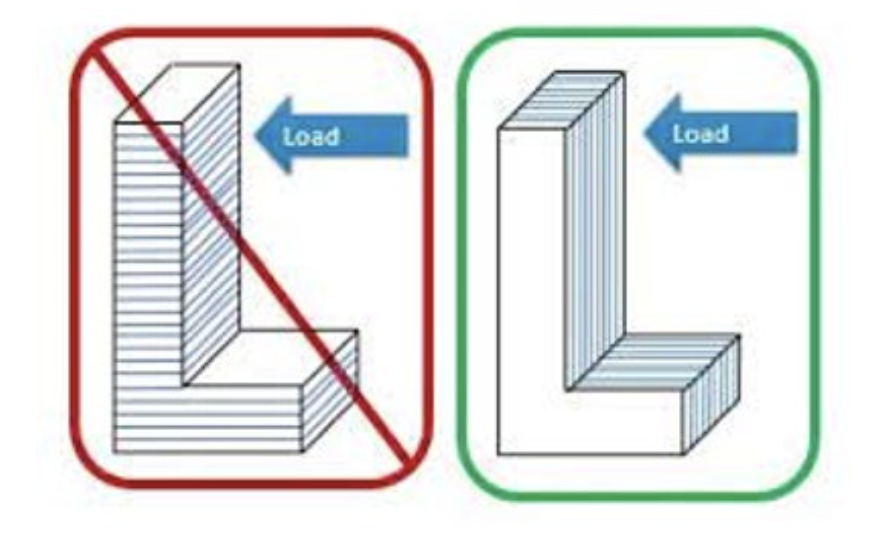
Anisotropy
Because 3D prints are made layer by layer, they can be stronger in some directions and weaker in others. This should be considered during design, especially for mechanical parts that will carry force. Here is an example picture:
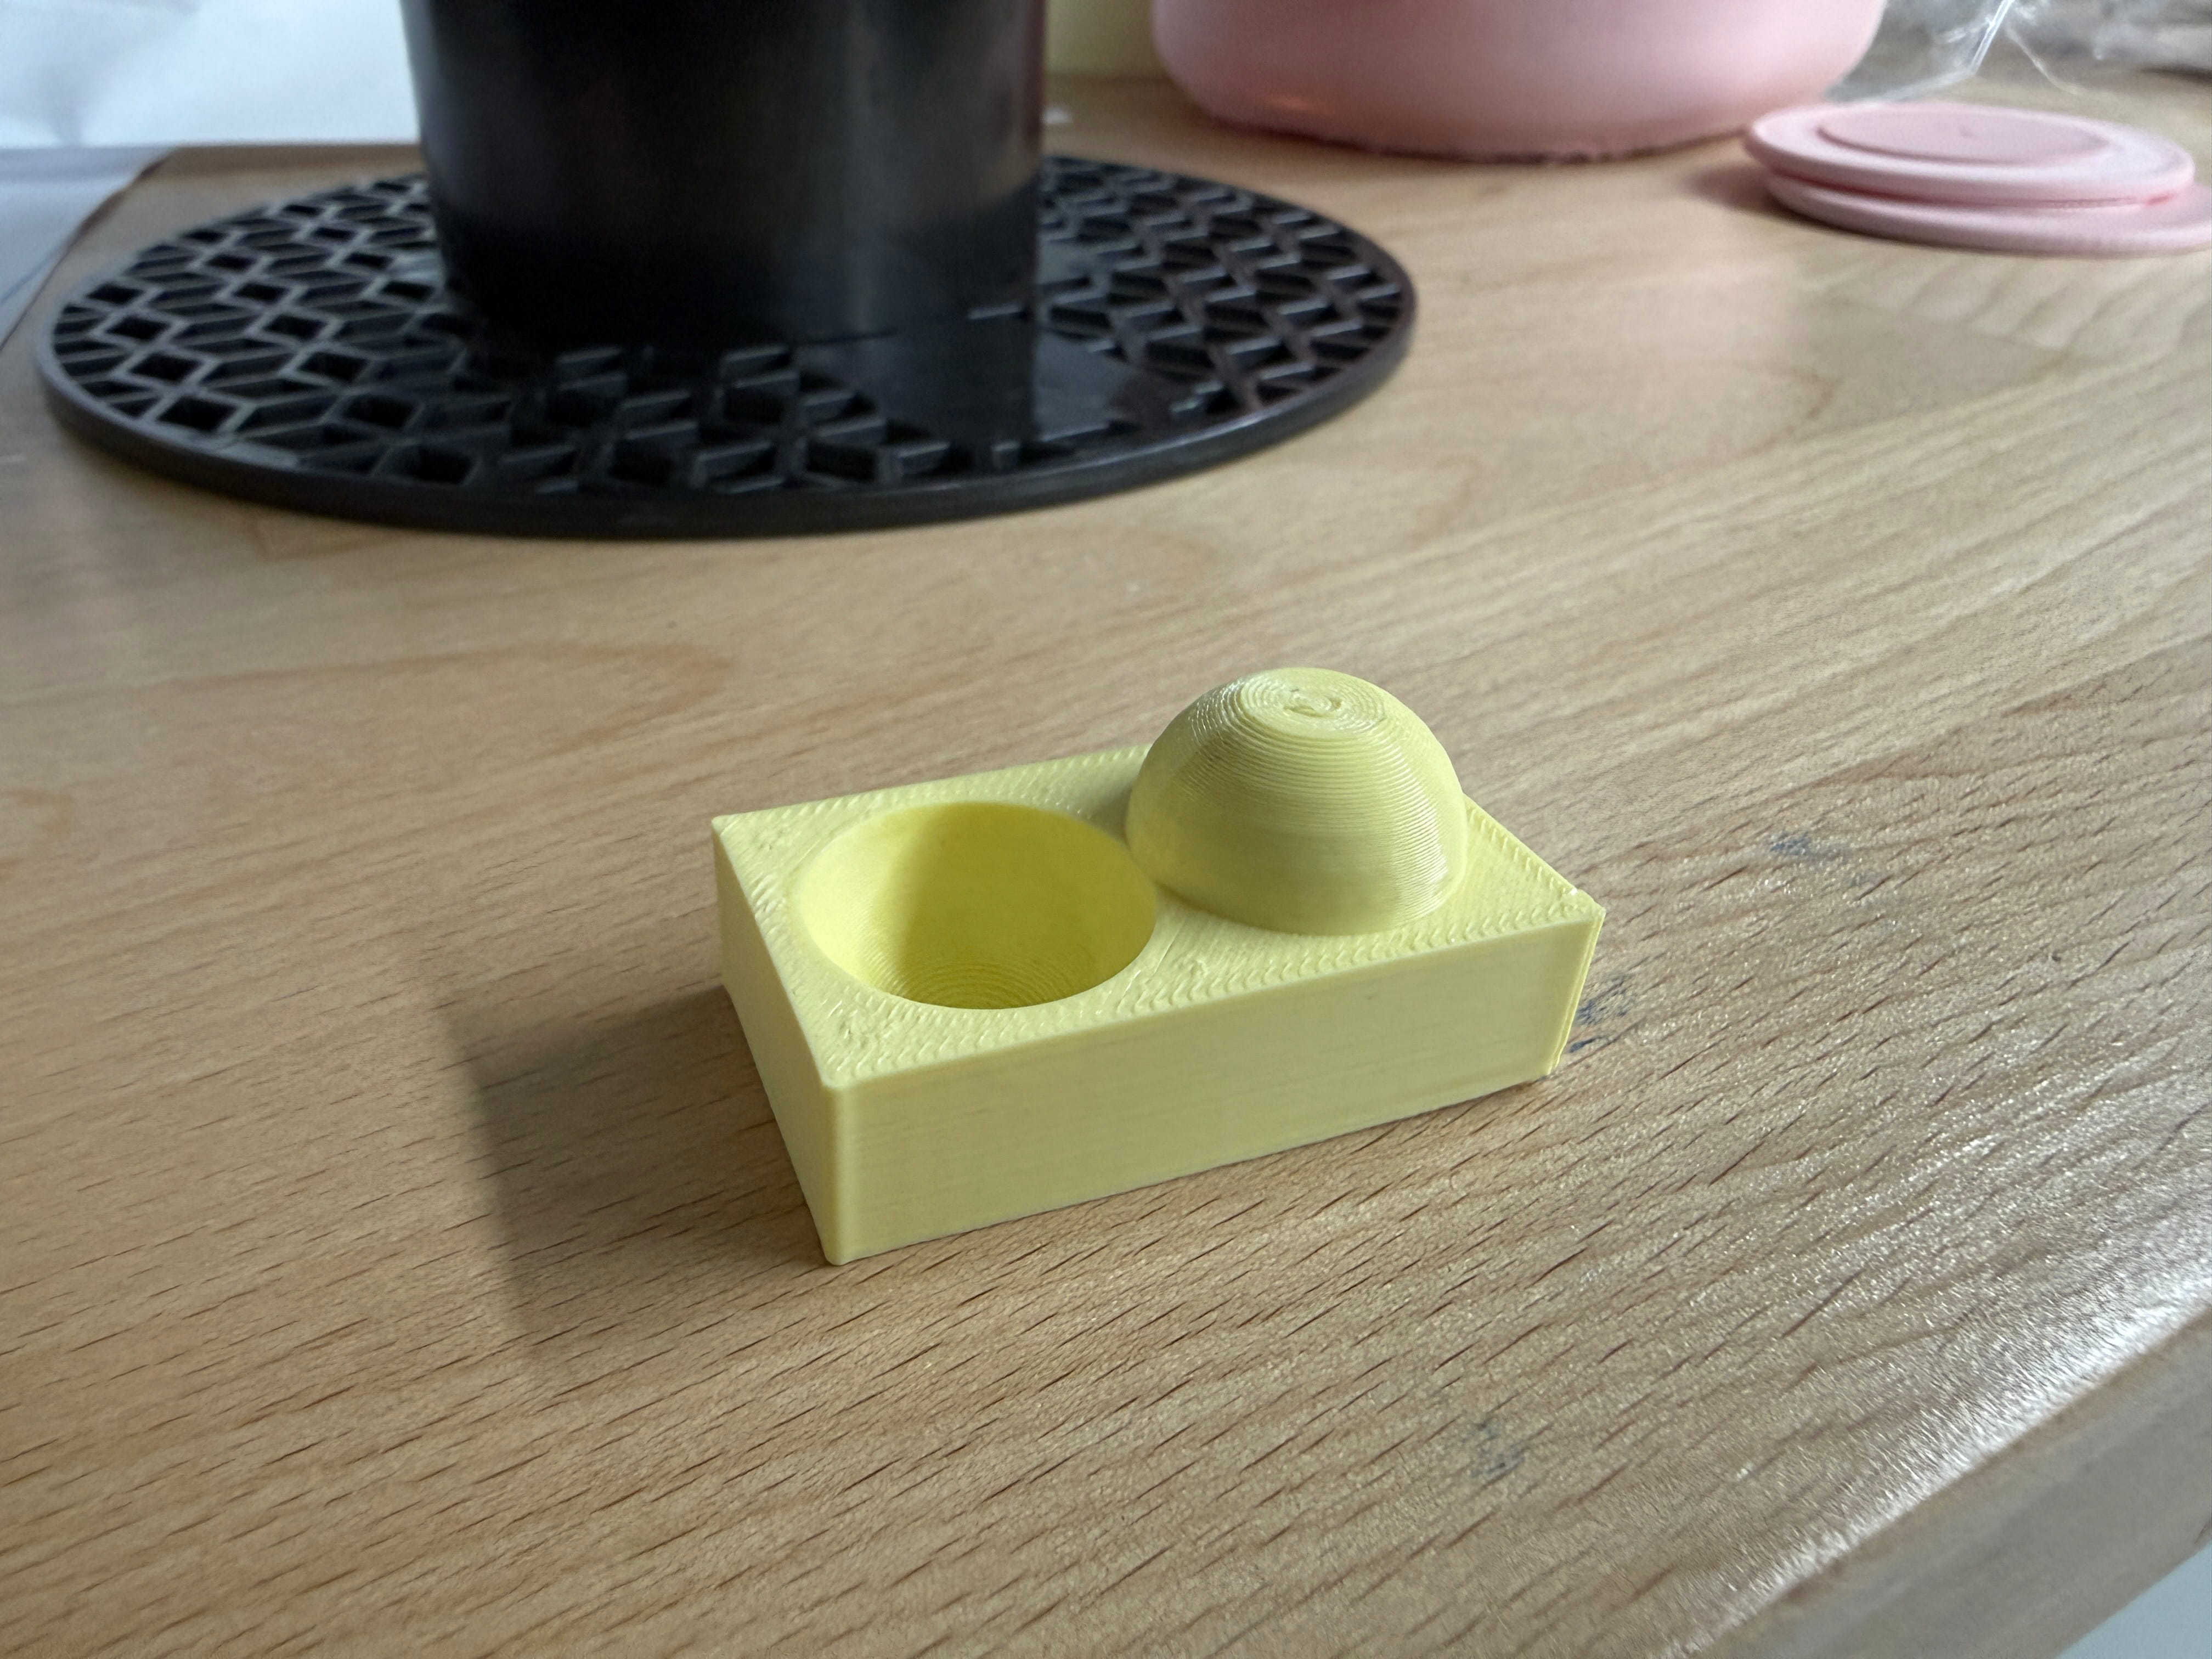
Surface Finish
Surface finish means how smooth or rough the outside of a 3D print looks. It depends on the printer’s resolution, the material used, and any finishing steps after printing, such as sanding or chemical smoothing. In this example below, we didn’t use any sanding or smoothing, just pure printing, but there was only a little problem with the sphere shape having a small bulge on top that we fixed by using a flush cutter; the hole didn’t have any problems:
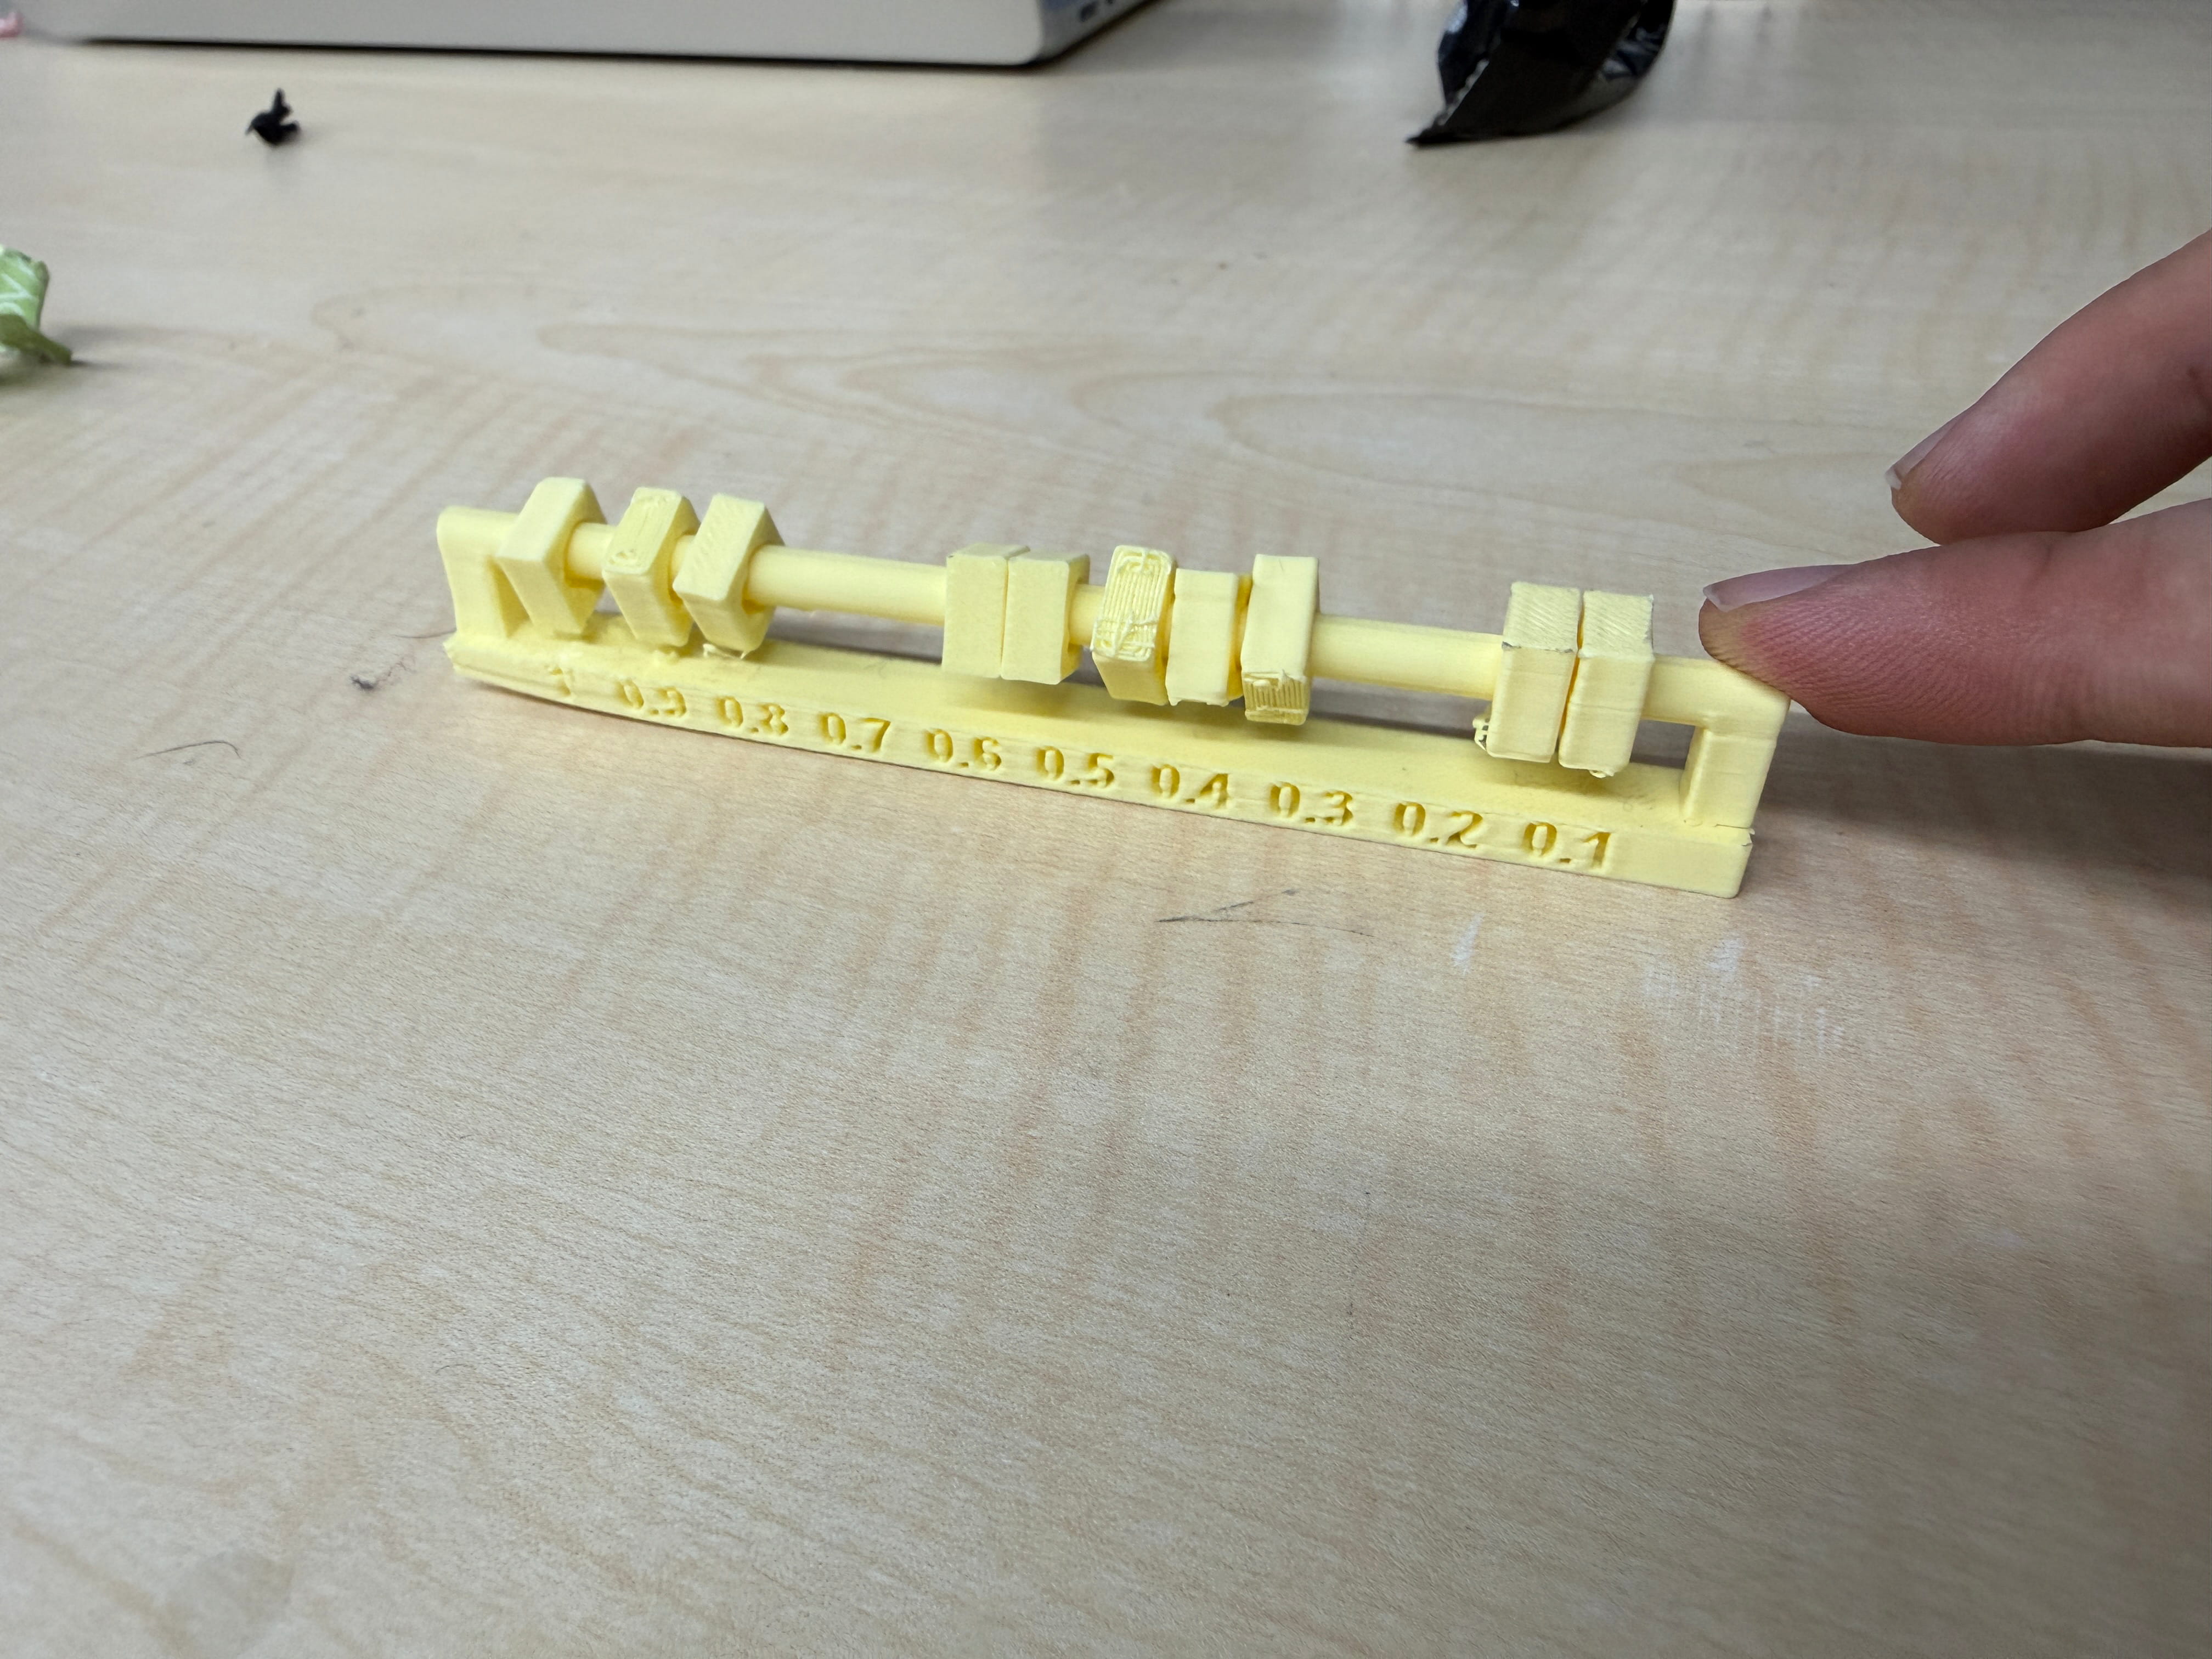
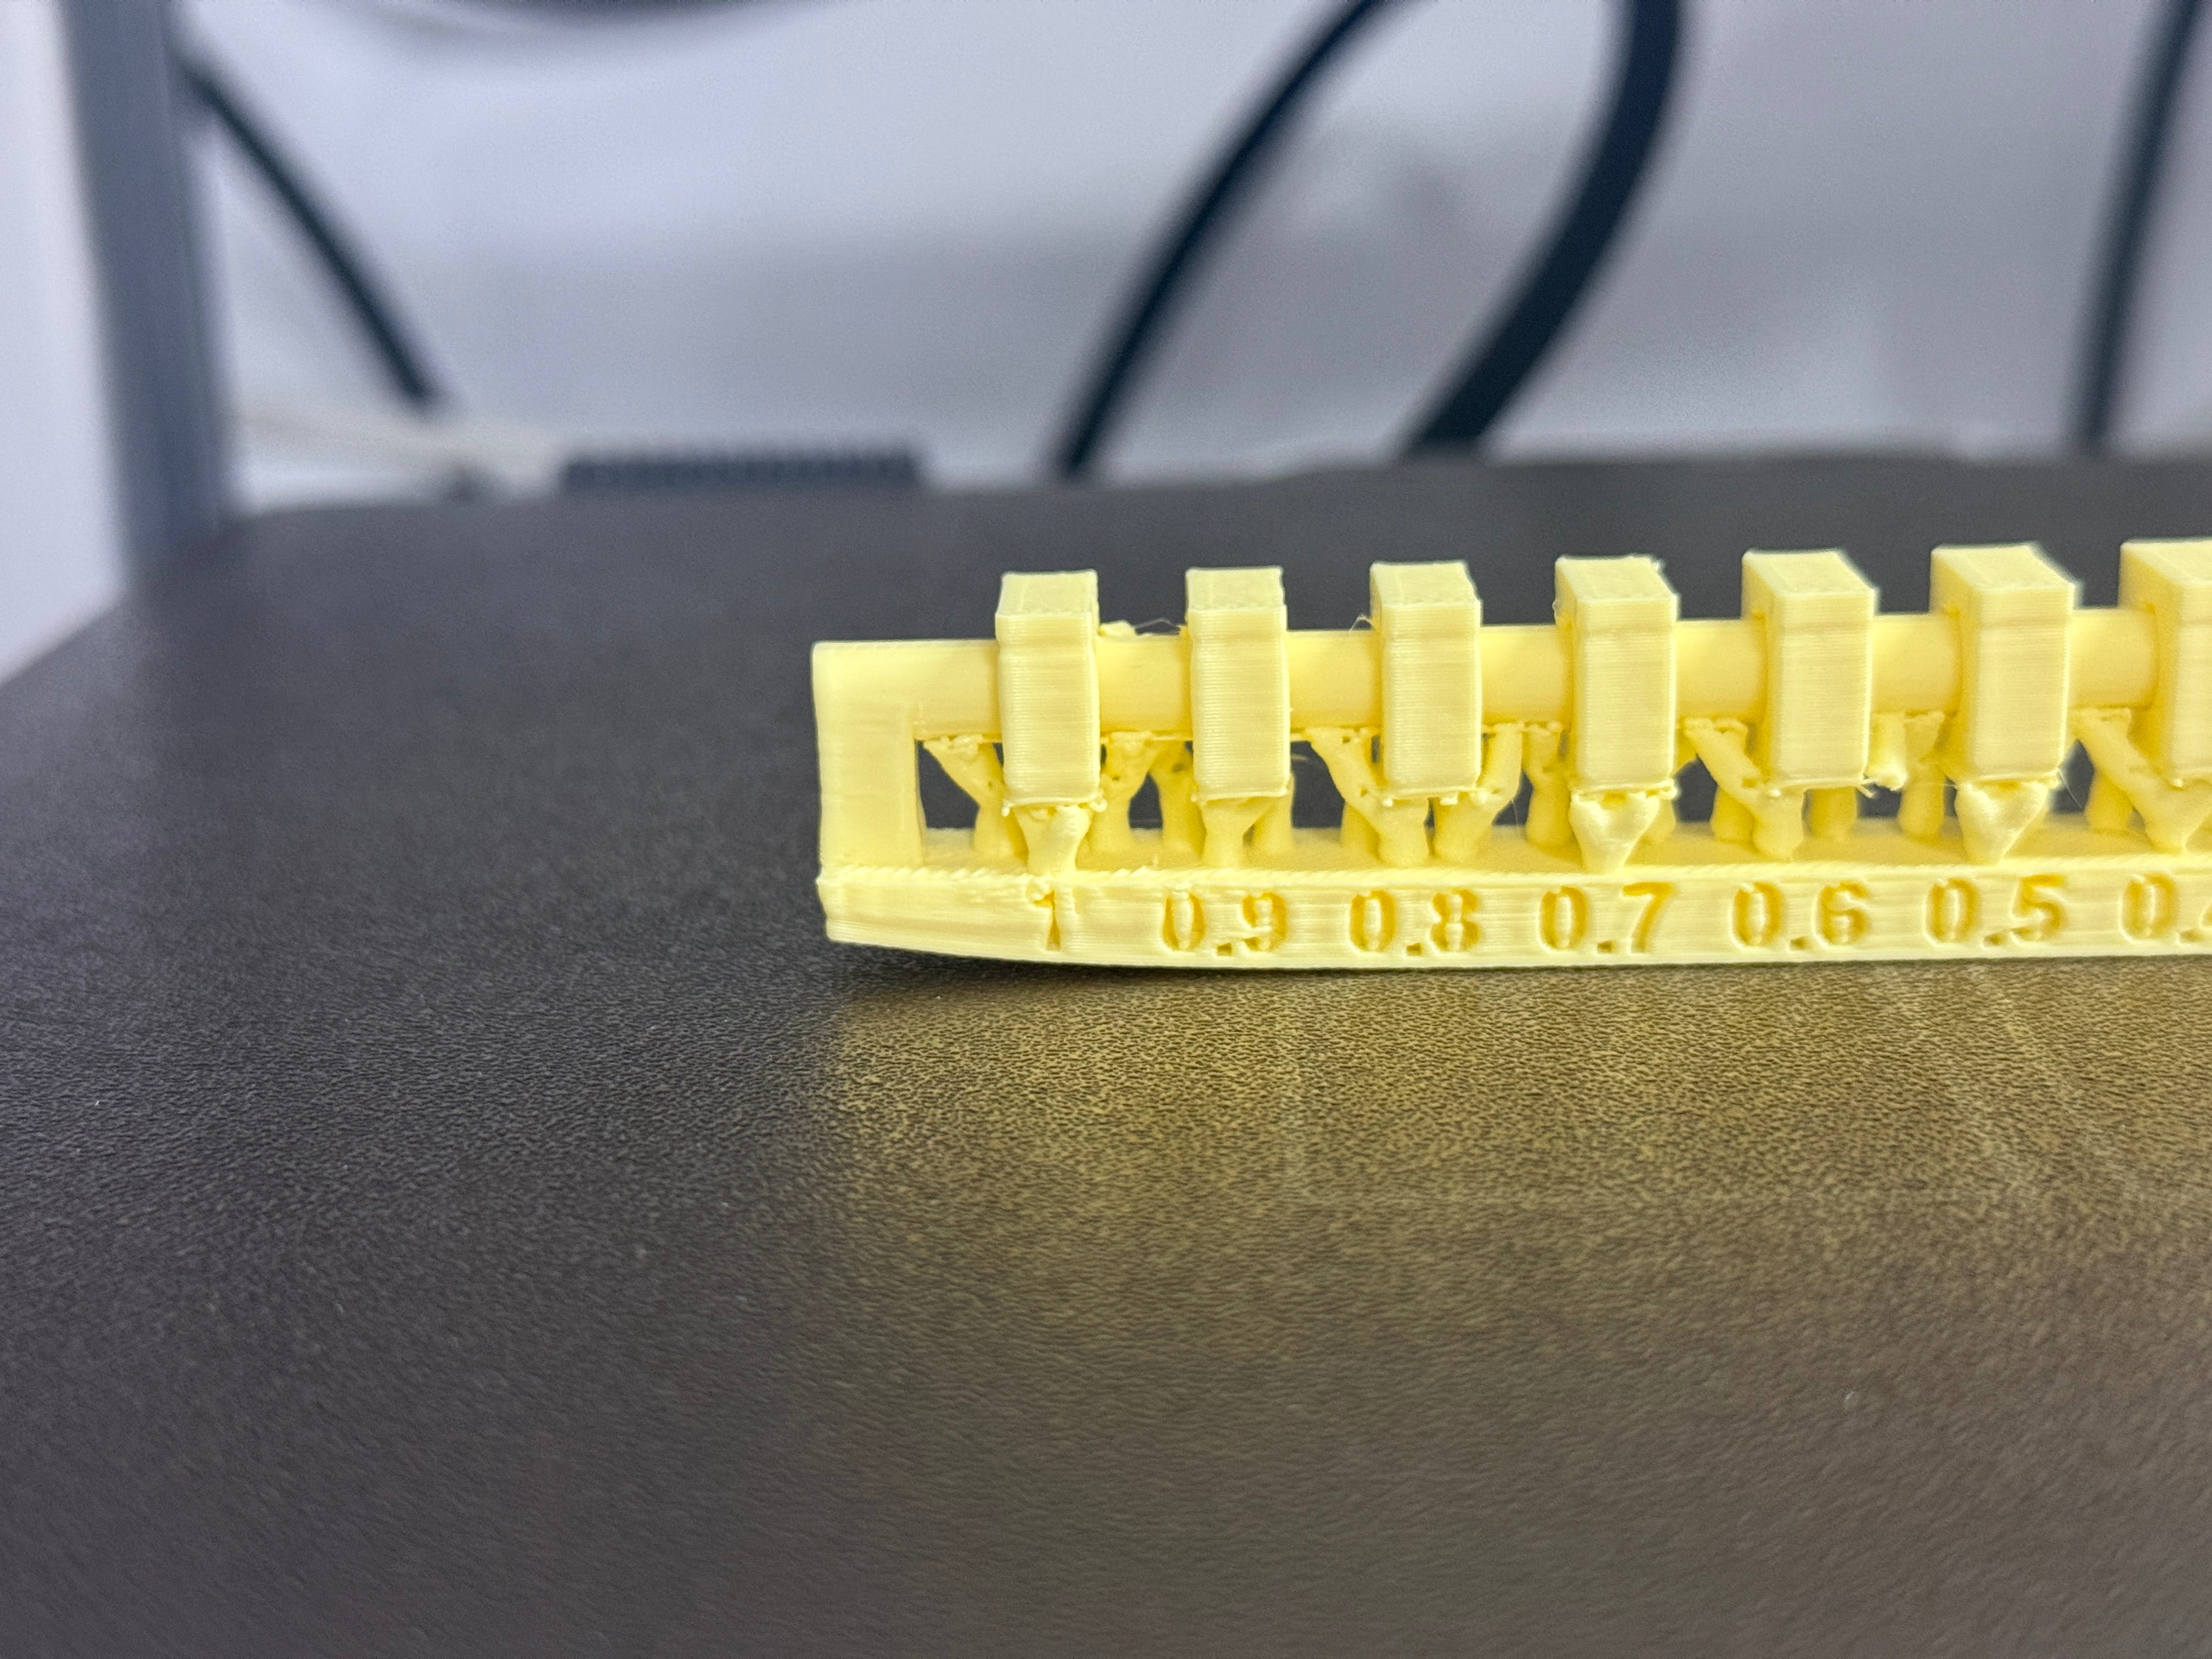
Clearance and Error / Warpings
Clearance is the small gap between the support structures and the printed part. If the clearance is enough, the supports can be removed more easily without damaging the print. It is usually around 0.2 mm to 0.5 mm, depending on the material and print quality. Here is an example of great clearance:
And in our clearance test print, we observed slight warping on the bottom edge . This was likely caused by bed adhesion issues or temperature changes during printing. This can affect the accuracy of the clearance test, so better first-layer calibration and bed adhesion would improve the result by far. Here is the problems visualized version that we experienced:
Supports
Supports are structures that are temporary parts used during 3D printing to hold overhangs of more than 45° and complex shapes. They help prevent sagging, deformation, and print failure, especially in areas that would otherwise print in the air. Supports are usually created automatically by the slicer when creating the structure, but they can also be added manually. Although they improve print success and quality, they use more material and increase time. But having good model orientation and slicer settings can help reduce the need for supports.
Infill Patterns and Density
In 3D printing, the inside of the structures of a part is called infill. Infill density can be adjusted from 0% to 100%, and the best value depends on how the part is going to be used. For example, prototypes and hobby projects usually work well with low infill with being often around 20% or less, while functional parts that need to handle mechanical stress often need higher infill, around 50% or more.
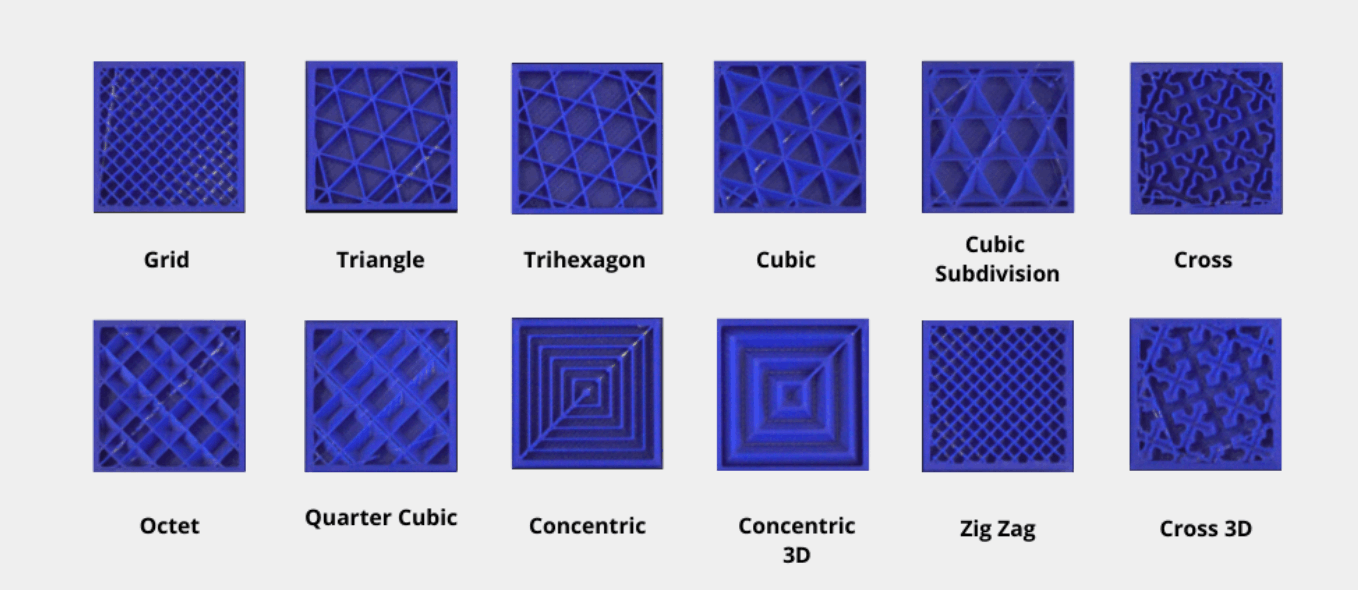
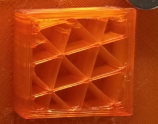
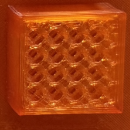
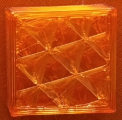
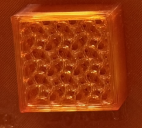
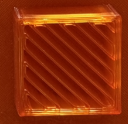
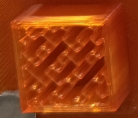
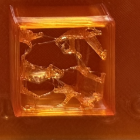
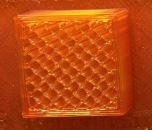
In terms of infill patterns, this is also important because it affects the 3D printed structures’ strength, flexibility, and print time. Our slicer program, Bambu Slicer, provides multiple infill pattern options so the print can be optimized for its intended use. Here is an example diagram of the infill patterns that we selected in our slicer and printed with 20% Density:
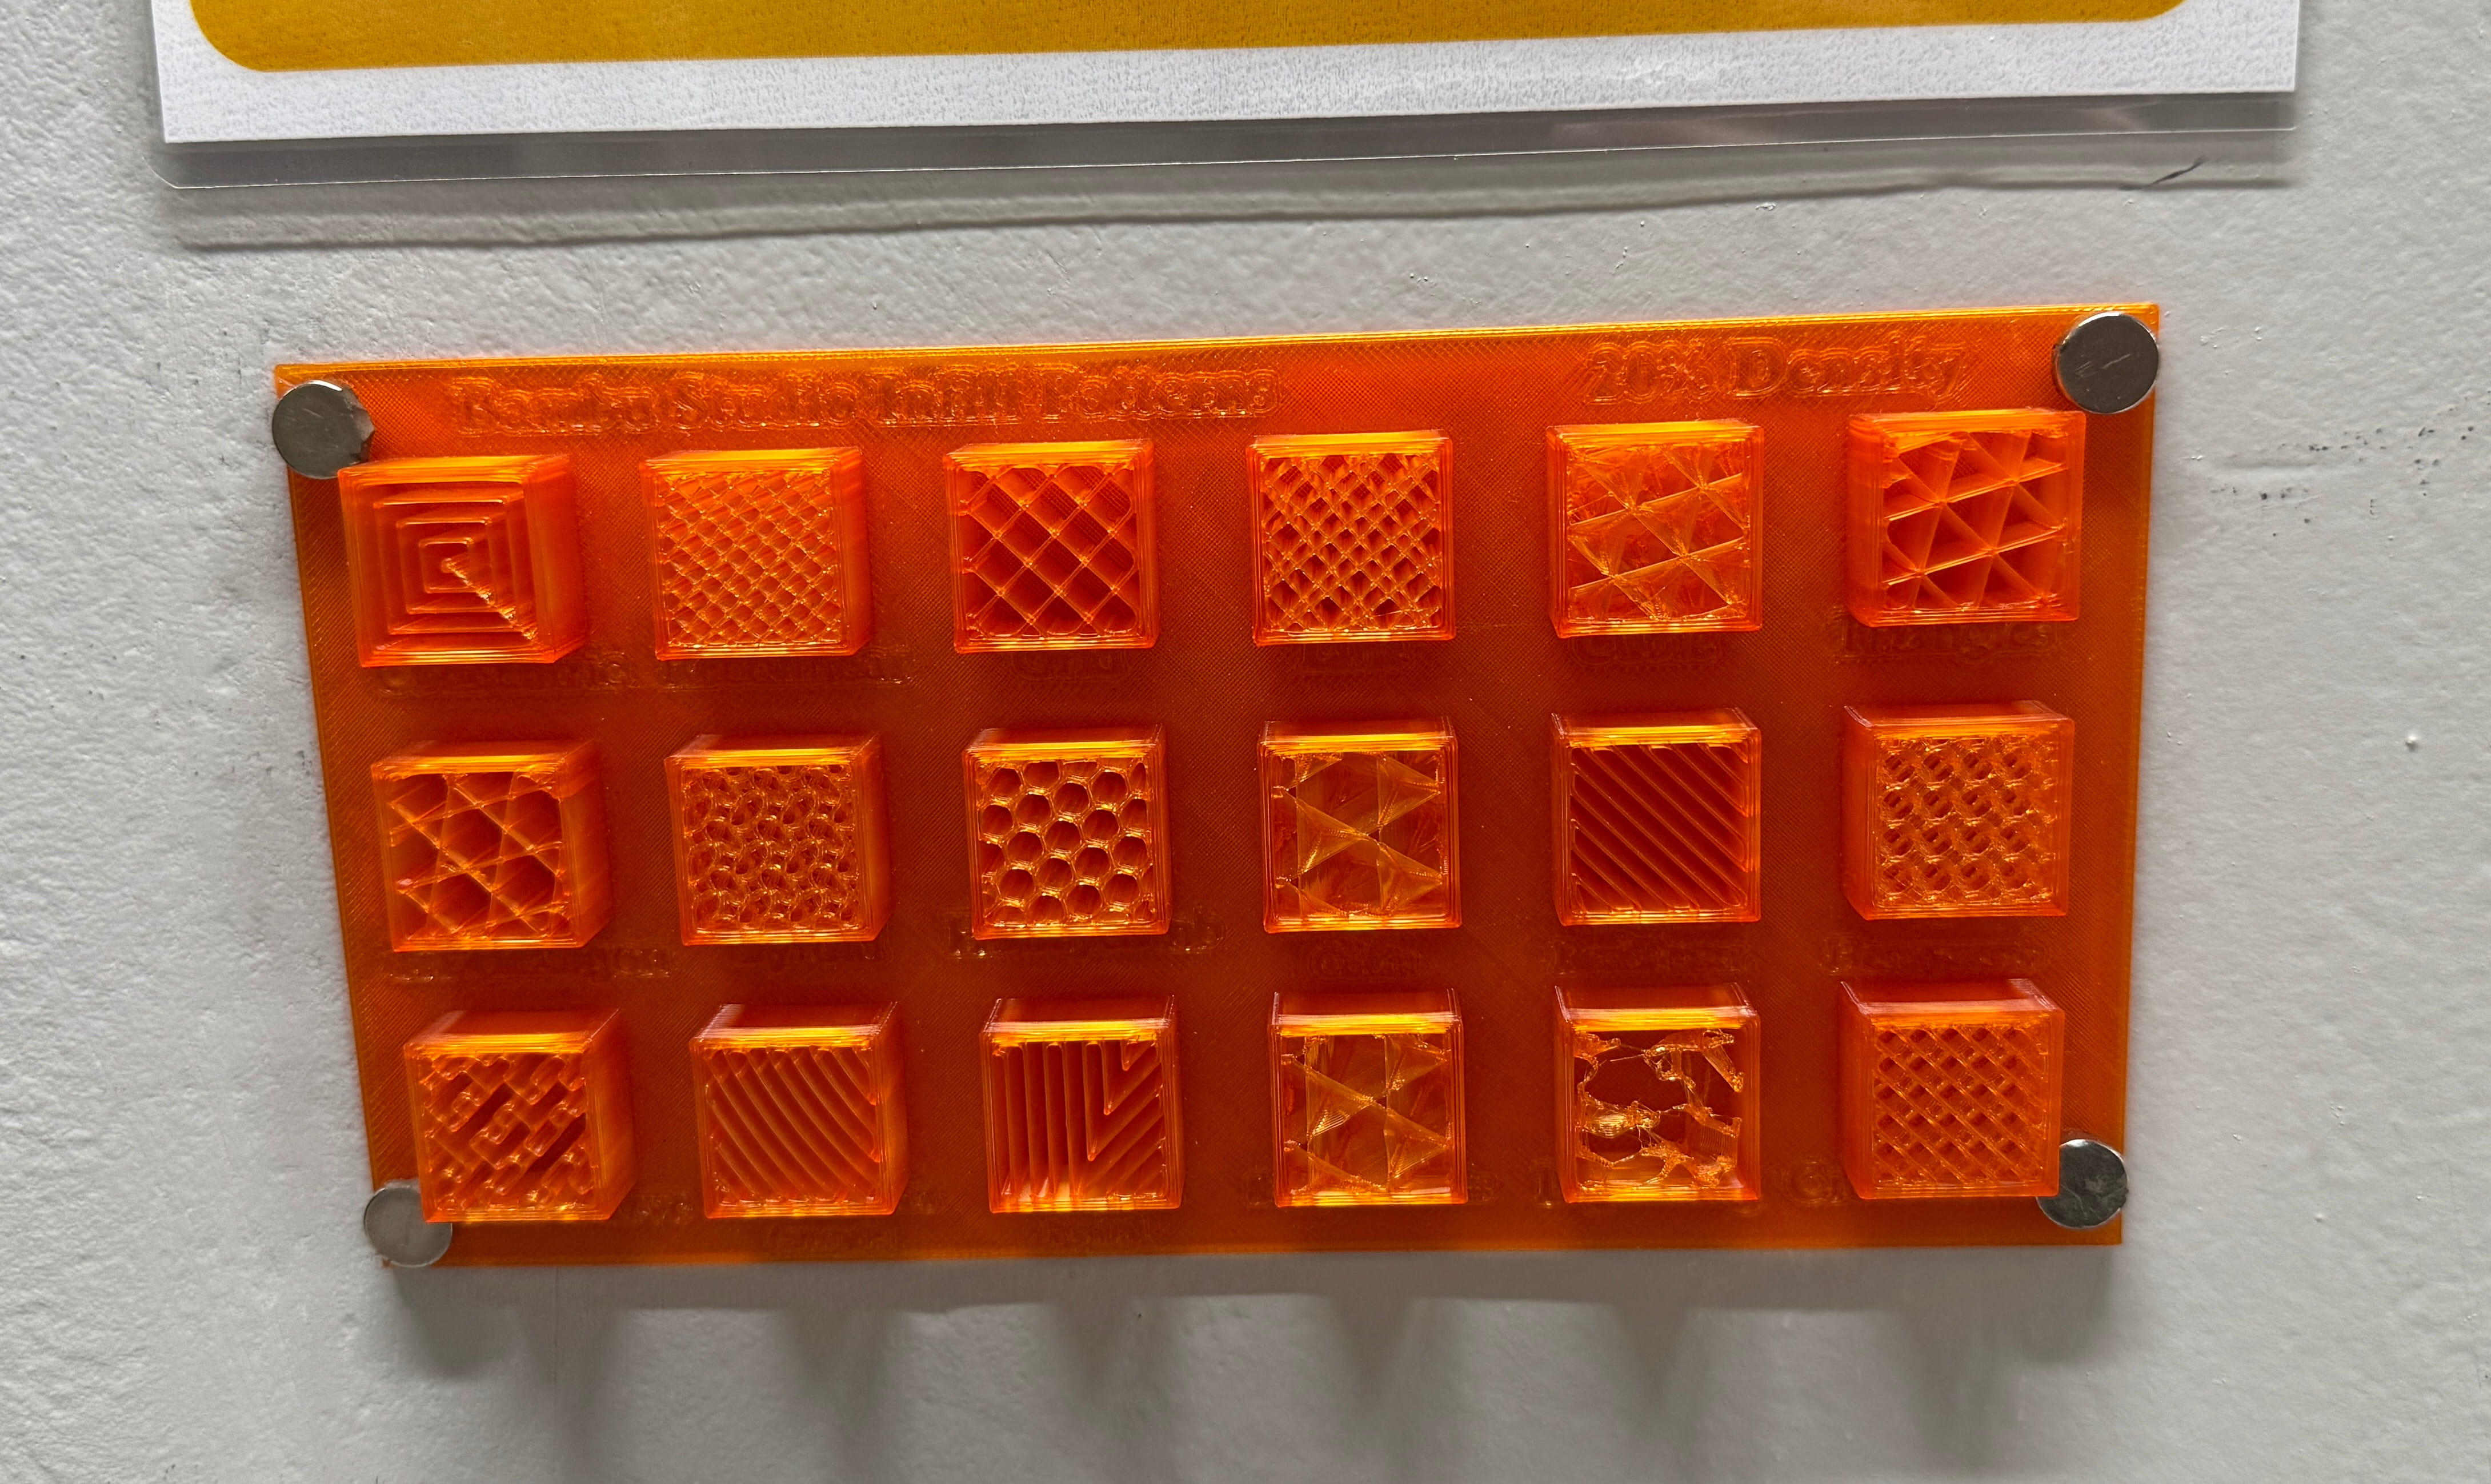
And here are the details of all the infill patterns that are in the photo:
- Cross Hatch
- Description A criss-cross line pattern that forms a hatched internal structure. It is simple and practical, offering a balance between speed and basic support.
- Used Density 20%
- Typical application General prototypes, visual prints, and everyday low to medium strength parts
- Printing Speed Fast to medium
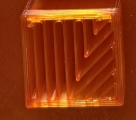
- Lines
- Description Straight parallel lines printed in one direction per layer. Simple and efficient.
- Used Density 20%
- Typical application Visual prototypes, fast test prints, low-stress parts
- Printing Speed Very fast
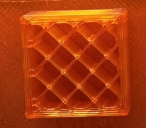
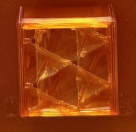
- Grid
- Description A 2D criss-cross pattern that creates square cells. Common general-purpose infill.
- Used Density 20%
- Typical application General prototypes and everyday parts
- Printing Speed Fast
- Triangles
- Description A triangular 2D pattern that gives better strength than simple lines/grid in many cases.
- Used Density 20%
- Typical application Functional parts that need moderate strength
- Printing Speed Medium

- Tri-Hexagon
- Description A mixed triangle and hexagon pattern. Offers a balance of strength and material use.
- Used Density 20%
- Typical application General functional parts and stronger prototypes
- Printing Speed Medium
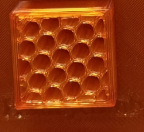
- Honeycomb
- Description A hexagonal pattern inspired by honeycomb structures. Good strength, but usually slower.
- Used Density 20%
- Typical application Functional parts and durable prototypes
- Printing Speed Medium to slow
- 3D Honeycomb
- Description A 3D version of honeycomb that gives strength in multiple directions.
- Used Density 20%
- Typical application Parts needing more balanced internal support
- Printing Speed Slow
- Cubic
- Description A 3D infill pattern that provides balanced strength in different directions.
- Used Density 20%
- Typical application Functional parts and general mechanical prototypes
- Printing Speed Medium
- Support Cubic
- Description Similar to cubic, but denser only where needed. Saves material and print time.
- Used Density 20%
- Typical application Large prints, prototypes, and parts where efficiency is important
- Printing Speed Medium to fast
- Optigram Spiral
- Description A spiral-based infill pattern that creates a continuous curved path inside the model. It gives a smooth internal structure and can improve print flow consistency.
- Used Density 20%
- Typical application Visual prototypes, design tests, and parts where smooth internal pathing is preferred
- Printing Speed Medium
- Archimedian Chorda
- Description A chord-based curved infill pattern inspired by Archimedean-style geometry. It creates a decorative-looking internal structure with moderate support.
- Used Density 20%
- Typical application Decorative-functional parts, pattern comparison tests, and design-focused prints
- Printing Speed Medium
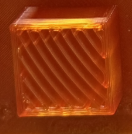
- Gyroid
- Description A smooth, continuous 3D wave-like pattern. Very popular because it balances strength, material use, and print consistency.
- Used Density 20%
- Typical application Functional parts, flexible strength needs, and general-purpose printing
- Printing Speed Medium

- Concentric
- Description Infill follows the outer shape of the model in repeated contours. It is more about shape-following than strength.
- Used Density 20%
- Typical application Aesthetic prints, top layers, flexible parts, and decorative models
- Printing Speed Medium
- Aligned Rectilinear
- Description A rectilinear infill pattern with lines aligned in a consistent direction. It is simple, efficient, and useful for predictable print behavior.
- Used Density 20%
- Typical application General prototypes, quick test parts, and low to medium strength prints
- Printing Speed Fast
- Hilbert Curve
- Description A space-filling curve pattern that follows a continuous path. It is useful for pattern experiments and can produce interesting internal geometry.
- Used Density 20%
- Typical application Pattern testing, aesthetic prints, and experimental prototypes
- Printing Speed Medium to slow
- Lightning
- Description A special infill that creates support-like branches only where top layers need support inside the part. It uses very little material.
- Typical Density Usually not set like normal infill, optimized automatically by slicer
- Typical application Fast prototypes, visual models, low-strength parts
- Printing Speed Very fast
- Rectilinear
- Description Straight-line infill similar to lines/grid variants, often used in some slicers as a basic default option.
- Used Density 20%
- Typical application General prototypes and quick test prints
- Printing Speed Fast
Choosing an infill pattern is important, as is the infill angle. A setting that many people ignore is the infill line direction, which is mostly set to 45° by default, so the printer can use both the X and Y motors together and print faster. However, changing this angle can improve the part’s strength or flexibility, especially when the walls of the model are placed diagonally.