Select a post to read
Weeklys
Week 01 — Project Management
This week I set up the website for the rest of Fab Academy with using Hugo, SSH Key and GitLab. My goal was to create a website that I can edit in VSCode, then push to FabCloud and have the website update easily.
Achievements
By the end of the week, I was able to:
Set up SSH authentication for GitLab (FabCloud)
Clone the official Fab Academy repository
Build and run a Hugo website locally and publicly
Week 02 – Computer Aided Design
This week I have to make only CAD (Computer Aided Design). I made one more sketch of my design. Firstly, this was an introduction to the situation, and I did all of my CAD in Fusion 360. I did all of this to see what my final project would look like in 3D and 2D, and I raised the hood with a 2D design using an Apple pencil in an app named Notability. This is how it looked
Week 03 - Computer controlled cutting
This week it was the first ever week that had machines in it, such as a vinyl and a laser cutter, and here are the names and the details of the machines that I used in this week’s assignment: XTool P2S Carbon Laser Cutter and XTool F1 Ultra, Cricut Maker 3, and the Roland Versastudio GS2-24 Vinyl Cutters
Learning Targets
- Design, test, and build a parametric press-fit construction kit.
- Show and explain how to create 2D designs using parametric modelling.
- Explain how to use a laser cutter step by step.
- Explain how to use a vinyl cutter step by step.
Hero Shot (Laser)
Week 04 - Embedded programming
Overview
This week, I focused on trying different workflows. Even though I had not worked deeply in this area before, I wasn’t familiar with the basics. I decided to start with digital work first and then move to physical implementation. Before designing anything, I reviewed several microcontroller datasheets, especially the Raspberry Pi Pico and its RP2040 chip.
Understanding the Datasheet
Before designing or programming a board, it is very important to understand the microcontroller by reading its datasheet. For this week I mainly studied the RP2040 datasheet to learn about its features, limits, and structure. This helped me make better design and programming decisions.
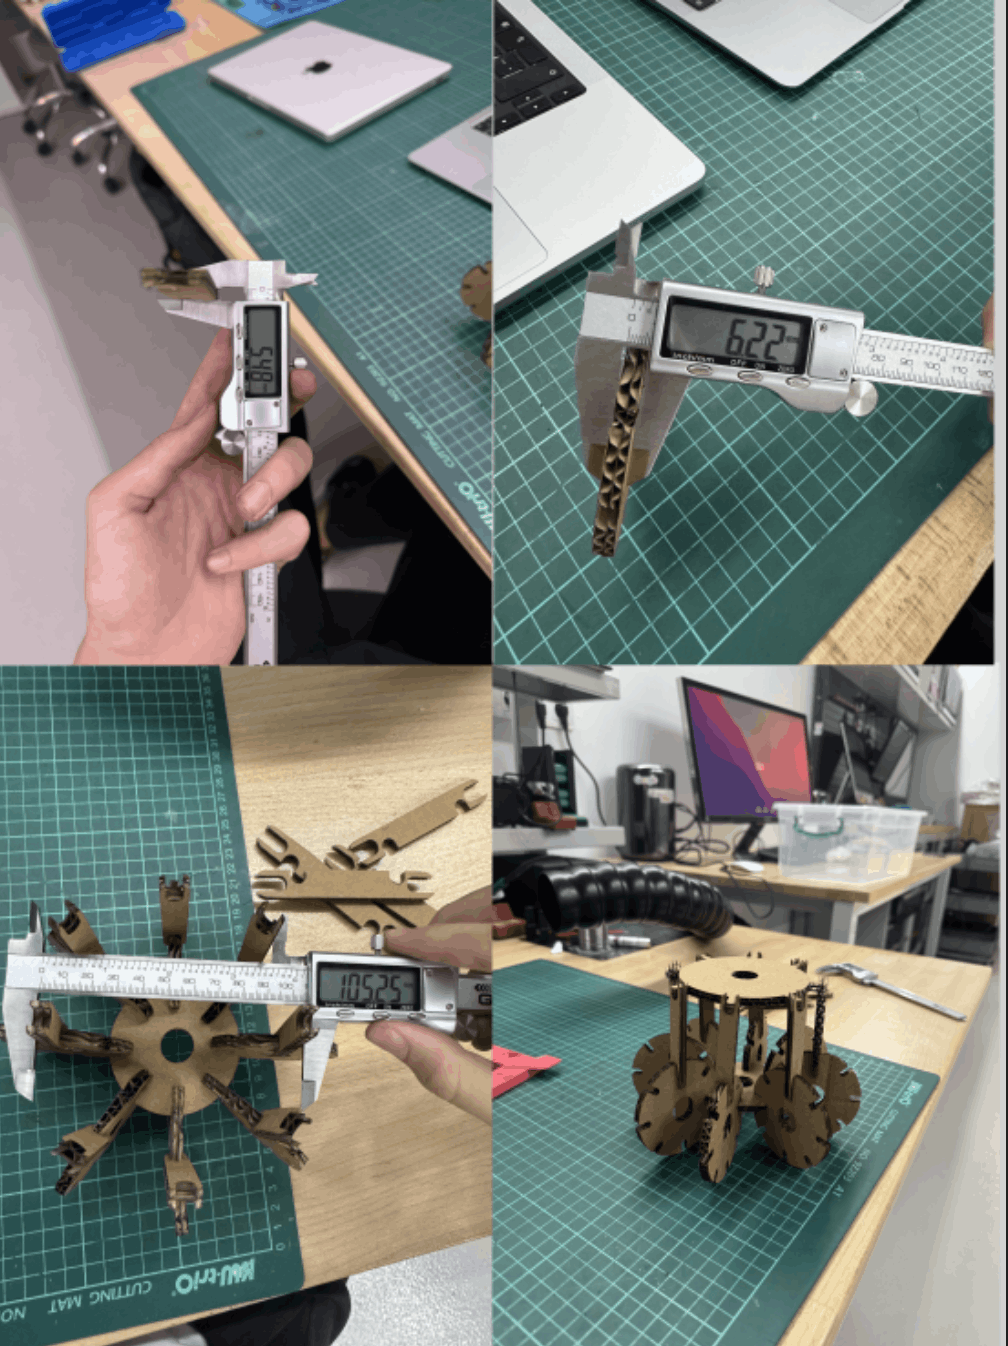
Week 05 - 3D Scanning and printing
For this group assignment, we studied the design rules of our 3D printers and learned what they can and cannot print well. Our main goal was to understand printer limits before making our own prints. We focused on testing 3D printing behavior and explaining important print settings and design features.
1) 3D Printing Technology
3D printing is a way to make real objects from a digital design by adding material layer by layer. It is also called additive manufacturing. It is useful for making prototypes, models, tools, and custom parts quickly.
Week 06 - Electronics Design (KiCad)
KiCad Design
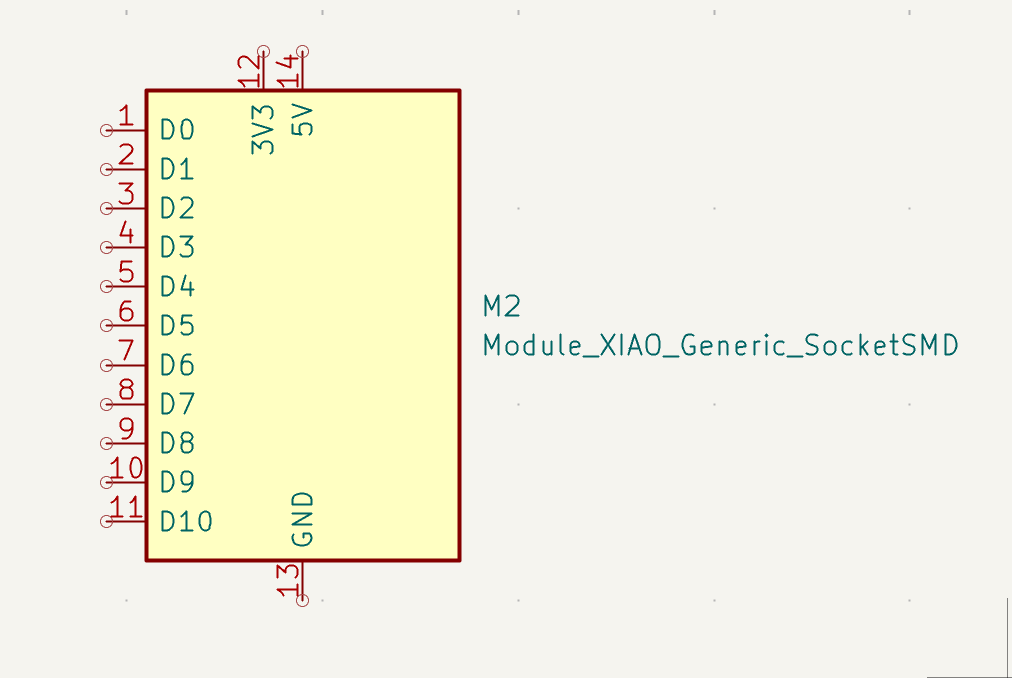
Schematic Design
Firstly, I opened the “Schematic Editor” and “PCB Editor” to start creating a design for a system with a “Photo Sensor”. First, I added a “Module_XIAO_Generic_SocketSMD” to start.
In the structure, I block the parts that are unnecessary. By pressing the key “Q” after touching the part, I don’t want to put an “X” on it, and “X” means no connection.
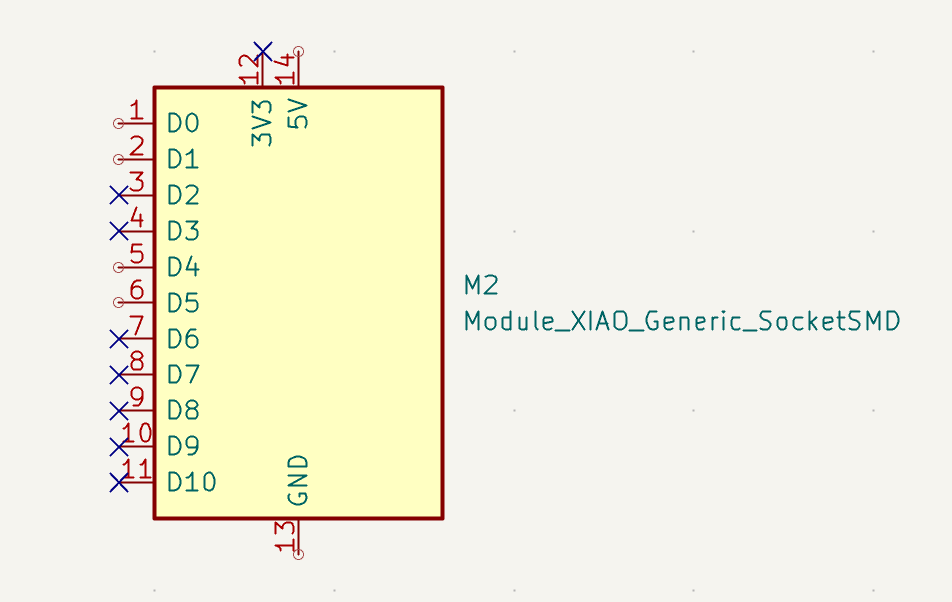
I left 1,2,5,6,13,14 open because I knew from the beginning that I was going to use them later on in the system. After that, I fill the 14th part with 5V and PWR_FLAG, and the 13th part with GND and PWR_FLAG. And the D4 and D5 with vertical headers.
Week 07 - Computer controlled machining
Week 8 - Electronics Production
The Electronics Production
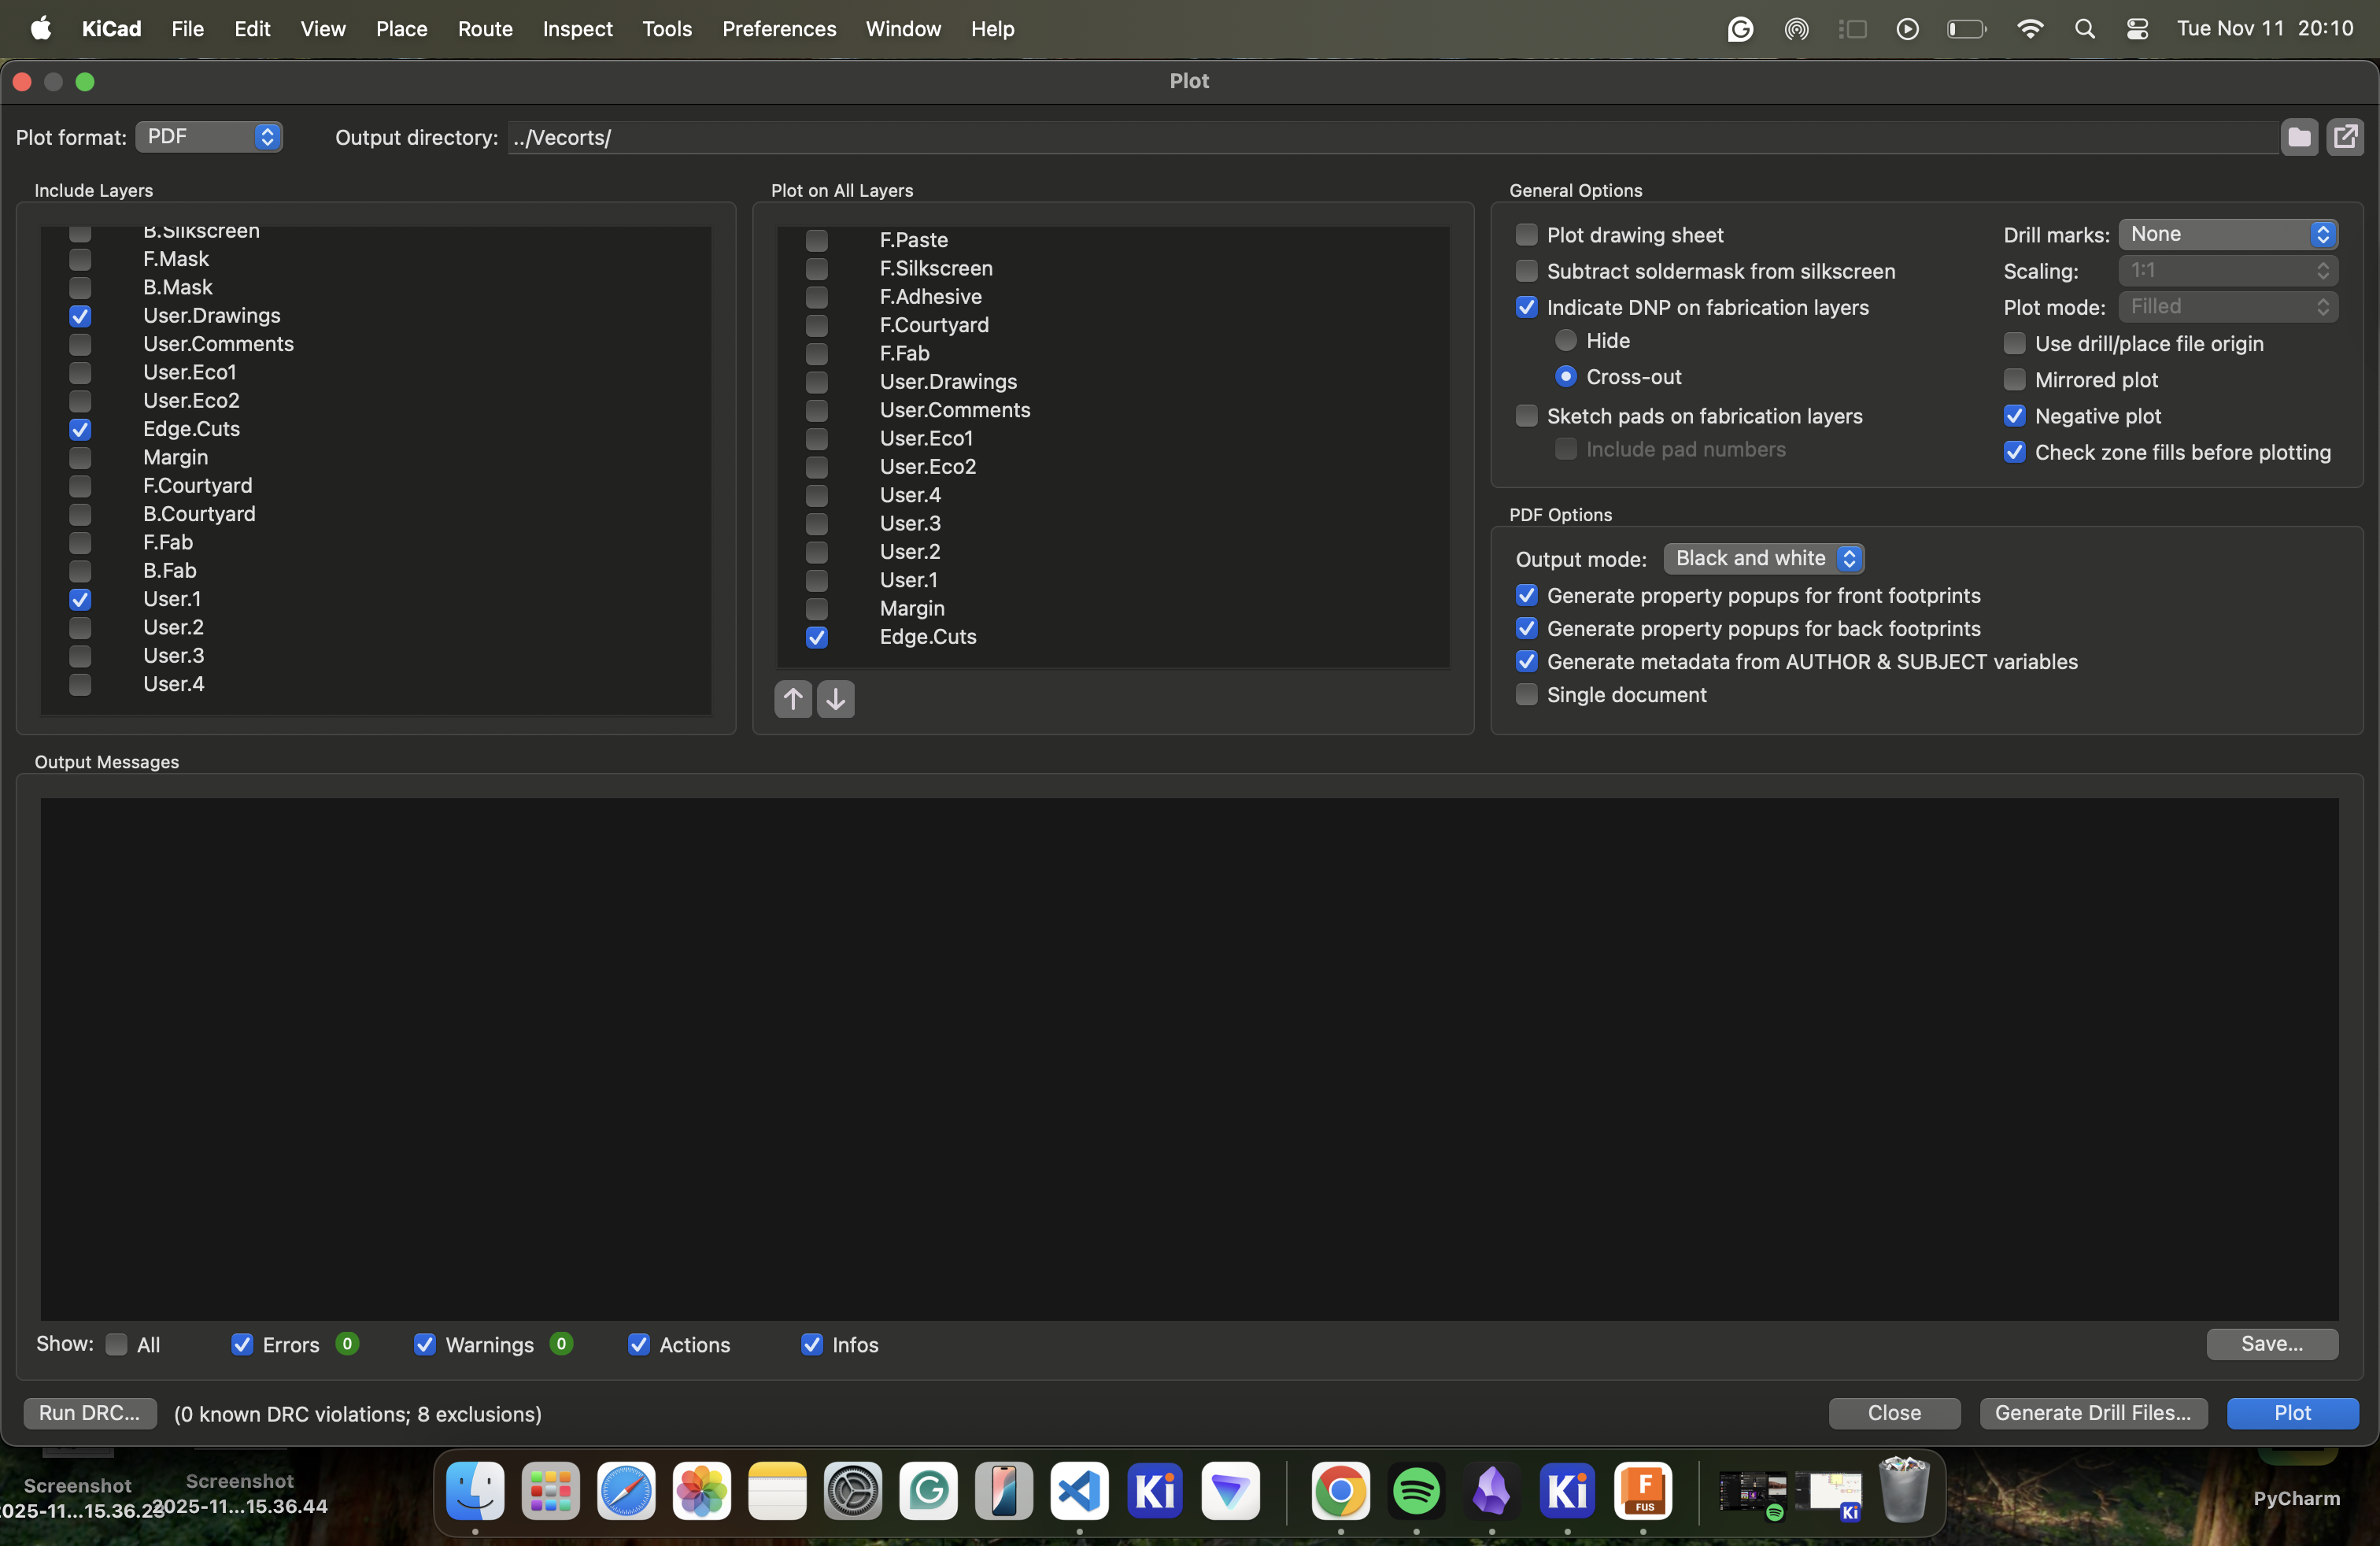
Default settings.

Make the PDF .svg.
 First adjustments with “Inkscape”
Changed it.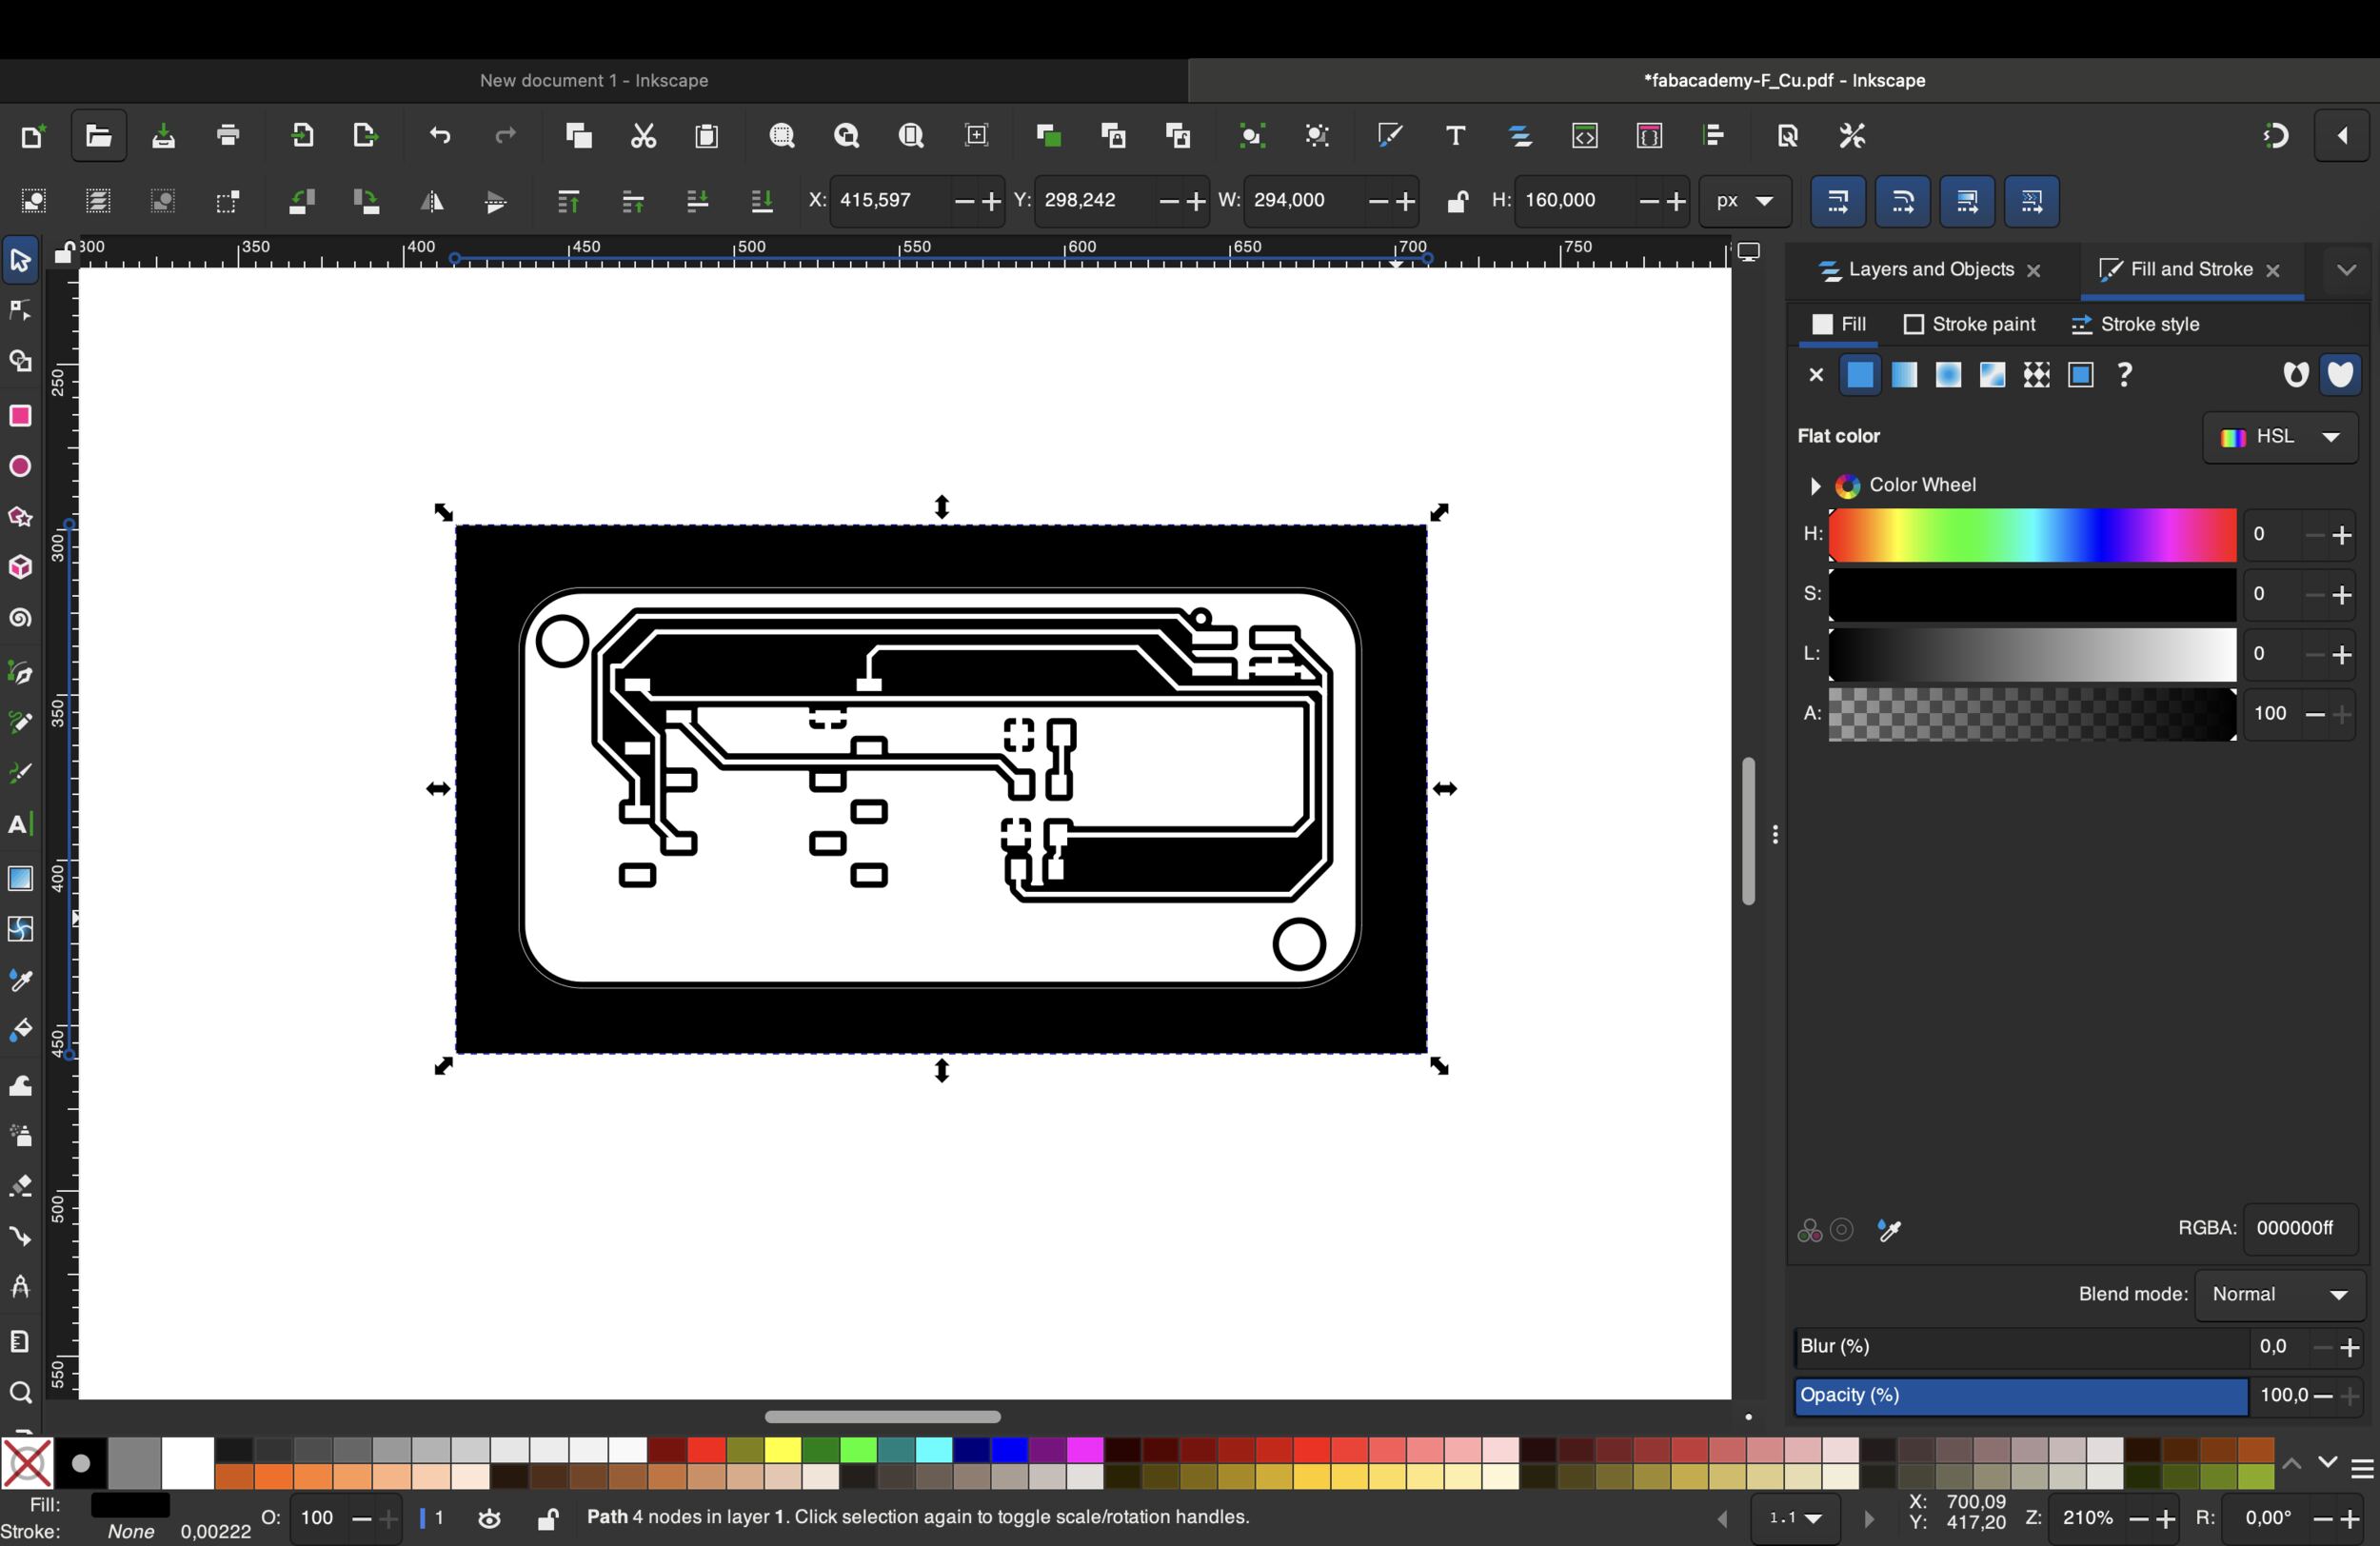 After all the mistakes, I started over. Firstly, I changed the default settings
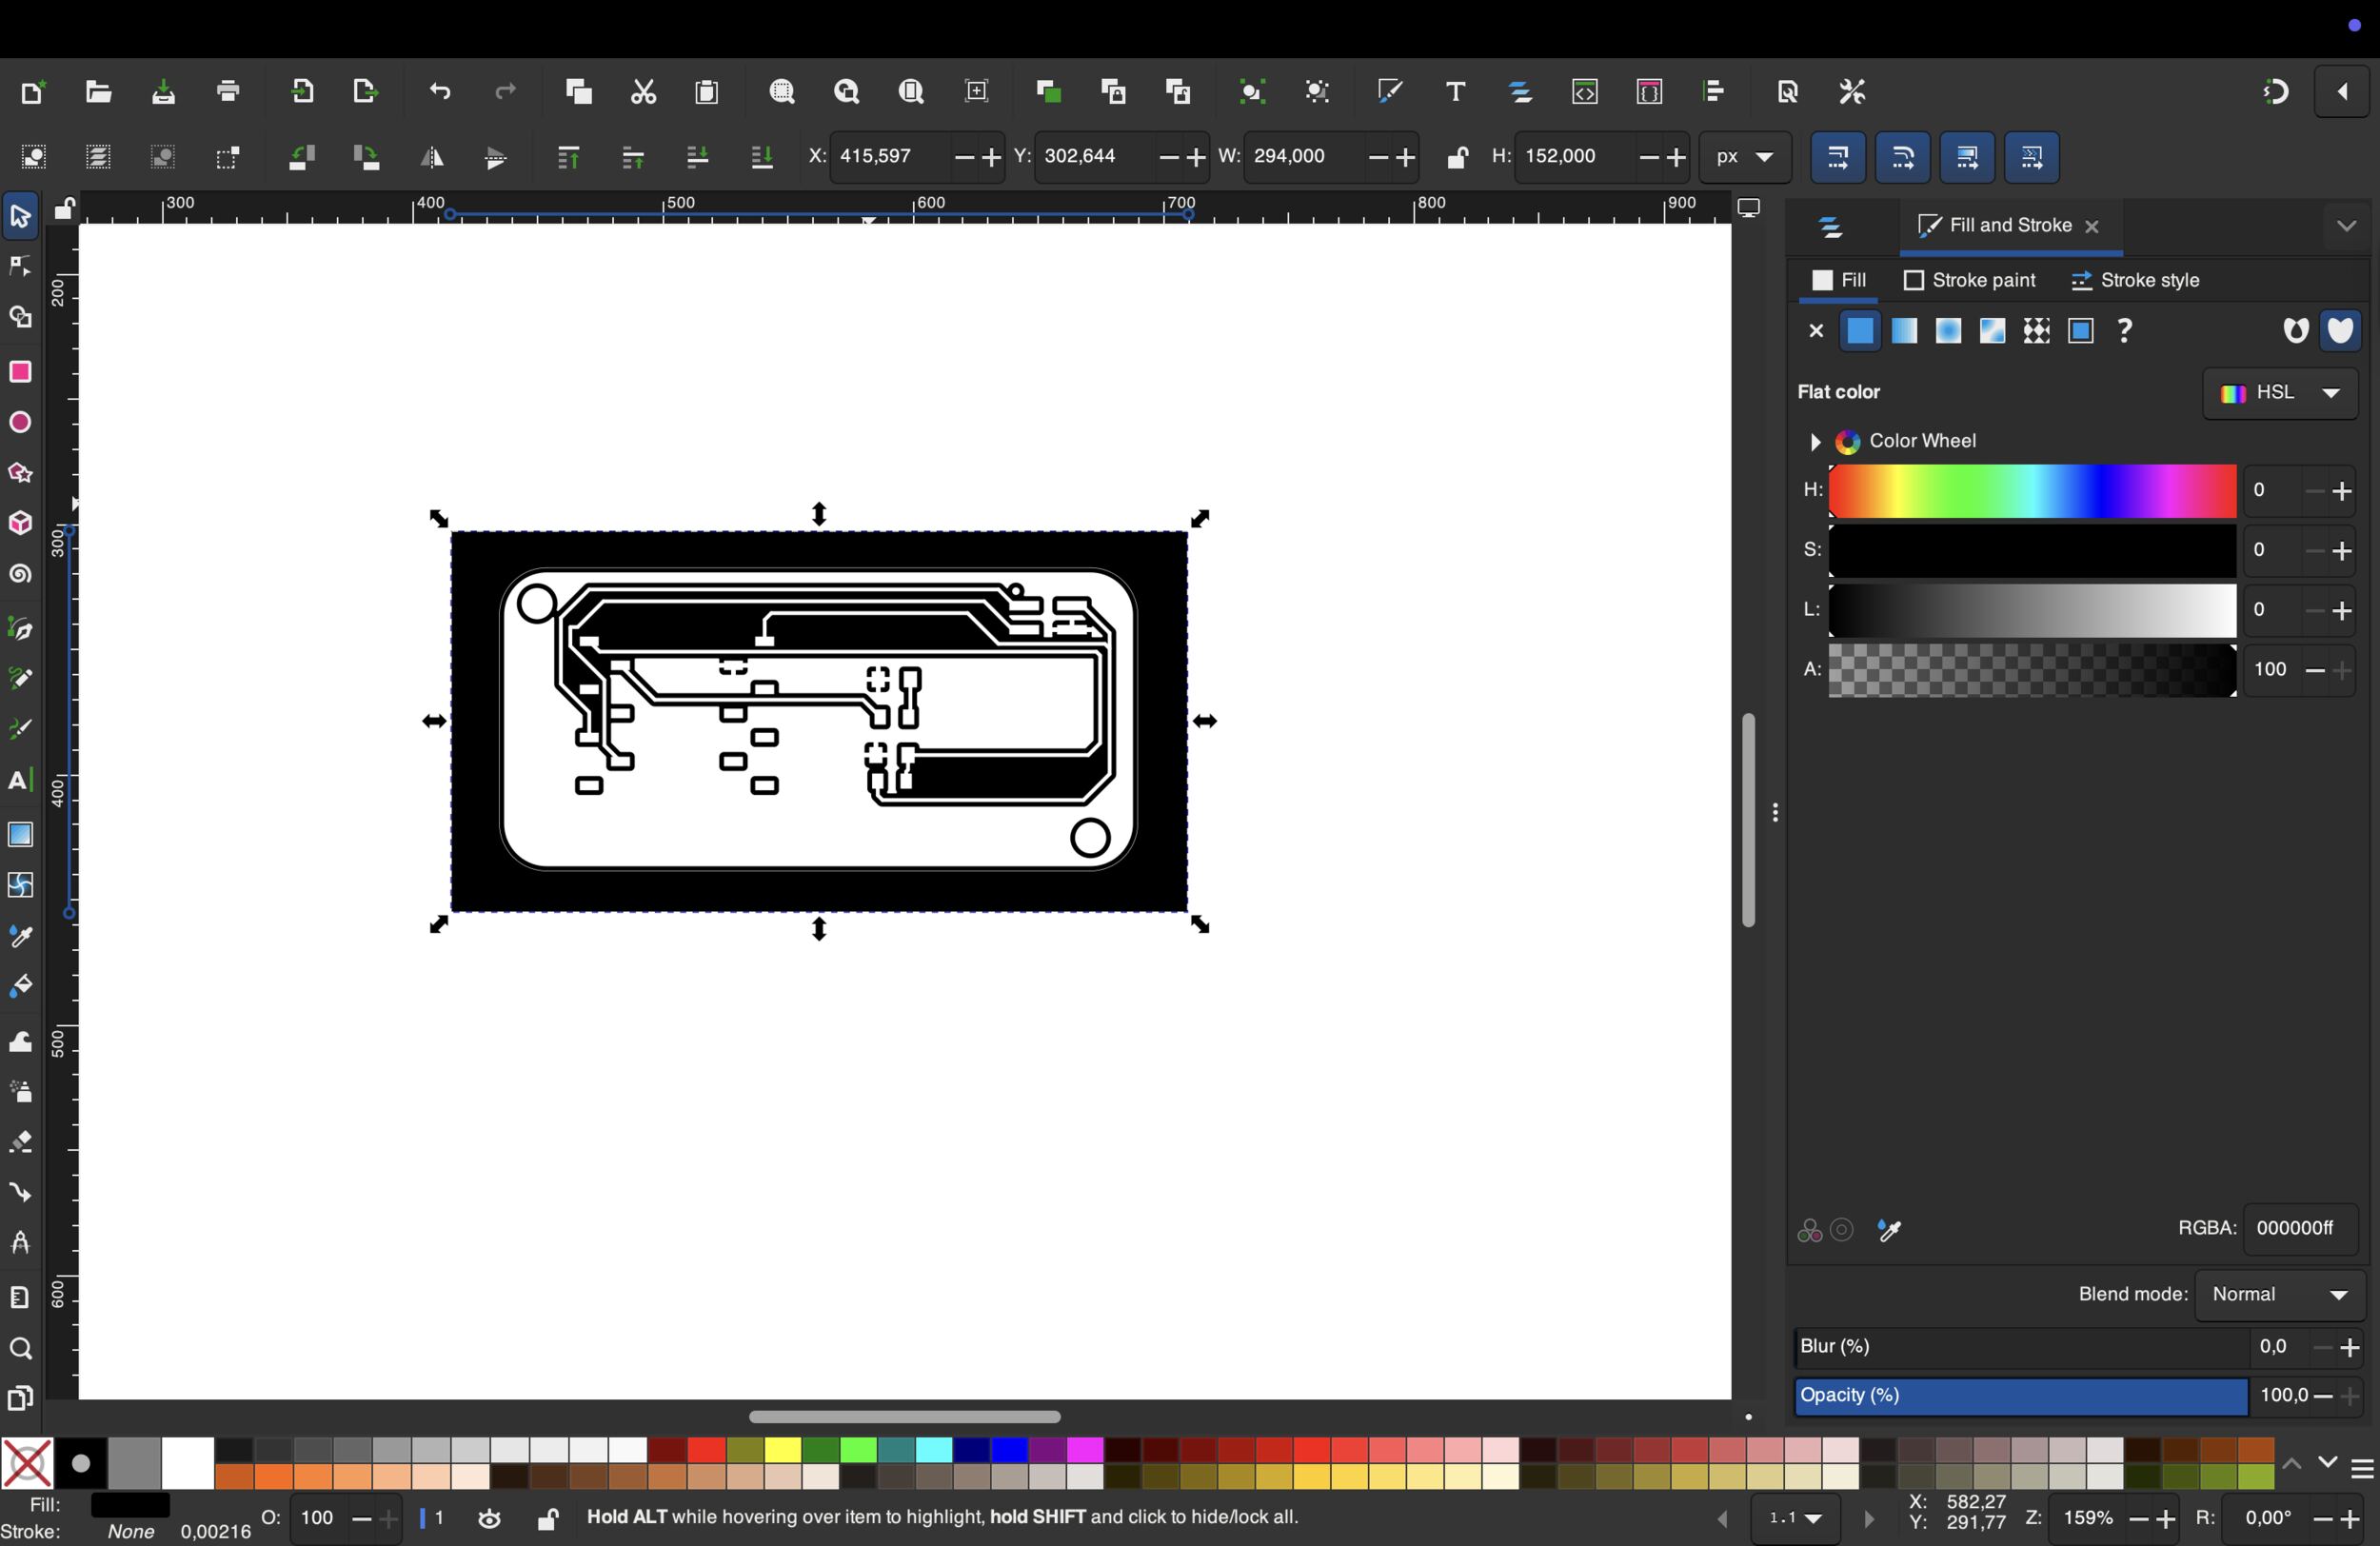
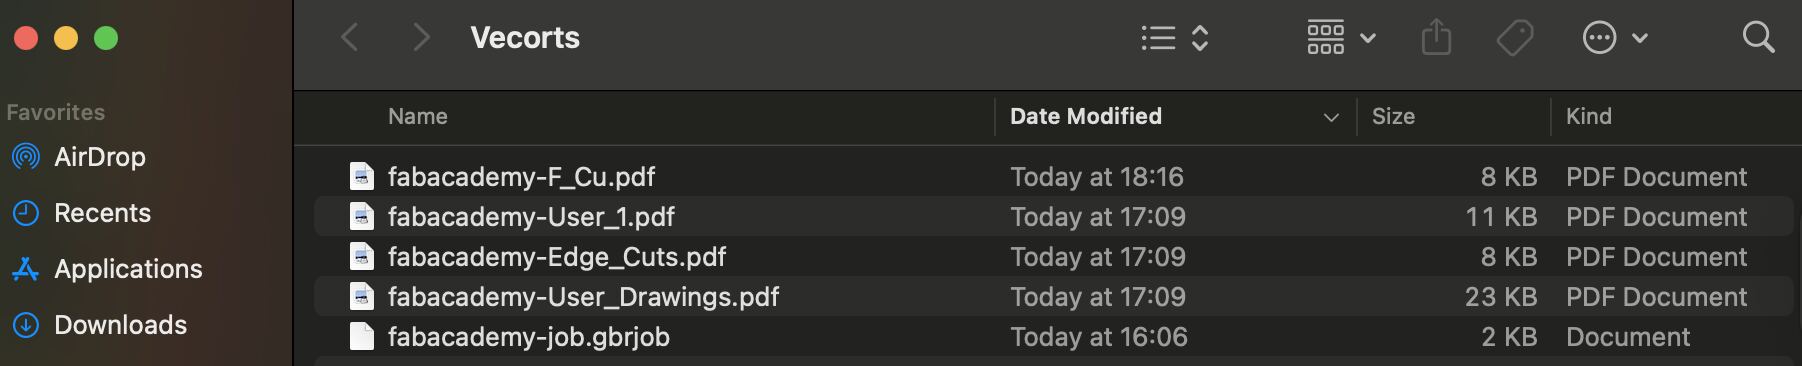
And as you can see at the top, there is a file named “Vectors” that the system automatically added to the “Vectors” file that I created, and this is how the file looked after the process.
Now we have to turn our PDF files into .svg and we do it with the help of “Inkscape”. We use Inkscape to remove unnecessary space in the background and make the color of the drawings, holes, and text black. I used this button to remove unnecessary space.