Networking and Communications
Week 11: Networking and Communications
- Send a message between two projects.
- Document your work on the group work page and reflect on your individual page what you learned.
What We Did
The objective of this group assignment was to send a message between two projects using Wi-Fi communication:
- Circuit 01: XIAO ESP32-S3 + RGB LED, configured as the server.
- Circuit 02: ESP32 + pushbutton, configured as the client.
Circuit 01: XIAO ESP32-S3 + RGB LED (Server)
The first circuit uses a XIAO ESP32-S3 connected to an RGB LED. This board creates its own Wi-Fi network and waits for HTTP requests from the client. Depending on the received color parameter, the RGB LED changes color.
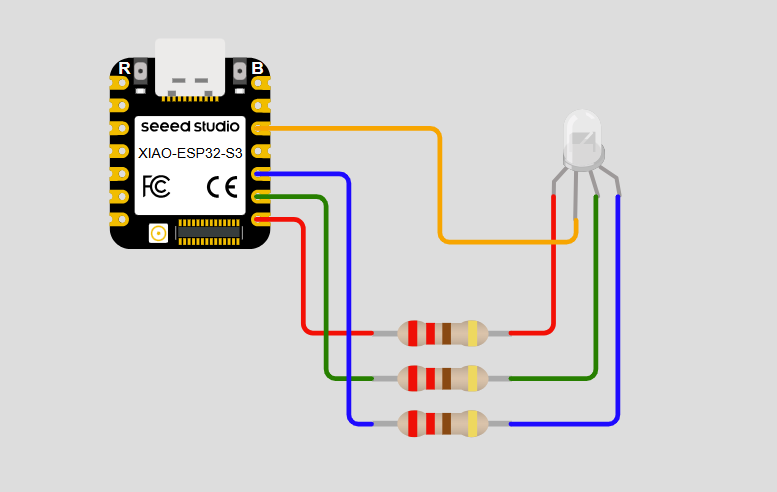
Server Code
						#include <WiFi.h>
						#include <WebServer.h>

						const char* ssid = "ESP32_RGB";
						const char* password = "12345678";

						WebServer server(80);

						// RGB LED pins
						const int RED = D7;
						const int GREEN = D8;
						const int BLUE = D9;

						void turnEverythingOff() {
						digitalWrite(RED, LOW);
						digitalWrite(GREEN, LOW);
						digitalWrite(BLUE, LOW);
						}

						void changeColor() {
						if (!server.hasArg("color")) {
							server.send(400, "text/plain", "Missing color");
							return;
						}

						String color = server.arg("color");
						turnEverythingOff();

						if (color == "red") {
							digitalWrite(RED, LOW);
							digitalWrite(GREEN, HIGH);
							digitalWrite(BLUE, HIGH);
						}
						else if (color == "green") {
							digitalWrite(RED, HIGH);
							digitalWrite(GREEN, LOW);
							digitalWrite(BLUE, HIGH);
						}
						else if (color == "blue") {
							digitalWrite(RED, HIGH);
							digitalWrite(GREEN, HIGH);
							digitalWrite(BLUE, LOW);
						}
						else if (color == "white") {
							digitalWrite(RED, HIGH);
							digitalWrite(GREEN, HIGH);
							digitalWrite(BLUE, HIGH);
						}

						server.send(200, "text/plain", "OK");
						}

						void setup() {
						Serial.begin(115200);

						pinMode(RED, OUTPUT);
						pinMode(GREEN, OUTPUT);
						pinMode(BLUE, OUTPUT);

						turnEverythingOff();

						WiFi.softAP(ssid, password);
						Serial.println(WiFi.softAPIP());

						server.on("/led", changeColor);
						server.begin();
						}

						void loop() {
						server.handleClient();
						}
Server IP Address
The XIAO ESP32-S3 creates its own wireless network using
WiFi.softAP(), which places the board in
Access Point (AP) mode. When operating as an access point,
the ESP32 WiFi library automatically assigns the default IP address
192.168.4.1. For this reason, the server sketch does not
explicitly configure an IP address; it is generated automatically when
softAP() is executed.
Client IP Address
The ESP32 client connects to the wireless network created by the server
using WiFi.begin(), operating in
Station (STA) mode. Since the XIAO ESP32-S3 functions as the
access point, it automatically assigns an IP address to the client through
the DHCP service. The client does not need to know or use
its own IP address in the program. Instead, it only needs the server's IP
address (192.168.4.1) to send HTTP requests.
Networking Concepts Used in This Project
- IP Address: A unique numerical identifier assigned to each device connected to a network.
- TCP/IP: The communication protocol suite responsible for dividing data into packets, addressing them correctly, and ensuring reliable transmission between devices.
- Netmask: Defines which portion of an IP address represents the network and which portion identifies the individual device.
- Gateway: The device that connects one network to another. In this project, the XIAO ESP32-S3 acts as the gateway for its own local wireless network.
- HTTP (HyperText Transfer Protocol): The application-layer protocol used by the client to send GET requests and by the server to return responses.
- Port: A numerical identifier for a specific network service running on a device. The web server listens on port 80, which is the default port for HTTP communication.
Circuit 02: ESP32 + Pushbutton (Client)
The second circuit uses an ESP32 connected to a pushbutton. The ESP32 connects to the Wi-Fi network created by the XIAO ESP32-S3. Each time the button is pressed, the client sends an HTTP GET request to the server with a different color value.
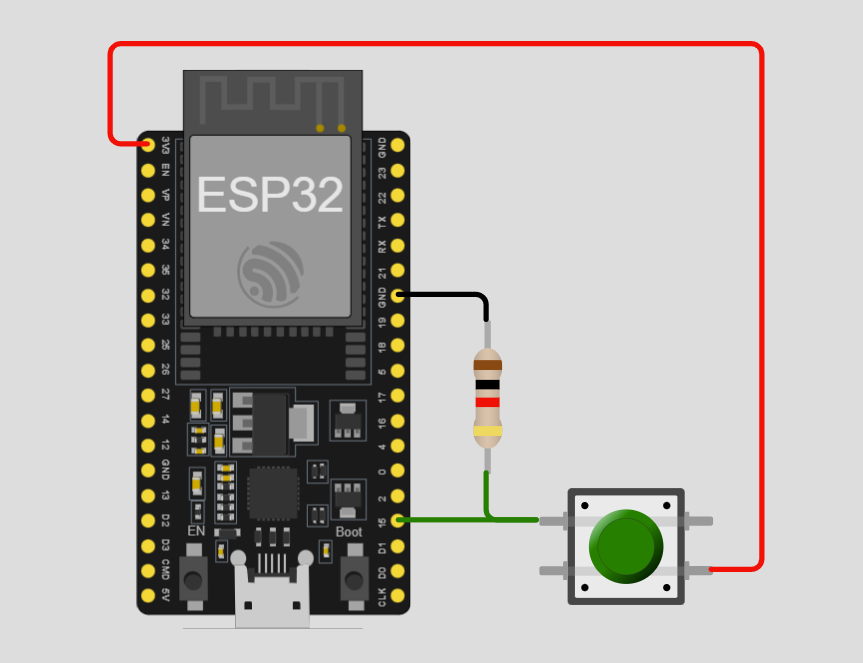
Client Code
						#include <WiFi.h>
						#include <HTTPClient.h>

						const char* ssid = "ESP32_RGB";
						const char* password = "12345678";

						const int button = 15;

						String colors[] = {
						"red",
						"green",
						"blue",
						"white"
						};

						int indexColor = 0;
						bool lastState = HIGH;

						IPAddress serverIP(192, 168, 4, 1);

						void sendColor(String color) {
						HTTPClient http;
						String url = "http://" + serverIP.toString() + "/led?color=" + color;

						http.begin(url);
						int code = http.GET();
						Serial.println(code);
						http.end();
						}

						void setup() {
						Serial.begin(115200);
						pinMode(button, INPUT_PULLUP);

						WiFi.begin(ssid, password);

						while (WiFi.status() != WL_CONNECTED) {
							delay(500);
							Serial.print(".");
						}

						Serial.println();
						Serial.println("Connected");
						}

						void loop() {
						bool state = digitalRead(button);
						delay(30);

						if (lastState == HIGH && state == LOW) {
							sendColor(colors[indexColor]);
							indexColor++;

							if (indexColor >= 4) {
							indexColor = 0;
							}

							delay(250);
						}

						lastState = state;
						}
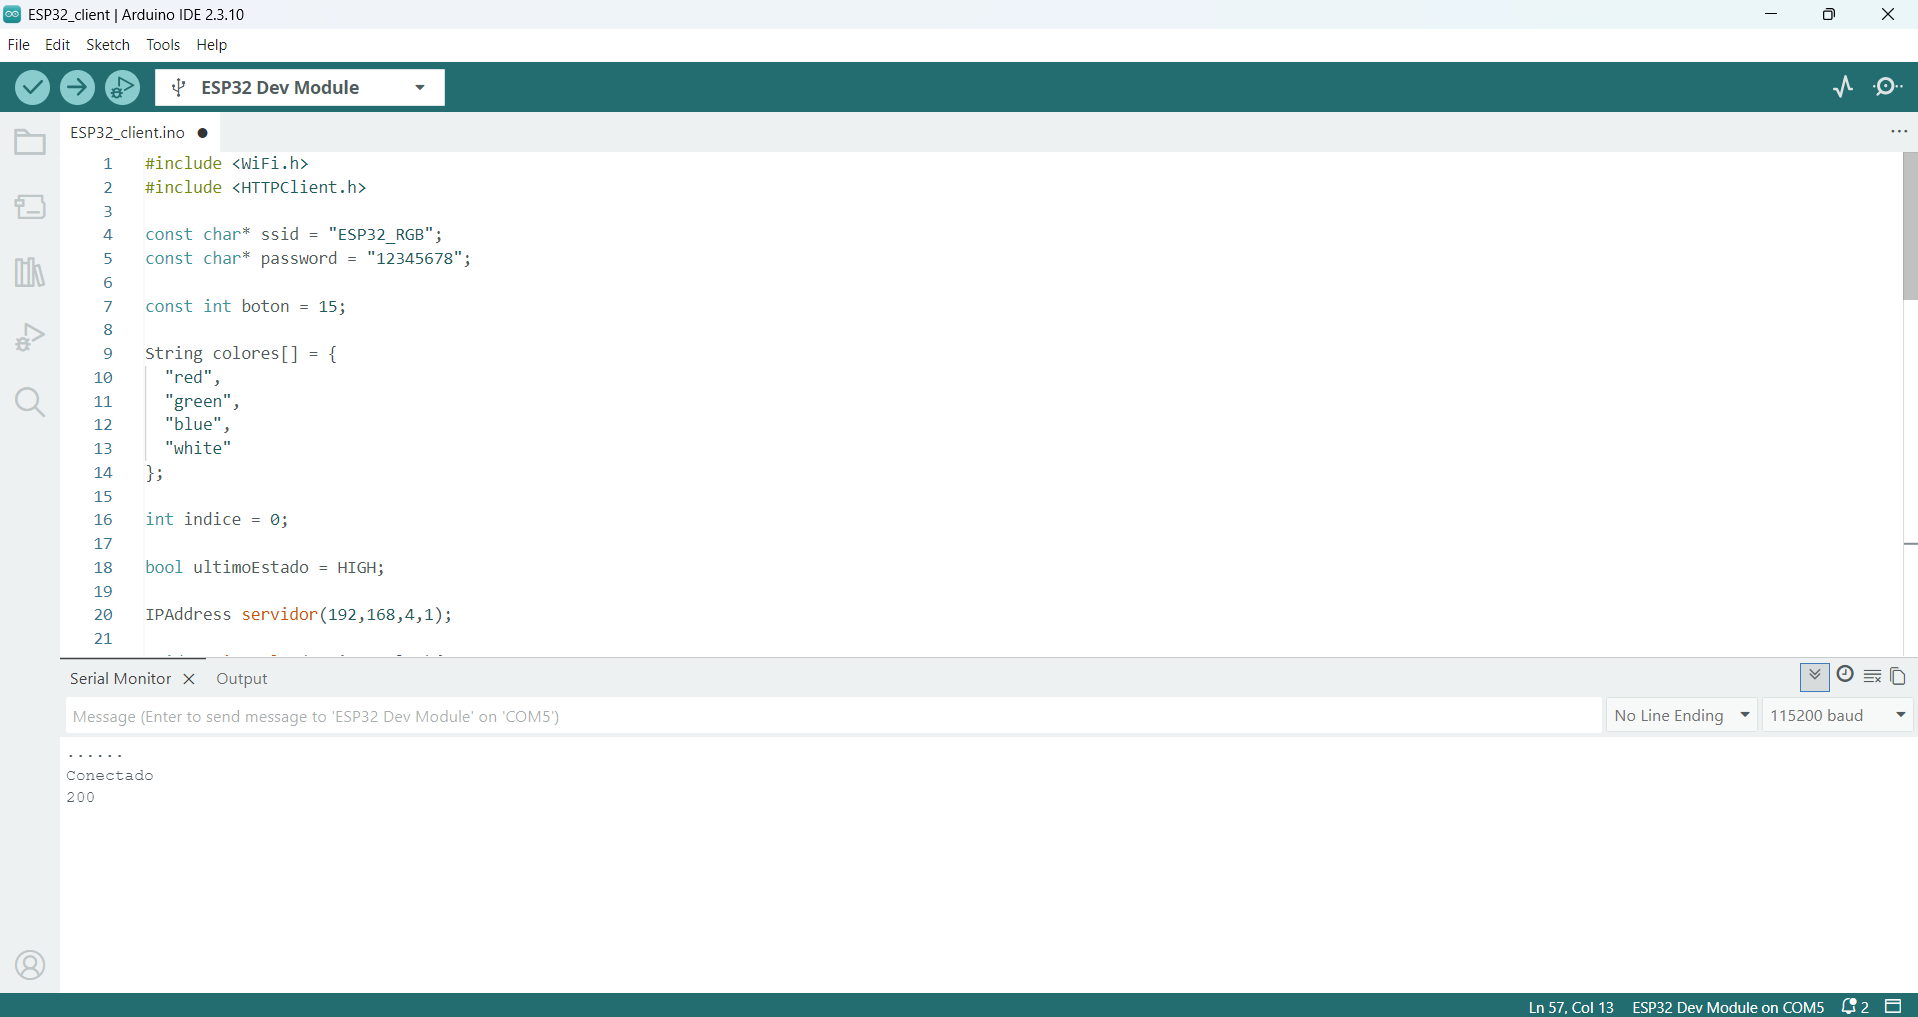
Test Video
How Everything Works
- The XIAO ESP32-S3 server creates its own wireless network using ESP32 Soft Access Point mode. Other Wi-Fi devices can connect to this network using the SSID ESP32_RGB and the password 12345678.
- The ESP32 client works as a Wi-Fi station, so it can connect to the wireless network created by the XIAO ESP32-S3 server.
- The client sends HTTP GET requests to the server. In this project, the request uses the server IP address and the route /led with a color parameter.
- The server listens for incoming requests, reads the color value, and changes the RGB LED color according to the received message.
Conclusion
This assignment allowed us to test basic communication between two embedded projects. The XIAO ESP32-S3 worked as a server by creating a local Wi-Fi network, while the ESP32 worked as a client by sending HTTP requests. This method is useful for sending simple commands, sensor data, or control messages between boards without using an external router.