Week 16: System Integration
Built & integrated machine As-built
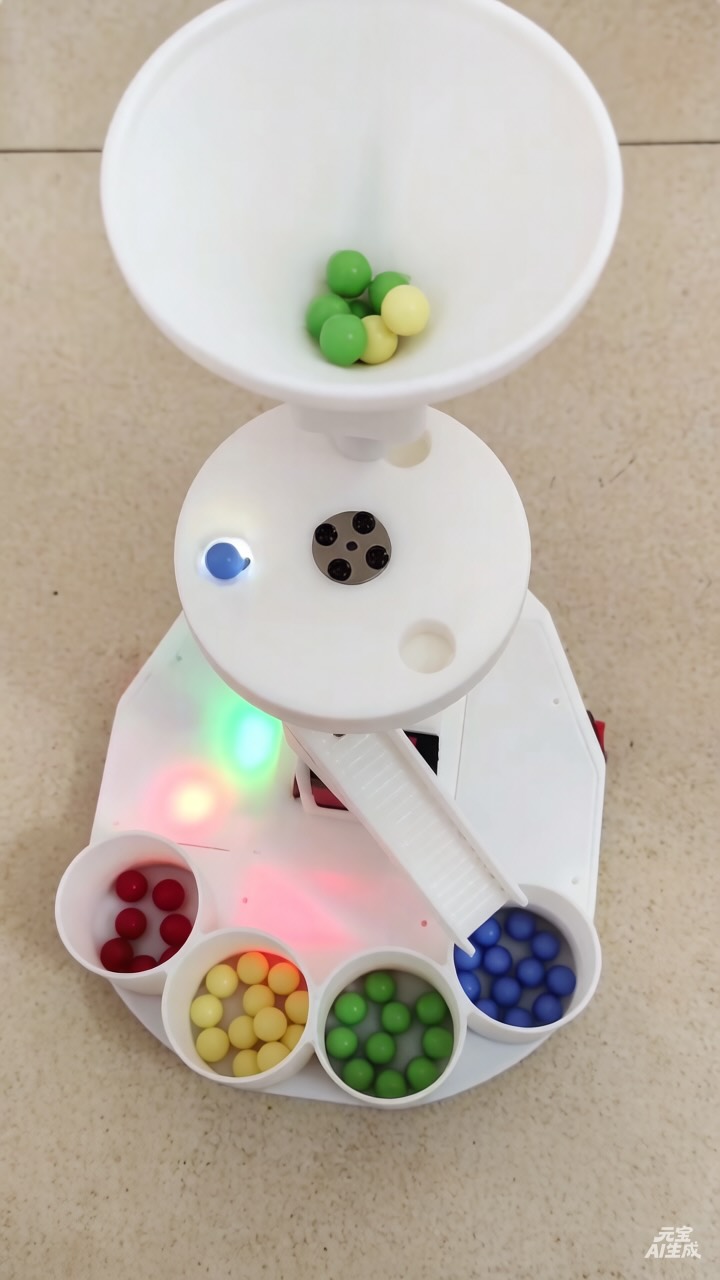
The color-sorting machine is fully assembled and running. Mixed Perler beads are poured into the 3D-printed funnel, indexed on the rotating disc, read by a TCS34725 sensor, and routed by two SG90 servos into colour-coded bins inside a laser-cut plywood electronics box. Full documentation continues on the Final Project page and in Electronics.
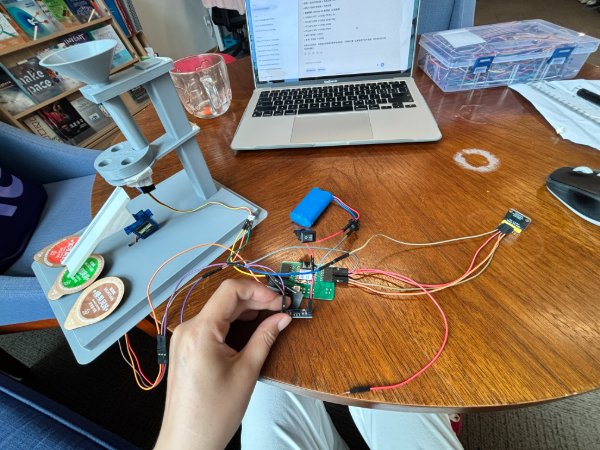
Full assembly — working sort
Completed machine on the bench with yellow, green, and red beads already sorted into their bins. Servo2 positions the white chute over the active bin; the wooden box hides the XIAO ESP32-C3, AMS1117 regulator, and jumper wiring.
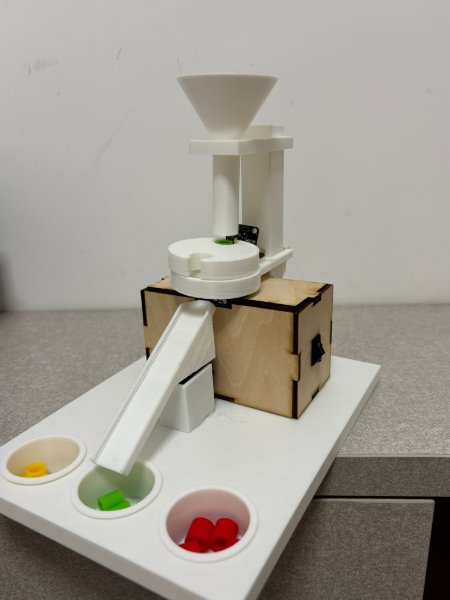
Mechanical integration — funnel, disc, chute & bins
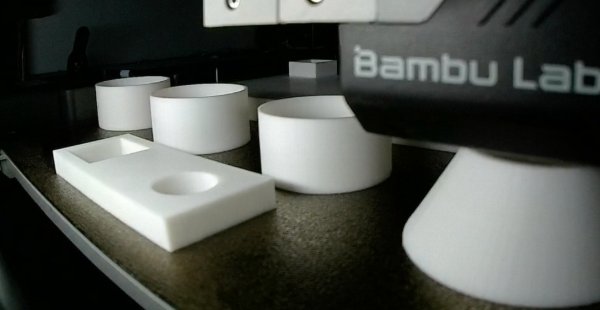
White PLA parts were printed on a Bambu Lab printer, then press-fit onto the laser-cut base. The funnel feeds beads onto the disc; the pivoting chute directs each sorted bead into a recessed bin.
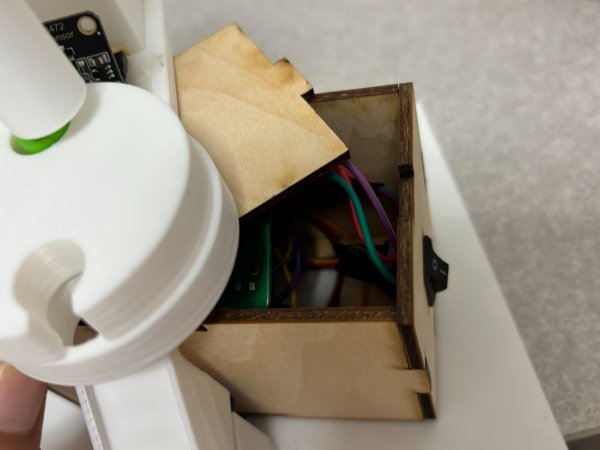
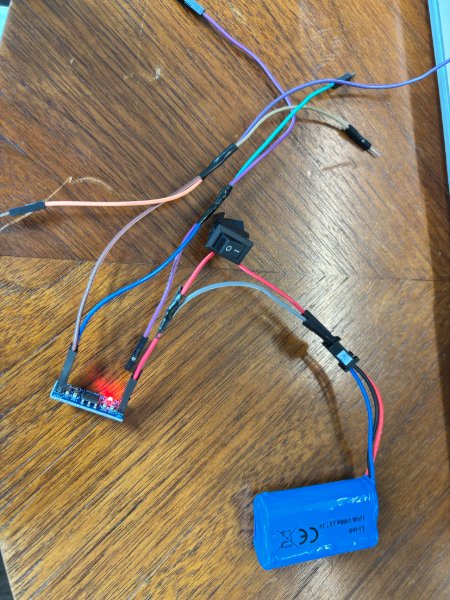
Electronics & wiring
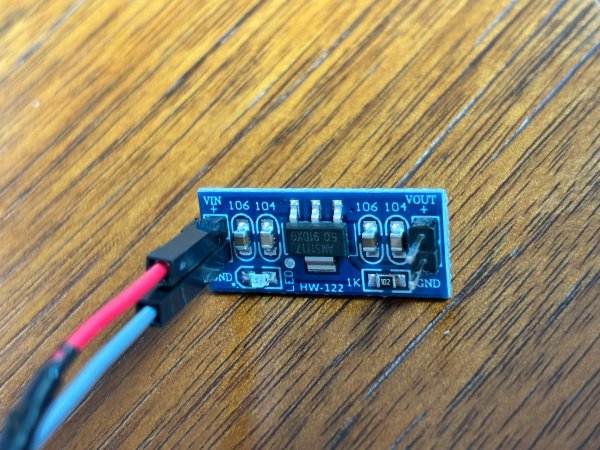
Power comes from a 7.2 V battery pack through a rocker switch and AMS1117 5 V regulator. The XIAO ESP32-C3, TCS34725 (I²C on GPIO6/7), and both servos share a common ground; servo power is not taken from the XIAO 3.3 V pin.
Sensor & servos mounted
Servo1 (GPIO2) advances the turntable; Servo2 (GPIO3) rotates the sort chute to 30° / 60° / 90° for red, green, and yellow. The TCS34725 sits in a printed holder ~5 mm above the bead path.
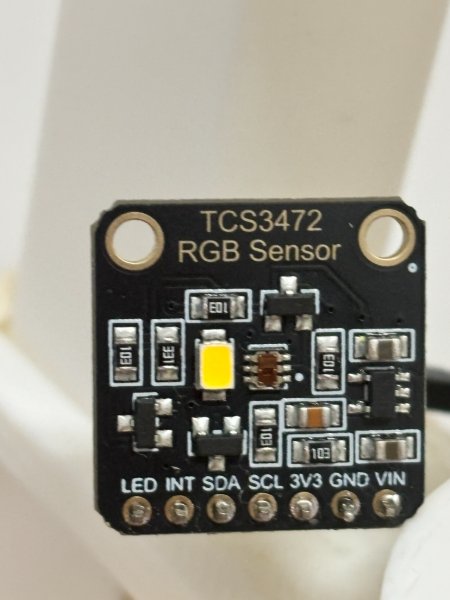
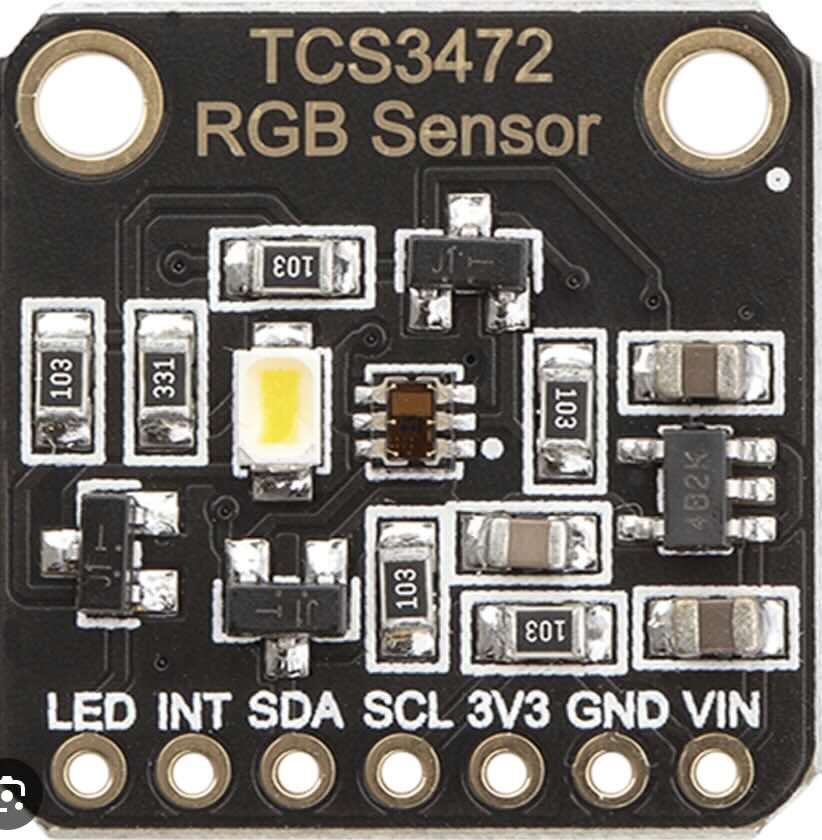
Wi-Fi web control test — start/stop from phone while machine sorts (Week 11).
Servo motion test — Servo1 feed cycle and Servo2 chute angles during integration debugging.
As-built component list
The built machine differs from the early stepper-motor plan below — integration used two SG90 servos instead of a 28BYJ-48 stepper:
- Seeed XIAO ESP32-C3 (main controller, Wi-Fi)
- TCS34725 colour sensor (I²C)
- 2× SG90 micro servo — feed turntable + sort chute
- AMS1117 5 V voltage regulator + 7.2 V battery pack + rocker switch
- 3D-printed funnel, disc, chute, bin base (PLA)
- Laser-cut plywood electronics enclosure
- Three colour bins (red, green, yellow)
Original integration plan Design phase
Early planning document from before the physical build. The sketches and flowchart below show the intended architecture; photos above document what was actually built.
My final project is a rotating-disc color sorting machine that detects the color of small objects like beads, and sorts them into different bins according to the color. The core components:
- XIAO ESP32-C3 (main controller)
- TCS34725 color sensor (I2C)
- Stepper motor (28BYJ-48) or DC geared motor for disc rotation
- Micro servo (SG90) for moving the sliding track
- Micro limit switch (at base, for position feedback or trigger)
- 3D-printed parts: funnel, rotating disc (with pockets), base frame, sliding chute, bins
- Power supply: 5V USB or battery pack
Integration plan
- Mount the motor on the base plate. Attach the rotating disc to the motor shaft.
- Mount the funnel above the disc so objects drop into disc pockets.
- Mount the color sensor at a fixed station over the disc (or under it).
- Mount the servo with a sliding chute (pivoting track) underneath the disc.
- Install the limit switch at the base to detect disc home position or to act as a manual start button.
- Write firmware that:
- Rotates the disc step-by-step.
- Reads color when an object is under the sensor.
- Moves servo to the correct chute angle.
- Releases the object into the chute.
- Uses the switch for synchronisation.
- Enclose electronics and organise wiring.
Implemented Methods of Packaging
The result is a self-contained desktop sorter: no loose wires, no exposed moving belts.
| Component | Packaging / Mounting |
|---|---|
| XIAO ESP32 | Mounted on a small PCB breakout with M2 screws; placed inside a printed electronics box under the base. |
| Voltage regulator (AMS1117) | Mounted inside the laser-cut electronics box; converts the 7.2 V battery pack to a stable 5 V supply for the XIAO, servos, and color sensor. |
| Color sensor | Inserted into a printed holder that keeps it 5mm above the disc surface. |
| Servo | Screwed into a bracket that supports the sliding chute. |
| Limit switch | Mounted on the base with an adjustable screw actuator; triggered by a tab on the disc (home position). |
| Wiring | All wires routed through channels in the base; using cable ties and a single cable exit. |
| Overall enclosure | A laser-cut acrylic cover with ventilation slots protects the electronics and moving parts. |
Designed to Look Like a Finished Product
- Color: White PLA + transparent acrylic top to show the mechanism.
- Funnel: Transparent window to see objects as they enter the disc.
- Bins: Colour-coded (red, green, blue, black for “other”) with engraved labels.
- Base switch: Prominent, user-friendly illuminated push button to start each sorting cycle.
- Feet: Rubber pads to prevent sliding.
- Cable management: All electronics hidden in a bottom compartment accessible via a snap-fit lid.
- Status (optional): LED ring around the funnel that glows in the colour of the detected object.
Documentation of System Integration
Hardware Integration
- Motor & disc assembly
- Stepper motor (28BYJ-48) controlled via ULN2003 driver.
- Disc rotation: 60° per step (6 positions). Home position detected by limit switch.
- Sensor mounting
- TCS34725 placed over the disc at station #2 (after funnel). Distance = 5mm, ambient light blocked by a printed shroud.
- Servo & chute
- Servo mounted under the disc, pointing upward. Its horn rotates a sliding track (a curved ramp). Angles:
- Red → 0° (chute aligns with Bin 1)
- Green → 45° (Bin 2)
- Blue → 90° (Bin 3)
- Other → 135° (Bin 4)
- Servo mounted under the disc, pointing upward. Its horn rotates a sliding track (a curved ramp). Angles:
- Base switch
- Normally open micro switch wired to GPIO3 (internal pull-up). When pressed, it starts the sorting routine. Also used to confirm that the chute is clear (after a 200ms delay).
- Power
- XIAO ESP32 powered via USB-C (5V).
- Stepper motor and servo powered separately from a 5V/2A supply with common ground.
Software Integration (Arduino IDE) — early plan
Draft firmware below targeted a stepper-driven disc. The as-built machine uses dual SG90 servos instead; see working code in Week 11 and Final Project — Electronics.
#include <Stepper.h>
    #include <Wire.h>
    #include <Adafruit_TCS34725.h>
    #include <ESP32Servo.h>

    // Pins
    #define STEPPER_IN1  D0
    #define STEPPER_IN2  D1
    #define STEPPER_IN3  D2
    #define STEPPER_IN4  D3
    #define SERVO_PIN    D4
    #define SWITCH_PIN   D5
    #define SDA_PIN      D6
    #define SCL_PIN      D7

    Adafruit_TCS34725 tcs = Adafruit_TCS34725(TCS34725_INTEGRATIONTIME_50MS, TCS34725_GAIN_4X);
    Servo chuteServo;
    Stepper myStepper(2048, STEPPER_IN1, STEPPER_IN3, STEPPER_IN2, STEPPER_IN4);

    int currentPos = 0;
    const int stepsPerPocket = 341; // 2048/6

    void setup() {
      Serial.begin(115200);
      Wire.begin(SDA_PIN, SCL_PIN);
      if (!tcs.begin()) {
        Serial.println("Sensor error");
        while (1);
      }
      chuteServo.attach(SERVO_PIN);
      pinMode(SWITCH_PIN, INPUT_PULLUP);
      myStepper.setSpeed(15);
      // Home: rotate until switch is pressed
      while(digitalRead(SWITCH_PIN)) {
        myStepper.step(10);
        delay(2);
      }
      currentPos = 0;
      Serial.println("Ready");
    }

    String classifyColor(uint16_t r, uint16_t g, uint16_t b) {
      if (r > g && r > b && r > 200) return "RED";
      if (g > r && g > b && g > 180) return "GREEN";
      if (b > r && b > g && b > 180) return "BLUE";
      return "OTHER";
    }

    void setChute(String color) {
      if (color == "RED") chuteServo.write(0);
      else if (color == "GREEN") chuteServo.write(45);
      else if (color == "BLUE") chuteServo.write(90);
      else chuteServo.write(135);
      delay(500); // chute settles
    }

    void loop() {
      // Wait for base switch press to start
      if (digitalRead(SWITCH_PIN) == LOW) {
        delay(50); // debounce
        // Move disc to bring a pocket from funnel to sensor
        myStepper.step(stepsPerPocket);
        currentPos = (currentPos + 1) % 6;
        delay(300);

        // Read color
        uint16_t r, g, b, c;
        tcs.getRawData(&r, &g, &b, &c);
        String color = classifyColor(r, g, b);
        Serial.println(color);

        // Set chute angle
        setChute(color);

        // Move disc to release position (e.g., next step)
        myStepper.step(stepsPerPocket);
        currentPos = (currentPos + 1) % 6;
        delay(500);

        // Return chute to neutral (optional)
        chuteServo.write(90);

        // Wait for user to press switch again
        while(digitalRead(SWITCH_PIN) == LOW);
        delay(100);
      }
    }
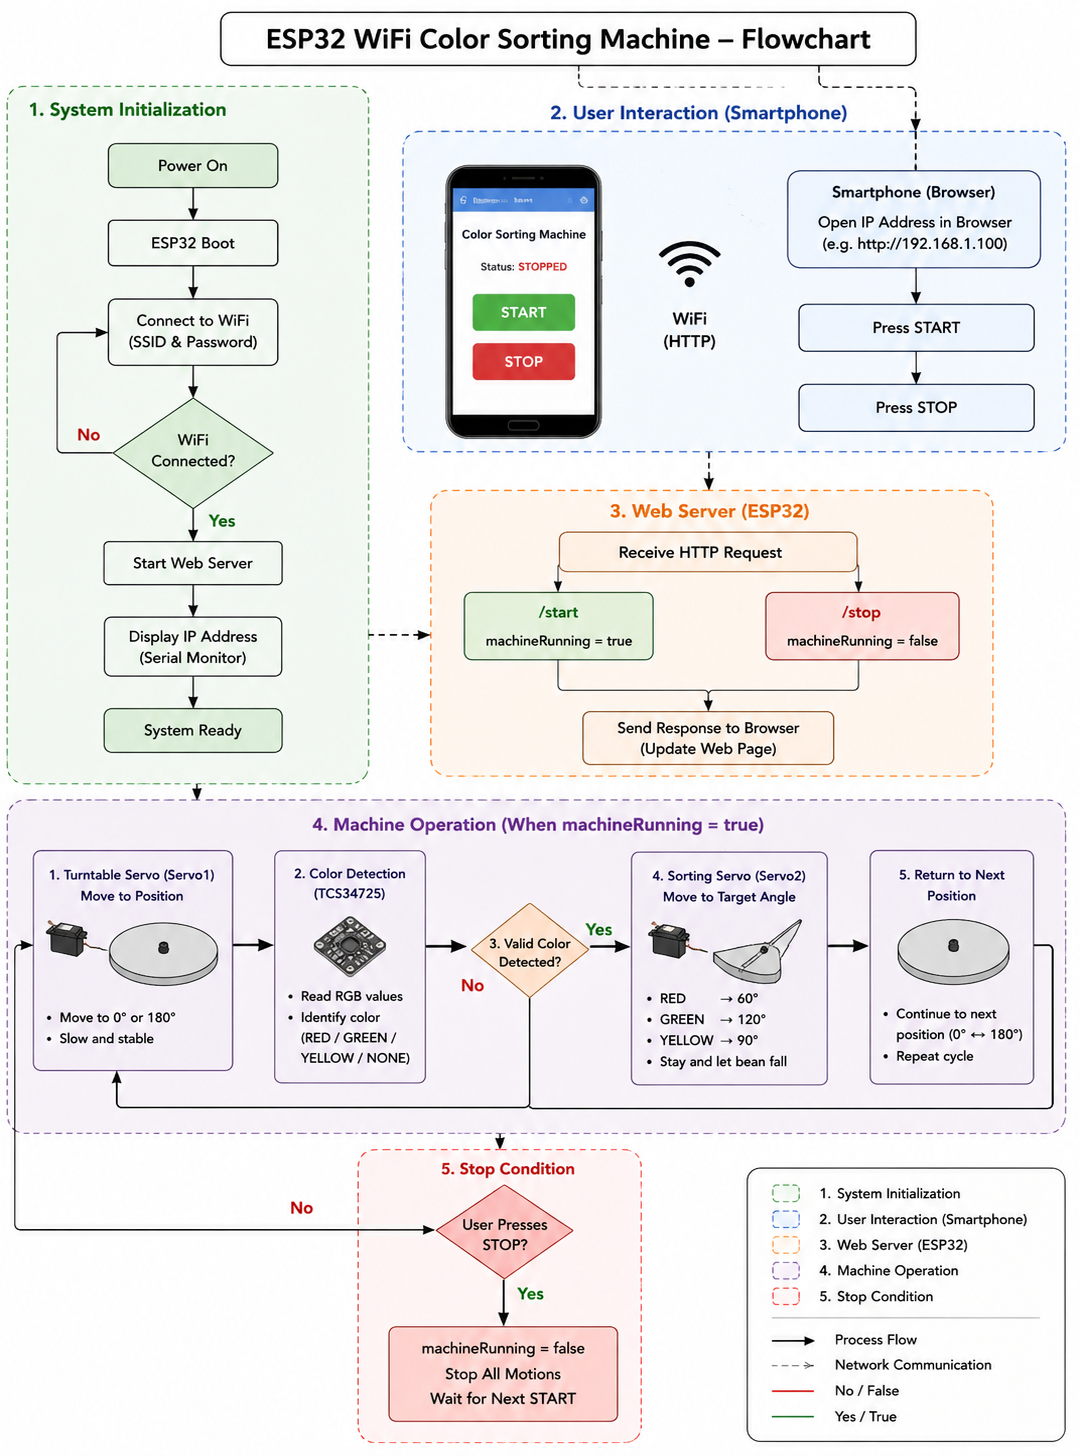
Planning sketches & flowchart
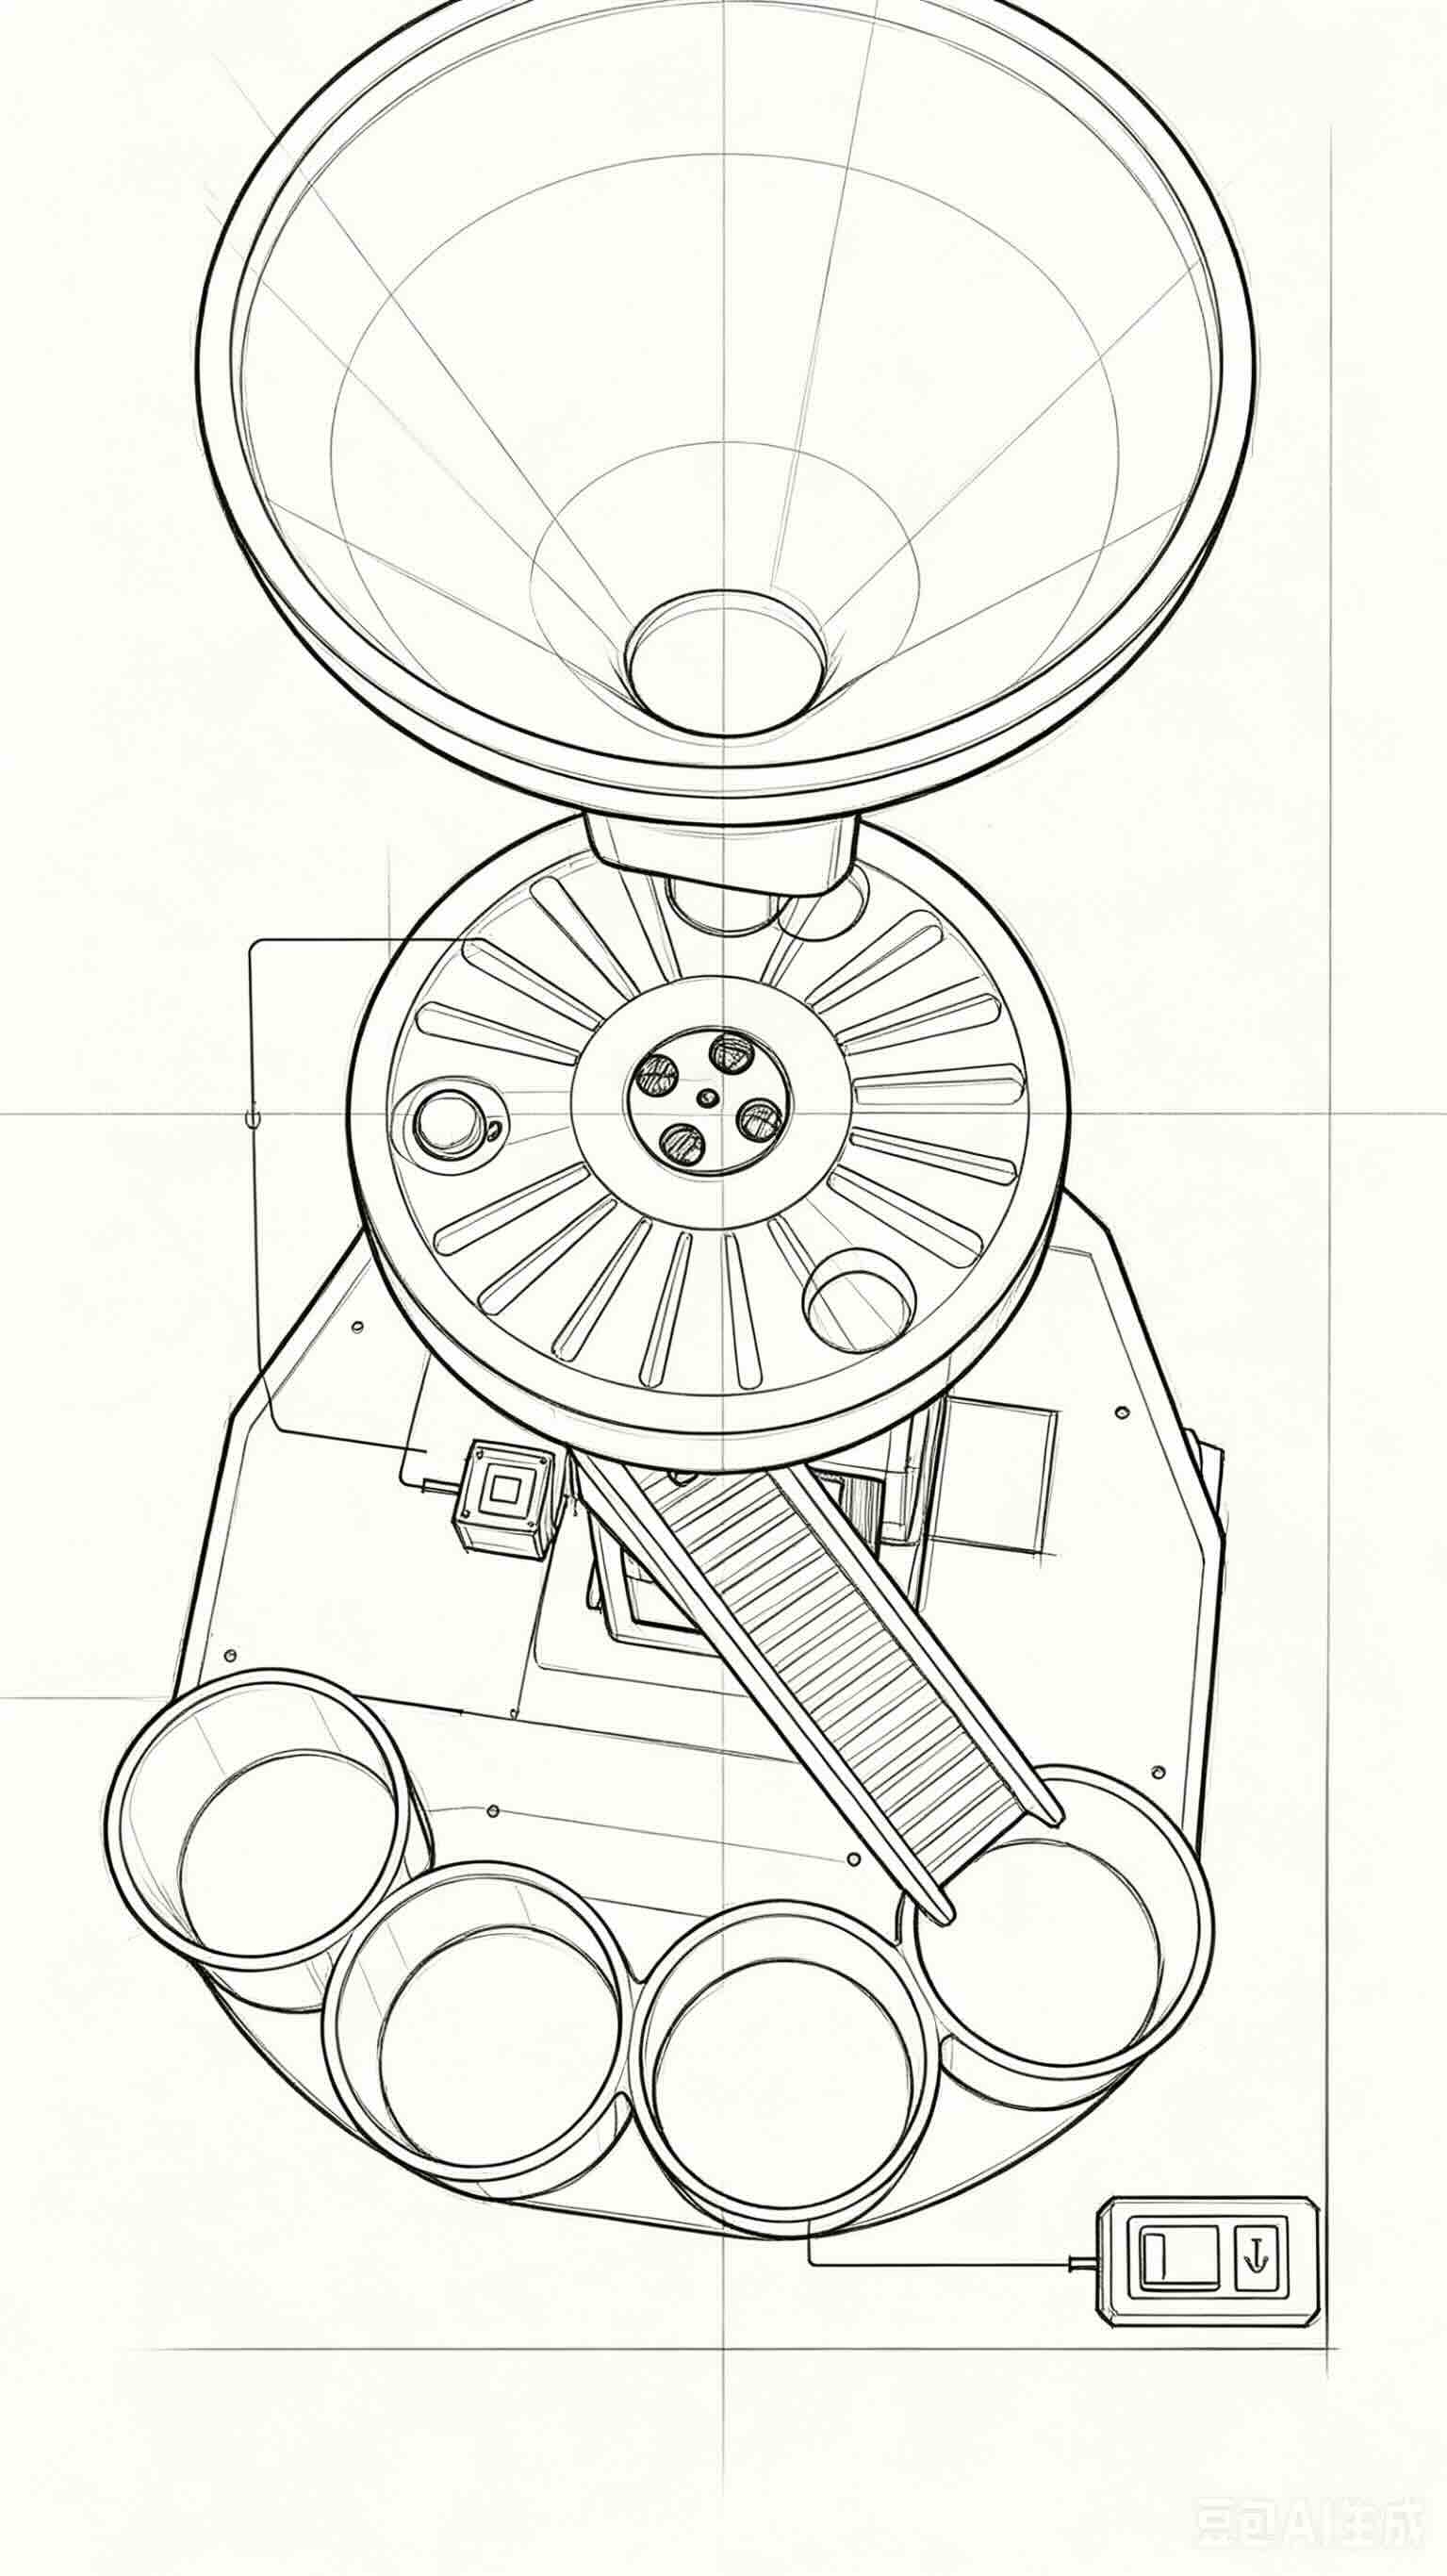
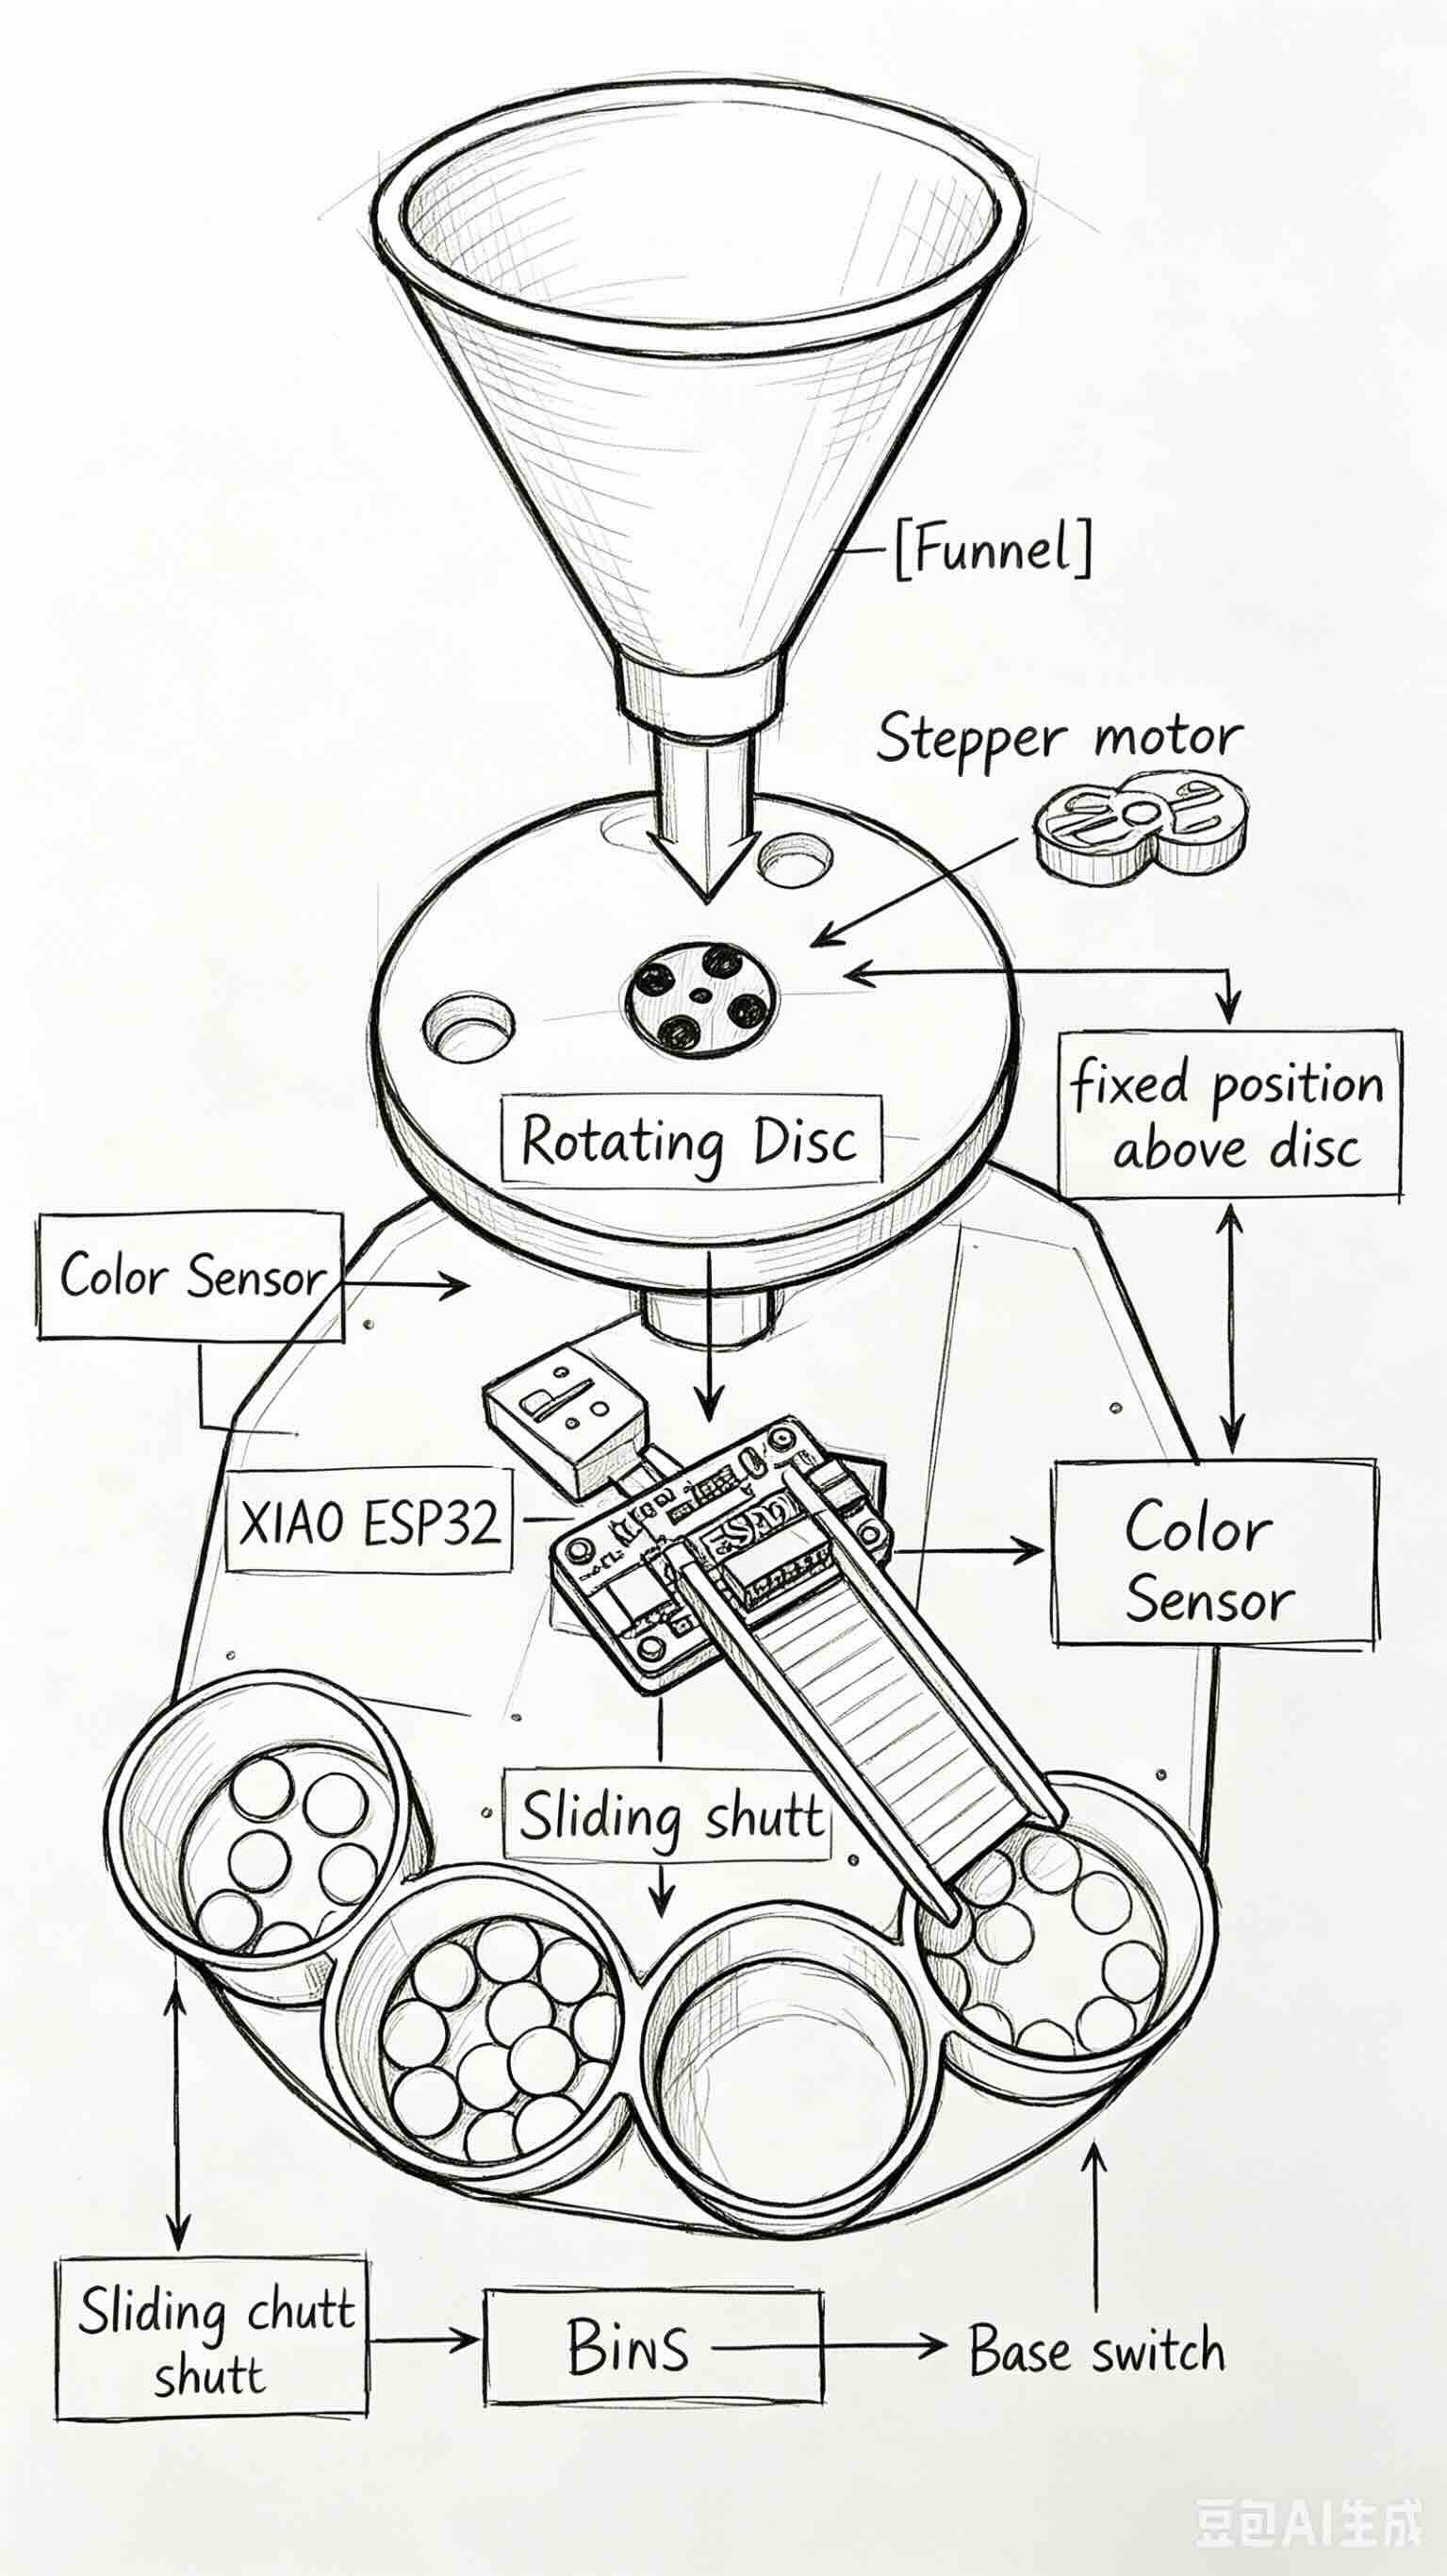
Early system block diagram and mechanical layout sketches (before the as-built photos above).
Sketch 1 – System block diagram
Sketch 2 – Mechanical layout (side view)
Link to final project documentation
Final Project — full documentation · Electronics & firmware · 2D & 3D design