Week 5:3D scanning and printing
This week, I'm working on testing the parameters of four different models of 3D printers, and summary all the the test data.Design my own model and document the process and design steps. Try to use 3D scanning software Luma and Creality 3D scanner to san an object and record the process
Assignments
Group Work : Test the design rules of a 3D printer(overhangs, tolerances, bridging,stringing, diameters)
Individual assignments:1.1. Design and print a small 3D object that cannot be made through subtractive manufacturing 2. 3D scan an object and record the process.
Group Work Assignment Workflow
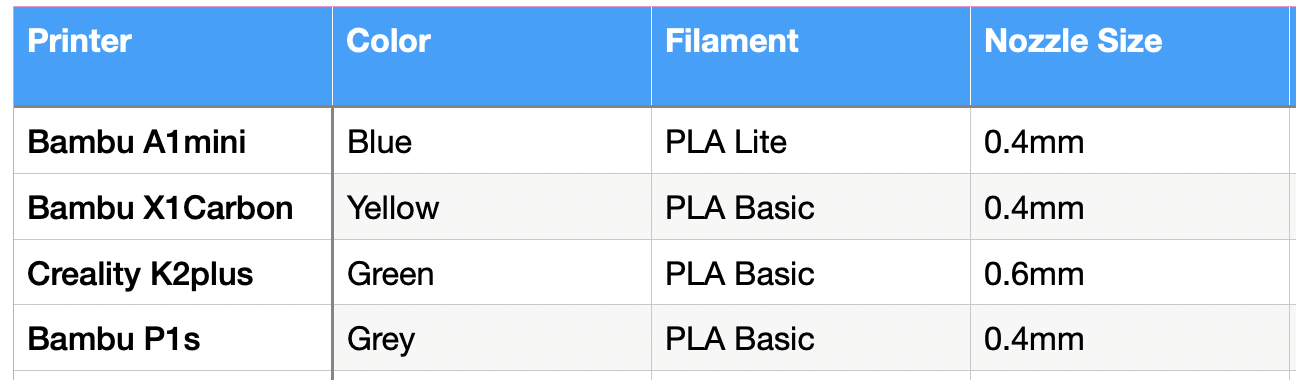
Module choose and test the 3D printer
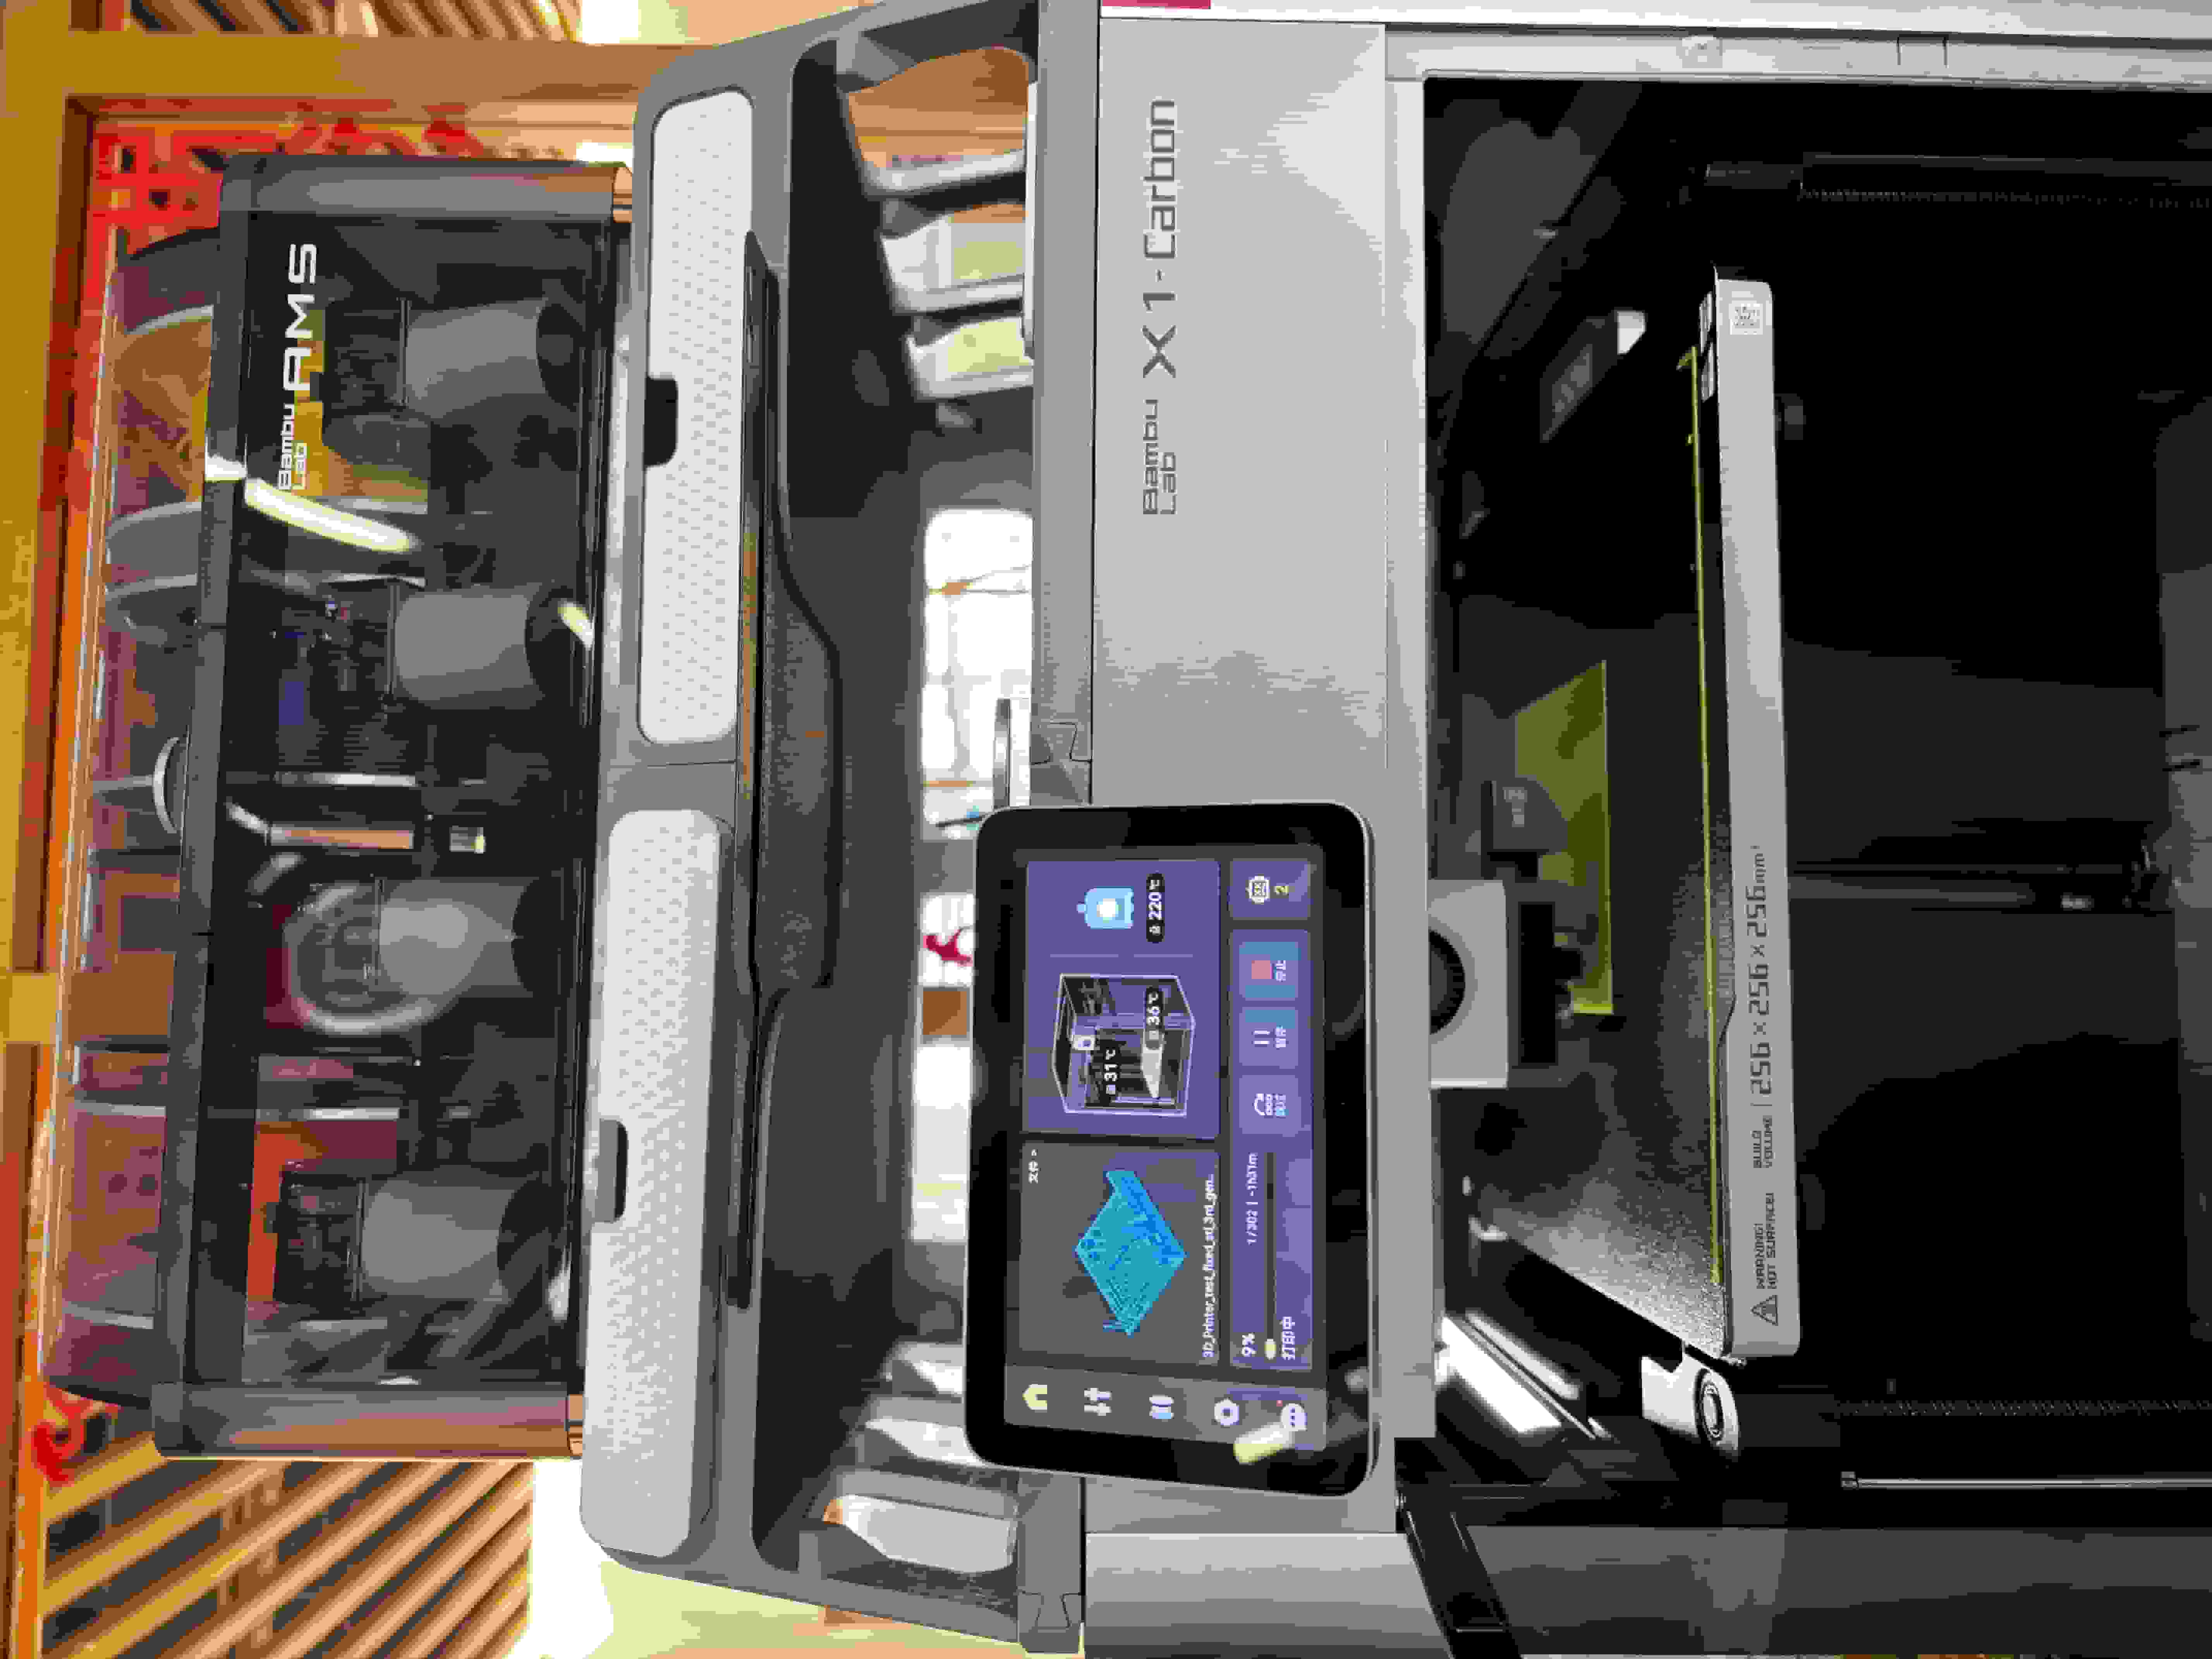
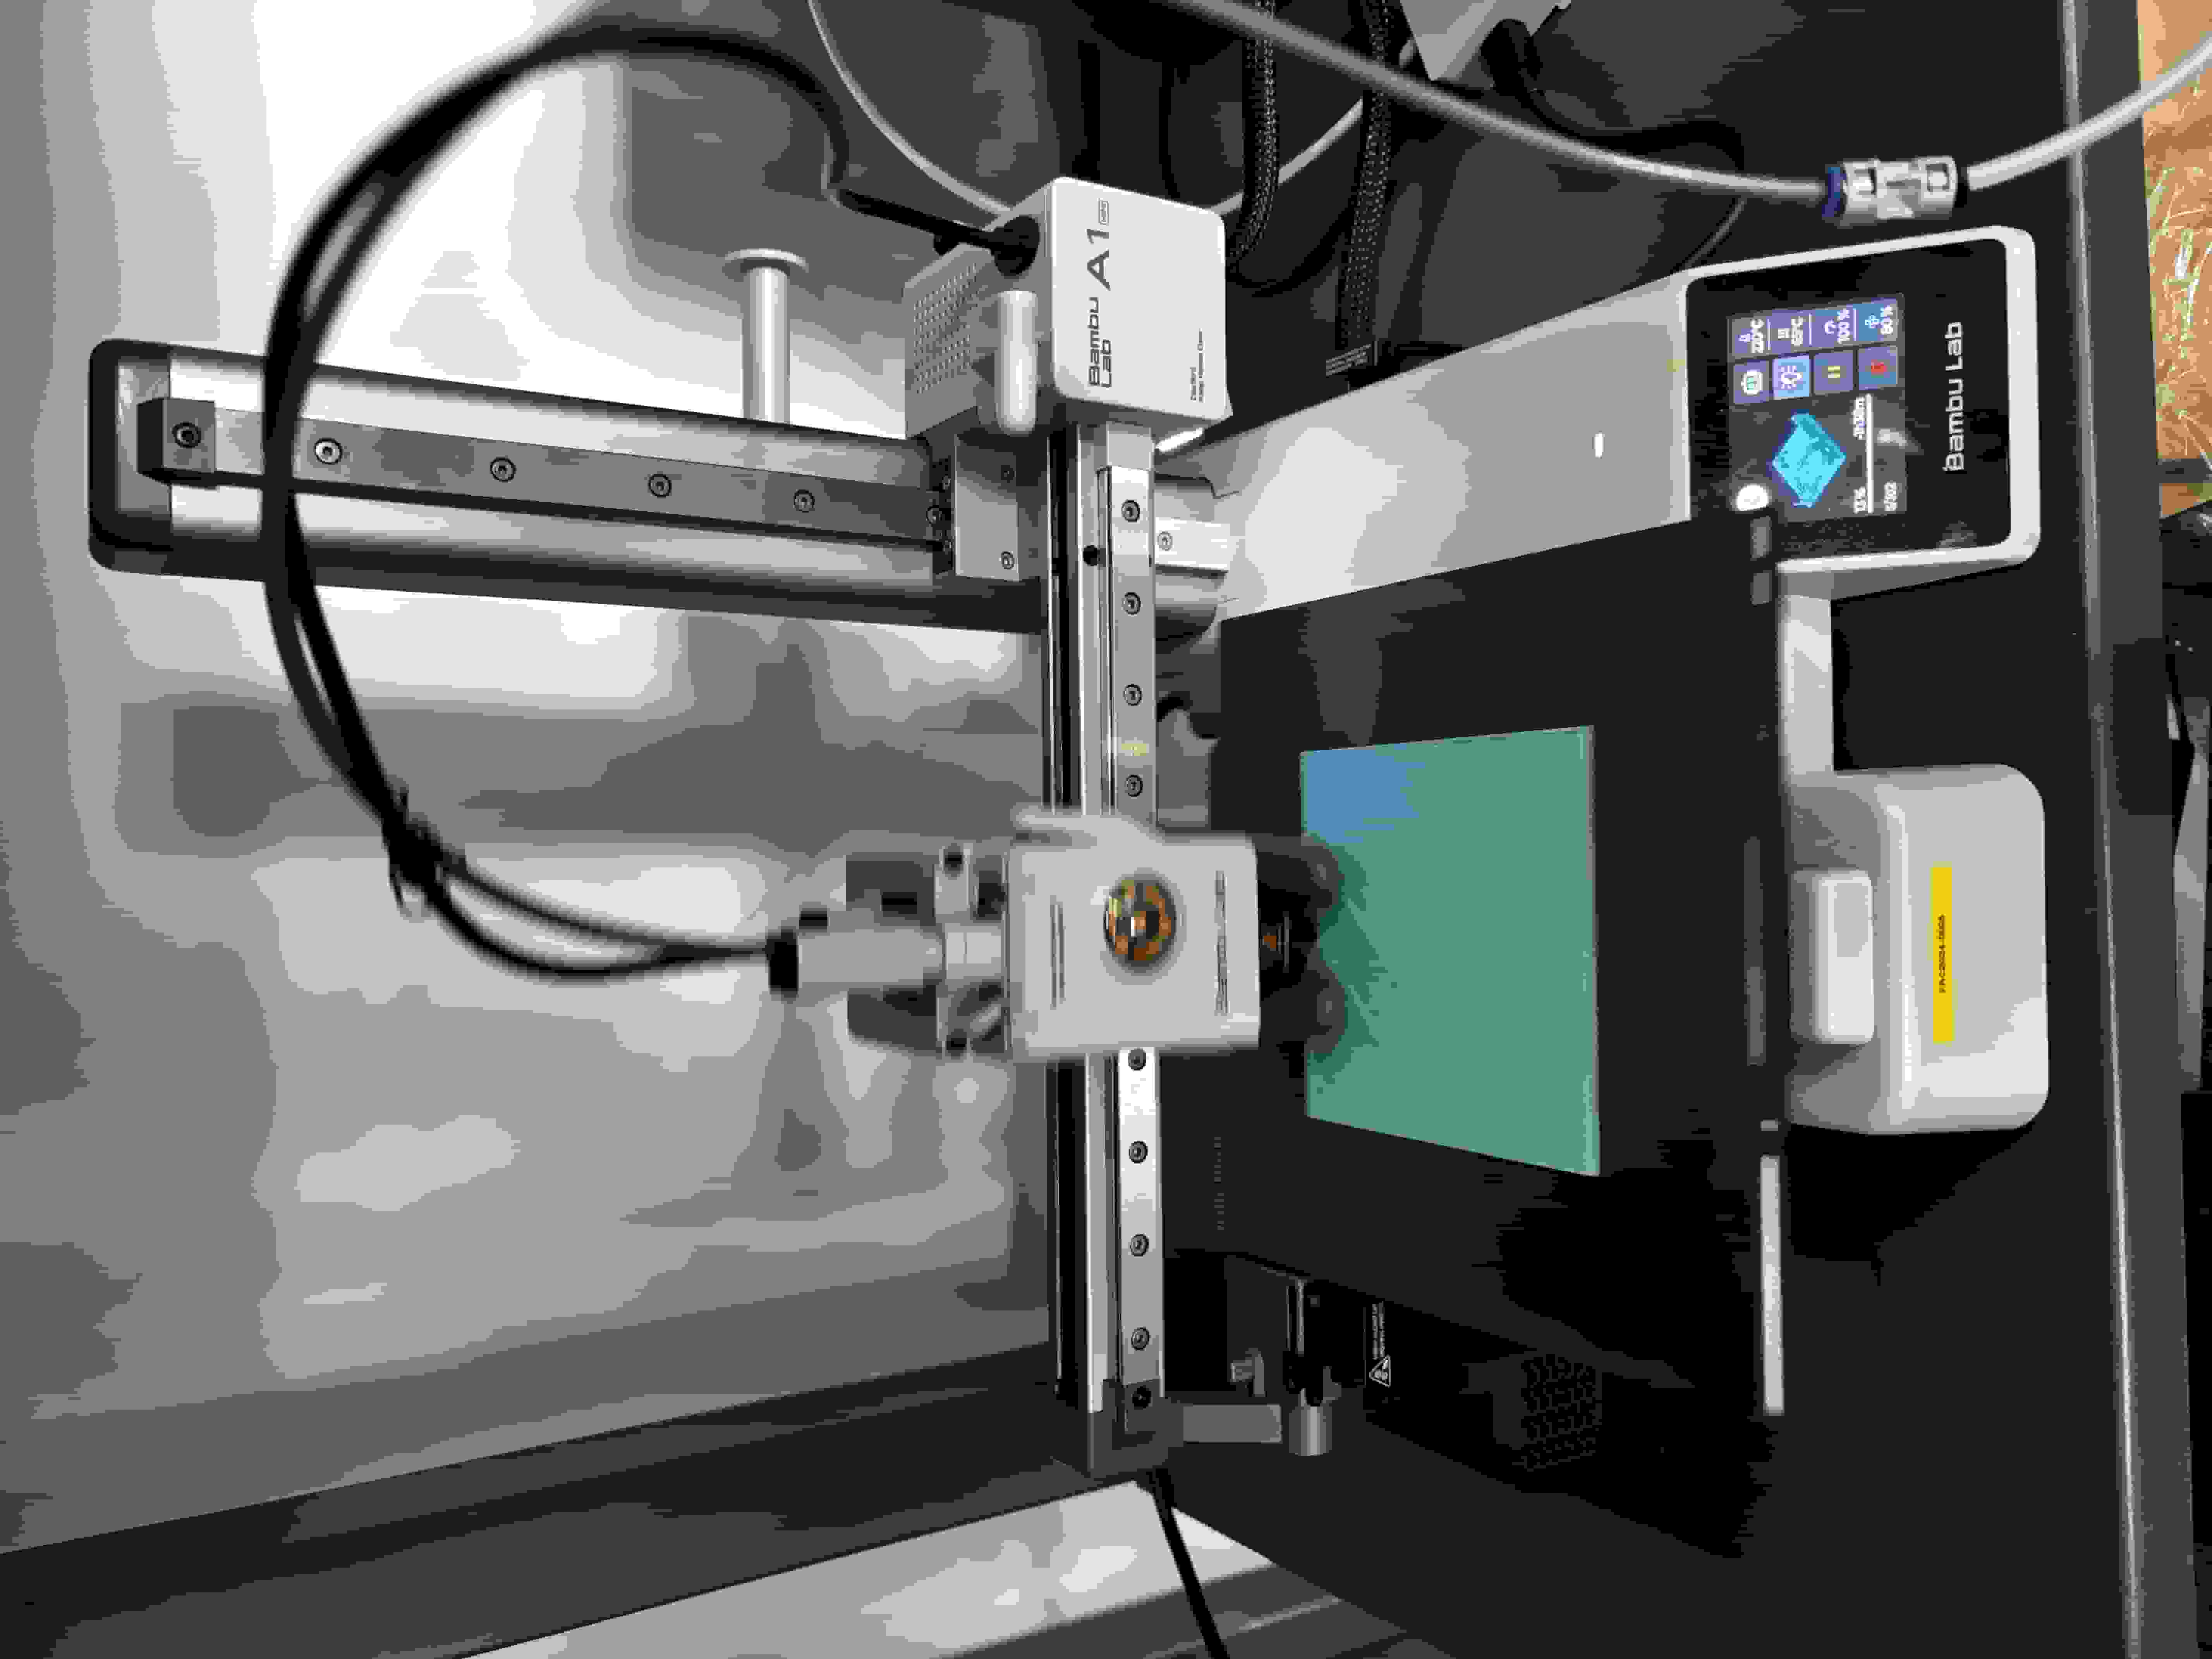
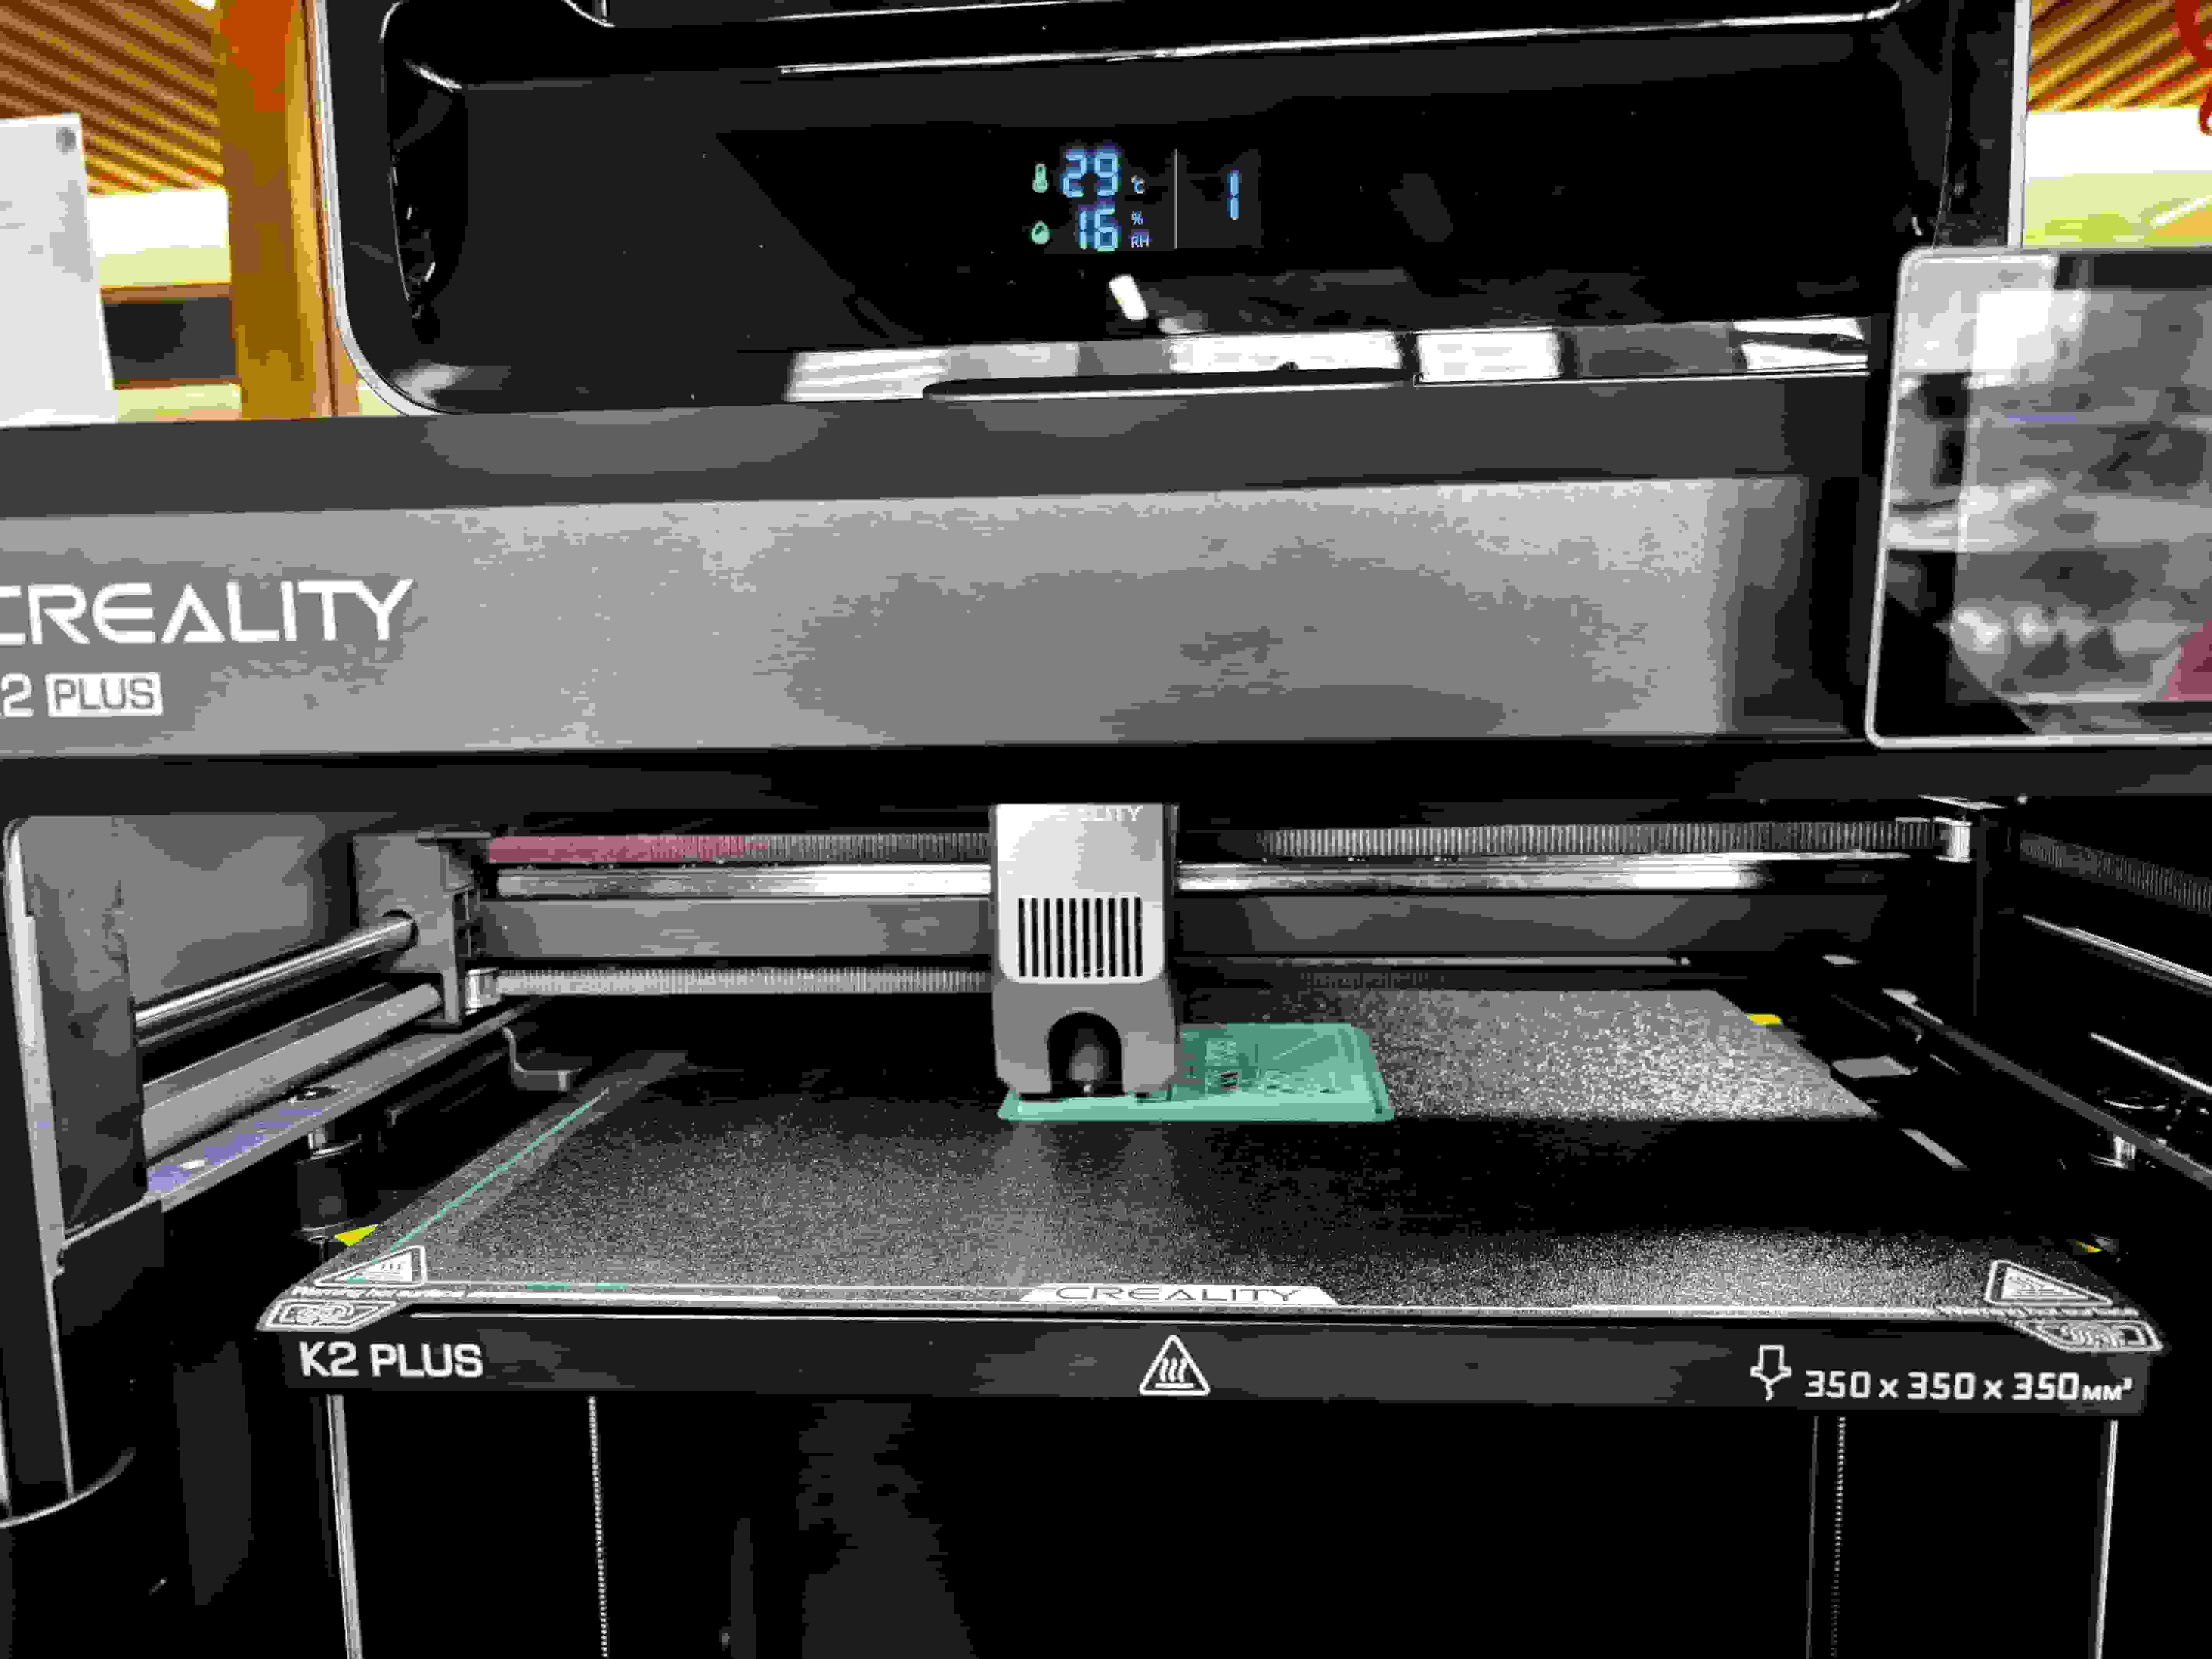
3D printer testing:
I went on to Thingiverse choose the All in ONe 3D test as a print test.
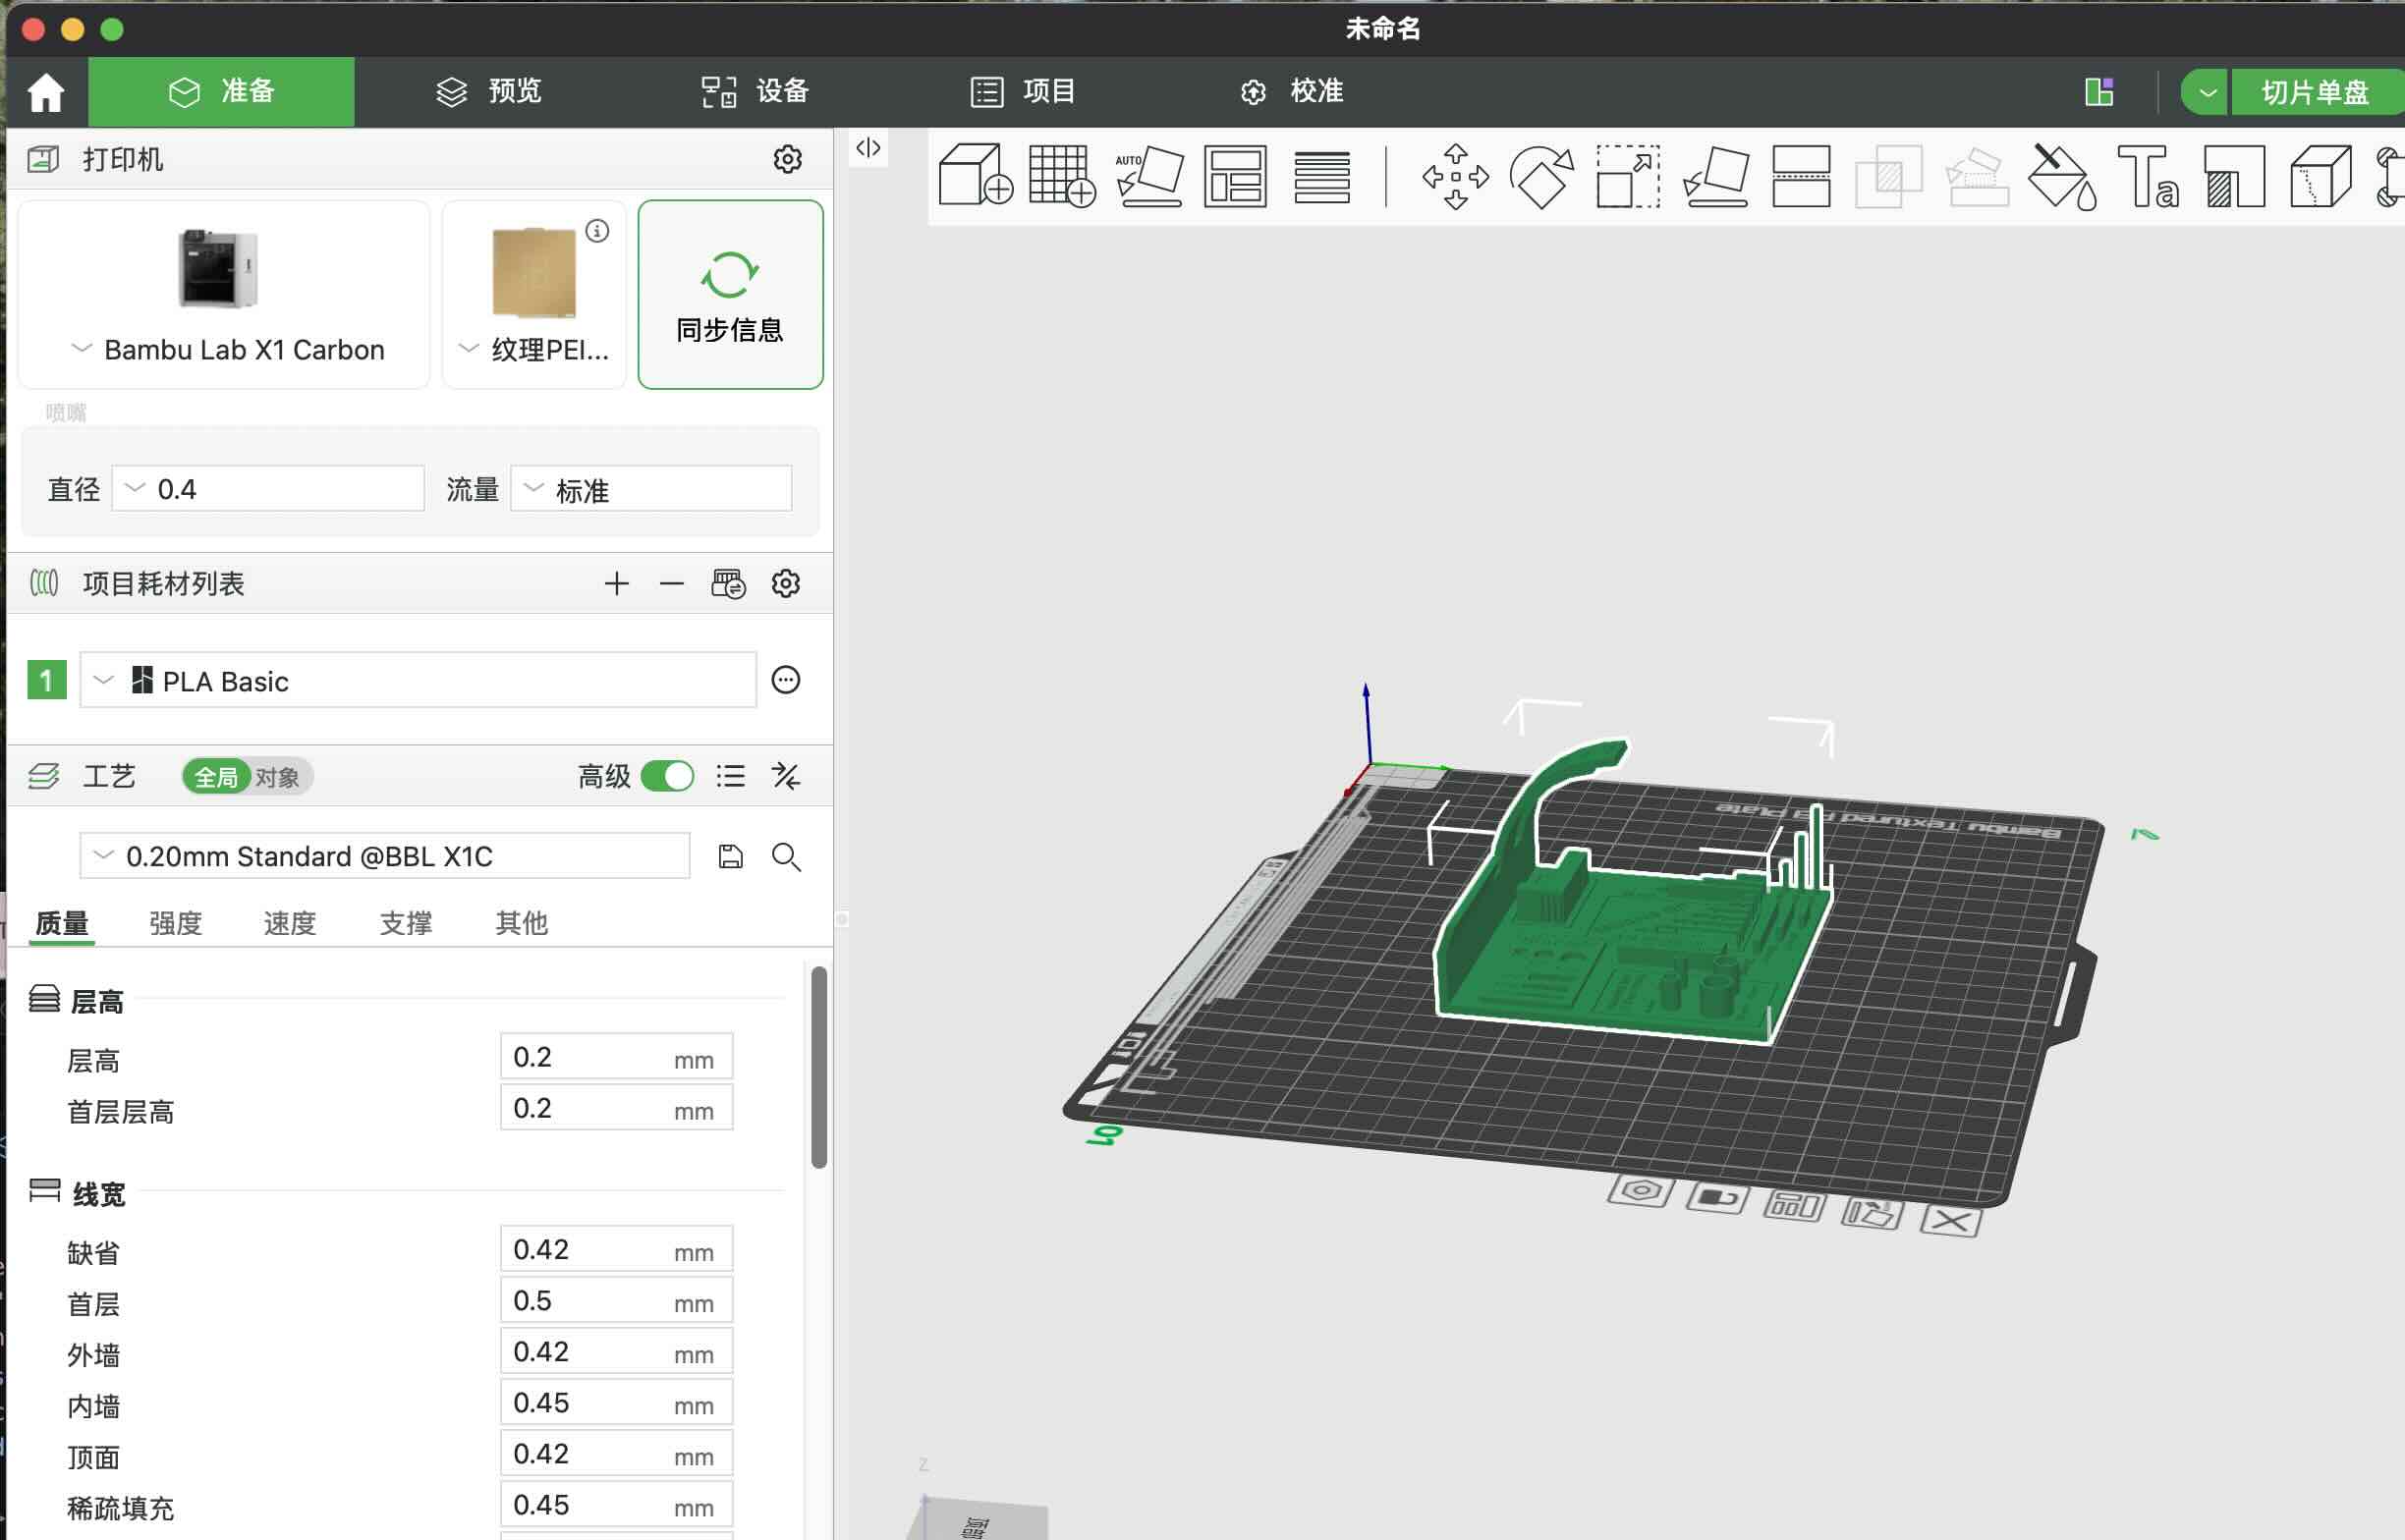
Slicing Software: Bambu Studio and Creality Print; supports other slicers capable of exporting standard G-code like SuperSlicer, PrusaSlicer, and Cura, though some smart features may not be supported.
Supported Operating Systems for Slicing Software: MacOS, Windows
We first download the file from it, and then upload stl file to the Bambu corresponding software Bambu Studio.
We set up with these parameters with out adding supporting material:
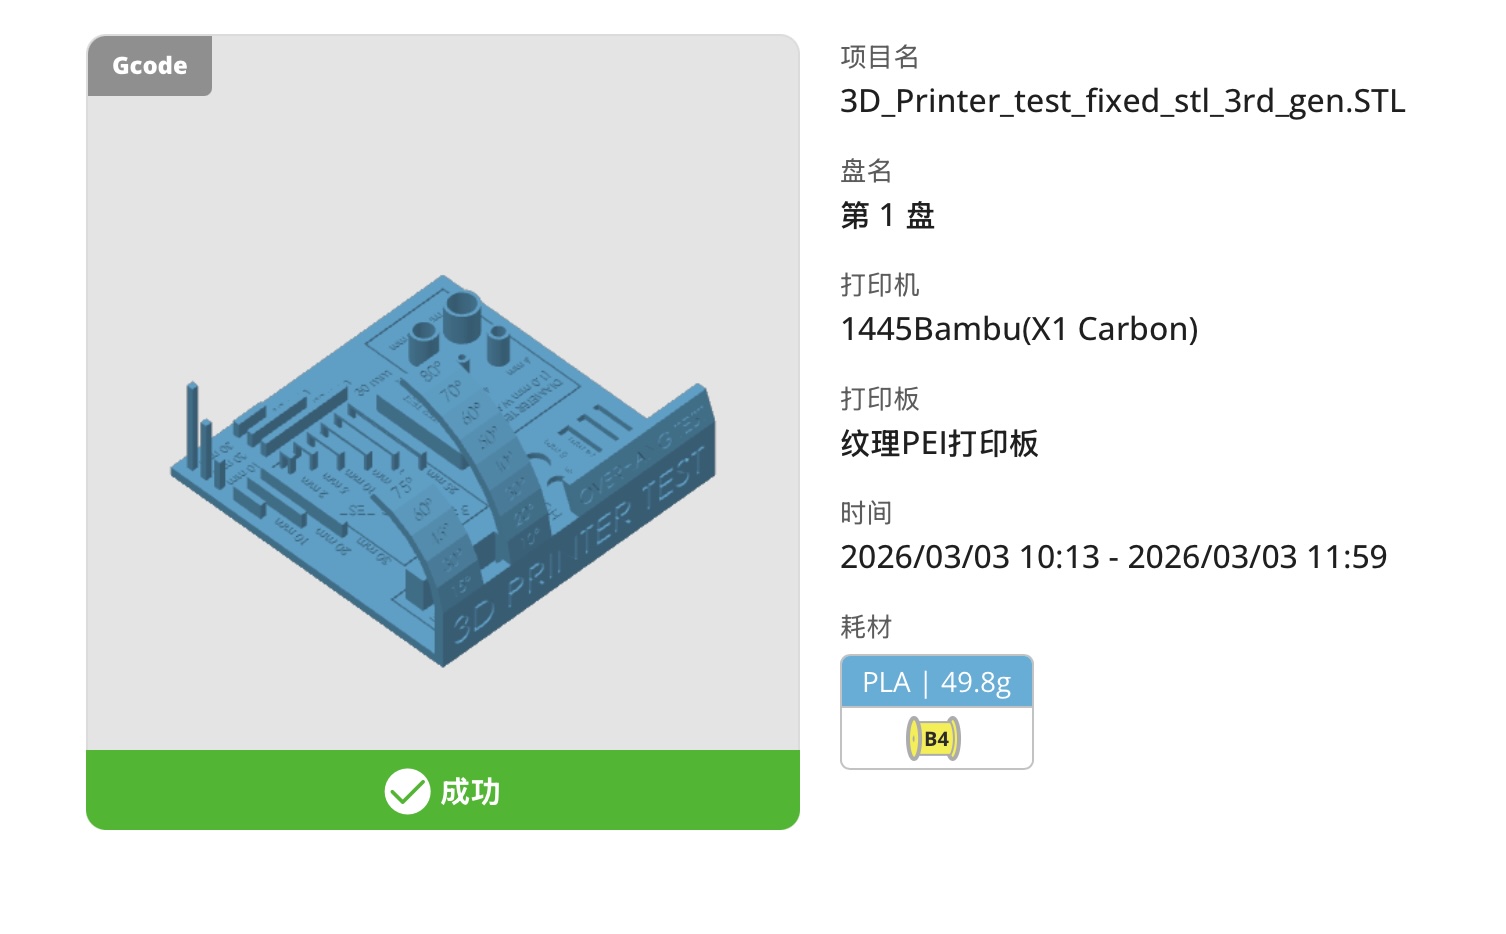
Here is the result of the print:
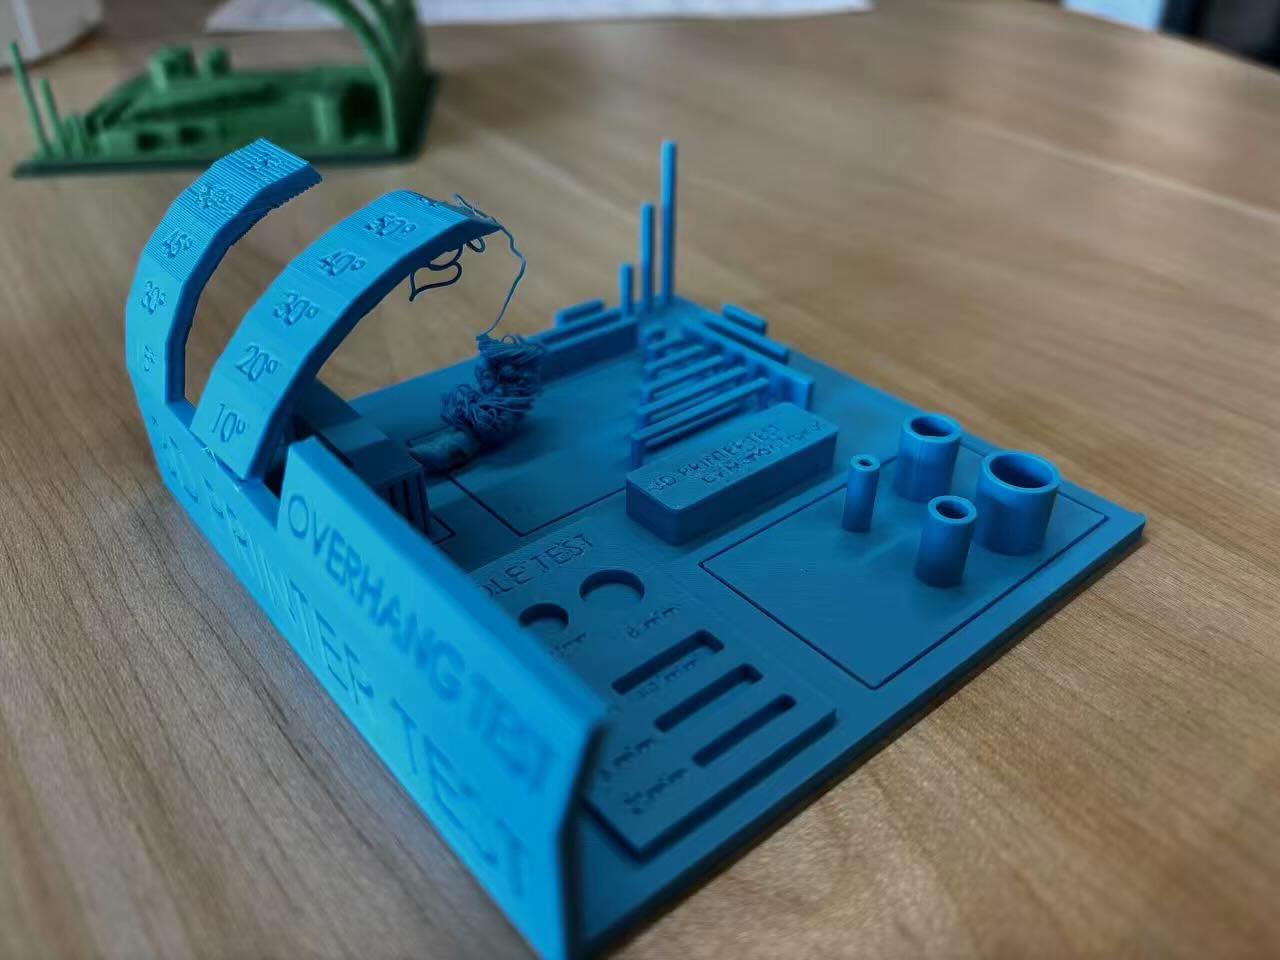
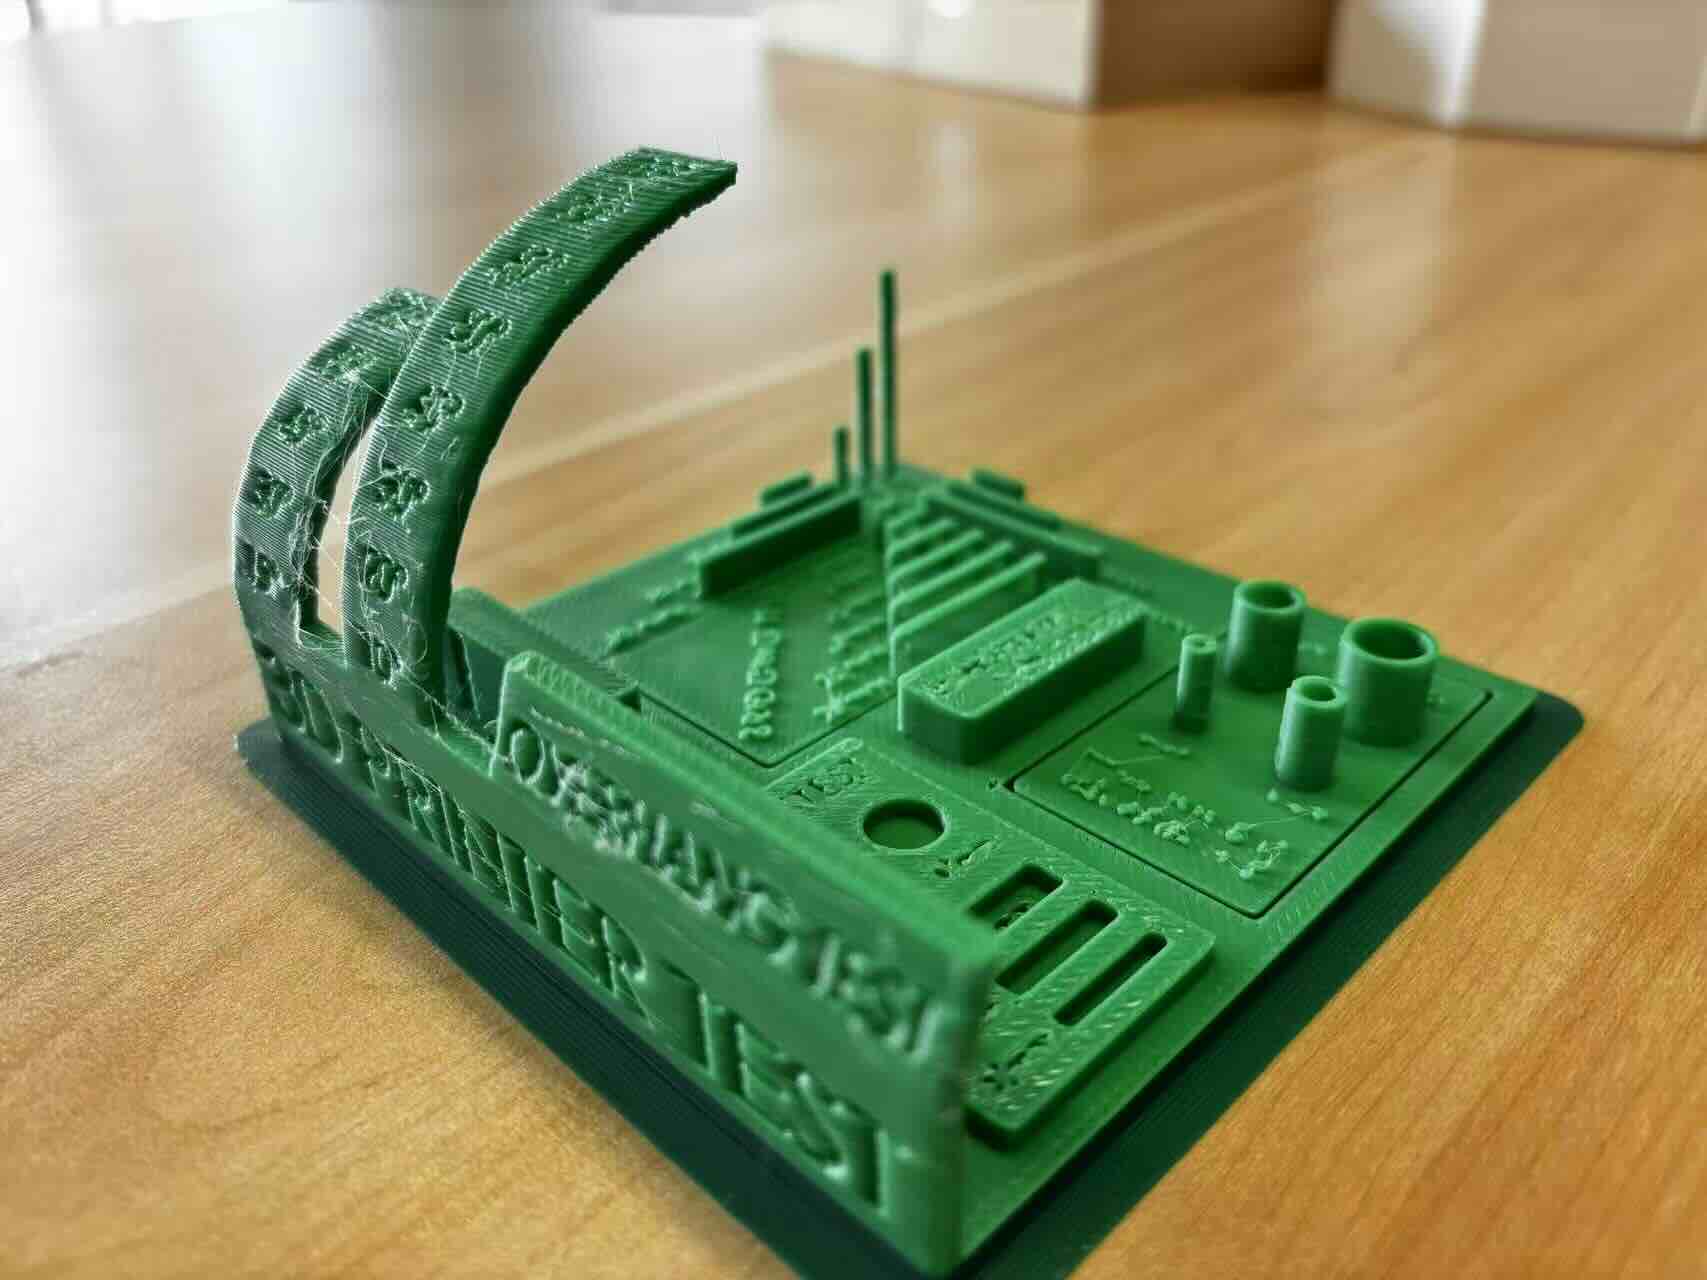

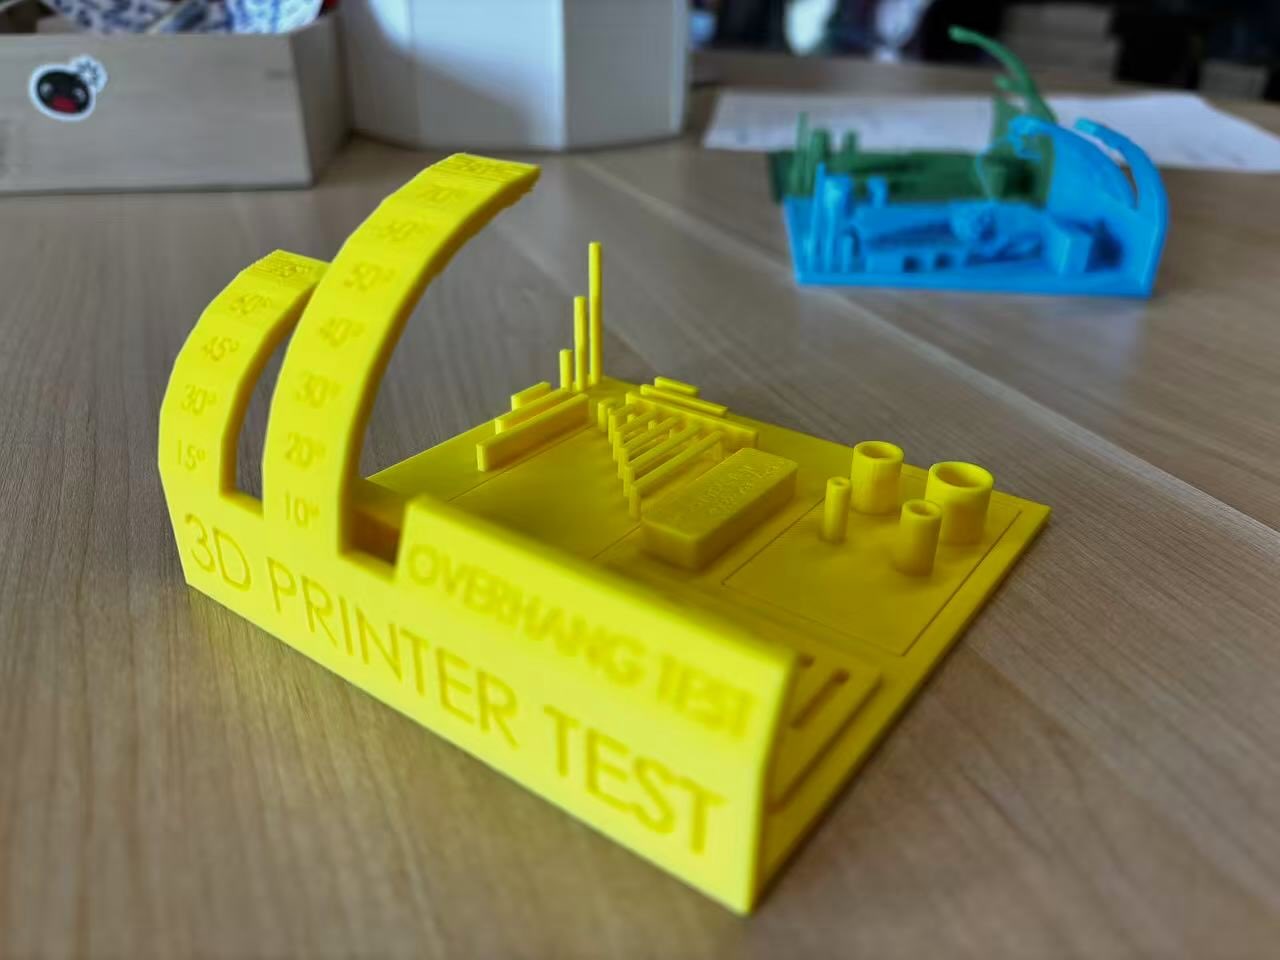
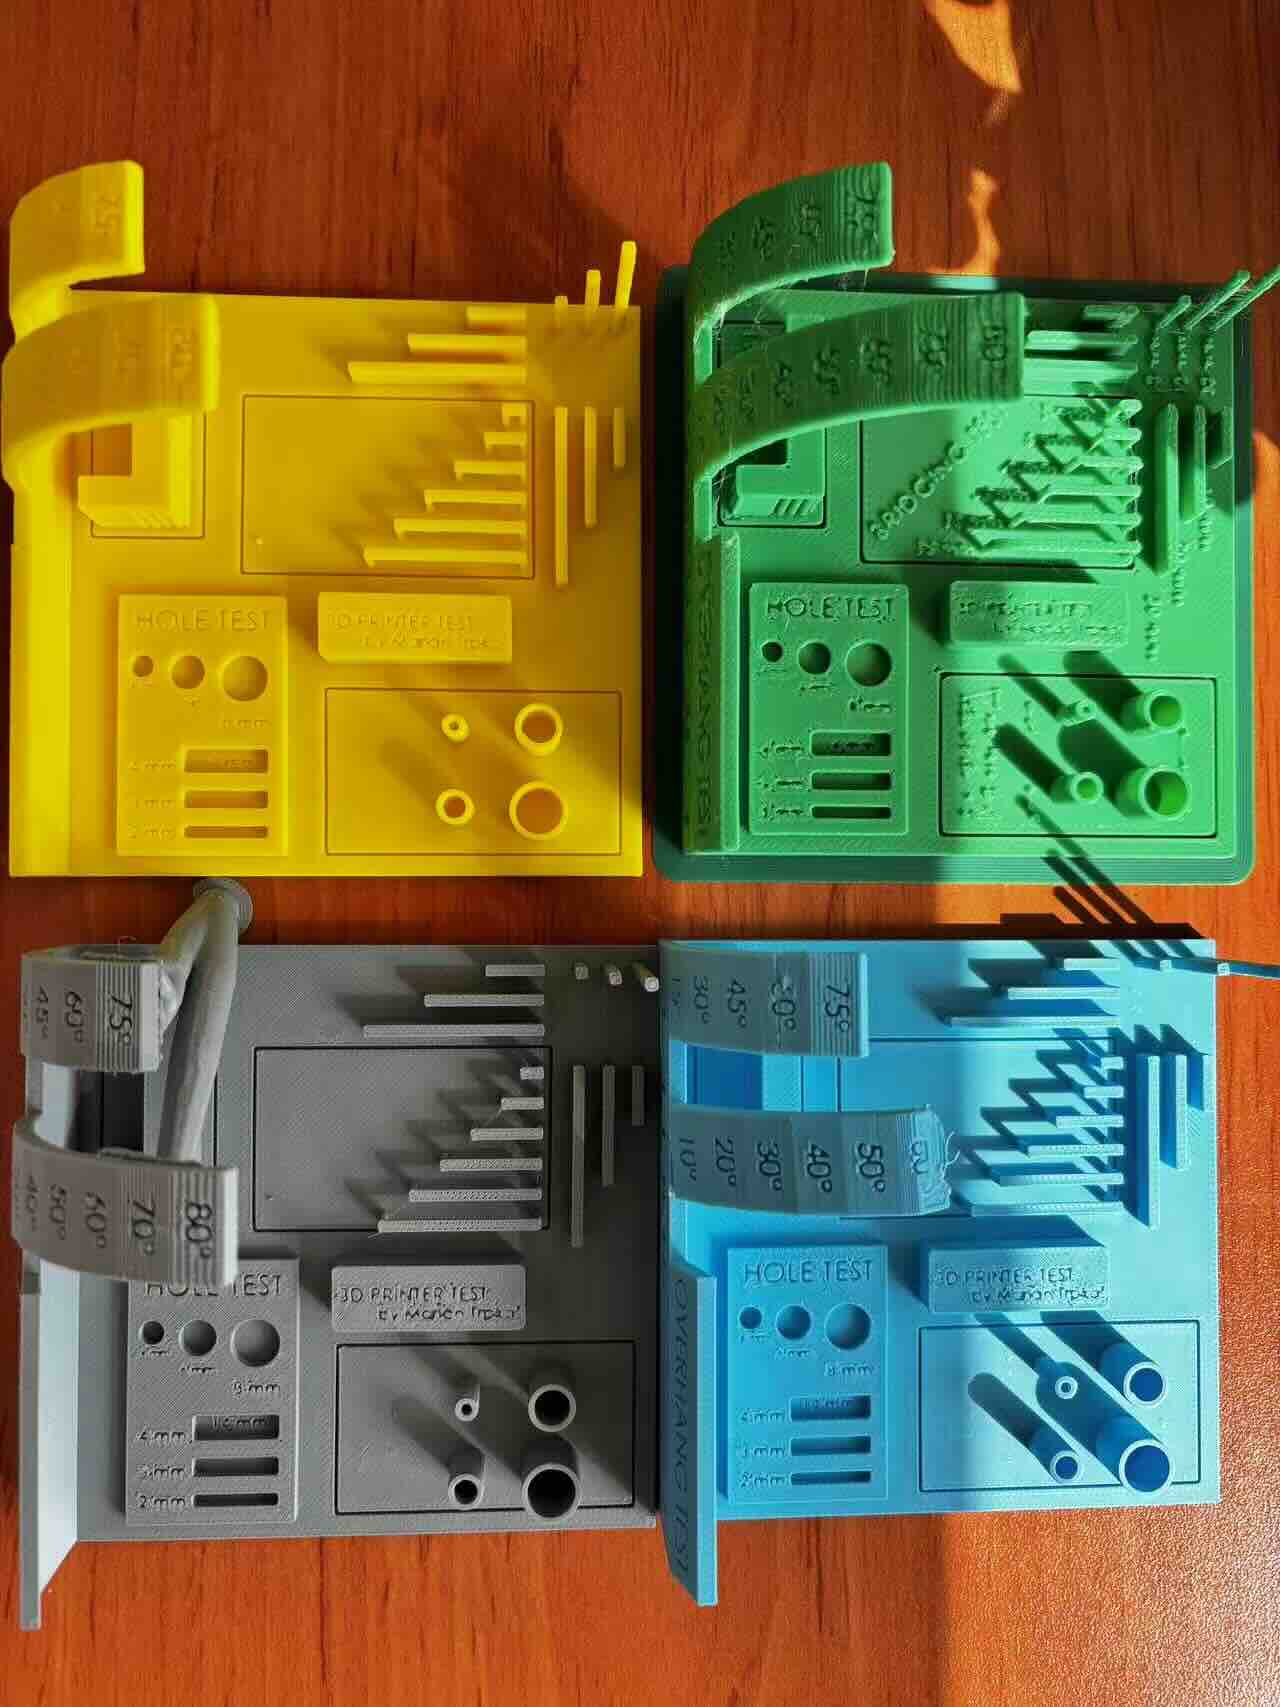
Test Record
Test Summary

Note:When the same model is imported into slicing software, some fine text is automatically cropped in Bamboo Studio, while Creality preserves portions of it.
Individual assignments
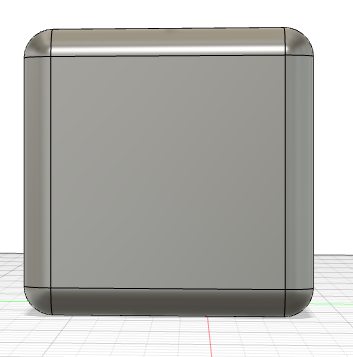
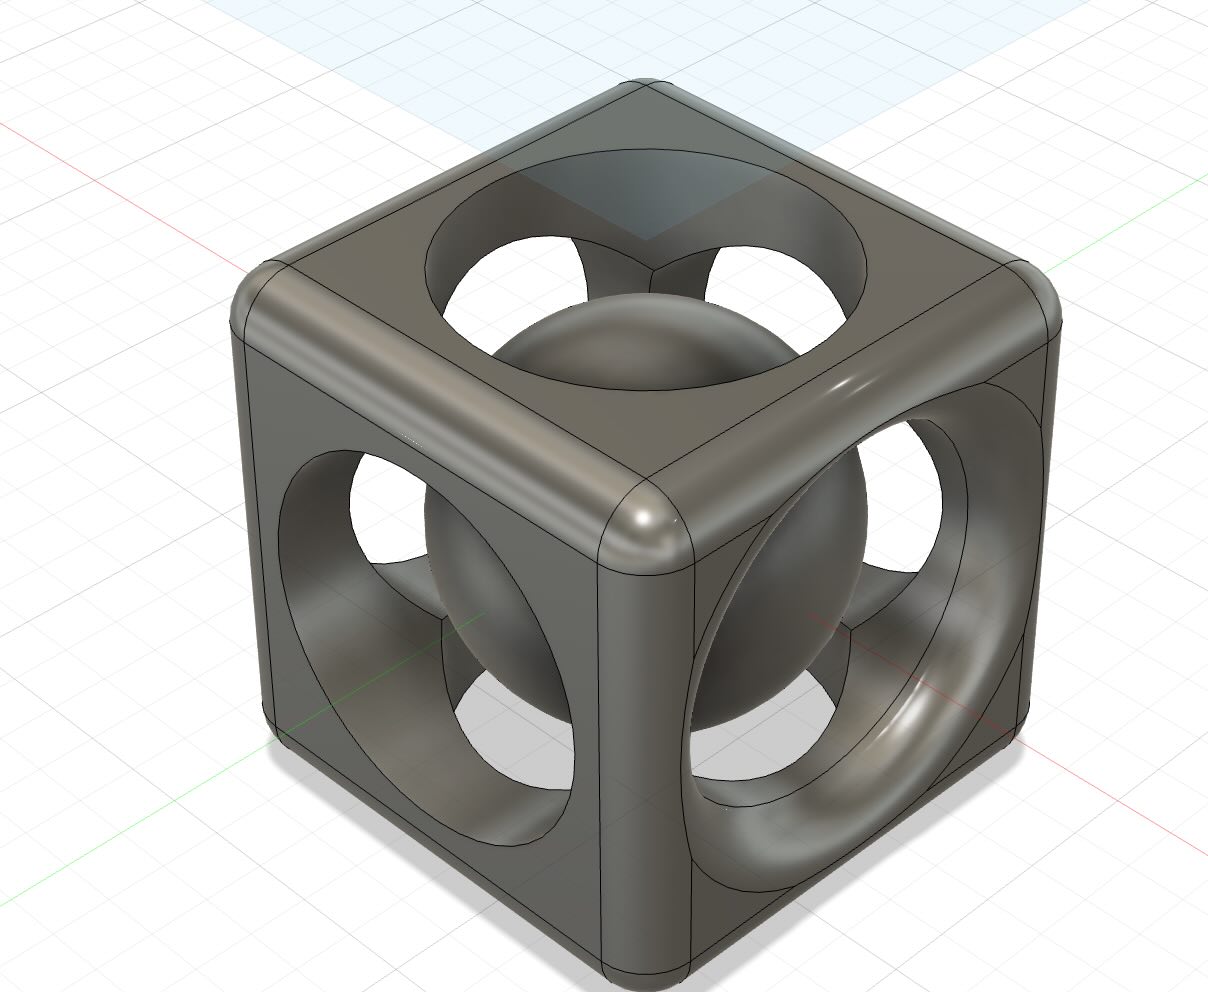
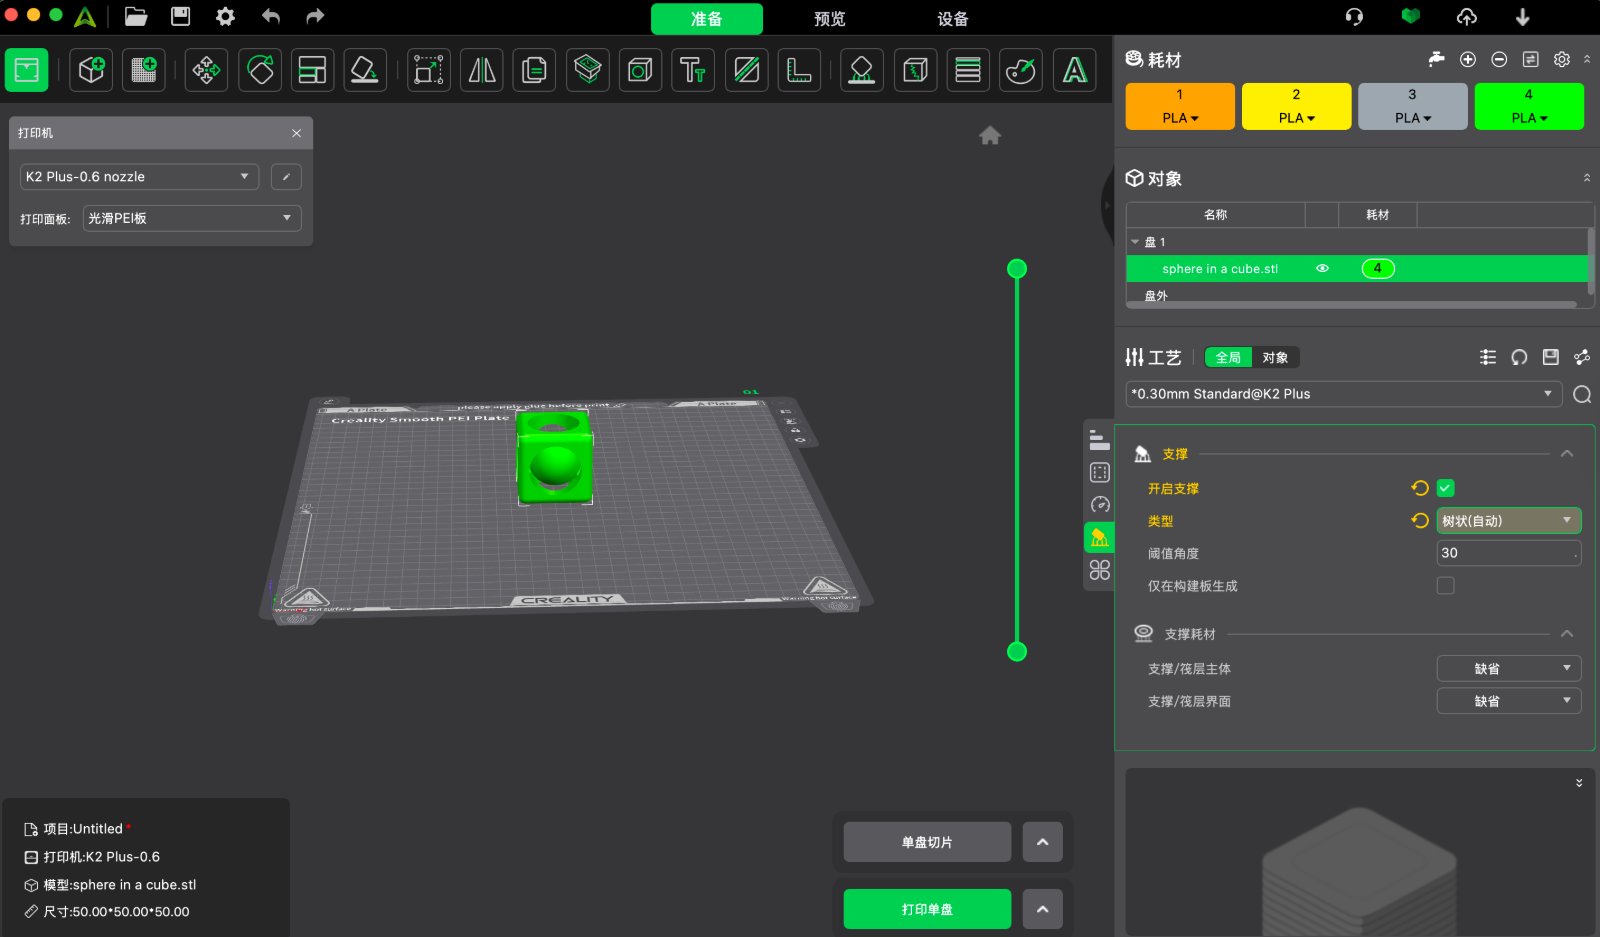
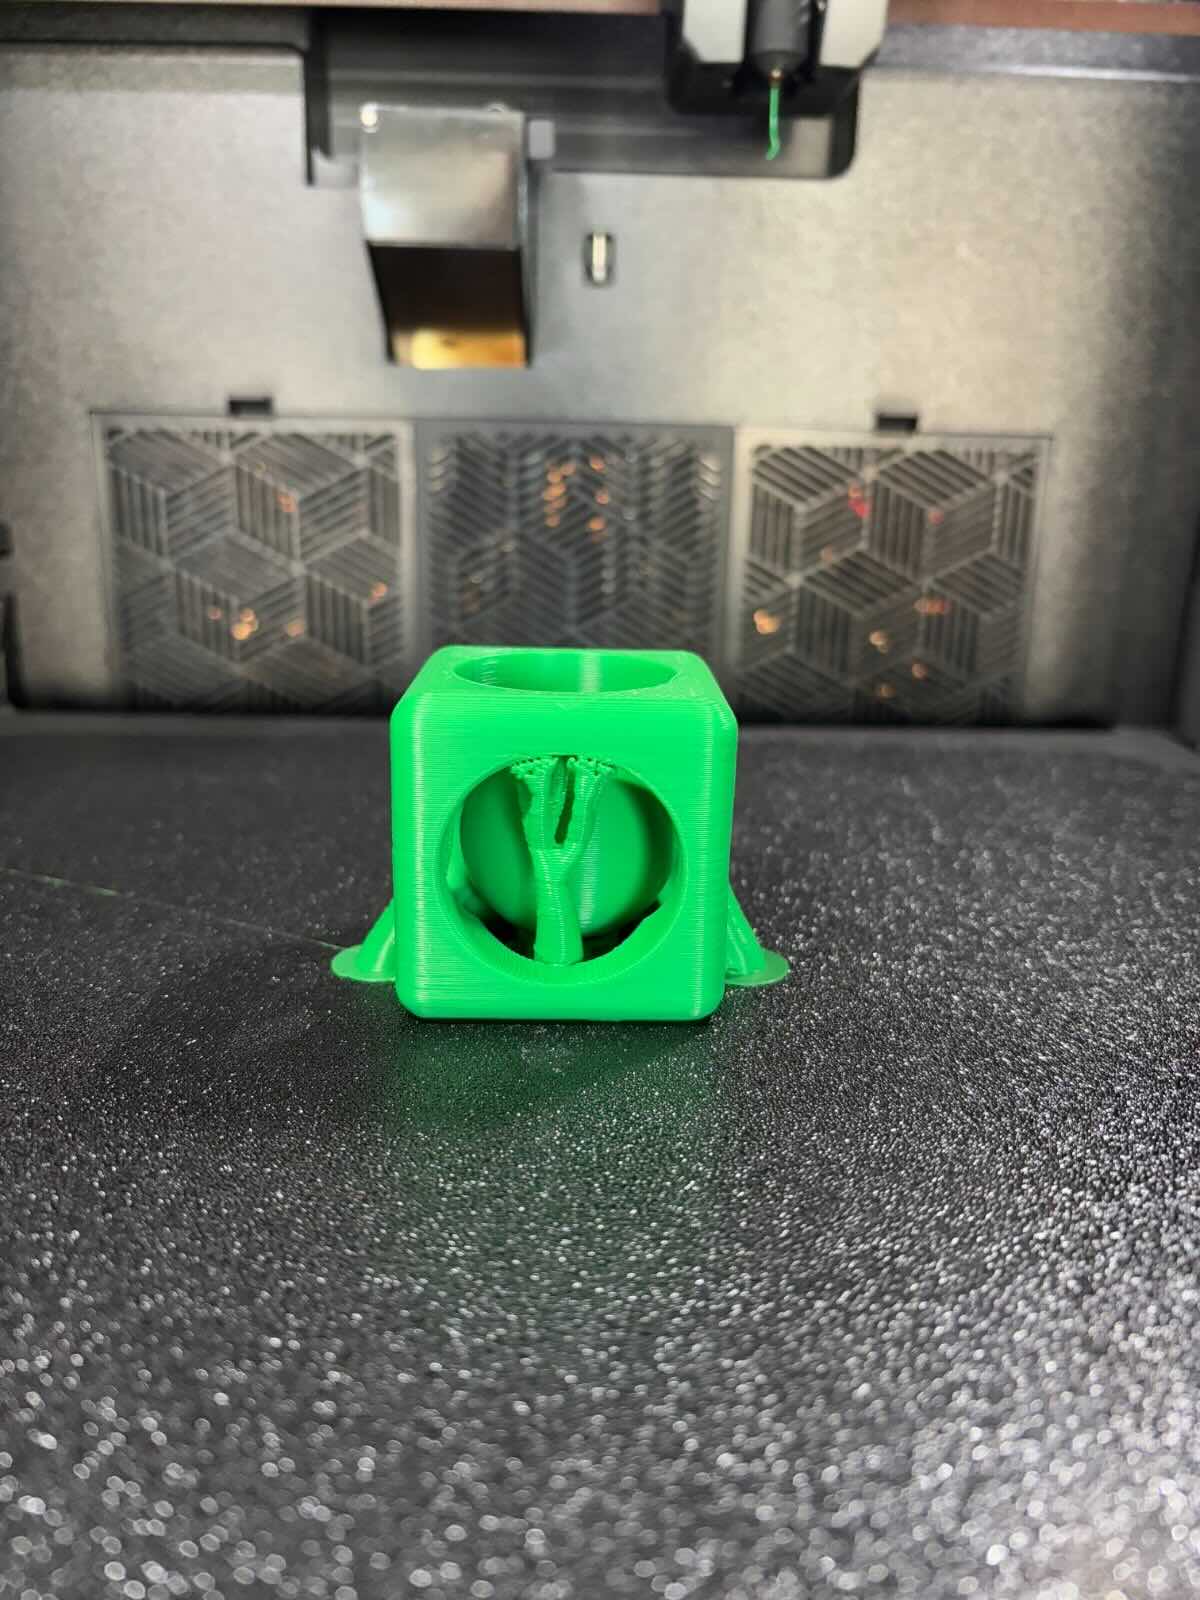
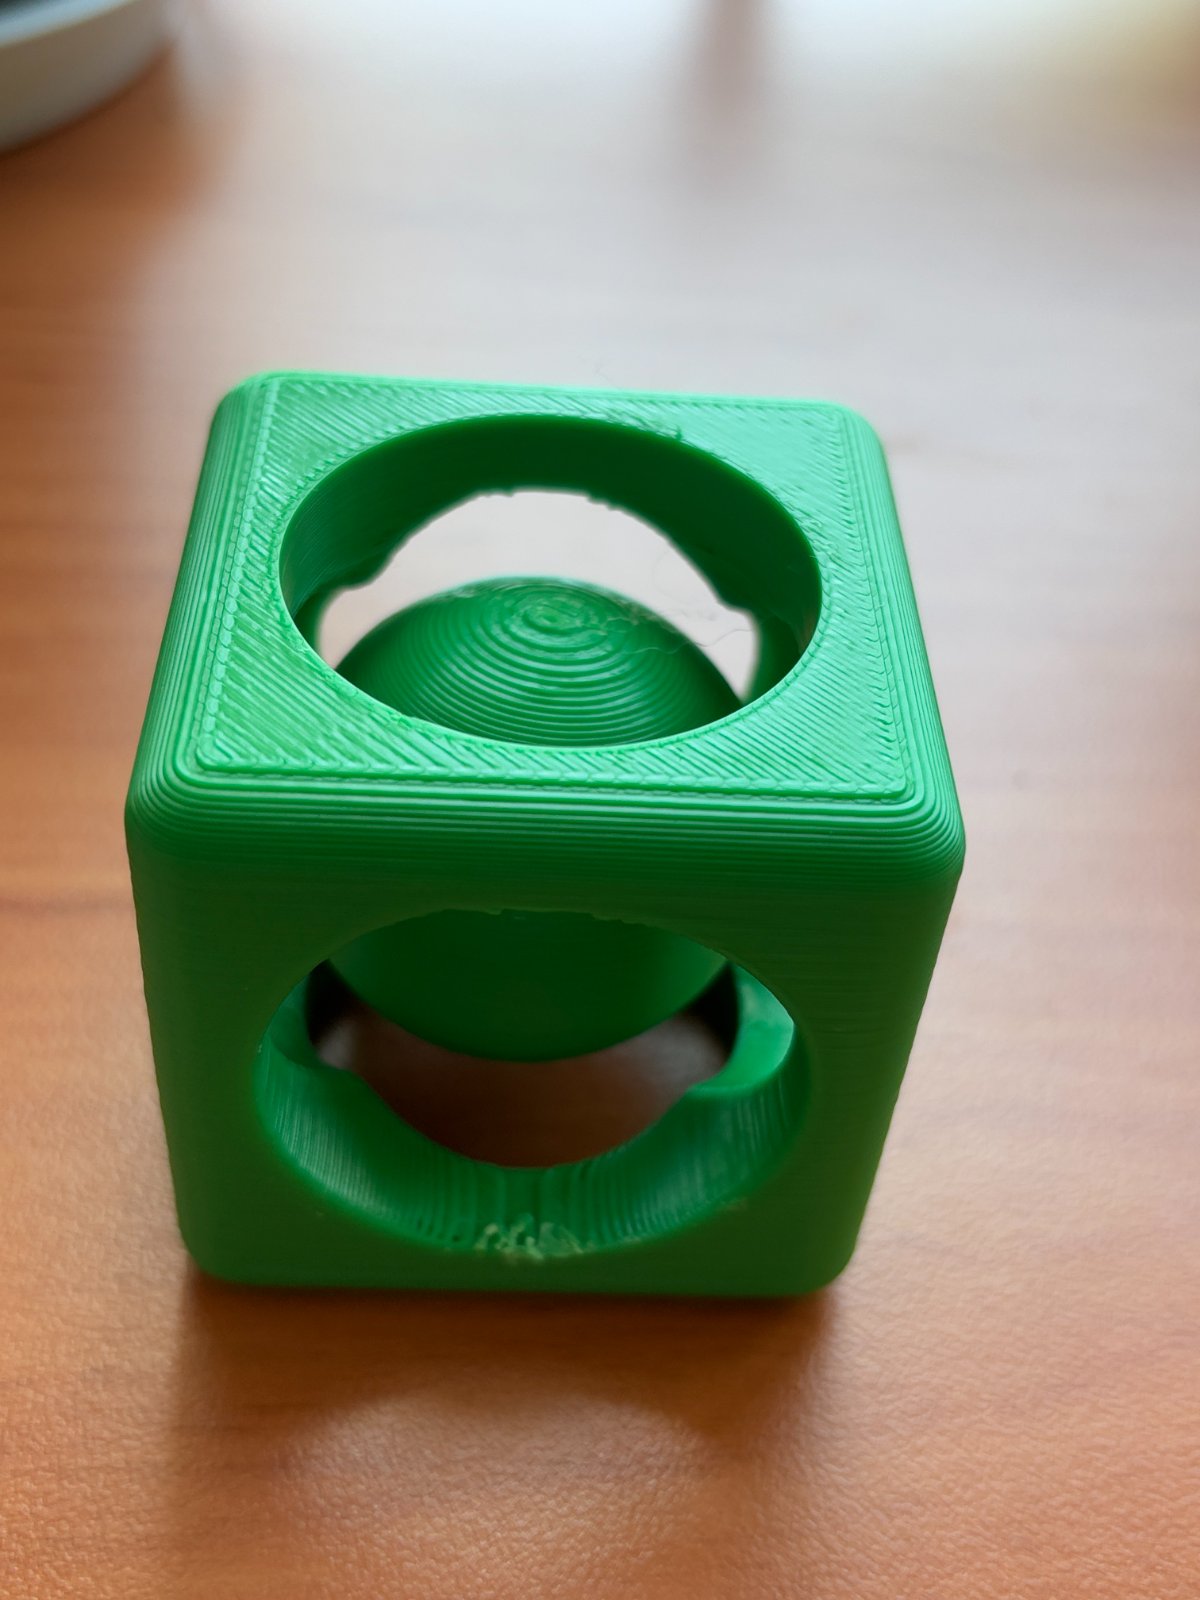
Design and print a small 3D model sphere in a cube that cannot be made through subtractive manufacturing
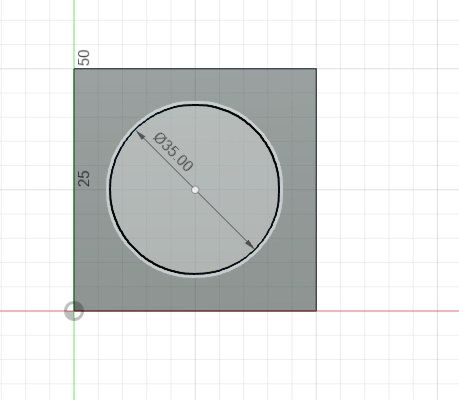
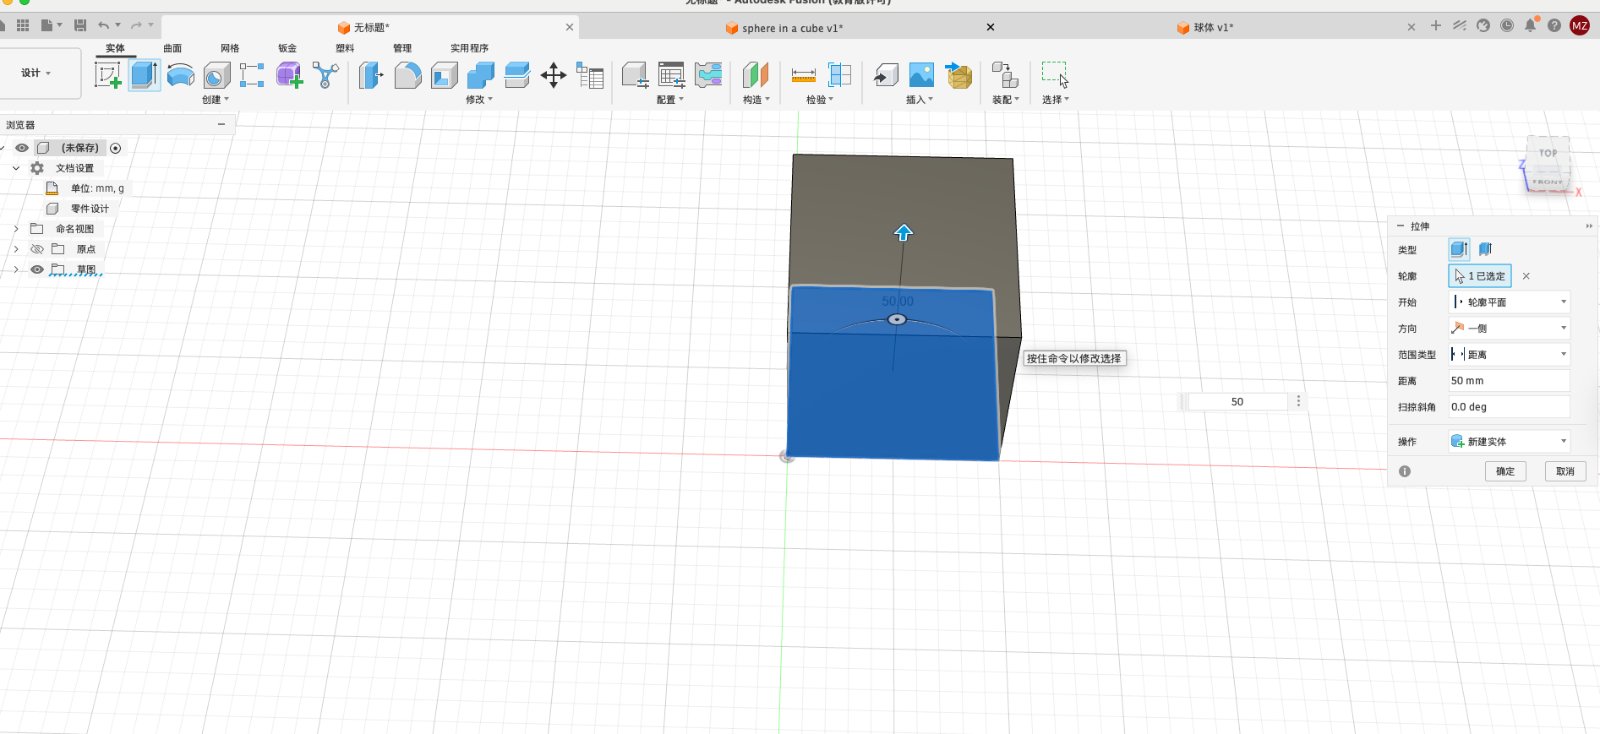
Step 1.Create the basic cube model in the software.
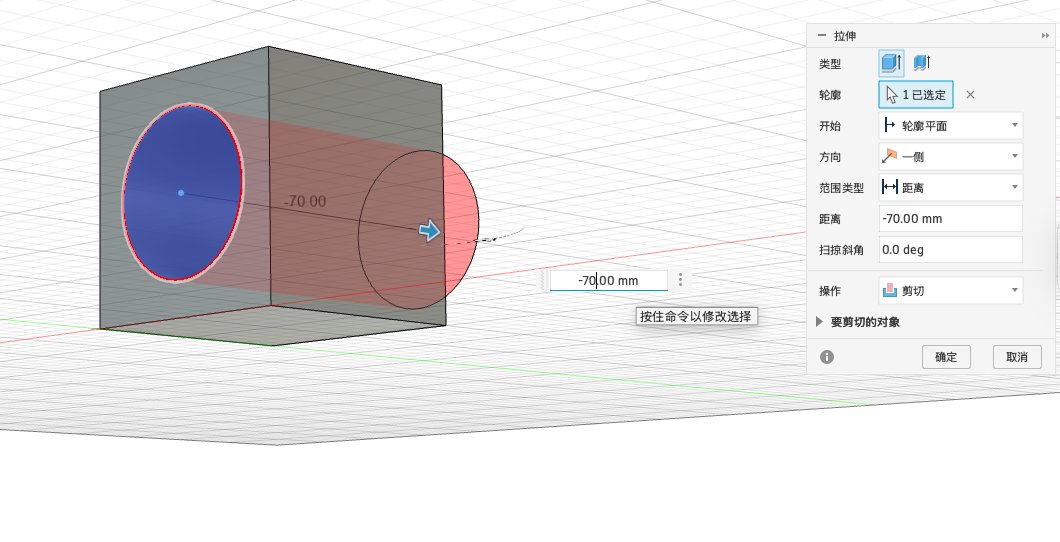
Open Fusion 360 and create a new design, go to create a sketch, set center at origin(0,0,0), click on the square button to create a 50mm by 50mm rectangle.Then extude the rectangle to a 50mm height cube.
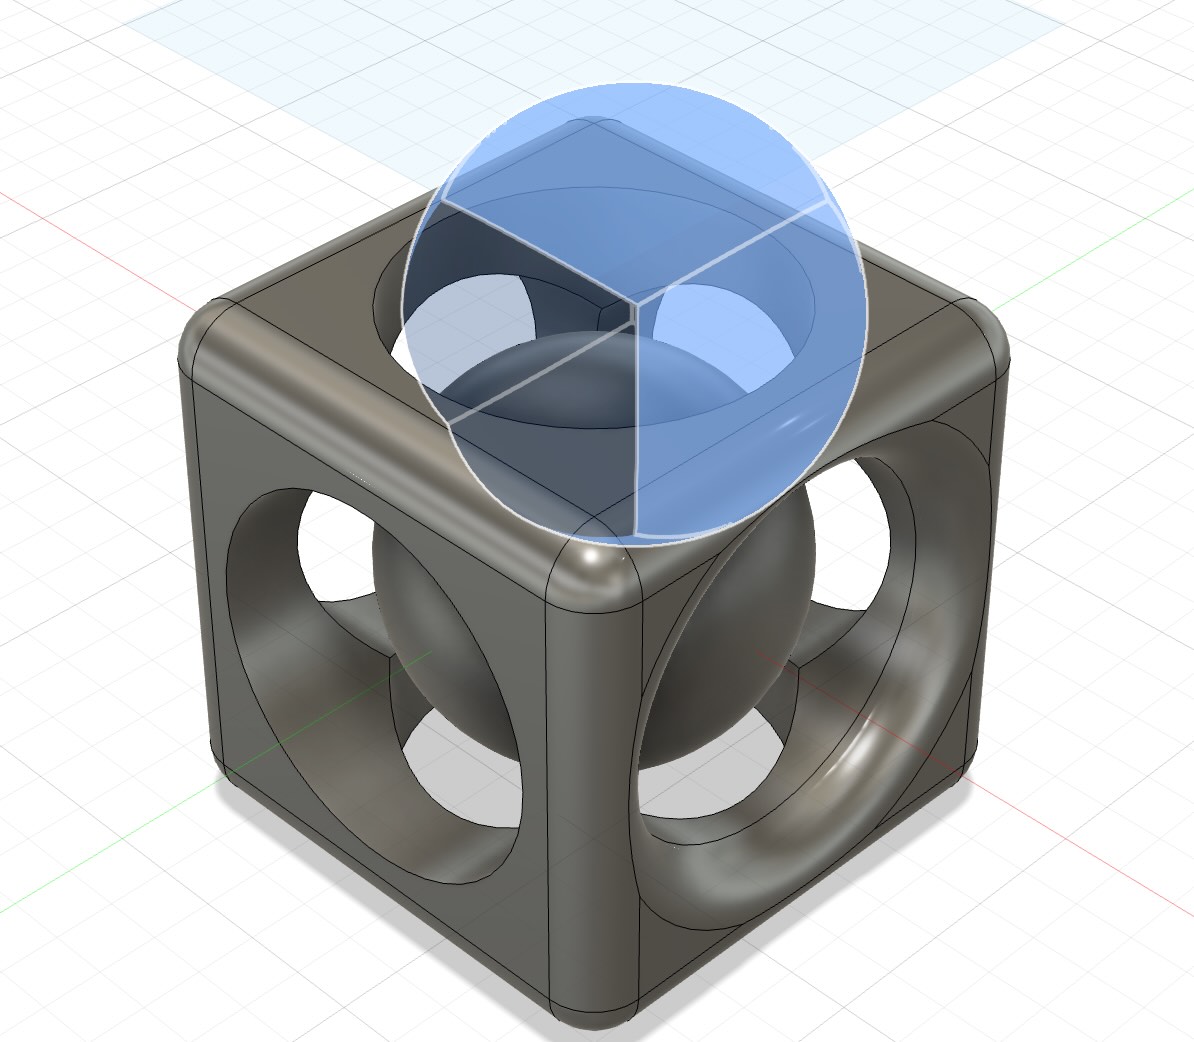
Step 2.Create 6 large round holes on the cube.
Select the circle button to create a circle to 35mm diameters.Set operation to Cut, Then use the extrude tool to extrude the circle to a 70mm diameter hole, then confirm.Repeat the same steps to create the other hole. Select fillet button under modify tool, then select the edge of the cube, and set the radius to 5mm, then confirm,the edge of the cube will be rounded.
Step 3.Create the sphere in the cube.
Set center at origin(0,0,0), create sphere, diameter to 37mm,then confirm. Later move the sphere to the center of the cube by using the shotcut key M.
Step 4.Export the model to STL file.
Select the file menu, then select export, then select STL file, then confirm. The STL file will be exported to the desktop.Here is the original file.
Step 5.Print the model on the 3D printer.
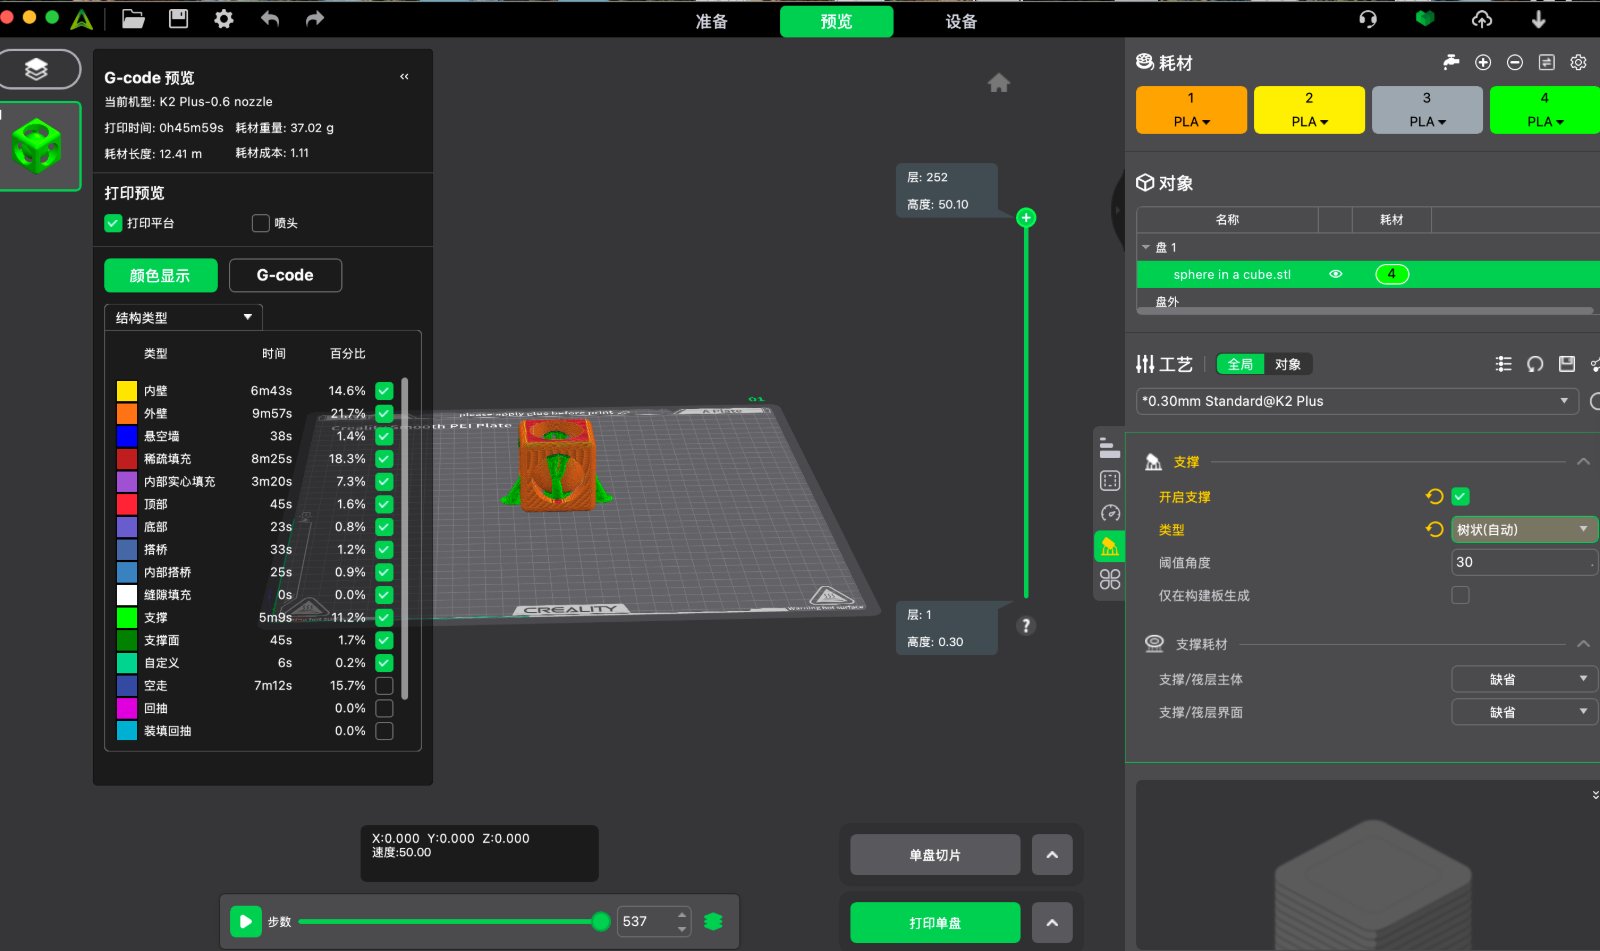
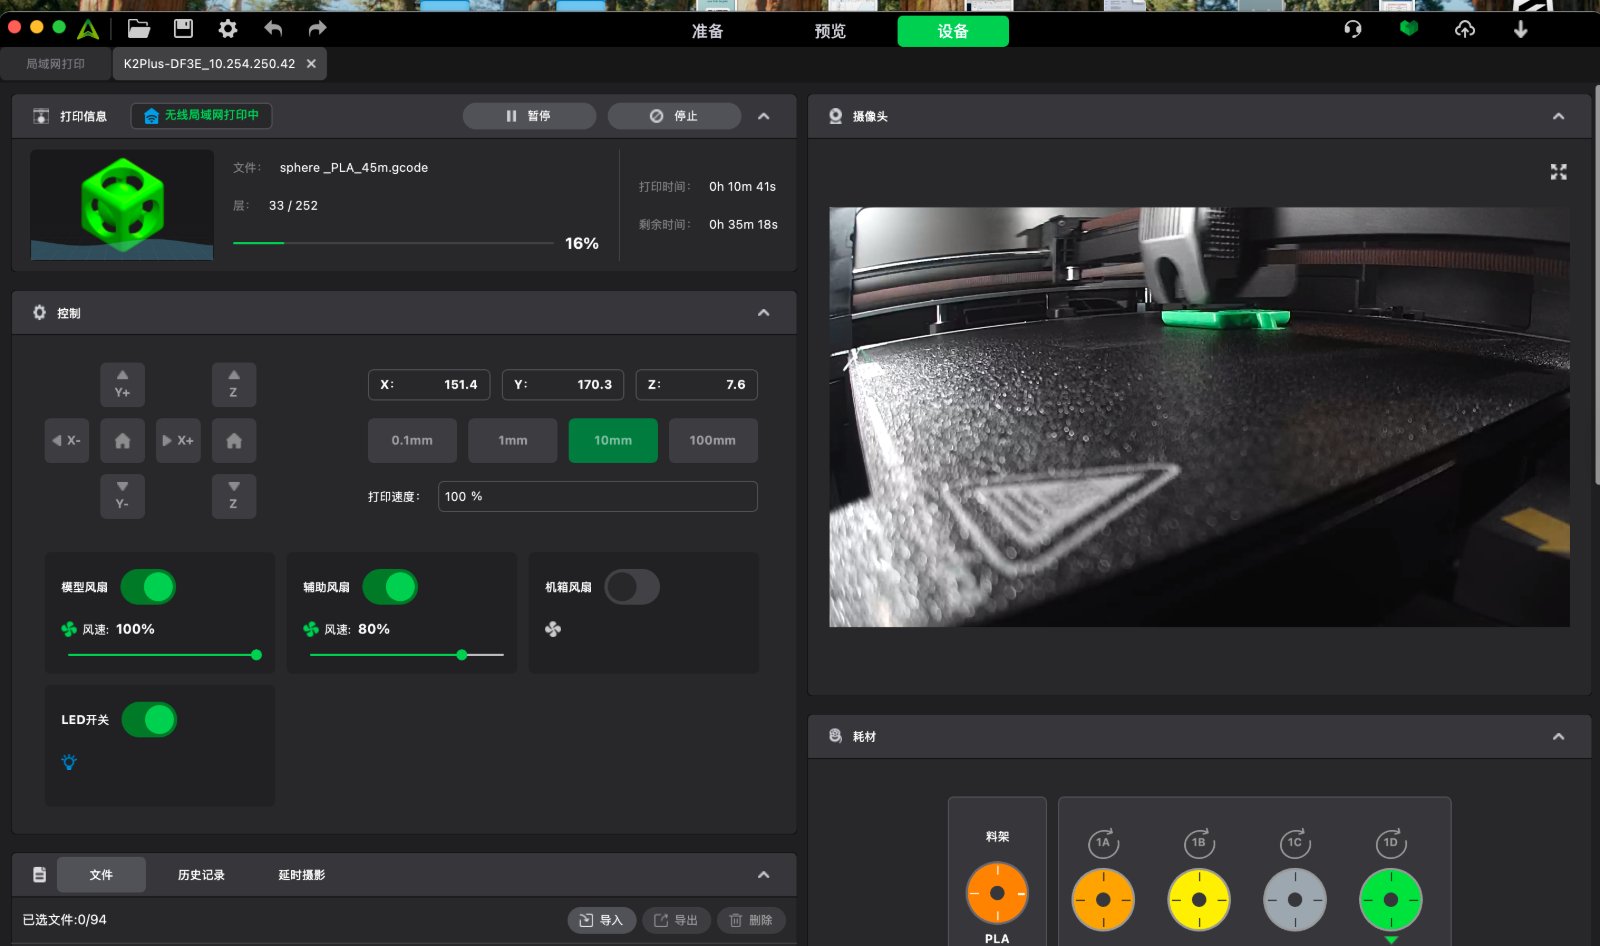
Go to Creality Print, upload the STL file, set the parameters especially adding the support material, then click on the print button. The model will be printed on the 3D printer.
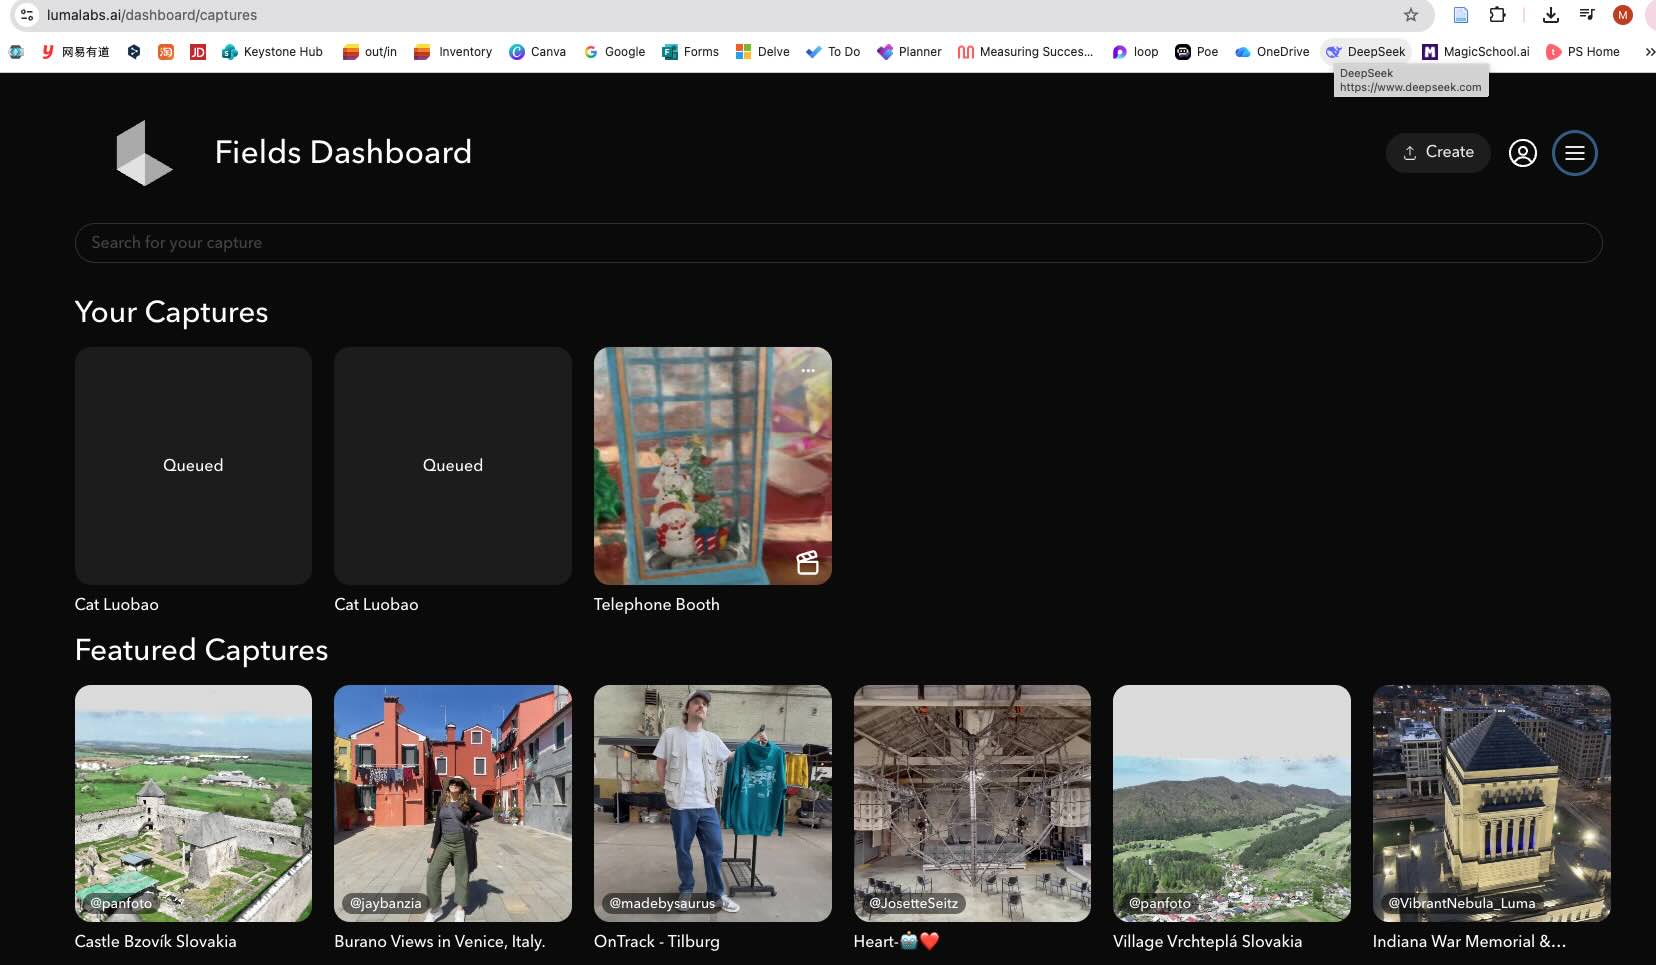
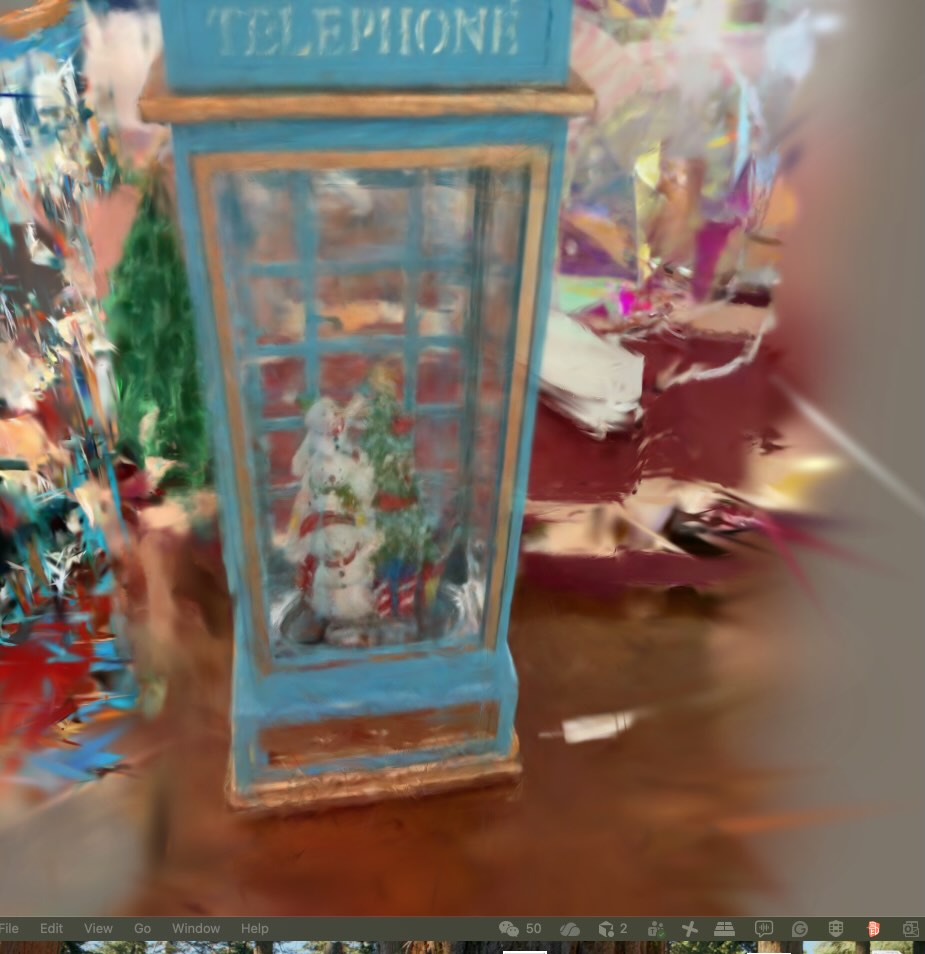
3D Scanning Process
Lumalabs.ai
— I choose a telehpne booth decoration as the object, after I scanning and upload the video of 360 degree,it takes long time to generate the 3D video, and the quality is not good.I'm not sure if it's related to the Wi-Fi connection, but the 3D model does not look sharp. Maybe the Wi-Fi connection is unstable because I'm using the China location Wi-Fi to scan the object, and the scanning process is very slow. Or maybe objects made of transparent material are not good for scanning.
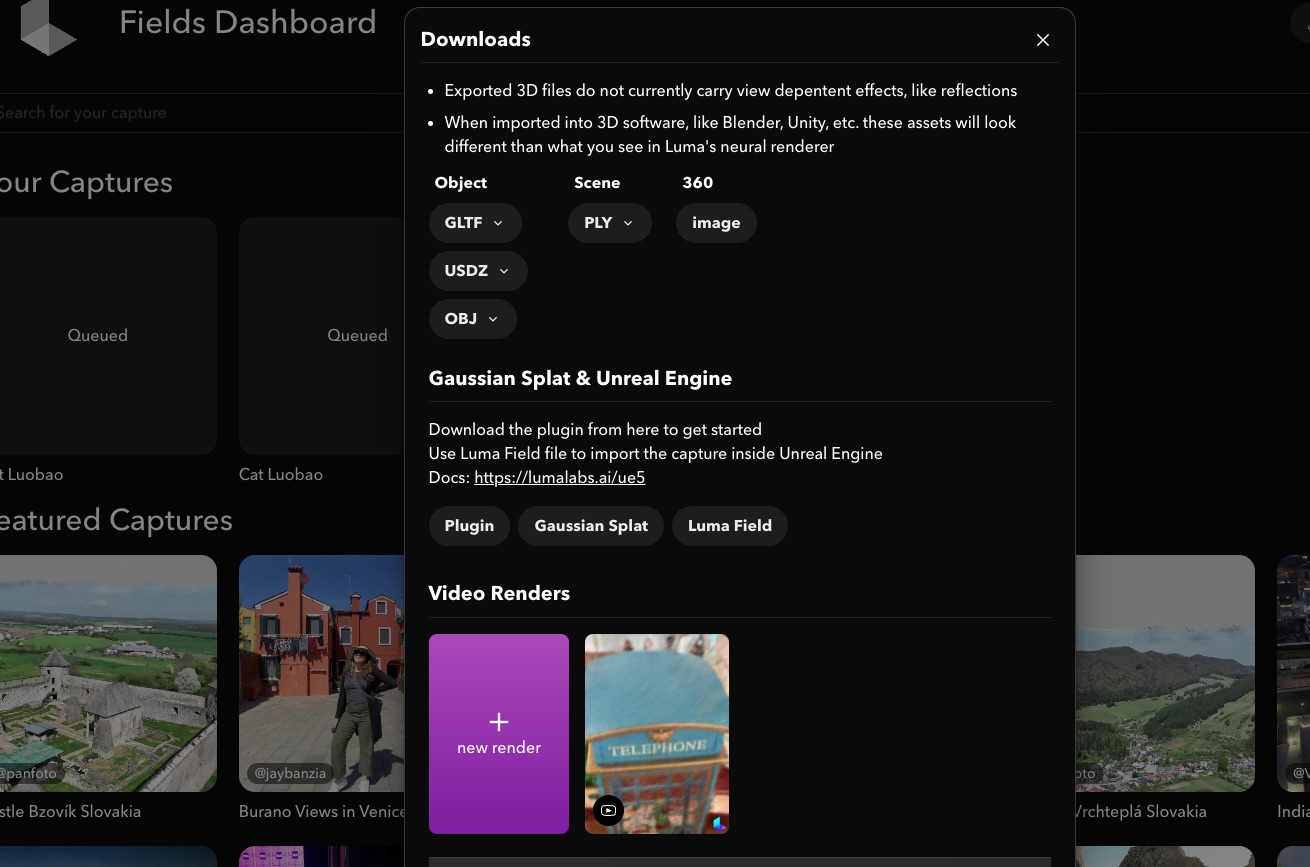
After it generated you can export 3D file and import it to the 3D printer.
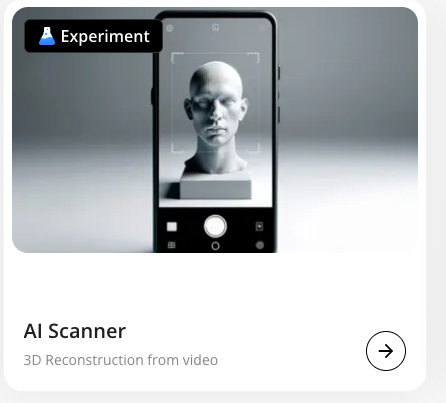
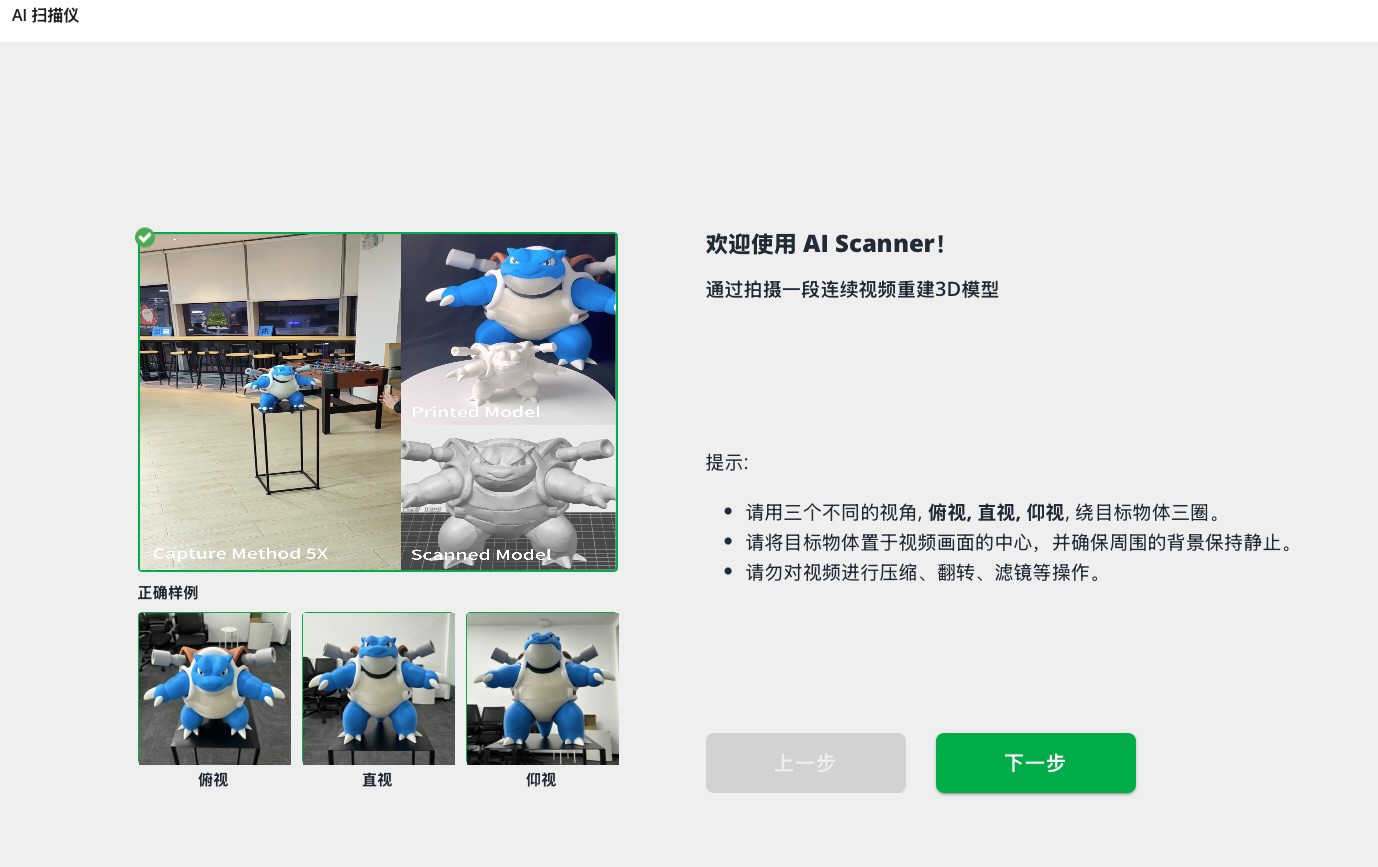
Makerworld.com-AI Scanner
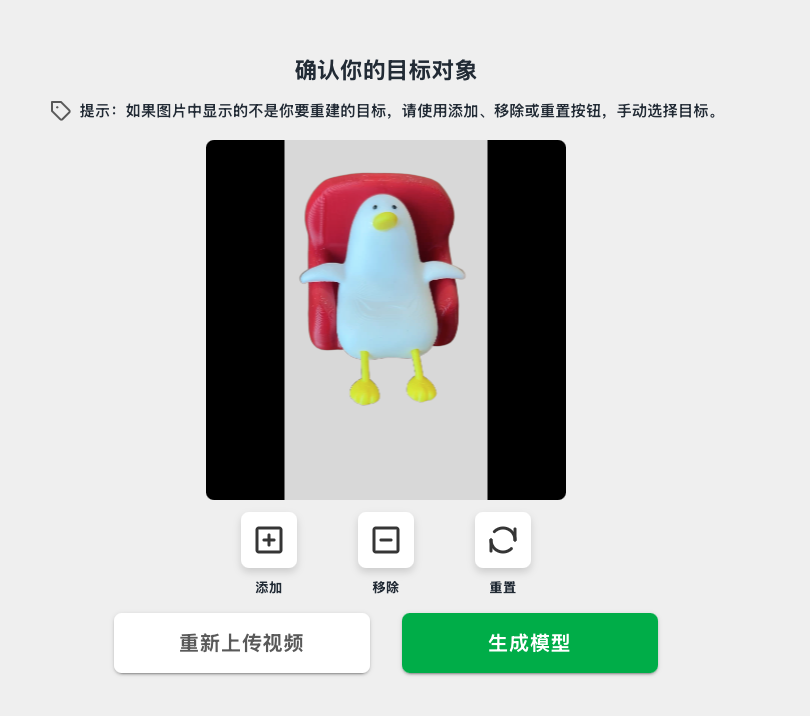
I select another website Makerworld and upload the video of 360 degree, this time I change another object to scan, and the scan process is much faster, and the quality is much better.
After it generated you can export 3D file and import it to the 3D printer, or using the Bambu Studio to edit the 3D file and print it directly.

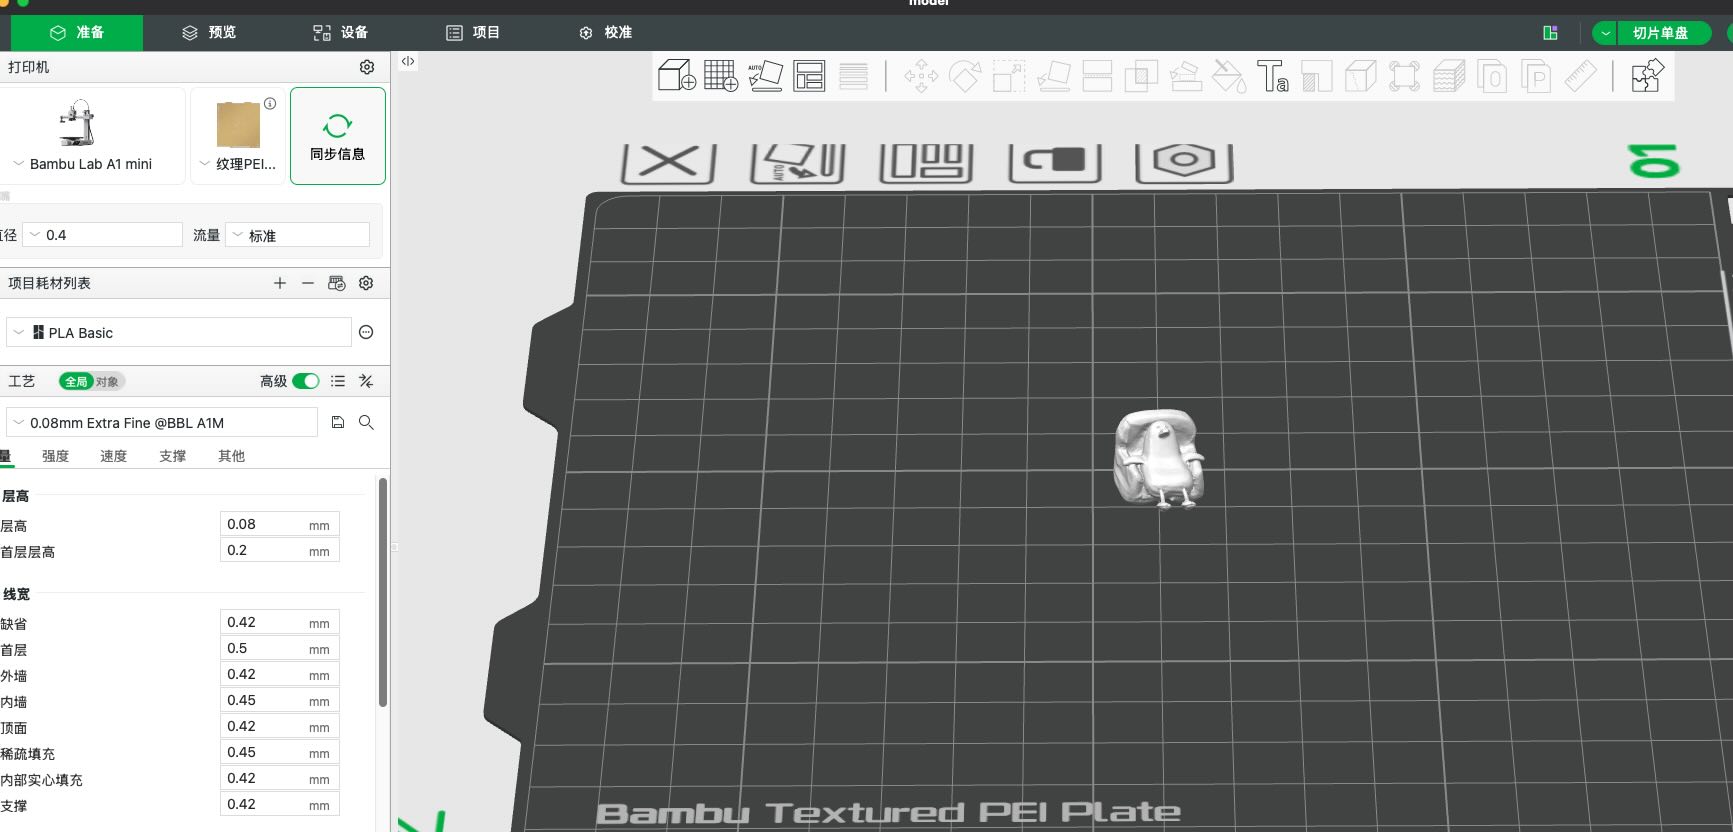
Source file
ai_scanner_stl.stl — AI scanner design (STL export).