Week 1: Project Management
Missions of the Week1 Assignments
- Sign and uplodaded Student Agrement
- Work through a Git Tutorial
- Create a basic HTML page for my assignment
- Upload the page to your GitLab repository
- Submit the URL of your page to the assignment link
- As a page with sketches and decritions of my final project
Student Agreement:
I agree to abide by the rules of the Fab Academy and to conduct my work in a professional manner. I understand that I am responsible for my own learning and that I will be evaluated based on my participation and performance in the class.
View the Student Agreement · Markdown source
Research and Sketches
This week I worked on defining my final project idea and started to getting used to the documentation process.
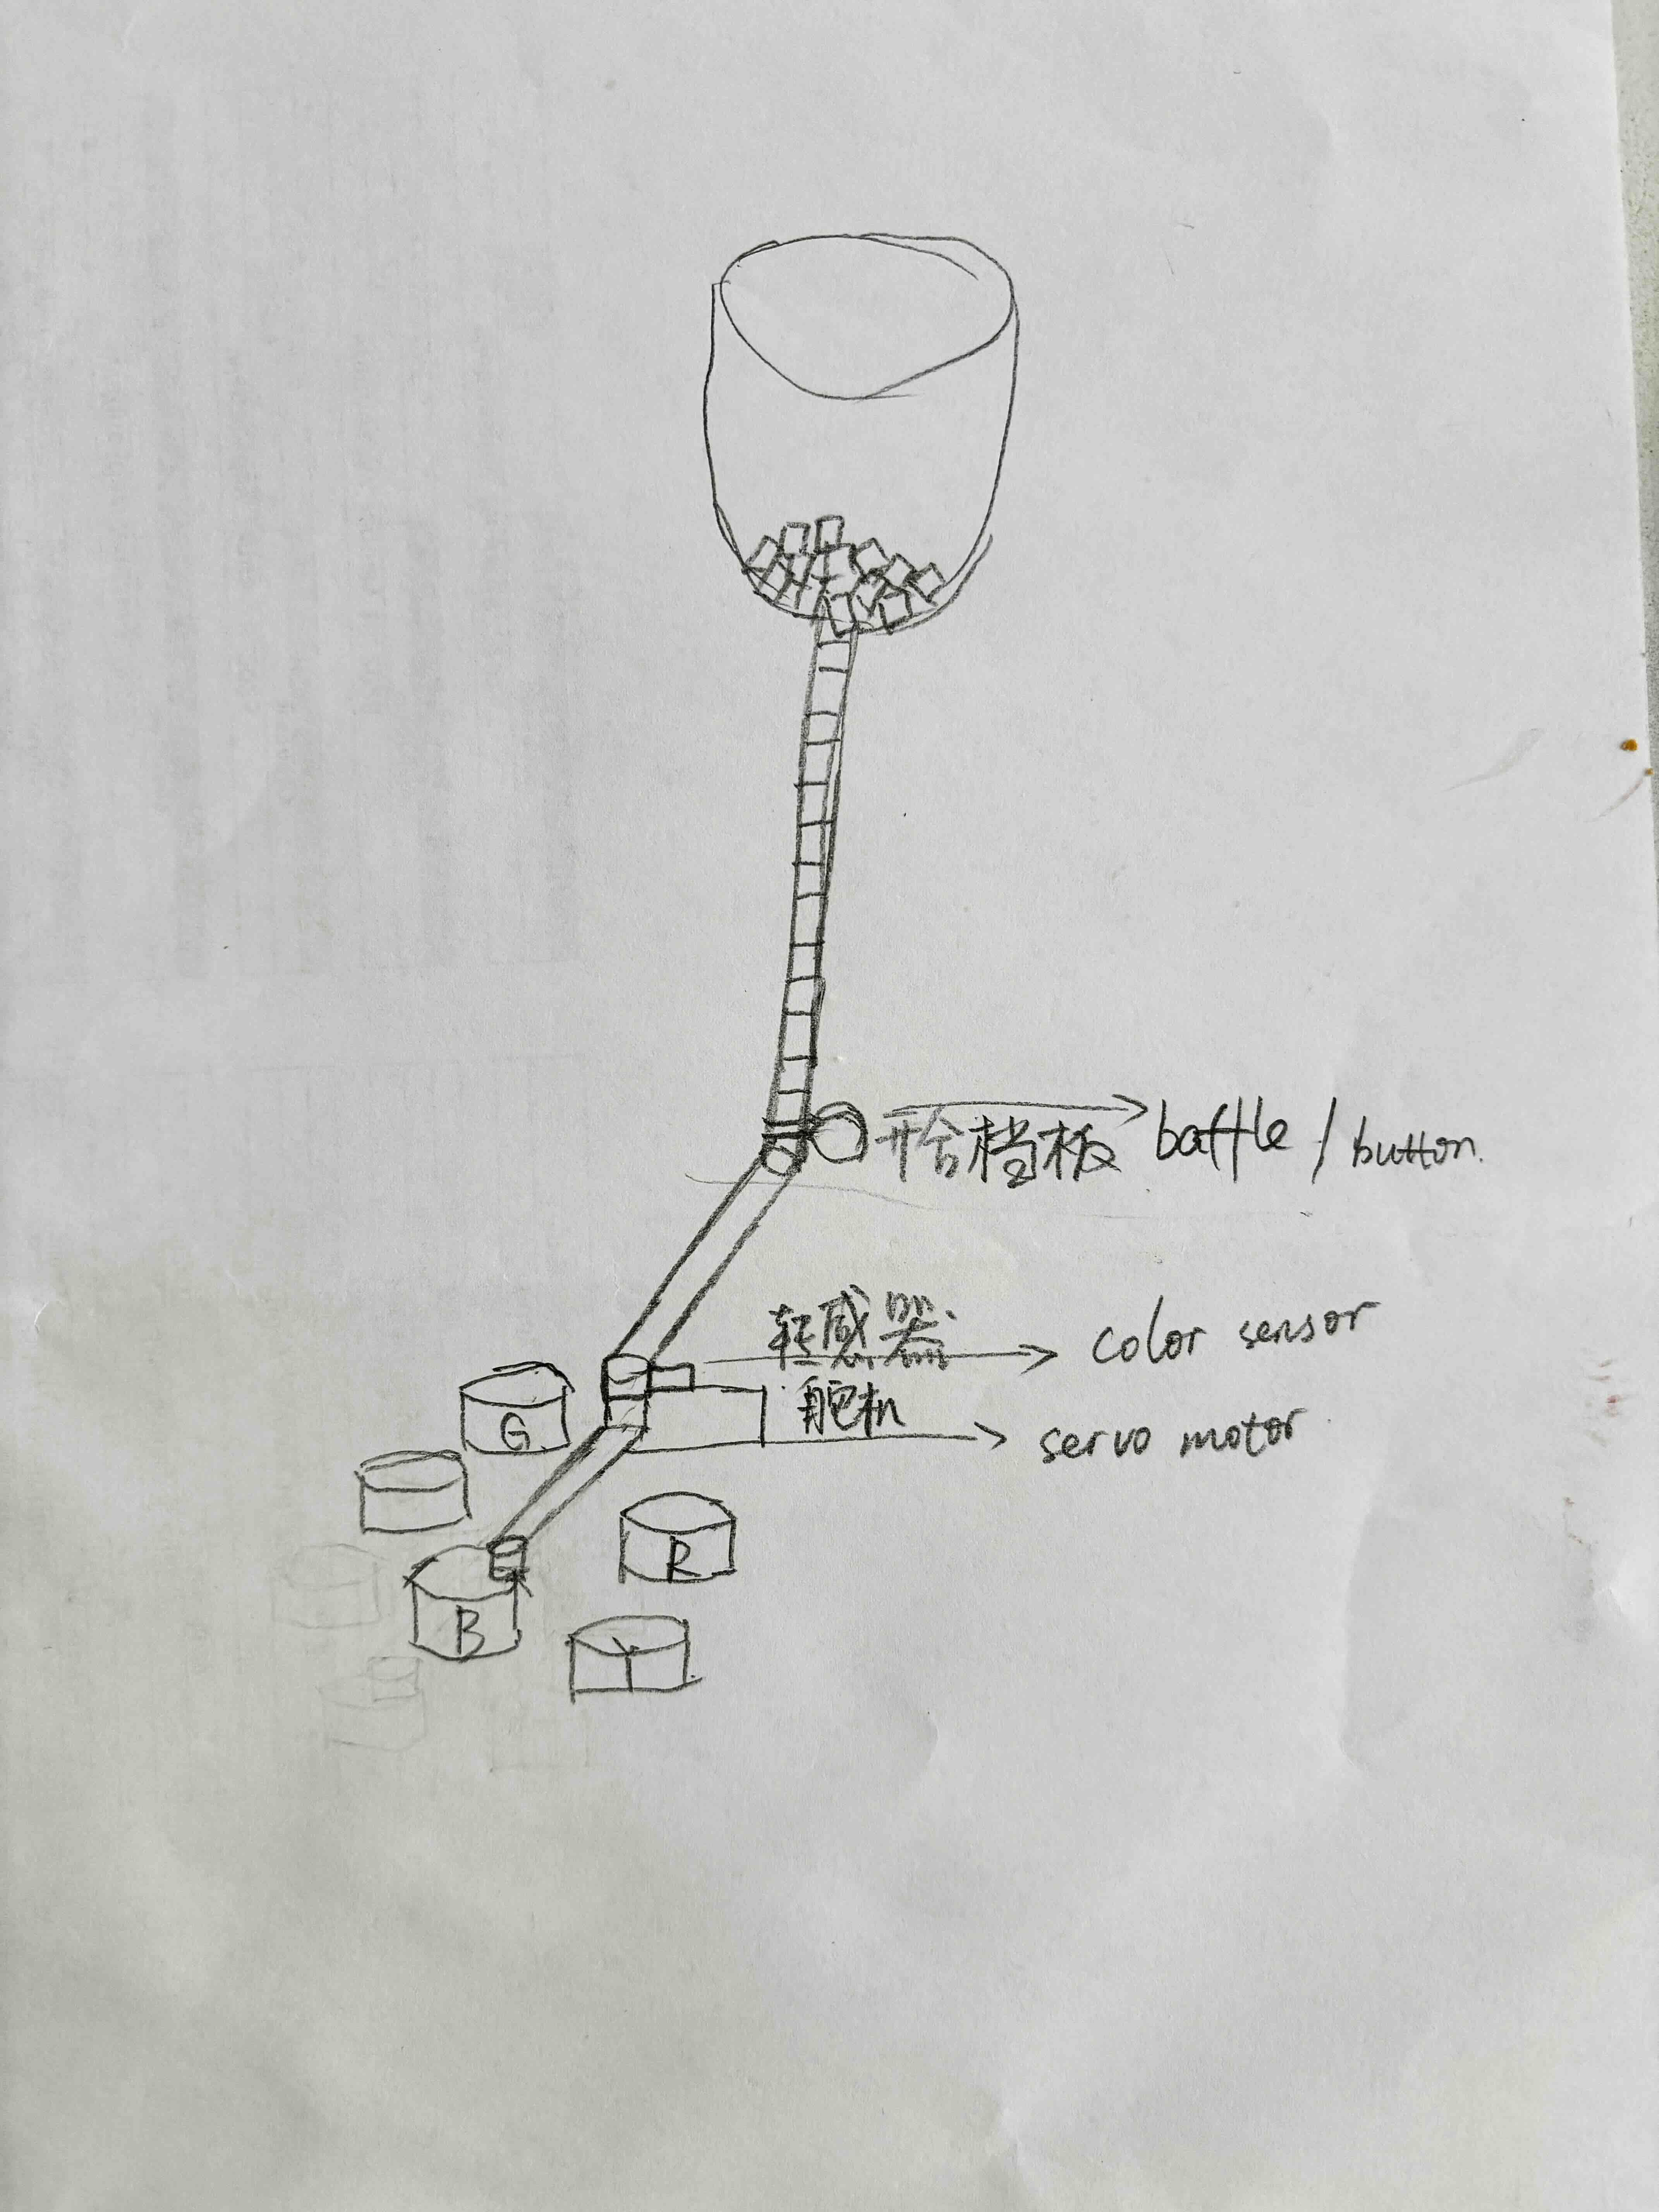
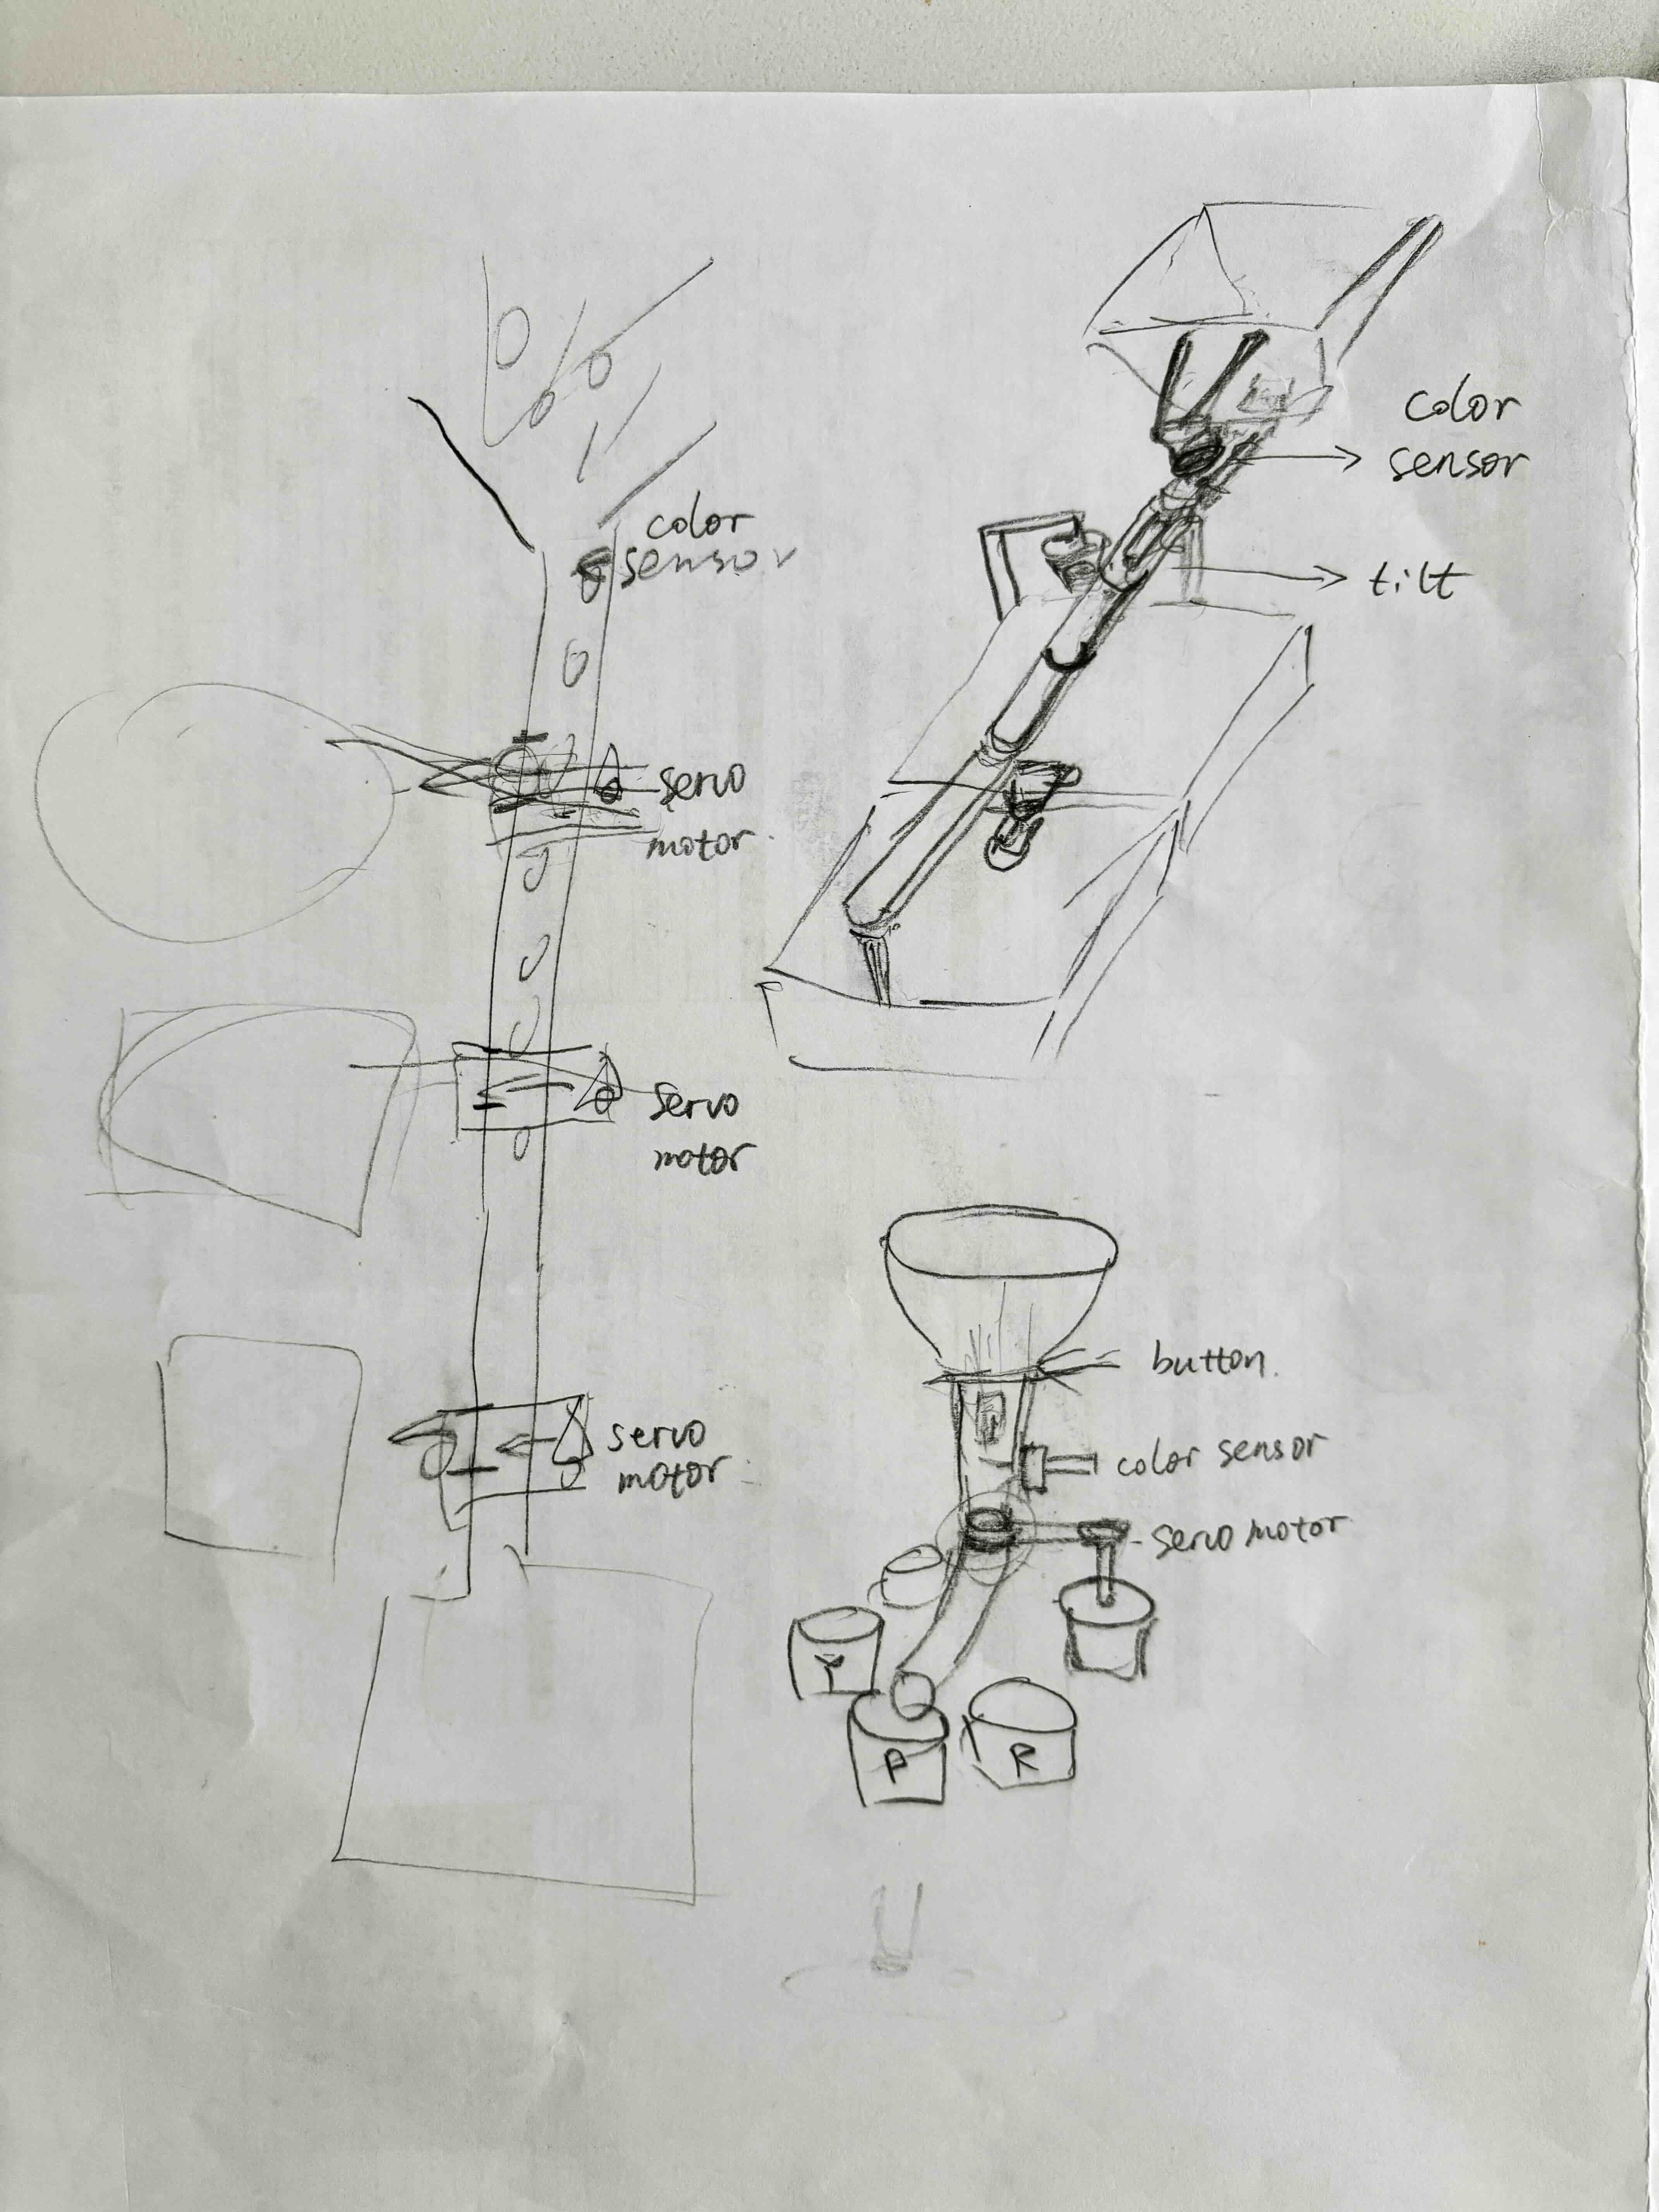
Over the weekend, I accompanied my daughter as she played with Bead Art at the mall. She accidentally mixed all the colors together, making them extremely difficult to separate. Afterward, I researched online and found that many people enjoy Perler Bead Art, yet there currently isn't a small mechanical device available to sort the colors. So, I decided to try making a Perler Bead color sorter to help more players efficiently and quickly sort their beads.
Git Repository Setup & Version Control
What is Git?
Git is version-control software. It tracks every change in a project folder (a repository or repo), lets you return to older versions, and supports teamwork without overwriting each other's work.
Simple example: edit a file → save → git commit → Git records exactly what changed.
Fab Academy uses GitLab (gitlab.fabcloud.org) to host student documentation. The live website is published from this repository via GitLab Pages.
Workflow overview
- Log in to GitLab (Fablabs SSO)
- Create your student repository (or open the one Fab Academy assigned)
- Generate a Personal Access Token (PAT) — required for HTTPS clone/push from your laptop
- Clone the repo locally
- Edit → commit → push to update the live site
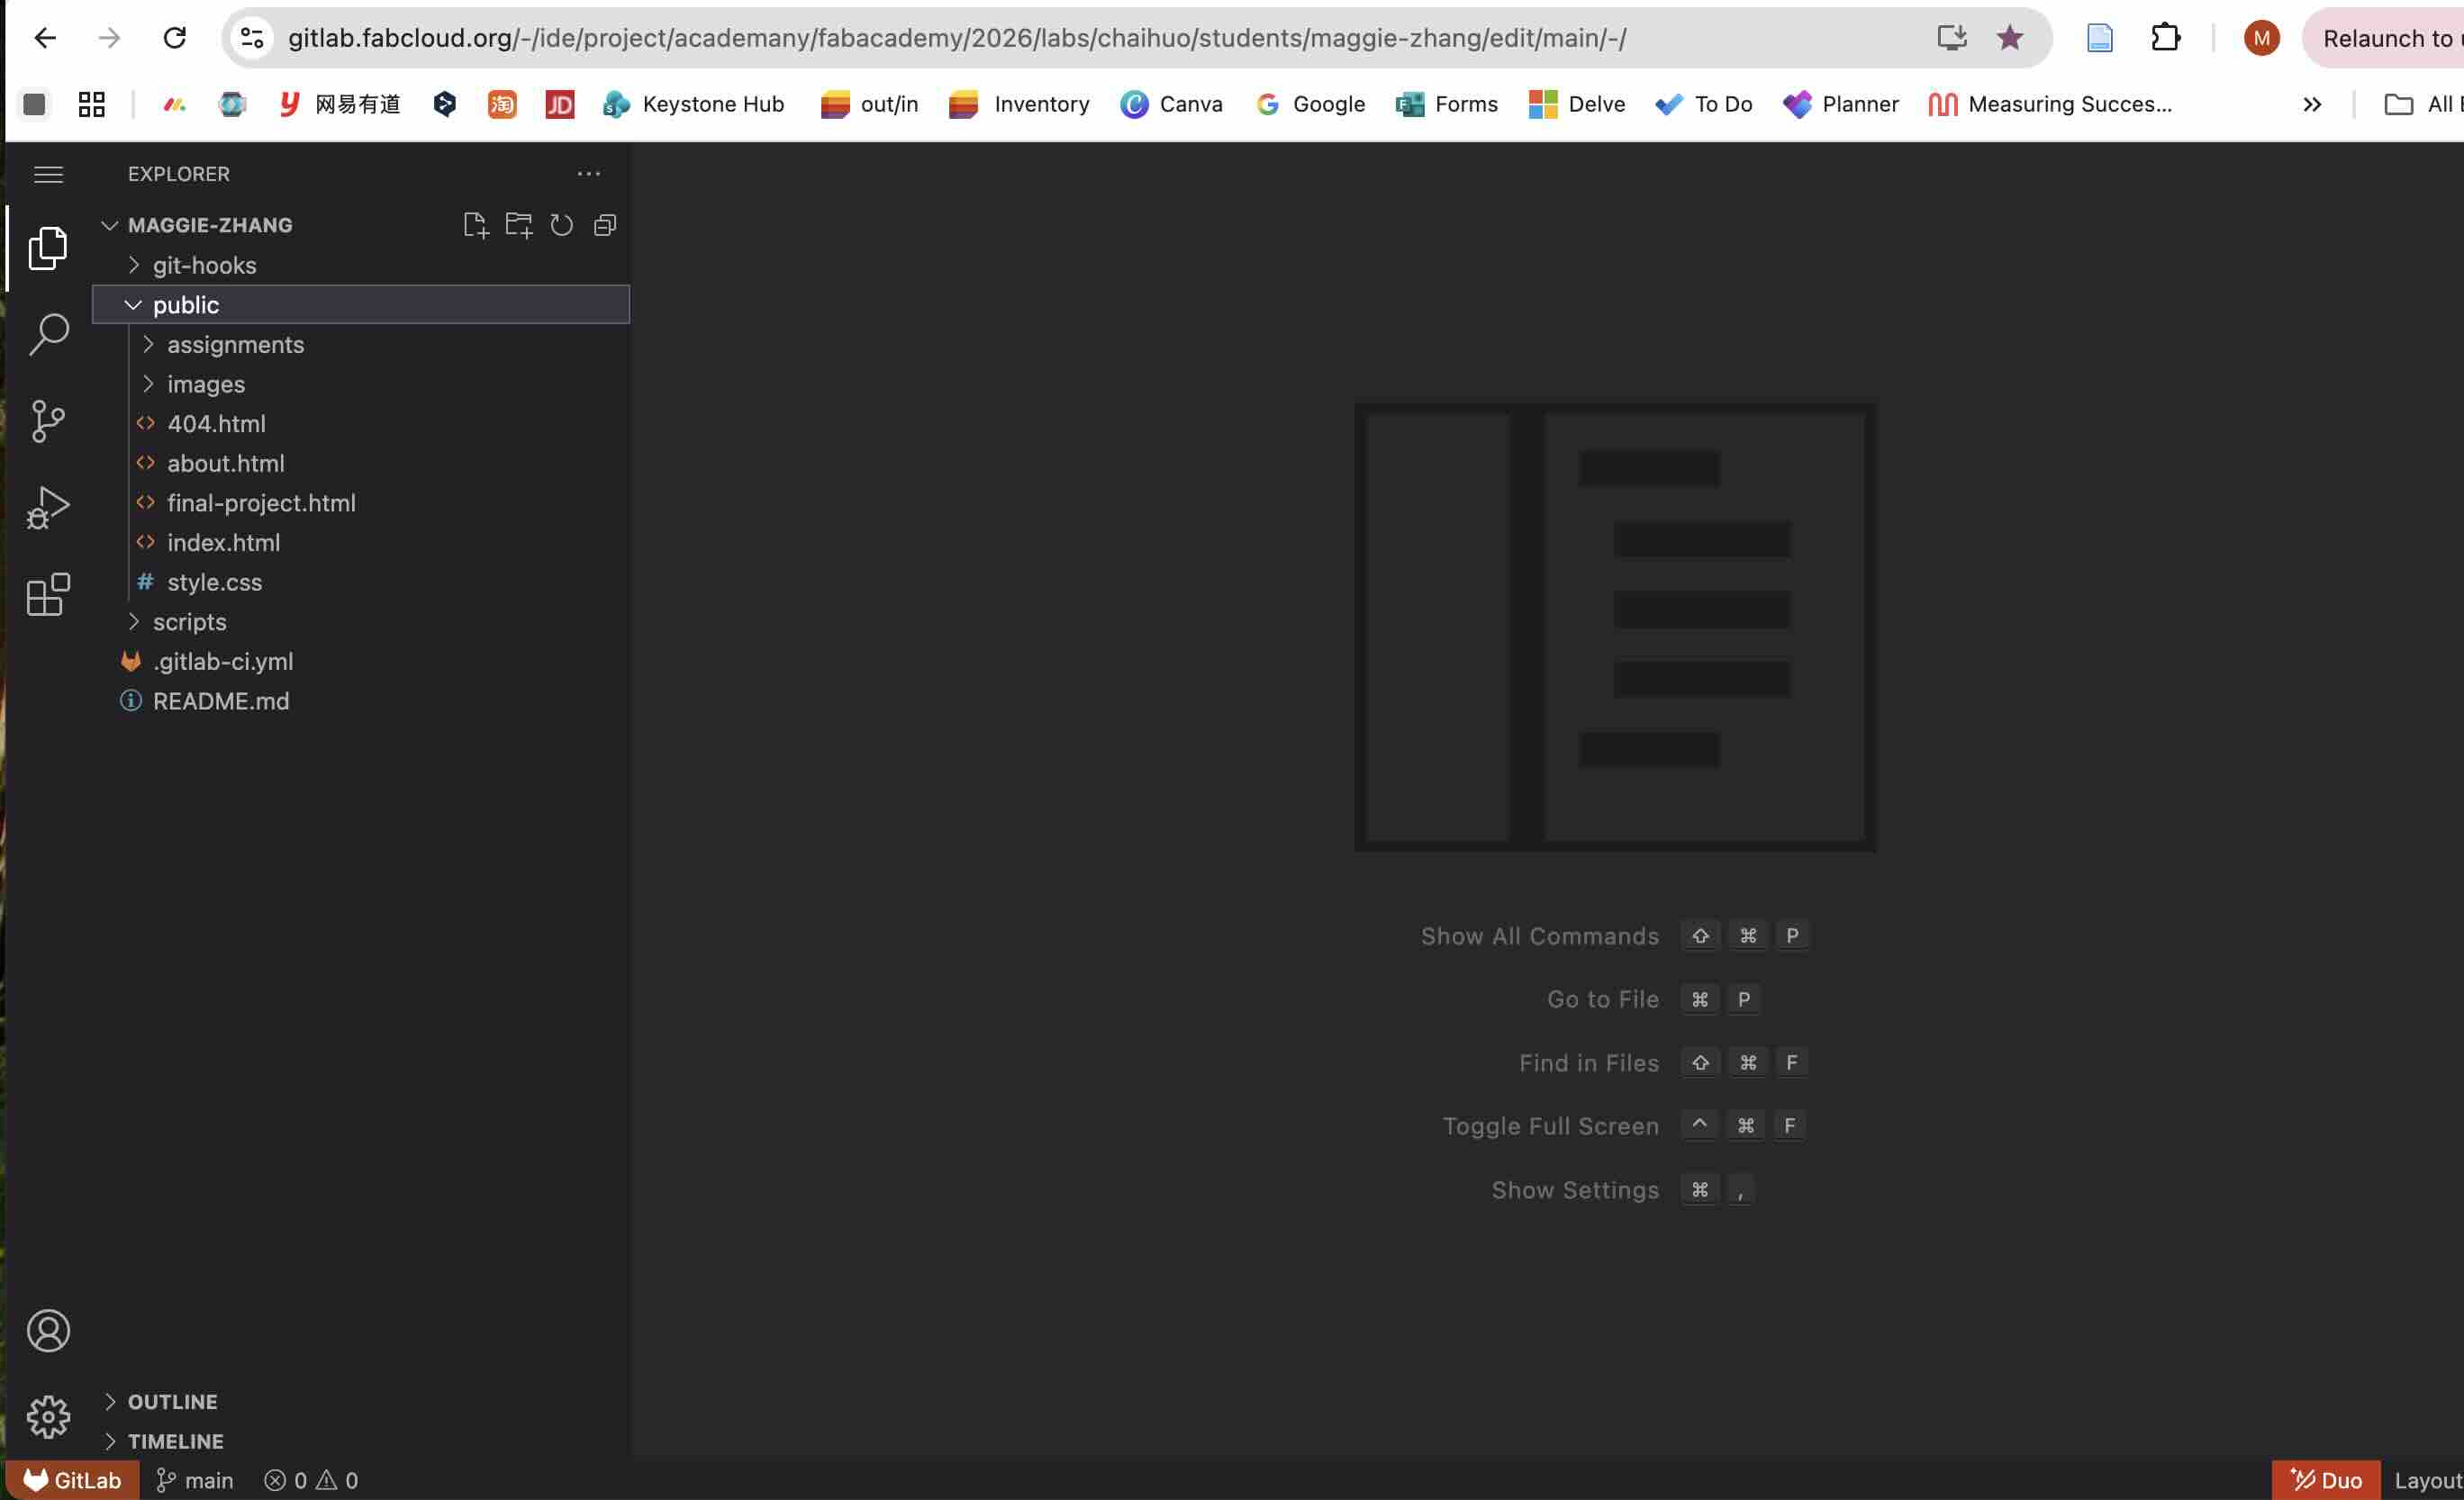
I first tried the GitLab Web IDE in the browser to understand how files map to the published site, then moved to local development on my computer.
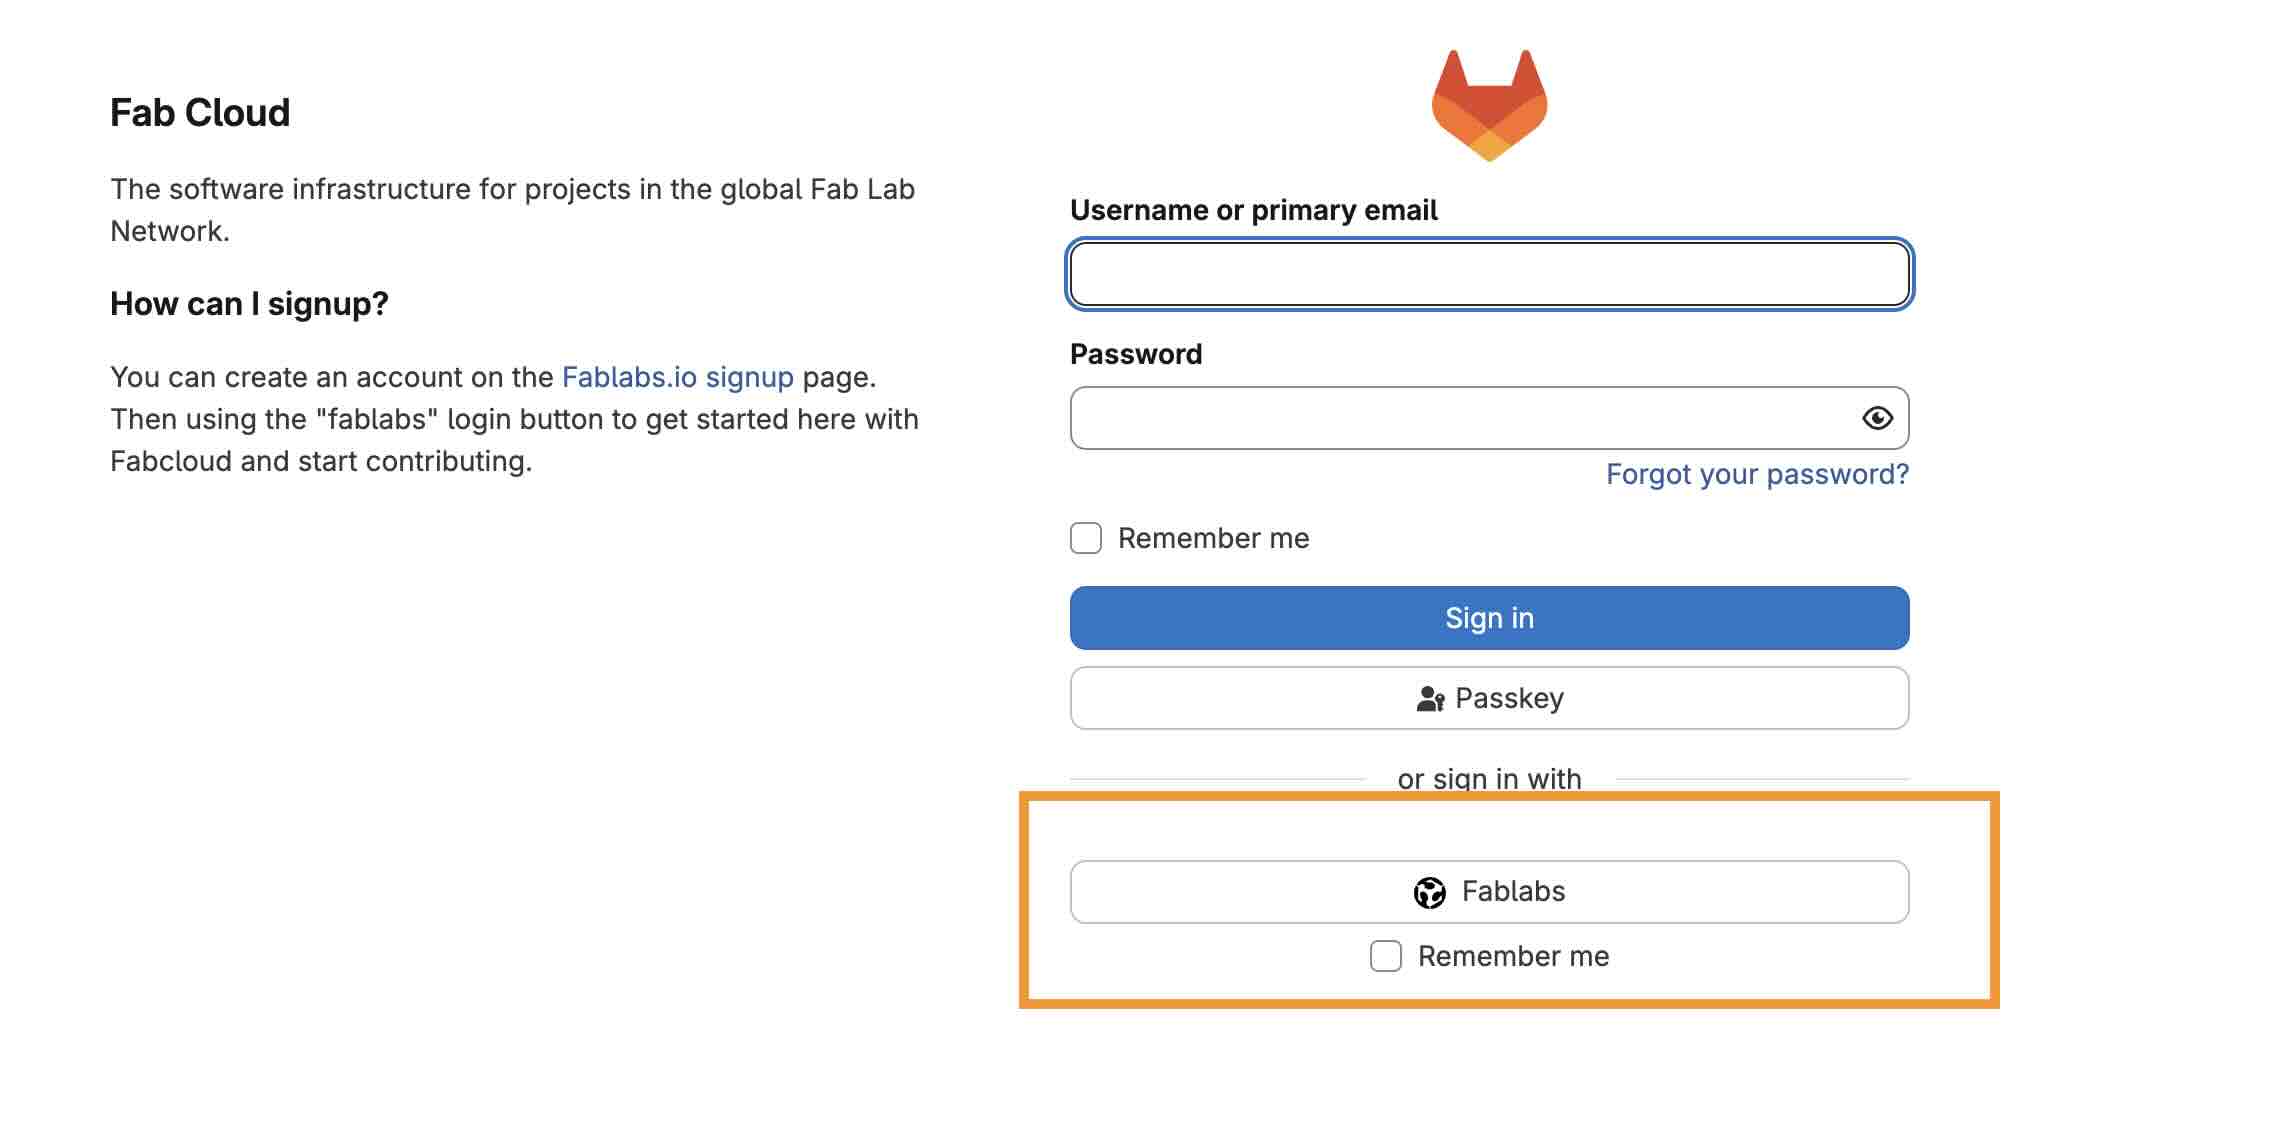
Step 1 — Log in to GitLab
- Open gitlab.fabcloud.org
- Click Sign in and choose Fablabs
- Use the same email as your Fab Academy account
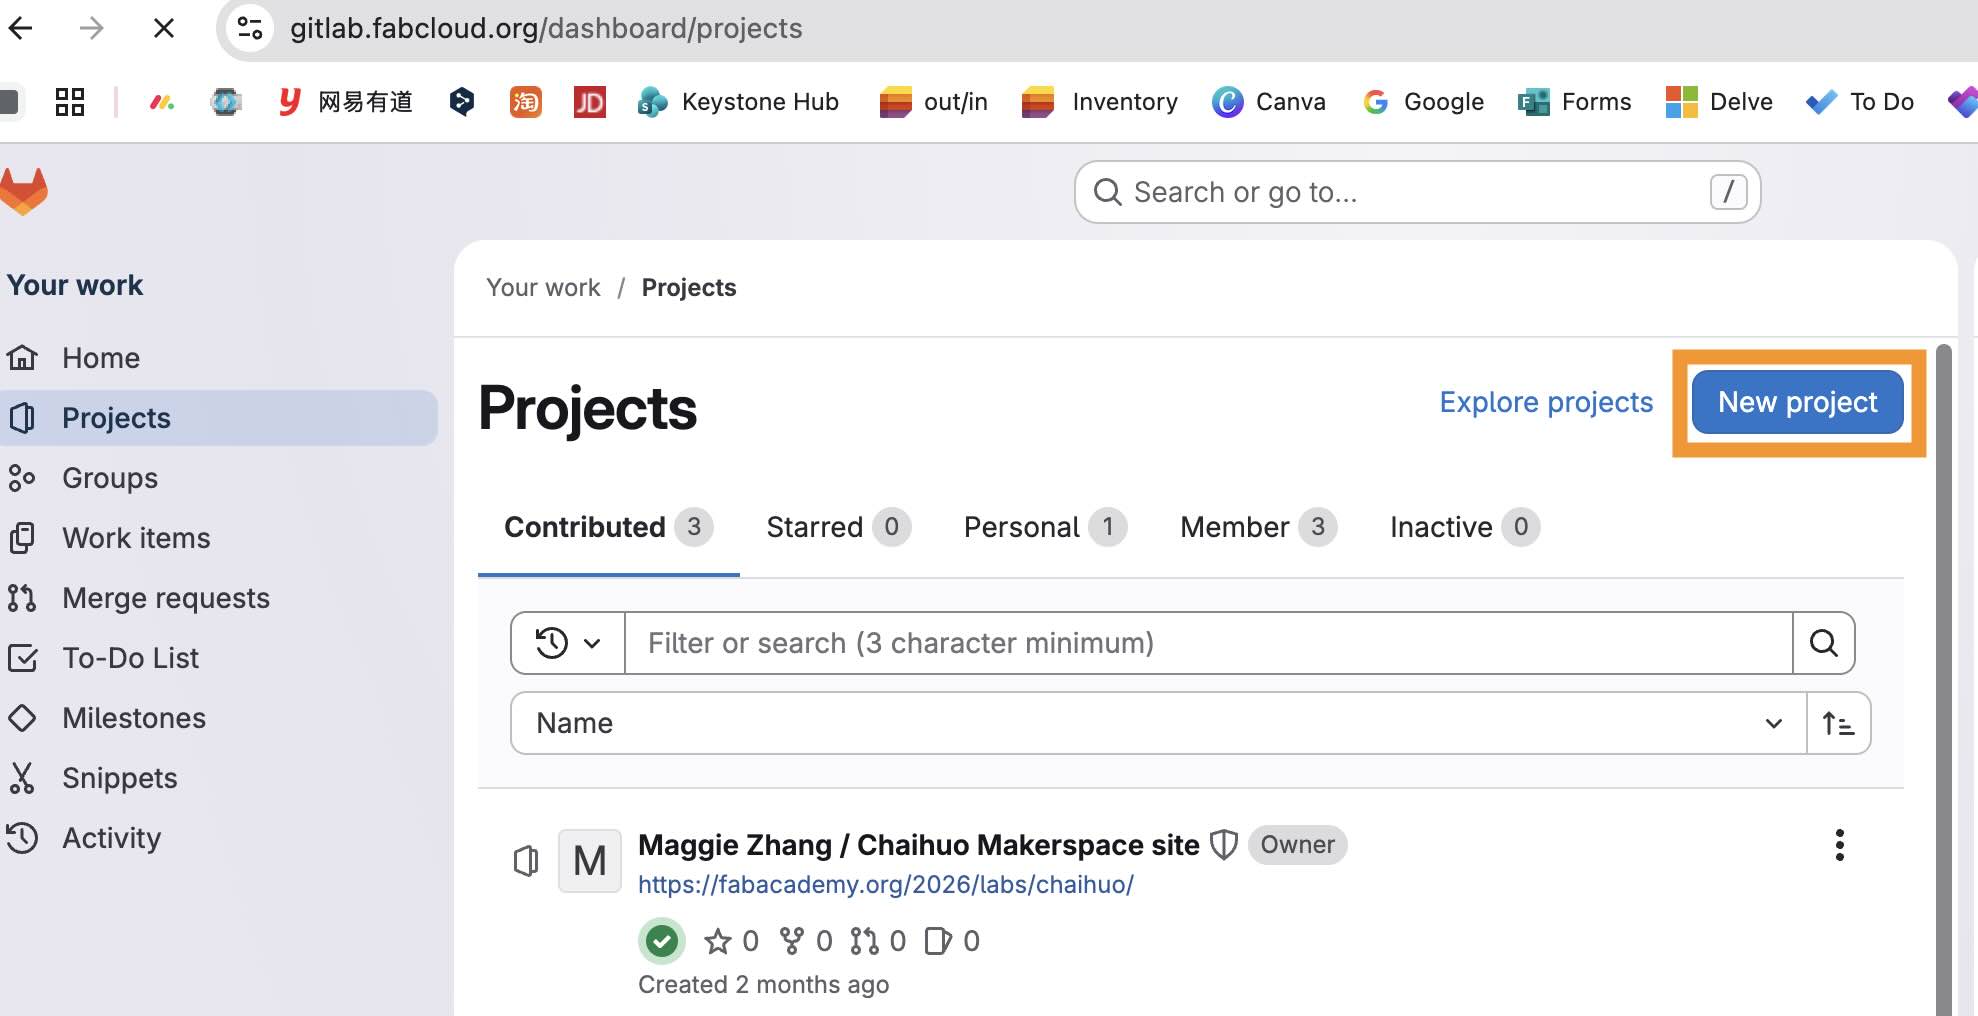
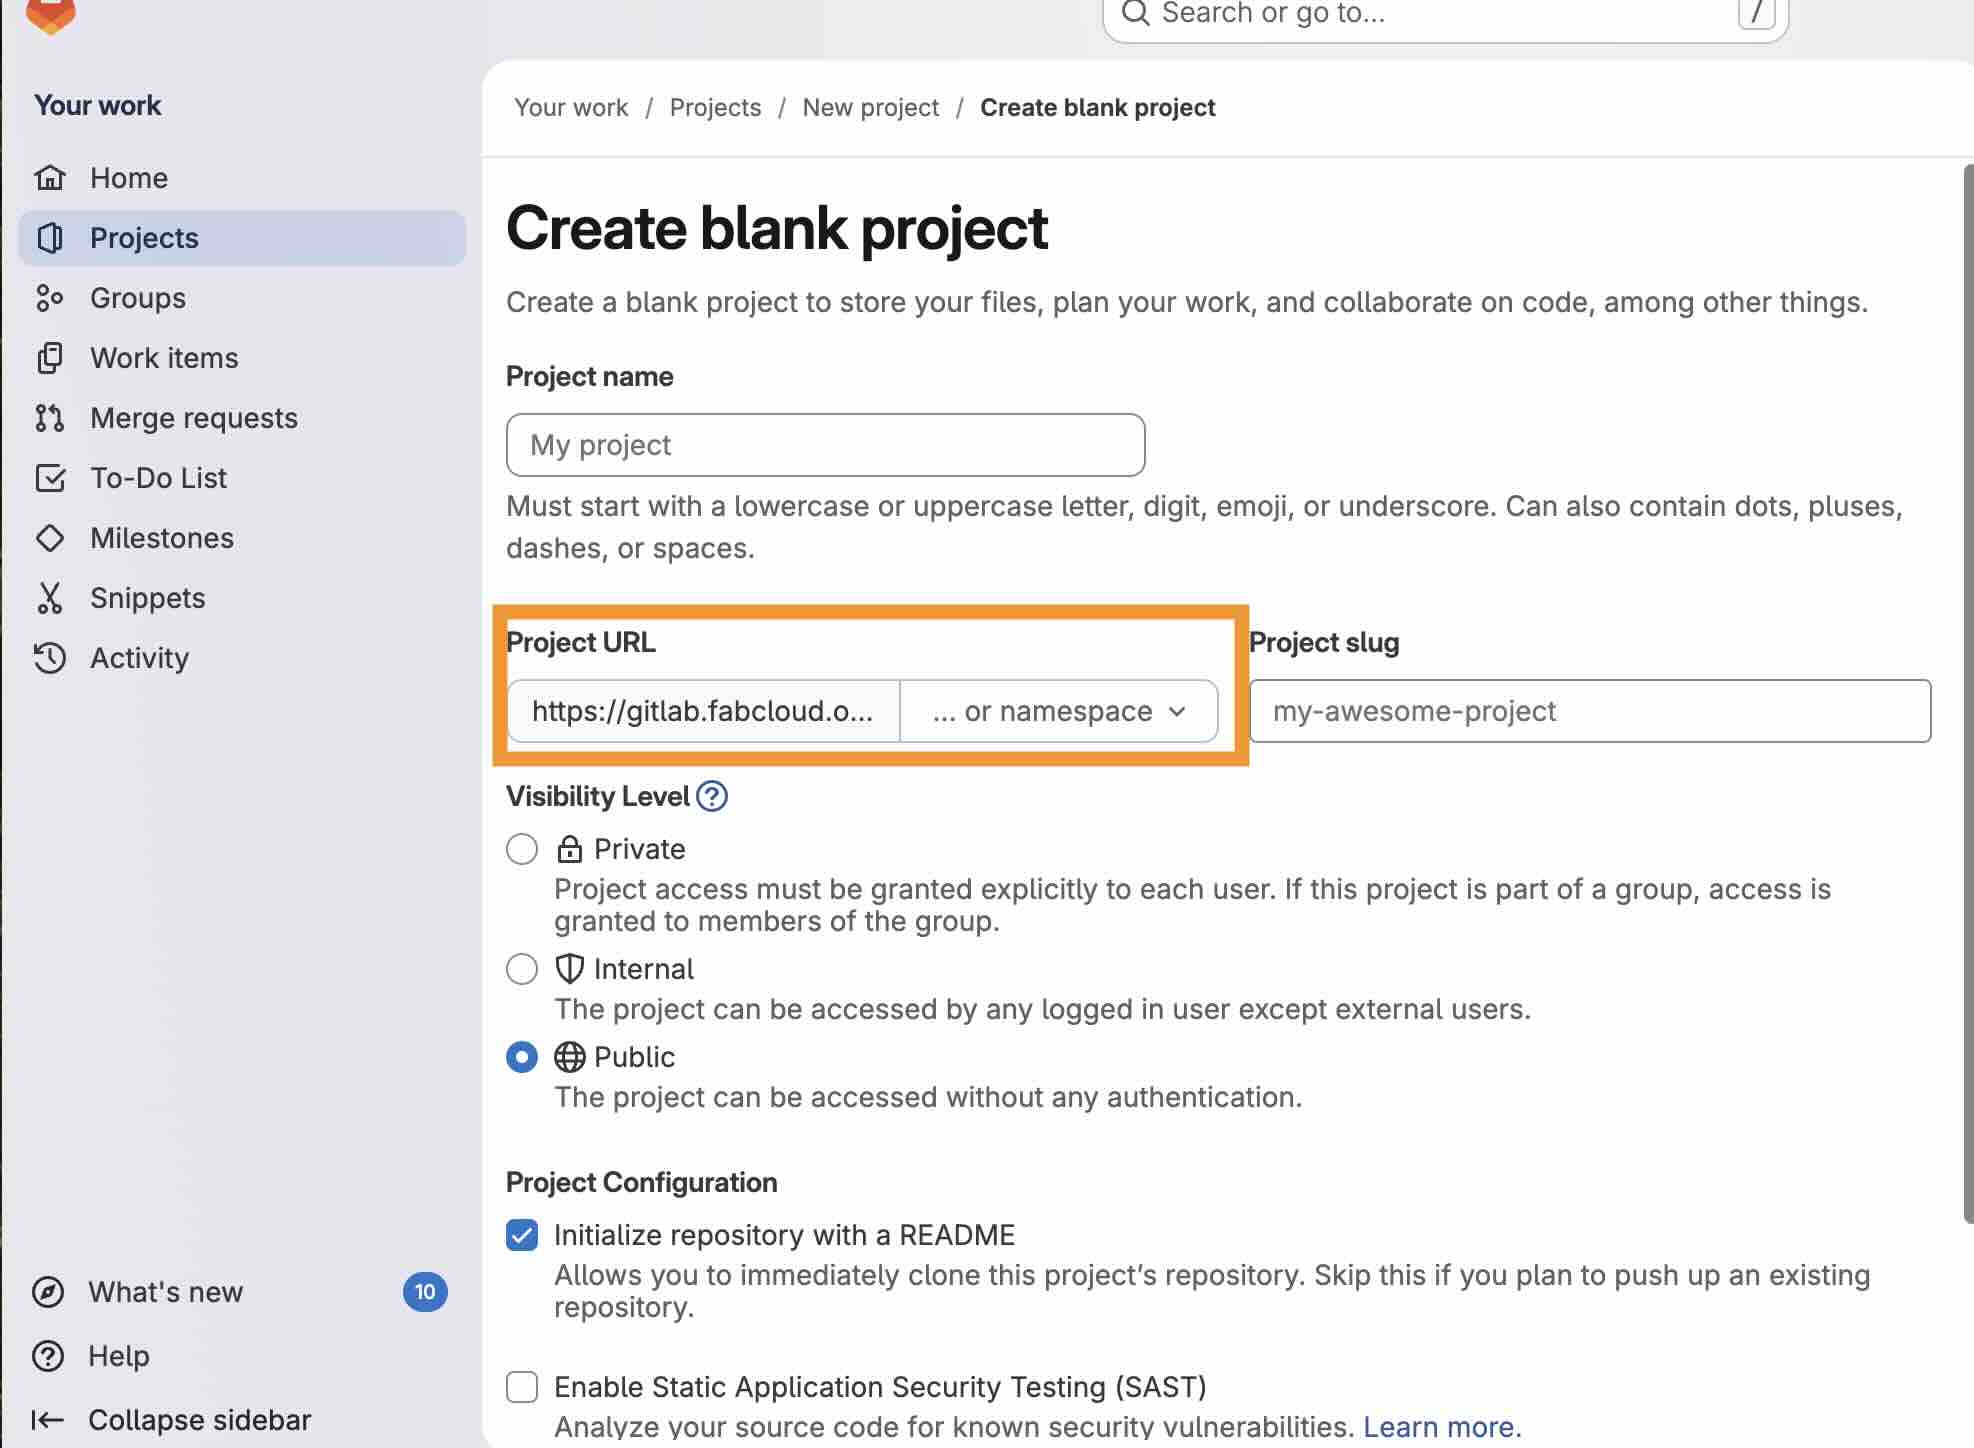
Step 2 — Create your repository
- After sign-in, go to Projects → New project (or open your existing Fab Academy student repo)
- Project name: e.g. maggie-zhang; visibility: Public
- Click Create project
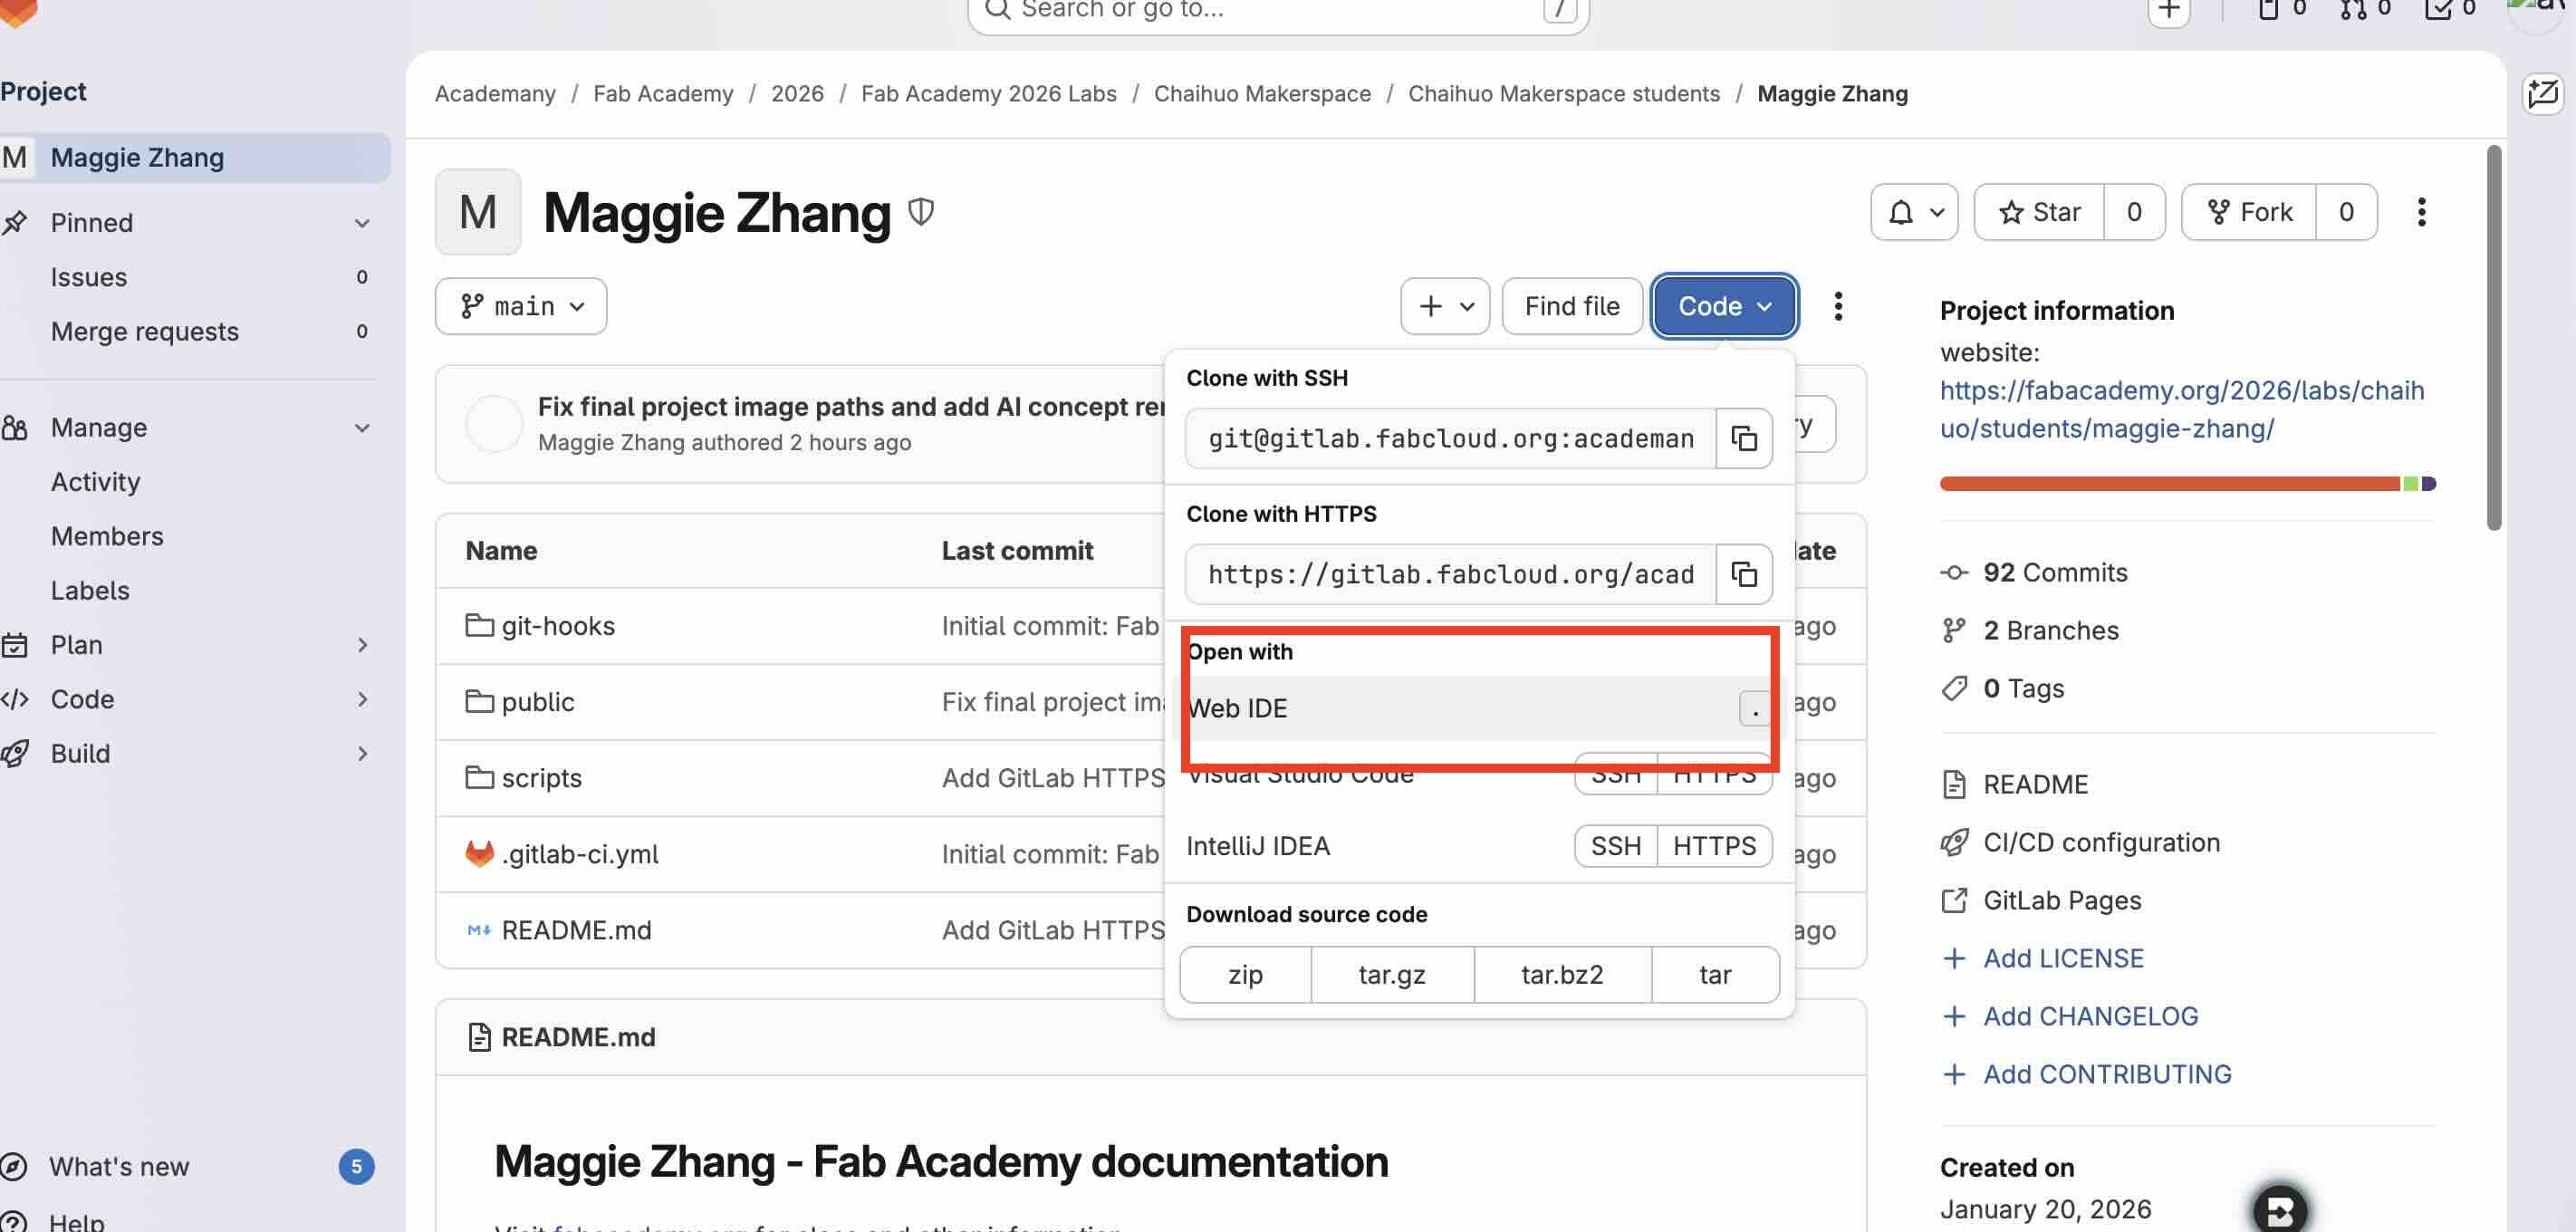
- On the project home page, copy the HTTPS clone URL
My repository: gitlab.fabcloud.org/…/maggie-zhang
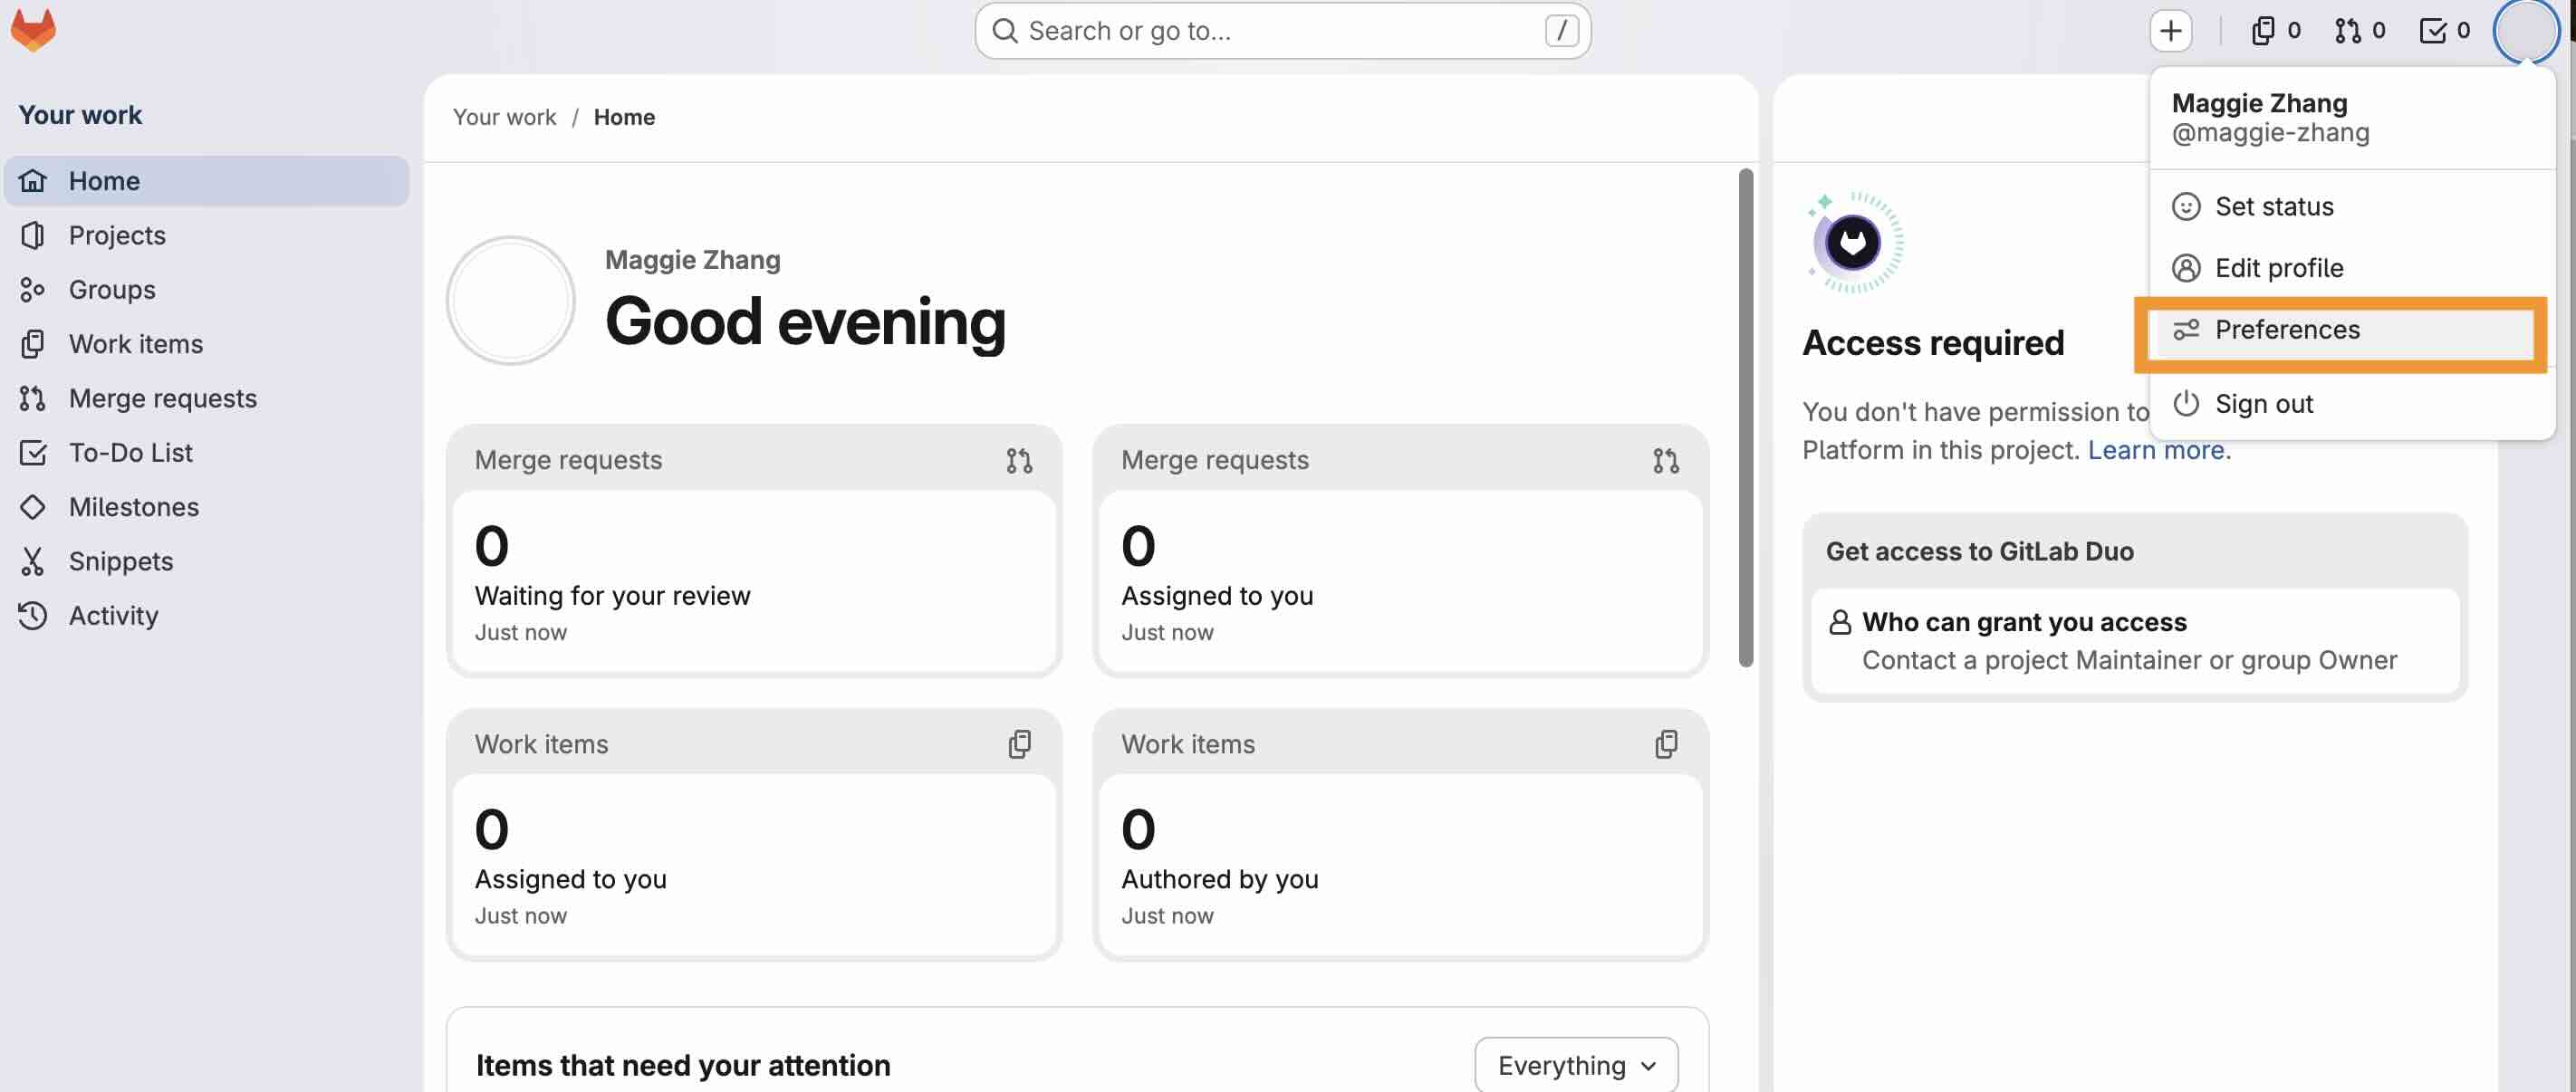
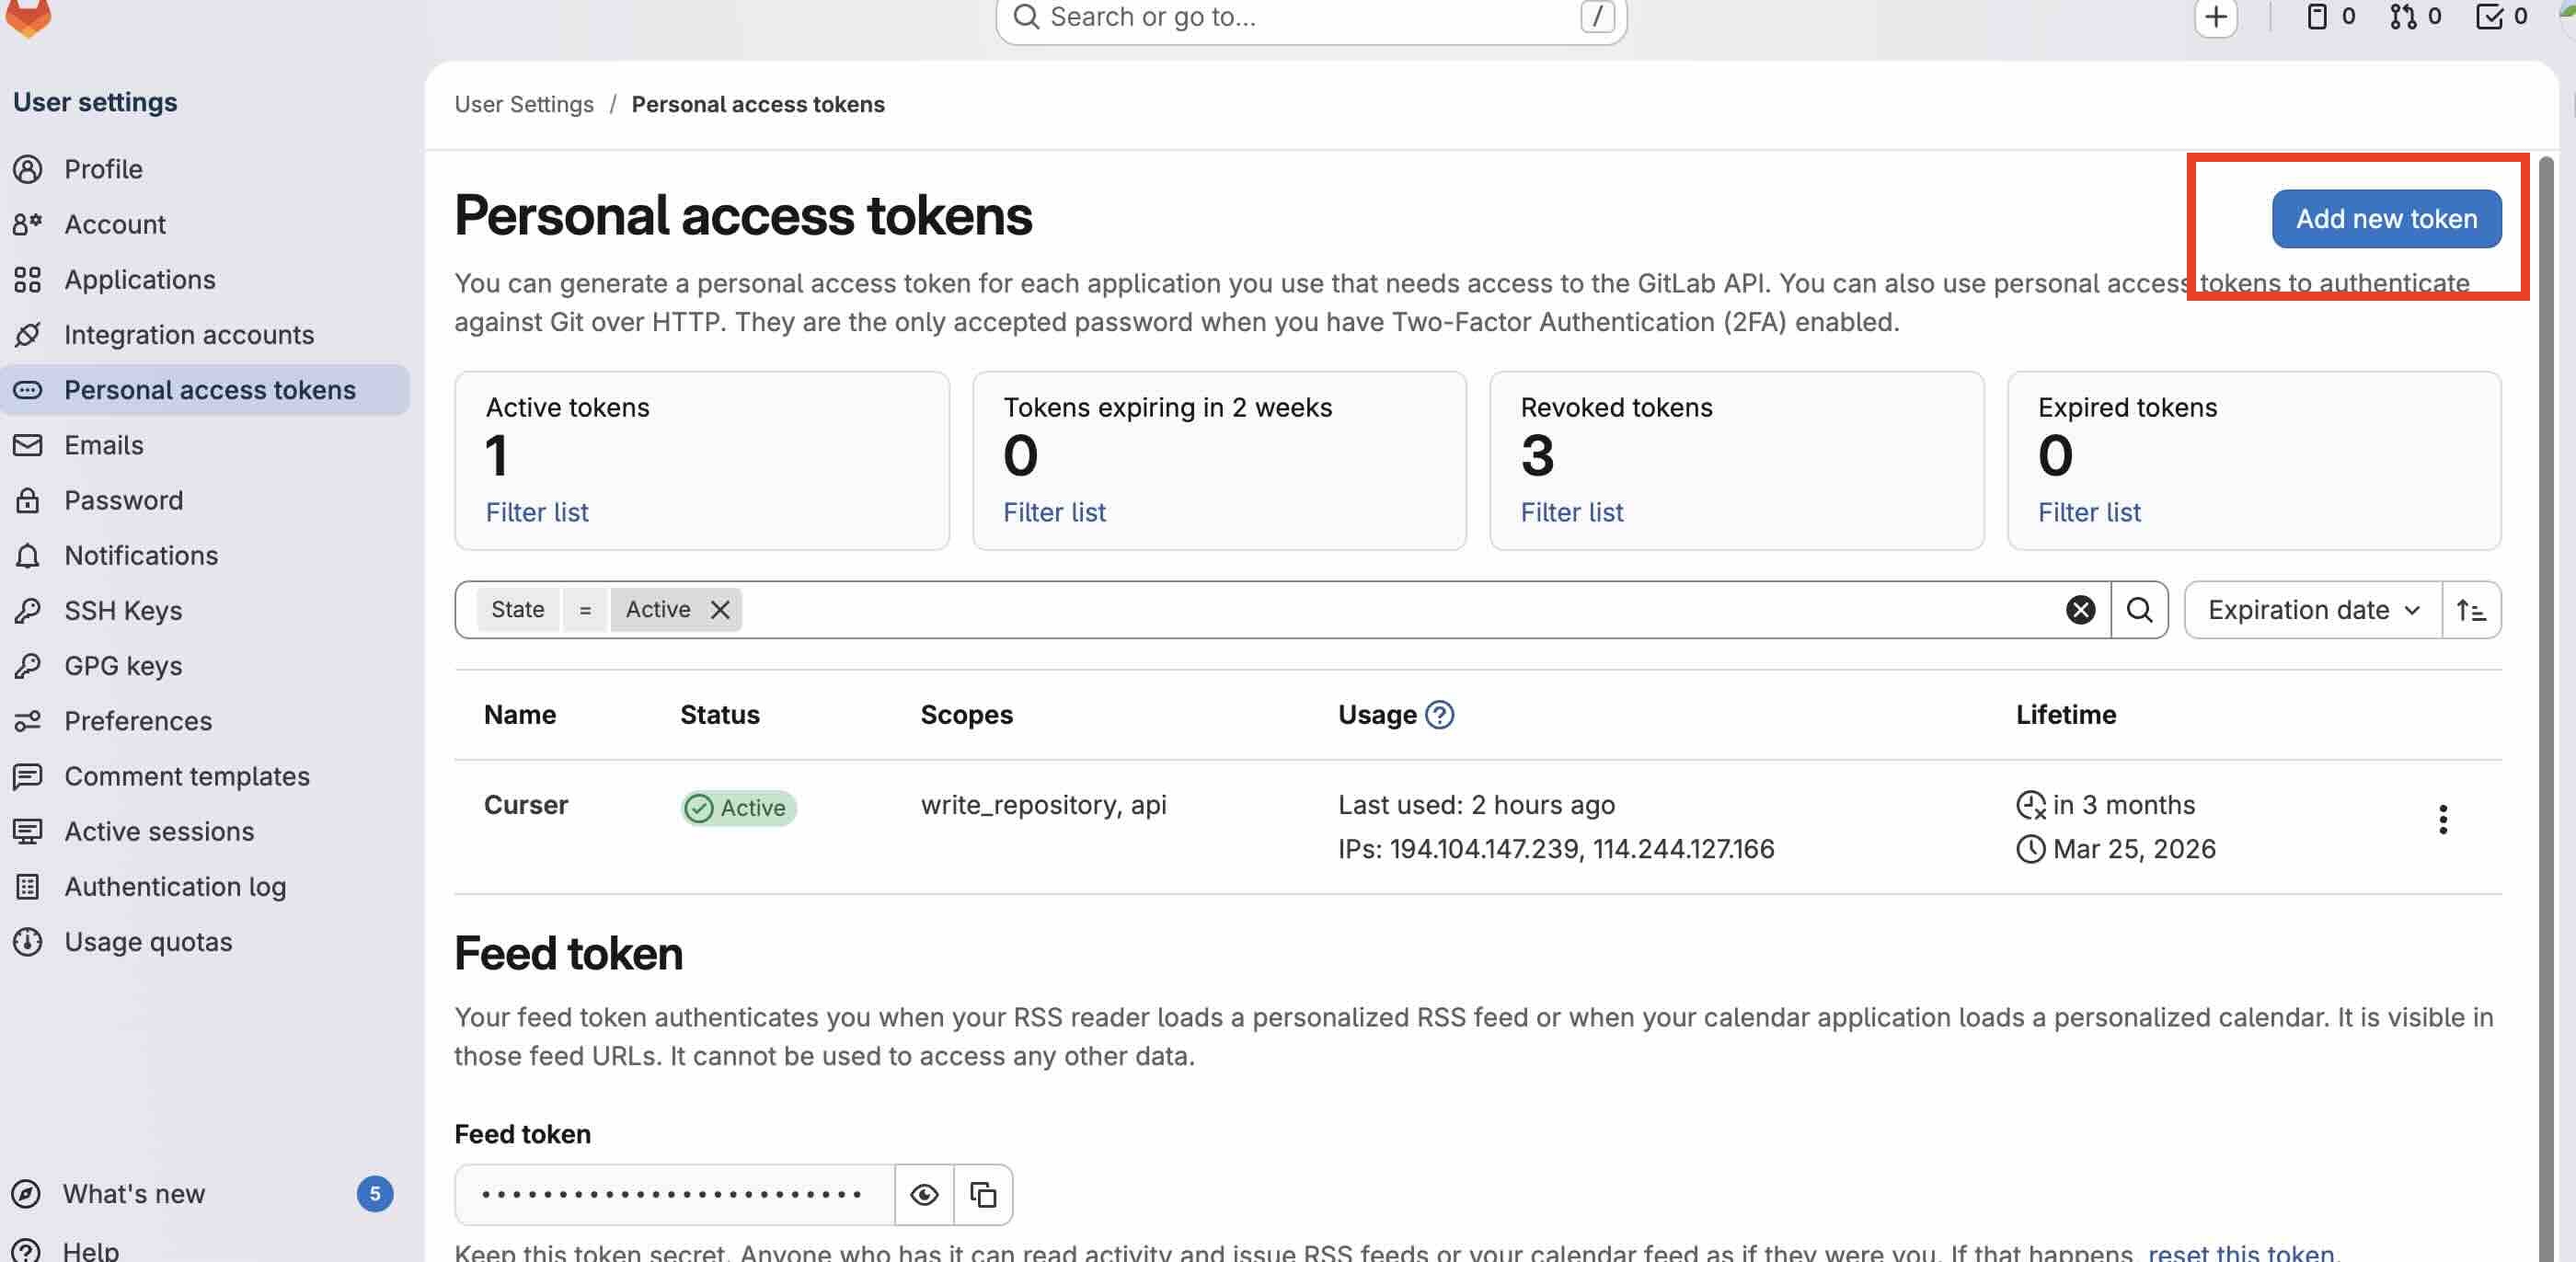
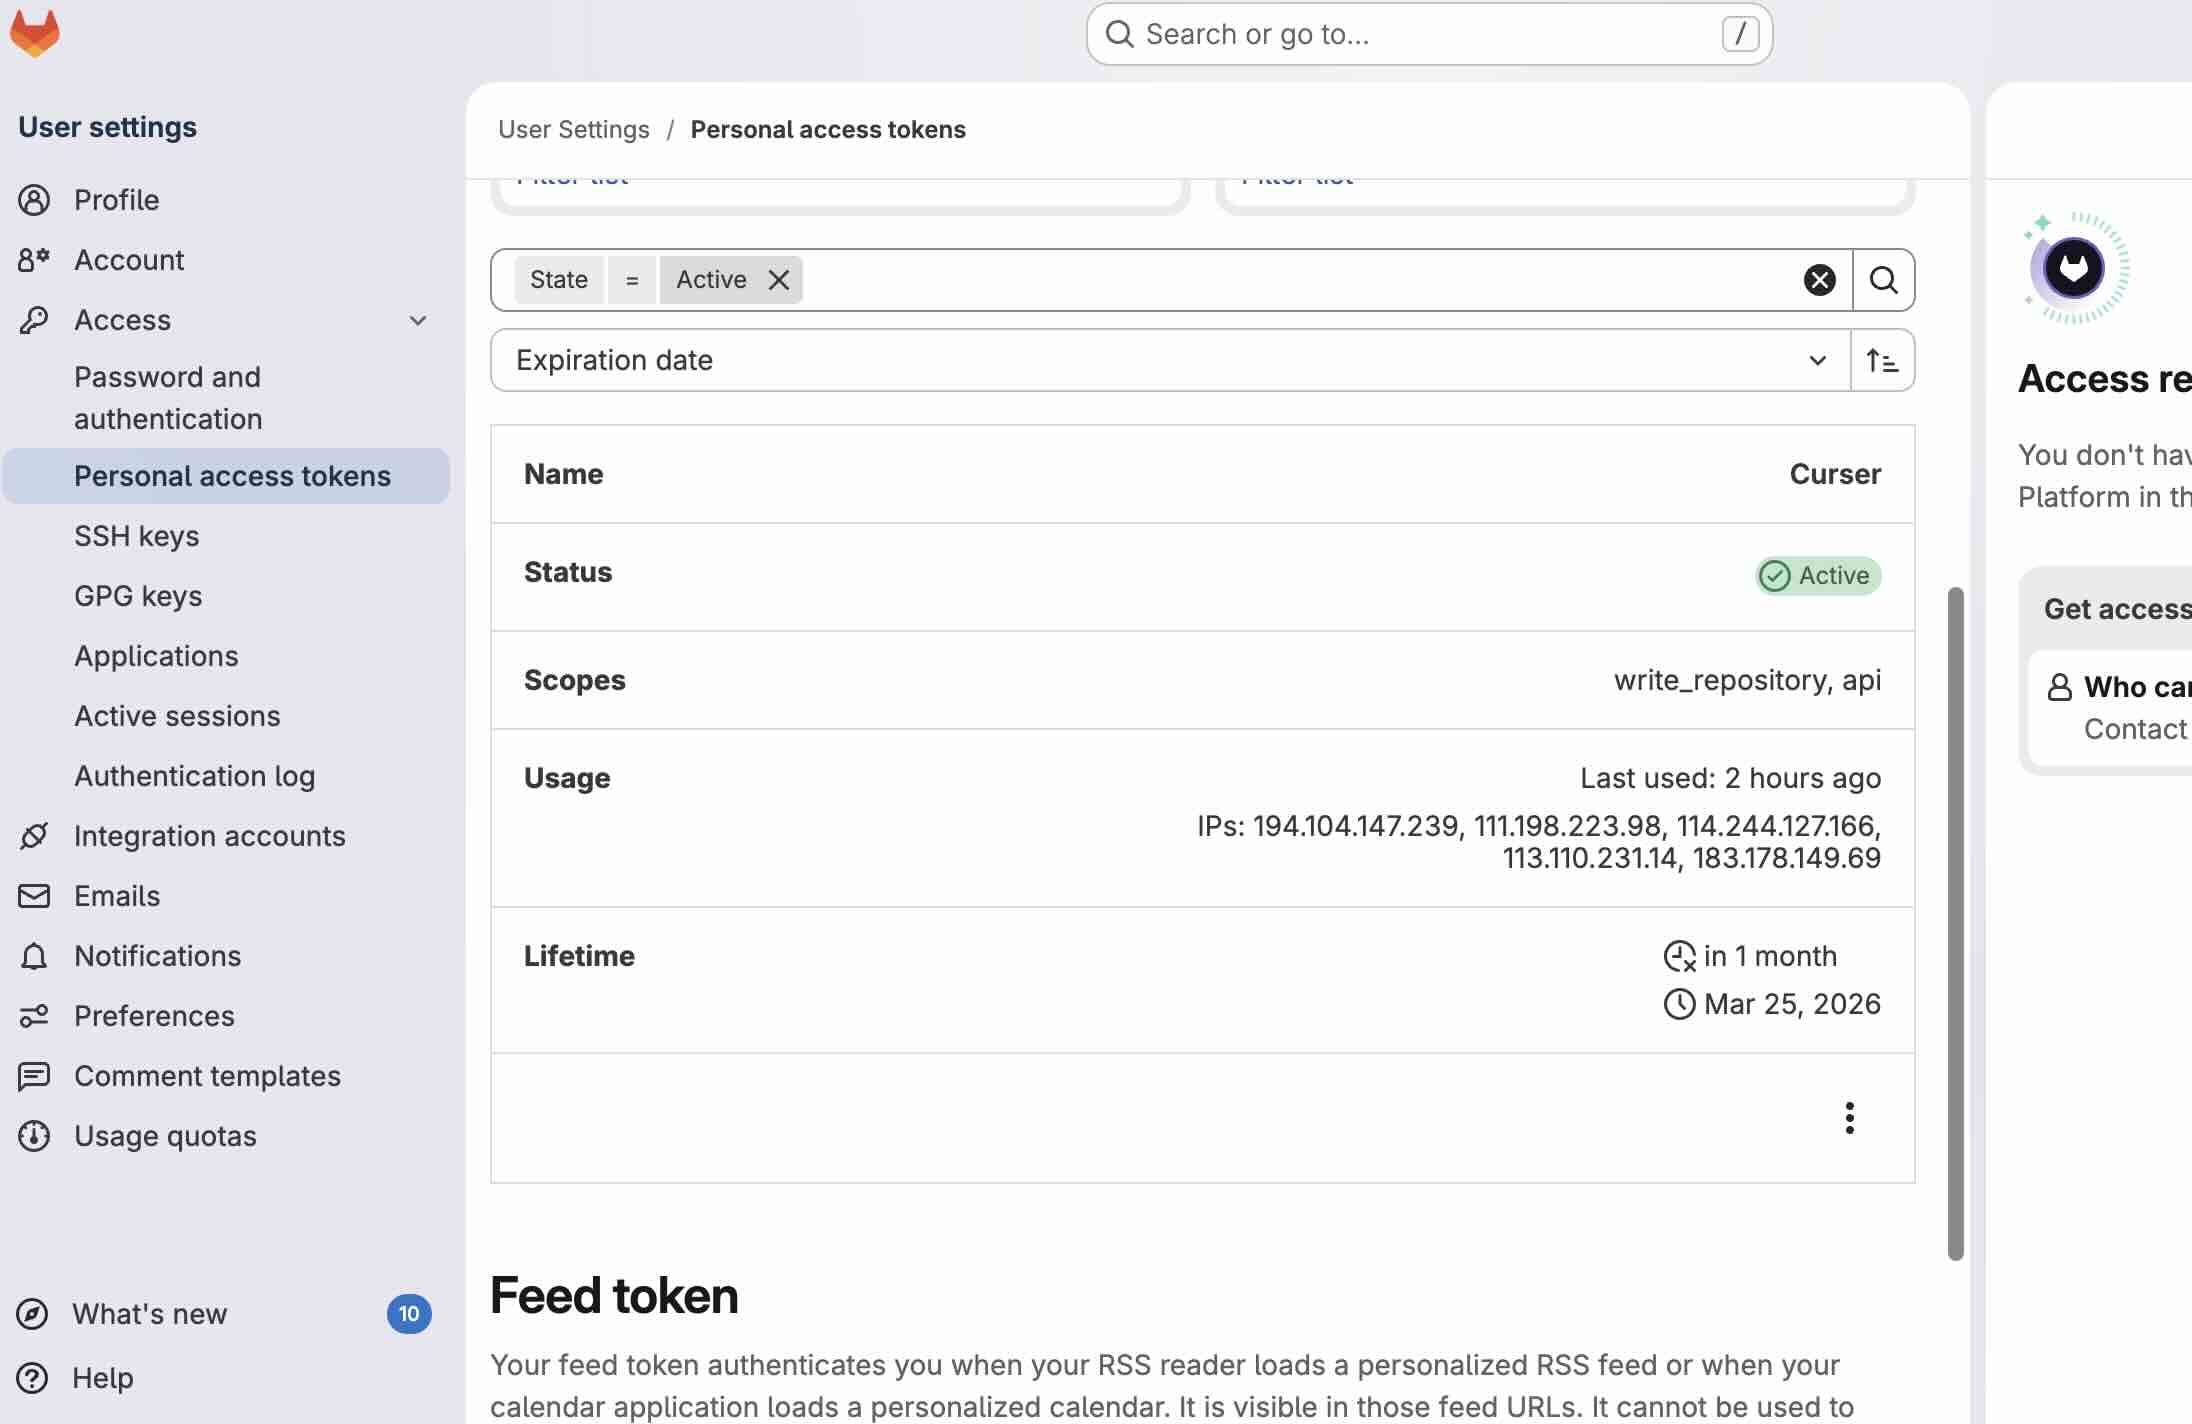
Step 3 — Generate a Personal Access Token (PAT)
GitLab no longer accepts your account password for git push over HTTPS. You need a PAT instead — treat it like a password and store it safely.
- Click your avatar (top right) → Edit profile or Preferences
- In the left sidebar, open Access tokens
- Click Add new token
- Token name:
cursor - Expiration date: choose a date (set a calendar reminder to renew before it expires)
- Scopes: tick at least read_repository and write_repository (needed for clone, pull, and push)
- Click Create personal access token
- Copy the token immediately — GitLab shows it only once. If you lose it, create a new token.


Step 4 — Clone the repository locally
In Terminal (or Git Bash), run:
git clone https://gitlab.fabcloud.org/<your-group>/<your-project>.git
cd <your-project>
When prompted:
- Username: Maggie Zhang
- Password: paste PAT
Step 5 — Edit, commit, and push
Typical local workflow after changing files in public/:
git status
git add .
git commit -m "Describe what you changed"
git push origin main
After push, wait a minute and refresh your Fab Academy student page to confirm GitLab Pages updated.
Syncing with Cursor
After testing the GitLab Web IDE, I switched to Cursor as my main tool to edit documentation locally and sync changes to GitLab. Below is how I connect the repo and my reasons for this choice.
Why I chose Cursor for sync
- Built-in Git UI — The Source Control panel shows changed files, diffs, commit, and push without typing every Git command in Terminal.
- Better for HTML/CSS — Syntax highlighting, folder tree, and live preview fit Fab Academy weekly pages better than editing only in the browser Web IDE.
- AI-assisted editing — Cursor helps fix broken links, reorganize assignment text, and keep HTML structure consistent across many week pages.
- Same repo, same workflow — Still uses standard Git + my GitLab PAT; Cursor is the editor, GitLab remains the remote and publishes the live site.
- Terminal when needed — Integrated terminal is available for
git pull, troubleshooting, or commands the GUI does not cover.
Step 6 — Open the repository in Cursor
- Install Cursor and open the app.
- If the repo is not on your computer yet: File → Clone Repository, paste the GitLab HTTPS URL, choose a local folder, and clone. When asked for credentials, use your GitLab username and PAT (password field).
- If already cloned via Terminal: File → Open Folder… and select the project folder
maggie-zhang-main - Edit files under
public/— assignment HTML lives inpublic/assignments/, images inpublic/images/.
Step 7 — Commit and push from Cursor
- Open the Source Control view (branch icon in the left sidebar, or ⌃⇧G on Mac).
- Changed files appear under Changes. Click + next to a file to stage it, or stage all.
- Type a short commit message (what you changed and why), e.g.
Update week01 Git and Cursor sync docs. - Click Commit, then Sync Changes or Push to send to
origin/mainon GitLab. - First push may ask for GitLab credentials again — username + PAT (not Fablabs password). macOS can save these in Keychain.
- Wait ~1 minute, then refresh your Fab Academy student URL to verify GitLab Pages updated.
cursor in Step 3 so I know which PAT is used for pushes from this machine. Revoke old tokens in GitLab if you regenerate one.
Step 8 — Stay in sync (pull before you push)
If GitLab has newer commits (e.g. edits from another computer), pull first to avoid conflicts:
git pull origin main
In Cursor: Source Control menu → Pull, or run the command above in the integrated terminal. Then commit and push your local changes.
My daily workflow: open Cursor → edit public/assignments/weekXX.html → Source Control → commit → push → check live site.